Spring time beading
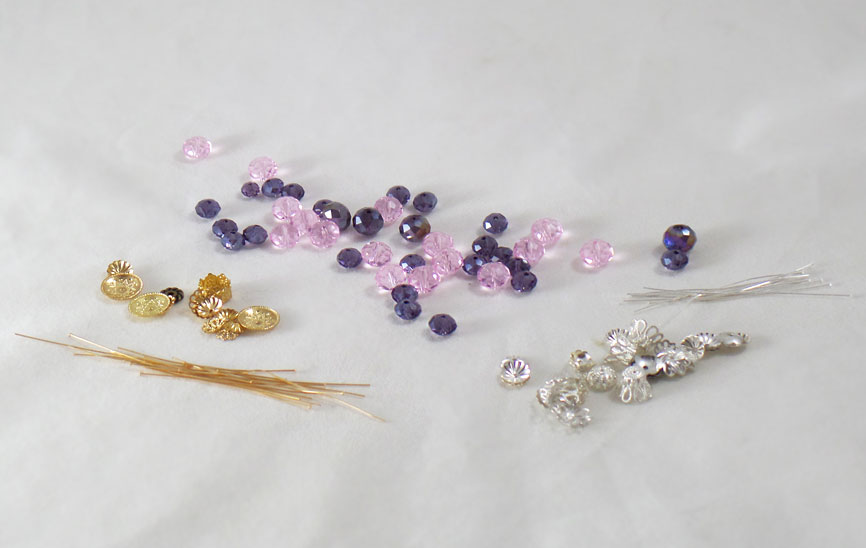
These past months have been such a whirlwind. From seasonal colds, allergies, a drought in our area, remodeling of our house, to art orders and design team projects things have been madcap busy. Now that things are seeming to calm down somewhat I wanted to share with you a few of my most recent jewelry projects.After ever project I like to resort supplies and see what items to incorporate into new projects. My beading and jewelry supplies are no exception. With so many projects and supplies I couldn’t pick just one idea. So I dumped out a collection of new jewelry supplies I had yet to sort. Inspiration hit me, thinking of the new and fresh colors of Spring, I picked only a few strands of Fiona Accessories beads to start me off.
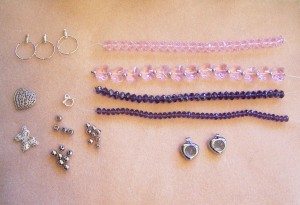
I sorted the bead strands by color and size and picked through the metal findings from a Fire Mountain Gems Boss’ Bead Bag to see what would look best together placed on a beading mat.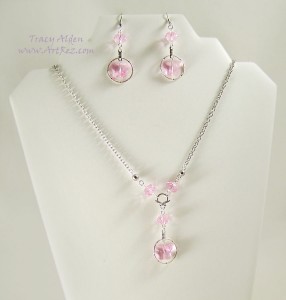
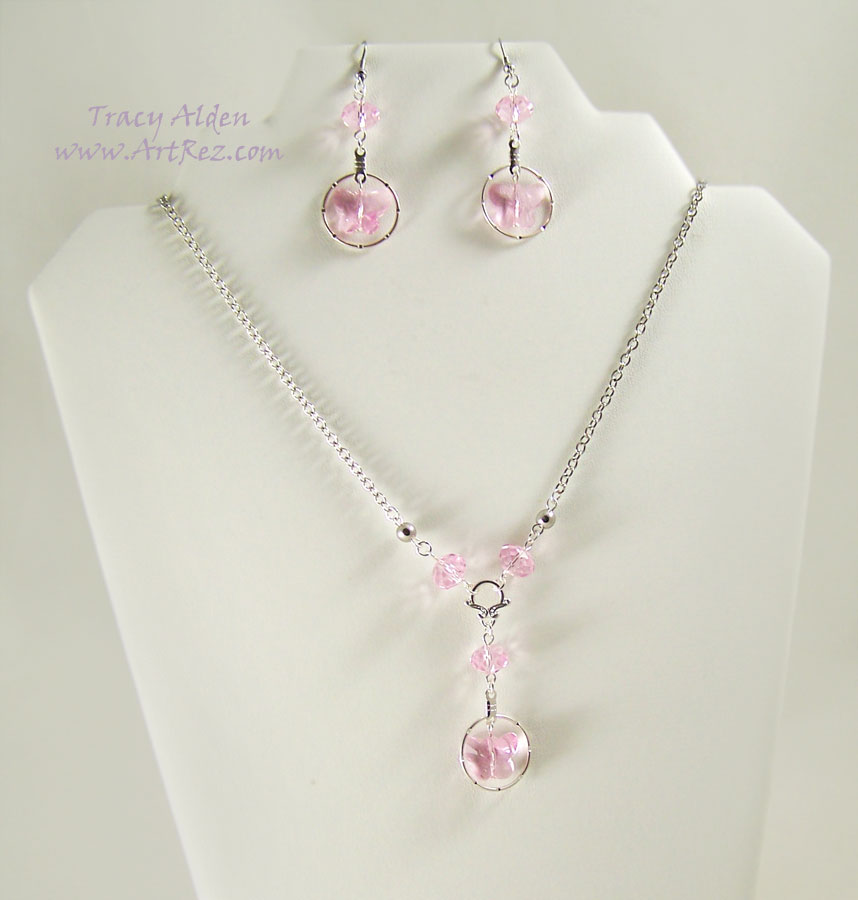
Using sterling silver findings and chain with the pastel pink rondel beads and the butterfly crystals from Fiona Accessories I was able to create a very light and feminine earring and necklace set.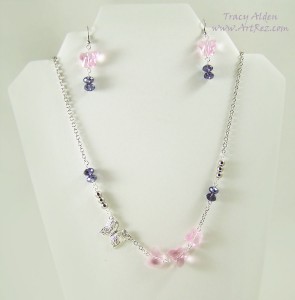
Next I tried an asymmetrical set with purple crystal rondels, crystal butterflies and a sterling silver butterfly.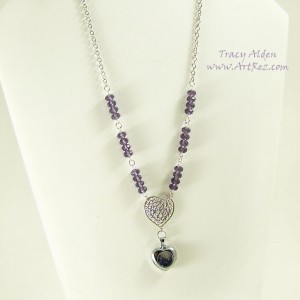
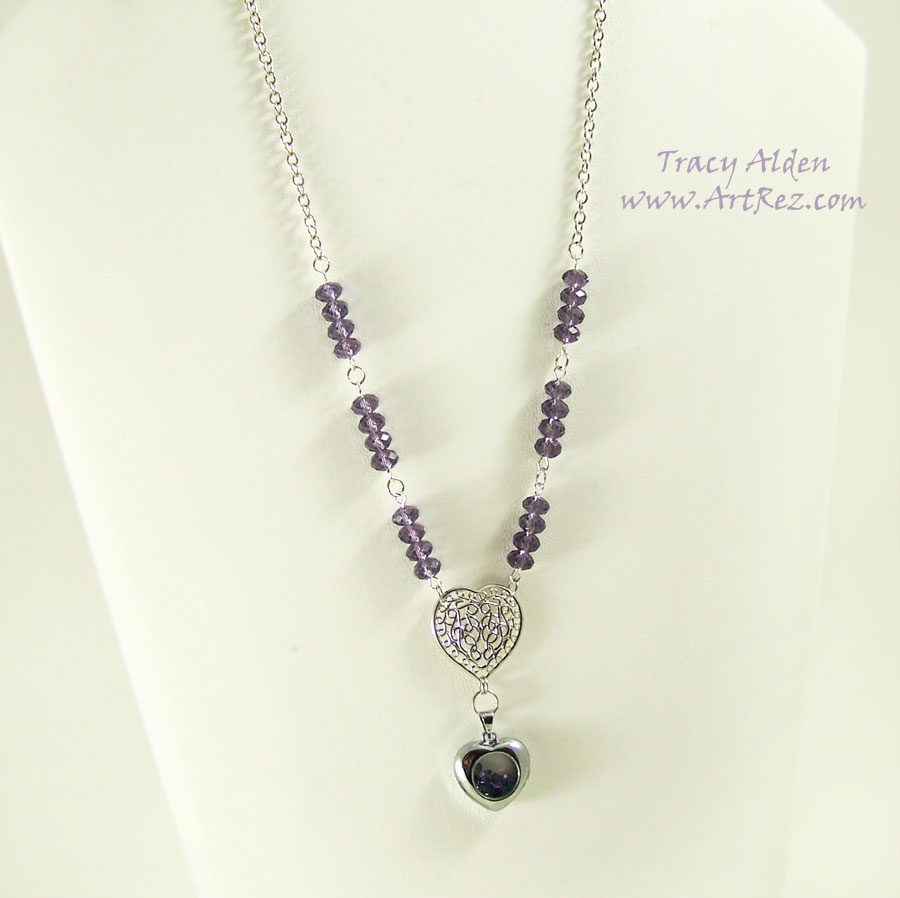
Using just the sterling silver findings and purple crystal rondels I created a simple Victorian inspired piece. I used a unique charm from Fiona Accessories that is a hollow metal heart with tiny faceted crystals encapsulated in the heart.

With the leftover beads and findings I thought of instead of just sorting them away why not make something fun to add to my miniature collection. The idea of using beads for miniature projects is an old but wonderful way to make lovely additions for any miniature scene.
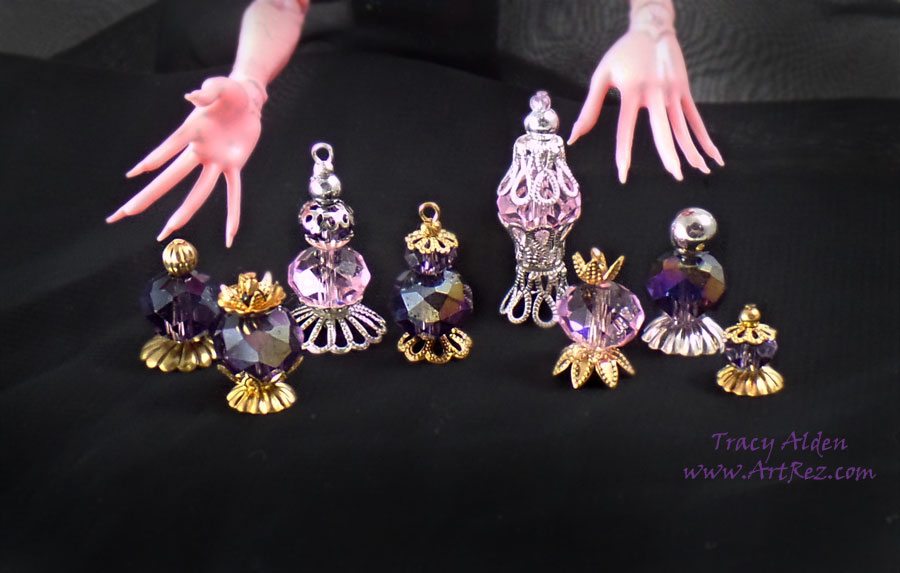
Using bead caps and beads stacked on jewelry wires I was able to create Play Scale (or 1:6 scale modeling) miniature perfume bottles.
Sorting through your craft supplies what might you be inspired to create for Spring? 🙂
Until next time, safe travels!
Beadsmith 1 Step Looper Tool review
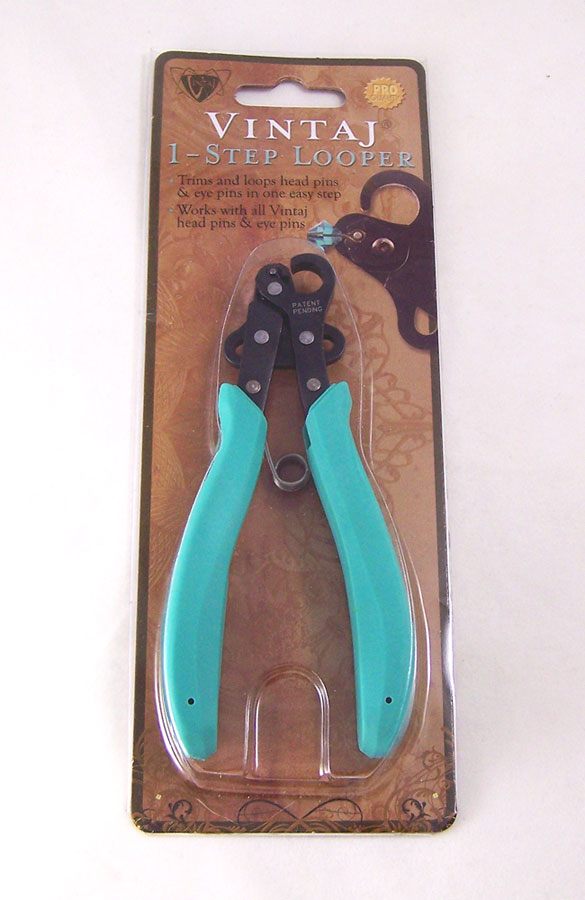
Happy New Year Everyone! For a crafter like me what better way to start the new year than with some crafting fun? Over the Holidays my husband got me a new jewelry tool, a Beadsmith 1 Step Looper Tool.When I went to the Winter Craft and Hobby Association Show of 2013 I got to see the staff at the Vintaj booth use this great tool. Since many of the products showcased at CHA are often not yet available for shipment until months down the line I had to wait to get this tool, which also meant my squirrely little mind forgot about it until I saw other people reviewing and posting photos months down the line. It had some mixed reviews but overall most jewelry makers liked it. I tried looking for the tool locally but no luck. Again it drifted from my crafter’s mind. Thankfully my husband remembered I was drooling over this tool and ordered one for me!
If you look at the above photo, you will see that the package says Vintaj on the front. No worries, it is still the Beadsmith 1 Step Looper; the Vintaj line tool is still made by Beadsmith, it just has turquoise handles while the one with the Beadsmith name on front has black handles. Even the info on the back of the package is the same. The tool trims wire 26-18 gauge, taking the place of needle nose pliers and wire cutters normally needed to make a looped end to jewelry wire. Here is the official video by Beadsmith about the tool. (YT: 1-Step Looper) (YT: 1-Step Looper) (YT: 1-Step Looper)
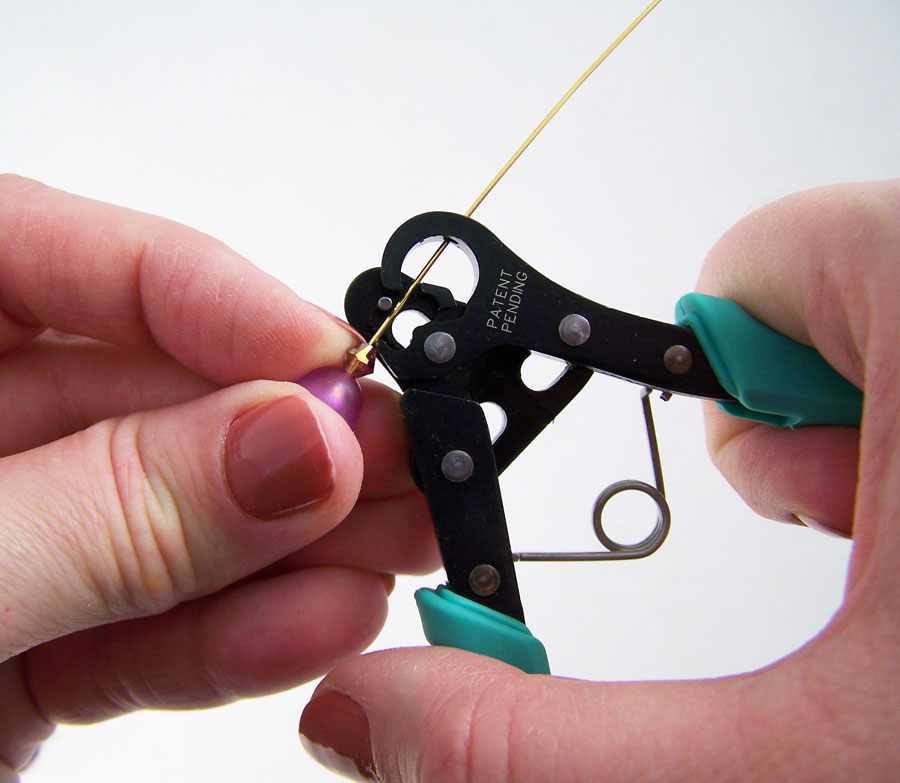
Starting with several beads threaded on a 2 inch headpin I threaded the wire through the lower jaw and extending out through the hole in the top jaw of the tool.
I squeezed the handles together and the wire gets cut by the tool. In fact it did it so quickly I was rather shocked at how easy it was and how little pressure I needed.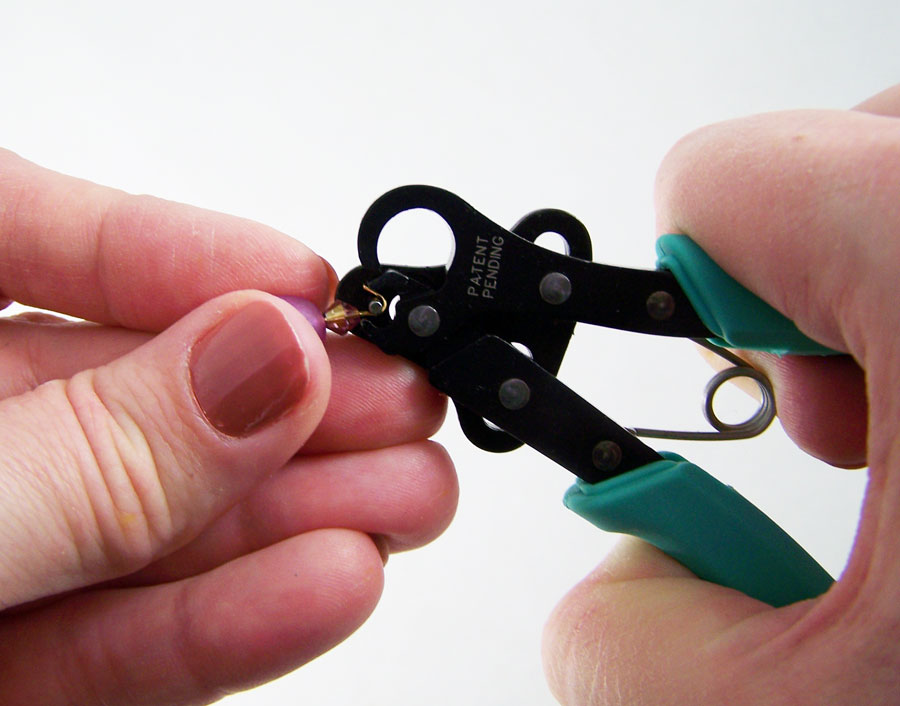
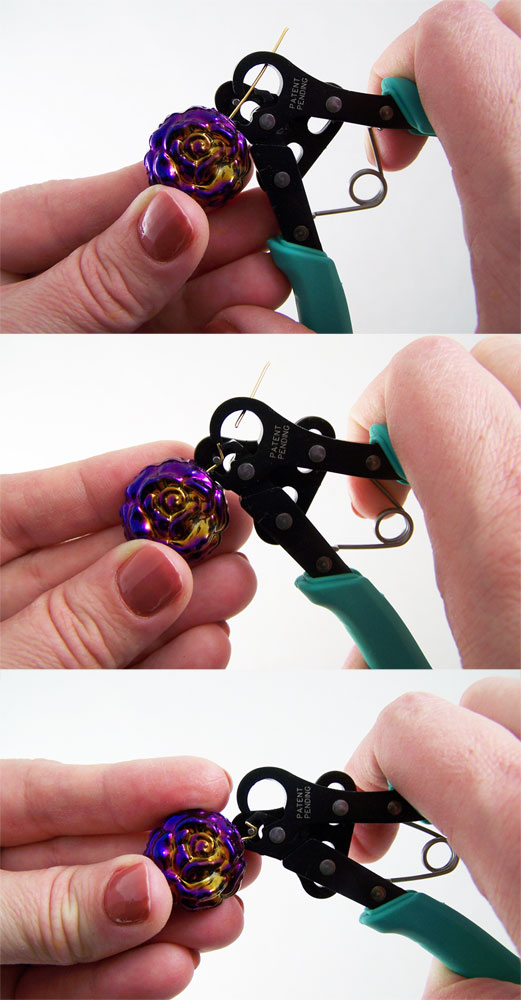
I continued to squeeze the handles and it curled the wire into a very neat and even loop.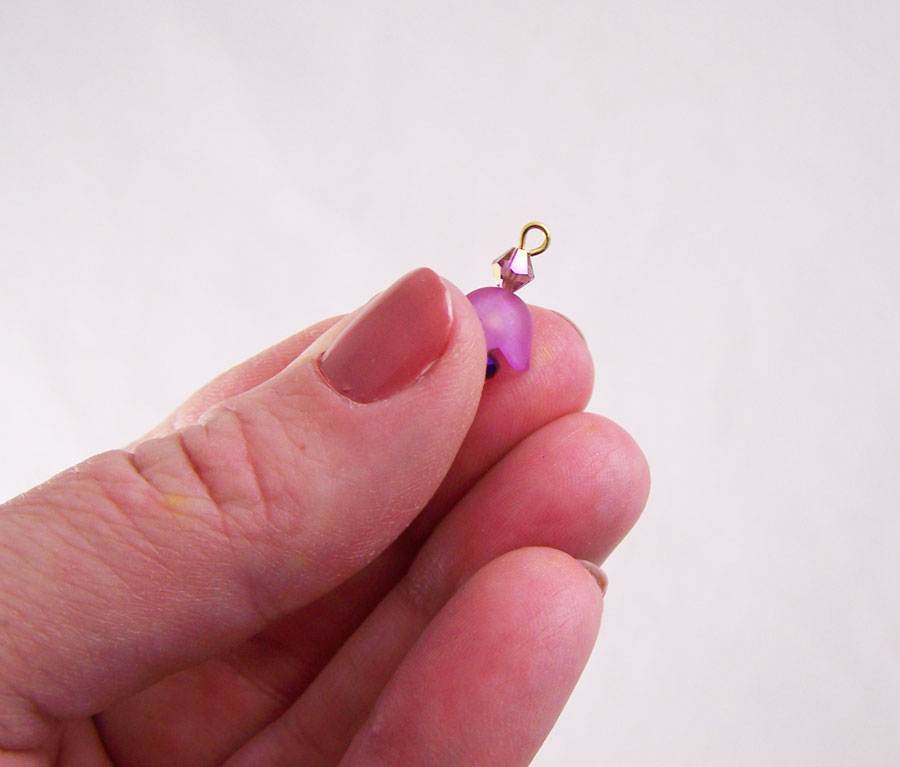
Normally making a loop like that requires me eyeballing the length of wire to cut it in the right area, using a wire cutter, getting a pair of round nose pliers to curl a loop and sometimes squeezing it into place with a flat nose pliers. This can take a minute of so for me and a necklace requiring a lot of loops can take some time. This tool made the loop in seconds.While I was very happy with the results I had heard some complaints that the tool sometimes didn’t always close the loop tight. I tried making several loops and all of them came out with neat closed loops. I started to try out all kinds of beads and wire, finally I was able to reproduce an open loop.
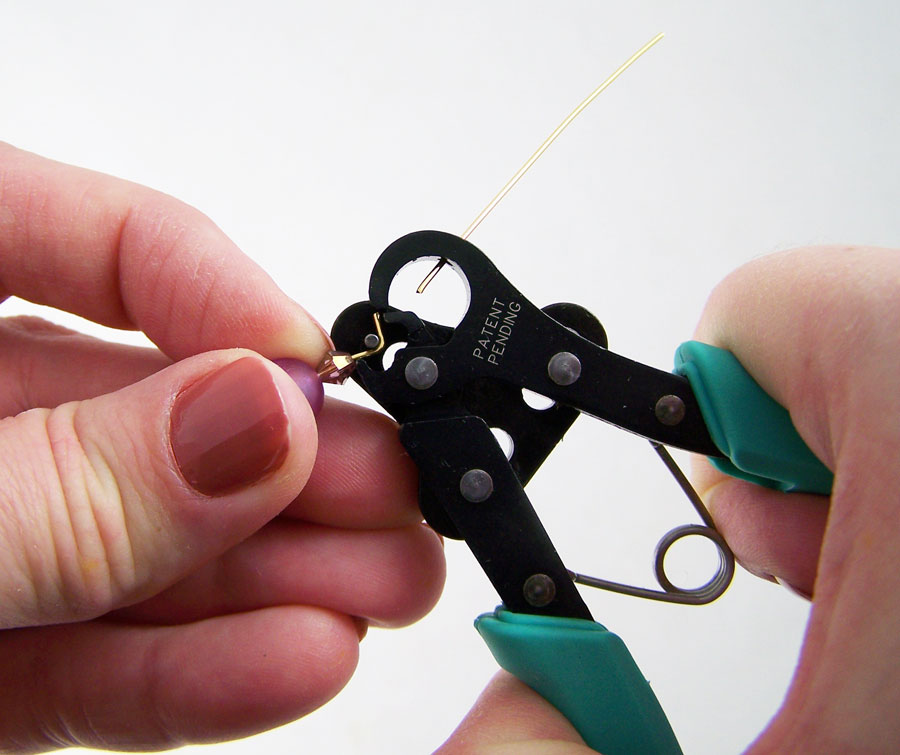
Sure enough when you have a large or odd shaped bead the wire loop doesn’t always loop closed. After looking over what I was doing I realized the issue was the bead shape and/or how close the beads are pushed on the wire to lower jaw of the tool before the handles are squeezed.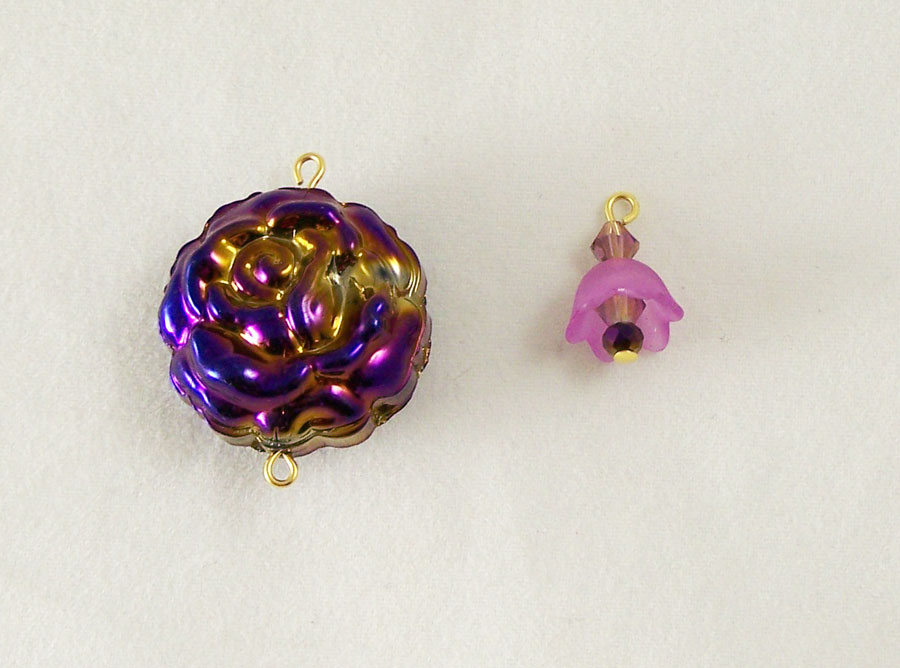
Here is the odd shaped rose bead next to a small crystal bead. An oddly shaped bead can prevent the wire from laying even against the tool, and there will be a slight gap in the final loop. This can even happen with more even-sized beads if you are not careful how plumb the piece is. However there is a very nice upside to it not being a tightly closed loop; If you are working with clay, glass or wood beads you can risk the chance of the wire loop digging into if not out right chipping the bead if the loop is made too tightly, but with the loop slightly open you can carefully close the loop with a pair of round nose pliers and have perfectly shaped loops every time. You can also use the slight opening to add more links or rings onto the piece before closing it with pliers. I plan on using the slightly open looping aspect to my advantage with future projects.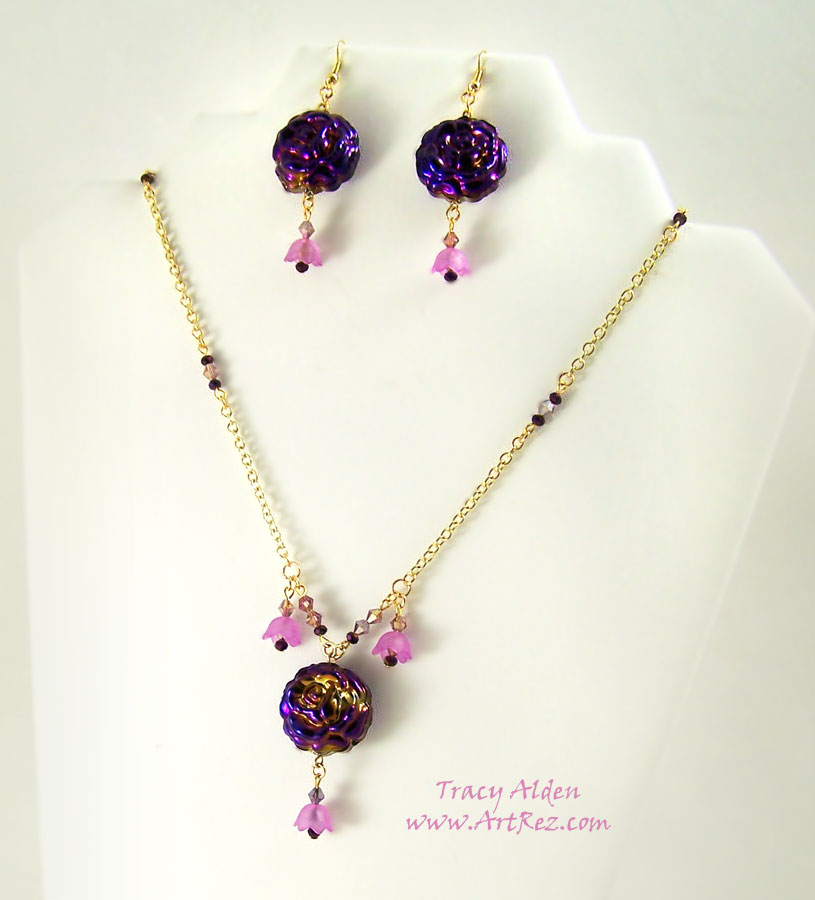
I made this earring and necklace set in about 15 minutes using the Looper Tool. I honestly took me longer to pick the beads and thread them on the wire than to use the tool and assemble. It is so easy on the hands if you get muscle cramps in your hands (like I do) or even arthritis this will make jewelry making easier.I would rate this tool as must have for any jewelry maker who makes lots of wire loops and wants awesome results every time.
Until next time, safe travels!
Amazing Crafting Products Design Team!
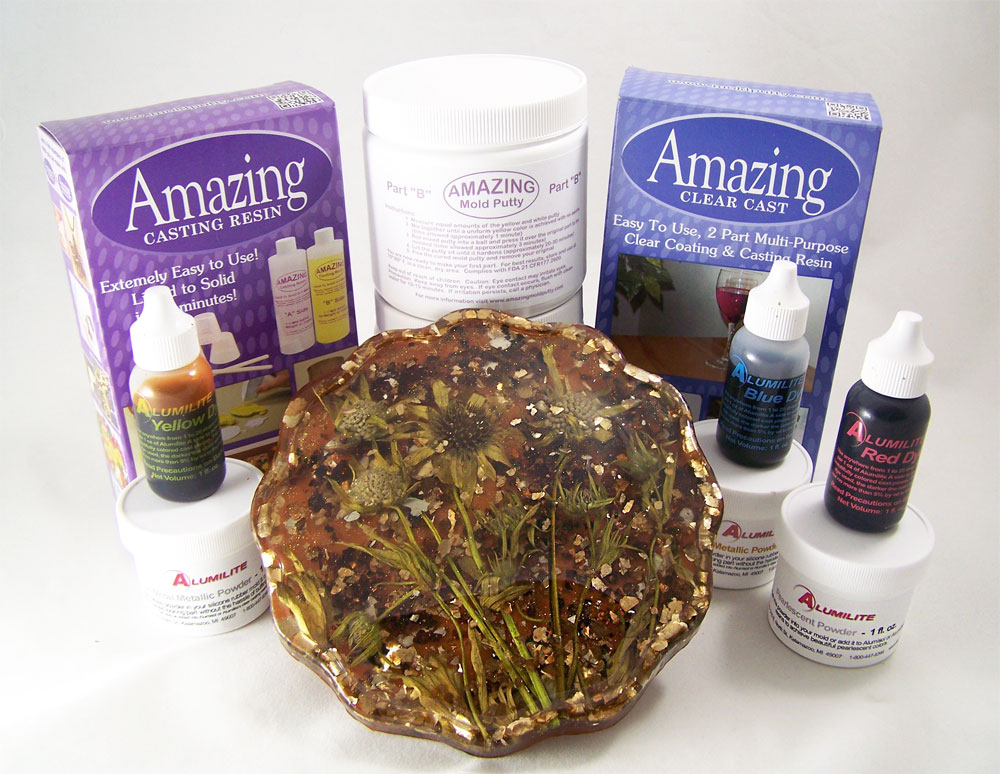
Things have been a whirlwind lately! So many new things happening and so many changes! I was contacted by the talented Susan M. Brown, Design Team leader for Amazing Crafting Products to see if I was interested in joining their design team since in the past I had used their product and enjoyed working with it. Of course I said yes and I am now a proud part of the Amazing Crafting Products design team blog! The photo above is of my first design team shipment and it was so full of awesome goodies to try out.
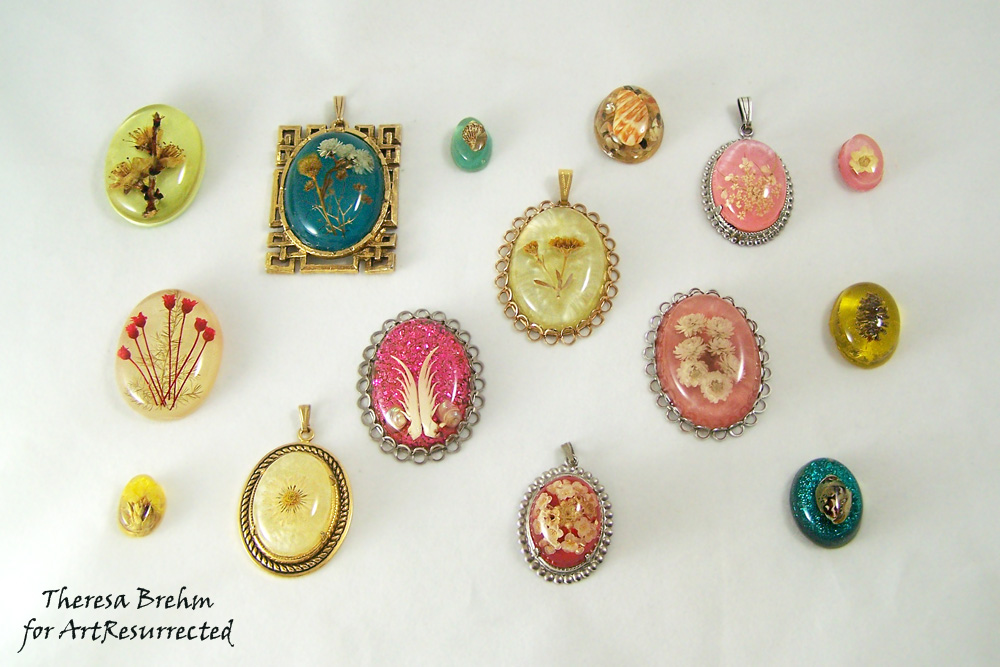 Not only do I enjoy using their products as I have noted in past blog posts, I was introduced to resin as wearable art by my parents many years ago. Here is a photo of some of my mother’s work. All of the pieces in the above photo are over 35+ years old. Amazing Crafting Products even graciously allowed me to showcase her work and vintage molds in an Inspiration post.
 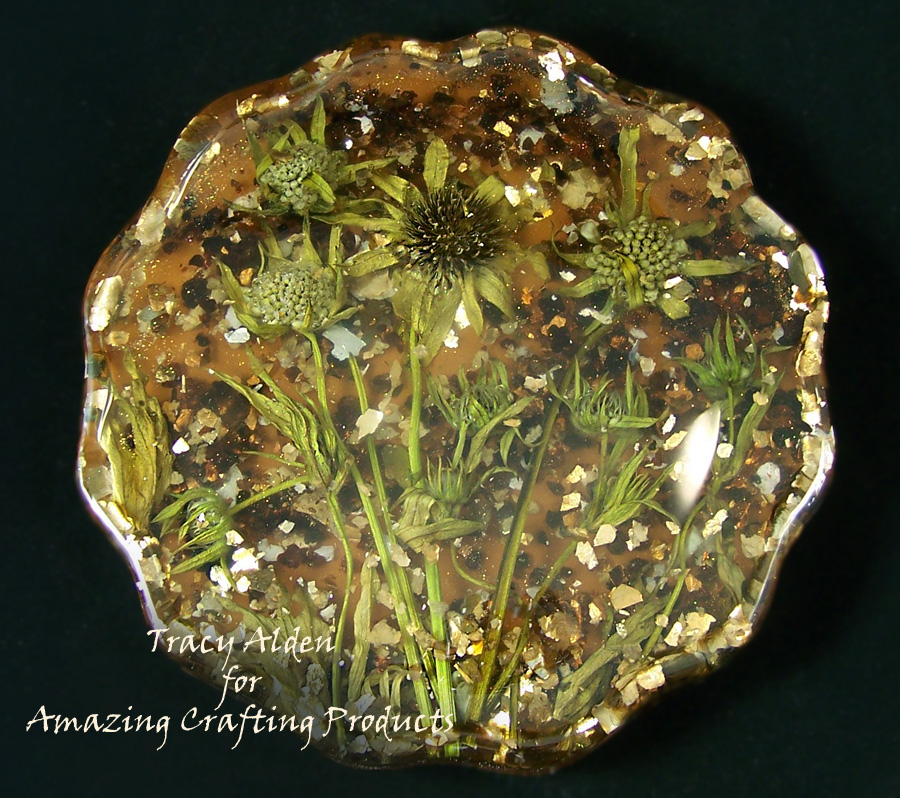 Entranced at an early age by the idea of encapsulating objects I was inspired to use one of my mother’s vintage polyurethane molds to make a retro trivet piece and tutorial!
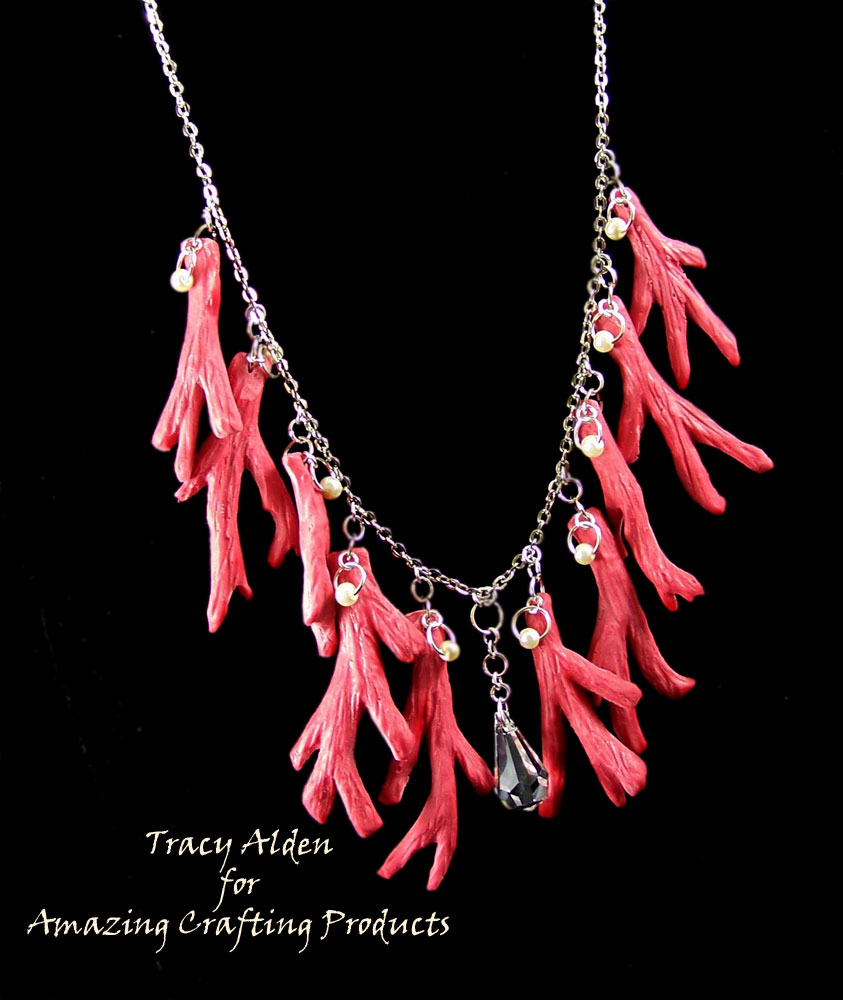 Now I am on a roll and I just can’t help but want to test out how the products perform. I am starting to get back into my polymer clay work so I tried my hand at a faux coral necklace and tutorial. I used polymer clay pieces for the originals to make the resin coral pieces.
For years now I have been trying to mimic the perfect faux amber, I blame a certain dinosaur movie for me always wanting the perfect piece of amber with an insect inside. While I have gotten close in the past there was always an issue with durability and/or clarity. Well, after trying some test with Amazing Clear Cast I was finally able to get the look I have wanted. You can find my inspirations post here talking about these new pieces.
Though don’t just take my word for it, please go to the Amazing Crafting Products design team blog to see all of the talented artists on the team! From model car makers, food artists, mixed media artist, paper crafters and so much more you will not be at a loss for ideas and inspiration. 🙂
Until next time safe travels!
Inspire Art lapel pins
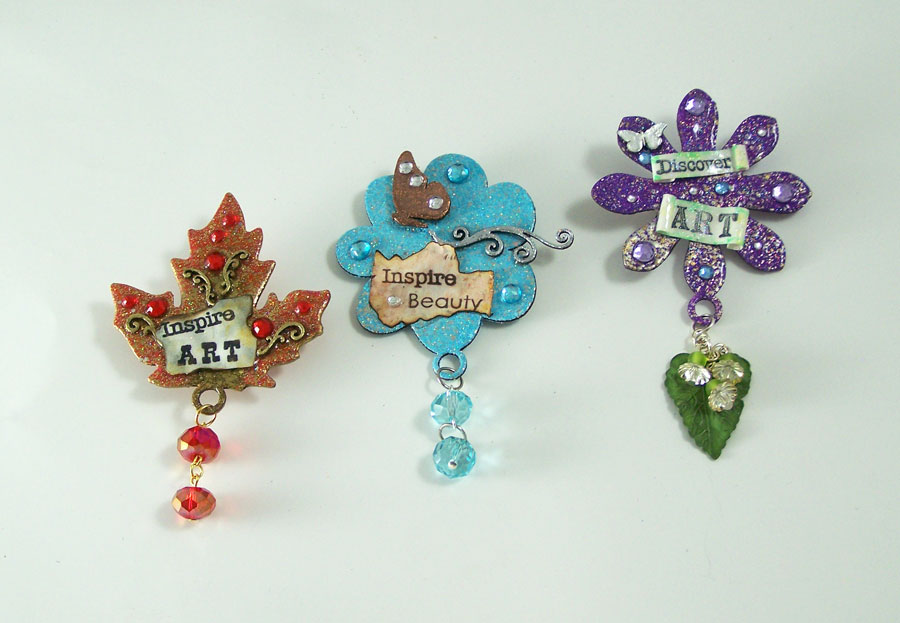
Positive affirmations, inspirational art and things that make one smile can really help with the creative process. Why not make and wear a little bit of inspiration? Today I want to show how to make your own Inspire Art lapel pins, such as the blue above with the copper butterfly.
Supplies:
G&P Assorted Bookboard Charm Bezel Shapes
G&P Bookboard Birds & Butterflies Accents
G&P Glastique Gloss Finishing Glaze
G&P Burnt Umber 3D Enamel Gel
G&P Yellow Ochre 3D Enamel Gel
G&P Metallic Copper 3D Enamel Gel
G&P Turquoise Lagoon Enamel Powder
G&P Copper Kettle Enamel Powder
G&P Siam Silver Enamel Powder
G&P Piccolo Embossing Powder Adhesive
Piccolo Easy Grip Tweezers
Heat Gun
2 Connie Crystal 10mm Crystal beads
2 Silver jumprings
1 Charm Brooch Pin
Crystal sticker gems
Small foam squares
2 Flat nose pliers
1 round nose plier
1 headpin
1 eyepin
Sentiment stamps or sticker
For this project we are using the large round flower bezel from the Charm Bezel Shapes set. Carefully remove one butterfly and swirl from the bookboard Accents set.
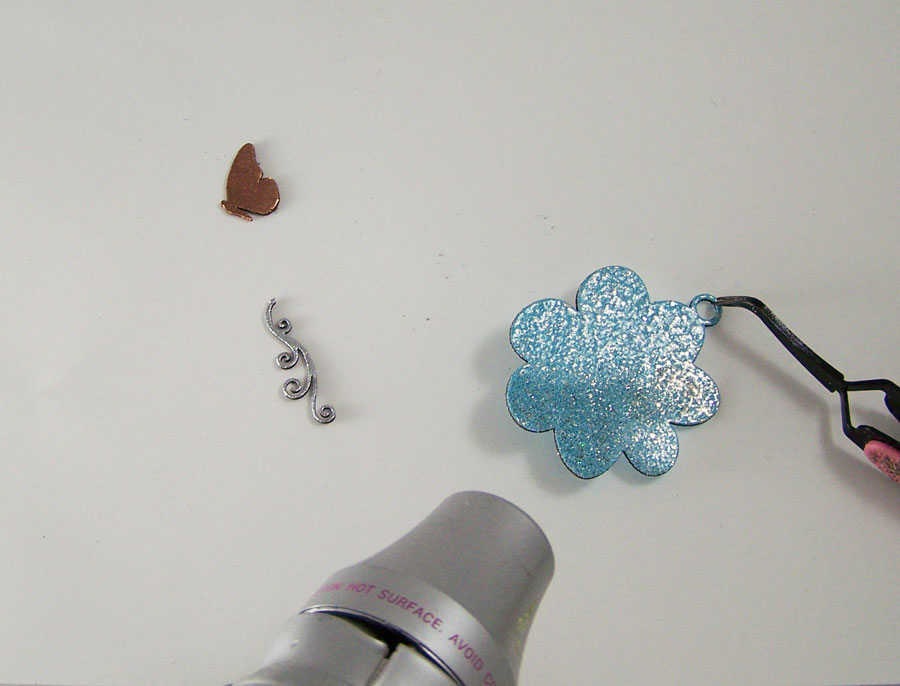 Apply Piccolo Enamel Adhesive to all of the bookboard pieces. Apply G&P Copper Kettle to the butterfly, G&P Siam Silver to the swirl and G&P Turquoise Lagoon Enamel Powder to the flower bezel. Heat set.
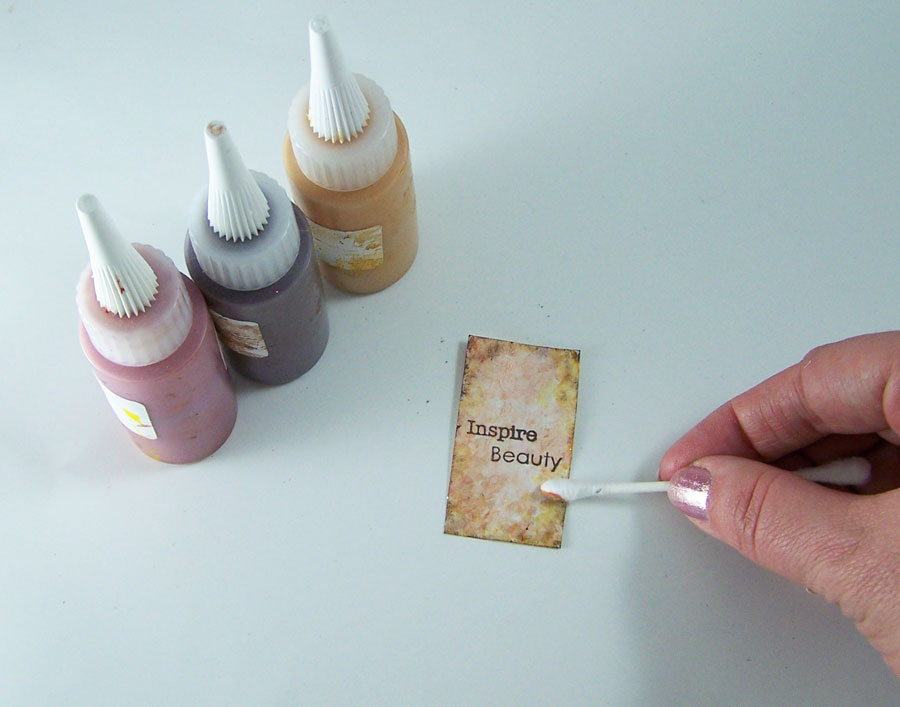 Stamp a sentiment on a 1inch by 2inch piece of paper. Apply G&P Burnt Umber. G&P Yellow Ochre, and G&P Metallic Copper 3D Enamel Gel with a cotton swap to the paper front and back to give an aged look.
*Ignore this step if you rather use a sentiment sticker.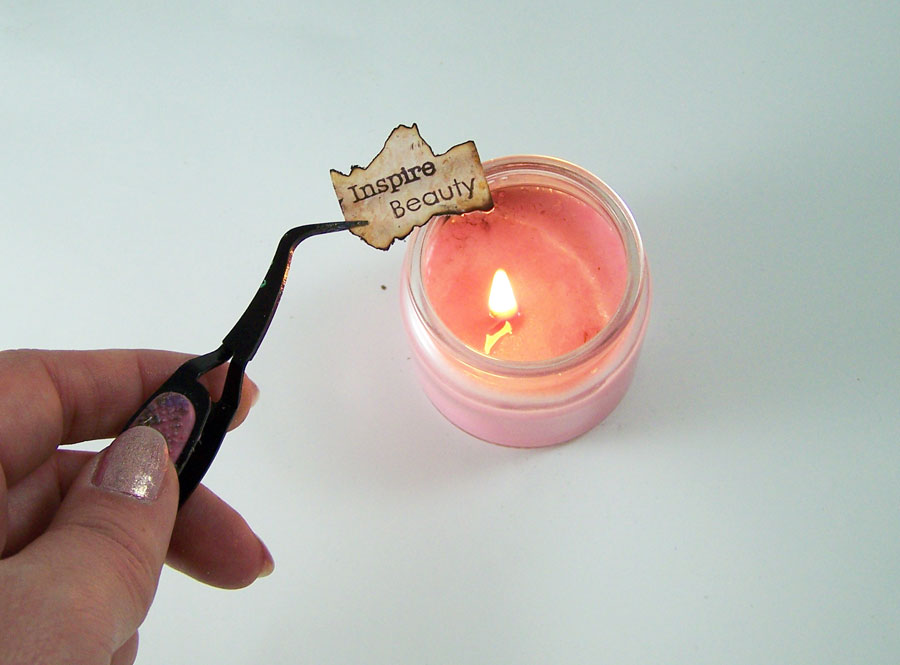 Using the tweezers grip the edge of the stamped paper and very carefully scorch the edges with a small candle flame.
*Ignore this step if you rather use a sentiment sticker.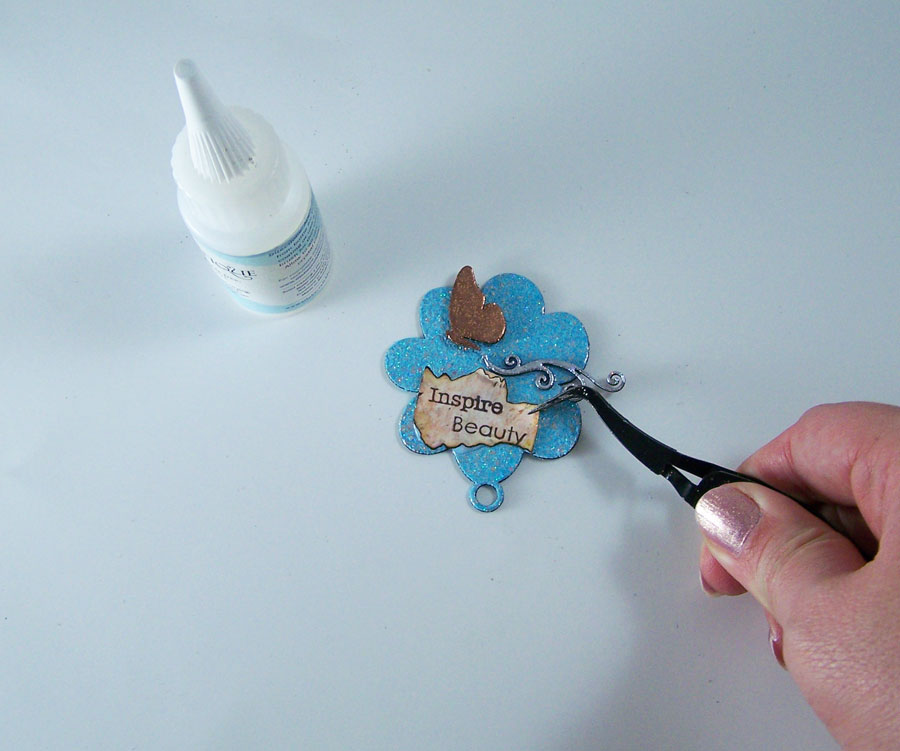
Use Glastique Gloss Finishing Glaze coat the flower bezel with a thin layer. Let dry. Adhere foam squares to the back of the butterfly and the sentiment, press onto the bezel. Attach the swirl Piccolo with Glastique Gloss and coat the assembled pieces with a thin coat of Glastique Gloss.
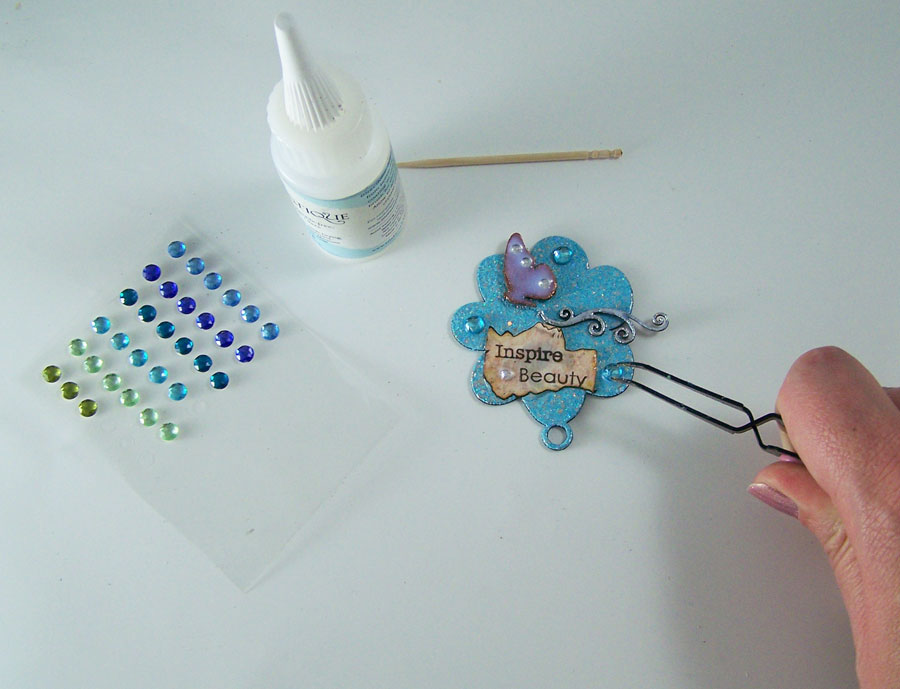 Use Glastique Gloss Finishing Glaze to glue on the sticker gems to the bezel as shown. Let dry.
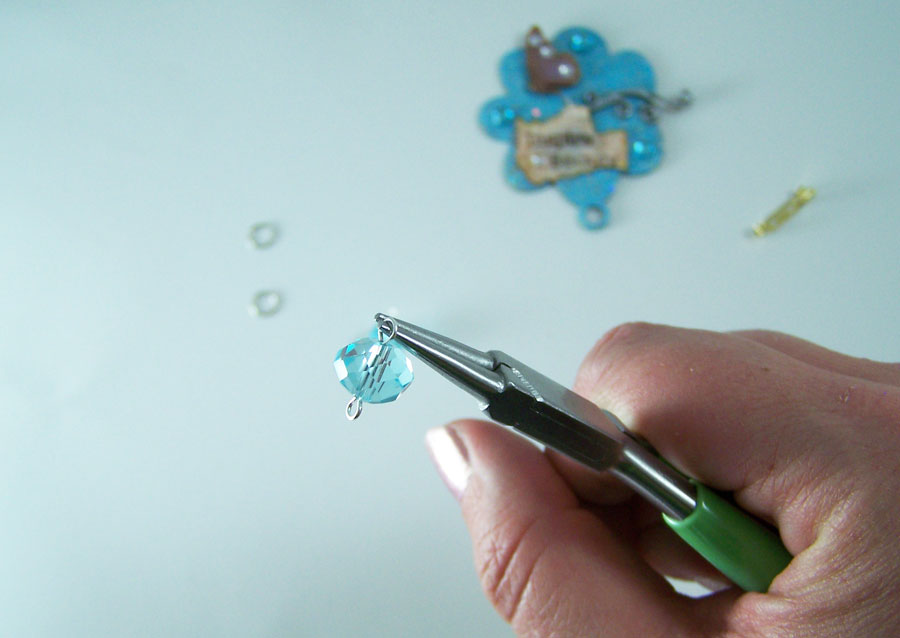 Thread one crystal bead onto the jewelry eyepin and one on the headpin. Using the round nose pliers curl over the remaining wire to form a loop on both jewelry pins.

Open up jump rings with the flat nose pliers and put one jumpring through the loop on the headpin and eyepin, close jumpring. Use the other open jumpring to connect the crystals to the bezel as shown, close jump ring.
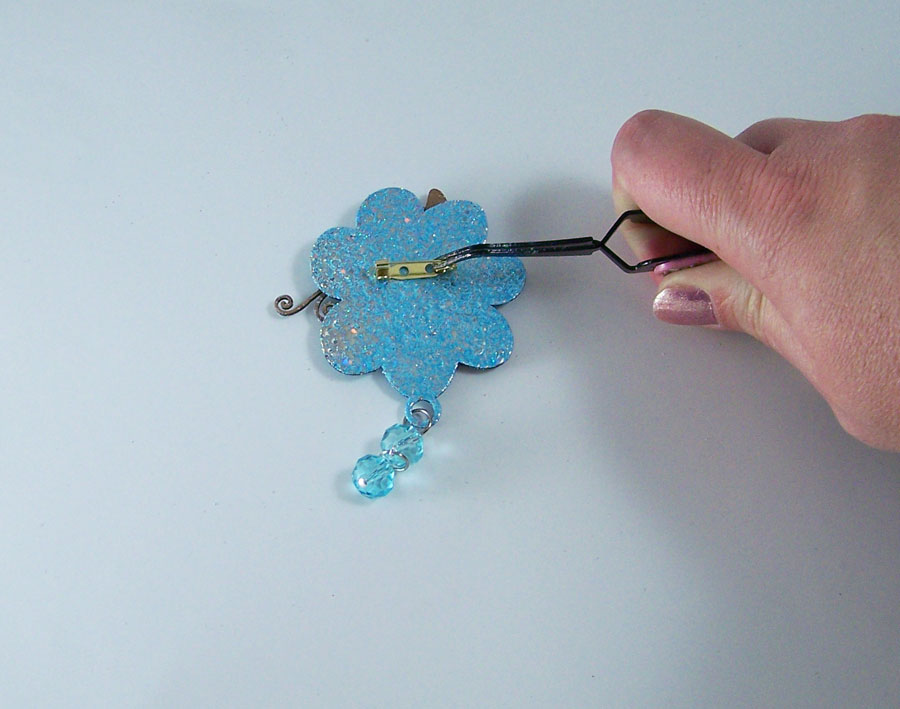 Glue charm brooch pin to the back of the bezel with jewelry glue. Let dry.
The inspire art pin is now ready to wear or give as a gift!
Until next time, safe travels!
CHA Winter Show 2013
Another Craft and Hobby Association Winter show has come and gone. While there were less vendors this year, I honestly feel this was one of the best I attended. This show was amazing! The classes, networking and show floor events were wonderful. I was able to make new accounts with several vendors and got to meet up with some seriously talented artists.
The wonderful Globecraft & Piccolo had a booth again at CHA. I am proud to be part of their Design Team and a part of product design & development! Members of the G&P design team, Jami Bostjancic (of Accent Allusions) and I were honored to be asked to do demos at the booth for three of the four days of CHA.
Here is some of the cool G&P products we got to demo at the show:
NEW Globecraft & Piccolo UV Resin: It cures in 3 minutes in UV light, scratch resistant, self leveling and not affected by humidity (in fact it can set up underwater). It works wonderful on top of chipboard, acrylic, paper, polymer clay, fabric, vellum and so much more!
NEW Globecraft & Piccolo Acrylic Bezels and Tags: Clear acrylic bezels and tags come in so many shapes and sizes. Perfect for making jewelry, mixed media and card decor! Looks lovely stamped and with paper backings.
NEW additions to the Globecraft & Piccolo Embossing powder line: These powders are specially designed to look awesome on large and small projects. G&P Embossing Powders are made of varying-sized particles that create a unique depth and dimension not available with traditional embossing powders. These wonderful colors can mimic stone, metal, natural elements and aged surfaces. The new colors are Real Rust, Ruby Red Slippers, Shamrock Dreams, Turquoise Lagoon, and Platinum!
New Piccolo Chipboard Elements: Now in many different sizes, great for home decor, card making, mixed media, jewelry and more! From holiday, seasonal, steampunk, animals, swirls, and elaborate corner and edge elements.

The Globecraft & Piccolo booth at CHA.
G&P display showcasing all of their embossing powders and chipboard charm sets. All of the charm sets on the velvet boards are my work. 🙂

G&P acrylic and chipboard bezels samples by the talented design team, the Secrist family (G&P) and I.
Just beautiful card decor work with Piccolos by the design team!
G&P Ornament sets. The lovely mixed media piece on the left is made by the talented Linda Neff (part of the G&P design team) from ornaments and a lampshade.
An overview of the booth.
Some samples of the demo work showing the new UV Resin and acrylic bezels! Pieces by Pat Secrist (Of G&P), Jami Bostjancic and I.The following photos are close up of booth display samples to show you how many new styles and techniques you can use with the new G&P products.

G&P acrylic bezel, G&P UV Resin, mica powder, permanent ink, paper and sticker gems.
Mini oval acrylic bezels with Pure Sparkle Glitter in Gold, mica powder, 3D Enamel Gel and sticker gems. Faux glass technique.
Top left and bottom bezels are acrylic and top right bezel is bookboard. 3D Enamel Gels, Pure Sparkle Glitter in Gold and Silver, mica powder and sticker gems. Glastique Gloss is used to seal each layer. Topped with the new UV resin. Nebula/night sky technique.
G&P acrylic bezel, G&P UV Resin, G&P Piccolo Gears, mica powder, permanent ink, paper and sticker gems. Piccolo layer technique.
G&P acrylic bezel, G&P UV Resin, mica powder, 3D Enamel Gels, Origami foil paper and sticker gems. Faux glass technique.Until next time safe travels!

Ancient and Contemporary Inspired Artistry