Quick and Easy Golden Boho Jewelry Set
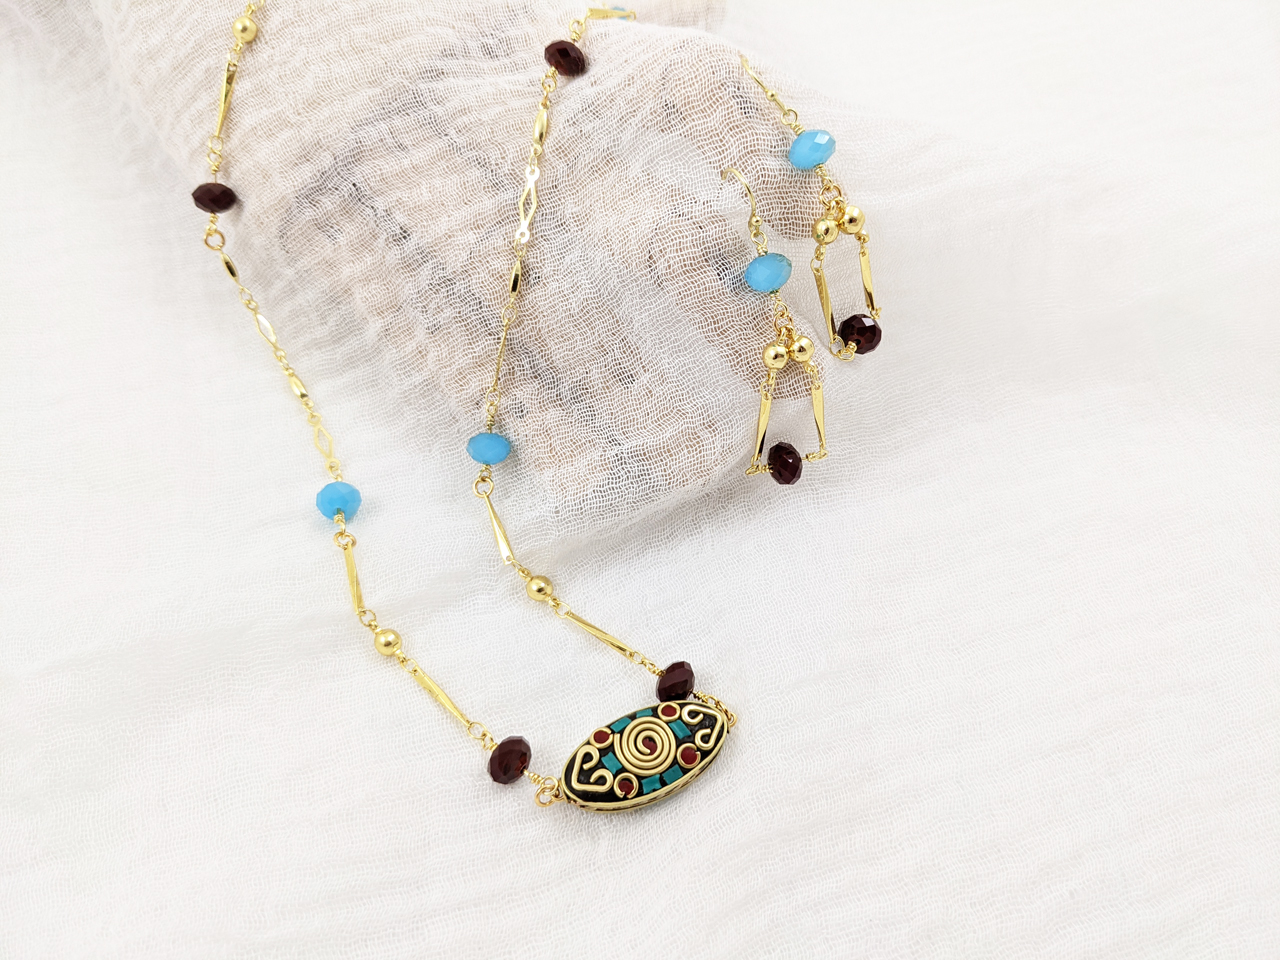
Hello! New Year and new ideas have me restarting my YouTube Channel! Now that I have the majority of my art studio in order it is time to be filming my newest tutorials, reviews and eclectic crafty fun. Starting with a tutorial on how to make your own quick and easy golden Boho jewelry set in less than 20 minutes using supplies from Jesse James Beads and Beadalon.
Supplies:
Jesse James Beads Chain Reaction Ruby Red #13 https://shrsl.com/2s1nc Jesse James Beads Chain Reaction Teal #8 https://shrsl.com/2s1nf
Jesse James Beads Tibet Boho Bundle https://shrsl.com/2s1n6
Beadalon 4mm jumprings https://shrsl.com/2s1na
Beadalon 7mm jumpring
Beadalon Lobster Claw https://shrsl.com/2s1nb
2inch 21 gauge gold plated eye pins
Gold Plate Earring Wires https://amzn.to/3cNTZn1
Round nose pliers https://amzn.to/36RakU9
2 Chain nose pliers
Wire cuttersWhile you are at my YouTube Channel don’t forget to subscribe to keep updated on my newest videos!
Until Next Time, Stay Crafty, Stay Safe!
*This is an affiliate post, which means I received an assortment of products as a compensation for the creation of art and/or may contain affiliate links. If you do make a purchase via my affiliate link, I will receive a small commission at no additional cost to you. This fee goes towards the funding of more art projects. I greatly appreciate your support. To read my full disclosure, click here.- Allegory Gallery, Art Journal, Beadalon, Beading, Doodles, Drawing, Green Girl Studios, Jewelry, Resin, Throwback Thursday
An Artistic Year in Review
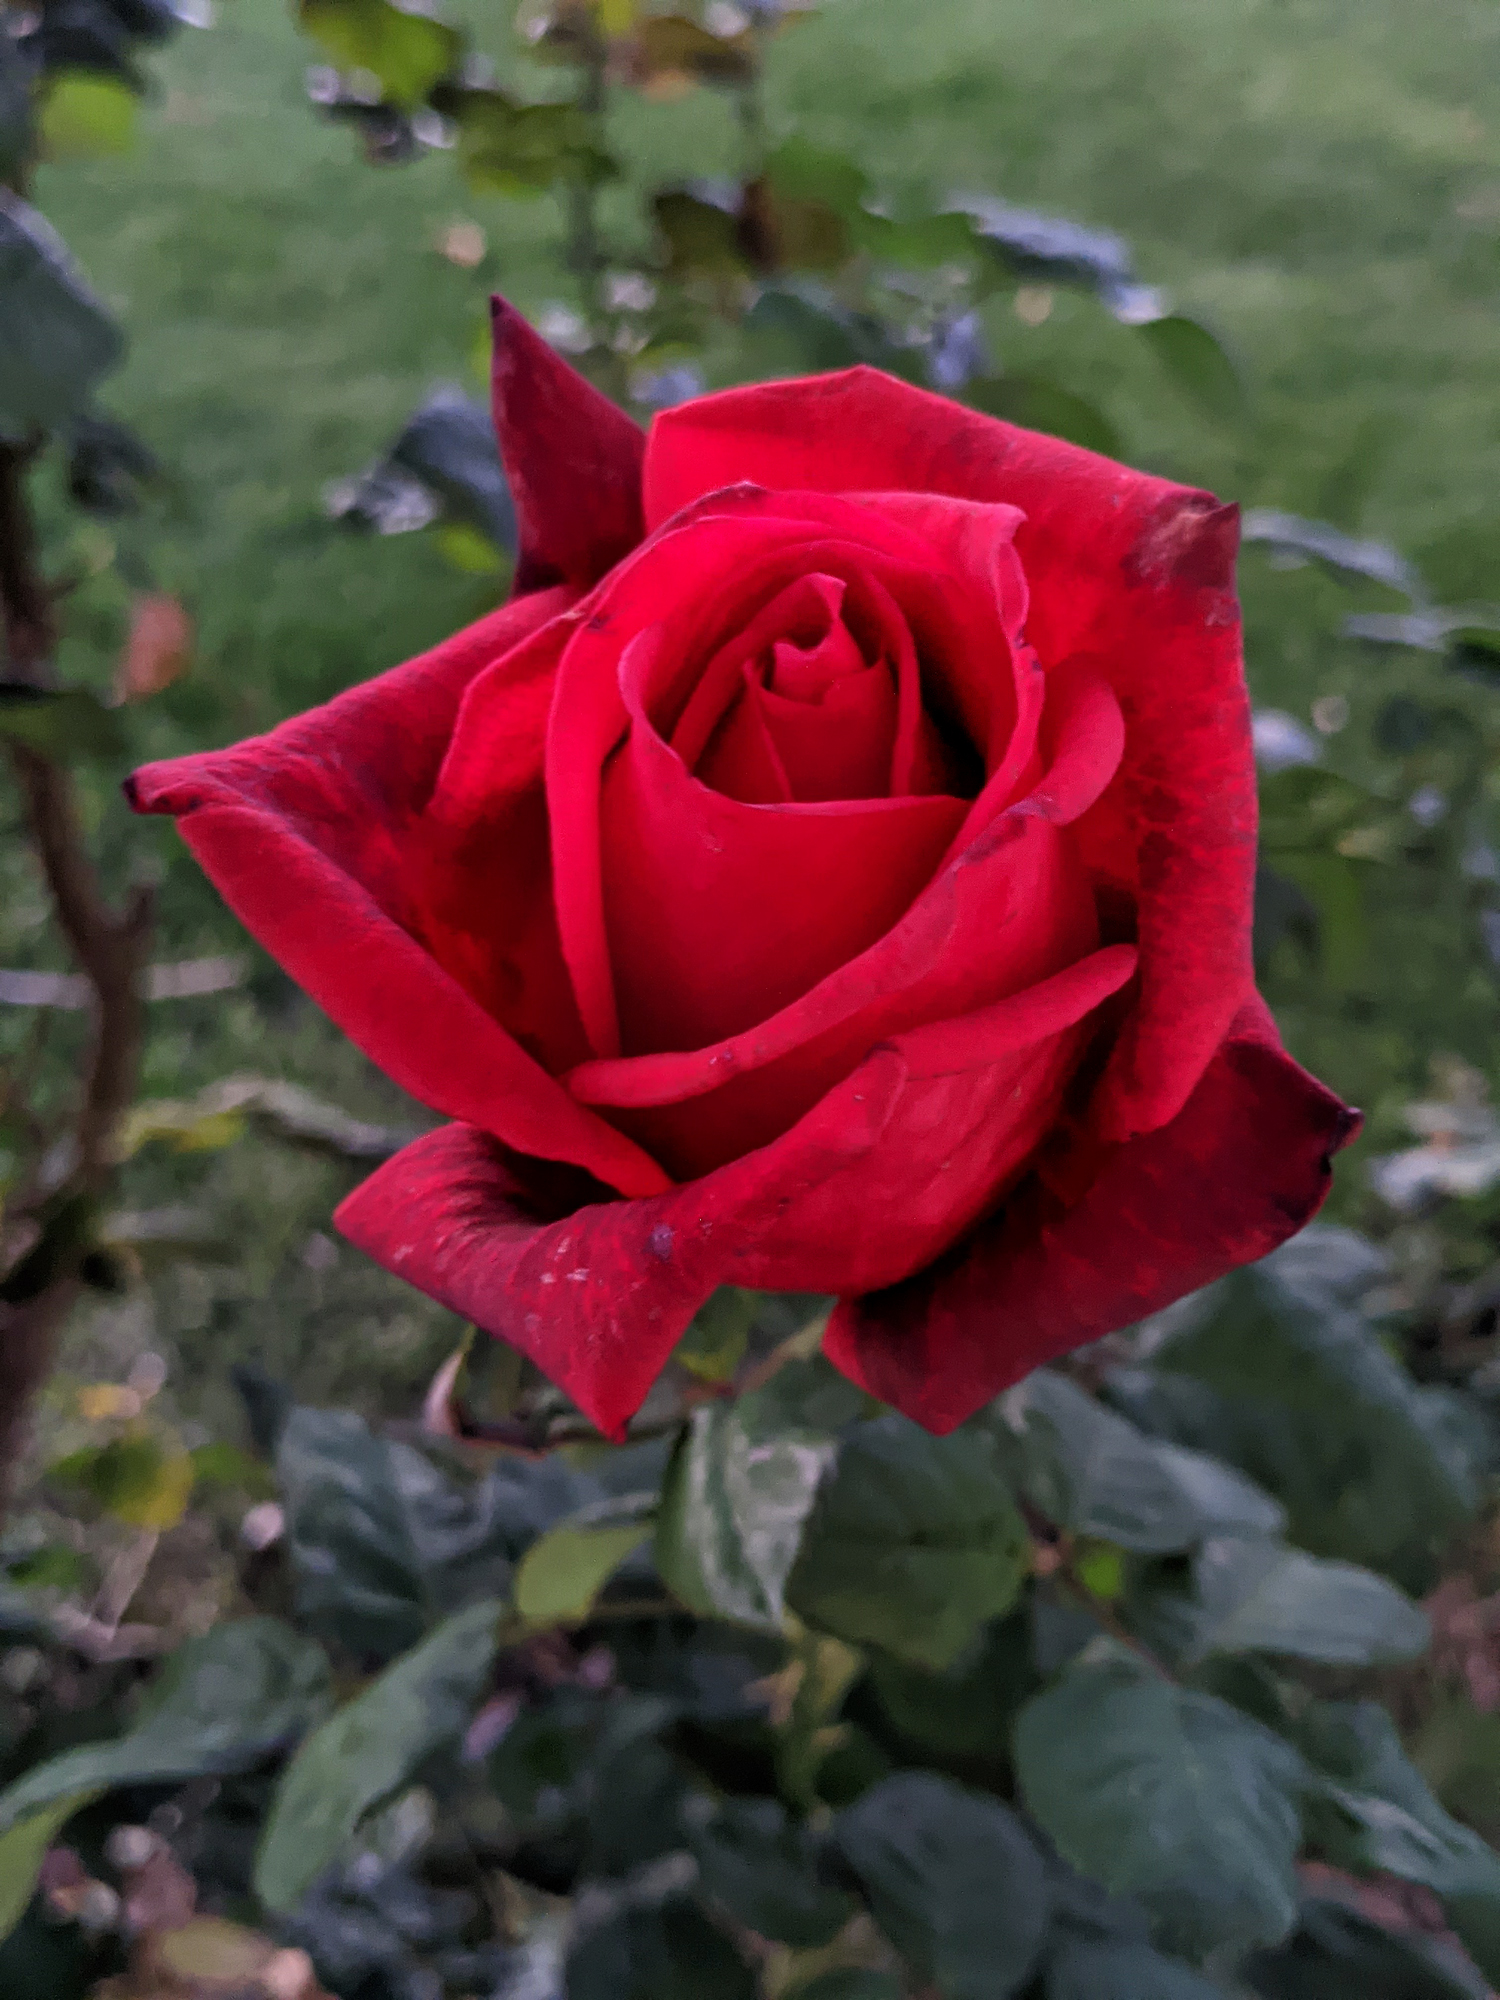
This year has been a trial by fire for pretty much most of us on this little blue dot of a planet we call home. Like many I had intended to do so much more but this year turned out very different.
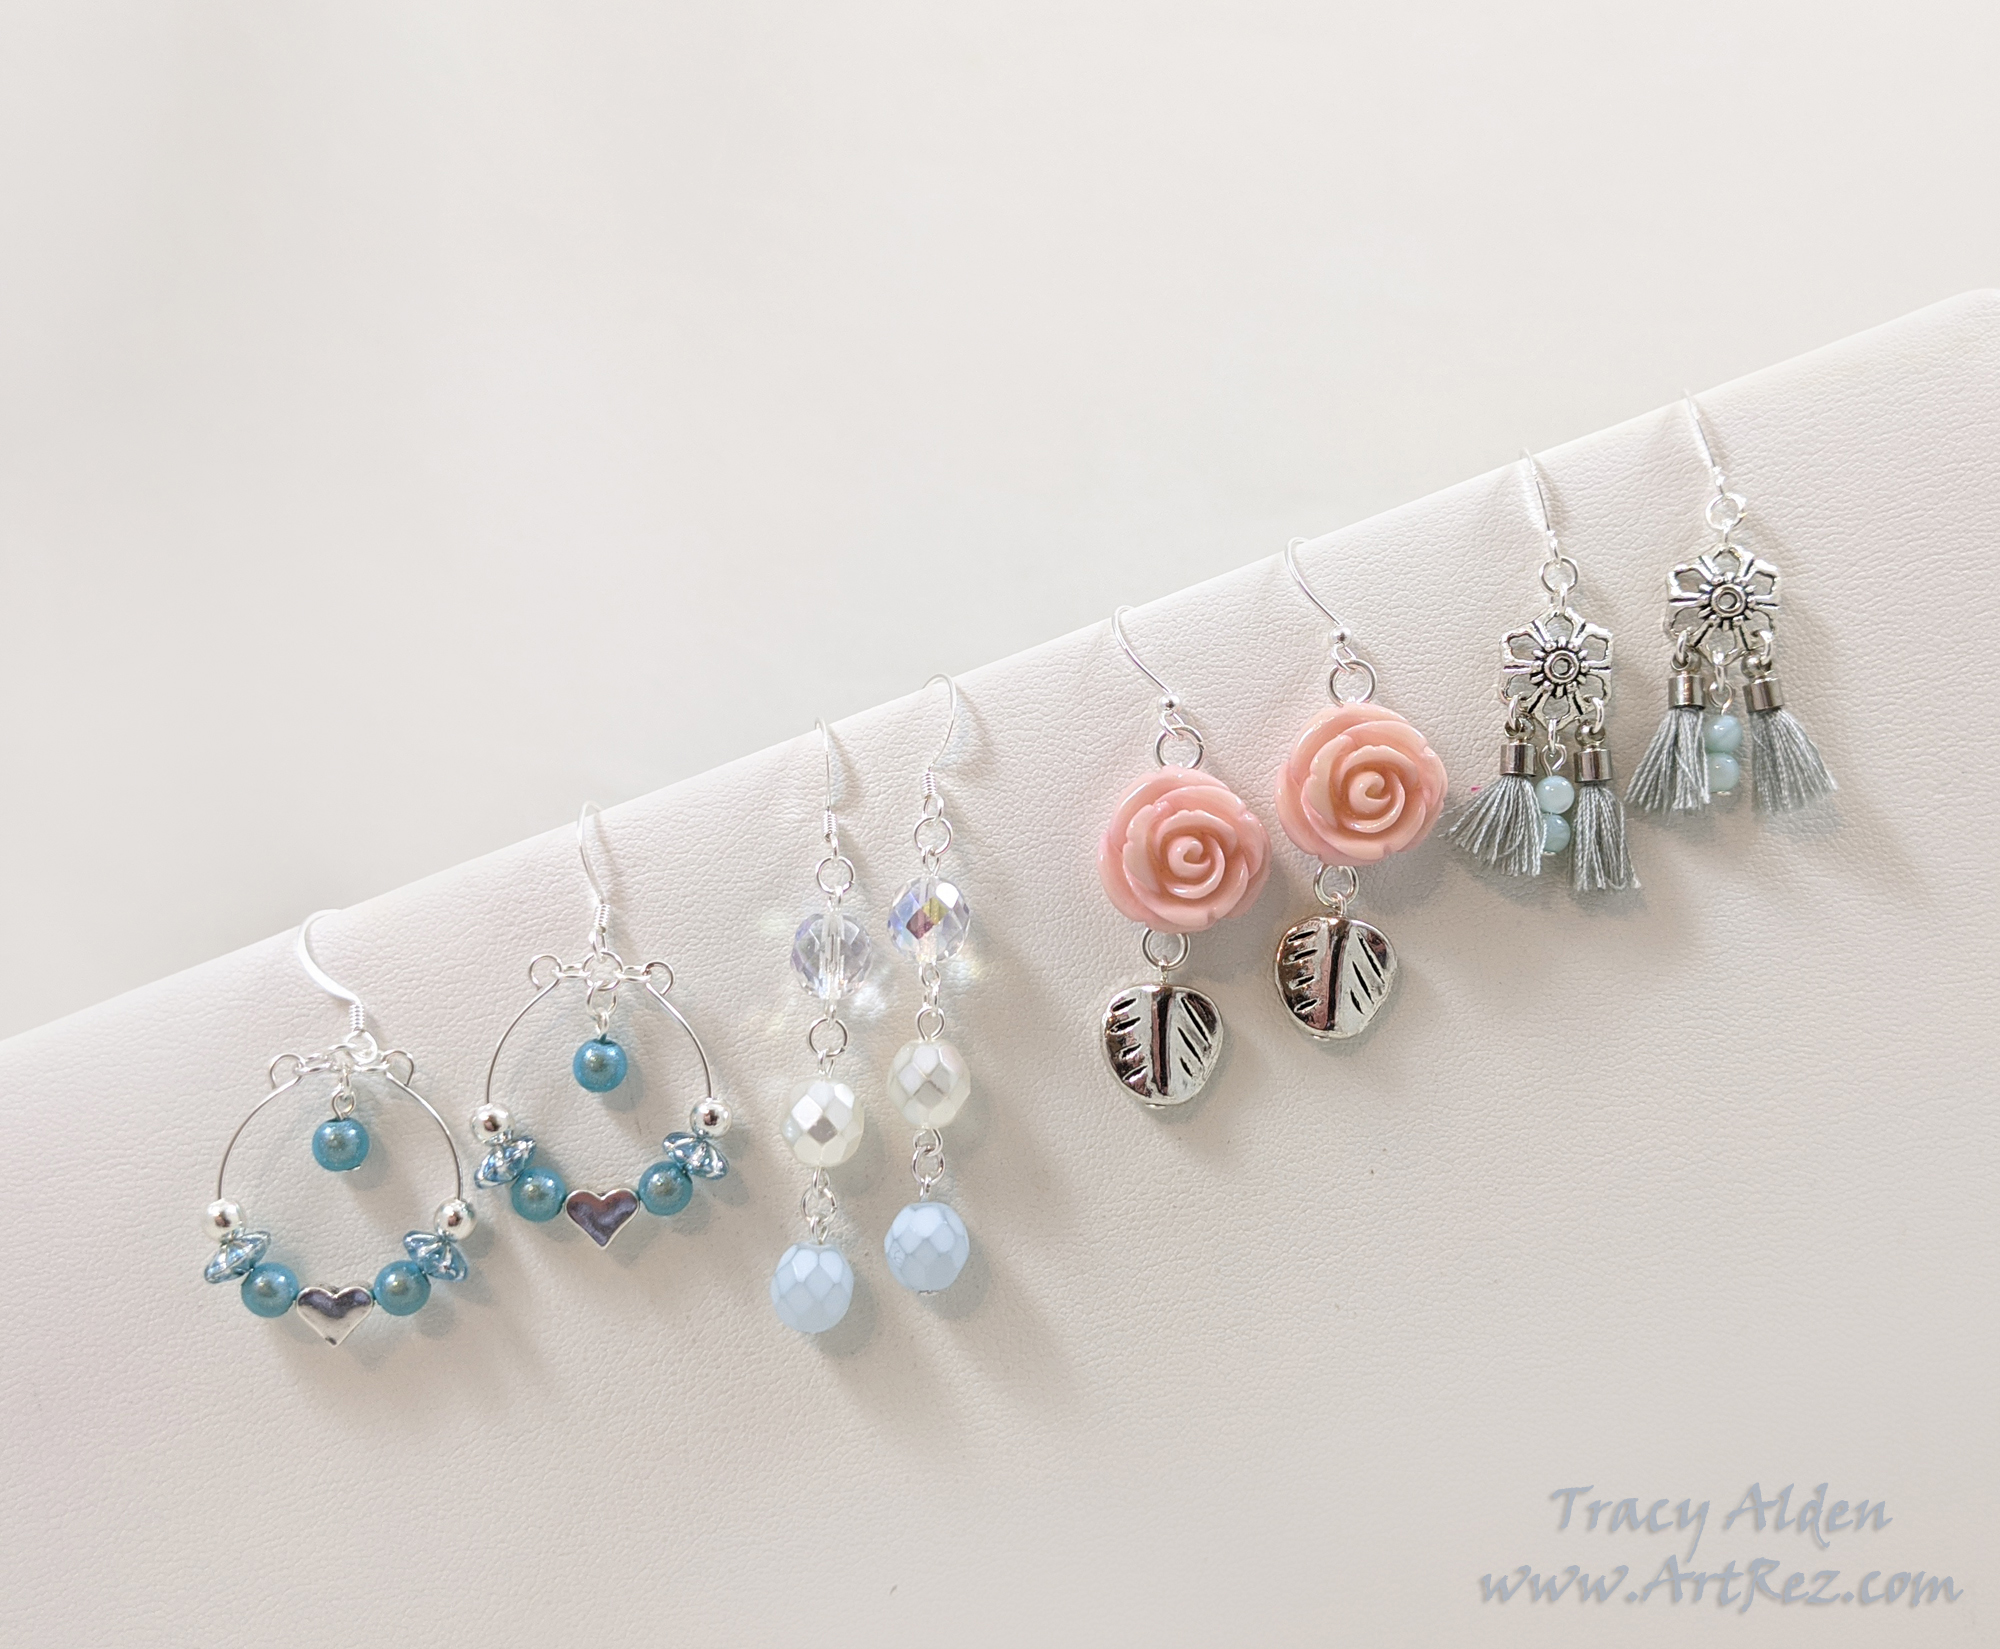
We moved once in the earlier portion of this year, selling our home of 12 years, moving into my mother’s house, as we were having difficulty finding a new home. It was a hectic time but one of my little pleasures was the continued subscription to Jesse James Beads‘s Magical Mystery Bead Boxes. Enjoying the colors and shapes, pushing my creative style into different directions.
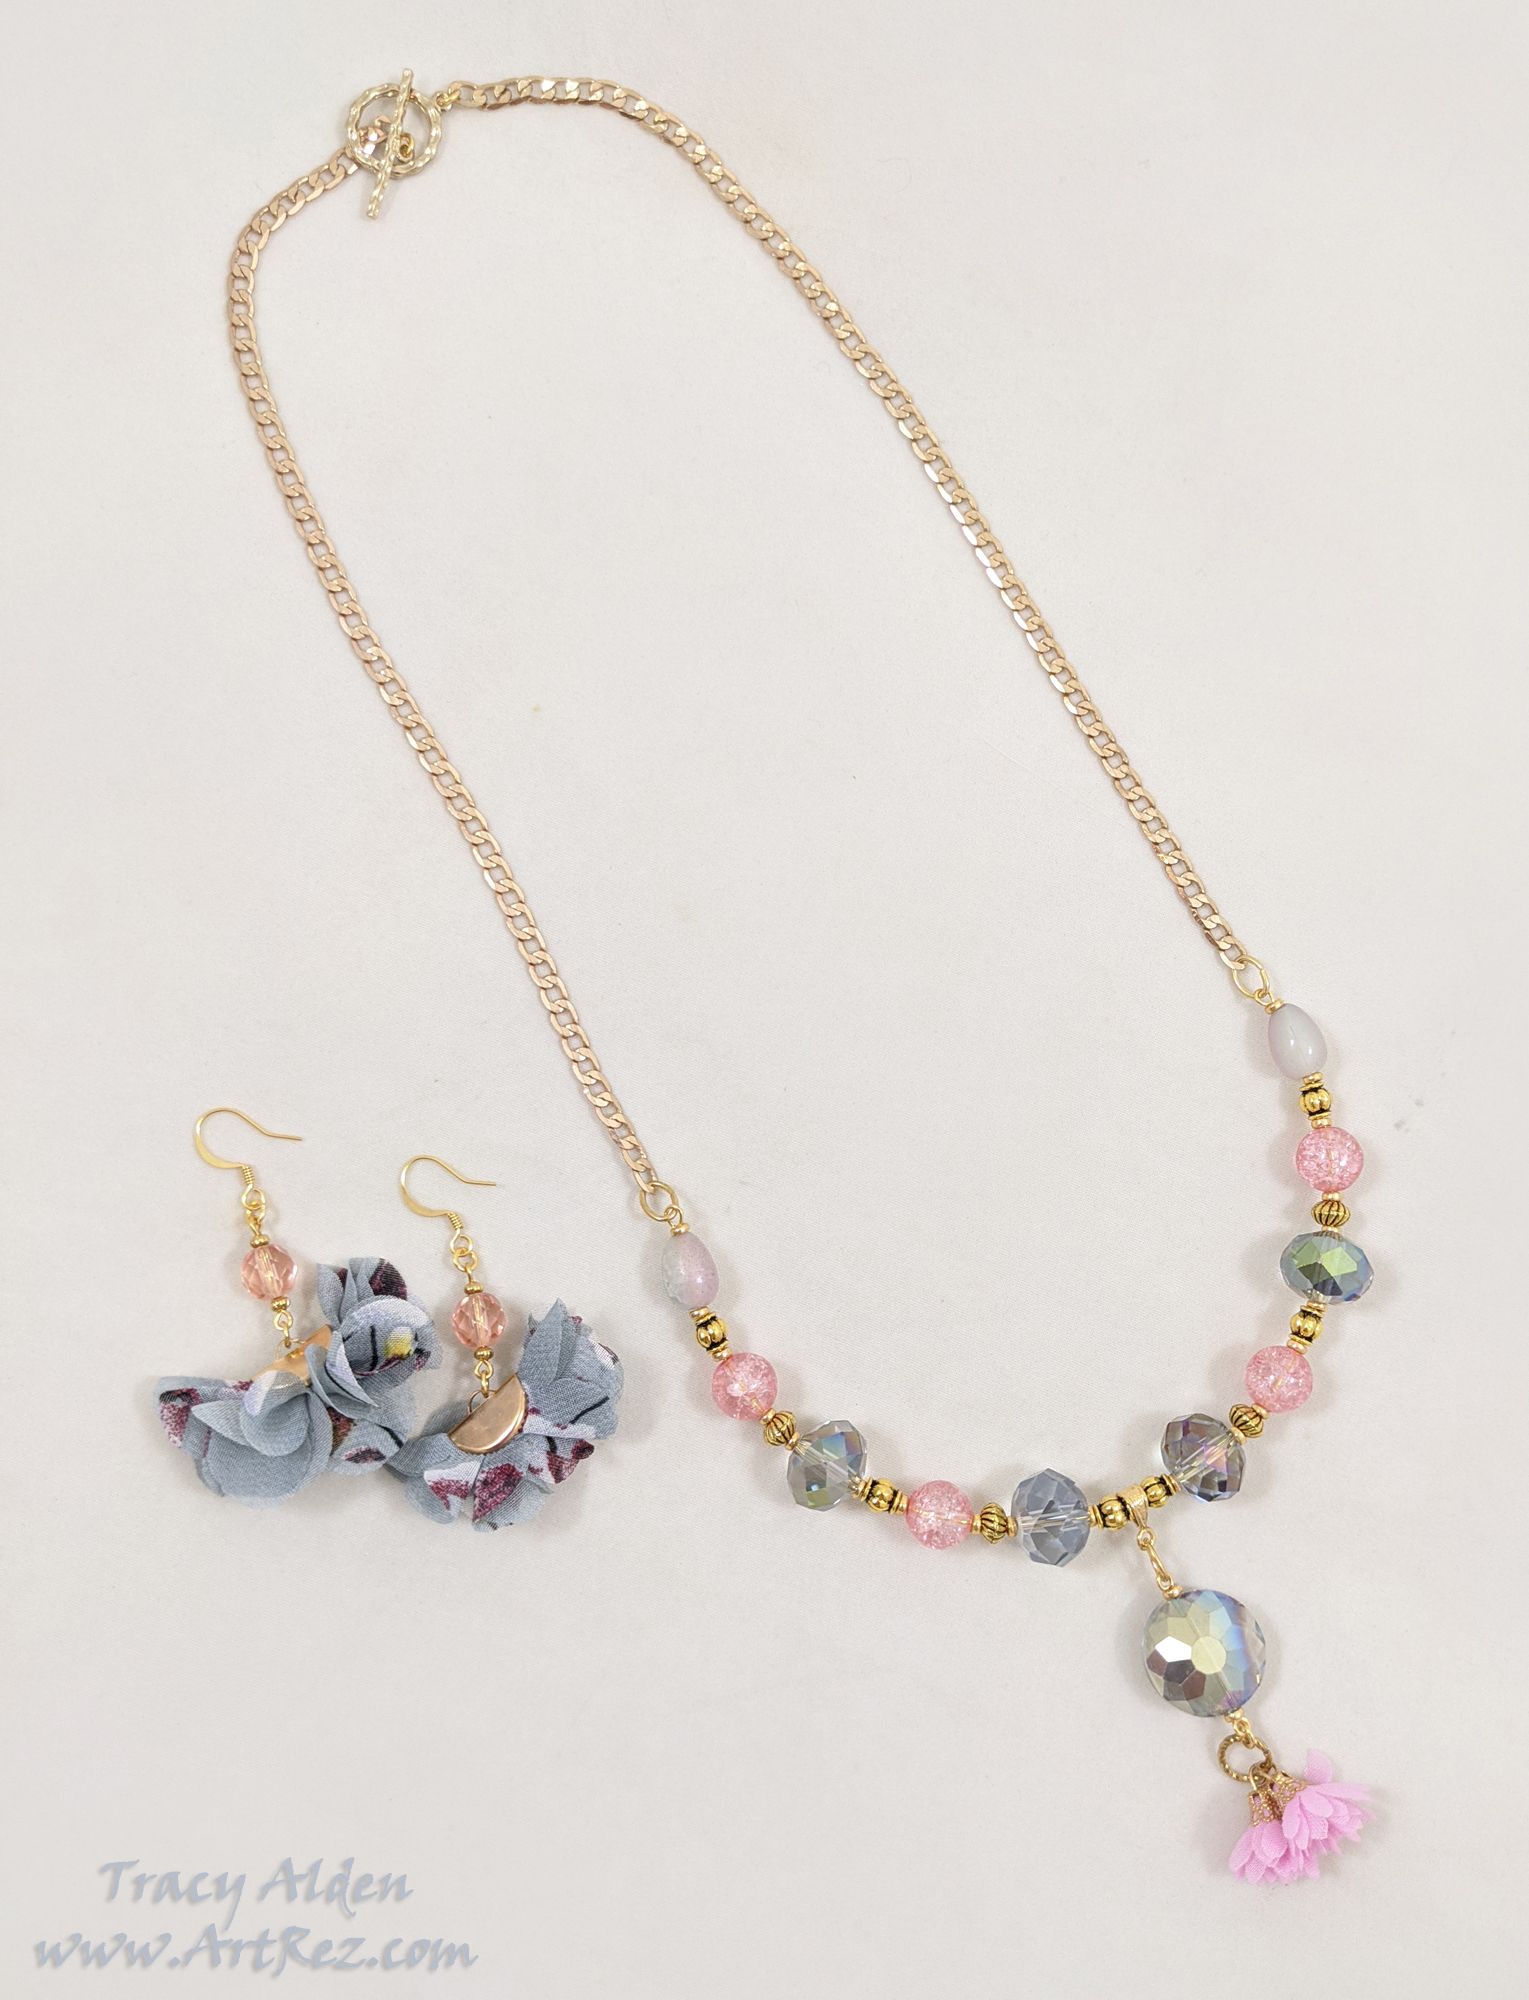
With a rainy Spring in full swing, I took inspiration from my potted garden to create different grey and pink toned jewelry pieces. My mother’s house went up for sale and we started packing for a second time.
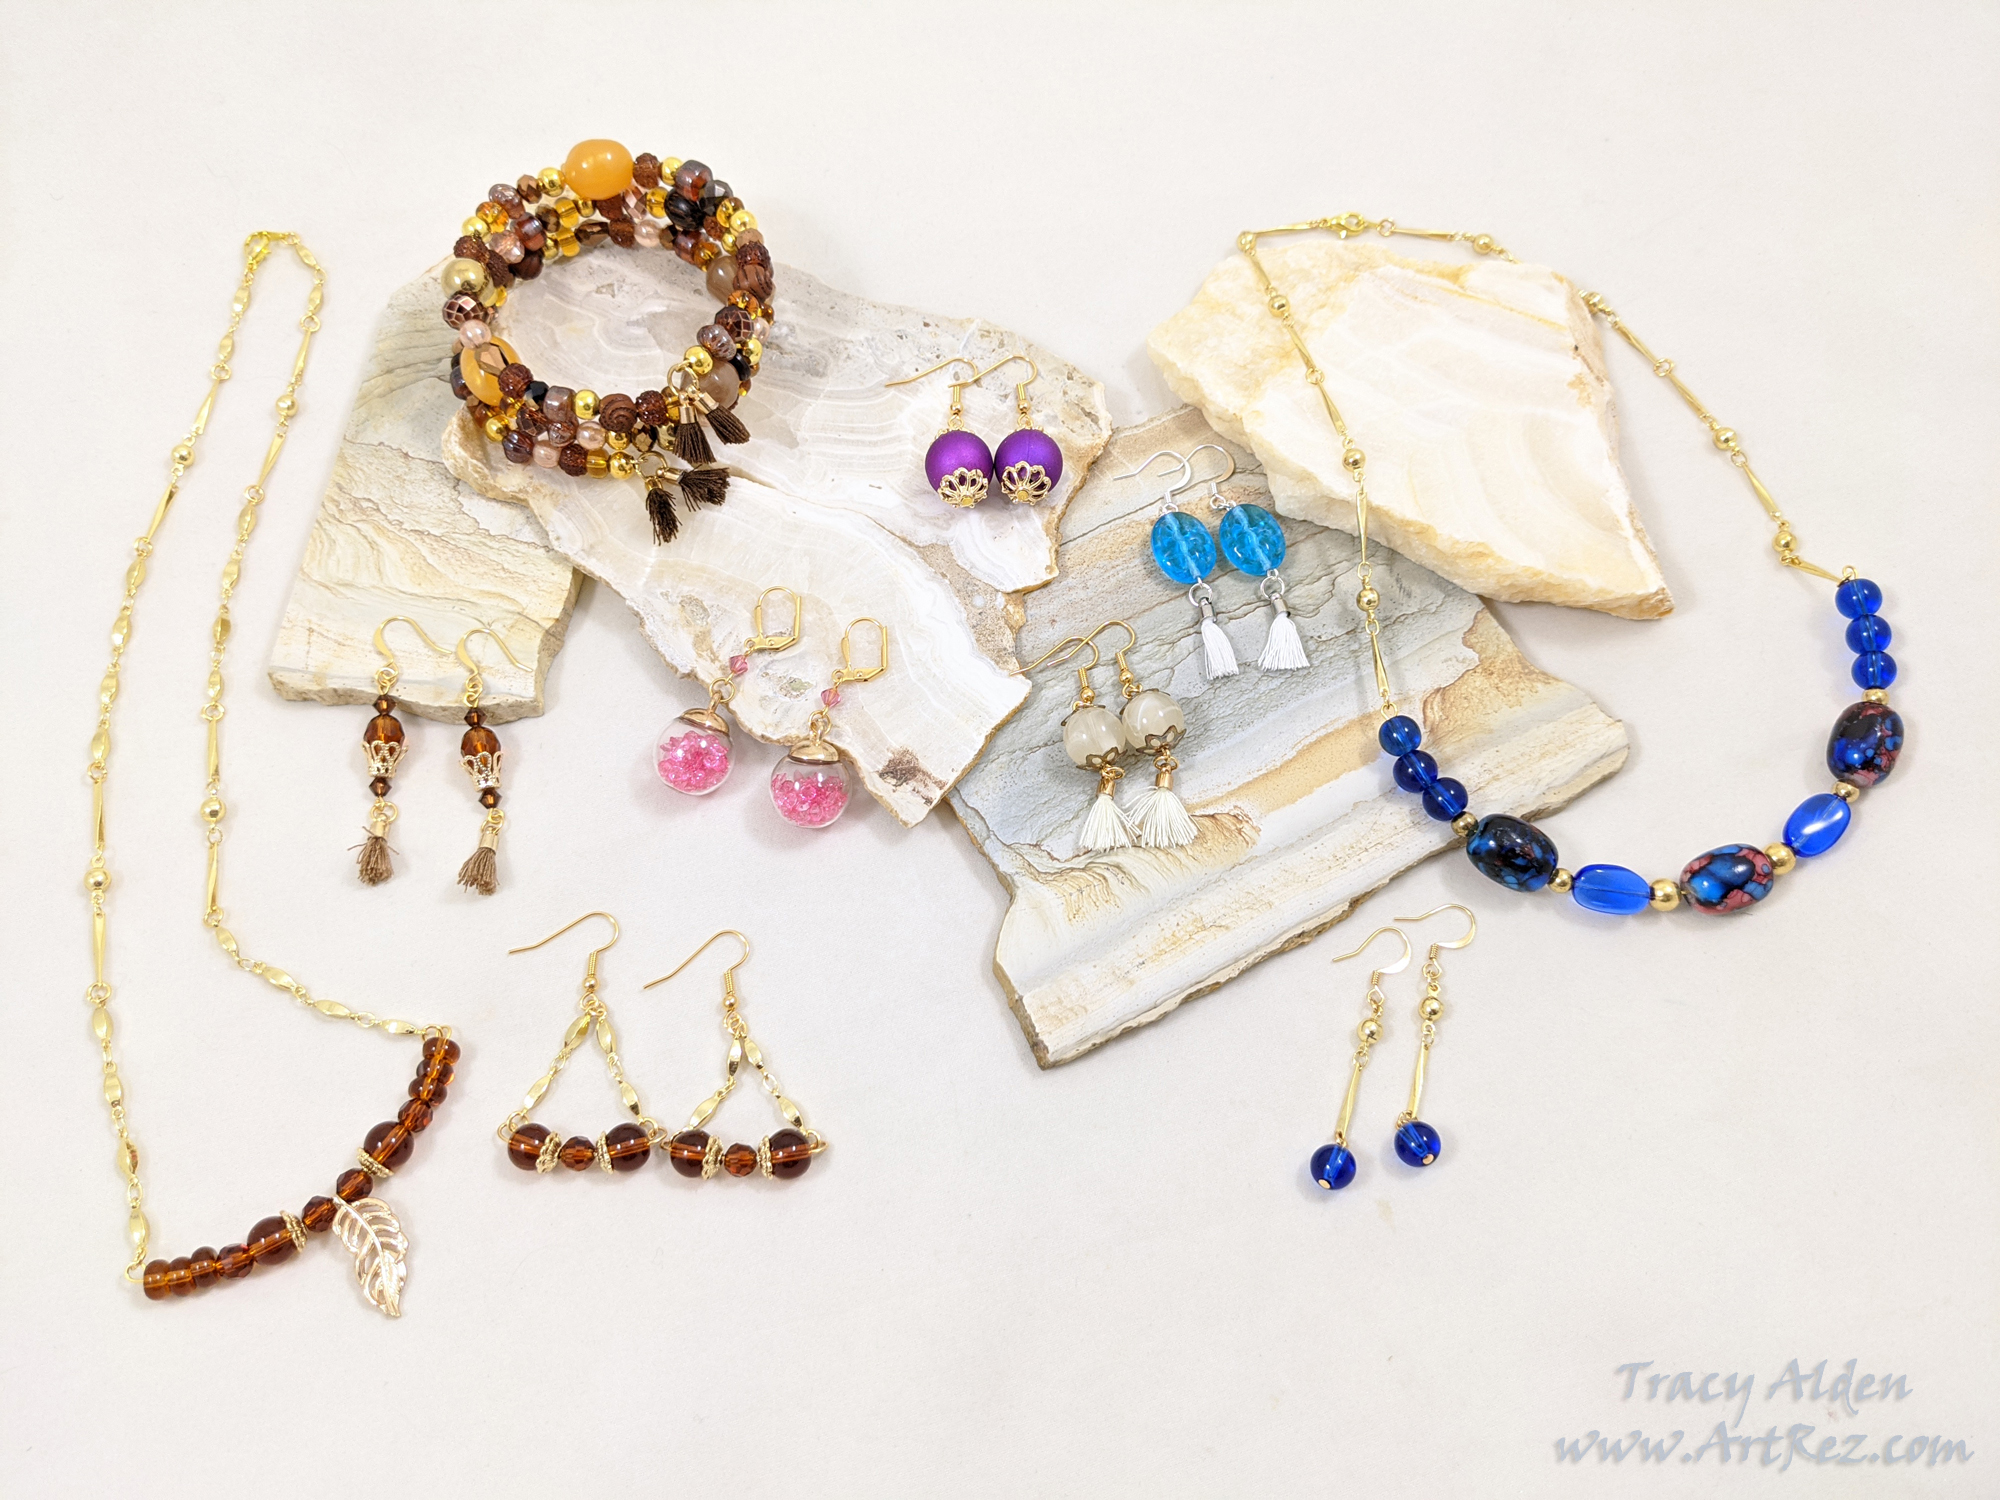
When shelter in place orders came, everything was stuck in a holding pattern. Not knowing what to do, but not being able to do much of anything I found myself going to artwork for solace. Jesse James Beads released a series of Quarantine Beading Kits, which I was eager to buy and work on. With some findings from Beadalon I was able to make an early start on gifts for the Holidays.
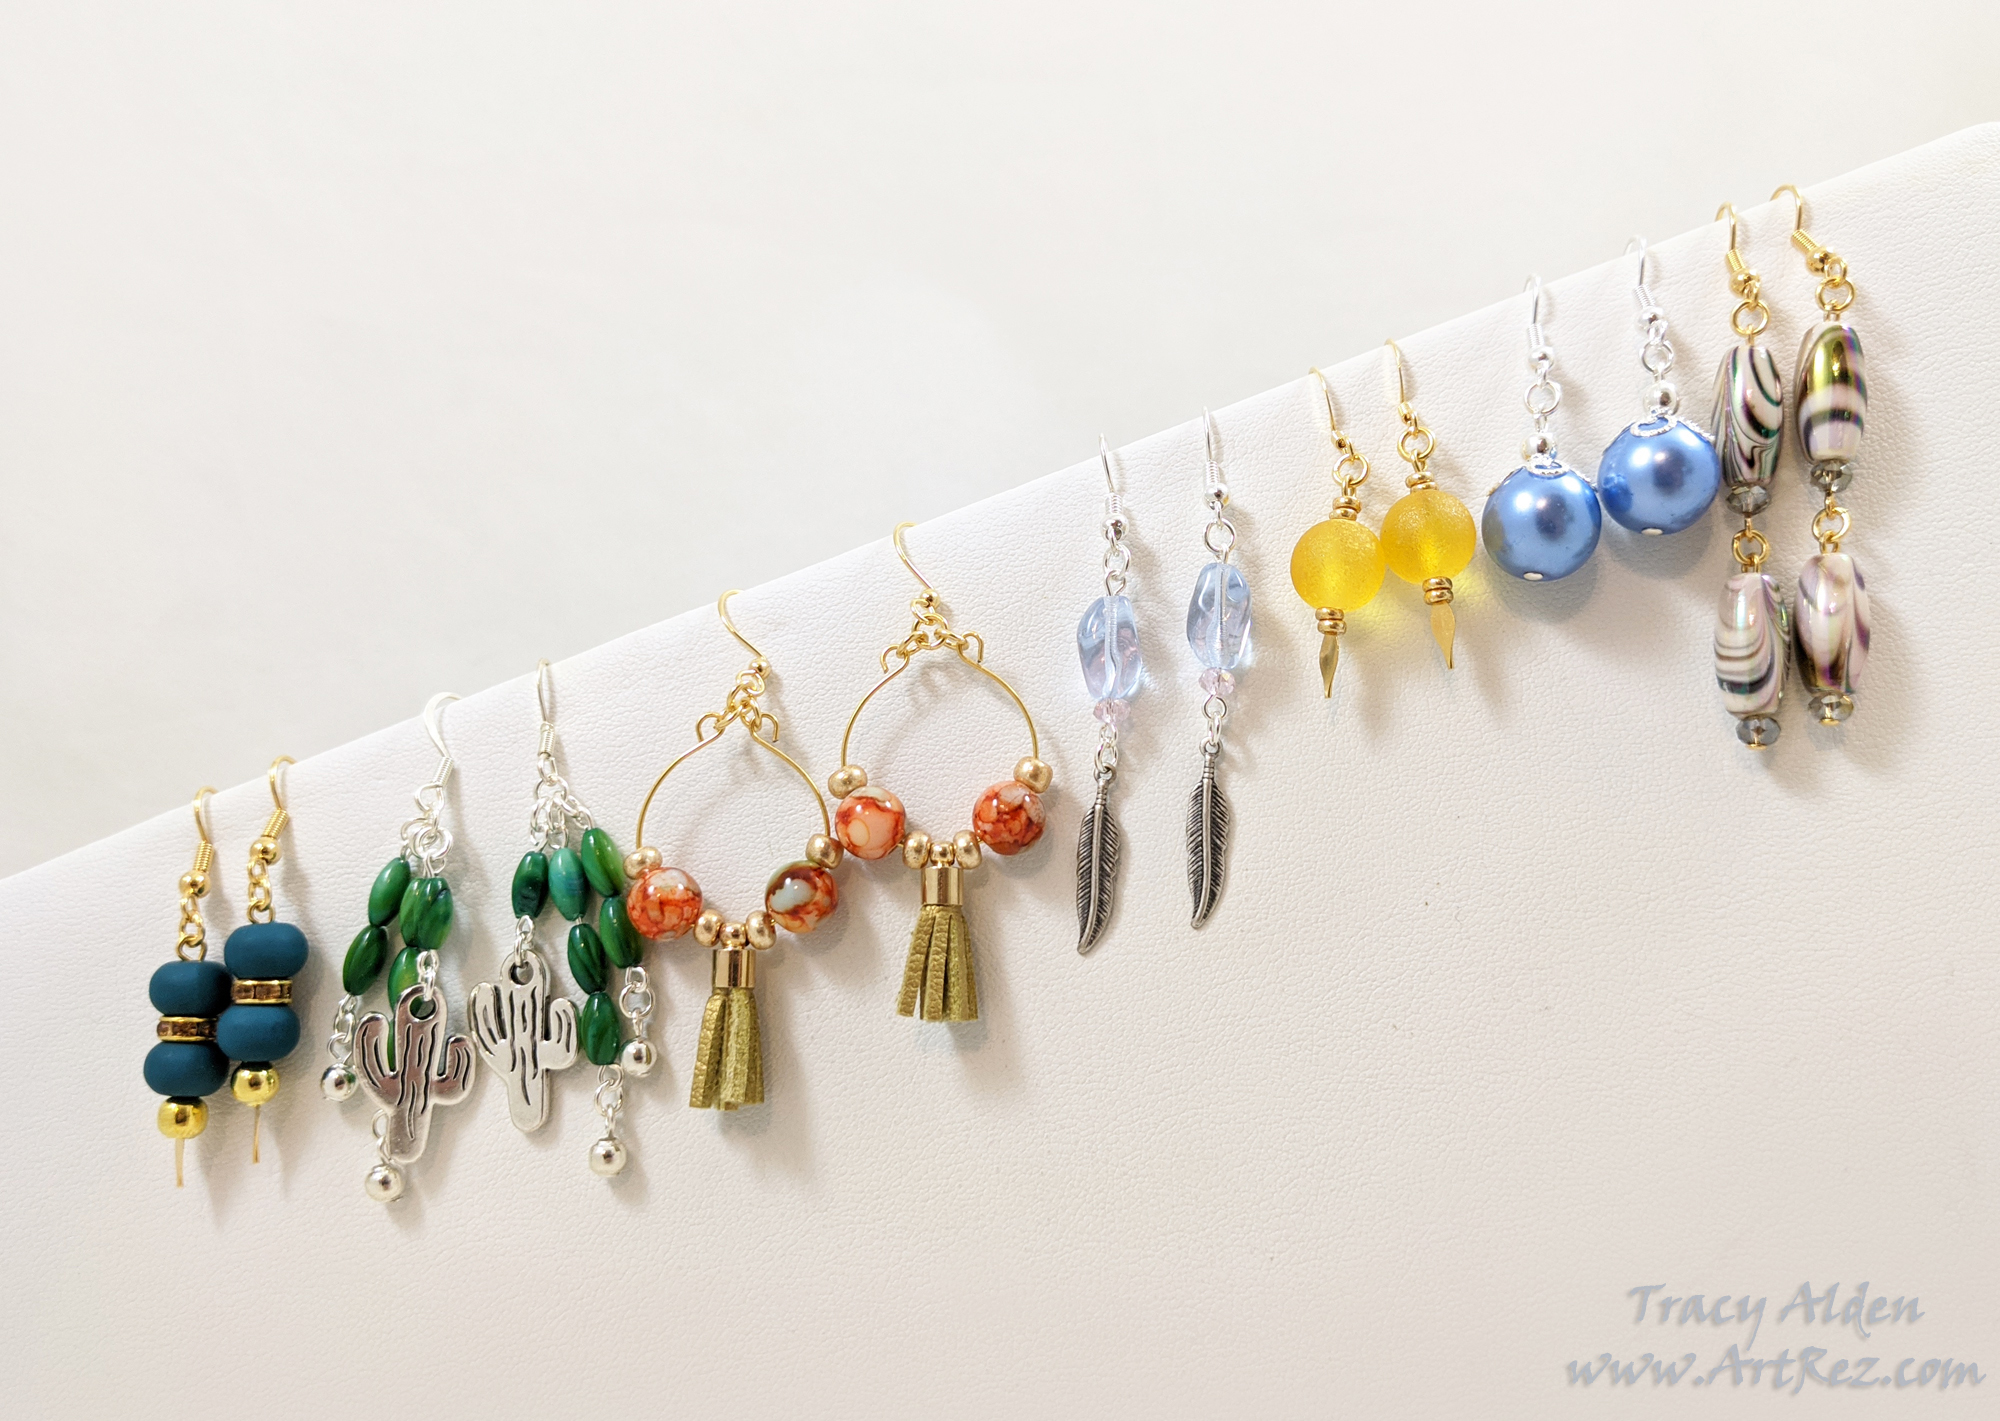
I would work on making art, day and night, giving my nervous energy an outlet. Desert sunrises and the blooming wildflowers continued to be an inspiration. Sprinkled with making masks for my family and packing up the last of our things made for very busy days.
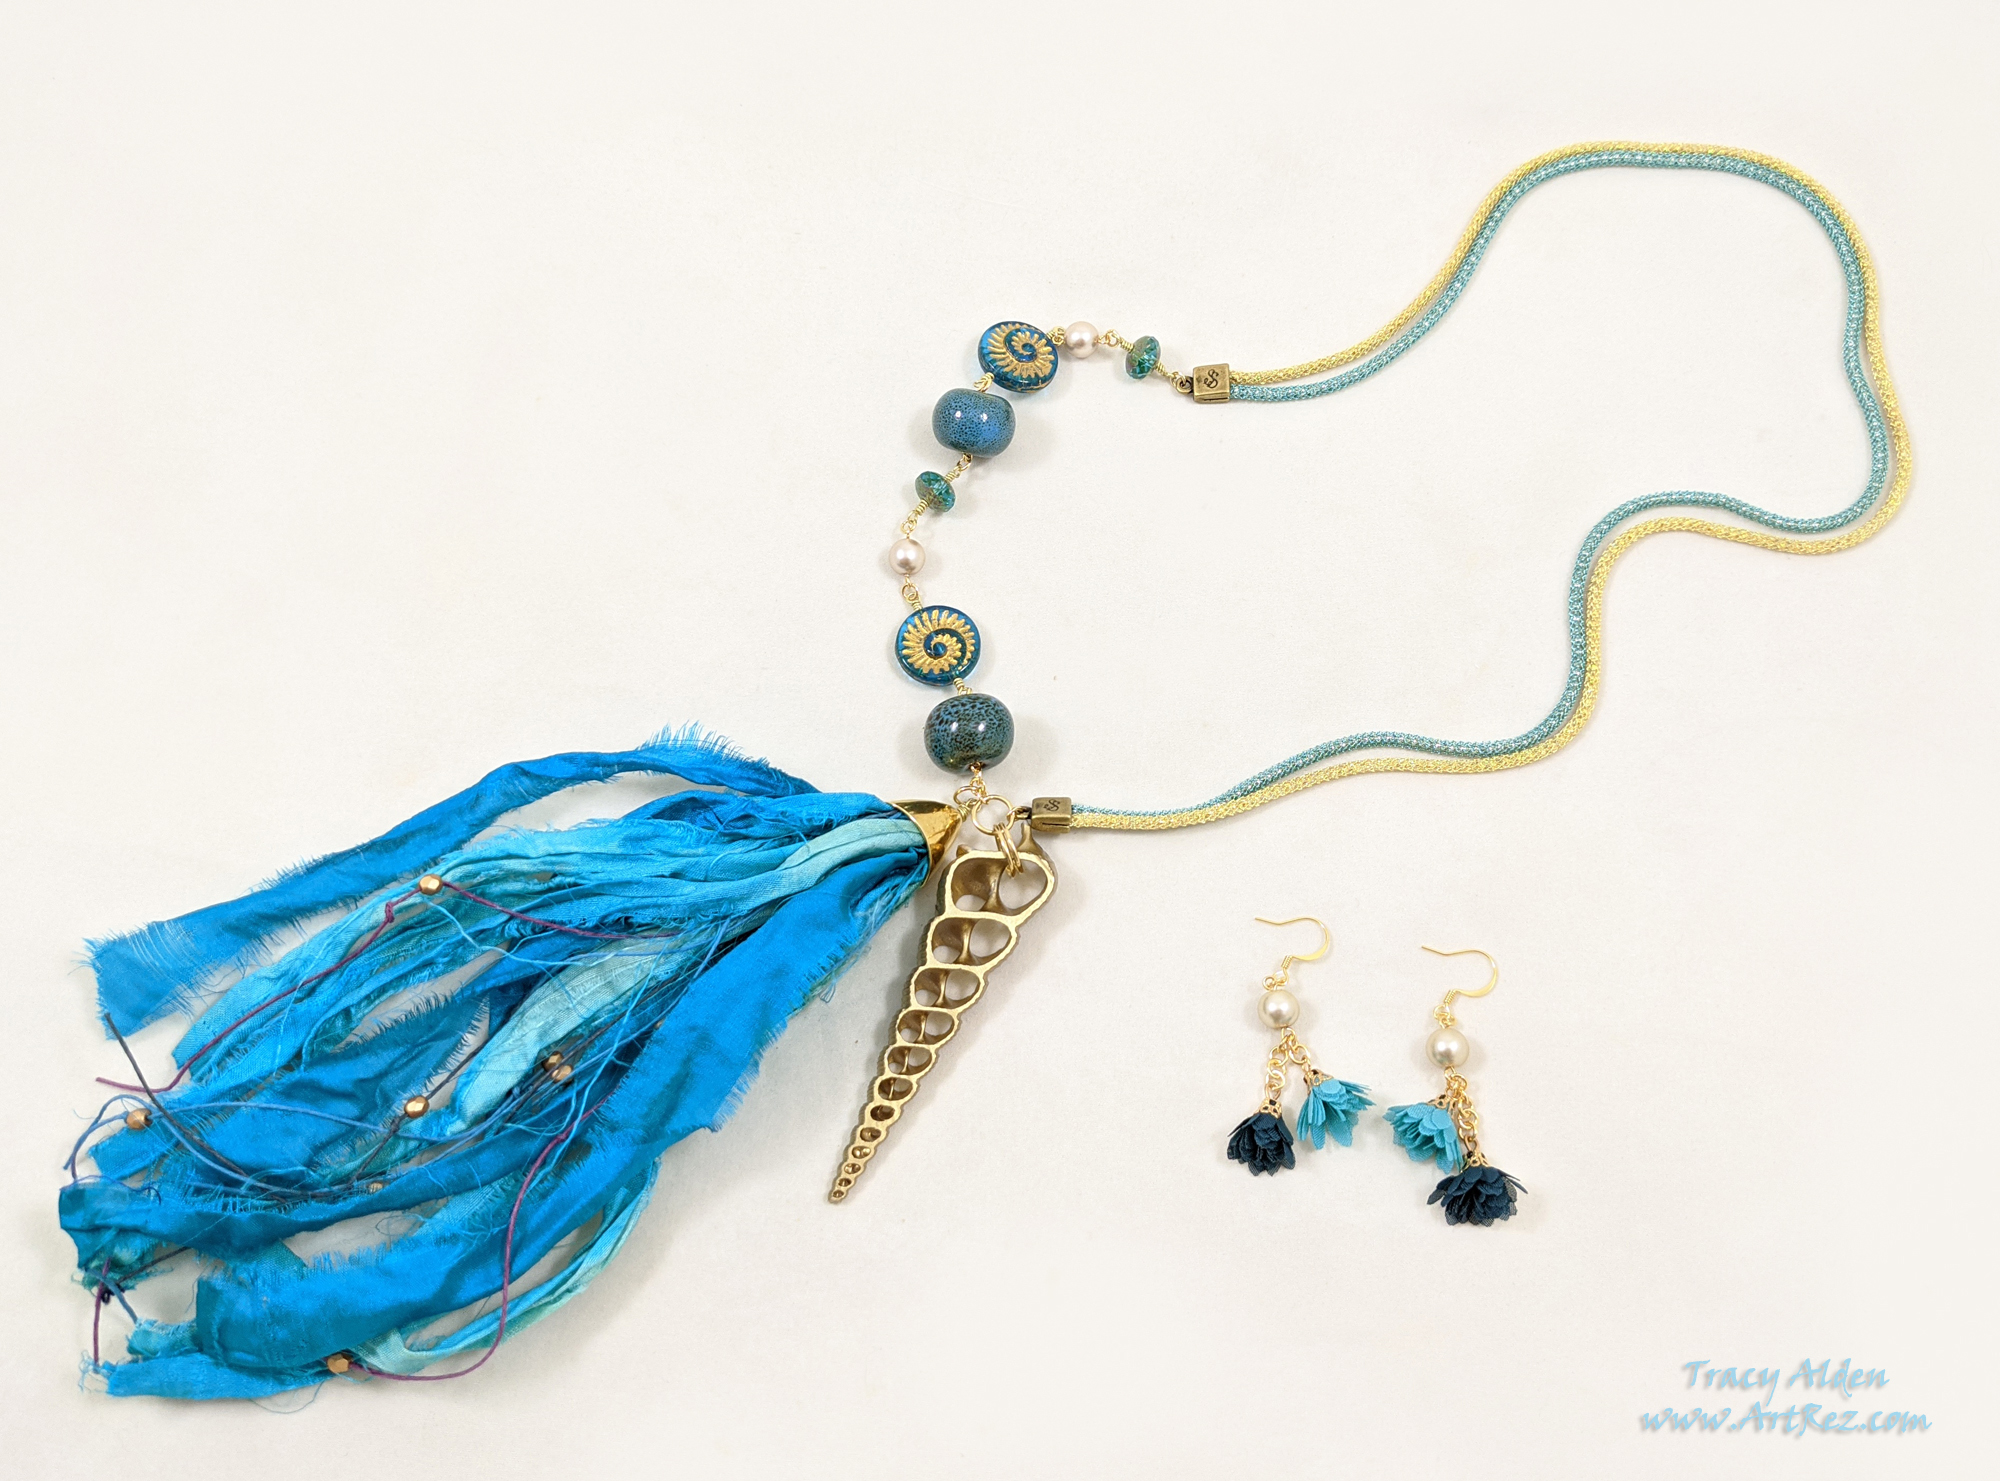
Silver Silk and More released a special Atlantis kit. Filled with golds, blues and greens it was a stunning collections of supplies. I found a sense of calm in a sea of uncertainty by creating these pieces while listening to the rain at night.
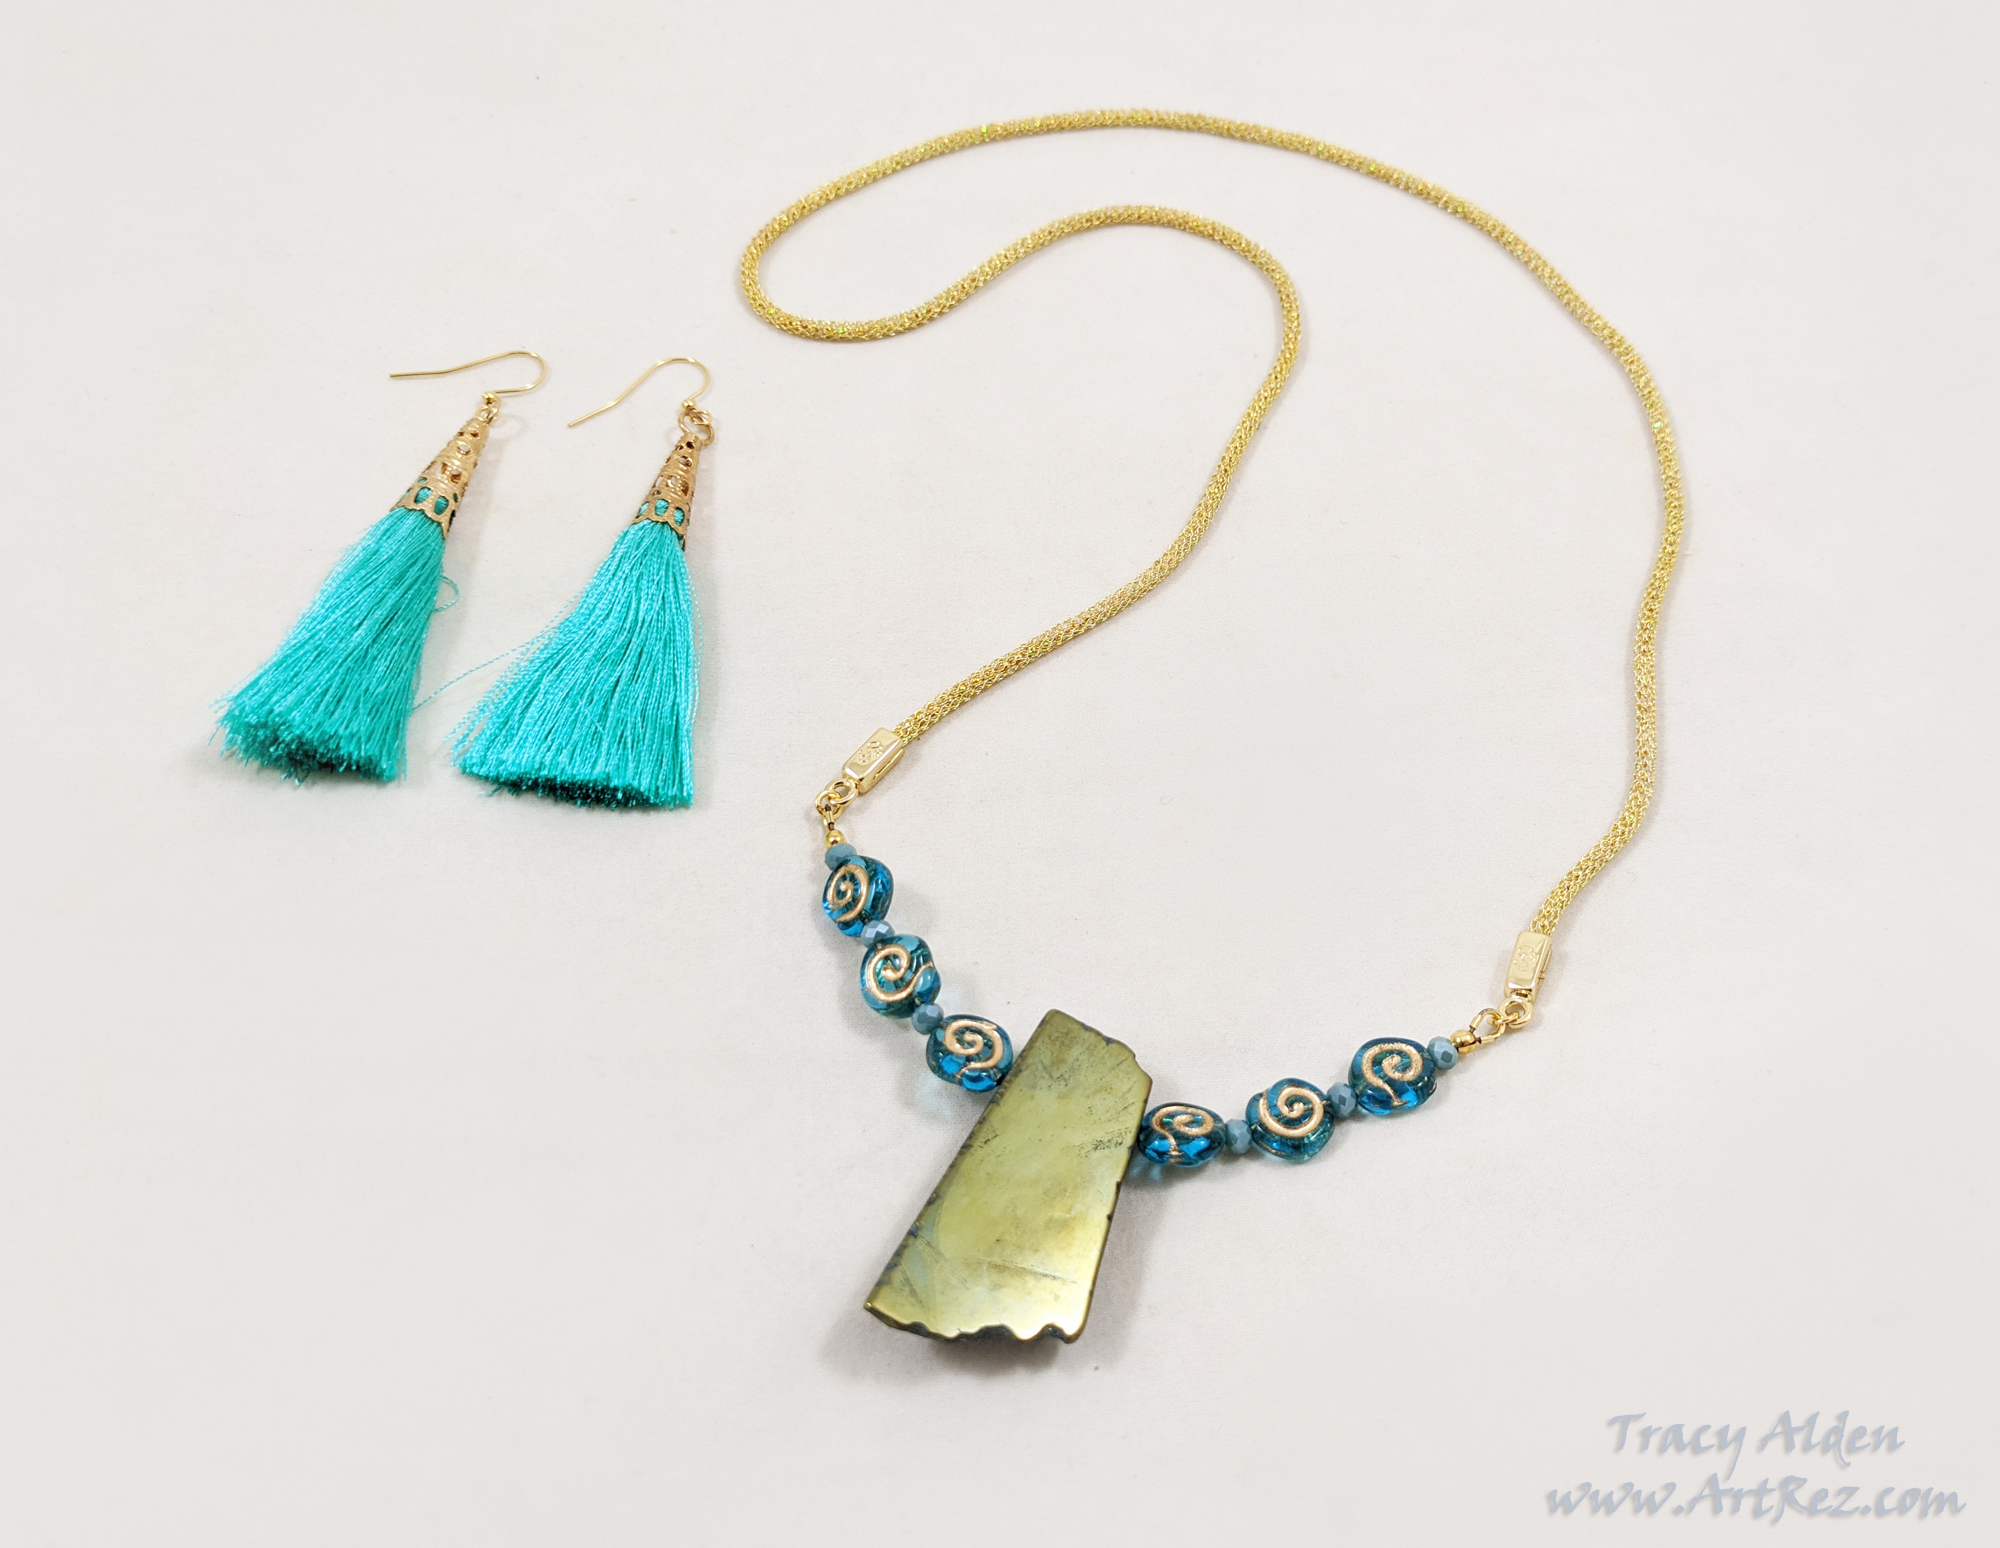
This set, that I ended up keeping for myself, would end up being one of the last pieces I would make before we moved again. I was getting increased tremors in my hands, more problems with my ability to walk, use my hands and losing feeling in my limbs. Once we moved a third time, my doctors were able to schedule surgery to work on my spine.
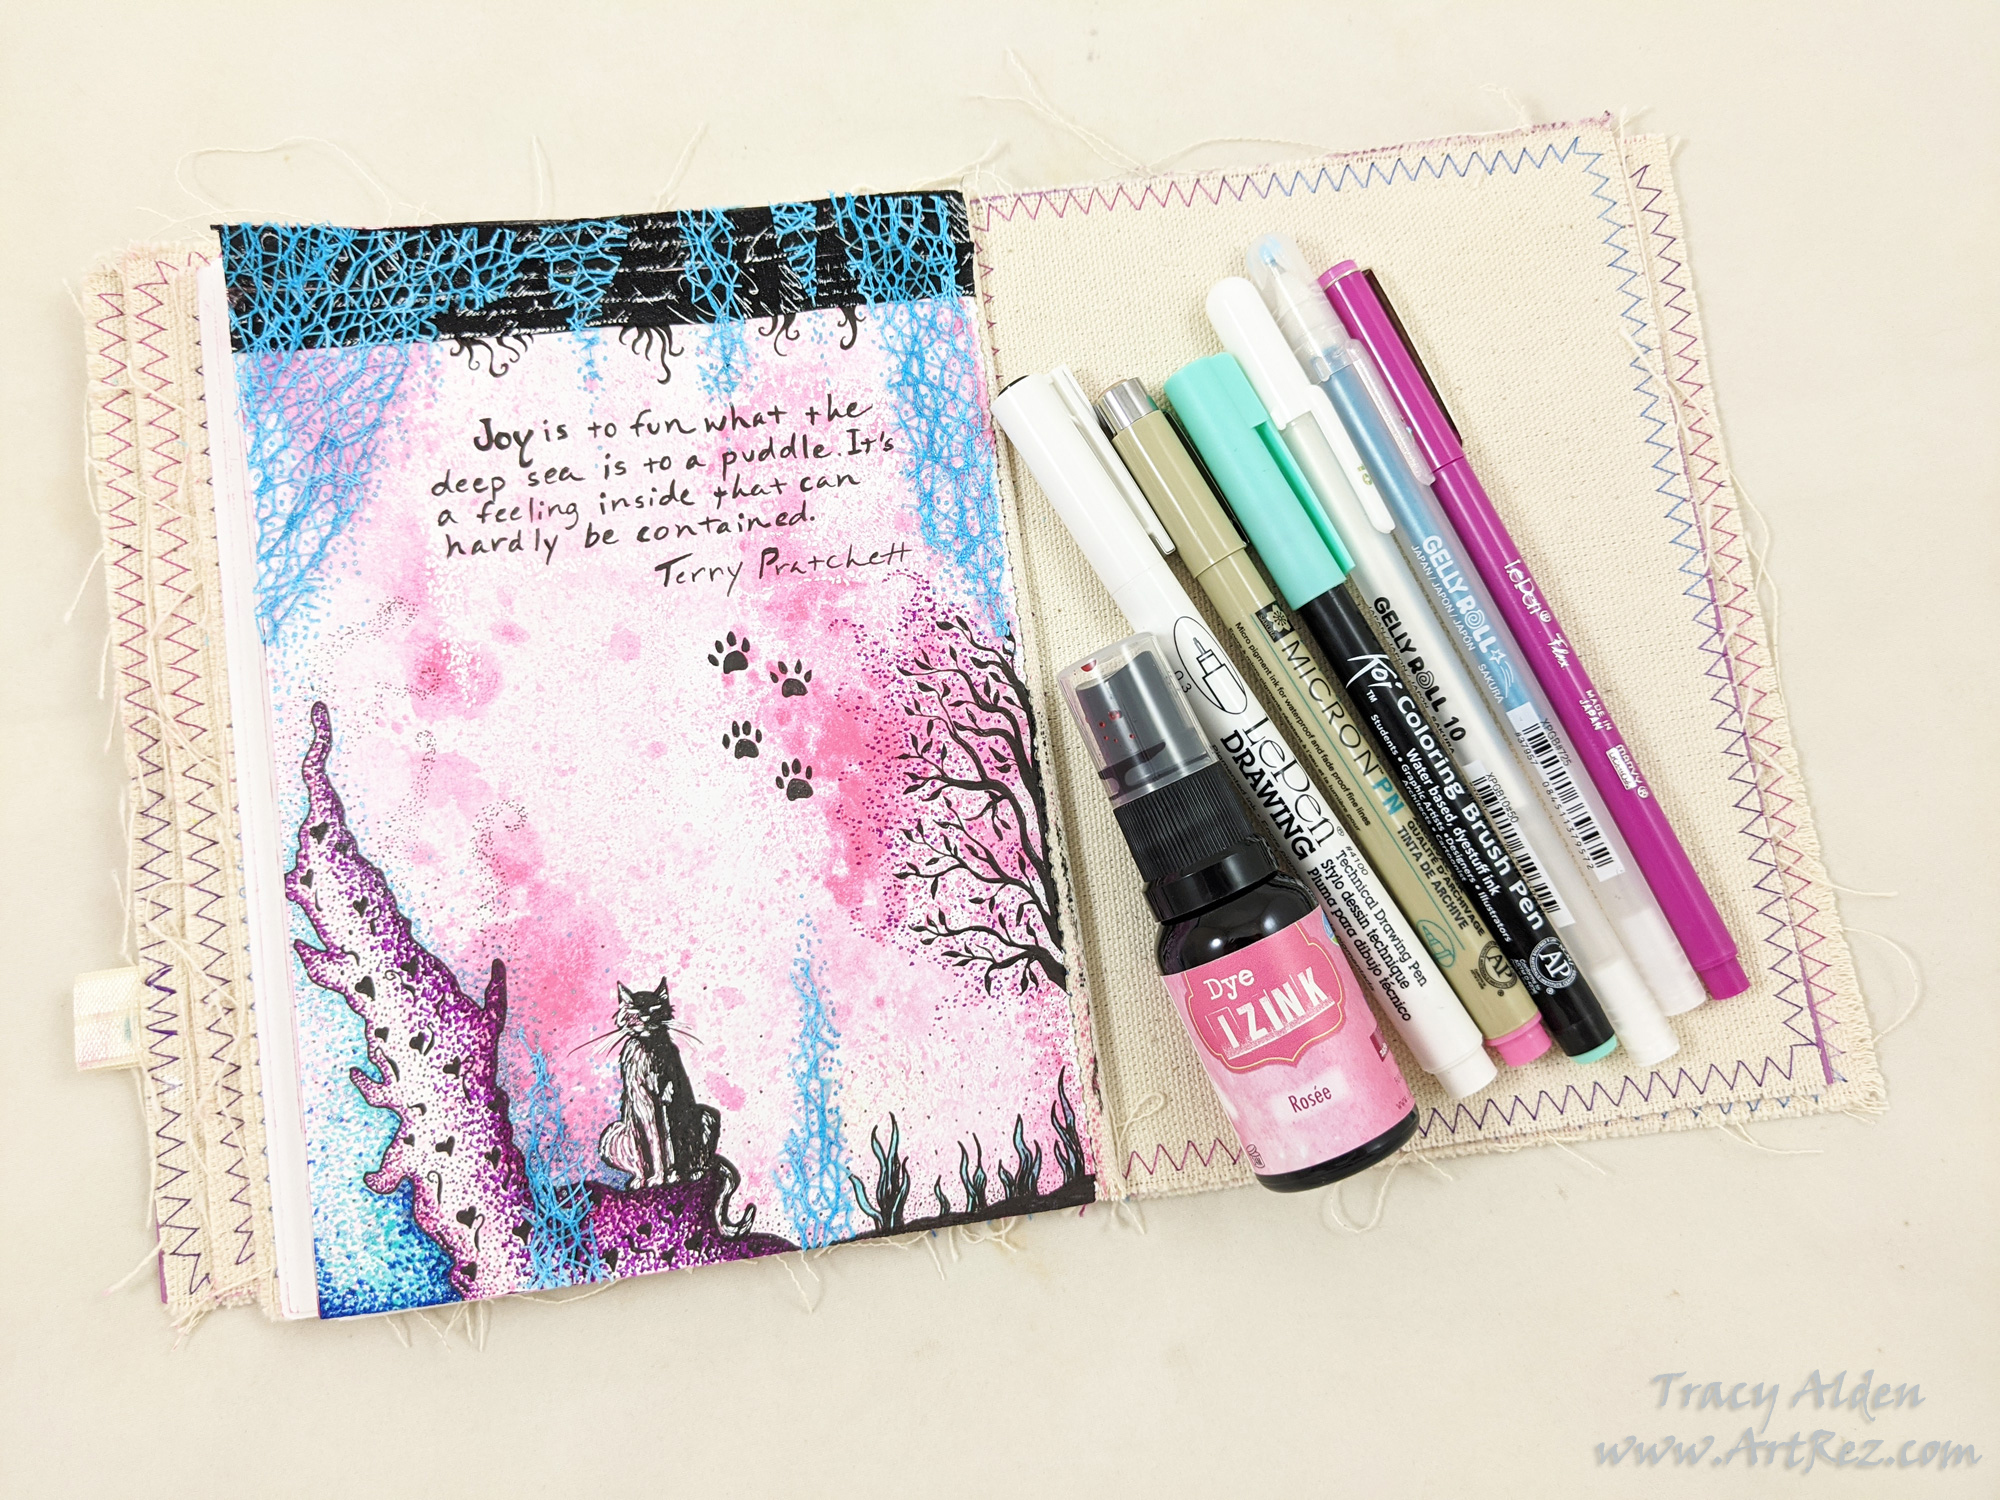
Recovery was slow but I could already feel my hands and feet, and walk with reduced pain. I started using wonderful journals from Rita Barakat as therapy and way to start testing my dexterity. At first it was simple doodles but it felt great to be able to hold tools without shaking too much.
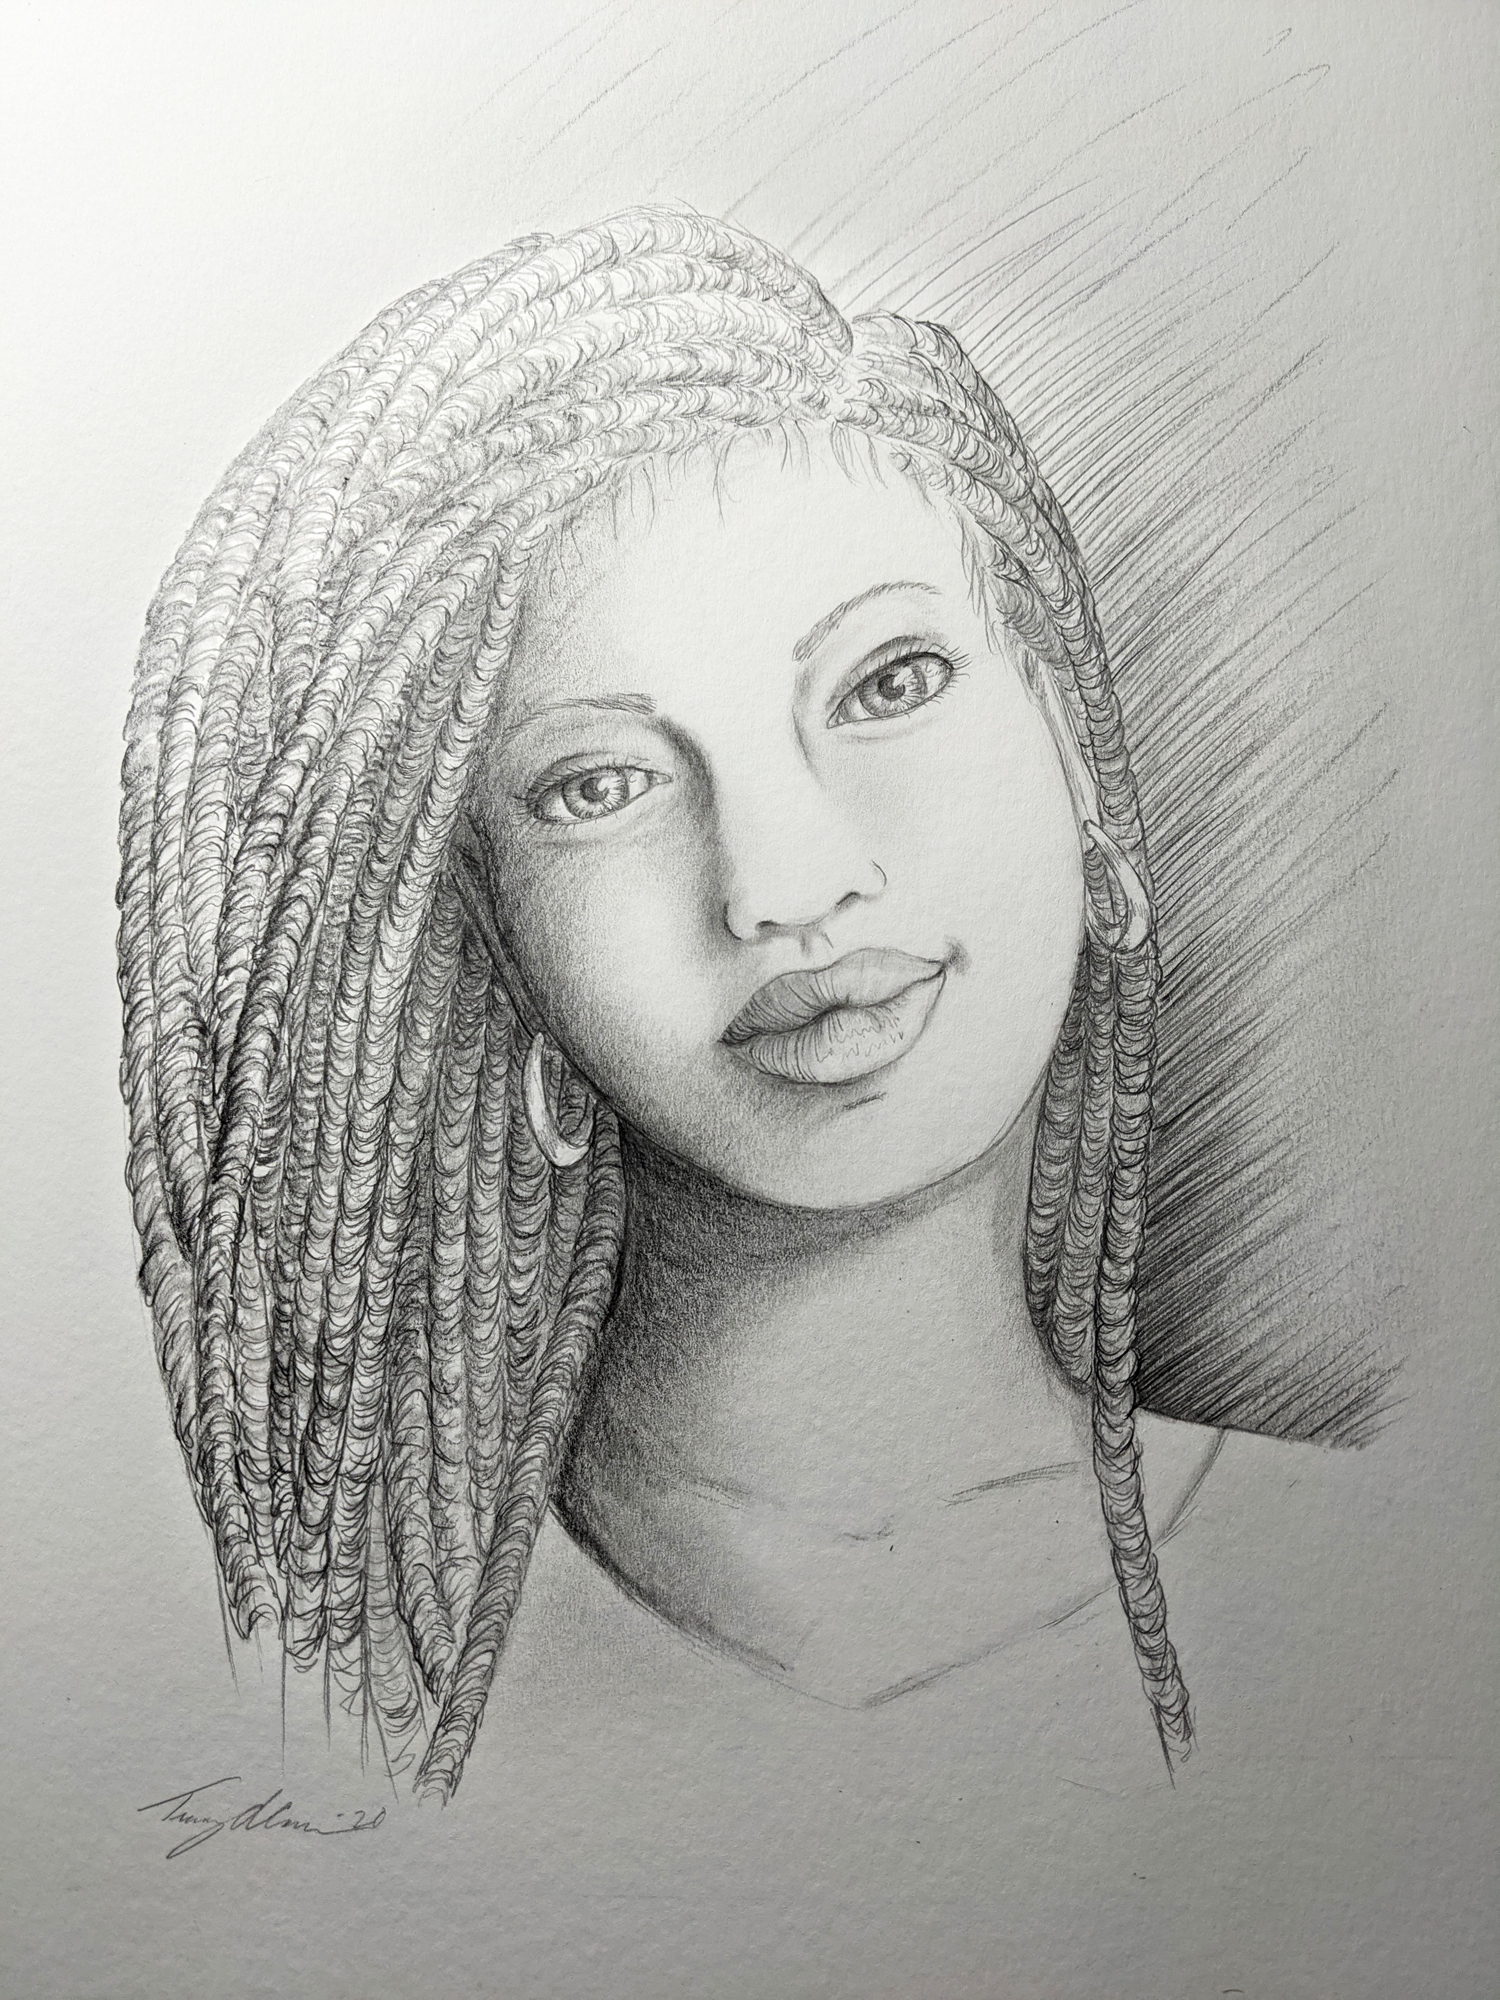
A first true attempt at sketching after surgery, “Hope”, a goddess of Fall and the ever changing future. Originally I was going to try watercolor but found out I wasn’t steady enough, I went back to an old comfort, pencil illustration.
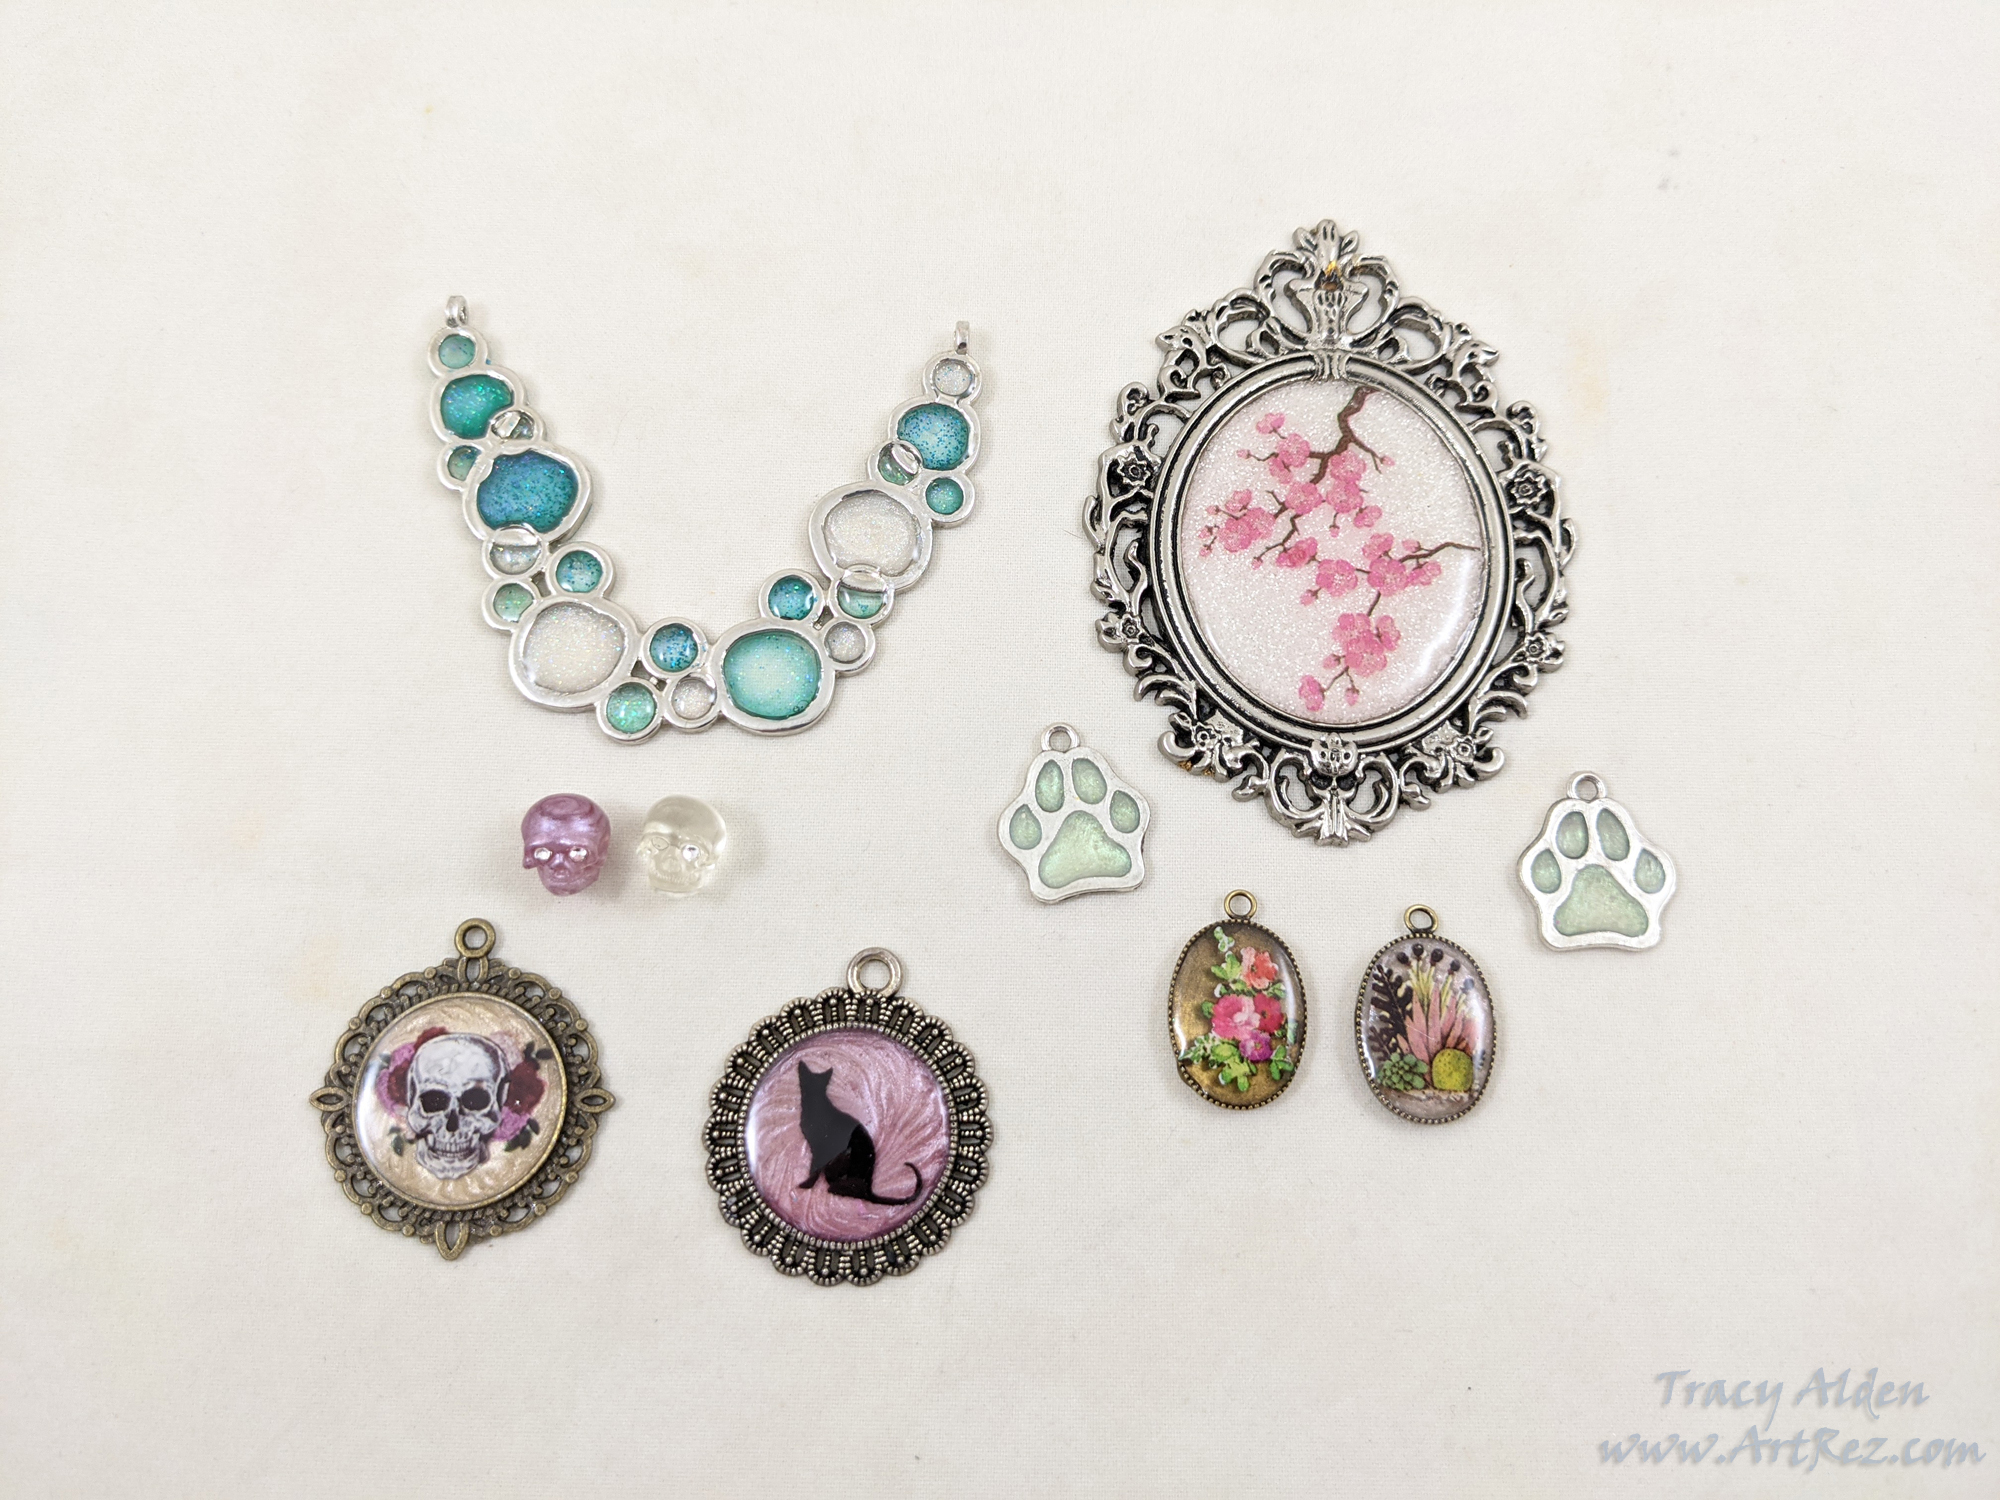
As I started to slowly heal and start unpacking some of my art supplies I found myself drawn to working with resin again. This time I wanted to give UV Resin from Let’s Resin a try. They had two different formulations and I found them both useful in different resin applications.
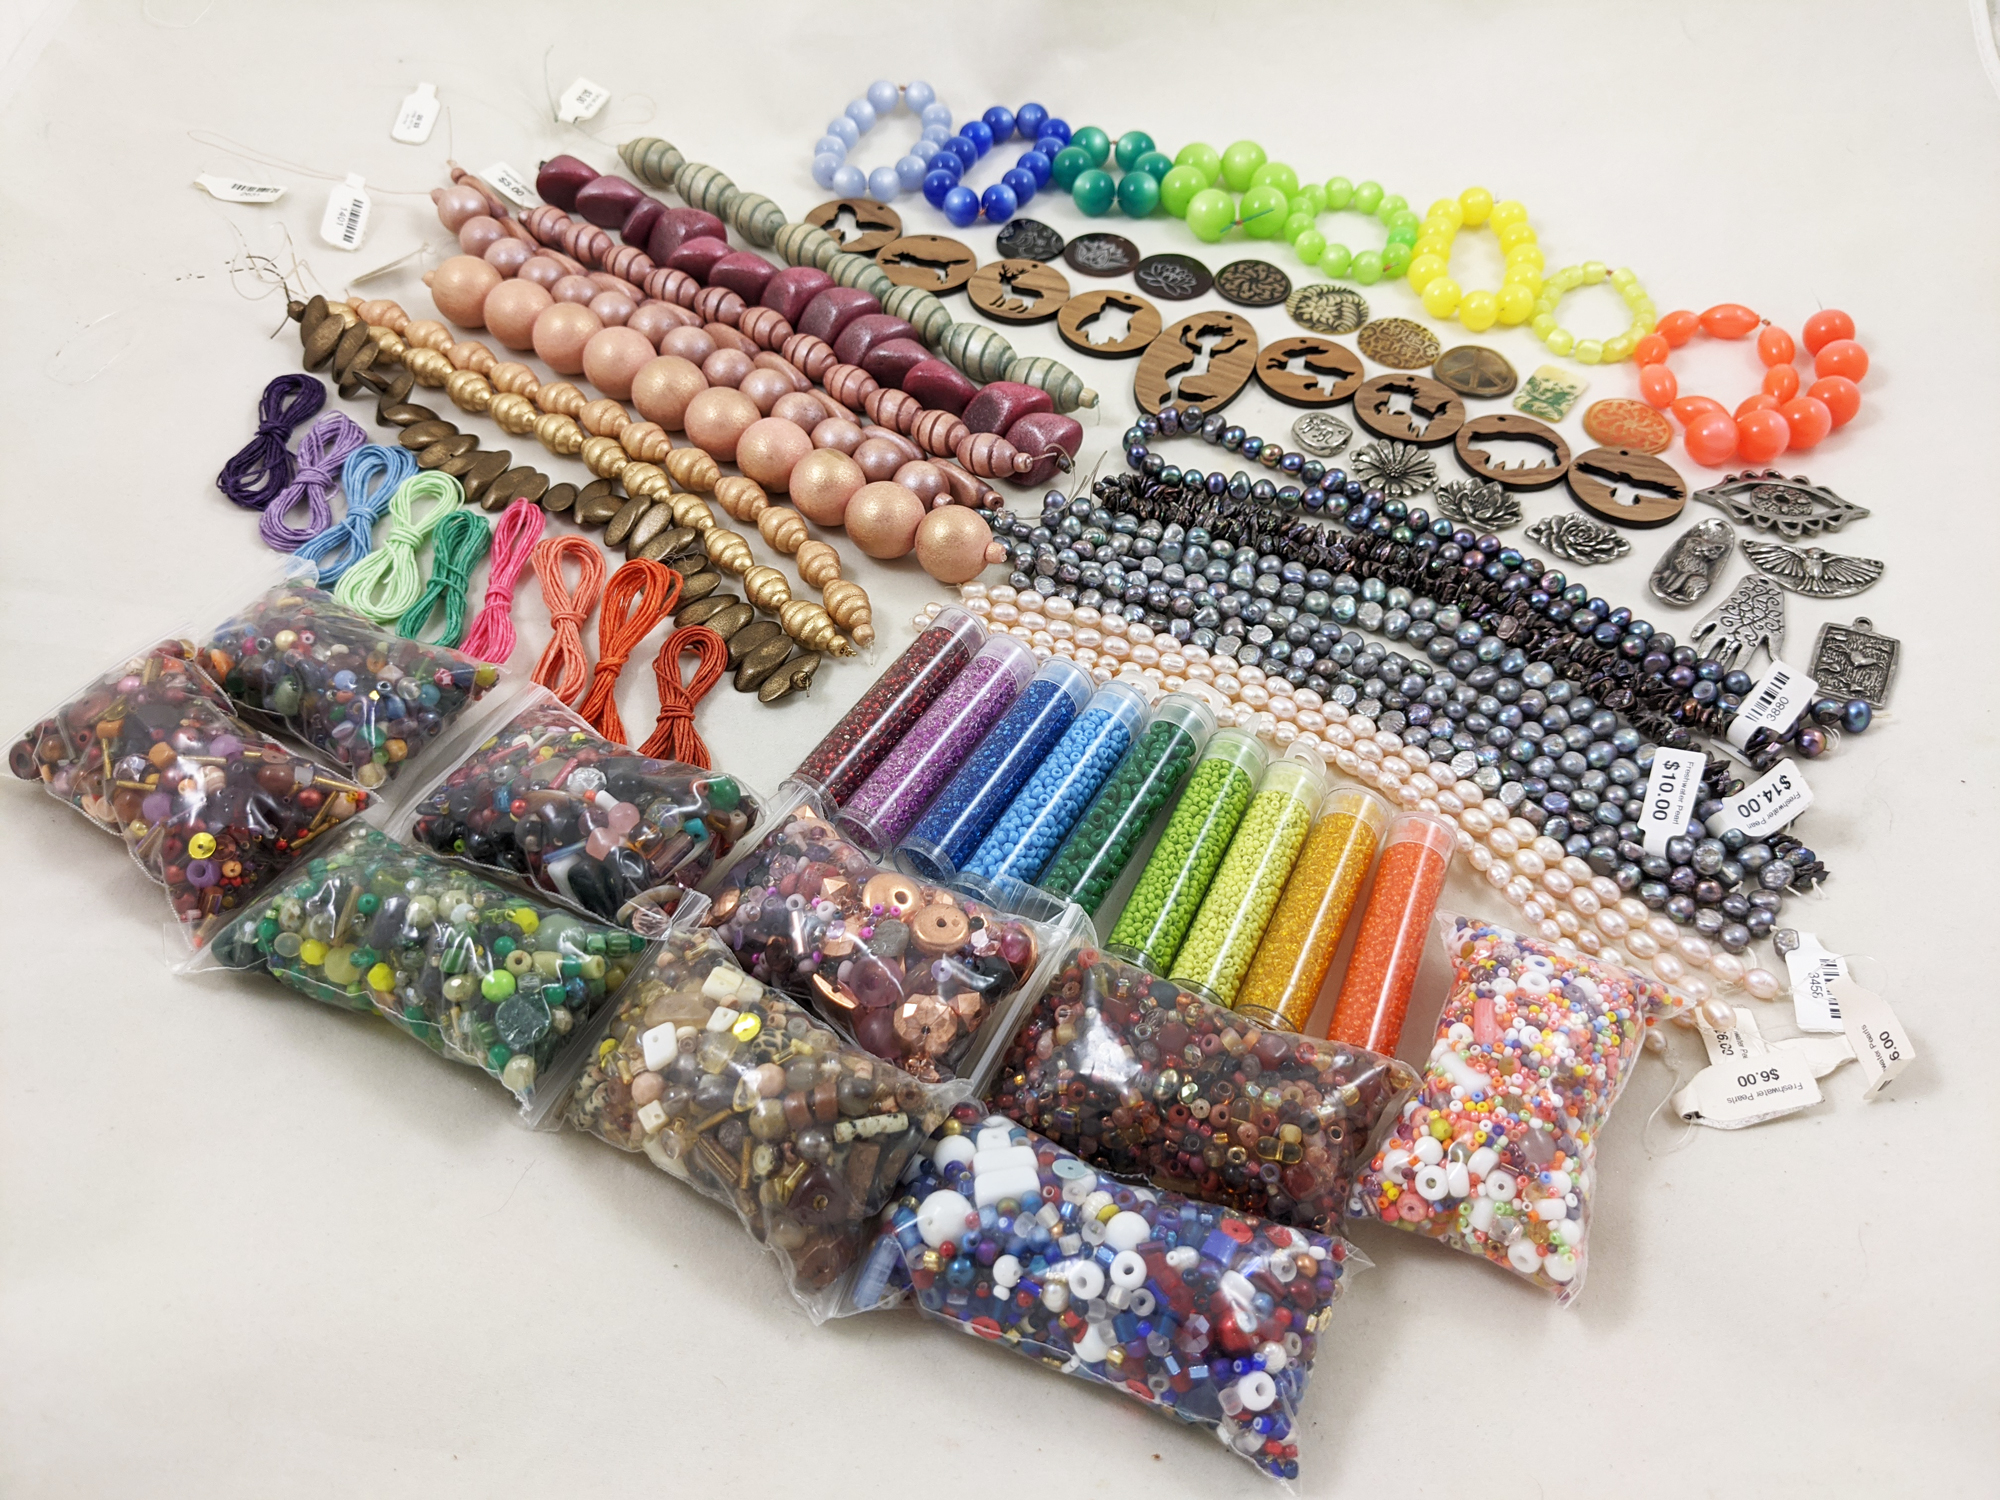
While my bones were still healing I found a new bead shop doing lives on Facebook, called Allegory Gallery, located in Ligonier, Pennsylvania. The owners, William and Andrew, were wonderful to watch. Sharing beads, treasures, design ideas and life stories. They were trying to keep afloat in these trying times while saving up to buy a permanent home for their store. They started a fund raiser called Little By Little, which one could, and still can, donate to via different options. I donated several times and ended up winning one of their wonderful prize packages.
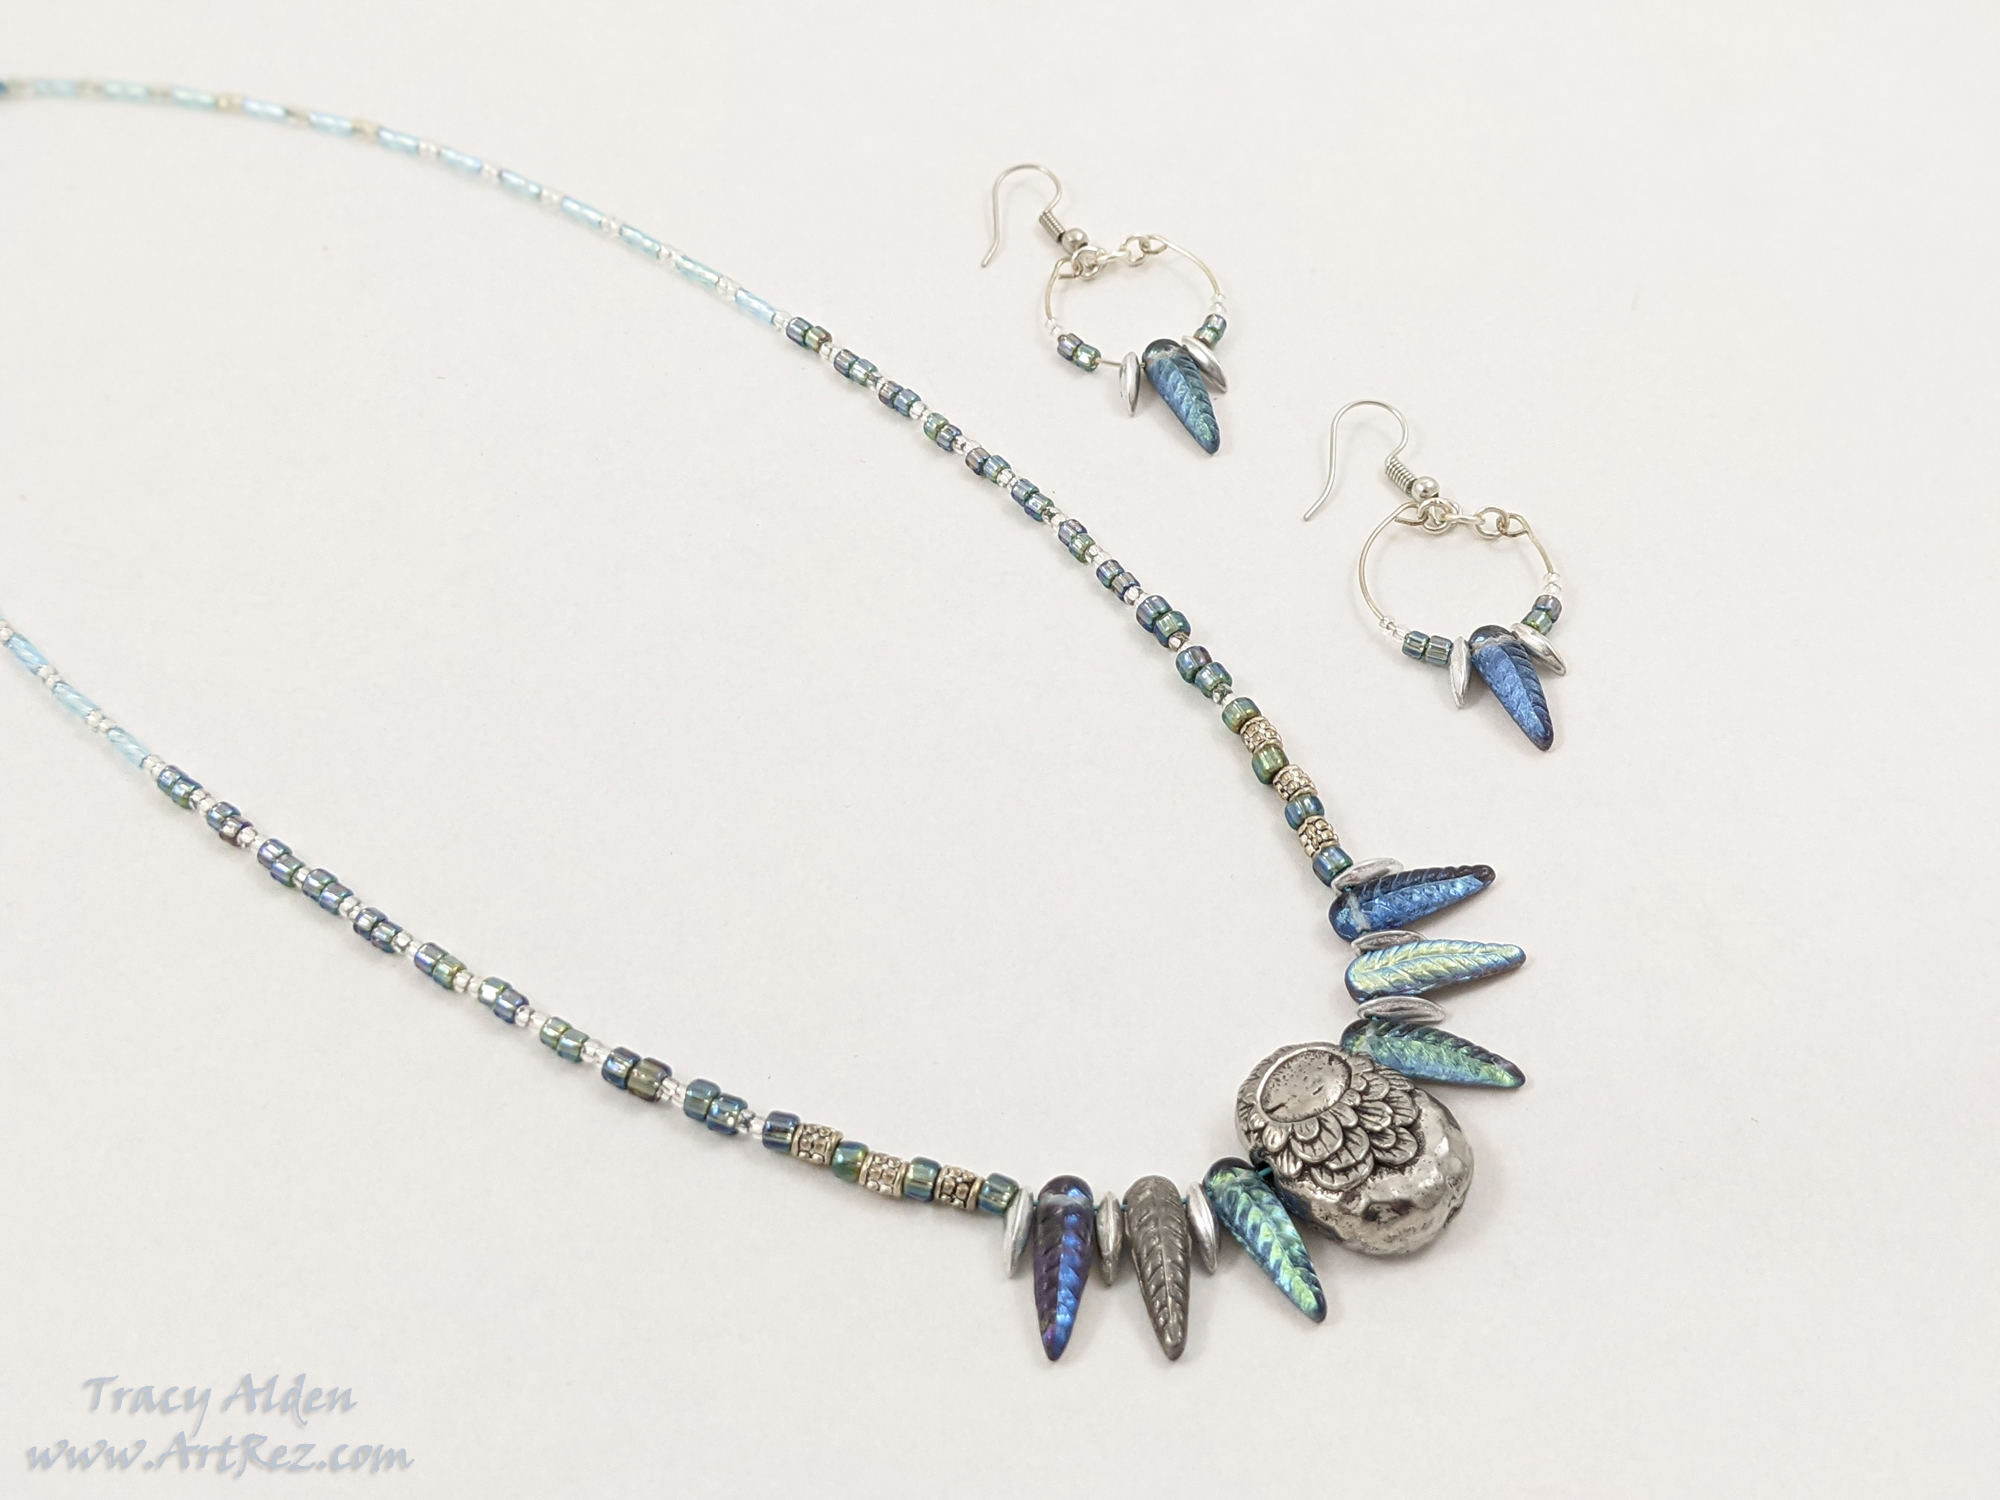
Andrew created an stunning collection of paintings called Opal Girls, (available for purchase on their website) that I found absolutely enchanting. Inspired by his work I used some of the beads and findings I won from Allegory Gallery, to create this jewelry set. The lovely pendant comes from with a pendant from Cynthia Thornton owner of Green Girl Studios, Andrew’s sister.
In this coming new year I look forward to finding more businesses to support, and share with with you.
Wishing you all a Happy and Healthy New Year! Jesse James Beads Brand Ambassador
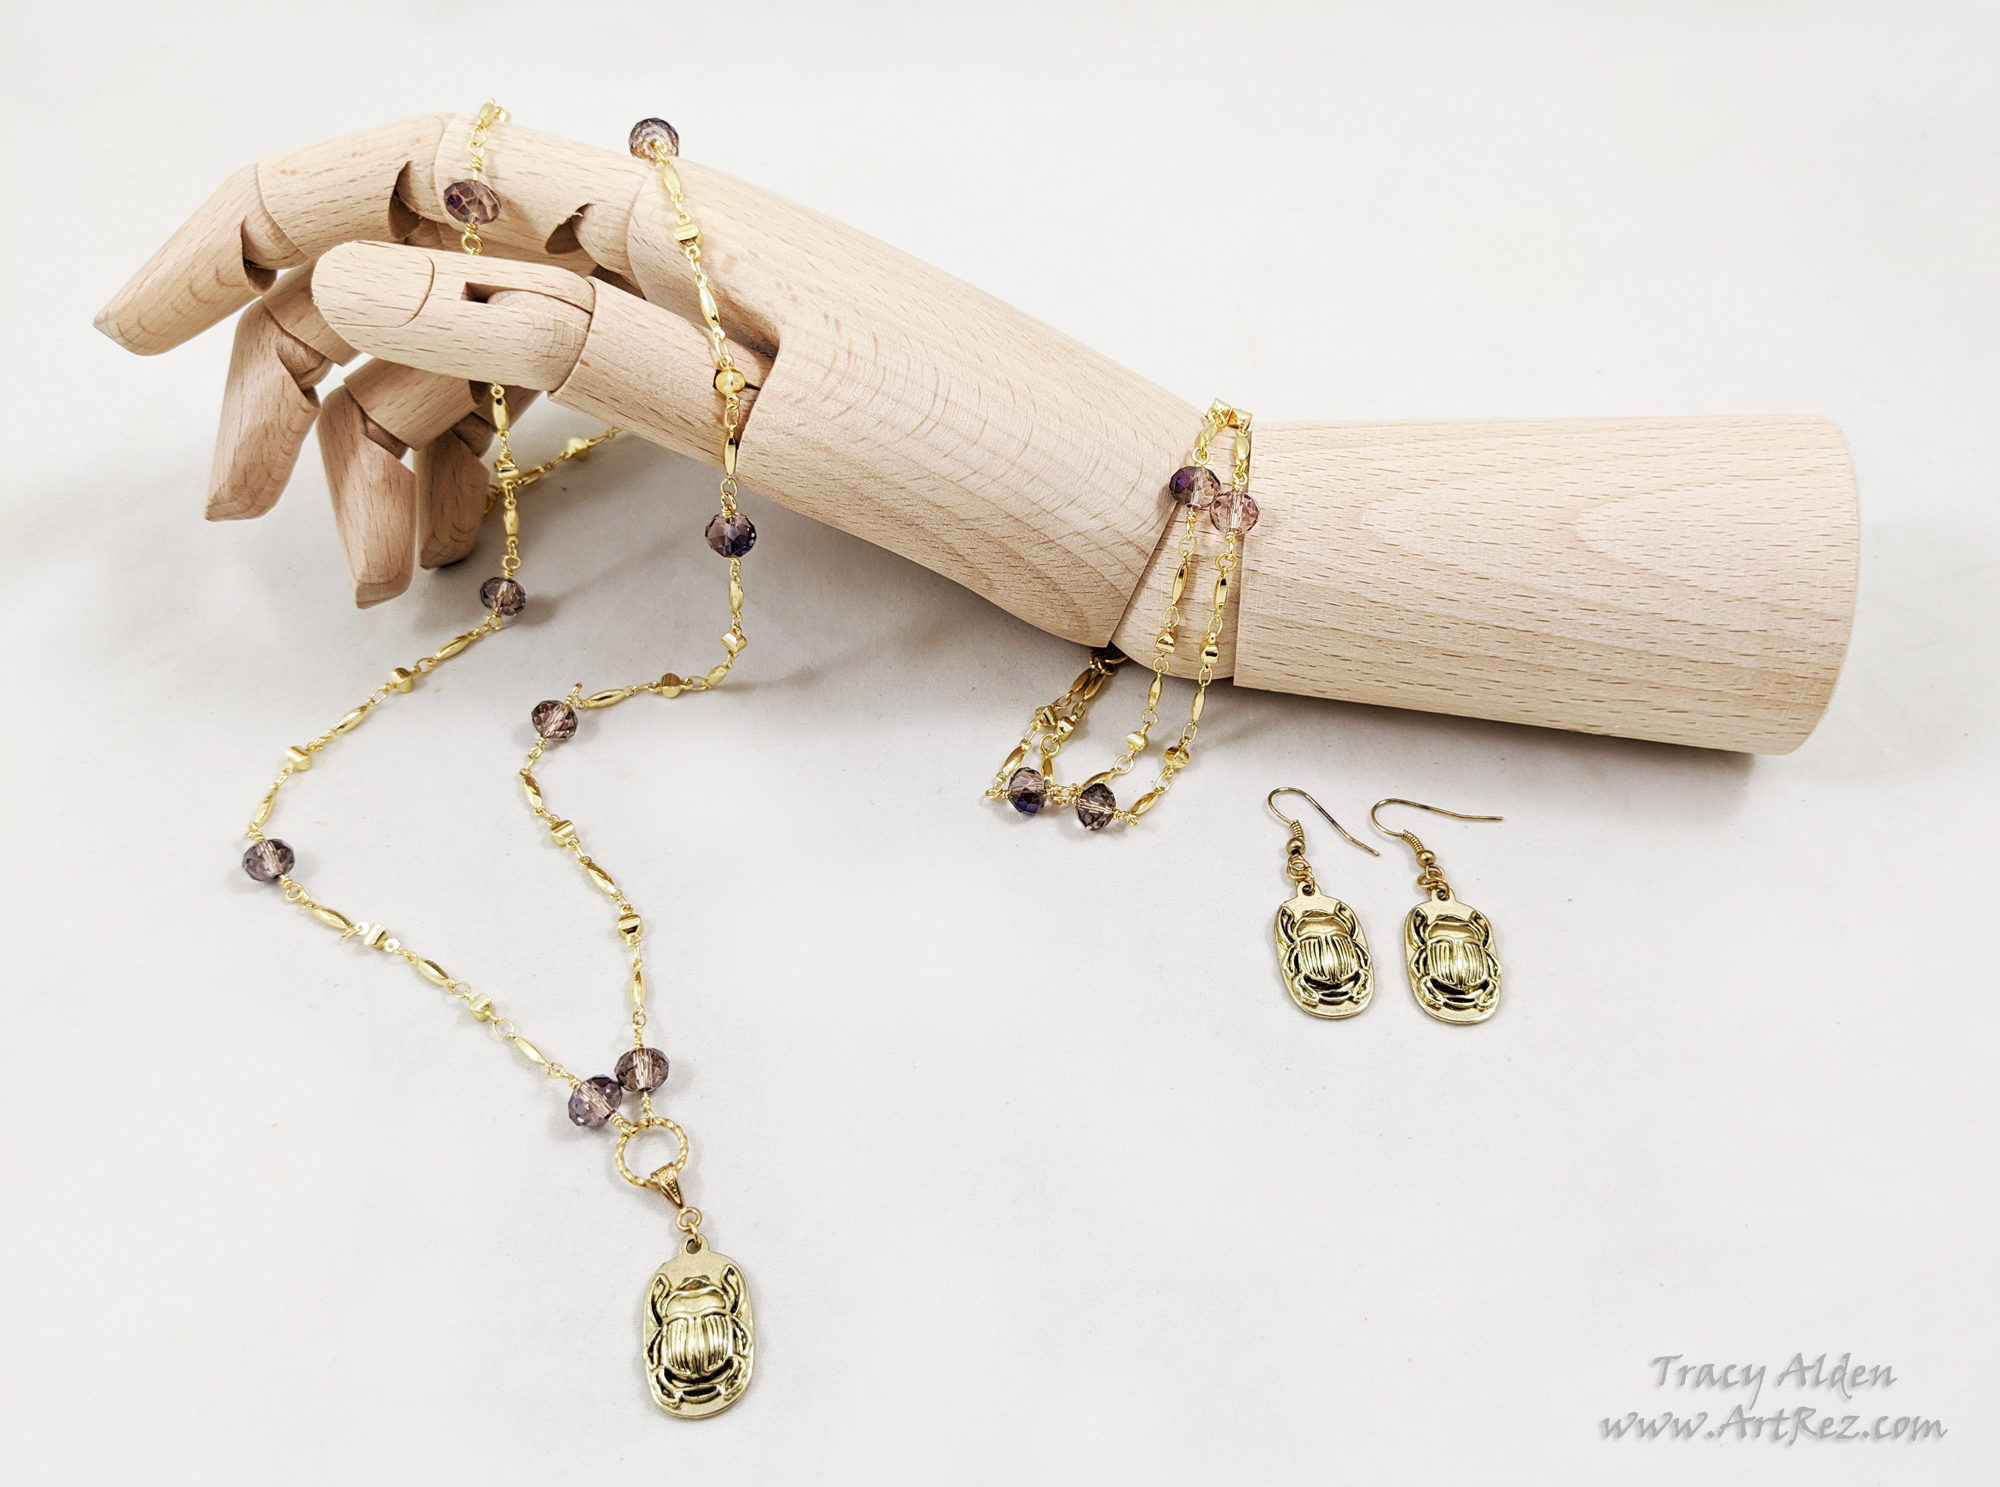
Viewing past projects you might notice I have a bit of a obsession with making jewelry. I am always looking for new findings, suppliers and interesting embellishments to add to my jewelry making supplies. Last year I started buying and working with products from Jesse James Beads. After becoming a fan rather quickly, I found out they were having a call for brand ambassadors, and thought I should apply.
After several nervous weeks I heard a response, I was selected as a brand ambassador! I am honored to be one of the many amazingly talented ambassadors for Jesse James Beads. Please take some time to look at the other ambassadors gorgeous work Here!
Now to share some of my recent creations using their products!
As ancient Egypt continues to be a inspiration and love of mine, I created a set using JJB Chain Reaction with gold plated scarab charms.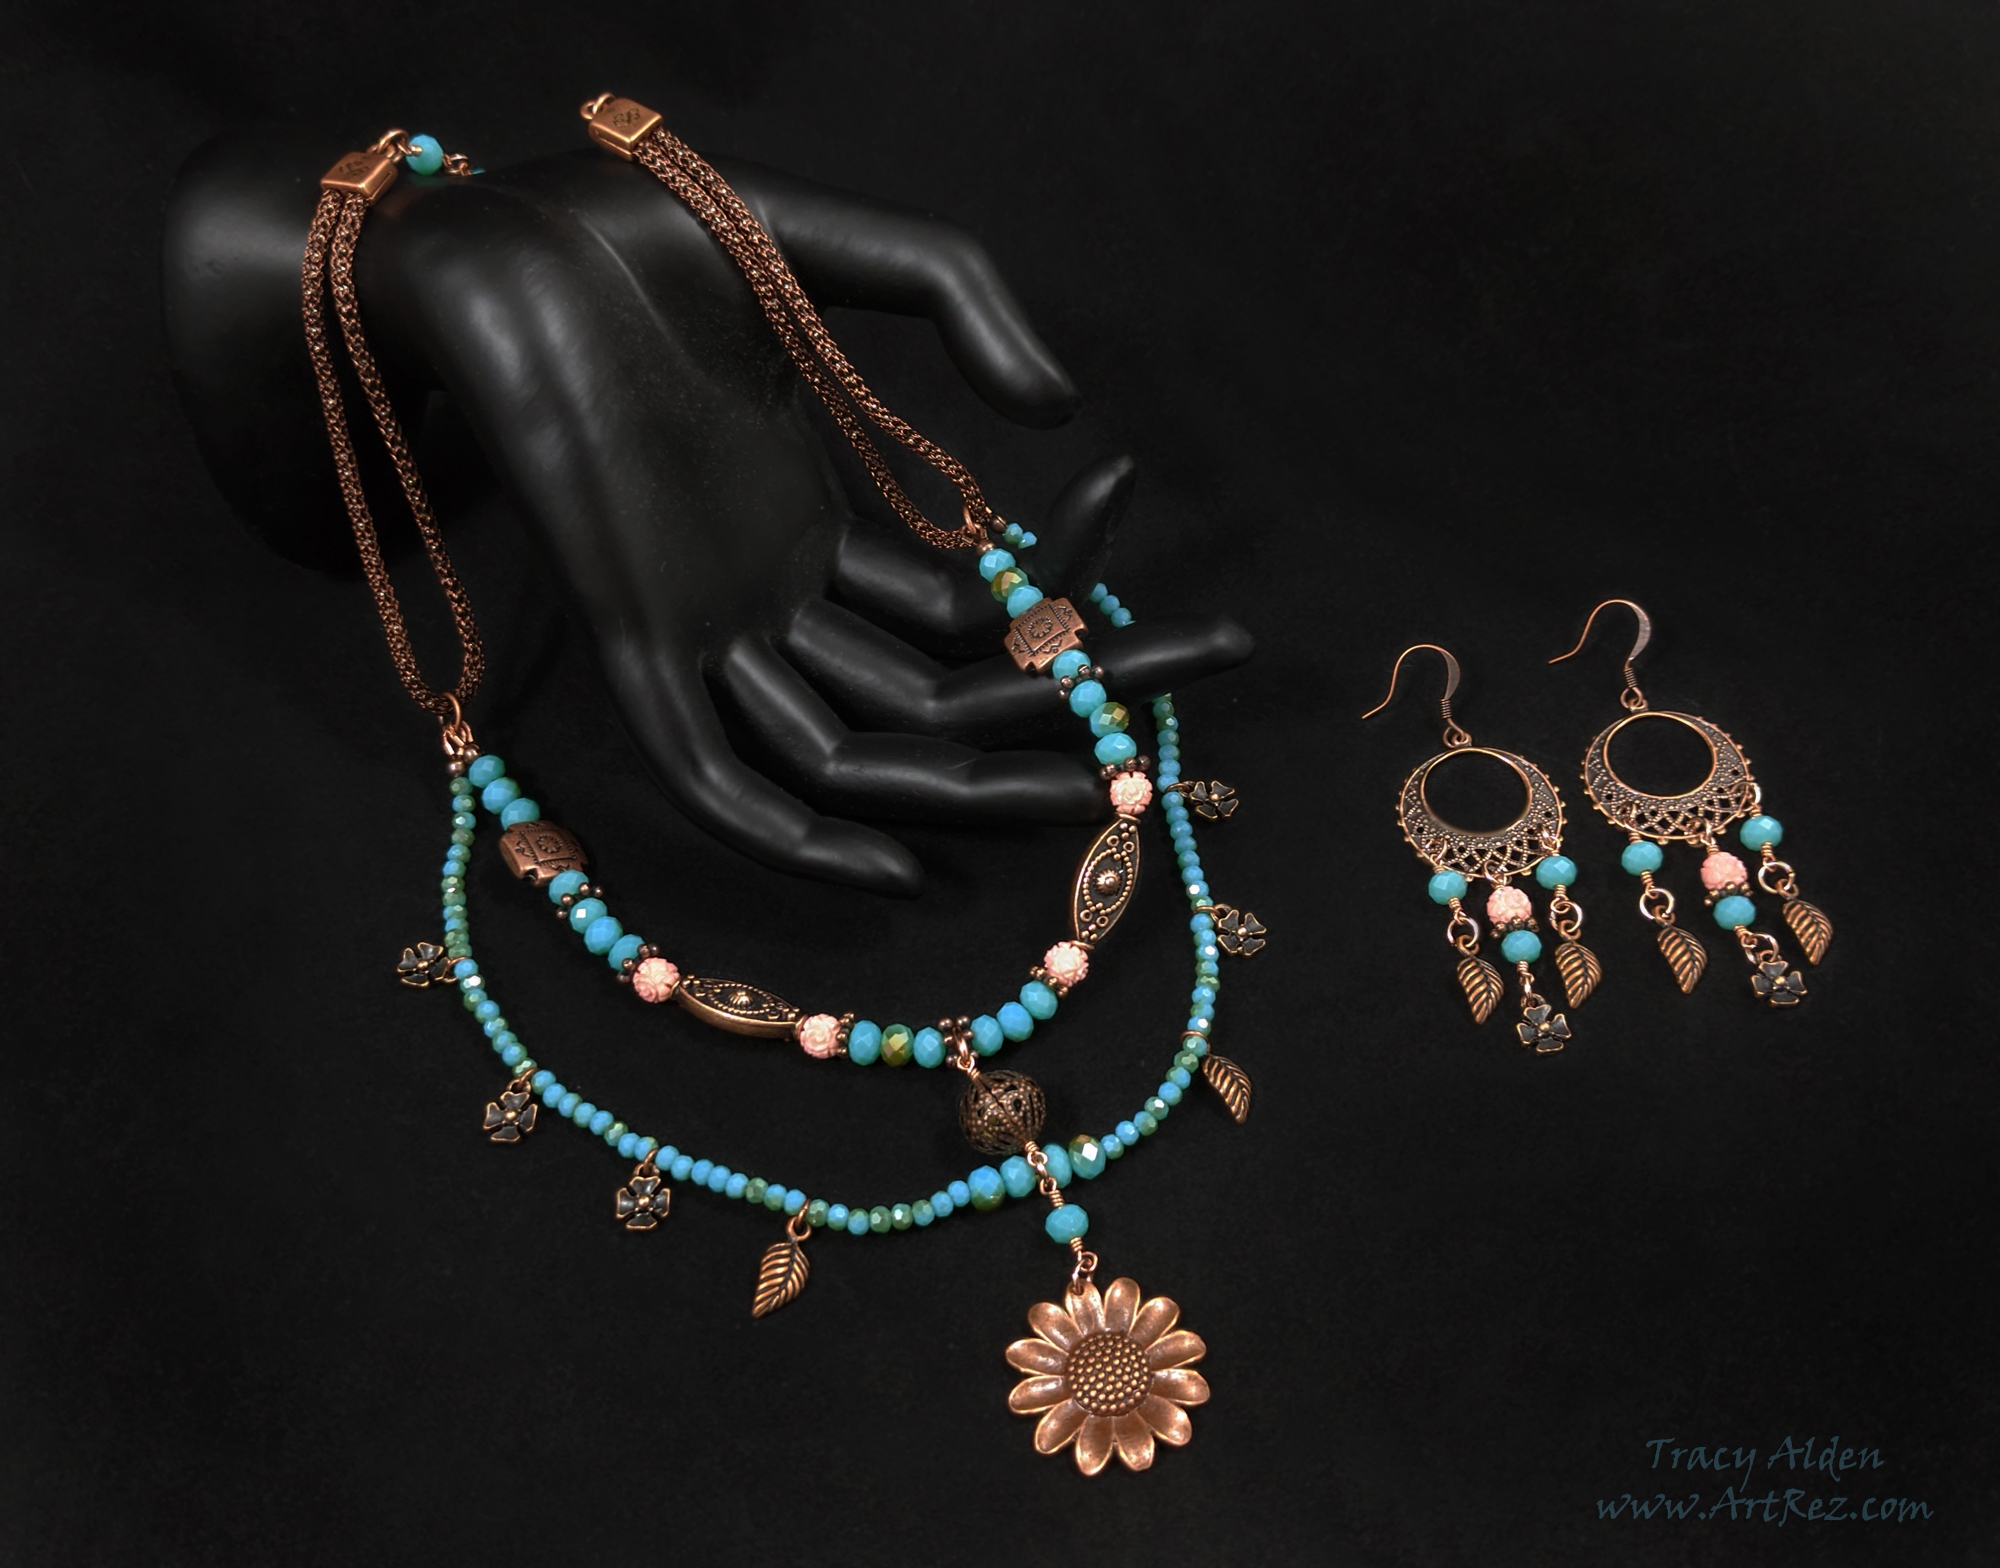
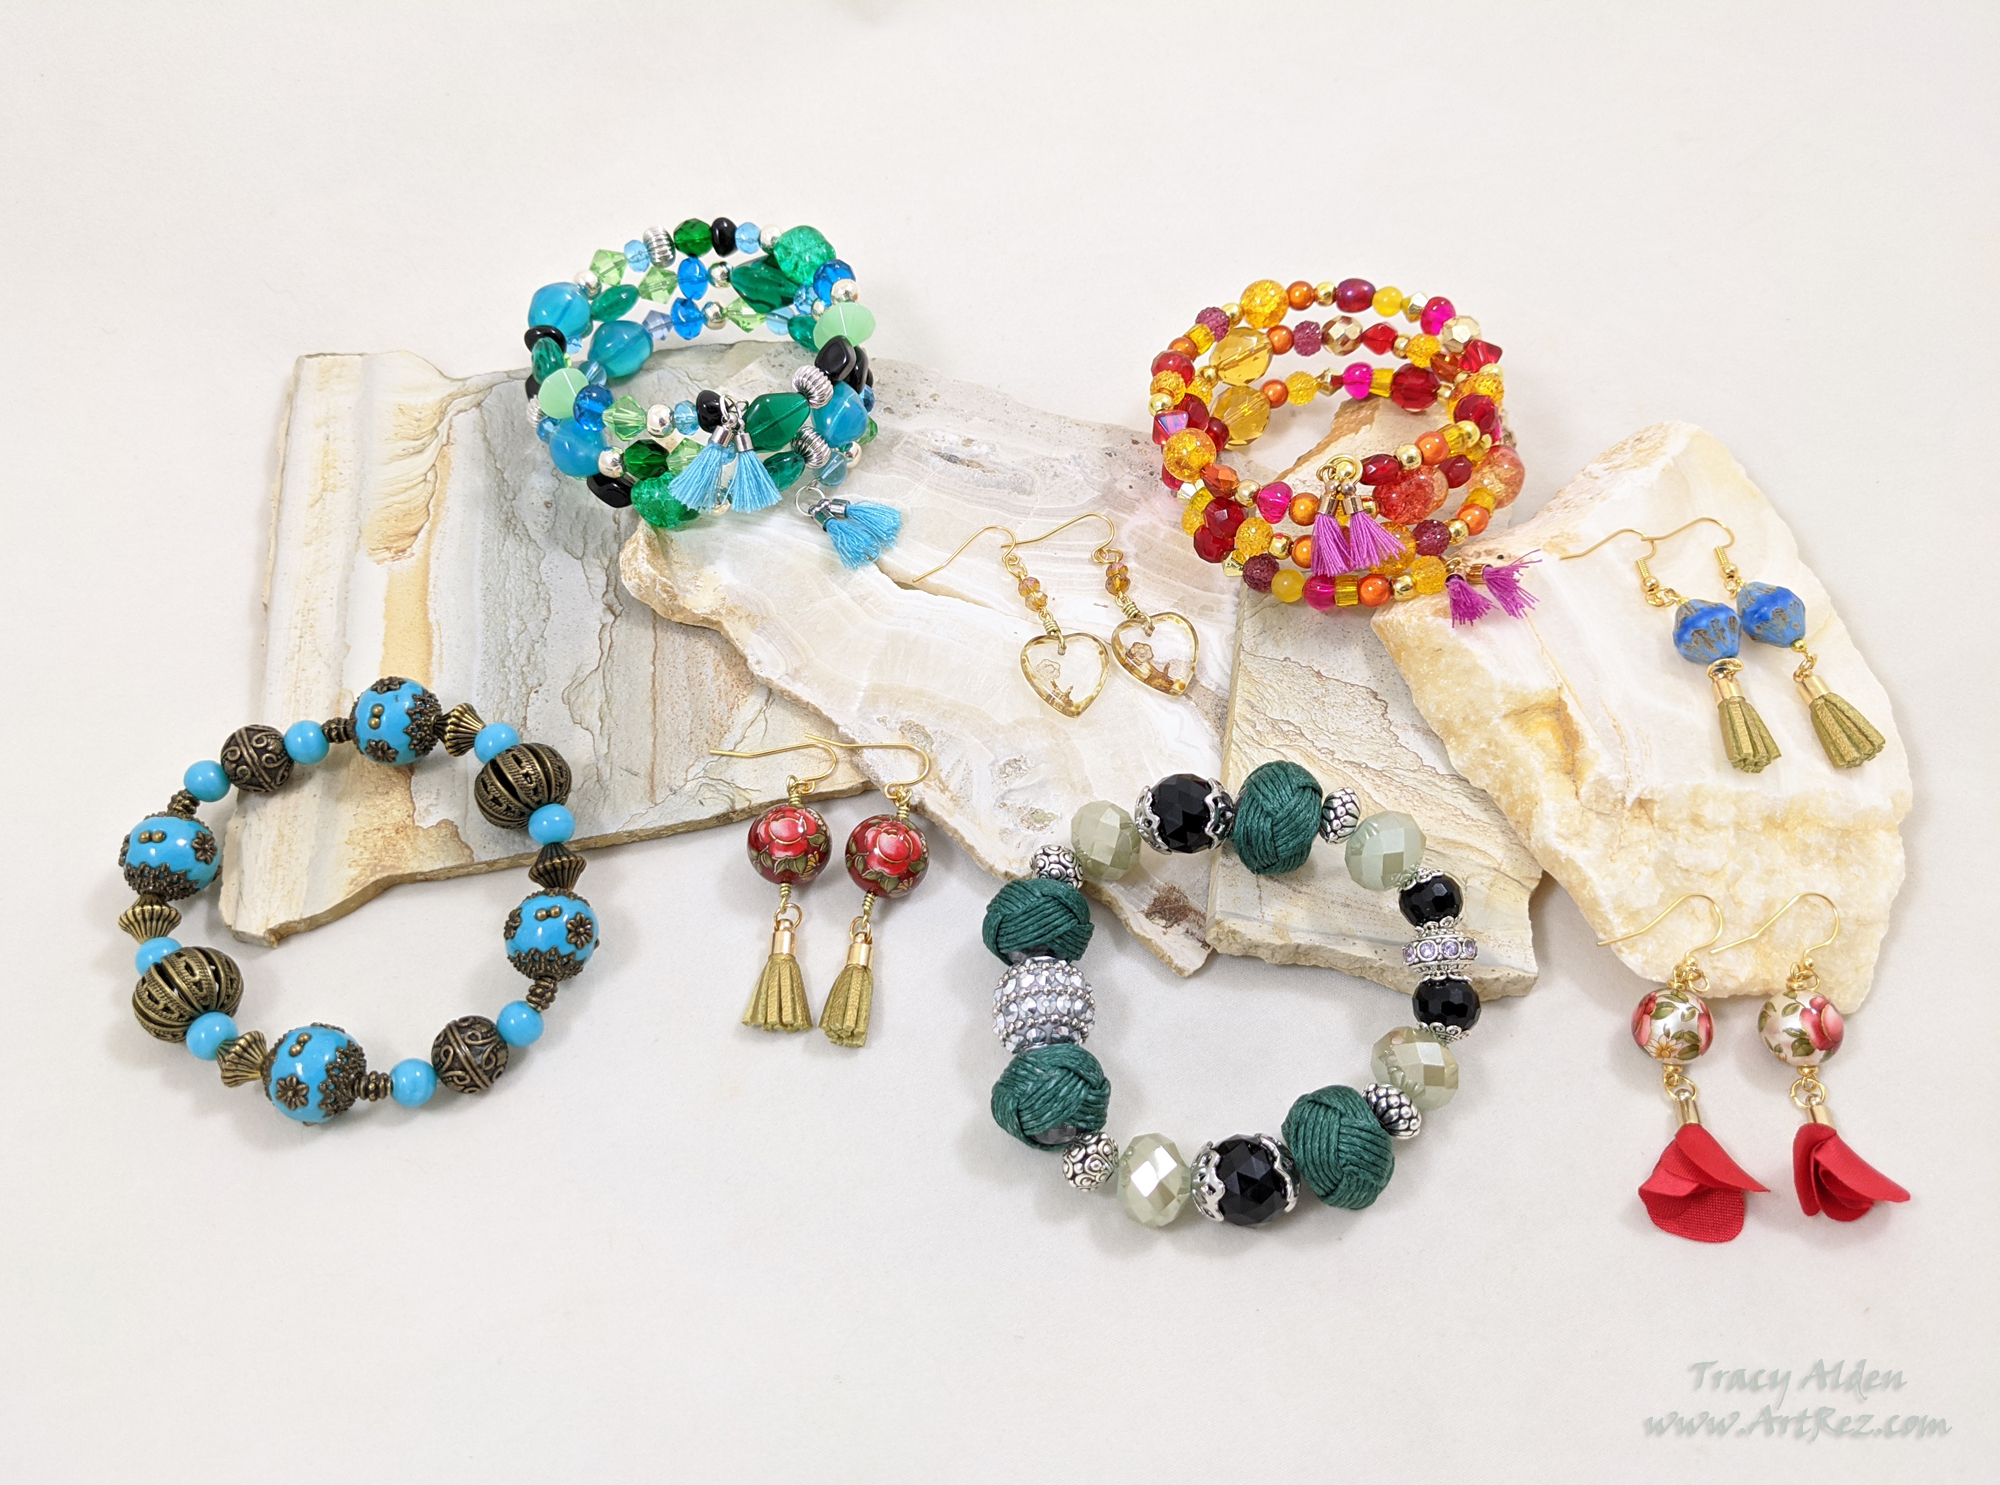
A combination of supplies from the February JJB Magical Mystery Box, SilverSilk Capture chain and a sprinkle of crystal beads create an enchanting copper and turquoise necklace and earring set.
Using a desert sunset palette, an assortment of Summertime bracelets and earrings came to life with JJB Bead Mixes. Memory wire, stretch cord, and findings from Beadalon.
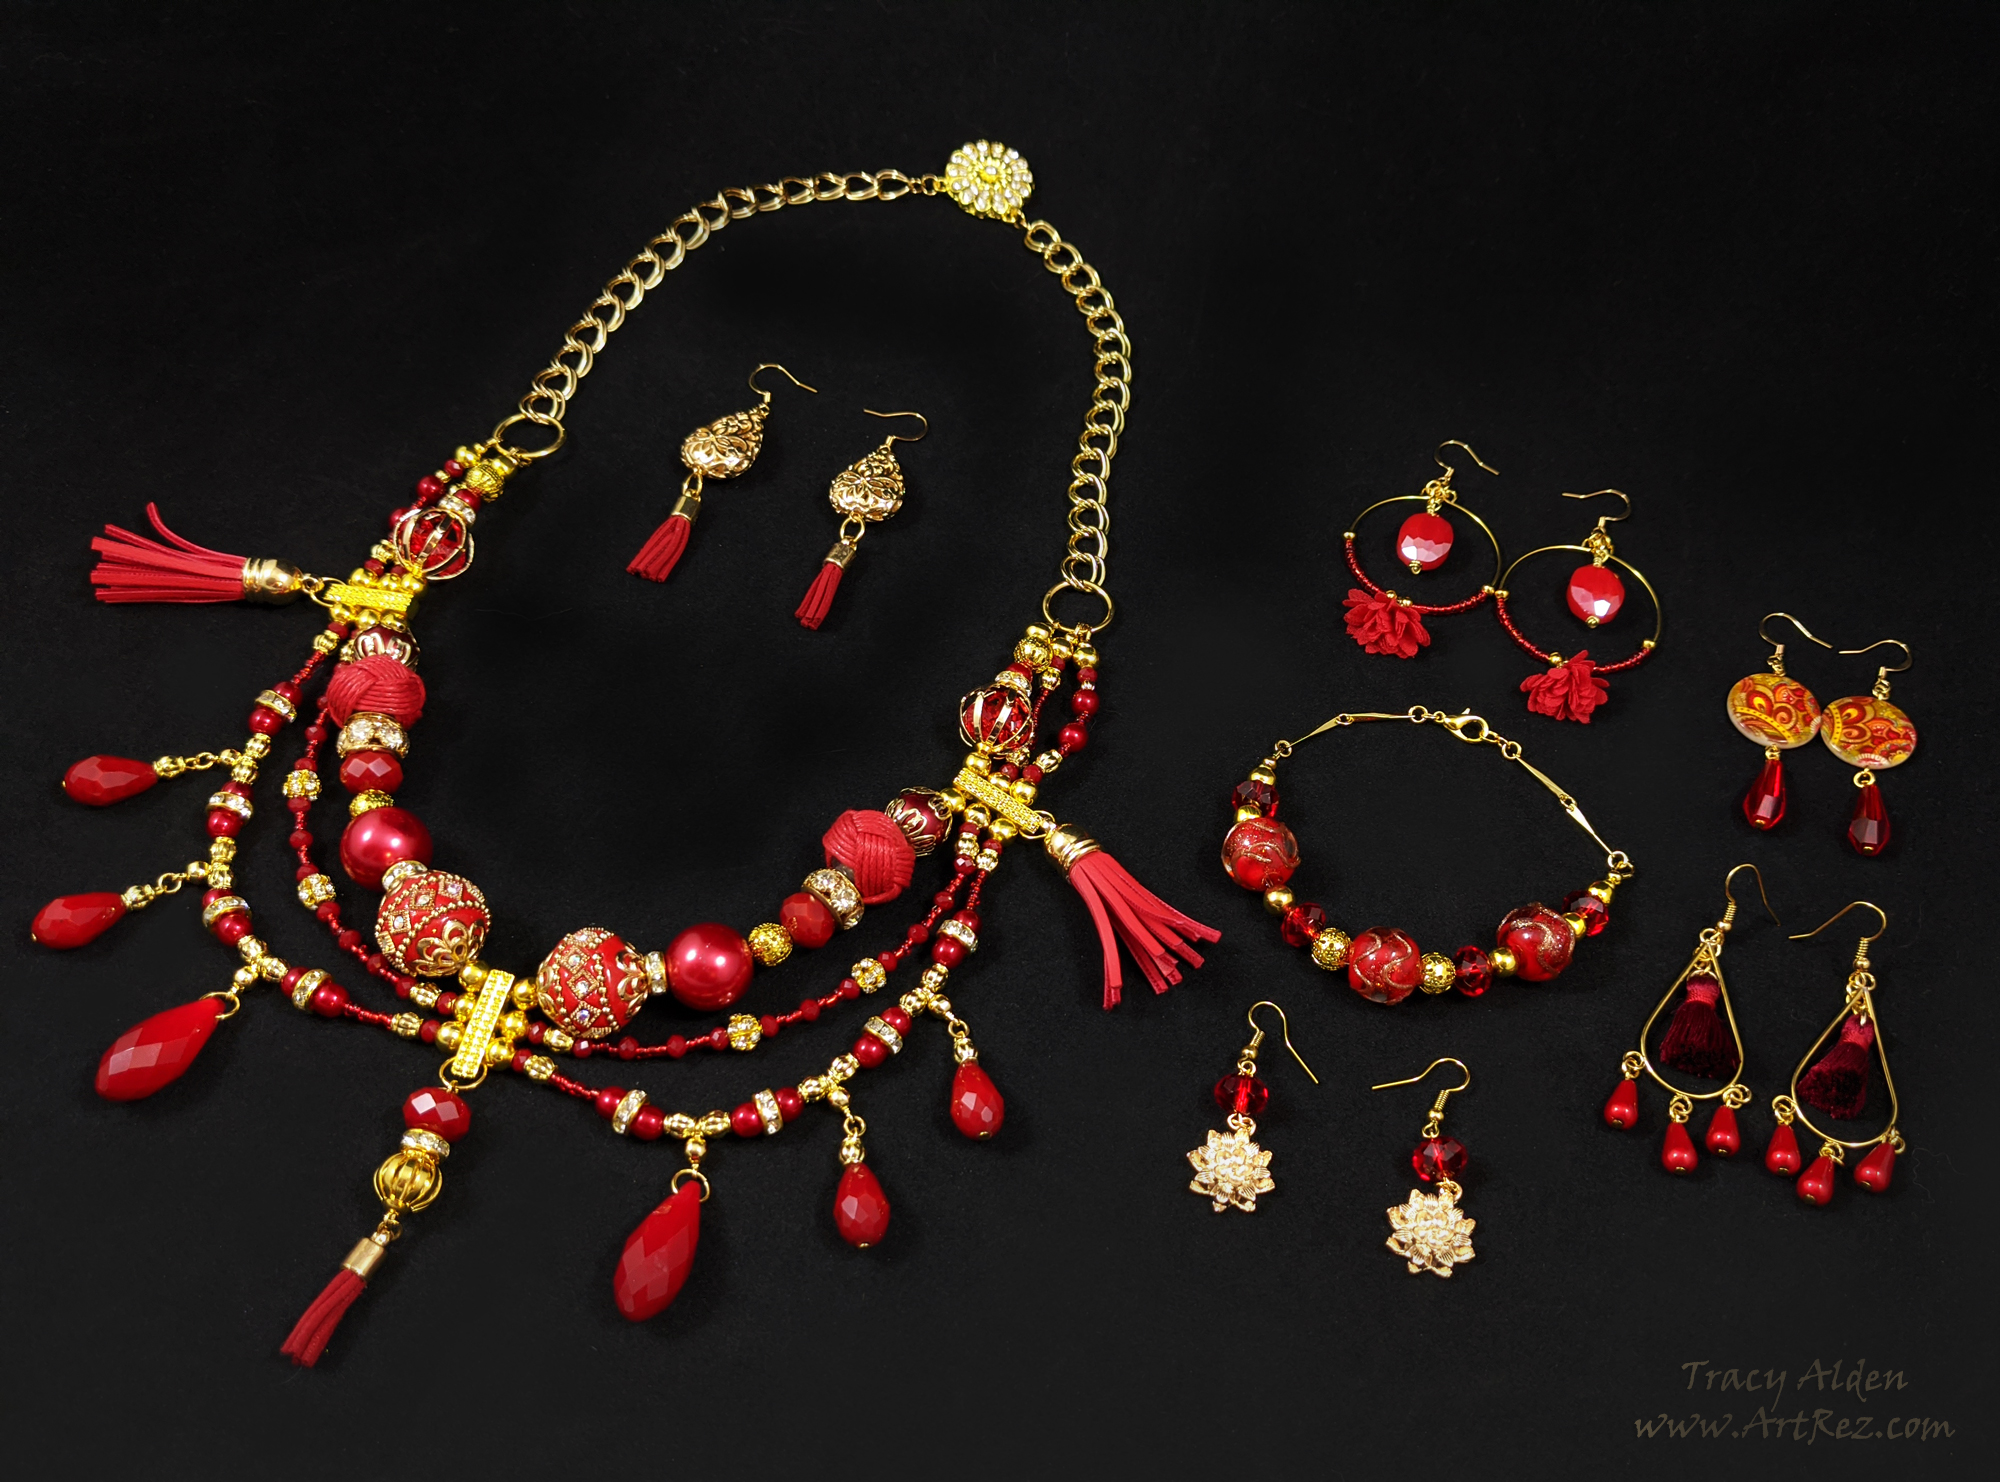
Harking back to days of old, this collection is inspired by Indian wedding jewelry. Primarily using the JJB Pantone Line, in Chili Pepper with additional supplies from JJB Magical Mystery Boxes, Chain Reaction and Winter Wonderland Collection.
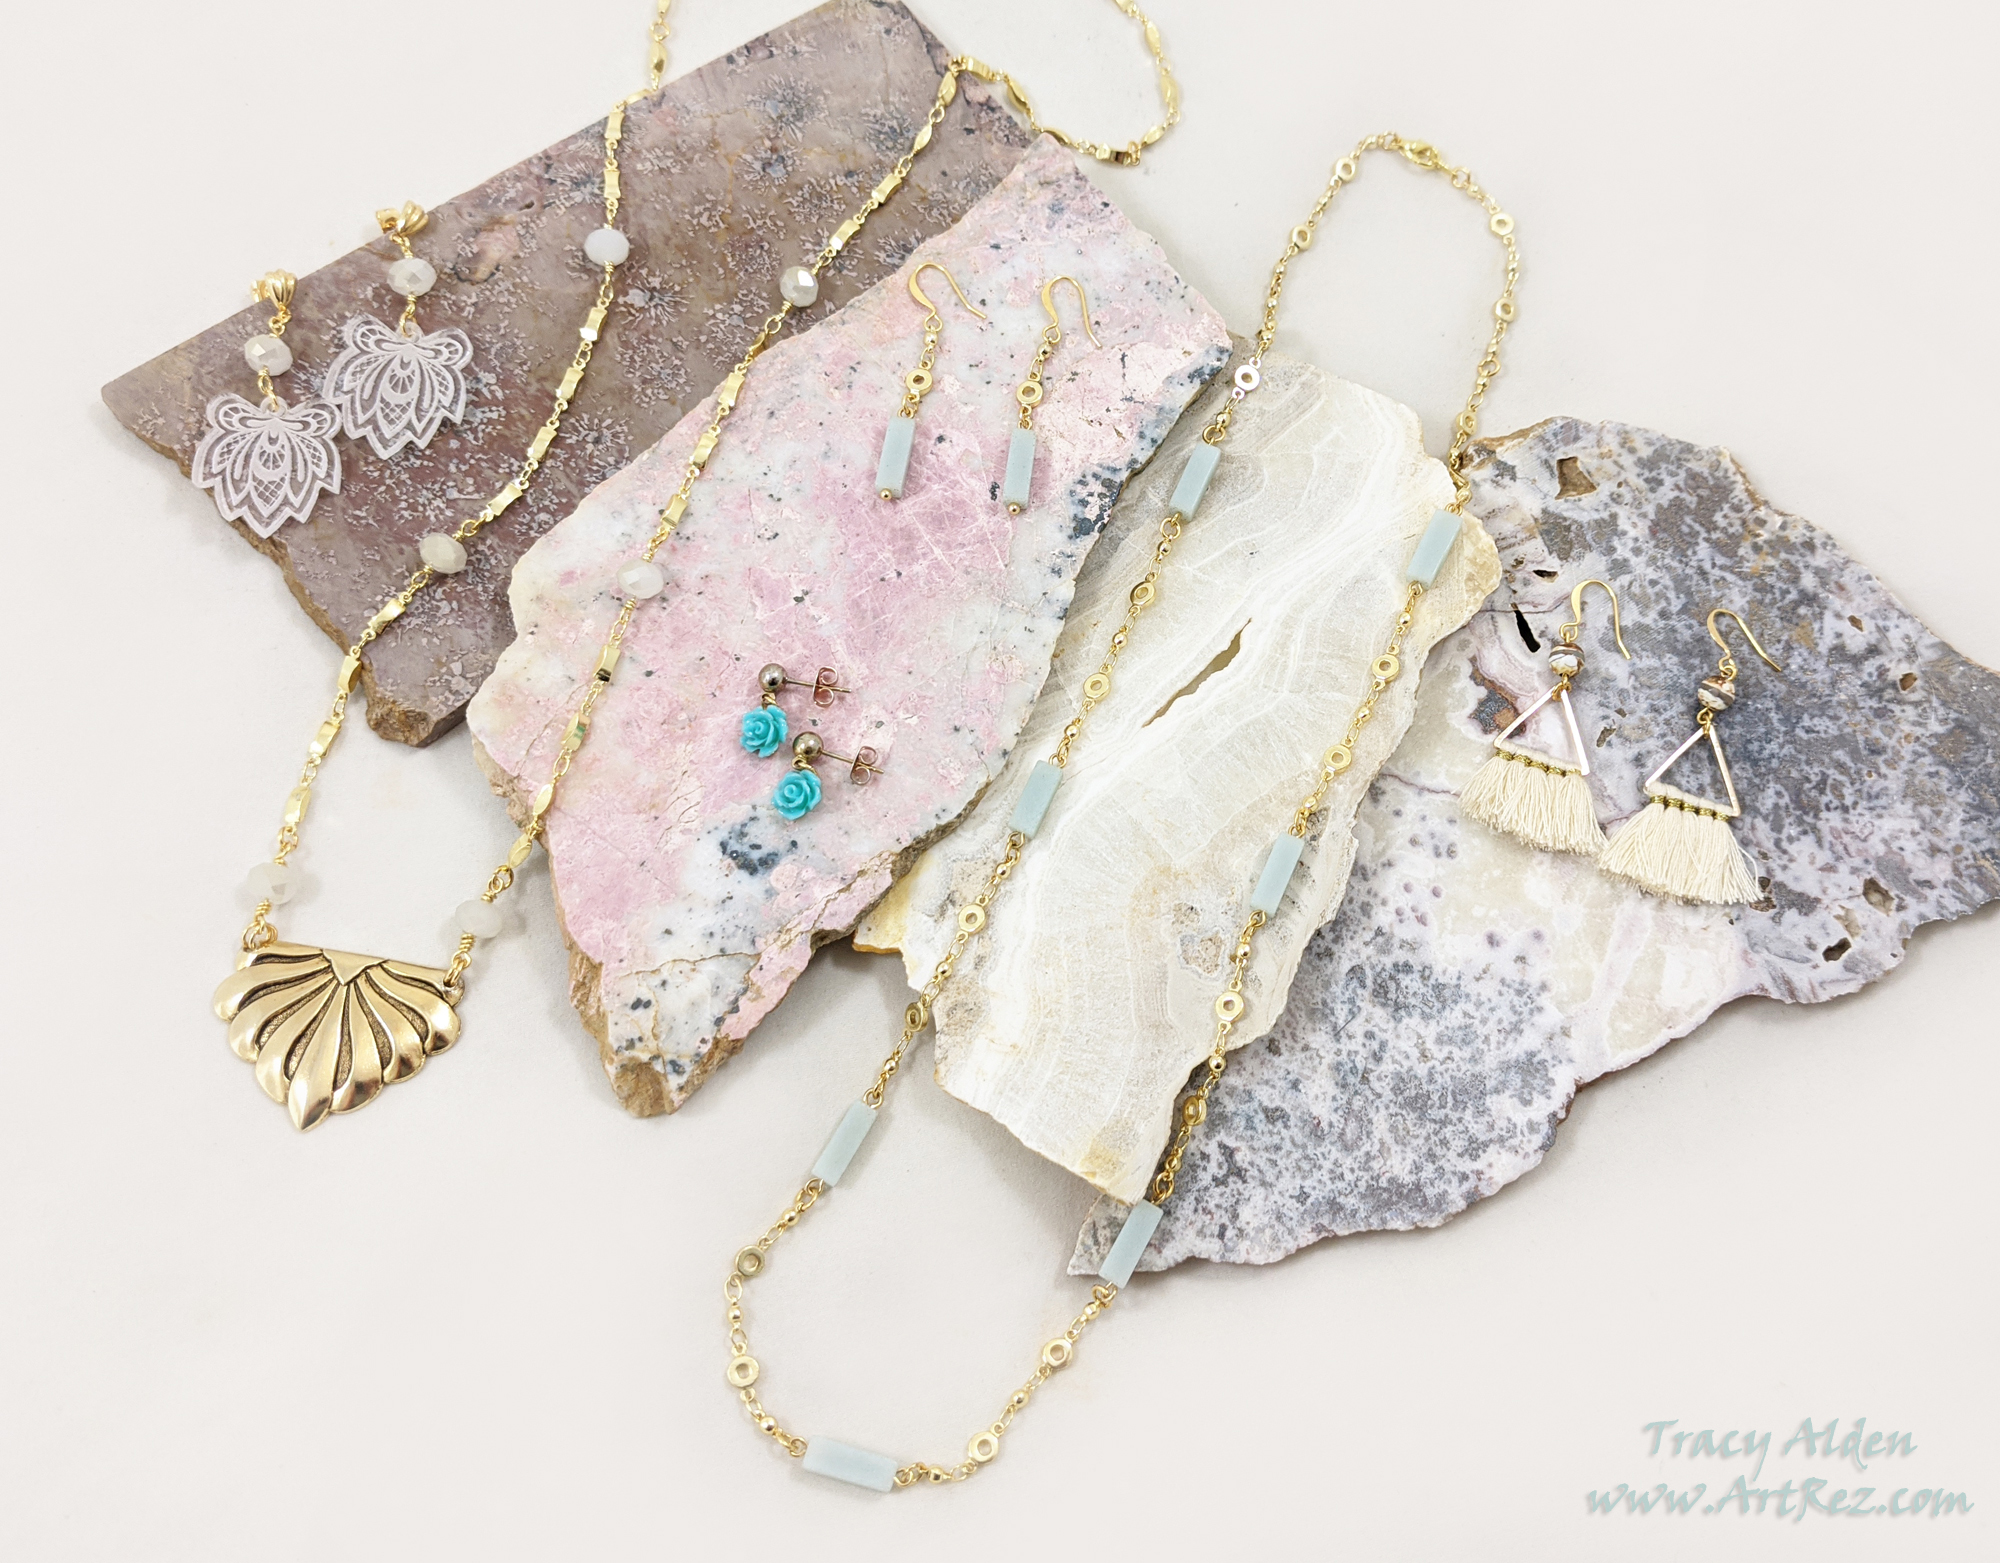
Suggestive of sandy beaches and lost civilizations these pieces use the JJB Chain Reaction, lotus charms, Amazonite and fiber tassels.
Looking for further ideas and inspiration? Hop on over to the Jesse James Beads Blog!
Until Next Time, Stay Safe!
*This is an affiliate post, which means I received an assortment of products as a compensation for the creation of art. To read my full disclosure, click here.A Quick and Classic, Blue Jewelry DIY
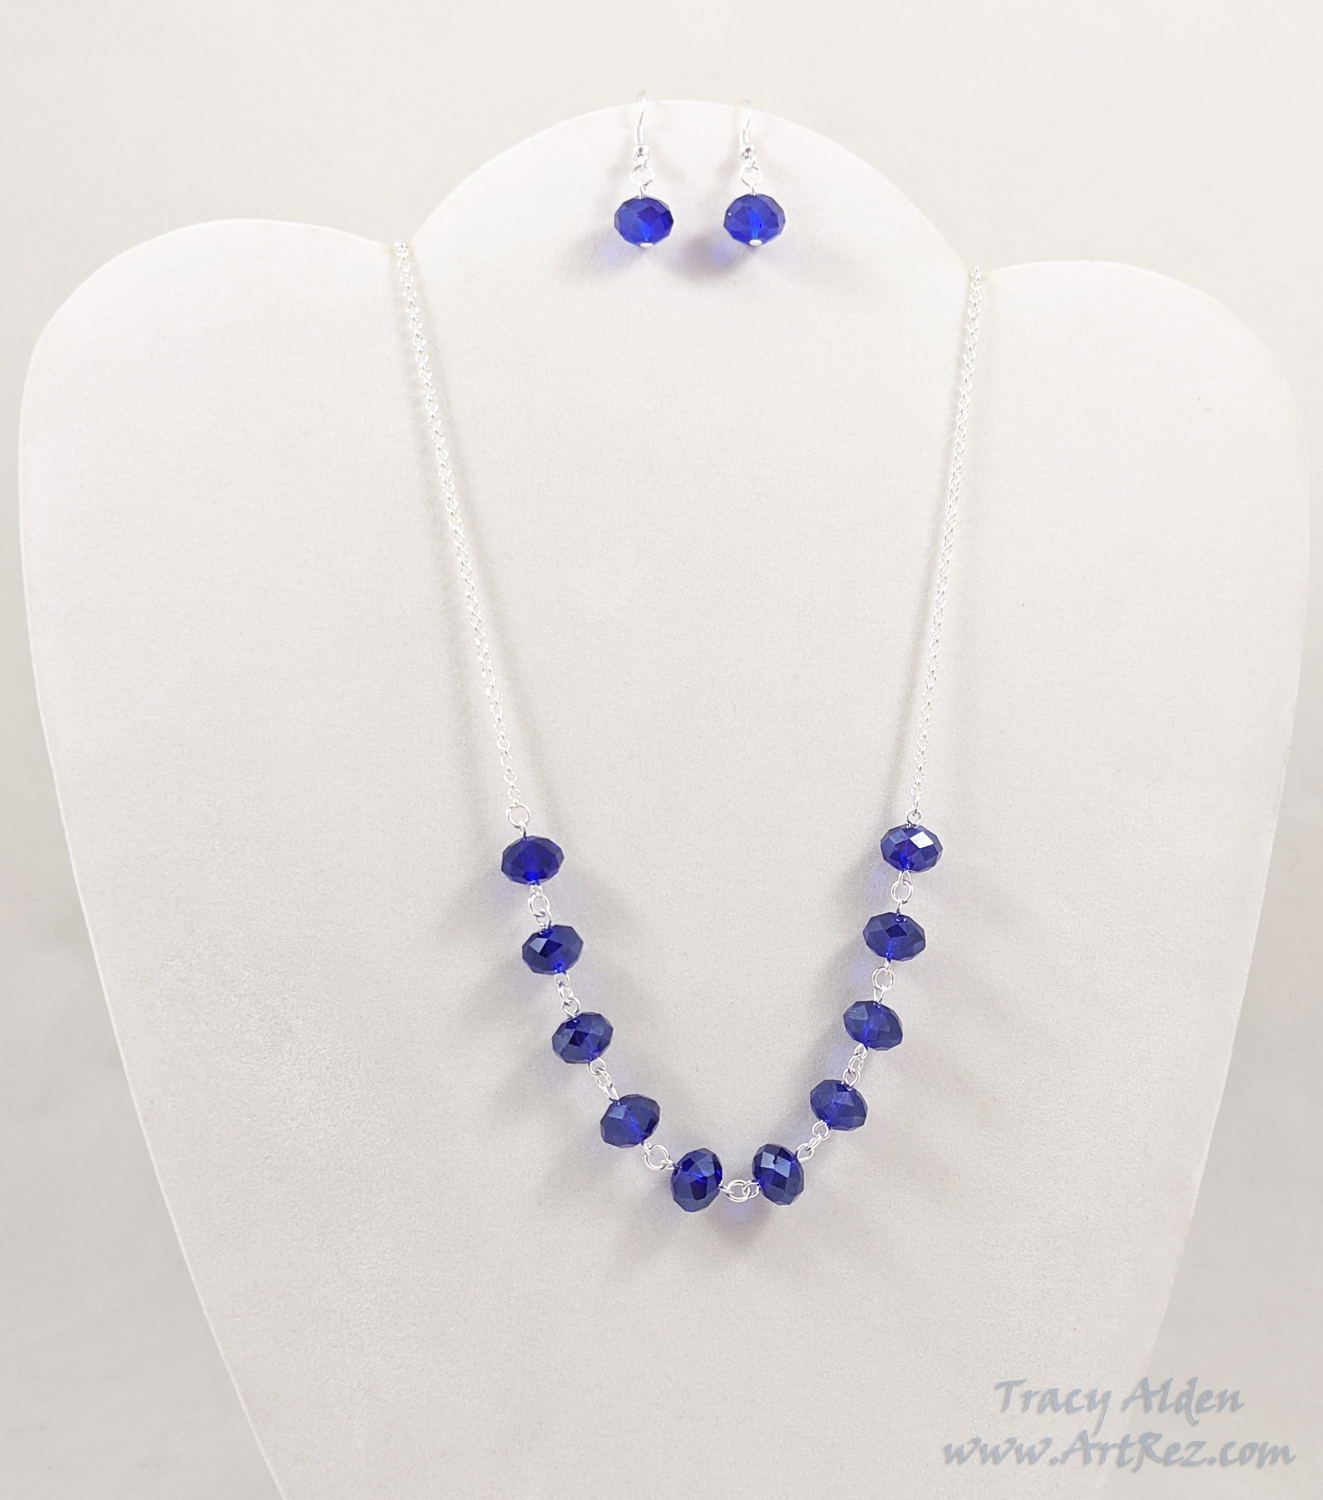
Color forecasts and trends help all facets of the art industry to be inspired, create, and design. This year Pantone announced their new color of the year, “Classic Blue”. A color that to me brings to mind the deep rich hues of lapis lazuli stone, twilight sky and dark blue iris blooms. Being that dark and intense blues are some of my favorite colors to work with, I was inspired into incorporating this color into a beginner jewelry project.
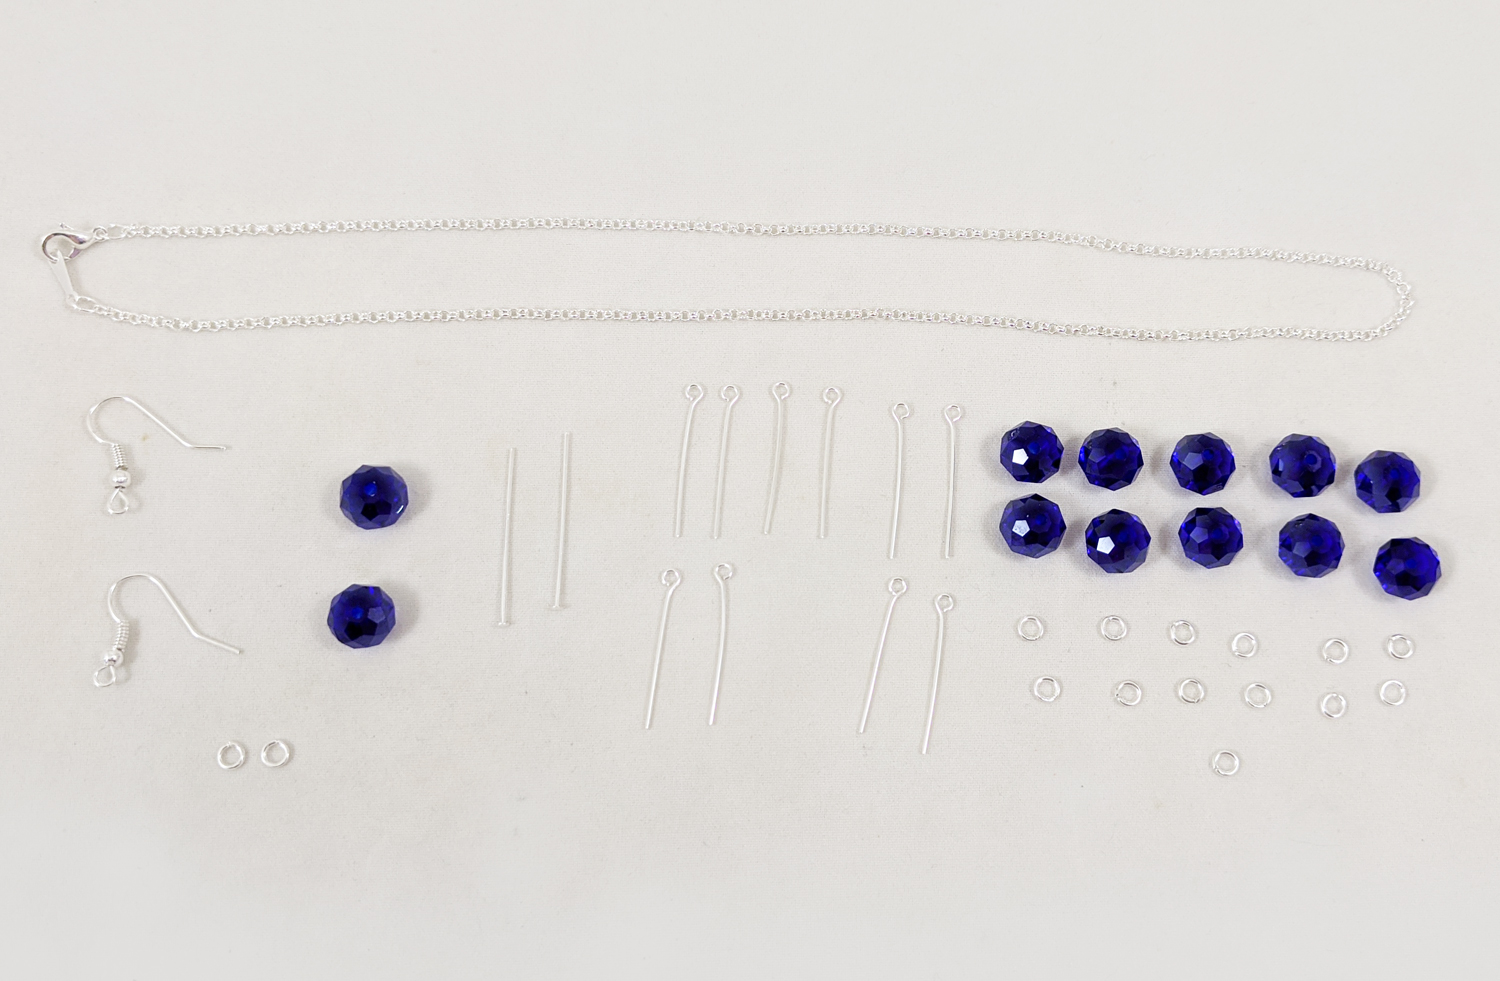
Supplies:
1 Silver plated round cable chain necklace, 16 inch
2 Fishhook earwires
10 Eye pins, silver-plated brass, 1 inch
2 Head pins, silver-plated brass, 1 inch
13 Silver Plated 4mm jumprings
12 Deep Blue 8x6mm faceted crystal rondelles
2 chain nose pliers
1 round nose pliers
1 wire cutter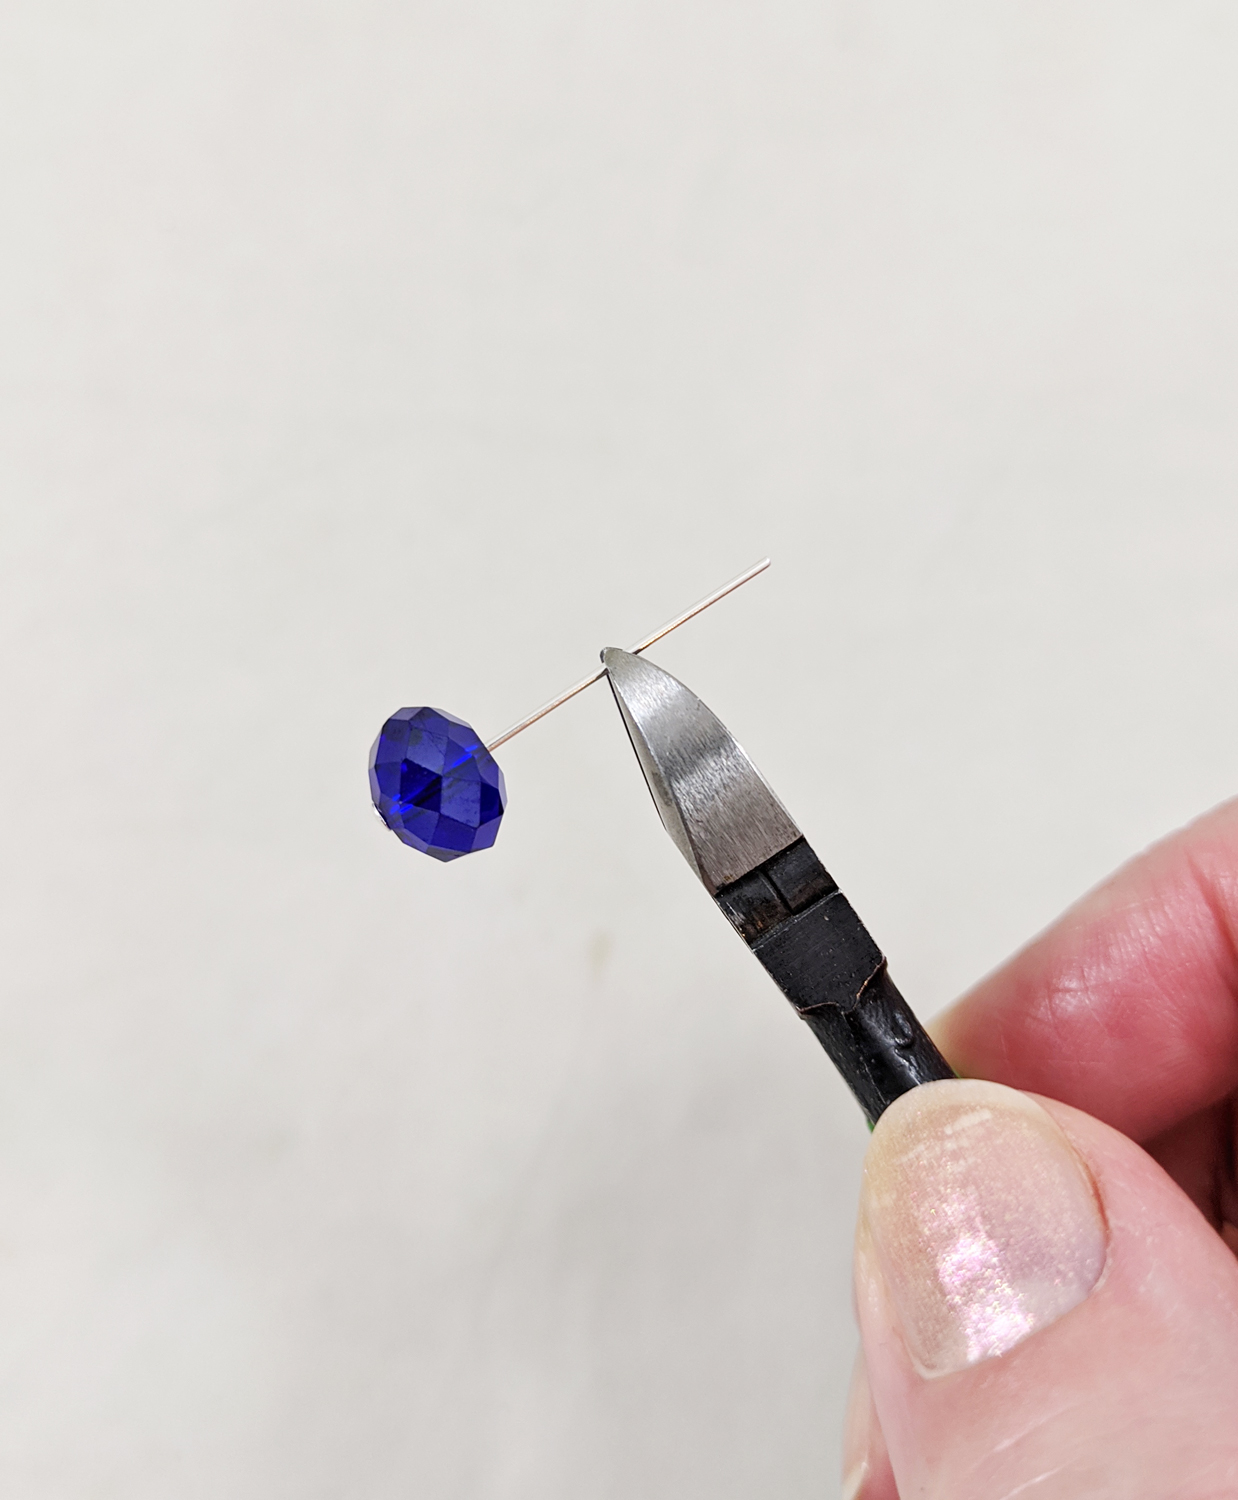
Starting with the earrings first, carefully thread one Deep Blue 8x6mm faceted crystal rondelle on a 1-inch silver plate head pin. Using the jewelry wire cutters, trim off the excess wire of the head pin.
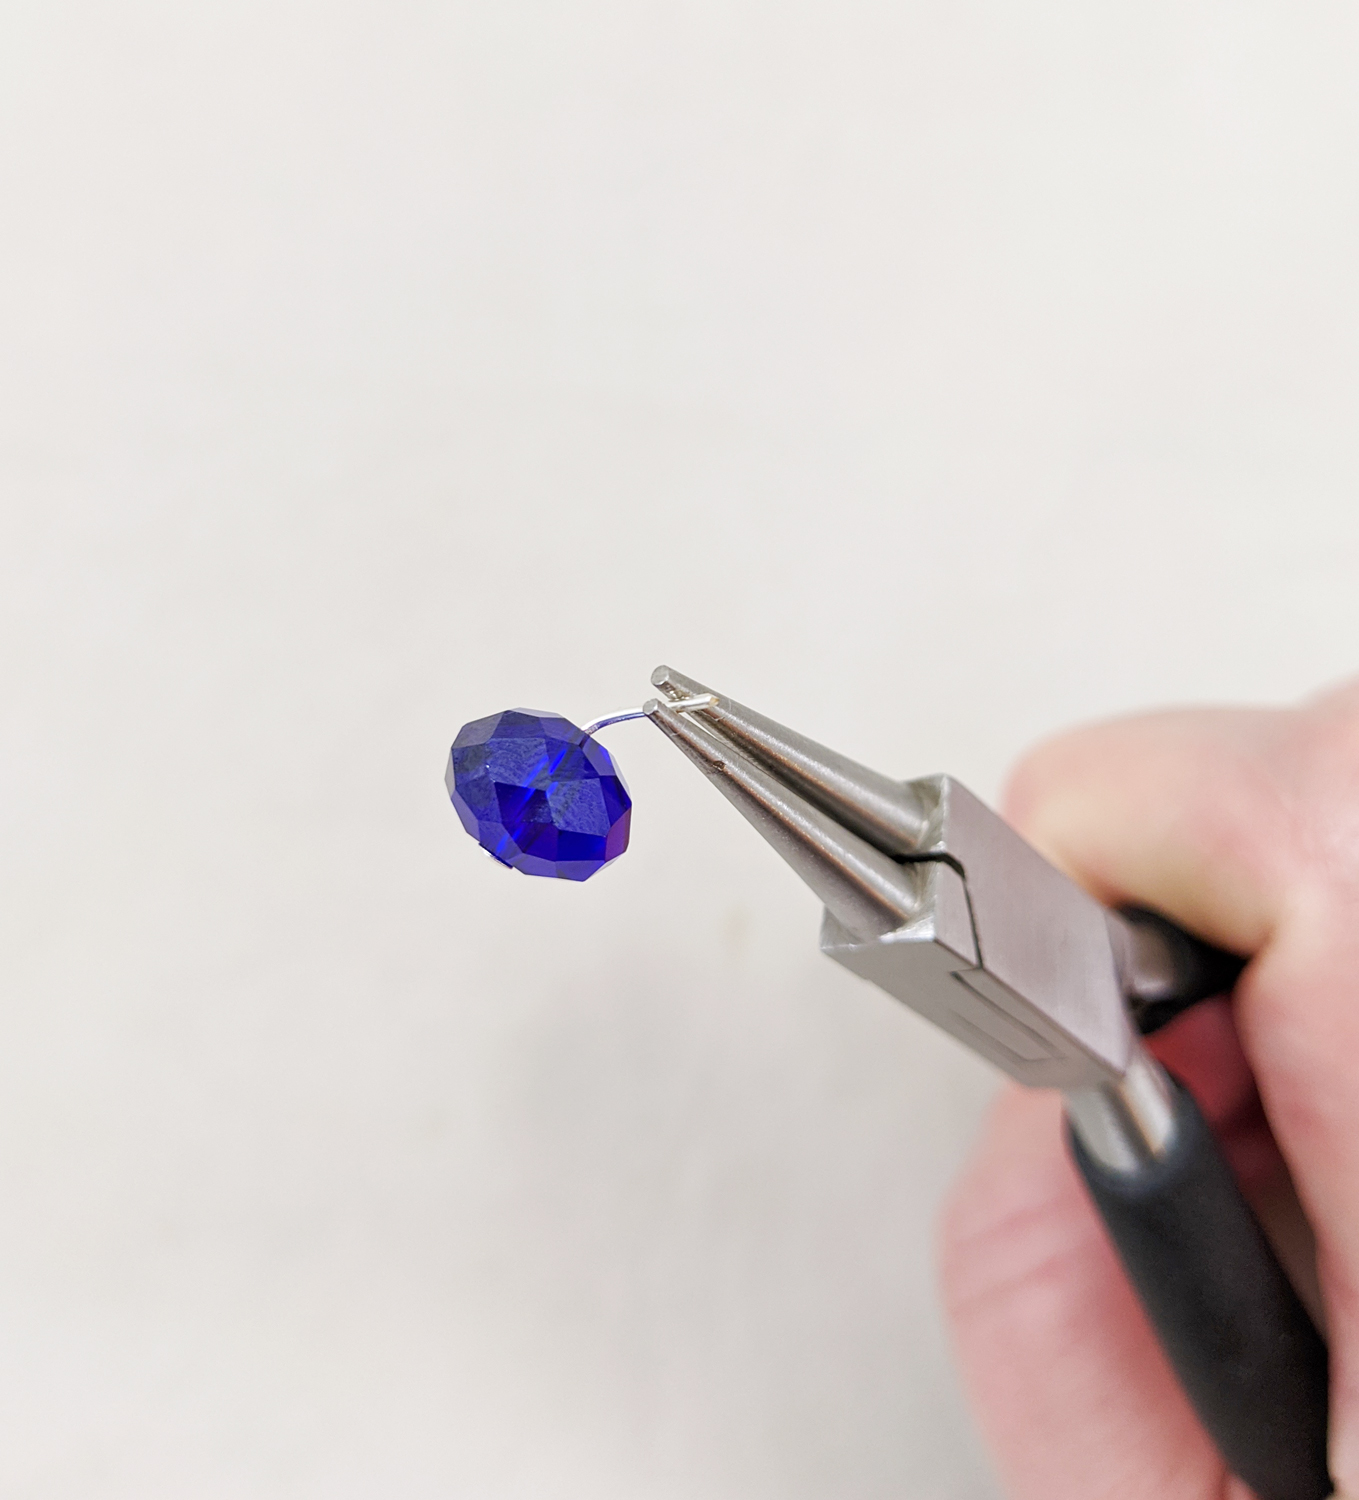
Using round-nose pliers carefully bend the head pin wire slightly towards you before starting the loop. This will ensure you have a more rounded and centered loop.
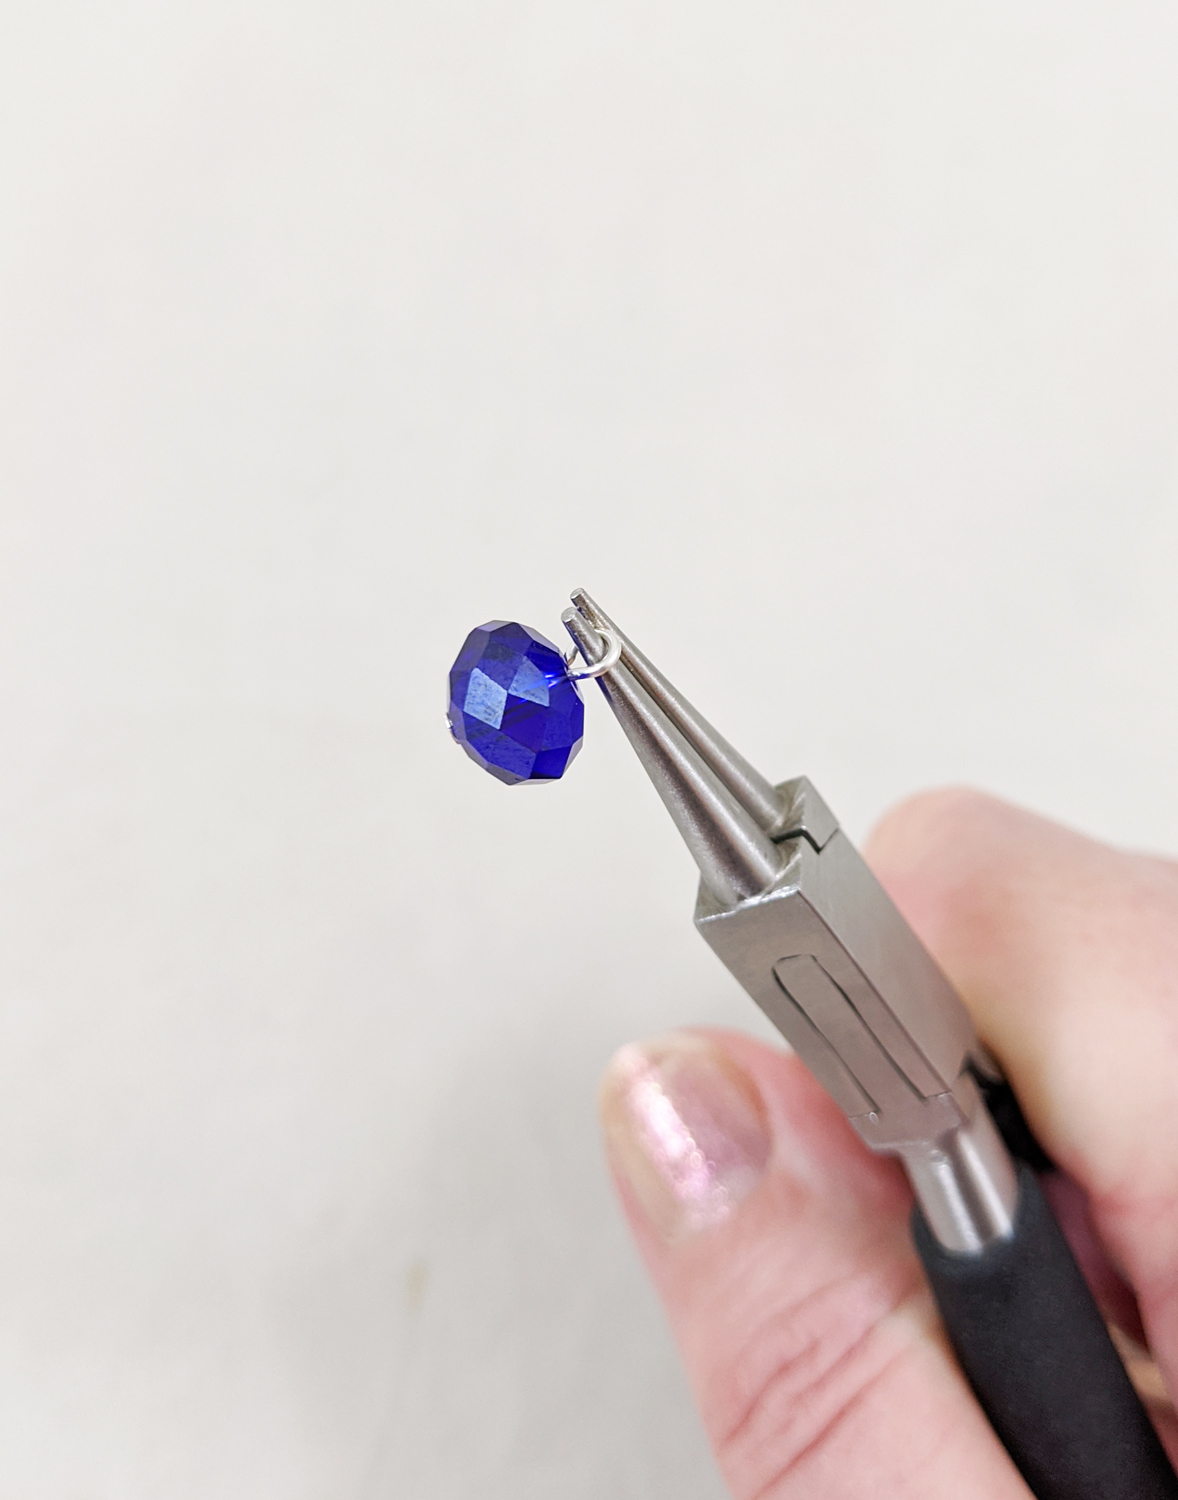
Curl over the wire into a complete loop with the round-nose pliers by rotating your wrist forward. Close the loop, snug to the bead.
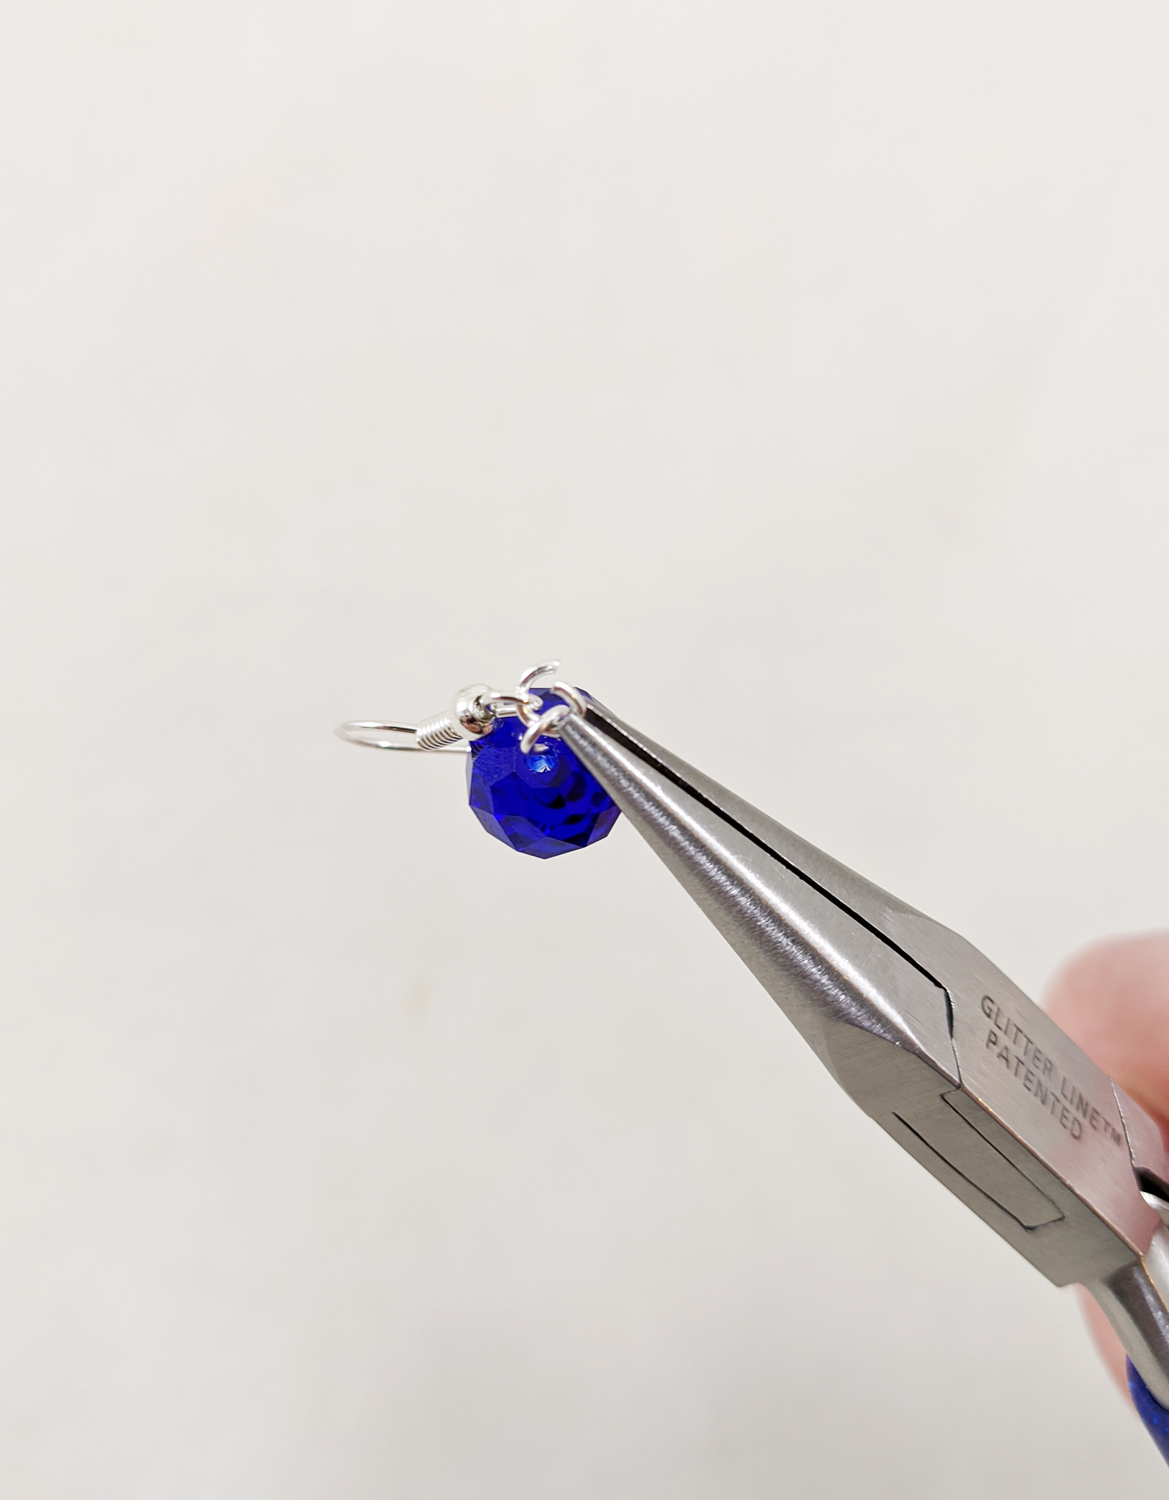
Using two pairs of chain nose pliers start twisting* the jump ring until the required opening is achieved. Thread both the head pin with bead and the fish hook earring wire on the open jump ring and close the jump ring with the two pairs of flat nose pliers by twisting the jump ring closed.
*Do not pull open jump rings as this will distort them.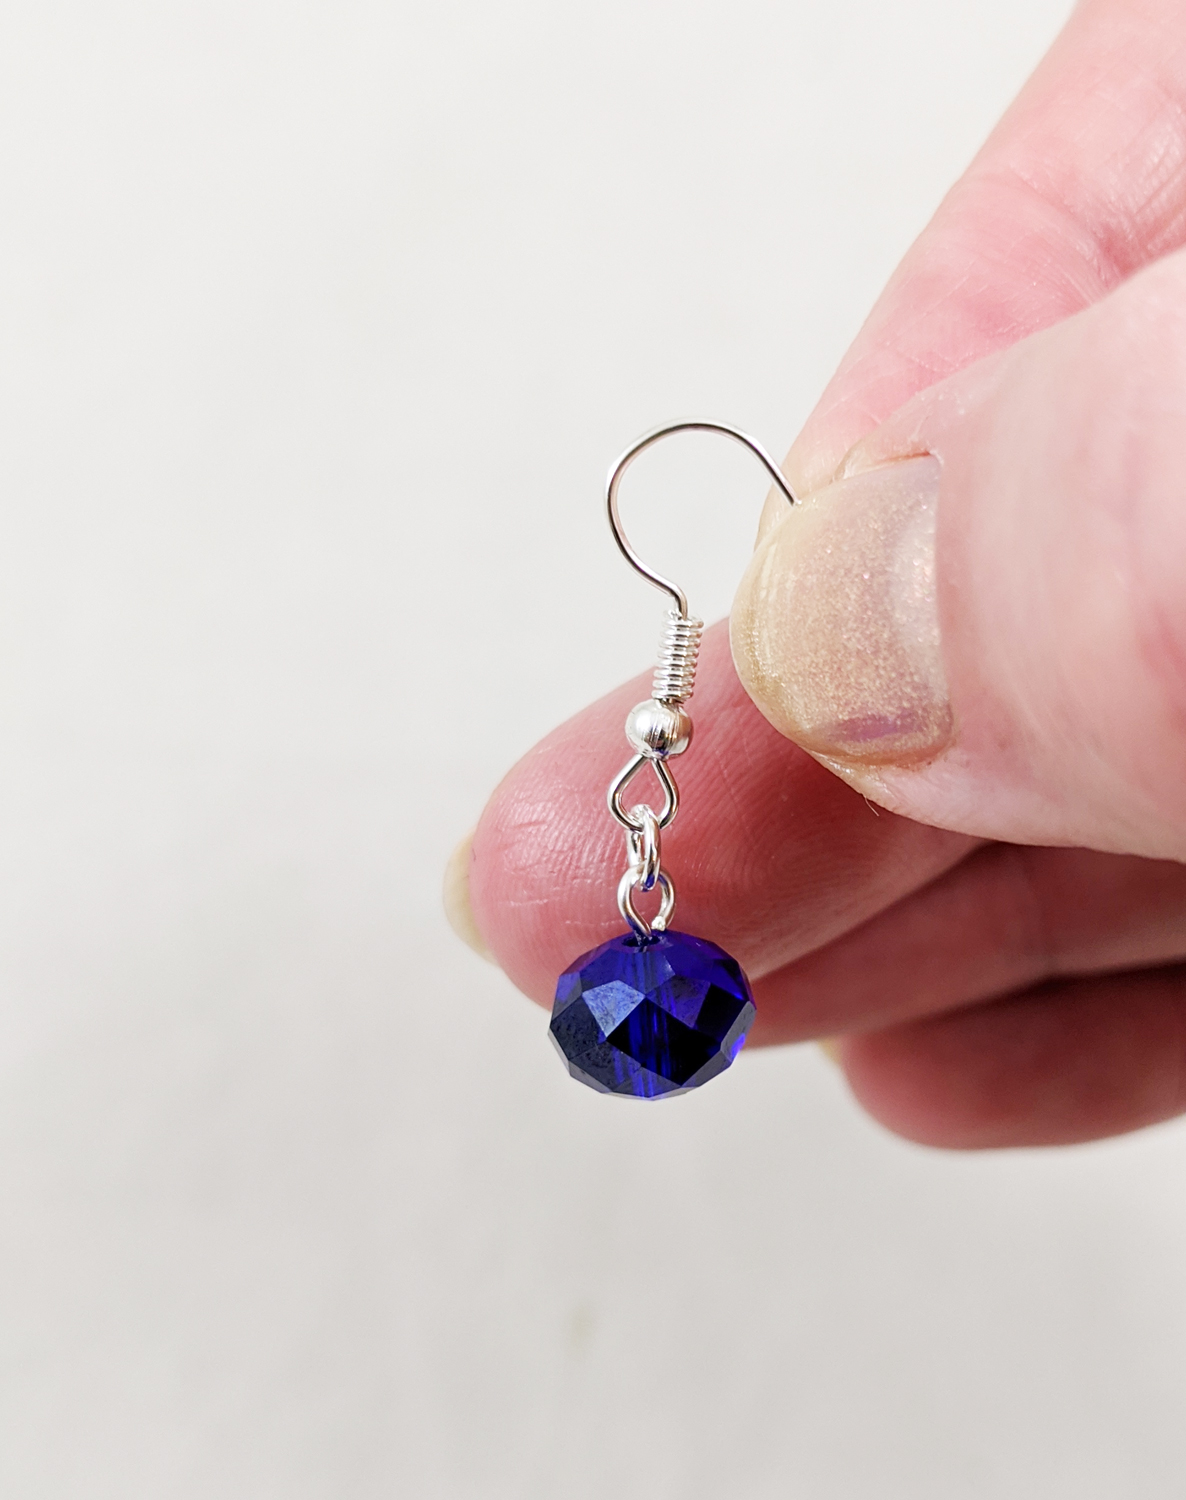
Once the jumpring is closed you should have one earring finished. Repeat this process to create the second earring.
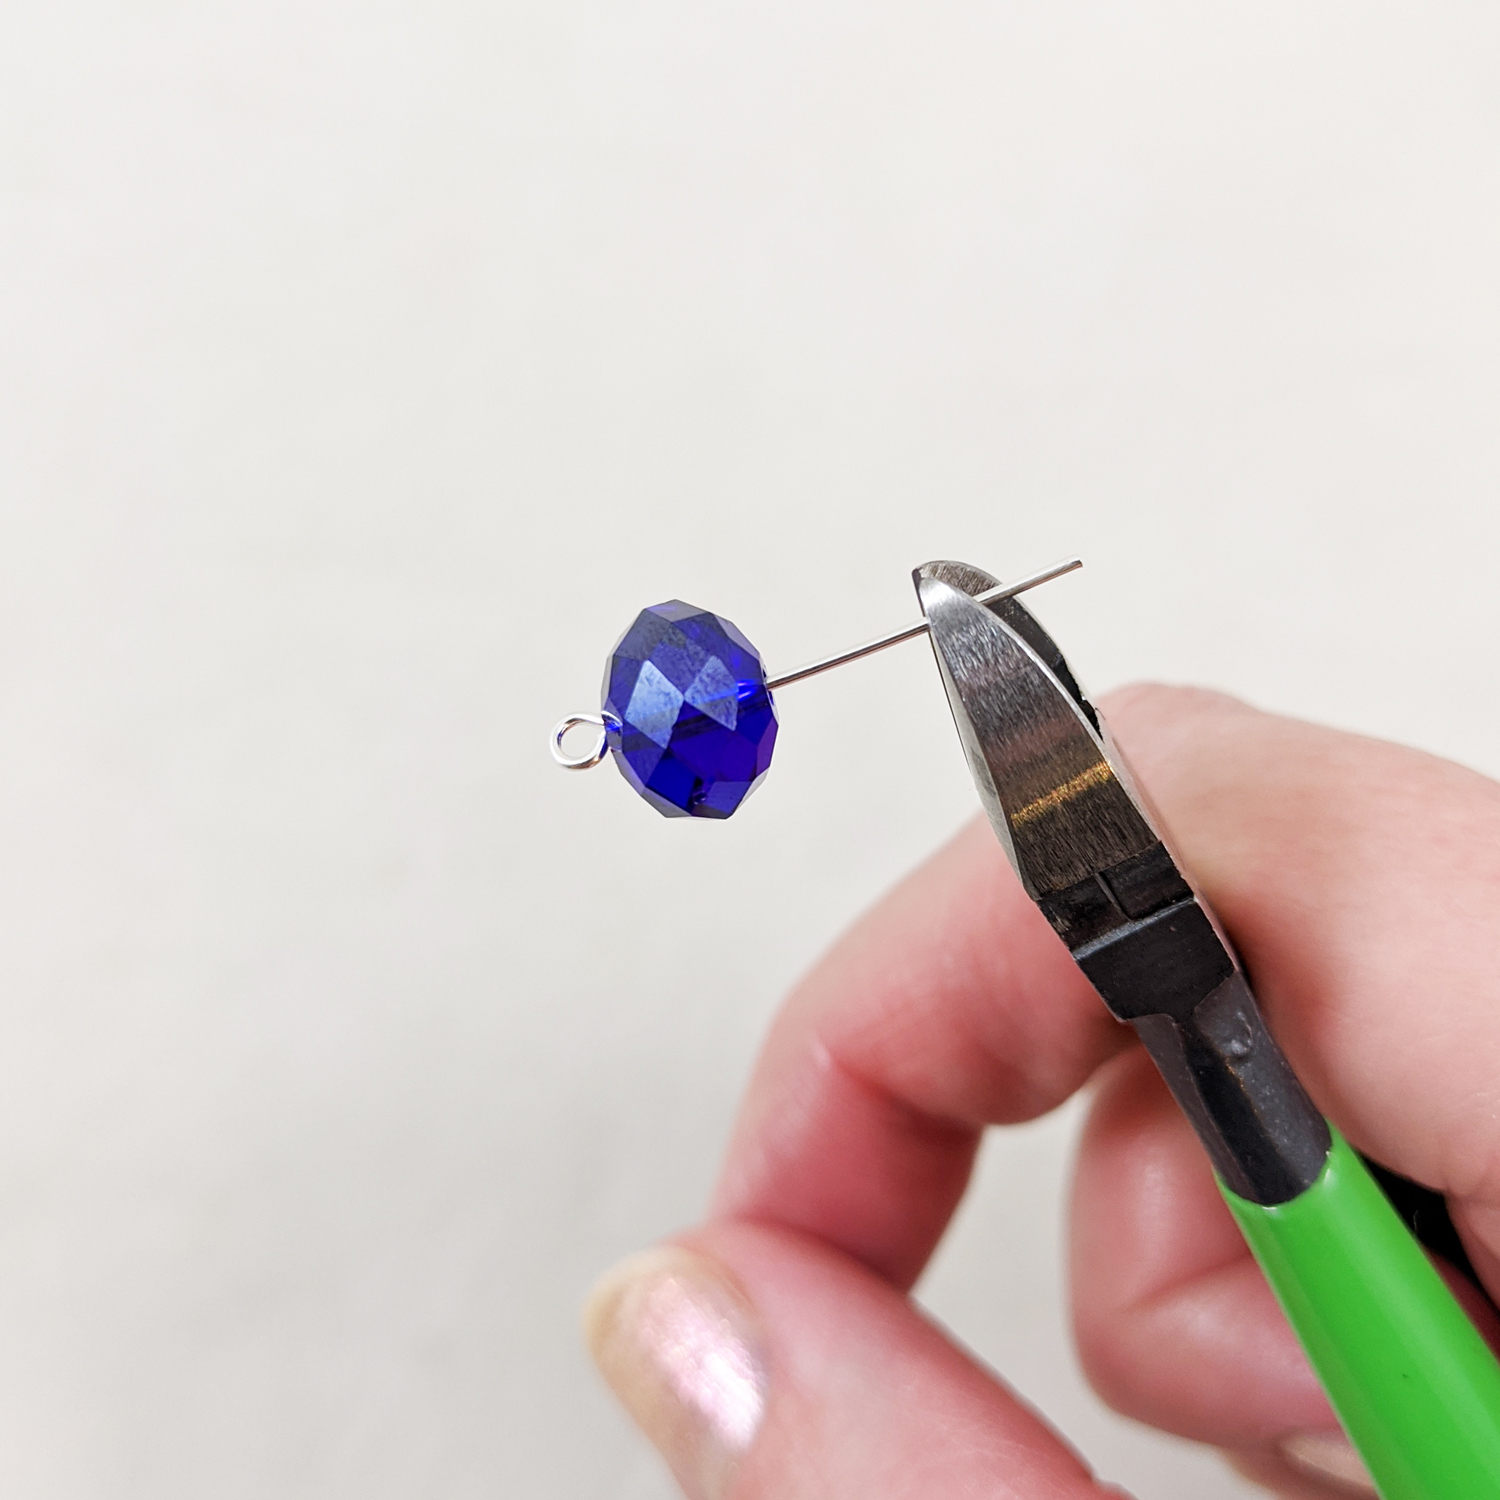
Now onto the necklace. Carefully thread one Deep Blue 8x6mm faceted crystal rondelle on a 1-inch silver plate eye pin. Using the jewelry wire cutters, trim off the excess wire of the head pin.
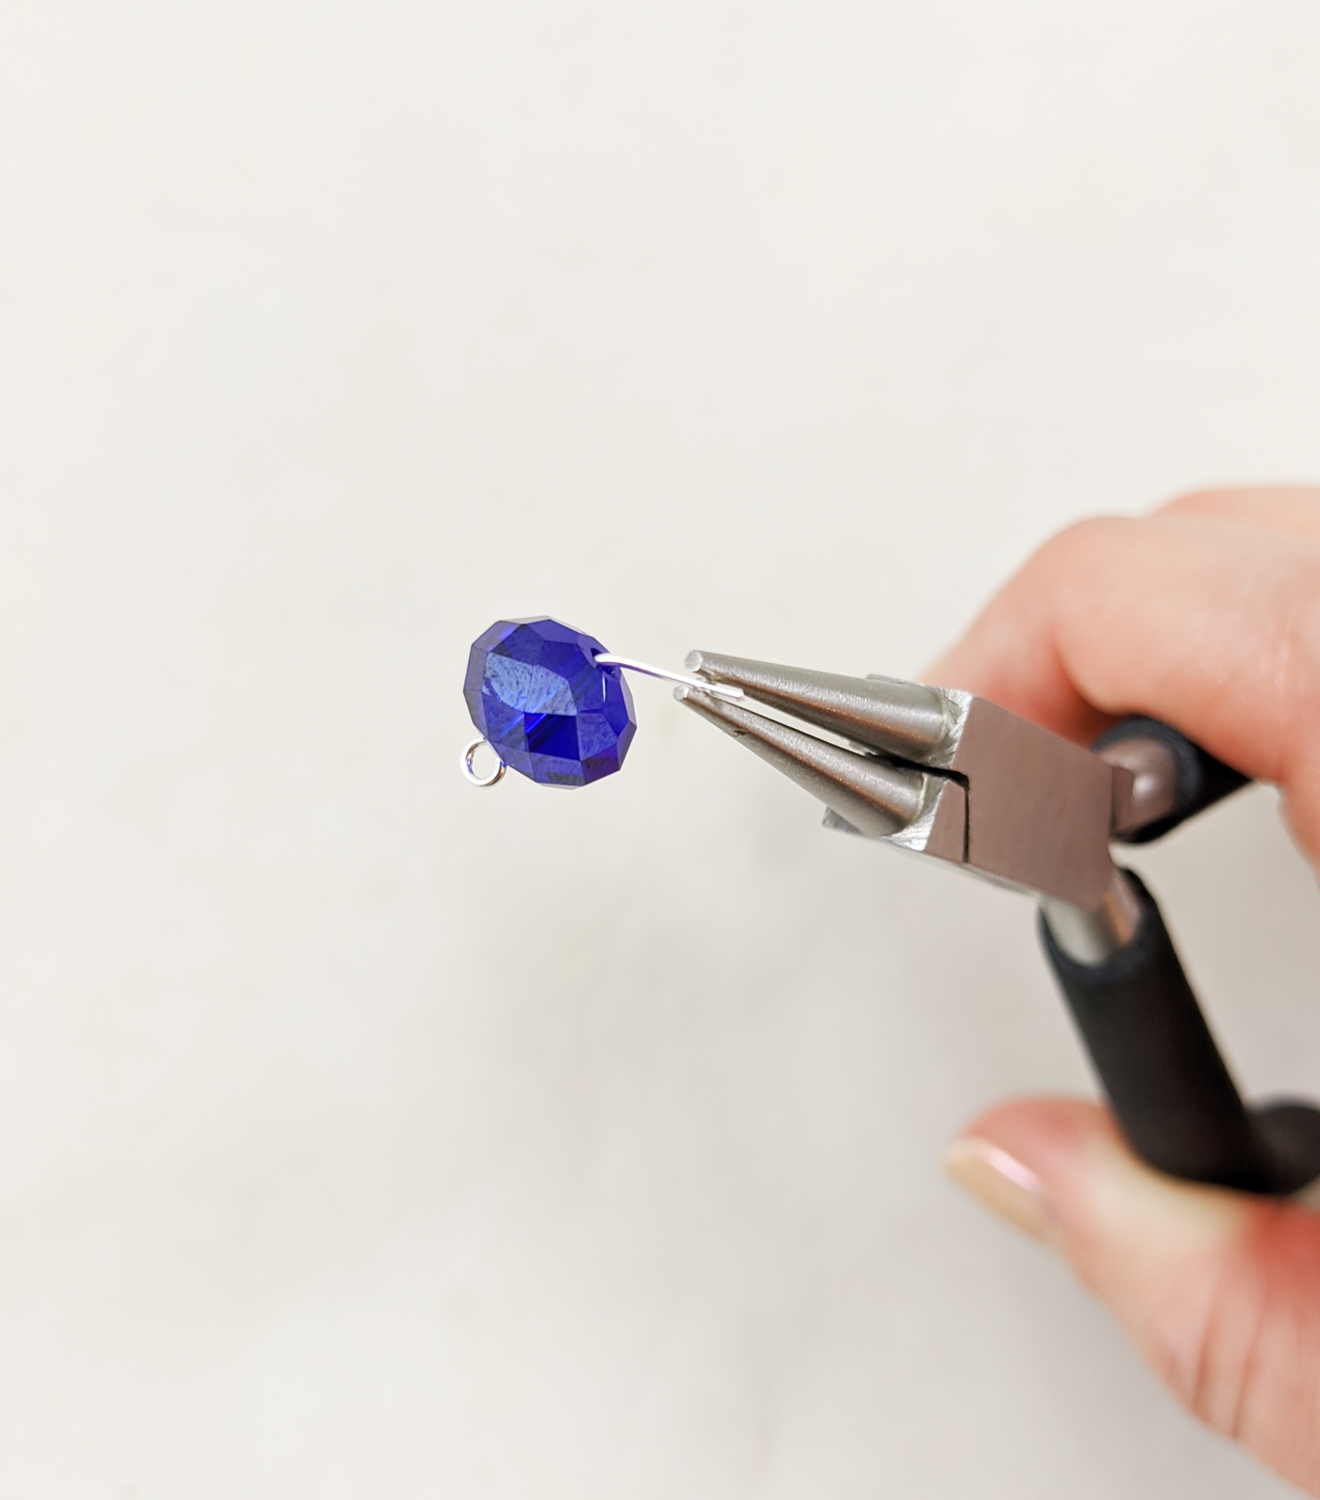
Using round-nose pliers carefully bend the head pin wire slightly towards you before starting the loop.
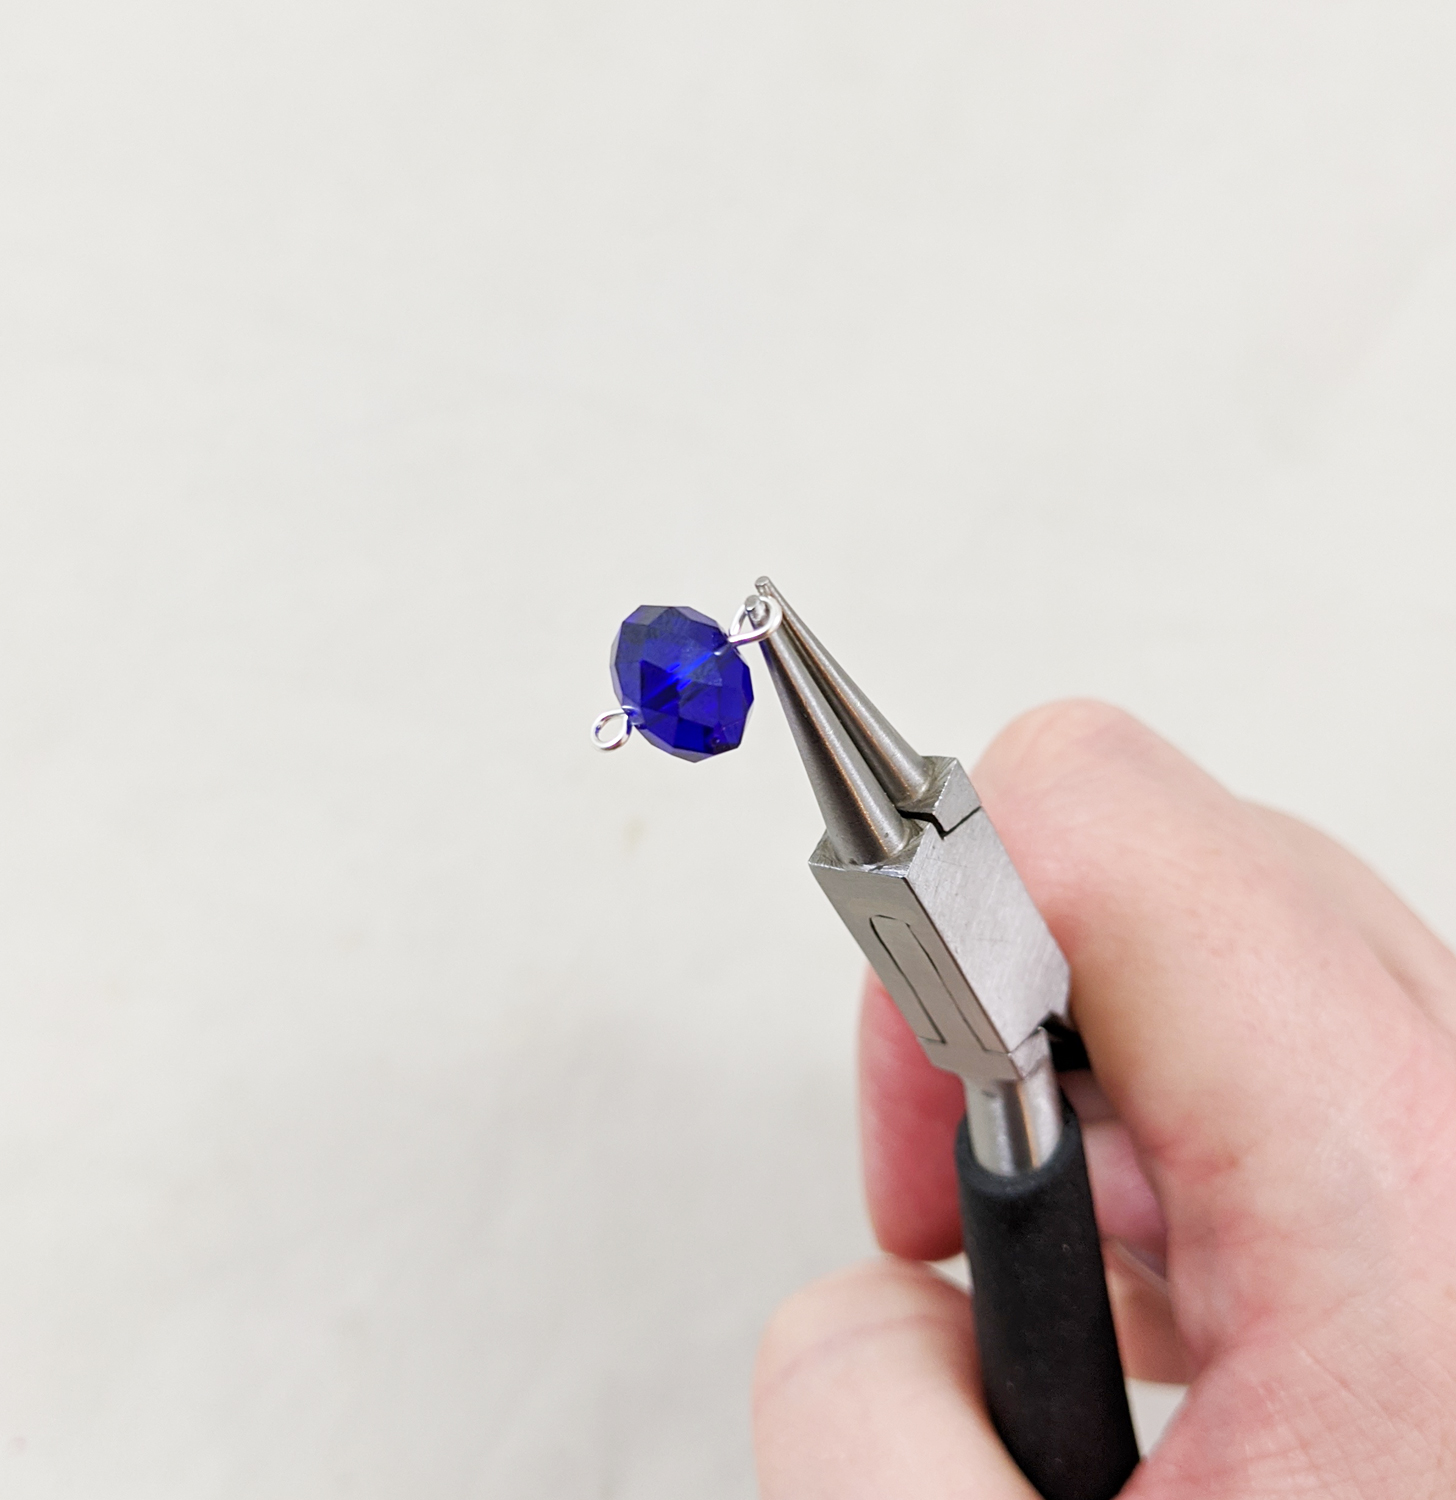
Curl over the wire into a complete loop with the round-nose pliers by rotating your wrist forward. Close the loop, snug to the bead. Repeat this process for the 9 other Deep Blue 8x6mm faceted crystal rondelles.
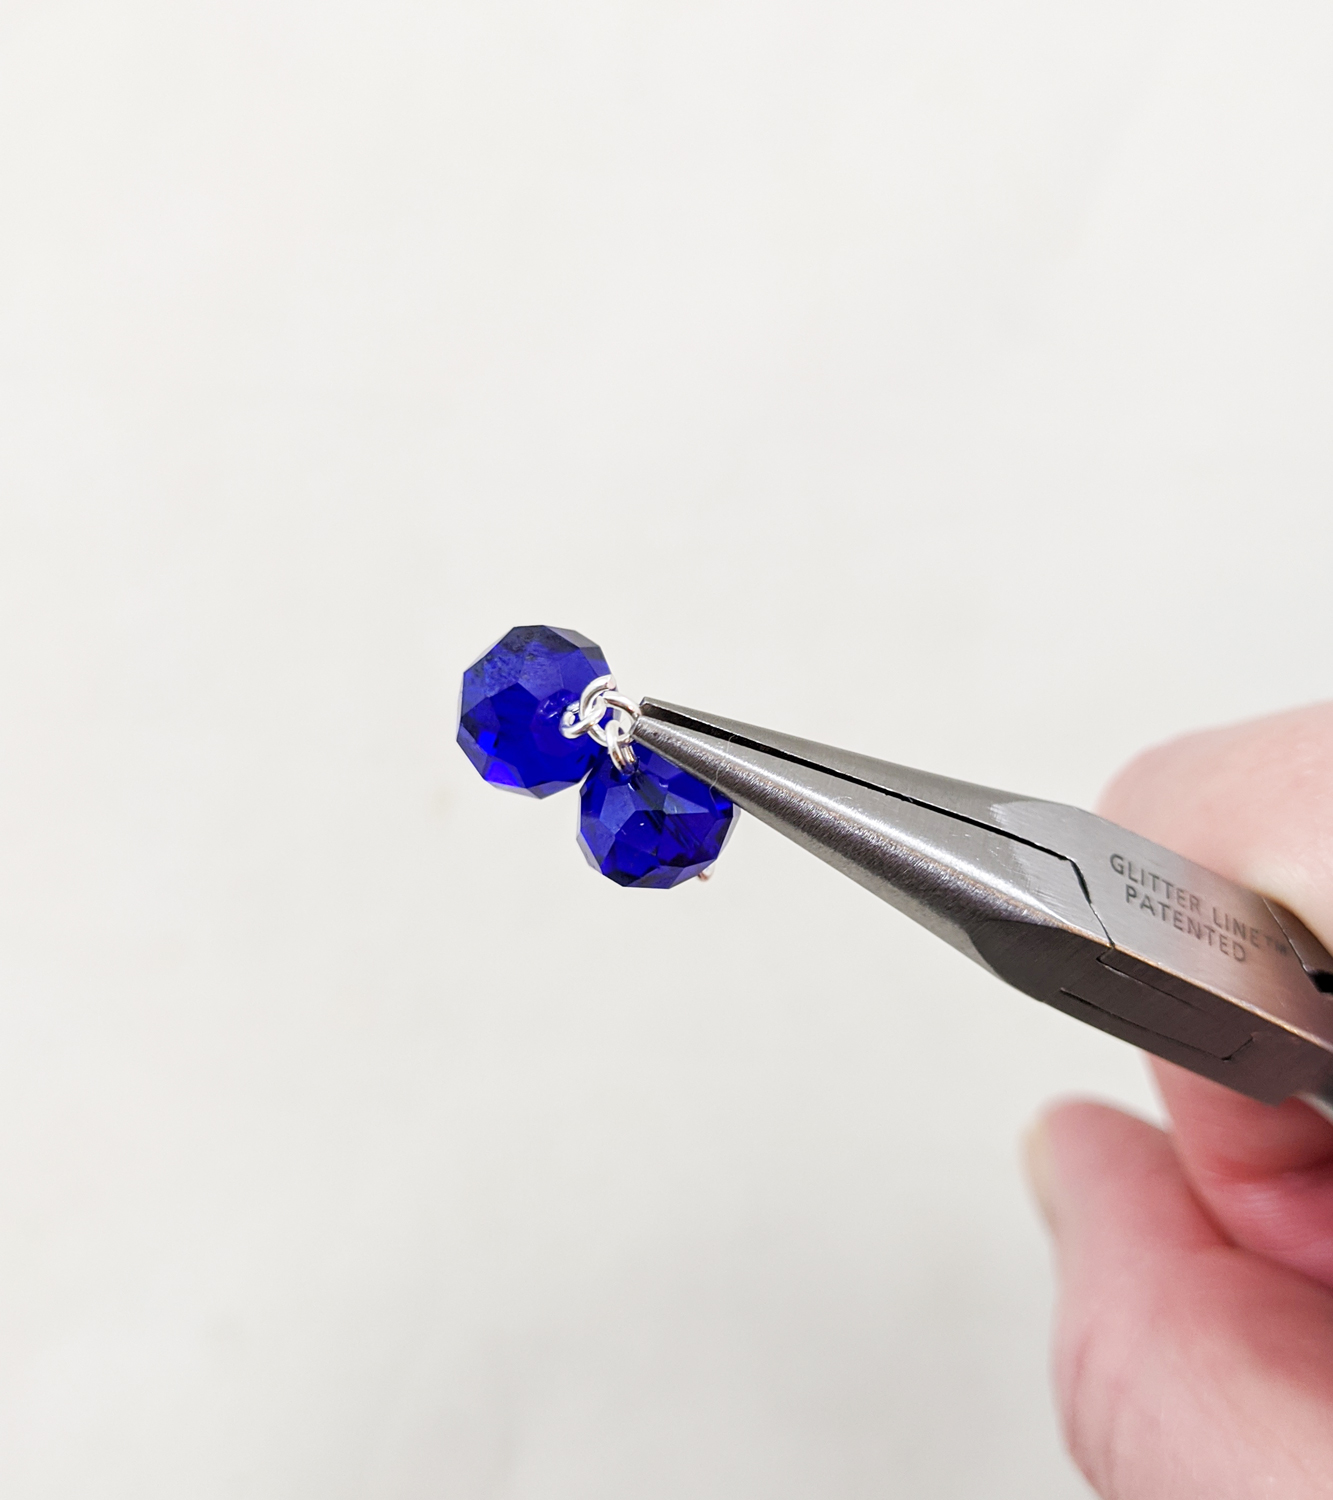
Using two pairs of chain nose pliers start twist the jump ring until the required opening is achieved. Thread both two crystal beads on finished eye pins on the open jump ring and close the jump ring with the two pairs of flat nose pliers by twisting the jump ring closed.
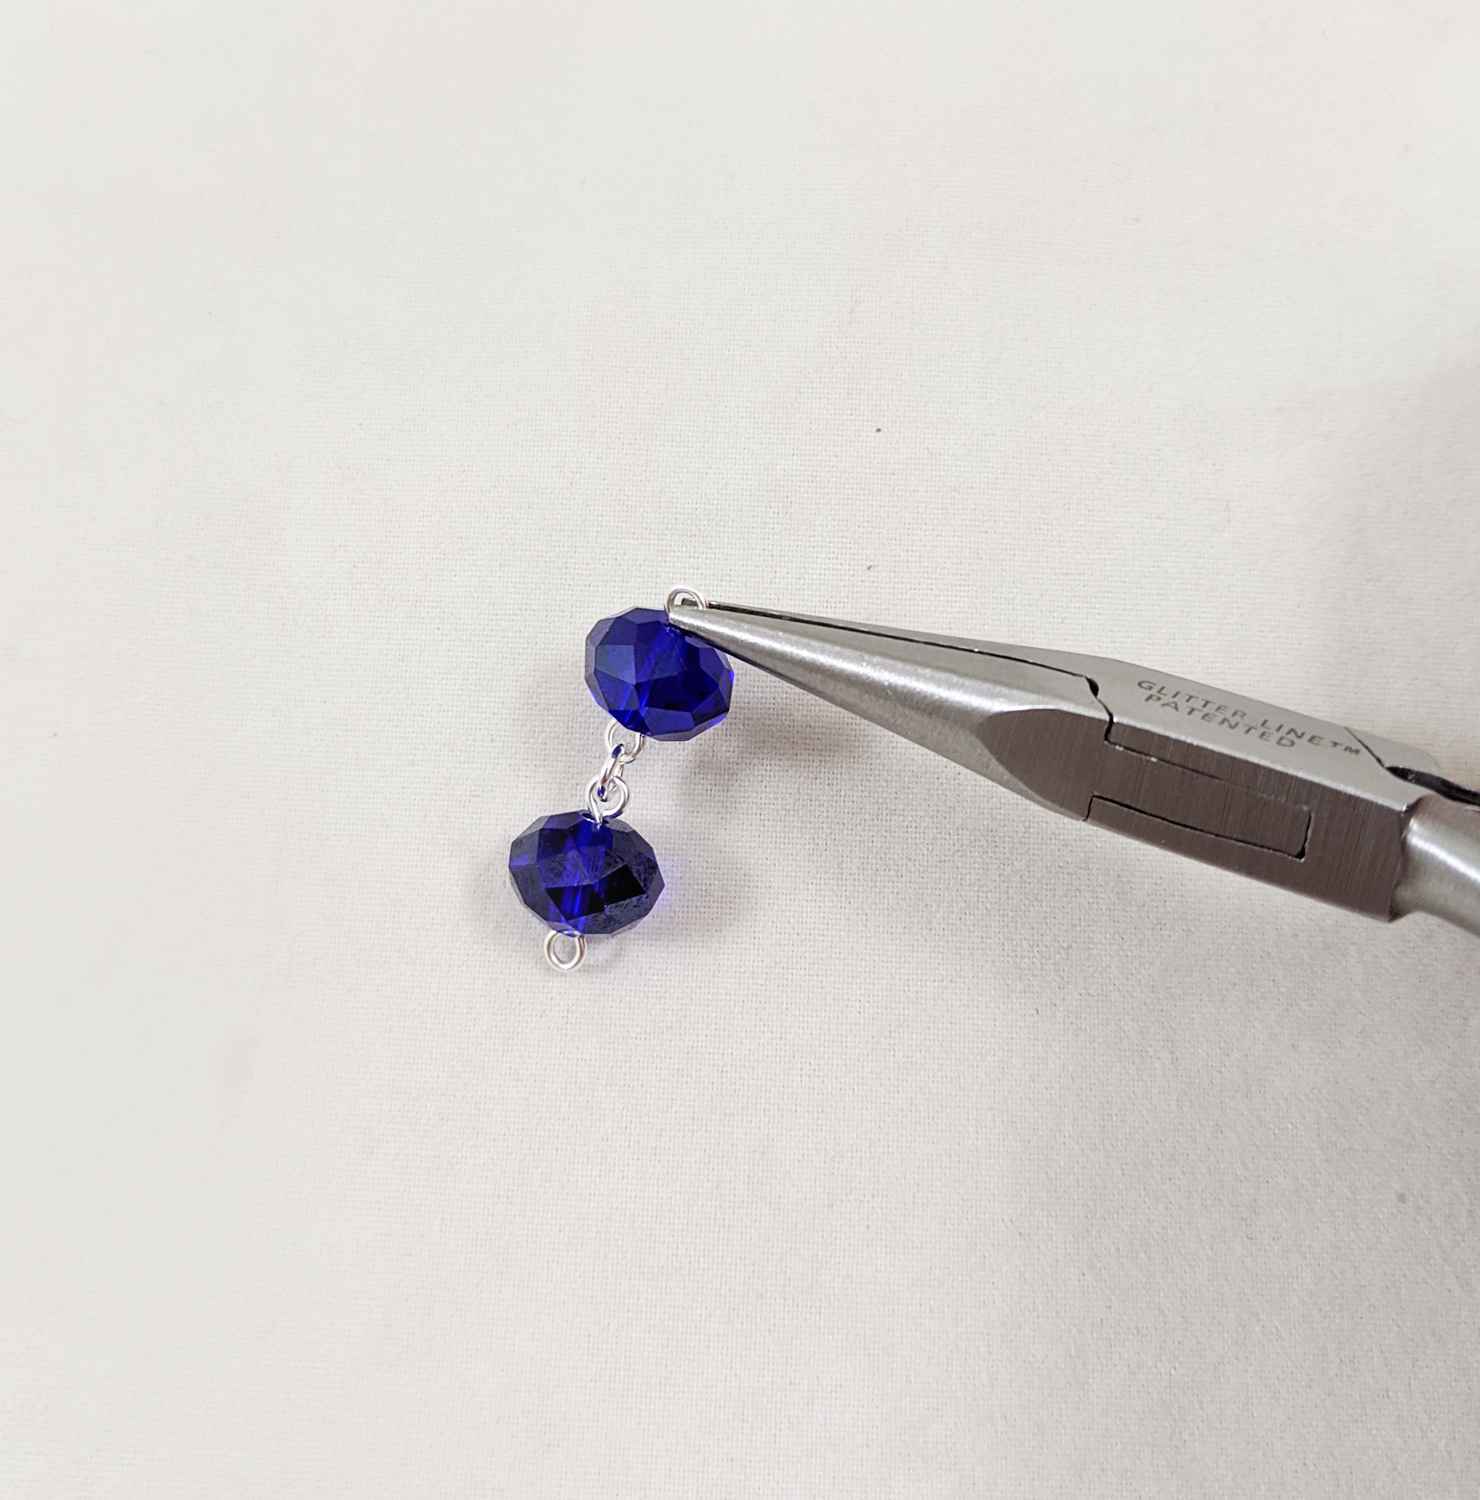
By attaching these two eye pins with beads together you have created your first two segments of your necklace.
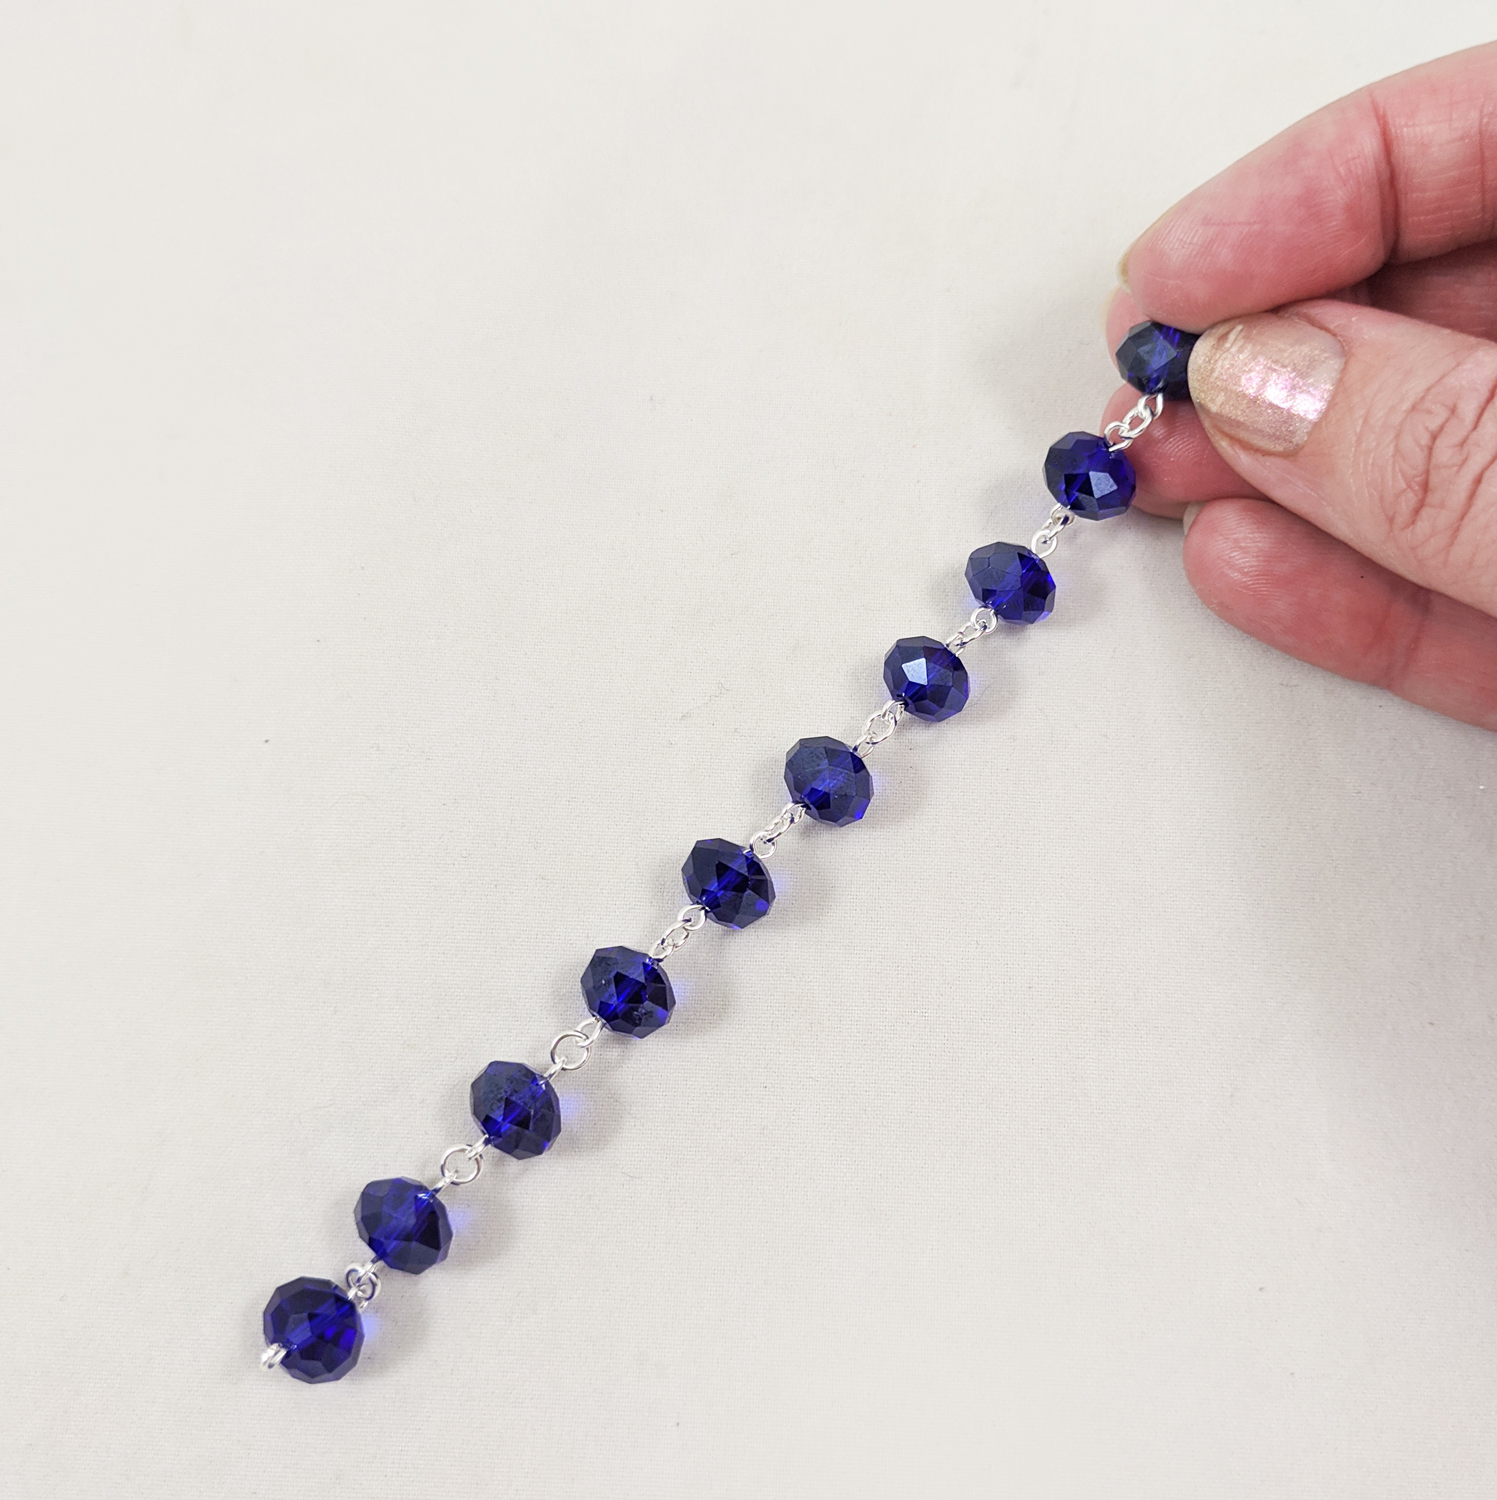
Repeat the process of connecting each crystal bead on a eye pin to the next until you have used all 10 beads to create a length of chain.
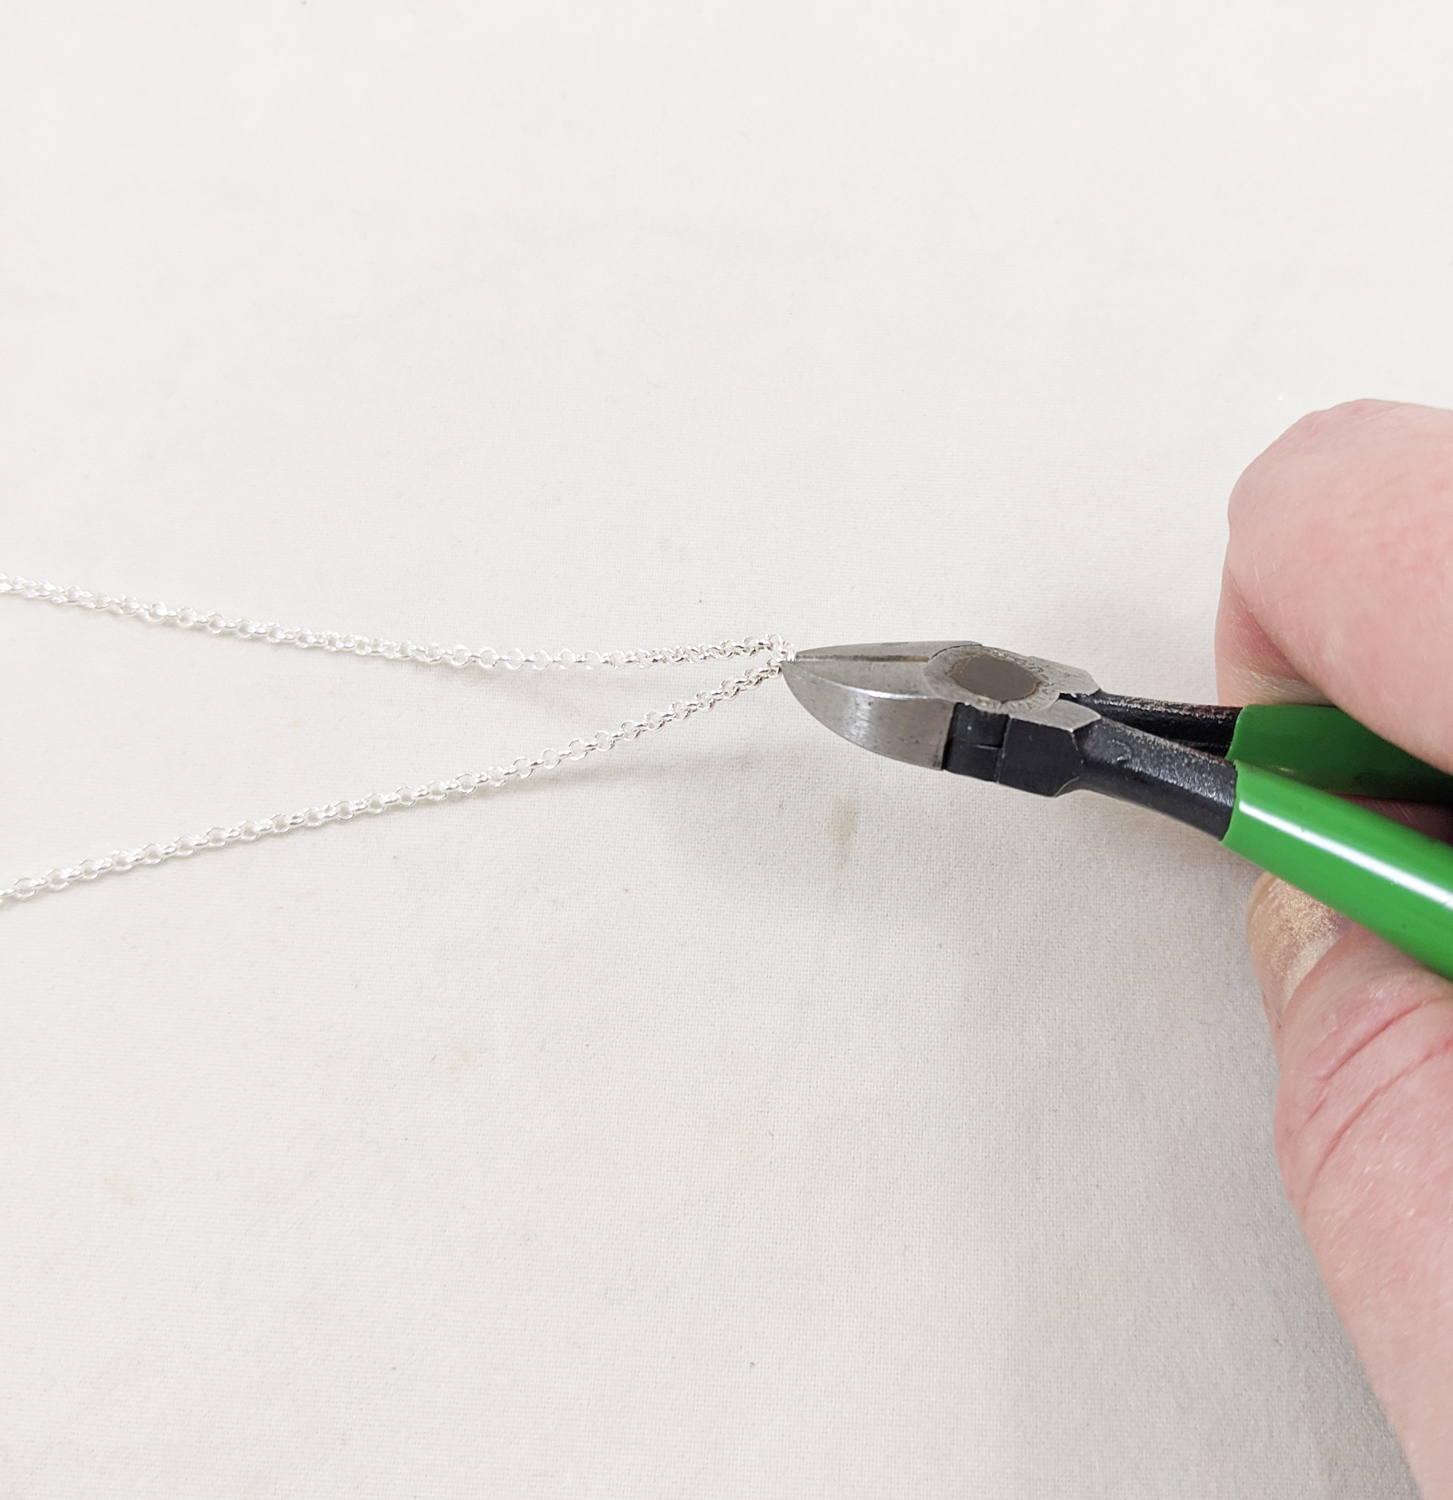
Lay the 16 inch Silver plated round cable chain necklace flat and carefully cut one segment, with wire cutters, to separate the necklace into two pieces.
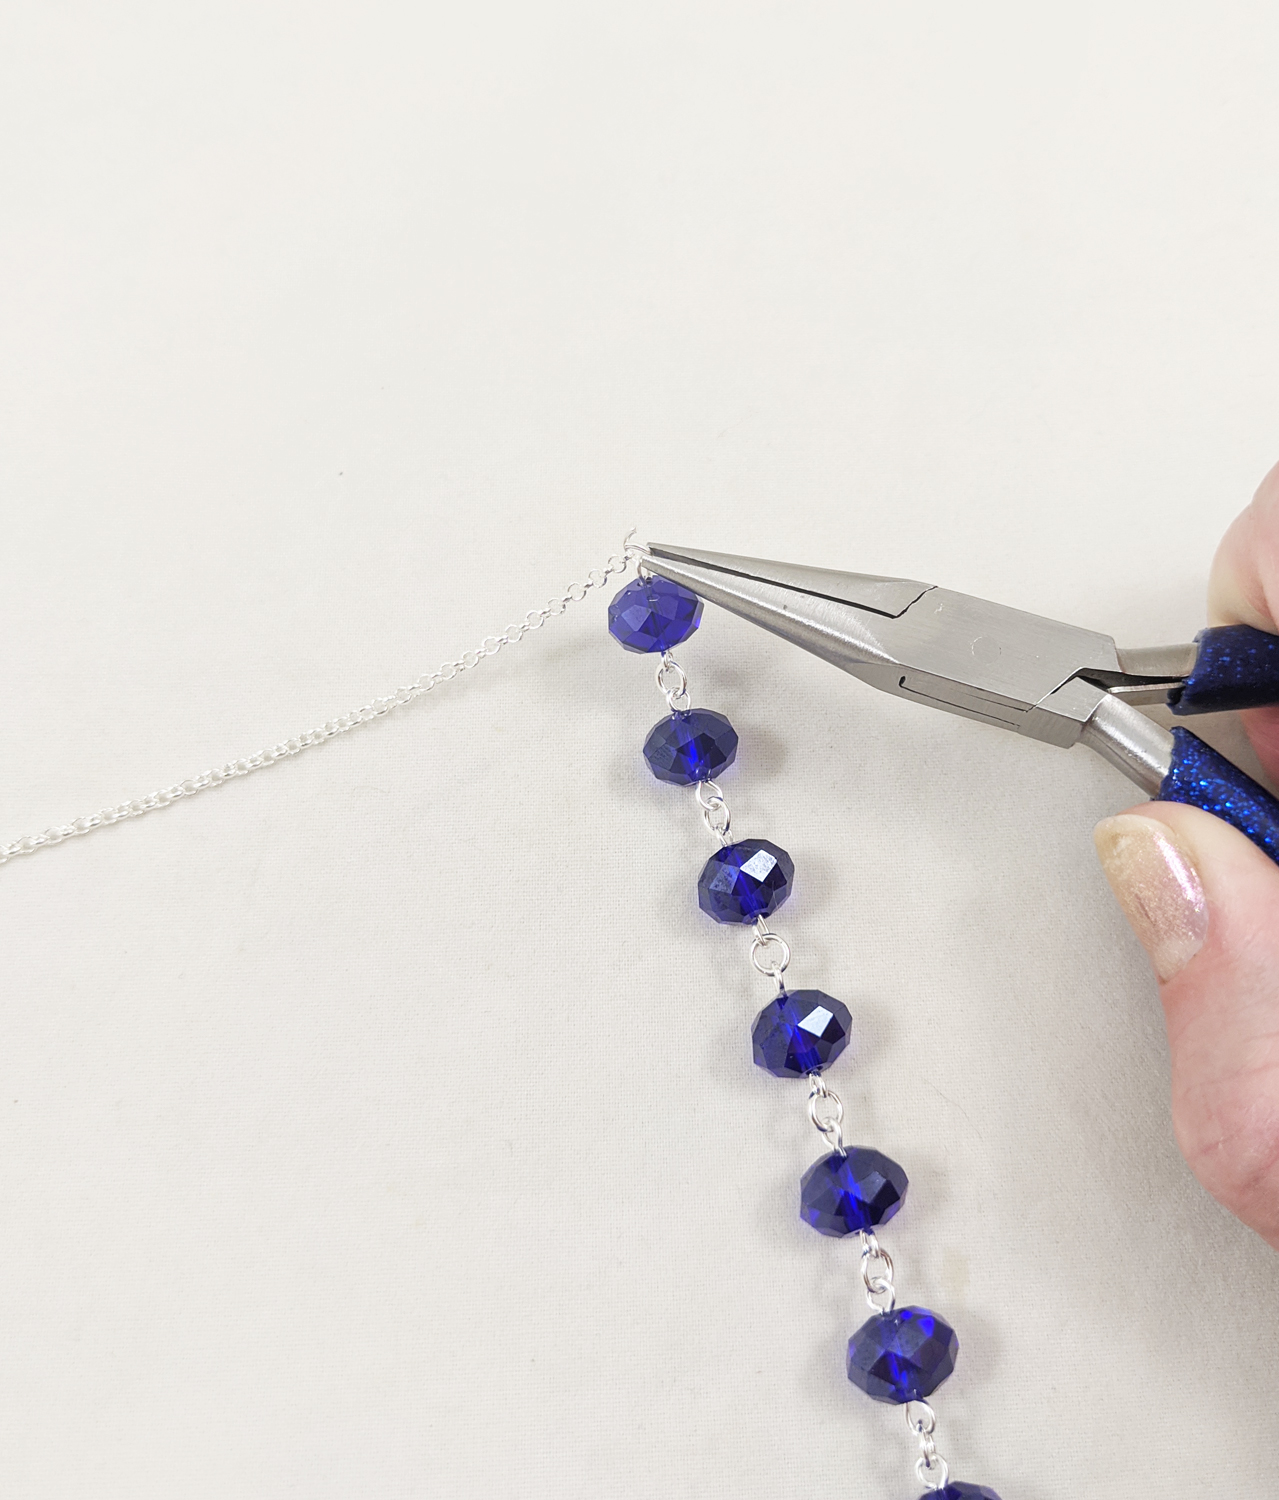
Using two pairs of chain nose pliers open one jump ring and thread both crystal bead chain to end of one of the chain pieces. Close the jump ring with the two pairs of flat nose pliers by twisting the jump ring closed.
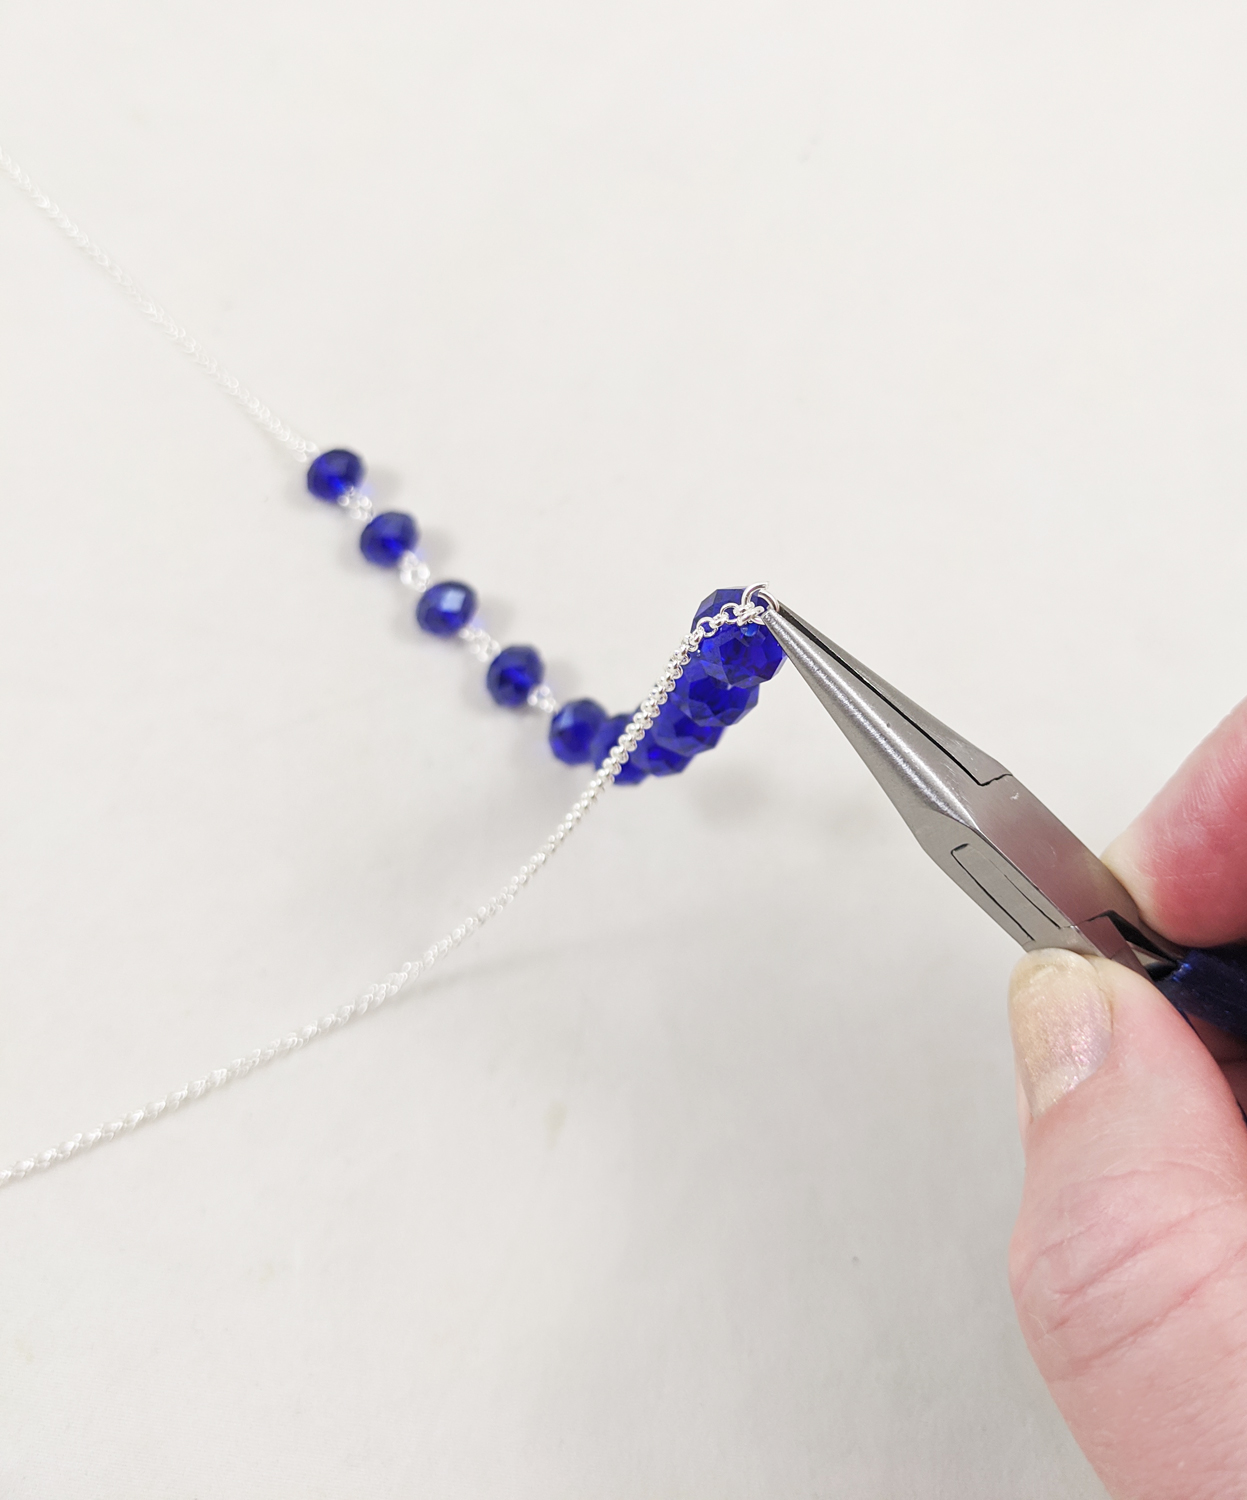
Repeat this process on the other side of the crystal chain.
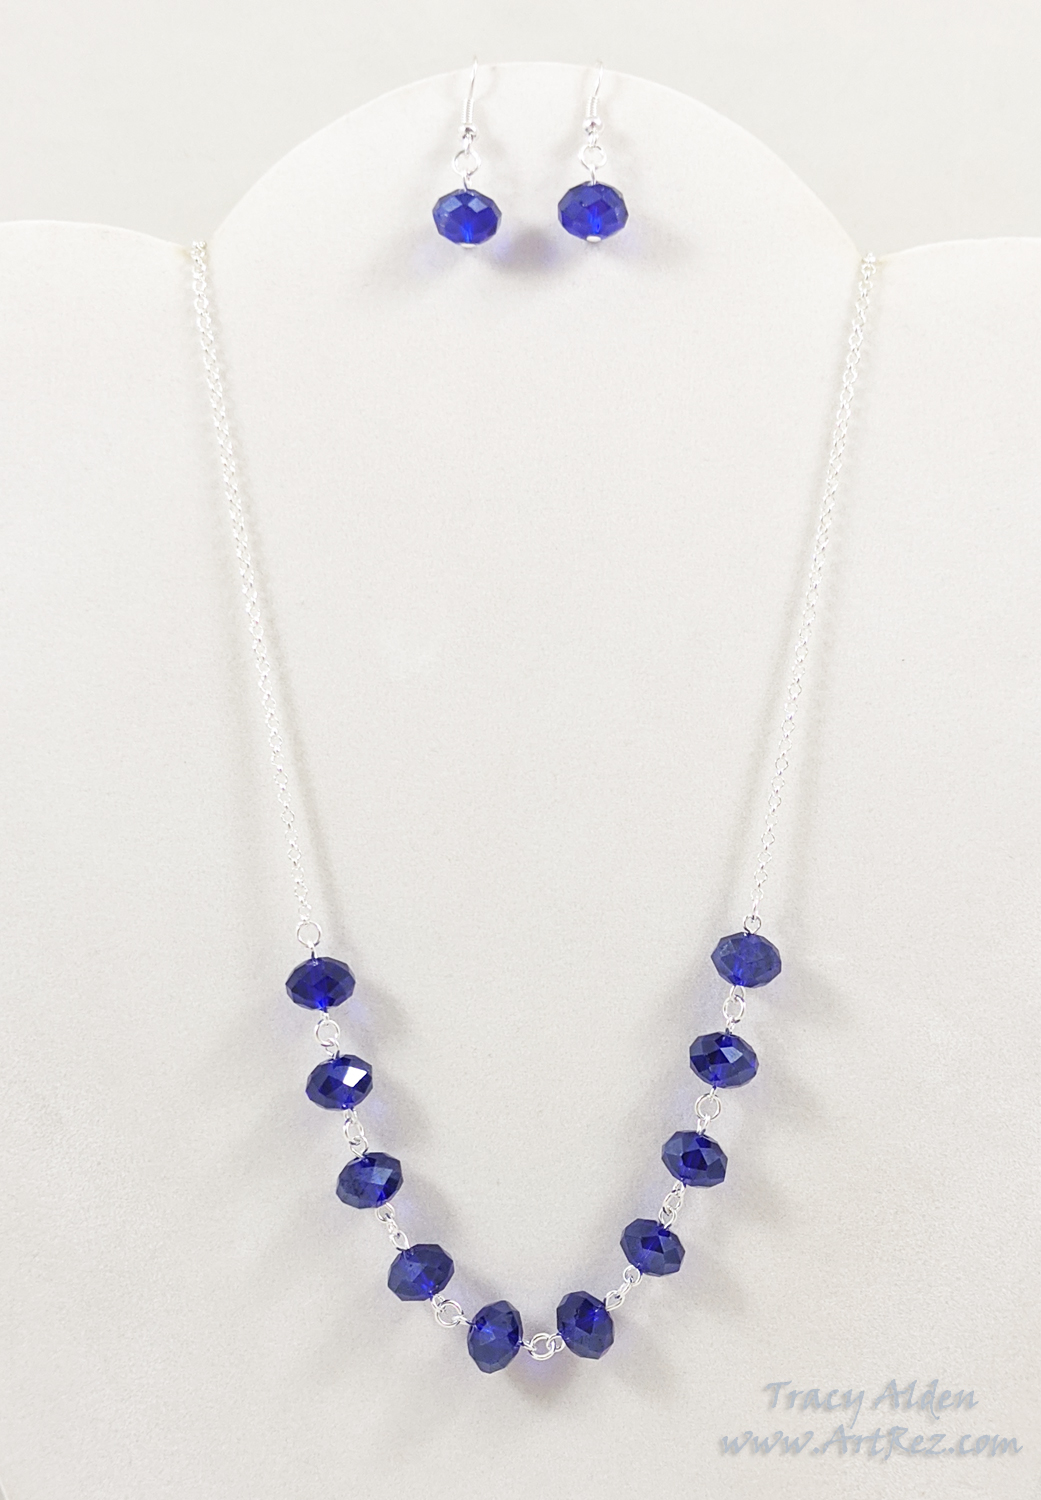
This quick and easy, yet in style and on trend jewelry makes a perfect addition to any wardrobe.
Until Next Time, Safe Travels!- Acrylic, Association For Creative Industries, Chalk Paint, Contests, Convention, Diamond Art, FaveCrafts, History Inspired, Home Decor, Mixed Media, Mod Podge, Throwback Thursday
#TBT Traveling a Forgotten Path, with Diamond Art
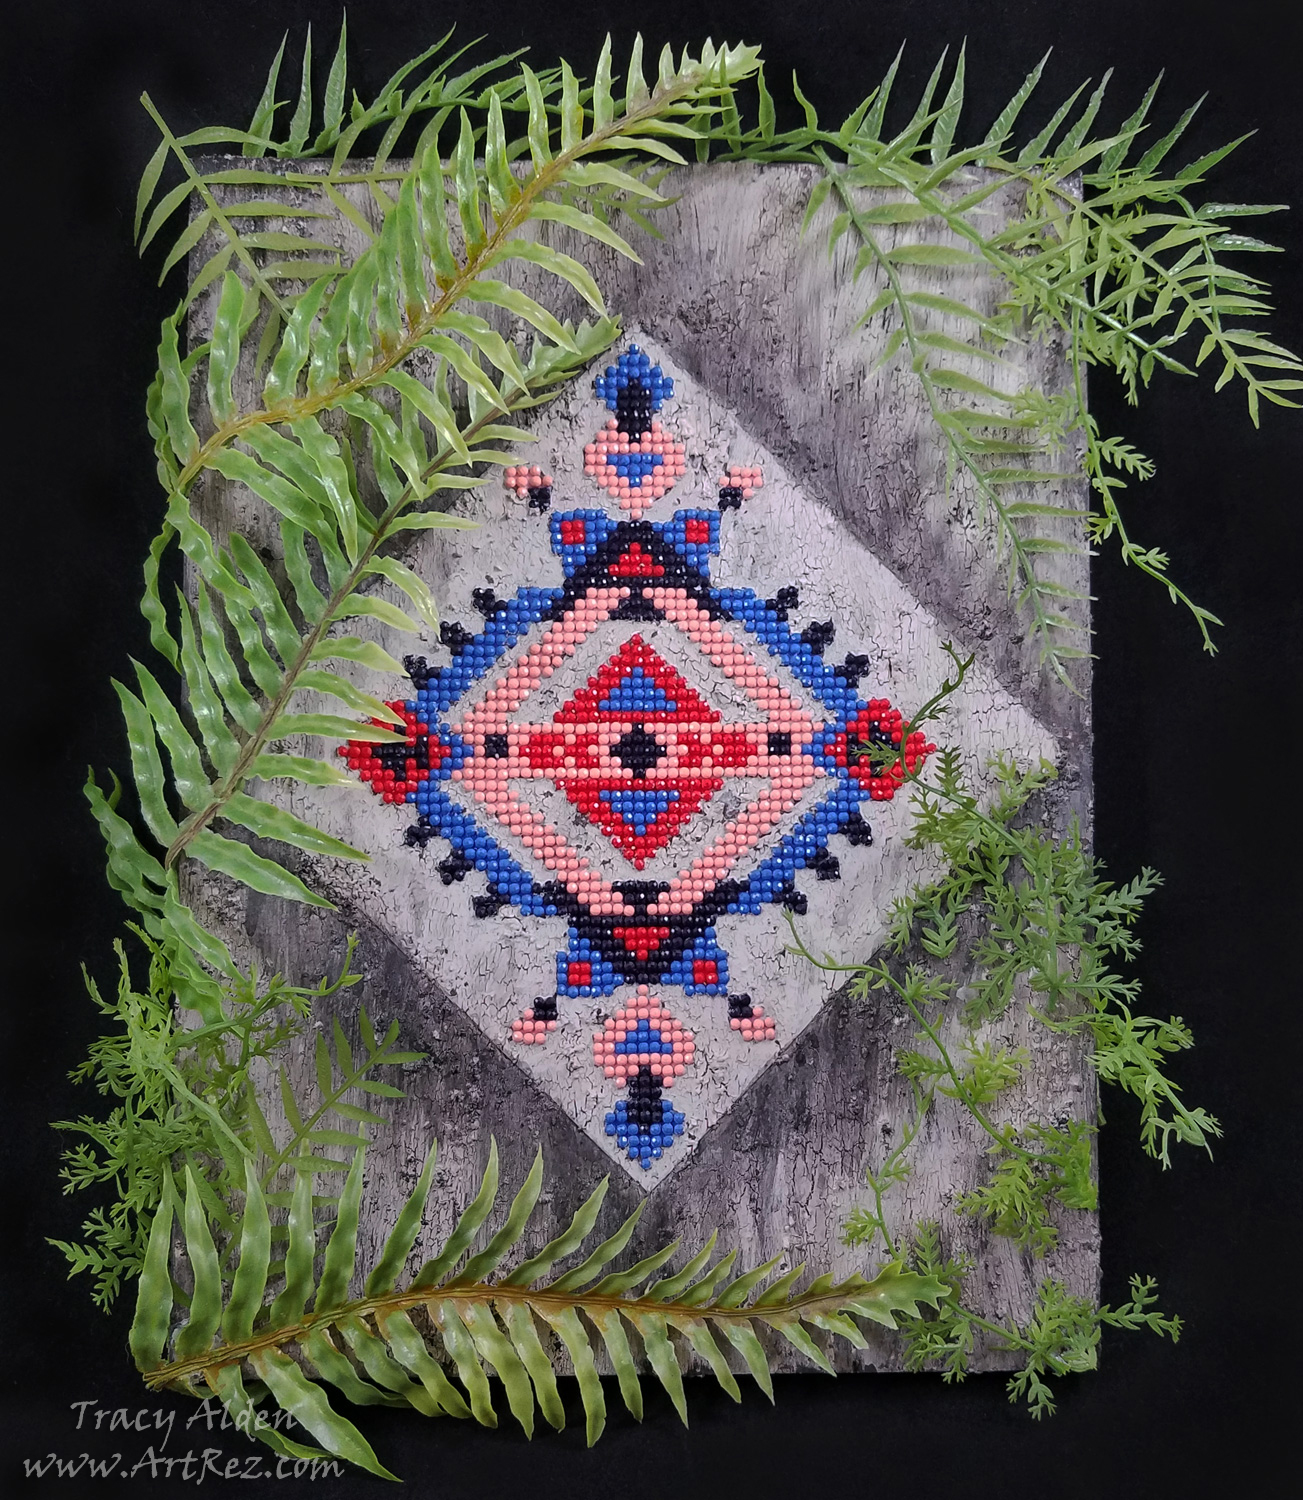
Hello! Continuing my Throwback Thursday posts, this time only going back to January, when I once again traveled to the Creativation Trade show, in Phoenix, Arizona. Held by Association For Creative Industries or AFCI, during the show I was honored to once again be invited to the 7th annual Prime Networking Event. This event gives bloggers, designers, authors and brands in the craft industry a chance to come together to network, make new partnerships, and learn about new product information. The event was fun, informative, and free product samples were provided by this year’s sponsors. After the event attendees were encouraged to try out and create art for the Favecrafts Best Blogger Craft Event. This year I won runner up in the Best Blogger Contest 2019 for my project!
For my entry I decided to use products from these sponsors: Diamond Art by Leisure Arts, Tribe Design, Mod Podge Ultra Matte Spray, FolkArt Crackle Medium and Home Decor™ Chalk Paint along with supplies from my personal collection of art supplies.
Supplies:
Diamond Art by Leisure Arts Diamond Painting Kit – Tribe Design
Mod Podge ® Ultra Matte Spray
FolkArt ® Mediums – Crackle Medium
FolkArt ® Home Decor™ Chalk Paint in Java, Parisian Grey, White Adirondack and Black
Liquid Fusion ® Clear Urethane Glue
9 inch x 12 inch Cradled Wood Board
Assortment of artificial tropical plants
1 Flat Paint Brush
1 Round Paint Brush
Scissors
Ruler
Pencil
Cotton swabs
Isopropyl alcohol
Used and dried coffee groundsSince it took a few hours to finish the Diamond Art kit by Leisure Arts, I had time to consider the pattern. In my mind it needed something more than to just be framed. It reminded me of patterns of old, and FolkArt Chalk Paint would help me with that. To have it look like a wall fragment I would need it to be on a board, Mod Podge Spray would help apply the canvas. For water damaged cracks, I would need a Crackle Medium.
Maybe it could be a forgotten image, now found once again? Slowly a story formed in my mind…..
After traveling many miles, you start seeing the remnants of a once mighty city, now taken over by nature. Slowly walking through the dense forest a fragment of a patterned wall slowly appears. What ancient artist created this image and who was it intended for?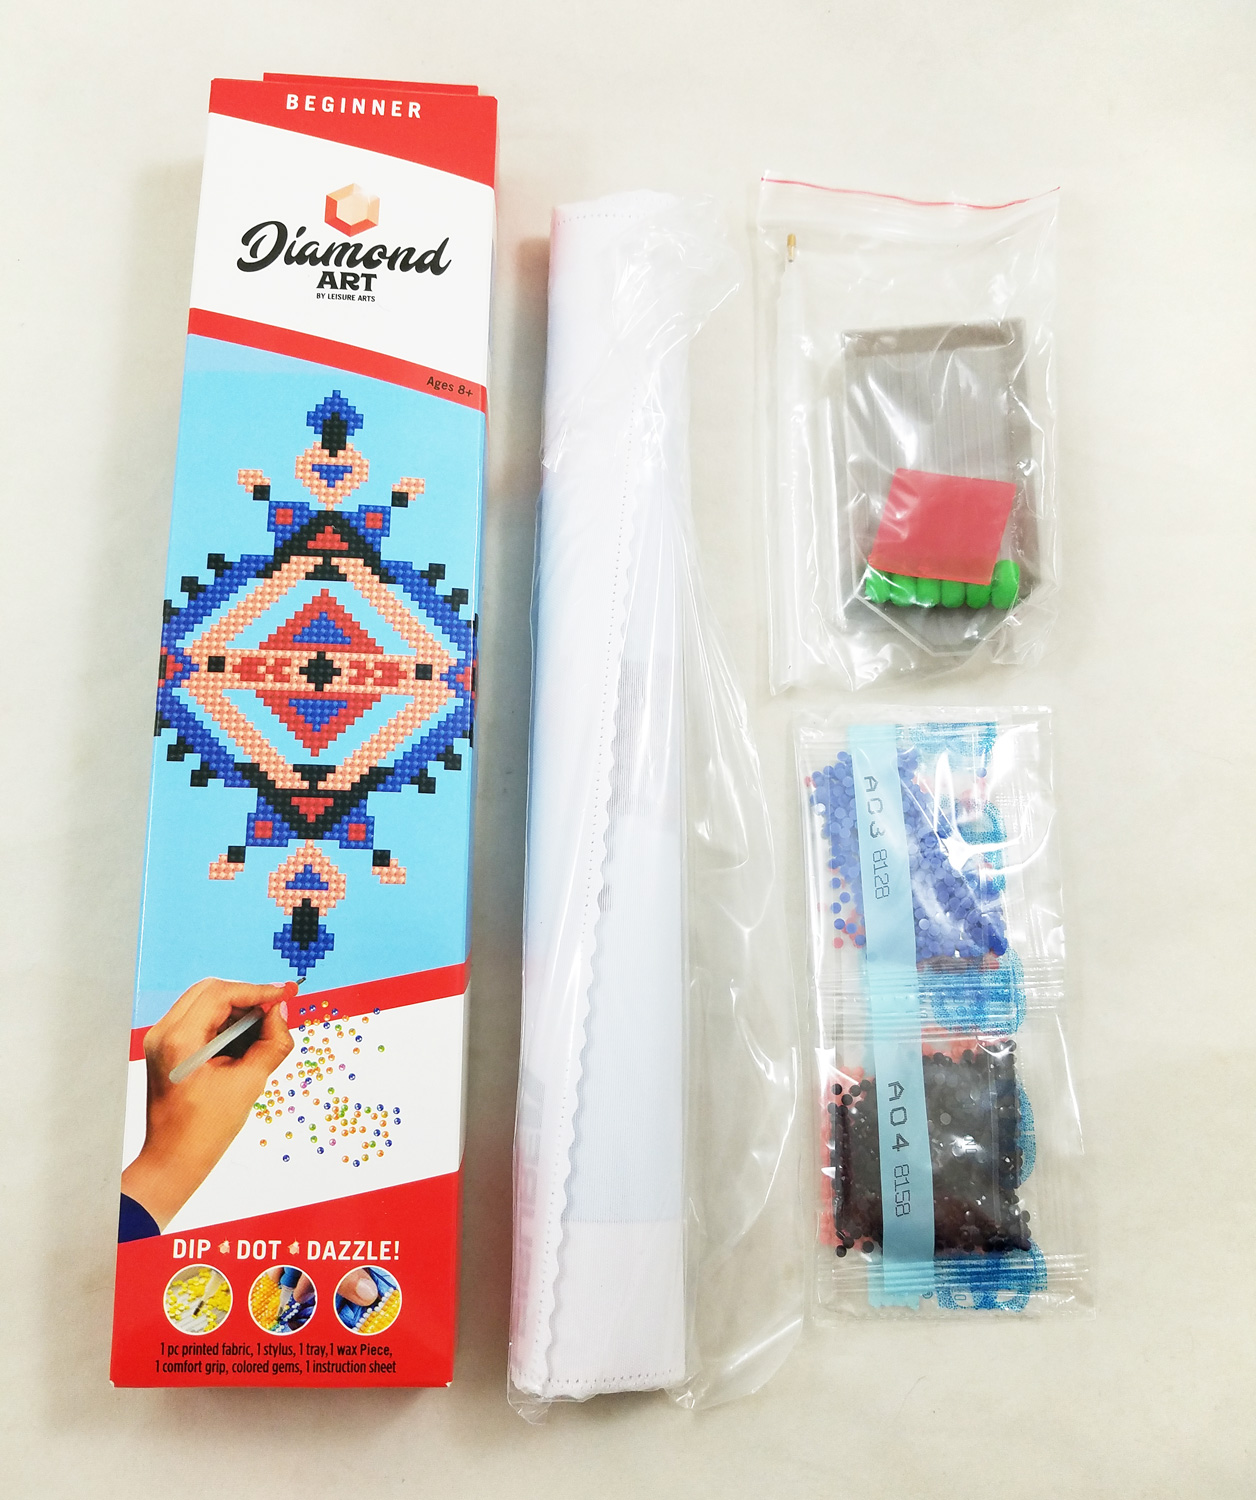
I opened up my Leisure Arts Diamond Painting Kit and made sure I had all of the required parts. The printed canvas needed to be flattened a bit before I started so making sure to leave the sticky film cover on the canvas, I placed a book on top of my canvas for a few hours before starting.
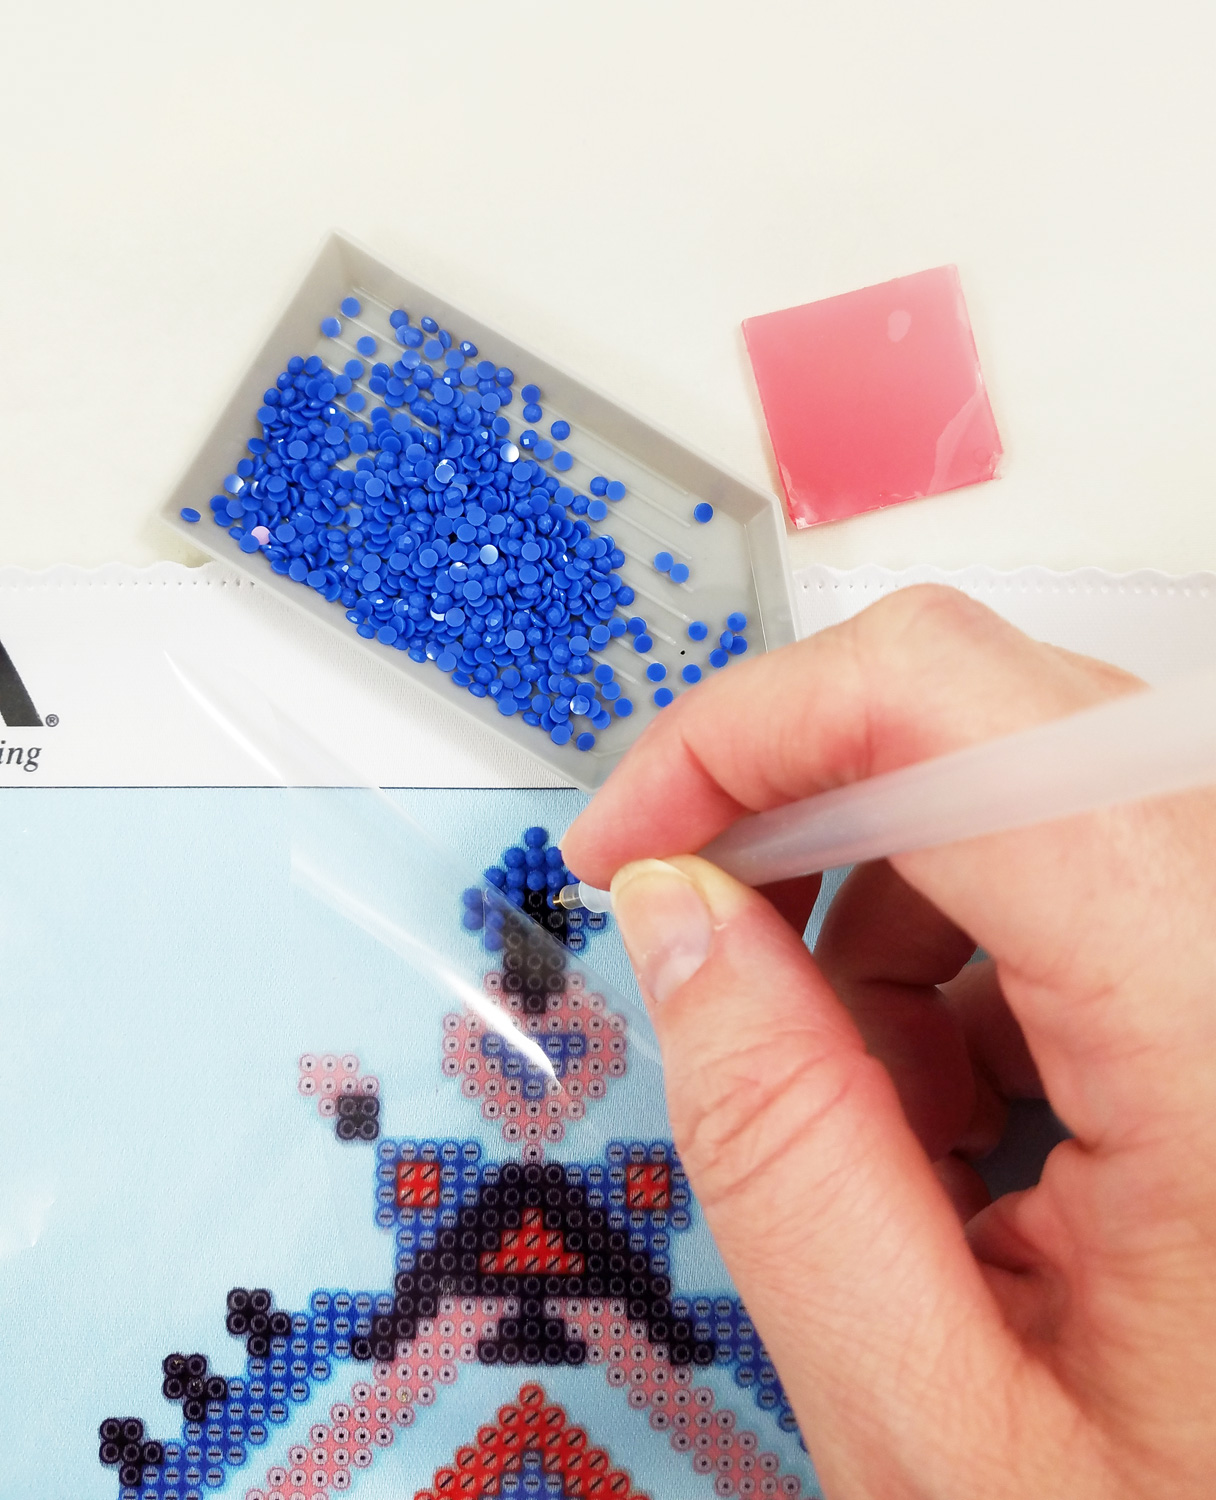
Following the instructions included with the Diamond Art I applied all of the flat backed diamonds to the canvas. It took me only a few hours to complete.
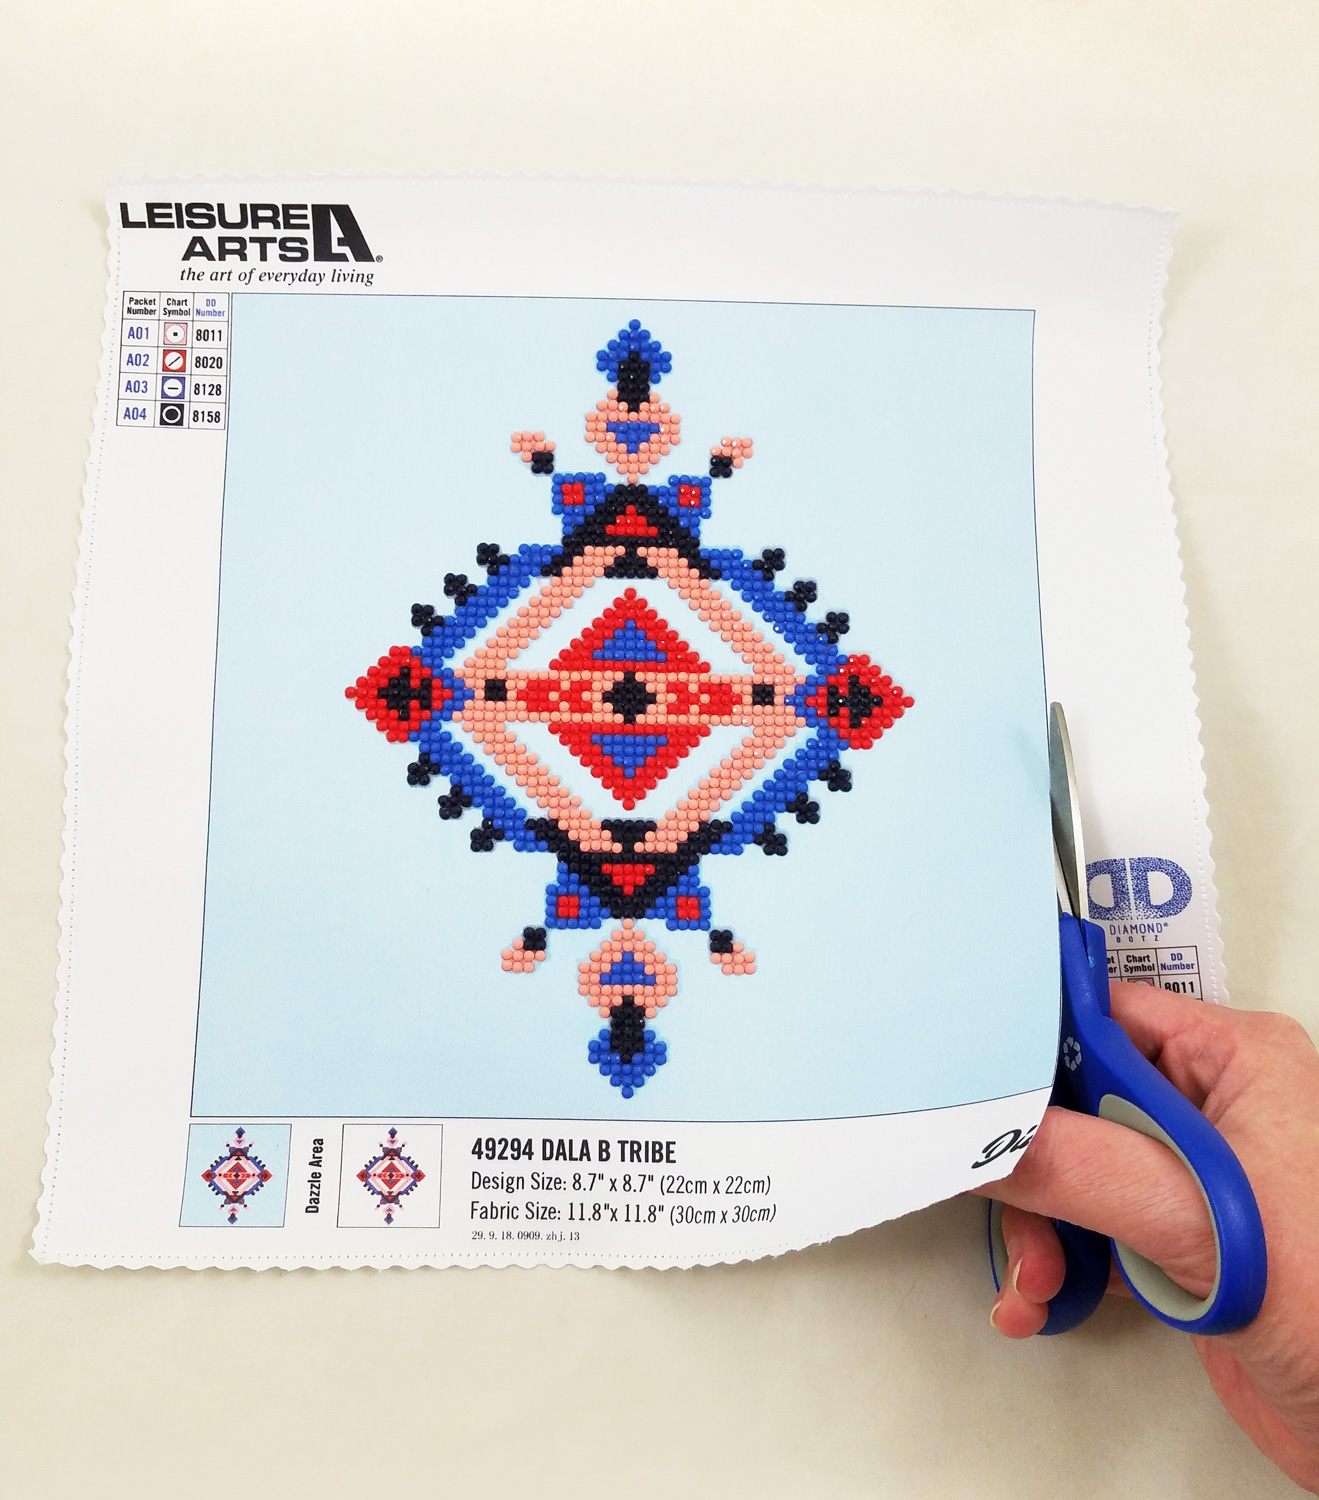
Next I trimmed the Diamond Art canvas to the very edge of the blue background with a pair of sharp scissors.
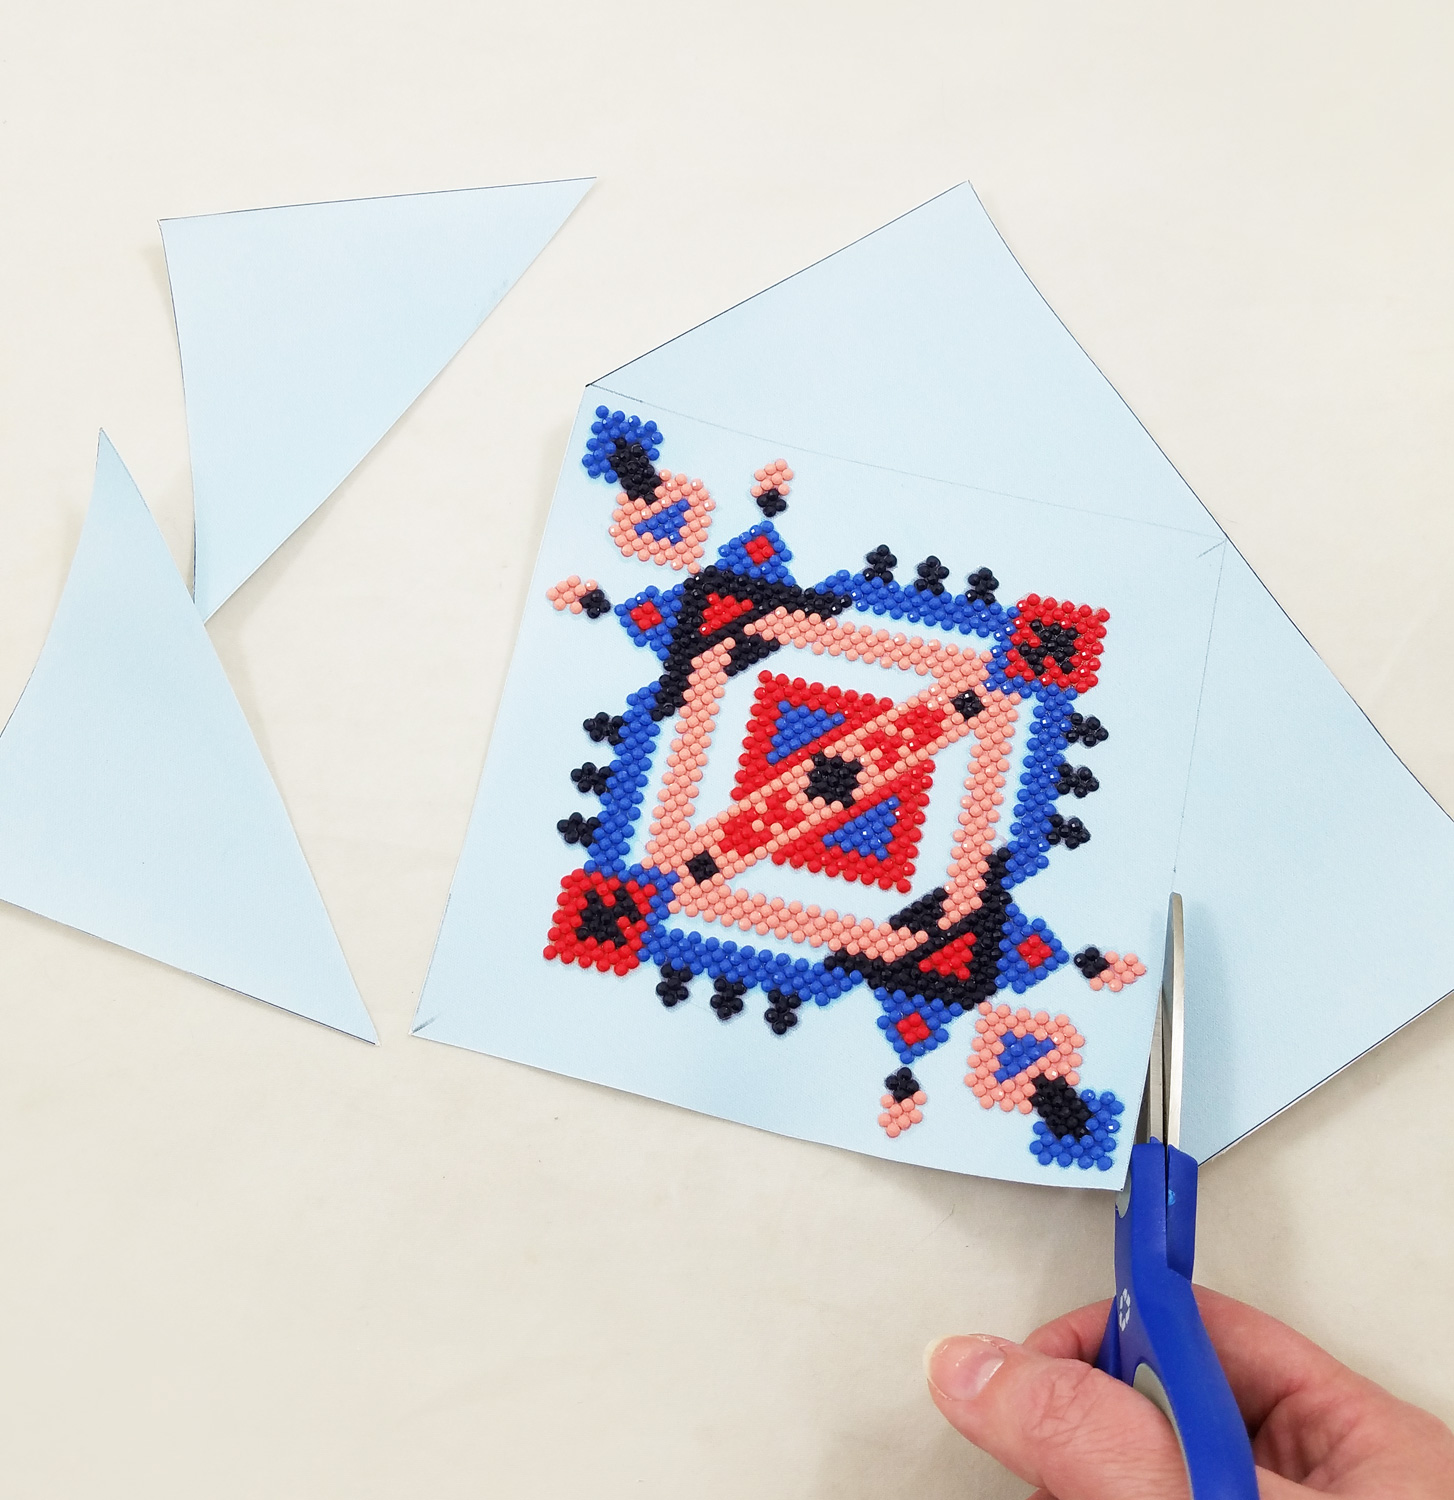
I carefully used a pencil and ruler to mark as close as possible to the Tribe Design pattern, creating a slightly elongated diamond outline. I then trimmed the canvas further with the scissors, using my pencil lines as my guide.
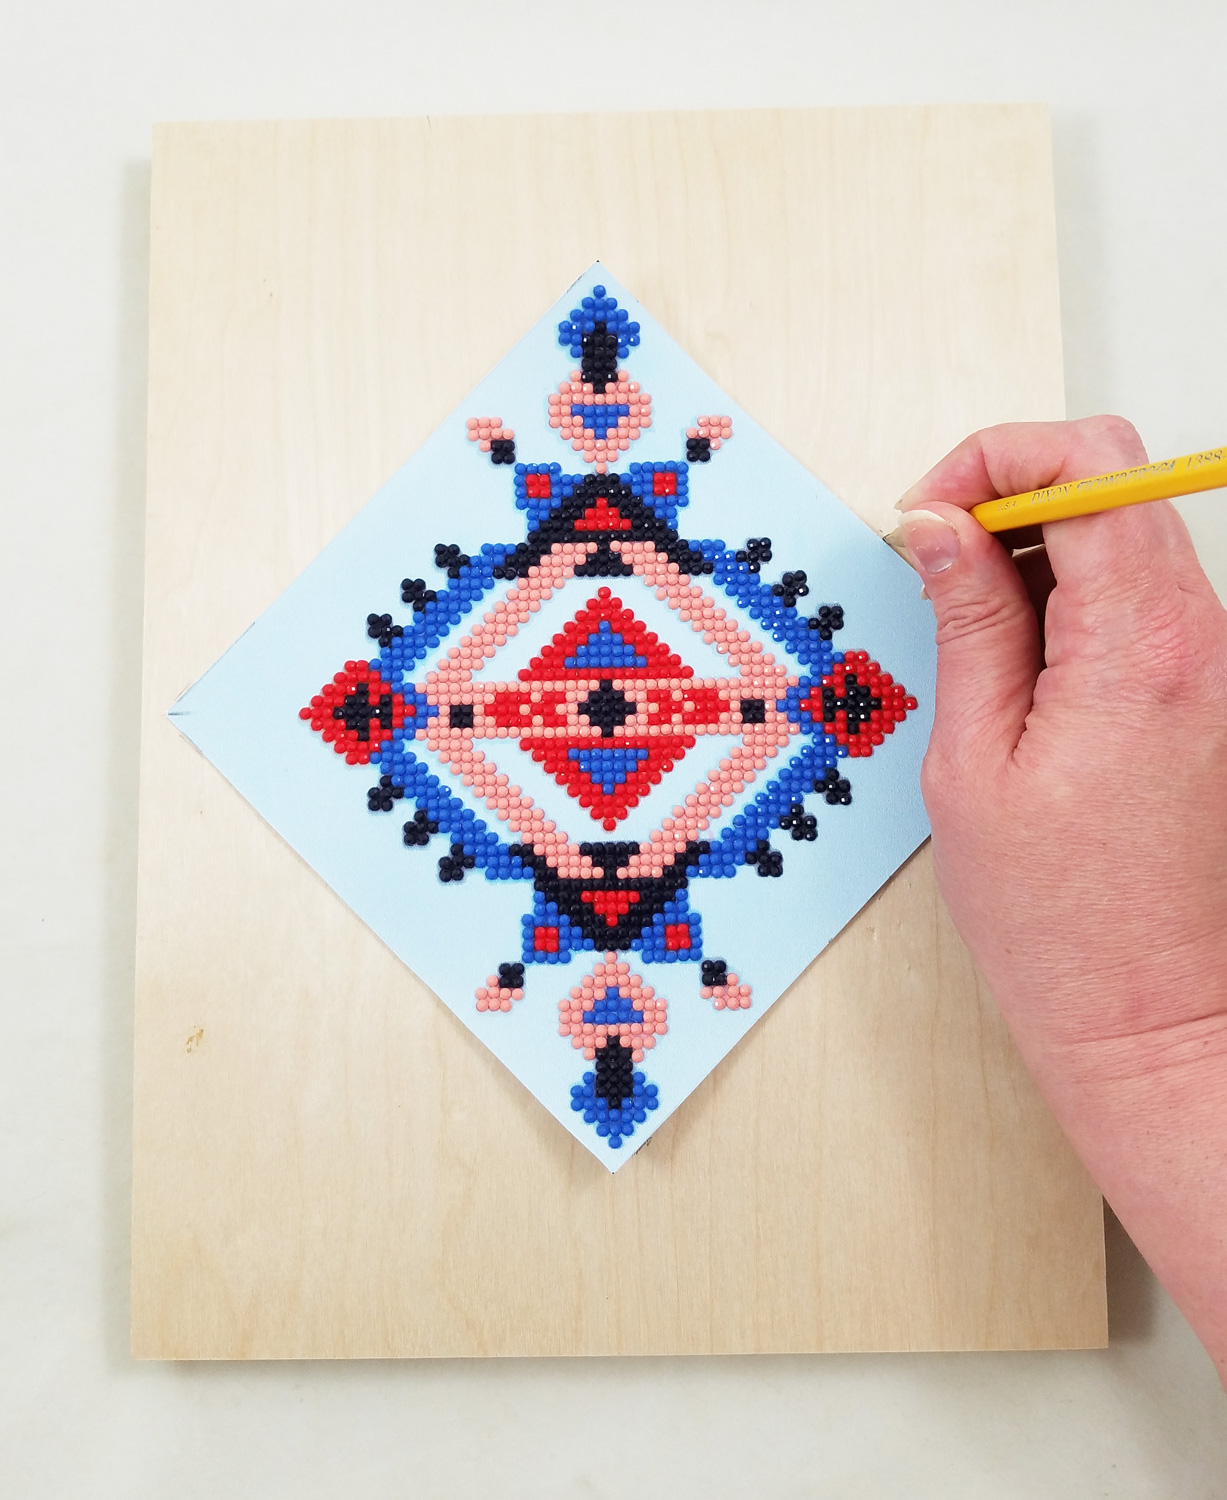
Now that the Diamond Art canvas was cut to size, it fit neatly on the wood board I wanted to attach it to. Once again, I used my pencil to mark out the exact placement of my canvas on the wood board.
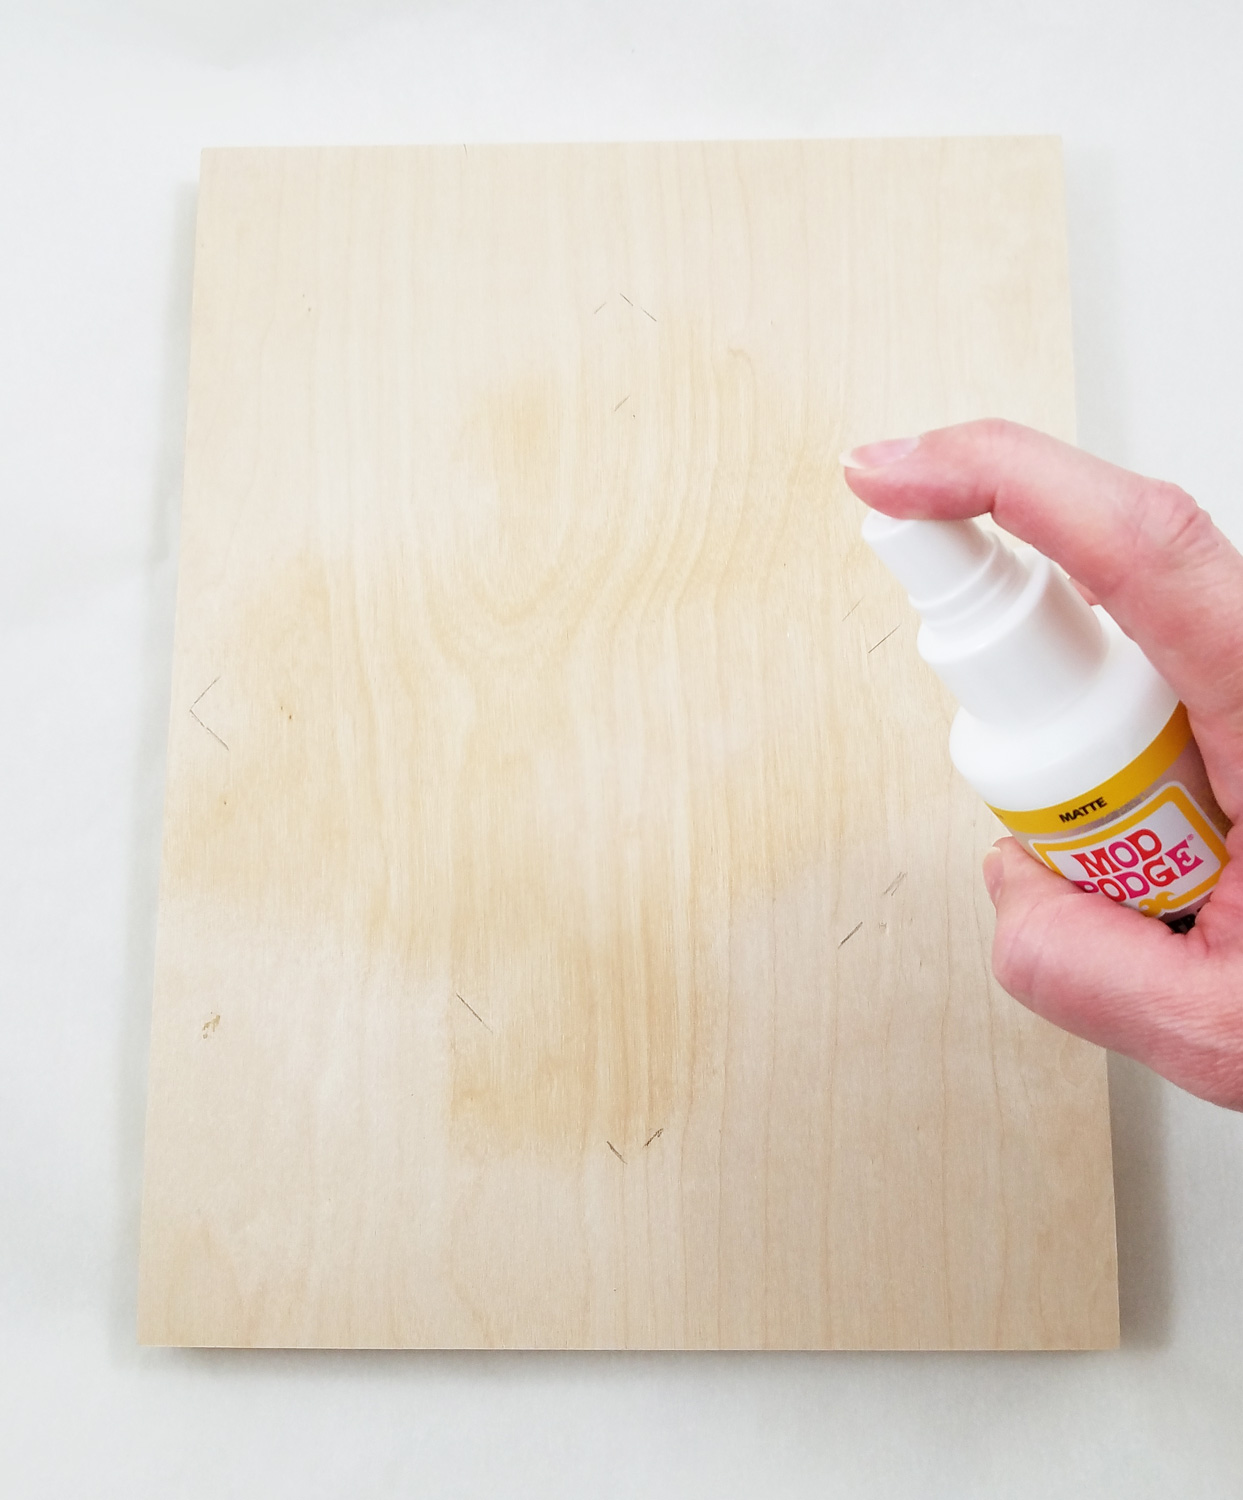
Making sure my wood board was clean of dust or particles I sprayed it with Mod Podge Ultra Matte in the pencil outline of the diamond.
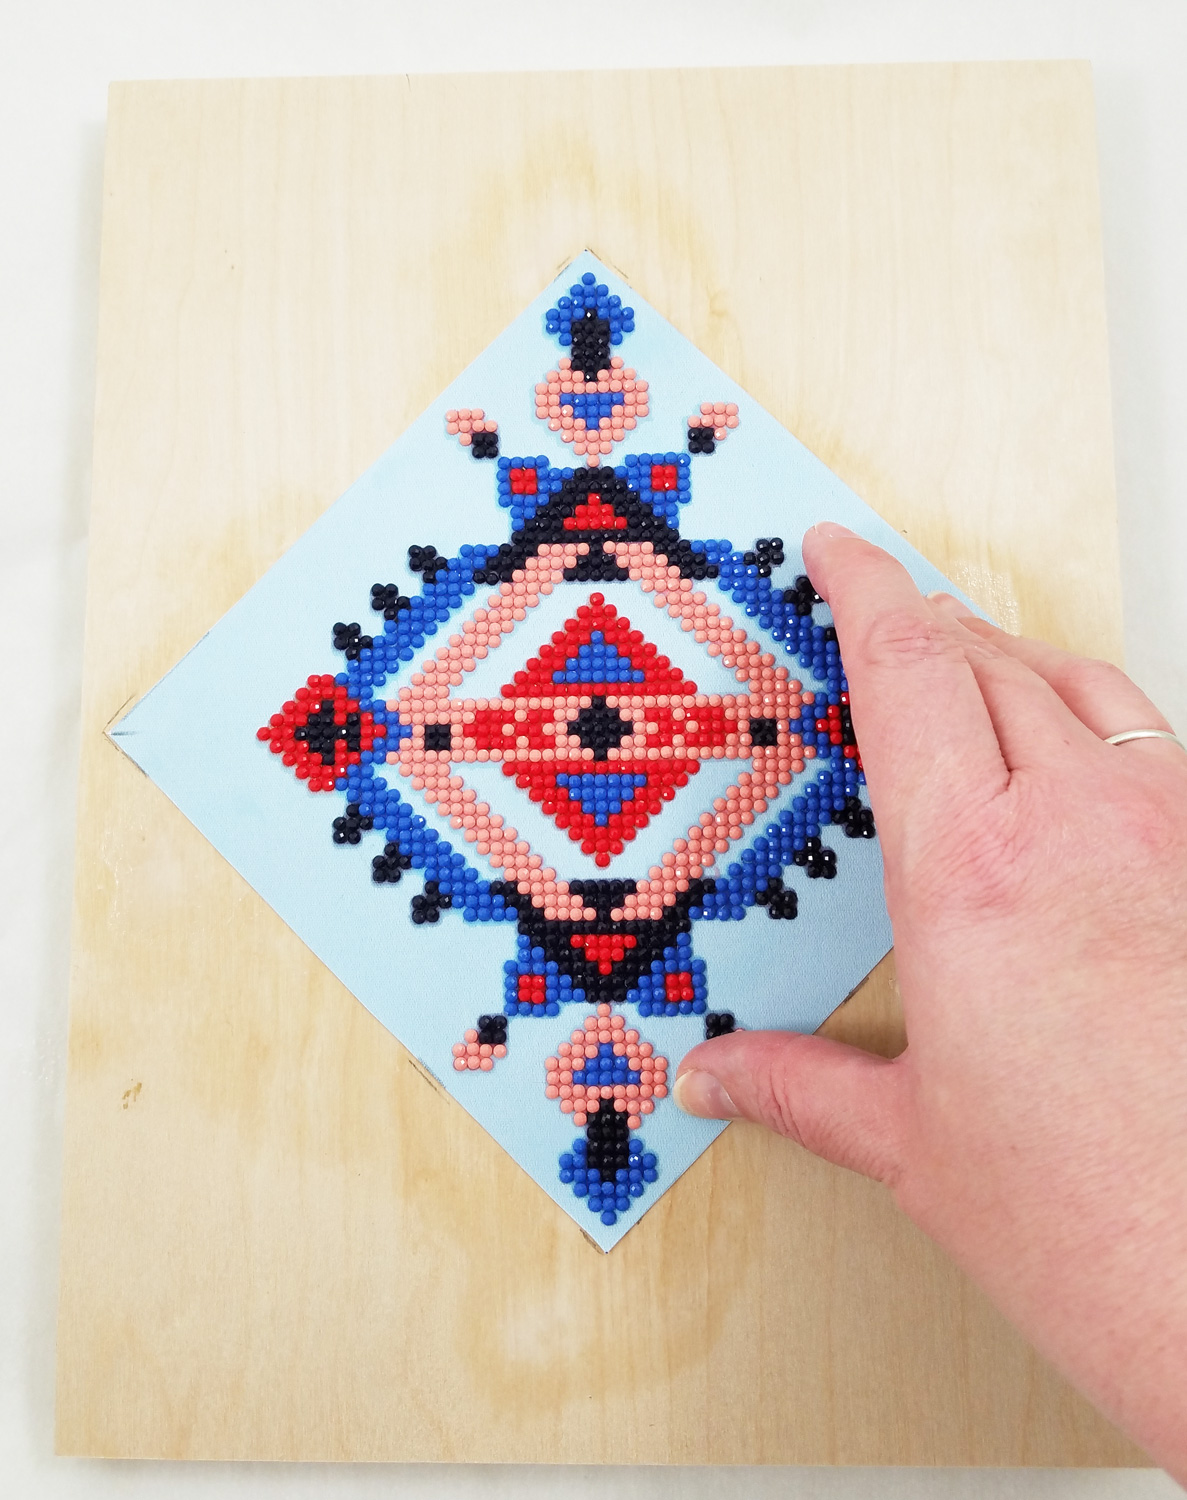
Quickly and carefully I applied the diamond canvas to the coated wood board. I applied firm pressure to the canvas. The spray version of Mod Podge Matte makes it much easier to apply fabric without a worry of oversaturation or bubbles forming. I let the Mod Podge fully dry.
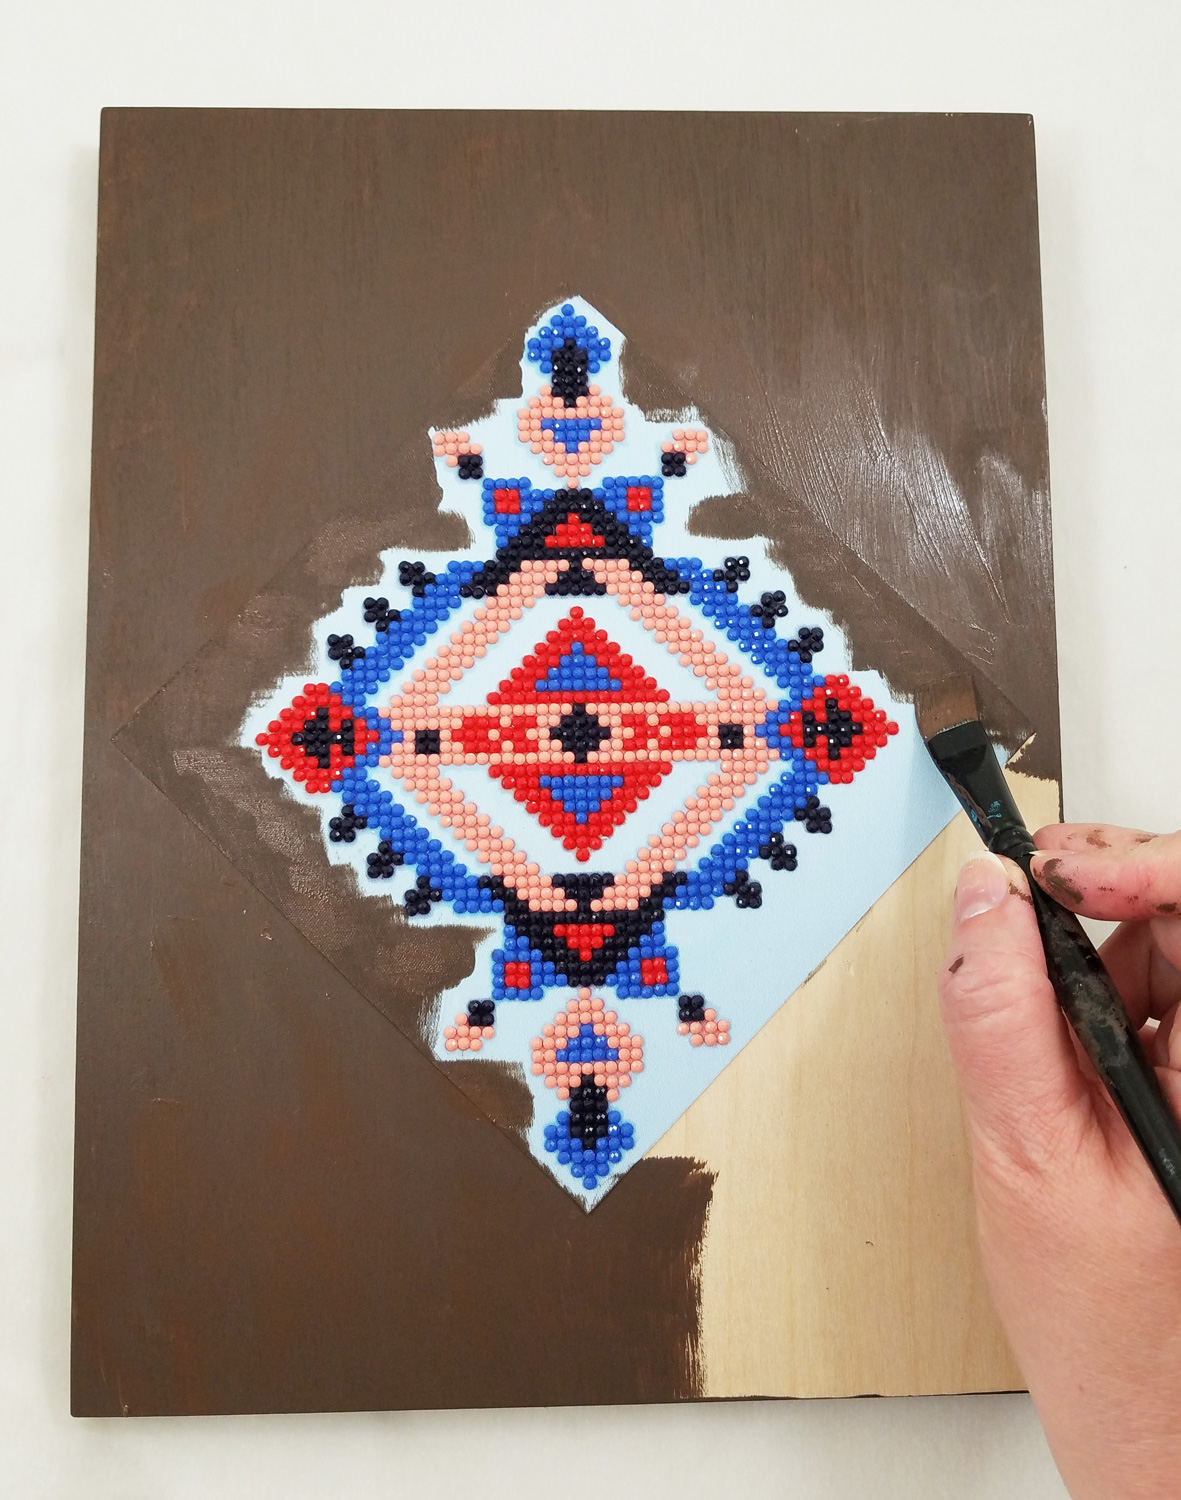
Making sure to cover the sides and front of the wood board I applied on FolkArt Home Deco Chalk Paint in Java. Using the flat paint brush to apply paint to the open sections of the wood board and the round brush for the detailed sections around the diamonds. The Tribe Design canvas had a tendency to soak up more paint, so I applied a bit more paint to make sure there was even coverage.
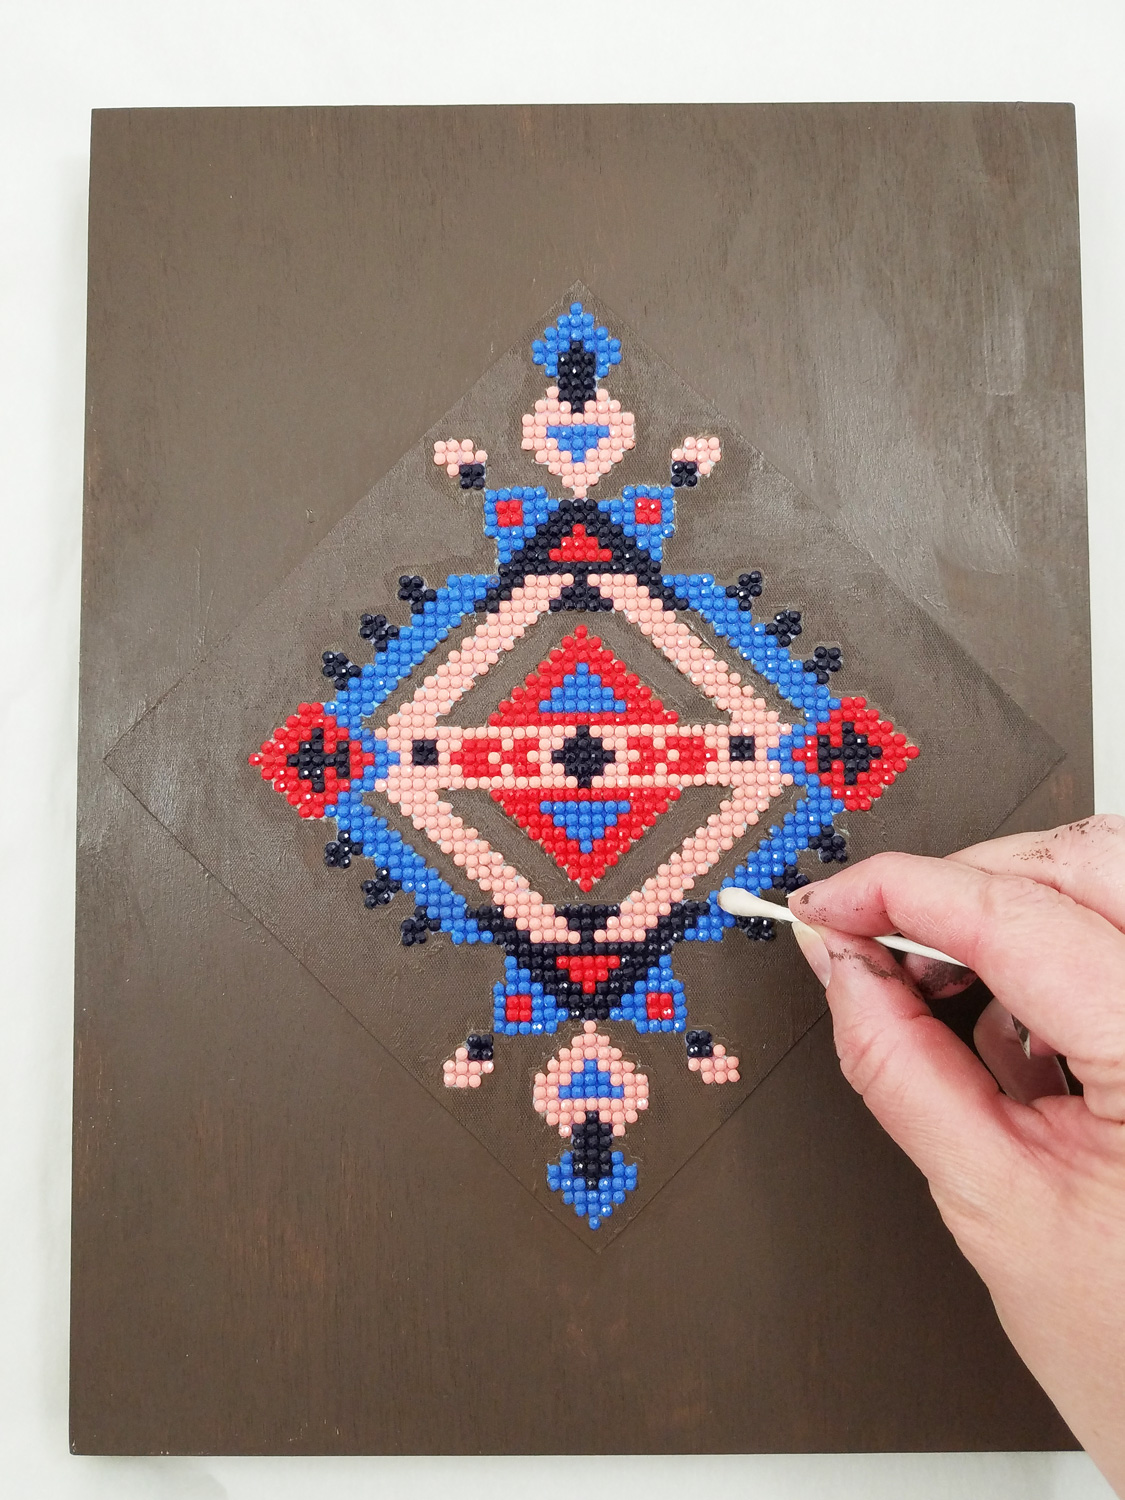
Before the paint fully cured I used cotton swabs dipped in isopropyl alcohol to remove any paint that accidently covered the diamonds. I then let the paint fully cure before the next step.
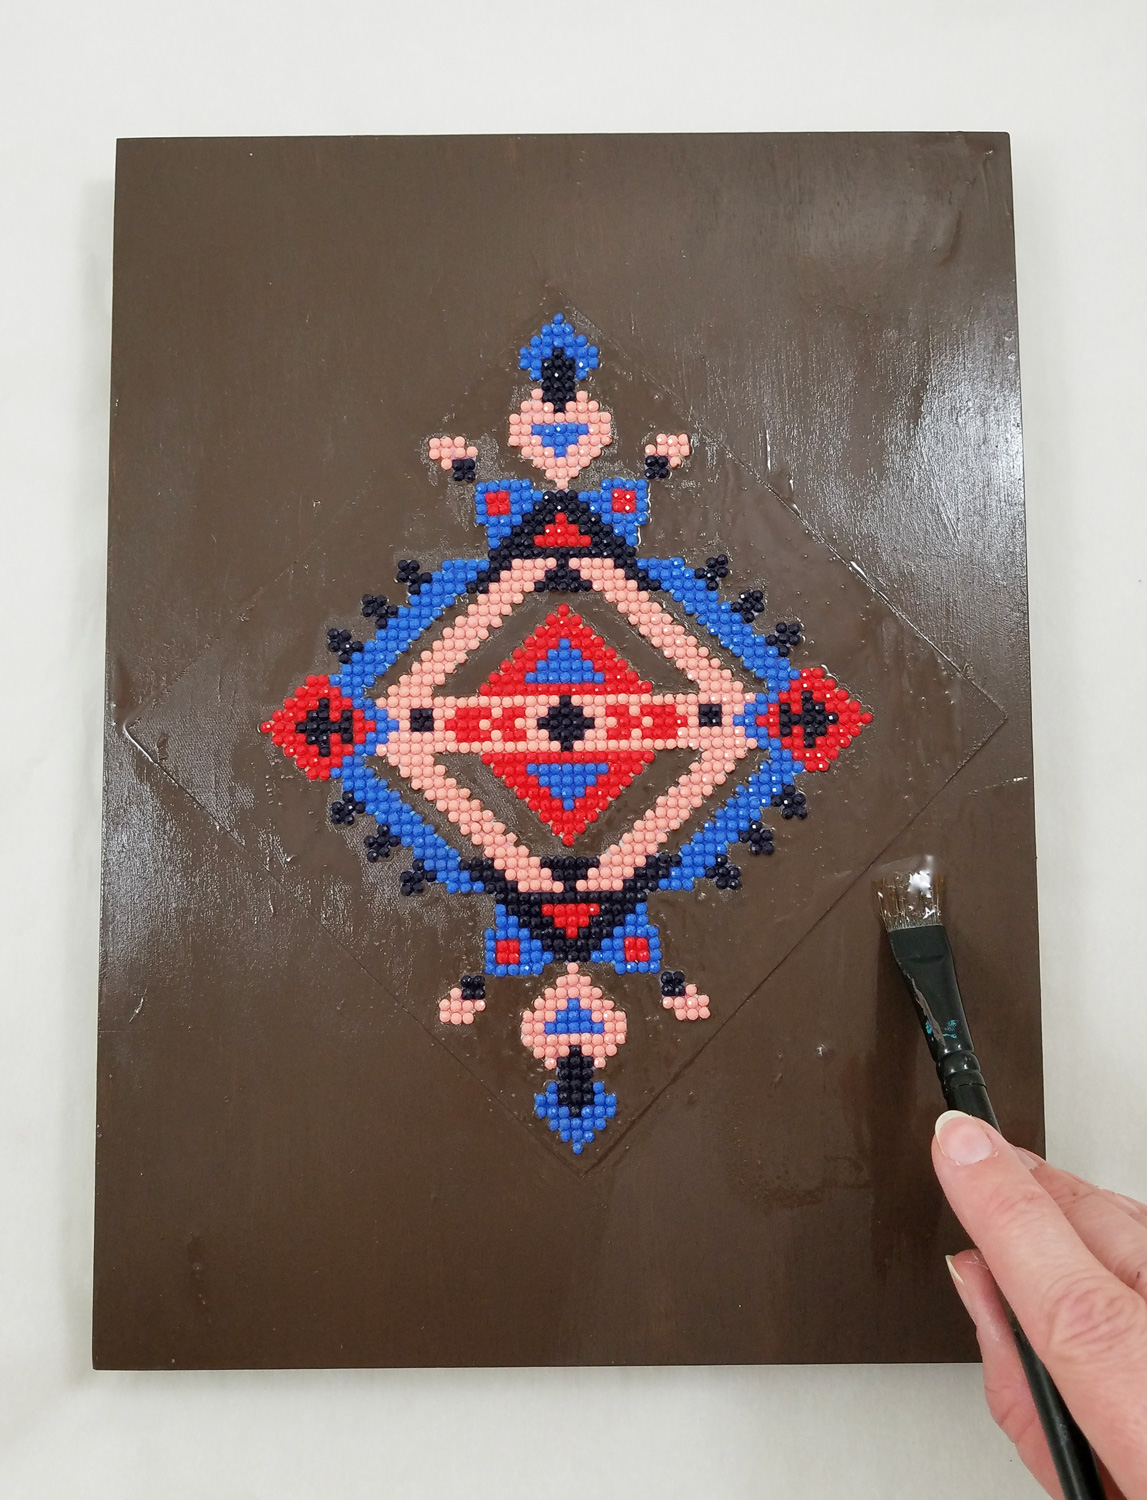
On the now dry paint I applied FolkArt Crackle Medium, careful to not over brush and to only apply the medium in one direction. This would ensure a better crackle formation later on. I let this layer fully dry.
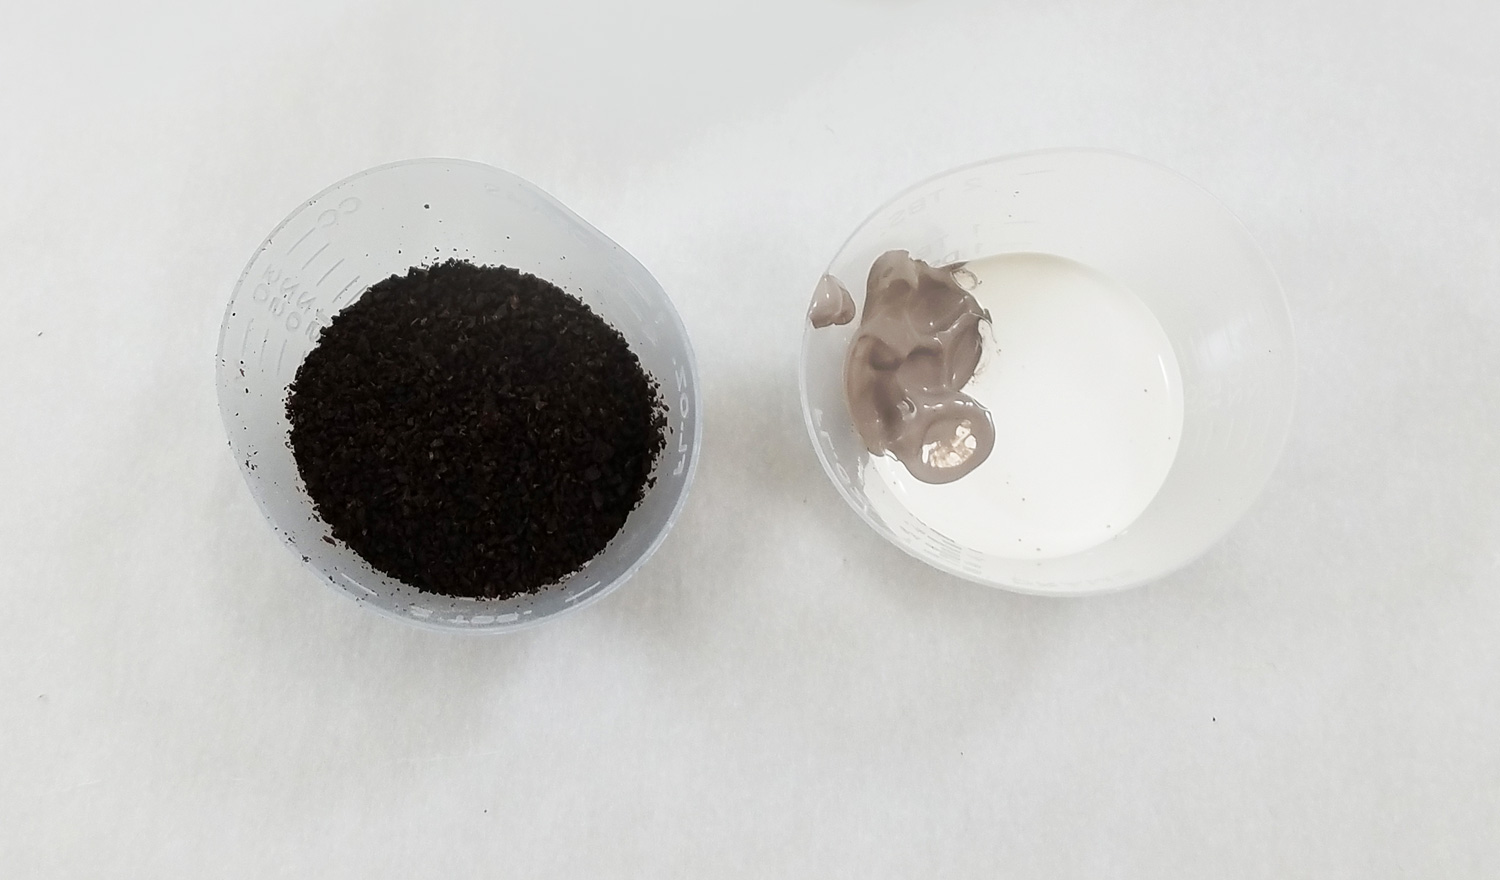
To create a highly textured topcoat I mixed a tablespoon of used and dried coffee grounds in a small cup, with 4 parts FolkArt Home Decor Chalk Paint in White Adirondack, with 1 part Parisian Grey.
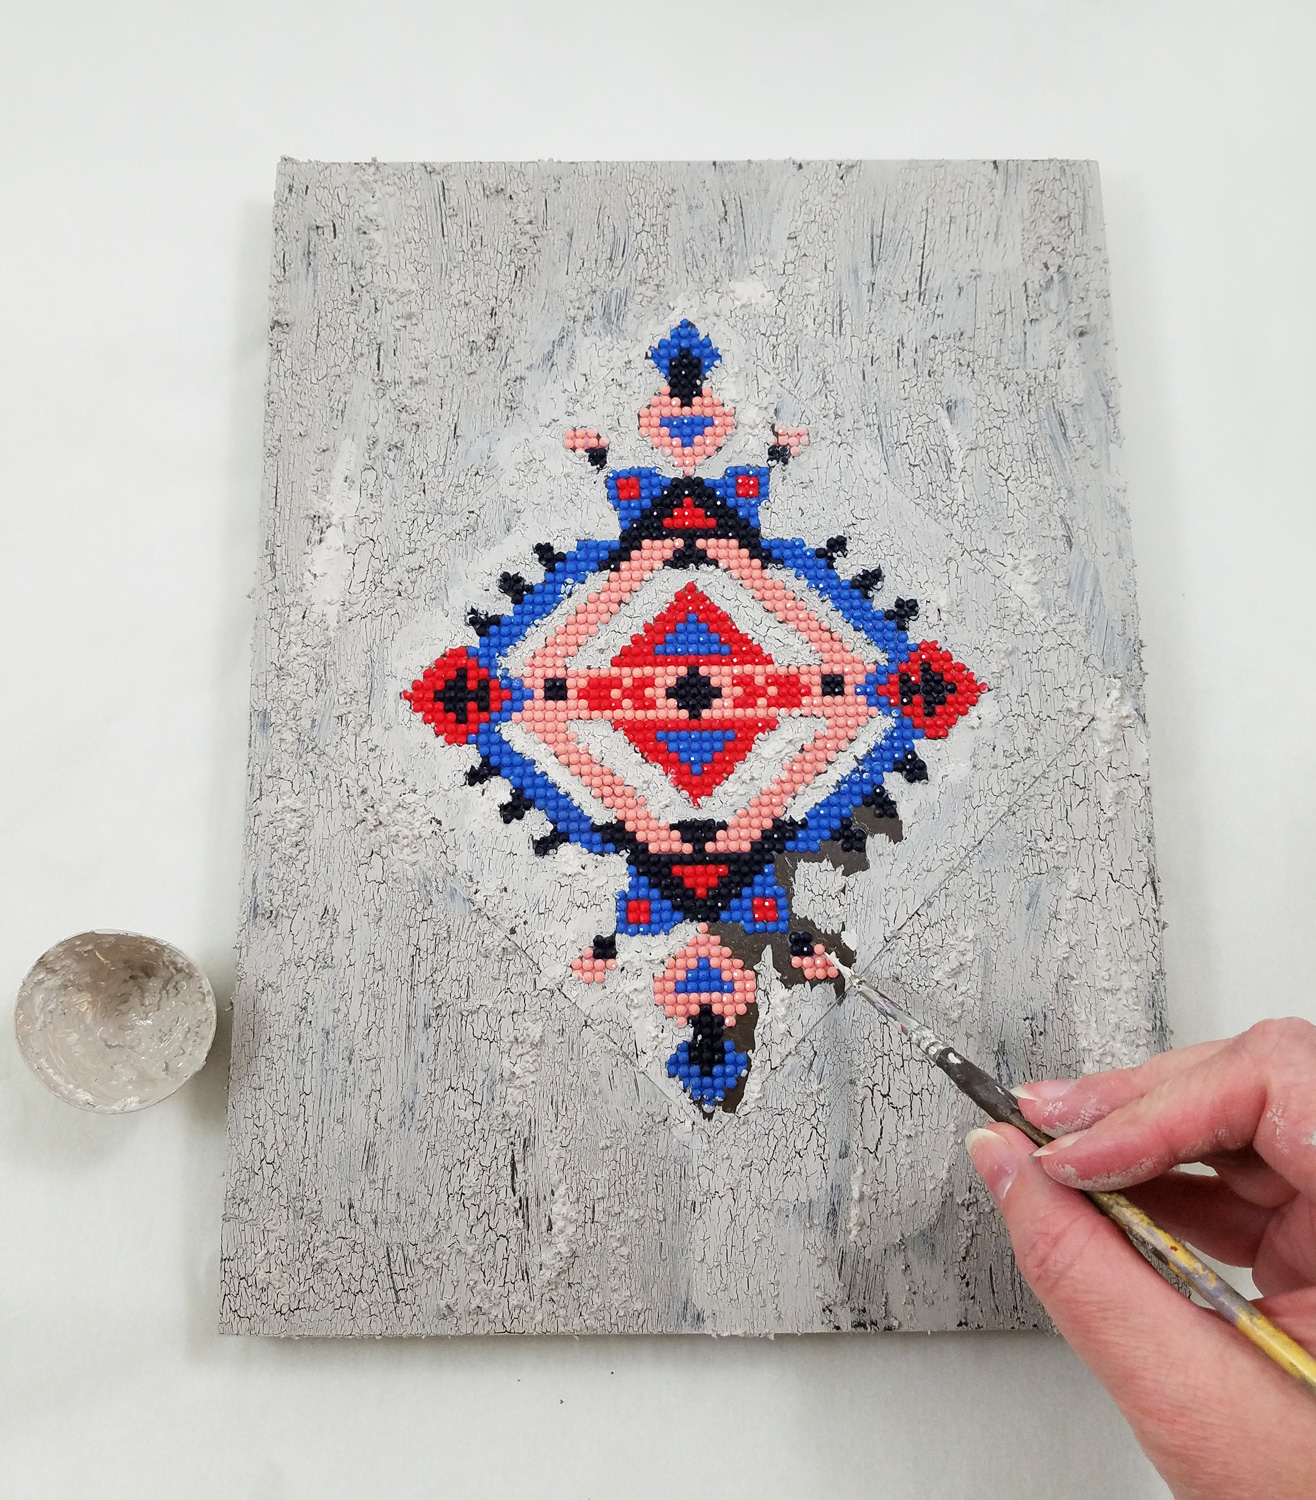
I quickly applied my textured topcoat to the crackle layer, making sure once again to not over paint, and for the most part, go only one direction with the brush strokes. Any time the paint built up too much on the brush I cleaned the paint brush with a paper towel and then reapplied fresh paint mixture to the brush.
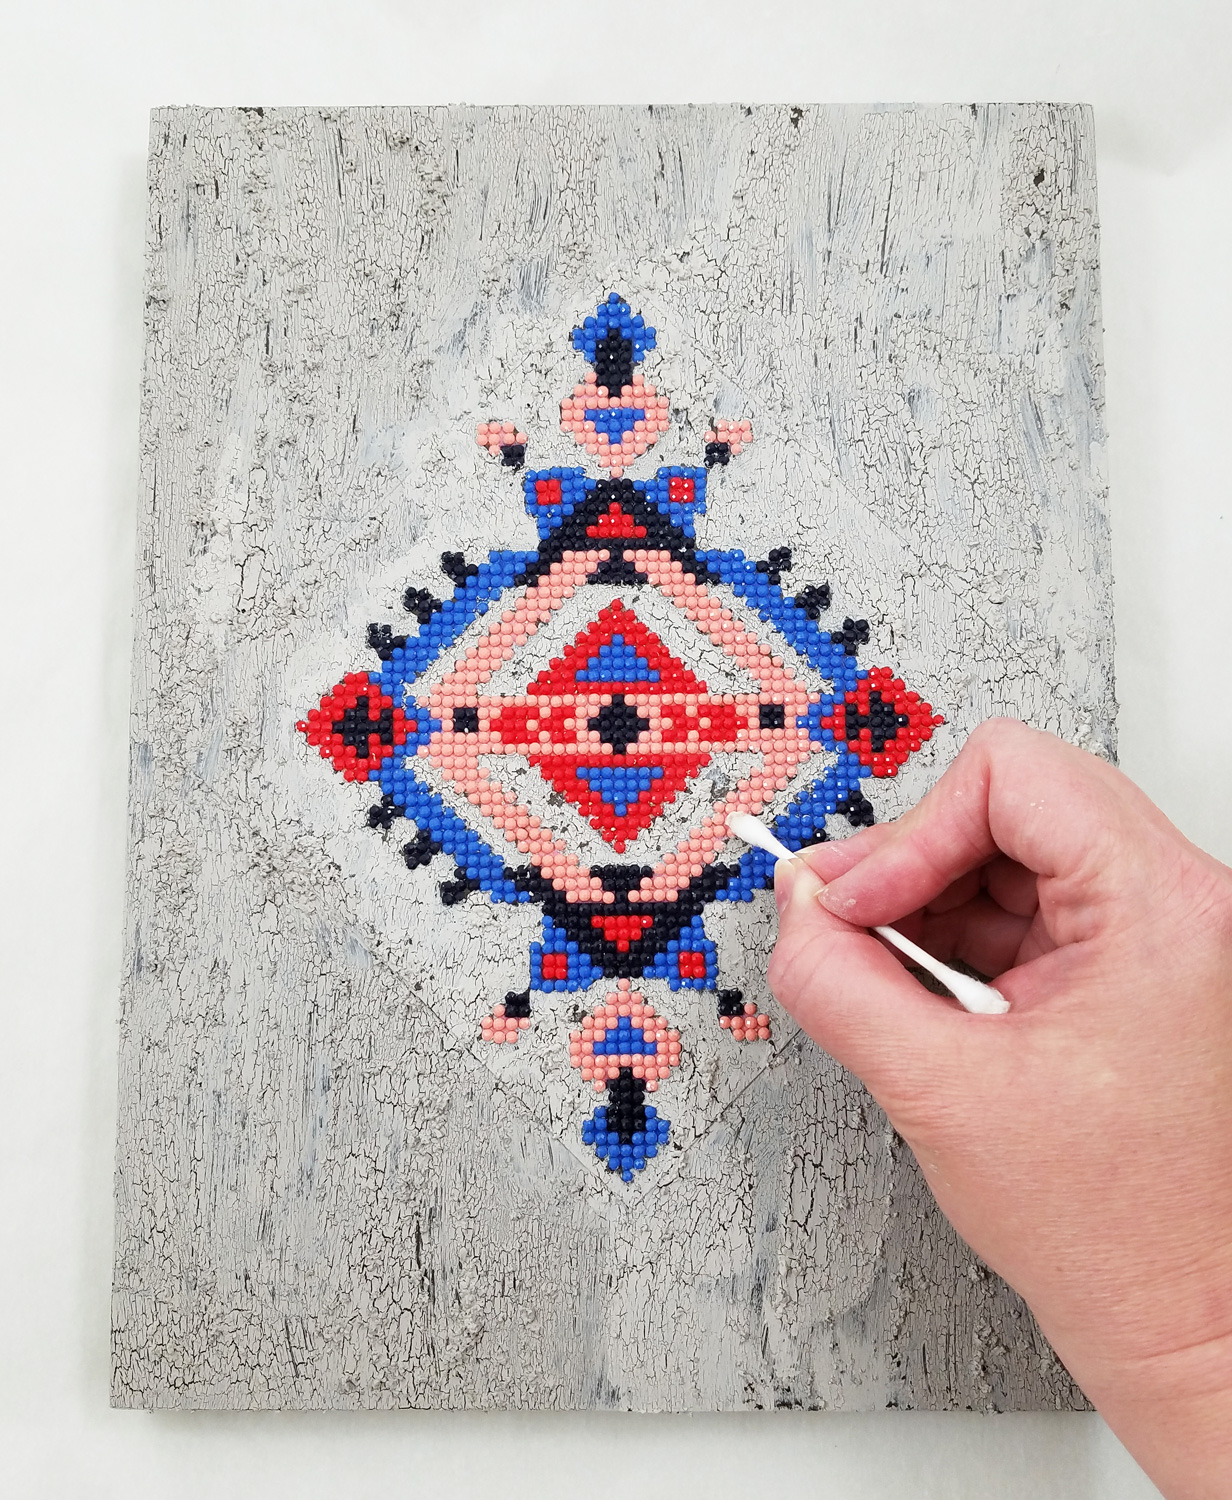
Once again before the paint fully cured I used cotton swabs dipped in isopropyl alcohol to remove any paint that accidentally covered the diamonds. I then let the paint fully cure before the next step.
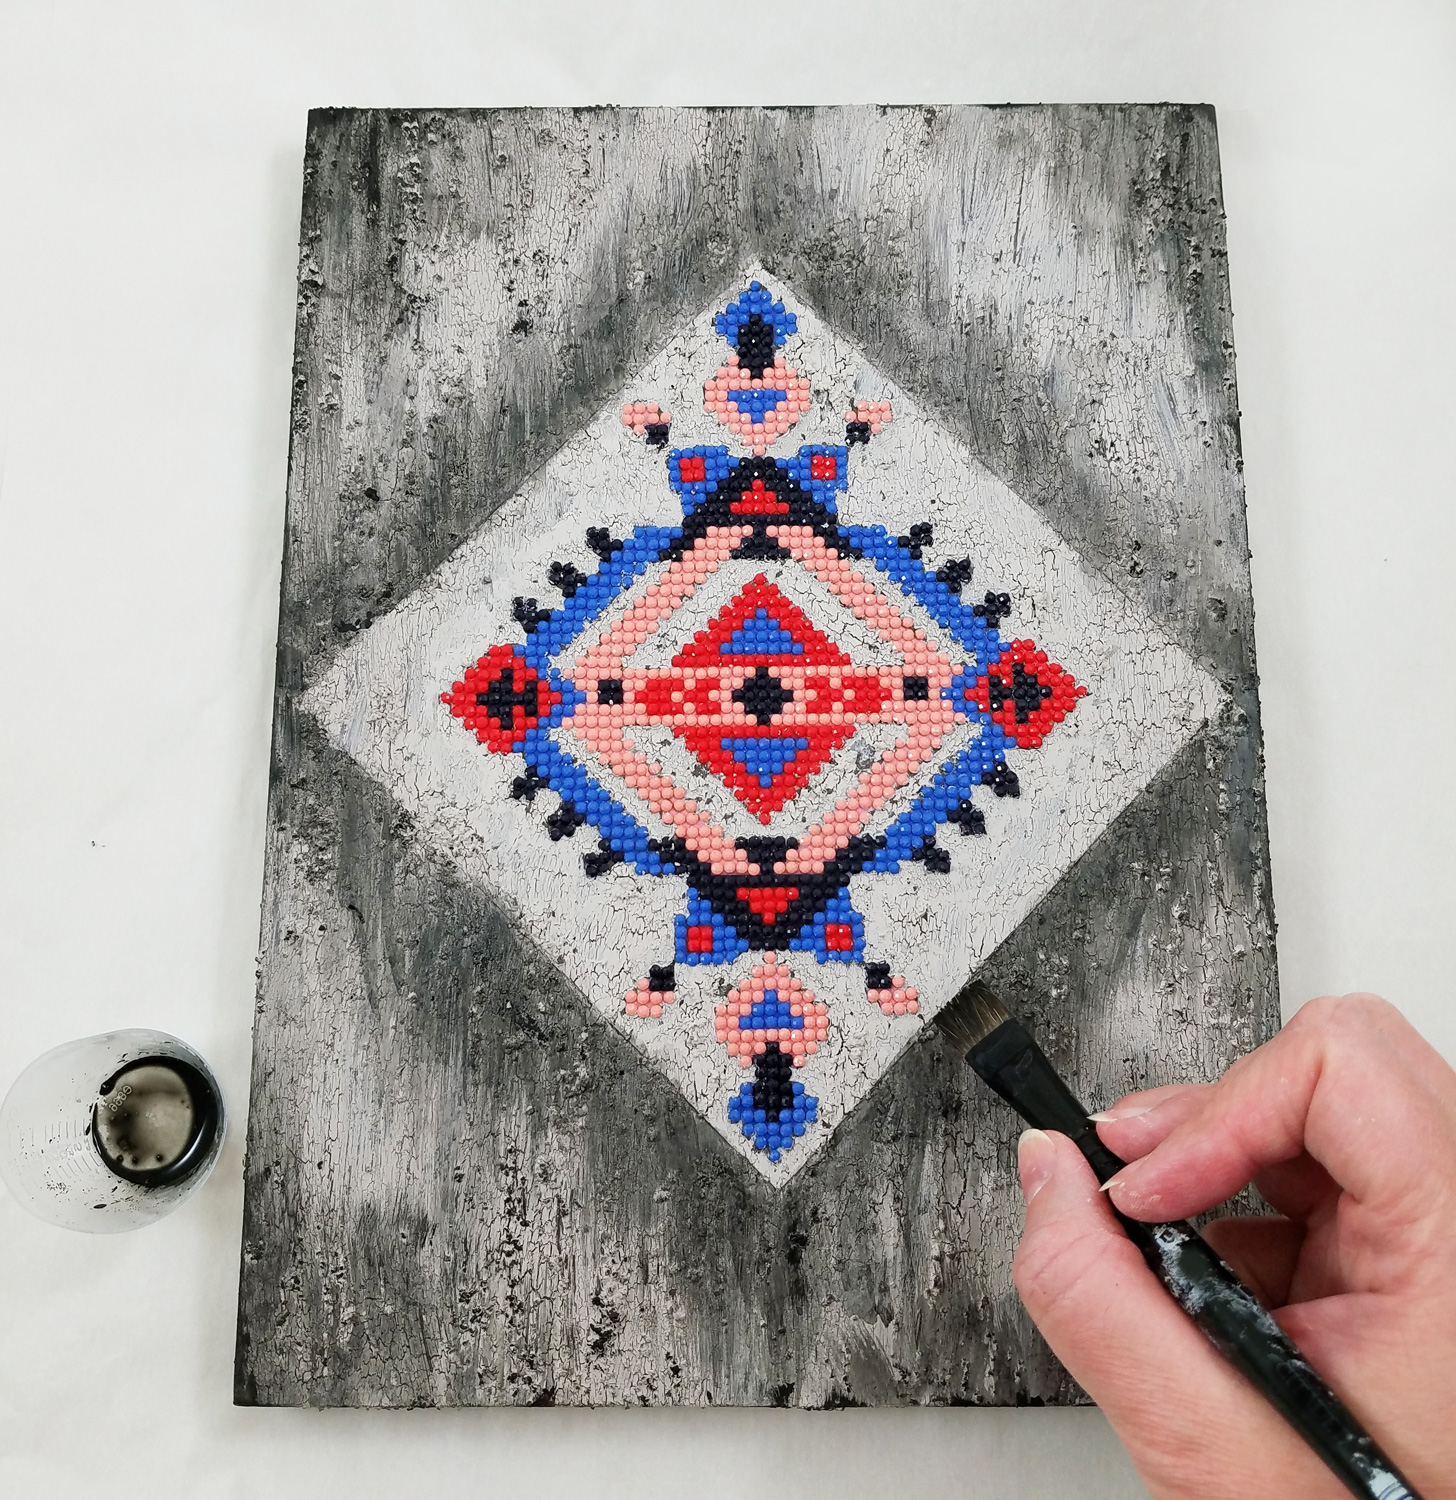
In a small cup I heavily diluted some Black FolkArt Home Decor Chalk Paint with some water and applied it to the cracks, textured elements and raised portions of the wood board, careful to avoid the flat backed diamond pattern. I left the paint to fully dry.
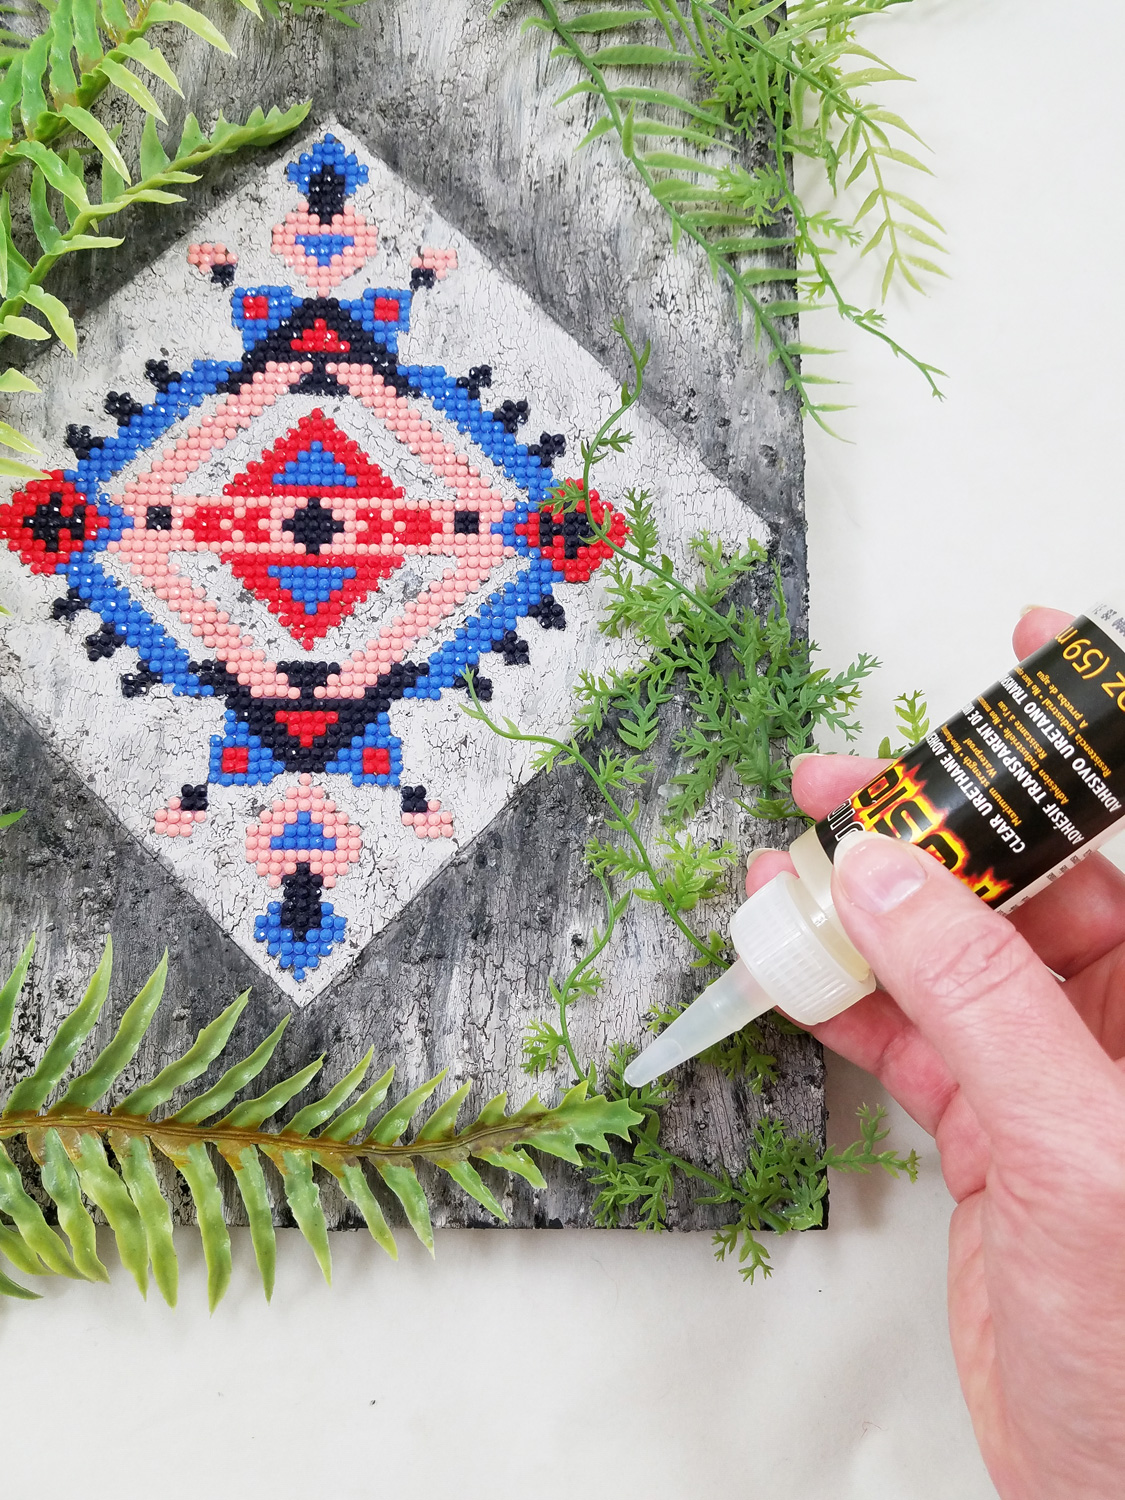
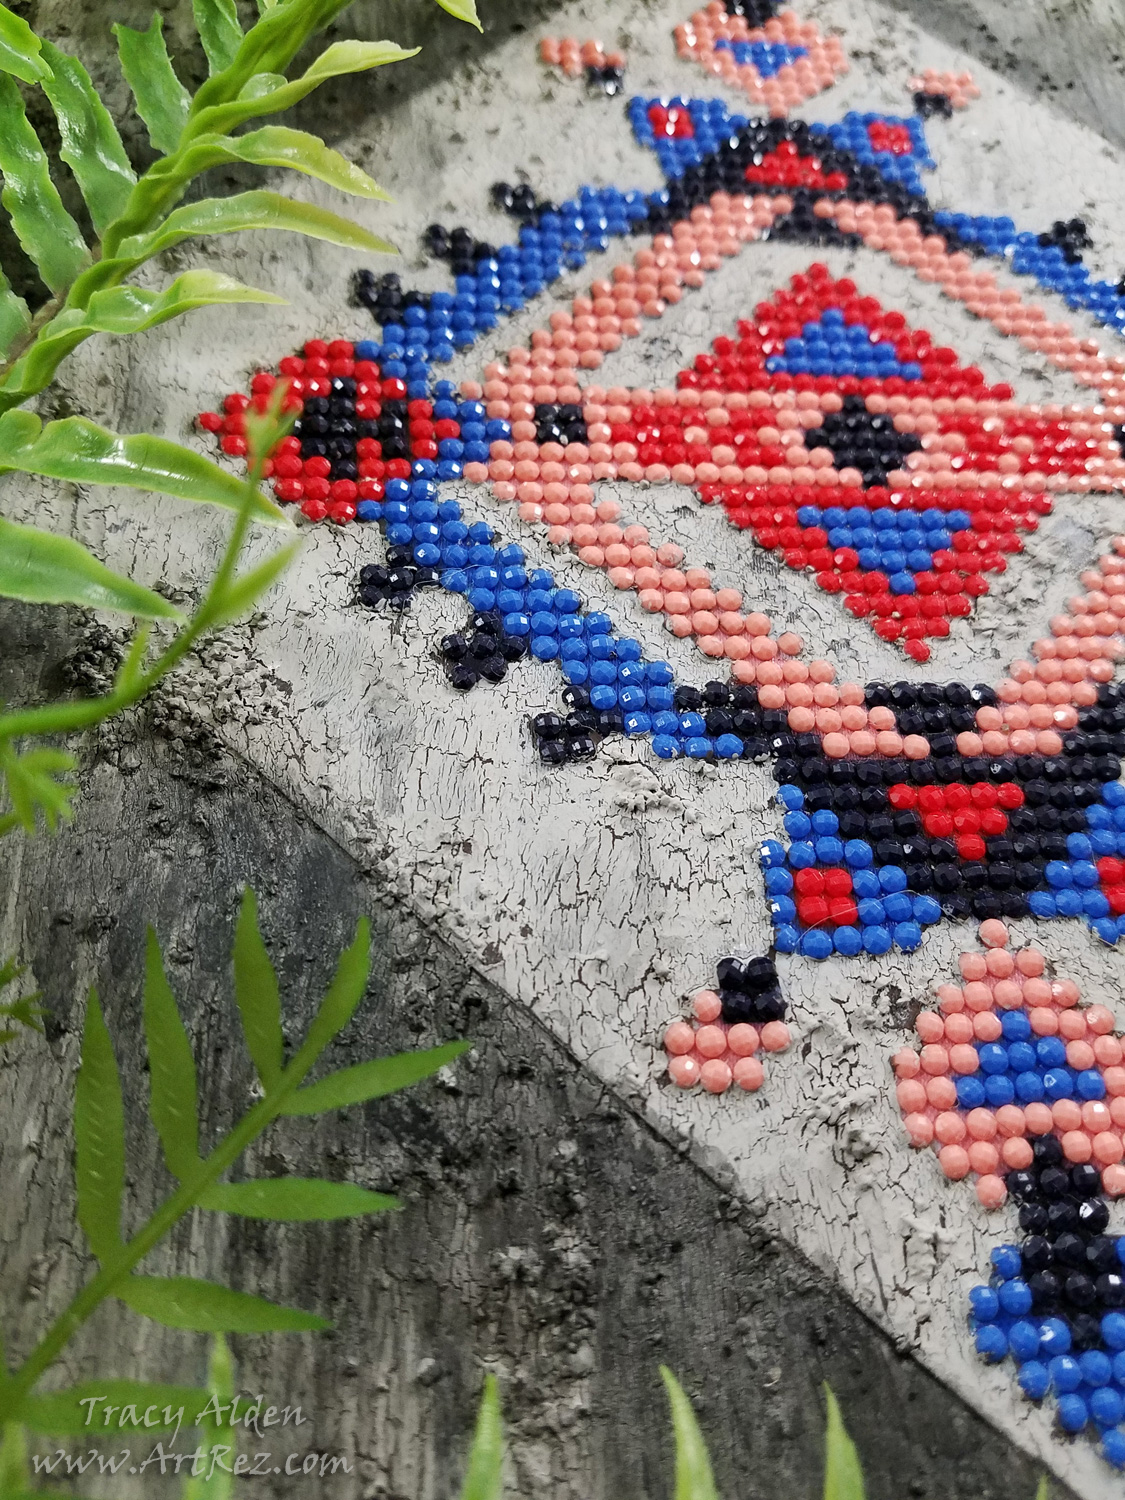
I cut and placed the artificial tropical plants on the board, finding the placement I liked best, gluing the plants in place with Liquid Fusion Clear Urethane Glue. Once the glue was fully cured my pieces was ready to be displayed.
Until next time, safe travels!
*This is an affiliate post, which means I received an assortment of products as a compensation for the creation of art. To read my full disclosure, click here.
