
The Mermaid’s Necklace, a #Cre8time fish-tale
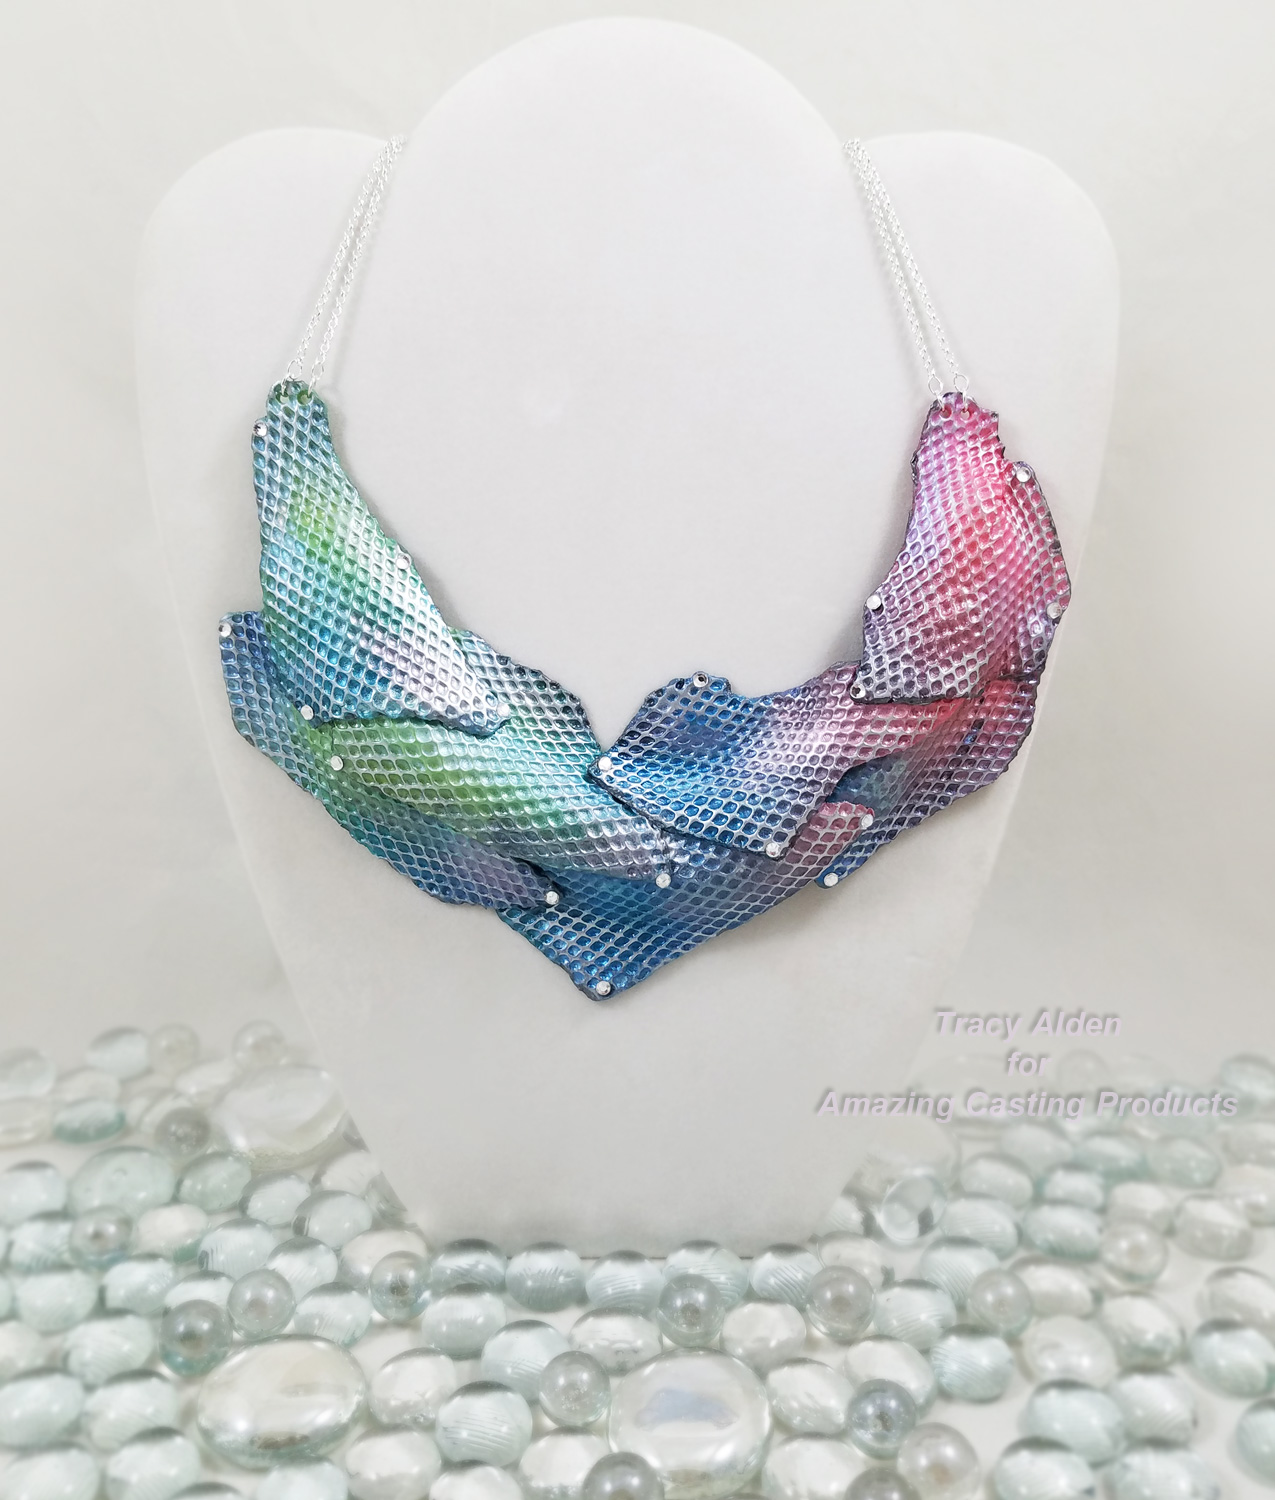
A great inspiration for my art is looking for and finding textures to duplicate and/or mold. While my project might look like something from the sea it started in a by far more mundane environment, my office. My metal pen, paper and paperclip holder is made out of mesh, a delicate diamond pattern, reminiscent of tiny fish scales. With the help of Amazing Mold Putty I could transfer this lovely pattern to Premo Accents polymer clay to create a necklace fit for a mermaid!
Supplies:
Amazing Mold Putty
Alumidust
Alumilite Metallic Powder
Premo Sculpey Accents Multipack 12 pc Mixed Effects(using Bright Green Pearl, Sunset Pearl, Peacock Pearl from this pack)
Premo Sculpey Accents Translucent
Sculpey Glaze Gloss
Acrylic Roller
Stylus (small sizes)
Pasta Machine (optional but helpful)
Ceramic Tiles
Craft Knife
Small Paint or Makeup Brush
Beacon Gem-Tac Glue
Rhinestones
Silver tone jewelry chain and jumprings
Metal mesh office pen and note holder or a piece of heavy weight mesh
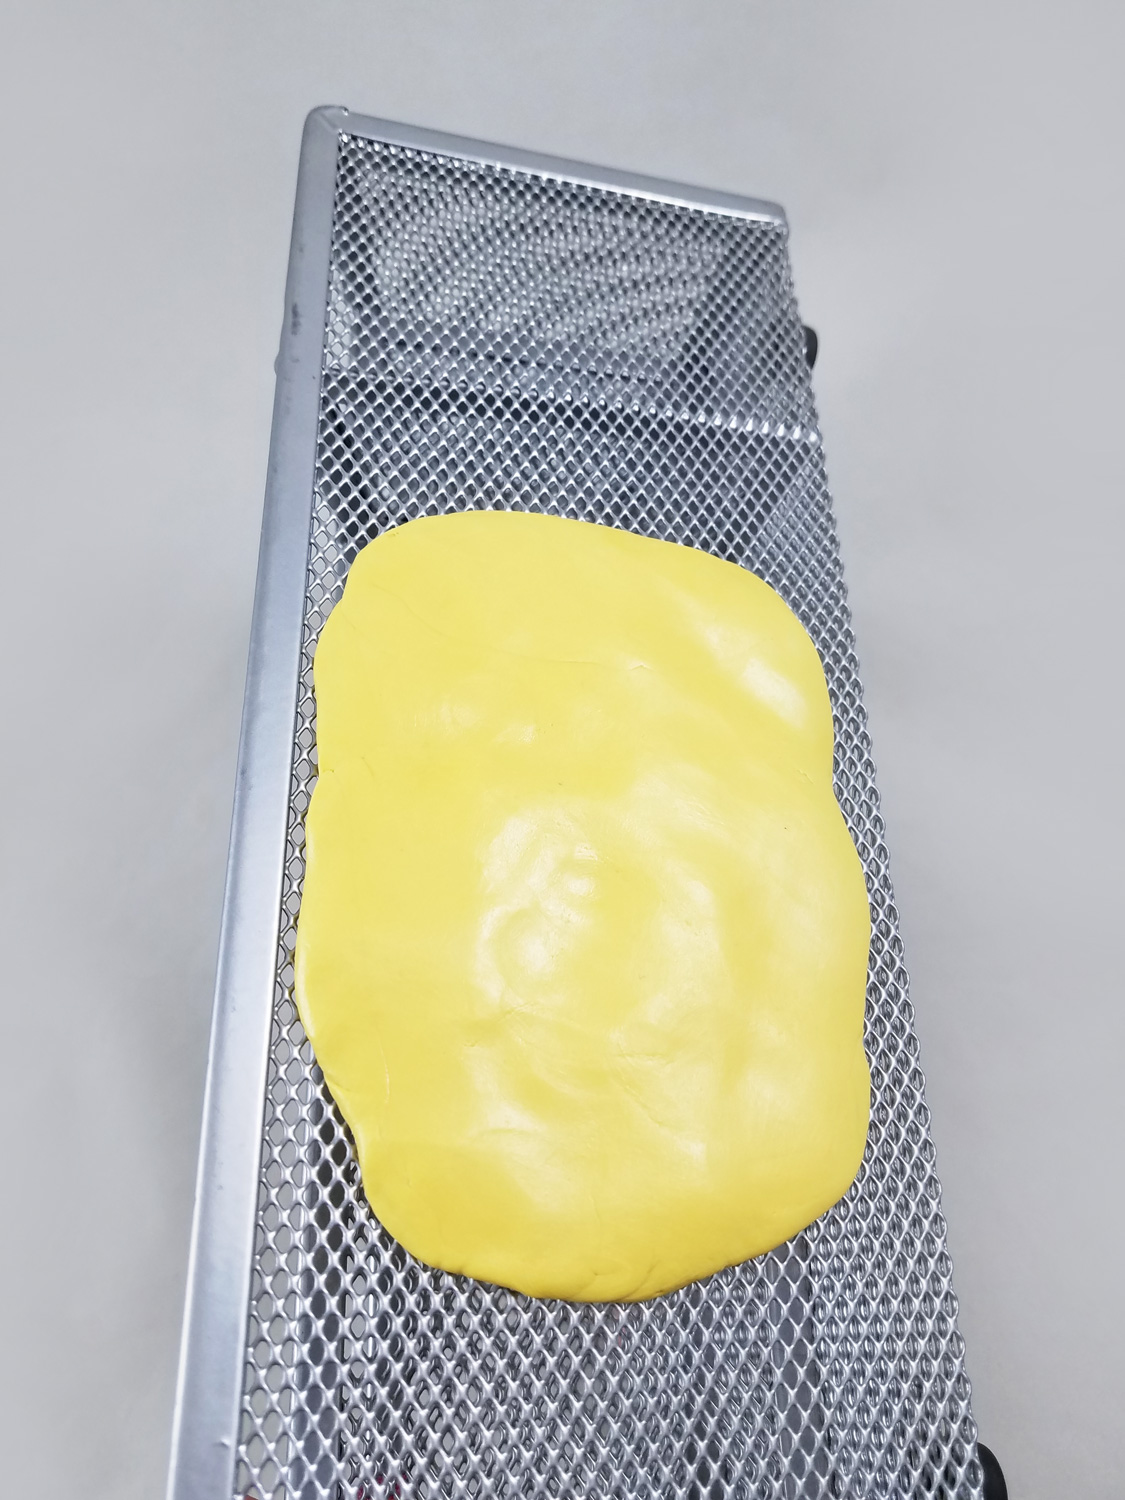
I mixed up some Amazing Mold Putty {CLICK HERE to view mixing/preparation}, and applied it to the largest open part of the mesh office supply holder. I was careful to press the Mold Putty through the mesh to get detail, but not too far that the mold putty would seep through creating weak points and holes in the mold.
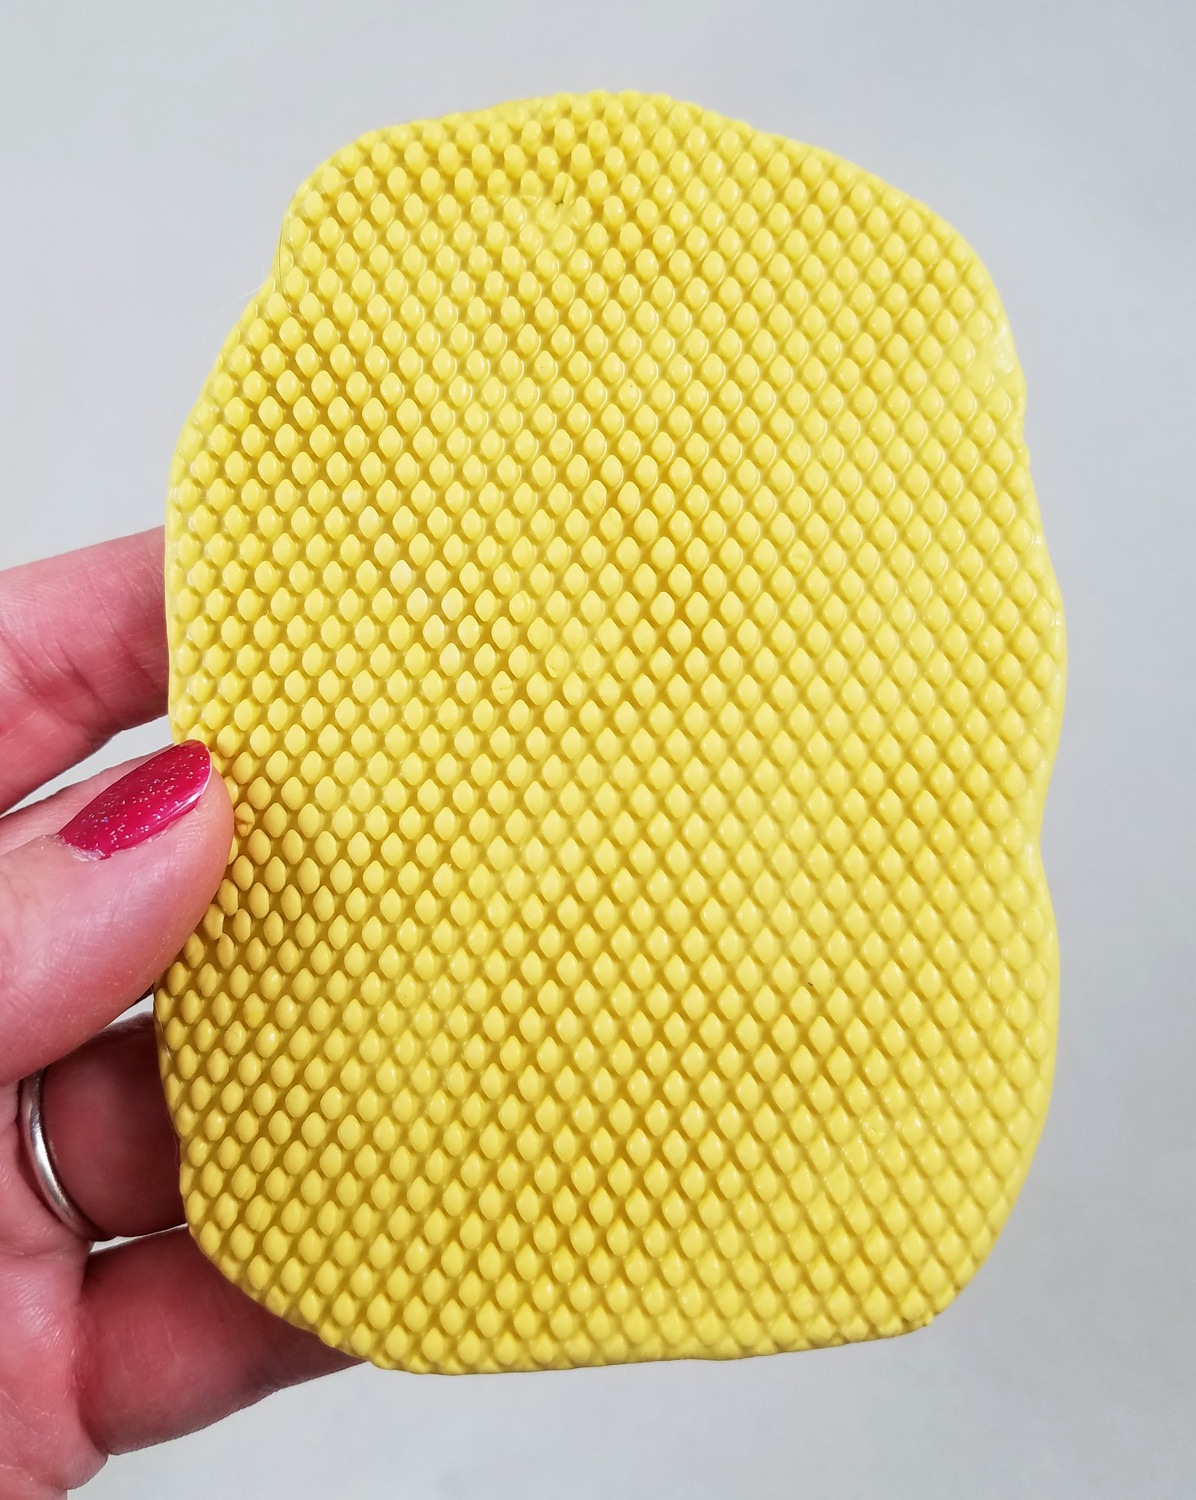
Once the Mold Putty was cure I carefully peeled it off the wire mesh. Now I had a perfect texture plate that had a close resemblance to tiny fish scales.
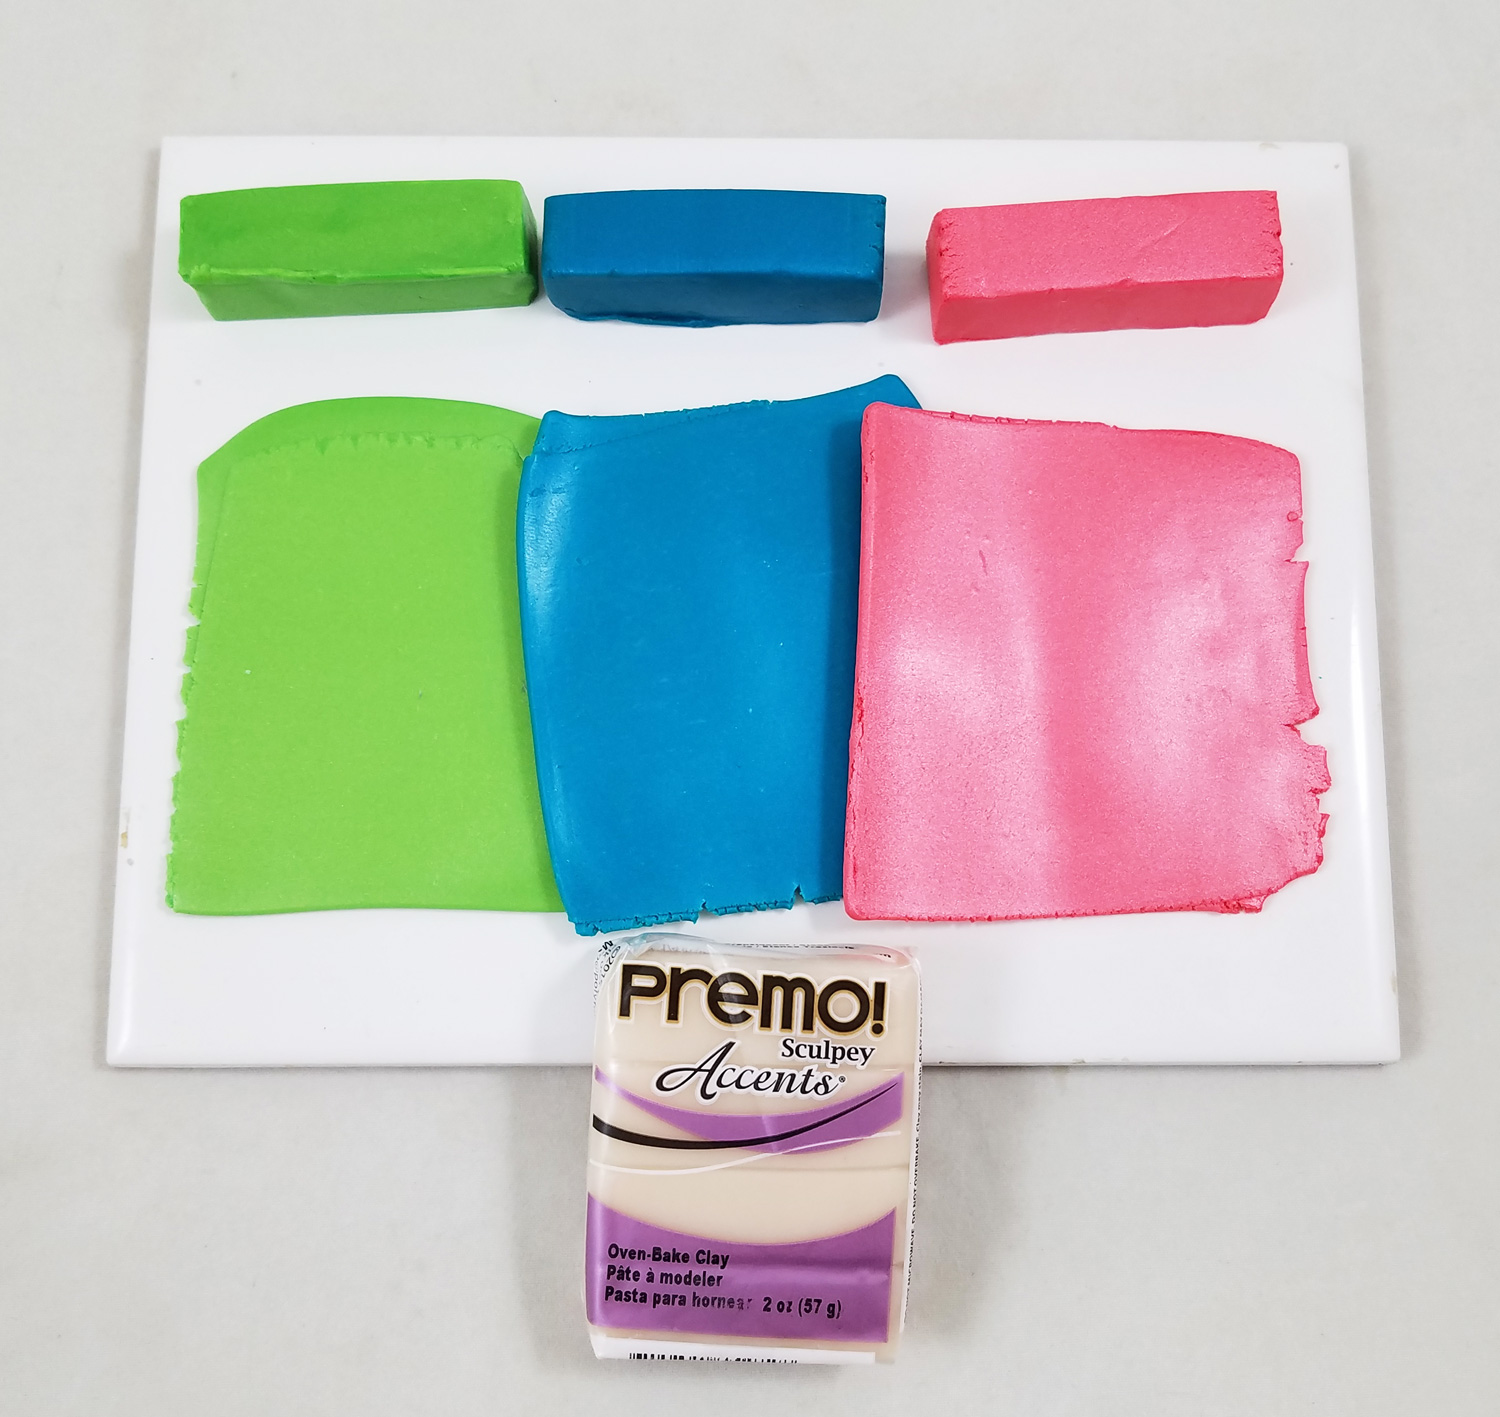
Using a pasta machine (devoted to craft use only) set on the thickest setting, I conditioned some Premo Accents Translucent polymer clay. I added the translucent clay to one half of the Bright Green Pearl, Sunset Pearl, Peacock Pearl clay bricks found in the Premo Accents Multipack.
*The addition of the translucent clay to the colored clay creates a look of slightly translucent fish scales once the clay is baked.
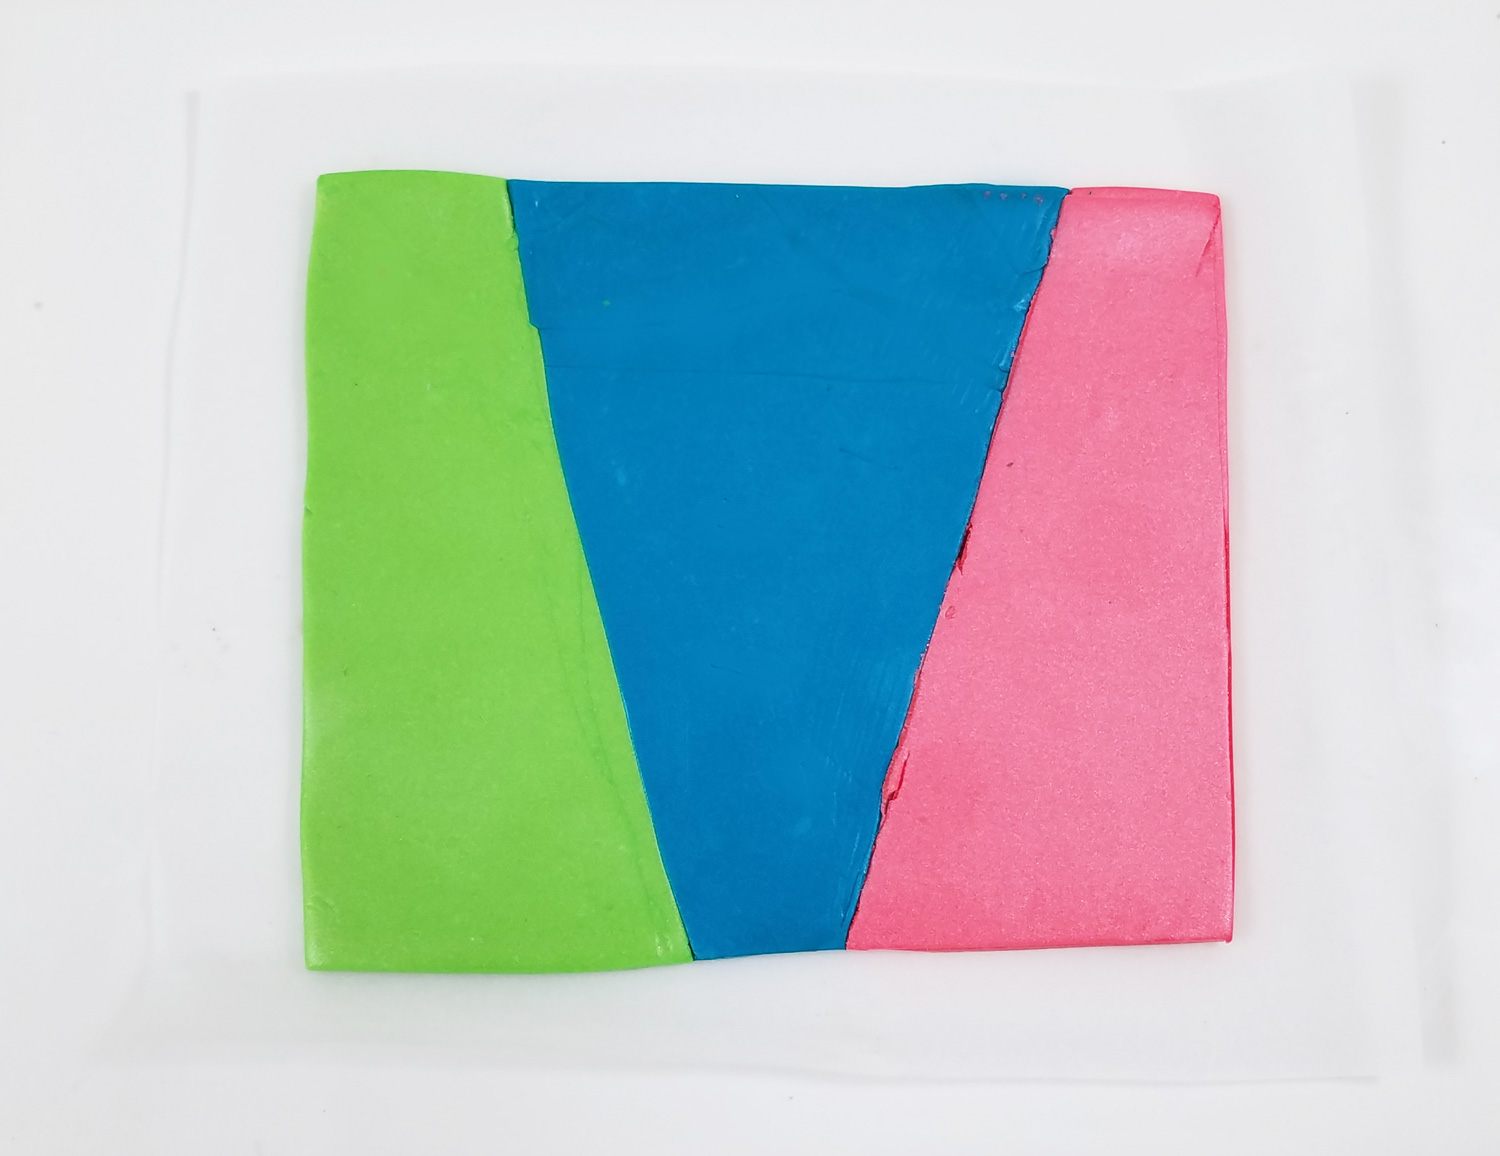
Next I cut my conditioned clay into wedges and pushed the edges together as seen in the above photo. What I created is the start of what is call an Offset Skinner Blend technique. This technique was developed by a talented polymer clay artist named Judith Skinner in the 1990s, which creates a stunning and smooth blend of colors in polymer clay when clay is cut into triangles and then run through a pasta machine multiple times. In the photo you can see those are not triangles, those are purposefully offset and trimmed so that it will create areas of pure unblended color with the blended portions, giving a more vibrant contrast in the final blend.
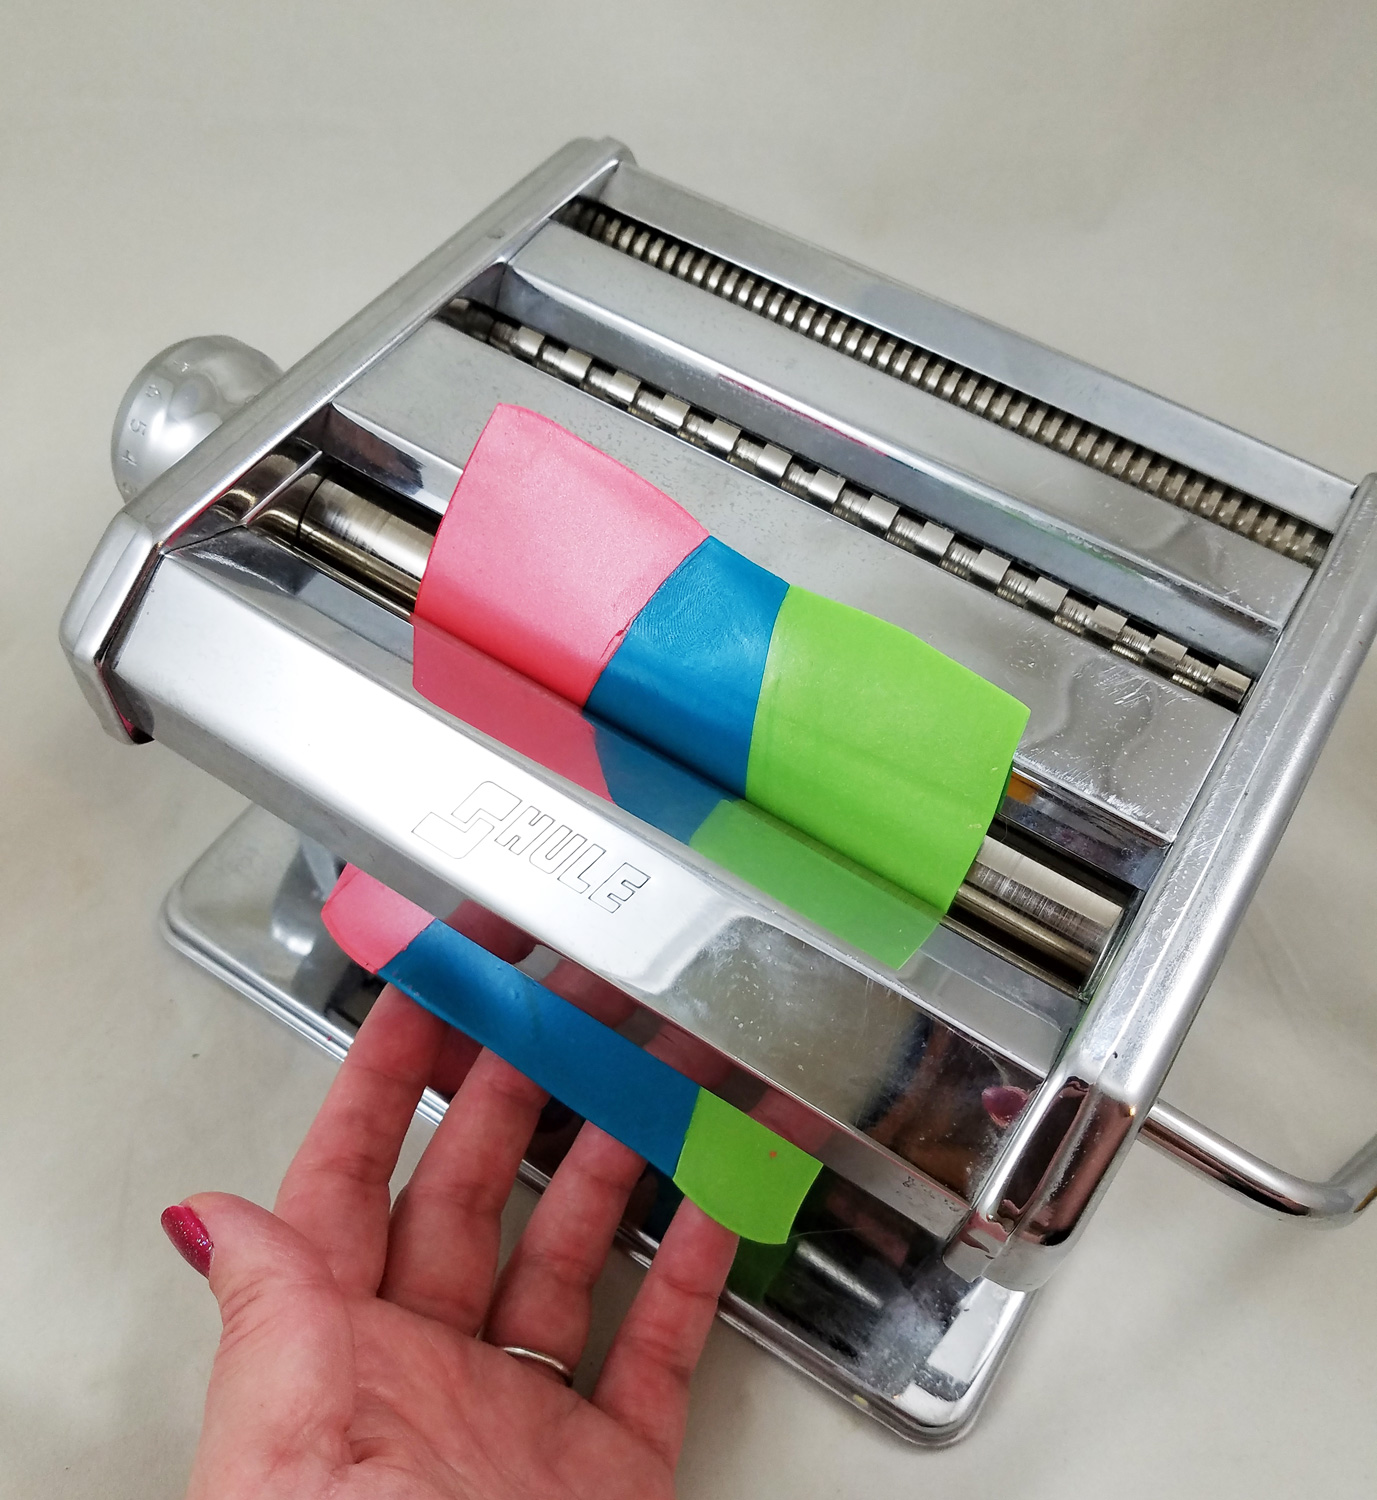
Using the thickest setting of the pasta machine I inserted the clay sheet, with the edge of of all three colors first; this made sure all the seams are pressed lightly together. I caught the clay sheet as it came out of the pasta machine.
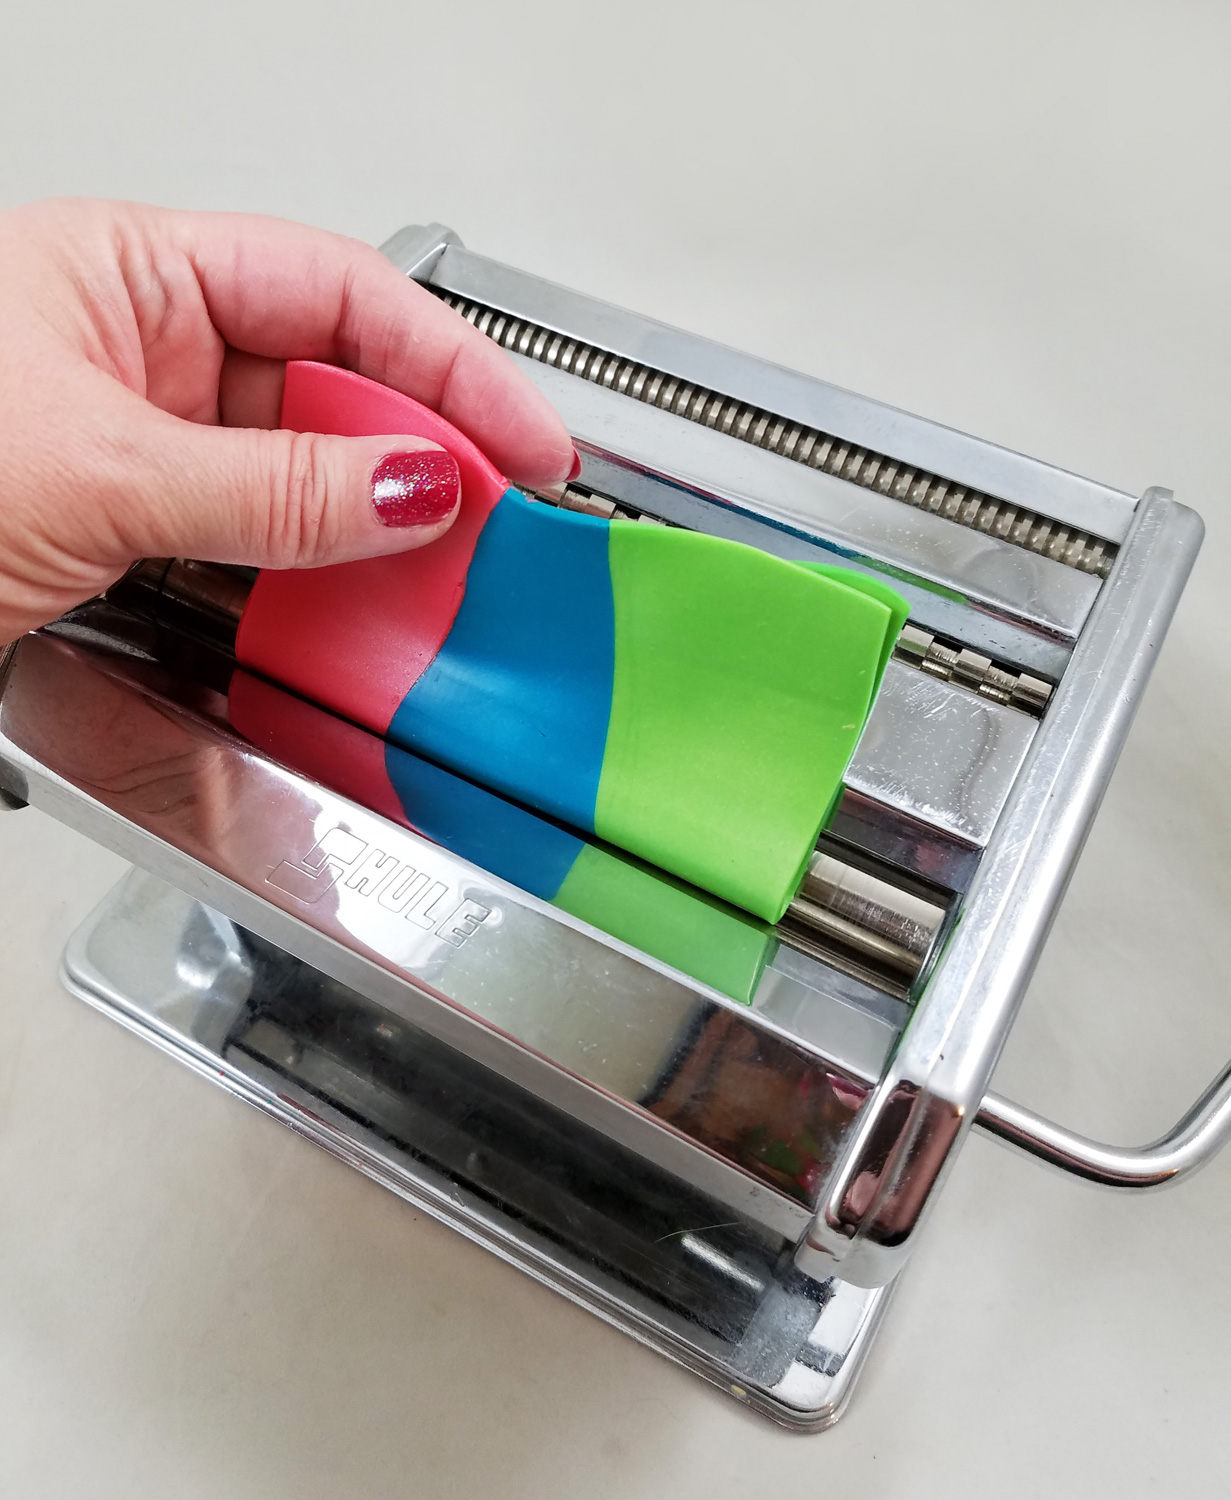
I then folded in half, top to bottom, the clay sheet making sure to match the colors on the sheet edges and once again run it through the pasta machine. I did that 10 more times, folding and rolling the clay sheet in the same direction.
*If you are new to trying this technique try it first with scrap clay to practice. Polyform Products has great video on how to create a Skinner Blend HERE.
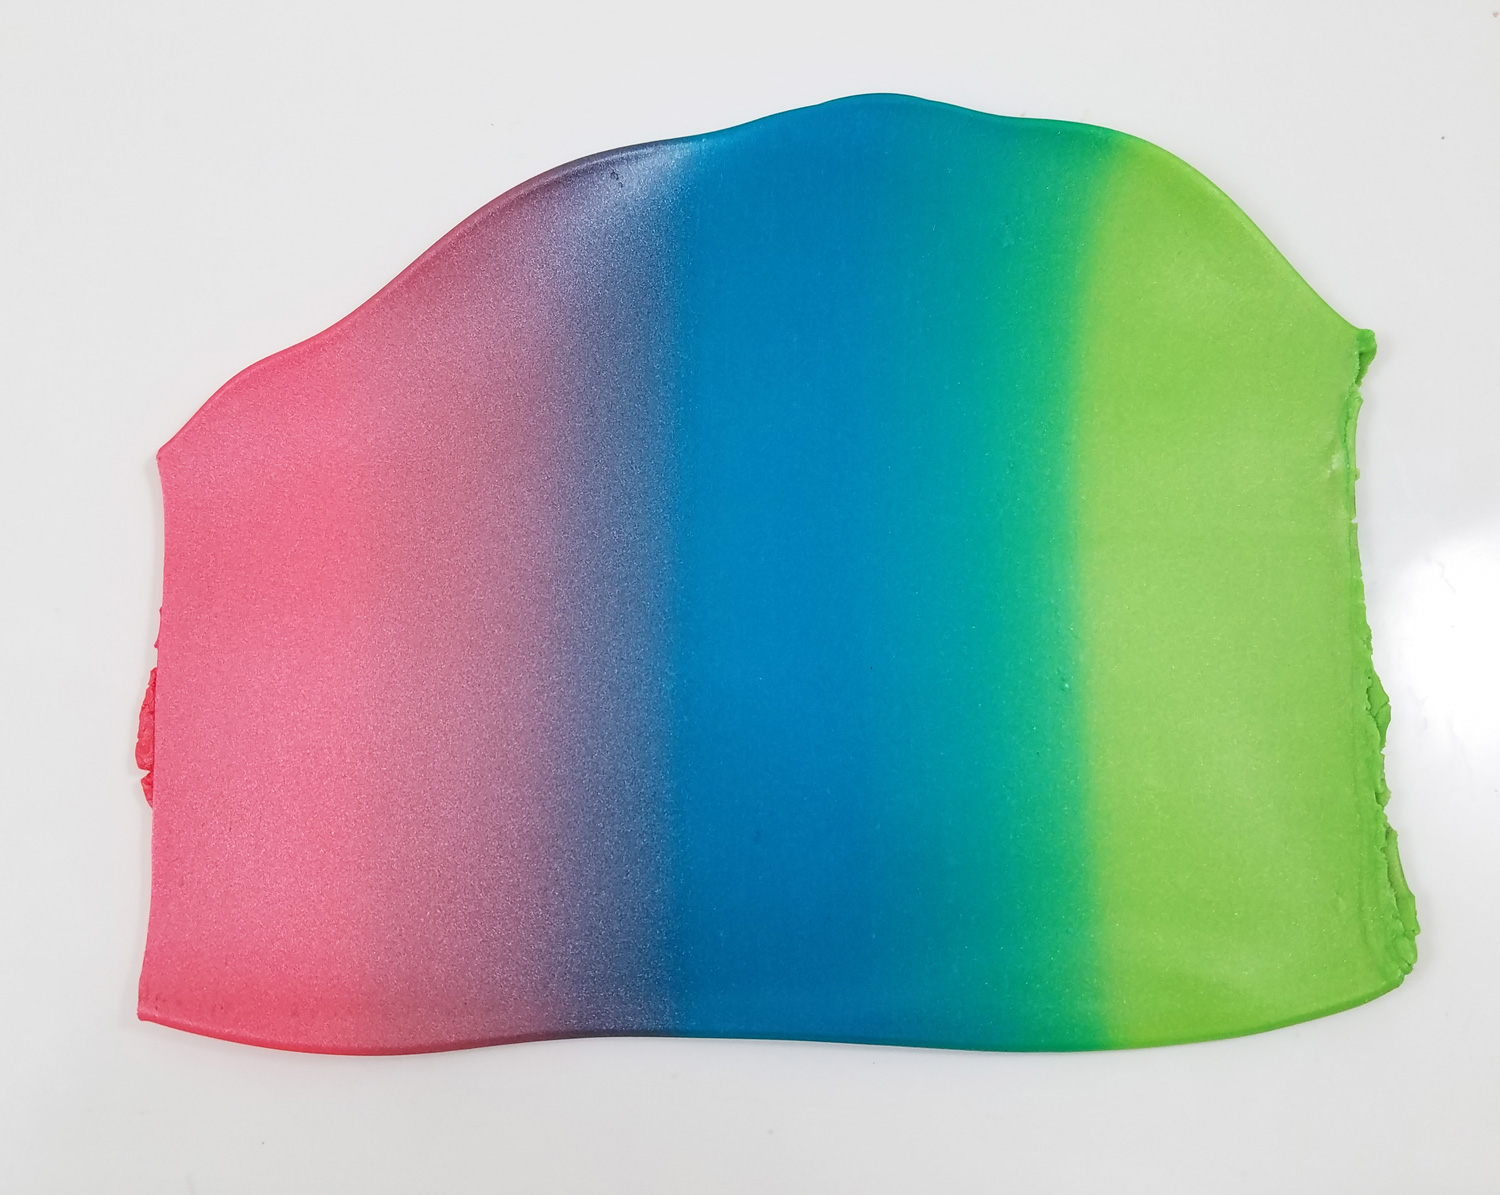
This gradient of colors is 10 fold-and-roll passes through the pasta machine, I wanted an even smoother transition of colors and ran the clay sheet a few more times through the pasta machine.
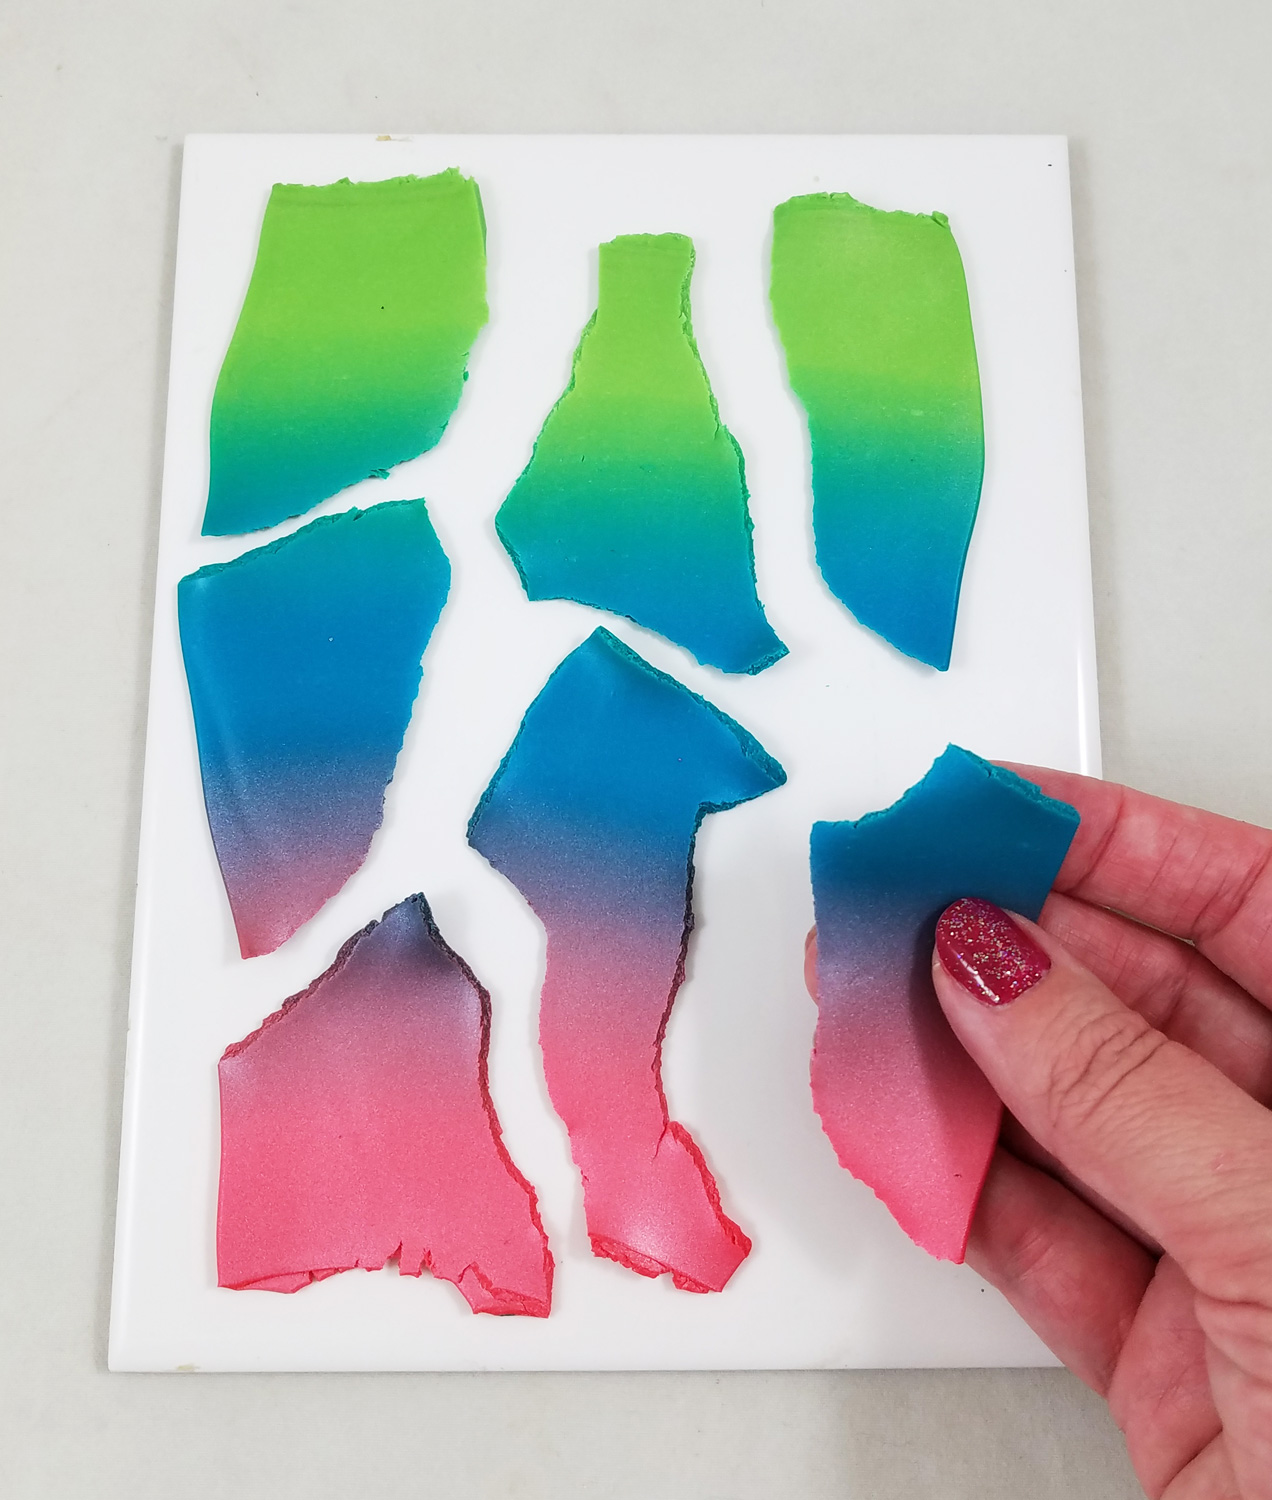
Once I got my clay sheet to the desired blend I carefully tore the gradient piece of clay into smaller pieces. This might seem a bit odd to do after all of the hard work getting a smooth gradient but stay with me!
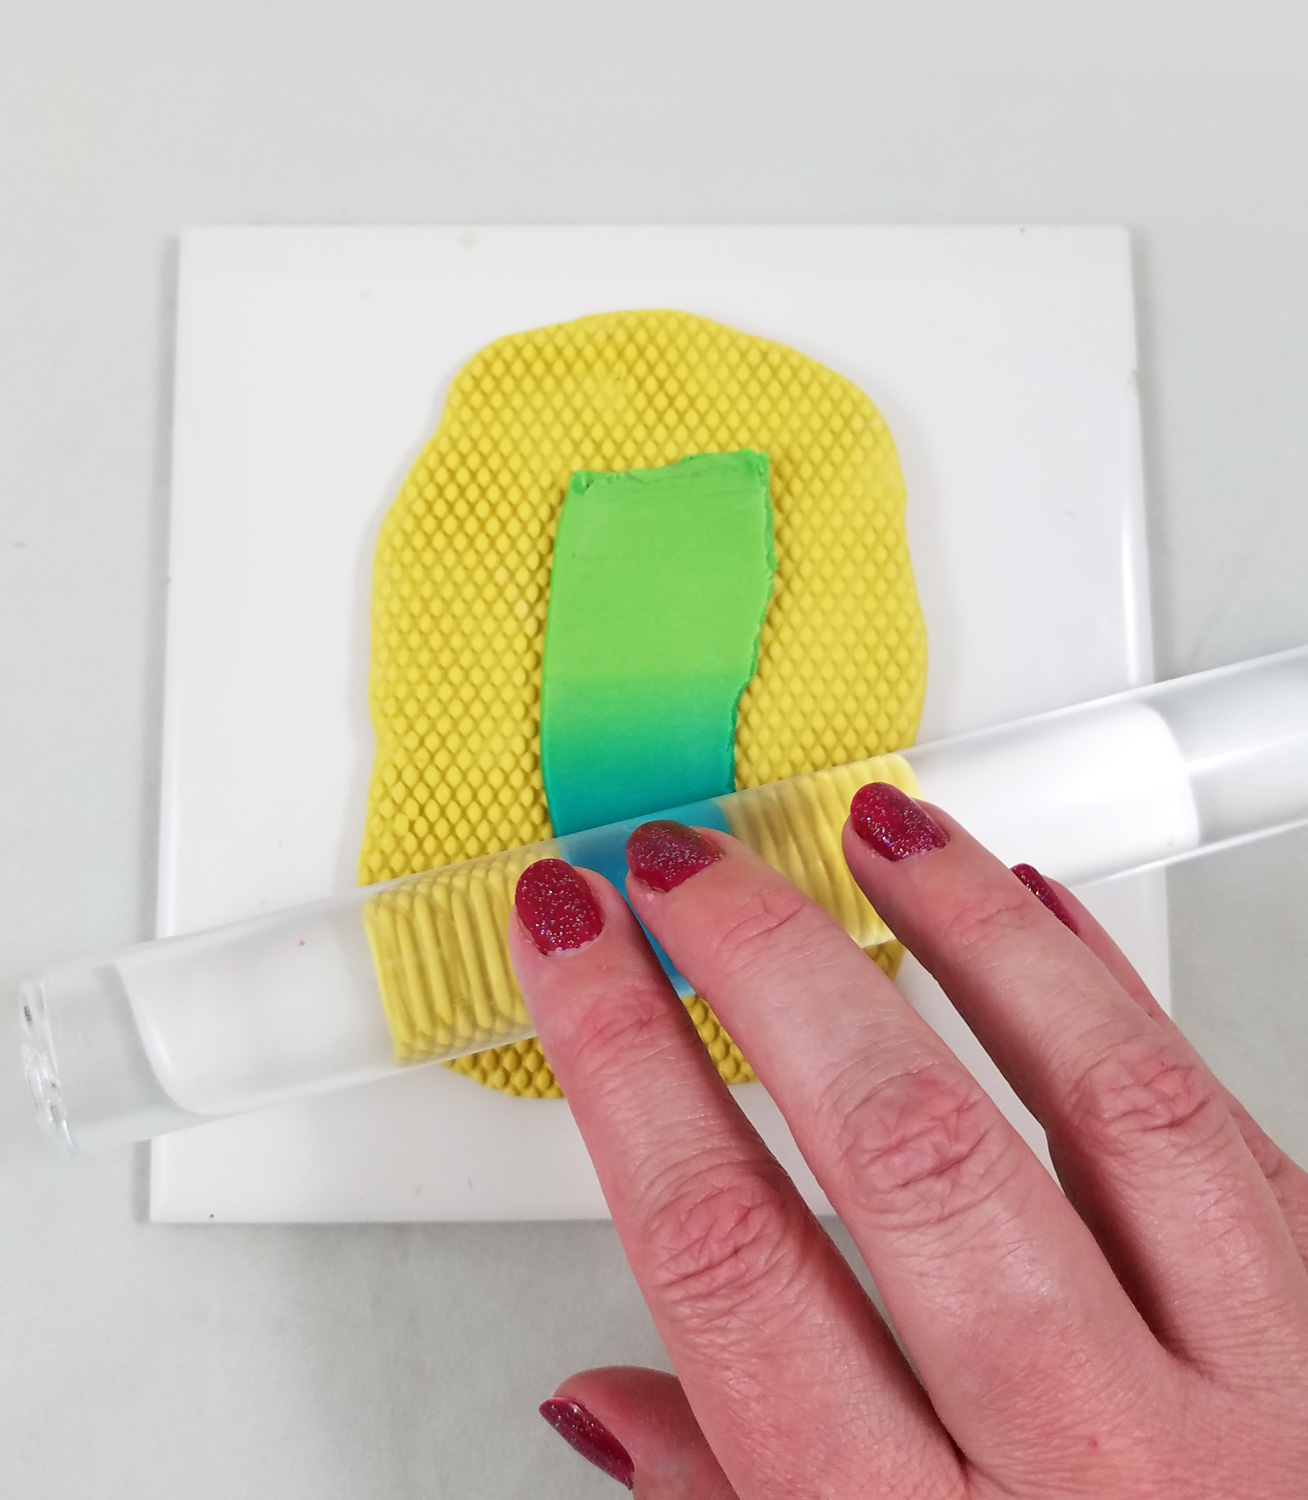
Taking each small torn piece of clay I placed it on my Amazing Mold Putty mesh texture plate and rolled an acrylic roller in a firm but consistent motion, careful to get as much texture as possible impressed into the soft clay.
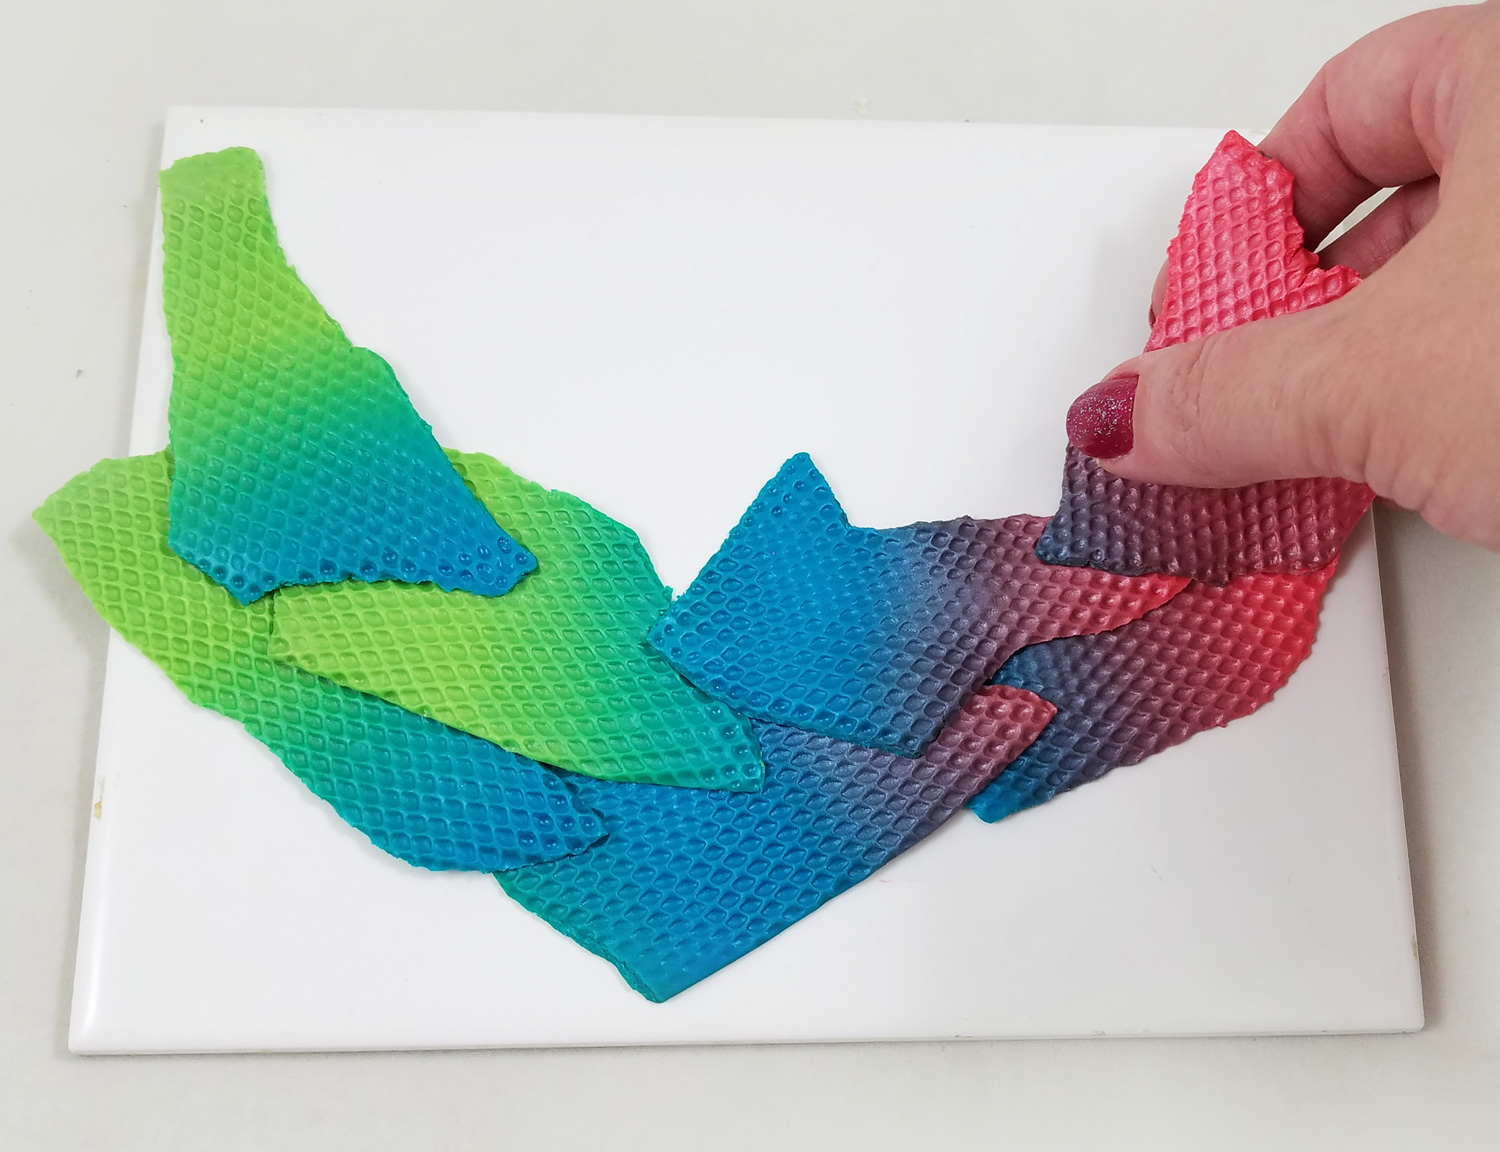
Each textured piece of clay was placed on top of each other in a semi-circle shape, and pressed lightly at the edges to help stick each piece together.
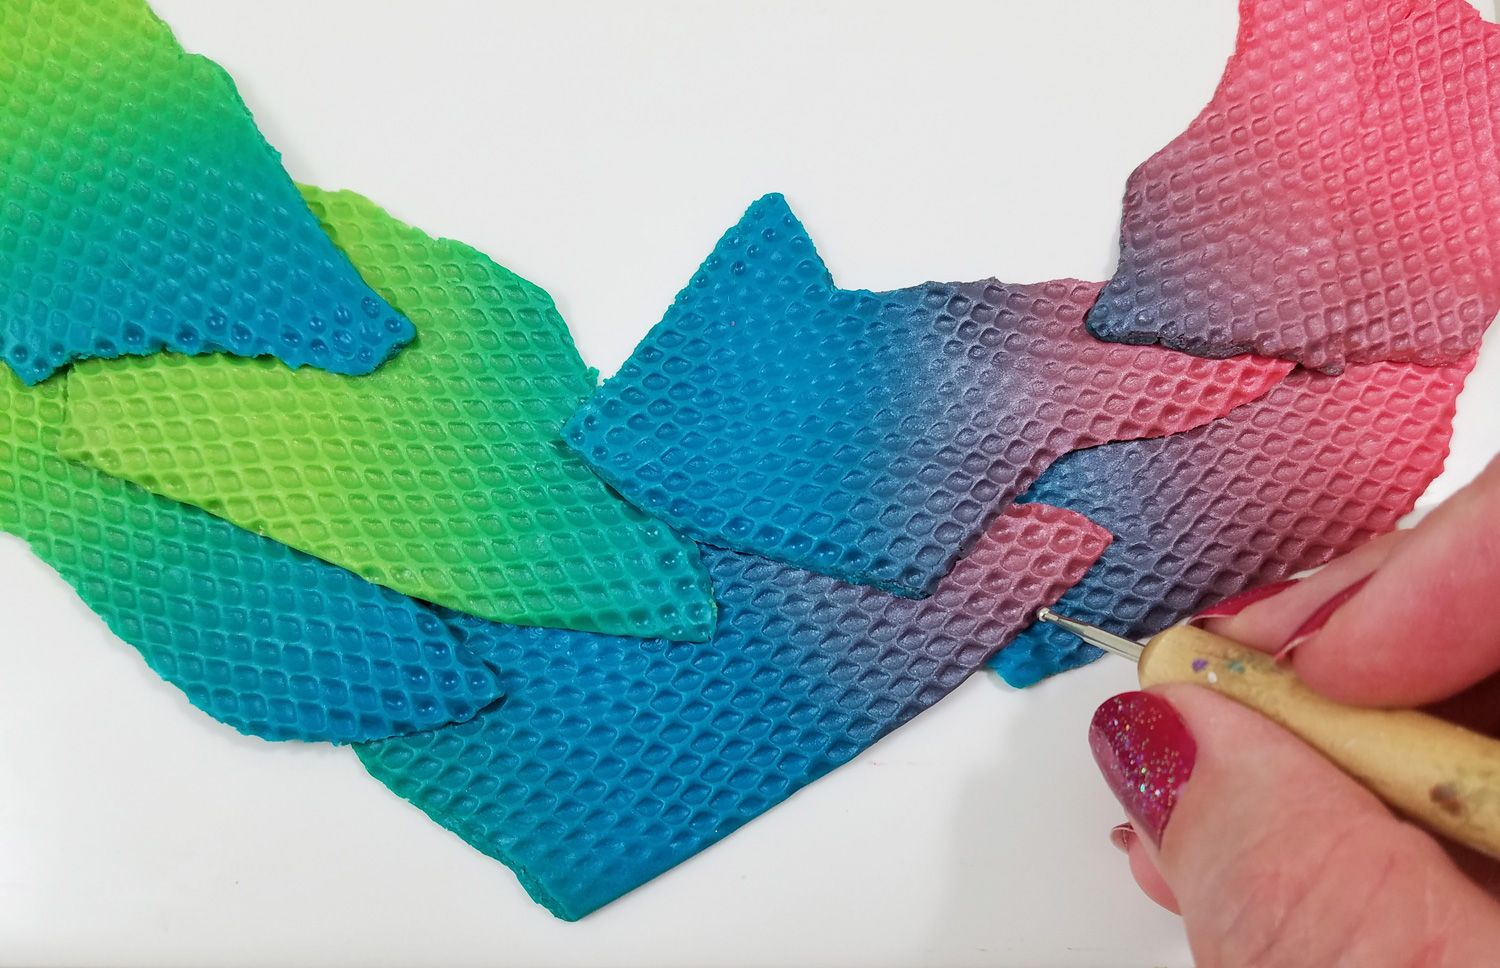
Using a small stylus I fixed any portions of the clay that didn’t get a complete impression of the texture plate and pressed the edges more firmly together in the scale-like indents.
I twisted up half a paper towel into a tube shape, curved it into a semi-circle and placed in on the my ceramic tile. I then carefully removed my curved clay piece off the tile and laid it on top of the twisted paper towel, pushing the clay sides down every so slightly creating a raised portion. The raised form would give the clay more dimension and allow for a more dynamic application of metallic powders.
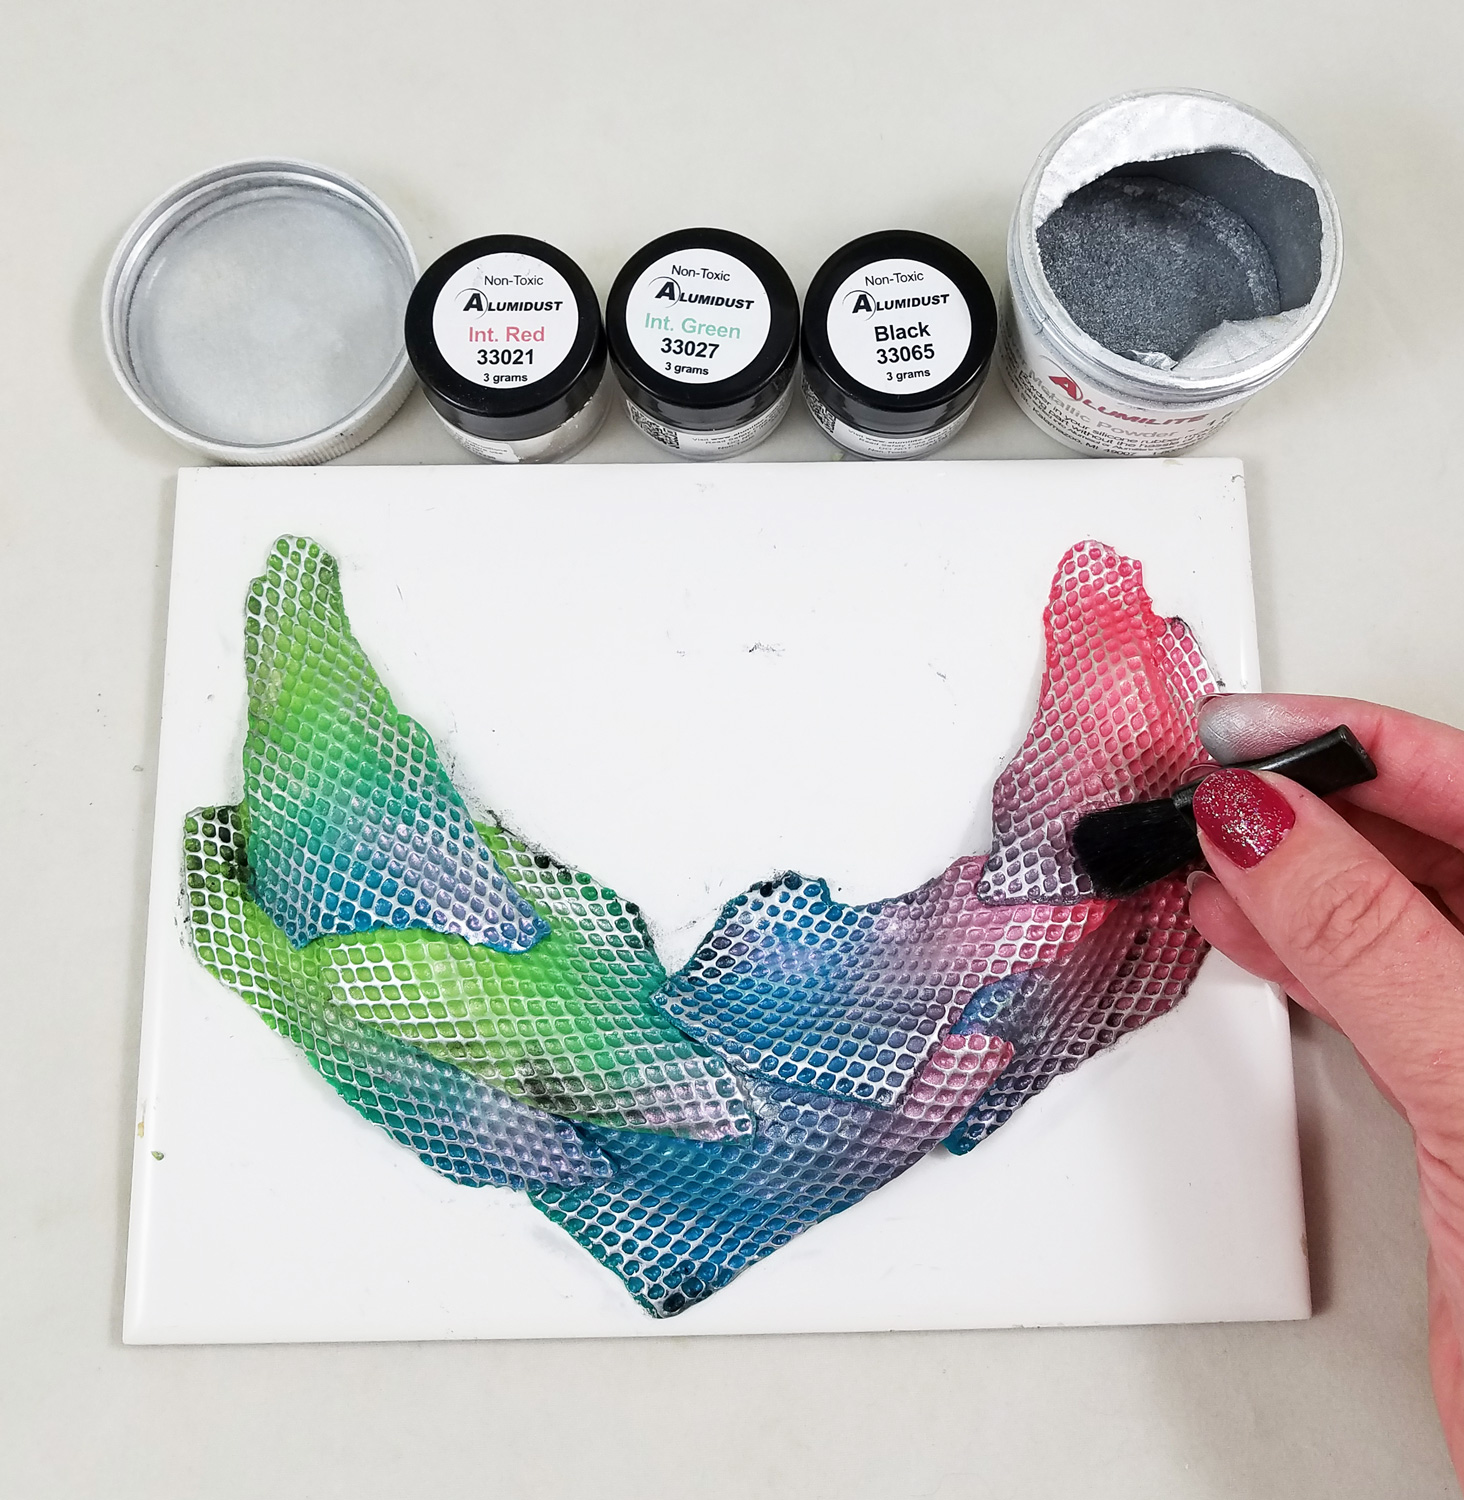
I dipped my finger in some Silver Alumilite Metallic Powder and gently ran my finger across the raised textured surface of the clay, highlighting the scaled texture. Using a soft makeup brush I applied Interference Red and Green Alumidust into the lower portions of the scale texture on the clay. I applied only a very small amount of the Black Alumidust to the edges of the clay. The powders bonded to the uncured polymer clay without the addition of a glue or sealant.
I made two holes on the top left and right of the necklace with a stylus; these would become holes to place jumprings and chain through once the clay is cured.
I then put the tile with the clay necklace into a toaster oven, heated per manufacturer instructions, to cure.
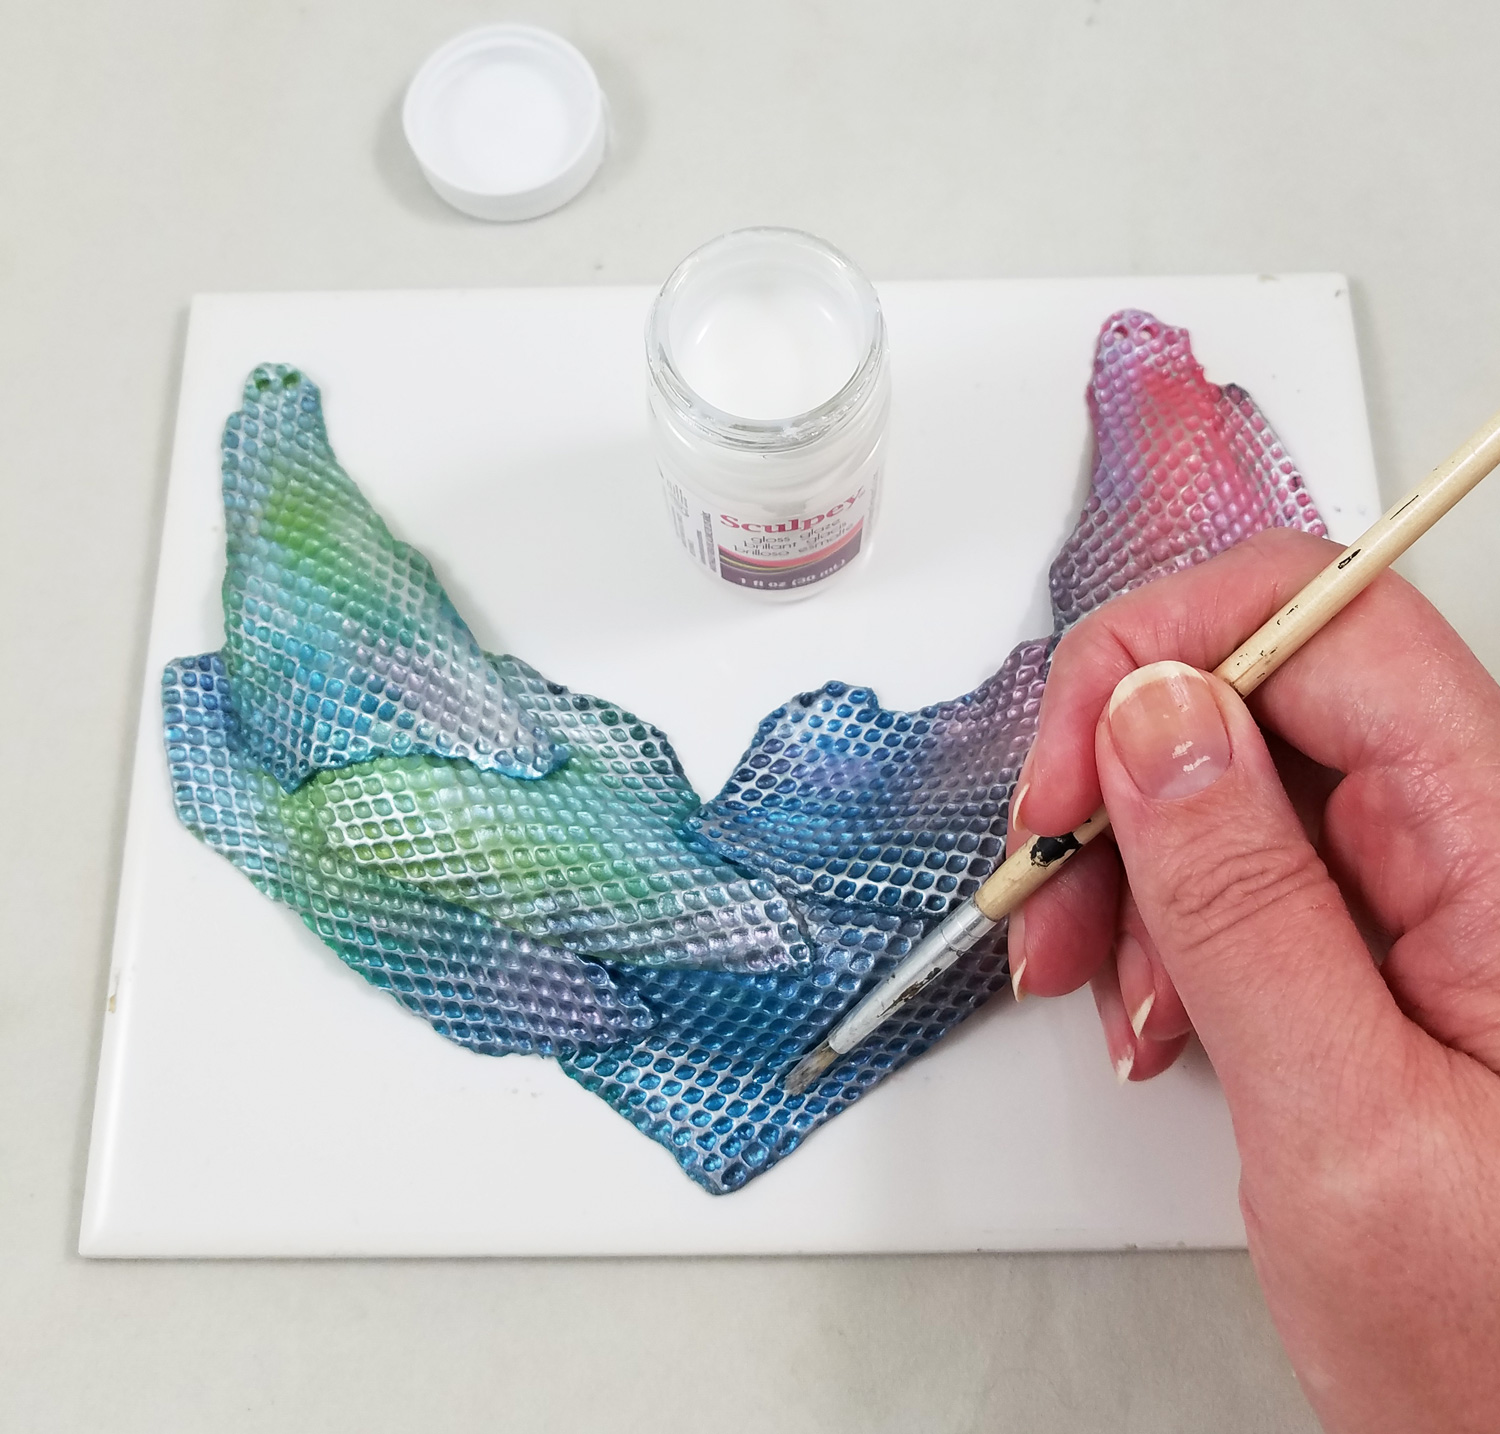
I painted on a coat of gloss Sculpey Glaze over the now cured piece of clay and let it dry per manufacturer instructions.
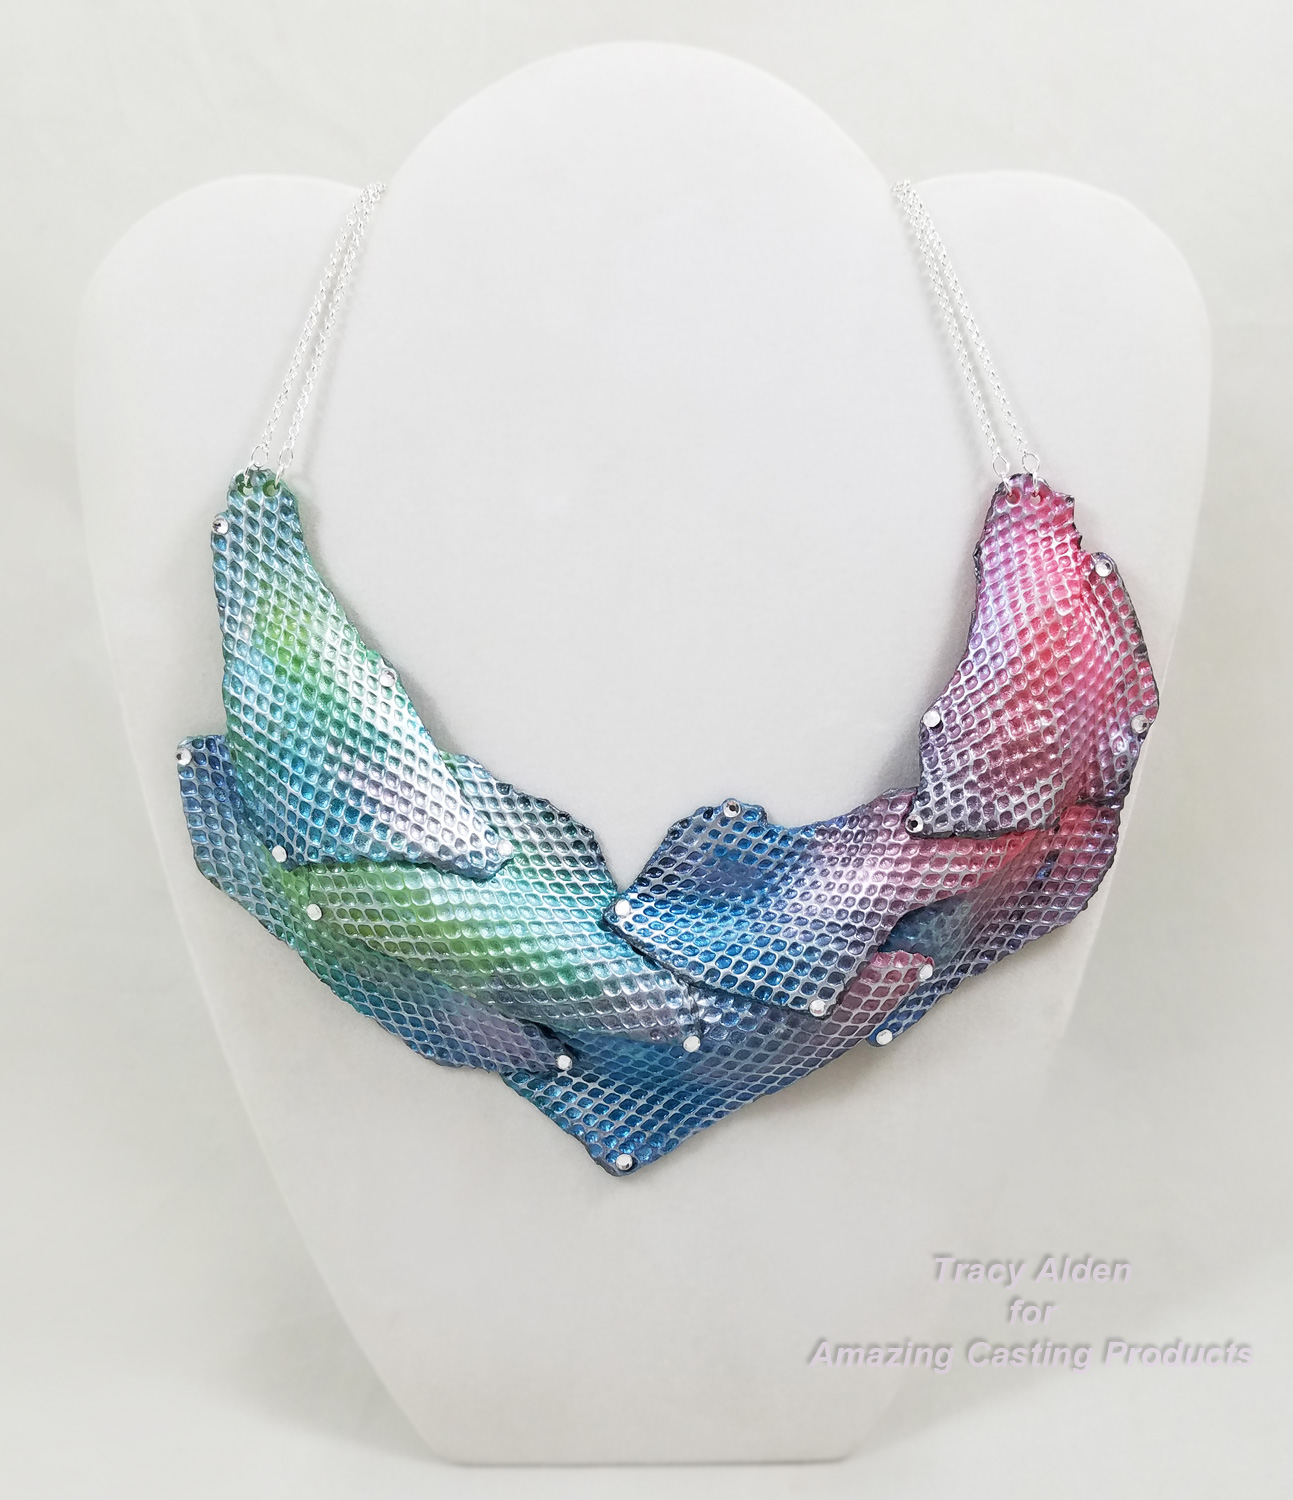
I applied little dots of Beacon’s Gem-Tac glue on the edges of the scales and I added flatback crystal rhinestones. I put jumprings through the two holes on each side and attached jewelry chain. Now the necklace was ready to wear!
Happy Holidays and until next time, safe travels!
This is an affiliate post, which means I received an assortment of products as a compensation for the creation of art. To read my full disclosure, click here.