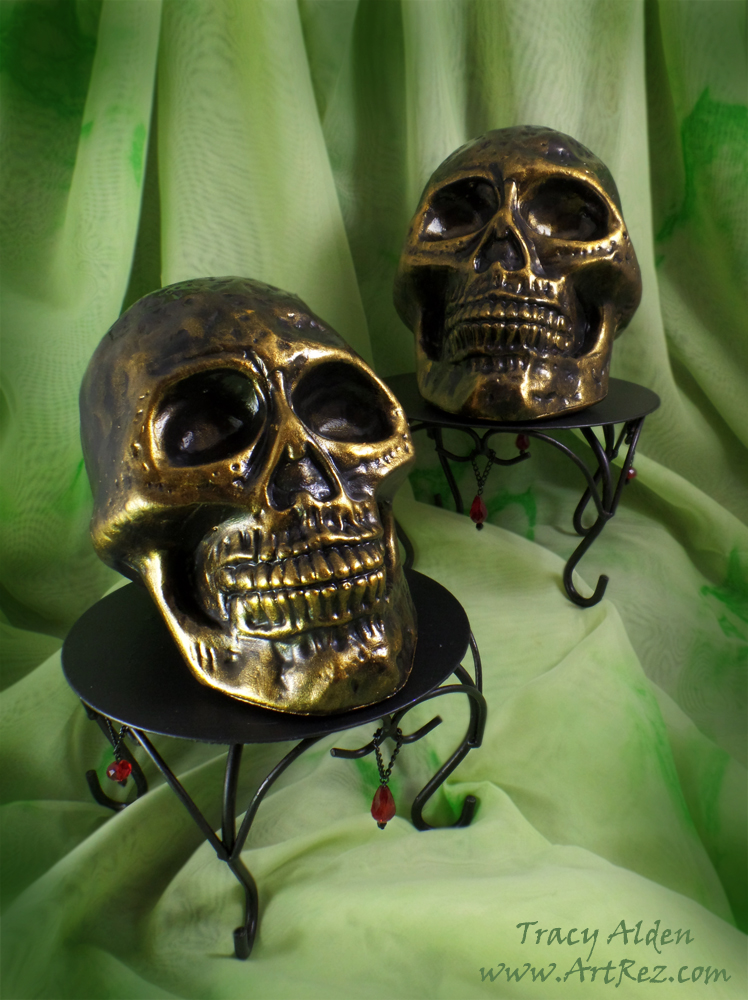
Upcycle Plastic Skulls into Ghoulish Glam Decor
The first day of October: the leaves are starting to fall and the temperatures are slowly starting to drop at night! With only a month left to get all of my Halloween projects, I have been traveling to all sorts of places for interesting supplies. One of my favorites is the many local Thrift Stores in our area that support local charities. At this time of year many will get in all kinds of Halloween items and one store had a lot of plastic skulls. I noticed that while the paint job on the skulls wasn’t particularly grand the sculpting of the skulls was nice. It got me thinking how they would look if I changed the paint and finish, replicating the look of ceramic!
Supplies:
Plastic Skulls and Metal Candle Stands
Liquitex Gloss and Matte Varnish
Black Chalk Board Paint
iZink Pigment Ink bottle – Gold
Fiona Accessories Red Crystal Drop Beads, Black and Red Crystal Rondelle beads
Beadsmith 1 Step Looper Tool
Black enameled chain, jump rings and headpins
Paint Brushes
Cosmetic Sponges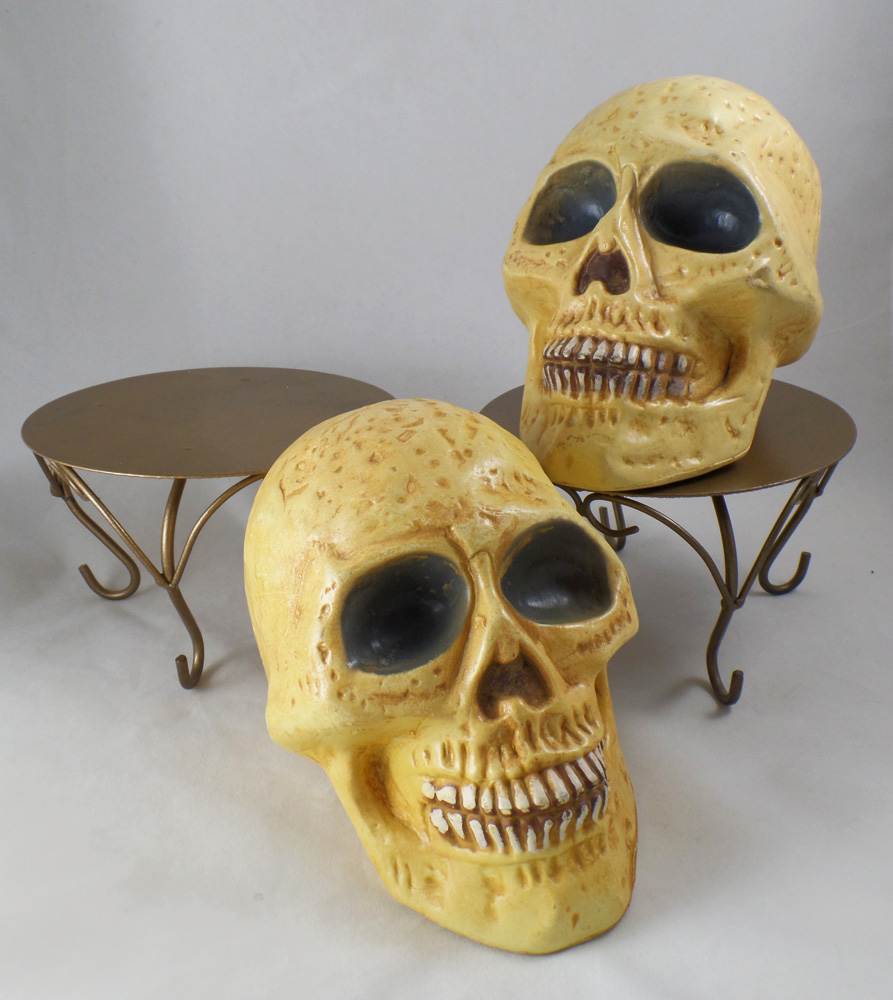
Along with the skulls I found some old candle stands with a old bronze finish. I noticed the skull fit perfectly on them so I bought them along with the skulls. I scrubbed the plastic skulls and candle stands, removing any dust, stickers and uneven edges.
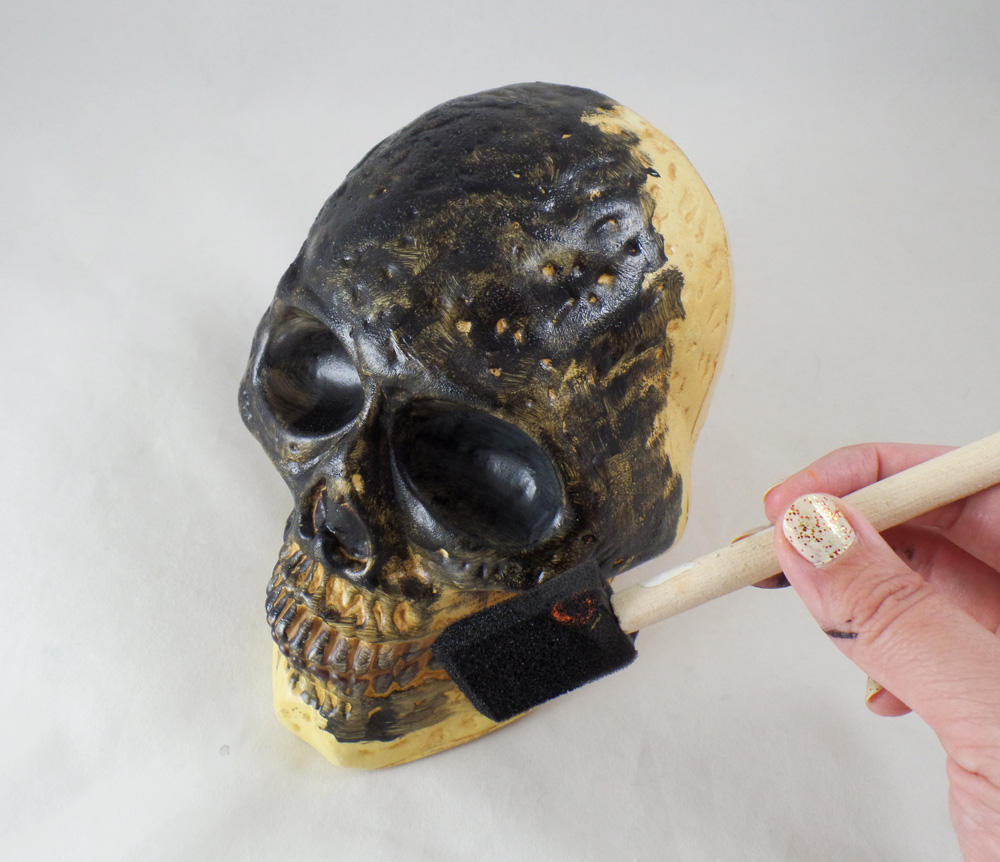
While I could have easily spray painted the pieces, I wanted to go with a nontoxic and child friendly direction by using chalk paint. I painted the skulls and candle stands with 3 layers of black chalk paint. Most chalk paints require a 1-2 hour dry time between coats of paint for best coverage and adhesion of the paint.
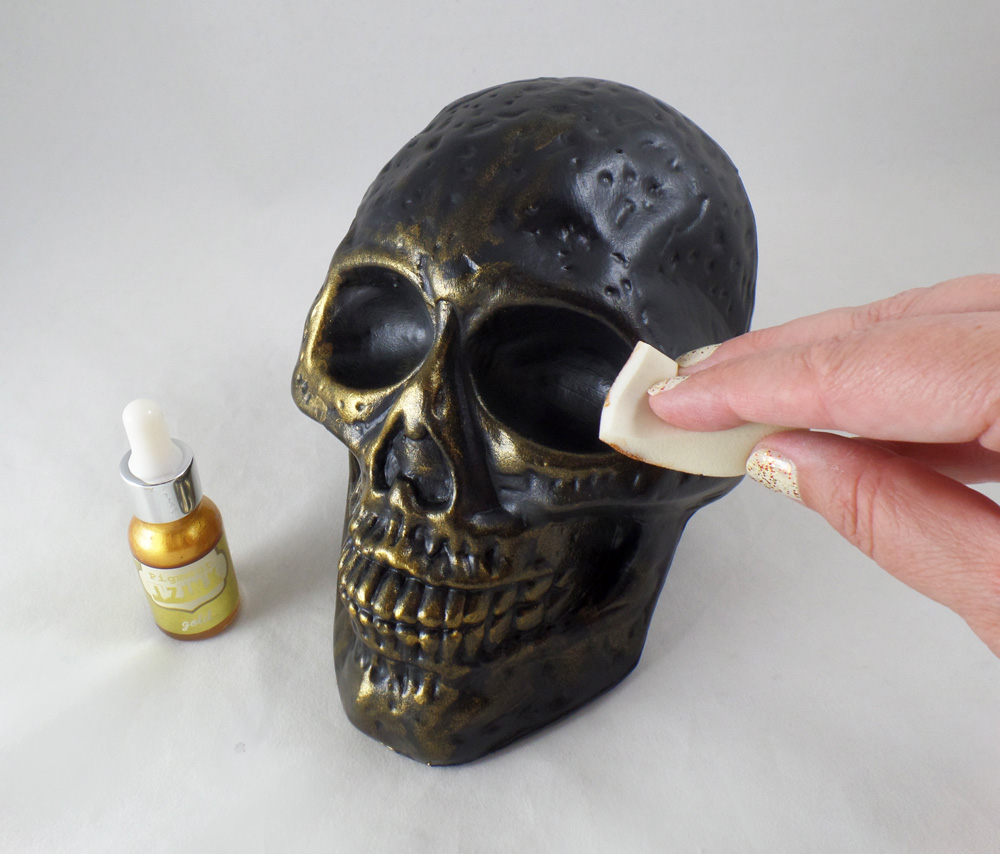
The skulls already looked better than they used to but I wanted them to look more like ceramic. Using a cosmetic sponge I applied Gold iZink Pigment Ink to the raised portions and detailed parts of the painted skulls. The ink dries rather quickly allowing me to add several layers on sections for a dramatic effect.
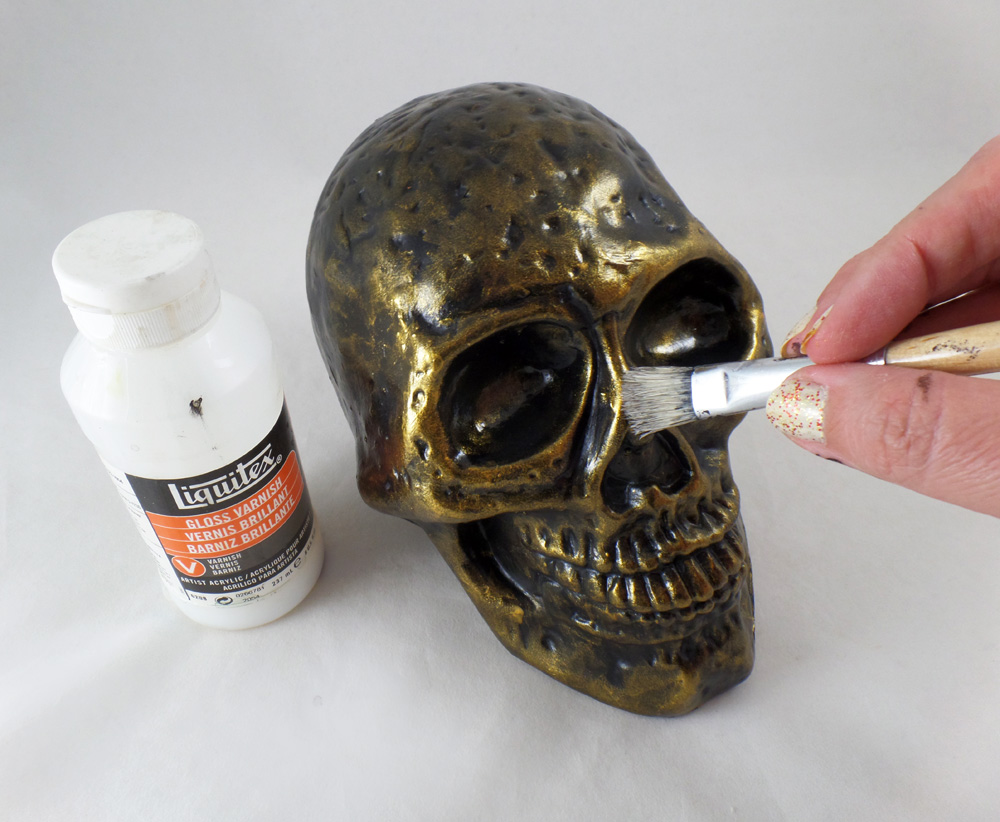
I applied Liquitex Gloss Varnish to the sections on the skulls with gold ink to make the gold tone visually stand out more and give the illusion of ceramic.
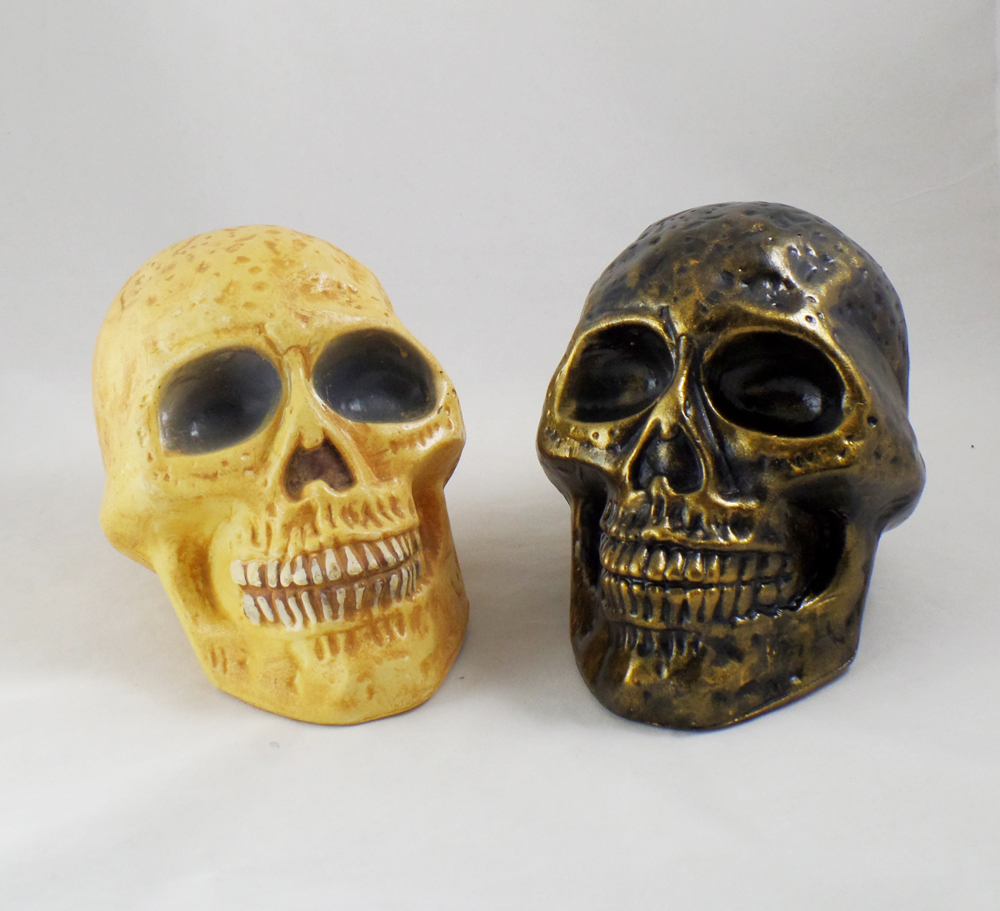
Compared to the original factory paint I was pretty happy with the new version, replicating the look for ceramic. However I felt the skulls needed something more.
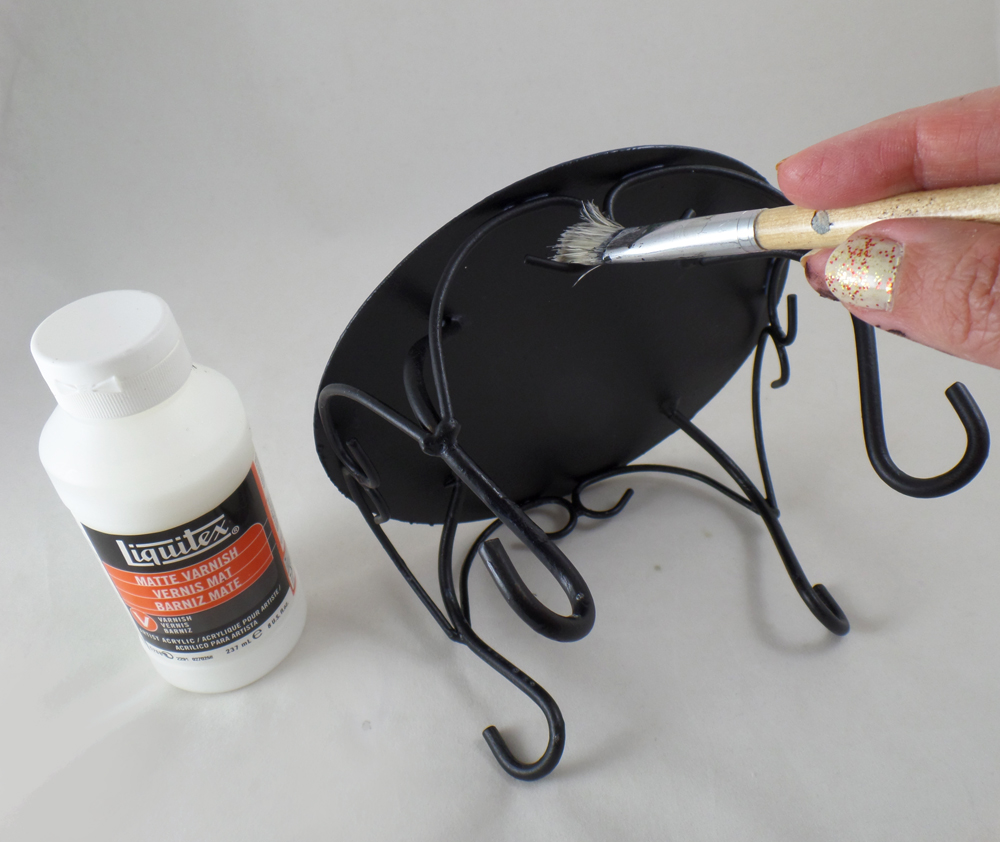
With the candle stands already painted with black chalk paint all I needed to do was paint them with Liquitex Matte Varnish to seal and protect the stands.
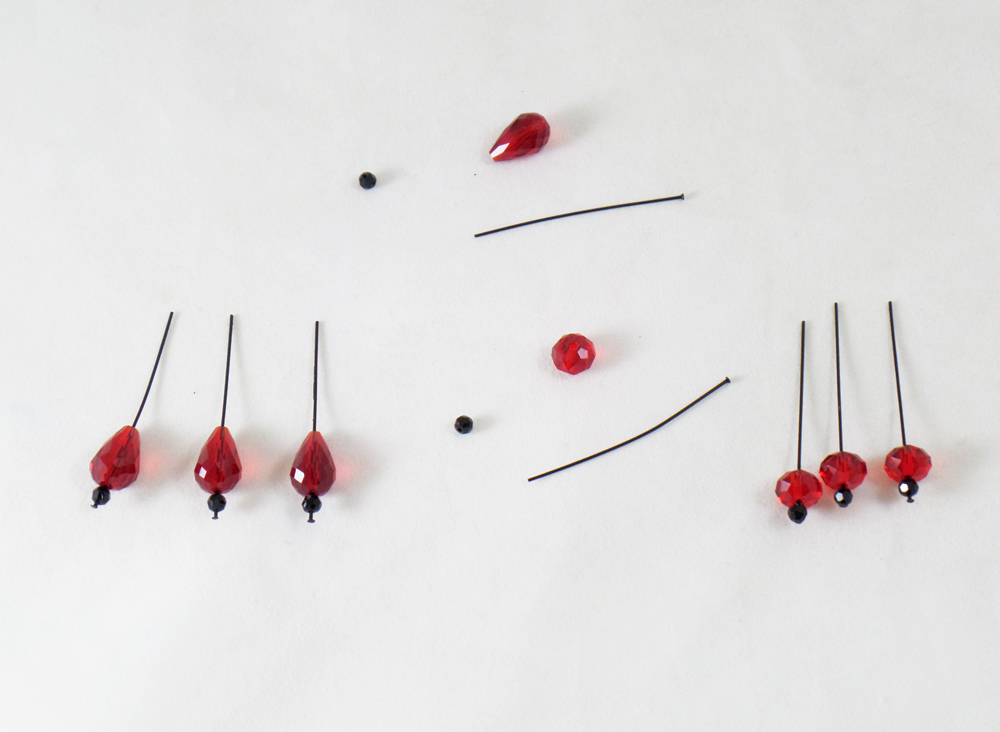
On four black enameled headpins I threaded on one black crystal rondelle and one red drop. On four more black enameled headpins I put one black crystal rondelle and one red rondelle. These will become embellishments for the candle turned skull stands.
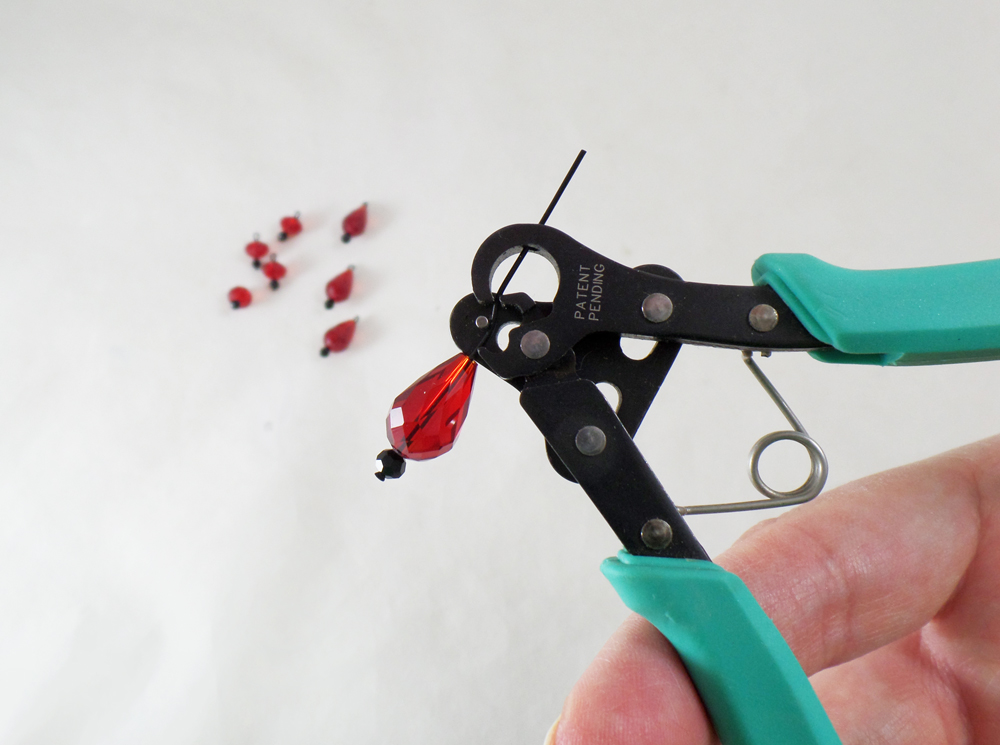
Starting with two beads threaded on a headpin I threaded the wire through the Beadsmith 1 Step Looper Tool, cutting and creating the loop I needed for the start of the beaded dangles. I repeated this the rest of crystal drops and rondelle beads on the headpins.
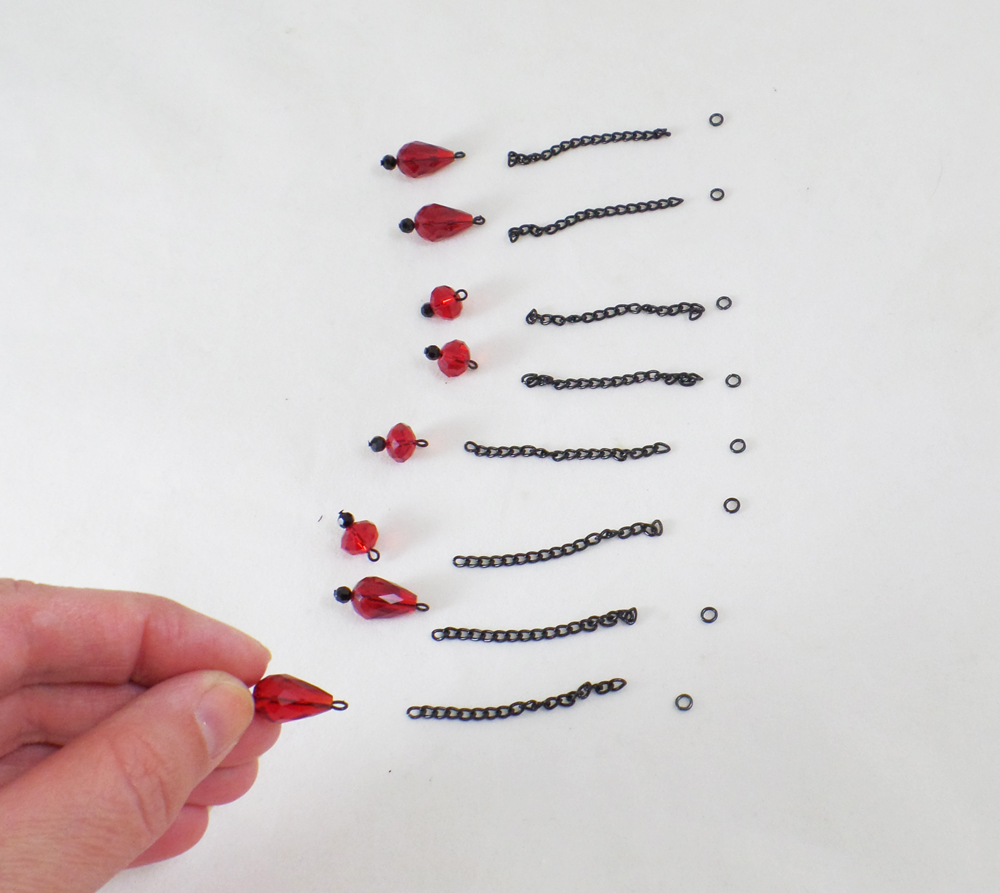
I cut black enamled chain into 2 inch lengths and placed eight black enamel jump rings with each chain and crystal bead drop.
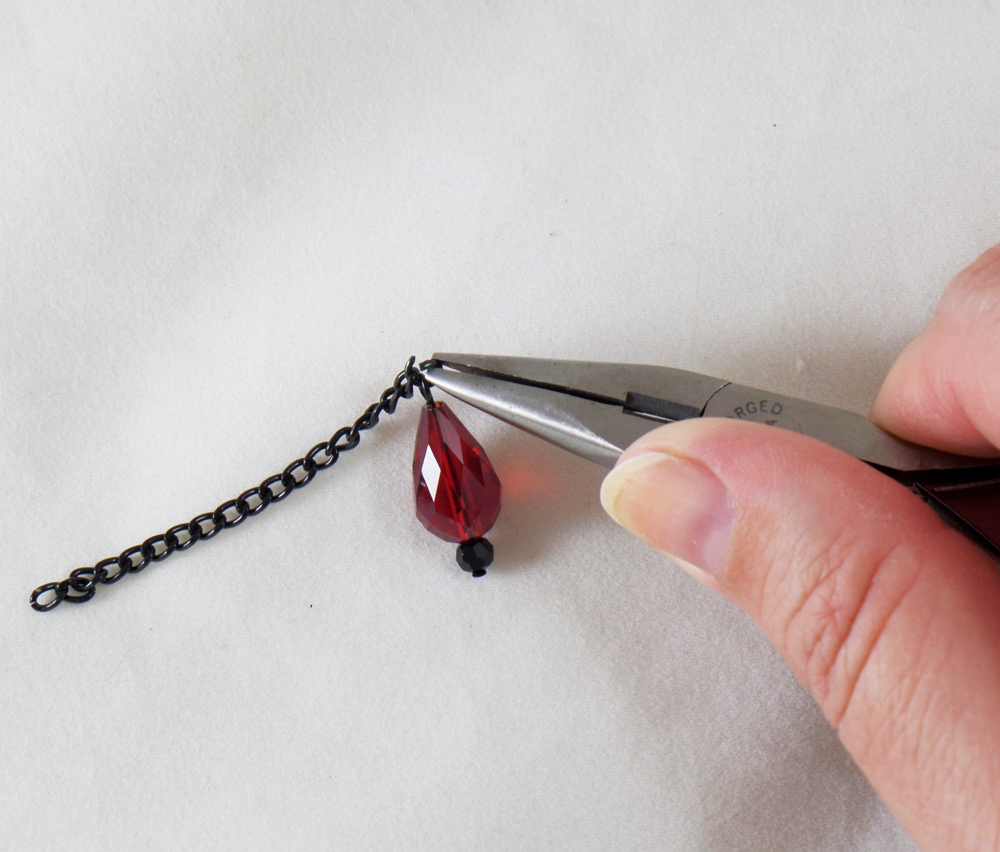
I opened up a jumpring with flat nose pliers and put the jumpring through one of the crystal bead headpins, and one of the cut lengths of chain.
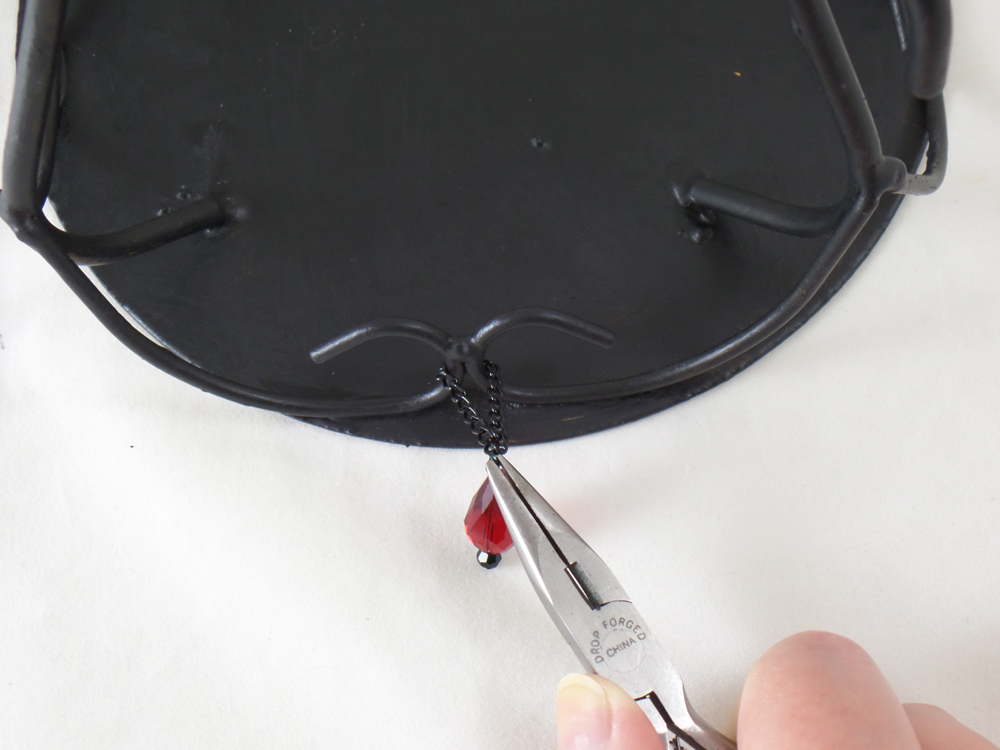
Flipping over a candle/skull stand I lopped the chain around one of the metal curls. I picked up the end of the chain not looped on the jump ring and carefully hooked the still open jump ring on it. I closed the jump ring with the pliers, making sure both ends of the chain and beaded headpin were threaded on the ring. Chain and beaded headpins were added to all four sides of the stand, then the stands were flipped over allowing the chain and beads to become a decorative element.
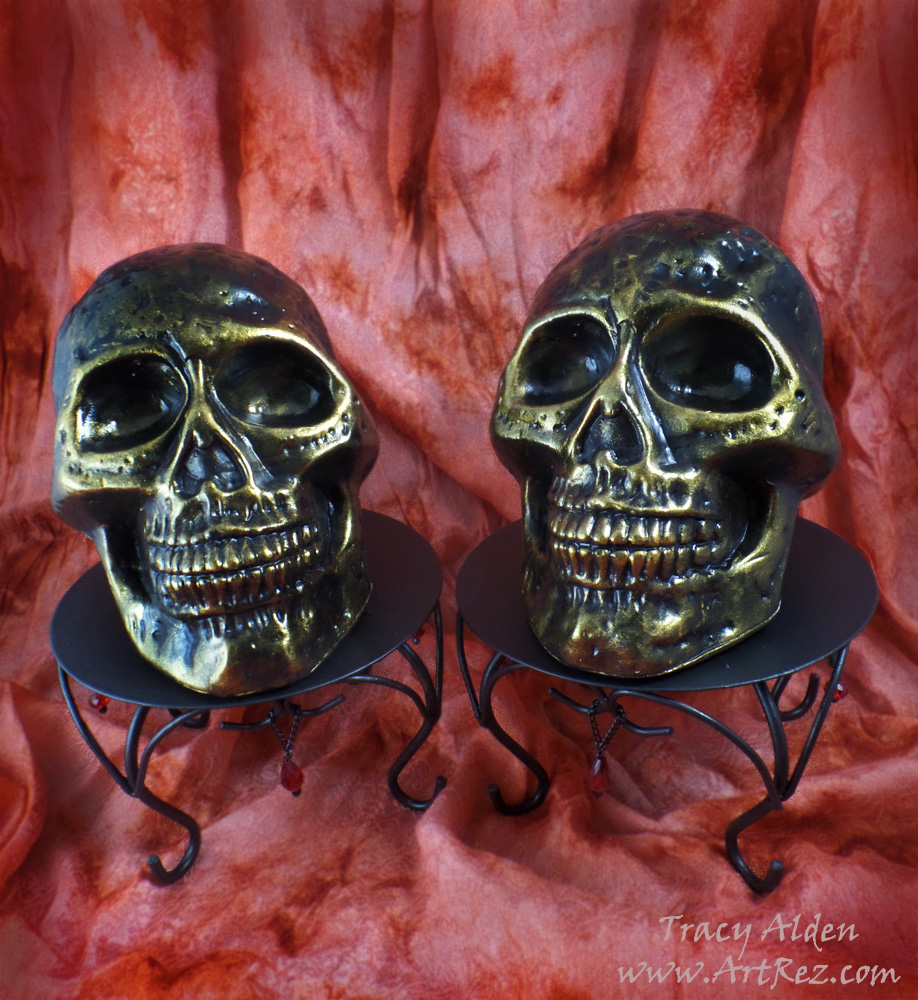
I placed the plastic skulls on their stands and placed them along with my ever growing collection of Halloween decor!
What old decorations might you find in your travels that you can upcycle?
Until Next Time, Safe Travels!
Day of the Dead Papier-mâché #Cre8time Inspiration
I am a huge fan of Day of the Dead festivals and artwork, even if it is a wee bit ahead of the calendar date! I was inspired to create these pieces after going to Linpeng International Inc./Fiona Accessories to visit with Fiona and Jimmy Lin. They are truly wonderful and talented people with a dedication to creating beautiful hand painted beads, jewelry and beading supplies, and I am grateful for meeting Fiona at the Craft and Hobby Association Trade Show in 2014. At this visit, as usual, we discussed beads and jewelry, went over new ideas and displays, but Jimmy showed me something a bit different this time: little packages of Acrylic flat back gems, normally used for scrapbooking, in a wide variety of colors. He asked me if I could think of any other applications and the first thing that came to mind was covering papier-mâché skulls with the gems for Day of the Dead decor.
Supplies:
Fiona Accessories Acrylic flat back gems Flower and Diamond shaped in sizes 14mm, 19mm, 22 mm and 20x30mm
Mini acrylic flat backed gems (normally for scrapbooking, nail or shoes)
Liquitex Gloss Varnish
Acrylic Paint
Paint Brushes
Papier-mâché mask and skull by Darice and often sold at Michaels late Summer into Fall
Beacon Gem-Tac (Great stuff, non-toxic and flexible)
Sakura Pigma Micron Pen Set (I just love using their pen sets for any illustrations I do)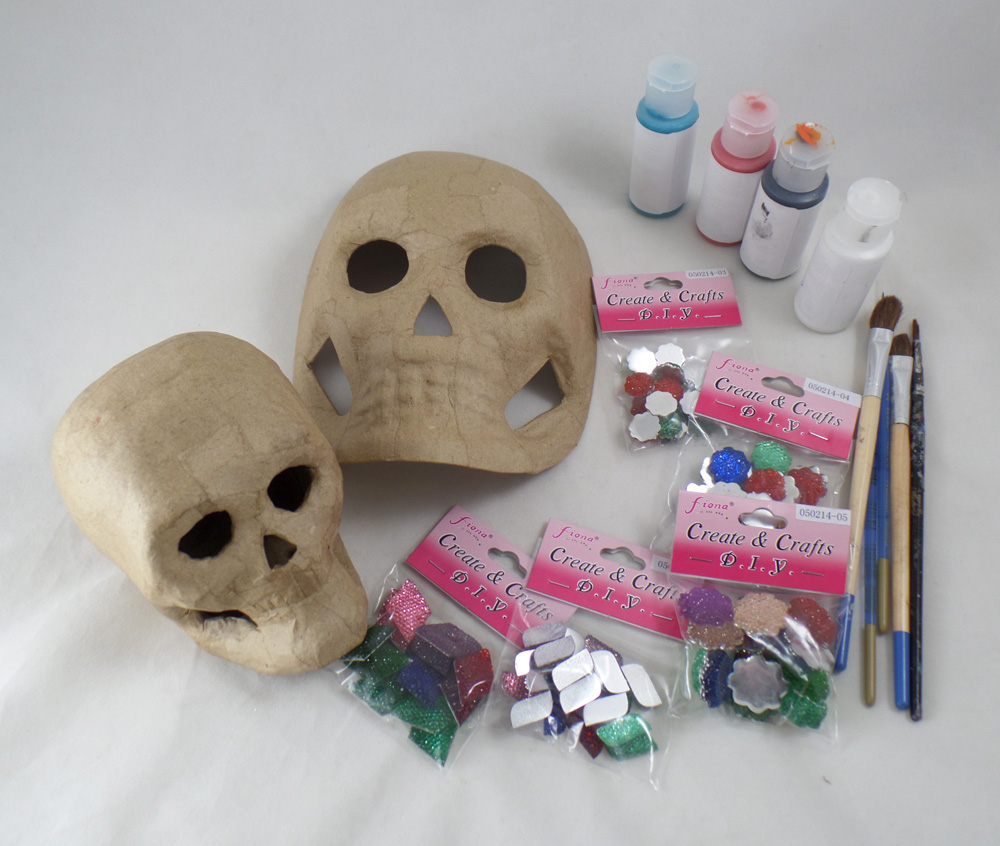
First I gathered all of my supplies, picking colors of paint, acrylic gems, brushes and which papier-mâché pieces I felt would look the best for what I had in mind.
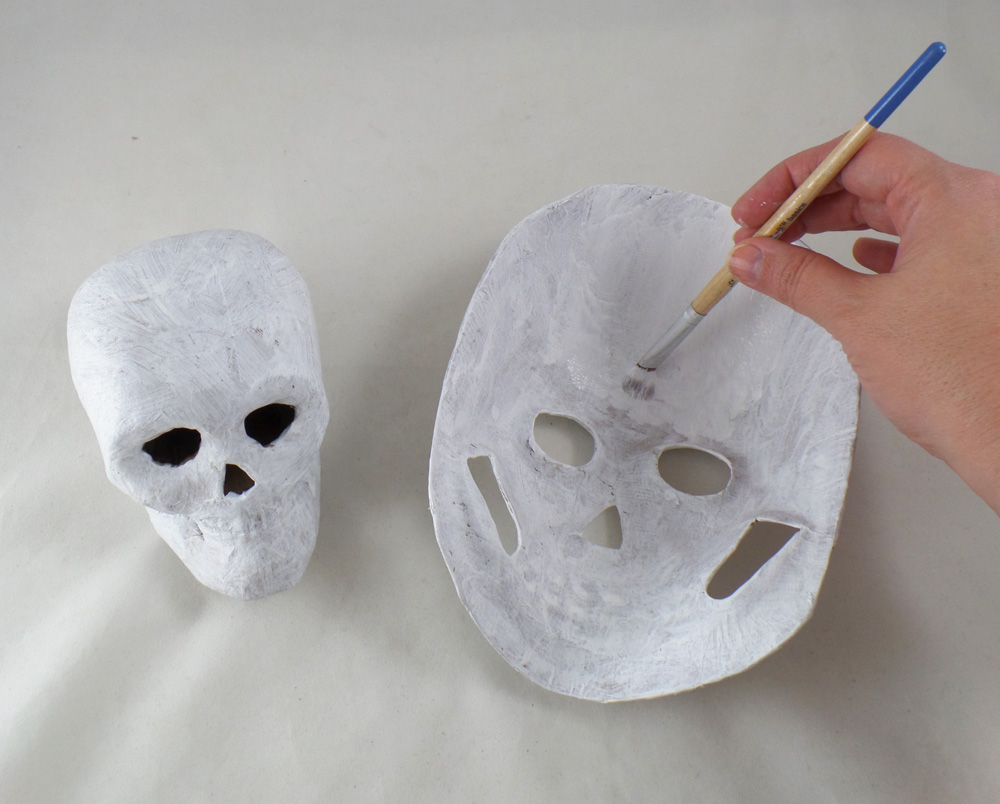
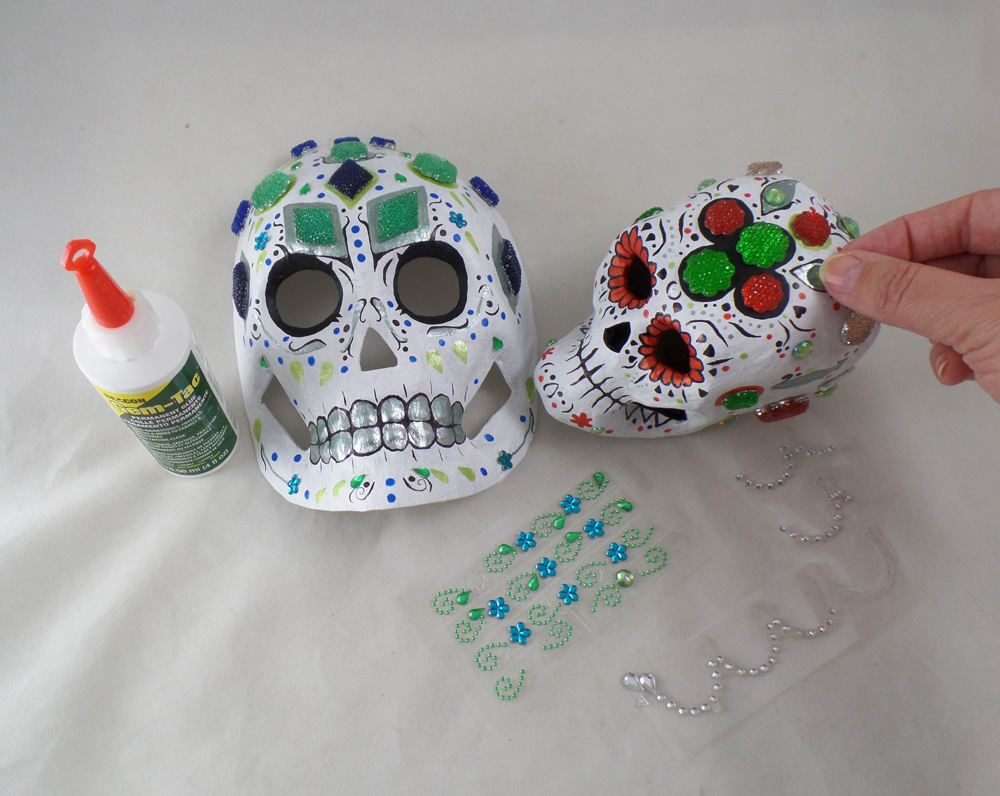
I started by applying white acrylic paint to the entire surface of the papier-mâché skulls. I let each layer of the paint dry completely before adding the next layer to prevent the papier-mâché from getting too wet and losing shape. I noticed that 2-3 coats of paint are normally required to get complete coverage.
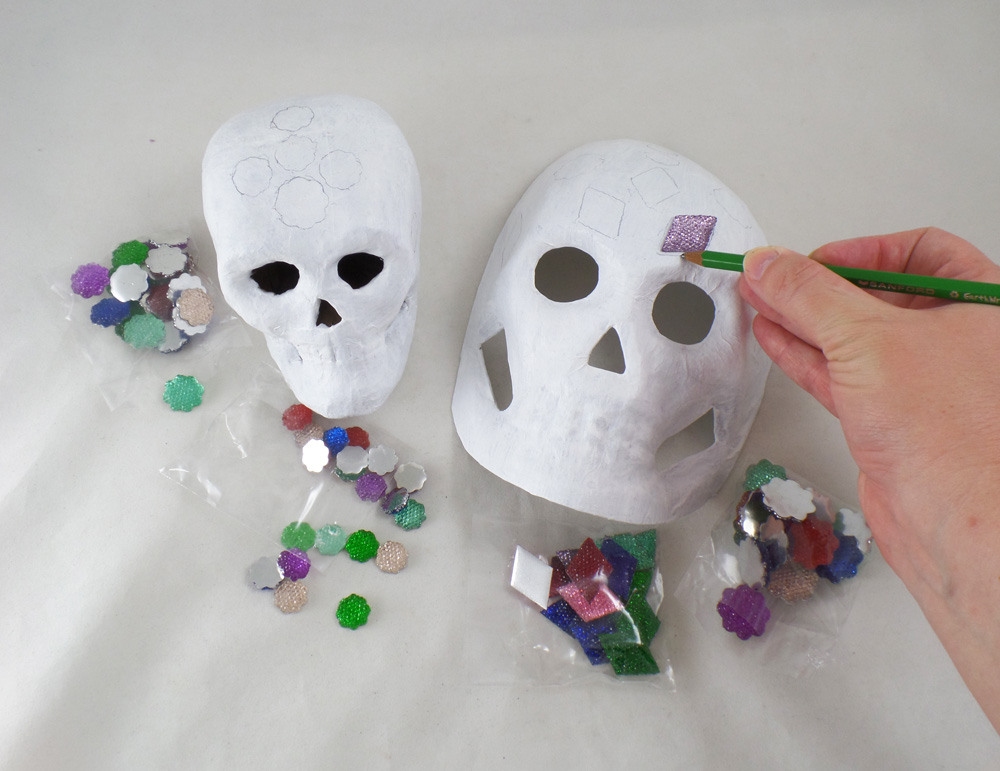
I started to loosely place where I would like the Fiona Accessories Acrylic flat back gems to sit on the papier-mâché and traced outlines in pencil, but I did not glue them on at this point. This would give me outlines to follow and color in with the pens and paint before applying the gems.
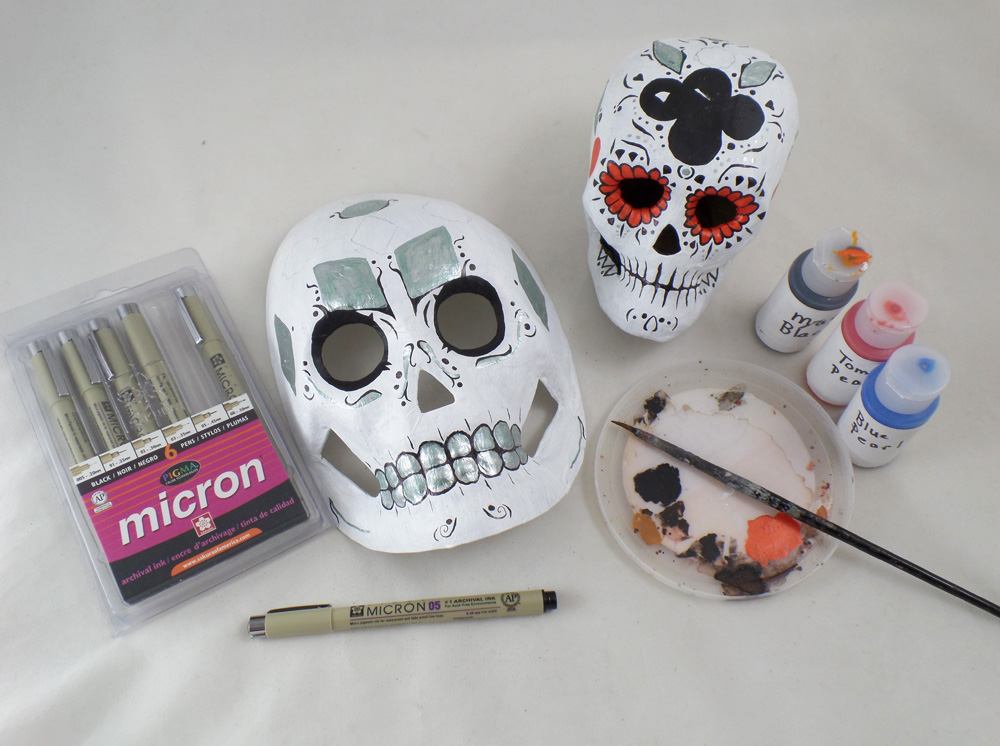
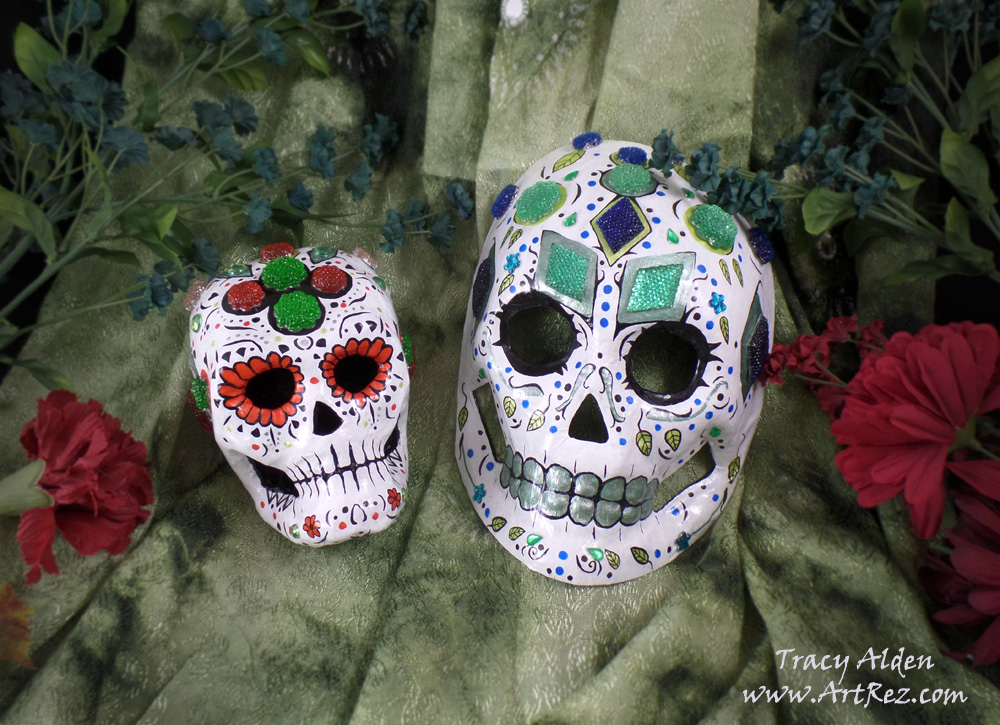
There is no set pattern or design to Day of the Dead masks, as it is a wonderfully free form style of art, allowing the artist to put any variety of shapes, symbols and scroll-work on their pieces. I have a fondness for plant life and organic shapes so I painted flowers, vines and geometric patterns across the pieces in silver, black, red and blue. I outlined key elements with Sakura Pigma Micron pens to make them visually pop more.
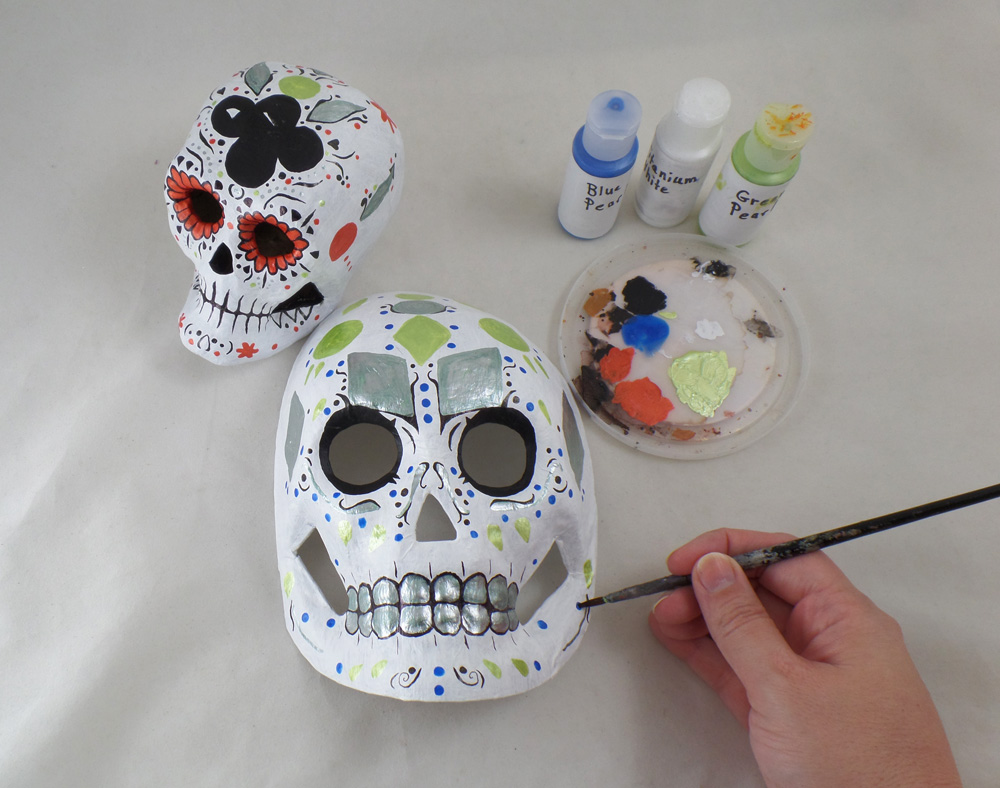
Since I really liked how the silver paint looked I added some leaves and geometric shapes in green pearl paint, along with flowers in red pearl paint. The paint having a slight shimmer would play off the sparkle of the acrylic gems. Applying the paint and drawing with the pens can take some time but I find it rather relaxing and meditative.
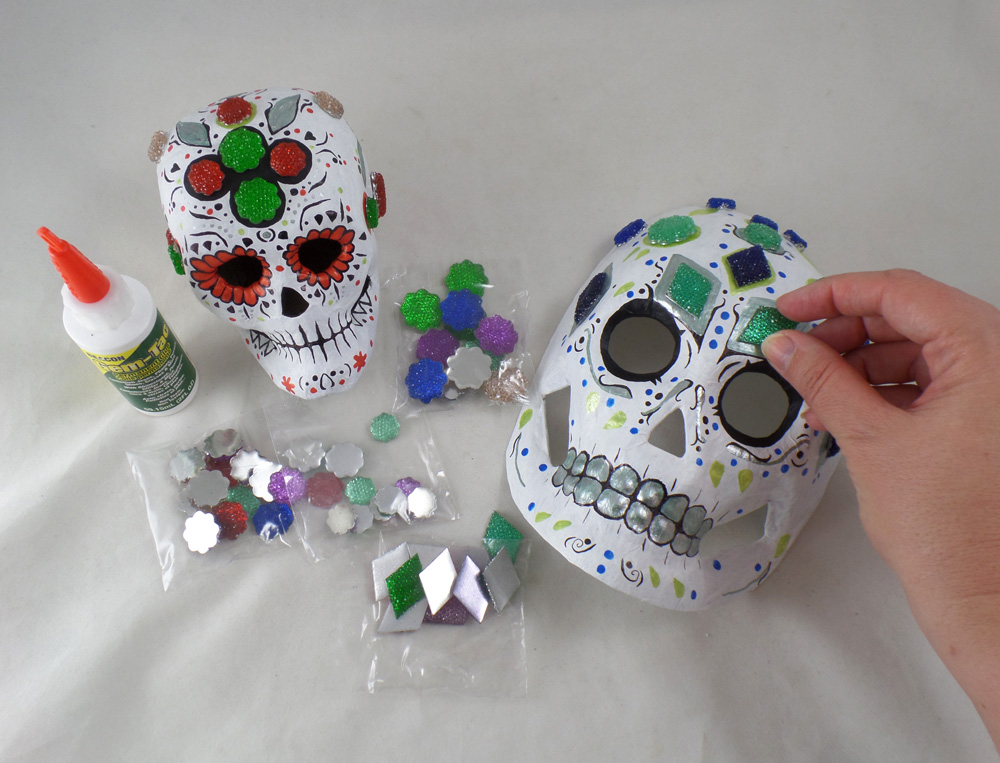
Once the paint was fully dry I applied the Fiona Accessories Acrylic flat back gems to the papier-mâché skulls with Beacon Gem-Tac. A small drop of the Beacon Gem-Tac will go a long way and dry perfectly clear; just holding the gem in place for a few seconds is all that is needed to get the gem to stick to the skulls.
Once all the large acrylic gems were applied to the papier-mâché skulls I filled in the open areas with more paint and pen details, then adding mini acrylic gems with more Beacon Gem-Tac. I let the glue fully dry before going onto the next step.

To make sure all of the detail and gems were protected I applied three coats of Liquitex Gloss Varnish to the skulls, letting each layer dry completely before applying the next.
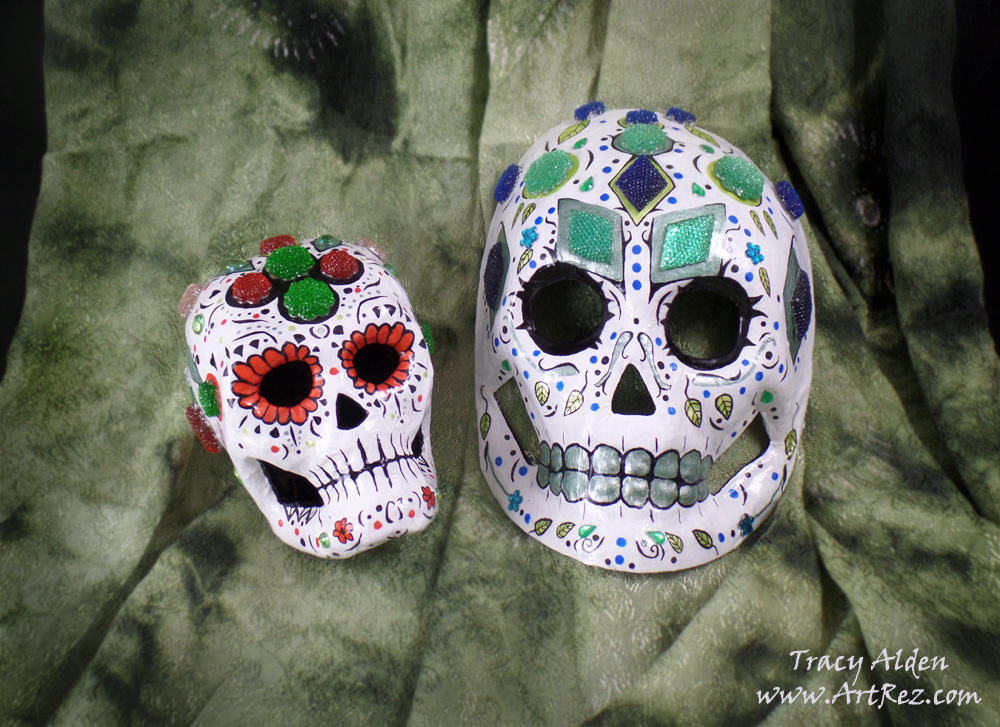
Once the varnish was dry I was able to add them to the rest of my Day of the Dead artwork collection!
Want to share your projects with Fiona Accessories‘s products? Post any projects and ideas on their Facebook Page! 🙂
Until Next Time, Safe Travels!
Polymer Clay Snowflakes Ornaments
With the weather changing and the nights getting pretty cold in our area I have been finding myself wanting to put out Winter decos in the house early. One of my favorite styles of Winter decorations is ornaments, but they don’t need a tree in our house! I hang them on garlands, from curtains and fireplace mantels. A fun and simple project I love to make with children in our family is polymer clay snowflakes! It just require a few basic polymer clay crafting tools and some imagination.
Supplies:
Premo! Sculpey Clay
Pluffy Clay
Pasta Machine/Clay Conditioning Machine
Snowflake Cookie Cutter *Once used with polymer clay do not use for food, just use it for crafts
Stylus
Rhinestones, beads or mini mirrors
Clear Plastic Wrap
Glitter
Jewelry Wire
Round needle nose pliers
Ceramic tile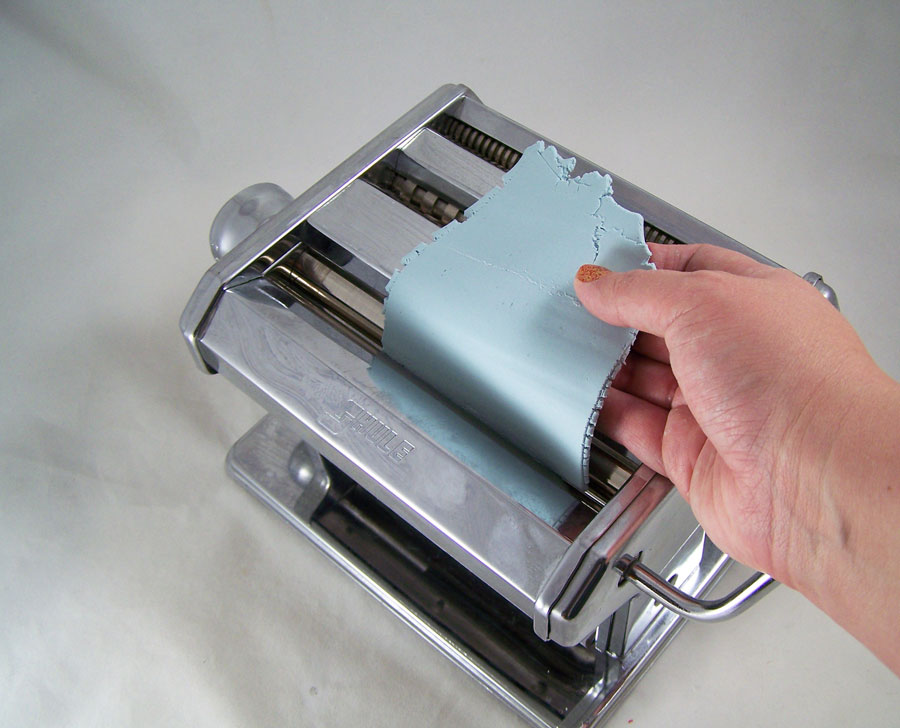 I mixed the Premo! and Pluffy clay together, a one to one ratio. Now you might be wondering why I using that mix of clay. Since we are making ornaments I wanted the pieces to be as light as possible, this is why I am using the Pluffy. I did a review of Polyform’s Pluffy a while back.
I conditioned and mixed the clays by running them through a pasta machine until they were thoroughly mixed on the the highest setting.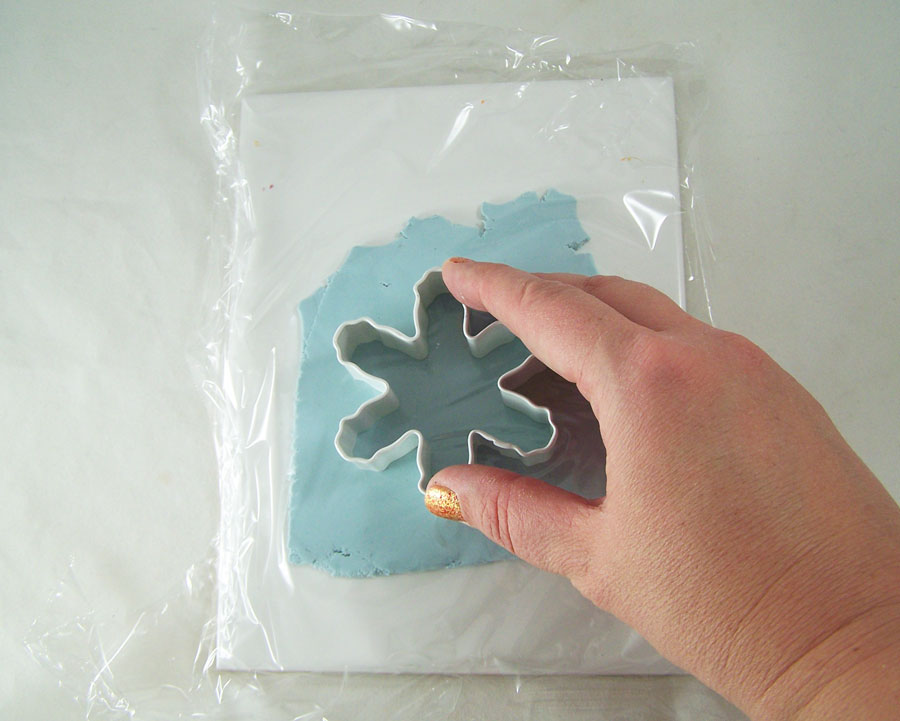 I then placed the clay on a ceramic tile and with a piece of plastic wrap on top of the clay. Carefully I placed the snowflake shaped cookie cutter ontop of the clay covered in plastic wrap and firmly pressed down through the clay until it was cut. The plastic wrap creates a nice beveled edge that you would not get if you just pressed the cookie cutter through the clay.
 Carefully I removed the excess clay, leaving the snowflake cut out in place. Saving excess clay for another snowflake or project.
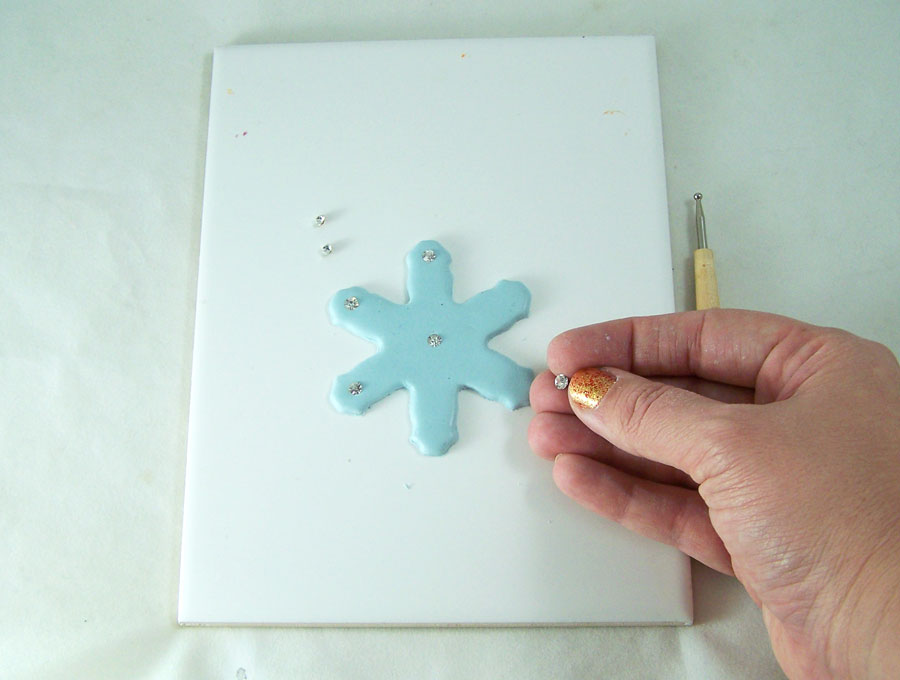 In this photo I put rhinestones in a pattern on the clay and press firmly into the clay but you can use any combination of rhinestones, beads or mirror pieces. There is no right or wrong way! 🙂
 Using several stylus I indented little dot patterns into the clay. Any texture stamps or indentations will work, have fun and come up with all kinds of patterns!
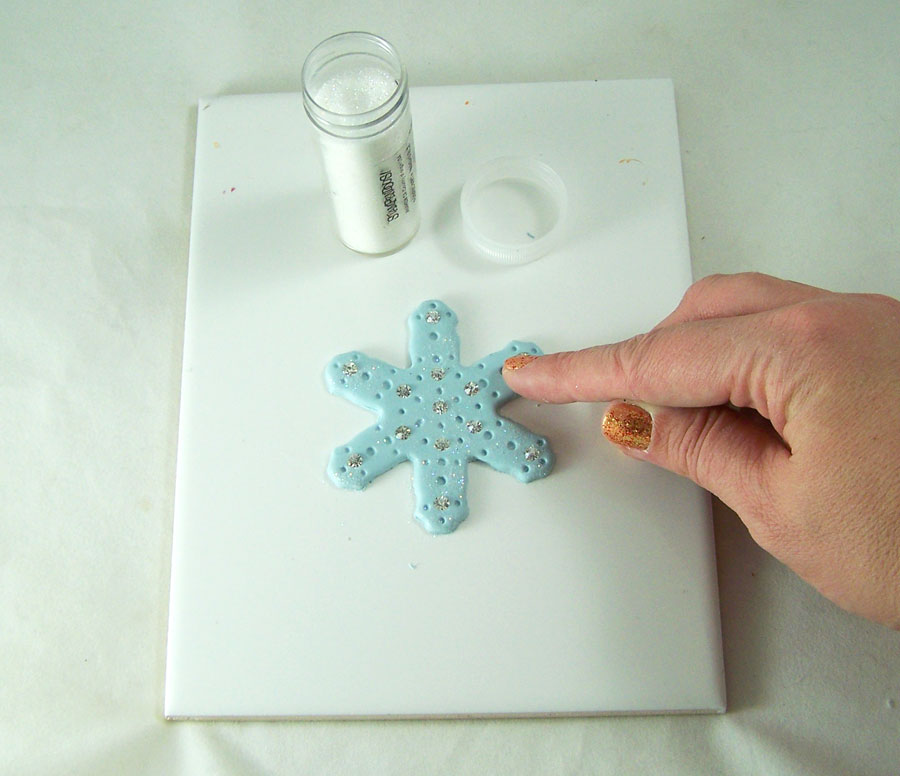 I added some glitter to the clay by lighting sprinkling small pinches of glitter onto the clay and rubbing the glitter into the clay lightly.
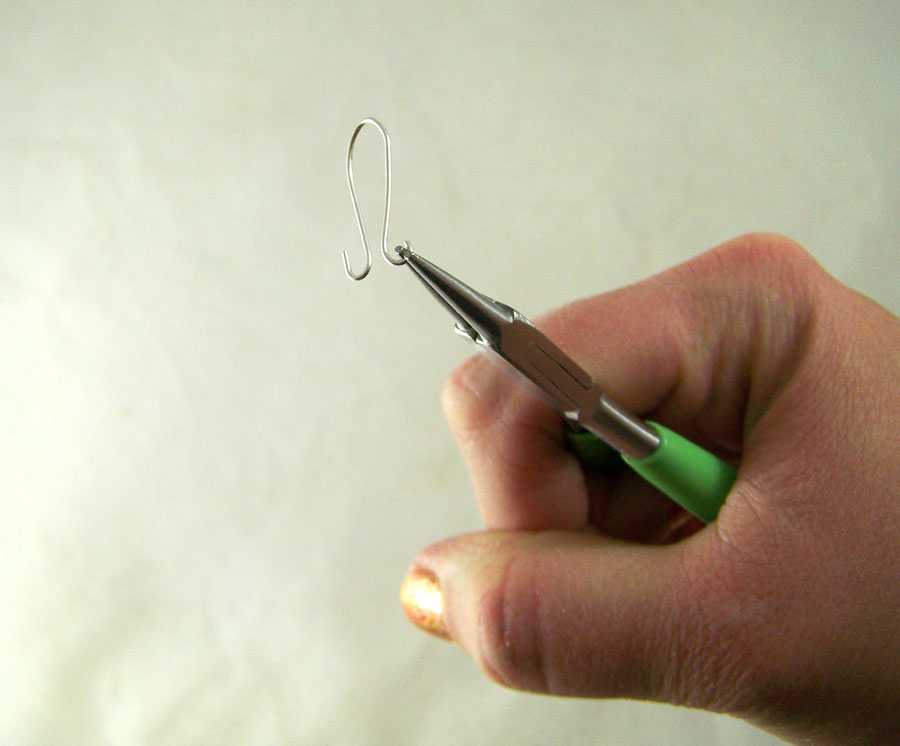 Using the round nose pliers I curled the edges of the jewelry wire; the curled edges will add an extra grip when pushed into the polymer clay.
 Carefully I pushed the wire loop into the stop of the polymer clay snowflake and smoothed the clay around it.
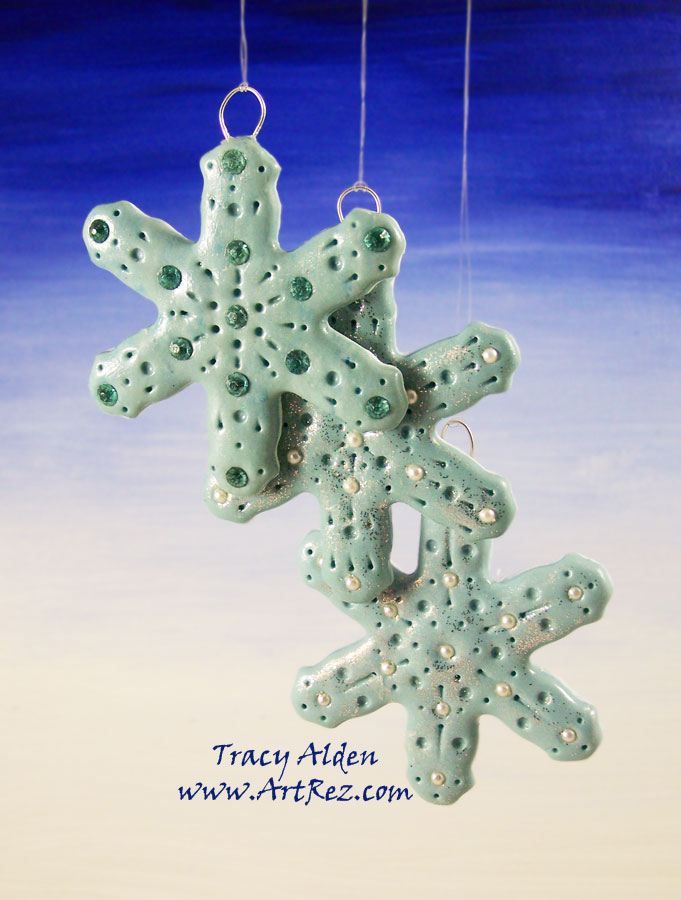
I then placed the tile on a polyclay designated cookie pan and bake according to manufacture instructions. Once cool I degreased the snowflake with dish soap and water. I sealed the piece with a sealer and it now it is ready to hang up!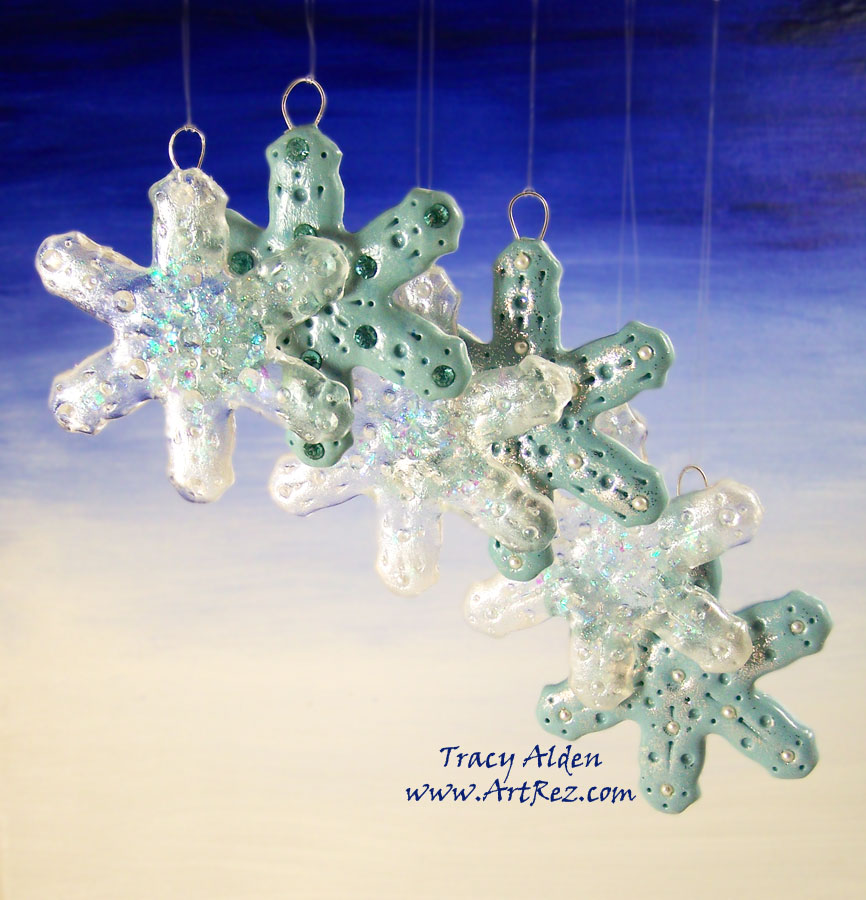 Notice the ice clear snowflakes next to the polymer clay snowflakes? Well taking this project a step further you can make resin copies of the polymer clay snowflakes, mimicking the look of frozen ice!
Hop on over to the Amazing Crafting Products Blog for my clear resin snowflake tutorial!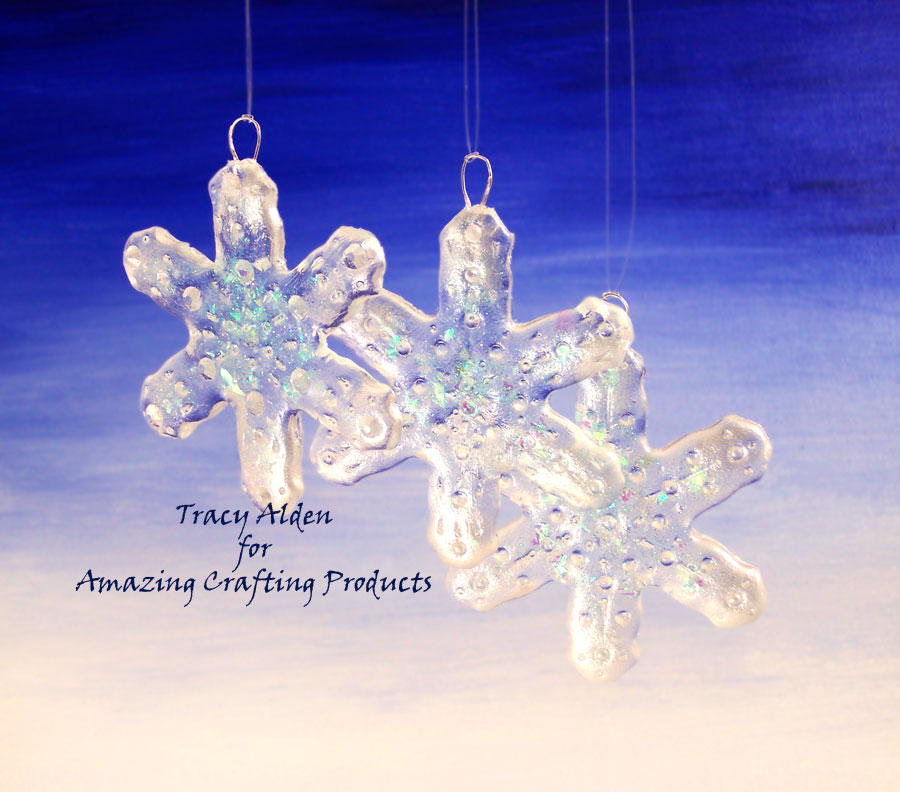 Until next time, safe travels!
Amazing Crafting Products Design Team!
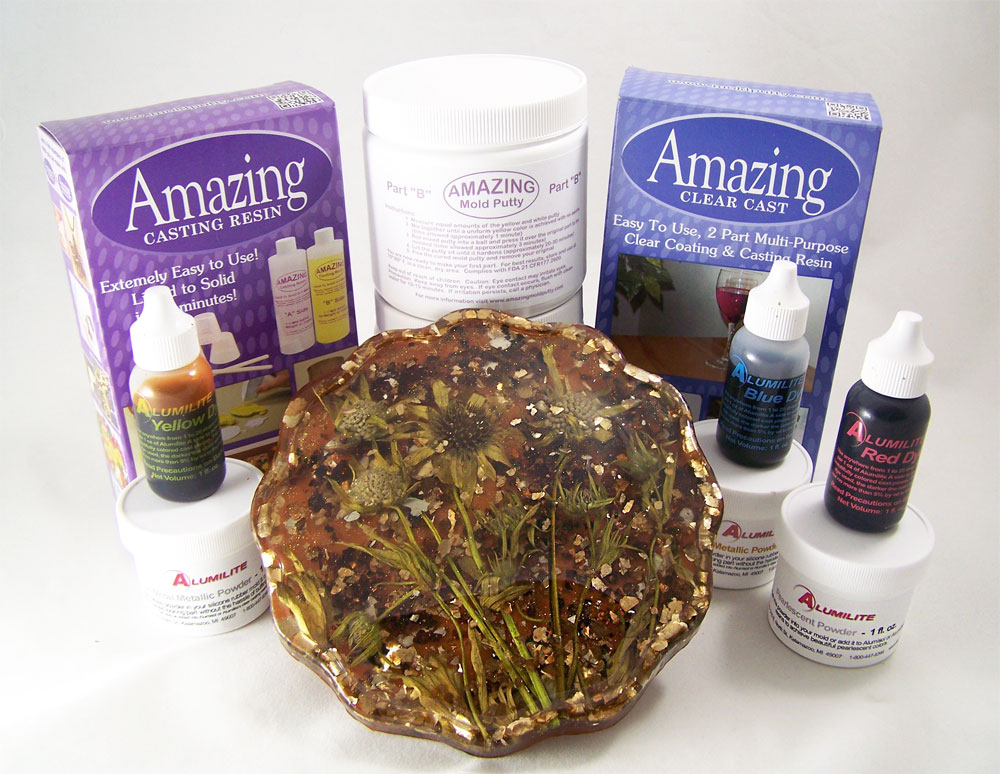
Things have been a whirlwind lately! So many new things happening and so many changes! I was contacted by the talented Susan M. Brown, Design Team leader for Amazing Crafting Products to see if I was interested in joining their design team since in the past I had used their product and enjoyed working with it. Of course I said yes and I am now a proud part of the Amazing Crafting Products design team blog! The photo above is of my first design team shipment and it was so full of awesome goodies to try out.
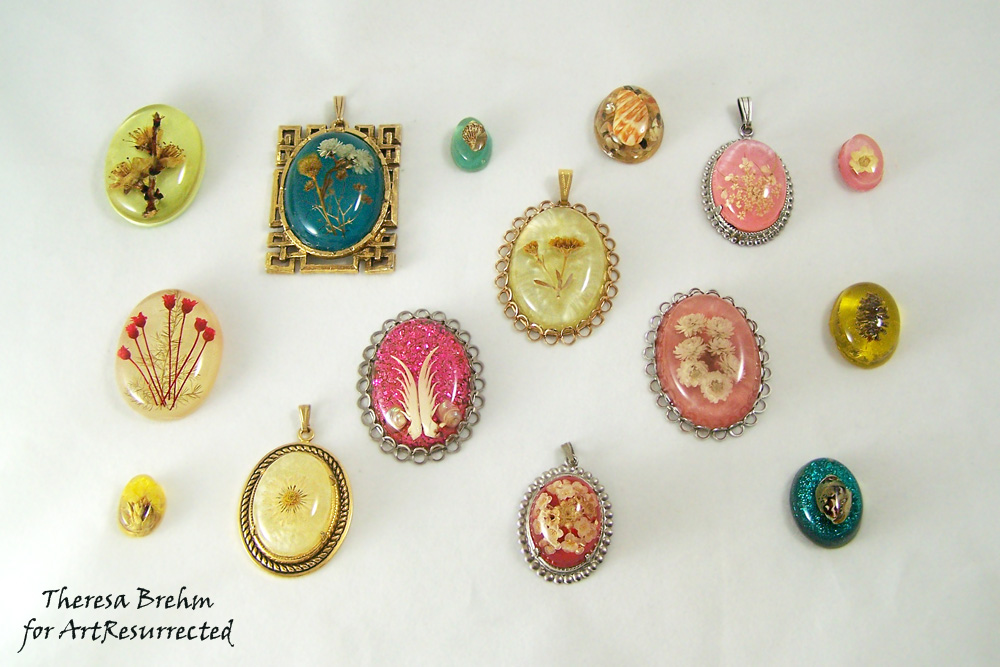 Not only do I enjoy using their products as I have noted in past blog posts, I was introduced to resin as wearable art by my parents many years ago. Here is a photo of some of my mother’s work. All of the pieces in the above photo are over 35+ years old. Amazing Crafting Products even graciously allowed me to showcase her work and vintage molds in an Inspiration post.
 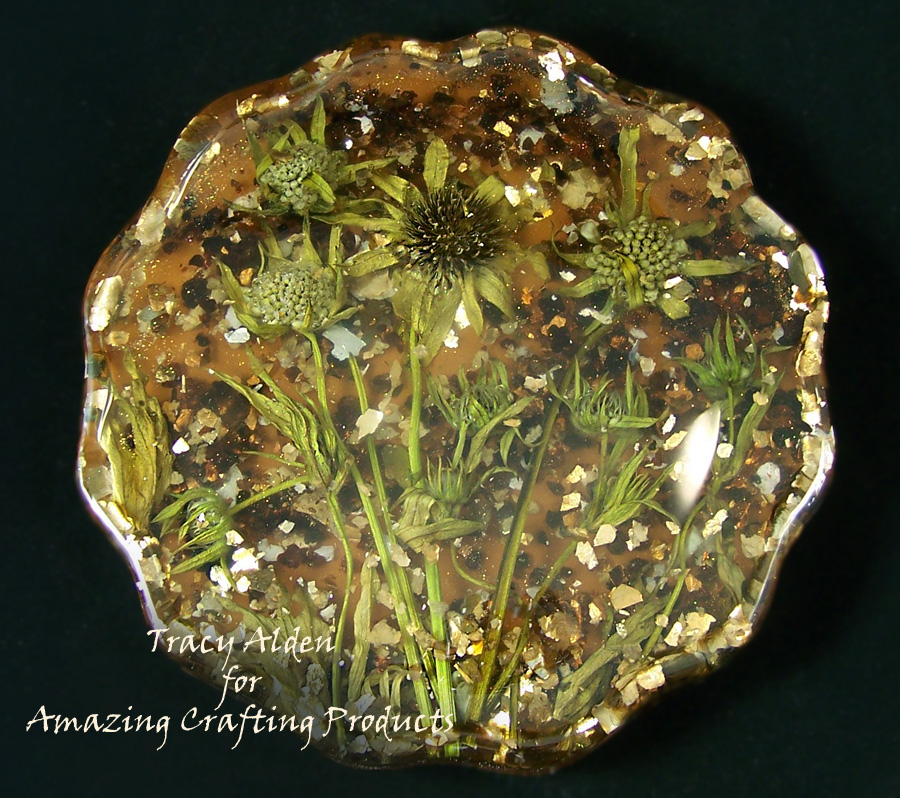 Entranced at an early age by the idea of encapsulating objects I was inspired to use one of my mother’s vintage polyurethane molds to make a retro trivet piece and tutorial!
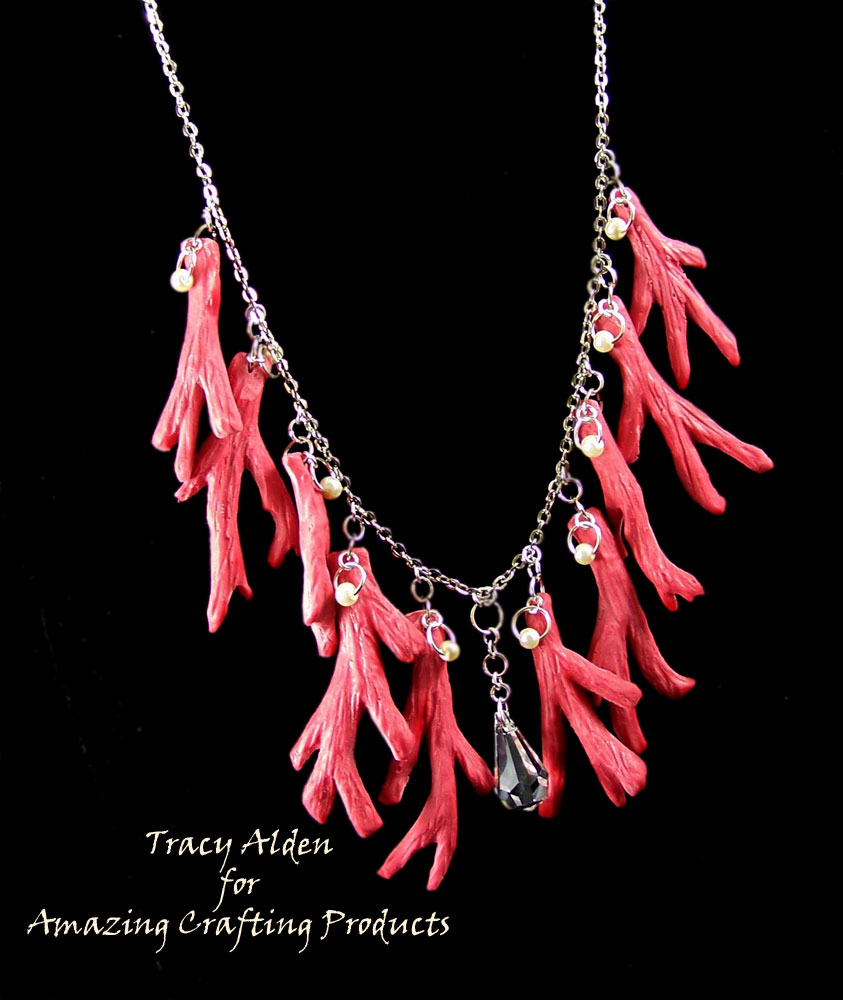 Now I am on a roll and I just can’t help but want to test out how the products perform. I am starting to get back into my polymer clay work so I tried my hand at a faux coral necklace and tutorial. I used polymer clay pieces for the originals to make the resin coral pieces.
For years now I have been trying to mimic the perfect faux amber, I blame a certain dinosaur movie for me always wanting the perfect piece of amber with an insect inside. While I have gotten close in the past there was always an issue with durability and/or clarity. Well, after trying some test with Amazing Clear Cast I was finally able to get the look I have wanted. You can find my inspirations post here talking about these new pieces.
Though don’t just take my word for it, please go to the Amazing Crafting Products design team blog to see all of the talented artists on the team! From model car makers, food artists, mixed media artist, paper crafters and so much more you will not be at a loss for ideas and inspiration. 🙂
Until next time safe travels!
Craft & Hobby Association Create & Connect Conference and Trade Show
Another Craft and Hobby Association Summer show has come and gone! This year it was called the Create & Connect Conference and Trade Show and was held in Las Vegas. While this was by far a much smaller show than the Winter CHA yearly show, it was still a great show to attend. There were better opportunities to talk and network with vendors and designers. There was also plenty of new products and artwork to see! I got there a day late due to health concerns and forgot my camera so I had to take photos with my phone but here is a few of the booths that I just loved and have to share with you.

As per normal Die Cuts With a View (otherwise known as DCWV) had a stunning display of papers, bead, embellishments and artwork! These three lovely shadow boxes were attached to the outside of their booth showcasing some of their products and talented designers.
DCWV had both their Summer and Winter collections up and were doing wonderful make-n-take canvas and necklace art.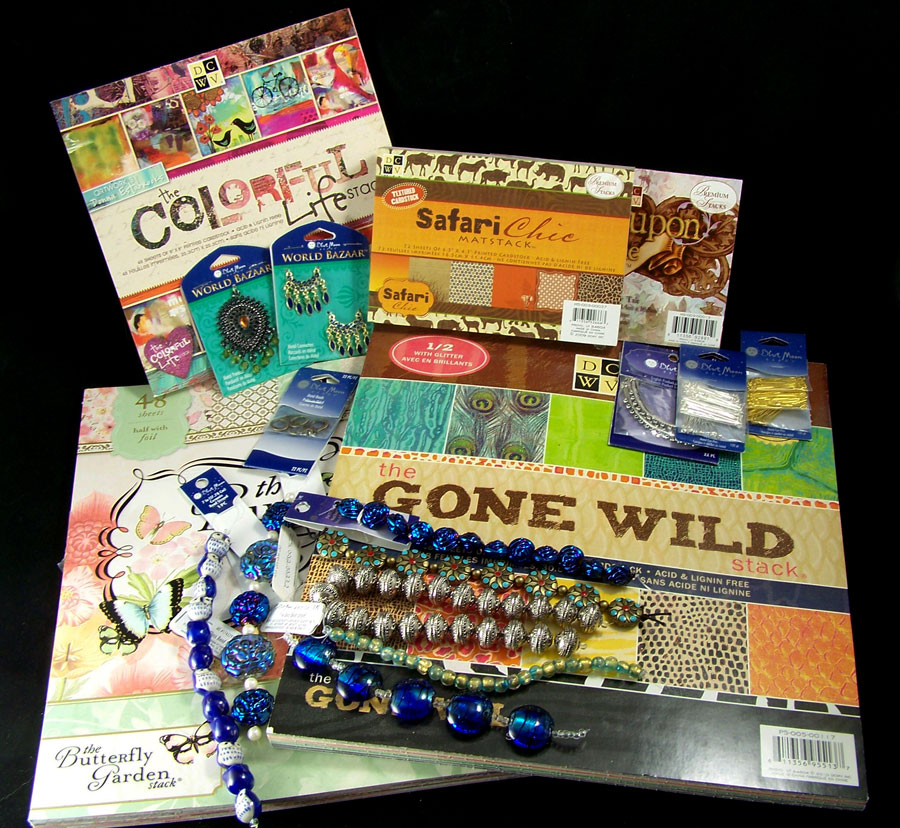
Those lucky enough to be there the last day of the trade show and the last few hours had the chance to buyDCWV papers and Blue Moon Beads. Here is some of the items I was able to purchase from them the last hour. 🙂
The talented Suzann Sladcik Wilson, book author and CEO of Beadphoria, Inc. was at the Buttons Galore and More booth doing demos on how to turn their whimsical line of buttons into wearable art!
Here is some of the Buttons Galore and More buttons turned into rings!They have so many designs and styles of buttons that could be used as embellishments in many art forms.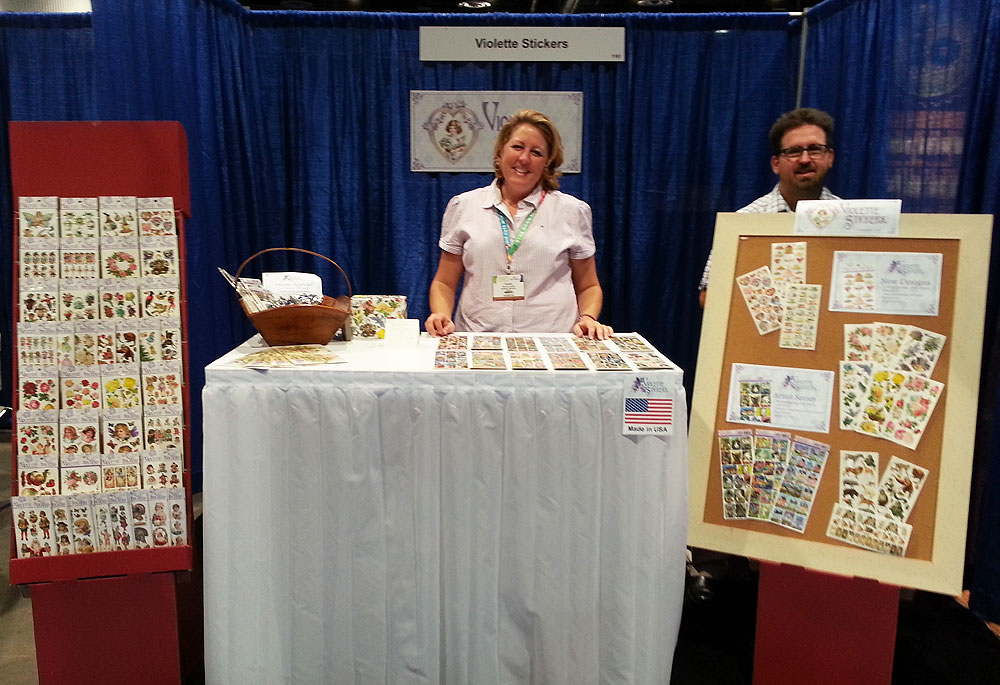
Next we have the awesome Violette Stickers, a small but growing sticker company with some of the most beautiful stickers. They were at the Winter CHA this year but I somehow didn’t see them. I am glad I got a chance to really look at their stickers this time! They have lovely reproduction Victorian art stickers and fun and funky modern art stickers.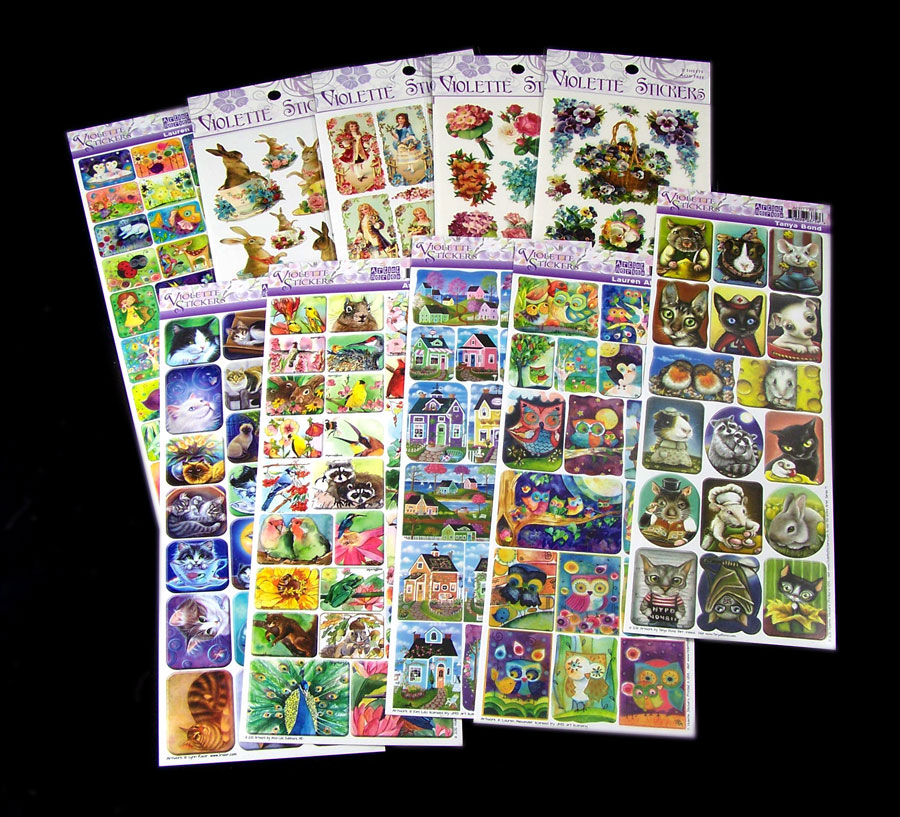
Here is some of their sticker selection I bought. The photo does not do them justice. They have vivid colors, sharp detail and some of their lines of stickers have clear backing making them perfect for layering in resin!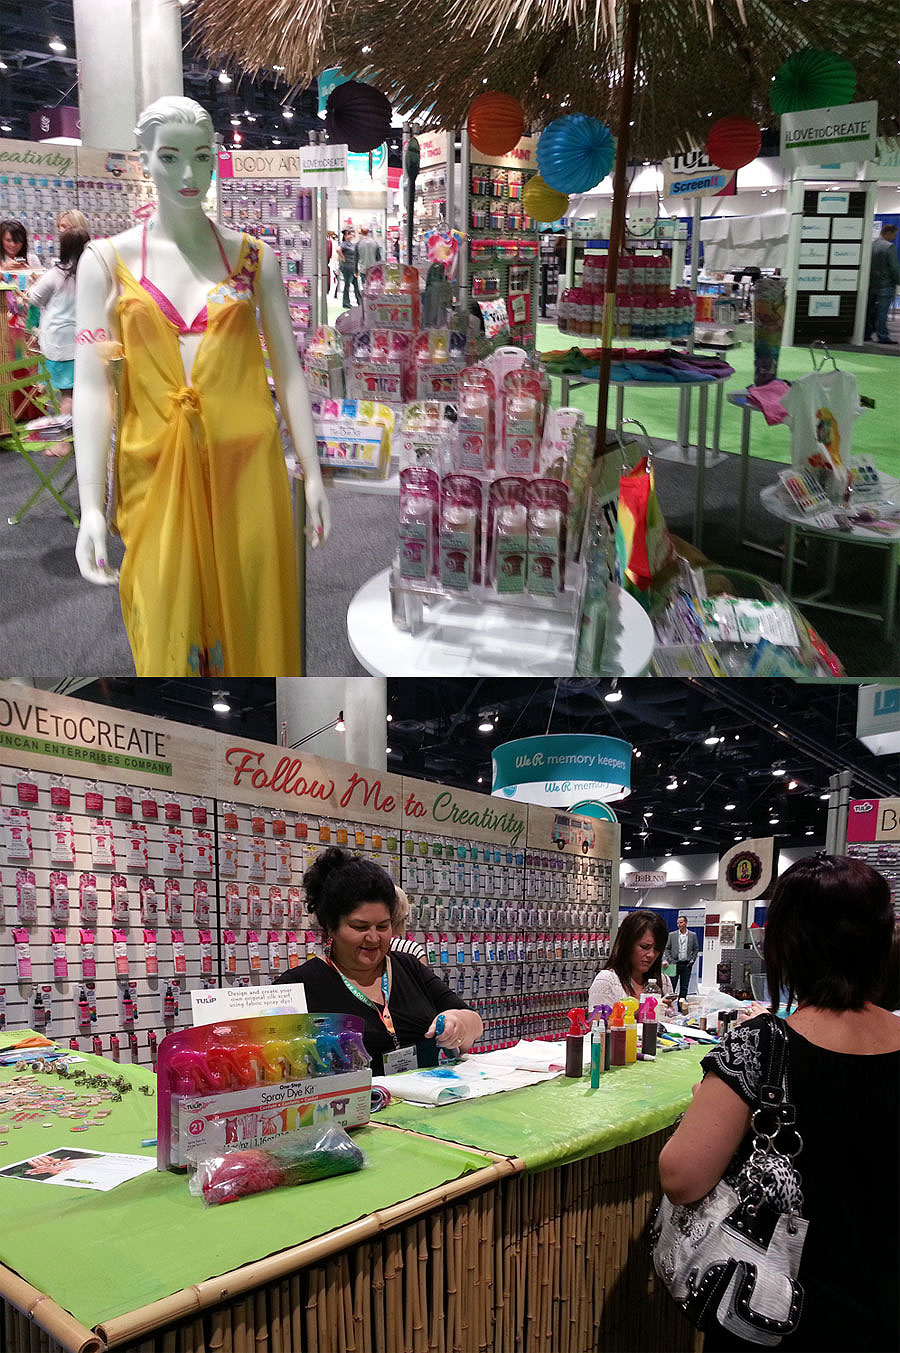
I love to Create booth had a wonderful collection of Summer themed art using their line of products. The talented Kathy Cano-Murillo founder of CraftyChica.com was doing demos at their booth of all kinds of wearable art! The Tulip One-Step Spray Dye Kit they are now selling is a no fuss way of dying fabrics. I love the ease of use and vibrancy of the colors!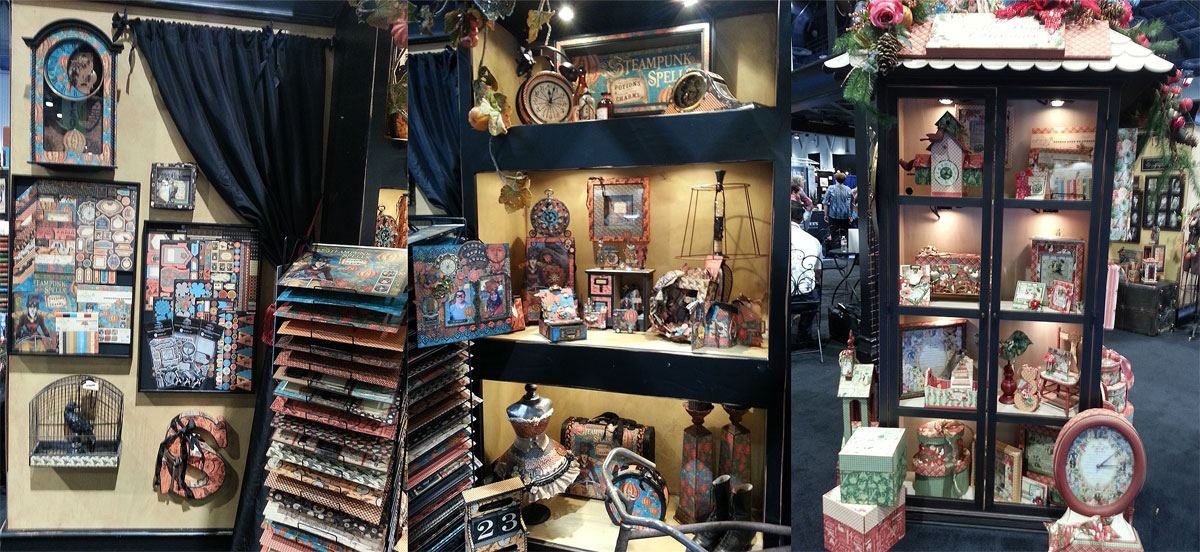
The ever popular Graphic 45 had a gorgeous booth full of Steampunk and vintage print papers and embellishments. The display of finished art using their products was just beautiful and I love that they are doing more home decor tutorials using their products!In the next few months I will be using all of the wonderful products I got at the show in new artwork. 🙂
Until next time safe travels!

Ancient and Contemporary Inspired Artistry
