A Crafty Halloween Throwback Thursday
Welcome to my Halloween Throwback Thursday! Halloween as I have often noted is one of my favorite holidays, I just love making all kinds of spooky and fun art. This week I was able to start unpacking all of my plastic tote bins filled to brim with ghoulish decor. I was reminded of my Halloween projects I have created for Amazing Casting Products and I wanted to share a few of my favorites!

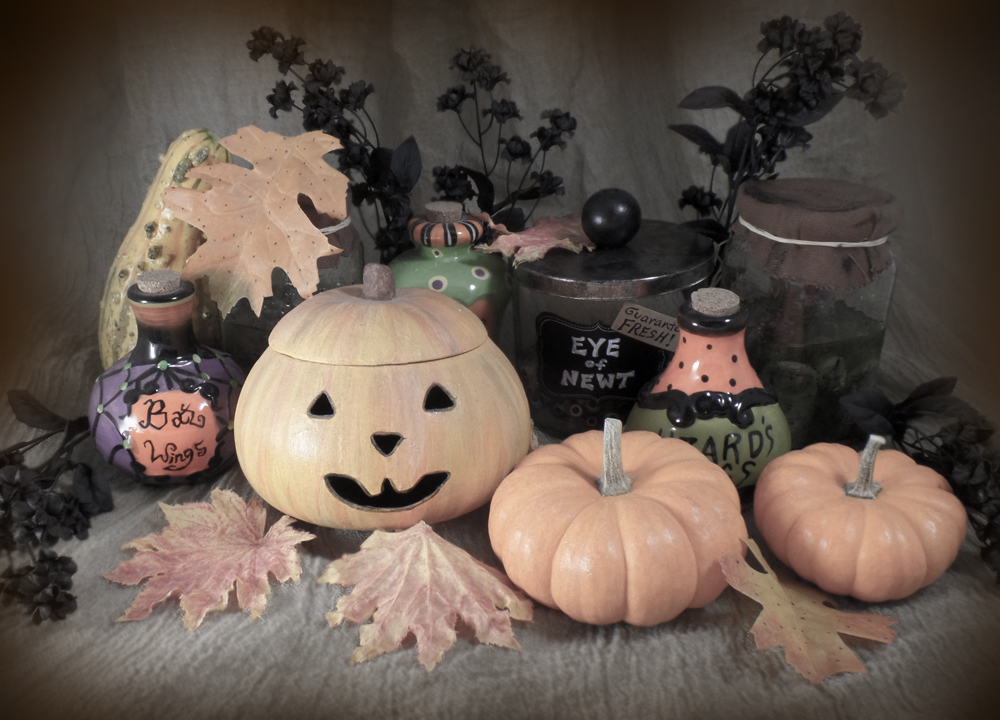
How to enhance a Pumpkin’s Smile with resin teeth using Amazing Casting Resin and Mold Putty.
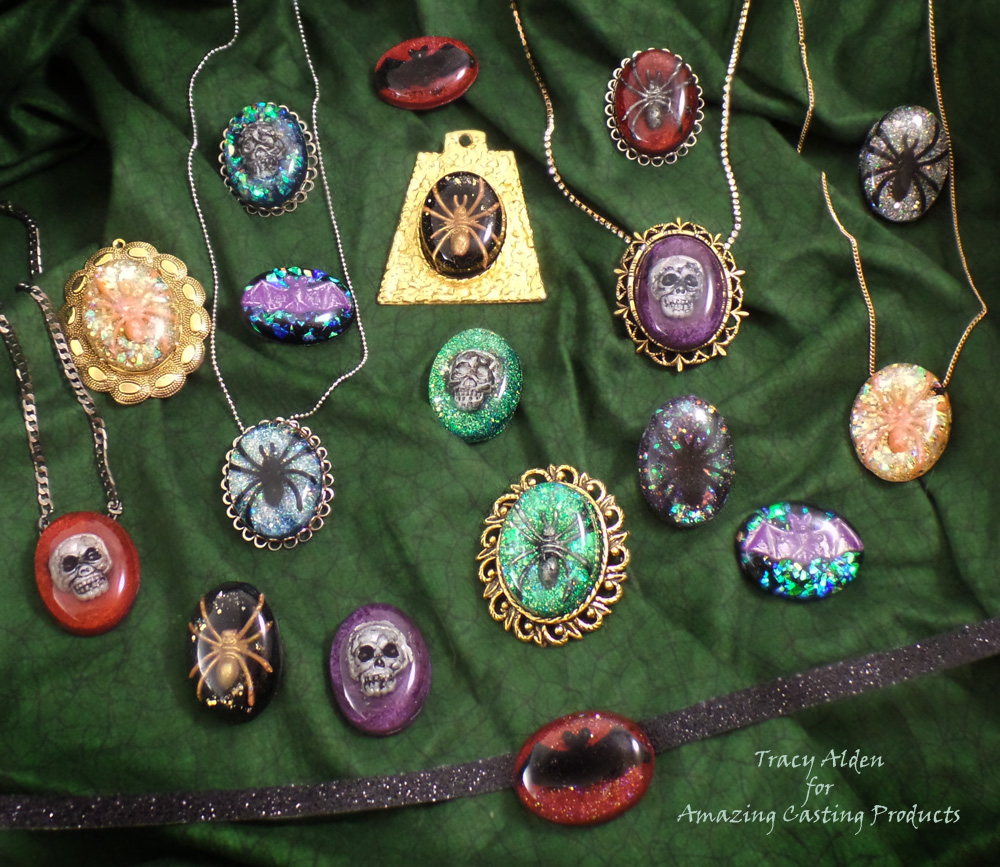
How to make Halloween party favors go from groan to glam with Resin Cabochons made with Amazing Clear Cast.
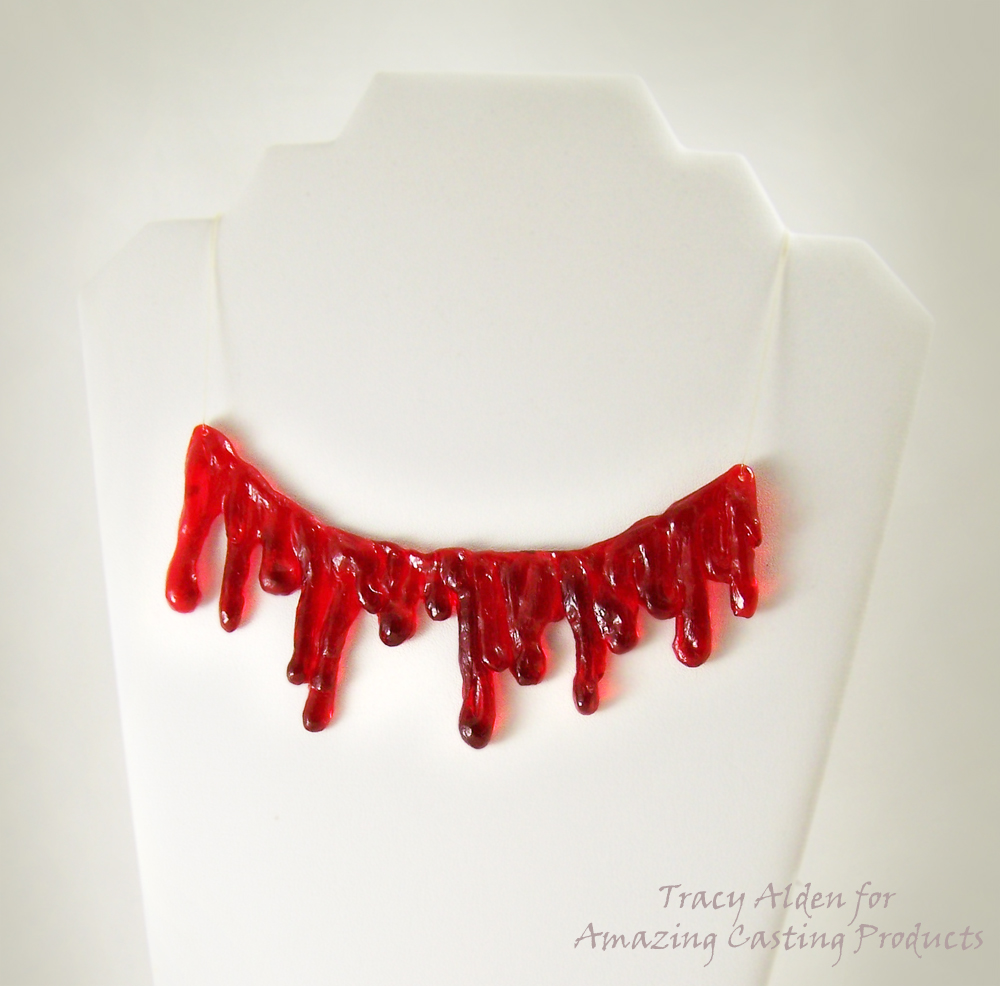
Running out of time on what Halloween costume to wear…. take a look at a Resin Blood Drip Necklace using Amazing Mold Rubber.
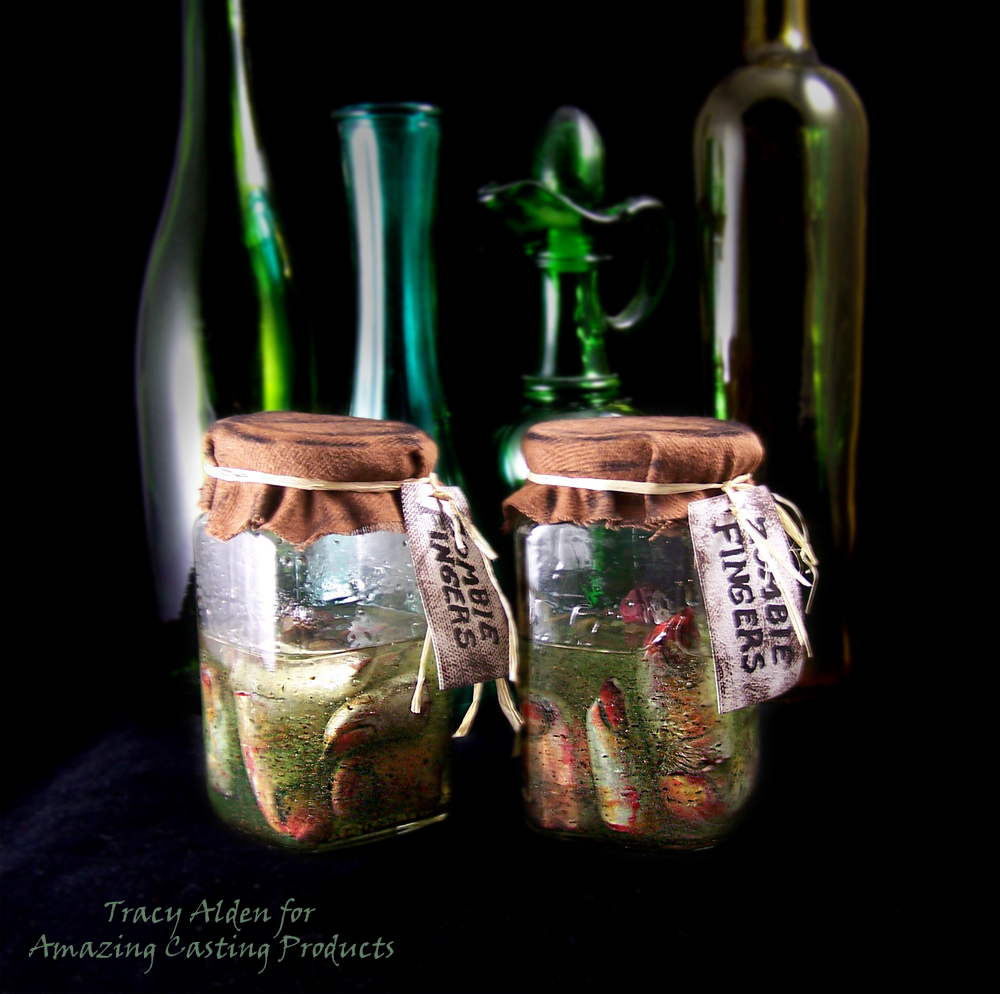
Need that perfect addition to a spooky apothecary? Try you hand at a upcycled Zombie Finger Apothecary Jar using Amazing Casting Products.
I hope sharing some of these projects has you mind a whirl with some Halloween craft project inspiration!
Until Next Time, Safe Travels!
Metallic Resin Charm Necklaces
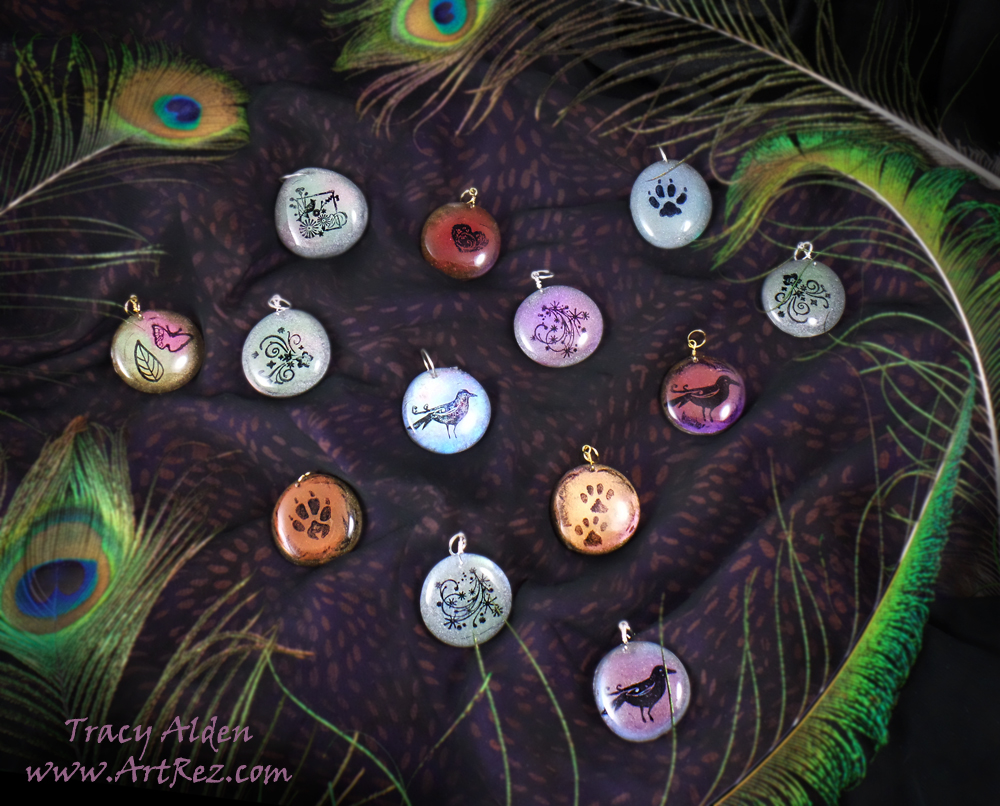
Sometimes inspiration for my craft projects is right in front of me, and surely this was one of those cases. I collect all kinds of little stones, trinkets and pieces of glass and often put them on display around the house in eclectic little assortments. I noticed the larger decorative glass pebbles I have, that can be found at most craft stores, have wonderful little round shapes that make me think of shapes of charms and pendants. I knew Amazing Remelt would make not only quick but glass-smooth molds and Amazing Clear Cast would be perfect to pour into the molds to create the charms, so off I went looking for my supplies!Supplies:
Amazing Remelt
Amazing Clear Cast
Alumidust
Alumilite Metallic Powder
StazOn Ink
Stir Sticks
Mini Stamps
Decorative Glass Pieces
Small Hand Drill
Ribbons, Cording and Metal Wire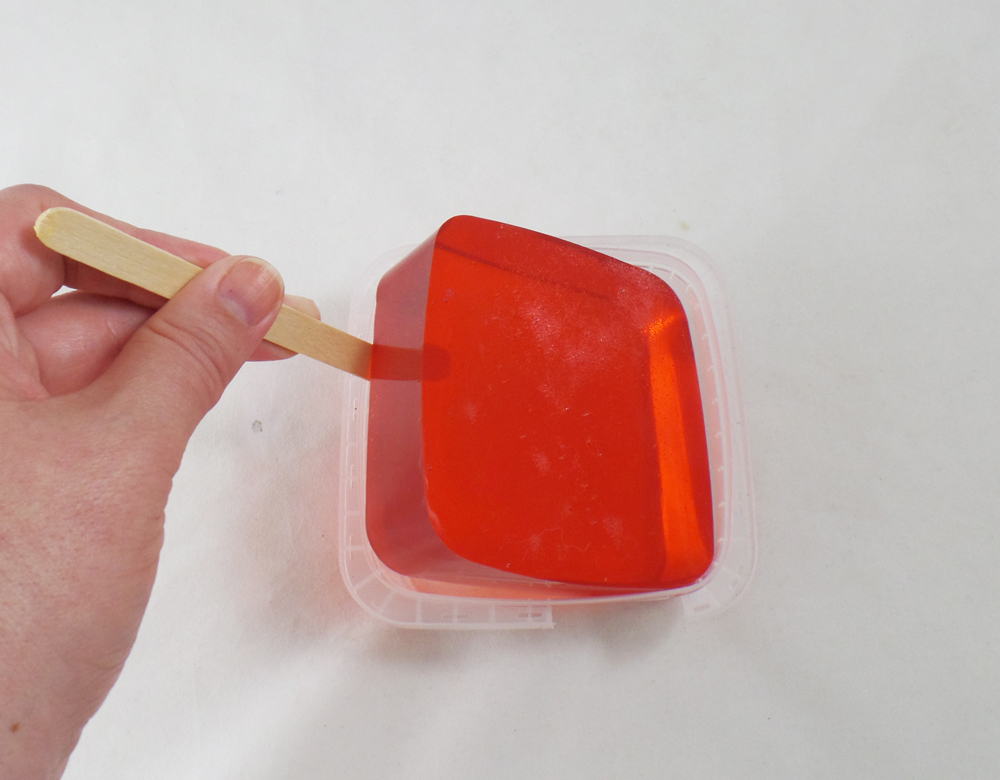
I started off with removing several blocks of Amazing Remelt from their containers. They are easy to remove by running a stir stick around the edges and gently lifting the Amazing Remelt from the container.
The Amazing Remelt containers acted as my mold boxes and I placed the glass pieces in the containers, making sure to leave some space between each piece so the mold will have separate spaces for each piece. You do not need to use an mold release on these pieces as they are smooth and non-porous.
I heated one half of a Amazing Remelt brick in the microwave until liquid, in one of the containers it came in. I poured the heated Remelt in the two containers holding the glass pieces, but only a thin enough layer to cover the bottom and a bit of the sides of the glass. This layer acts as an anchor for the pieces without having to glue the glass in place, I let this layer cool completely.
The second pour of Amazing Remelt I covered the glass pieces completely and let them cool to finish the molds.
Once the molds were cool and no longer tacky I carefully removed them from the containers and flexed the molds until the glass pieces popped out.
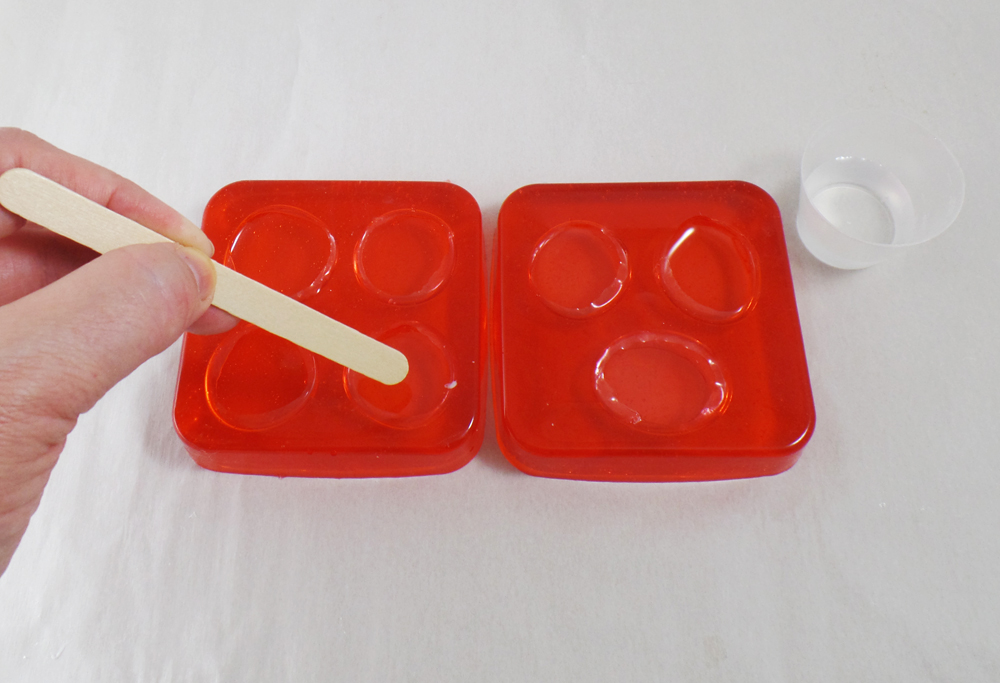
I mixed up a small batch of Amazing Clear Cast and filled each round in the mold halfway and let it cure to a hard yet somewhat tacky state.
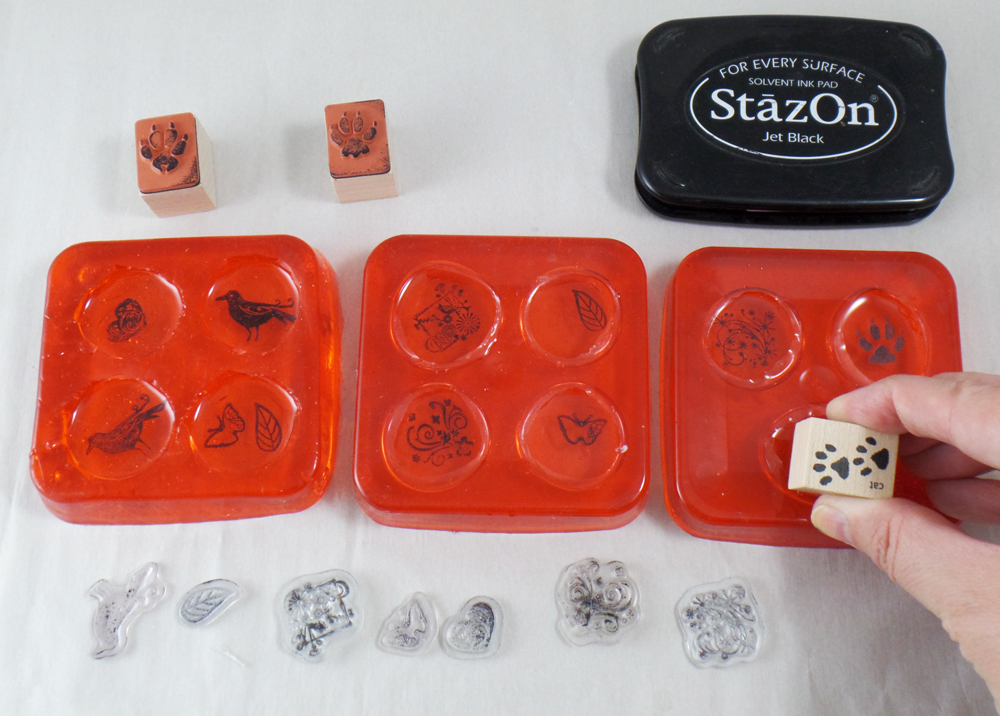
I then carefully inked and stamped little stamps with StazOn Ink into the tacky resin. The tacky state of the resin prevents the stamp from sliding and “grabs” onto the stamp, making sure I got a good stamped image.
*Pick your favorite stamps! As long as the stamp can fit the mold opening you can use any number of stamp images.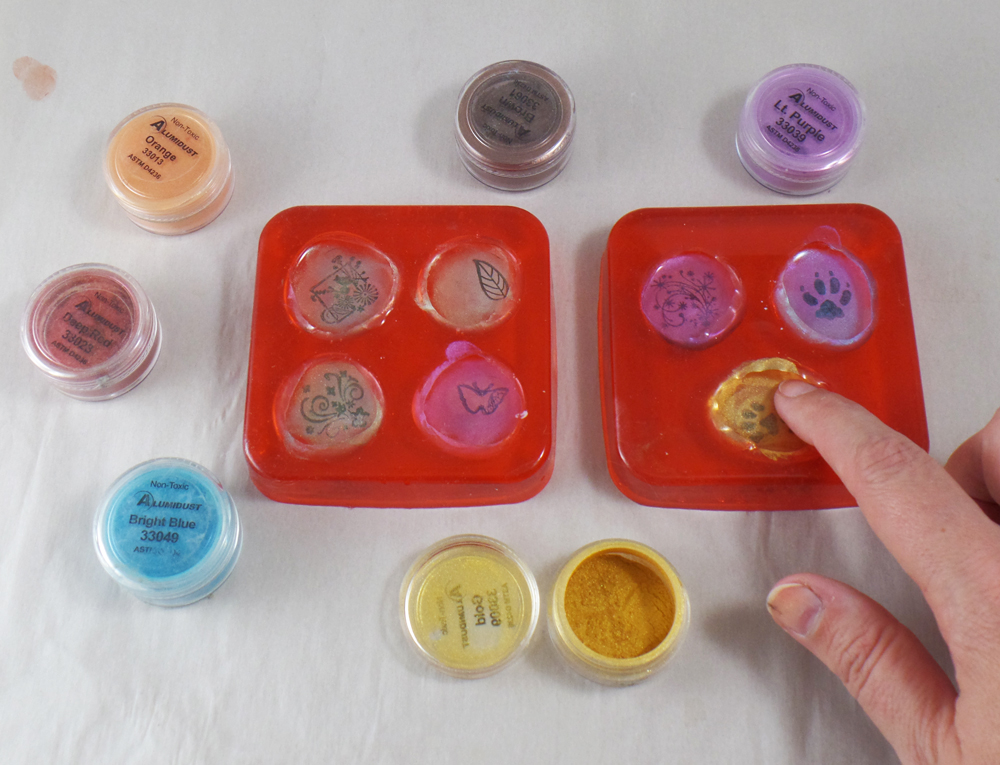
I rubbed Alumidust, in several different colors on the first layer of resin that was now stamped. Just like with the stamps there is no rhyme or reason to the color choices, just have fun with all the Alumidust colors!
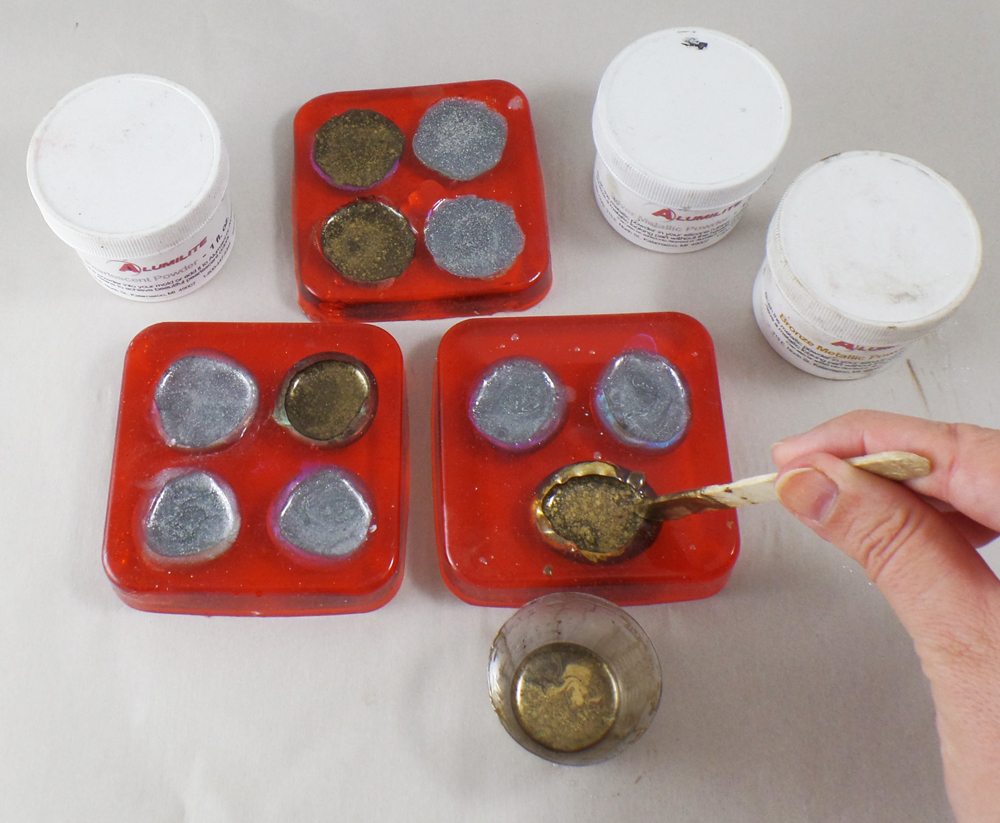
I mixed up two batches of Amazing Clear Cast mixed with Alumilite Metallic Powder, one silver and one bronze, and poured it in the molds as a second layer. I let it cure overnight.
* If you live in an high humidity area you might notice the when you pop out the resin pieces the next day they will be hard but slightly tacky. Just remove them from the molds and place them on parchment paper and wait for the resin to completely harden outside of the molds.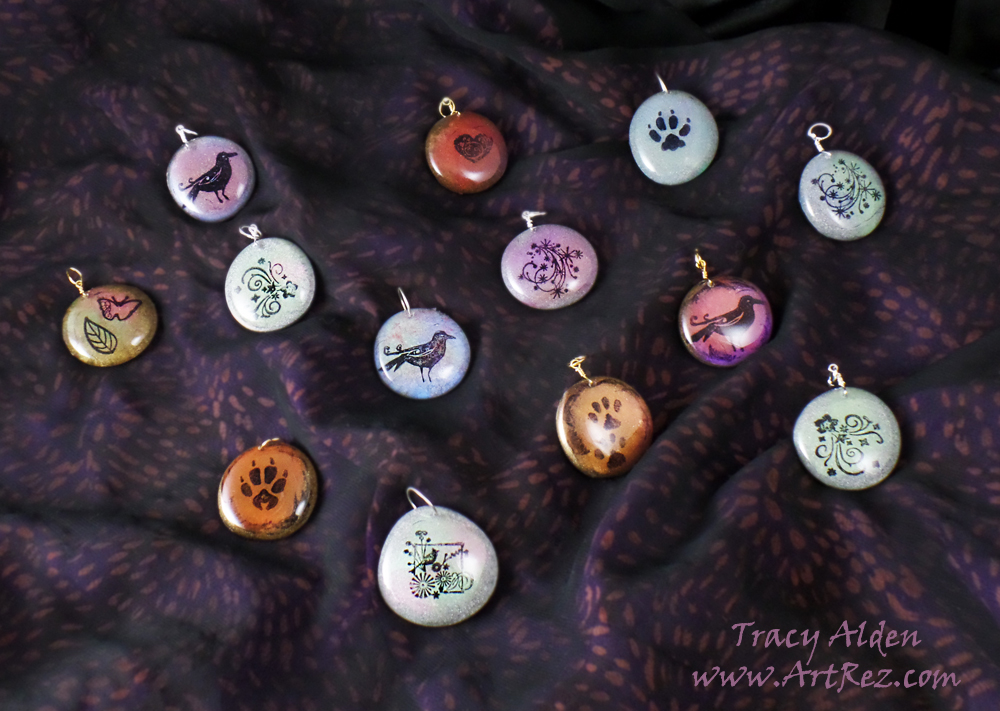
Once all of the pieces were fully cured, I carefully sanded any uneven edges and drilled holes with a hand drill. I scrubbed them clean and threaded jewelry wire and jump rings through the drilled holes. Now they are ready for ribbons, thread or chain!
Want to see more of Amazing Casting Products tutorials and inspiration? Hop on over to their Blog to see all kinds of Amazing Artists’ Designs!Until Next Time, Safe Travels!Faux Ancient Egyptian Pendants

One of my favorite pastimes is to go visit museums and flip through books with ancient jewelry collections. The ingenuity, craftsmanship and raw talent in ancient work is a true inspiration.
One of those ancient testaments to ingenuity is Ancient Egyptian Faience, known as the world’s oldest known form of glazed ceramic and a precursor to the earliest forms of glass making. While it shares the name faience with the tin-glazed pottery associated with Faenza in northern Italy, it is not true faience. Ancient Egyptian Faience is not made of clay at all but type of frit, a mixture of sand, quartz, silica, calcite lime and a mixture of alkalis. To the ancient Egyptians, it was known was known as “tjehnet” which means brilliant or dazzling. Often crafted into beads, pendants, figures, tiles and other small objects, using push molds or sculpted by hand, then heated to create lovely glazed pieces of art. It was used as a imitation of semi precious stones, such as lapis lazuli and turquoise, though many colors could be achieved by changing some of the ingredients of the frit mixture.
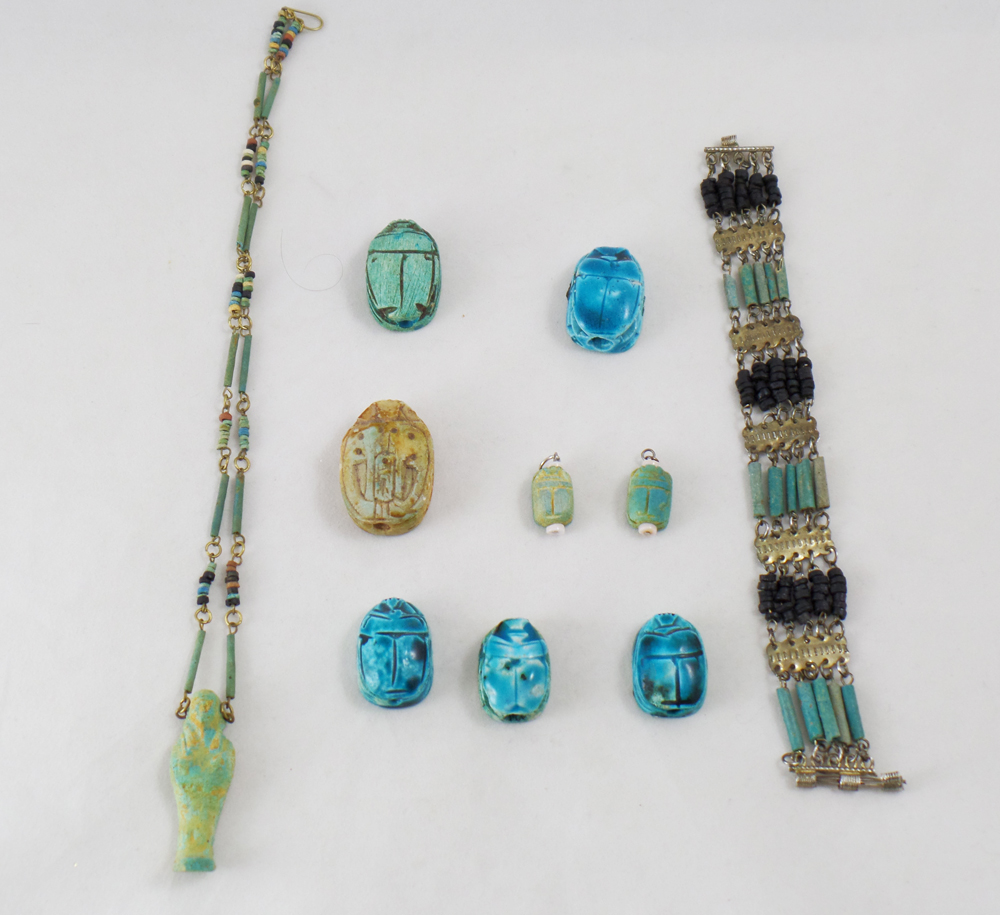
I wondered, how I could make something that looked like Ancient Egyptian Faience but without the need of a kiln? Using real Egyptian Faience as my model, such as those in the above photo, gave me a good idea of what colors and textures I wanted to match. While it is very easy to create the shapes out of any number of air dry and oven bake clays, the glazed appearance of much of the Ancient Egyptian Faience was going to be tricky. I got to thinking how Amazing Casting Products’s Amazing Clear Cast Resin on top of polymer clay could appear like a glaze and more akin to the lovely ancient work.
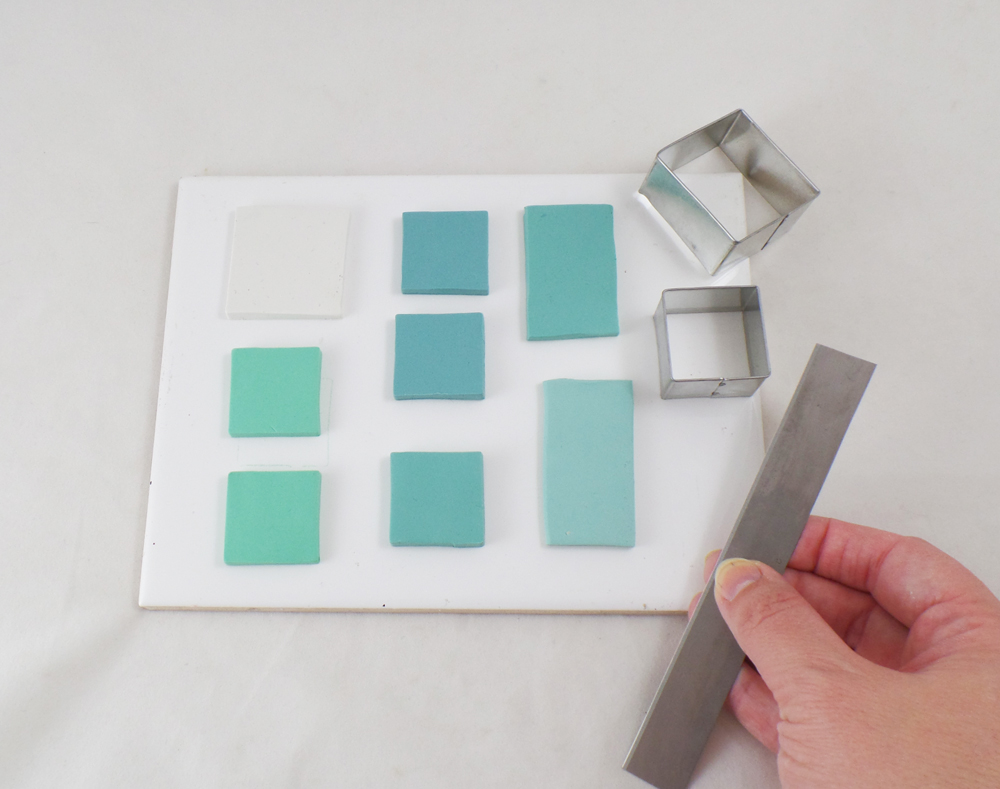
I started with conditioned polymer clay, in the color tones of blues and greens, betting that a base color of those hues would give me the best results. I also conditioned a piece of white polymer clay as a color test. I then cut all pieces into sizes and shapes good for pendents.
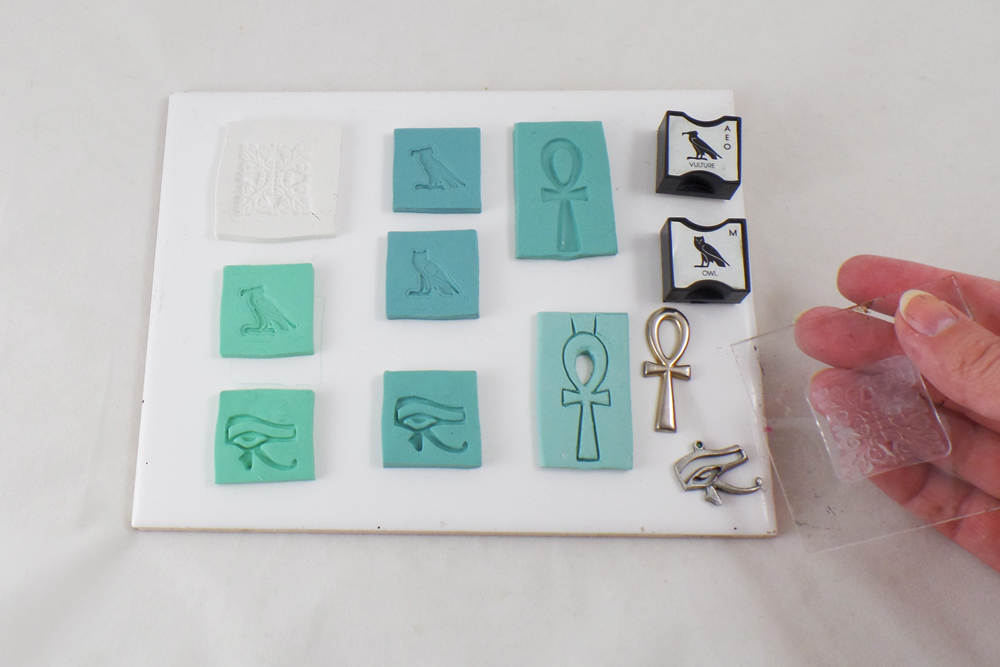
I went through my collection of stamps and charms, picking ones that were Egyptian themed. I sprayed the object to be pressed in the clay with water to act as a stamp release from the clay and pressed firmly into the clay.
I trimmed the pieces of clay close to the stamped images, smoothing edges and defining details of the stamped images.
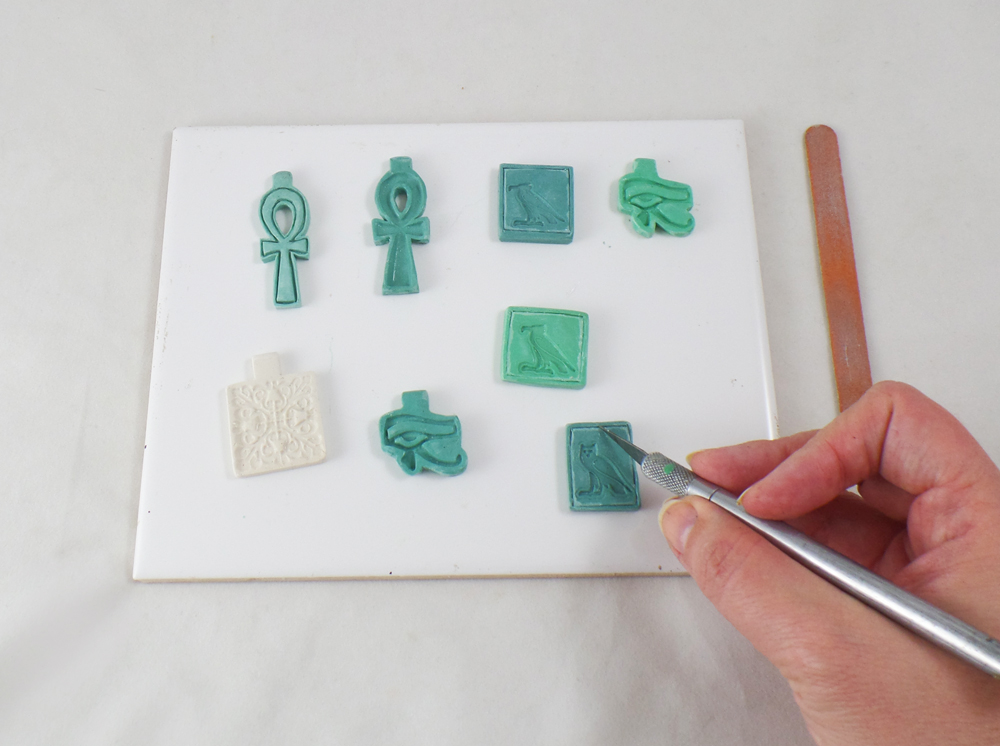
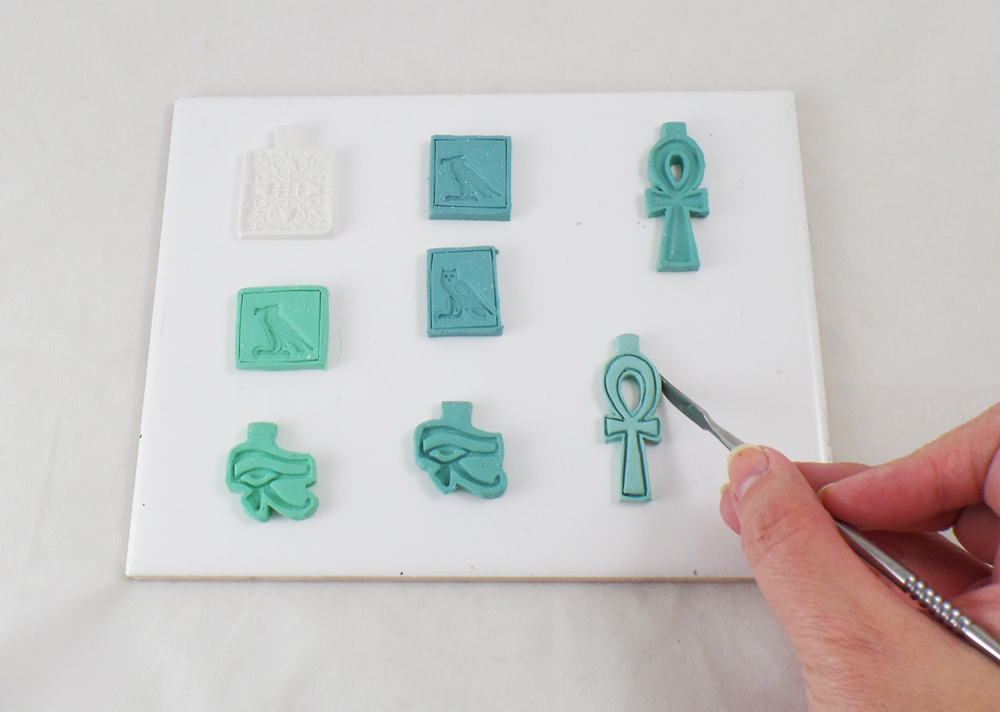
After curing the polymer clay by manufacturer’s instructions, and once the pieces were cool, I trimmed off any rough edges on the clay pieces with a craft knife.
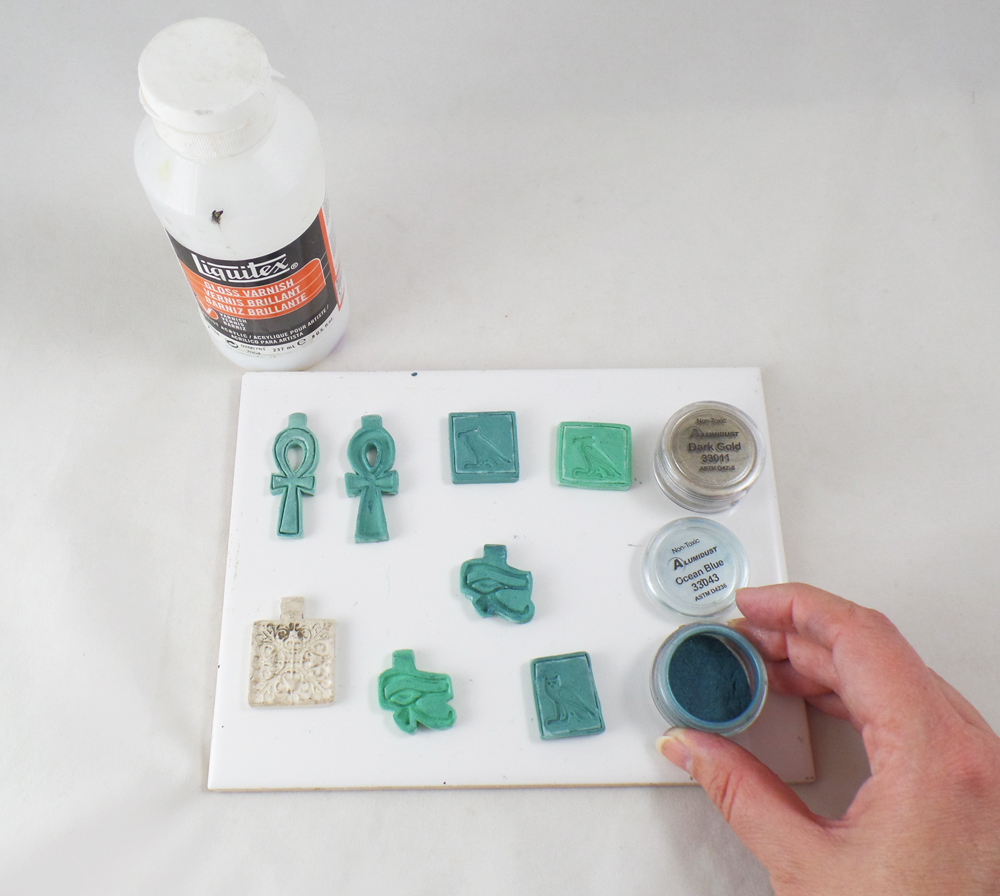
I applied a thin layer of Liquitex Gloss Varnish to all of the pieces and before they dried rubbed on a light layer of Alumidust.
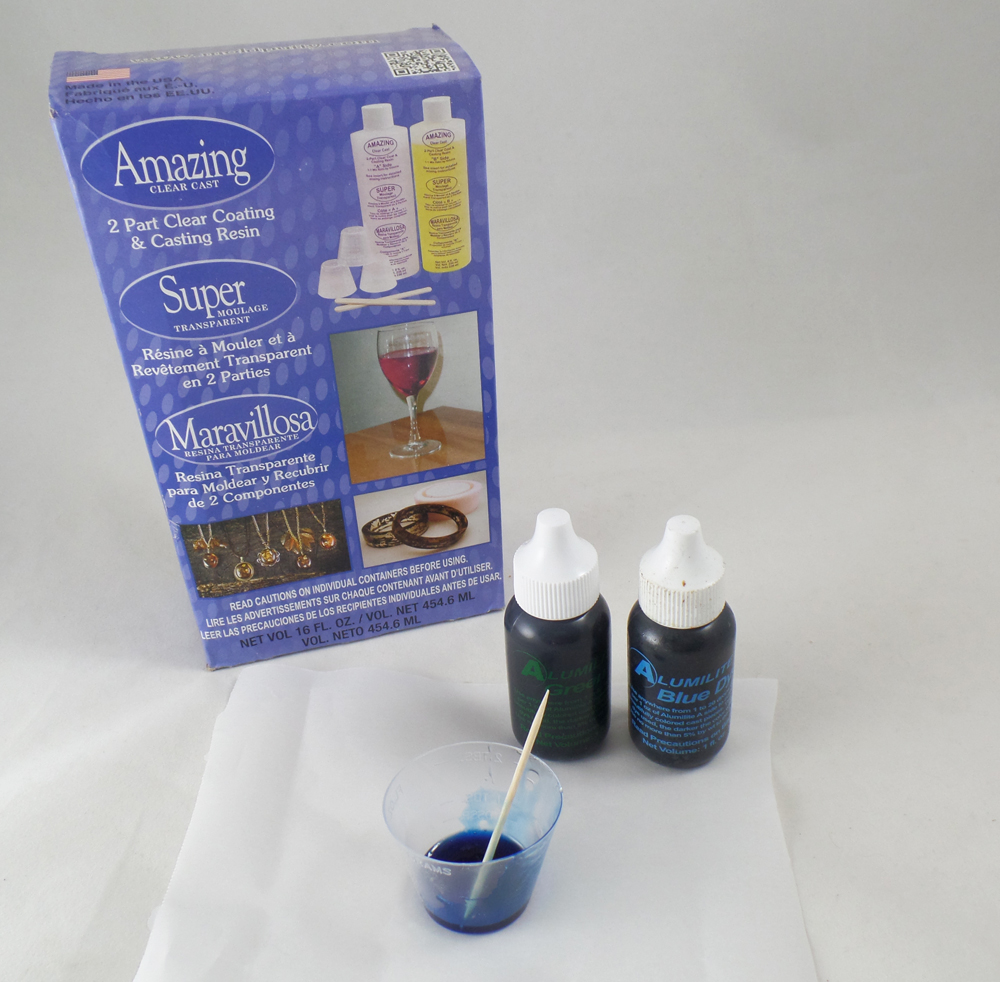
I mixed a very small amount of blue and green Alumilite Dyes with Amazing Clear Cast Resin, making sure to fully stir the dyes into the resin and let it sit for 10 minutes.
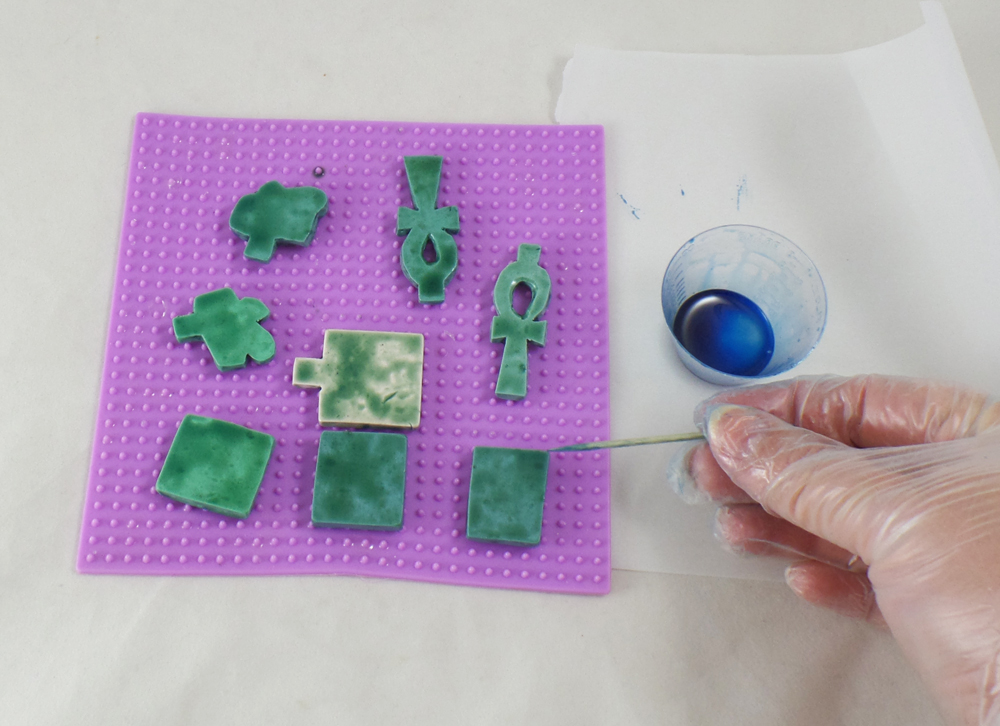
By letting the resin sit for 10 minutes, the resin will be thicker and stick more to the polymer clay pieces. I carefully applied the resin to the back and sides of the pendants with a toothpick first and let them cure completely, as per manufacture instructions, before moving onto the next step.
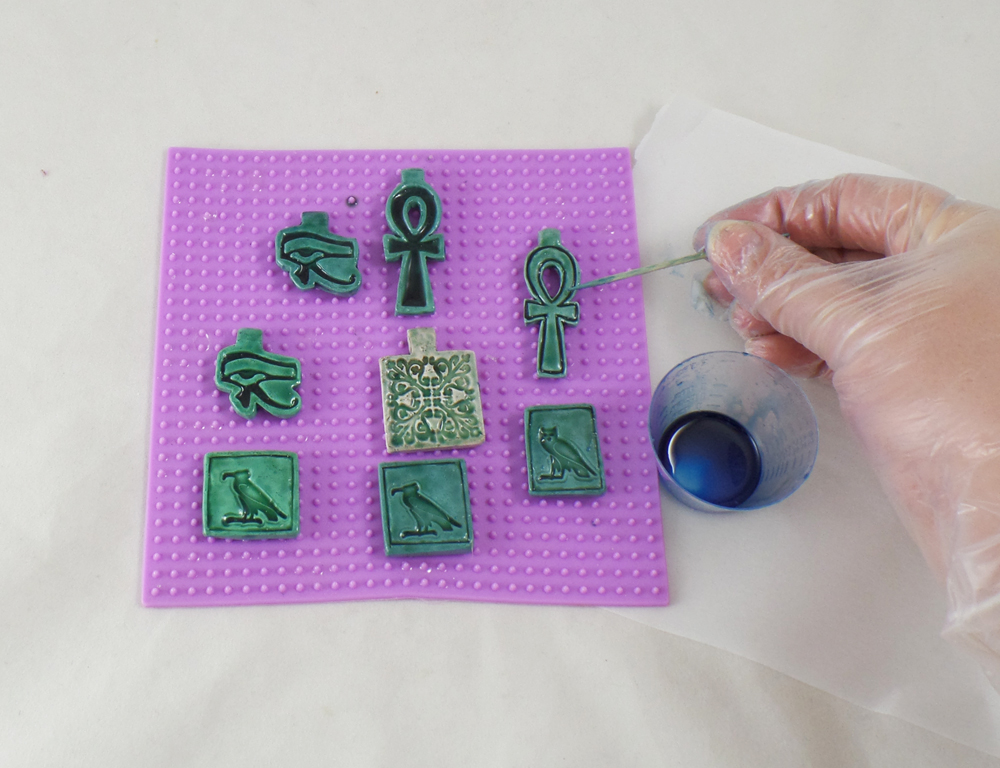
After the back of the polymer clay pieces were dry I applied resin to the front of the pieces with a toothpick, making sure to get all the groves and indents of the stamped images. I let this layer of resin cure completely.
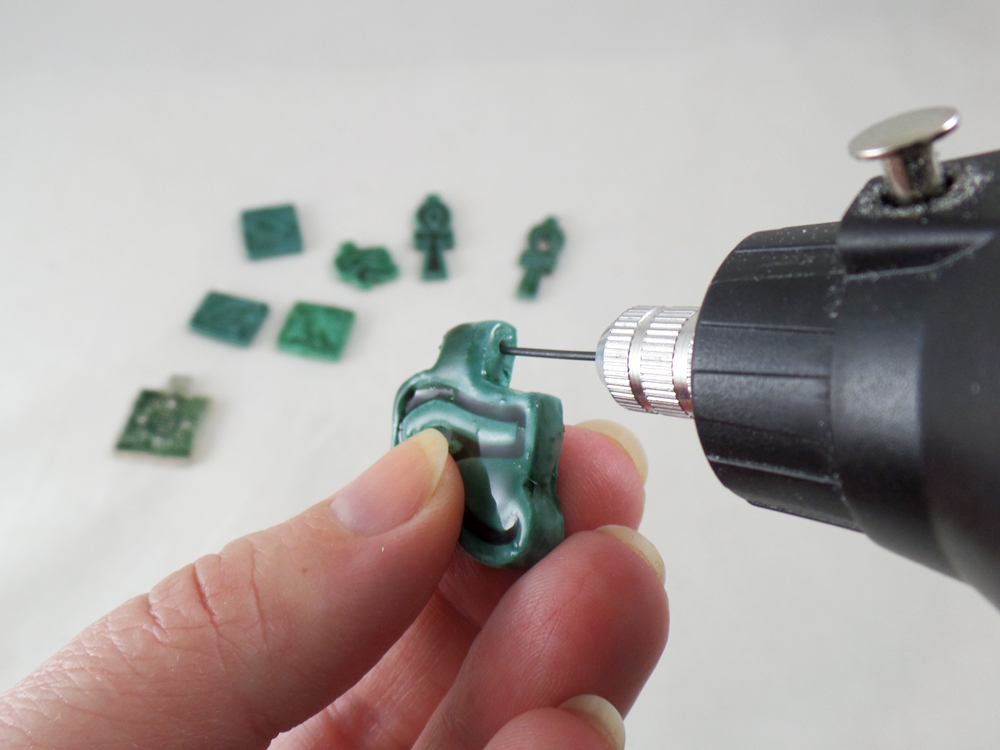
Once all of the pieces were fully cured I carefully drilled holes to put beading wire and thread through each piece.
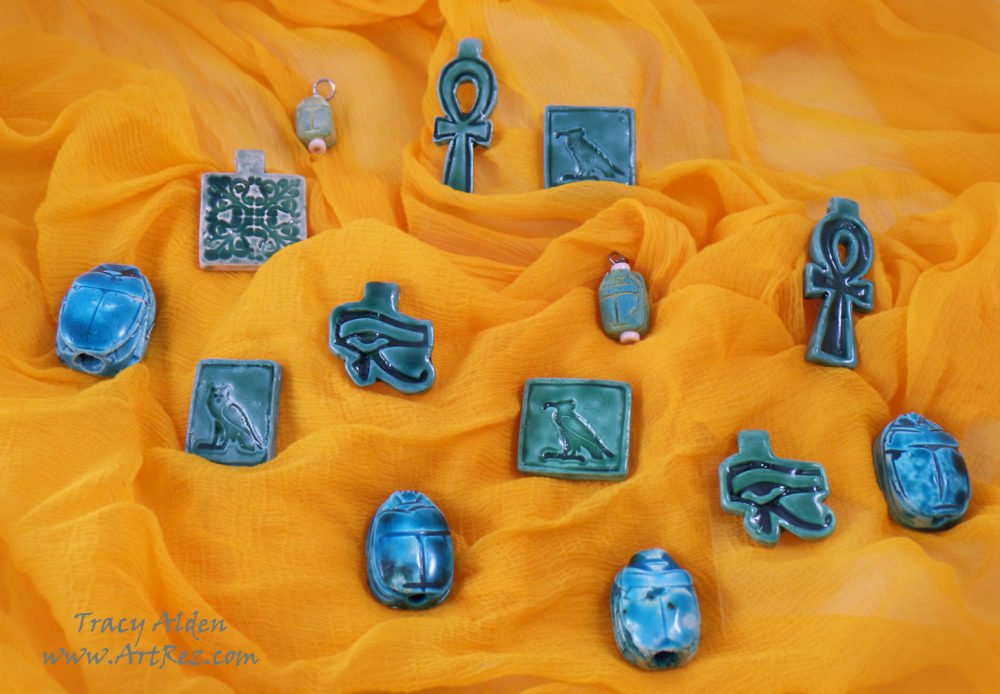 Here are the finished Faux pieces with the real Egyptian Faience, a pretty close match if I do say so!
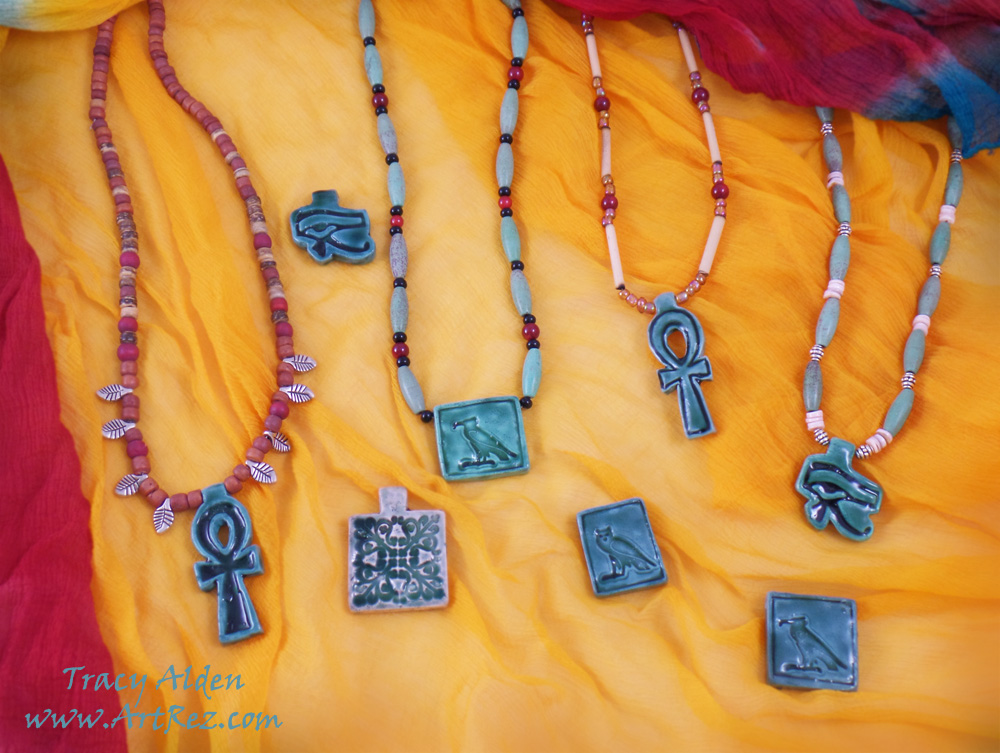 The addition of wood, glass, semi precious stones and shell makes these pieces look straight out of ancient jeweler’s marketplace!Want to see more of Amazing Casting Products tutorials and inspiration? Hop on over to their Blog to see all kinds of Amazing Artists’ Designs!Until Next Time, Safe Travels!
Craft & Hobby Association Mega Show 2015 part 1
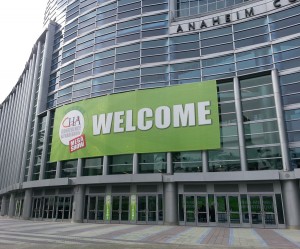 Now that I am mostly over the yearly cold the seems to lurk the halls of CHA, it is that time of year: my CHA Trade Show recap! CHA, otherwise know as the Craft and Hobby Association, has a Mega Trade Show every January, full of all kinds of wonderful arts and crafts manufacturers, demos, classes, meet and greets, designer showcases and new trends!
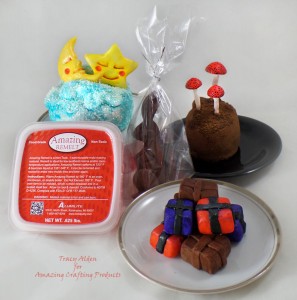
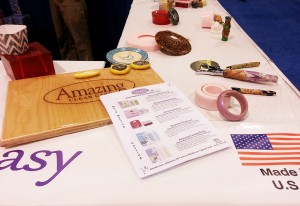
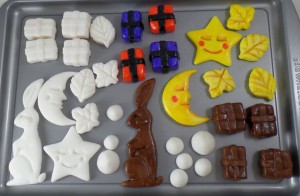
Since I am proudly part of their design team, this year Amazing Casting Products/Alumilite Corp. asked me to create some food samples using their new product Amazing Remelt and to do demos at their booth! My friend Jami Poe Bostjancic, a talented cake designer, taught me some of the ins and outs of fondant. As she noted, working with fondant has some similarities to polymer clay. I decided to make a sun and moon for a mini cake, mushrooms on a cinnamon and brown sugar cupcake, chocolate bunny and mini presents all out of fondant for the requested samples.
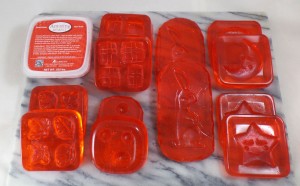
Fondant can easily be pushed into Amazing Remelt molds and then quickly popped out onto a cold cutting board to dry. Here I have prepped and readied my molds to be packed to go to CHA.
As per the website: “Amazing Remelt is a Non Toxic, 1-part reusable mold making material for room temperature or low exotherm materials. Amazing Remelt softens at 120°F and becomes liquid at 135°-140°F. It can be remelted and reused to make new molds time and time again. Ideal for making molds for smaller items such as jewelry, embellishments, and chocolate molds.”
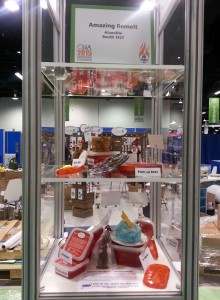
I assisted Susan M. Brown, Amazing Casting Products Design Team Leader and awesome artist in her own right, in assembling the Amazing Casting Products Hot Product display. I was able to take some photos of the display before the end of booth set up on the Friday before the show.
Susan brought some awesome little signs and clips from Deflecto, which helped hold up and highlight signs and info about the Amazing Remelt. I seriously need to buy some of the Deflecto Craft Organizers and Sustainable Office products now that I know they work so well.
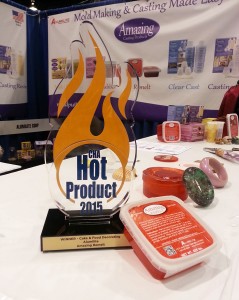
On Sunday the Craft and Hobby Association had a awesome gala event where they donated funds to charities and announced the winners of the Hot Product Categories! Amazing Casting Products/Alumilite Corp won Hot Product in Cake and Food Decorating at CHA for Amazing Remelt!
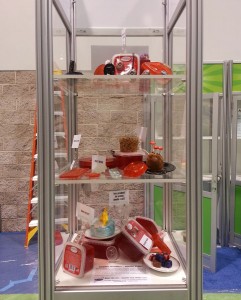
The Amazing Casting Products booth had all kinds of samples of what one can do with their products. Depending on the day they had different samples and demos, from bracelets, pizza cutters, pens, plates and more! Now that Amazing Clear Cast Resin has received FDA certification, meaning it’s food safe, you can even make plates and bowls from their resin!
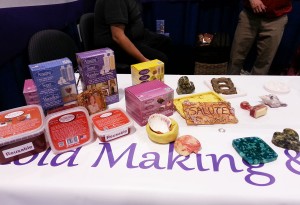
President of Alumilite Mike Faupel, wanted to make sure all the samples were easy to see, pick up and handle to showcase the versatility of the products.
I did afternoon demos at the booth of my push molds such as those seen in my CHA Sneak Peak Post.
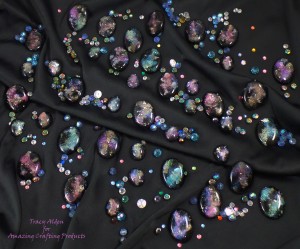
This year I wanted to make a booth display that was a little different. I started with vintage cabochon molds and used layers of Amazing Clear Cast Resin and Alumilite Metallic Powders, glitter and rhinestones. Each little cabochon was a mini galaxy piece that I wanted to attach to a gown.
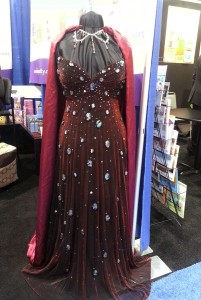
I first started creating a caftan but I wasn’t happy with the look, so I saved the fabric for another project and rummaged through my collection of thrift store finds. I found a red glittery gown that had seen better days. I made some alterations, changing the straps, fitting and how the gown would drape. I slowly glued on each cabochon with 36000 and rhinestones with Gem-Tac, as suggested by my stunningly talented cousin Kathleen Rojas, owner of Oso Rojo Costumes.
With the addition of a cape, and making necklace my “Cosmic Radiation” gown went on on display at the Amazing Crafting Products/Alumilite Corp booth.
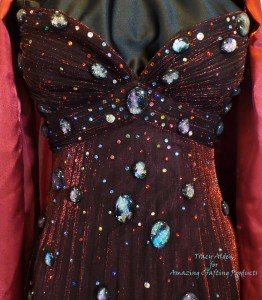
I was so happy with how the resin and inclusions sparkled under the bright trade show lights!
Come back later for Craft & Hobby Association Mega Show 2015 post, part 2!
Until Next Time, Safe Travels!
Drinks on me! Anything But a Card Challenge #36
Good morning! Today’s project tutorial is thanks to a challenge! The talented Susan M. Brown of SBartist: Painting In The Dark Blog asked me if I would be willing to be a guest designer for the Anything But a Card Challenge blog and of course I had to say yes!
Anything But a Card Challenge Challenge #36 : Summer Lovin’ – A celebration of all things summer! Think summer weather, vacations, sunflowers, beach parties, cold drinks and barbecues… bright colors and wide open sky. Pool parties all day, then sitting in lawn chairs sipping drinks and watching the night sky. The warm summer months have me thinking of cold drinks, sunny days and BBQs with family and friends. My project for the Anything But a Card Challenge for this month played perfectly into that inspiration!
One of the aspects of having a party or BBQ is that someone is bound to spill a drink. While many find it an annoyance I decided to use it as a inspiration!
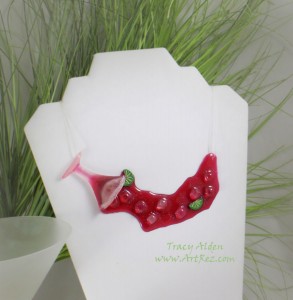
Starting with the idea of a spilled Pomegranate Martini or Cosmo, I came up with a wearable art piece called “Drinks on me!”
Supplies:
Amazing Mold Putty
Amazing Clear Cast Resin
Stampendous Multi Ultra Fine Crystal Glitter
Craft Knife
Polymer Clay
Stylus
Elastic jewelry cord
Small drill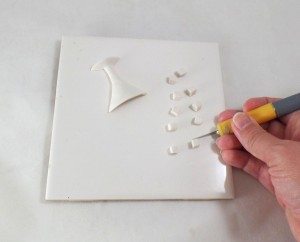
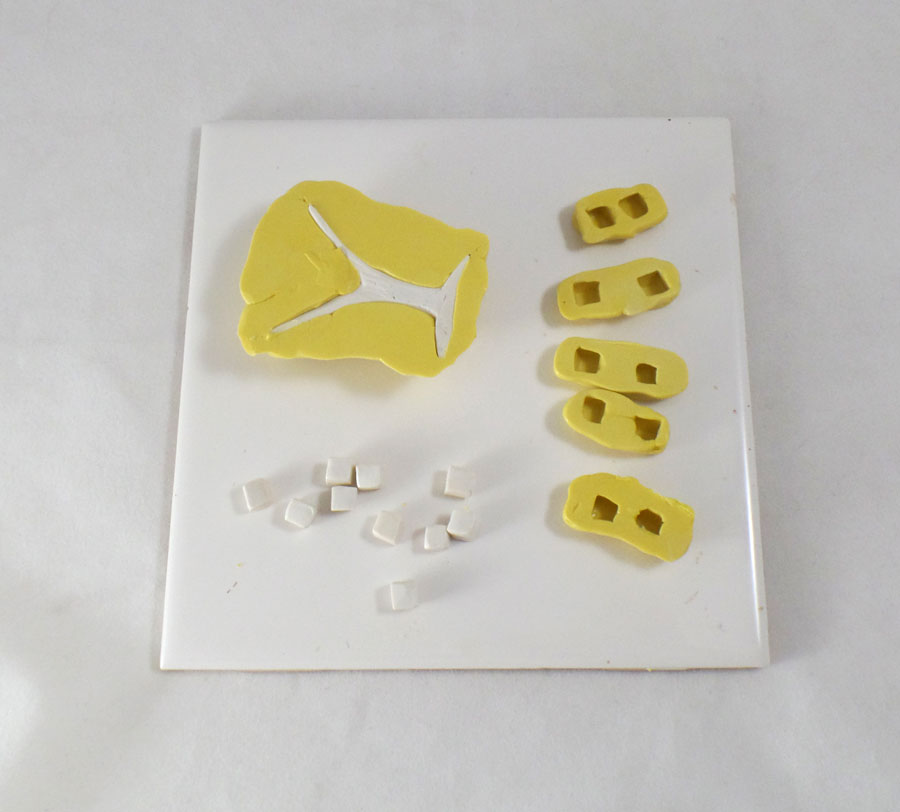
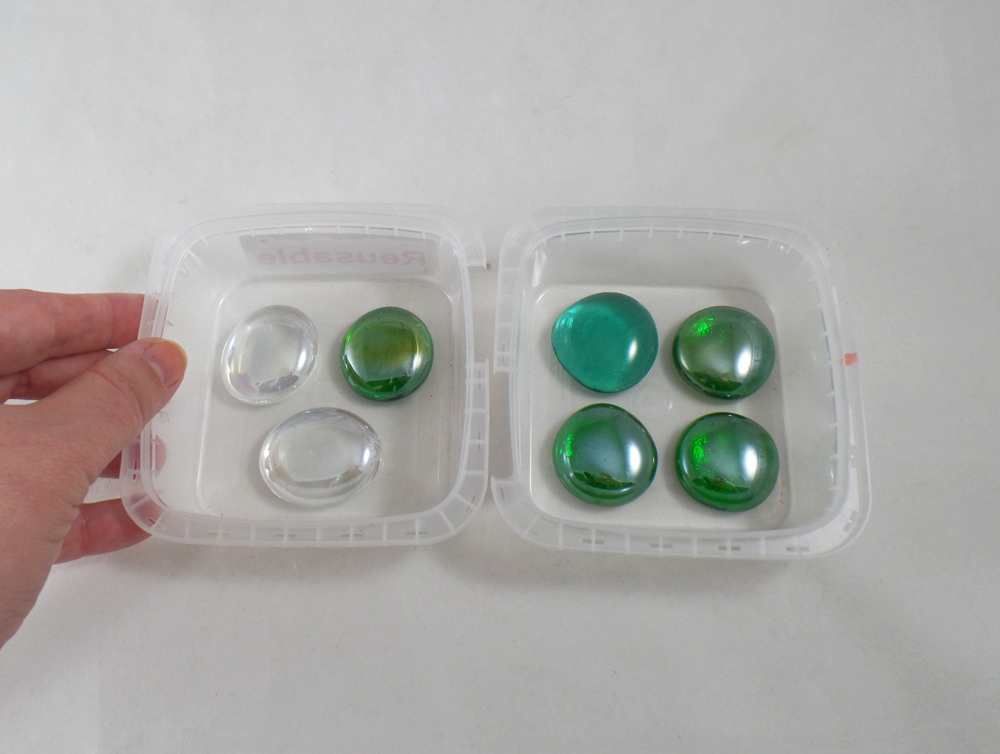
Using a stylus and a craft knife, I shaped and carved half a martini glass and ice cubes out of polymer clay. I then baked the clay pieces on the tile to manufacturer’s instructions.
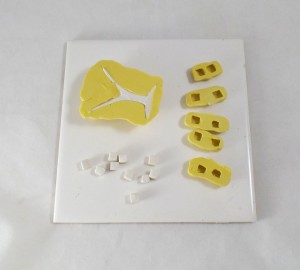
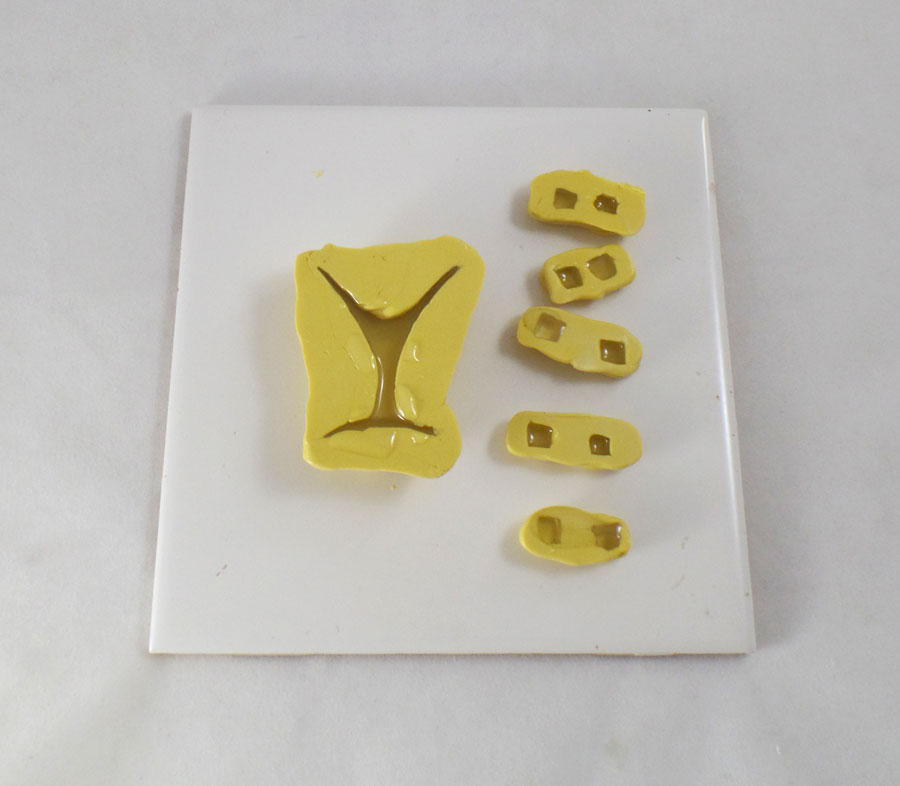
After I baked the polymer clay, I lightly sanded and trimmed the edges of the pieces with a craft knife and an emery board. Once the polymer pieces are cleaned of dust, I used Amazing Mold Putty to make molds of the pieces.
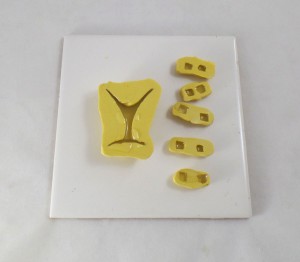
Once the molds were cured I poured Amazing Clear Cast Resin into the molds and let it set for about five hours. The pieces came out frosted by using the Mold Putty and that was the perfect look for the glass and ice cubes.
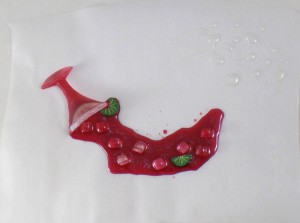
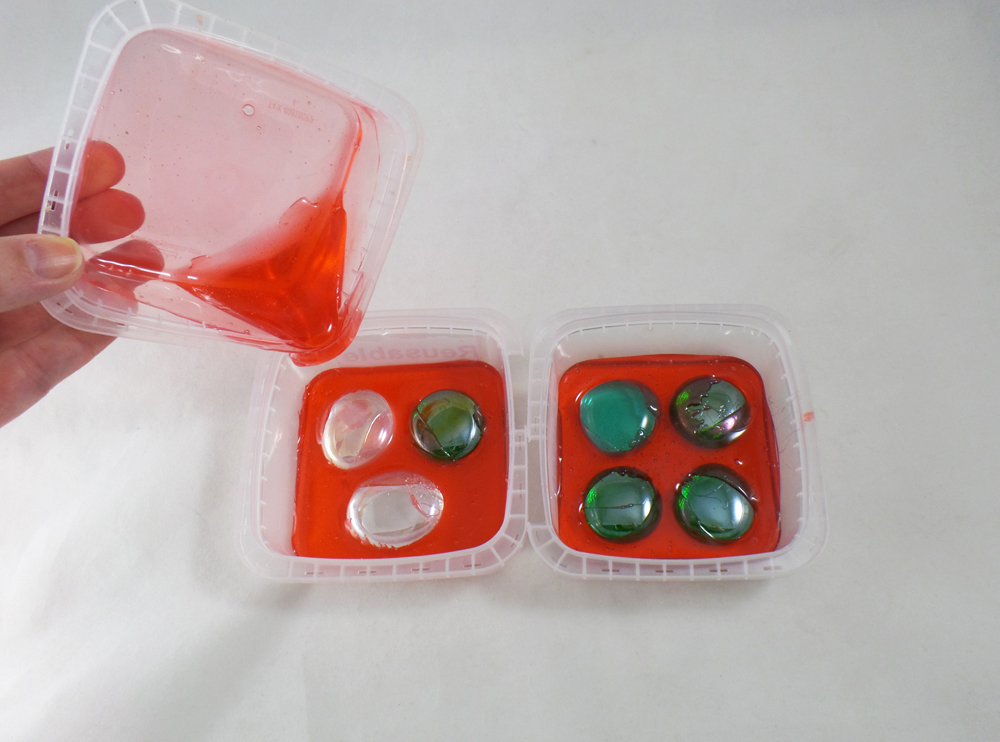
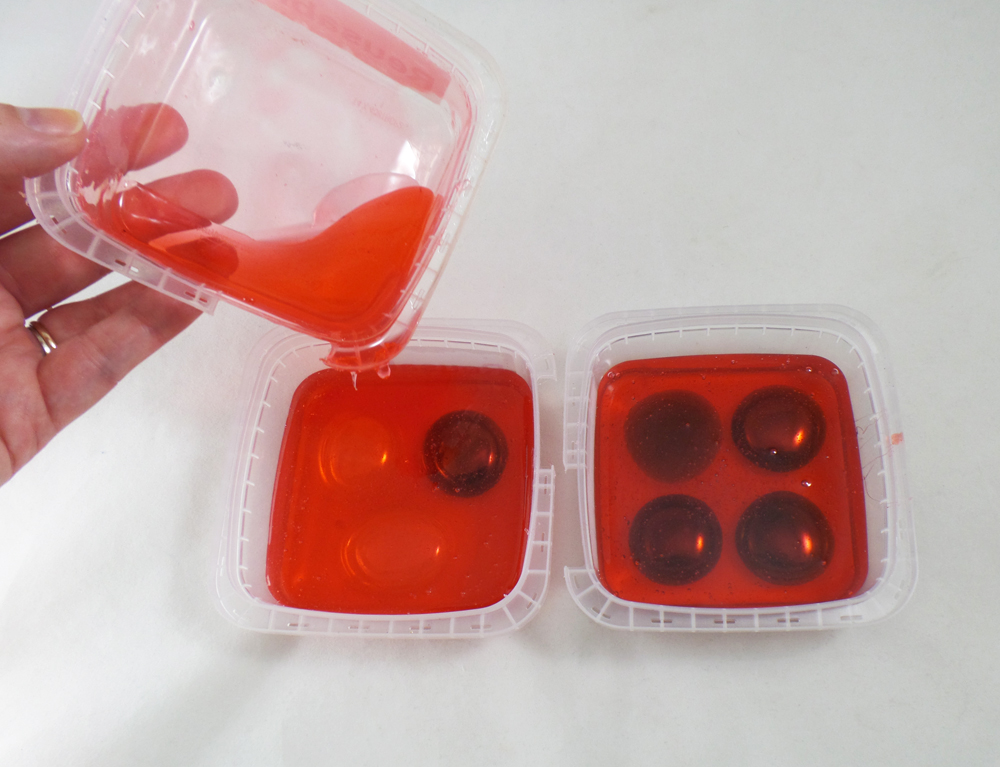
I then placed the glass upside down on *parchment paper and poured Amazing Clear Cast Resin tinted with Alumilite Red Dye in a controlled U shape. I coated the ice cube resin pieces with untinted Clear Cast and placed them gently into the tinted resin to give the illusion of melting ice. I added a few polymer clay lime cane slices, sprinkled a touch of Stampendous Multi Ultra Fine Crystal Glitter on the tinted resin to finish off the look and let it all cure.
*The resin has to be poured on parchment paper otherwise the resin will soak into any other paper.
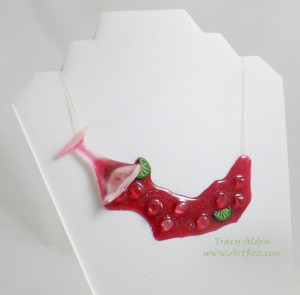
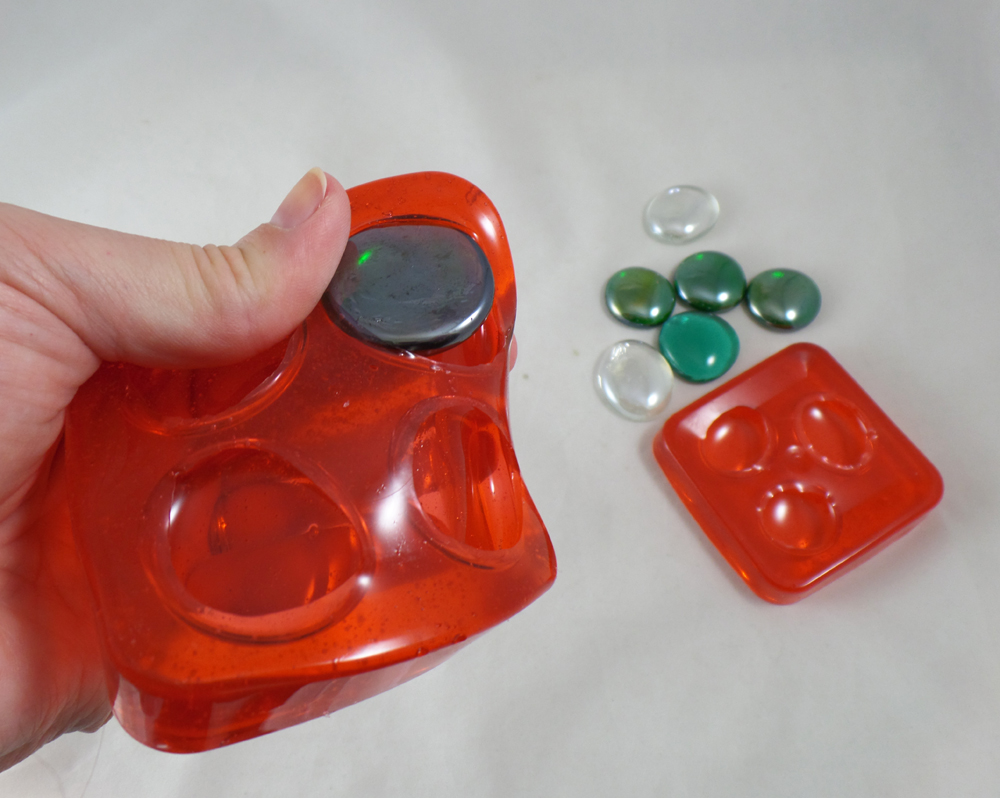
I drilled a hole on each side of the pendant and threaded clear elastic jewelry cord on for easy wear.
One of the really fun aspects of this project is with a simple change of dye used with the resin you can create any spilled drink you would like!
What might YOU make for the Anything But a Card Challenge? CLICK HERE to link up your projects! 🙂
Until next time, safe travels!

Ancient and Contemporary Inspired Artistry