#TBT The Upcycled Mummy’s Curse! A spoOky DIY
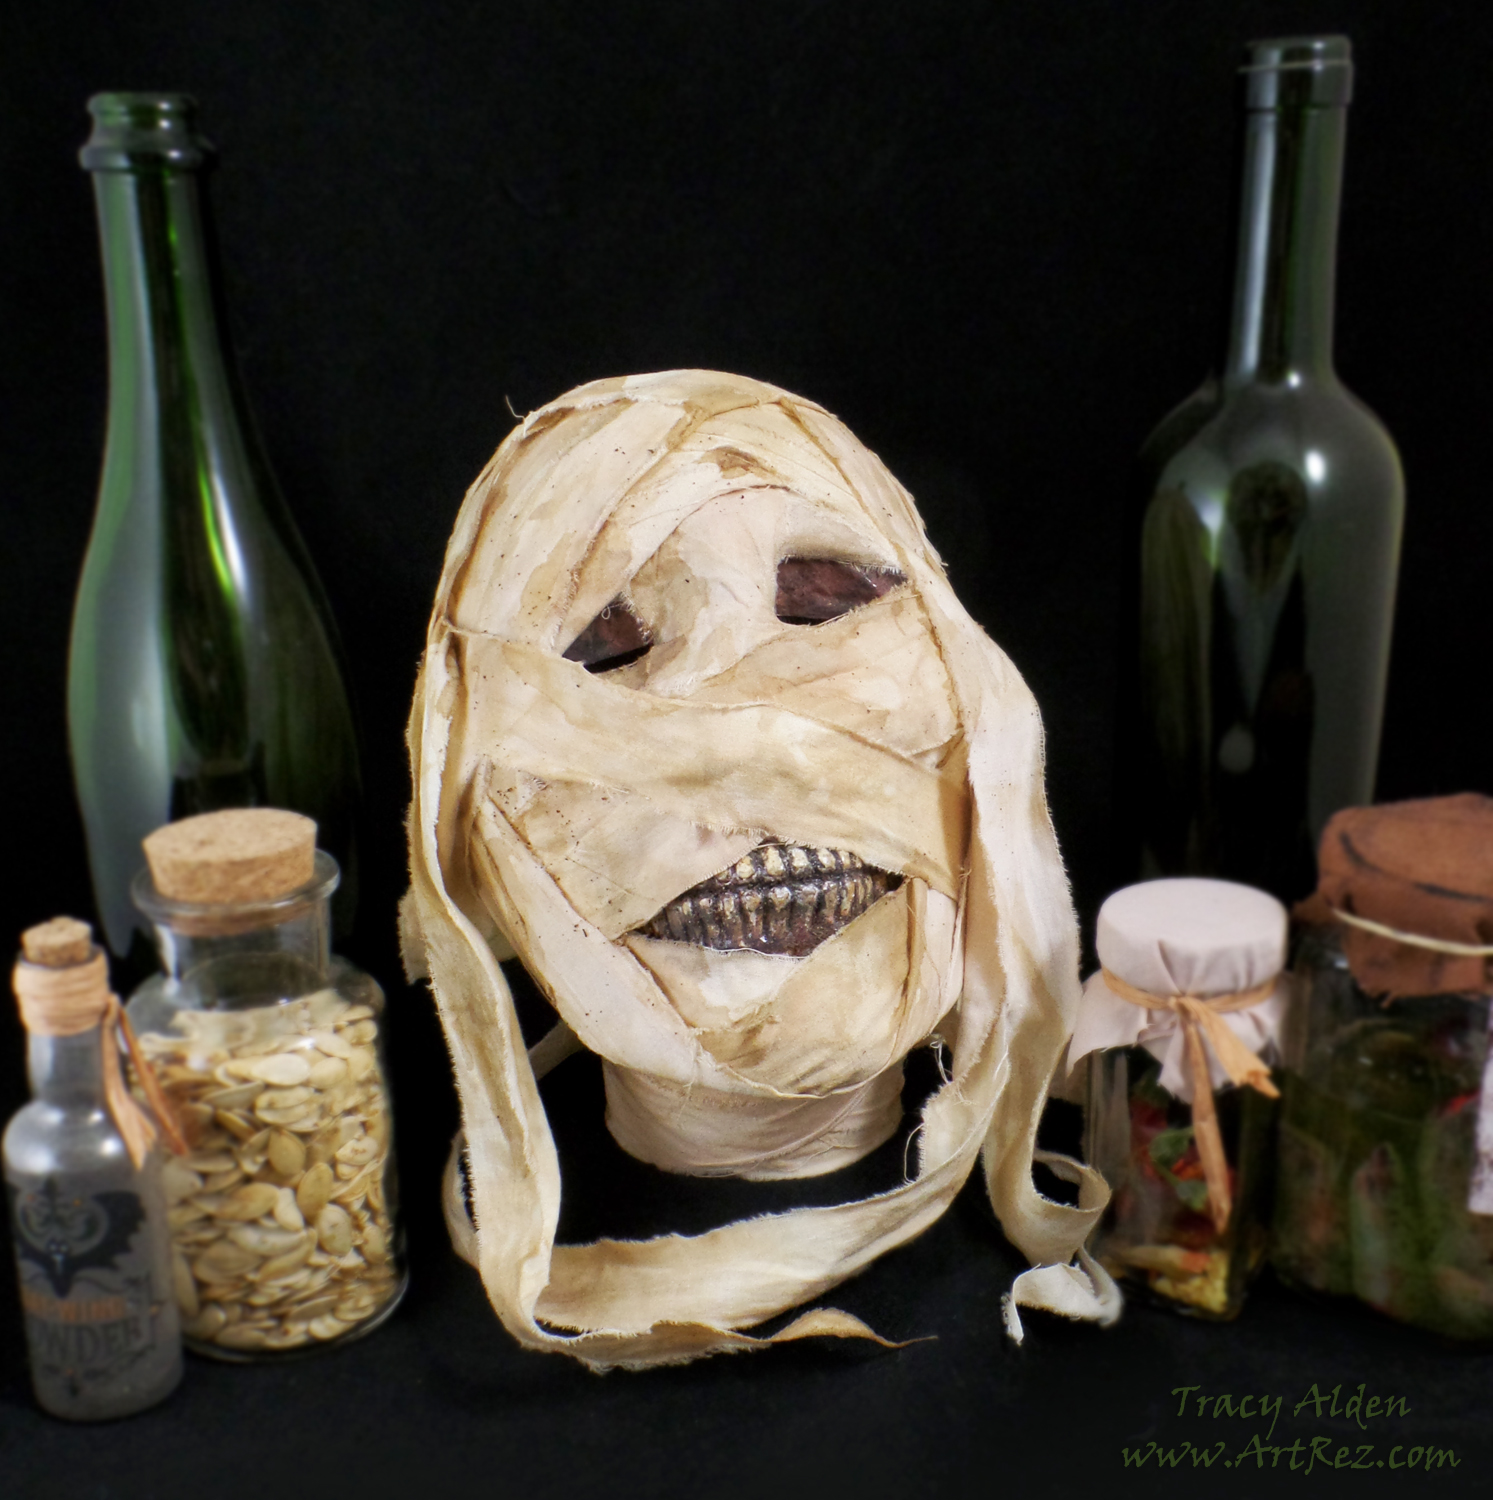
Continuing my Throwback Thursday posts, this time highlighting my love of Halloween, Ancient Egypt and upcycled crafts! Posted in 2015 on the Amazing Casting Products blog, I had some rather odd inspiration for this project and it all started with me finding some fun plastic Halloween skulls at a Thrift store. With two of them, I made Ghoulish Glam Skulls and the rest I saved for Halloween decor around the house.
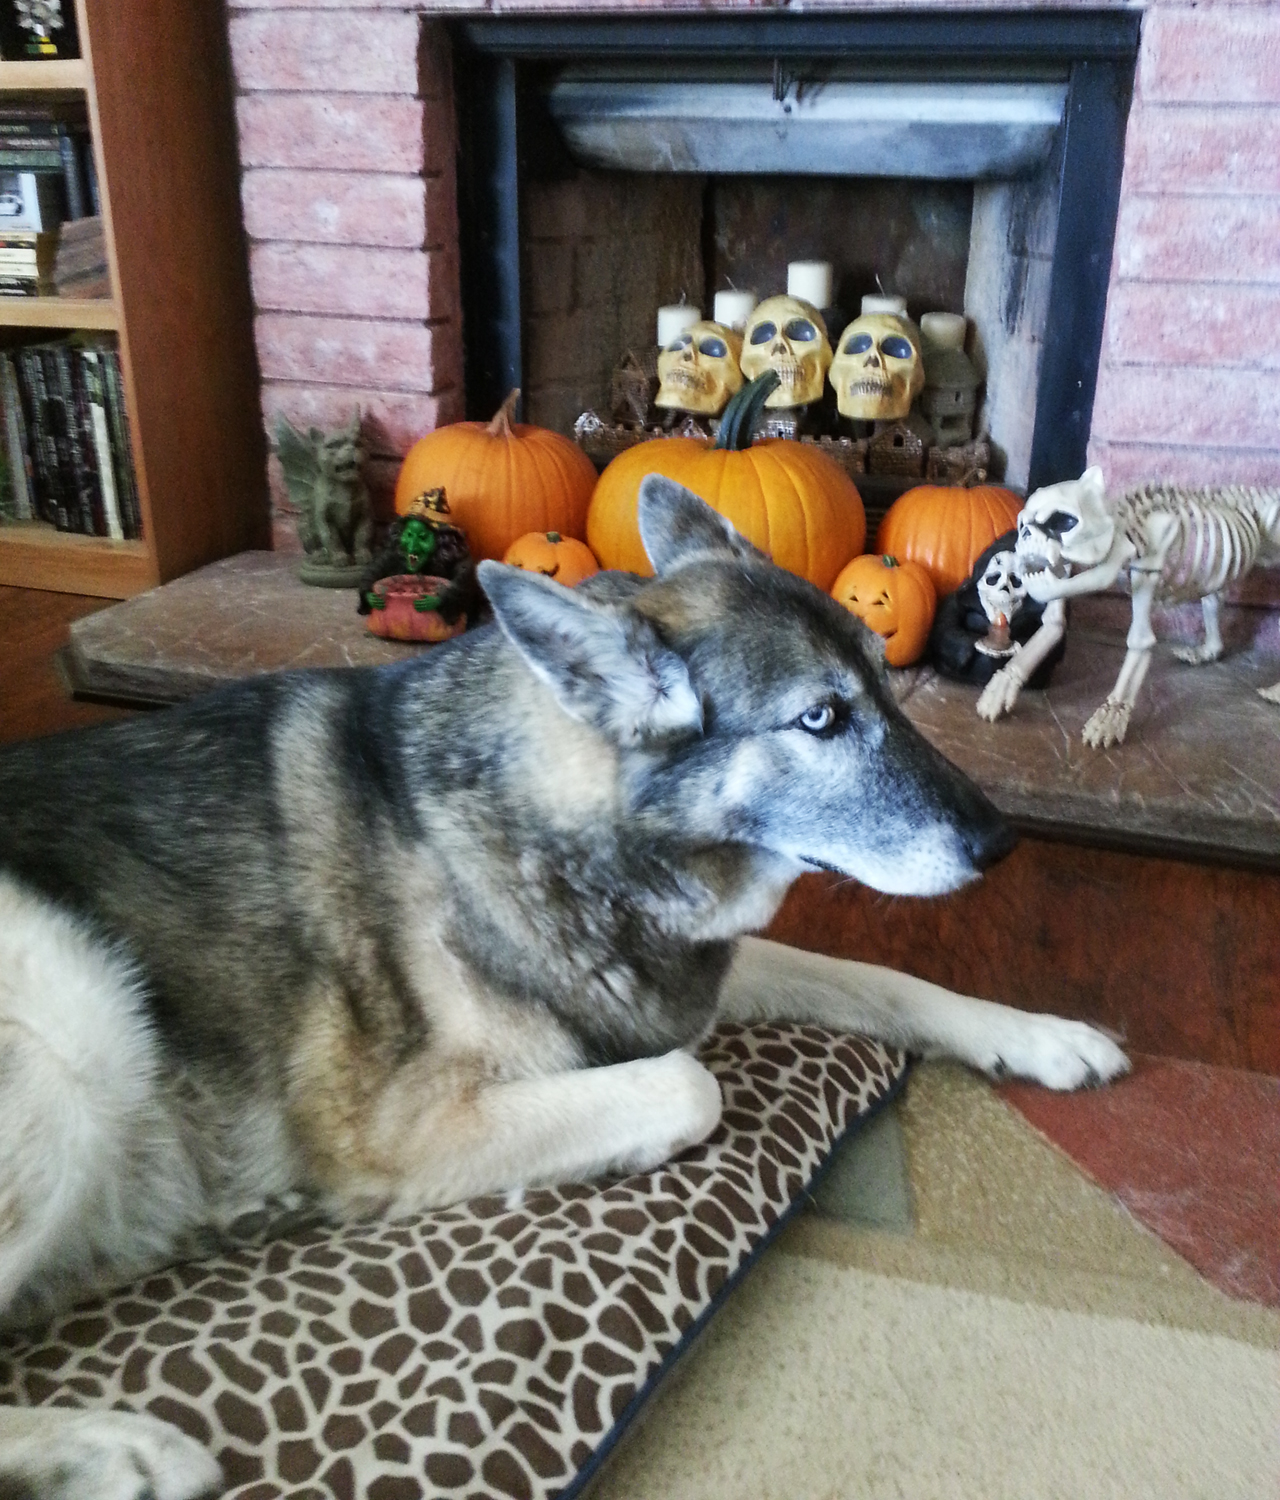
While I was outside in the garden one of our dogs, Luna, decided to play in the house, the skulls were close to her toys and she cracked one of them. I of course couldn’t be angry with her playing though her rather adorable “I totally did NOT do that” face also helped. When I was about to throw out the skull, an idea came to me: why not use the cracked skull as a base for a Halloween mummy head prop?
Supplies:
Amazing Casting Resin
Alumilite Dyes
Liquitex Gloss and Matte Varnish
Acrylic Paint
Aluminium Foil and Paper Bags
Stir Sticks
Plastic Halloween Skull
Cotton Muslin Fabric
Black leaf tea bags
Beacon’s Gem-Tac
Paint Brush
Paper Tape Roll
Hot Glue Gun and glue sticks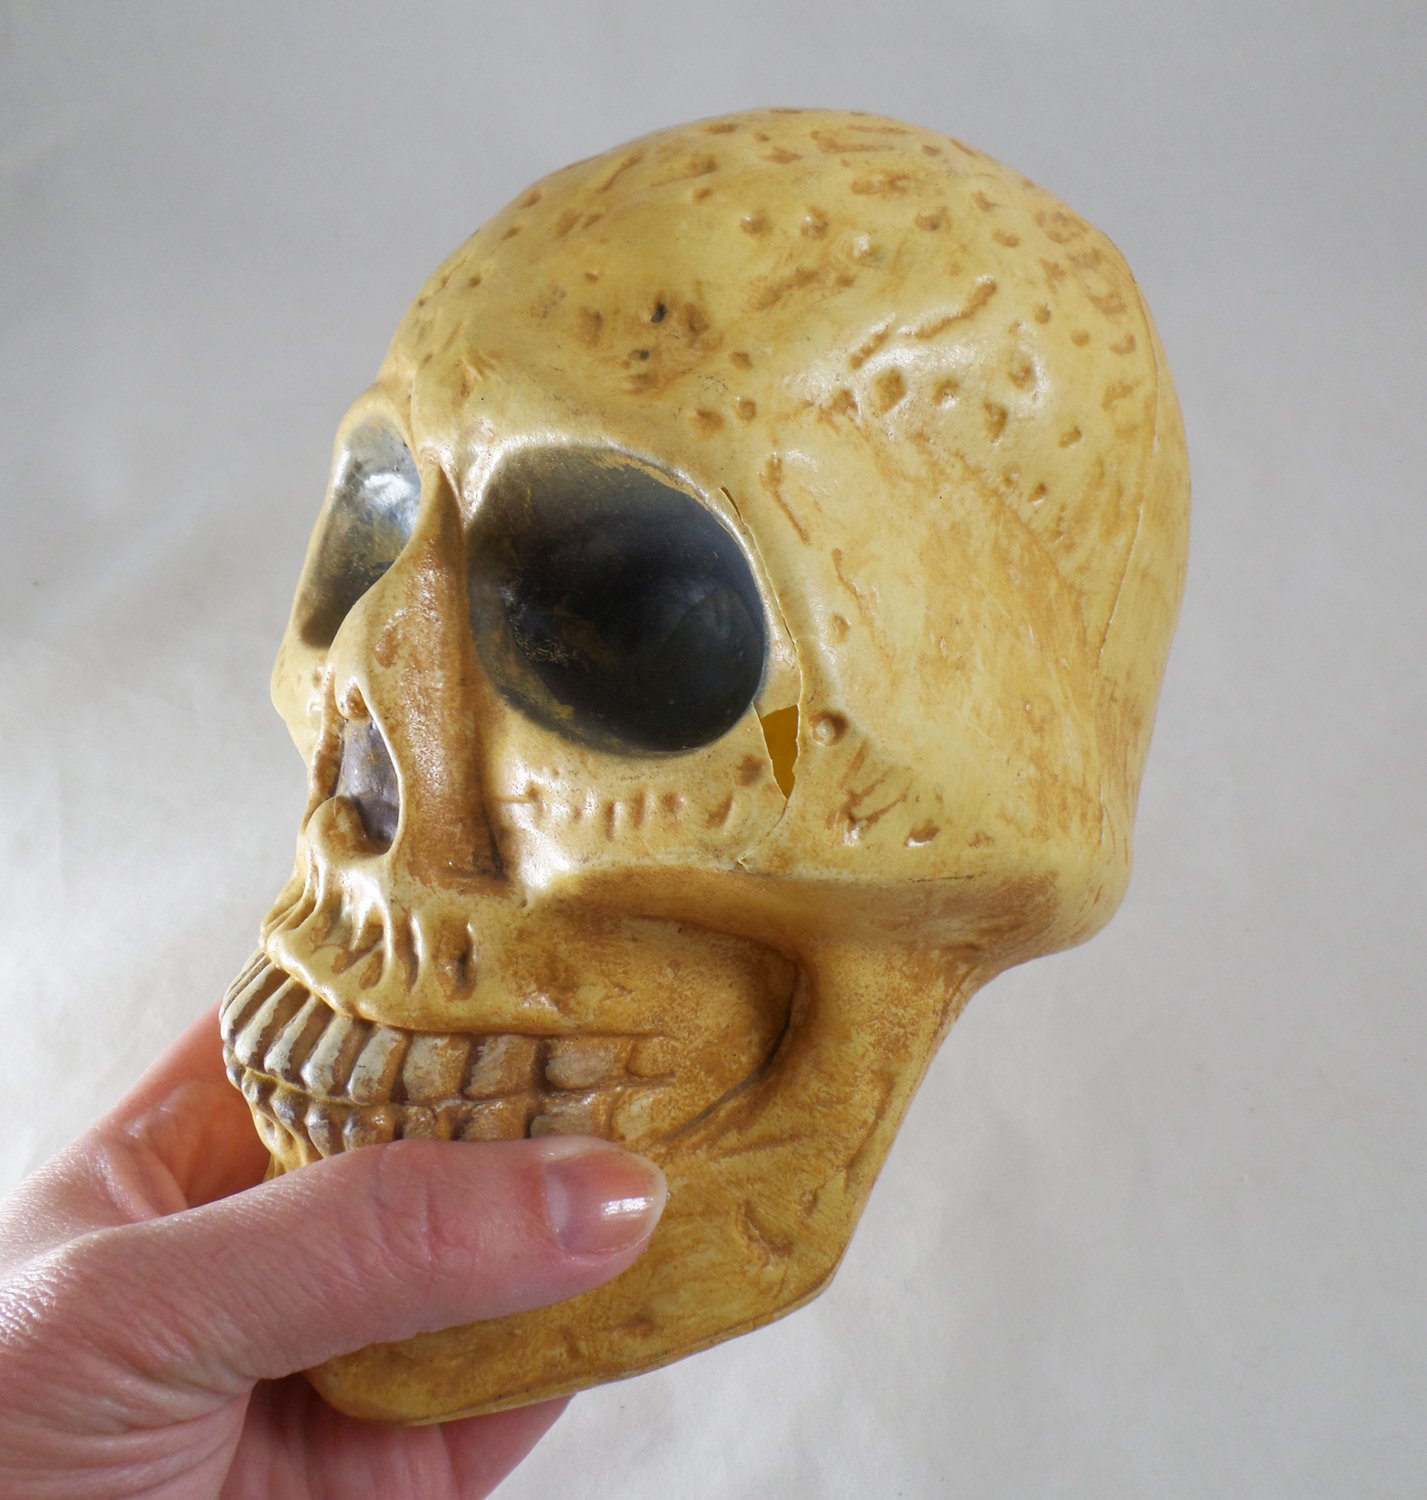
With the crack being along the side of the eye socket and most of the left side of the skull I needed to stabilize the now-fragile skull. I thought of using Casting Resin but I needed to seal the hole before filling the skull with resin. I taped up the crack with clear packing tape, creating a temporary seal for the resin.
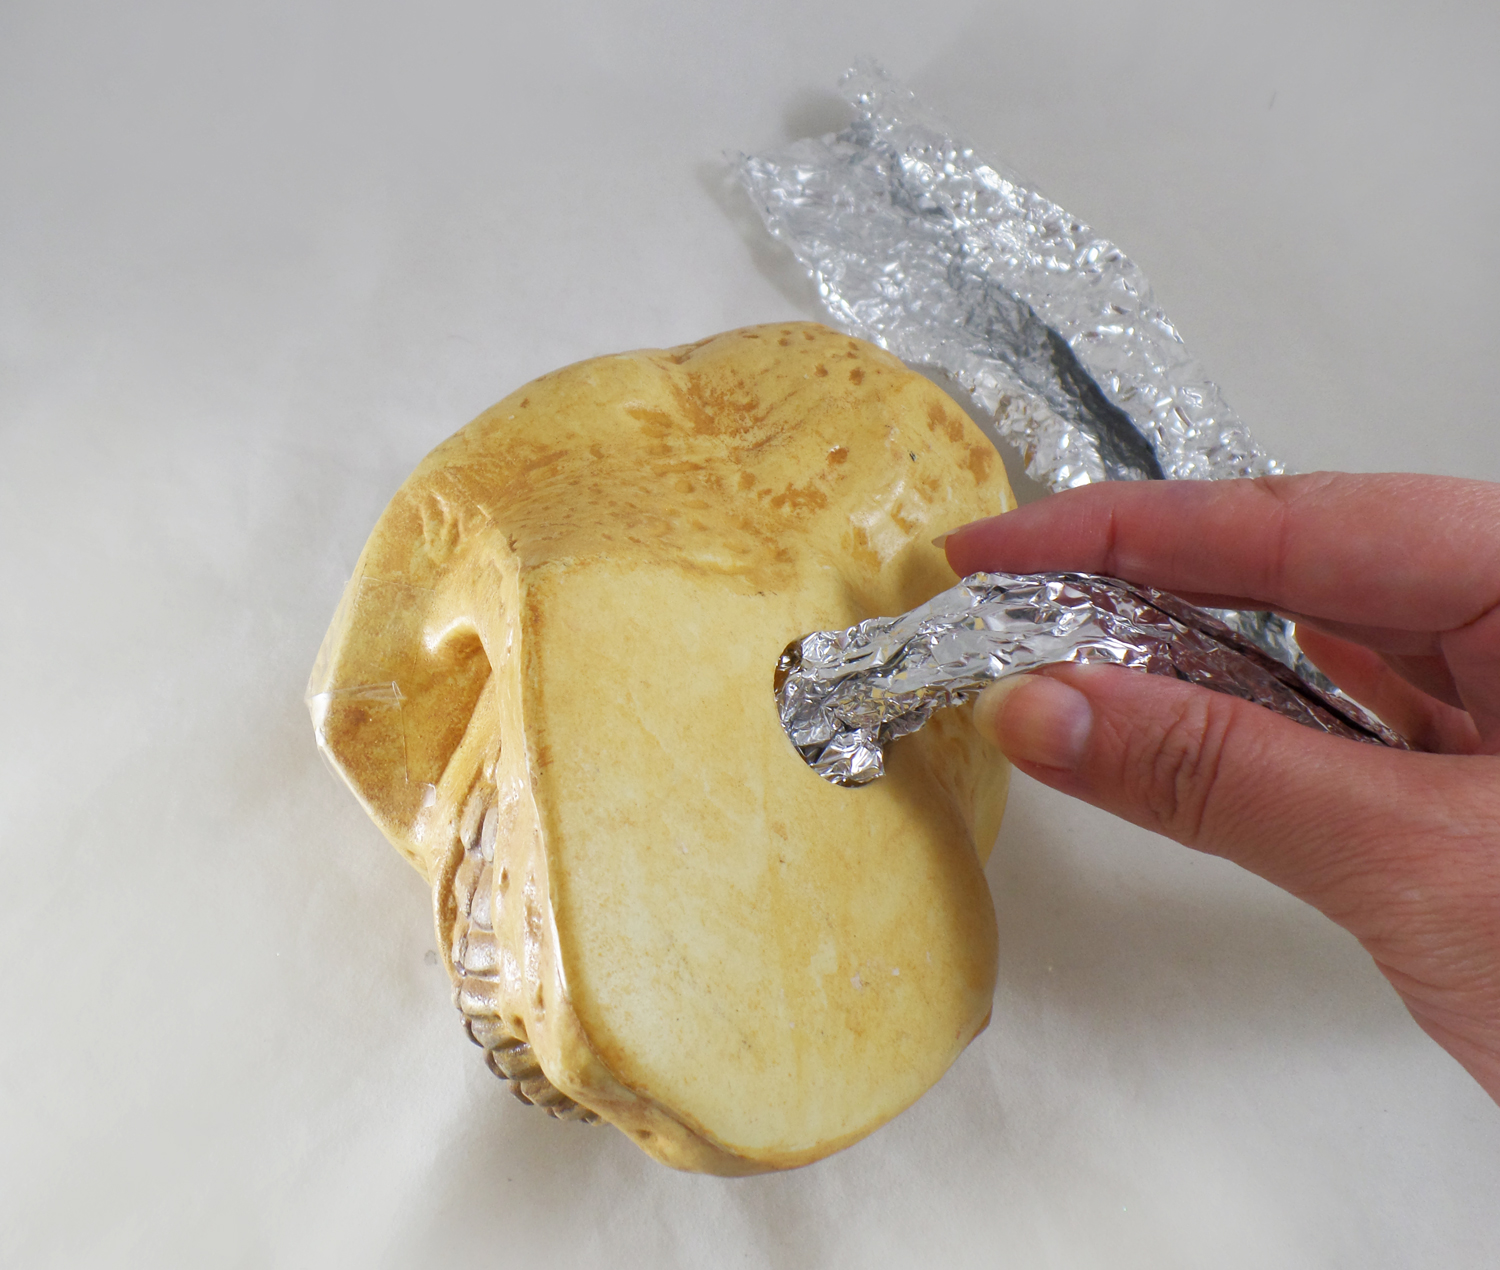
Knowing that if I were to fill up the whole skull with Casting Resin it would not only require a lot of resin but make the skull on the heavy side I needed to put some sort of filler inside the skull. Using used clean paper bags and crumpled aluminum foil I slipped them inside the skull through a hole in the bottom.
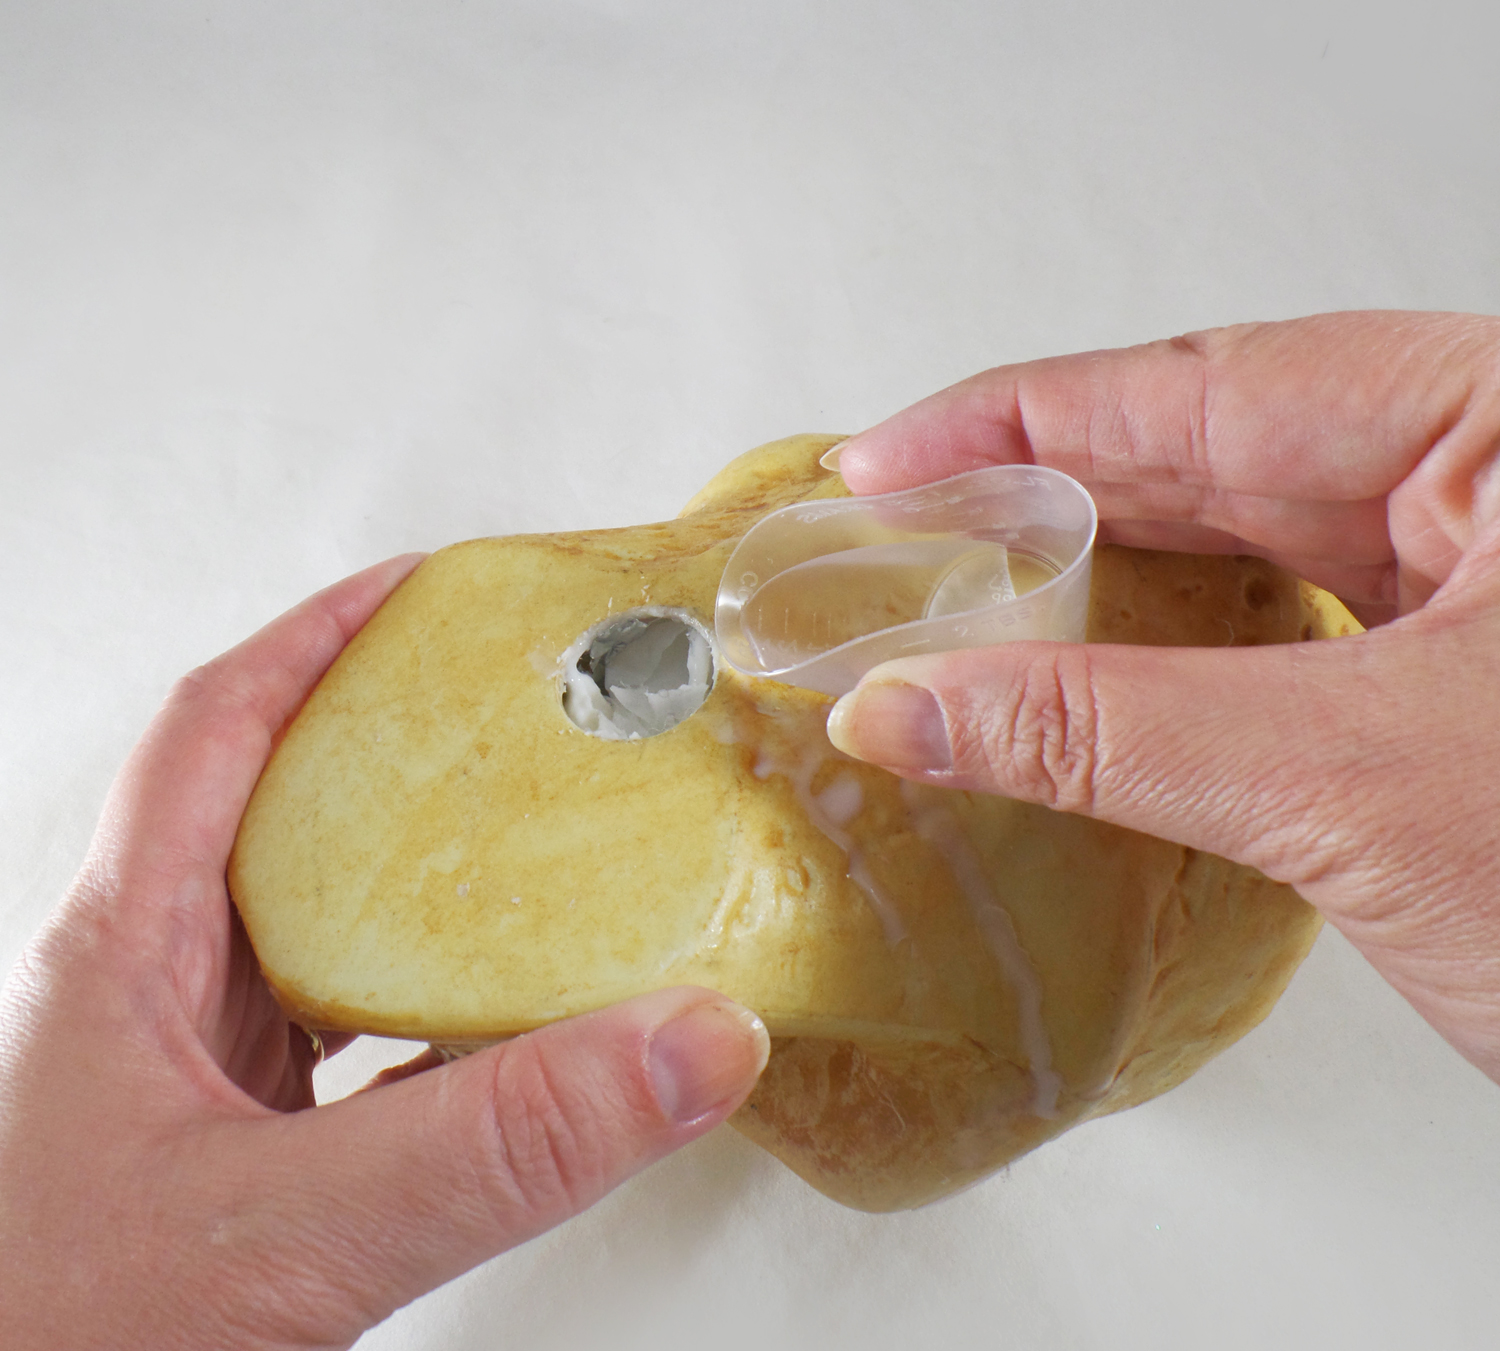
Next I made small batches of Amazing Casting Resin and poured it through the hole in the bottom of the skull. By pouring small batches and then tilting the skull I was able to make sure all of the inside of the skull was equally covered with resin, stabilizing the plastic skull. This process went very quickly because Amazing Casting Resin sets up in 10-15 minutes. I ended up using 3/4 of a resin kit to fill the inside of the skull.
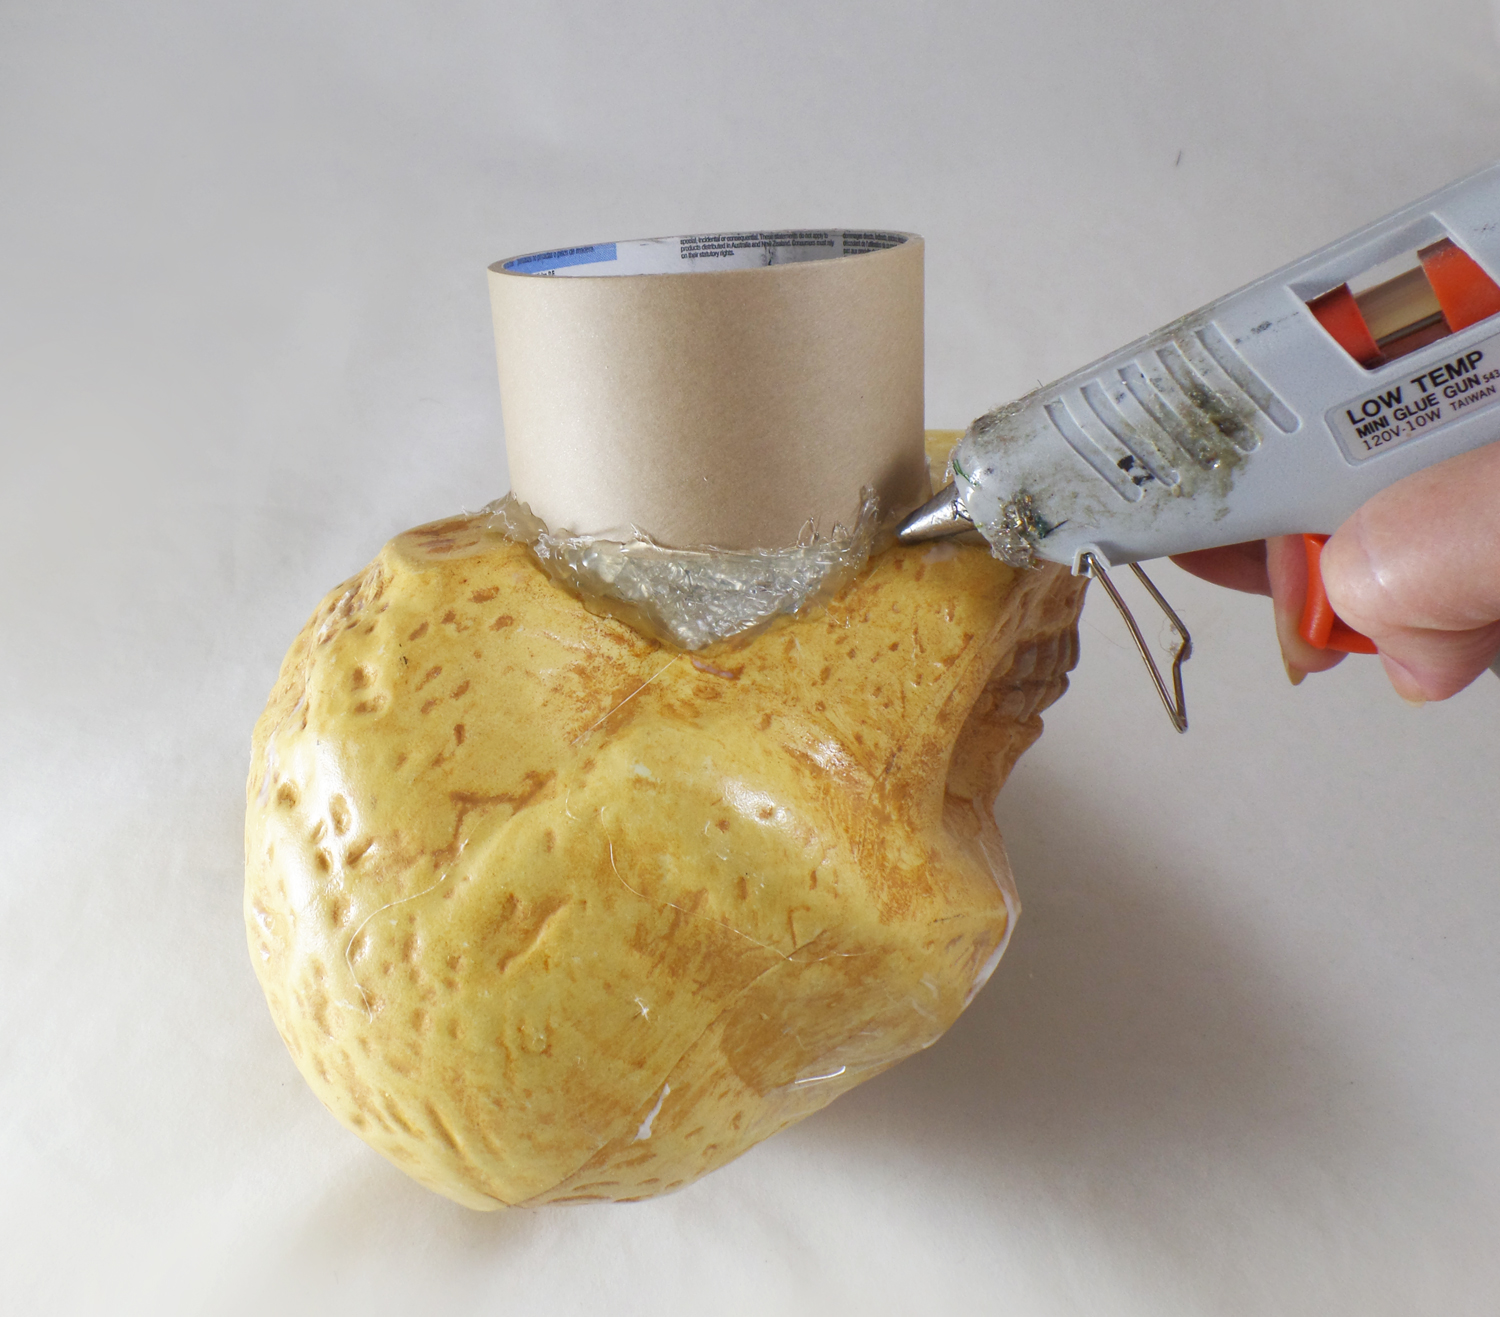
Once I had filled up the inside of the skull I hot glued a tape roll to the bottom of the skull to create a neck for the mummy head. Any gaps between the tape roll and the skull I filled in with aluminum foil and hot glue.
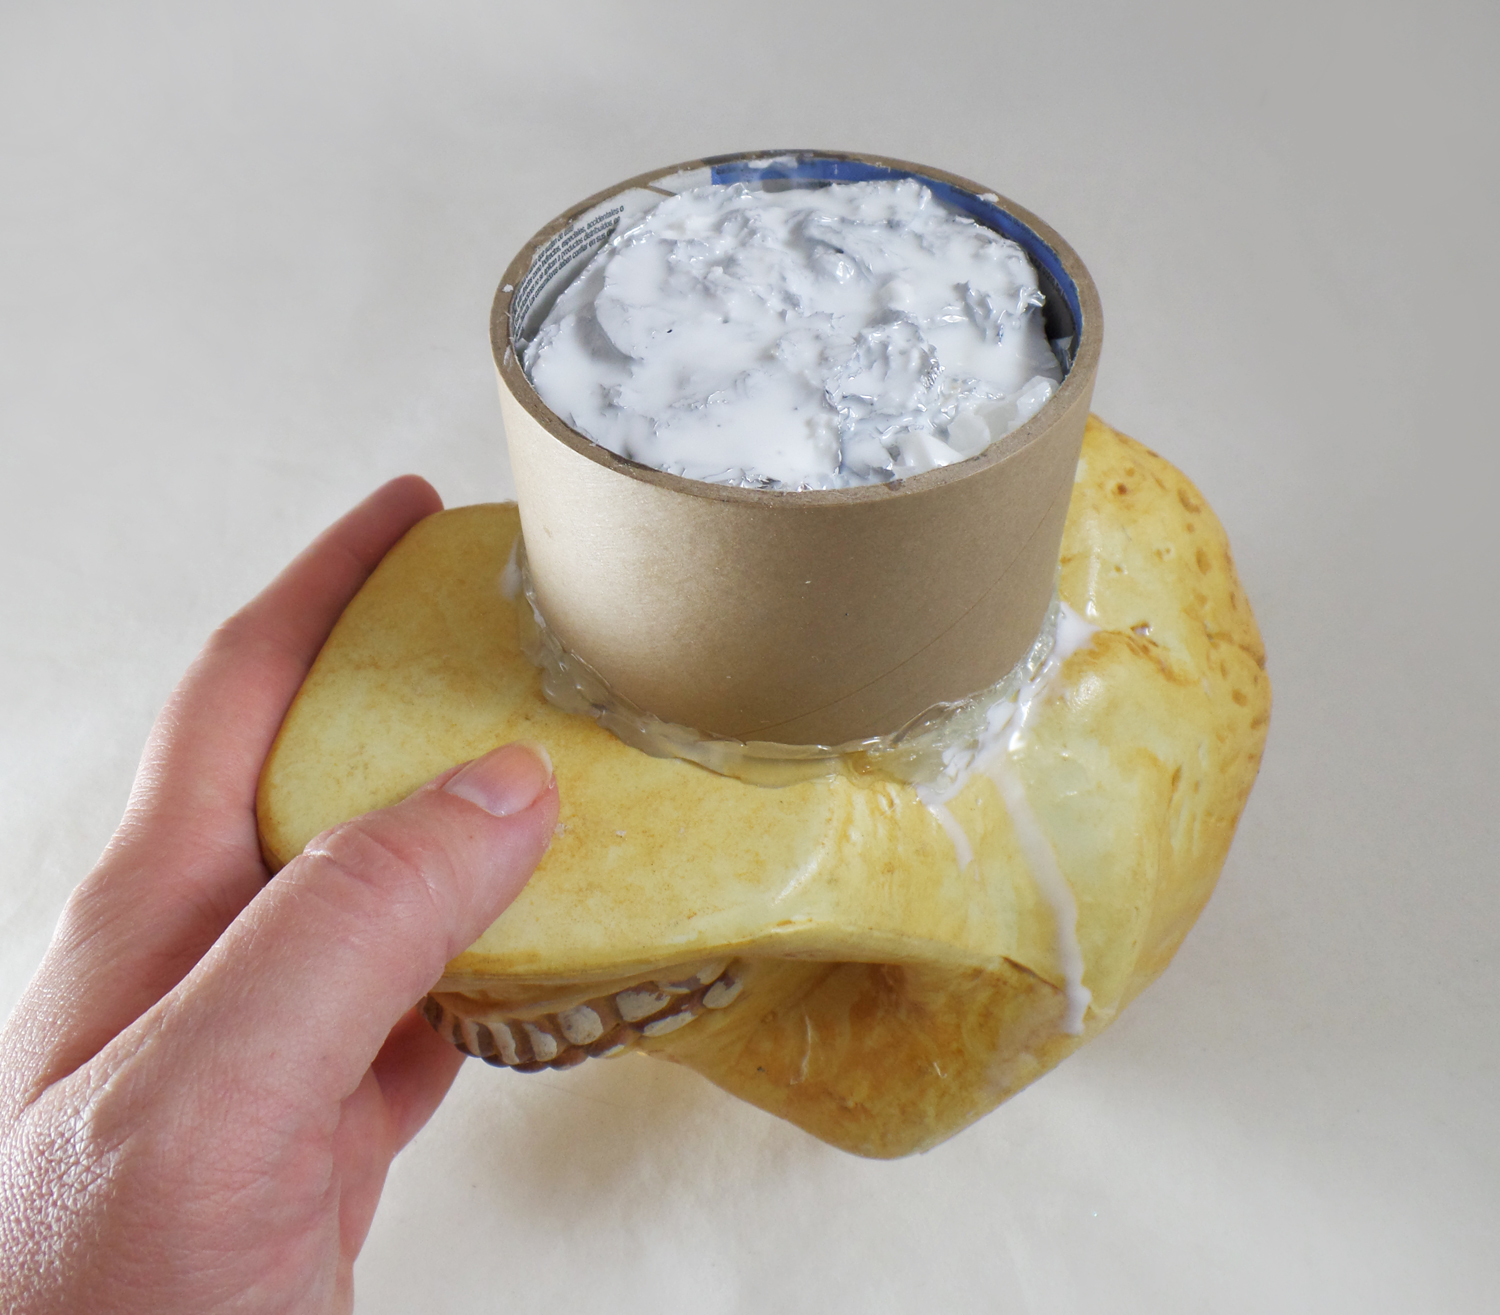
I then mixed up some Casting Resin and poured it into the newly formed neck of the mummy head. I put some extra foil into the neck cavity and filled it up with more Casting Resin, using up all of the kit.
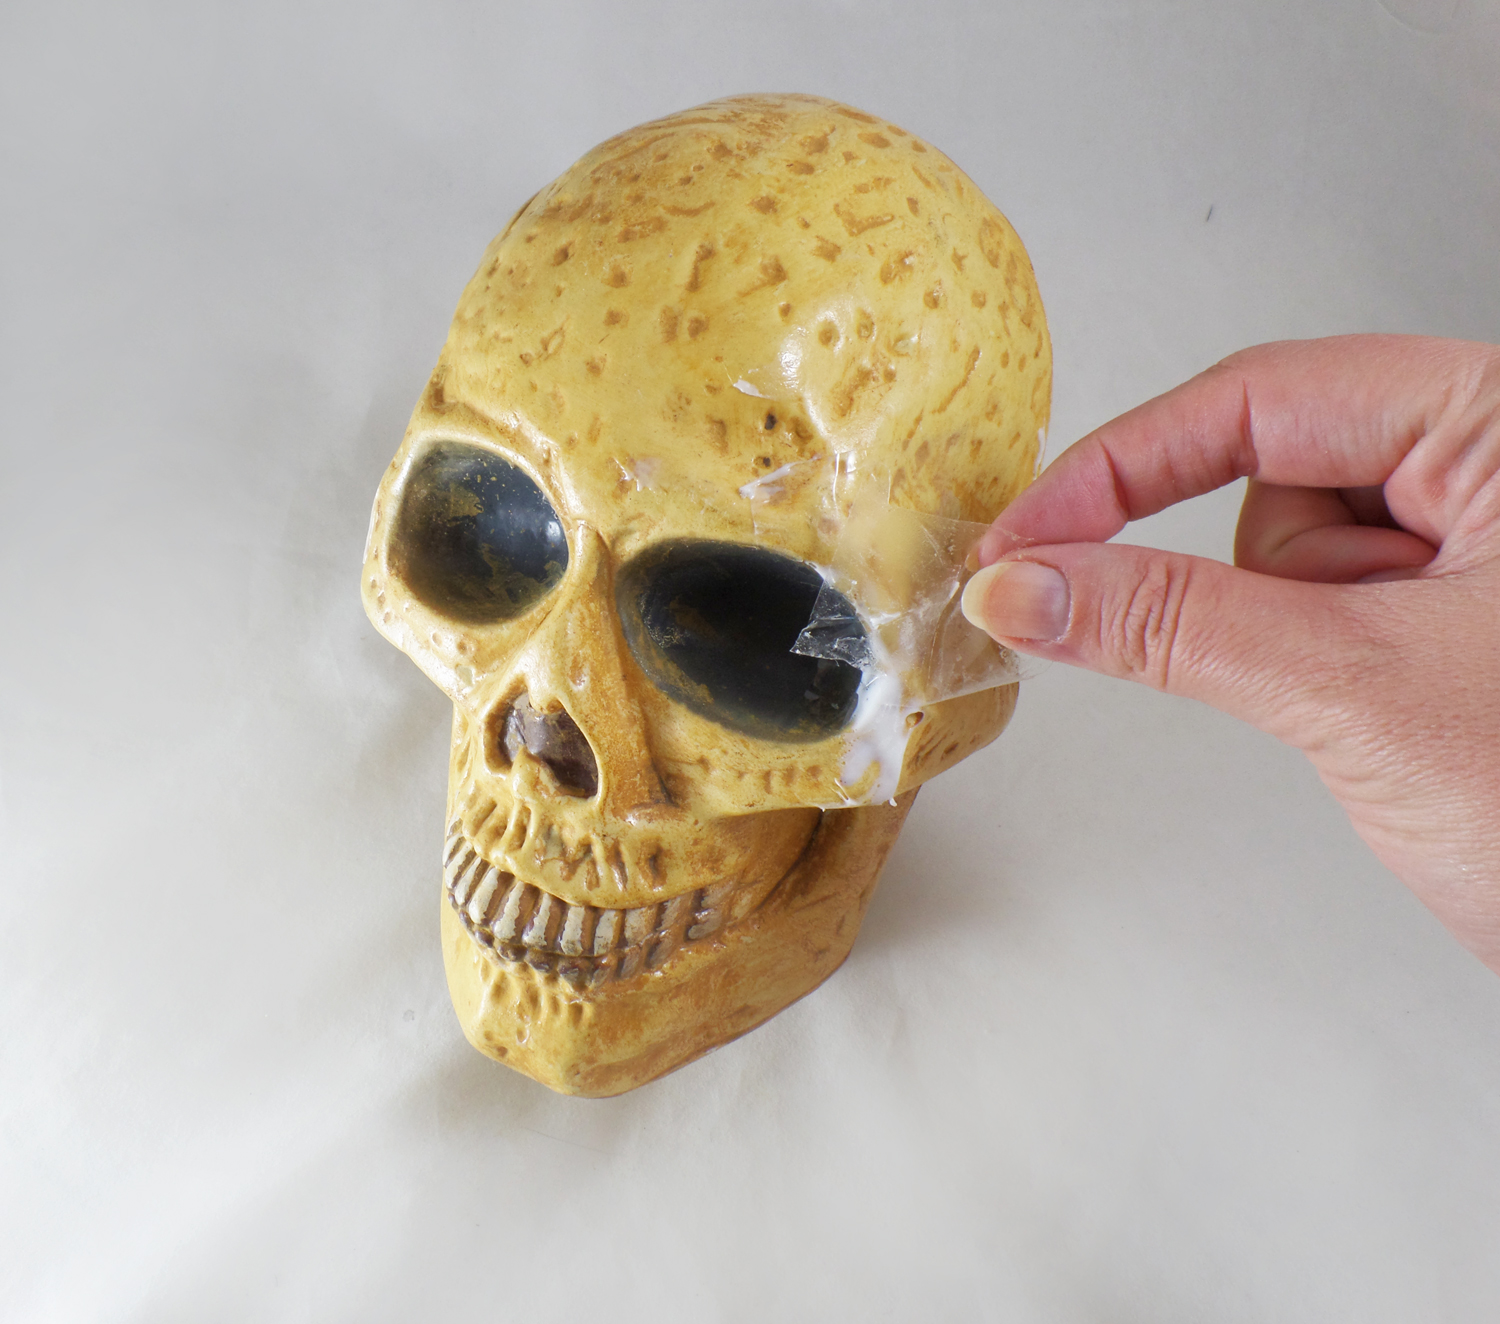
Once the resin was cured, I removed the tape from the now resin-filled crack and removed any excess resin spills off the skull.
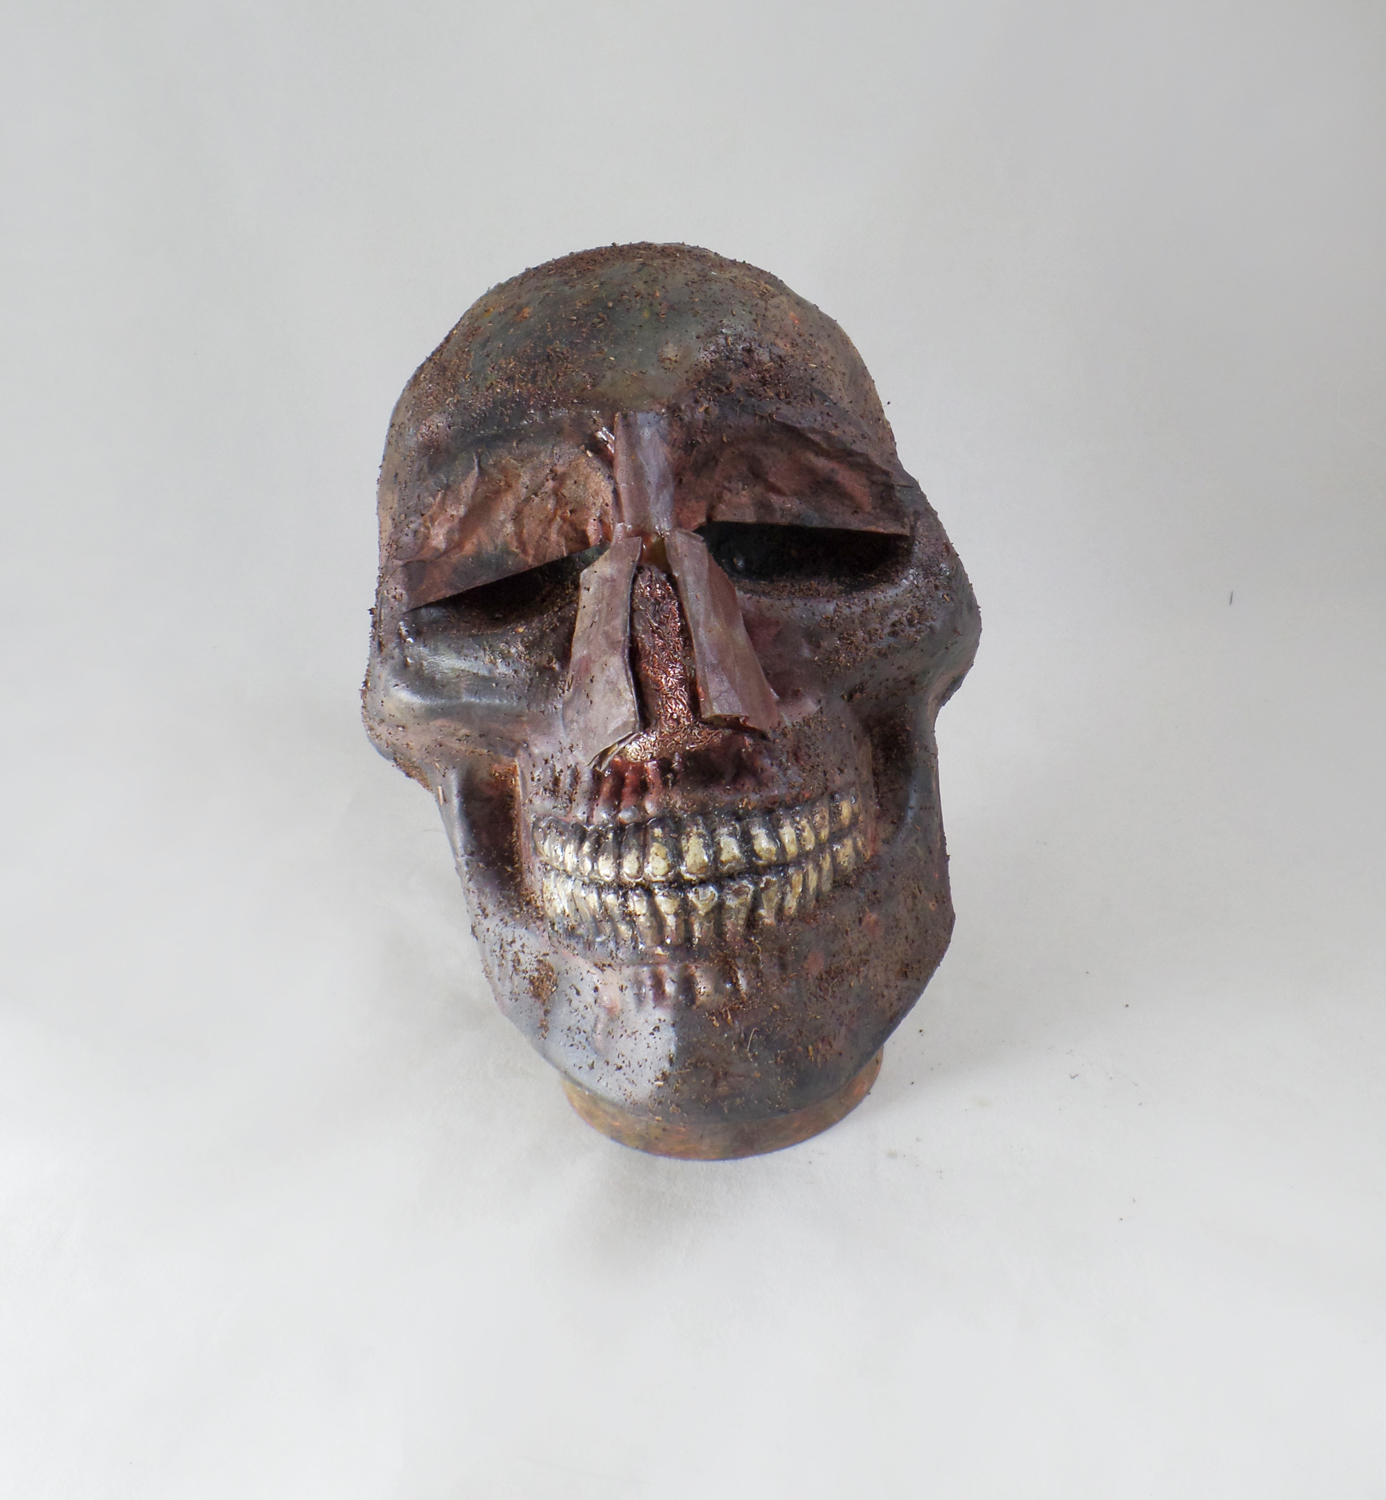
Since not much of the plastic would be visible under the wrappings but I didn’t want it looking like a skull. I painted the skull with a mixture of yellow, brown and black acrylic paint. I glued on used tea bags to create eyelids and created a nose out of paper bags and tin foil. I glued on some loose tea grounds to give the look of sand/dirt and sealed it with Liquitex Matte Varnish.
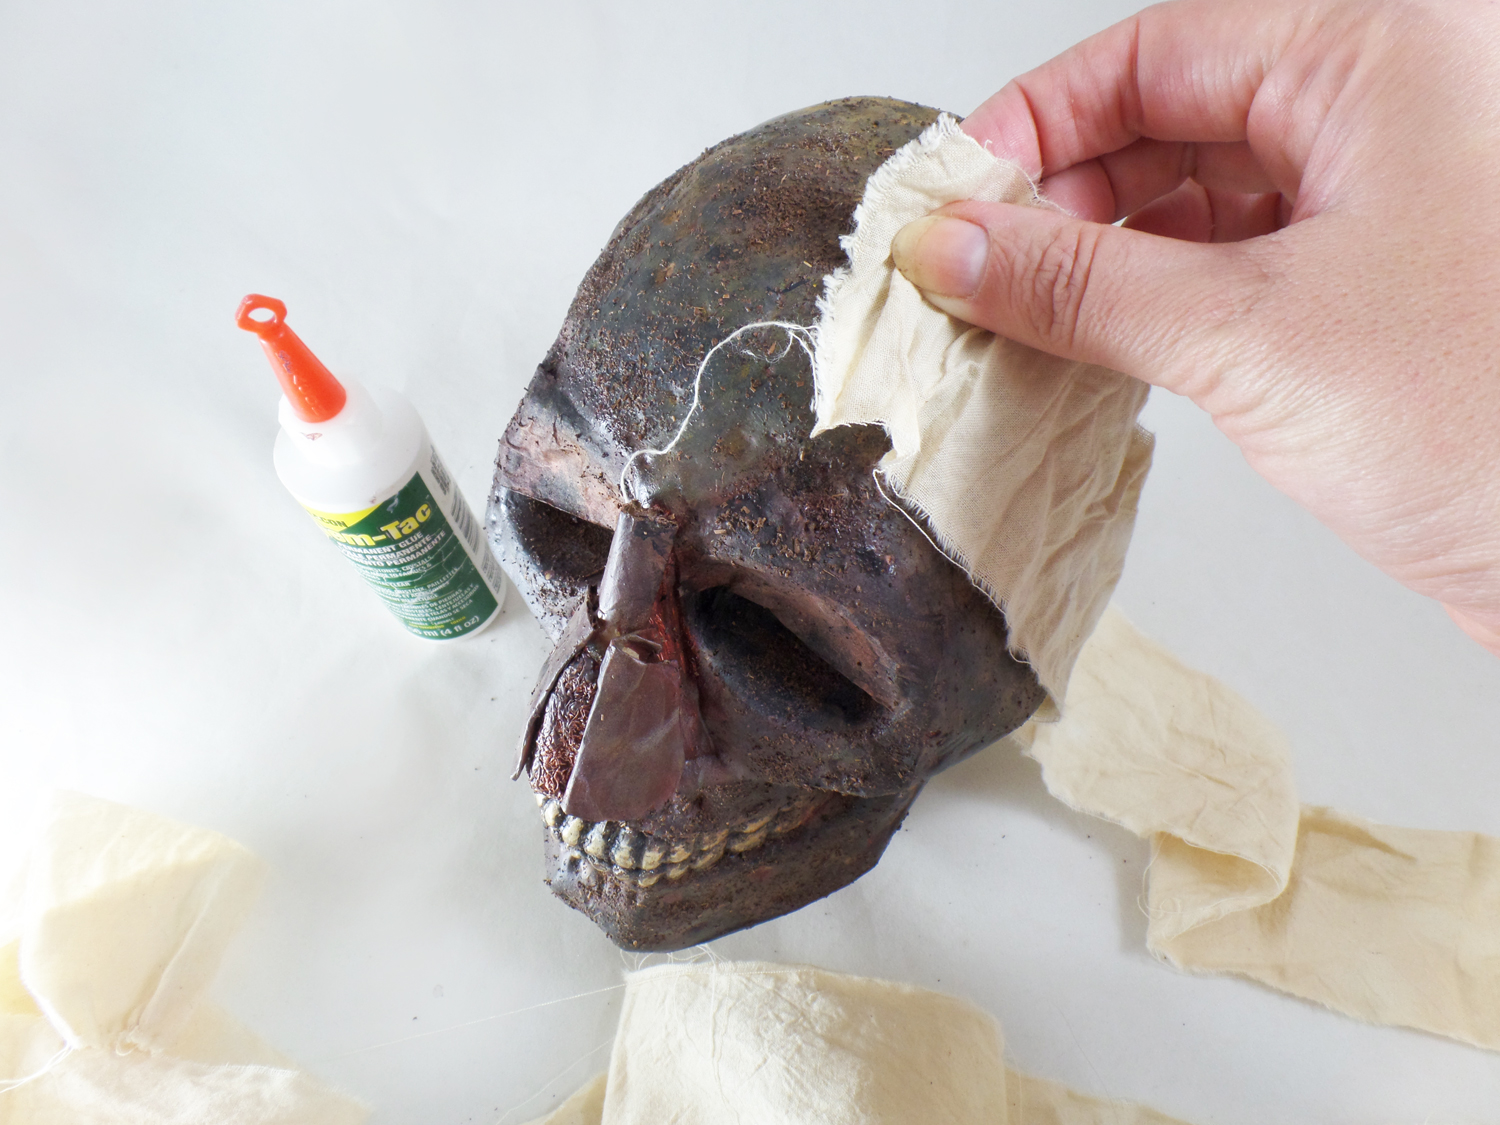
To create wrappings: I dyed cotton muslin fabric in a bath of hot black leaf tea and bags. I let it soak for a few hours to stain and then let the fabric dry. Once dry I tore the fabric into 2 inch strips to make wrappings. I started applied the wrappings to the skull with a bit of Beacon’s Gem-Tac and started to wind it around the skull. I didn’t use any set pattern or style; I just had fun and made sure to cover up any of the more skull-like features of the head.
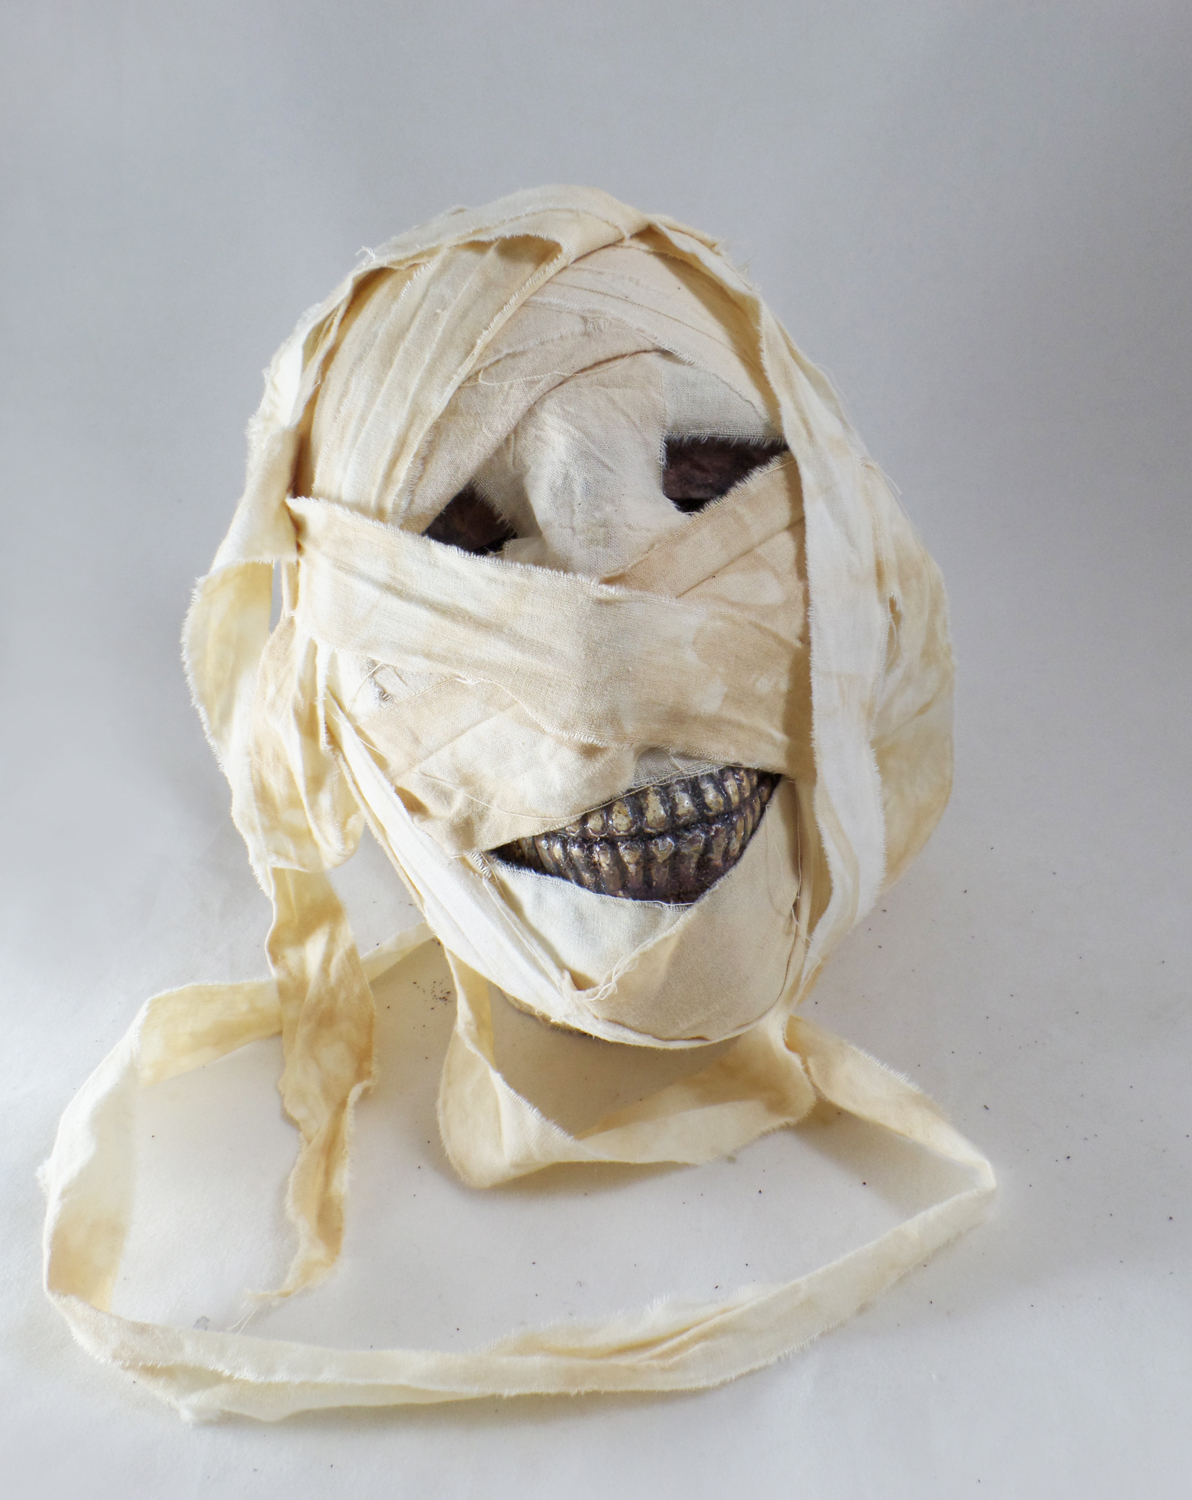
Once I was finished wrapping the skull I liked the overall look, but felt it needed something more to create the look of age.
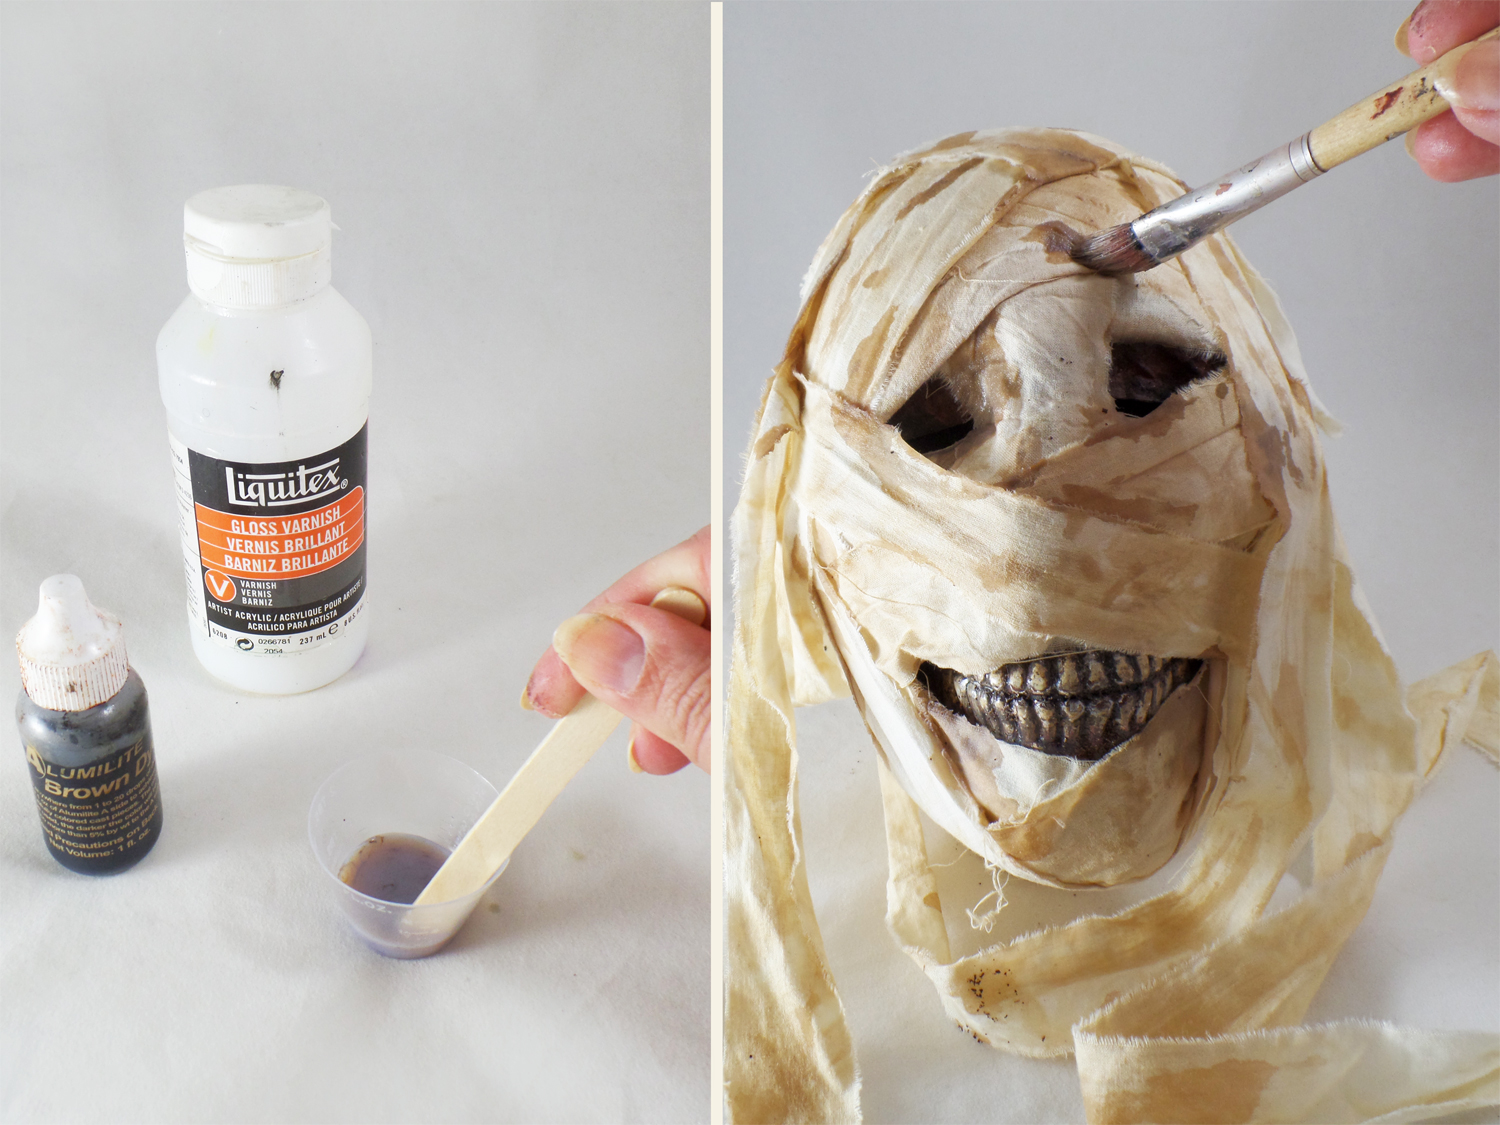
Since real mummies still have old oils and resin still visible on the surface of their wrappings, I created some out of Liquitex Gloss Varnish mixed with some Brown Alumilite Dye. I used the varnish instead of resin because I wanted to control how it dripped and needed it to dry quickly. The Alumilite Dye allowed me to tint the varnish without losing the transparent nature of the varnish.
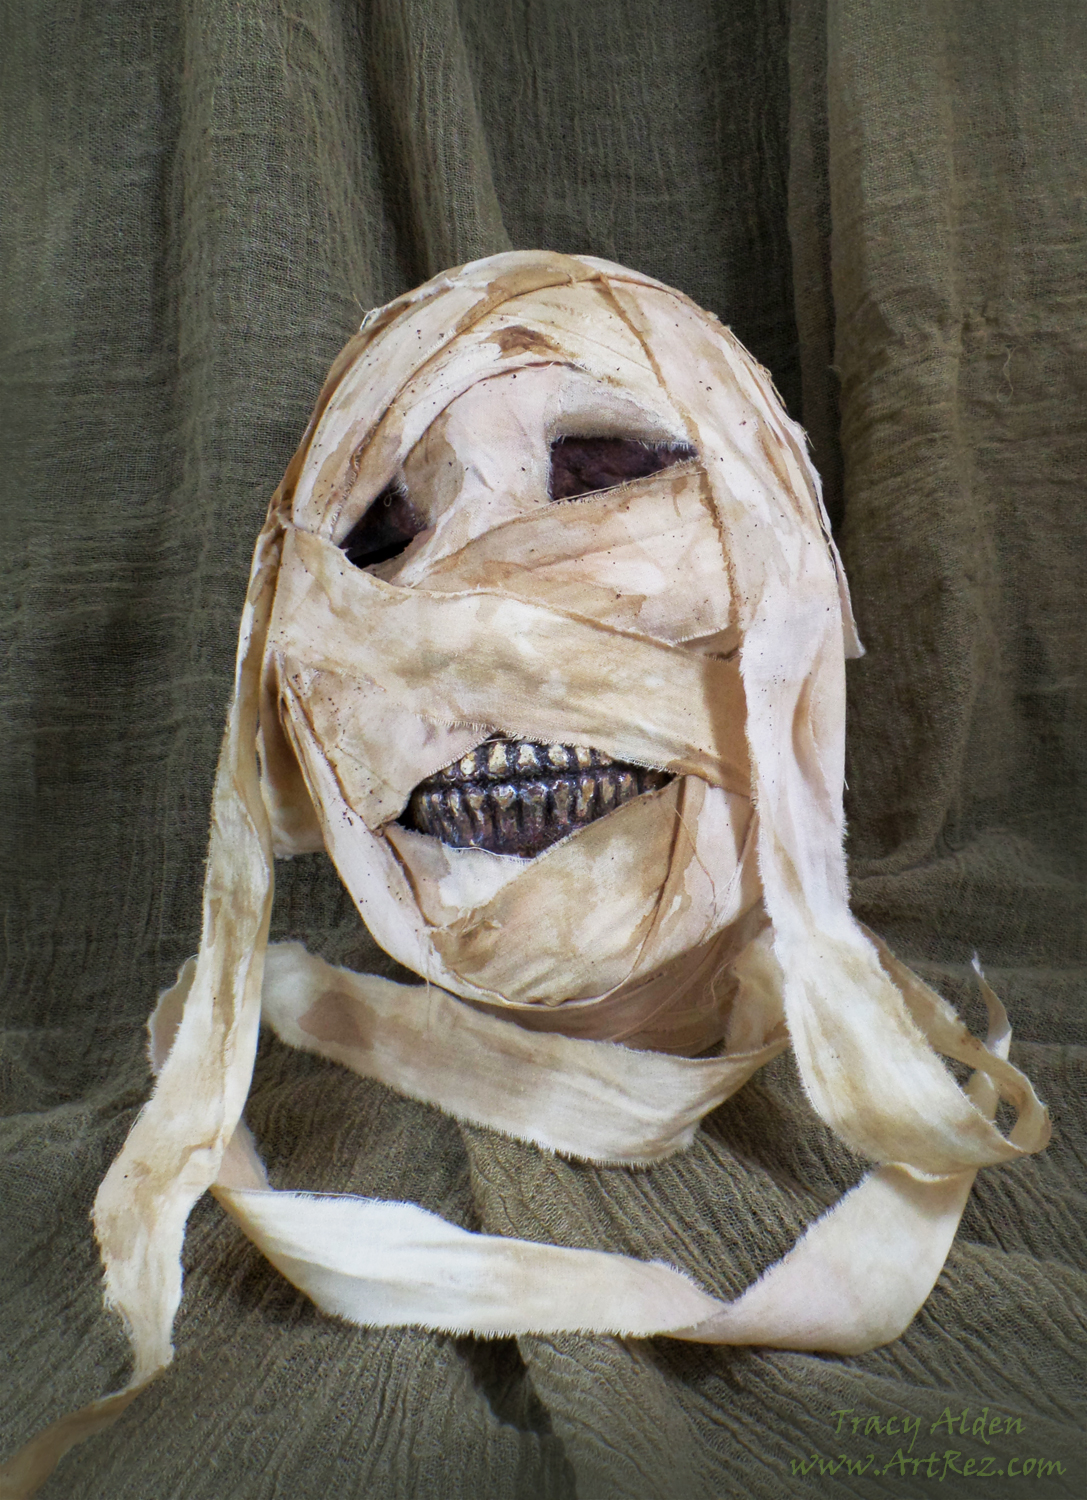
Once dry, this spooky décor is a perfect addition to my creepy curiosity cabinet on display for Halloween!
Until next time, safe travels!
This is an affiliate post, which means I received an assortment of products as a compensation for the creation of art. To read my full disclosure, click here.
#TBT Sit for a Spell! DIY Eye of Newt Apothecary Jar
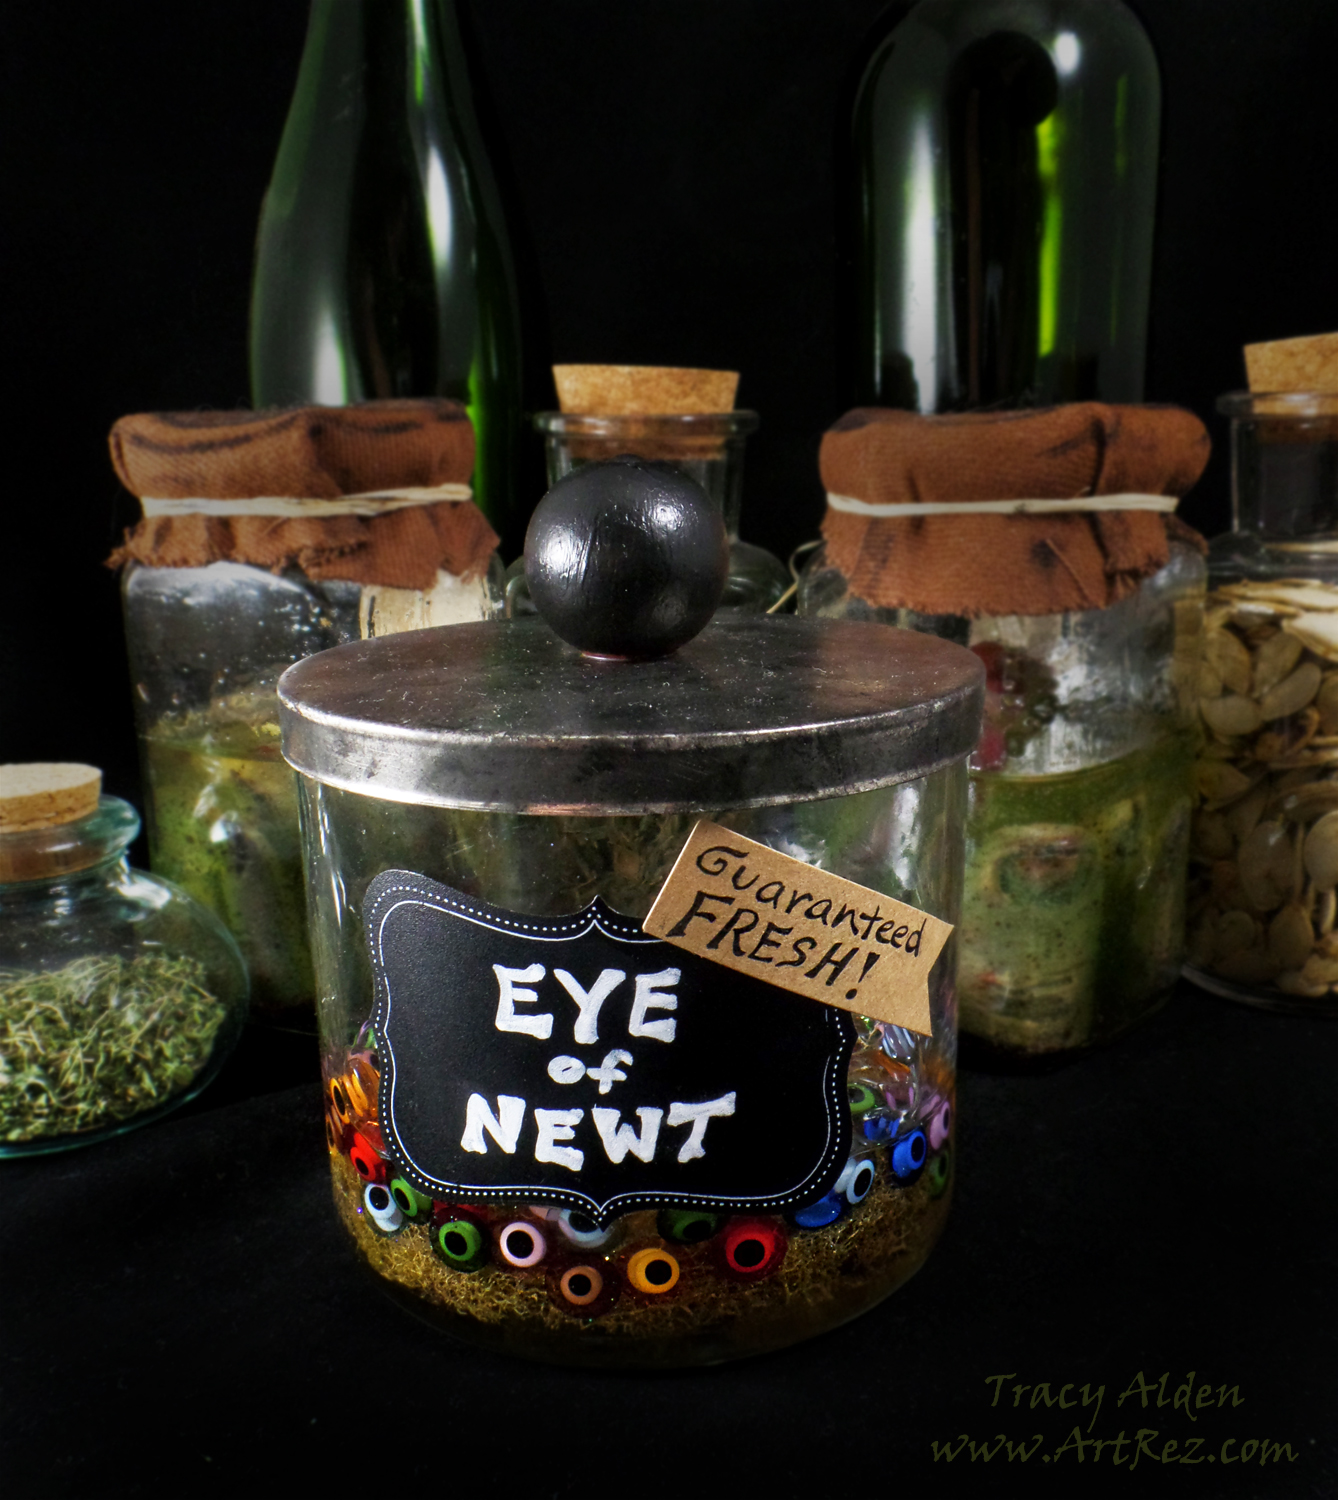
Kicking off my Throwback Thursday posts with one of my favorite upcycling Halloween crafts. Posted in 2015 on the Amazing Casting Products blog, this quick and easy project is perfect with Halloween coming up fast.
Taking inspiration from one of William Shakespeare’s most famous plays, Macbeth:
“Eye of newt, and toe of frog,
Wool of bat, and tongue of dog,
Adder’s fork, and blind-worm’s sting,
Lizard’s leg, and howlet’s wing,–
For a charm of powerful trouble,
Like a hell-broth boil and bubble.”That part of the play has a wonderful spooky quality, often inspiring all types of ghoulish displays and decor for Halloween. The interesting part is that most of those names of ingredients were not intended to be taken literal, but were herbalist or folk terms for common herbs and plants. In the case of “Eye of newt” it was referring to a type of mustard seed. However thanks to pop culture more often than not most people think of real newt eyes in a jar. So knowing some seeds in a jar isn’t that ghoulish of a Halloween decoration I decided to go with the pop culture version of making a jar with faux newt eyes.
Supplies:
A Glass Jar previously used for a candle
Resin
Moss
Eye Beads
Glitter (optional)
Chalk Sticker
Chalk Pen
Wood Bead
Black Chalk Paint
Sandpaper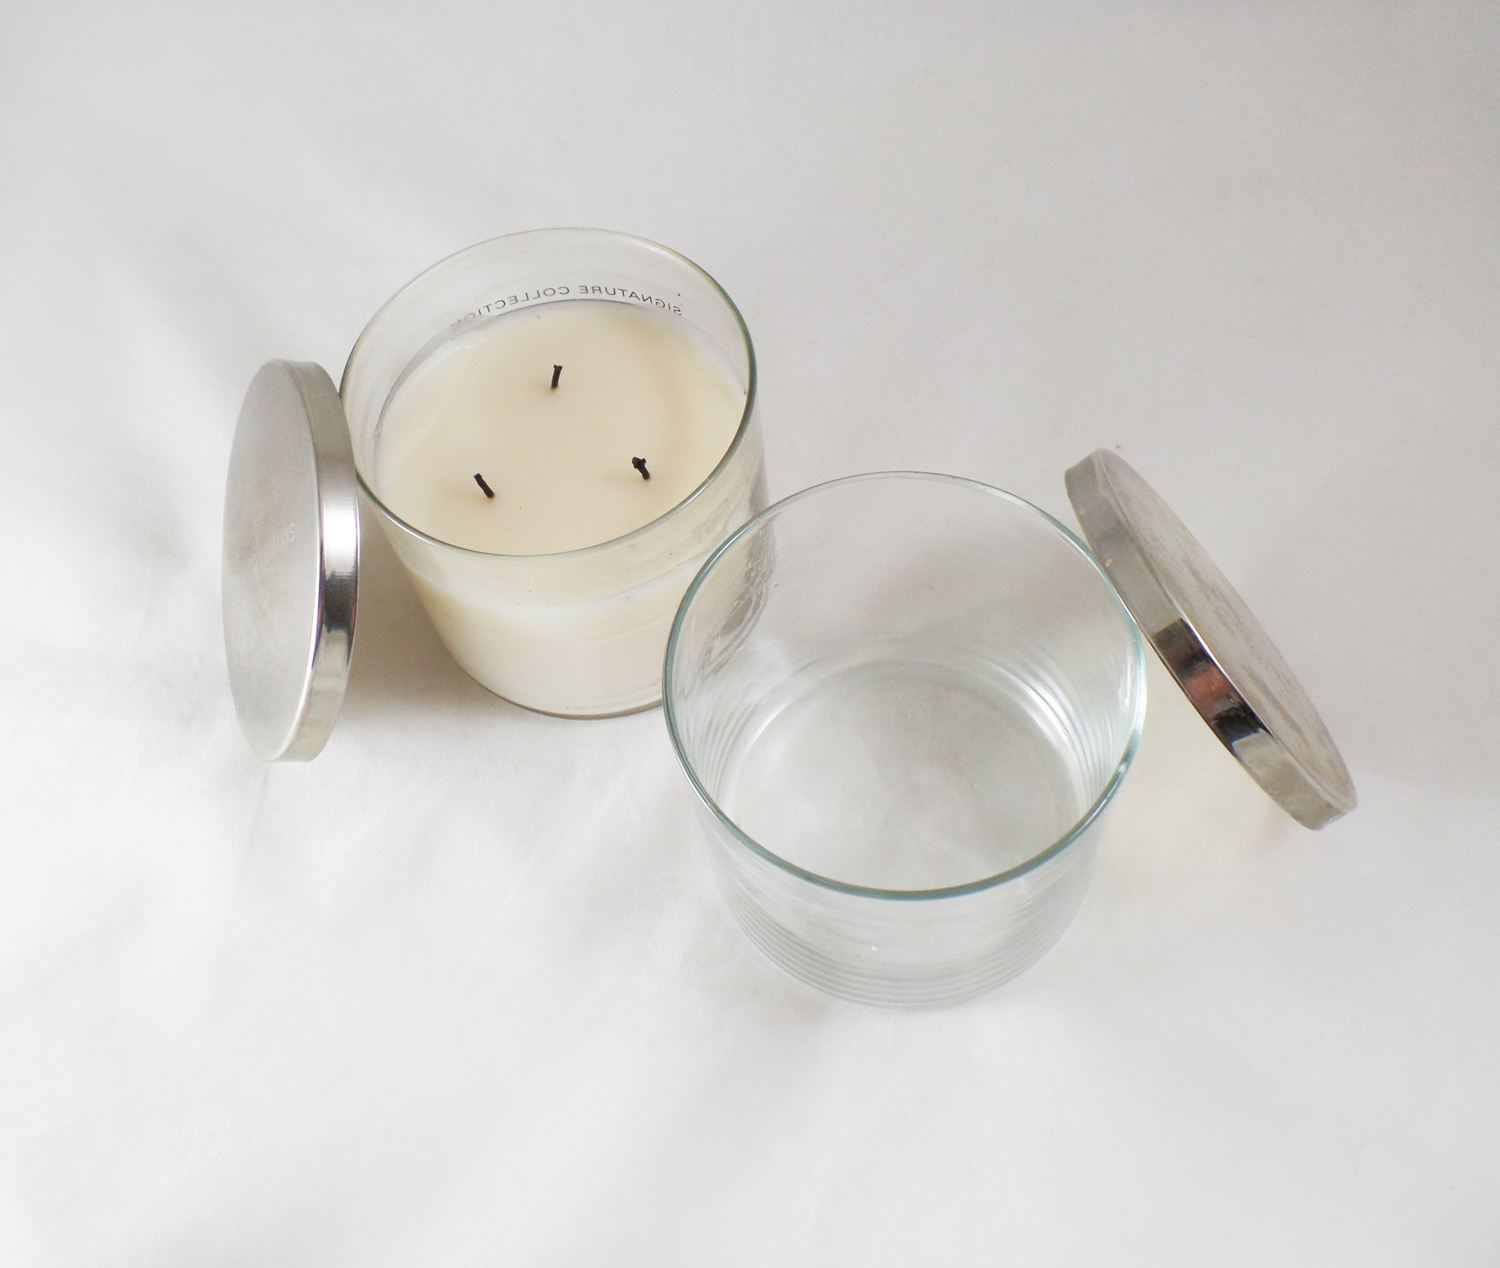
I cleaned up a old jar that previously had a three wick candle with a metal lid, making it perfect for an apothecary jar. I picked this type of glass because it is tempered and can handle the heat often created by thick pours of curing resin.
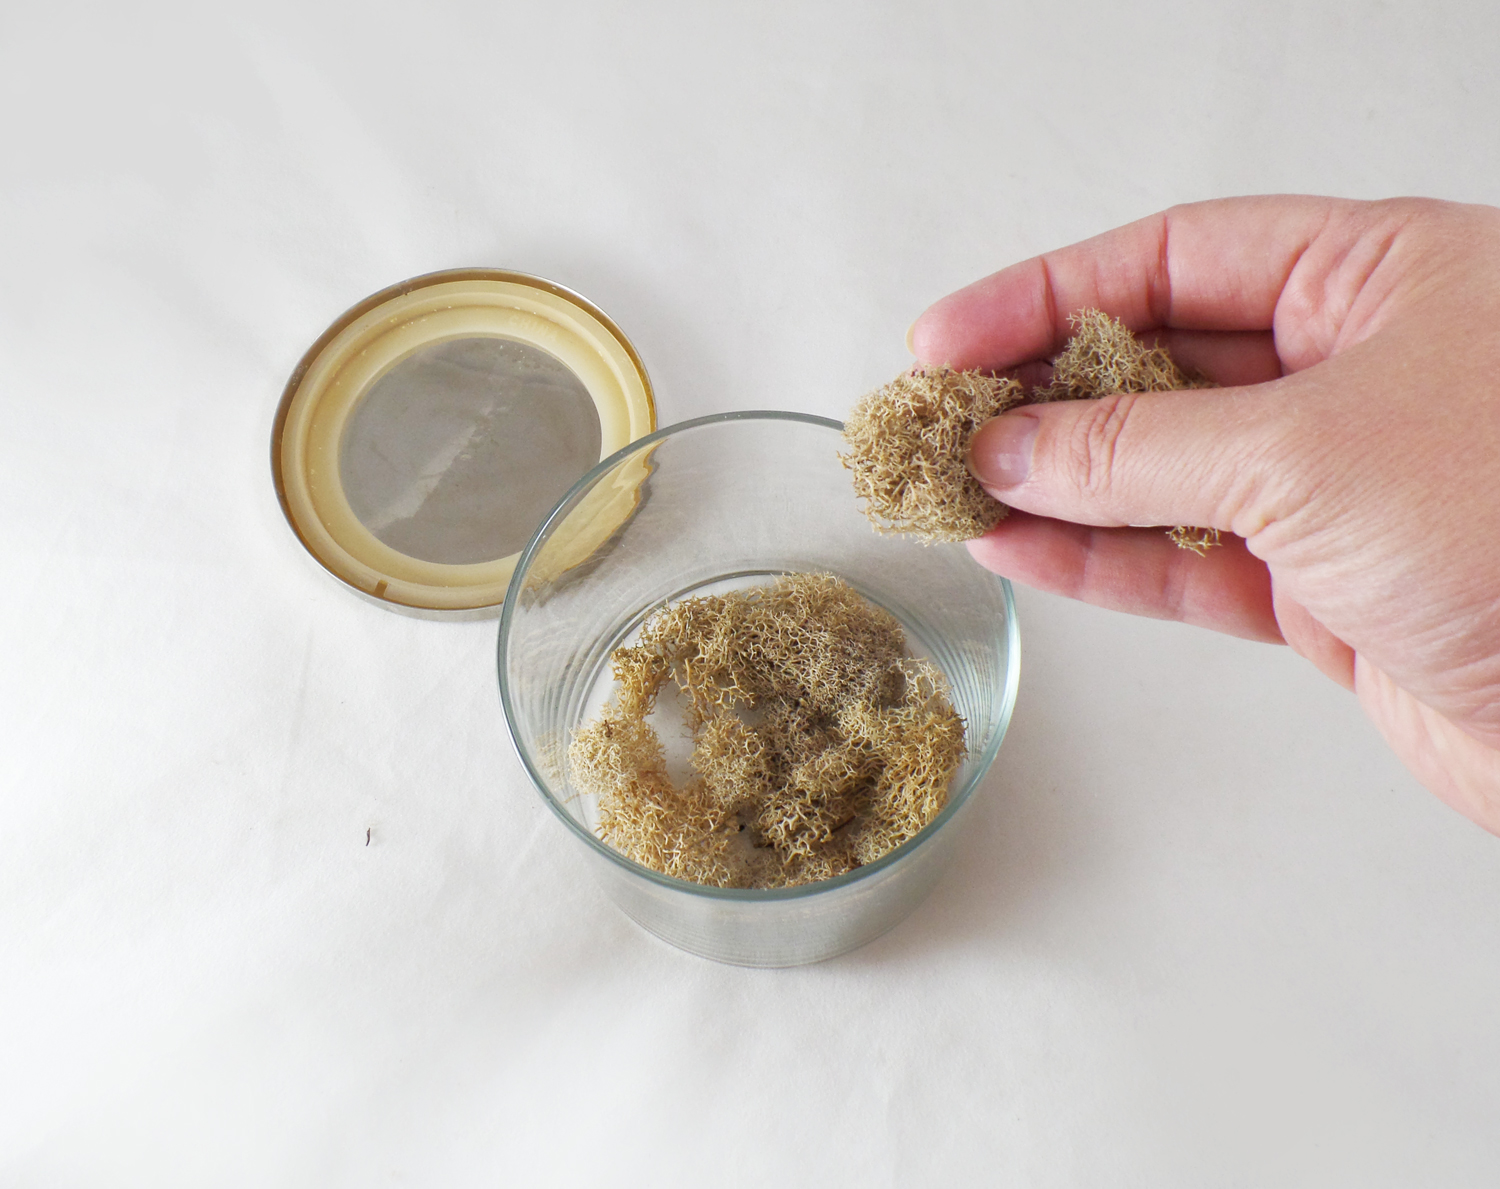
I put some dried moss at the bottom of the jar to add some visual contrast. It would also help with adding some textured base to prop the fake eyes on so they wouldn’t all sink to the bottom.
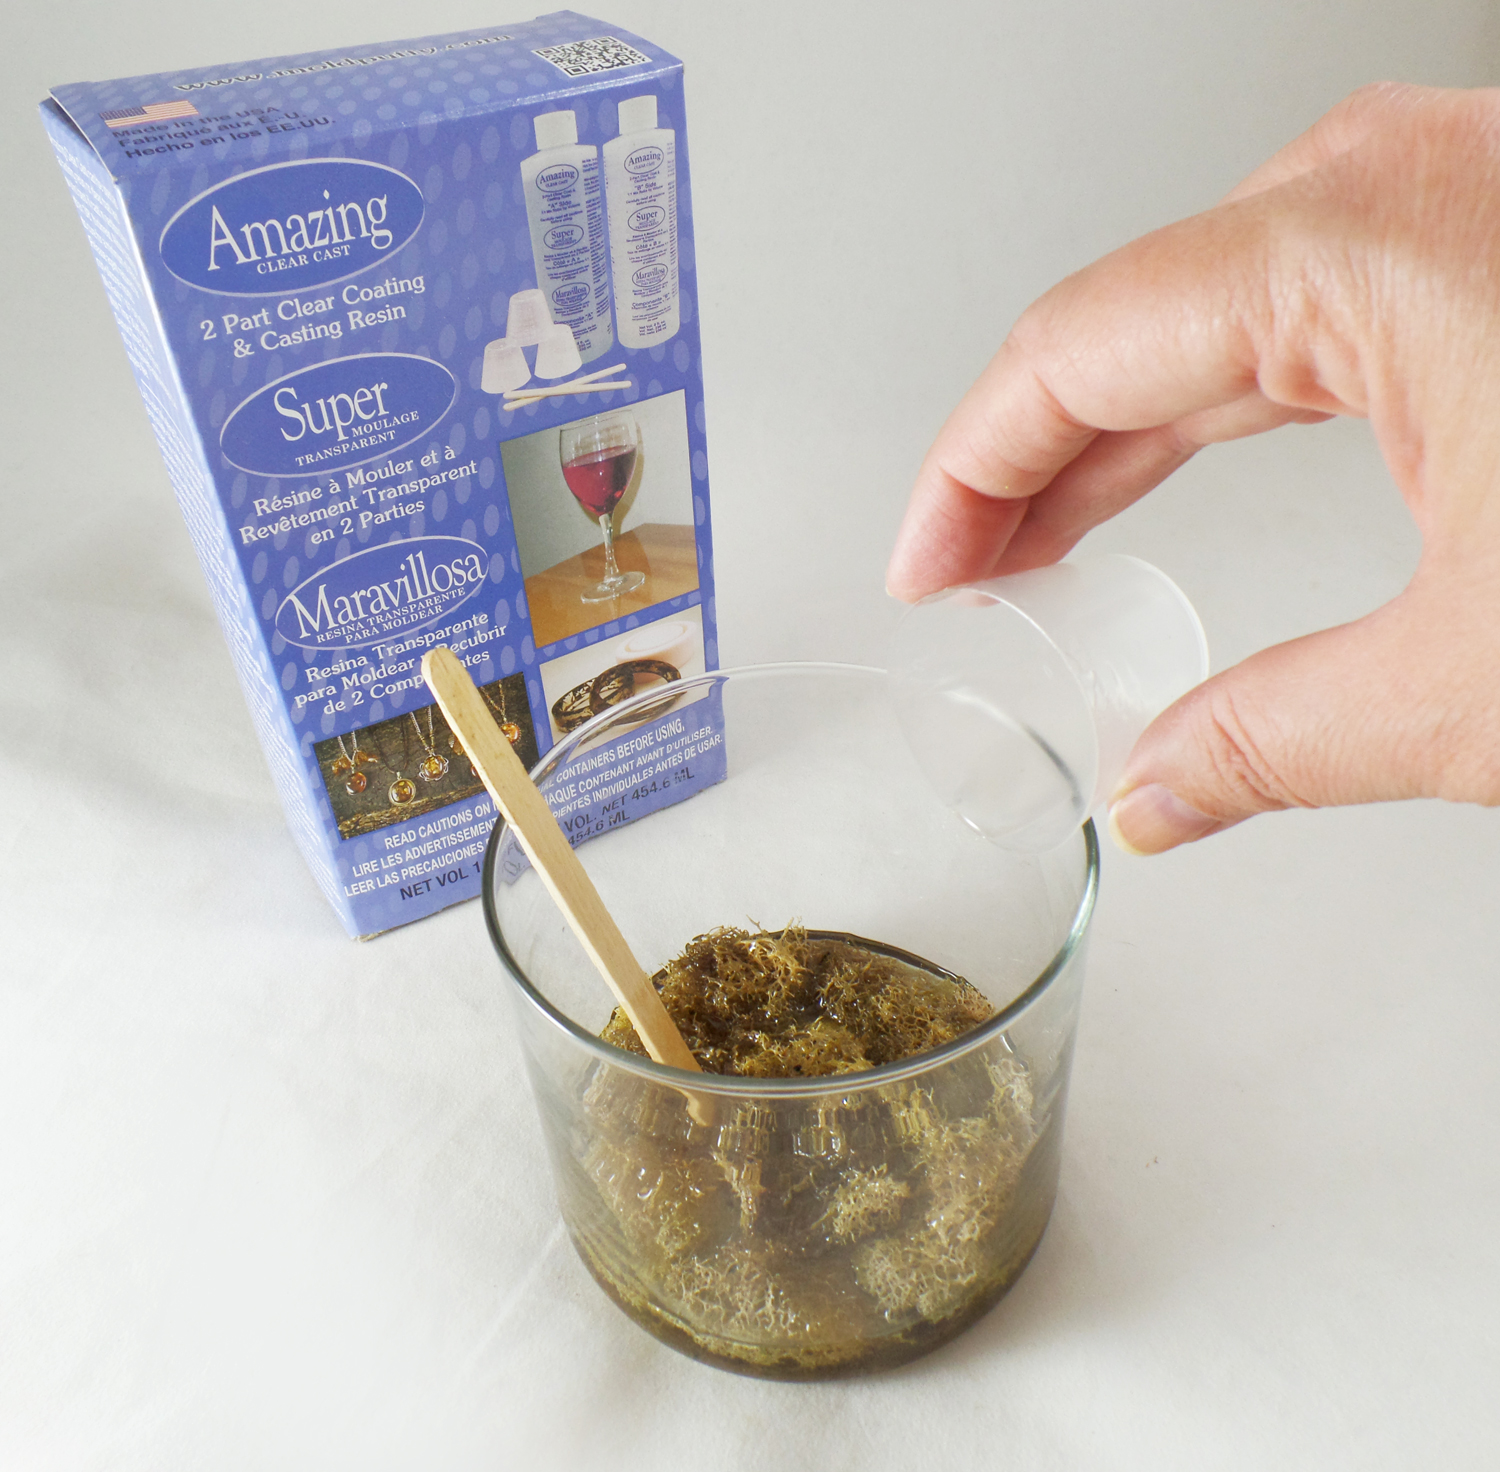
I mixed up 3 fluid ounces of Amazing Clear Cast Resin and slowly poured it on top of the moss to cover it.
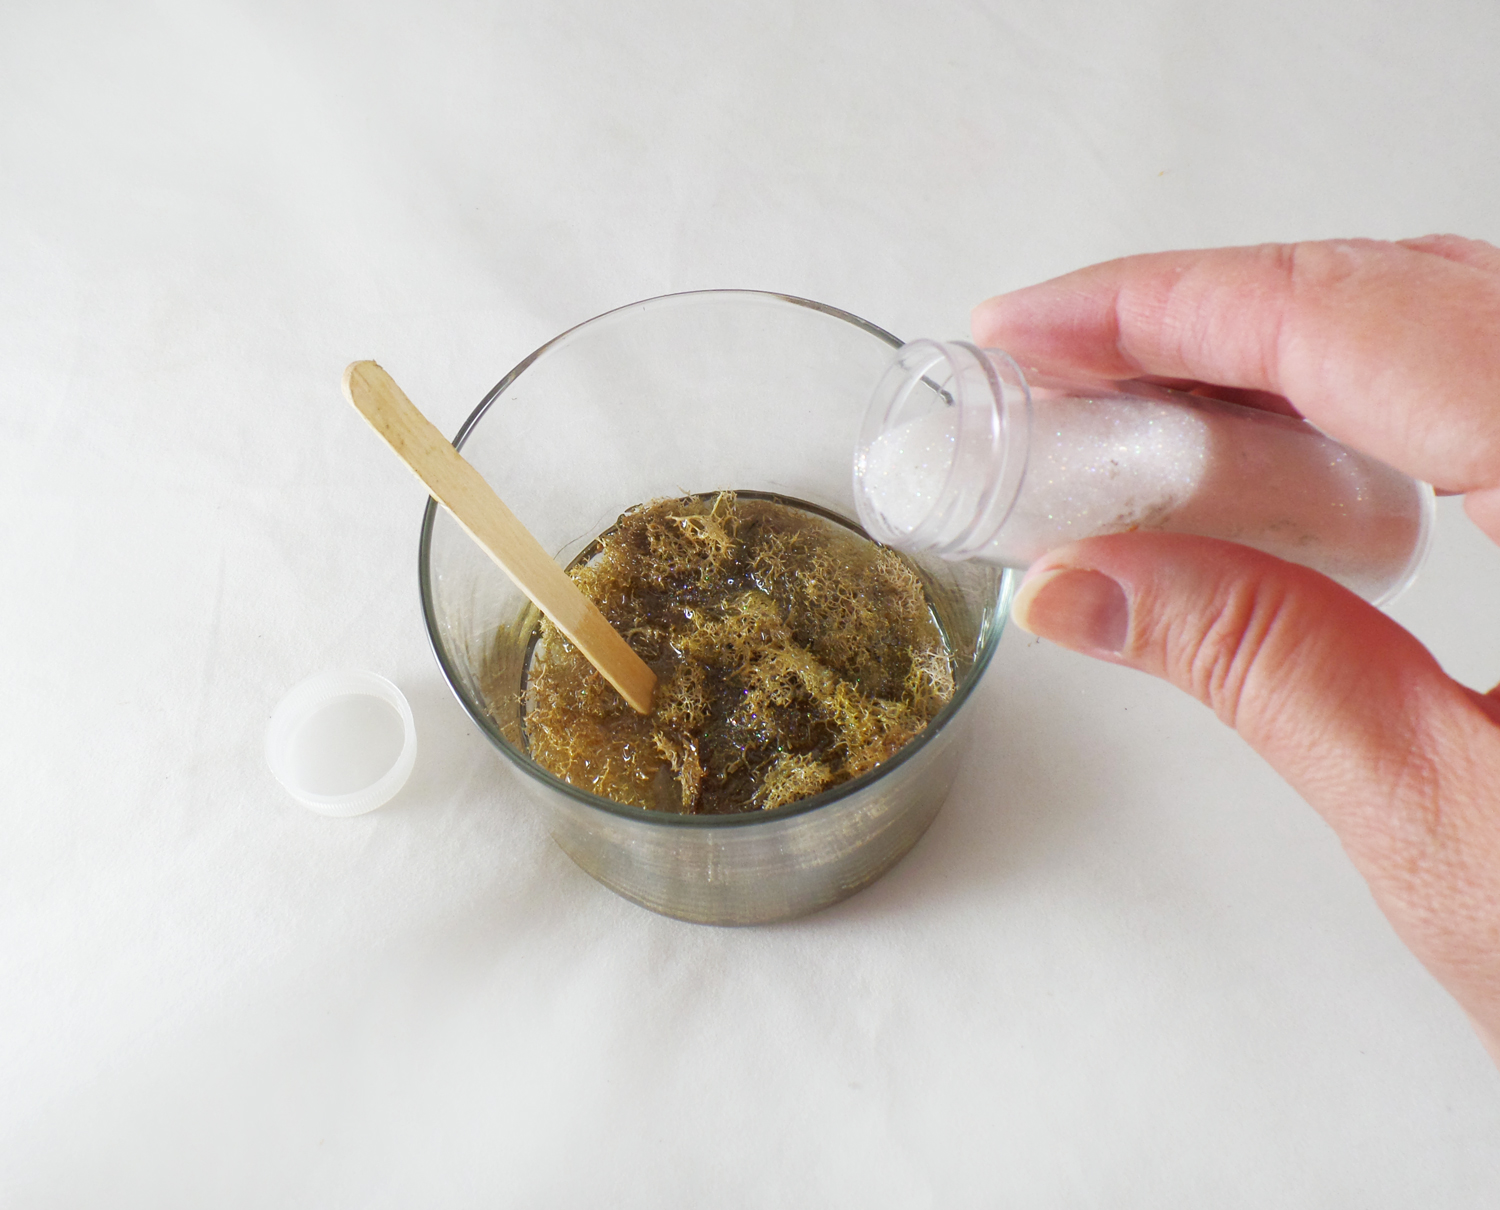
The moss became a bit dark after the resin started to soak into it, so before the resin layer started to cure I sprinkled a bit of micro crystal glitter* to give just a slight shimmer to the moss layer.
*The glitter is an optional step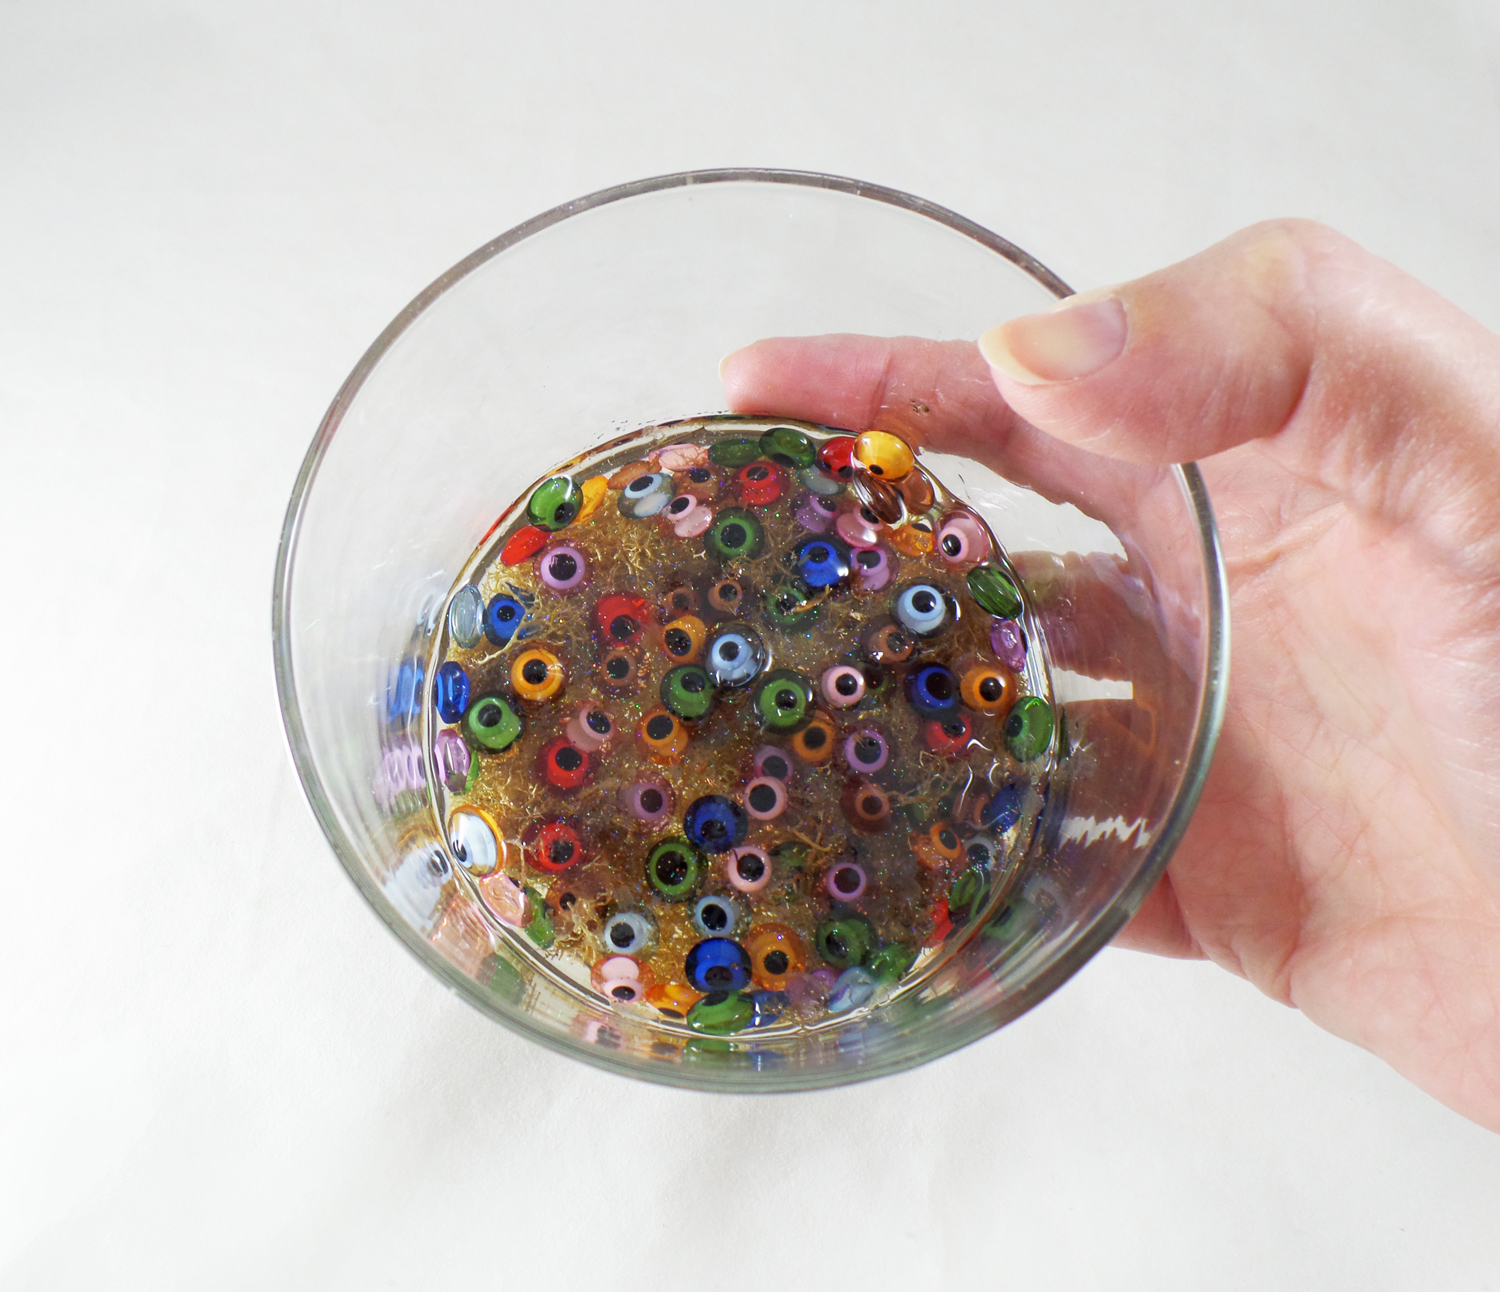
For newt eyes I used transparent acrylic Eye of Warding beads carefully placed in the still wet resin. Recent popularity of the beads has had a lot of bead manufacturers making all kinds of the Eye of Warding beads out of glass, acrylic, clay and even recycled plastic.
*Take a trip to your favorite craft store to check out what types of beads they might have for you to use!
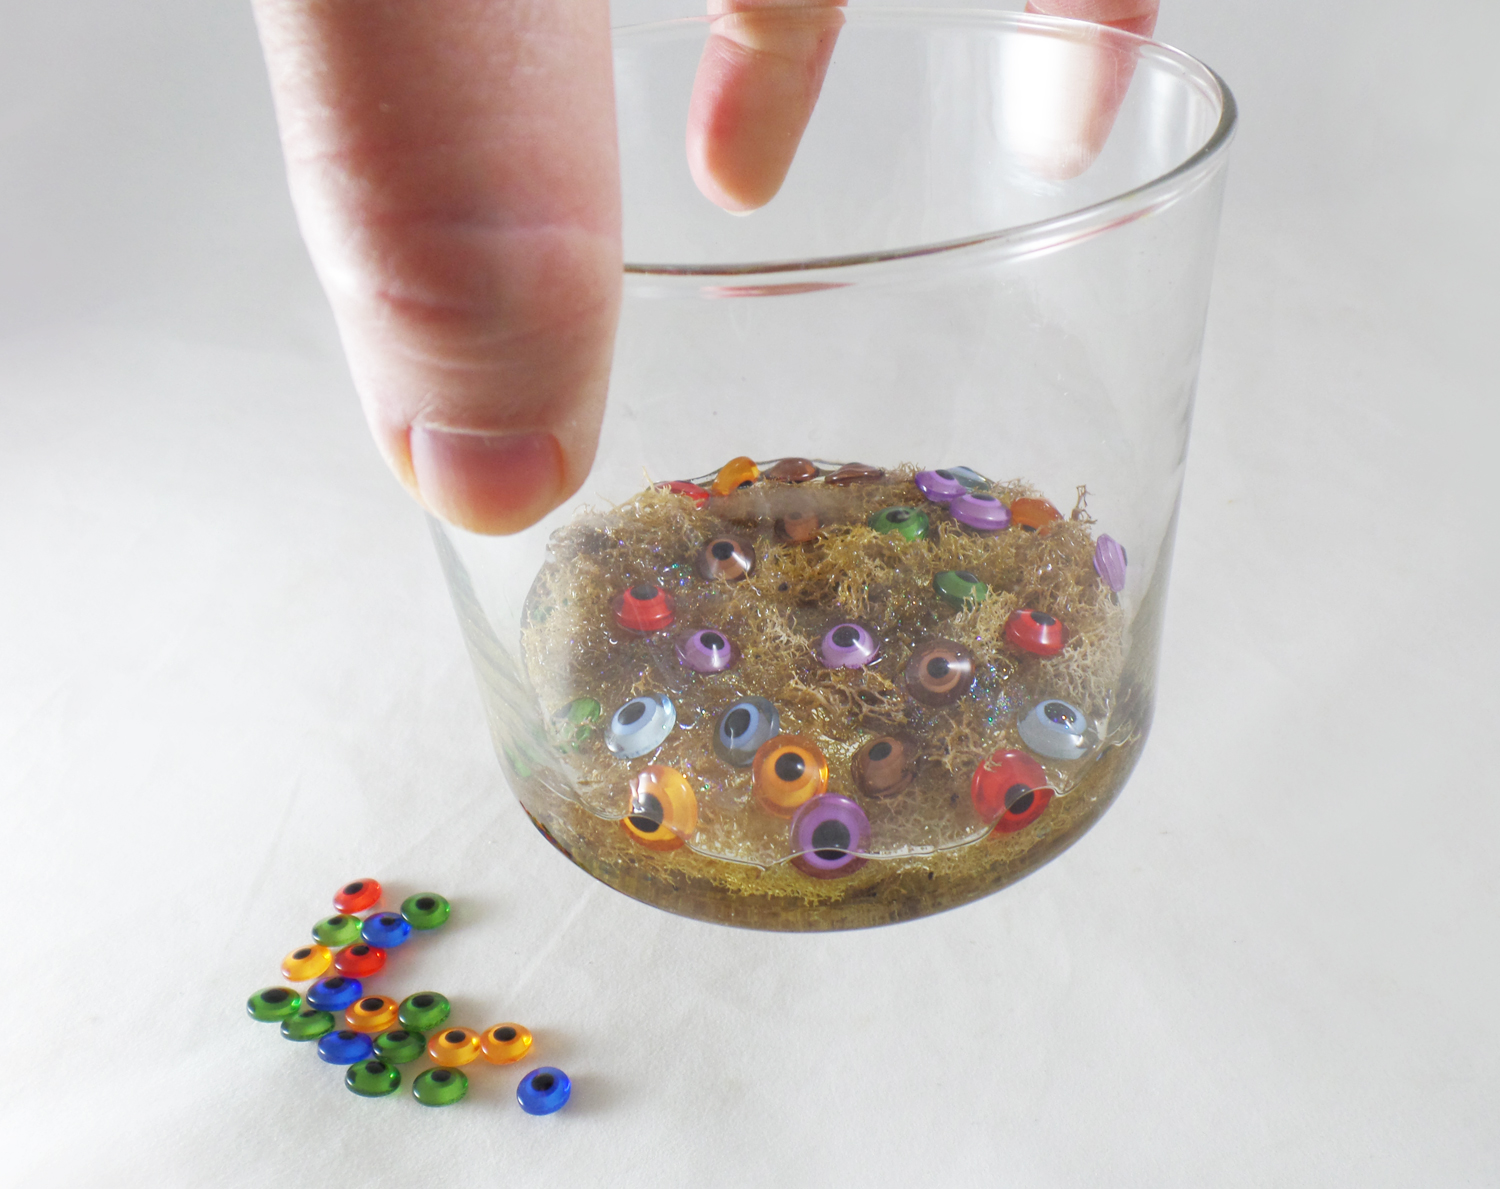
Once I let the first layer of resin cure for about an hour I added some more eye beads and little snippets of moss. I didn’t want to add too much. I wanted it to look like someone used the “newt eyes” a lot in their spells.
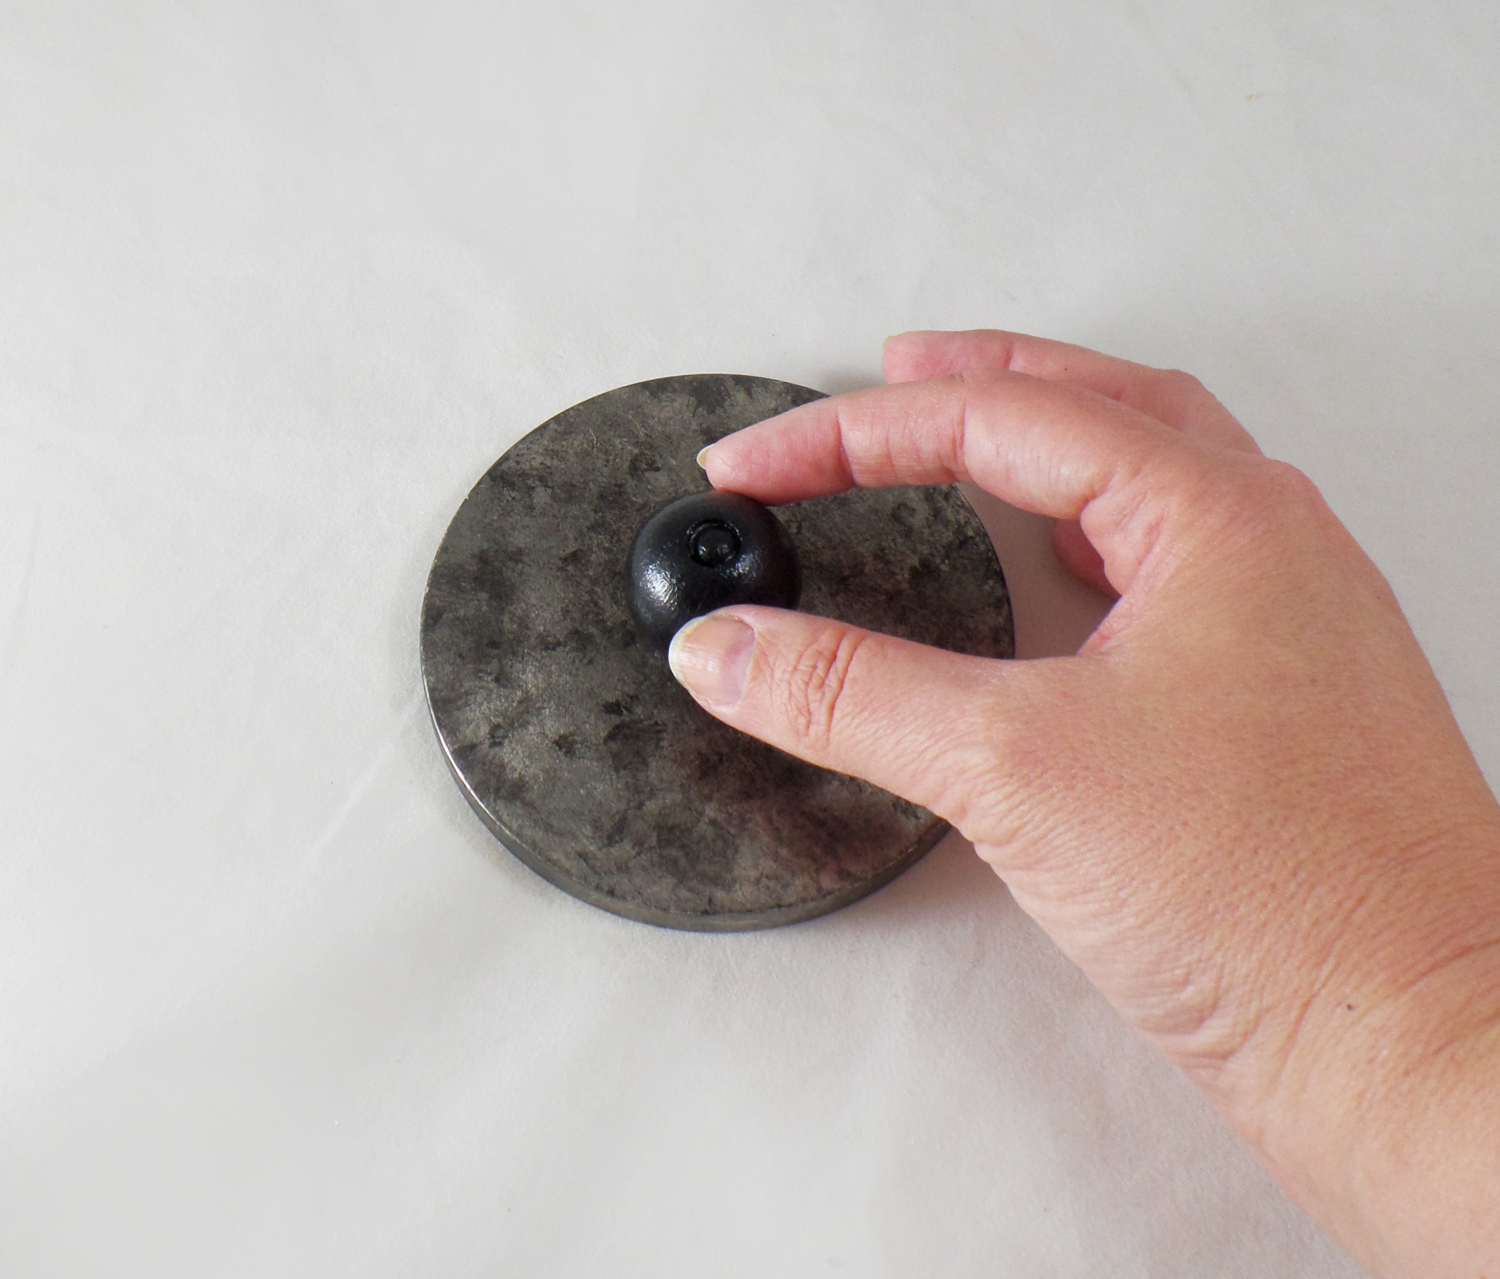
While the final layer of resin cured I worked on the lid to the jar. To bring down some of the bright silver tone of the lid I used some sandpaper and little bit of chalk paint to give it an aged look. A painted wooded bead, glued on top of the lid, gave it a pull knob.
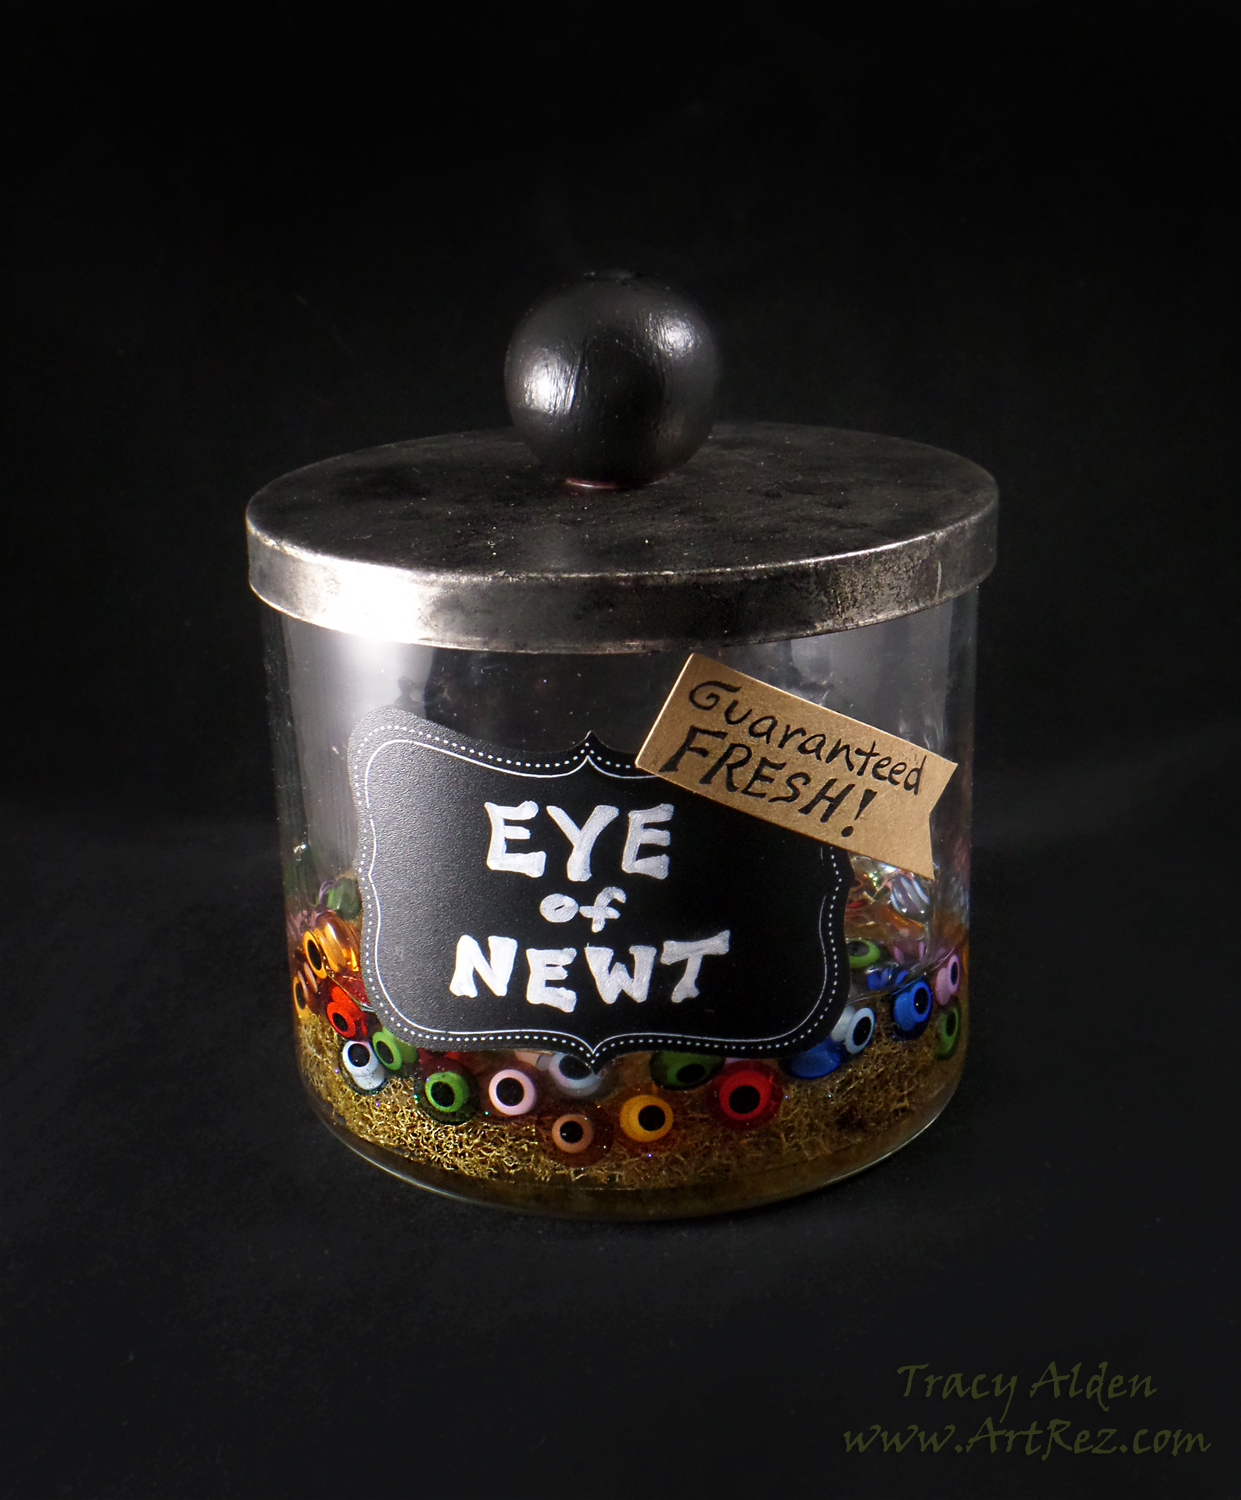
With a chalk board sticker for a label the jar was finished and not a single newt harmed! 🙂
Until next time, safe travels!
*This is an affiliate post, which means I received an assortment of products as a compensation for the creation of art. To read my full disclosure, click here.
Upcycle Plastic Skulls into Ghoulish Glam Decor
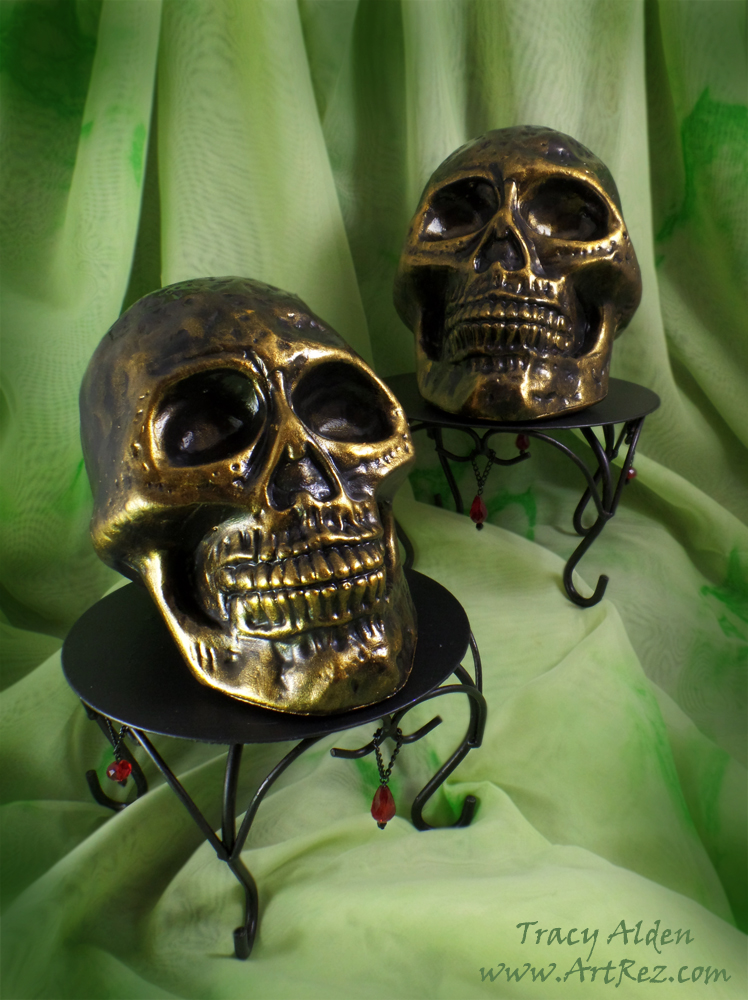
The first day of October: the leaves are starting to fall and the temperatures are slowly starting to drop at night! With only a month left to get all of my Halloween projects, I have been traveling to all sorts of places for interesting supplies. One of my favorites is the many local Thrift Stores in our area that support local charities. At this time of year many will get in all kinds of Halloween items and one store had a lot of plastic skulls. I noticed that while the paint job on the skulls wasn’t particularly grand the sculpting of the skulls was nice. It got me thinking how they would look if I changed the paint and finish, replicating the look of ceramic!
Supplies:
Plastic Skulls and Metal Candle Stands
Liquitex Gloss and Matte Varnish
Black Chalk Board Paint
iZink Pigment Ink bottle – Gold
Fiona Accessories Red Crystal Drop Beads, Black and Red Crystal Rondelle beads
Beadsmith 1 Step Looper Tool
Black enameled chain, jump rings and headpins
Paint Brushes
Cosmetic Sponges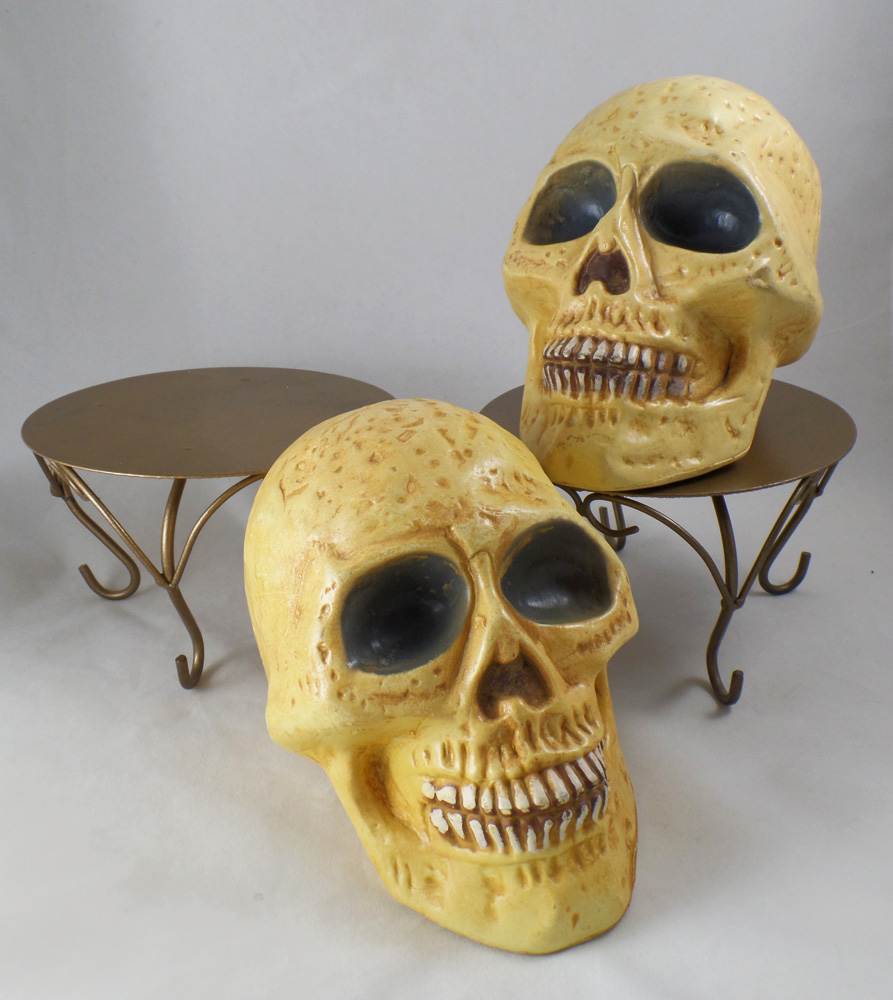
Along with the skulls I found some old candle stands with a old bronze finish. I noticed the skull fit perfectly on them so I bought them along with the skulls. I scrubbed the plastic skulls and candle stands, removing any dust, stickers and uneven edges.
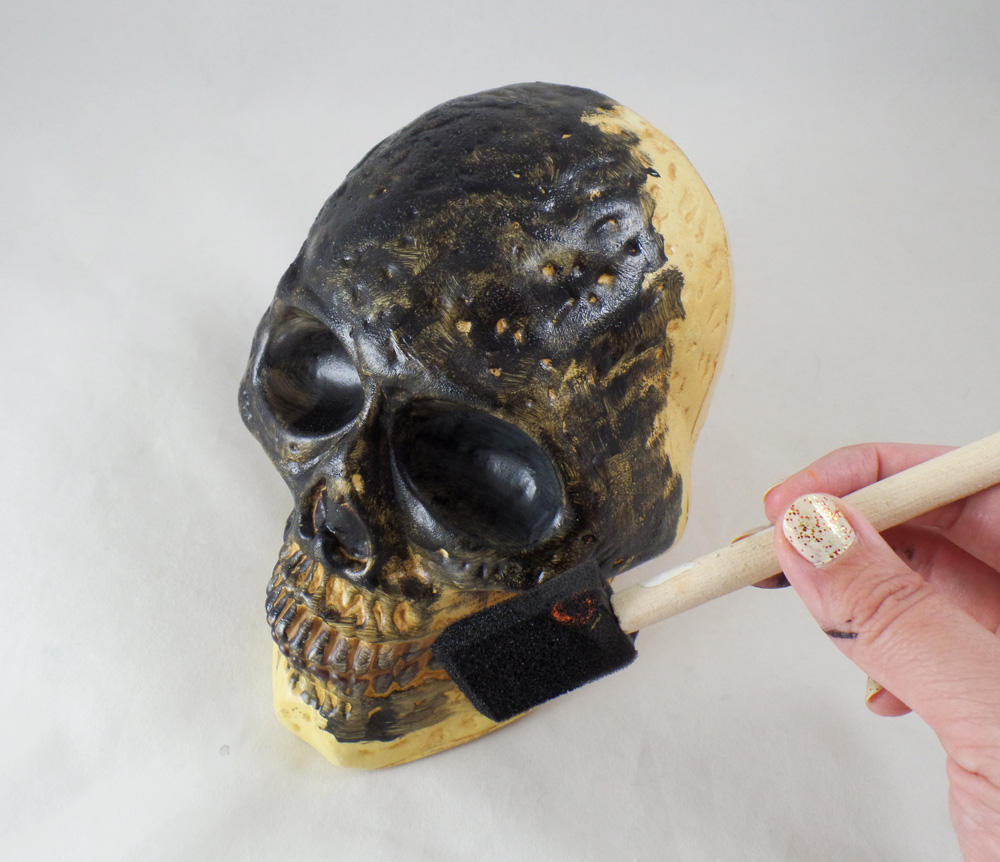
While I could have easily spray painted the pieces, I wanted to go with a nontoxic and child friendly direction by using chalk paint. I painted the skulls and candle stands with 3 layers of black chalk paint. Most chalk paints require a 1-2 hour dry time between coats of paint for best coverage and adhesion of the paint.
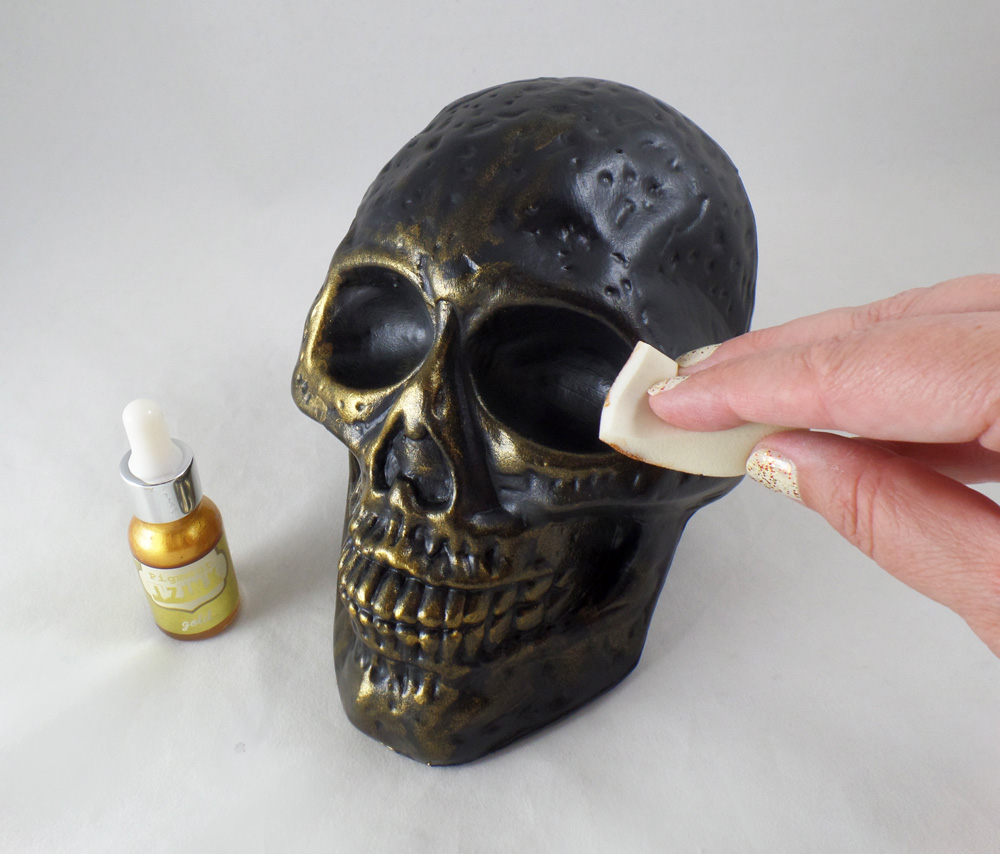
The skulls already looked better than they used to but I wanted them to look more like ceramic. Using a cosmetic sponge I applied Gold iZink Pigment Ink to the raised portions and detailed parts of the painted skulls. The ink dries rather quickly allowing me to add several layers on sections for a dramatic effect.
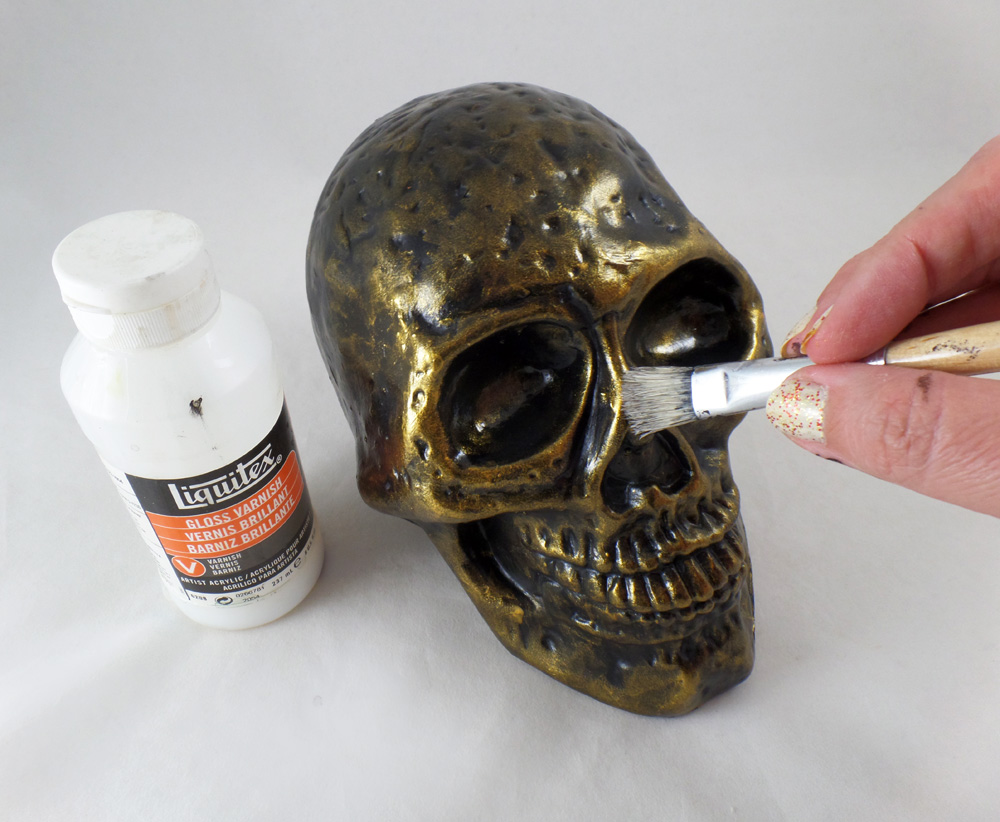
I applied Liquitex Gloss Varnish to the sections on the skulls with gold ink to make the gold tone visually stand out more and give the illusion of ceramic.
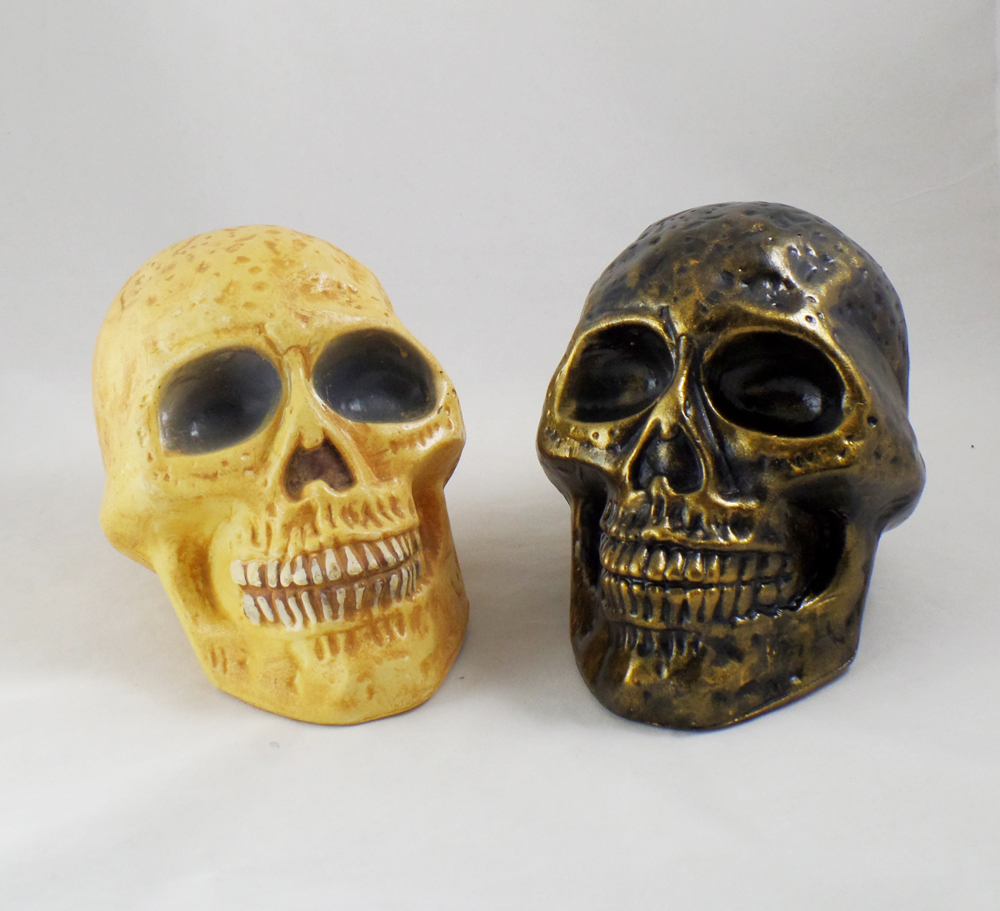
Compared to the original factory paint I was pretty happy with the new version, replicating the look for ceramic. However I felt the skulls needed something more.
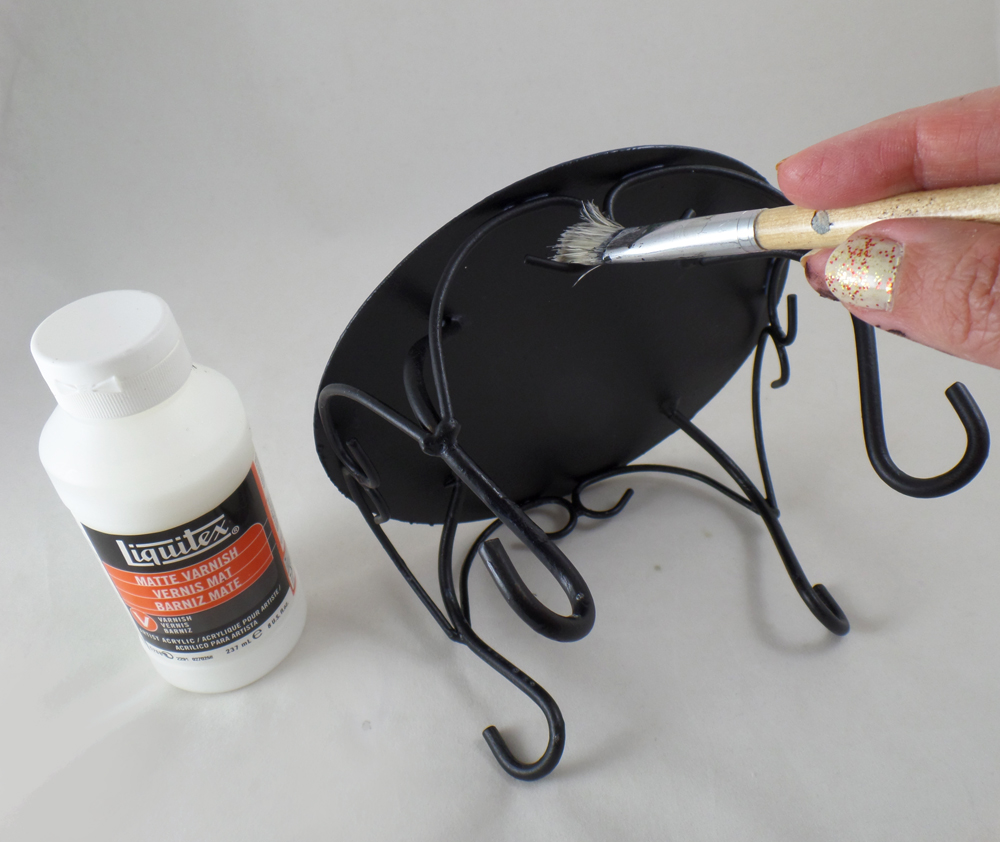
With the candle stands already painted with black chalk paint all I needed to do was paint them with Liquitex Matte Varnish to seal and protect the stands.
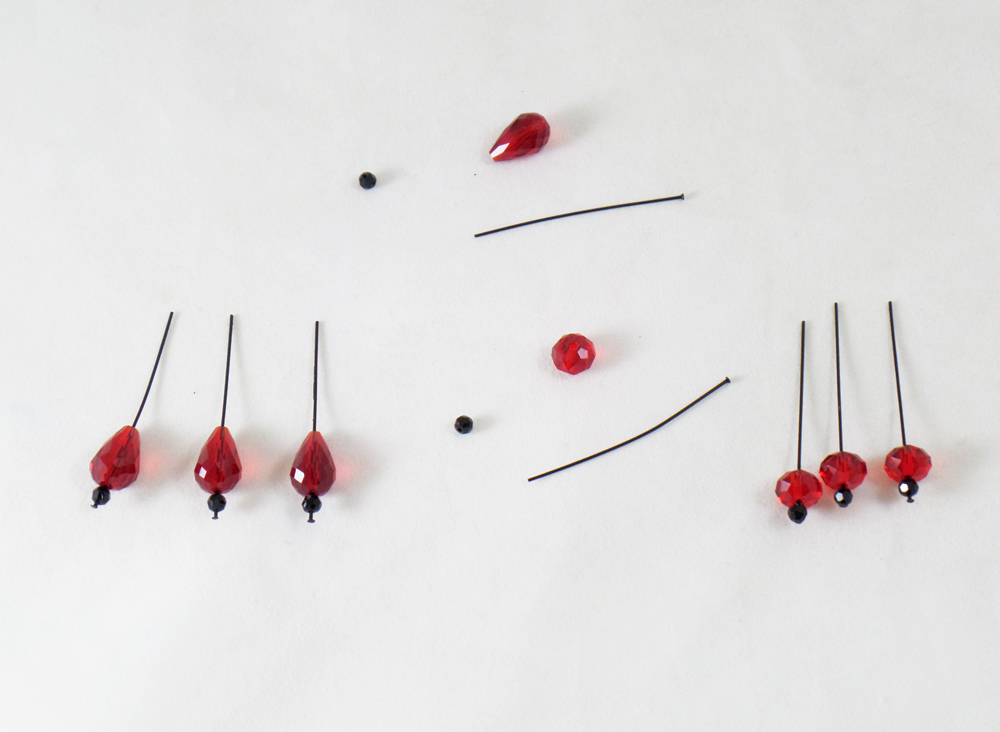
On four black enameled headpins I threaded on one black crystal rondelle and one red drop. On four more black enameled headpins I put one black crystal rondelle and one red rondelle. These will become embellishments for the candle turned skull stands.
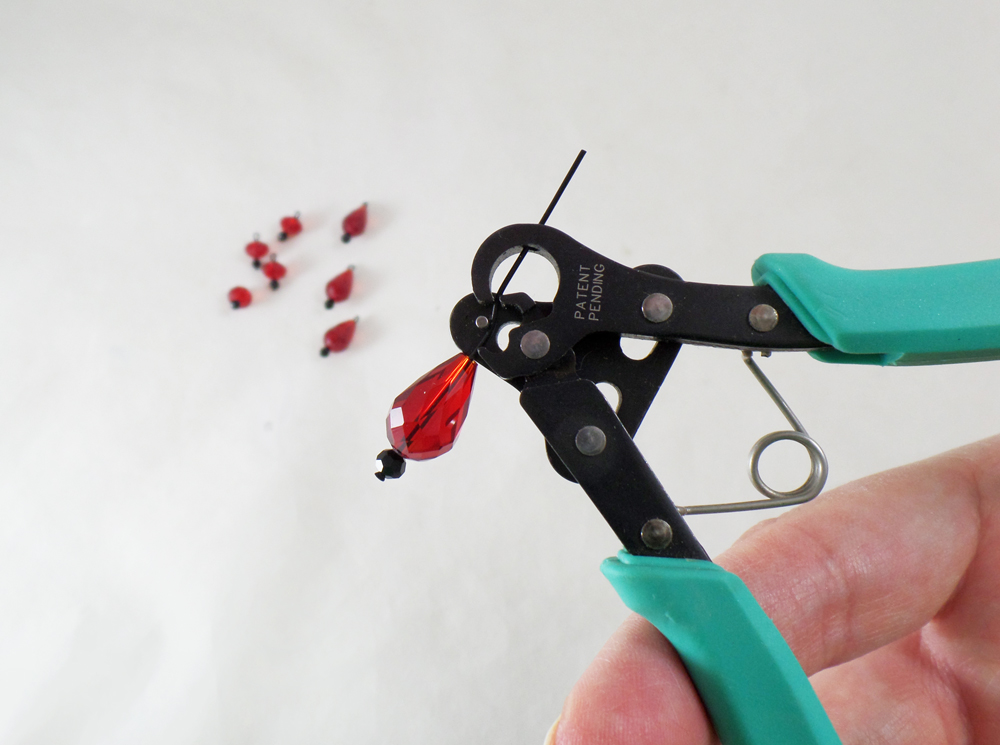
Starting with two beads threaded on a headpin I threaded the wire through the Beadsmith 1 Step Looper Tool, cutting and creating the loop I needed for the start of the beaded dangles. I repeated this the rest of crystal drops and rondelle beads on the headpins.
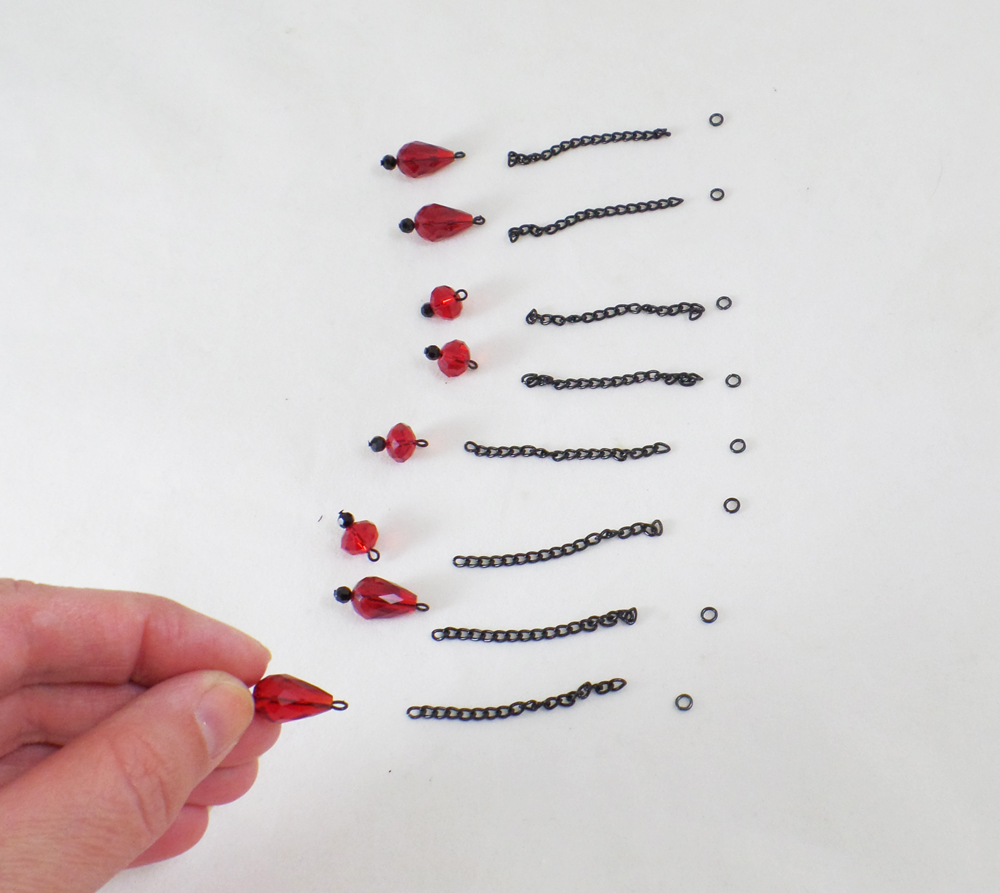
I cut black enamled chain into 2 inch lengths and placed eight black enamel jump rings with each chain and crystal bead drop.
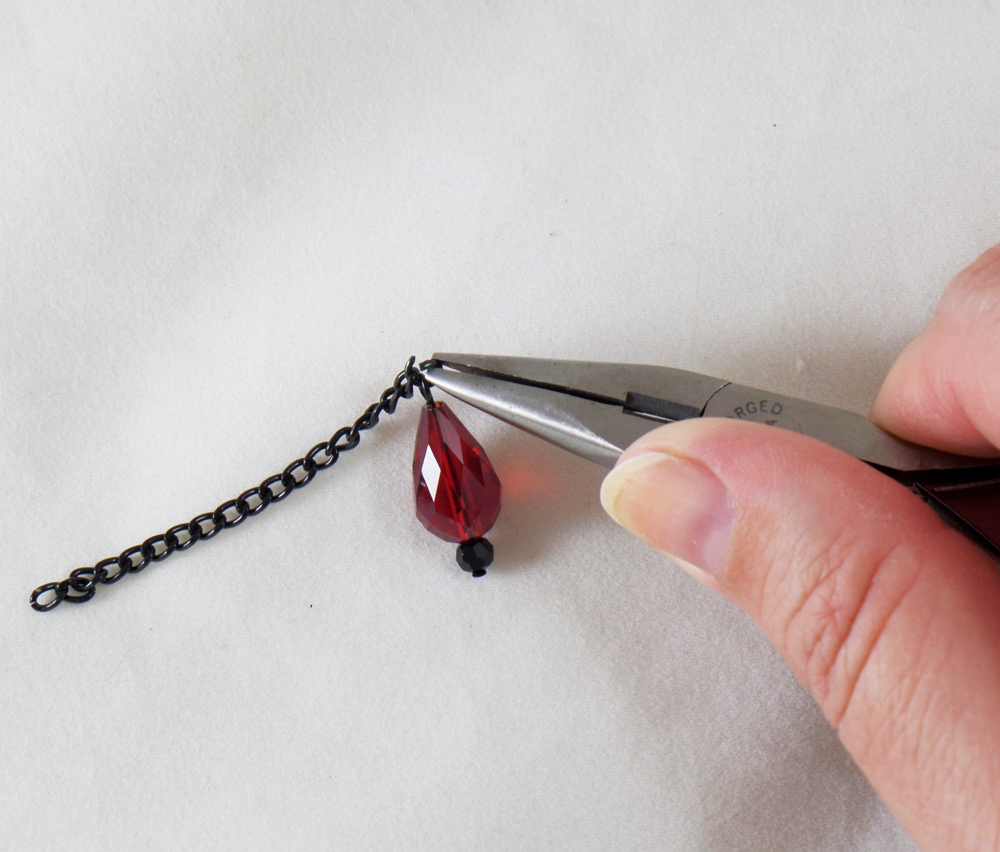
I opened up a jumpring with flat nose pliers and put the jumpring through one of the crystal bead headpins, and one of the cut lengths of chain.
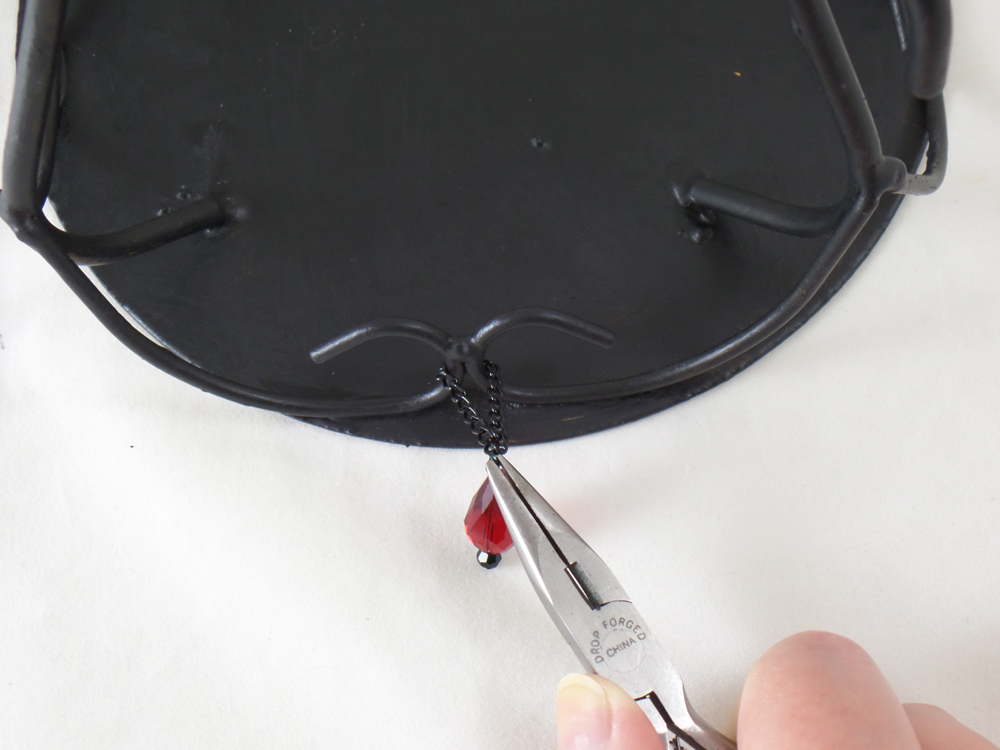
Flipping over a candle/skull stand I lopped the chain around one of the metal curls. I picked up the end of the chain not looped on the jump ring and carefully hooked the still open jump ring on it. I closed the jump ring with the pliers, making sure both ends of the chain and beaded headpin were threaded on the ring. Chain and beaded headpins were added to all four sides of the stand, then the stands were flipped over allowing the chain and beads to become a decorative element.
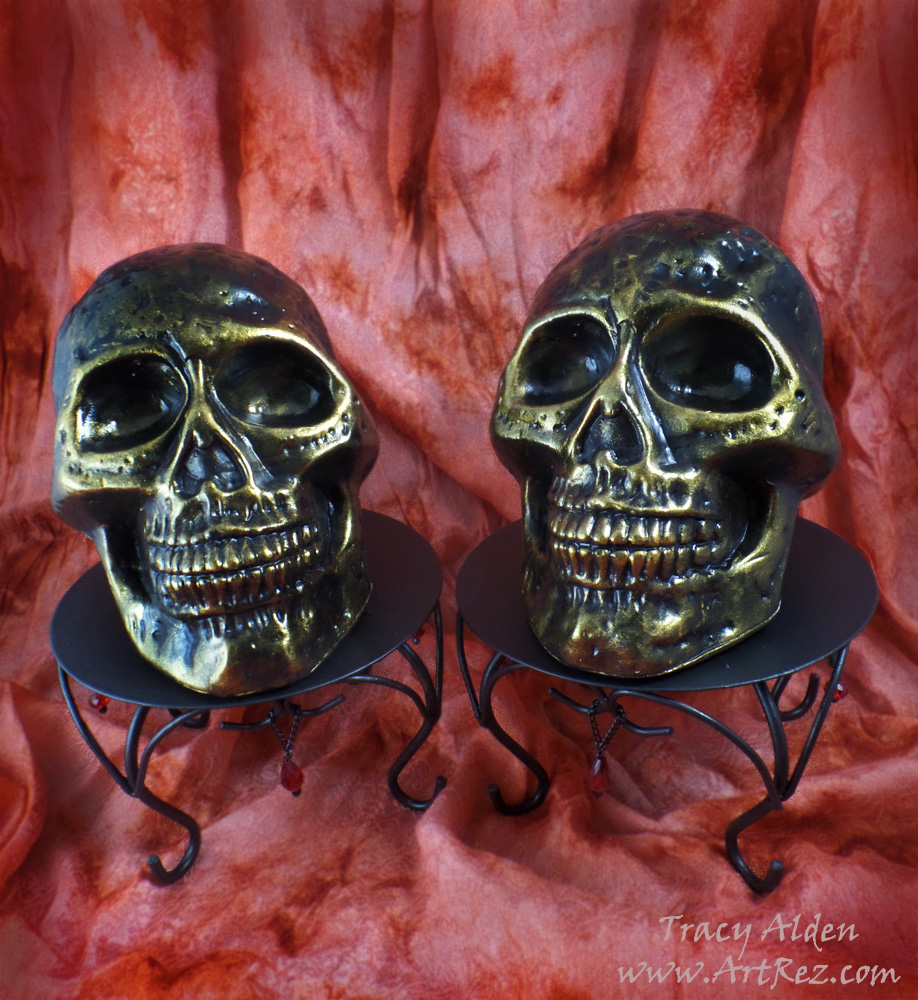
I placed the plastic skulls on their stands and placed them along with my ever growing collection of Halloween decor!
What old decorations might you find in your travels that you can upcycle?
Until Next Time, Safe Travels!
Mod Podge + Recycling = Home Decor
This time of year many people get gifts wrapped in tissue paper, and most of the time it ends up in the trash. Why not recycle into a beautiful piece of home decor or if you are a crafter that vends, booth decor? In a few short hours you can have a rather nice piece of decor that looks far more valuable that what it once was. 🙂
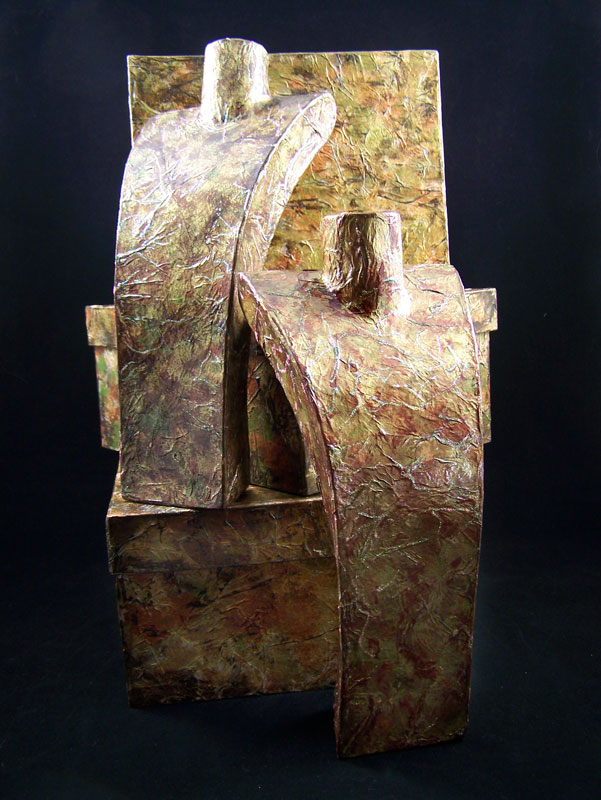
Recycled mixed media artwork….
I love doing mixed media artwork. I often feel confined if stuck using one form of media. Art like nature, in my mind, should be flowing, entrancing, organic in thought and in form. The inclusion of recycled elements in art not only helps the environment but gives a second life to pieces once forgotten. In my travels I am constantly looking for things to use in my artwork, such as dried plants, sticks, metal, stones, anything that might catch my fancy.
One of my favorite ancient Egyptian myths was how those long past and forgotten would live again if people would repeat their name and talk of their life. When I make recycled art I try to pick ancient ideas and stories to replay with modern recycled goods. I feel I am giving people glimpses of stories and worlds long forgotten, whispering ideas of times past using the tools of unwanted items of today.
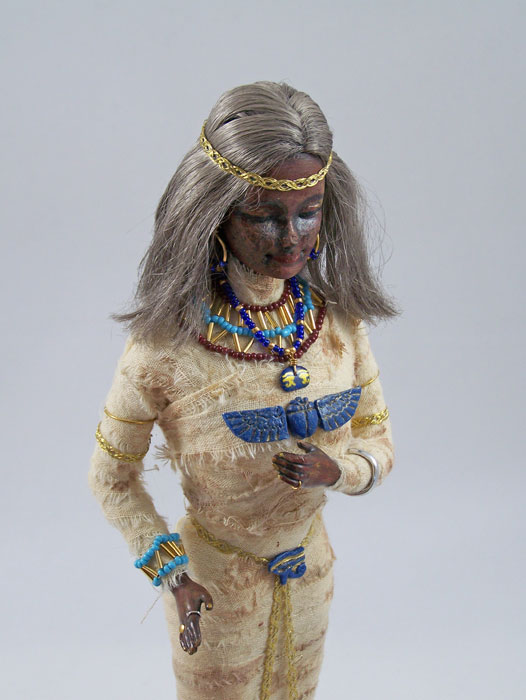
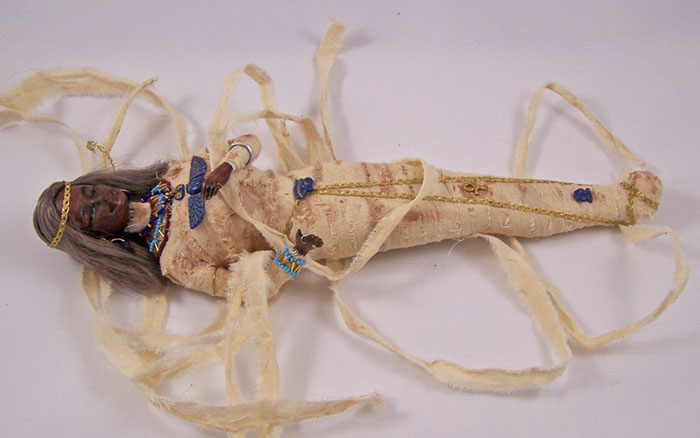
The Recycled Princess:
In her former life this was a rather badly damaged Barbie doll. The toy had a major amount of gouges, scratches and was apparently chewed on. While I know many other people have done mummy dolls before I often find them grotesque and not well made. I wanted this one to be as realistic as possible, just in miniature format. Her wrappings are muslin scraps dyed with used tea leaves. Her jewelry is made from old earrings and all her pendants and amulets are made from polymer clay. All of the acrylic pant is from old paint bottles I found at a yard sale; they were somewhat on the “chunky” side but when layered on the plastic of the Barbie it looked like mummified skin. Her hair was also dyed with the old acrylic paints. To bend the arms into new positions I put them in a boiling water bath to re-shape.
Now this once forgotten toy tells a story of a ancient princess, carefully mummified, silently resting throughout eternity.
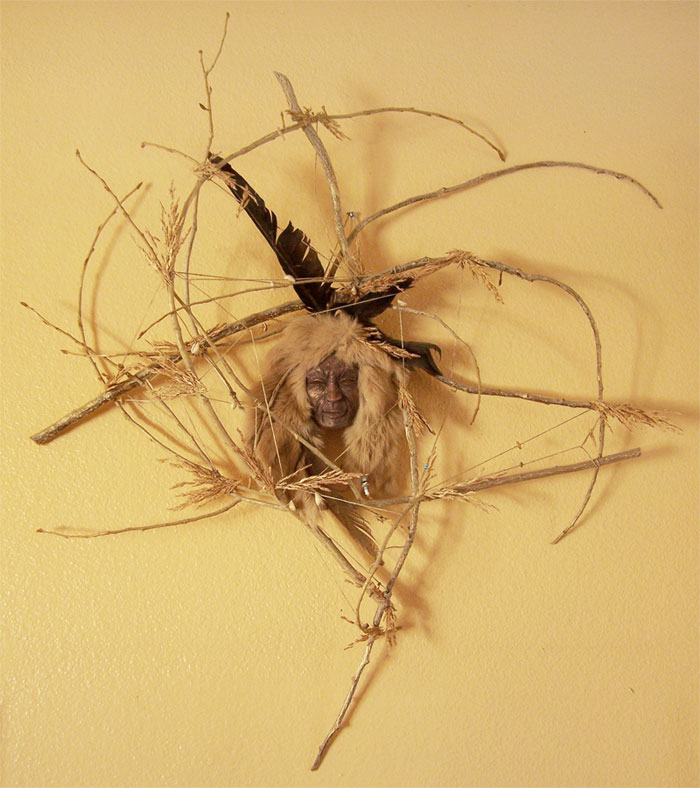
Beautiful Crone Maiden:
Found poplar tree sticks laying on the ground in a circular pattern was my inspiration for this piece. I collected those sticks and tried to arrange them as I had found them, using old hemp twine. The addition of beads and shells from broken old necklaces, dried weeds and found raven feathers all helped to give meaning. It took me tinkering around with polymer scrap clay to create the center piece. I gave her a headdress of rabbit fur salvaged from a rotting fur coat. I only use old recycled leather and fur in my pieces.
A story of a medicine woman, ever seeing but sightless, dreaming of visions of the future build on the past.
What wonderful stories might you create out of found objects and scraps?
Until next time, safe travels!

