Family of Pumpkins
I have pumpkins on the brain lately (sounds like a condition doesn’t it? LOL). I am trying to grow a pumpkin patch, wanting to make pumpkin pie, finding vintage ads of pumpkins and creating pumpkins out of polymer clay. I have always had fond memories of carving pumpkins, making pumpkin cakes and cookies with my family. To me they are what Fall, Halloween and harvest festivals are about.
This year I am making all kinds of Fall crafts but I wanted to make something showcasing pumpkins and the happy feeling of family together for the seasons. I started with making a cute little family of pumpkins out of polymer clay. I really liked how they came out but felt I could use them on so many projects such as cards, magnets, jewelry and wall decor. So I decided to make a mold of them so I could do all the projects I thought of and more.
For the pumpkin family mold I used:
Polymer clay (any brand or color will do since I made a mold from the original polymer piece)
Amazing Mold Putty
Amazing Casting Resin
Martha Stewart Crafts 2oz Multi-Surface Satin Acrylic Craft Paint Carrot, Jonquil and Beetle Black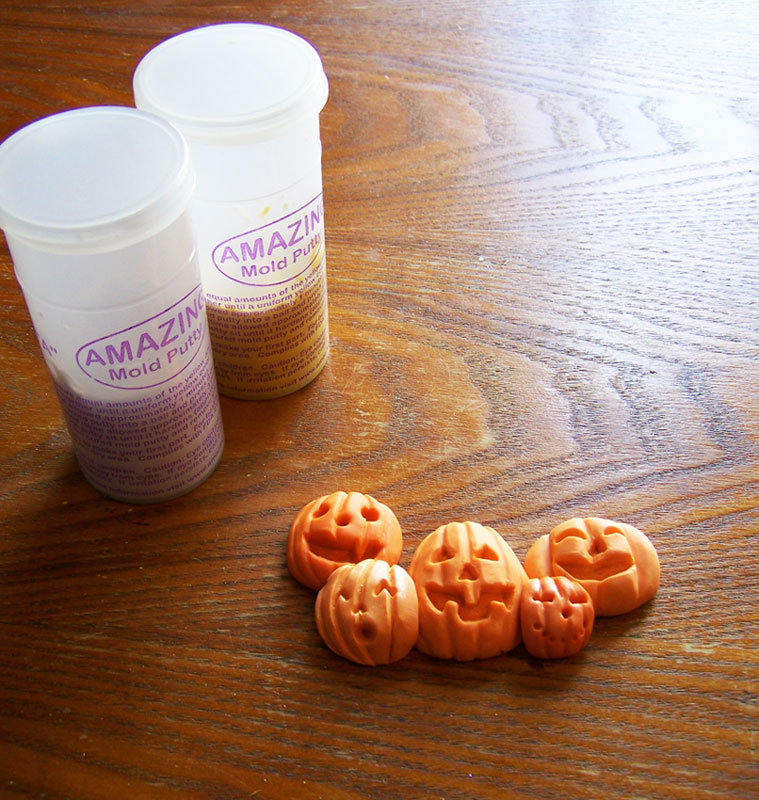
Here is the original pumpkin family made out of poly clay. I gave them deep smiles and happy faces, I don’t have to worry about any detail being lost since the Amazing Mold Putty does wonderful with anything with high detail.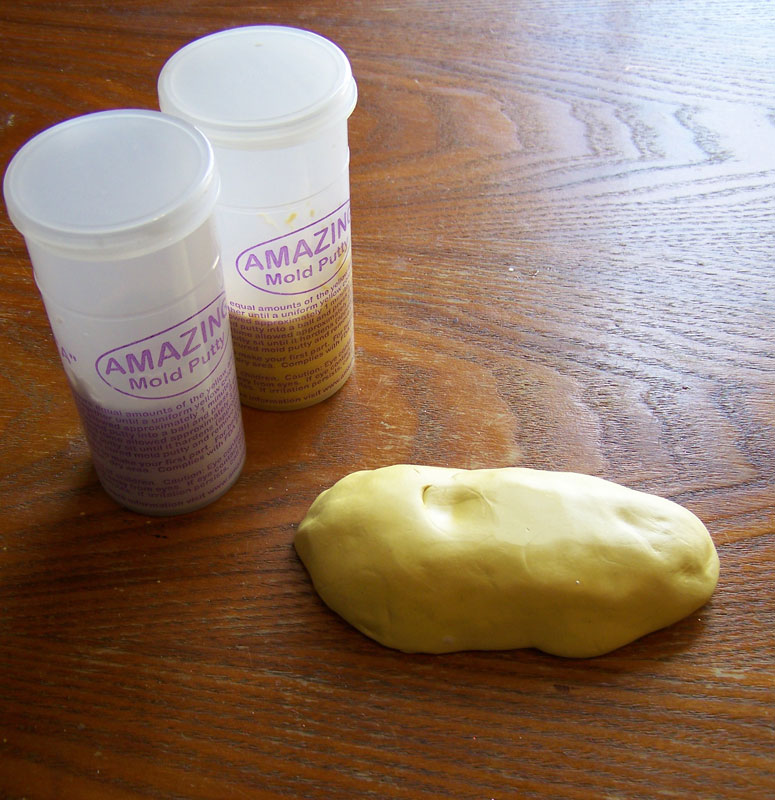
I mixed the putty according to the manufacture’s instructions, though the Amazing Mold Putty is rather forgiving if there is not exact amounts used. I do not attempt to remove the mold for at least 20 minutes to make sure the mold has set.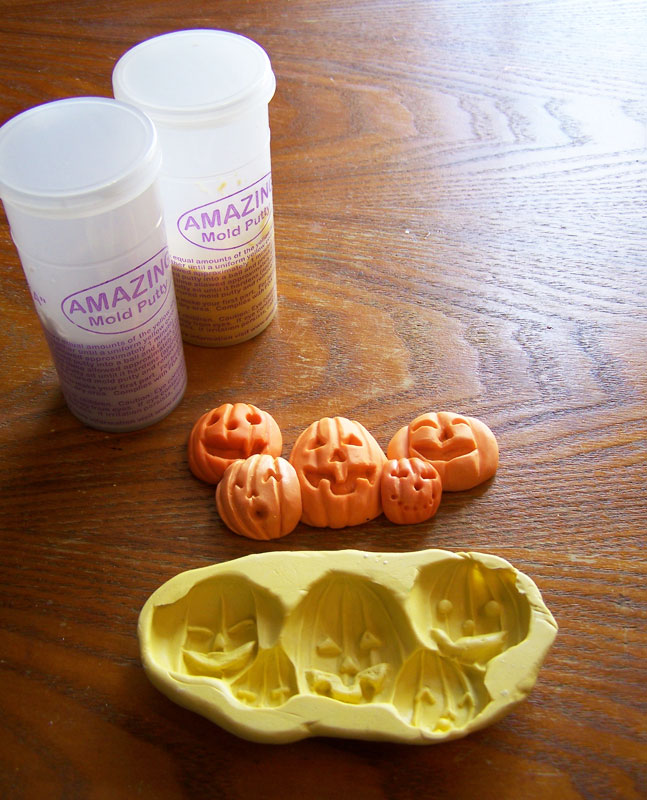 While the cure time for the molds is 20 minutes I like to leave the orignal in the molding putty for longer, making sure the mold is a rigid as possible (but keep in mind it is silicon and very flexible once cured) before trying to make any replicas. The mold can be cleaned with mild soap and water before you make any replicas to remove any loose particles left by the original.
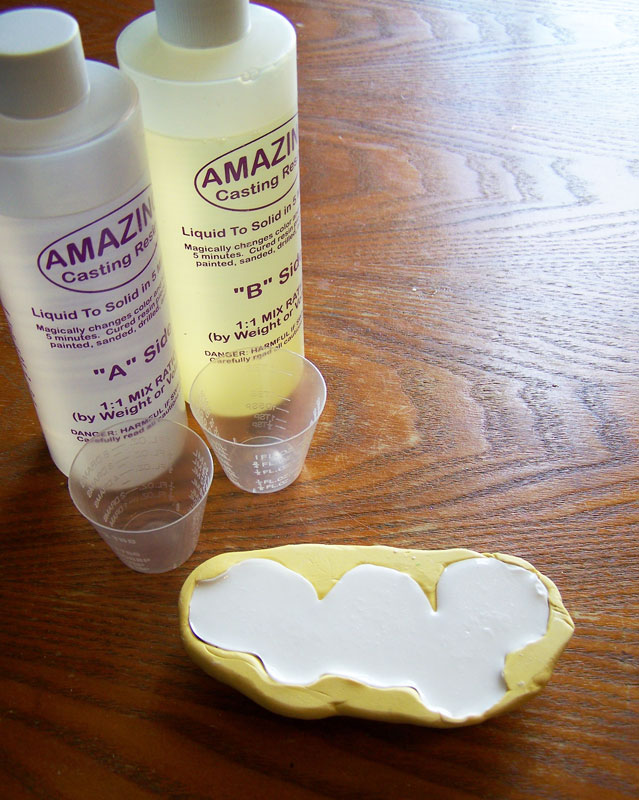 When mixing the Amazing Casting Resin I have to be careful about stirring too fast and for too long. Once the two parts are combined stir carefully until clear, scraping sides, about 15-20 seconds. I then immediately start to pour the resin into the mold; be careful not to pour too quick as you will increase the amount of air bubbles. It will set in 10 minutes, but keep in mind that the thicker the piece the faster the cure time. In this case the pumpkin family is a thick piece and set in about 8 minutes.
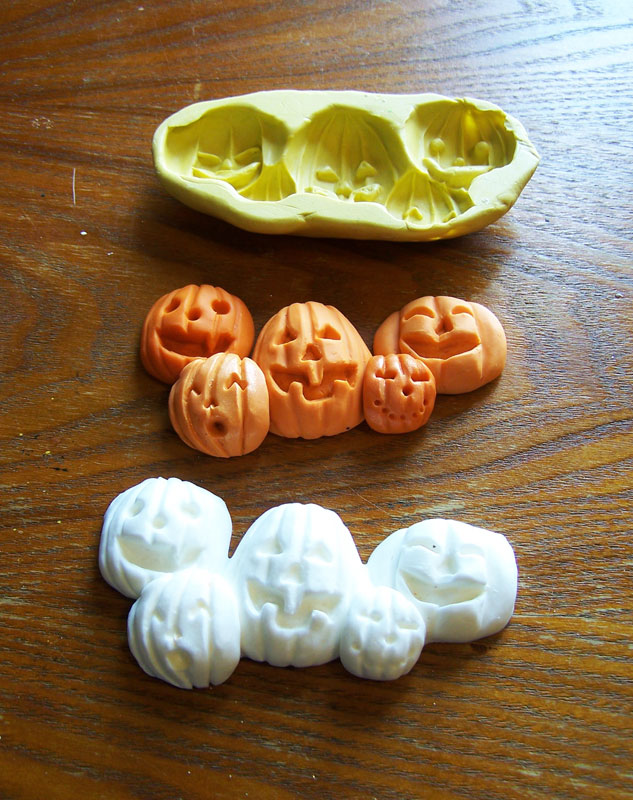 Here the resin copy is next to the original and the mold. Once the piece is cured I demold, trim any rough edges, sand and started painting.
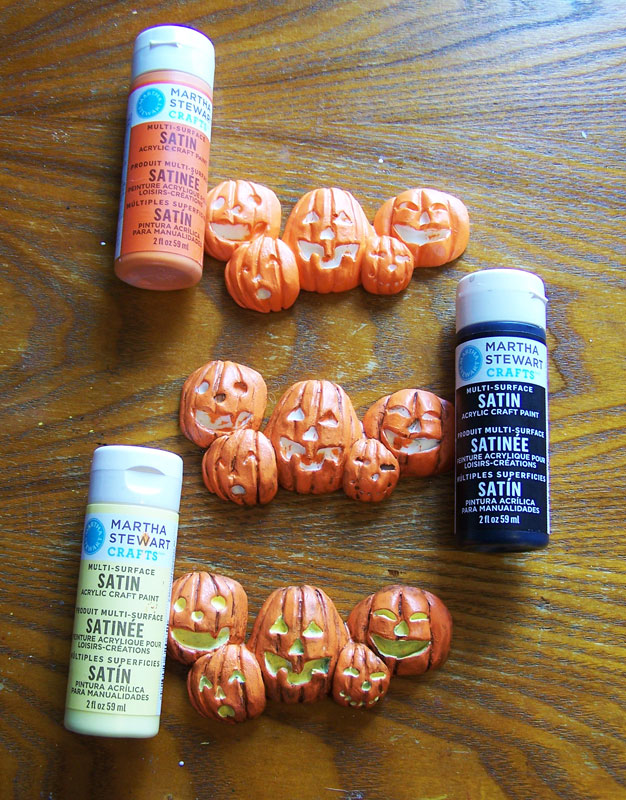
Here I show the 3 stages of painting. I have found that the Martha Stewart Crafts Multi-Surface acrylic paint bonds well with the resin replicas. I start with the Carrot, then a color wash of Beetle Black and then paint the Jonquil paint only in the eyes, noses and mouths of the pumpkin family.The first project I wanted to make with a pumpkin family was a home decor piece for my mother. She loves the holidays and always likes to have the family home to celebrate.
For the home decor piece I used:
Globecraft Memories Classic Fancy Rectangle
Globecraft Memories Glastique Gloss Finishing Glaze
Globecraft Memories Enamel powders 24K Gold and Mossy Glen
Globecraft Memories Piccolo Accents
Cardstock (any color or brand will work, I used orange, metallic white and black)
Mini Fall Leaves (most local craft stores carry small bags of fabric or paper leaves in the scrapbooking or floral sections)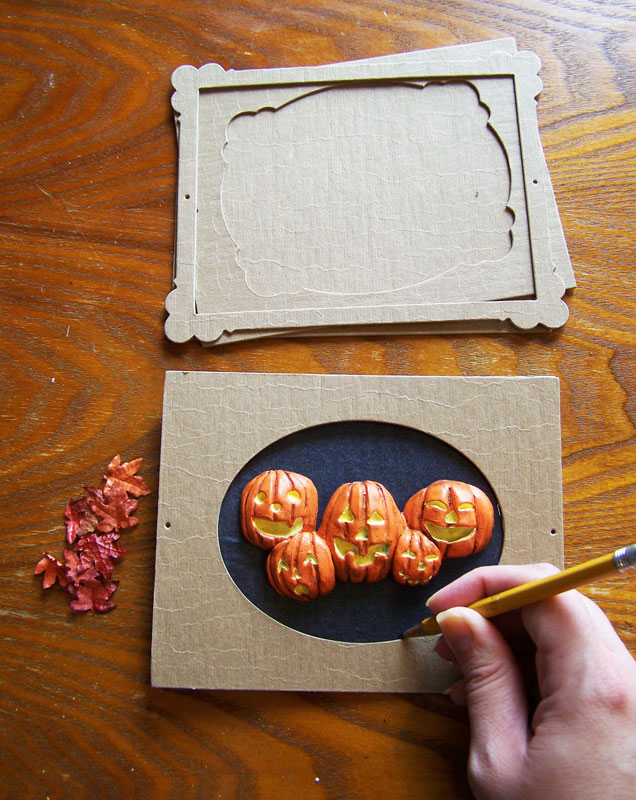 Using one of the finished pumpkin resin pieces, I placed it in the middle of the Classic Fancy Rectangle and traced along the inside of the oval to make sure the background paper, pumpkins and a leaf embellishments fit inside the globe.
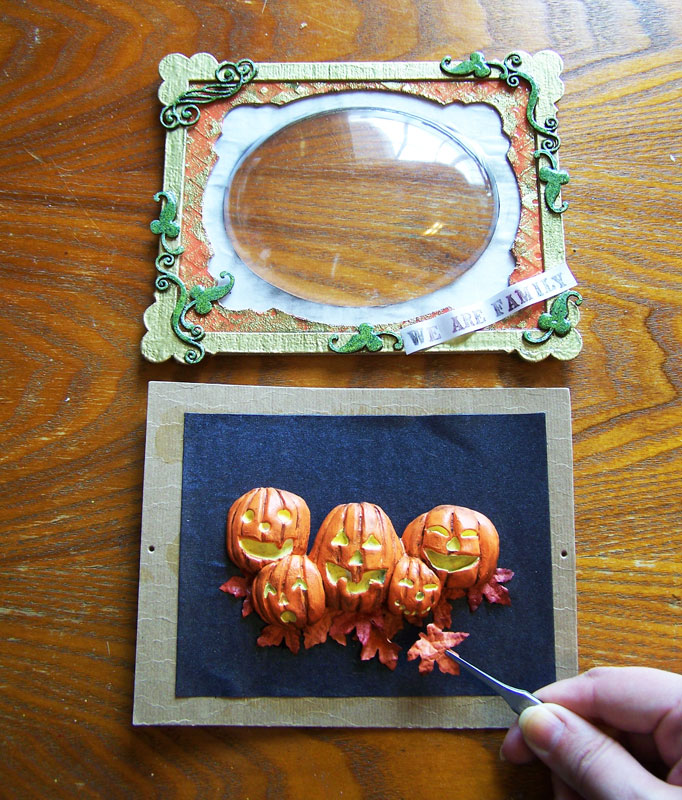 Once I decorated the outer layers of the frame with the paper, enamel and Piccolos, I coated the outside layers with two coats Glastique Gloss glaze. Once completely dry I glued the layers and globe with Glastique together. I then glued the pumpkin resin piece to the backplate of the frame with a thick layer of Glastique. I carefully added the mini leaves around the bottom of the pumpkin family to give them a “bed” of leaves to be on.
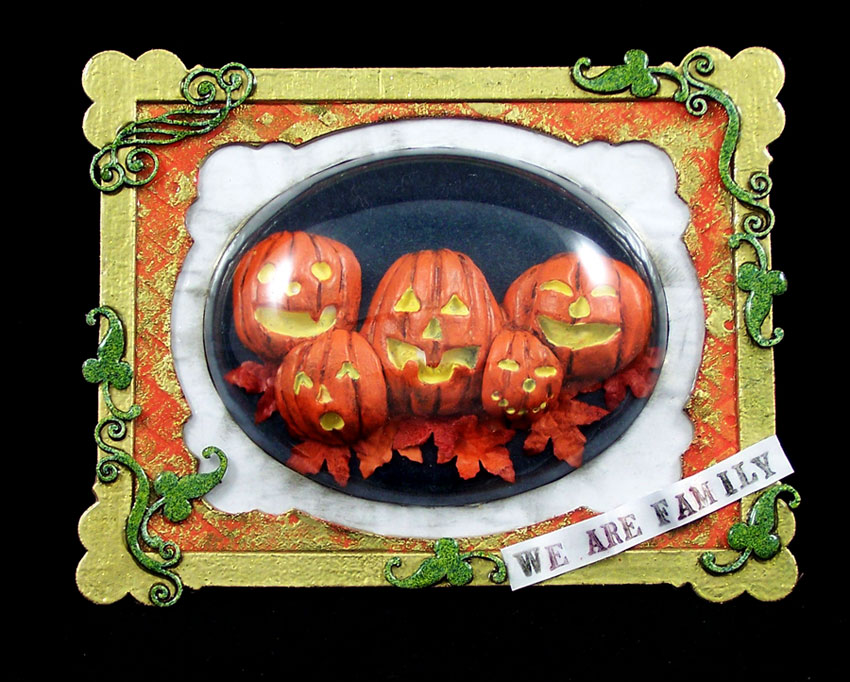
Glue the top layers of the the frame to the backplate with Glastique and once dry it is now ready to hang on the wall! 🙂Until next time, Safe Travels!
CHA Winter show 2012 part 2
As I noted in my last post this year’s winter Craft and Hobby Association show was awesome! My last post was mostly about Globecraft Memories and my first time doing demos at the CHA. This post will be about some of the new products, designs and workshops at CHA!
First I would like to talk about the DCWV booth which had some of the most beautiful paper and bead booth decor at the Winter CHA. DCWV Inc. is known for their very popular scrapbooking papers, cards, brads, stickers, albums, and embellishments. In 2010, the Blue Moon Beads brand was acquired by DCWV, so the booth was showing a wonderful fusion of these companies. I have used both DCWV and Blue Moon Beads products before, mostly for artwork at small shows. I must say though after seeing their booth decor and product samples I just had to get wholesale catalogs to use their products for classes.
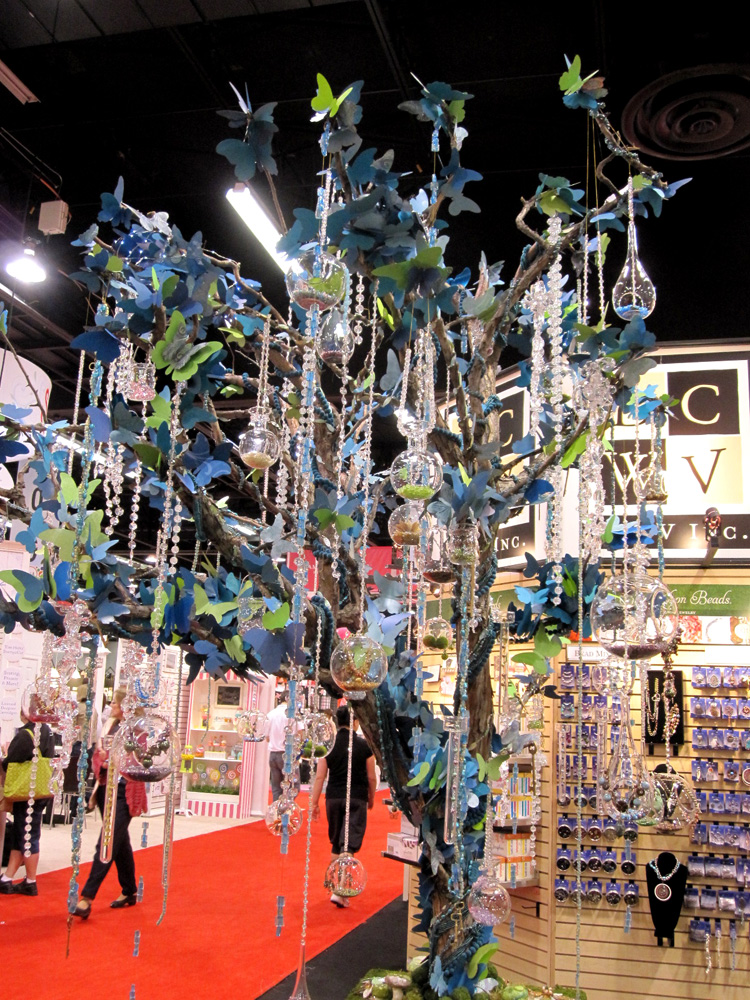
The blue color tone tree was one of my favorites. It looked right out of a fairy tale. I keep trying to think how in the world I could make a tree of my own and where to put it.! LOL
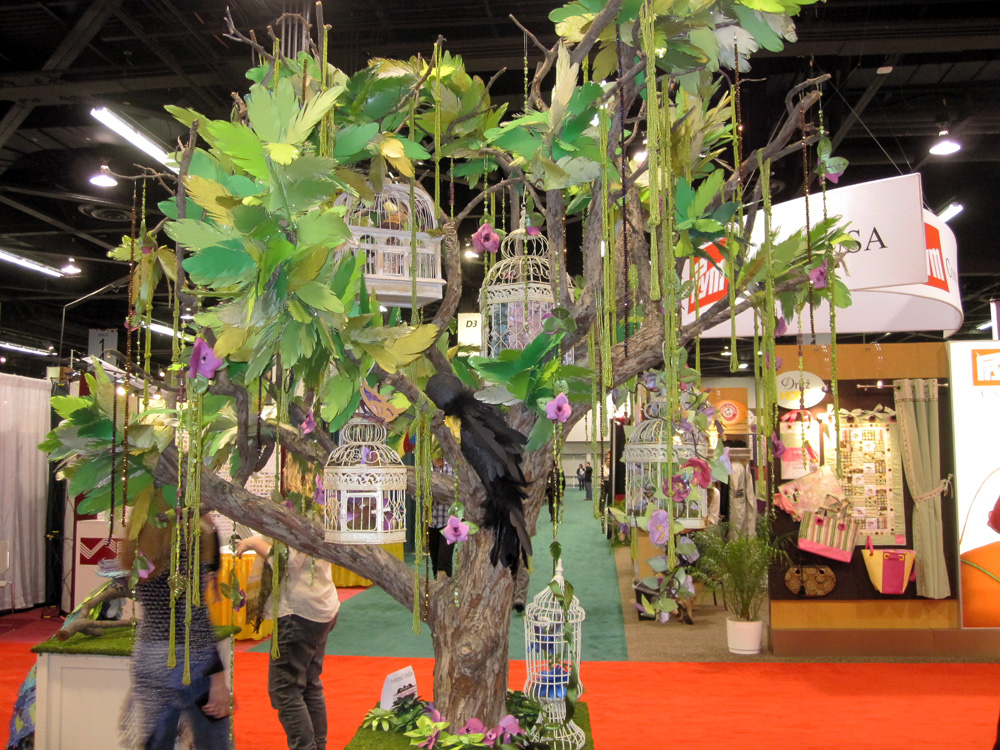
The green beads on this tree are just gorgeous, and the photo does not do it justice.
I ended up wandering around, several isles over, and once again to stopping at a booth just because of how stunning booth decor was. In this case a glittering, full size gown made from crystal beads, paper and chain. I had to stop to see what this booth was about!
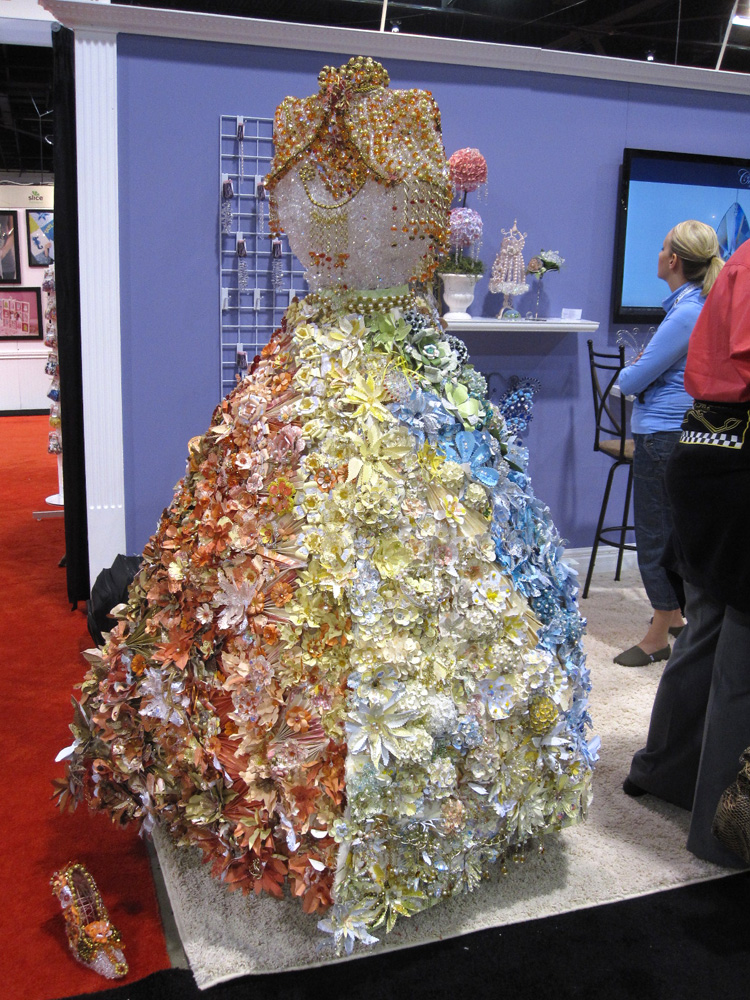
As I ended up finding out this beautiful piece of art was part of Connie’s Crystal booth. They carry genuine, high quality crystal beads and focal pieces in a stunning array of colors.
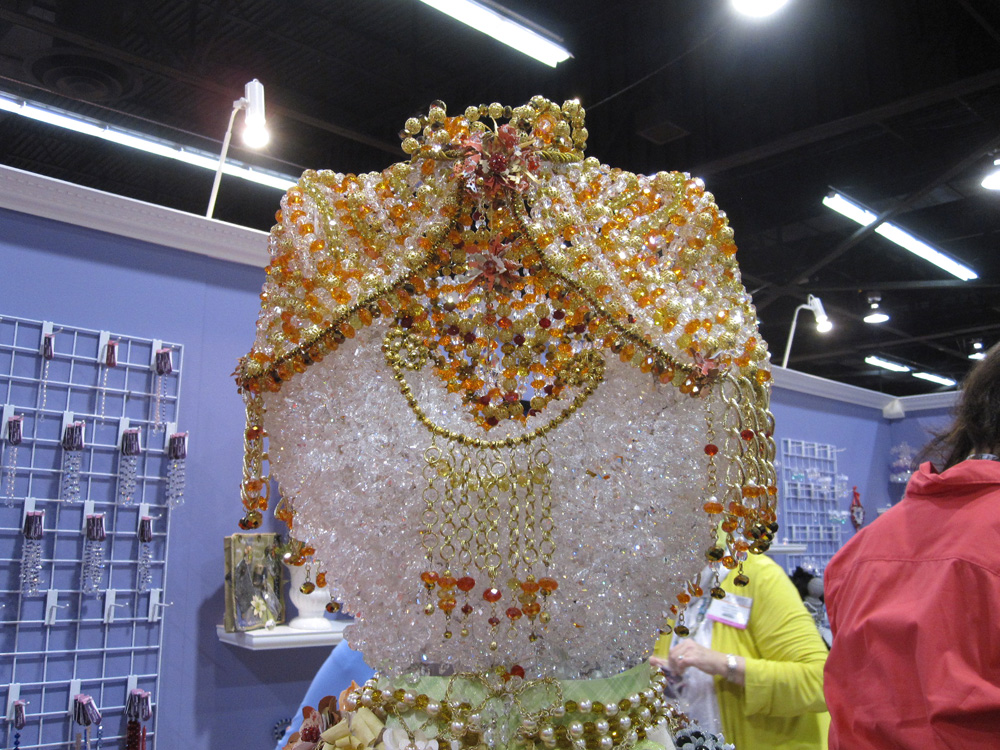
A close up of the bodice of the wonderful booth display at Connie’s Crystals.
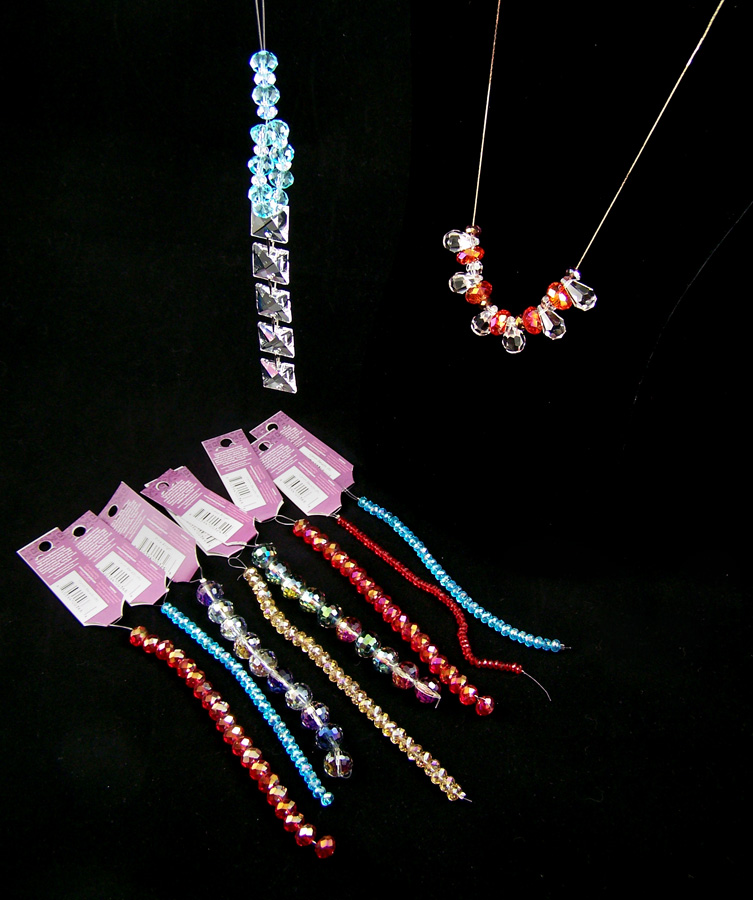
I wandered by their booth on the last day and noticed they were selling out the booth crystals, so of course I had to buy some. Sadly I did not get there early enough to get all of the colors I wanted but I did buy some beauties. The reflection of light with their sun-catcher line is amazing. If you do bead work, mixed media or even just want lovely sun-catchers go to their website and request a catalog!
While I normally do not have time to attend many workshops at CHA, when I heard about Makin’s Clay Explore the Possibilities class I had to take it! Makin’s Clay produces a no-bake polymer clay providing an alternative modeling medium to oven-bake type polymer clays, environmentally safe, biodegradable and user friendly. The workshop, which was instructed by designer Ann Butler, explored the applications of Makin’s Clay and helped those who attended gain hands-on experience using Makin’s Brand products.
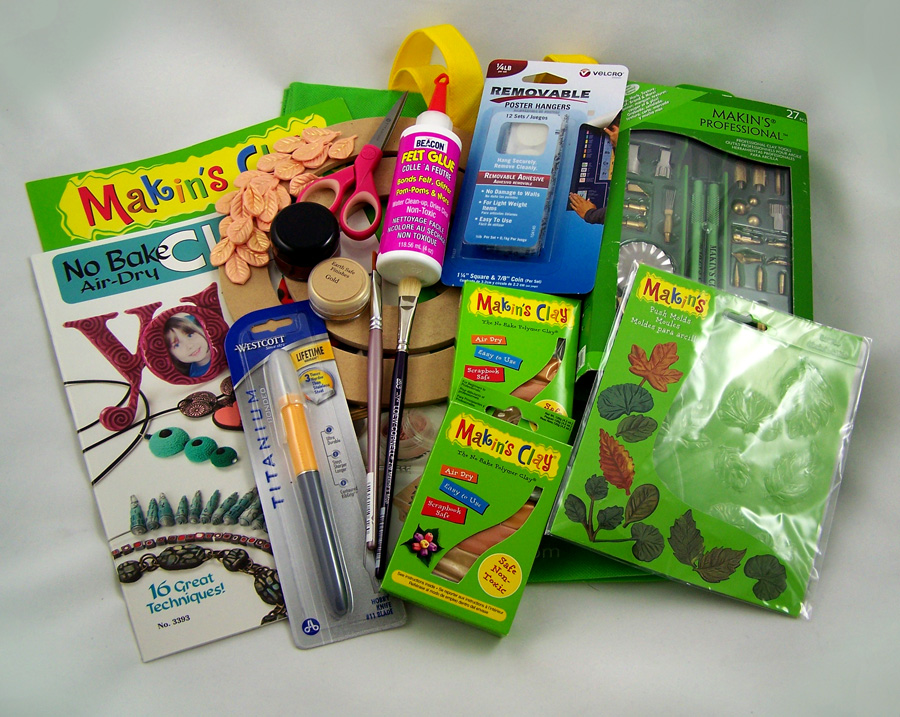
Each workshop participant received this seriously awesome complimentary Makin’s Clay gift bag just stuffed with goodies! I even ended up winning a Makin’s Professional Clay Tools set in class as well!
While I have not used Makin’s Clay polymer clay line in the past I do use their tool line a lot and I can say it is some of the best on the market. After trying out their clay and finding out they make some rather nice new color lines I will be using their clay with projects in the future. 🙂
Until next time, safe travels!
Websites, Miniatures and Happiness!
So many new things to talk about and so little time.
I went on vacation for my birthday with my husband and a group of friends. We decided to go to Vegas to enjoy the Fremont Street Experience, it was a great time. One of my friends suggested the Paris buffet, oh my goodness was it good! Other than a bit of sun sickness from the heat it was a fun and if not a trifle silly time in Vegas.
After I got back from vacation I decided to get a massive overhaul of my website, I wanted it to be easier to work on, cleaner layout and search engine optimized. The lovely and talented Debra from Kittyloaf Designs did a wonderful job of that! She got everything up in running in less than 2 hours and has walked me through setting up more content on the site. I am still learning and adding things to the site but Debra has been such a wonderful person about it all. Besides being a web designer she also happens to be a very talented seamstress and artist.
My only issue as of late is that locally we have been having a lot of lighting and rain storms, a rarity in the beautiful high desert that we live in. Which makes working on electrical devices somewhat difficult if there is a fear of power outages. So while be prevented from adding new things to my website I got to working on some polymer clay projects. I was given some wonderful polymer clay books for my birthday, so while watching the flash floods and keeping as many electrical items turned off I made some minis!
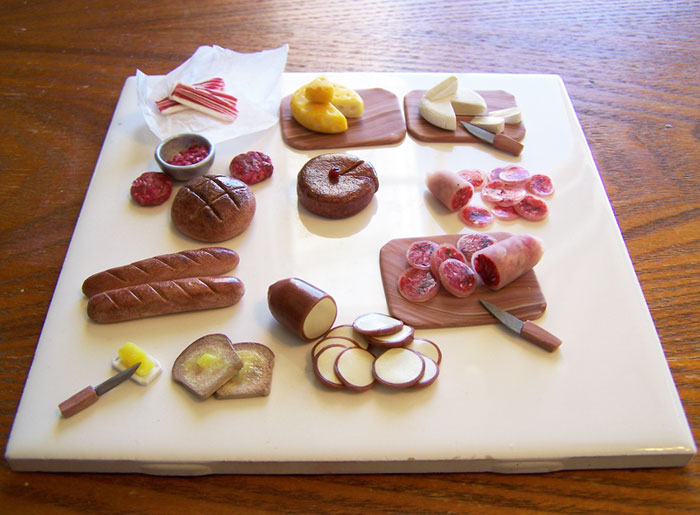
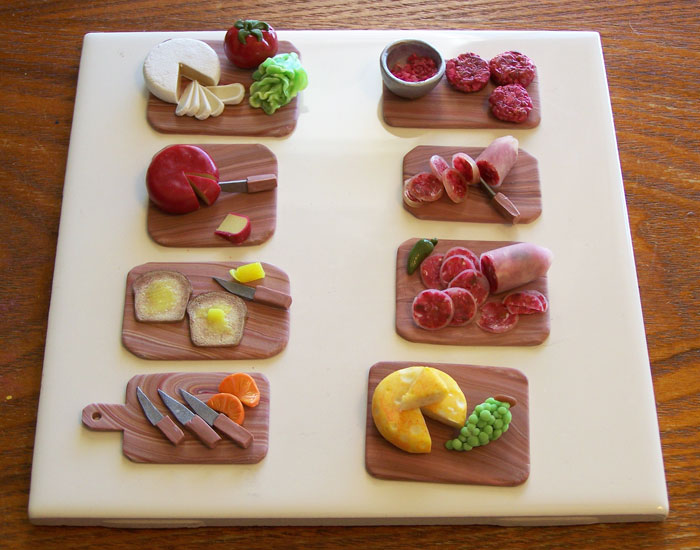
1 inch scale (1 inch equals 1 scale foot) miniature food made out of polymer clay.
From top left bacon strips, swiss cheese, brie cheese, summer sausage, gouda cheese, toast with butter, baguettes, sourdough loaf, ground beef and a fruit cake in the middle.From top left brie with lettuce and tomato. Ground Beef and patties. Summer sausage slices. Swiss cheese and grapes. Knives and oranges. Toast and butter. Cheddar and slices.
I got quite a few more projects in the works and will be posting about them shortly!
Safe Travels!Work, wildlife and polymer clay!
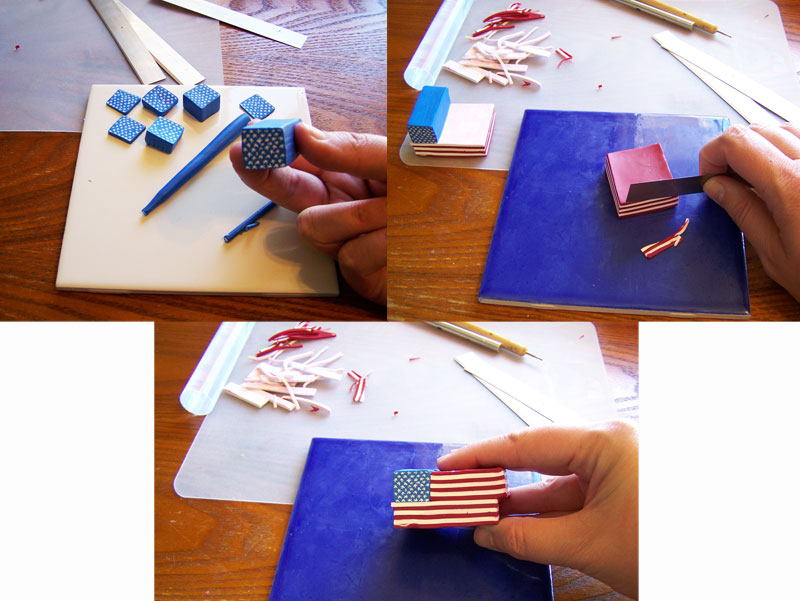
Lately, my art workload has been insane, along with our weather. The week of the 4th of July we had flash flooding, which dramatically changed the placement of dirt on our property but made a lot of the local flora and fauna very happy. I got to stay inside, relax and watch the rain while trying out some new projects (nothing like the sound of rain to sooth the soul!). For the 4th I tried making a flag cane.
It turned out to be more fun than I expected. The only issue I find is some slight distortion with the stars when you start to reduce the cane. The next time I will chill the cane to prevent that.
Taking time to let the clay rest, as well as having a very clean and sharp blade, prevents any smearing. The slices can be easily made into lapel pins.
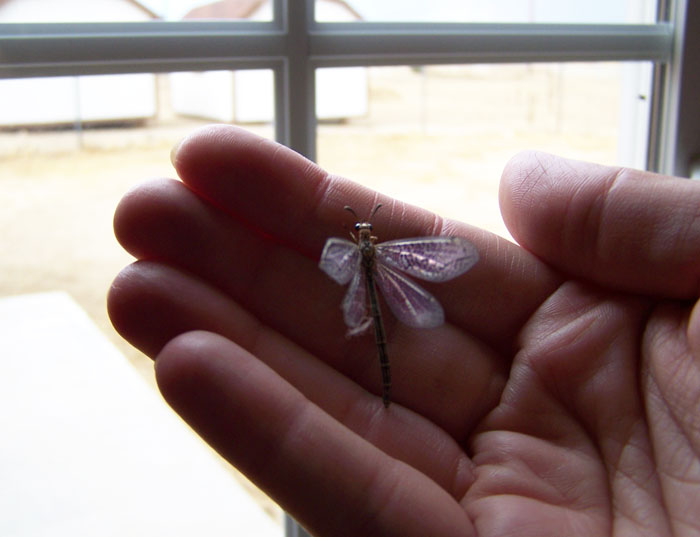
After the rains we had an invasion of dragonflies in our house and I had to keep shepherding them outside.
Bit of a blurry photo but they move like mad. 🙂
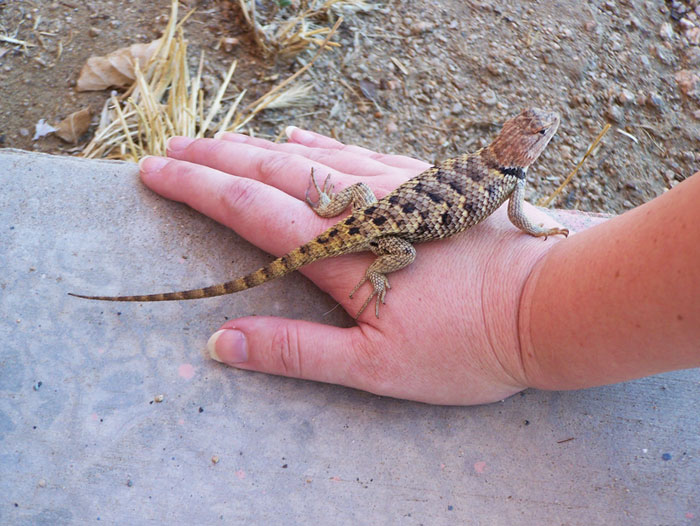
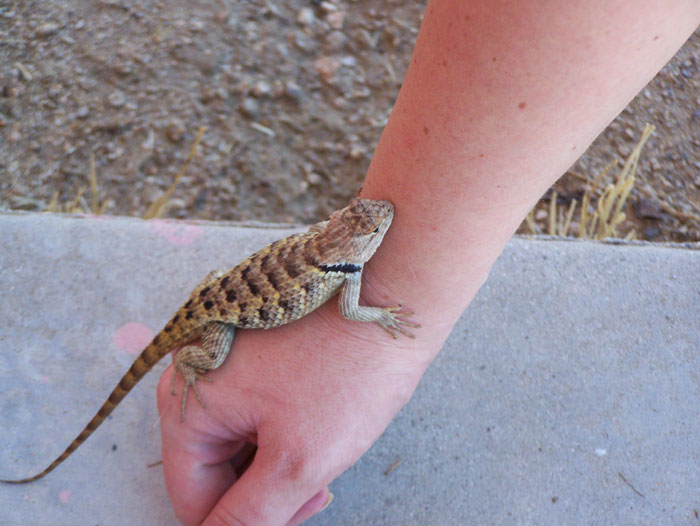
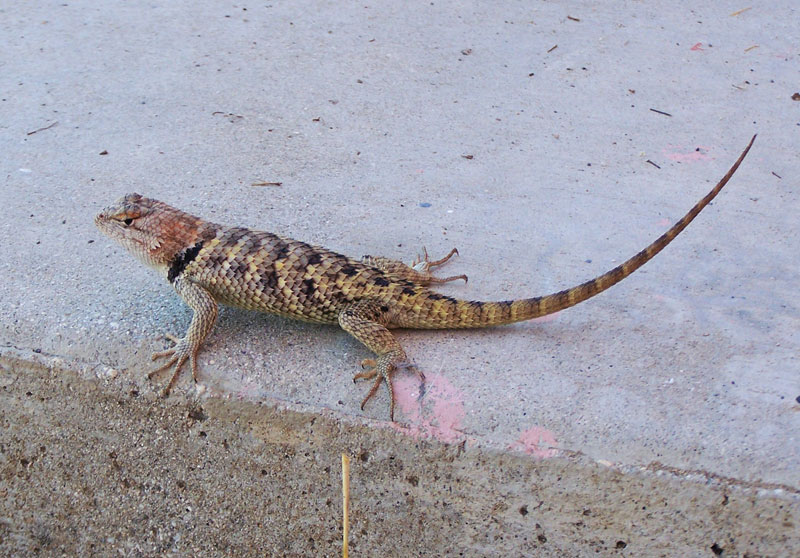
Then in the process of cleaning the yard we found a rather dazed Yellow-backed Spiny Lizard (Sceloporus uniformis) attached to the side of my truck tires. We gave it some water and tried to let it go but it seemed to want to stay.
I tried to nudge it off and it just hugged me tighter.
Carefully I peeled her off and she just sat there staring at us. You can tell it is female because it had no blue underbelly marking and the head was a faint orange.
Finally she slowly walked off and went right under the parked truck. She stayed there most of the day eating ants. 🙂
After seeing and getting a chance to work with all of these and many more creatures I felt inspired to try some new textures and themes. I always say nature and its wonders are the best of inspiration.
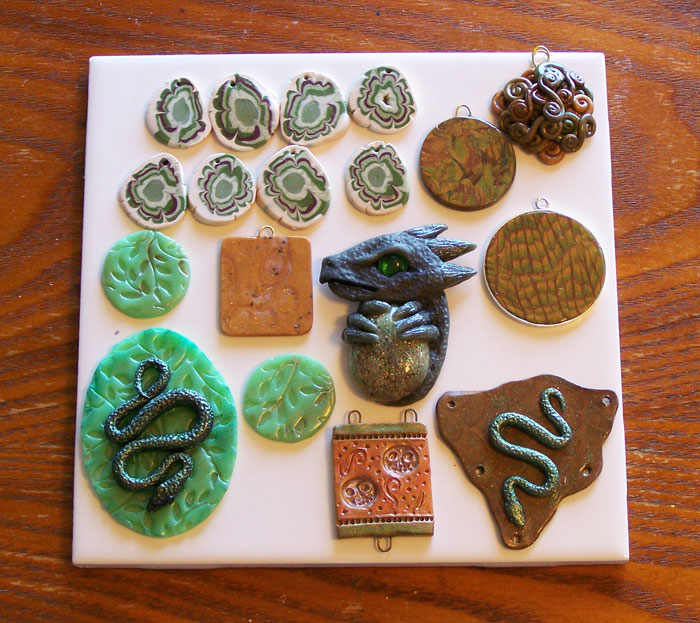 Here is some of my gold/green polymer clay mixes with reptile, fossils and texture themes with their final gloss coat.
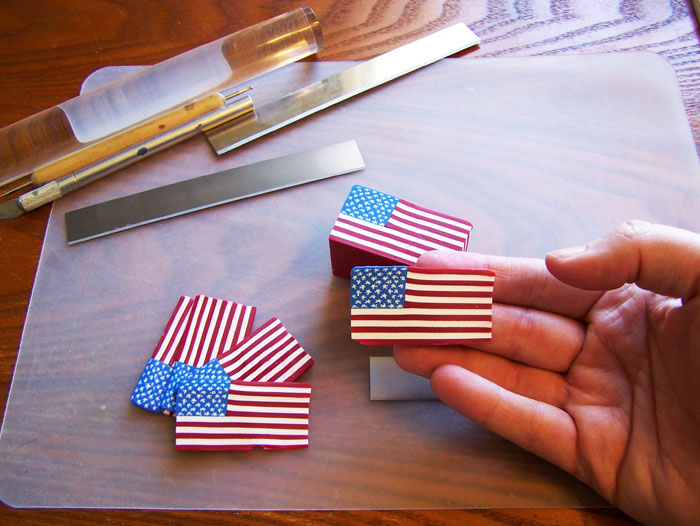
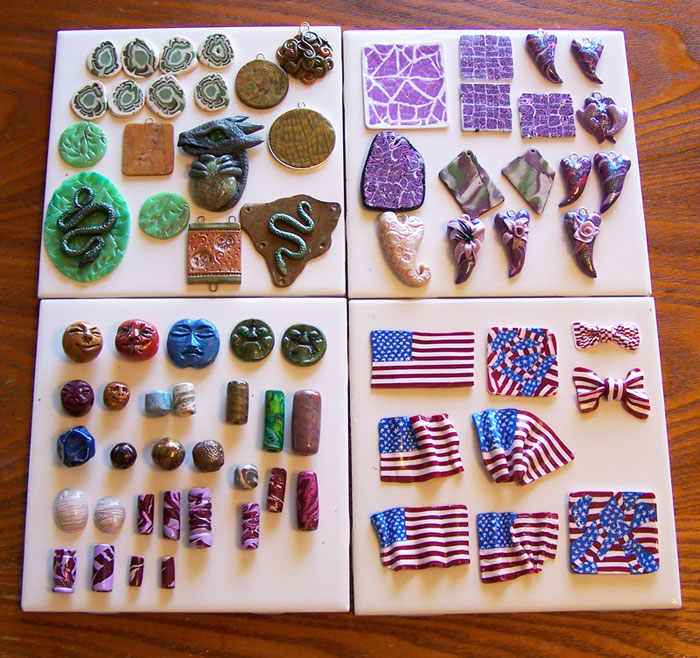 Here are some of my cane slices and jewelry pieces after their final gloss coat. The flag slices will have clay flowers and ribbons added to them. Stringing and designing the layout for the other beads and pendents will be the fun part.
What wonderful interactions with nature might you have that can inspire you? 🙂
Until next time safe travels!
Recycled mixed media artwork….
I love doing mixed media artwork. I often feel confined if stuck using one form of media. Art like nature, in my mind, should be flowing, entrancing, organic in thought and in form. The inclusion of recycled elements in art not only helps the environment but gives a second life to pieces once forgotten. In my travels I am constantly looking for things to use in my artwork, such as dried plants, sticks, metal, stones, anything that might catch my fancy.
One of my favorite ancient Egyptian myths was how those long past and forgotten would live again if people would repeat their name and talk of their life. When I make recycled art I try to pick ancient ideas and stories to replay with modern recycled goods. I feel I am giving people glimpses of stories and worlds long forgotten, whispering ideas of times past using the tools of unwanted items of today.
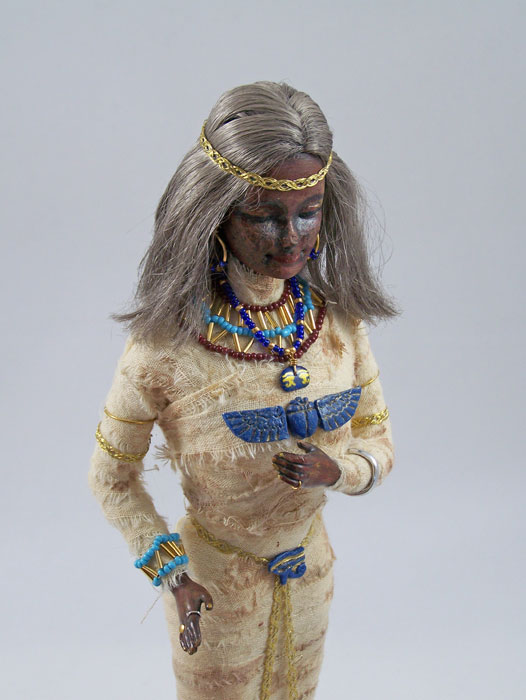
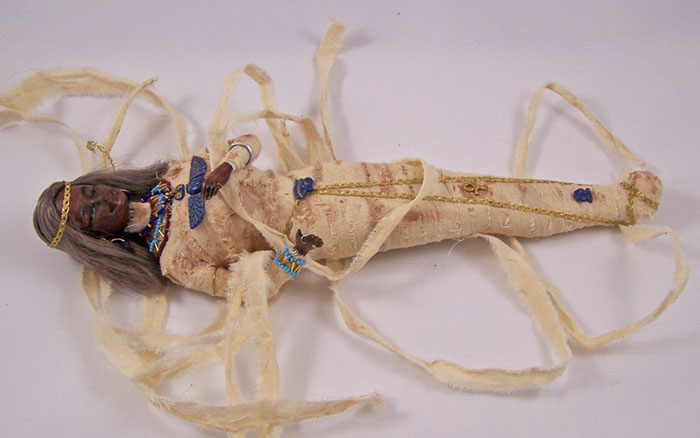
The Recycled Princess:
In her former life this was a rather badly damaged Barbie doll. The toy had a major amount of gouges, scratches and was apparently chewed on. While I know many other people have done mummy dolls before I often find them grotesque and not well made. I wanted this one to be as realistic as possible, just in miniature format. Her wrappings are muslin scraps dyed with used tea leaves. Her jewelry is made from old earrings and all her pendants and amulets are made from polymer clay. All of the acrylic pant is from old paint bottles I found at a yard sale; they were somewhat on the “chunky” side but when layered on the plastic of the Barbie it looked like mummified skin. Her hair was also dyed with the old acrylic paints. To bend the arms into new positions I put them in a boiling water bath to re-shape.
Now this once forgotten toy tells a story of a ancient princess, carefully mummified, silently resting throughout eternity.
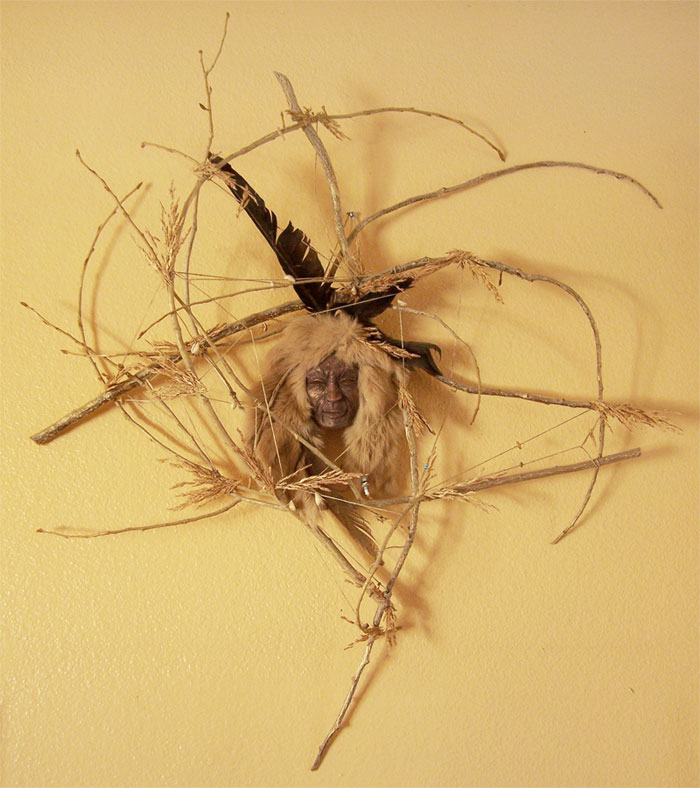
Beautiful Crone Maiden:
Found poplar tree sticks laying on the ground in a circular pattern was my inspiration for this piece. I collected those sticks and tried to arrange them as I had found them, using old hemp twine. The addition of beads and shells from broken old necklaces, dried weeds and found raven feathers all helped to give meaning. It took me tinkering around with polymer scrap clay to create the center piece. I gave her a headdress of rabbit fur salvaged from a rotting fur coat. I only use old recycled leather and fur in my pieces.
A story of a medicine woman, ever seeing but sightless, dreaming of visions of the future build on the past.
What wonderful stories might you create out of found objects and scraps?
Until next time, safe travels!

