A Crafty Halloween Throwback Thursday
Welcome to my Halloween Throwback Thursday! Halloween as I have often noted is one of my favorite holidays, I just love making all kinds of spooky and fun art. This week I was able to start unpacking all of my plastic tote bins filled to brim with ghoulish decor. I was reminded of my Halloween projects I have created for Amazing Casting Products and I wanted to share a few of my favorites!
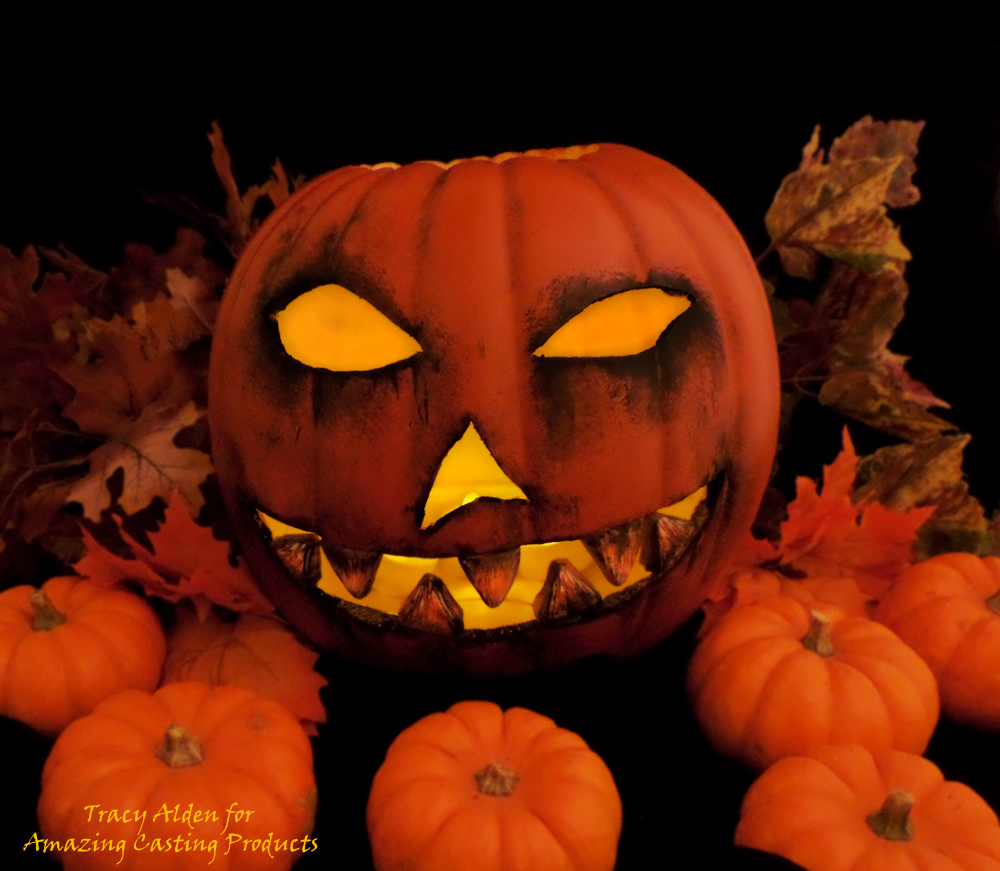
How to enhance a Pumpkin’s Smile with resin teeth using Amazing Casting Resin and Mold Putty.
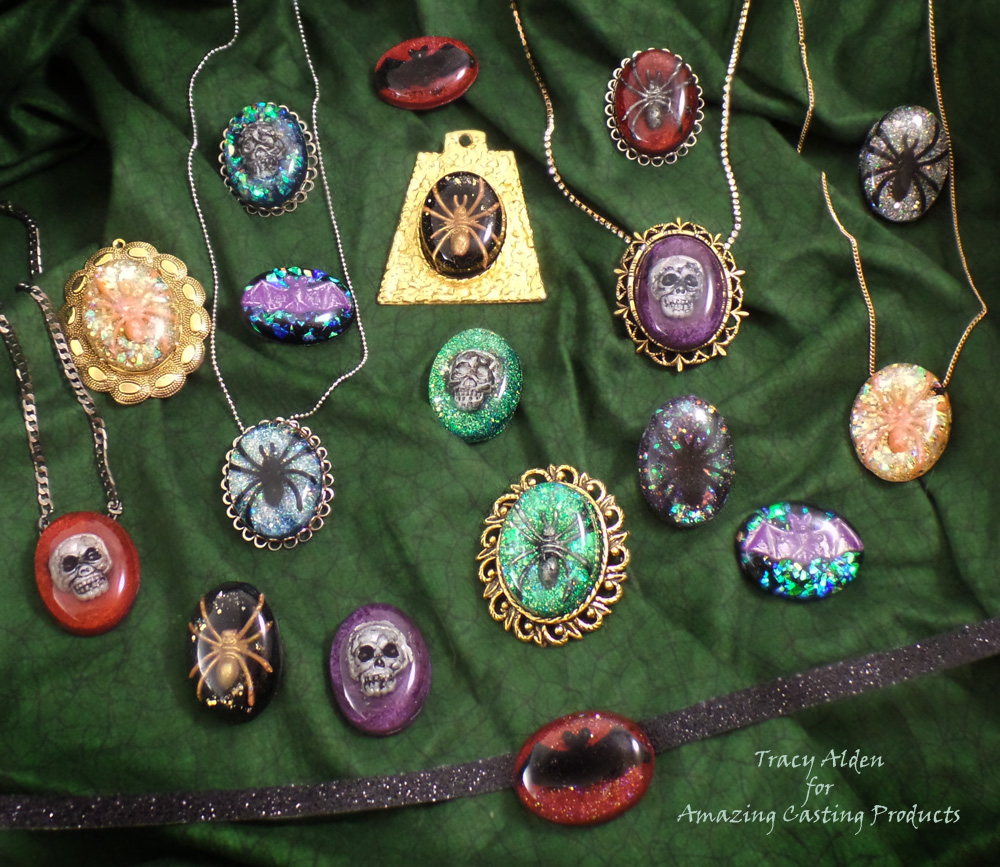
How to make Halloween party favors go from groan to glam with Resin Cabochons made with Amazing Clear Cast.
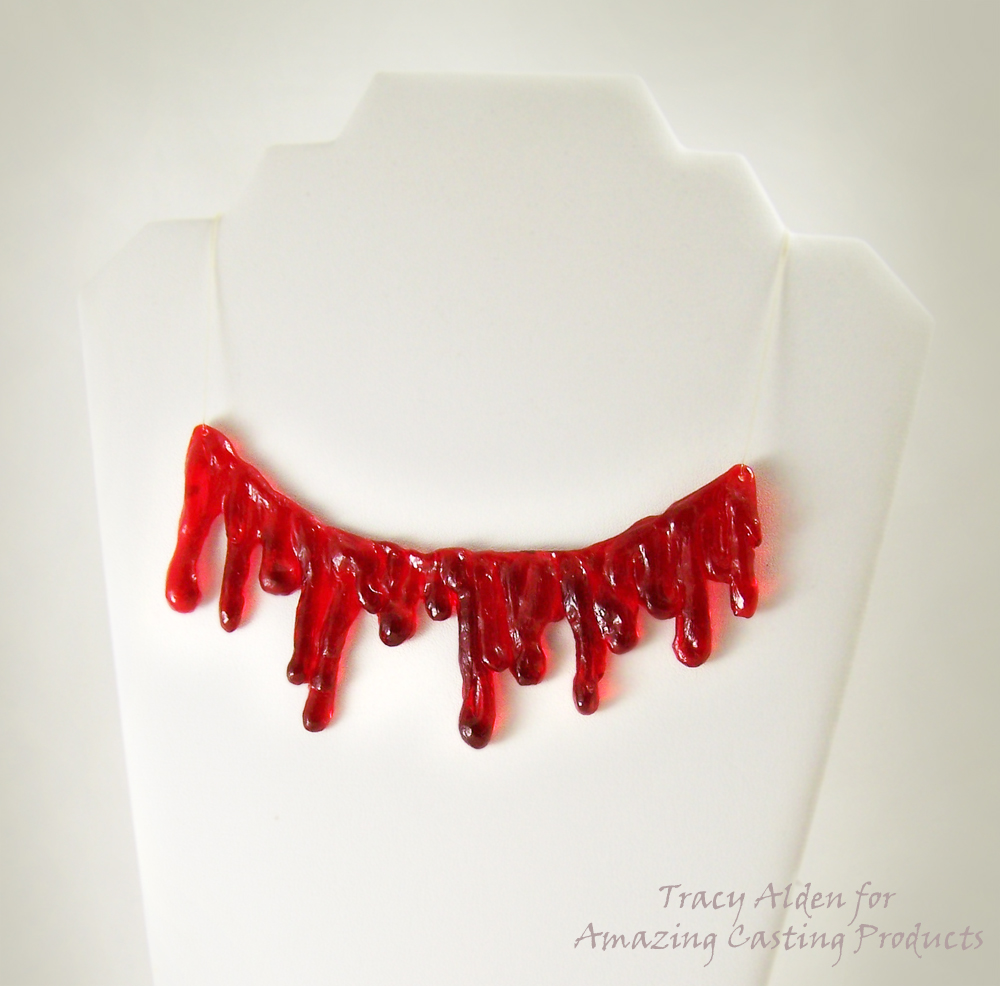
Running out of time on what Halloween costume to wear…. take a look at a Resin Blood Drip Necklace using Amazing Mold Rubber.
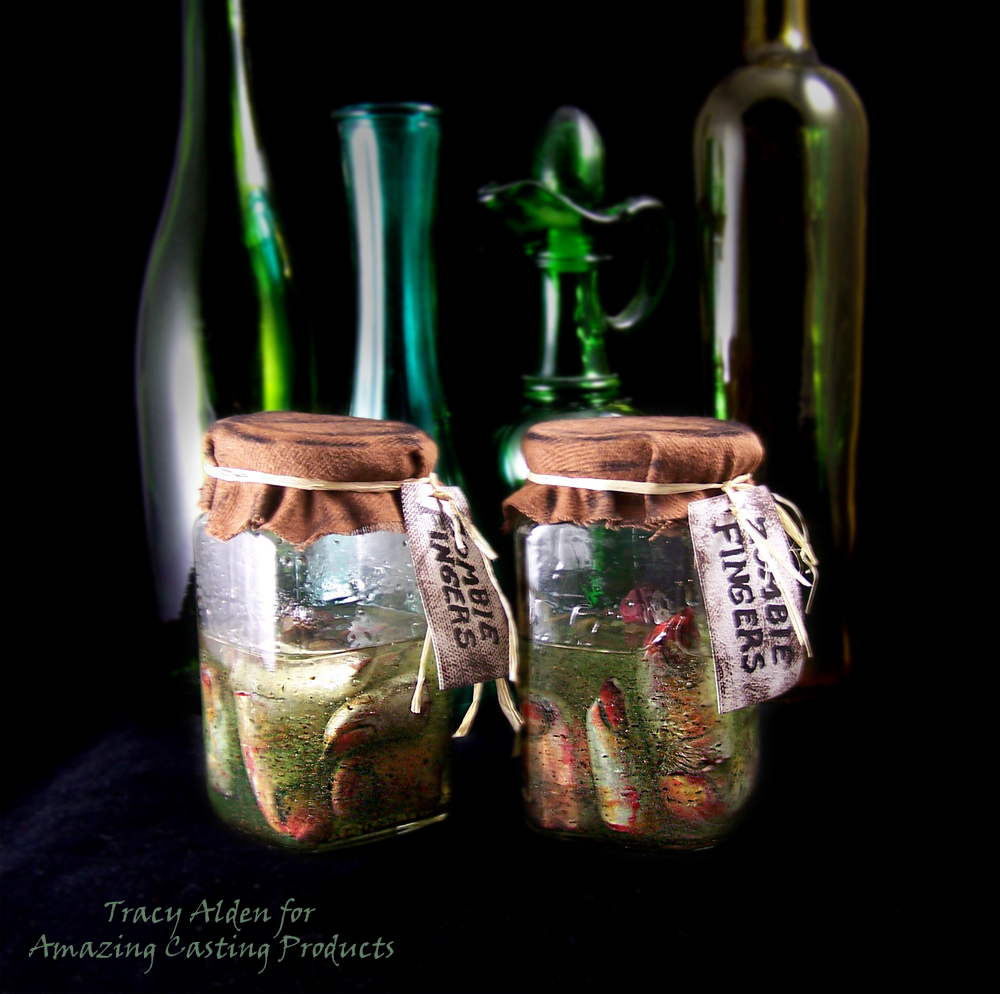
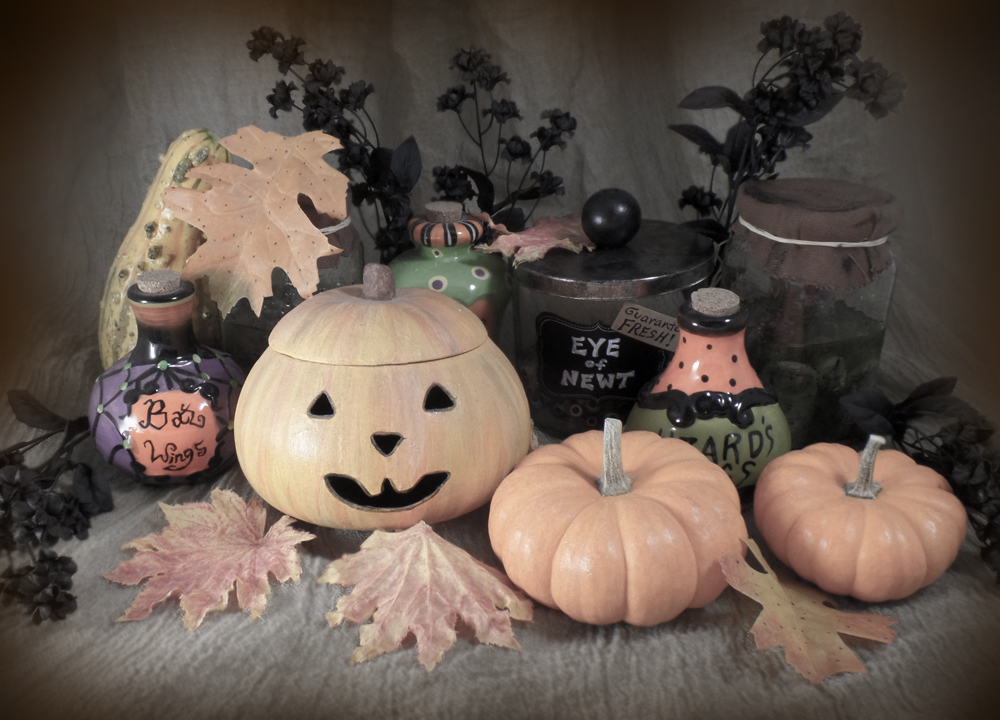
Need that perfect addition to a spooky apothecary? Try you hand at a upcycled Zombie Finger Apothecary Jar using Amazing Casting Products.
I hope sharing some of these projects has you mind a whirl with some Halloween craft project inspiration!
Until Next Time, Safe Travels!
Got a Monster Eye on You! Halloween Jewelry DIY
 Oh my goodness, it is already October! Things are flying by so quick with all of the work we are doing on our house! With most of the house packed up it was hard to do any arts and crafts. I was going stir crazy with everything I needed being packed up. Finally with more rooms being finished I could start unpacking and I was able to sneak out some beads and supplies to make a few Halloween inspired projects.
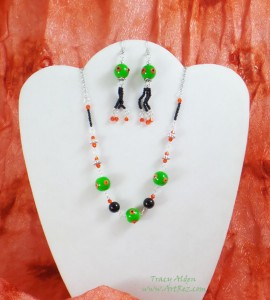
My first one is a simple and ghoulish Halloween jewelry project using a bracelet and earrings set from Fiona Accessories. I rather love their line of Halloween Jewelry Fiona Accessories carries, full of the classic colors and themes, with hand painted elements.
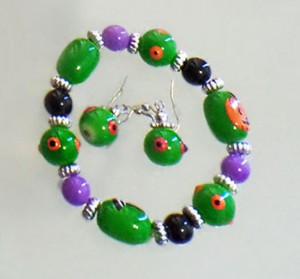
One of the pieces they carry is BR-2027 Painted Halloween Bracelet, with fun little green monster eye beads that got me thinking of turning it into a new jewelry set. Now not only does it have the awesome eyeball beads it also has very delicate hand painted beads of a pumpkin, witch’s hat and a ghost. I cut apart the bracelet and was careful to keep those beads for another project, they are just too cute.
Supplies:
Fiona Accessories BR-2027 Painted Halloween Bracelet
Needle and Flat head Nose Pliers
Silver tone jewelry eyepins and nailpins(21 gauge), chain, jewelry clasp and jumprings
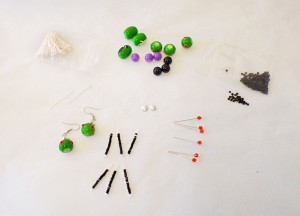
Orange crystal beads
Black Seed Beads
Spreading out my supplies on the table I separated the beads by shape and color. Using six eye pins I threaded on black seed beads, six nail pins I threaded on orange crystal beads and on two eyepins the eyeball beads.
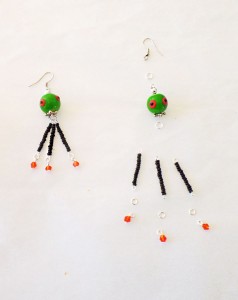
Carefully I snipped off the excess wire, and using round nose pliers I rolled the end of the wire into a loop. I repeated this with all of the jewelry wire with crystal, seed and eyeball beads on them. I opened up a jumpring with the flat nose pliers and put the jumpring through one of the crystal beads, now on a wire and the seed beads, on a wire. When I closed the jumpring with the pliers the bead became a beautiful dangle on the black seed bead length of wire. I repeated this for two more and attached them to one of the eyeball beads, creating little black “tentacles” growing out of the eyeball bead. I repeated this for the second earring.
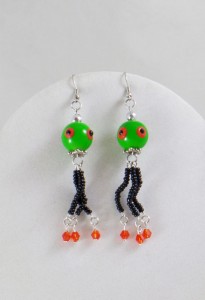
Once I assembled both earrings I slightly bent the jewelry wire the seed beads were on to give them to look of moving tentacles. As cute as they were I wanted to make a matching necklace.
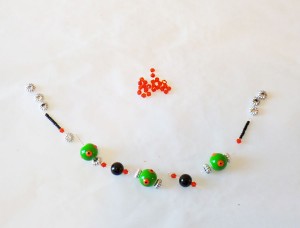
I placed the rest of the eyeball, black glass, seed, crystal and silver beads down to get an idea for the necklace layout. Using more silver eye pins I threaded on the beads, snipped off the excess wire, and using round nose pliers I rolled the end of the wire into a loop. I connected each piece to the next with more jumprings, linking all of the pieces together and added a jewelry clasp at the end to finish off the necklace.
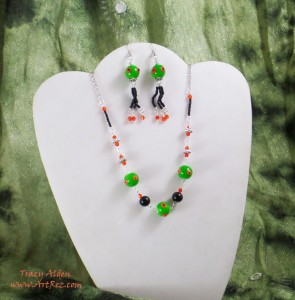
Now I have a fun and freaky monster jewelry set! What might you make with your favorite Halloween themed beads? 🙂
Until next time, safe travels!Halloween crafts and Pumpkin Harvest!
It has been a very long month and seemed to have gone by so quickly. I never seem to have enough time to get all of the arts and crafts I want to get done for Halloween. There are so many directions you can go to be creative for Halloween: home decor, themes, costumes and accessories. Jewelry is thankfully one of those crafts that is easy to make, even with time constraints. I ended up finding this perfect twisted tree pendant from Blue Moon Beads. It had a silver bird dangle attached to the tree; while cute it did not lend well to a Halloween theme, so I removed it and started to brain storm. I wanted to make a more classy addition to a witch costume. Going with the classic idea of poison apples, I started to rummage through my glass and crystal beads.

“The wicked tree” ended up being simple to make but classical in design. I thought blood red crystals would add the needed flash of color with a touch of sparkle to remind of the ruby red but deadly apples.Now still going with the Halloween theme, I bring you to my garden. As I noted in my last post pumpkins have been a big theme for me this season. For me Halloween is one of the best times to showcase this lovely squash. This year I attempted my first try at a completely organic pumpkin patch. Starting with only homemade organic compost and organic seeds I ended up planting 12 seedlings. Traditionally you want to plant pumpkins no later than June, I ended up planting them in the beginning of July but they still came out wonderful. I picked a small variety called New England Pie. This is a classic traditional heirloom pie pumpkin on the East Coast. They are small and usually only weigh a few pounds.

Quickly they took over my little raised garden patch and started to bloom! The bees did the rest and little pumpkins started to form!

I was so happy to harvest the first pumpkin of the season. But many more started to turn orange….
I have many more still turning orange on the vine but I was able to harvest these. They have to cure for 10 days but they look wonderful as Halloween decor until I can cook them up. 🙂My family can’t wait for them to be ready to eat and they are already planning on what to make. One of my favorite recipes to use for pumpkins besides stuffed pumpkin is Olive Oil Pumpkin Bread. At first it might sound a bit odd but it is a wonderful recipe to use. The flavor is light but the bread is rich in nature, perfect to give as a gift.
Wishing everyone a Happy and Safe Halloween! Until next time, Safe Travels!

Ancient and Contemporary Inspired Artistry