- Allegory Gallery, Art Journal, Beadalon, Beading, Doodles, Drawing, Green Girl Studios, Jewelry, Resin, Throwback Thursday
An Artistic Year in Review
This year has been a trial by fire for pretty much most of us on this little blue dot of a planet we call home. Like many I had intended to do so much more but this year turned out very different.
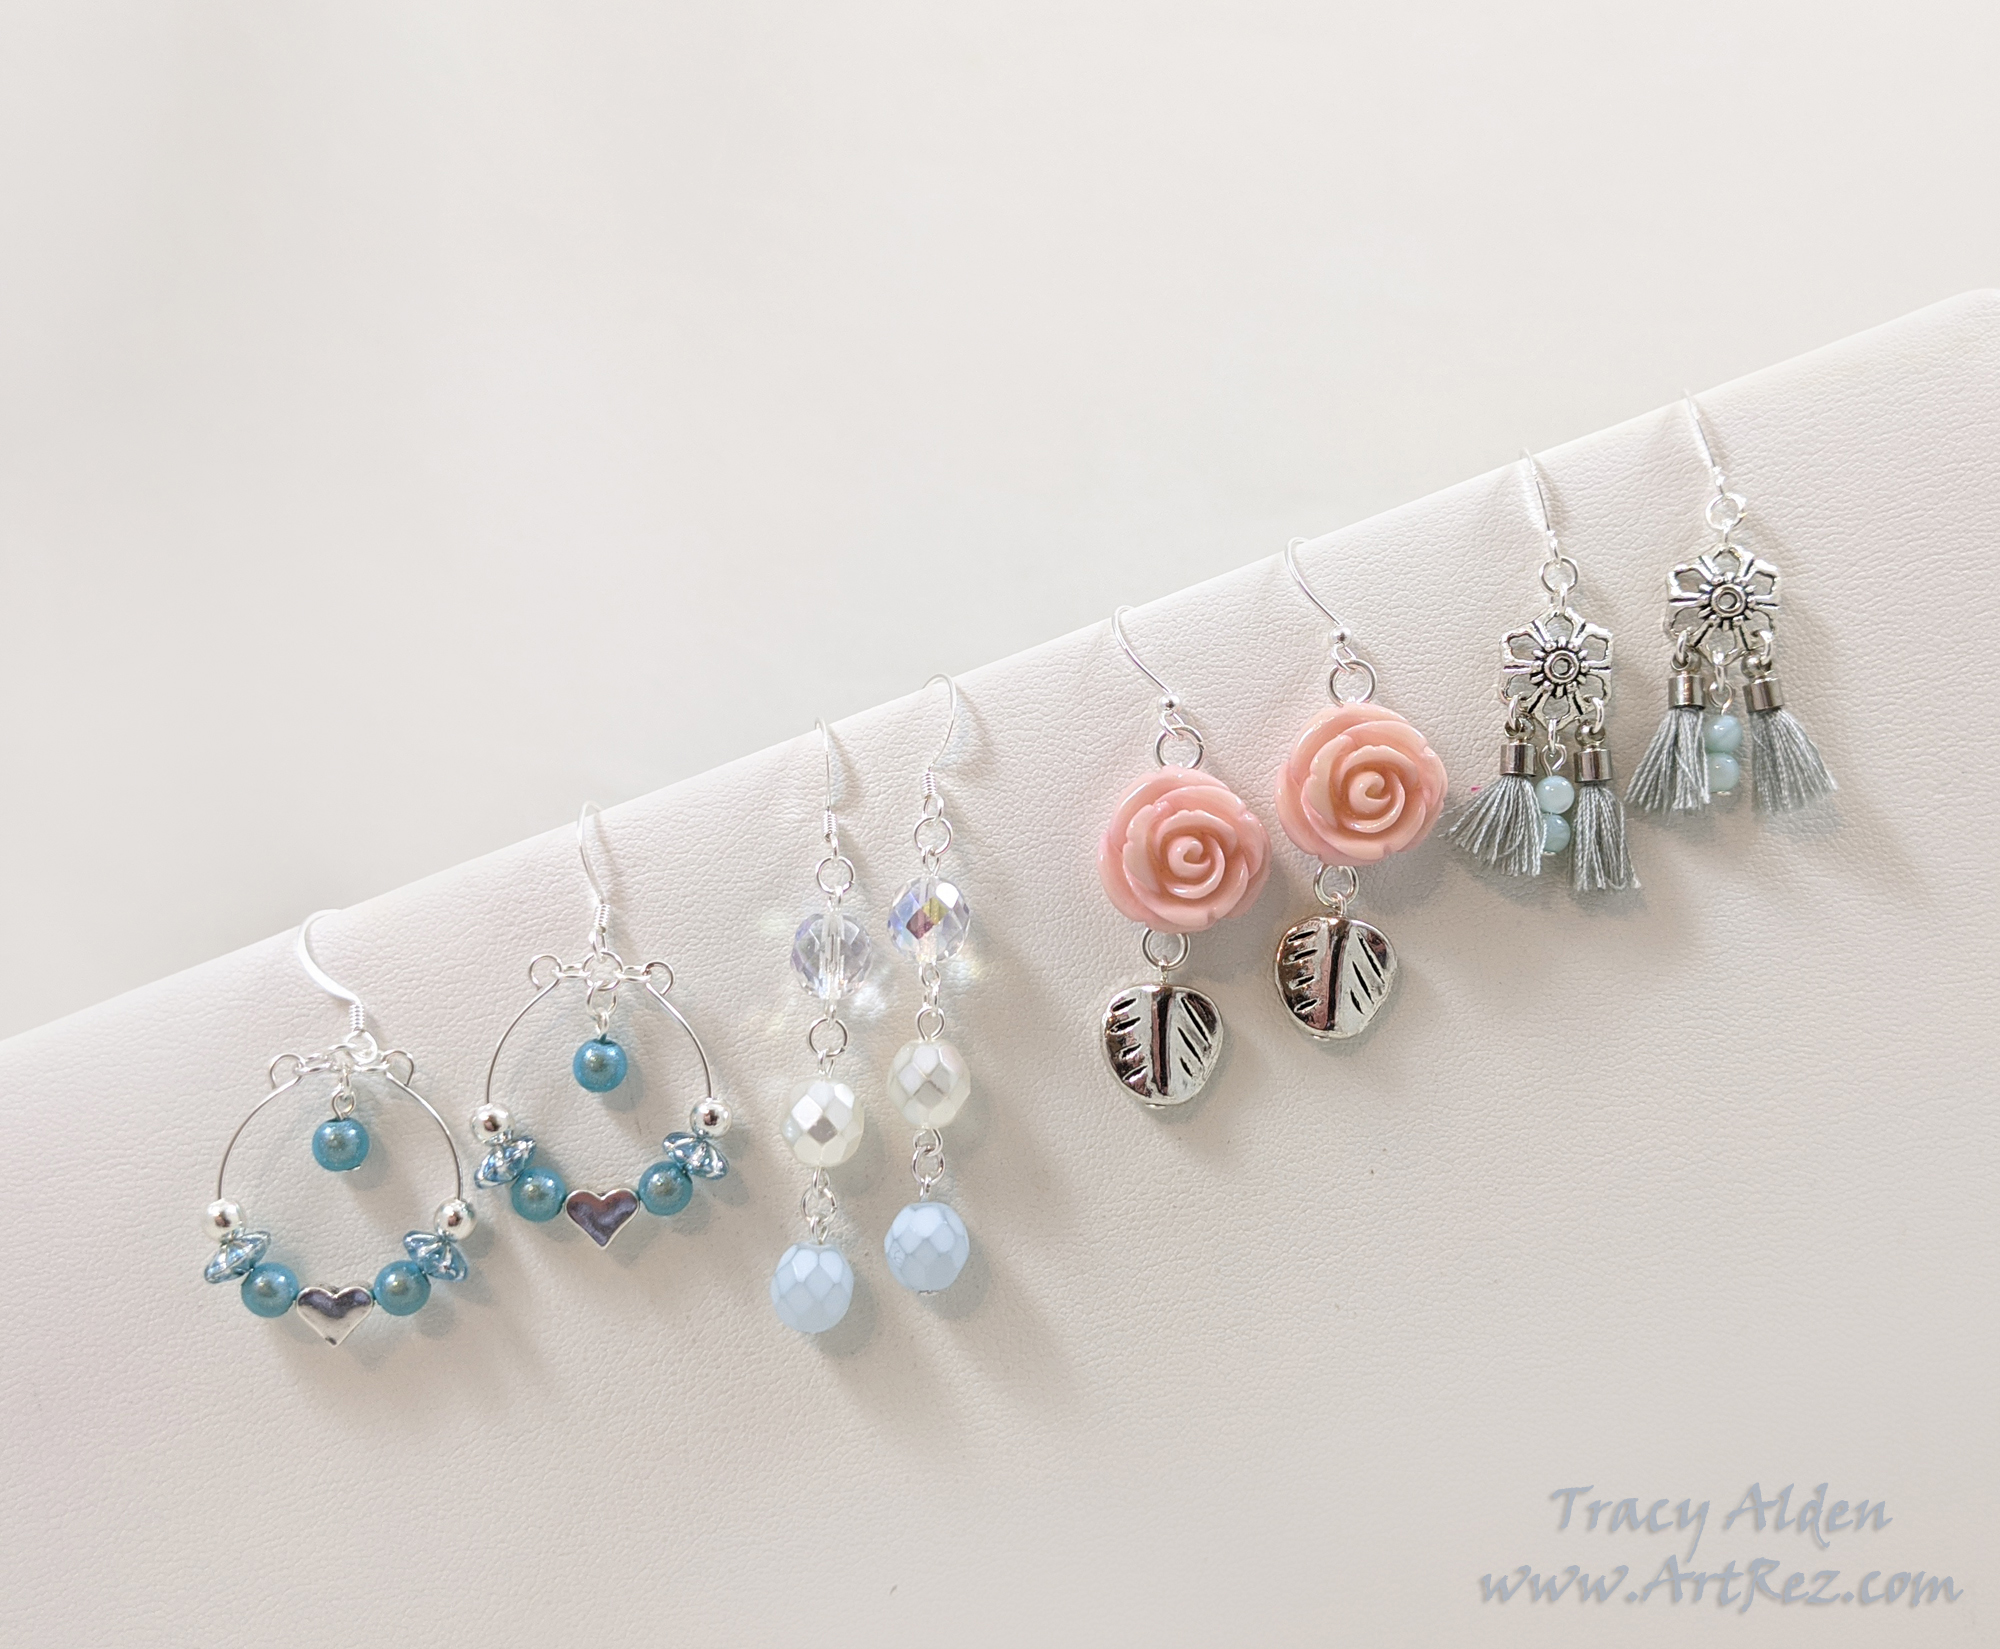
We moved once in the earlier portion of this year, selling our home of 12 years, moving into my mother’s house, as we were having difficulty finding a new home. It was a hectic time but one of my little pleasures was the continued subscription to Jesse James Beads‘s Magical Mystery Bead Boxes. Enjoying the colors and shapes, pushing my creative style into different directions.
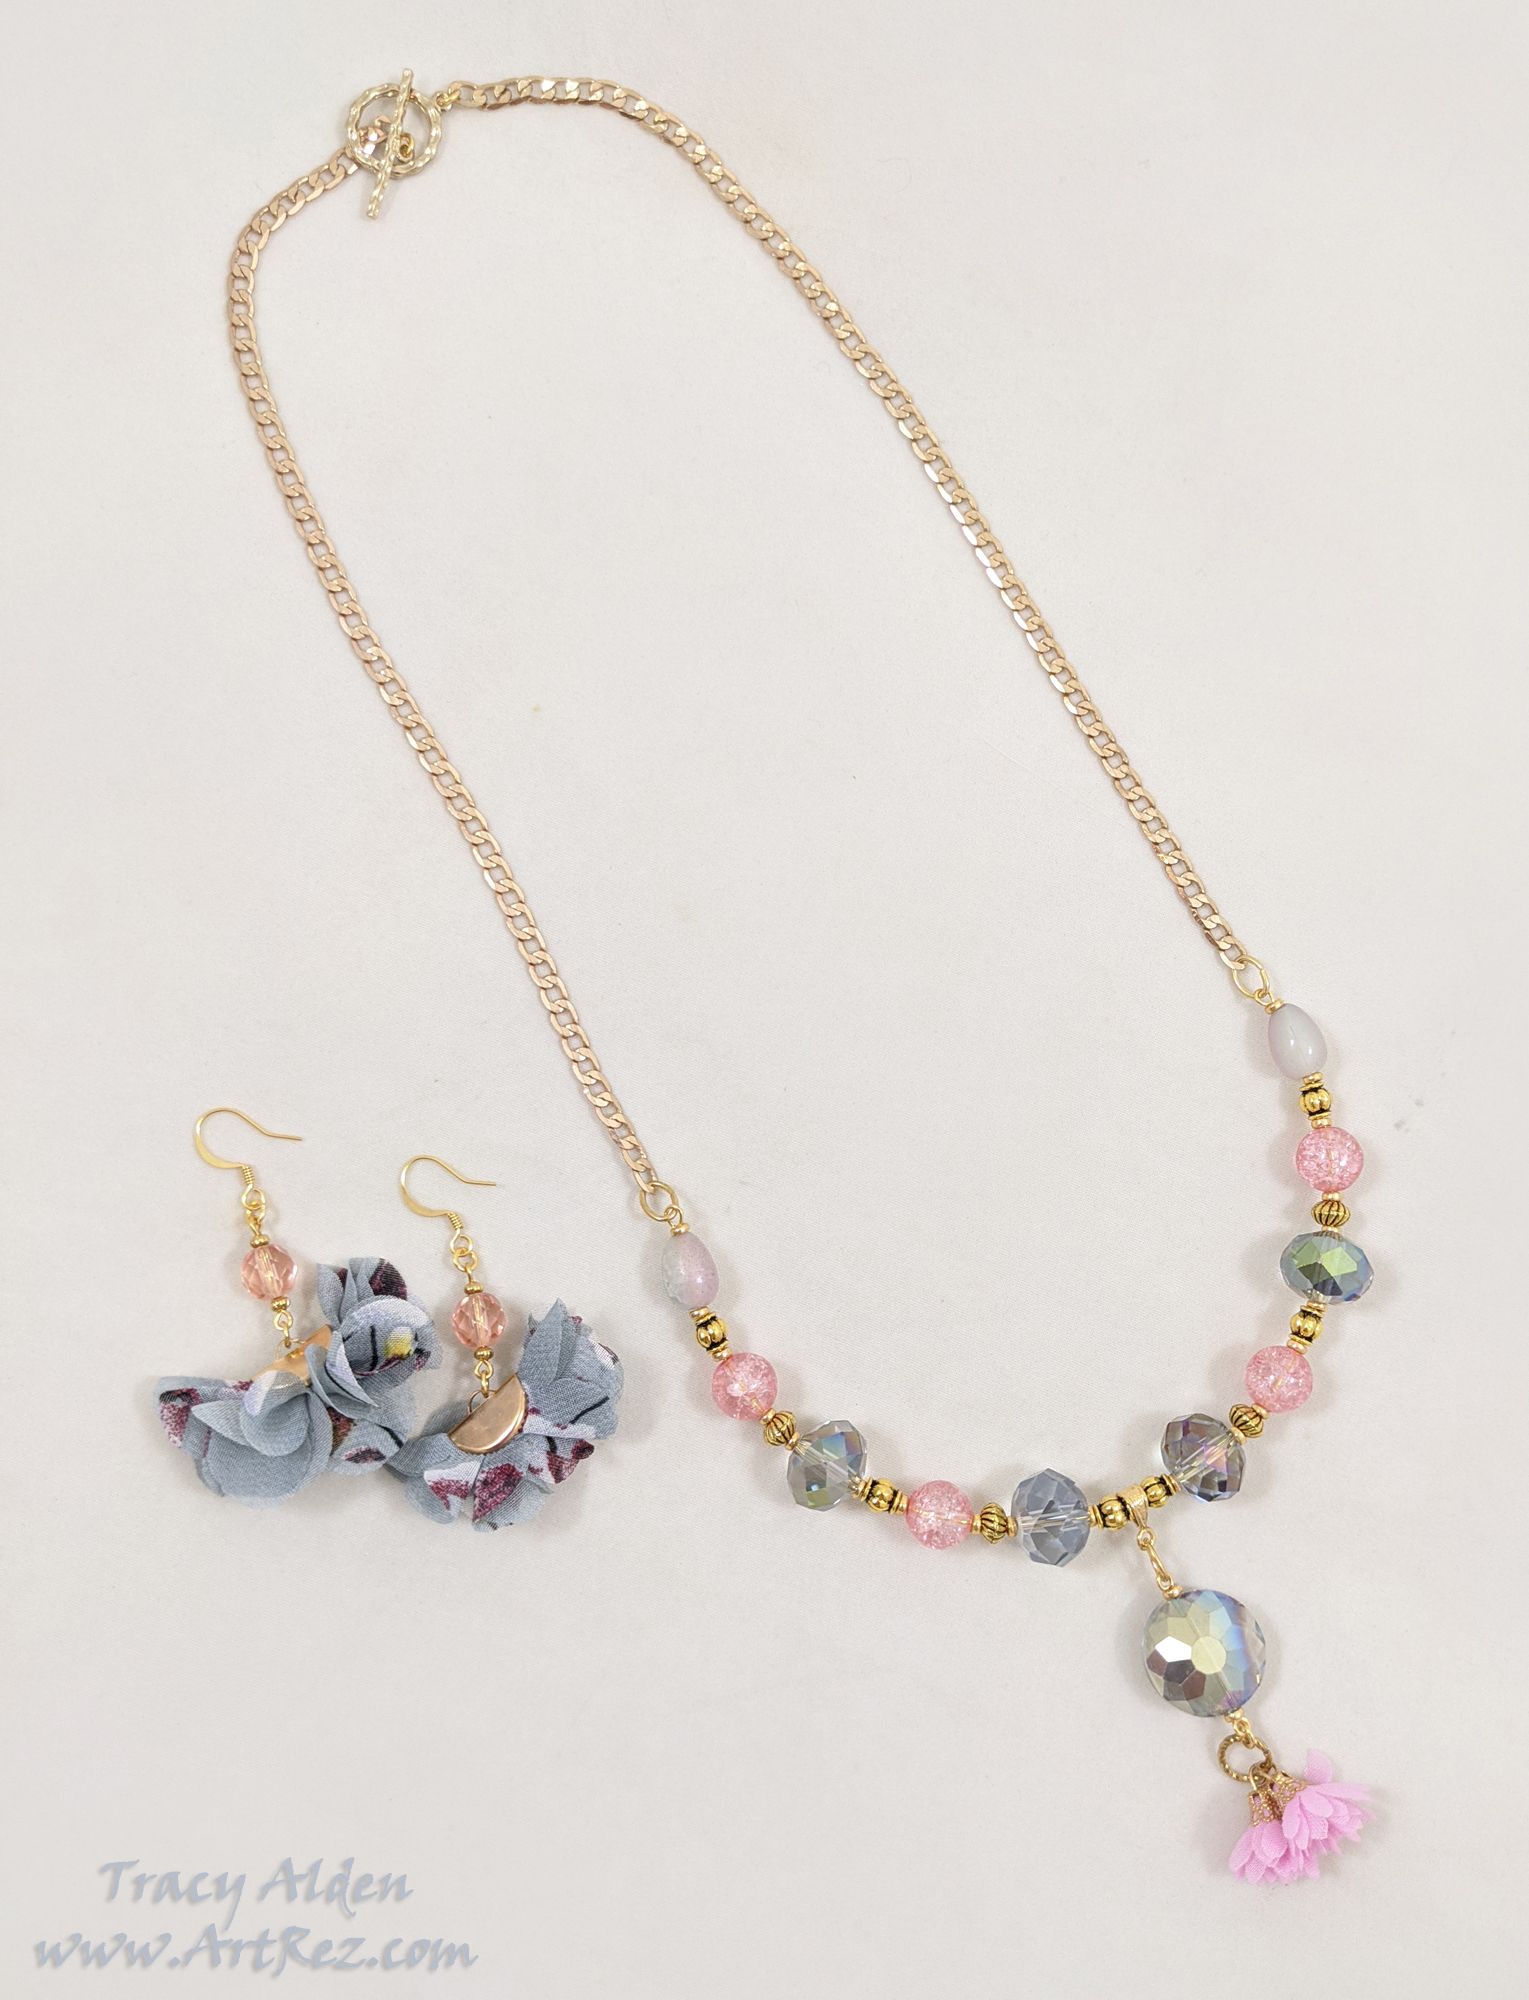
With a rainy Spring in full swing, I took inspiration from my potted garden to create different grey and pink toned jewelry pieces. My mother’s house went up for sale and we started packing for a second time.
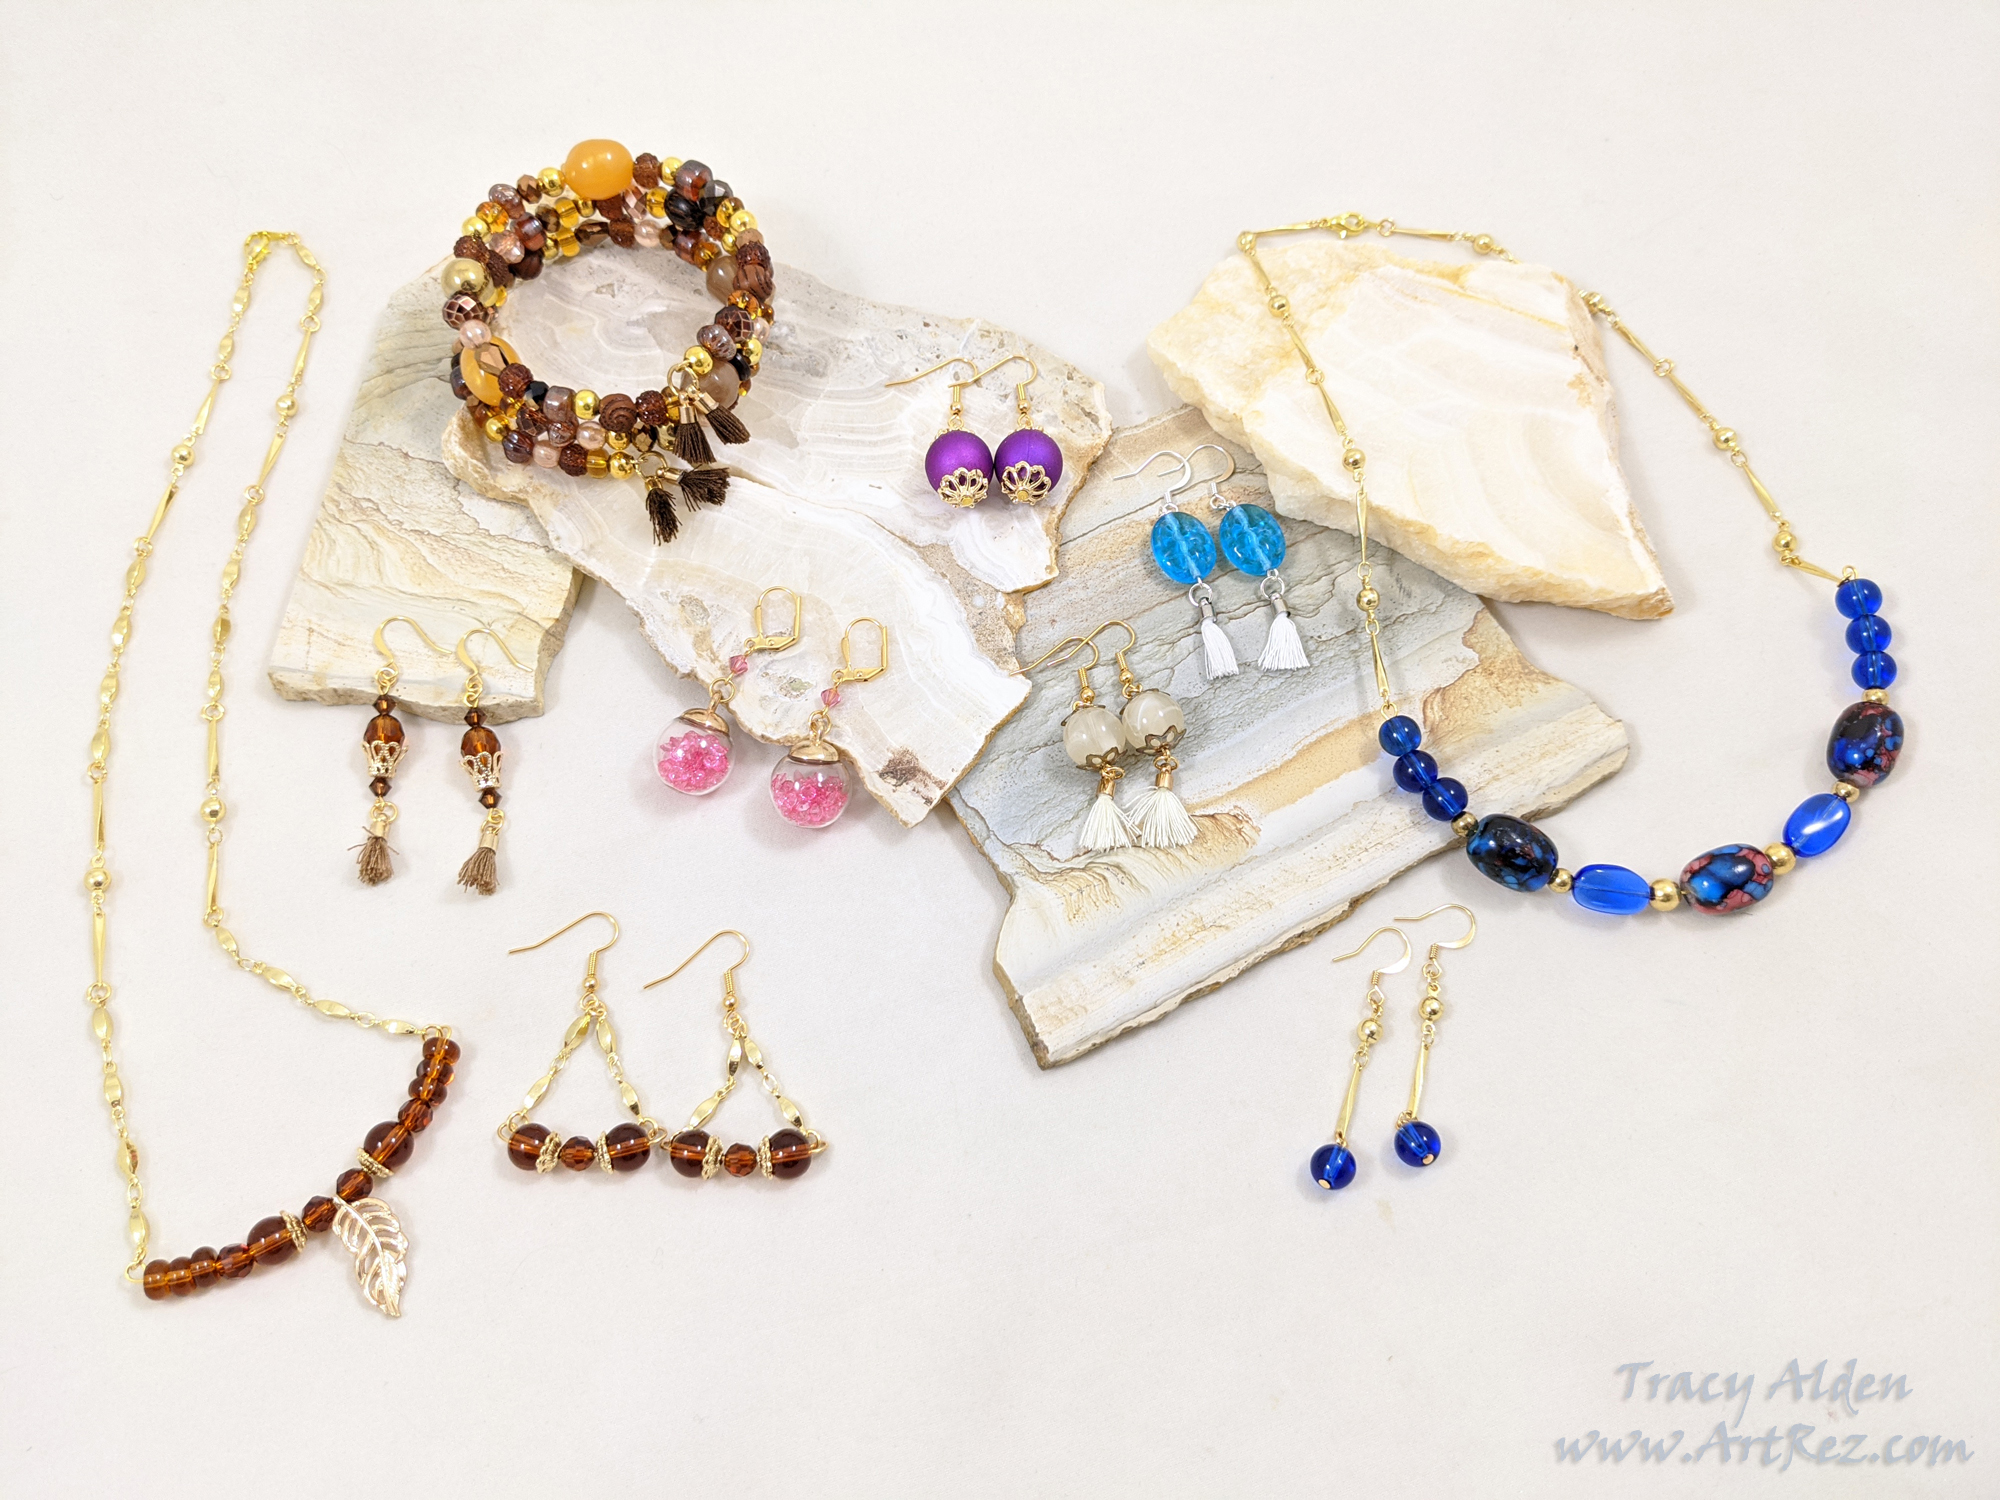
When shelter in place orders came, everything was stuck in a holding pattern. Not knowing what to do, but not being able to do much of anything I found myself going to artwork for solace. Jesse James Beads released a series of Quarantine Beading Kits, which I was eager to buy and work on. With some findings from Beadalon I was able to make an early start on gifts for the Holidays.
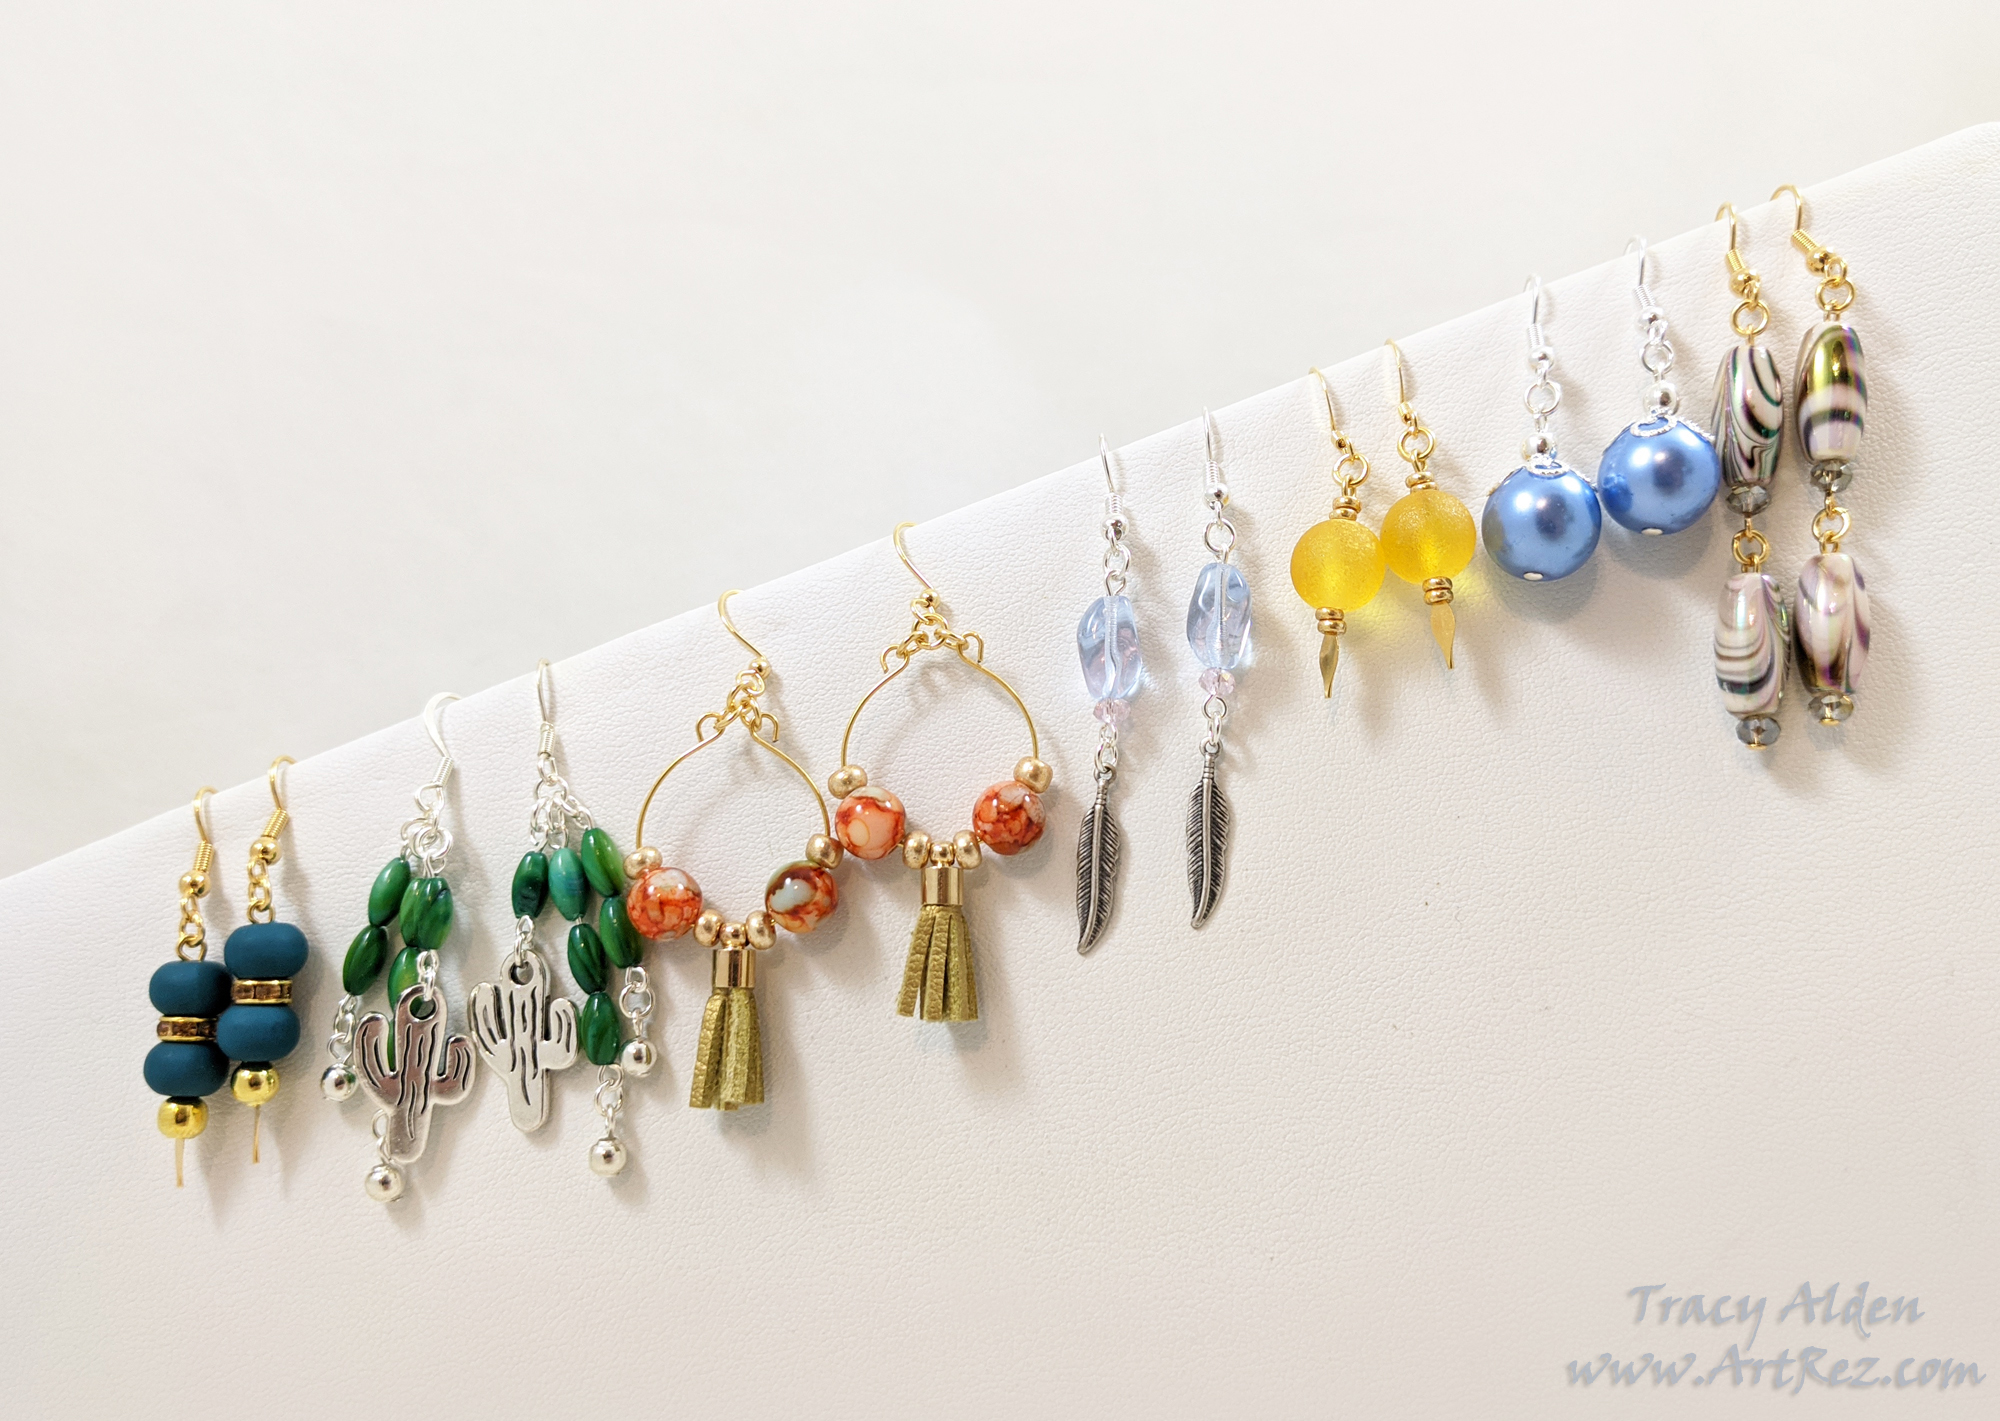
I would work on making art, day and night, giving my nervous energy an outlet. Desert sunrises and the blooming wildflowers continued to be an inspiration. Sprinkled with making masks for my family and packing up the last of our things made for very busy days.
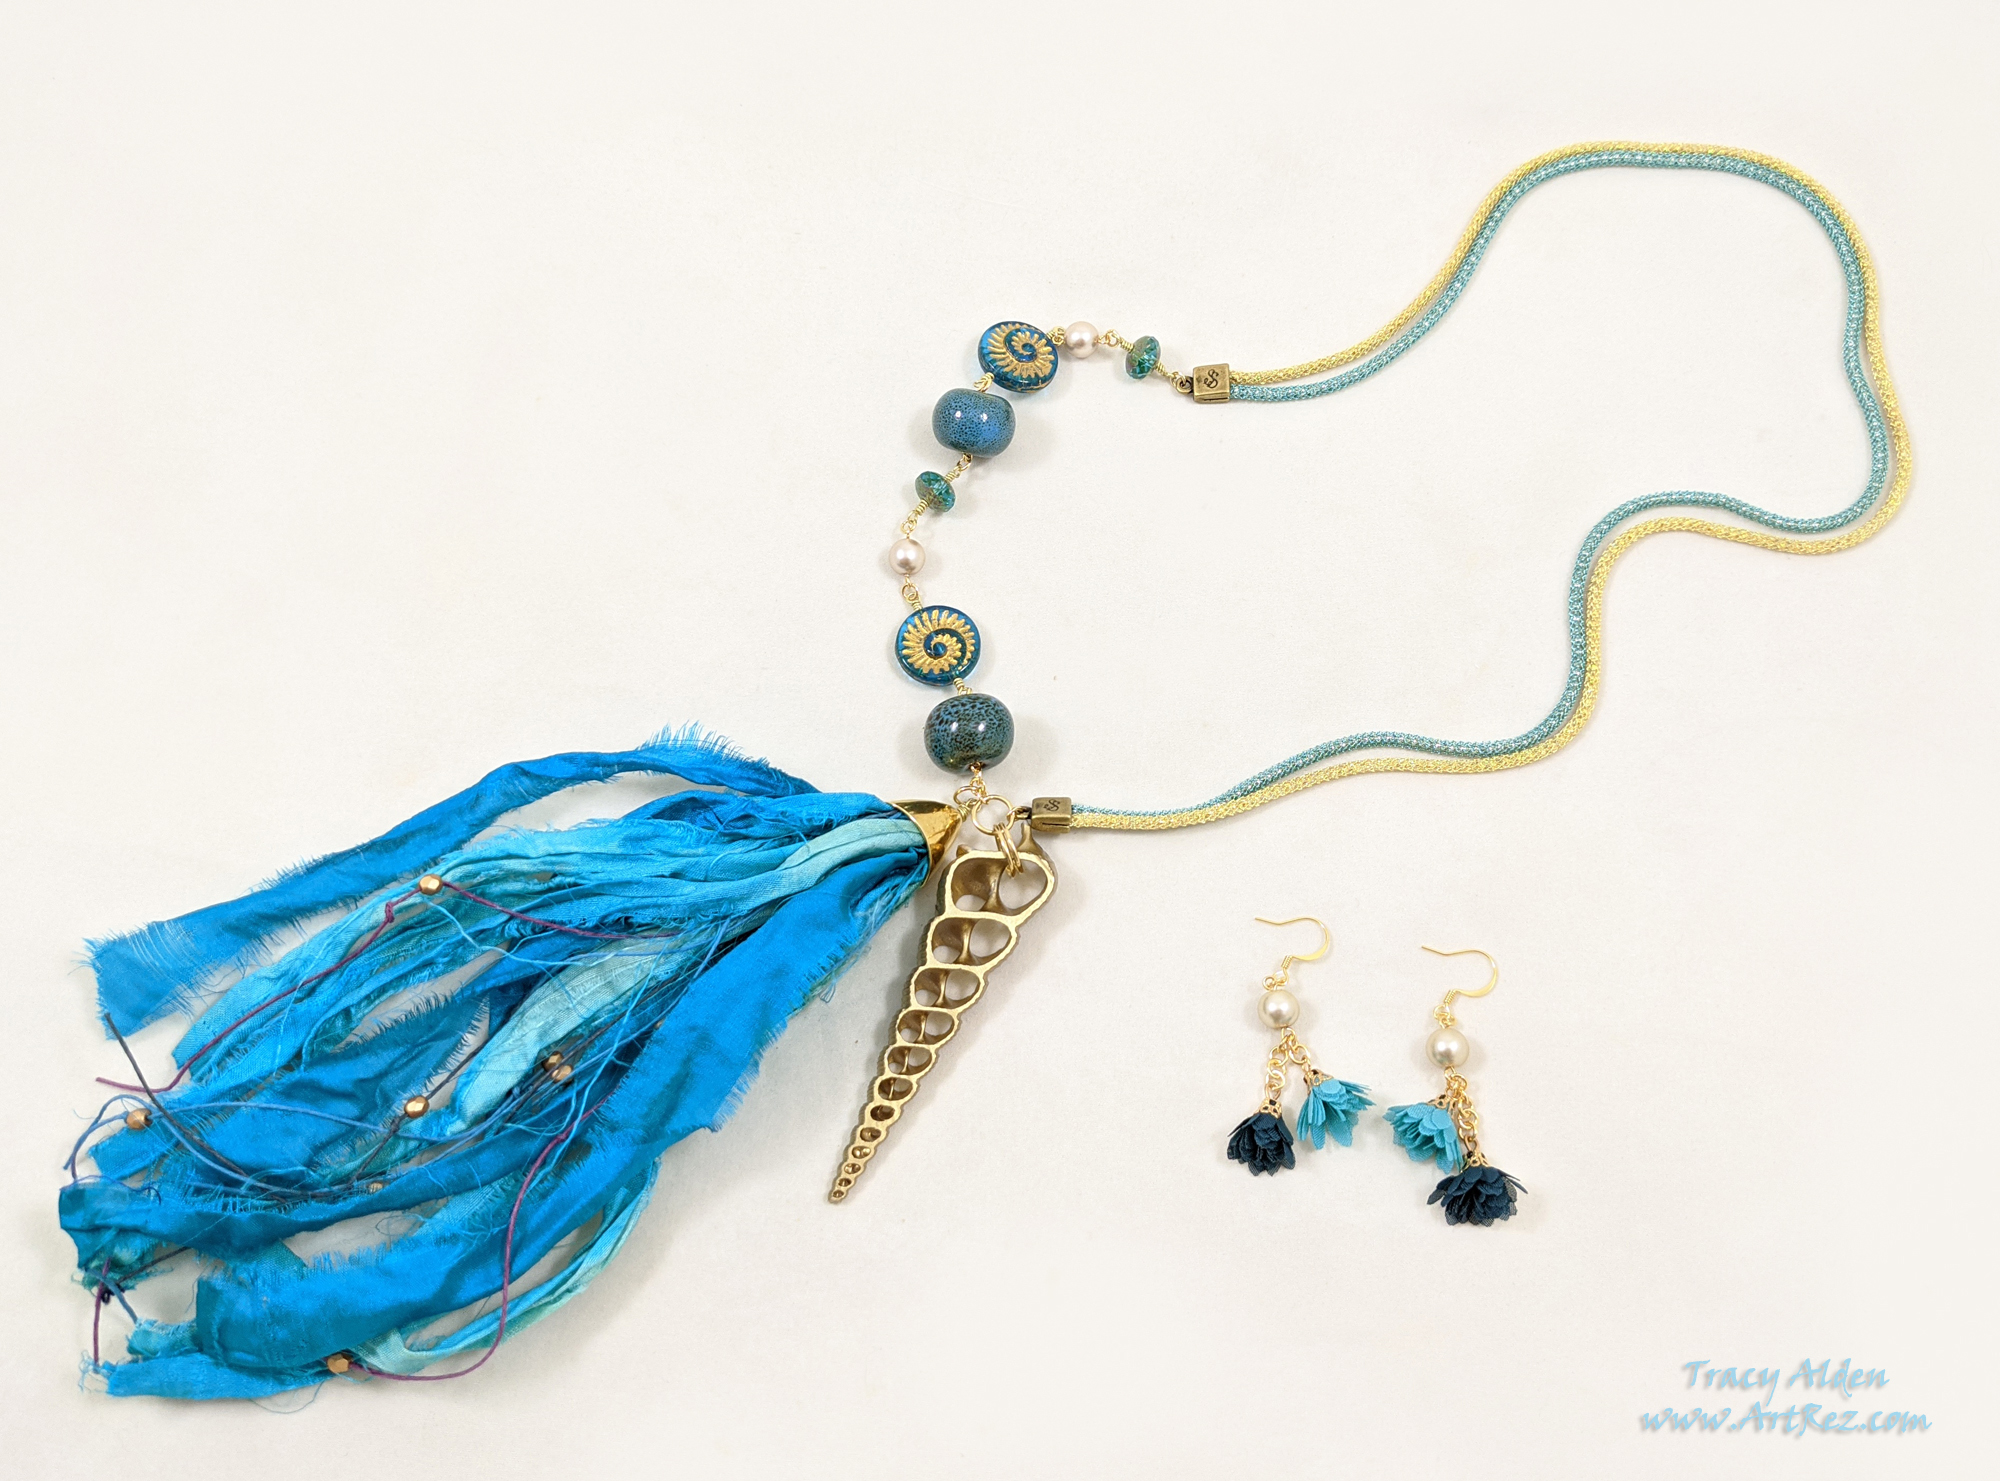
Silver Silk and More released a special Atlantis kit. Filled with golds, blues and greens it was a stunning collections of supplies. I found a sense of calm in a sea of uncertainty by creating these pieces while listening to the rain at night.
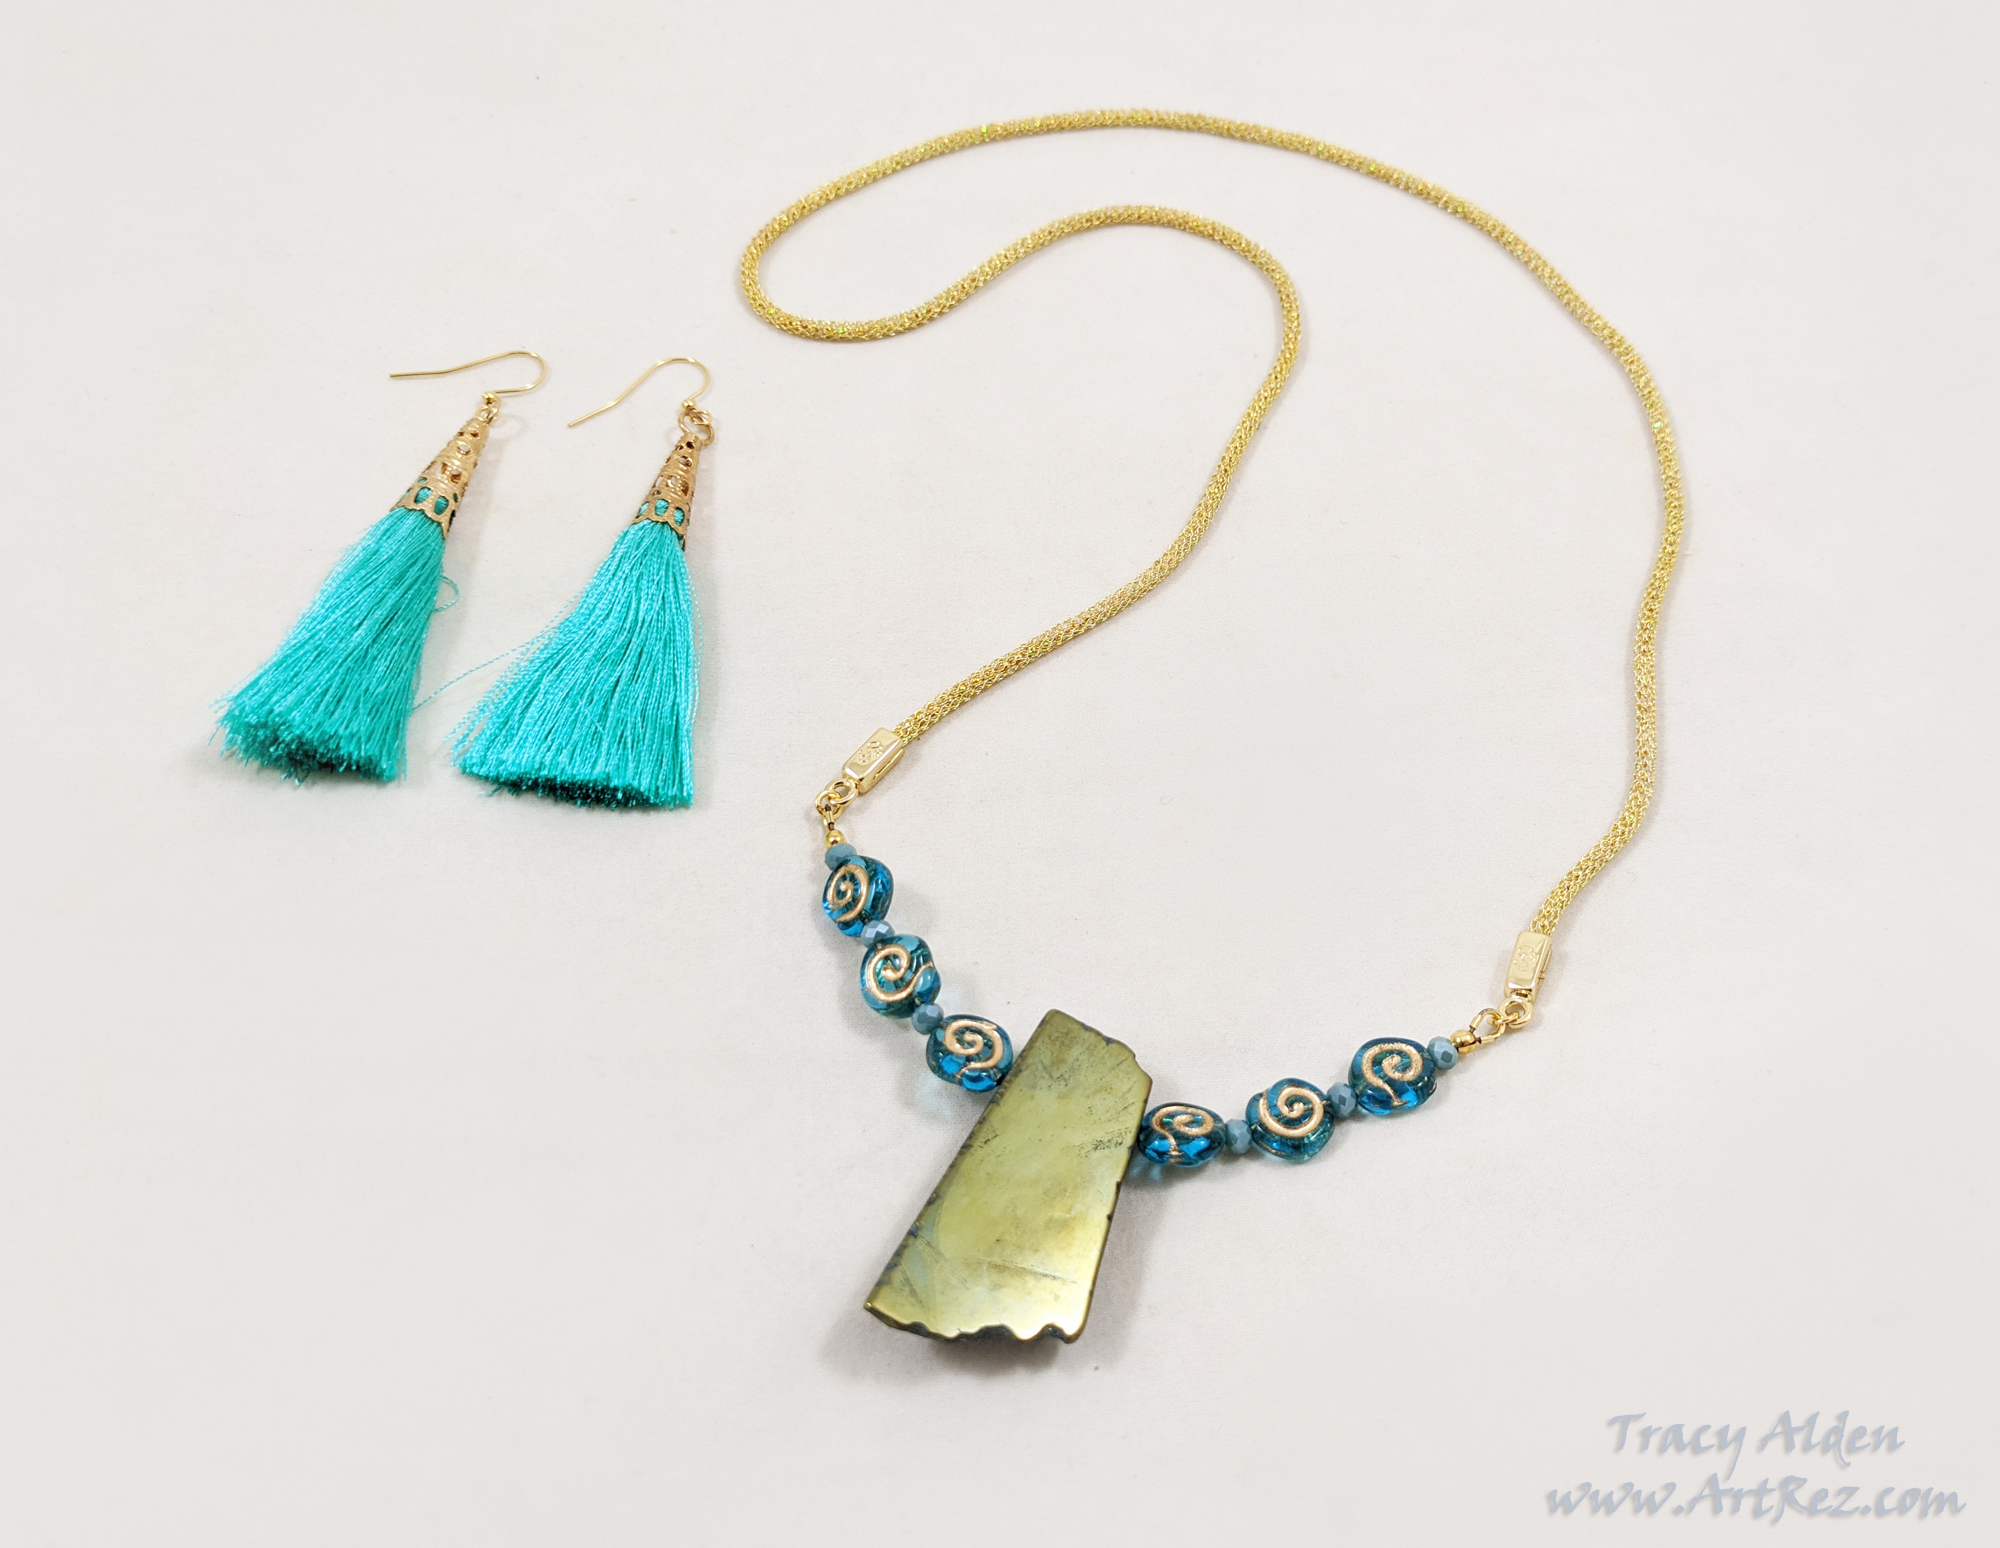
This set, that I ended up keeping for myself, would end up being one of the last pieces I would make before we moved again. I was getting increased tremors in my hands, more problems with my ability to walk, use my hands and losing feeling in my limbs. Once we moved a third time, my doctors were able to schedule surgery to work on my spine.
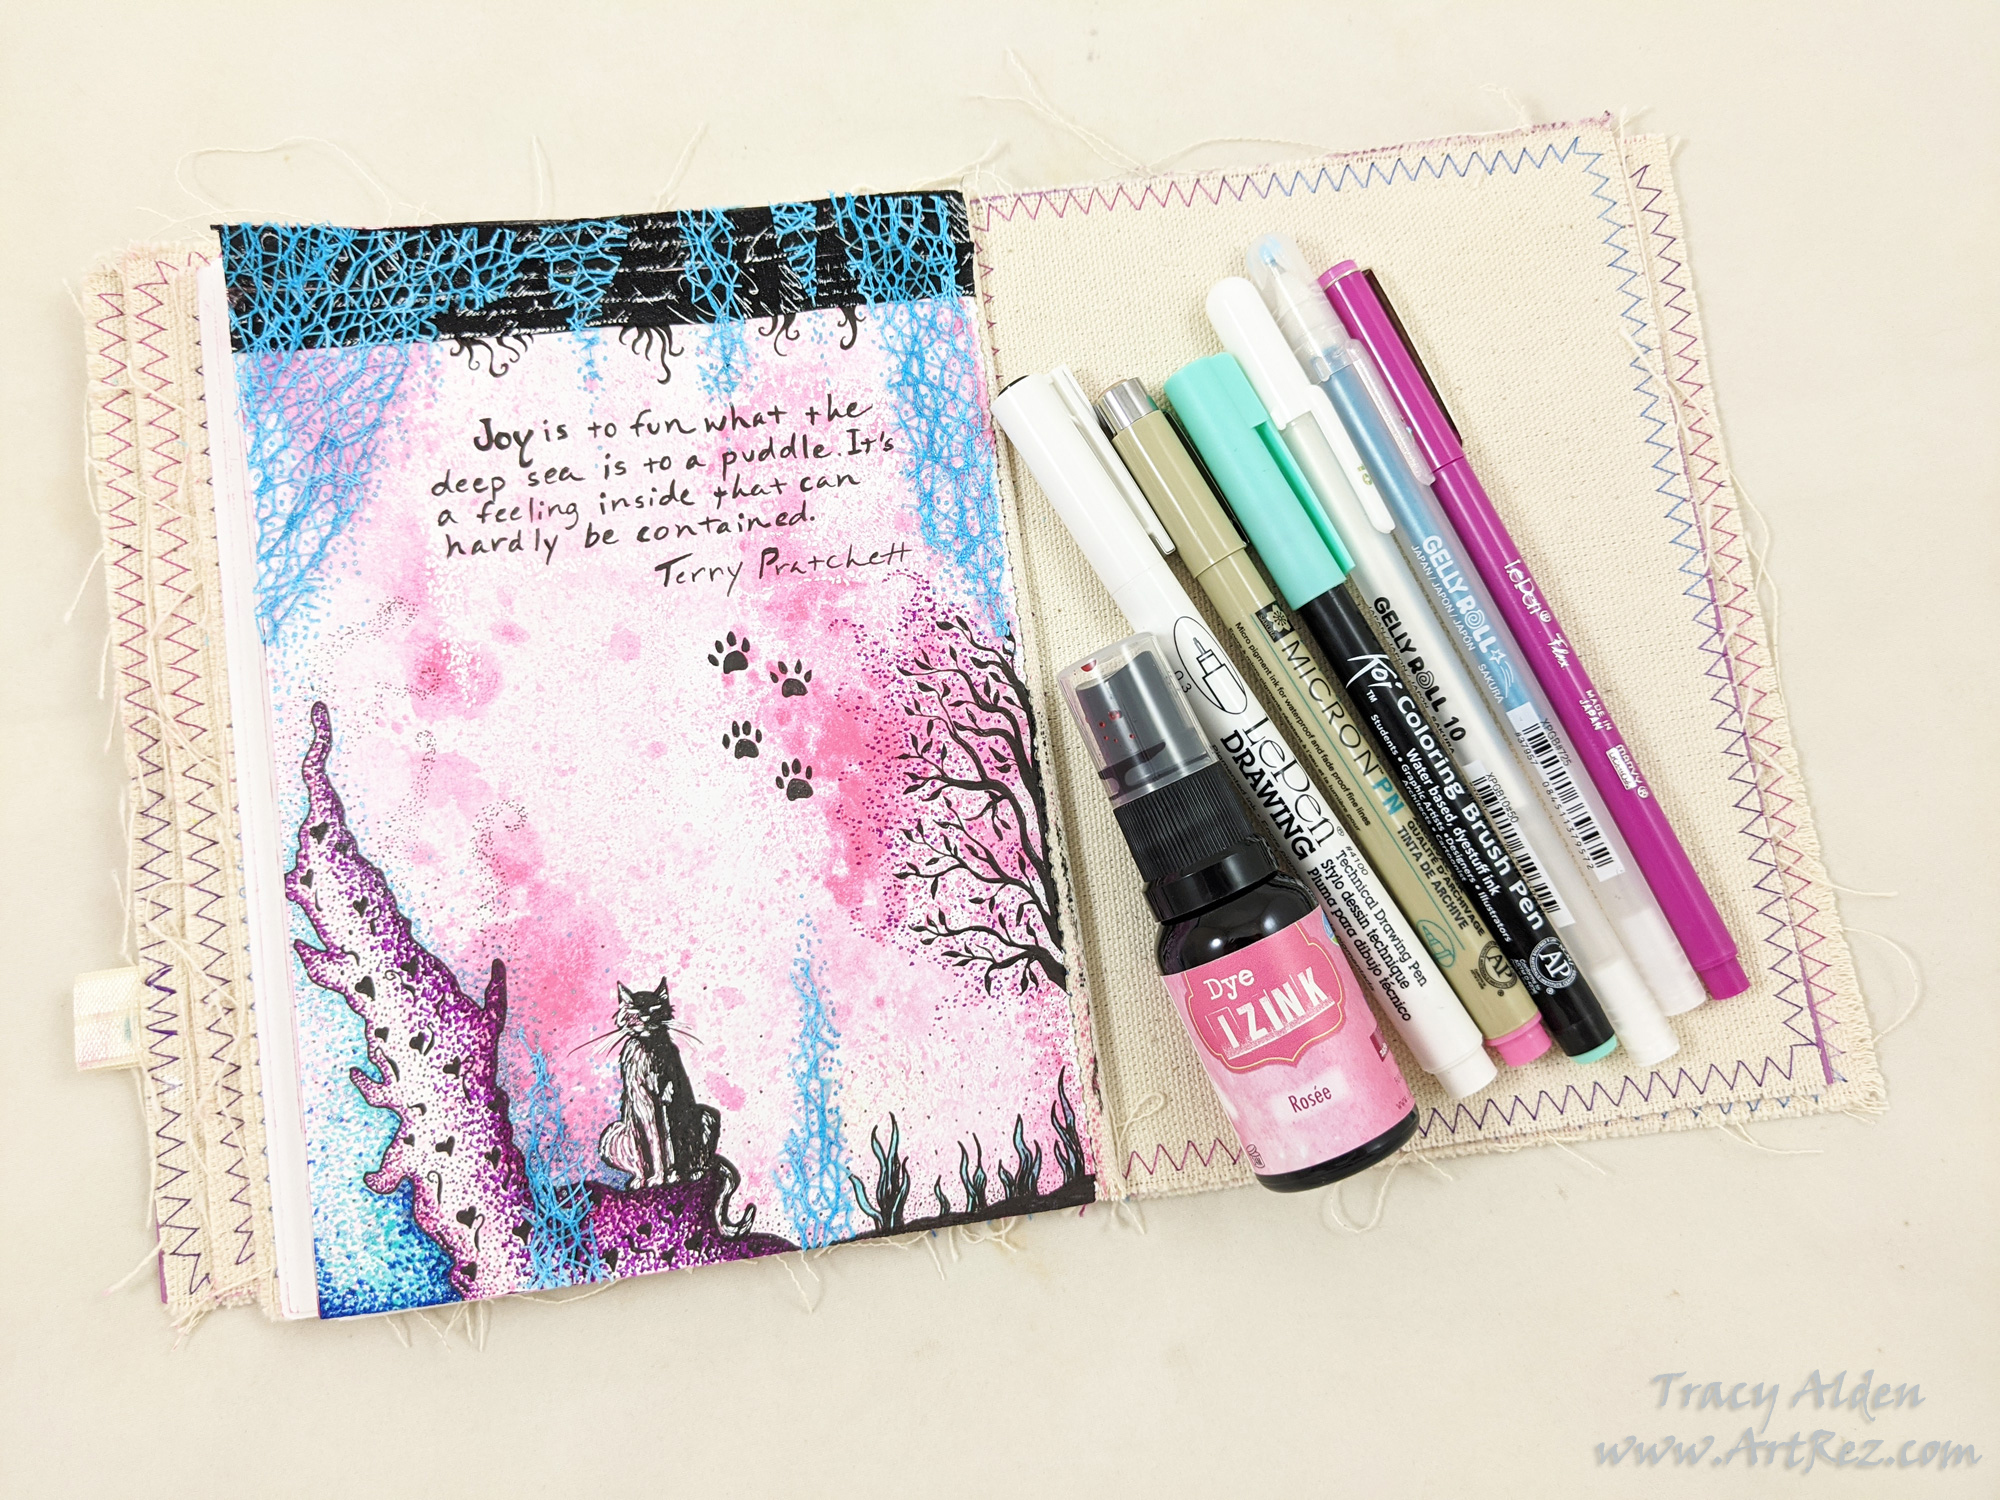
Recovery was slow but I could already feel my hands and feet, and walk with reduced pain. I started using wonderful journals from Rita Barakat as therapy and way to start testing my dexterity. At first it was simple doodles but it felt great to be able to hold tools without shaking too much.
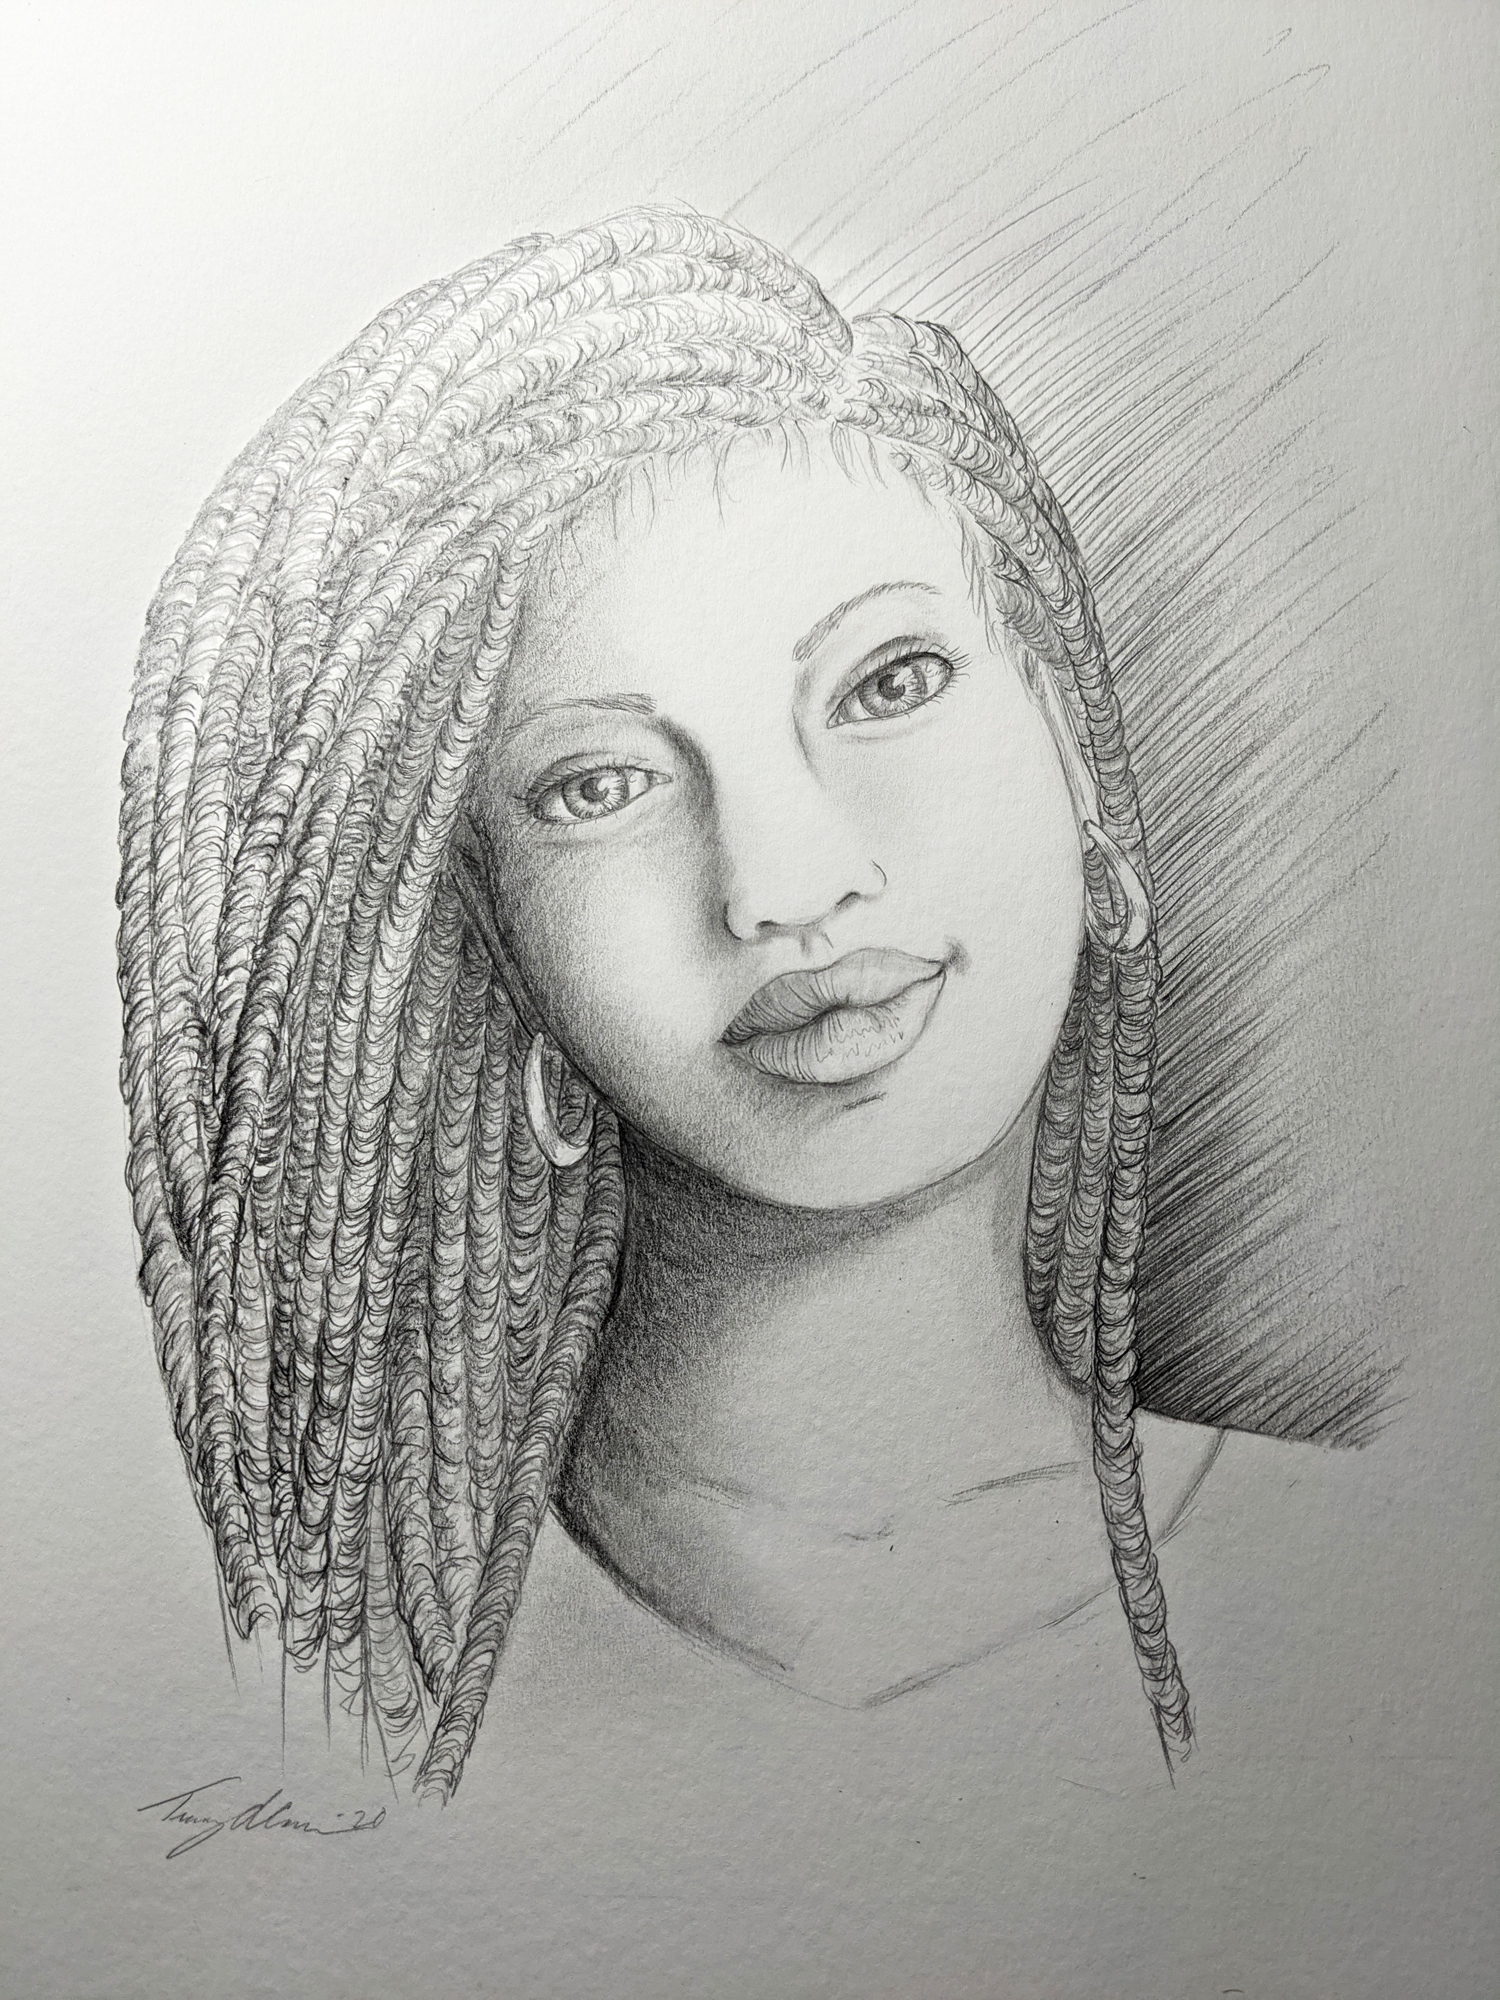
A first true attempt at sketching after surgery, “Hope”, a goddess of Fall and the ever changing future. Originally I was going to try watercolor but found out I wasn’t steady enough, I went back to an old comfort, pencil illustration.
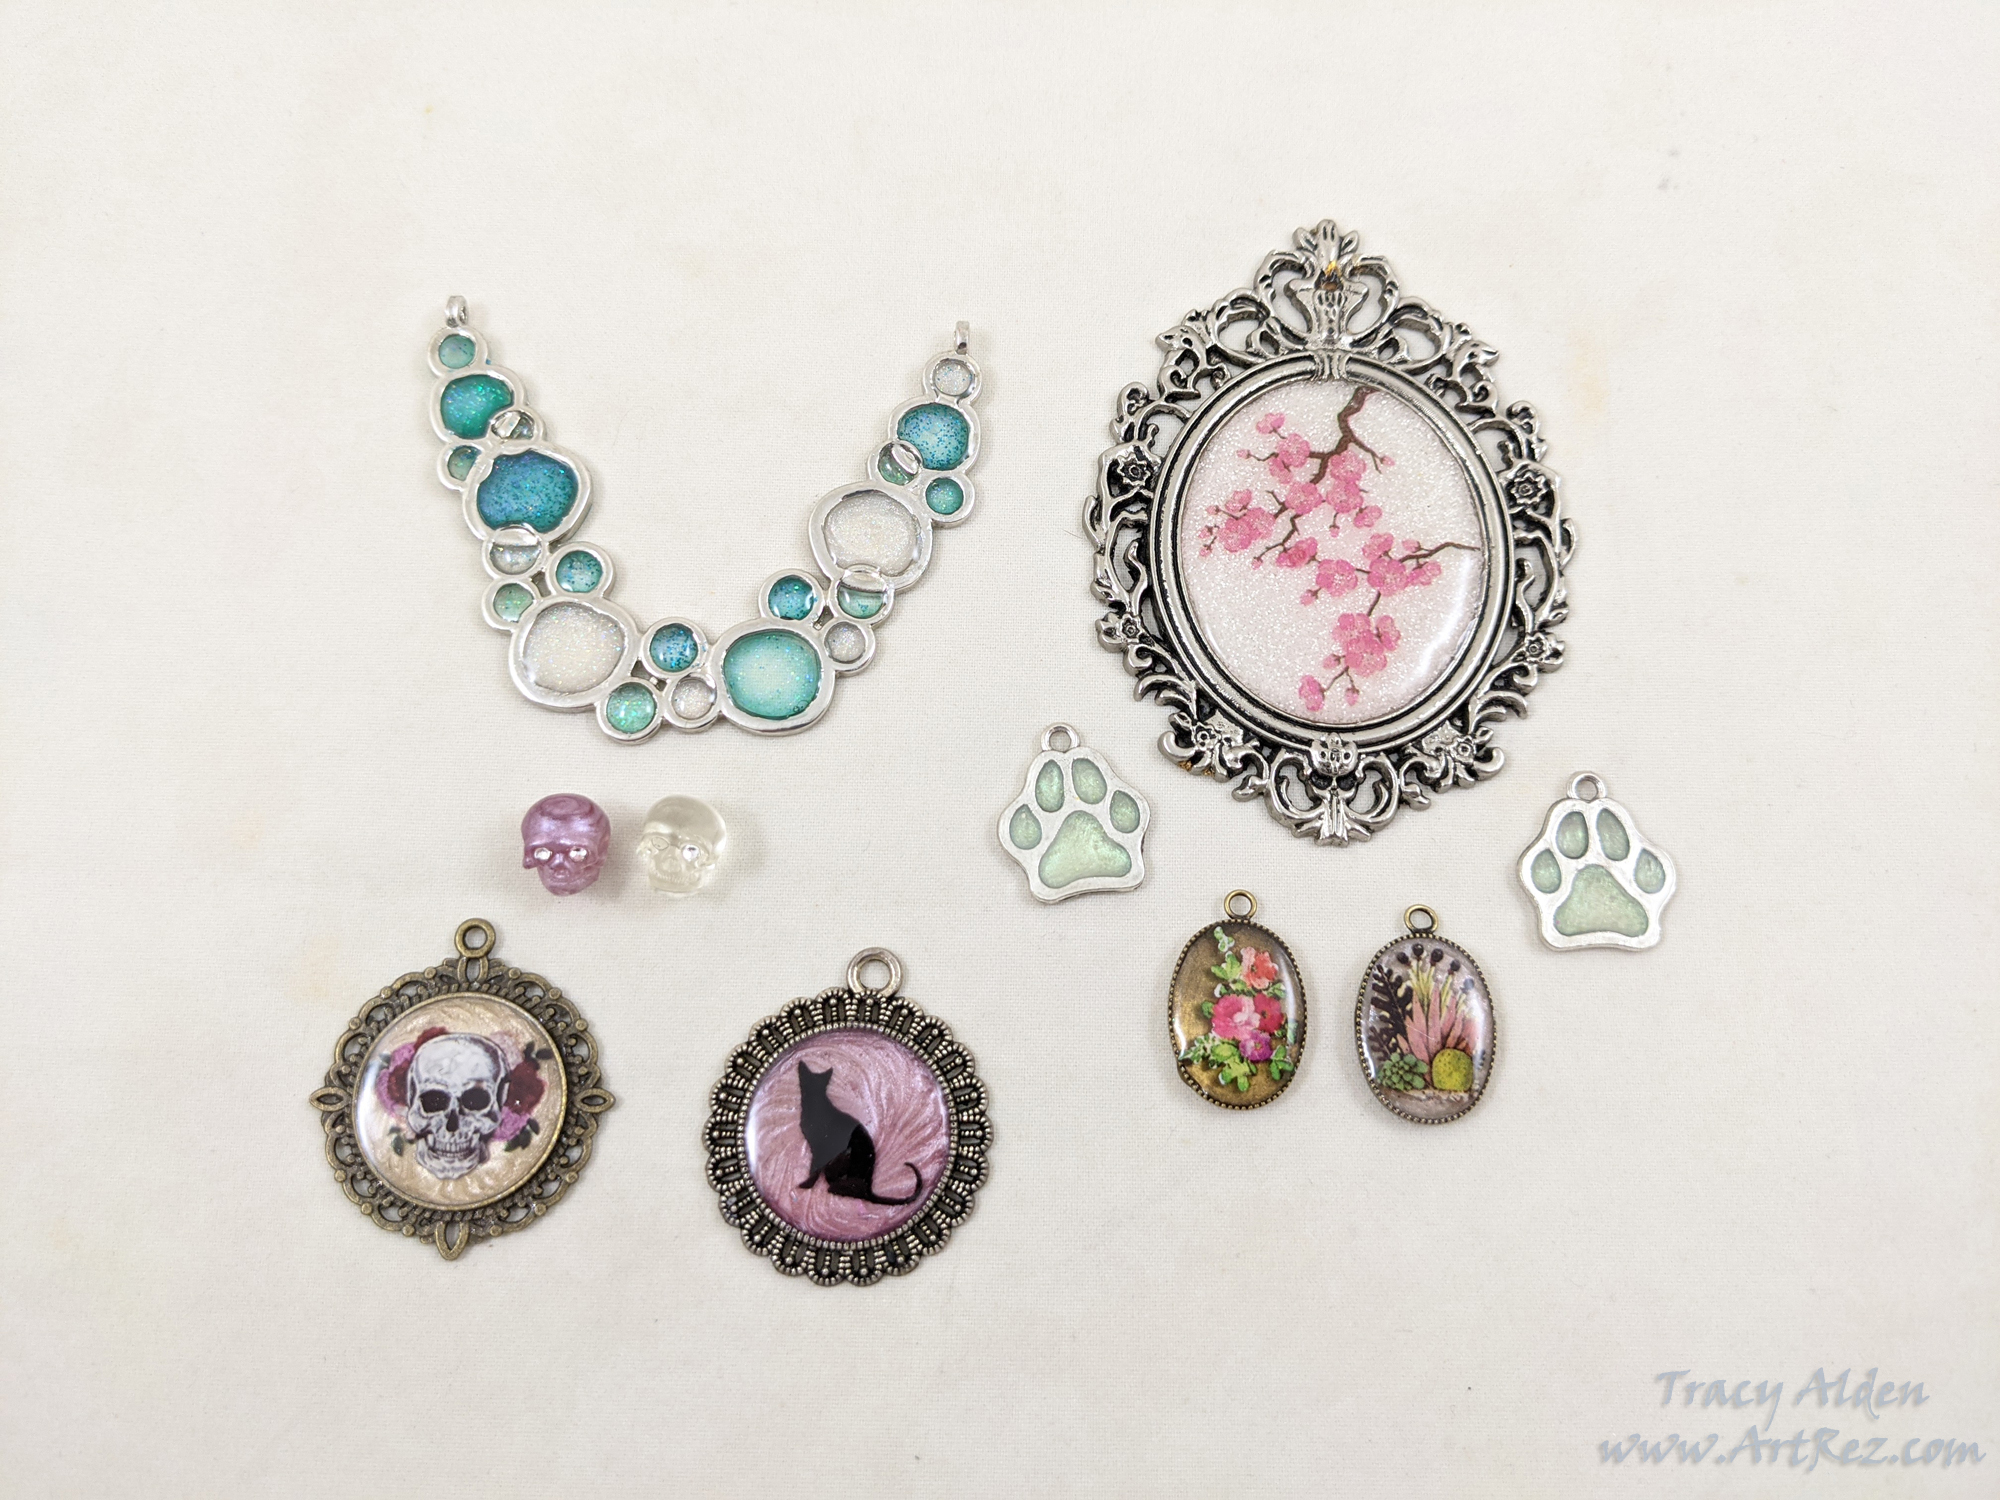
As I started to slowly heal and start unpacking some of my art supplies I found myself drawn to working with resin again. This time I wanted to give UV Resin from Let’s Resin a try. They had two different formulations and I found them both useful in different resin applications.
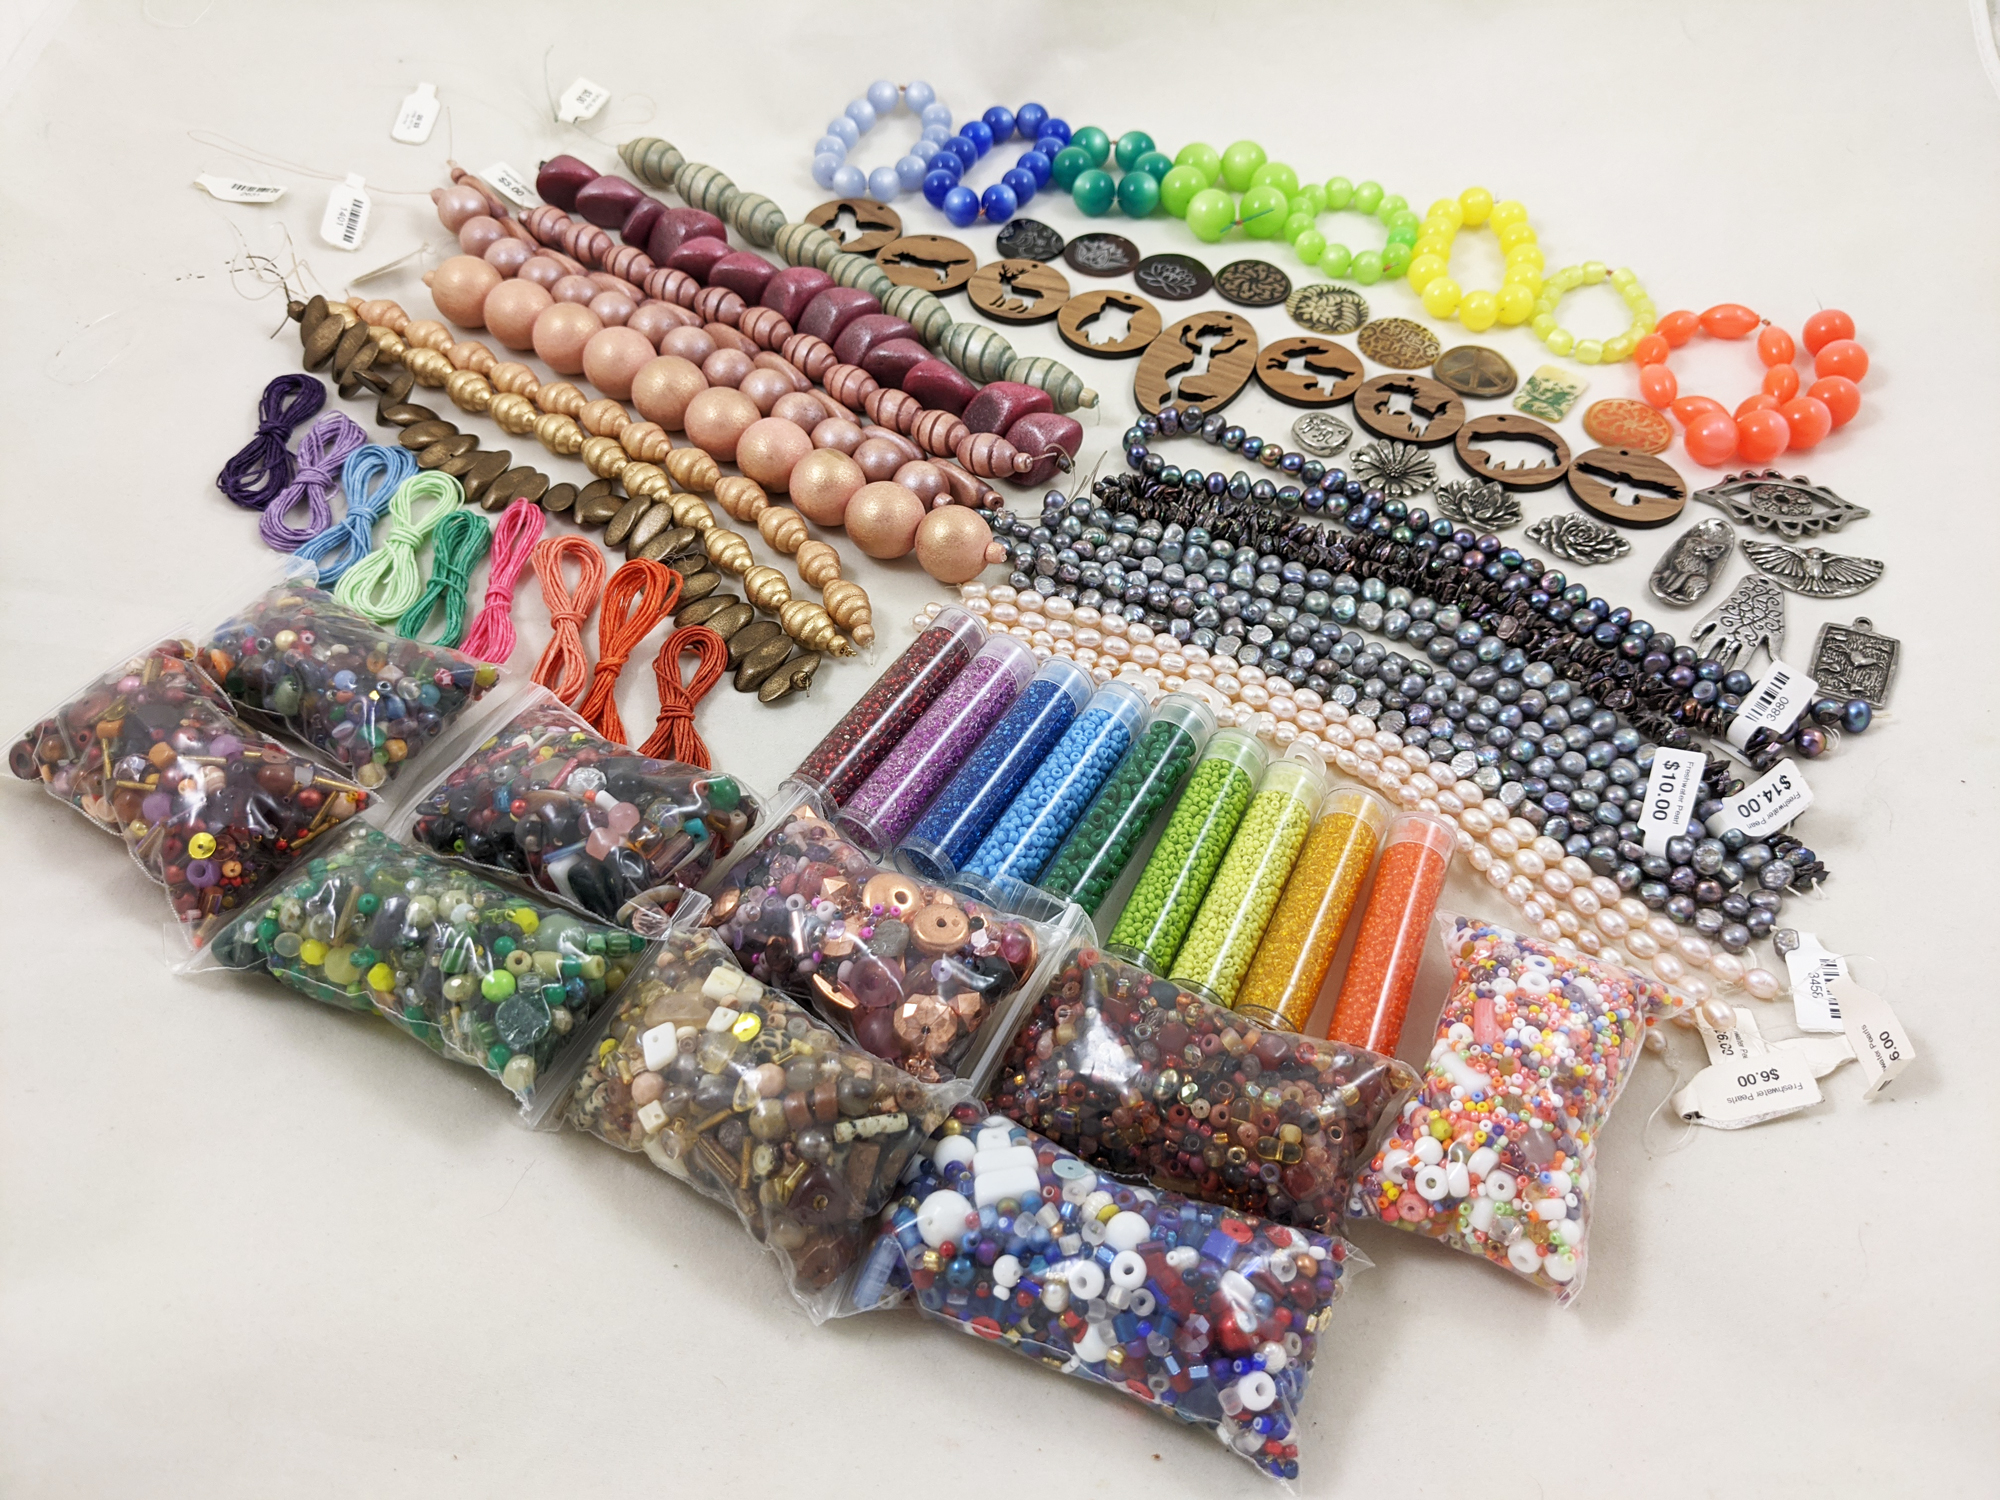
While my bones were still healing I found a new bead shop doing lives on Facebook, called Allegory Gallery, located in Ligonier, Pennsylvania. The owners, William and Andrew, were wonderful to watch. Sharing beads, treasures, design ideas and life stories. They were trying to keep afloat in these trying times while saving up to buy a permanent home for their store. They started a fund raiser called Little By Little, which one could, and still can, donate to via different options. I donated several times and ended up winning one of their wonderful prize packages.
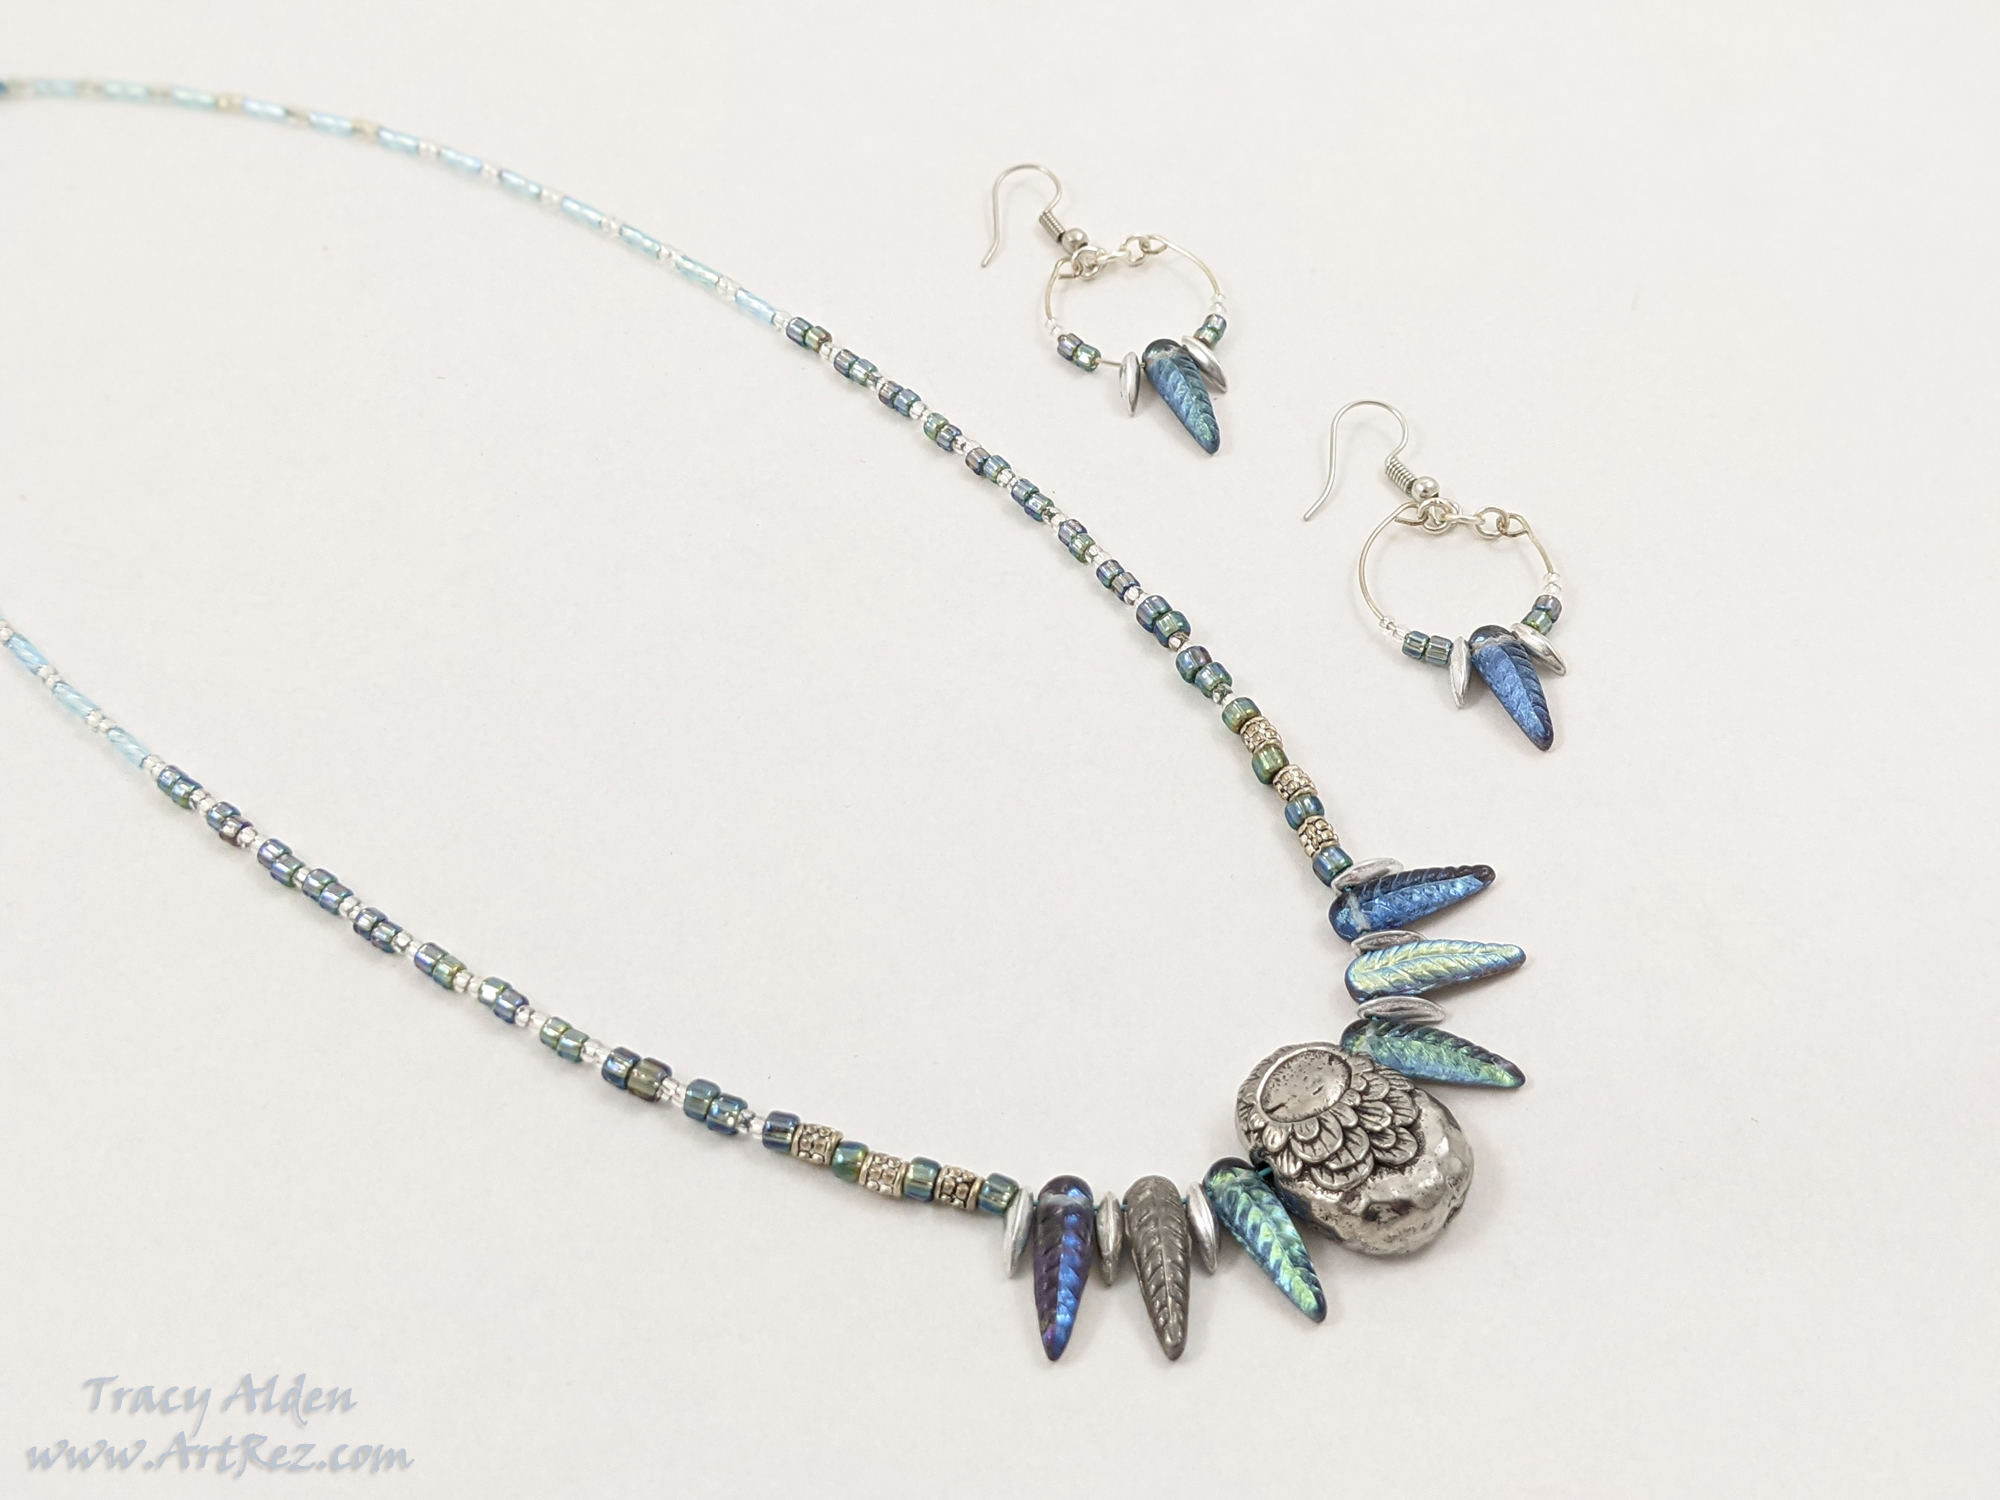
Andrew created an stunning collection of paintings called Opal Girls, (available for purchase on their website) that I found absolutely enchanting. Inspired by his work I used some of the beads and findings I won from Allegory Gallery, to create this jewelry set. The lovely pendant comes from with a pendant from Cynthia Thornton owner of Green Girl Studios, Andrew’s sister.
In this coming new year I look forward to finding more businesses to support, and share with with you.
Wishing you all a Happy and Healthy New Year! - Acrylic, Association For Creative Industries, Chalk Paint, Contests, Convention, Diamond Art, FaveCrafts, History Inspired, Home Decor, Mixed Media, Mod Podge, Throwback Thursday
#TBT Traveling a Forgotten Path, with Diamond Art
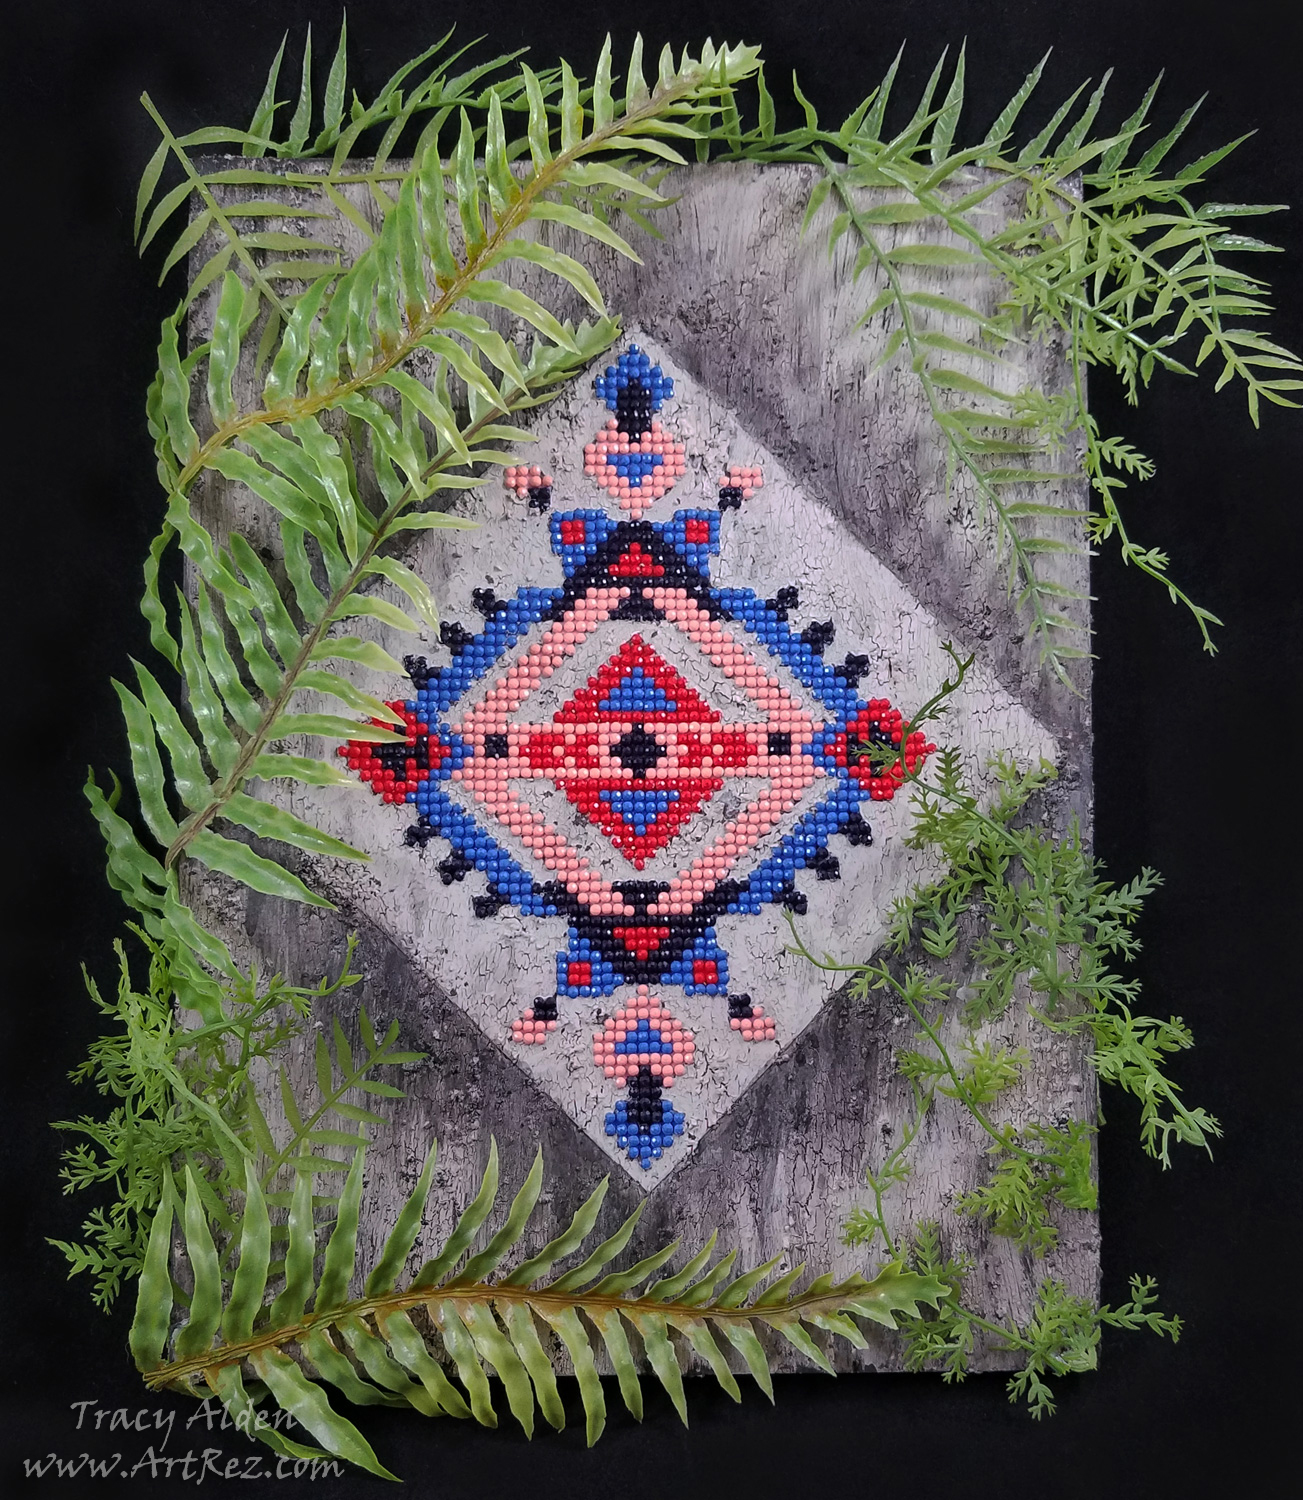
Hello! Continuing my Throwback Thursday posts, this time only going back to January, when I once again traveled to the Creativation Trade show, in Phoenix, Arizona. Held by Association For Creative Industries or AFCI, during the show I was honored to once again be invited to the 7th annual Prime Networking Event. This event gives bloggers, designers, authors and brands in the craft industry a chance to come together to network, make new partnerships, and learn about new product information. The event was fun, informative, and free product samples were provided by this year’s sponsors. After the event attendees were encouraged to try out and create art for the Favecrafts Best Blogger Craft Event. This year I won runner up in the Best Blogger Contest 2019 for my project!
For my entry I decided to use products from these sponsors: Diamond Art by Leisure Arts, Tribe Design, Mod Podge Ultra Matte Spray, FolkArt Crackle Medium and Home Decor™ Chalk Paint along with supplies from my personal collection of art supplies.
Supplies:
Diamond Art by Leisure Arts Diamond Painting Kit – Tribe Design
Mod Podge ® Ultra Matte Spray
FolkArt ® Mediums – Crackle Medium
FolkArt ® Home Decor™ Chalk Paint in Java, Parisian Grey, White Adirondack and Black
Liquid Fusion ® Clear Urethane Glue
9 inch x 12 inch Cradled Wood Board
Assortment of artificial tropical plants
1 Flat Paint Brush
1 Round Paint Brush
Scissors
Ruler
Pencil
Cotton swabs
Isopropyl alcohol
Used and dried coffee groundsSince it took a few hours to finish the Diamond Art kit by Leisure Arts, I had time to consider the pattern. In my mind it needed something more than to just be framed. It reminded me of patterns of old, and FolkArt Chalk Paint would help me with that. To have it look like a wall fragment I would need it to be on a board, Mod Podge Spray would help apply the canvas. For water damaged cracks, I would need a Crackle Medium.
Maybe it could be a forgotten image, now found once again? Slowly a story formed in my mind…..
After traveling many miles, you start seeing the remnants of a once mighty city, now taken over by nature. Slowly walking through the dense forest a fragment of a patterned wall slowly appears. What ancient artist created this image and who was it intended for?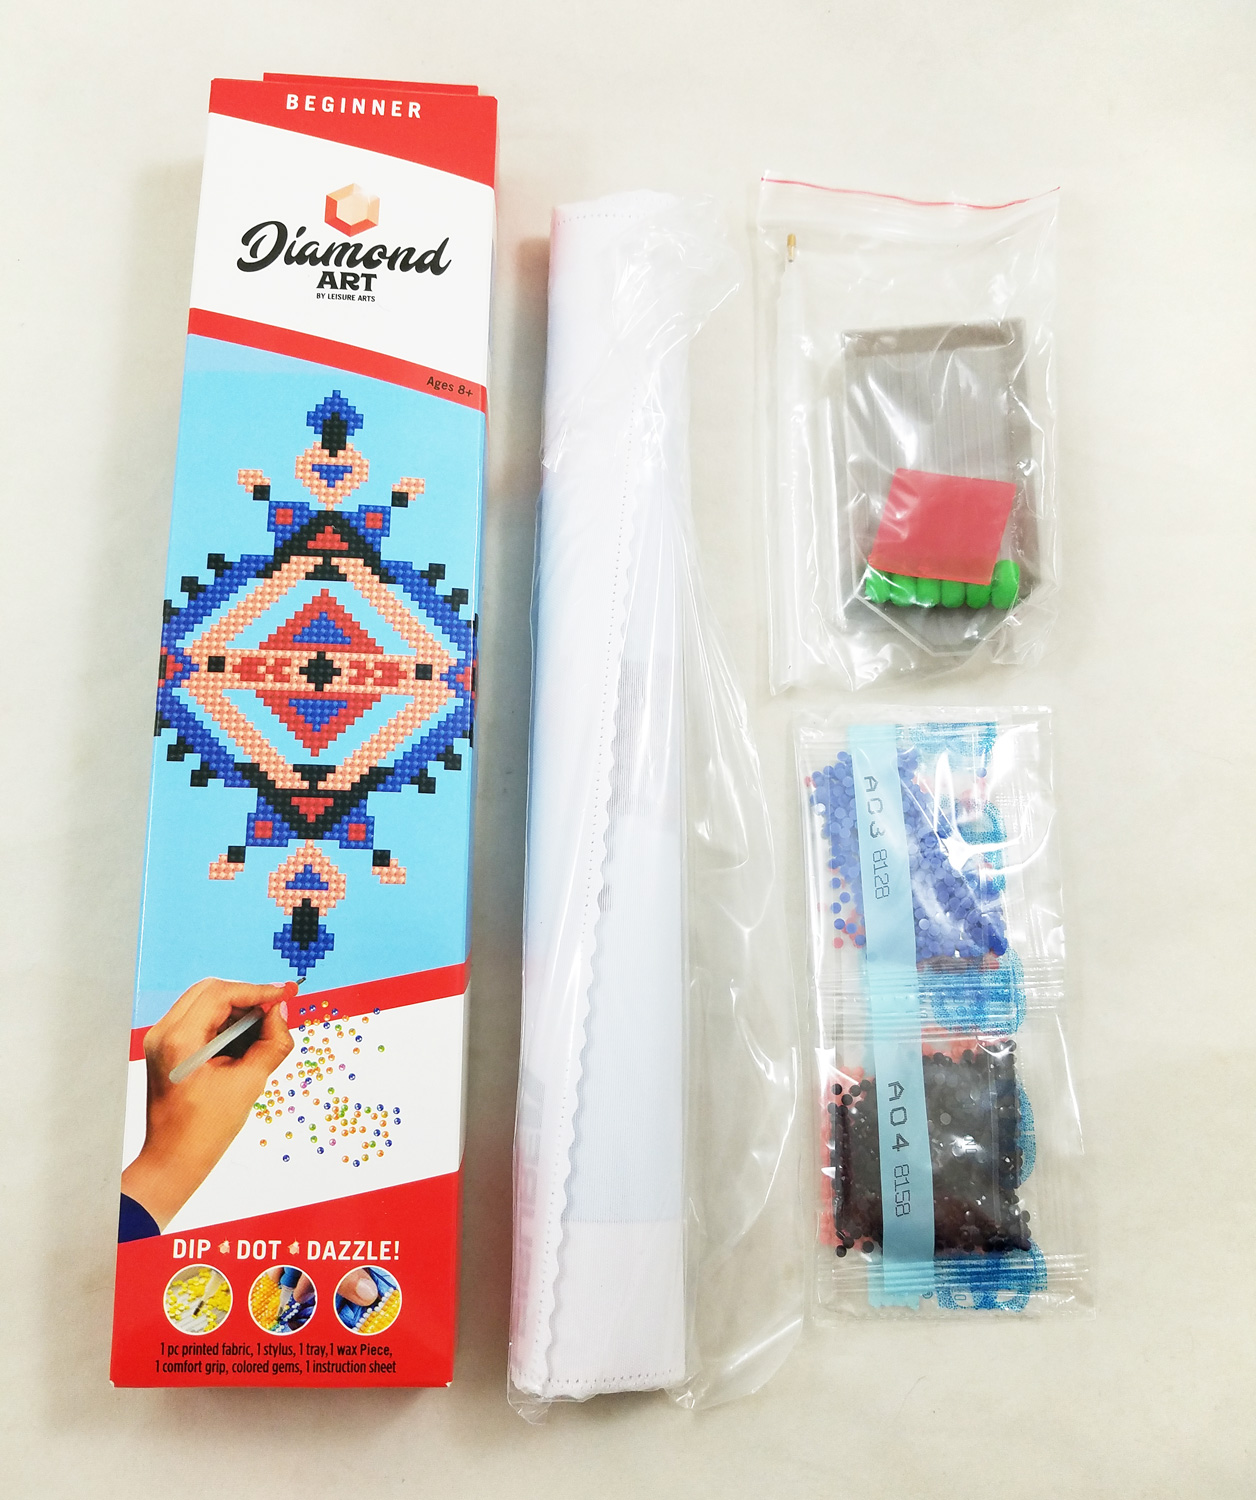
I opened up my Leisure Arts Diamond Painting Kit and made sure I had all of the required parts. The printed canvas needed to be flattened a bit before I started so making sure to leave the sticky film cover on the canvas, I placed a book on top of my canvas for a few hours before starting.
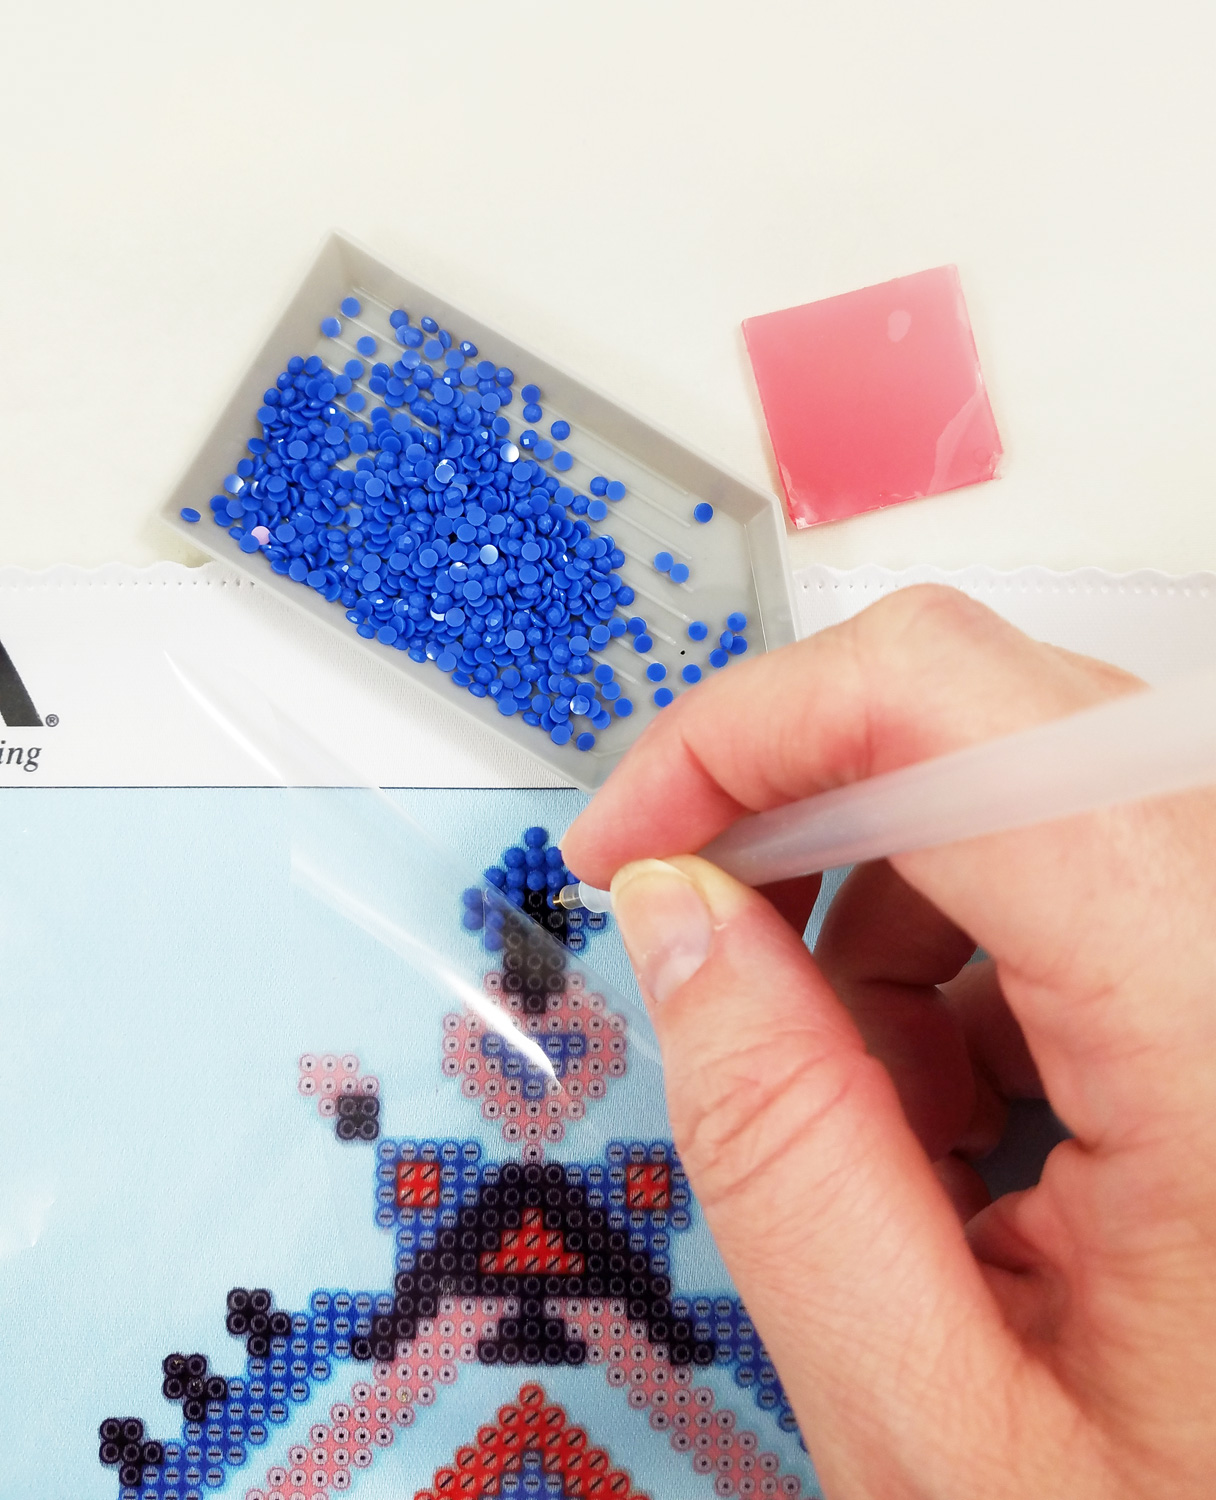
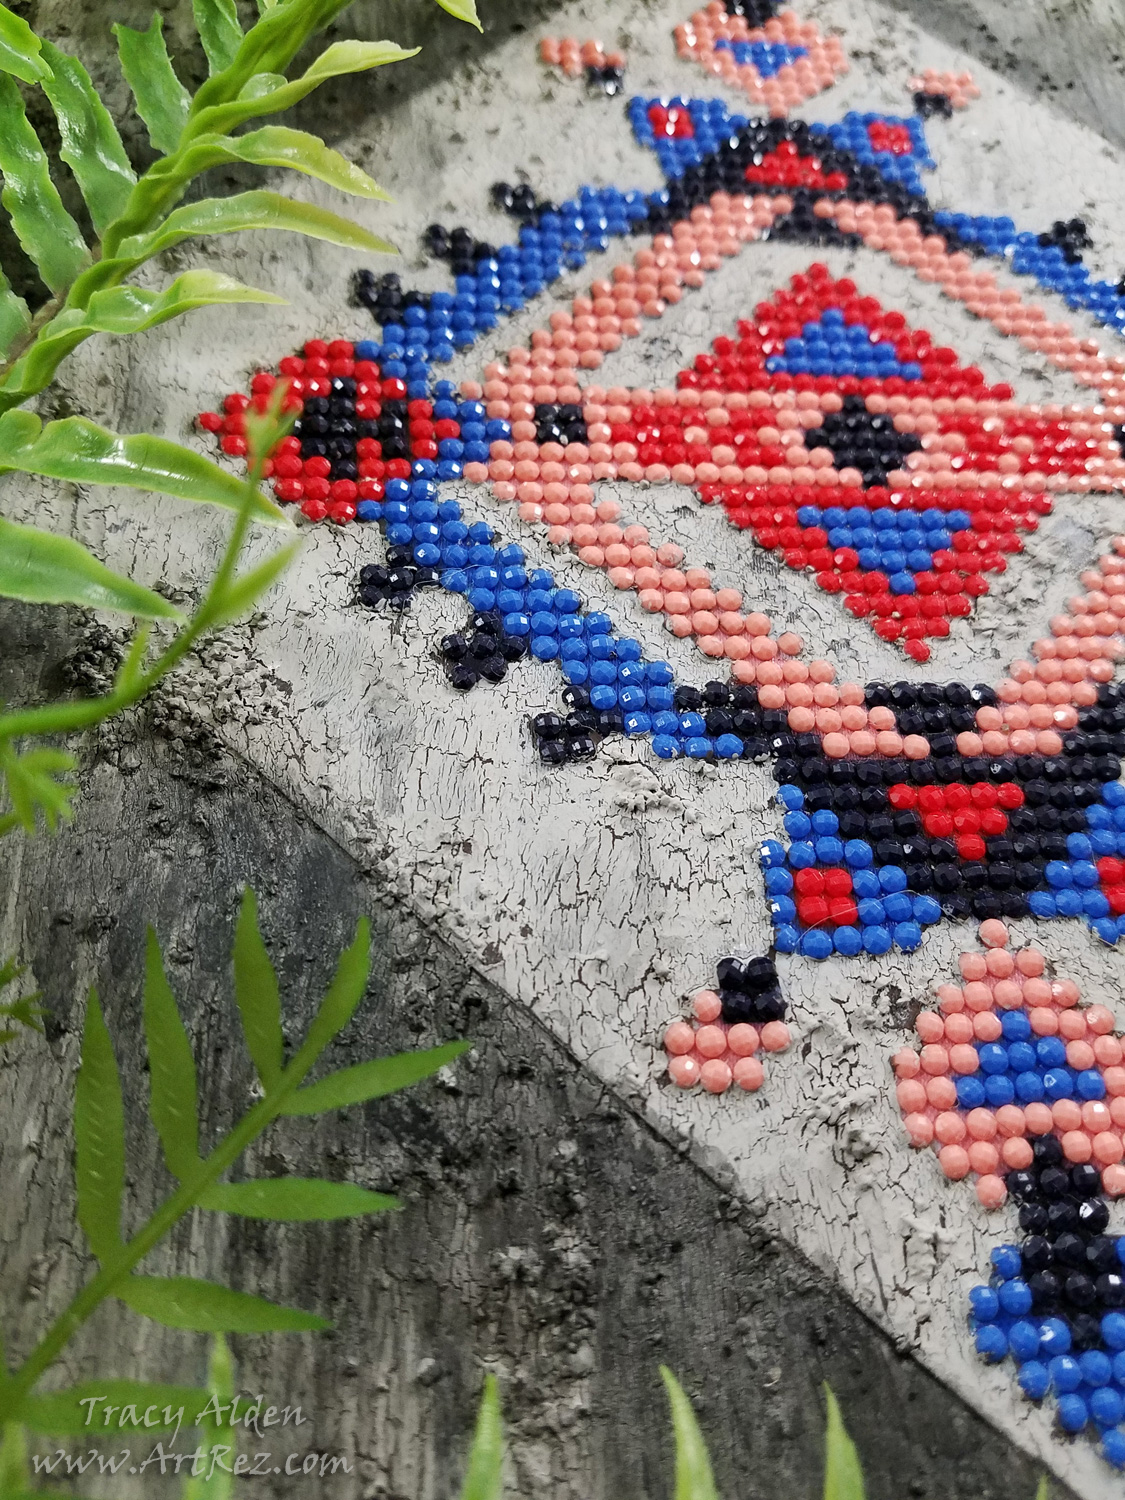
Following the instructions included with the Diamond Art I applied all of the flat backed diamonds to the canvas. It took me only a few hours to complete.
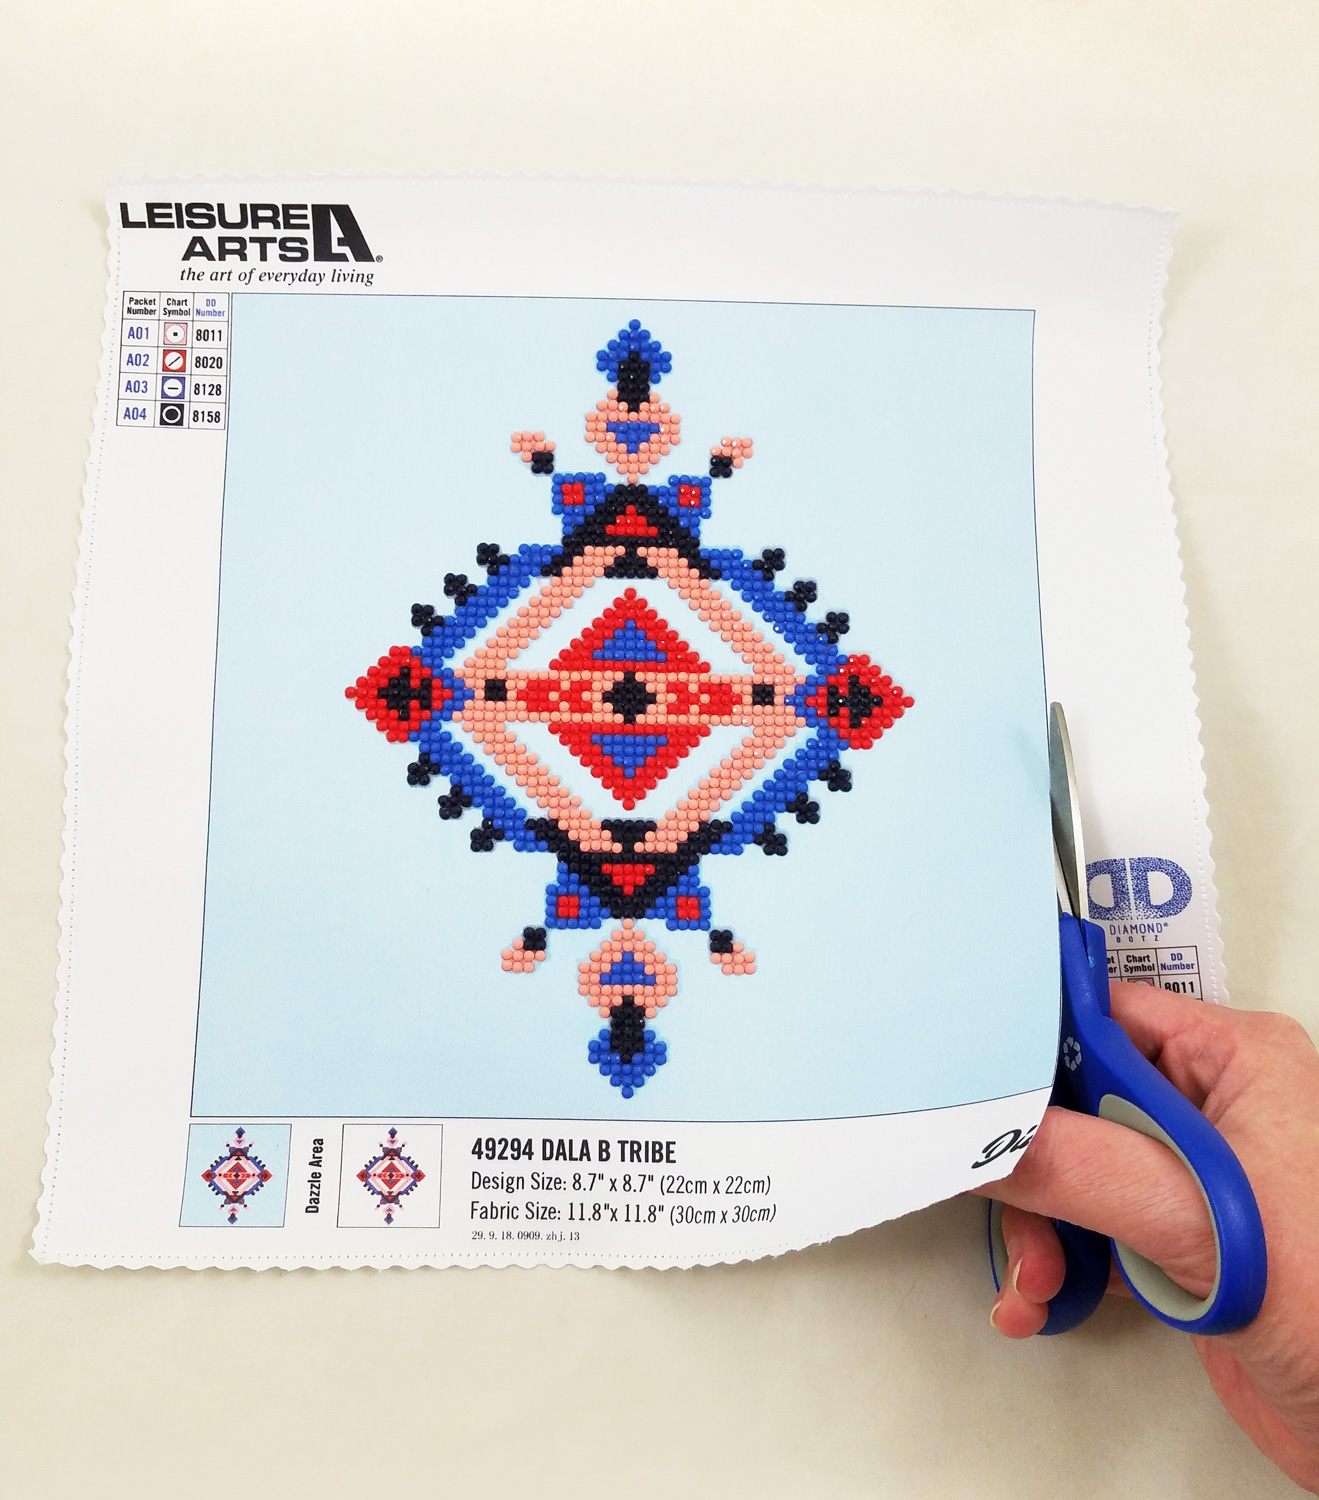
Next I trimmed the Diamond Art canvas to the very edge of the blue background with a pair of sharp scissors.
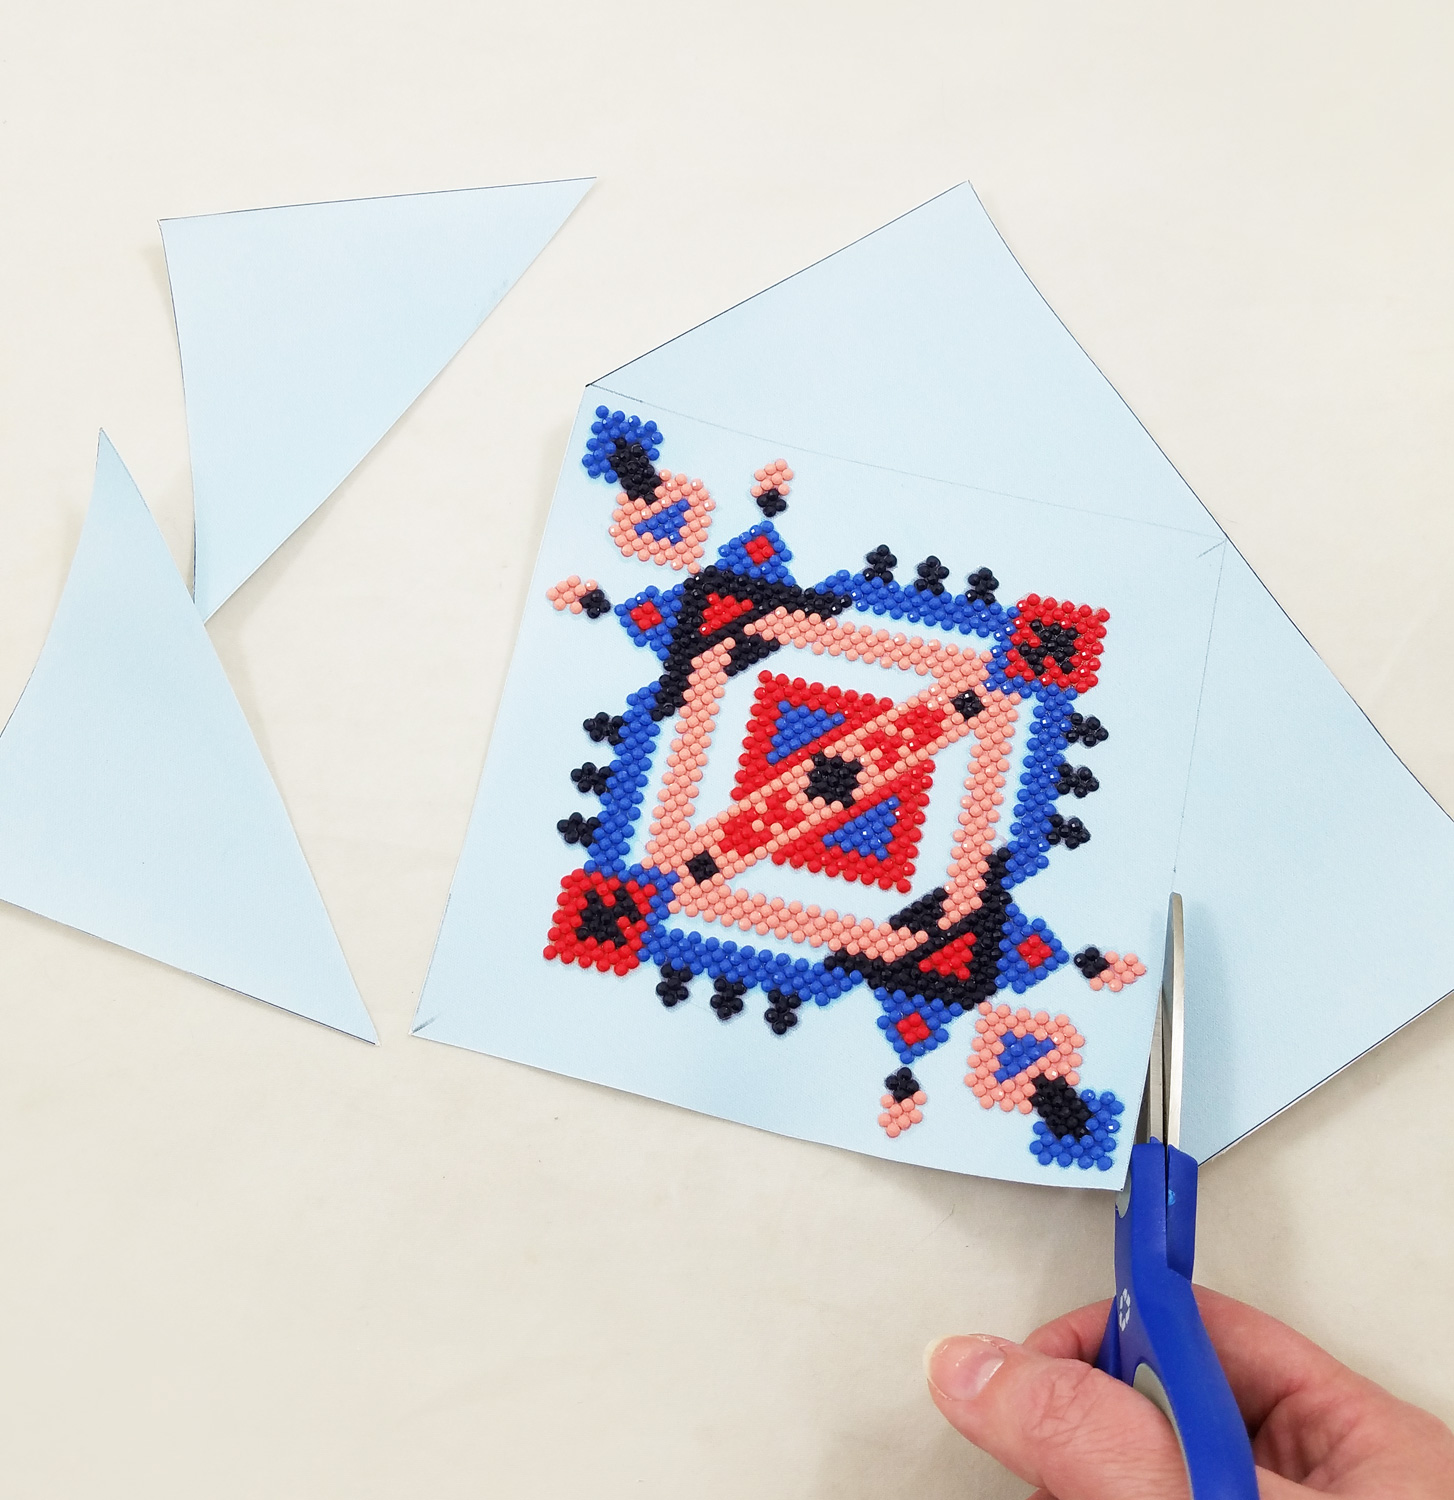
I carefully used a pencil and ruler to mark as close as possible to the Tribe Design pattern, creating a slightly elongated diamond outline. I then trimmed the canvas further with the scissors, using my pencil lines as my guide.
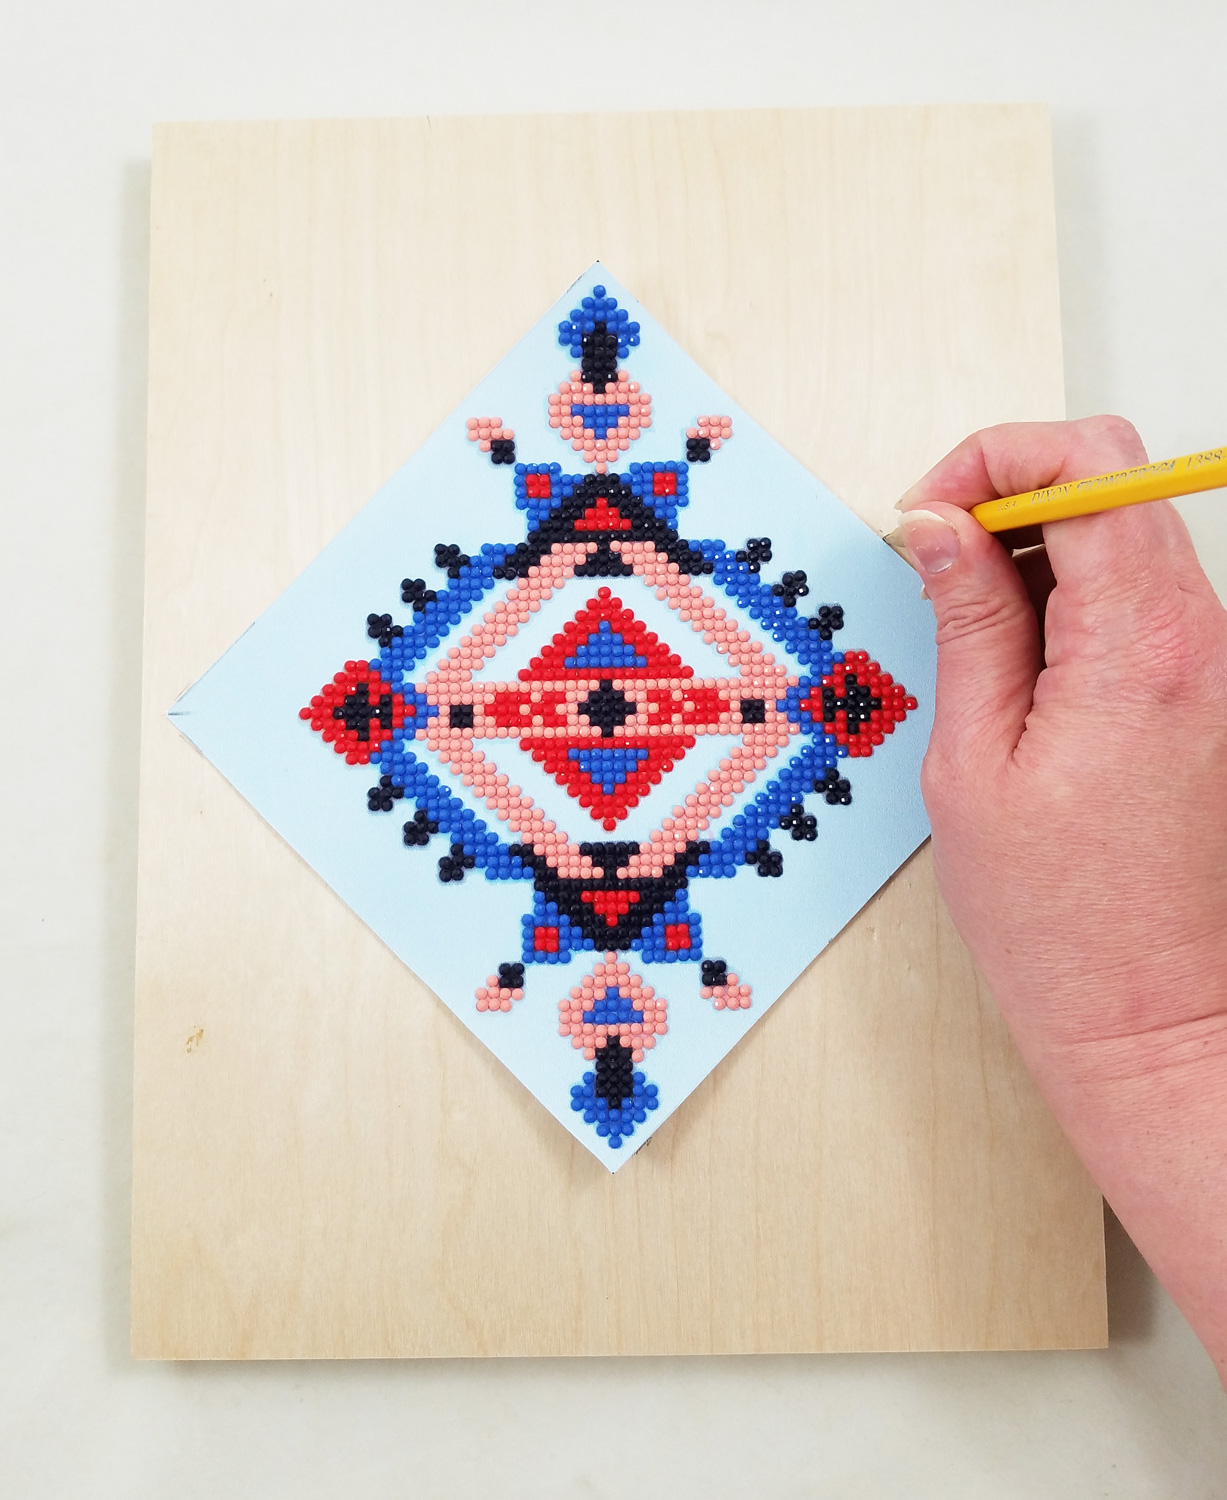
Now that the Diamond Art canvas was cut to size, it fit neatly on the wood board I wanted to attach it to. Once again, I used my pencil to mark out the exact placement of my canvas on the wood board.
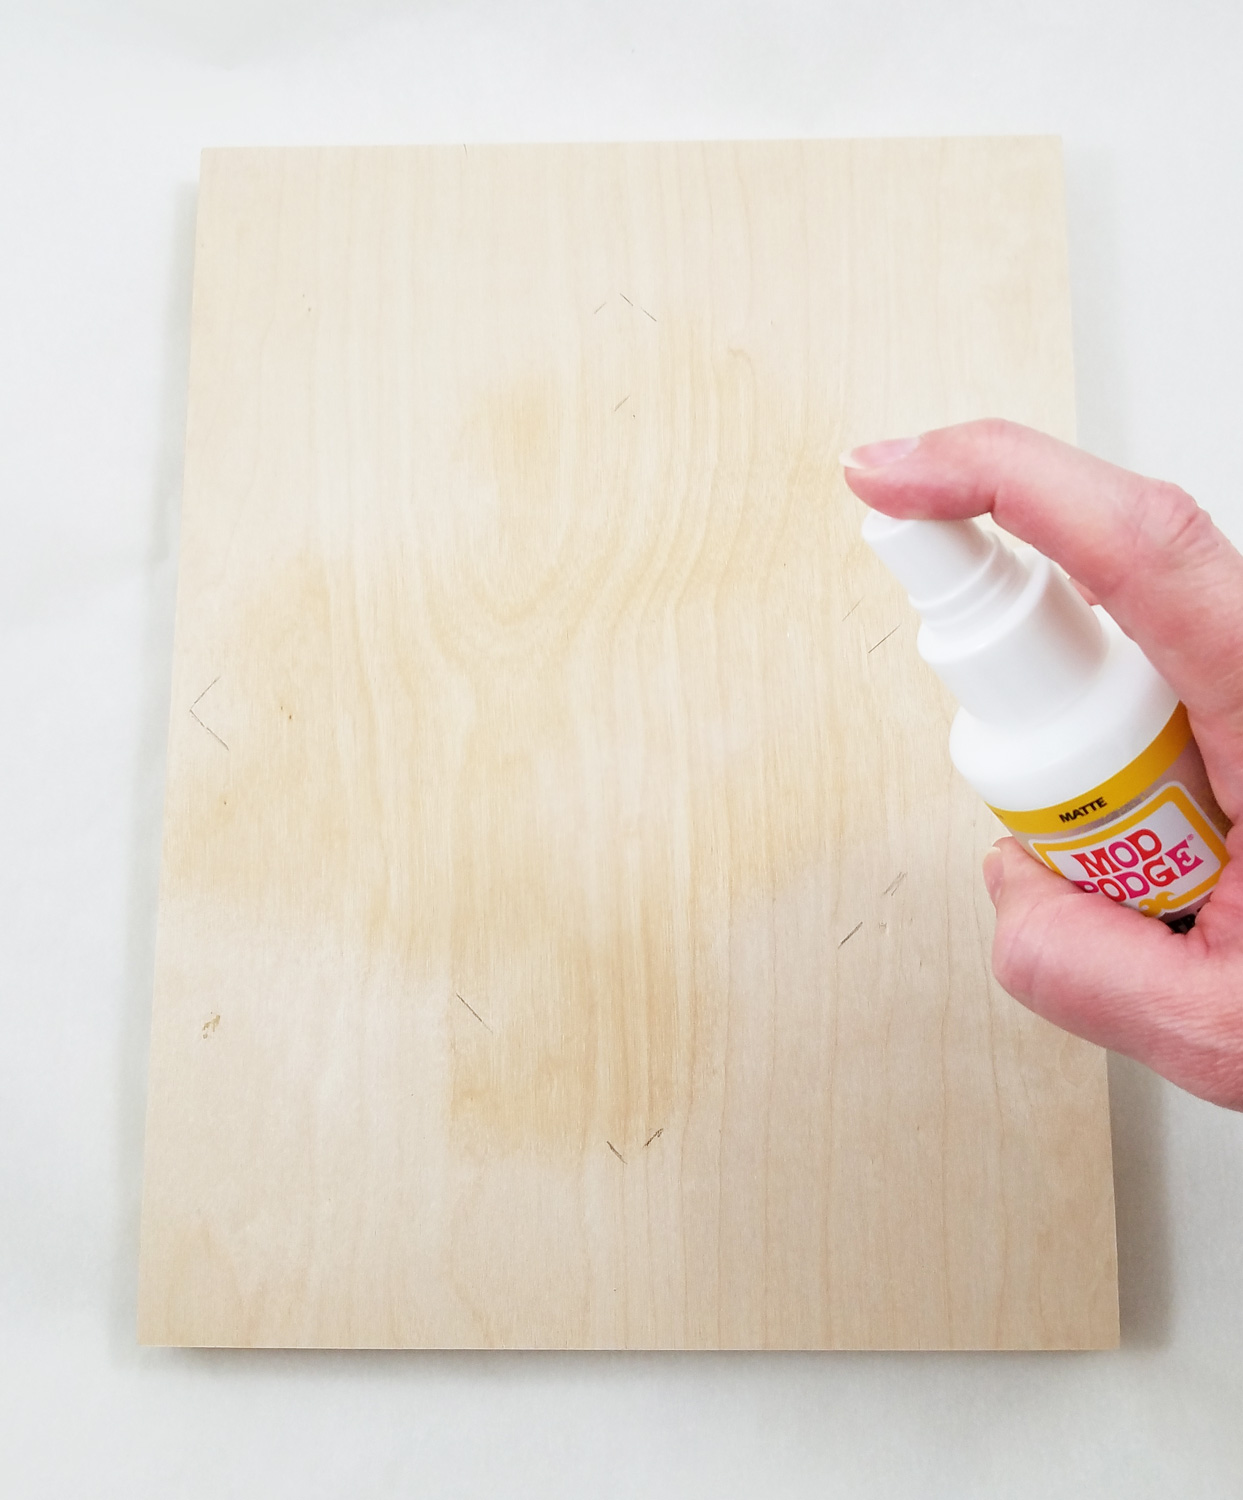
Making sure my wood board was clean of dust or particles I sprayed it with Mod Podge Ultra Matte in the pencil outline of the diamond.
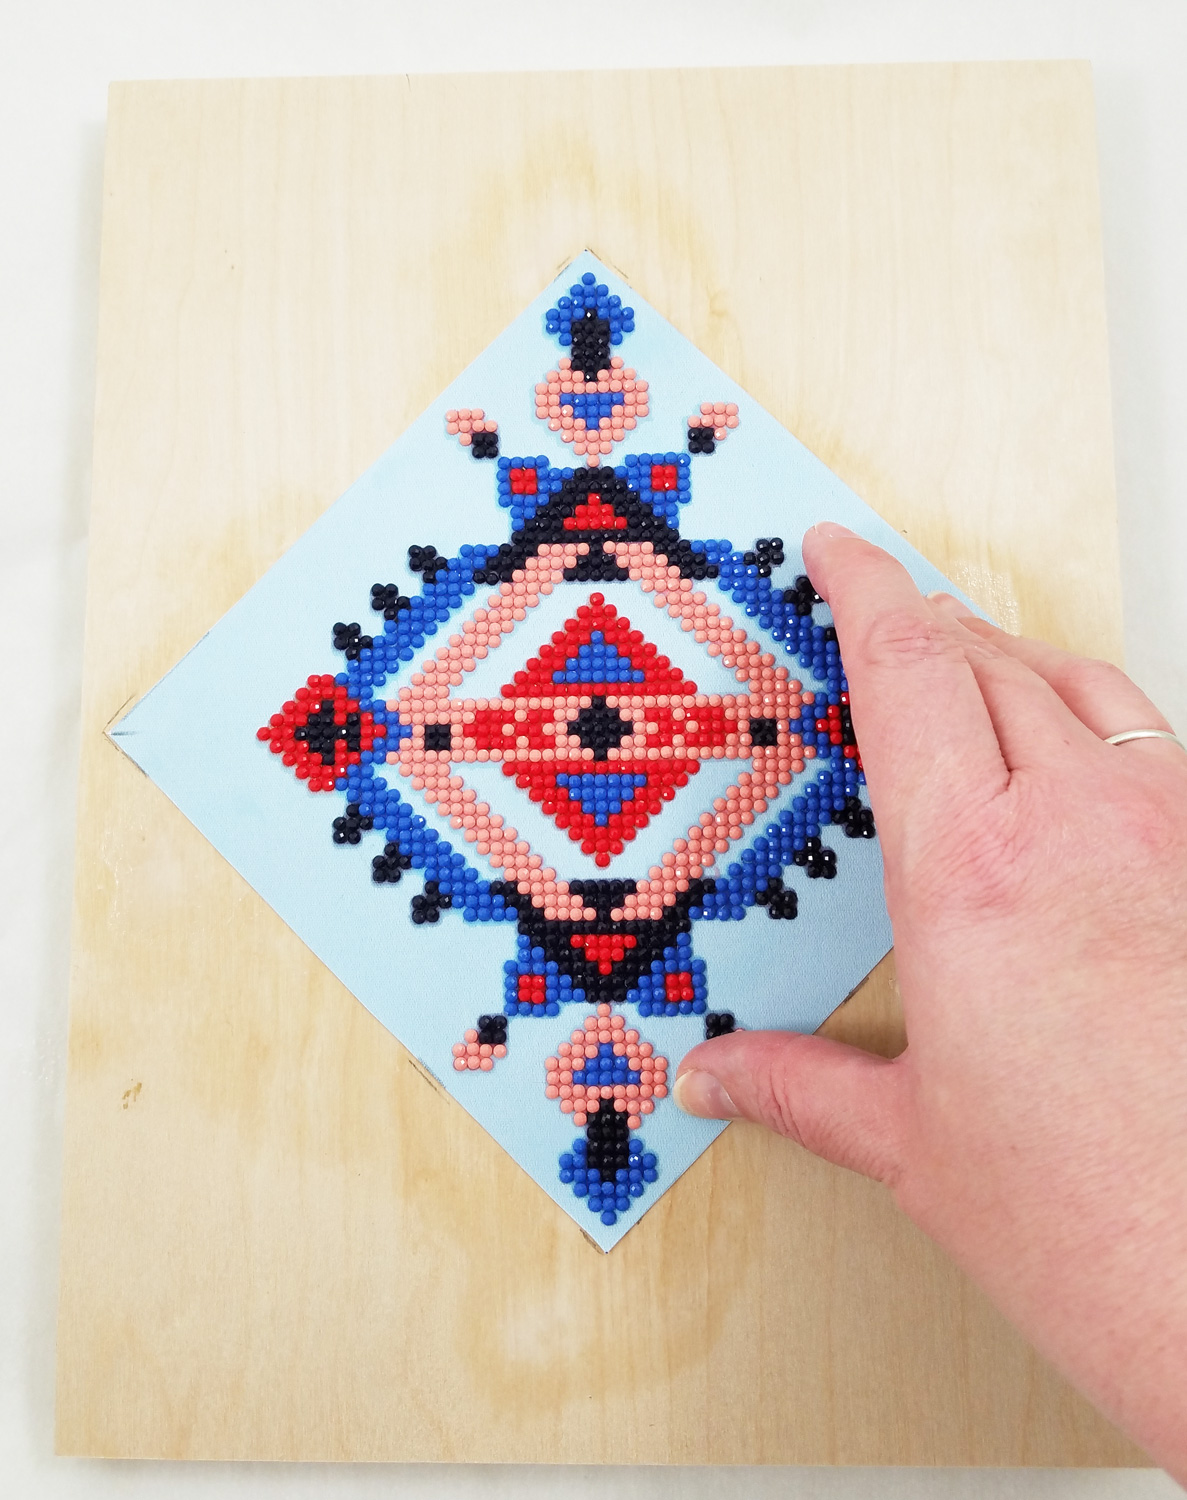
Quickly and carefully I applied the diamond canvas to the coated wood board. I applied firm pressure to the canvas. The spray version of Mod Podge Matte makes it much easier to apply fabric without a worry of oversaturation or bubbles forming. I let the Mod Podge fully dry.
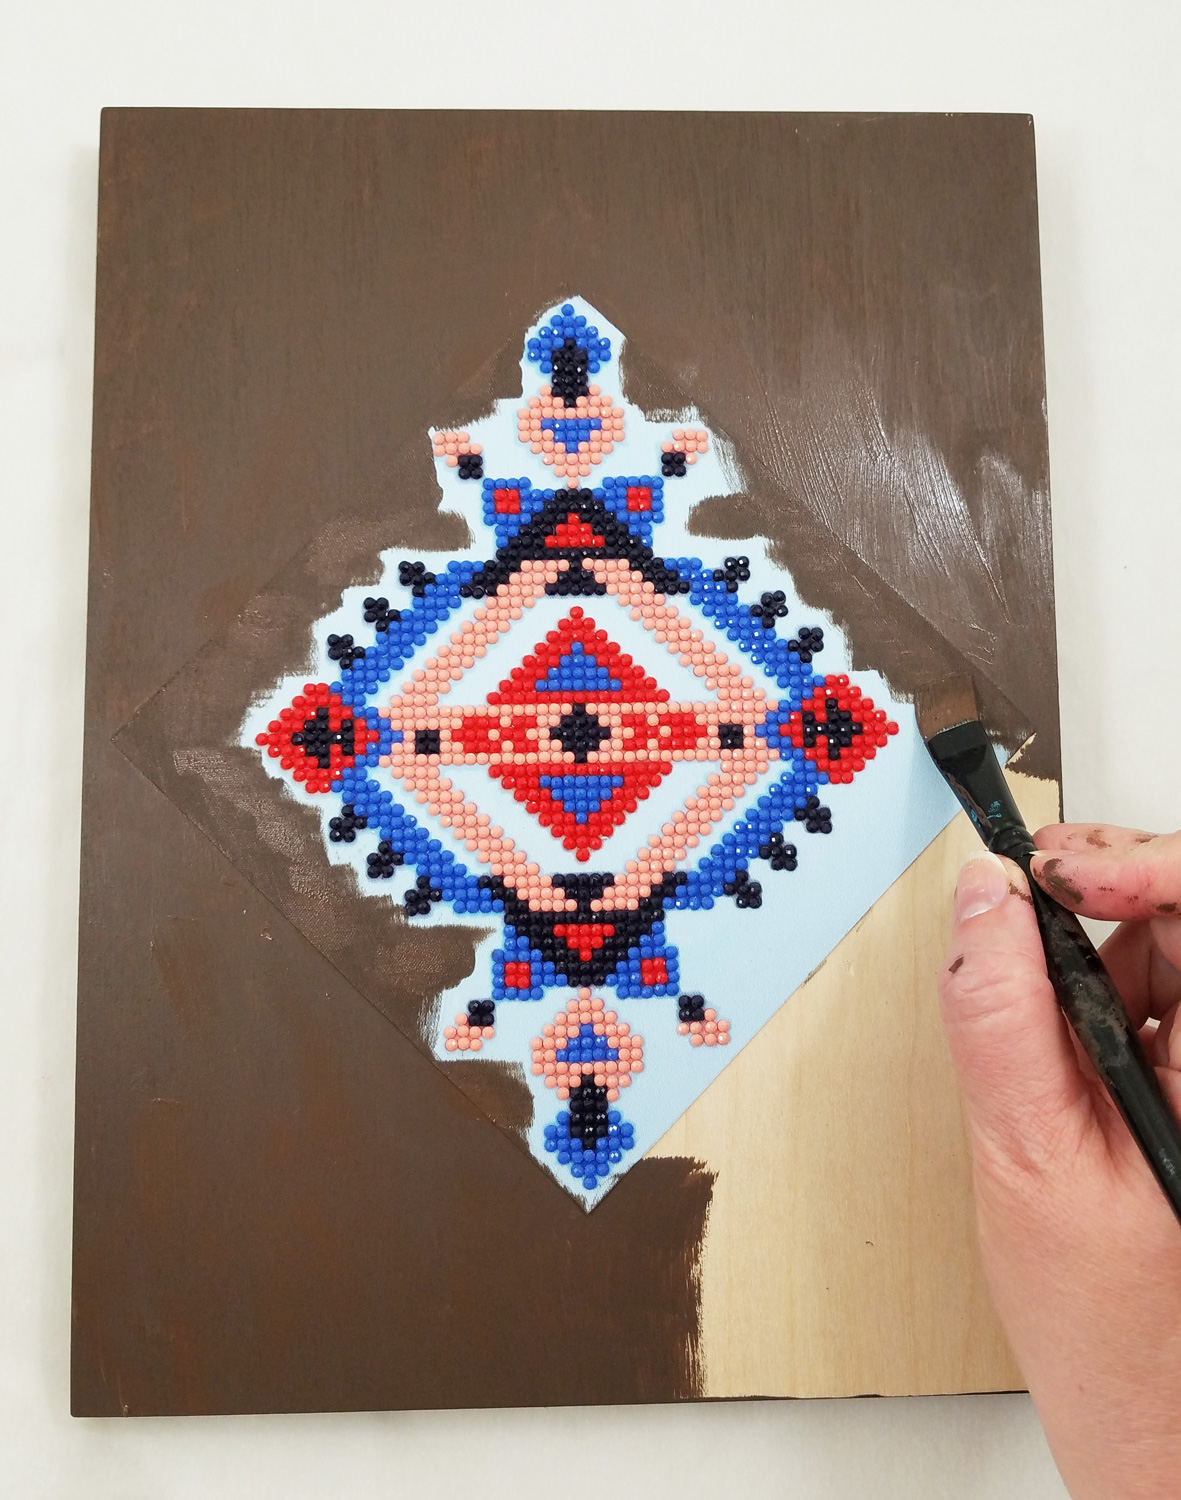
Making sure to cover the sides and front of the wood board I applied on FolkArt Home Deco Chalk Paint in Java. Using the flat paint brush to apply paint to the open sections of the wood board and the round brush for the detailed sections around the diamonds. The Tribe Design canvas had a tendency to soak up more paint, so I applied a bit more paint to make sure there was even coverage.
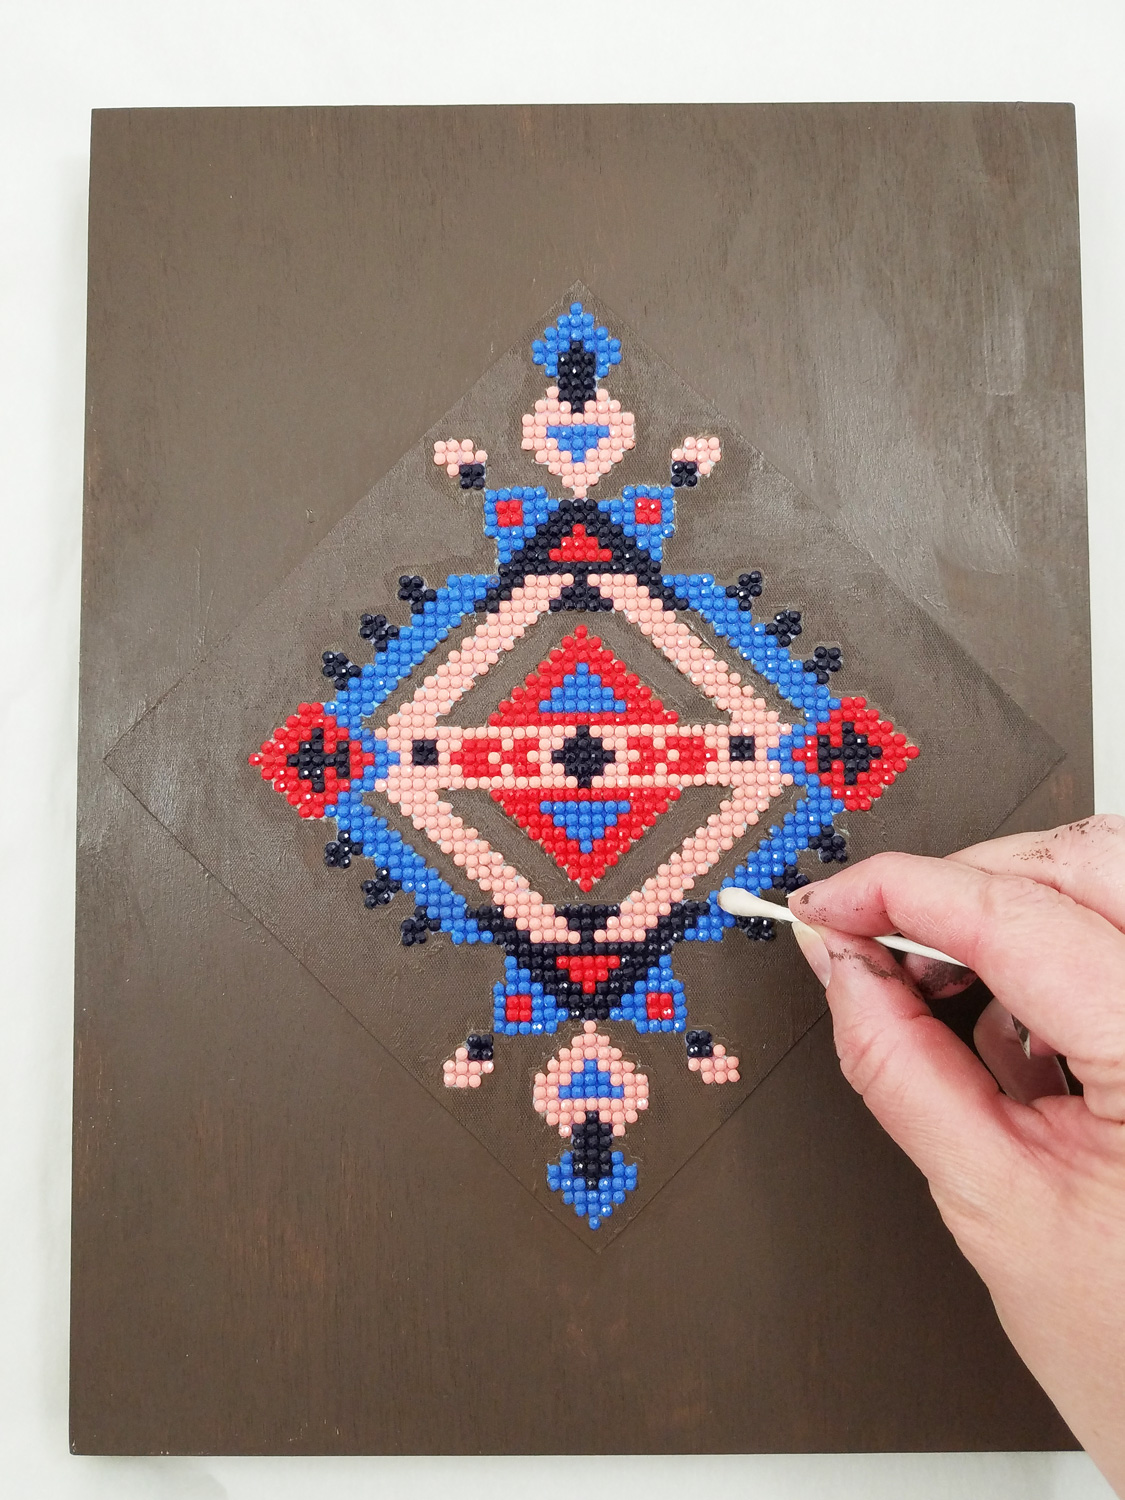
Before the paint fully cured I used cotton swabs dipped in isopropyl alcohol to remove any paint that accidently covered the diamonds. I then let the paint fully cure before the next step.
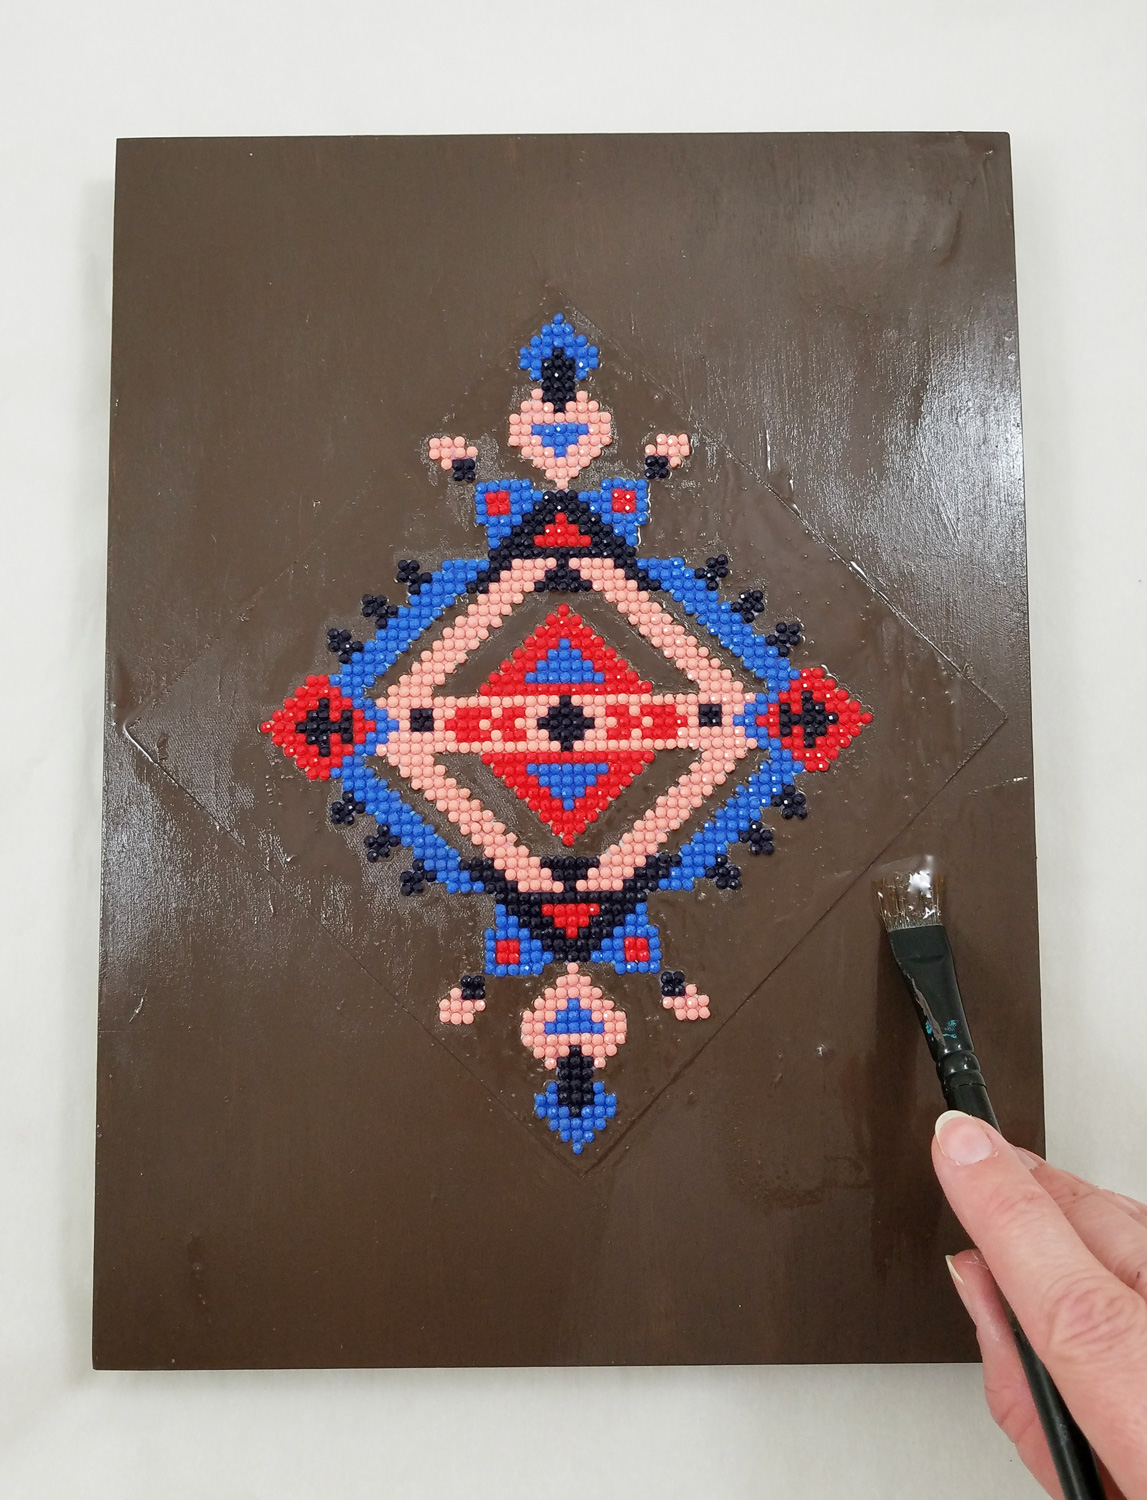
On the now dry paint I applied FolkArt Crackle Medium, careful to not over brush and to only apply the medium in one direction. This would ensure a better crackle formation later on. I let this layer fully dry.
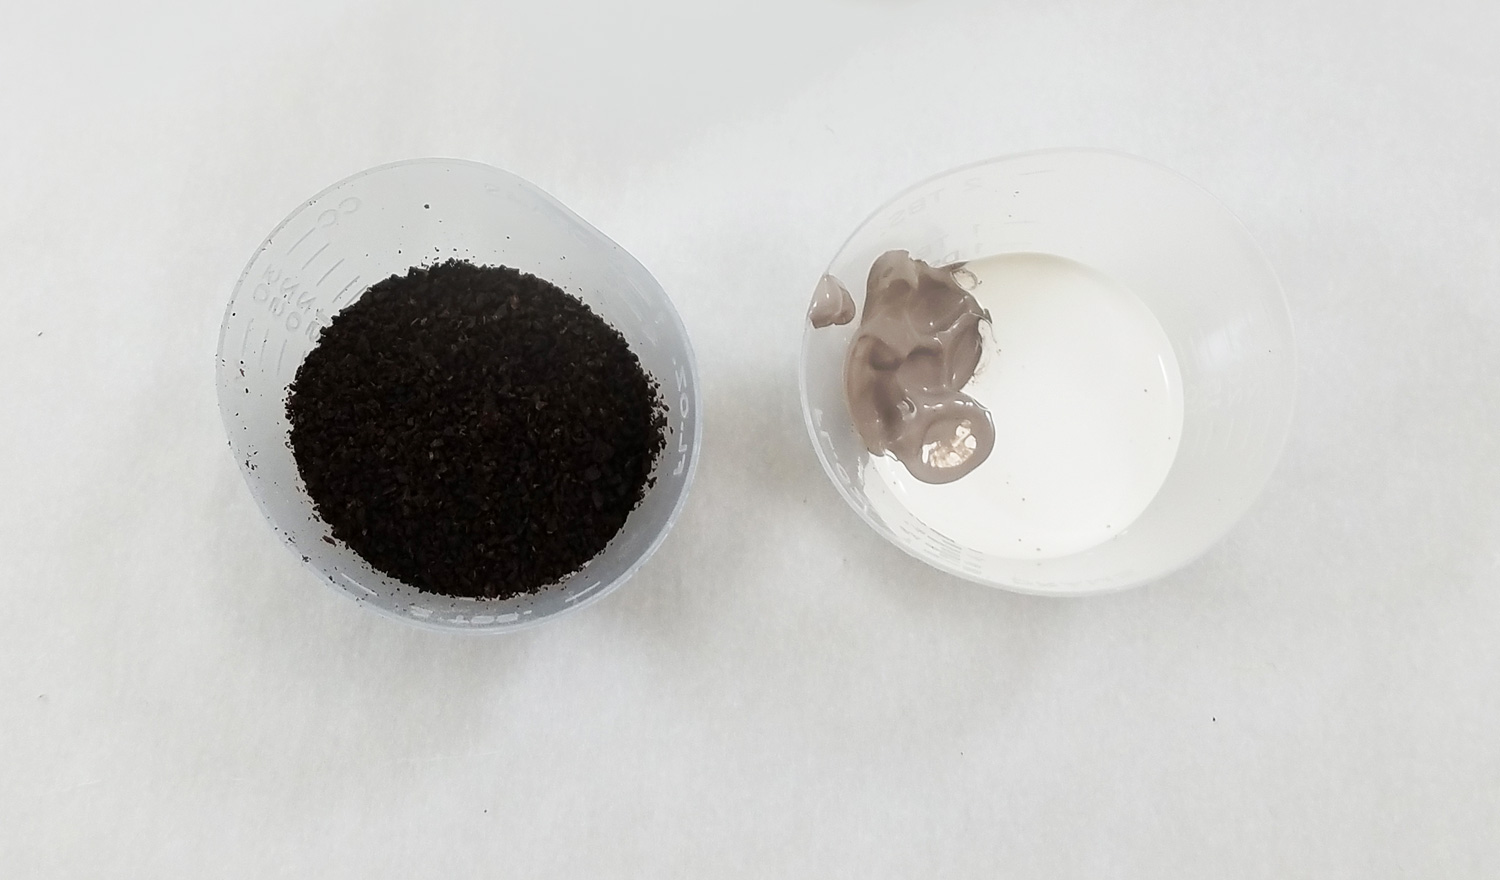
To create a highly textured topcoat I mixed a tablespoon of used and dried coffee grounds in a small cup, with 4 parts FolkArt Home Decor Chalk Paint in White Adirondack, with 1 part Parisian Grey.
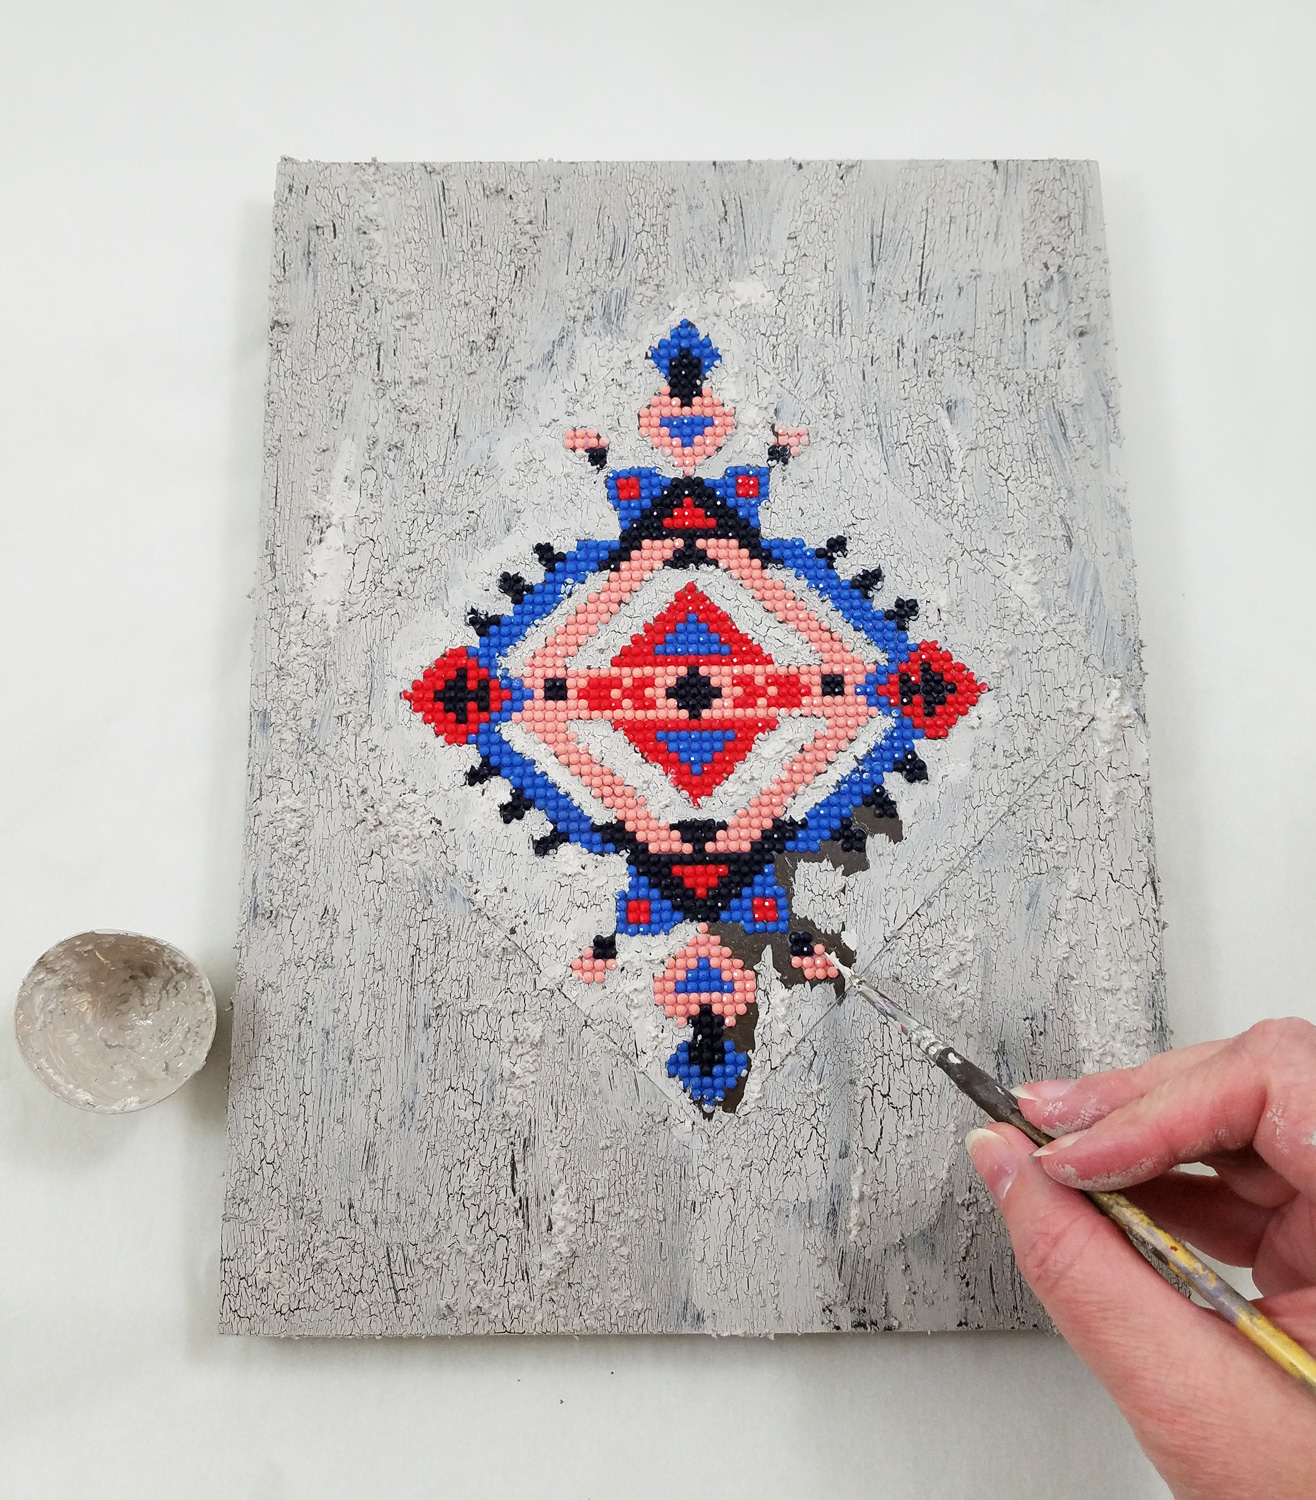
I quickly applied my textured topcoat to the crackle layer, making sure once again to not over paint, and for the most part, go only one direction with the brush strokes. Any time the paint built up too much on the brush I cleaned the paint brush with a paper towel and then reapplied fresh paint mixture to the brush.
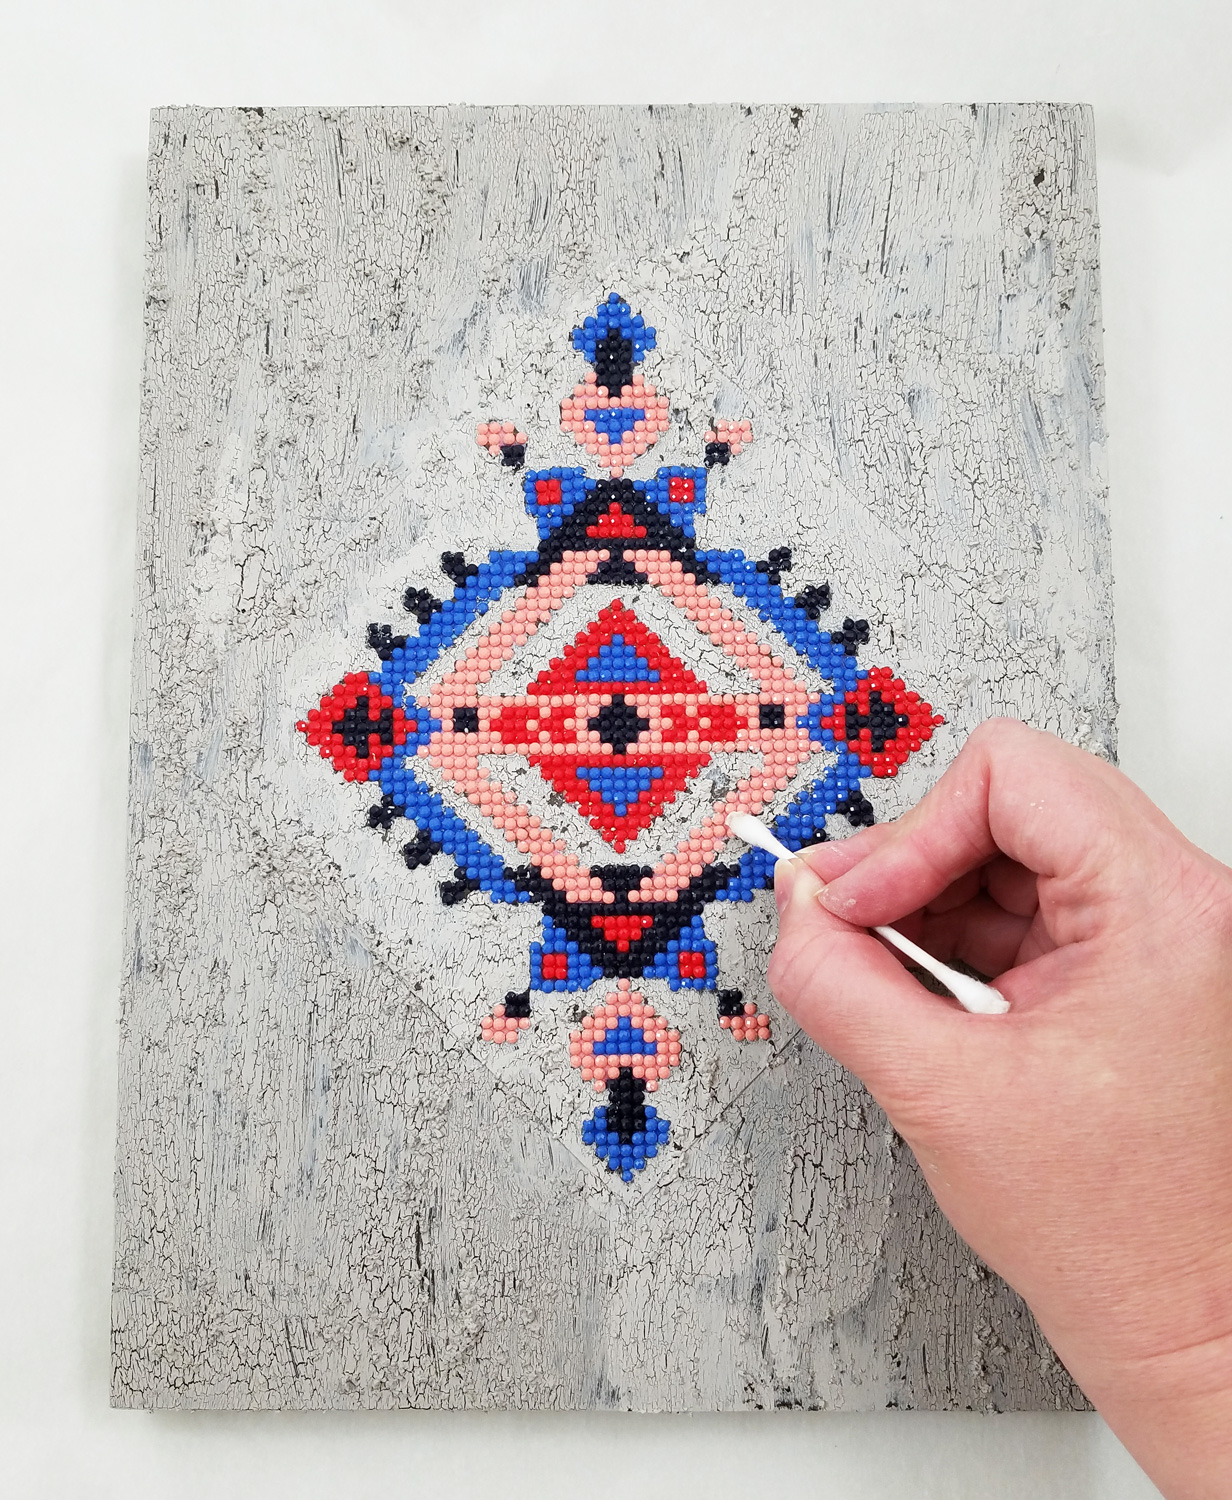
Once again before the paint fully cured I used cotton swabs dipped in isopropyl alcohol to remove any paint that accidentally covered the diamonds. I then let the paint fully cure before the next step.
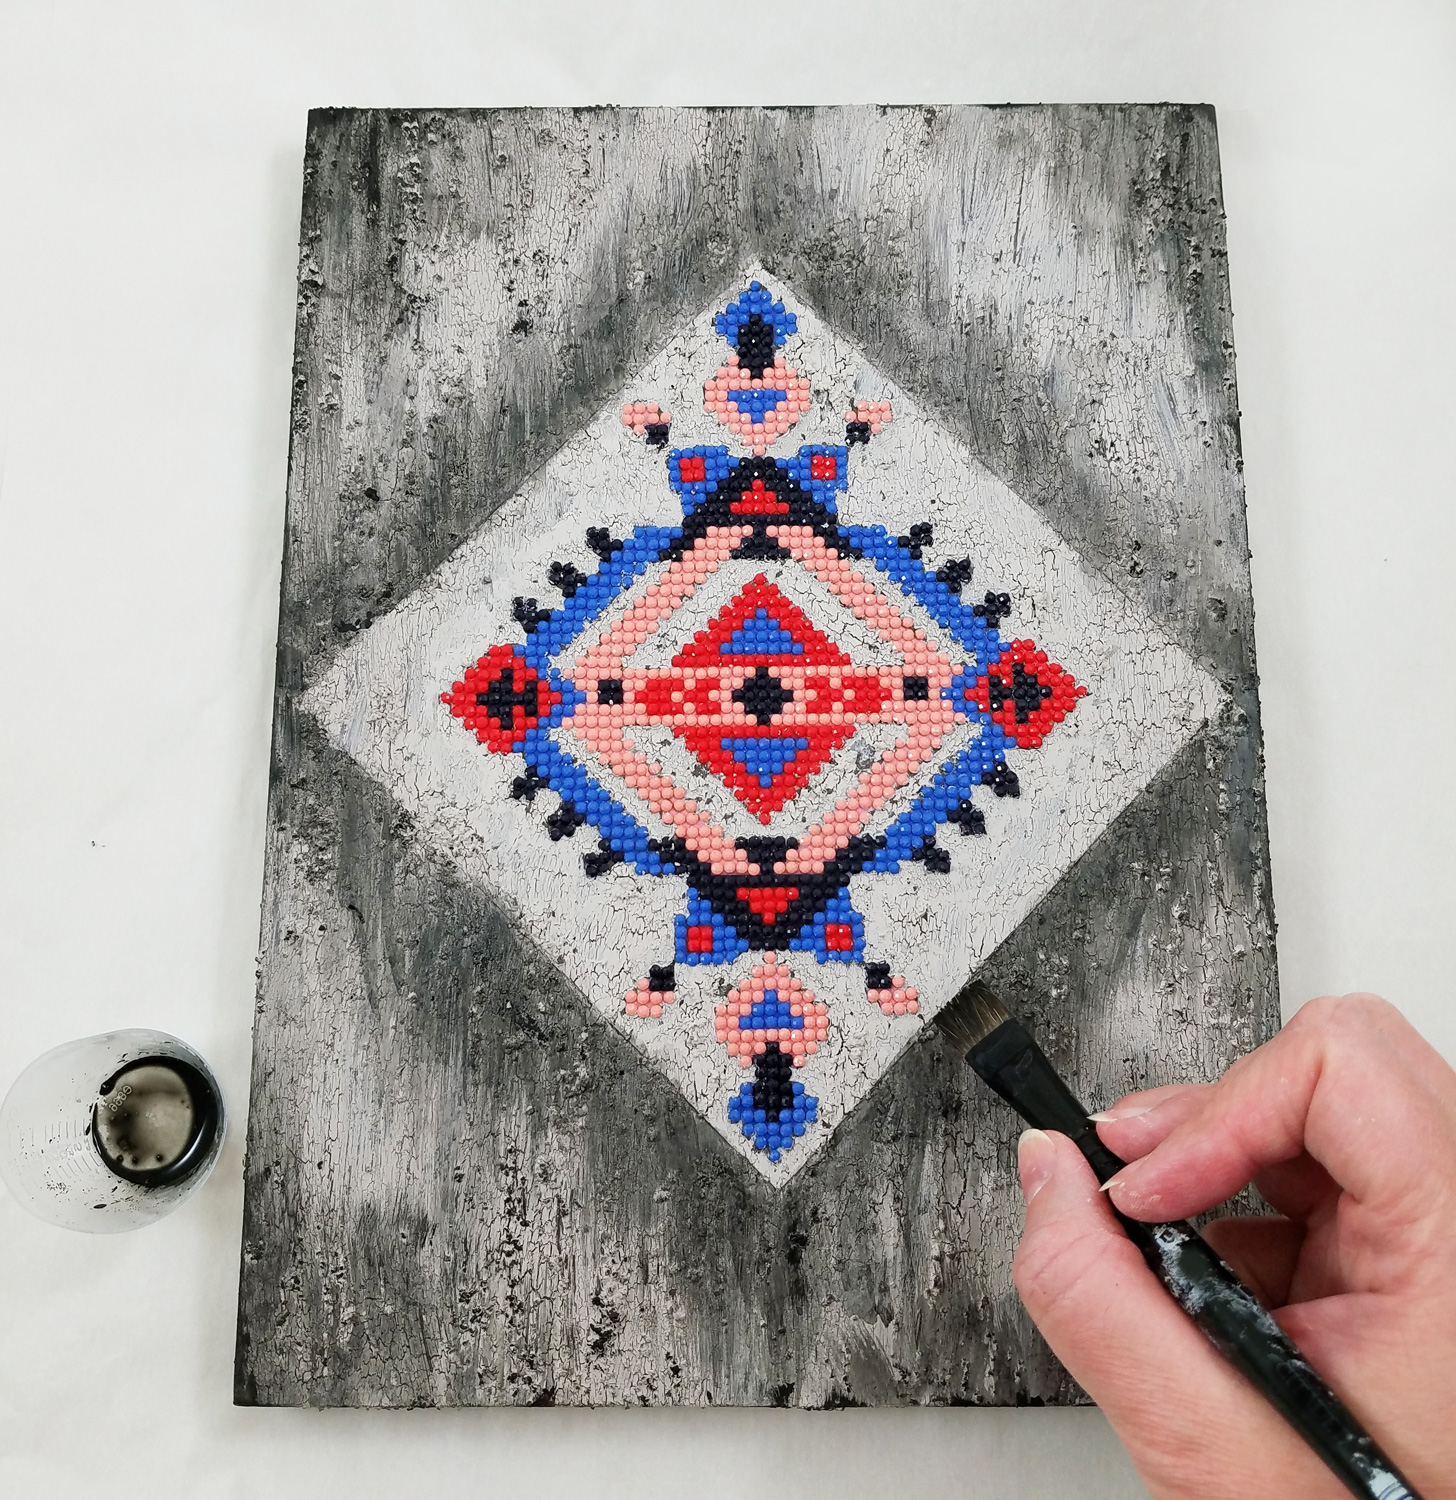
In a small cup I heavily diluted some Black FolkArt Home Decor Chalk Paint with some water and applied it to the cracks, textured elements and raised portions of the wood board, careful to avoid the flat backed diamond pattern. I left the paint to fully dry.
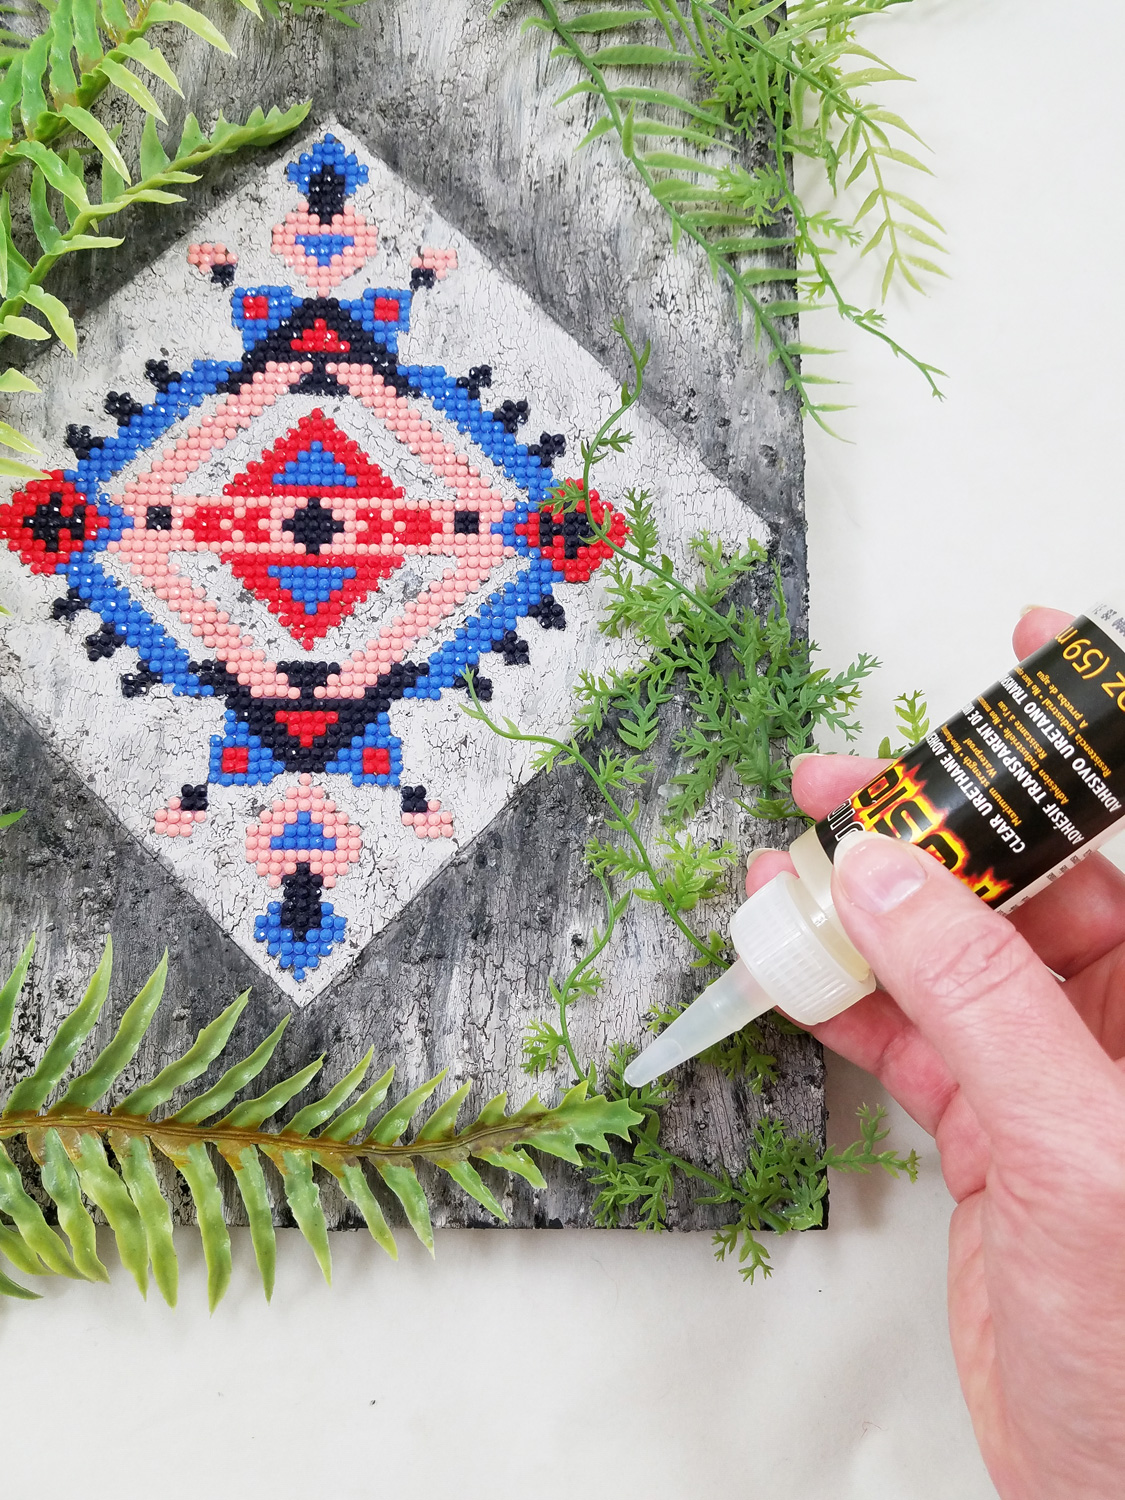
I cut and placed the artificial tropical plants on the board, finding the placement I liked best, gluing the plants in place with Liquid Fusion Clear Urethane Glue. Once the glue was fully cured my pieces was ready to be displayed.
Until next time, safe travels!
*This is an affiliate post, which means I received an assortment of products as a compensation for the creation of art. To read my full disclosure, click here. #TBT A Quick Vampire Bite of Halloween
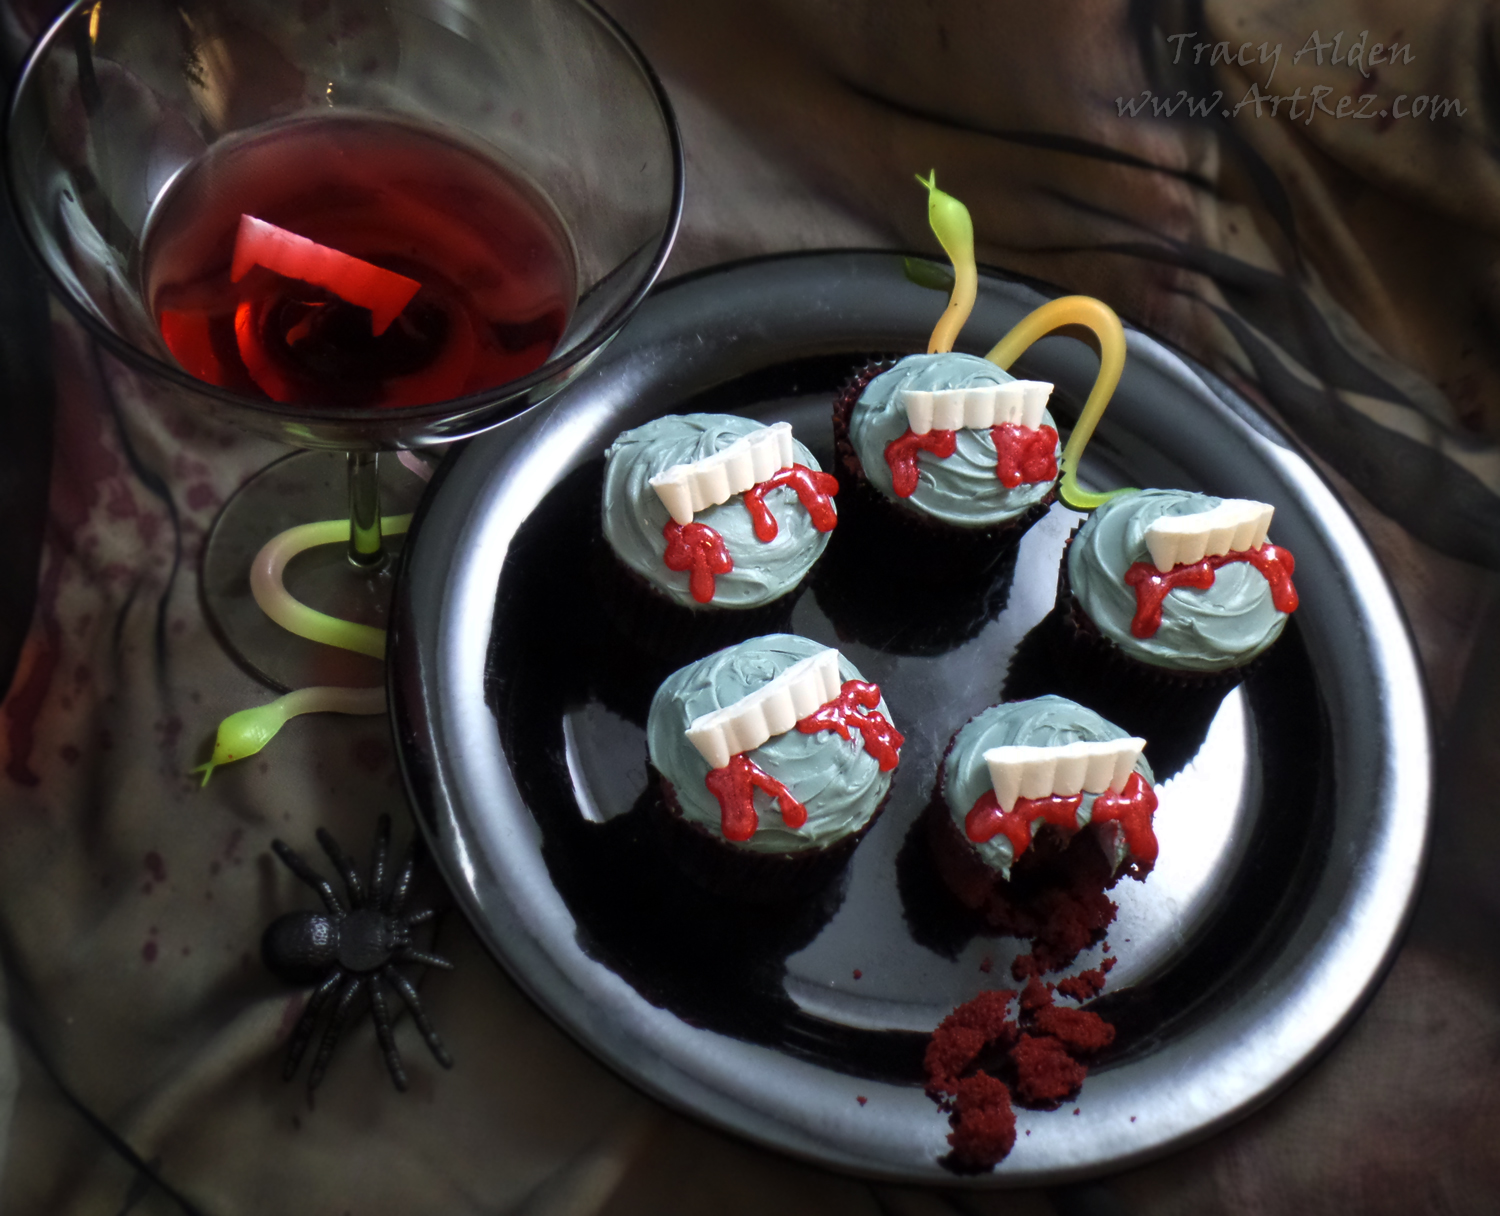
Hello! Continuing my Throwback Thursday posts, this time going with my love of hosting Halloween parties and the little ghoulish delights that need to be decorated. While it would have been okay to just put plastic vampire fangs on each cupcake, I wanted to make the fangs an edible candy treat!
Supplies:
Amazing Mold Putty
Plastic Children’s size Vampire Fangs
Wilton Candy Melts
Wilton Blood Red Sparkle Gel Icing
Red Velvet Cake Mix
Black Cupcake tin liners
White icing tinted blue-grey
Toothpicks
Sandwich baggies
Butter knife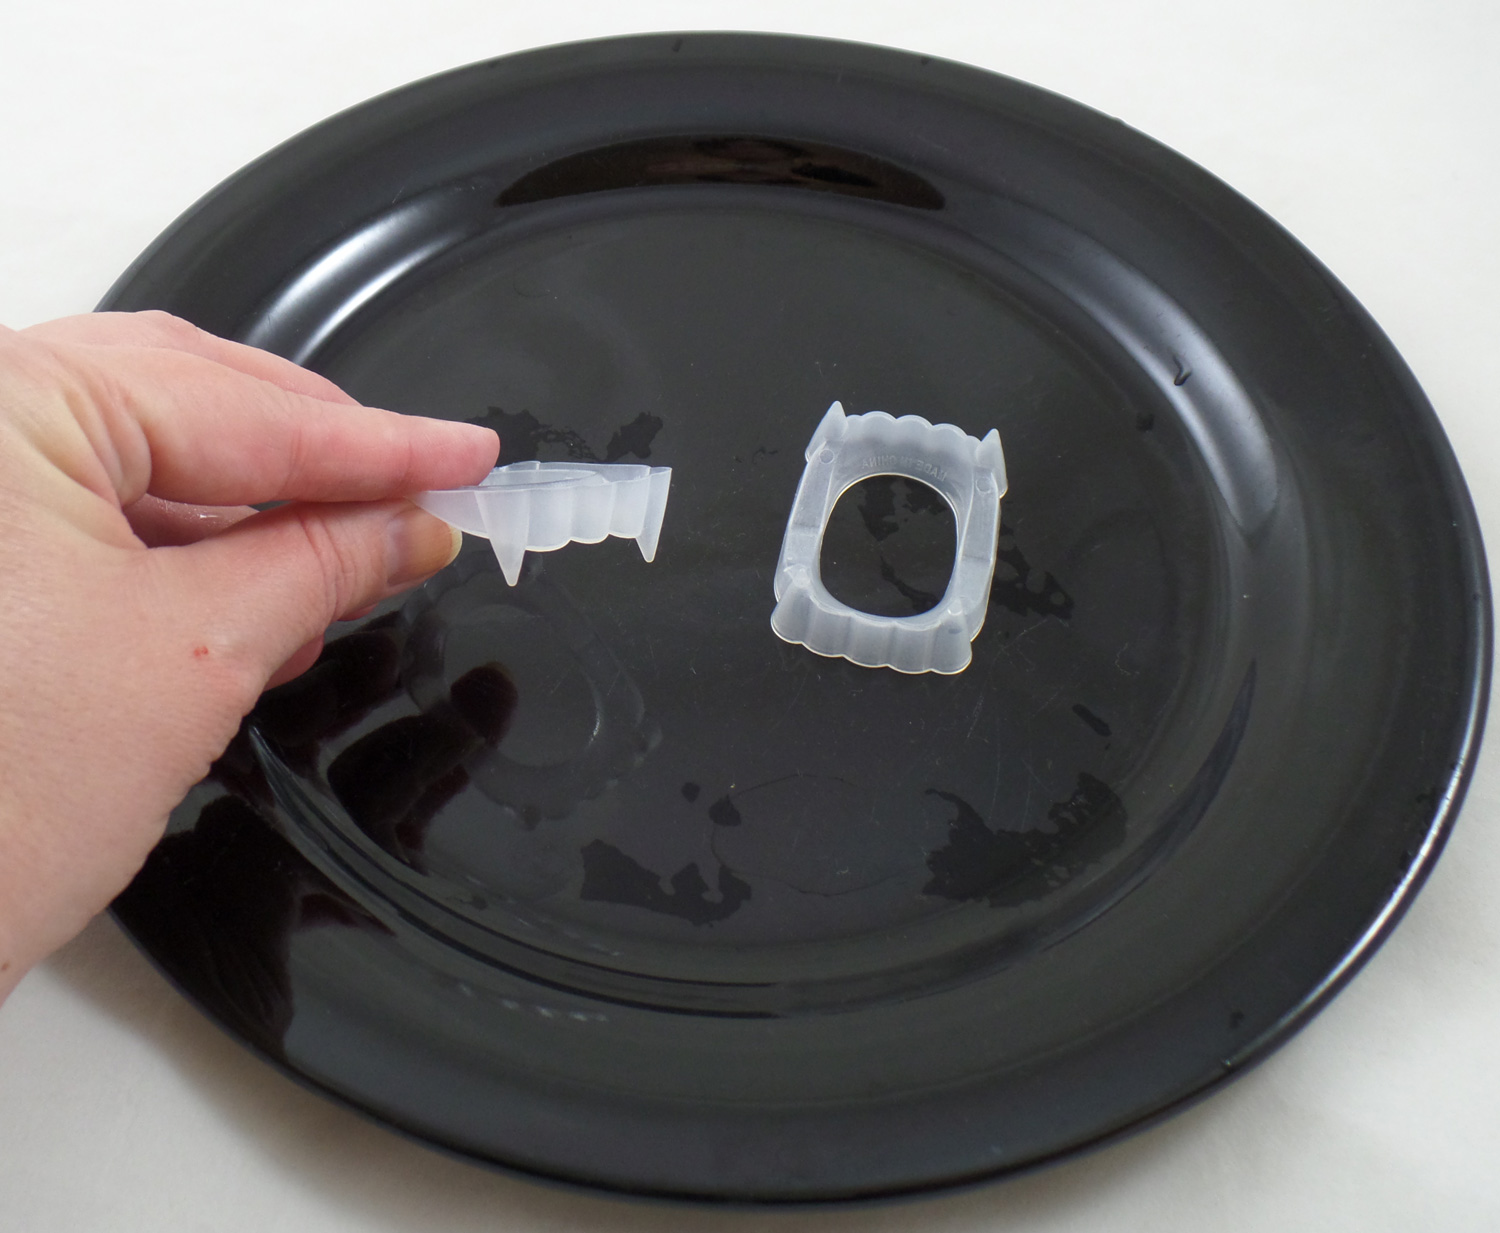
I cleaned two child sized vampire fangs, with soap and water to prepare them for molding. I placed them on a black dinner plate so I had a smooth and contrasting surface to work on.
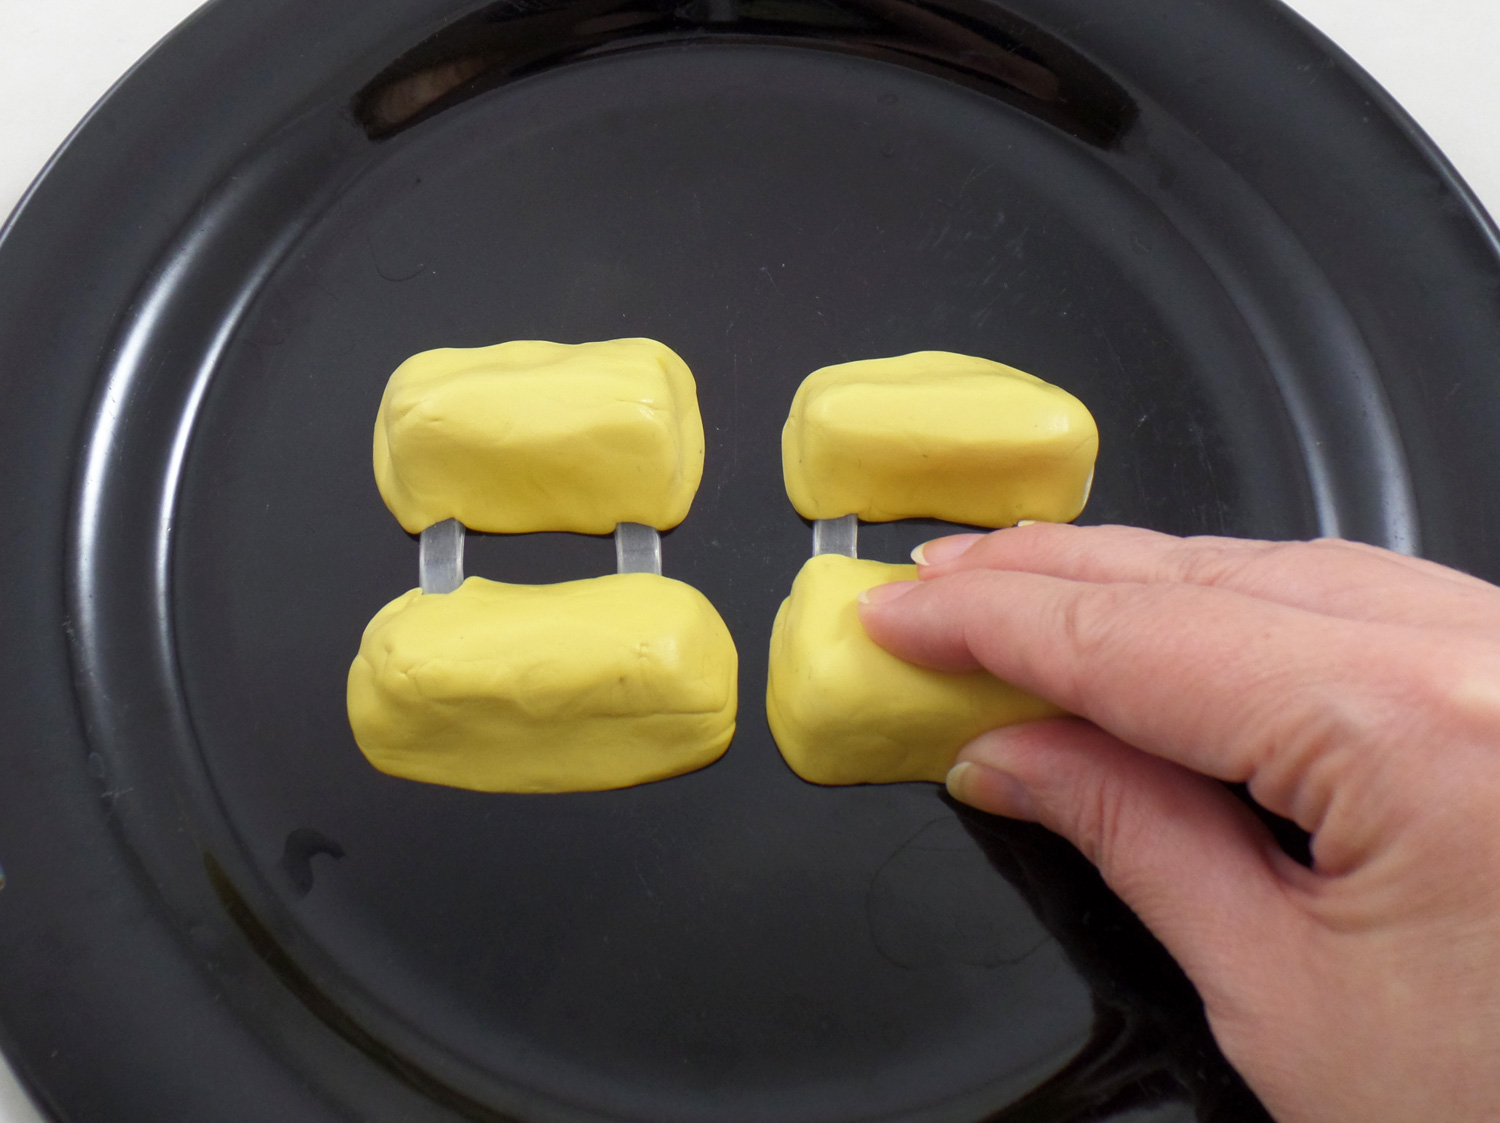
I mixed up some Amazing Mold Putty and molded it around the front portions of the vampire fangs. I was careful to press the Mold Putty up against the fangs to make sure I got a good molding of the fangs.
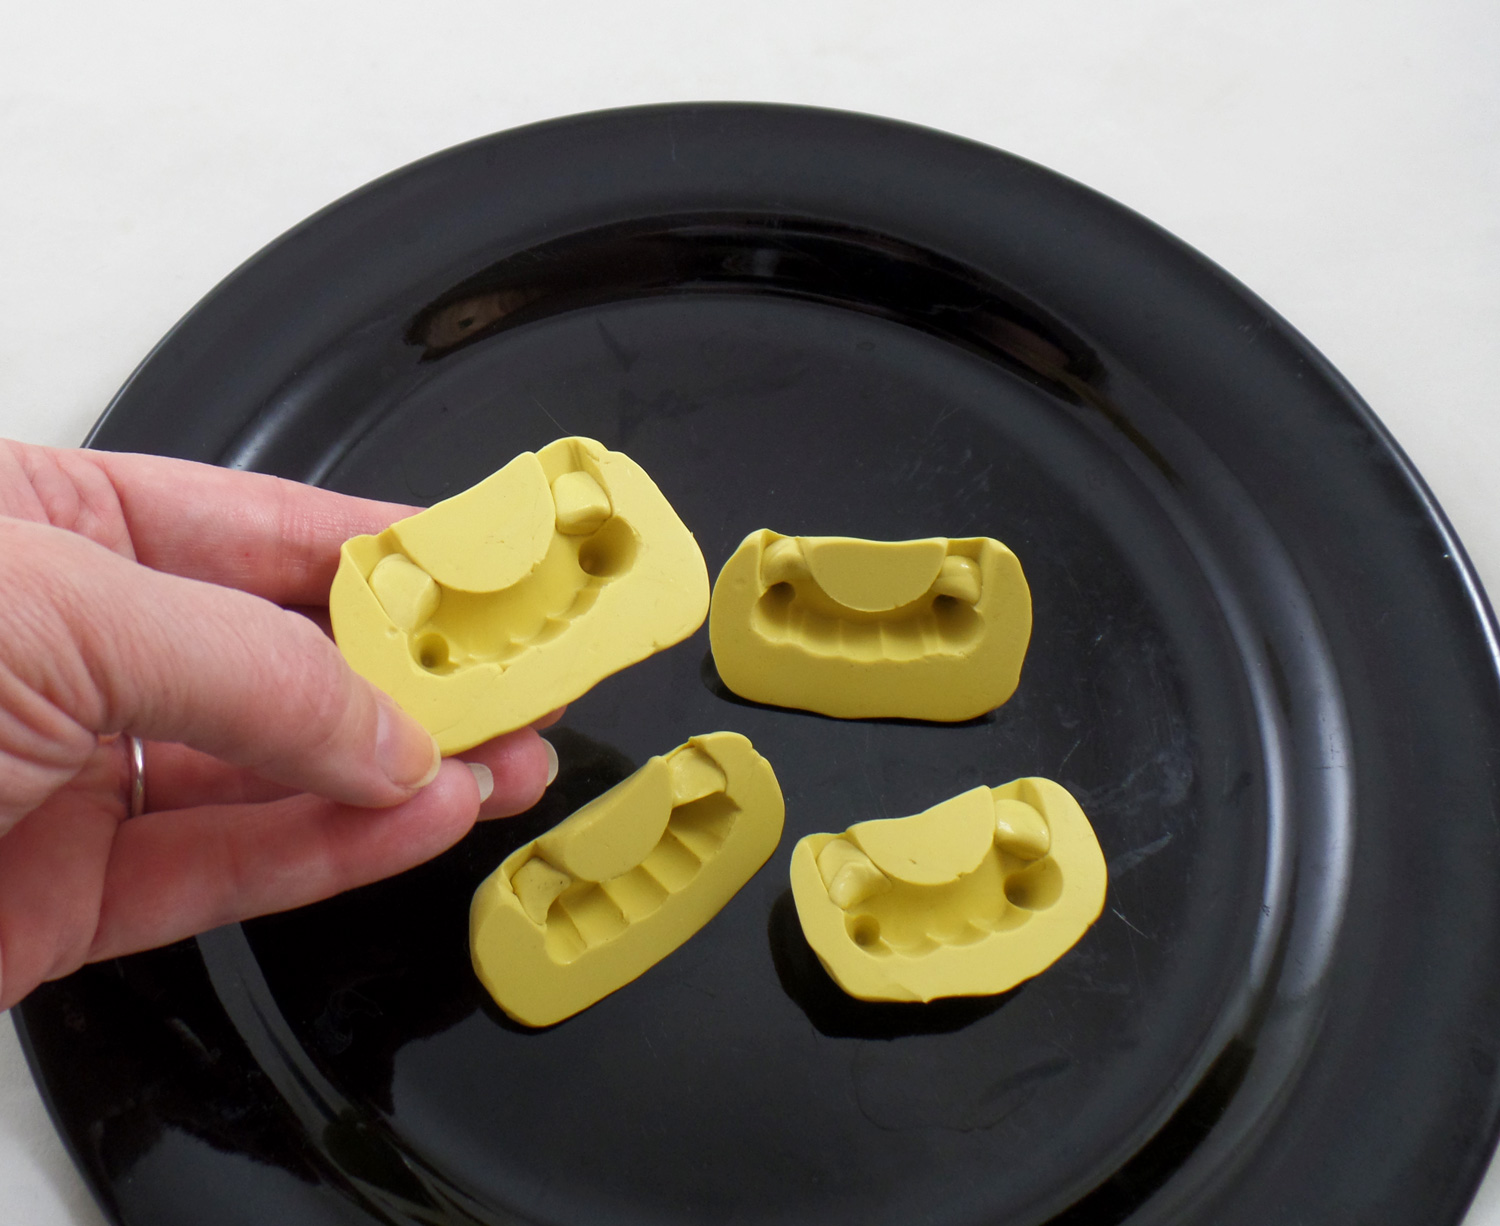
Once the Mold Putty was cured I removed the plastic fangs. To close up the grove created by the gum portion of the vampire fangs I mixed up and pressed tiny little wads of Mold Putty into the open portion of the mold as seen in the above photo. By doing this I would be able to place melted candy into the molds with no worry of the candy leaking out the back of the fang mold.
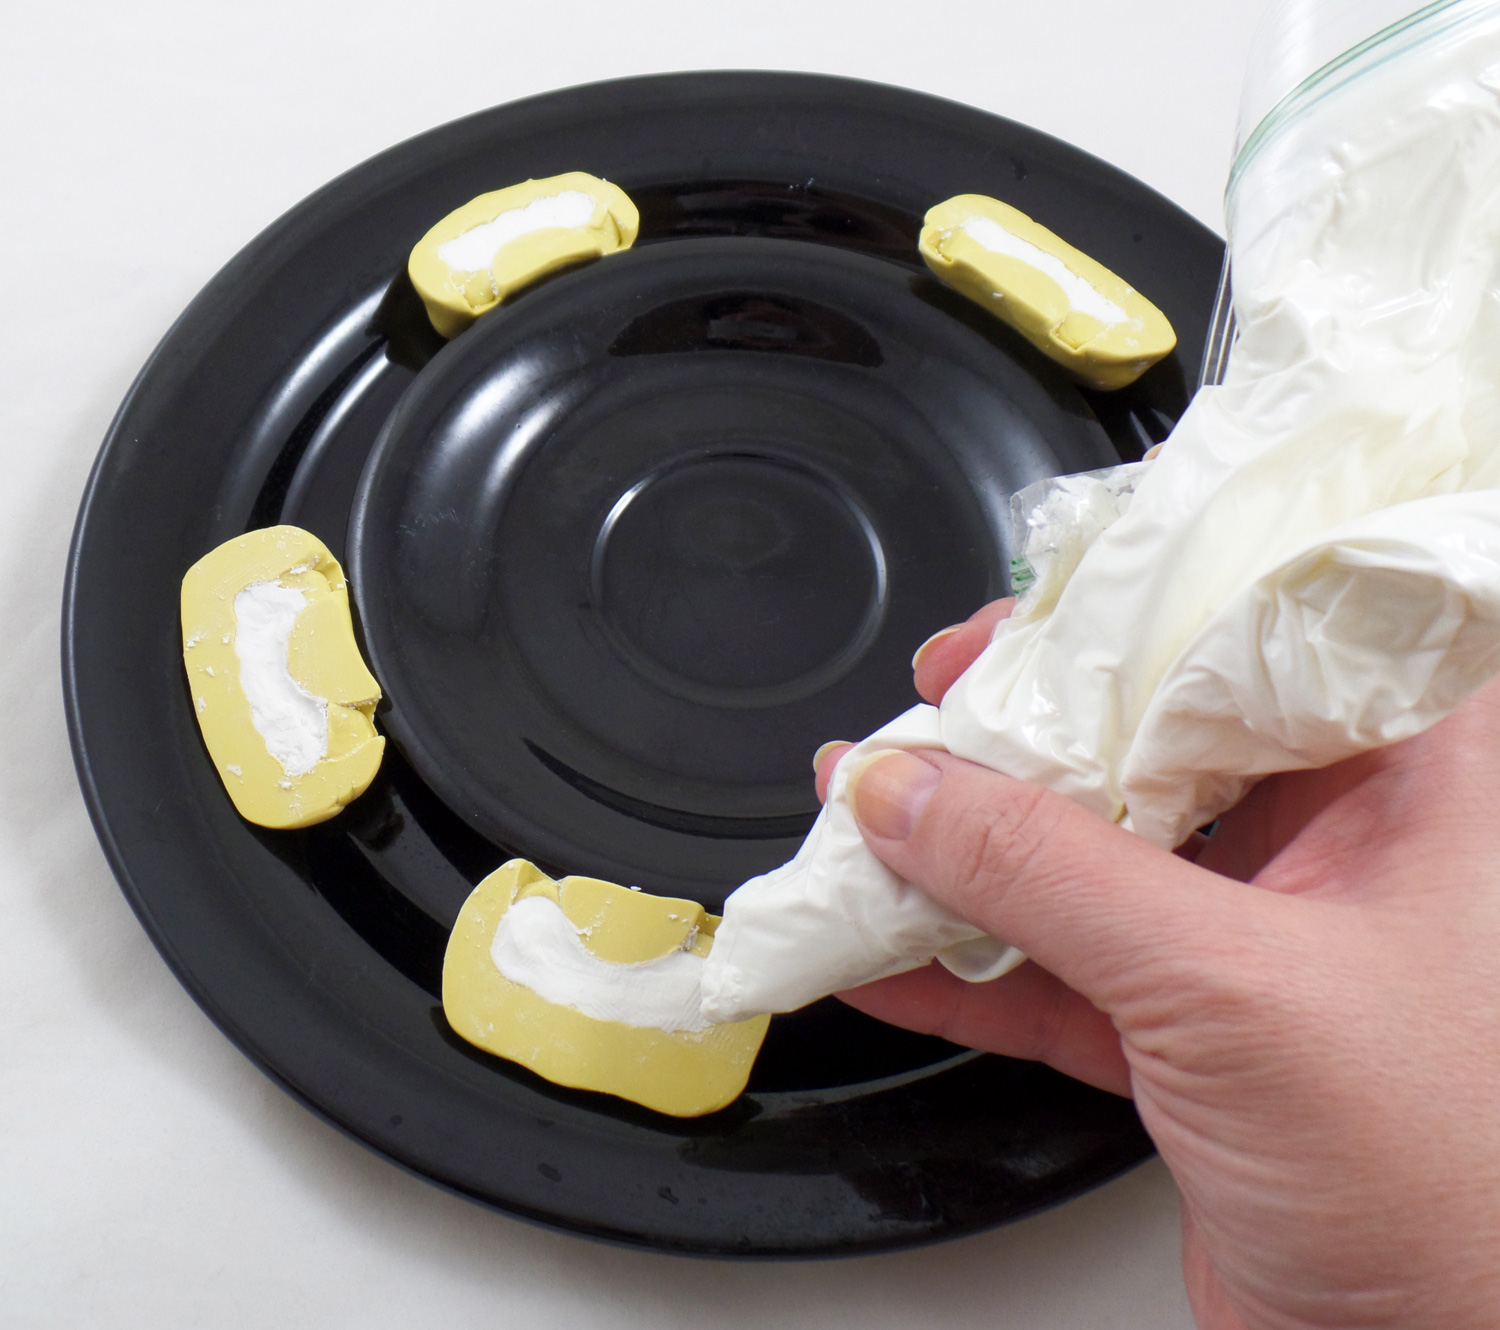
To keep the molds upright I placed a small teacup plate inside the large dinner plate and placed the molds snug inside the dinner plate and against the teacup plate. This will keep the molds in place while the candy is piped into the molds.
Following the manufacturer instructions I carefully melted the Wilton Candy Melts in a sandwich bag in the microwave. Once the candy was melted I snipped the end off a corner of the sandwich baggie and pipped the candy into the molds.*Make sure the candy is completely cooled before removing from the mold to make sure you don’t break off a fang. A quick trip in the refrigerator is a sure way to help your candy along!
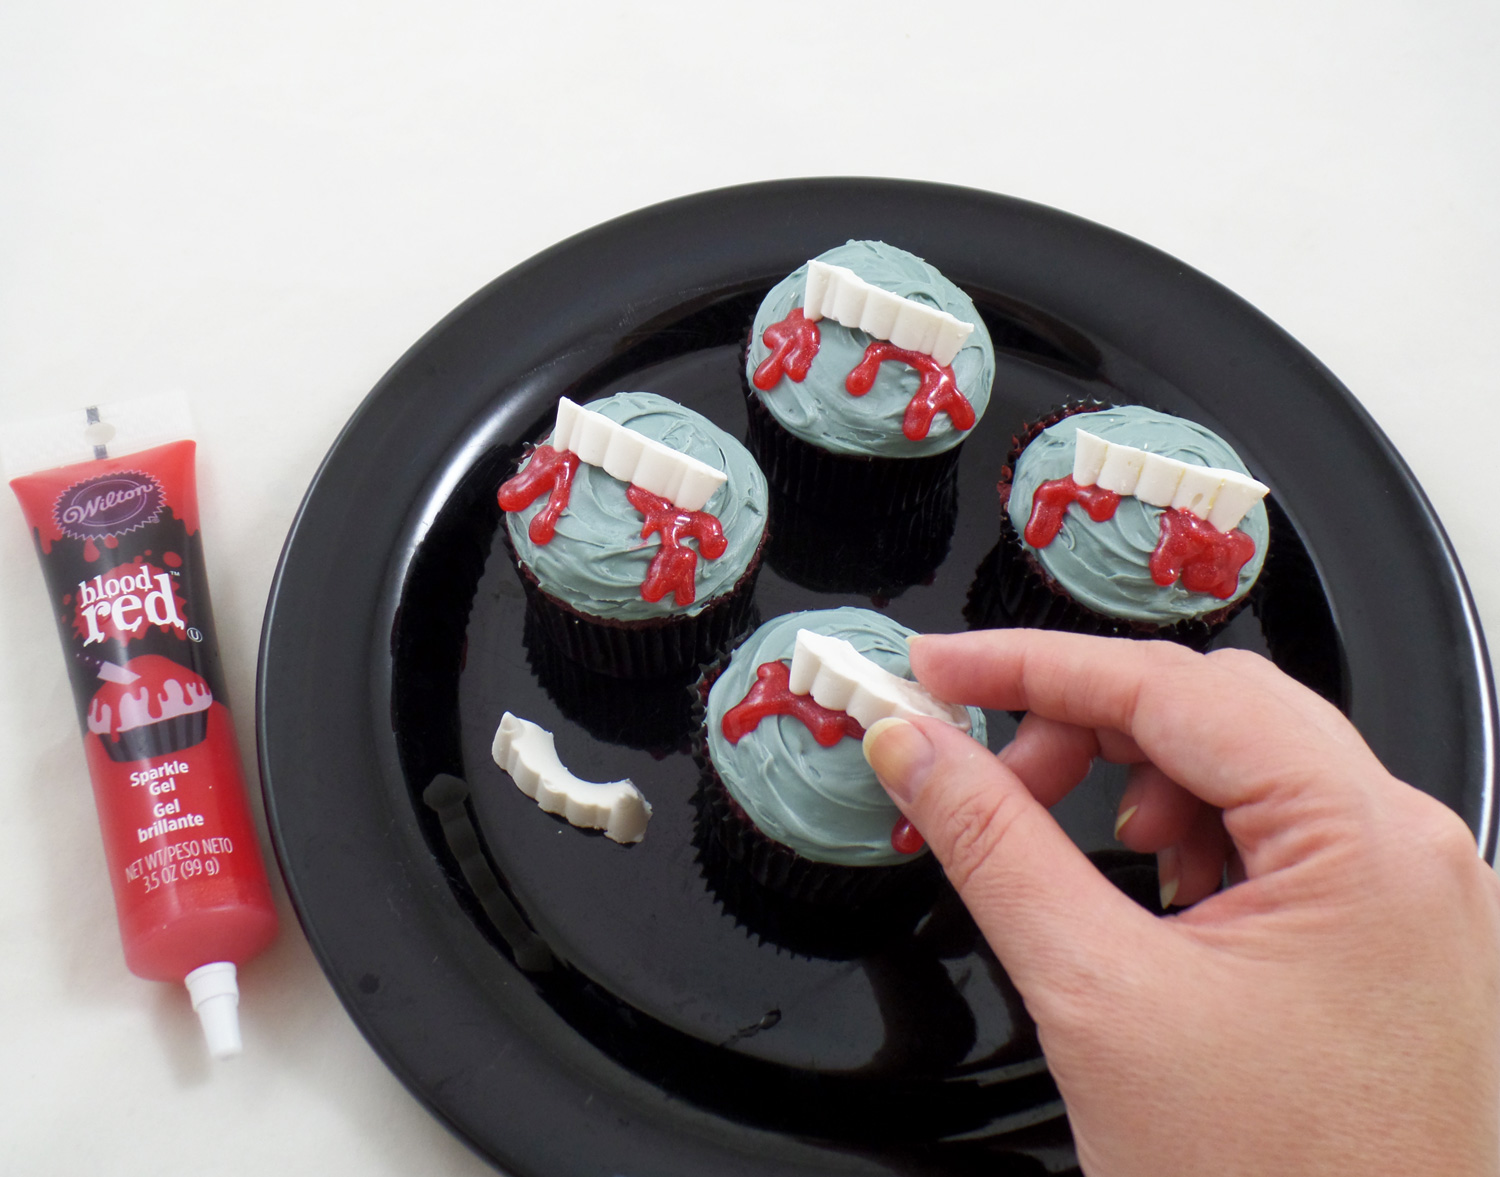
I made up a batch of Red Velvet cupcakes, applied blue-grey tinted icing, dribbled some Wilton Blood Red Glitter Gel Icing and carefully placed a set of candy fangs on each cupcake.
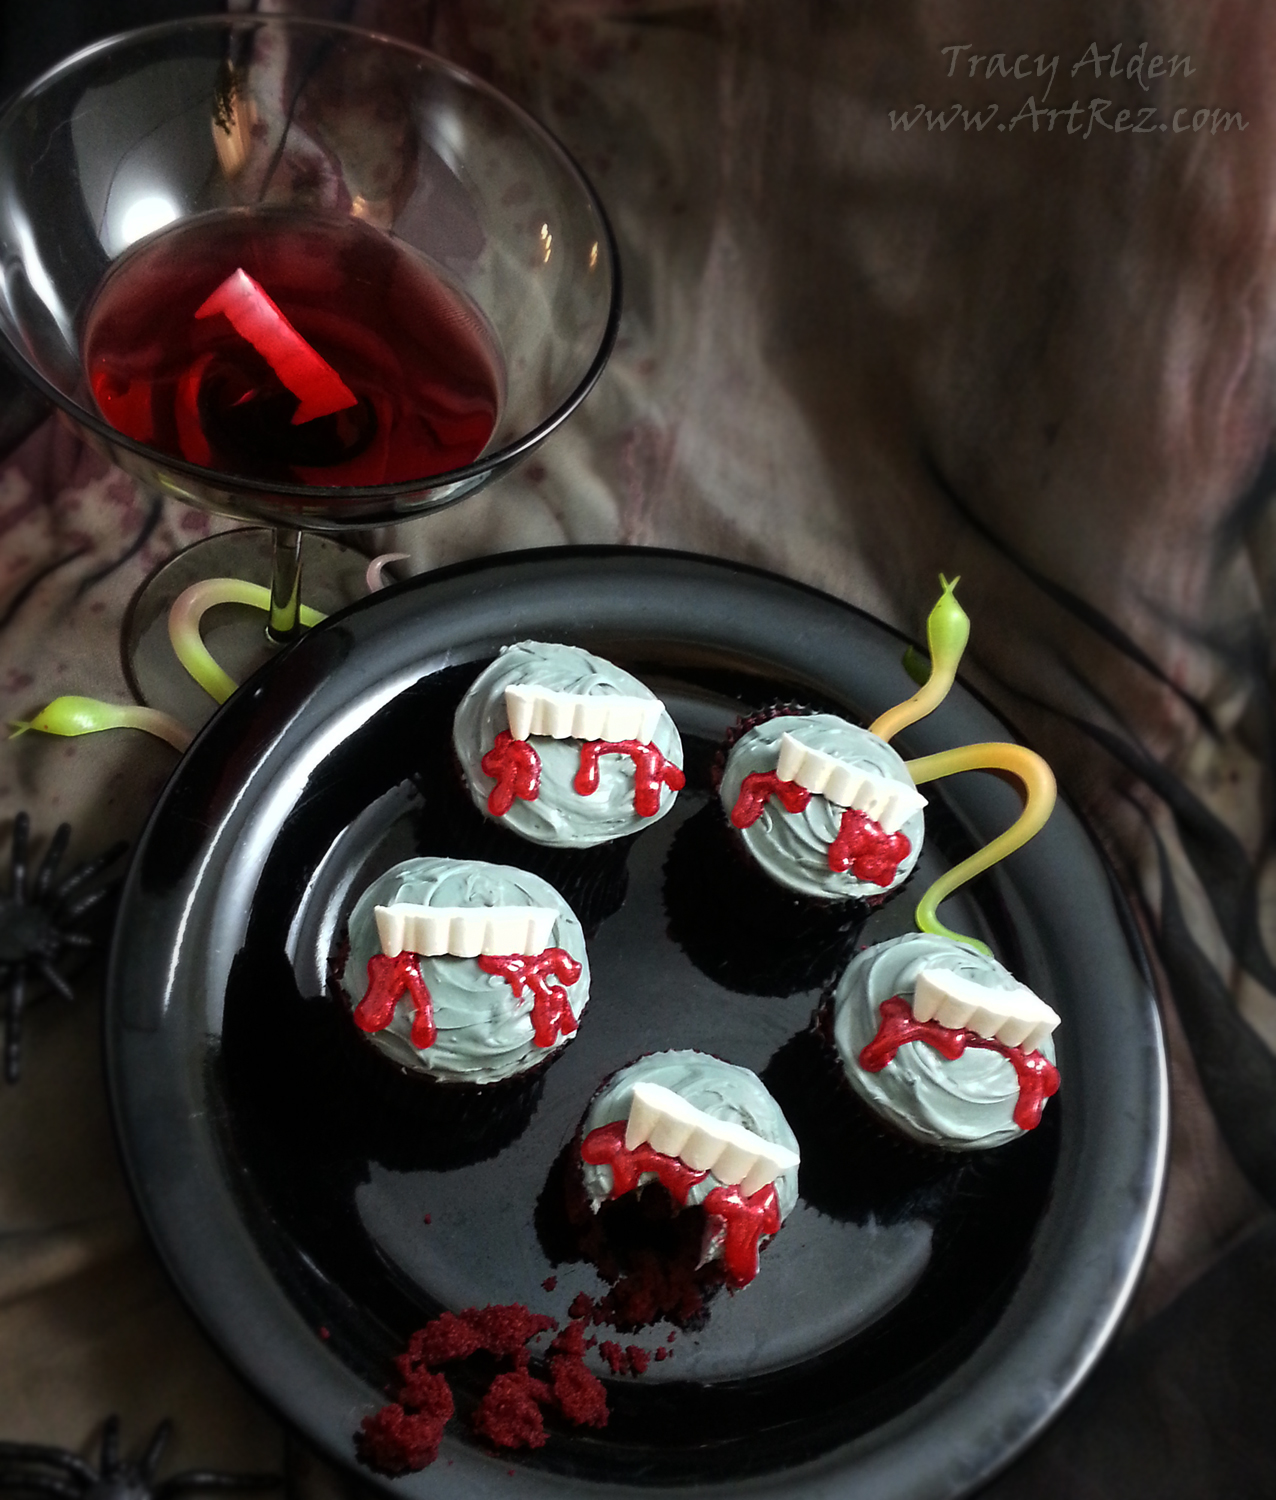
I had so much fun making the candy fangs I made more than I needed for the cupcakes, so the extra fangs made fun addition to cranberry cocktails!
Until next time, safe travels!*This is an affiliate post, which means I received an assortment of products as a compensation for the creation of art. To read my full disclosure, click here.
#TBT The Upcycled Mummy’s Curse! A spoOky DIY
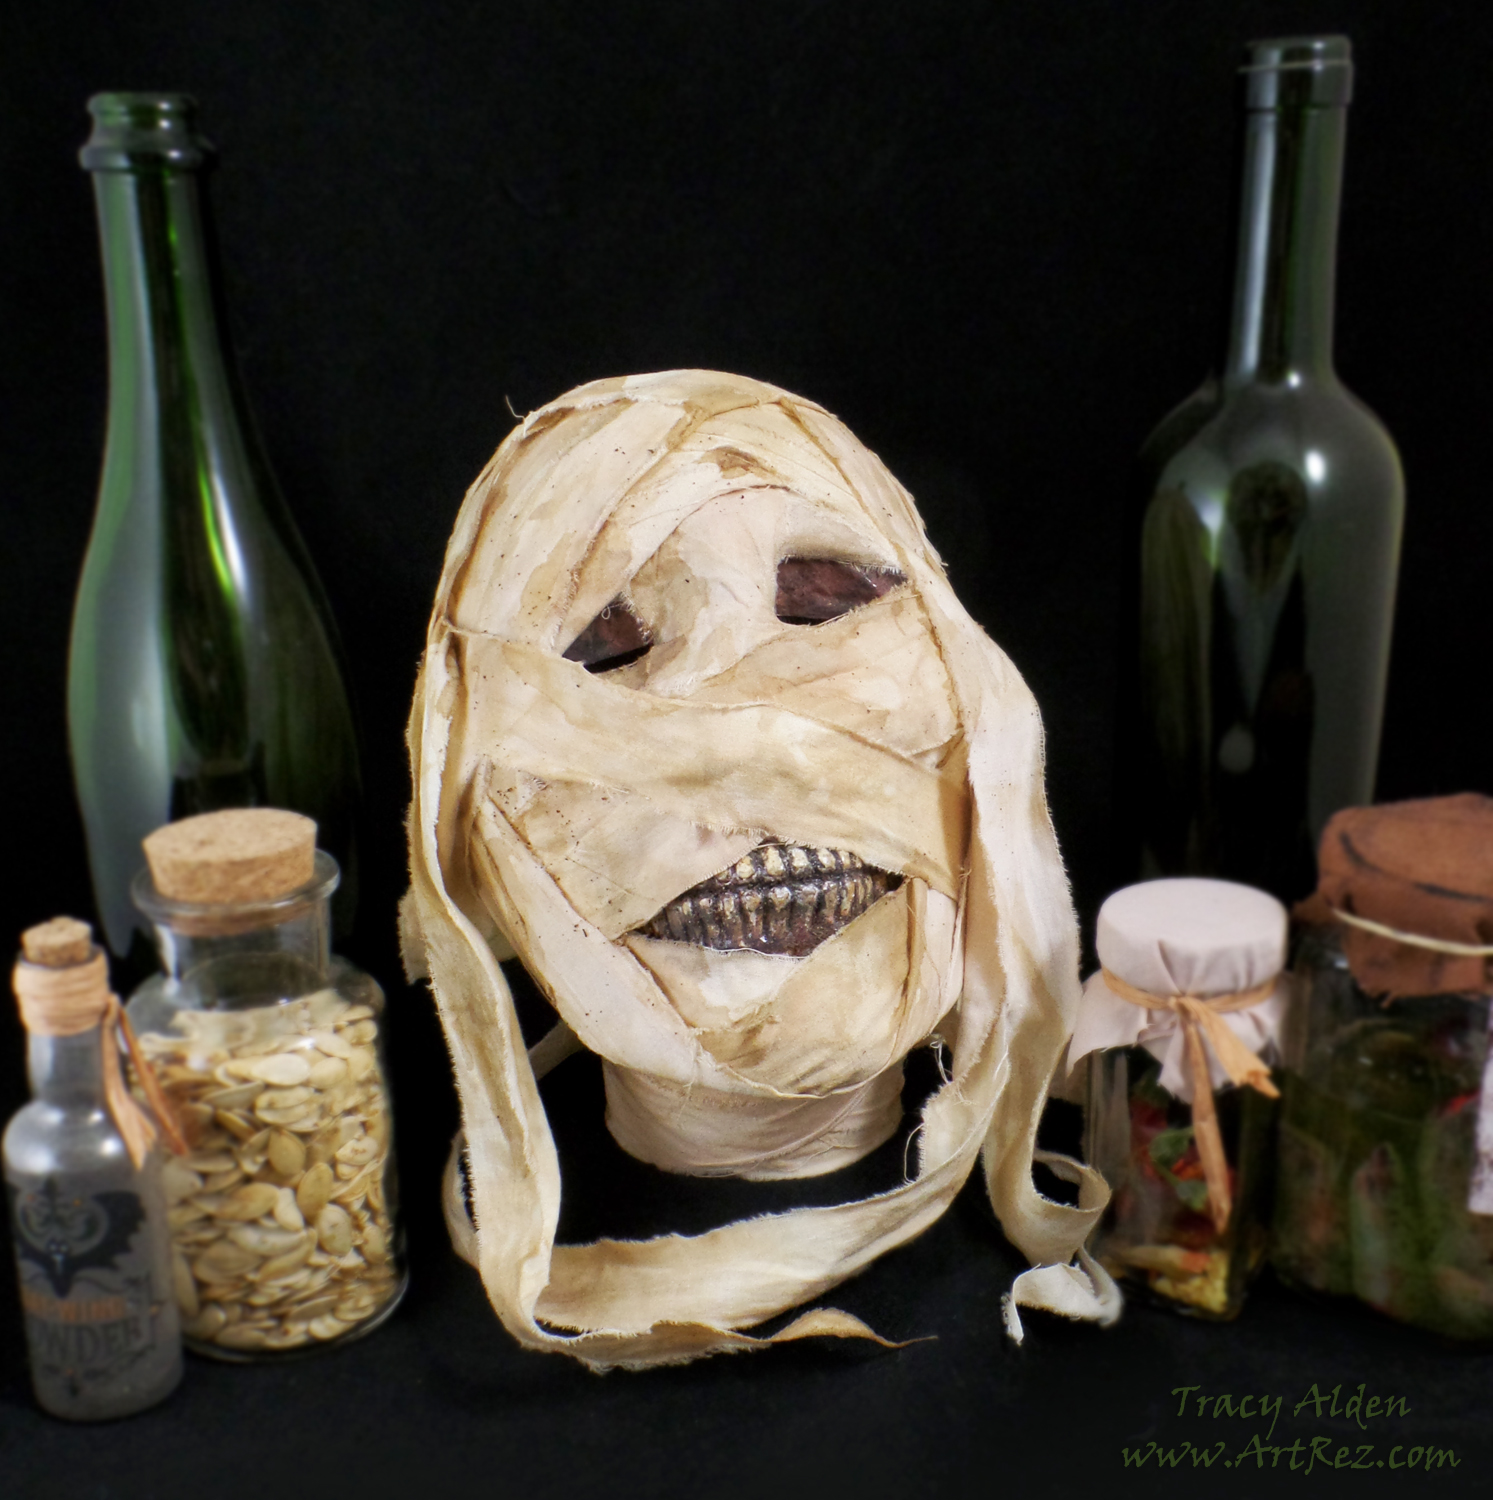
Continuing my Throwback Thursday posts, this time highlighting my love of Halloween, Ancient Egypt and upcycled crafts! Posted in 2015 on the Amazing Casting Products blog, I had some rather odd inspiration for this project and it all started with me finding some fun plastic Halloween skulls at a Thrift store. With two of them, I made Ghoulish Glam Skulls and the rest I saved for Halloween decor around the house.
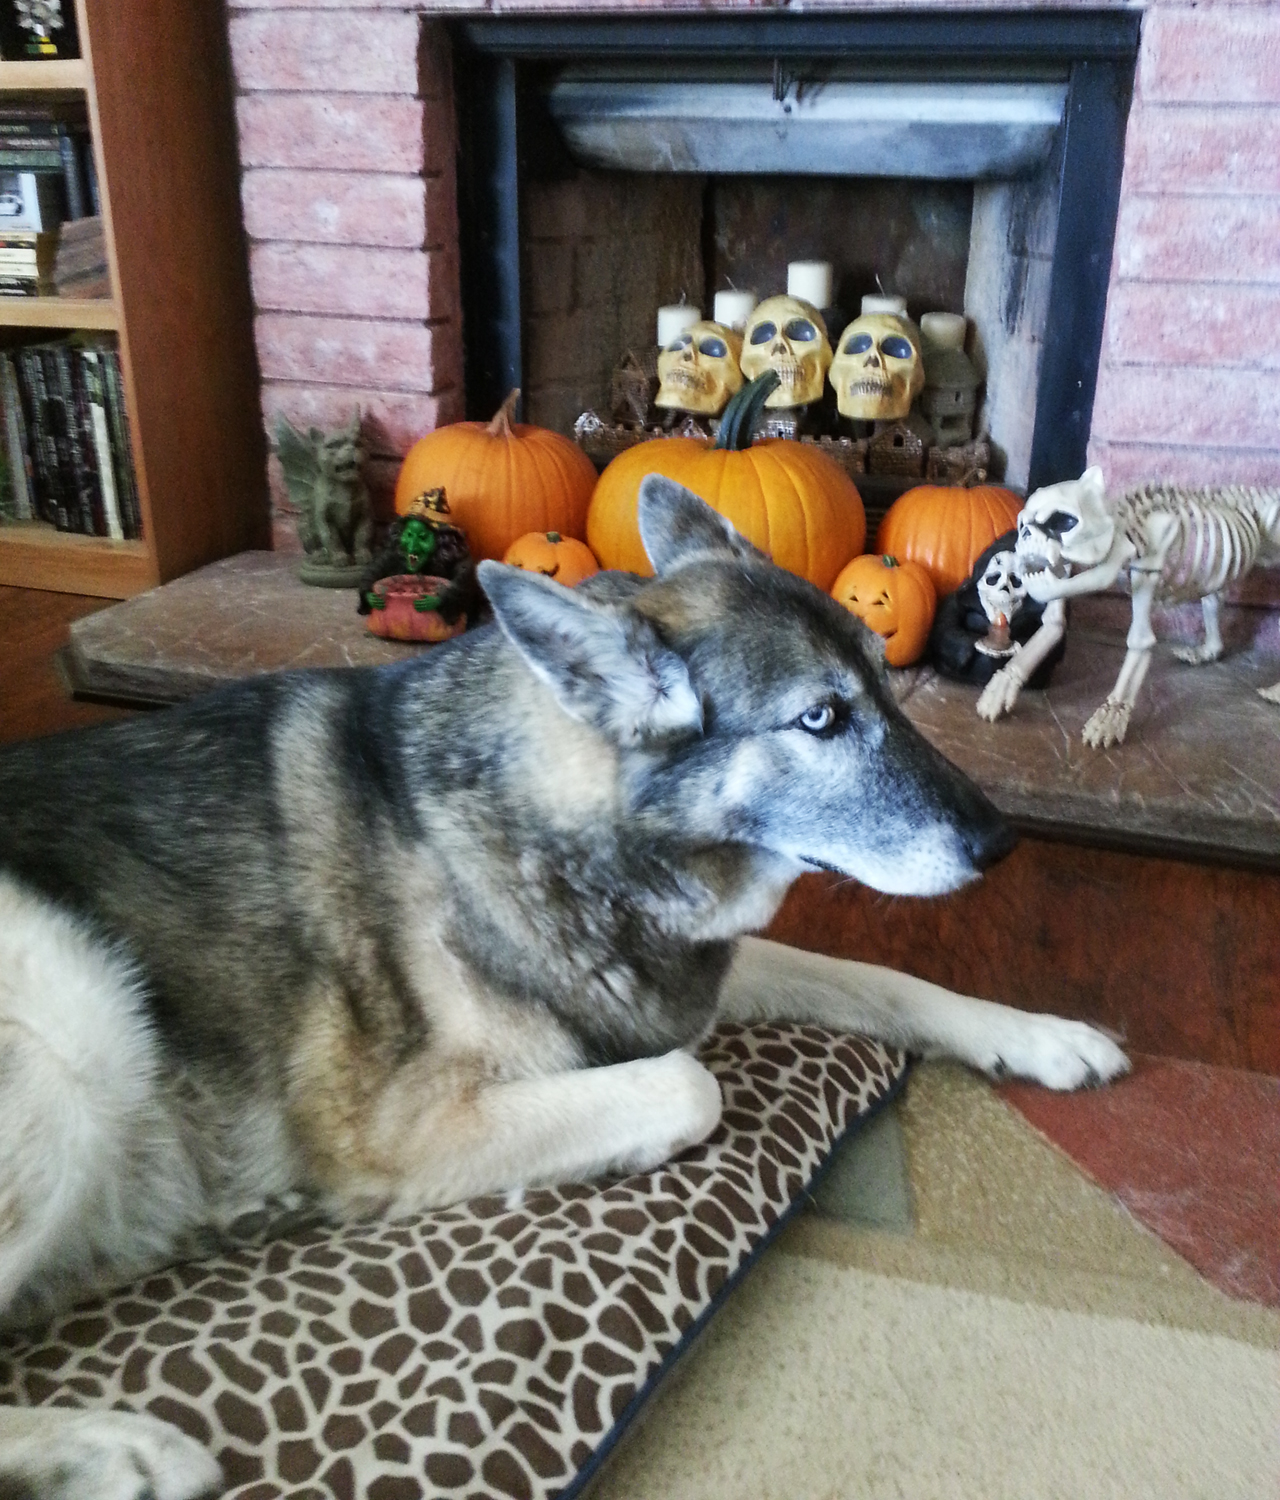
While I was outside in the garden one of our dogs, Luna, decided to play in the house, the skulls were close to her toys and she cracked one of them. I of course couldn’t be angry with her playing though her rather adorable “I totally did NOT do that” face also helped. When I was about to throw out the skull, an idea came to me: why not use the cracked skull as a base for a Halloween mummy head prop?
Supplies:
Amazing Casting Resin
Alumilite Dyes
Liquitex Gloss and Matte Varnish
Acrylic Paint
Aluminium Foil and Paper Bags
Stir Sticks
Plastic Halloween Skull
Cotton Muslin Fabric
Black leaf tea bags
Beacon’s Gem-Tac
Paint Brush
Paper Tape Roll
Hot Glue Gun and glue sticks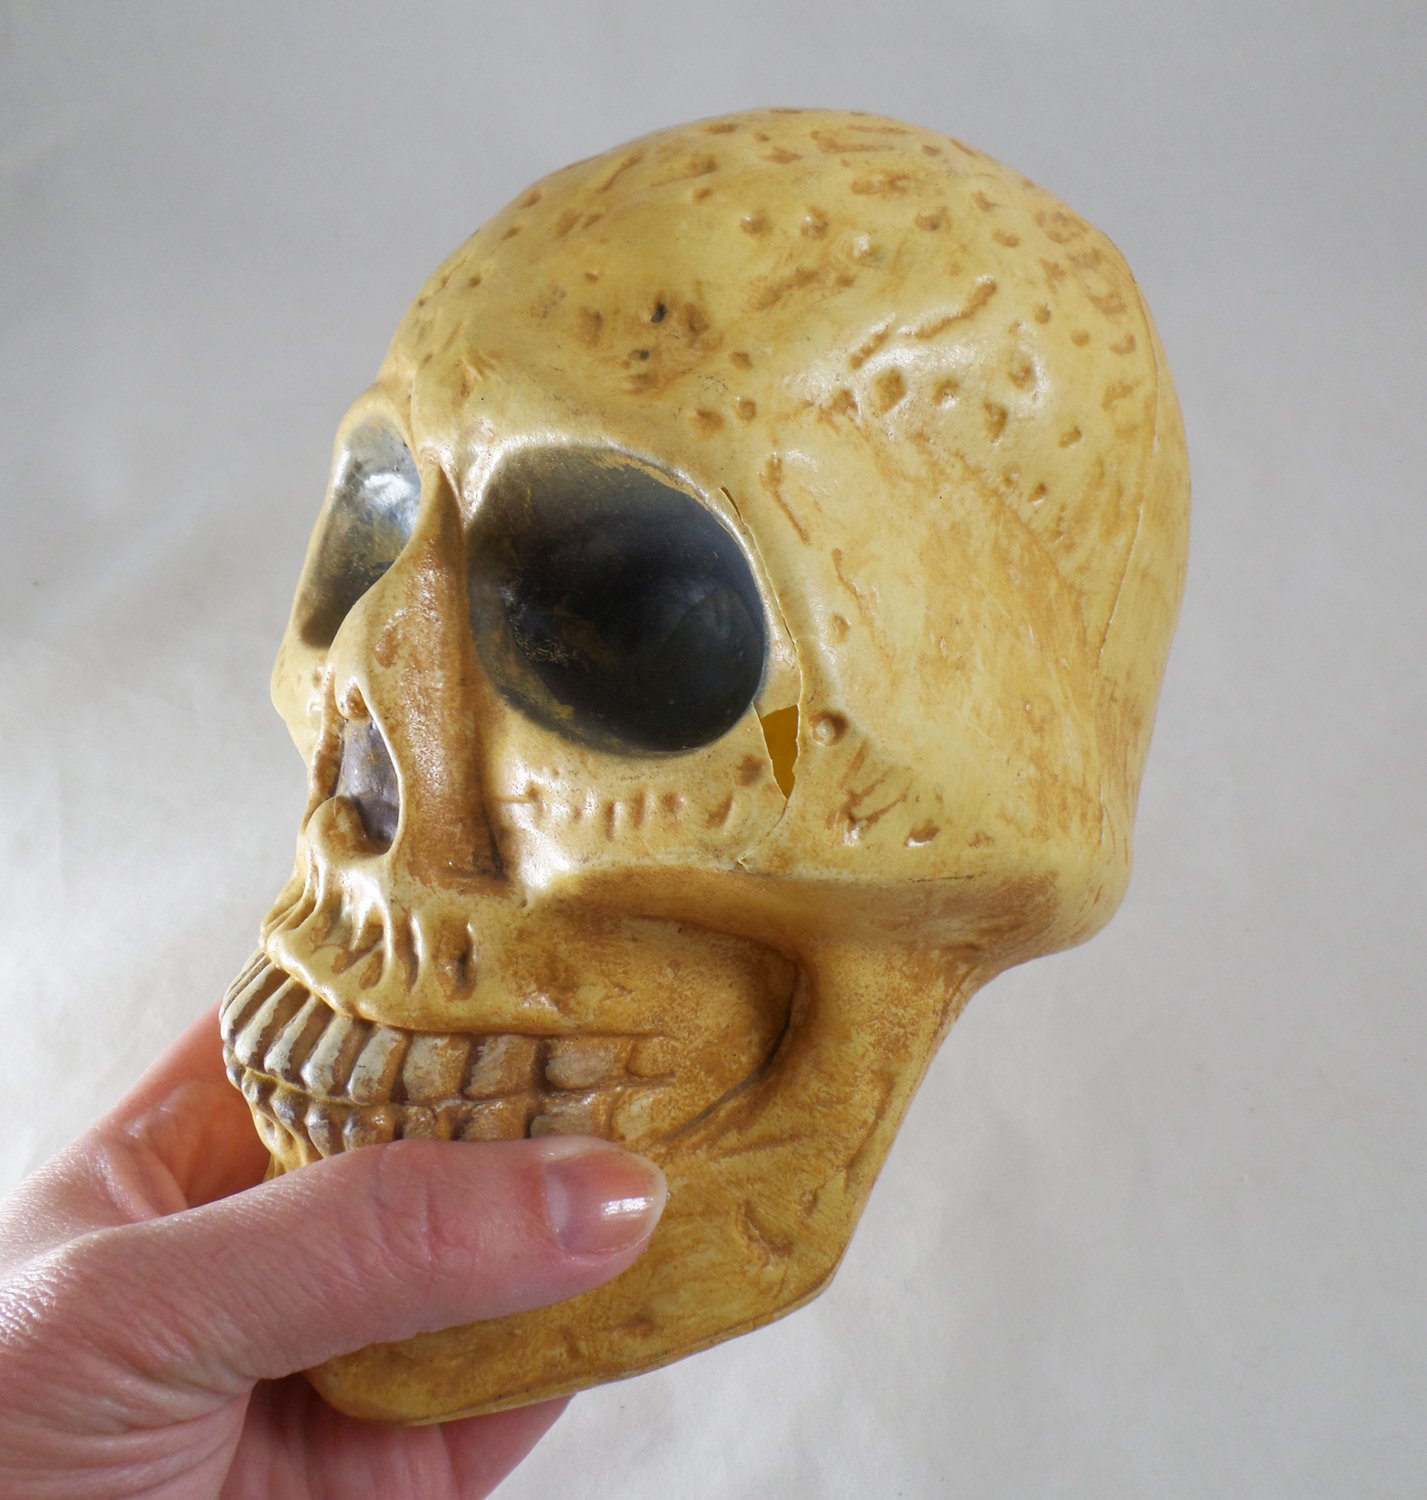
With the crack being along the side of the eye socket and most of the left side of the skull I needed to stabilize the now-fragile skull. I thought of using Casting Resin but I needed to seal the hole before filling the skull with resin. I taped up the crack with clear packing tape, creating a temporary seal for the resin.
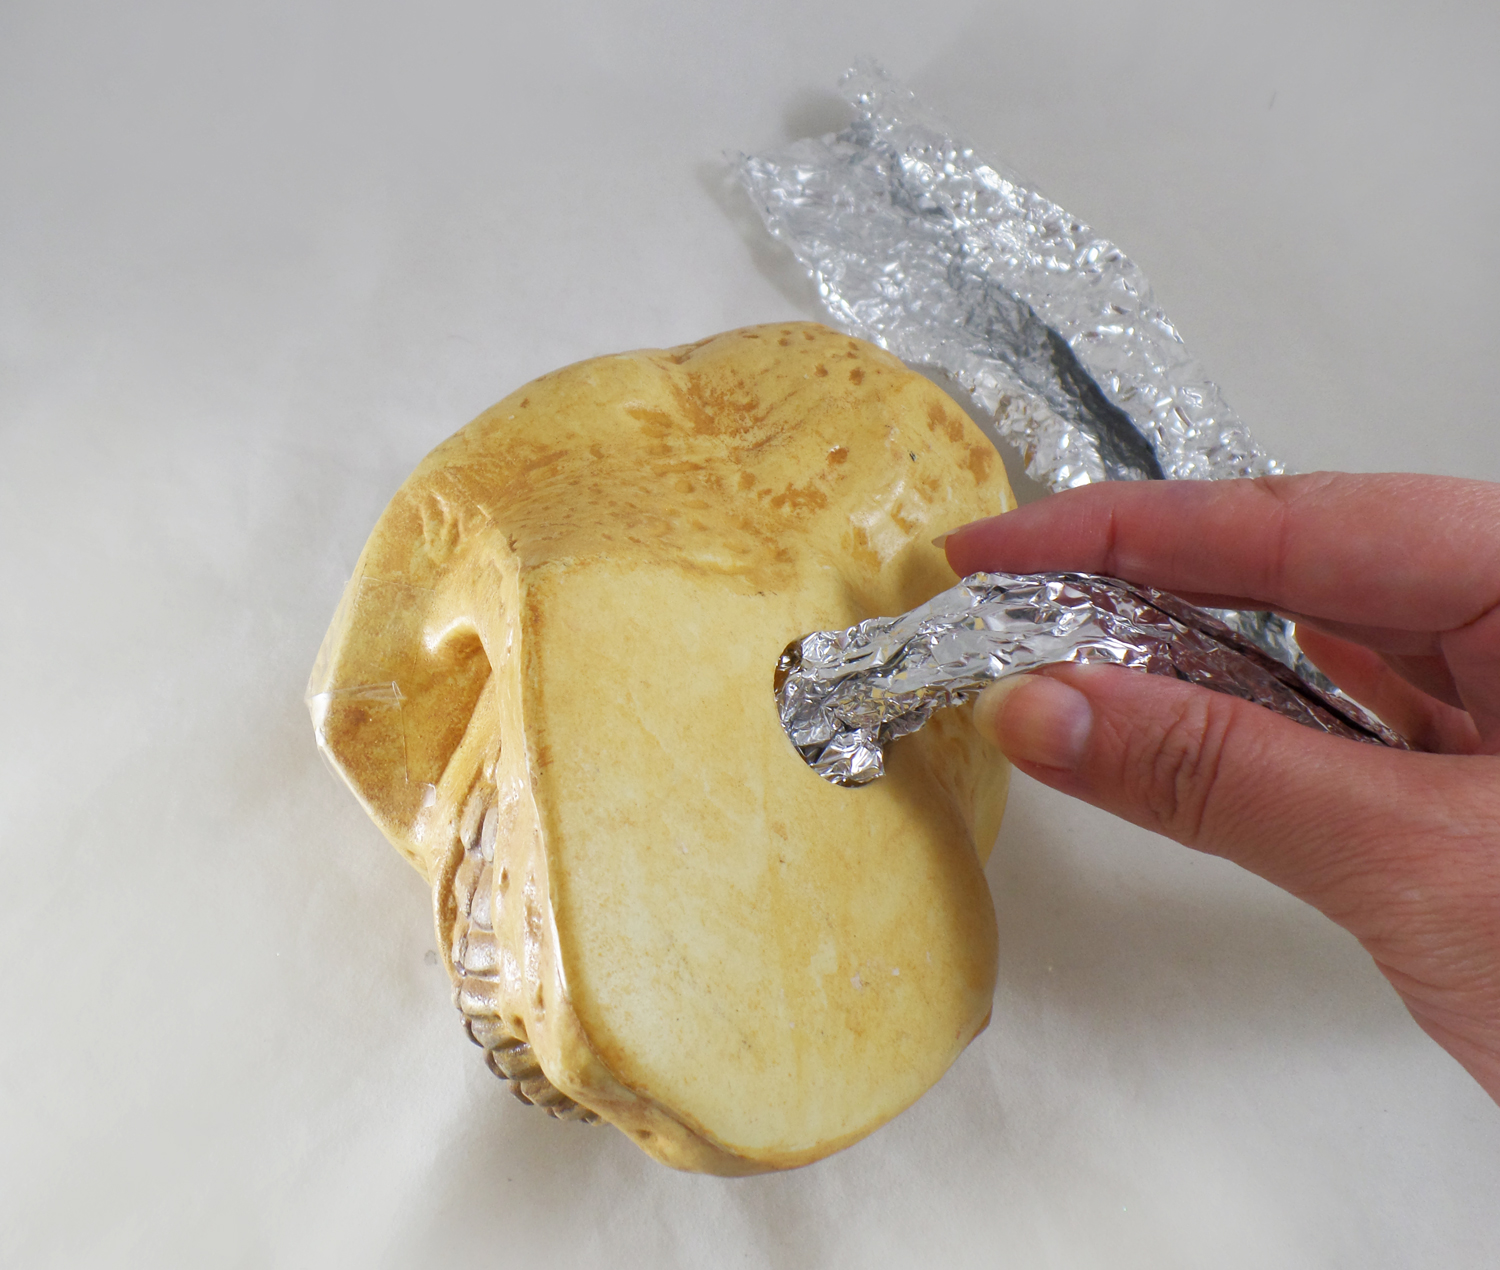
Knowing that if I were to fill up the whole skull with Casting Resin it would not only require a lot of resin but make the skull on the heavy side I needed to put some sort of filler inside the skull. Using used clean paper bags and crumpled aluminum foil I slipped them inside the skull through a hole in the bottom.
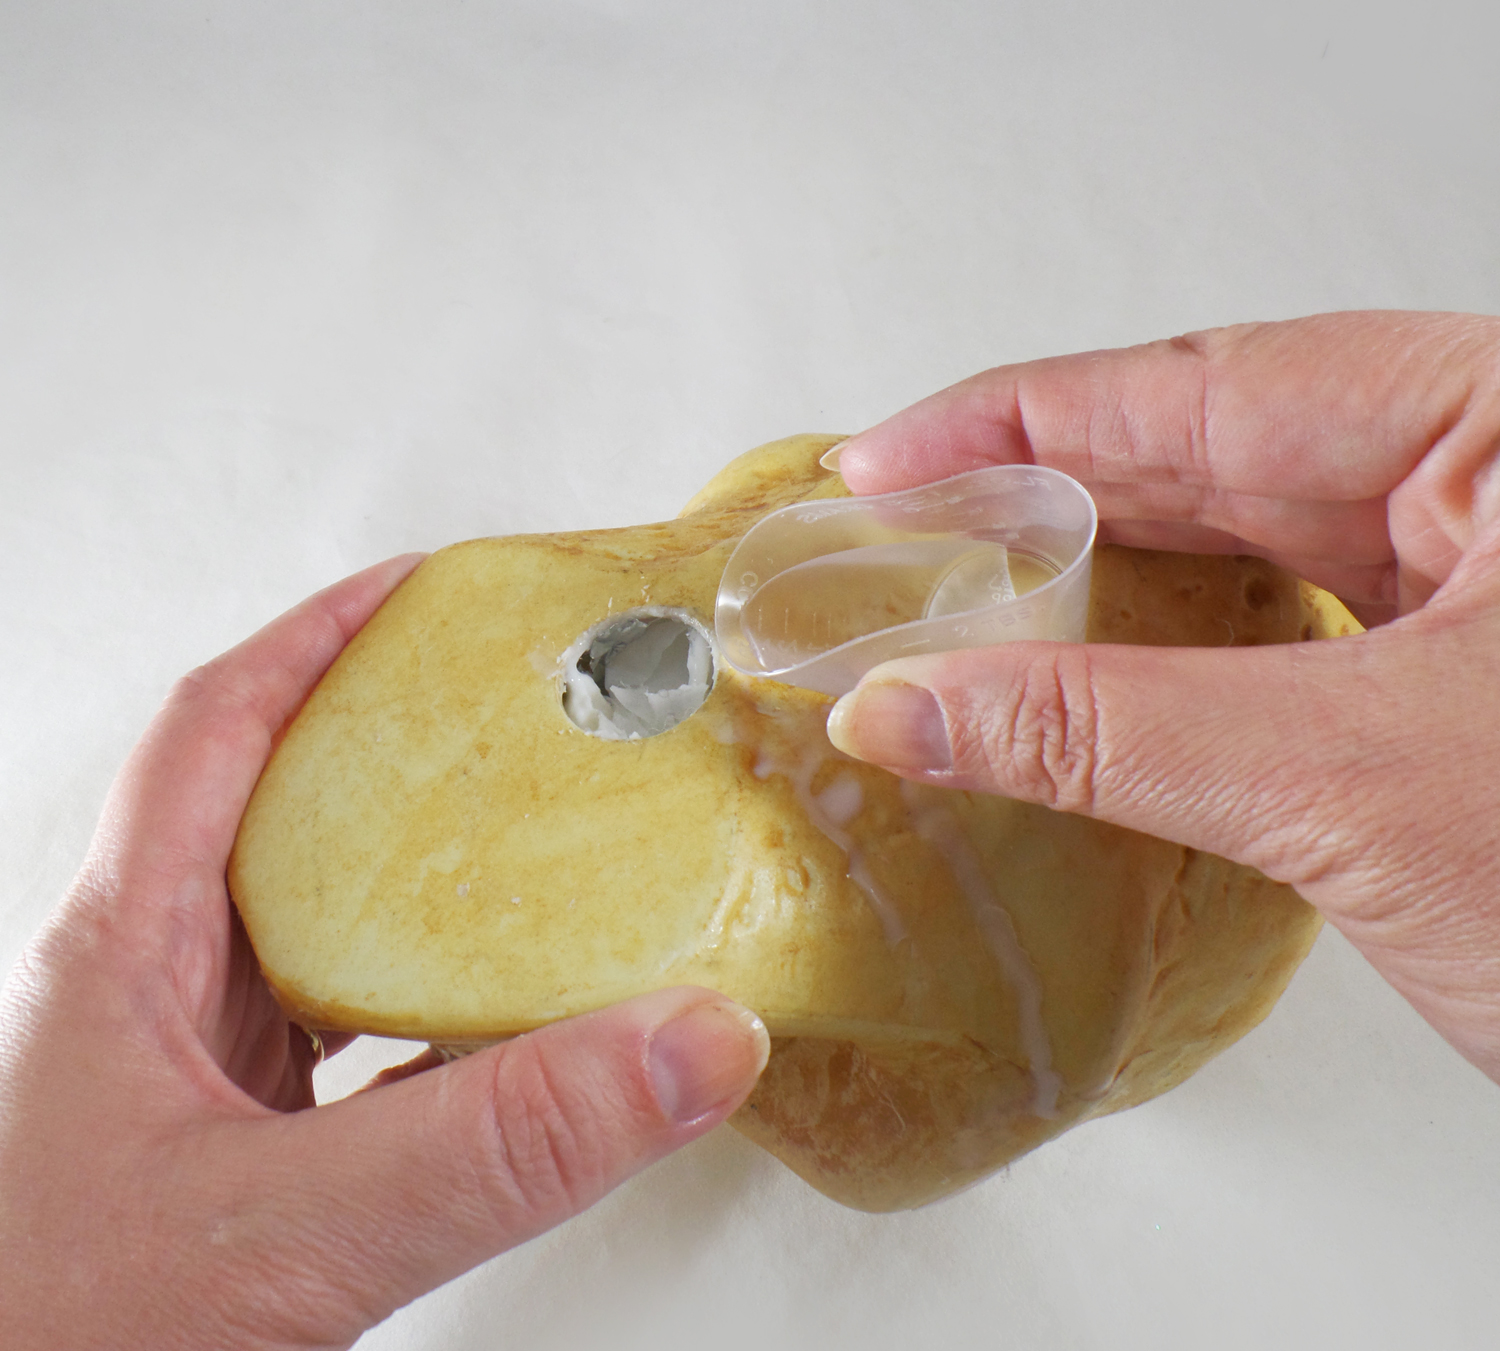
Next I made small batches of Amazing Casting Resin and poured it through the hole in the bottom of the skull. By pouring small batches and then tilting the skull I was able to make sure all of the inside of the skull was equally covered with resin, stabilizing the plastic skull. This process went very quickly because Amazing Casting Resin sets up in 10-15 minutes. I ended up using 3/4 of a resin kit to fill the inside of the skull.
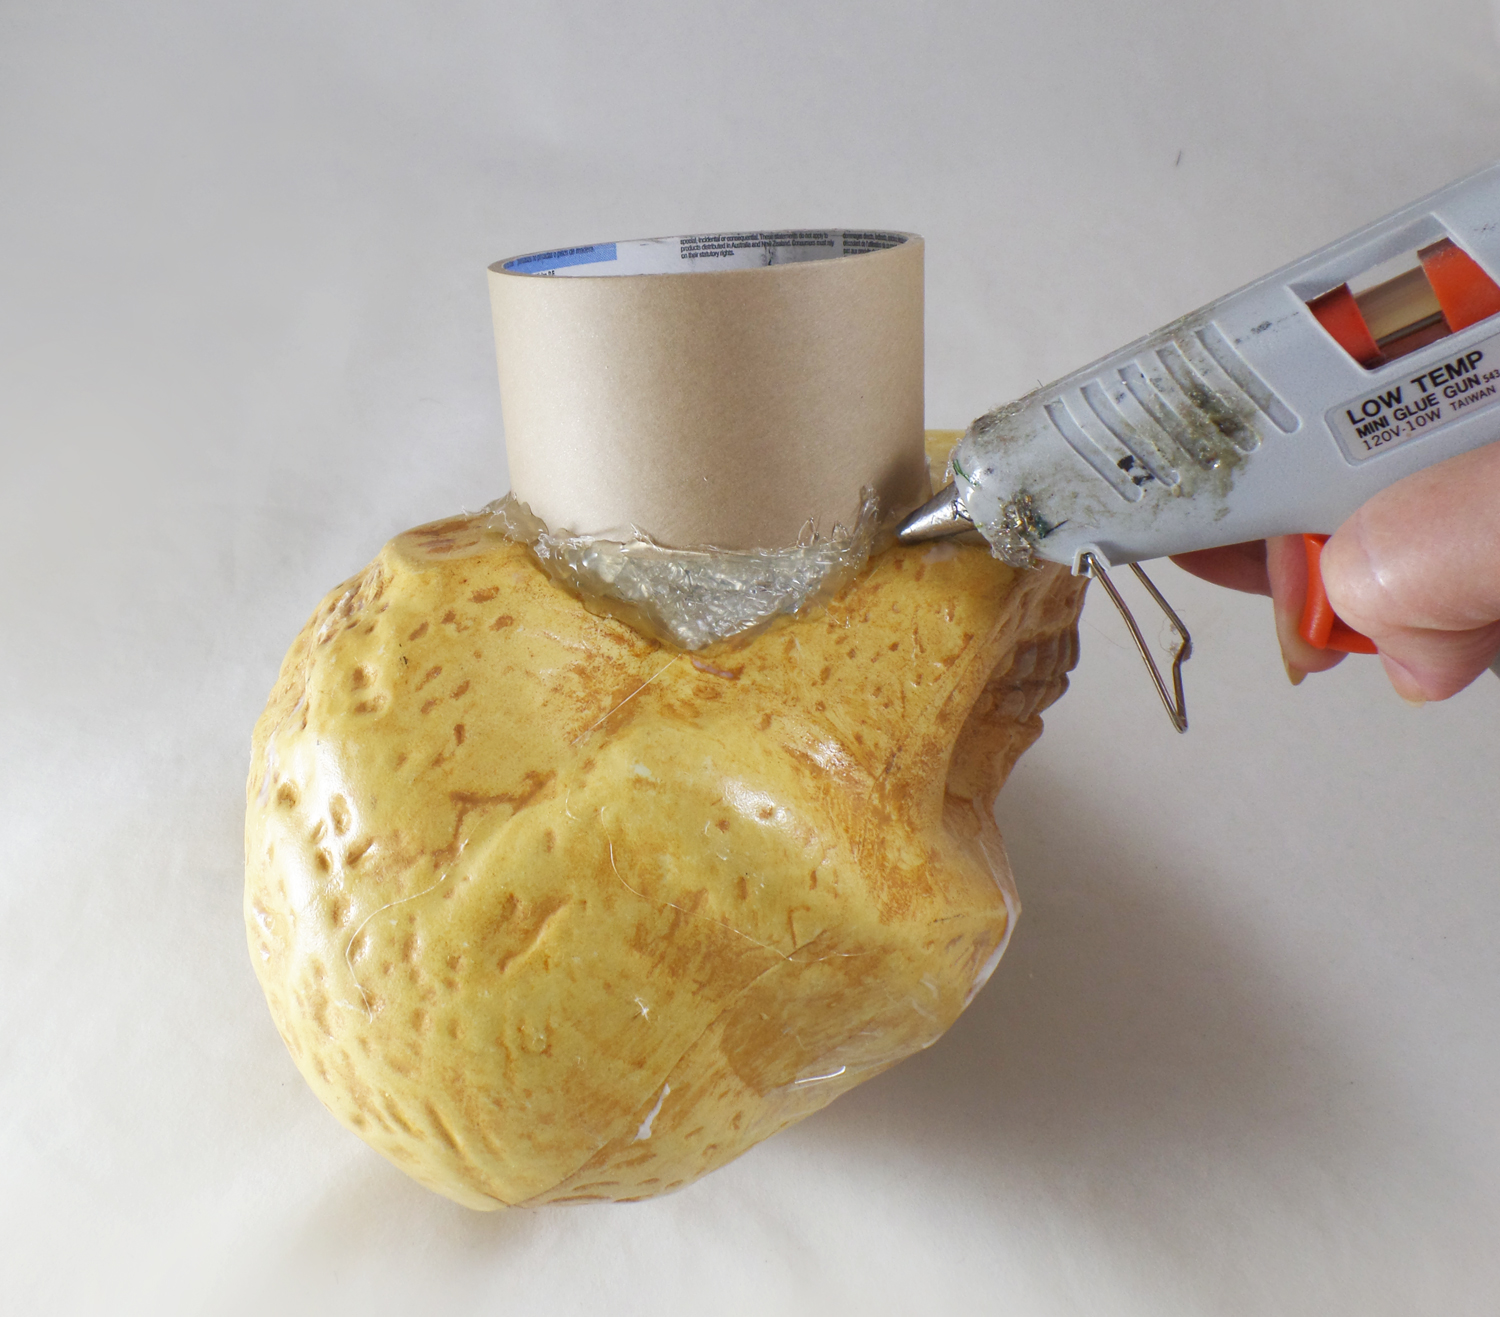
Once I had filled up the inside of the skull I hot glued a tape roll to the bottom of the skull to create a neck for the mummy head. Any gaps between the tape roll and the skull I filled in with aluminum foil and hot glue.
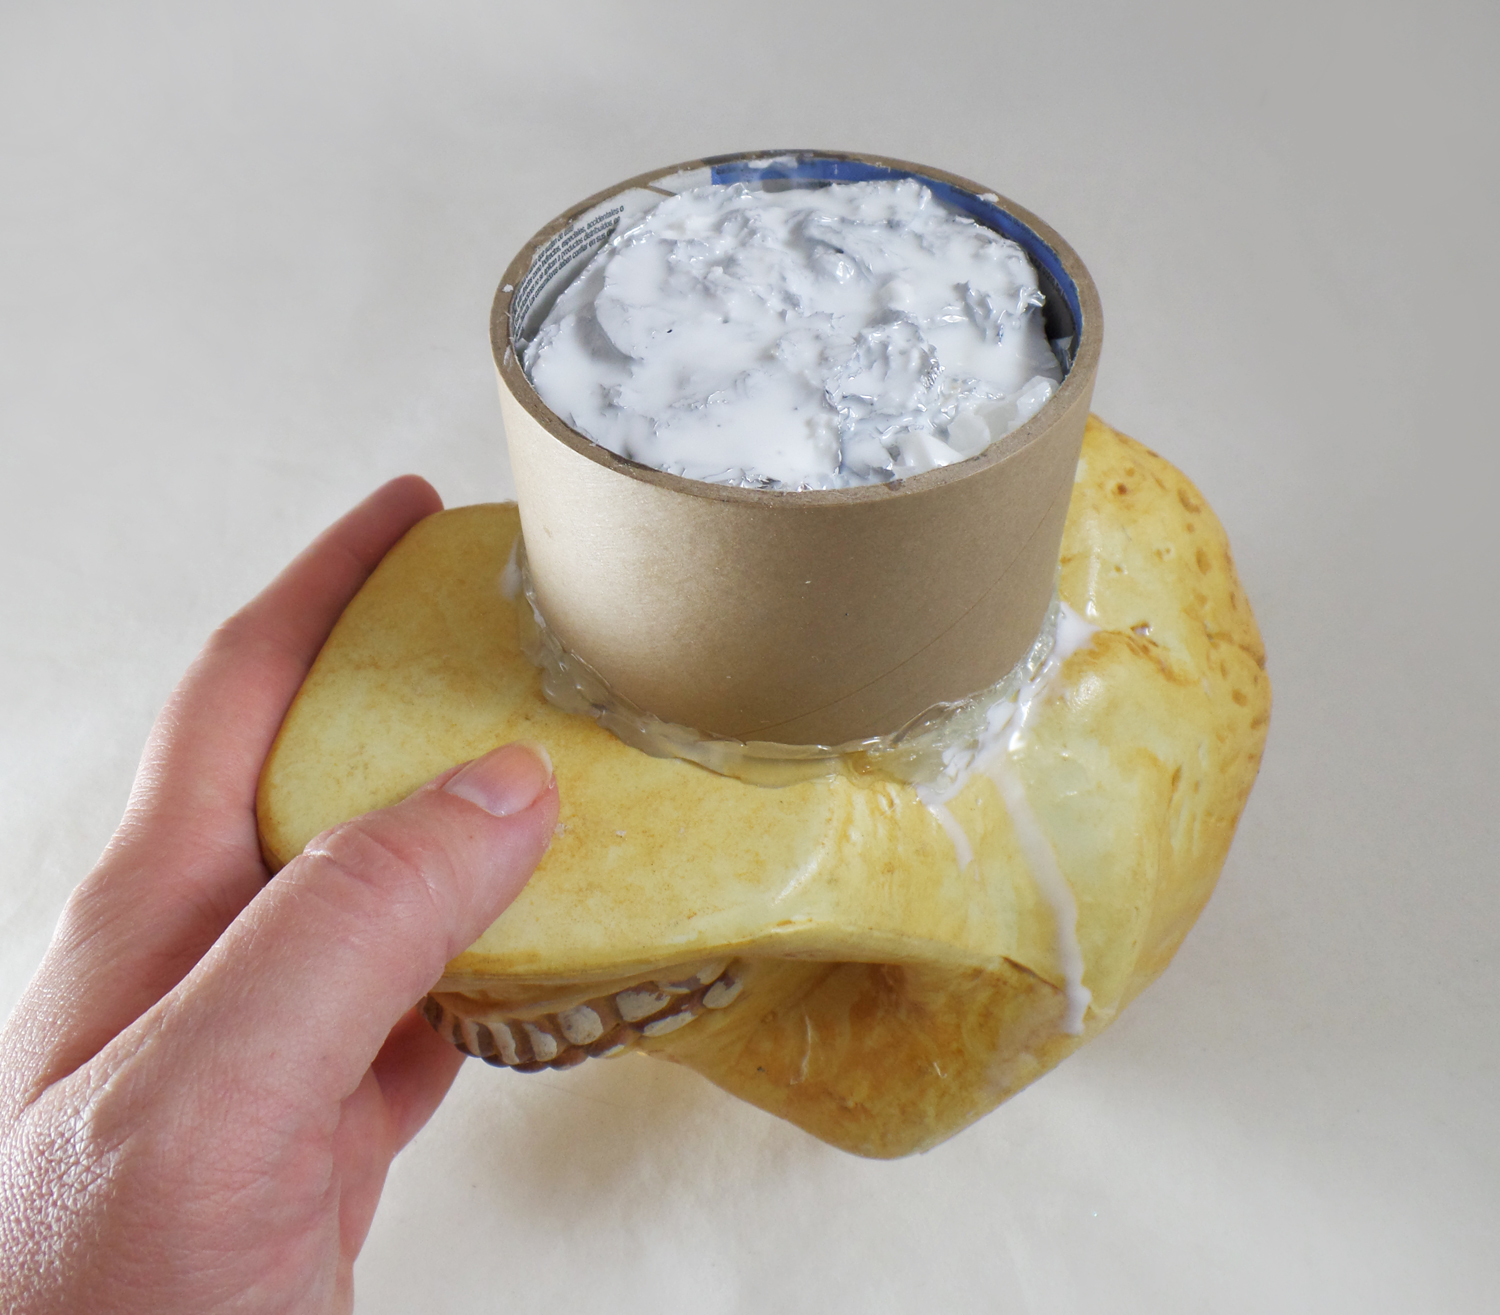
I then mixed up some Casting Resin and poured it into the newly formed neck of the mummy head. I put some extra foil into the neck cavity and filled it up with more Casting Resin, using up all of the kit.
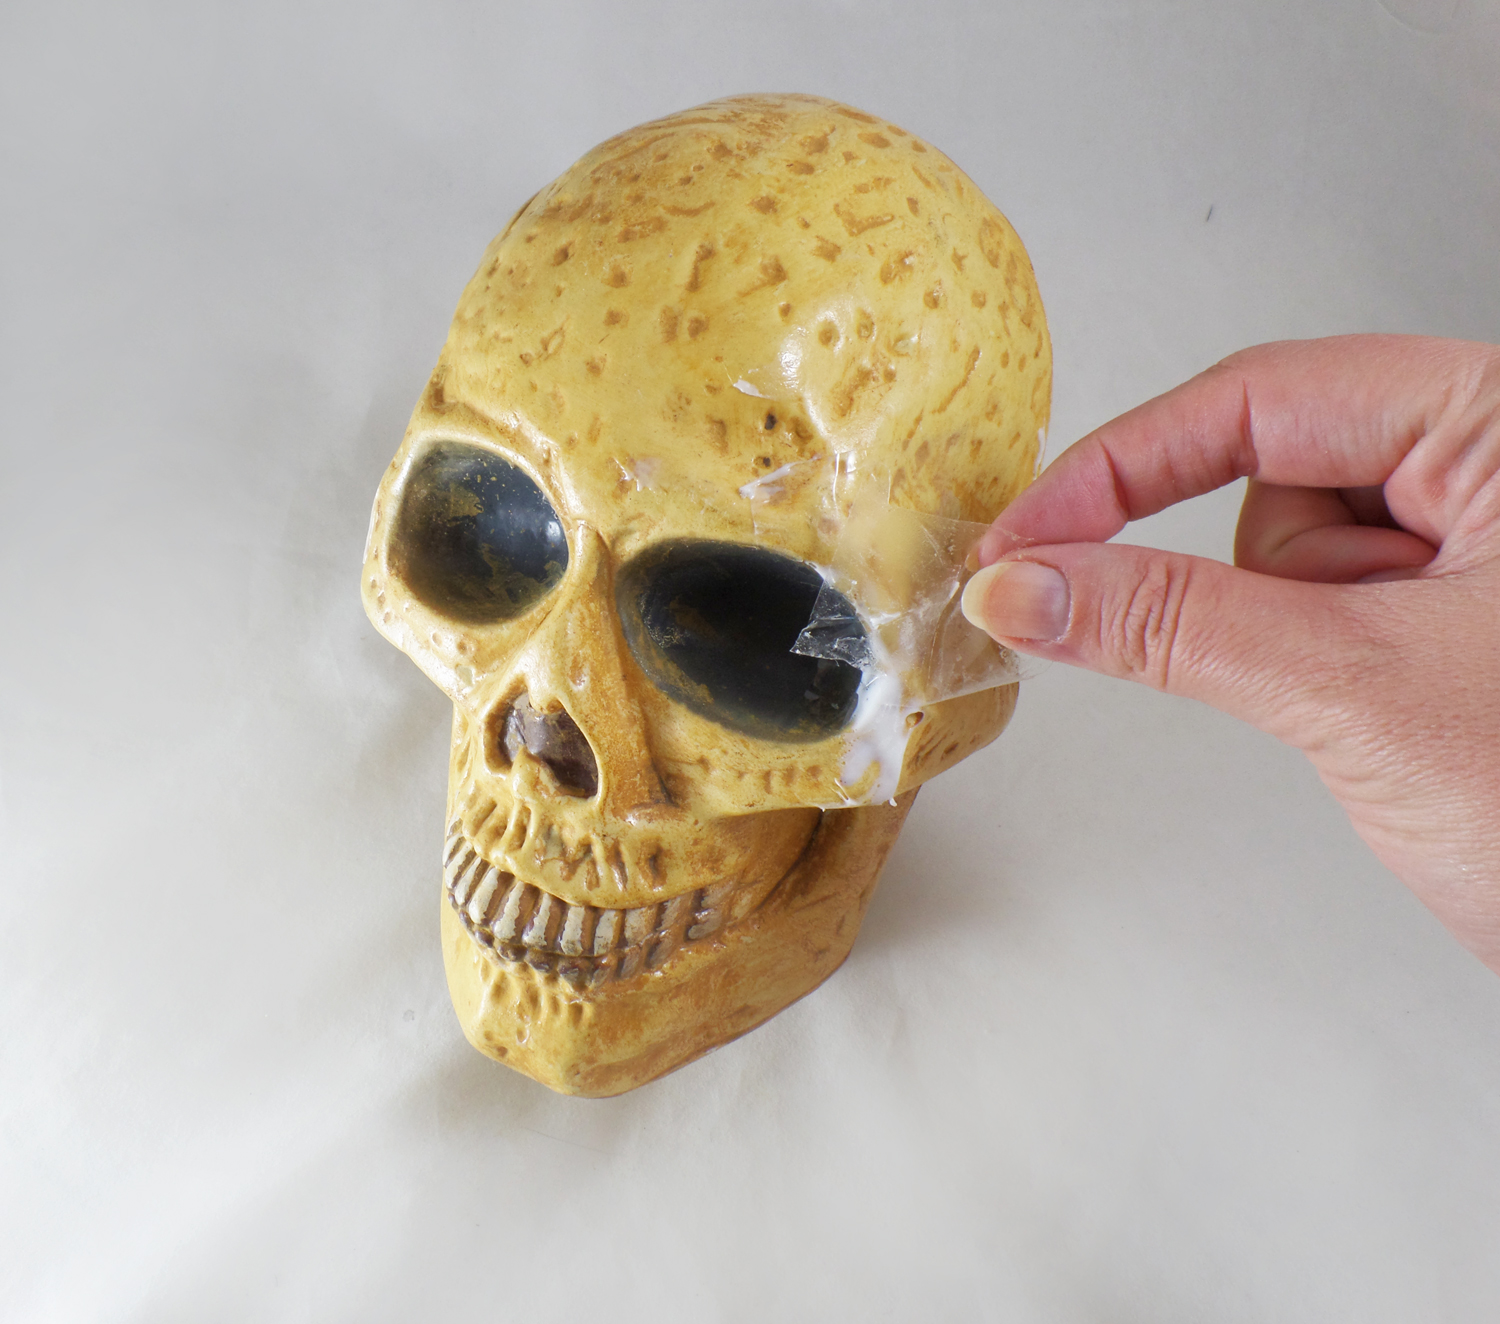
Once the resin was cured, I removed the tape from the now resin-filled crack and removed any excess resin spills off the skull.
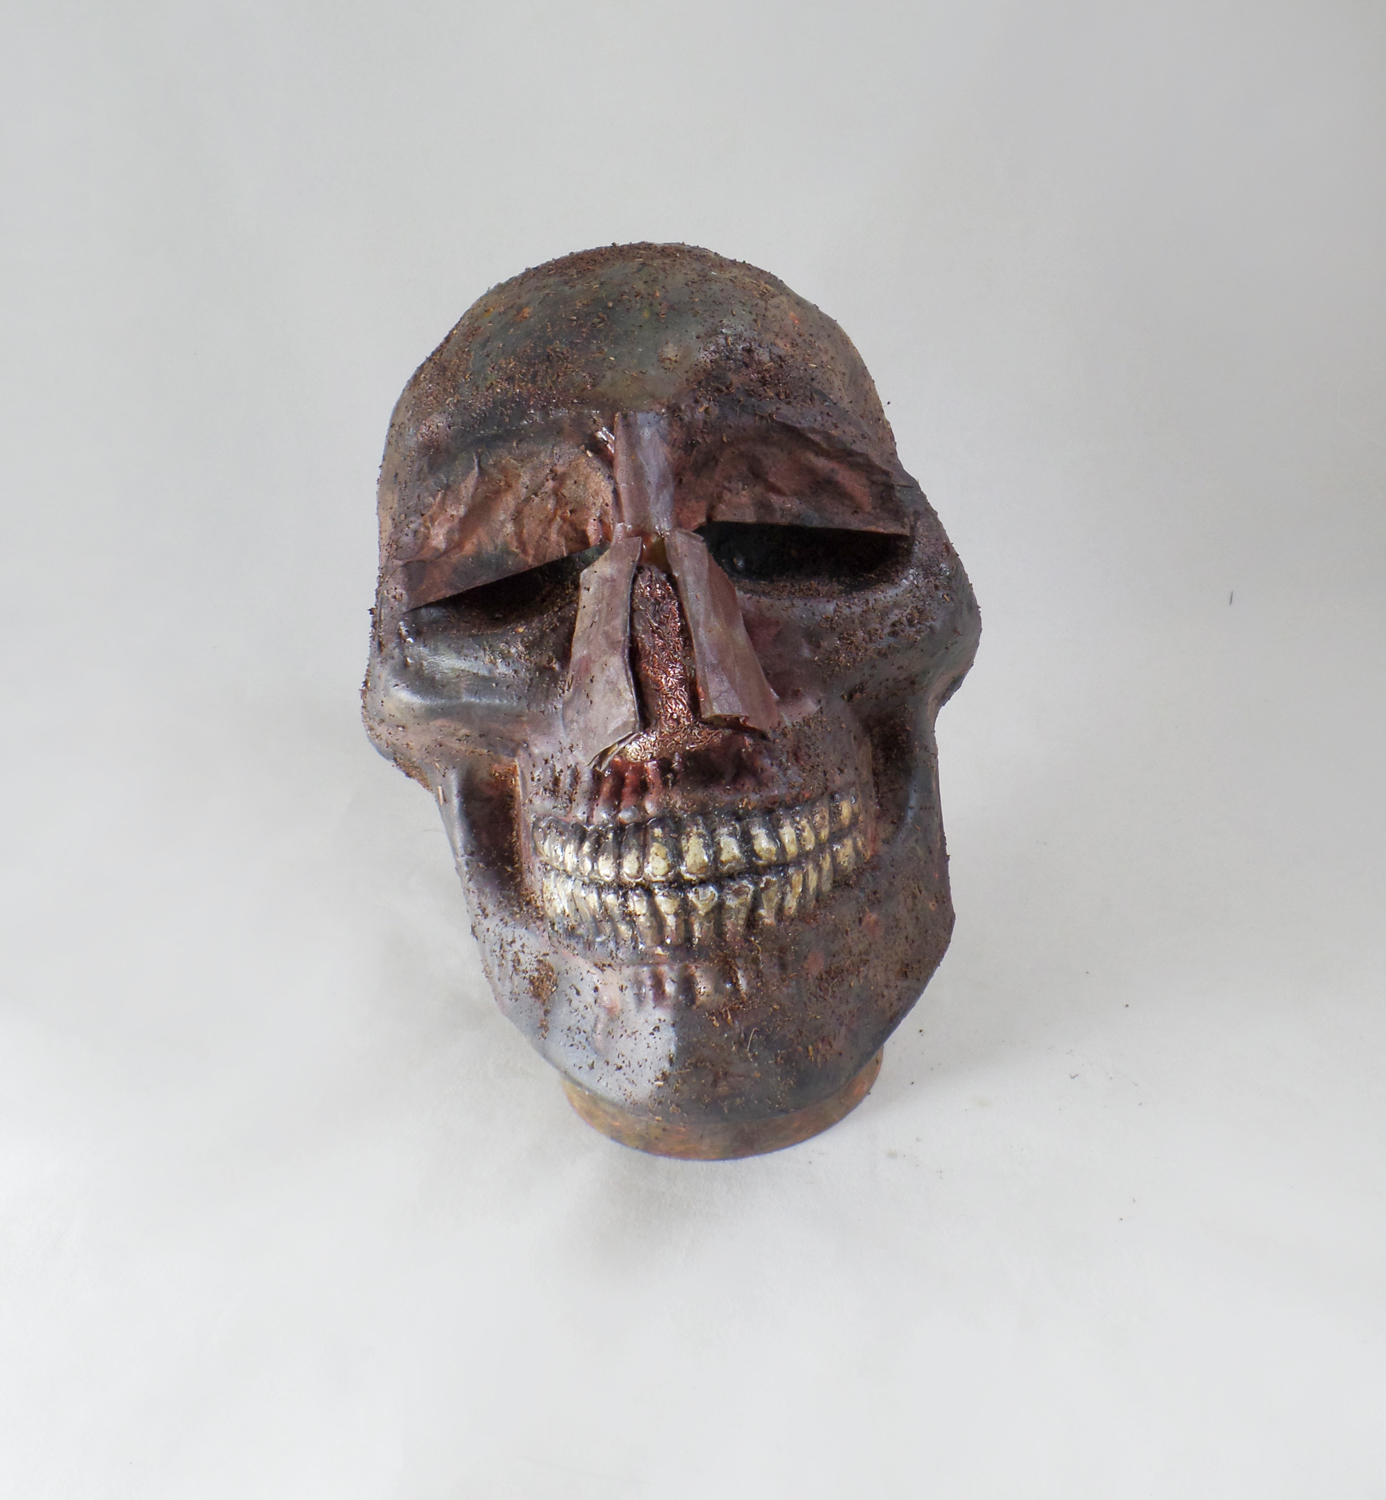
Since not much of the plastic would be visible under the wrappings but I didn’t want it looking like a skull. I painted the skull with a mixture of yellow, brown and black acrylic paint. I glued on used tea bags to create eyelids and created a nose out of paper bags and tin foil. I glued on some loose tea grounds to give the look of sand/dirt and sealed it with Liquitex Matte Varnish.
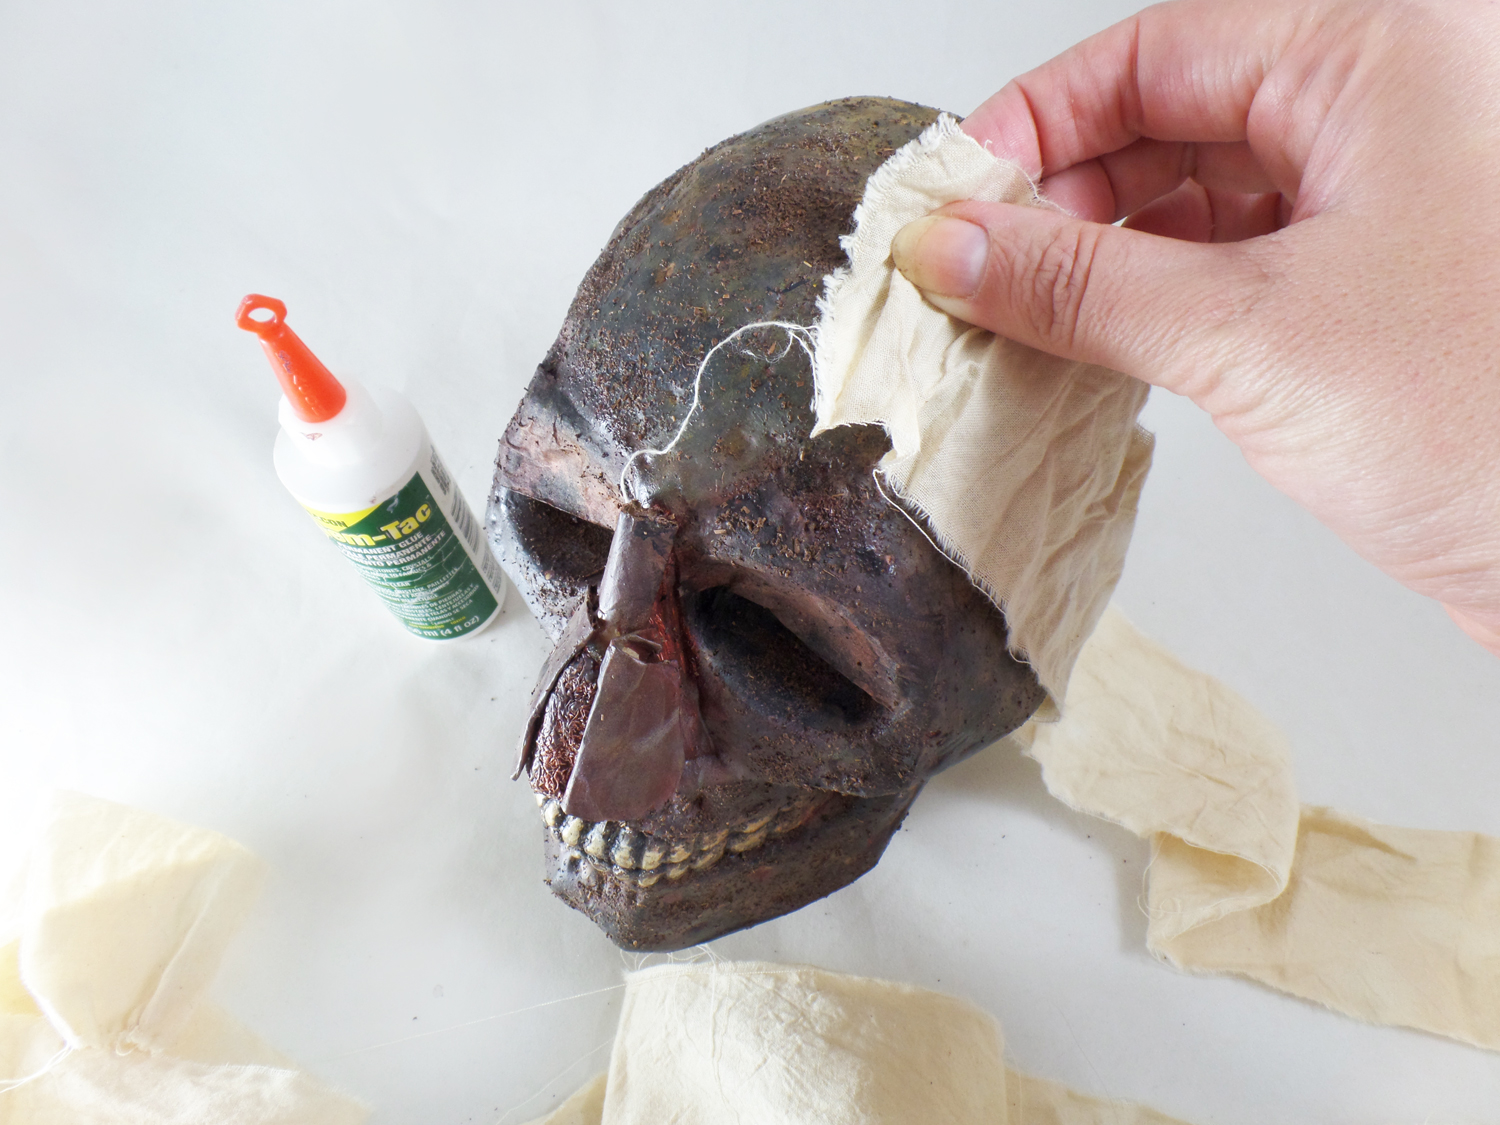
To create wrappings: I dyed cotton muslin fabric in a bath of hot black leaf tea and bags. I let it soak for a few hours to stain and then let the fabric dry. Once dry I tore the fabric into 2 inch strips to make wrappings. I started applied the wrappings to the skull with a bit of Beacon’s Gem-Tac and started to wind it around the skull. I didn’t use any set pattern or style; I just had fun and made sure to cover up any of the more skull-like features of the head.
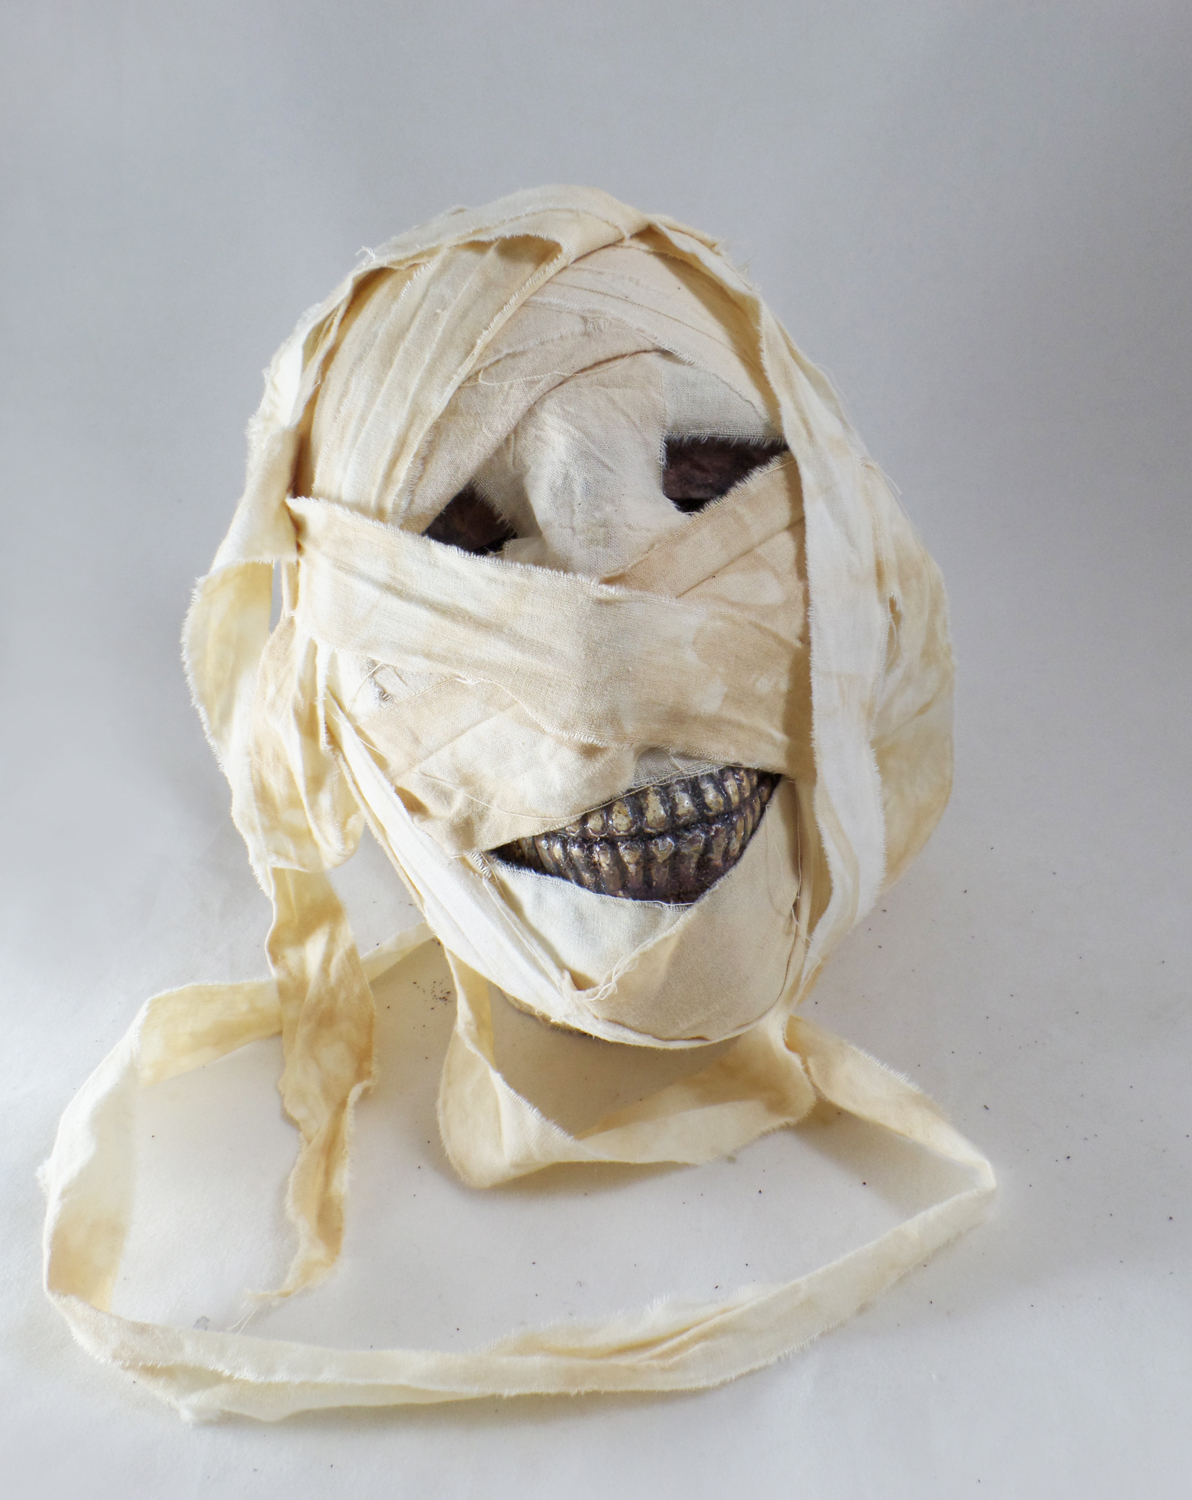
Once I was finished wrapping the skull I liked the overall look, but felt it needed something more to create the look of age.
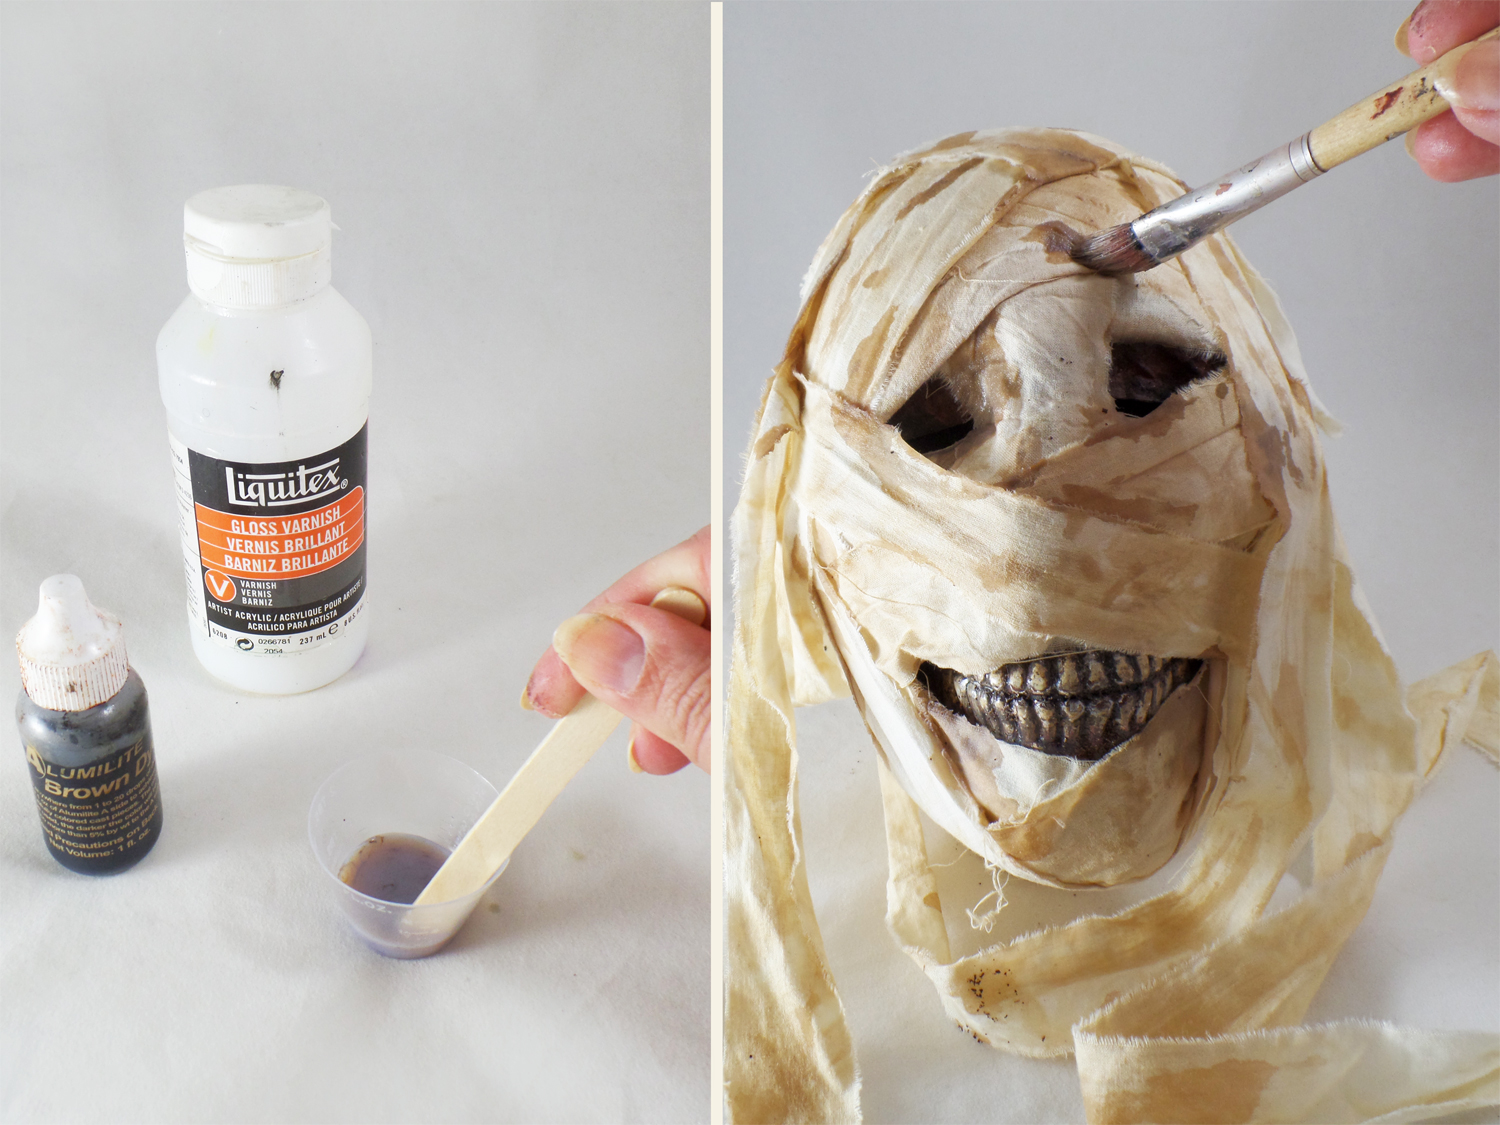
Since real mummies still have old oils and resin still visible on the surface of their wrappings, I created some out of Liquitex Gloss Varnish mixed with some Brown Alumilite Dye. I used the varnish instead of resin because I wanted to control how it dripped and needed it to dry quickly. The Alumilite Dye allowed me to tint the varnish without losing the transparent nature of the varnish.
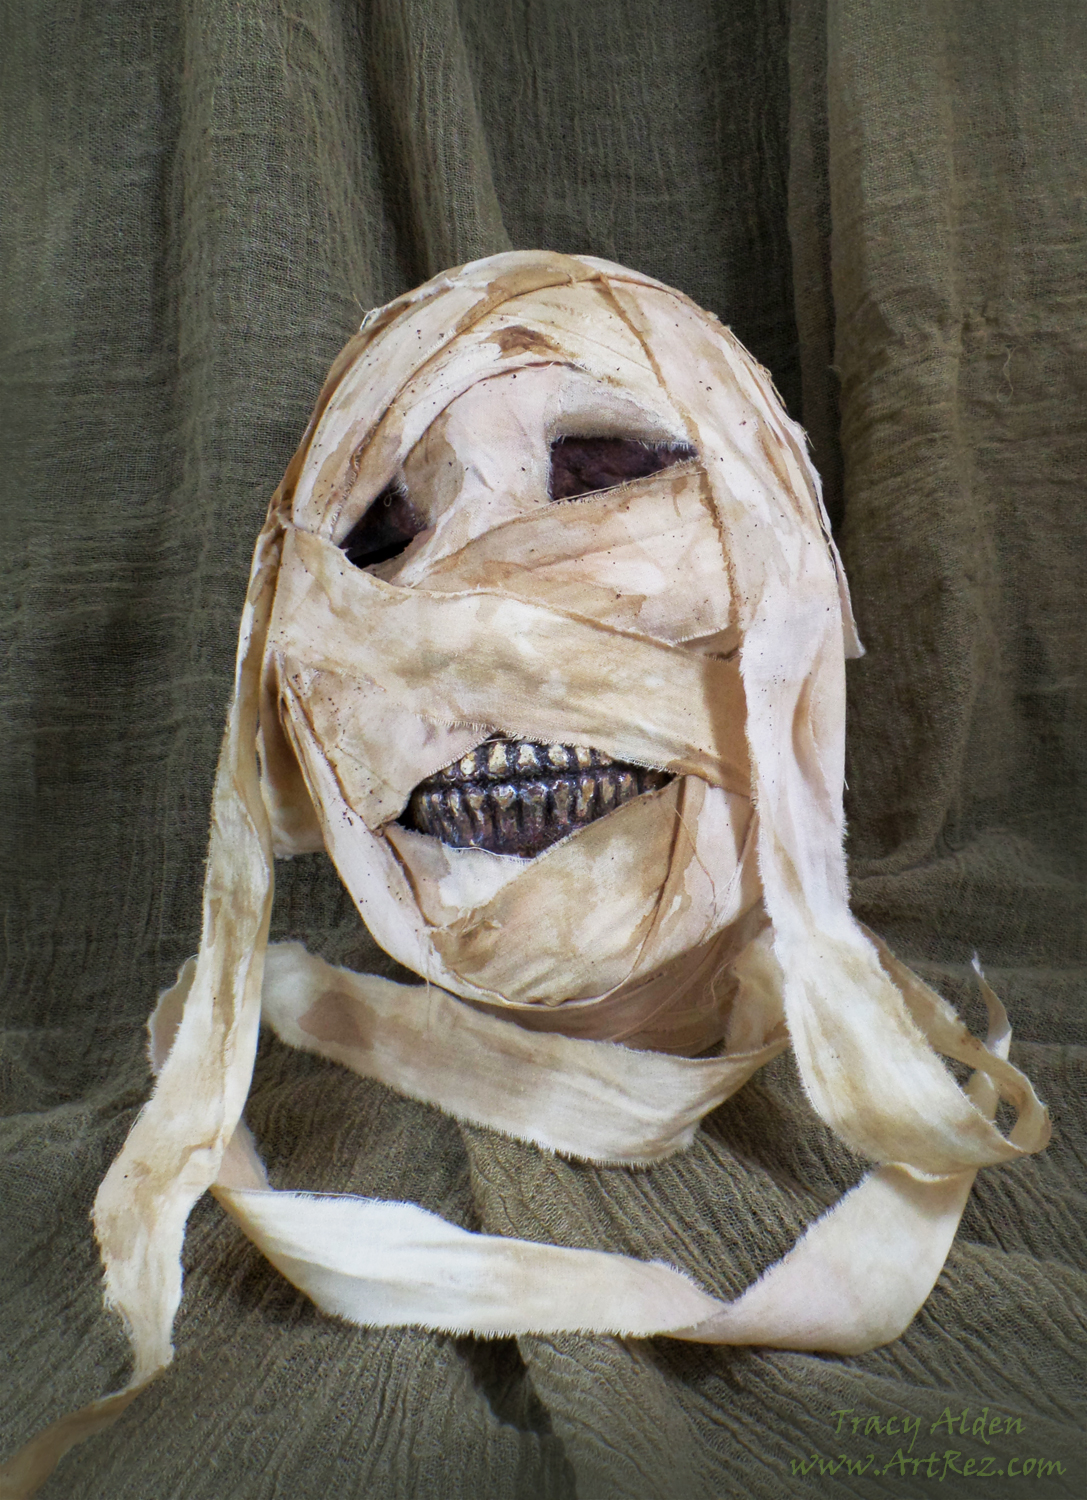
Once dry, this spooky décor is a perfect addition to my creepy curiosity cabinet on display for Halloween!
Until next time, safe travels!
This is an affiliate post, which means I received an assortment of products as a compensation for the creation of art. To read my full disclosure, click here.
#TBT Sit for a Spell! DIY Eye of Newt Apothecary Jar
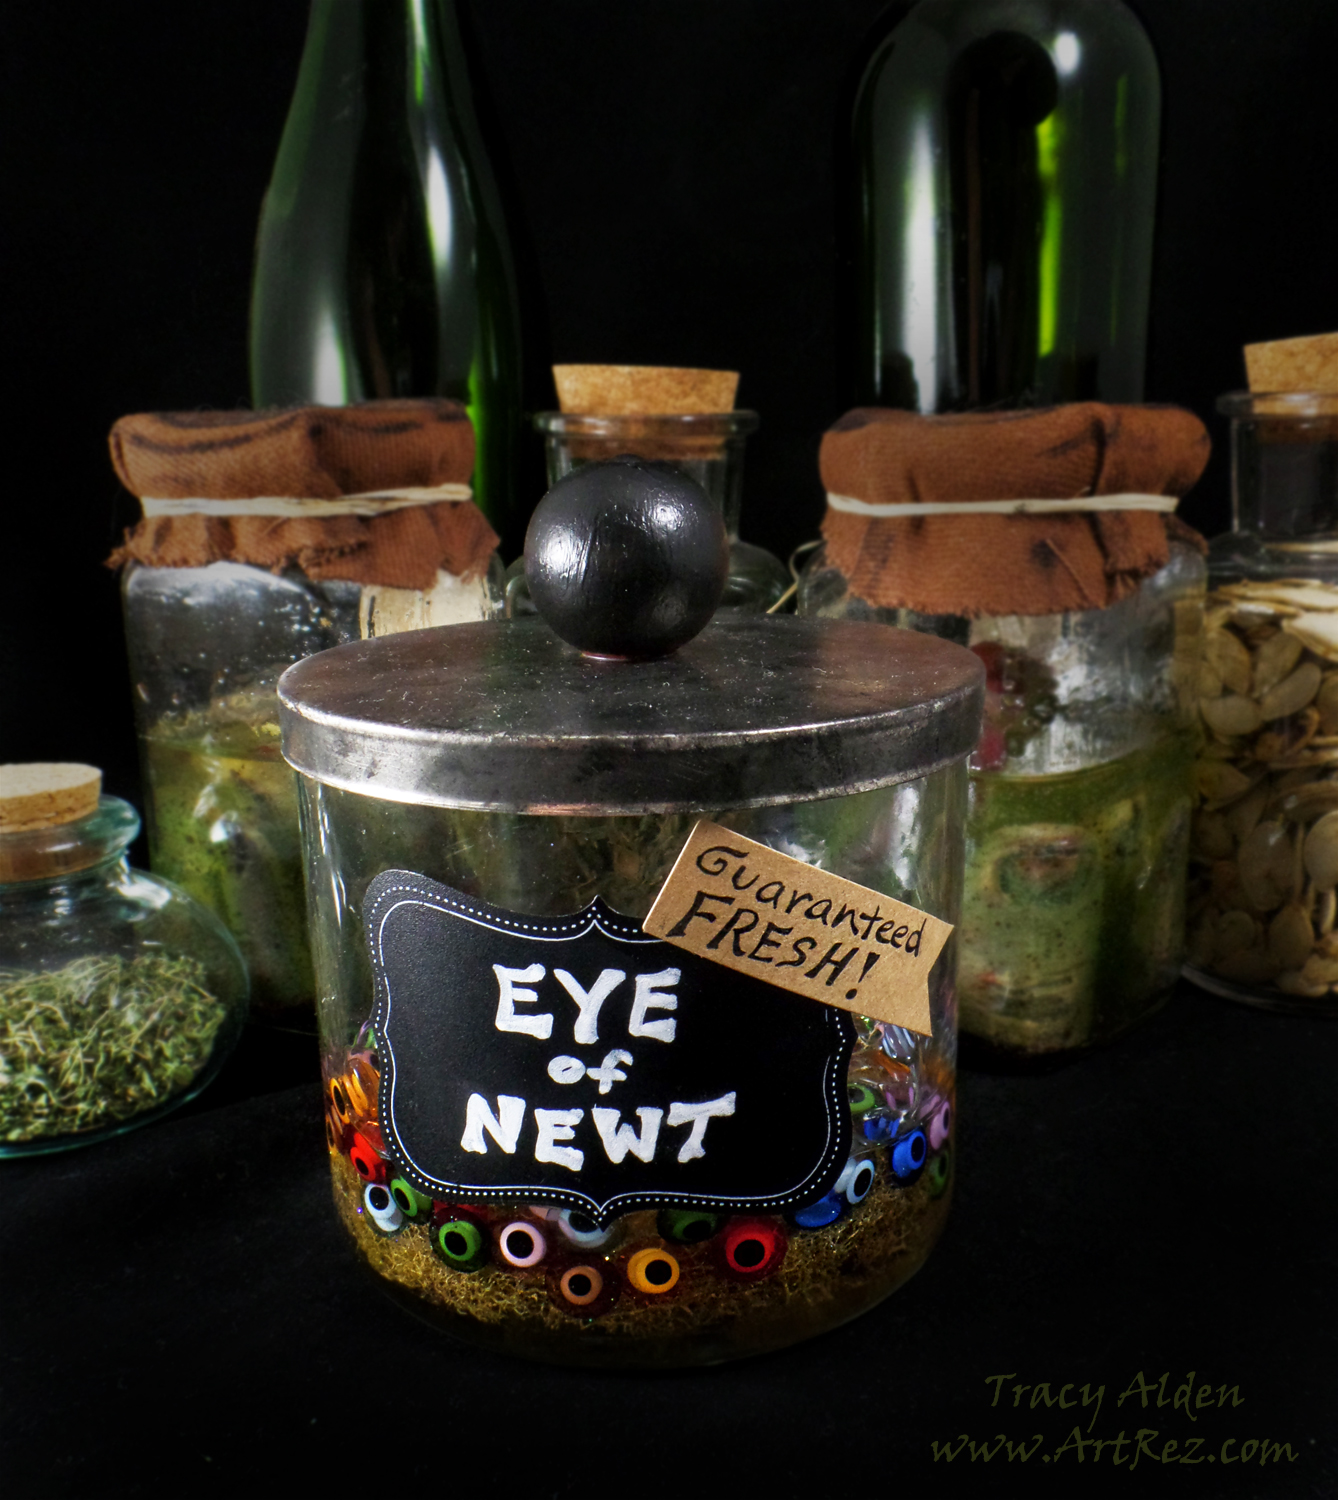
Kicking off my Throwback Thursday posts with one of my favorite upcycling Halloween crafts. Posted in 2015 on the Amazing Casting Products blog, this quick and easy project is perfect with Halloween coming up fast.
Taking inspiration from one of William Shakespeare’s most famous plays, Macbeth:
“Eye of newt, and toe of frog,
Wool of bat, and tongue of dog,
Adder’s fork, and blind-worm’s sting,
Lizard’s leg, and howlet’s wing,–
For a charm of powerful trouble,
Like a hell-broth boil and bubble.”That part of the play has a wonderful spooky quality, often inspiring all types of ghoulish displays and decor for Halloween. The interesting part is that most of those names of ingredients were not intended to be taken literal, but were herbalist or folk terms for common herbs and plants. In the case of “Eye of newt” it was referring to a type of mustard seed. However thanks to pop culture more often than not most people think of real newt eyes in a jar. So knowing some seeds in a jar isn’t that ghoulish of a Halloween decoration I decided to go with the pop culture version of making a jar with faux newt eyes.
Supplies:
A Glass Jar previously used for a candle
Resin
Moss
Eye Beads
Glitter (optional)
Chalk Sticker
Chalk Pen
Wood Bead
Black Chalk Paint
Sandpaper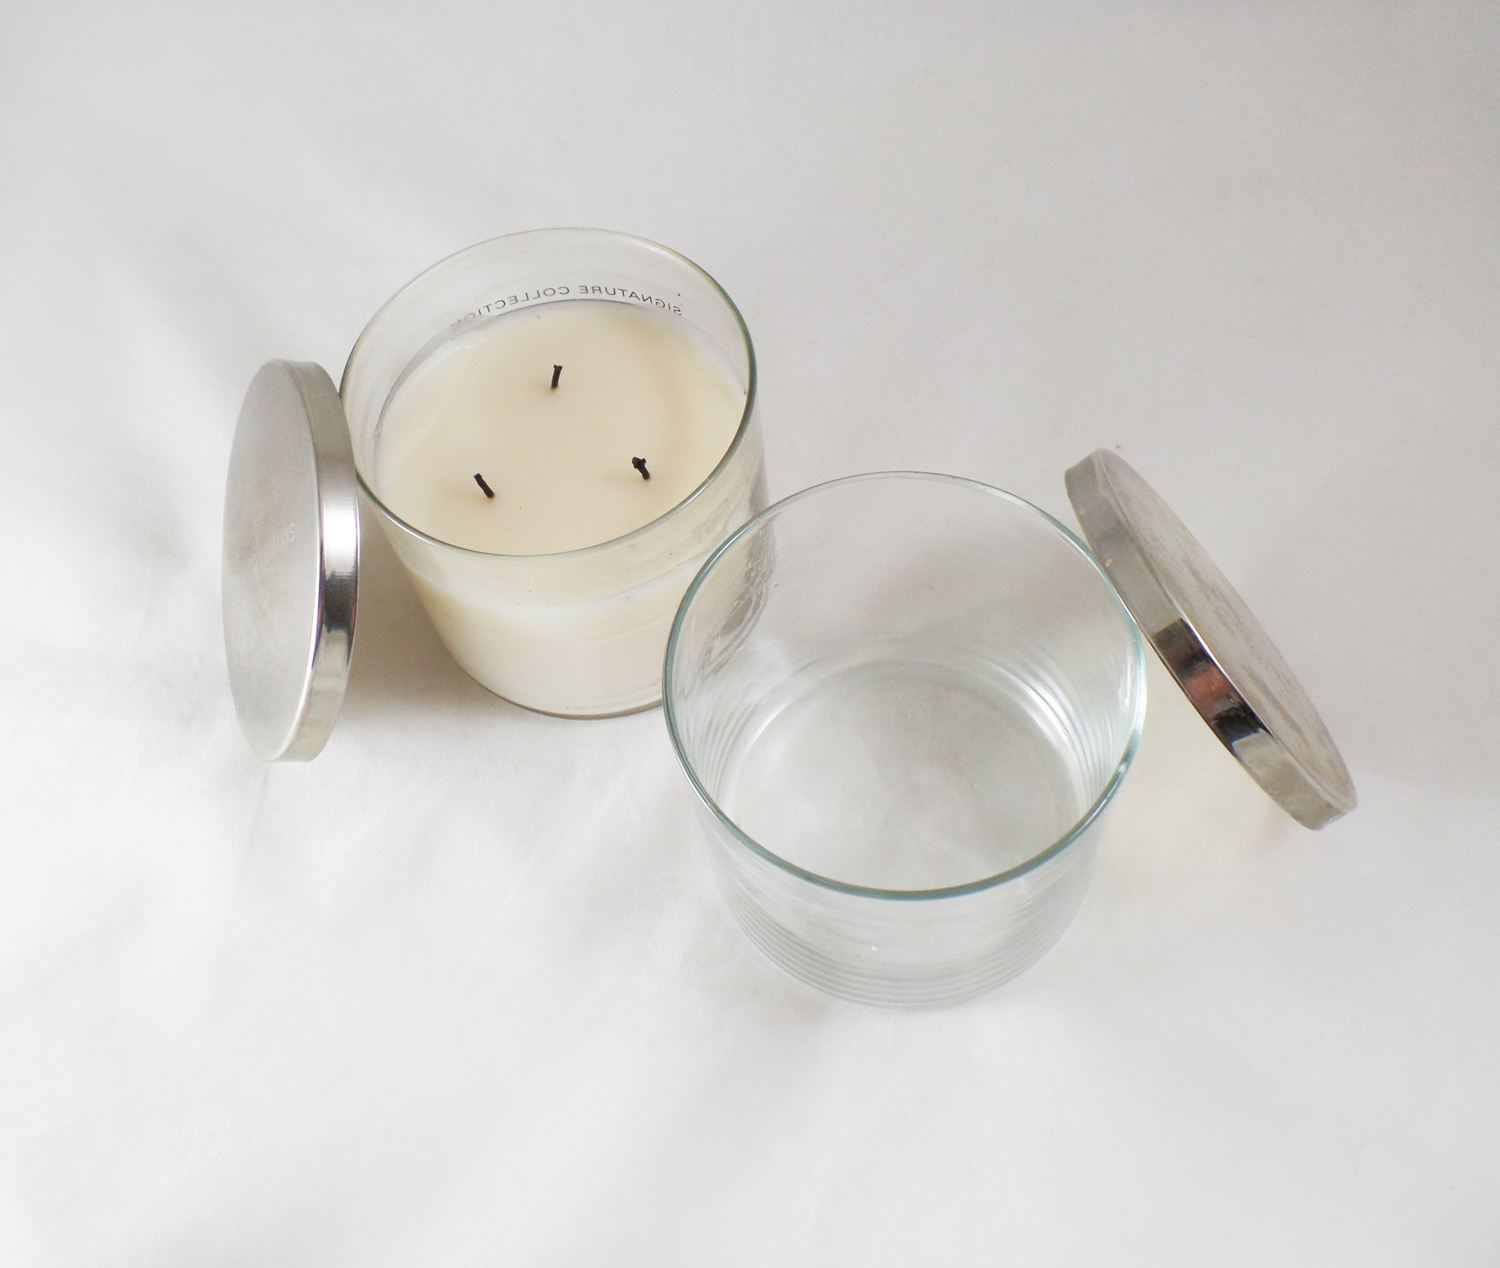
I cleaned up a old jar that previously had a three wick candle with a metal lid, making it perfect for an apothecary jar. I picked this type of glass because it is tempered and can handle the heat often created by thick pours of curing resin.
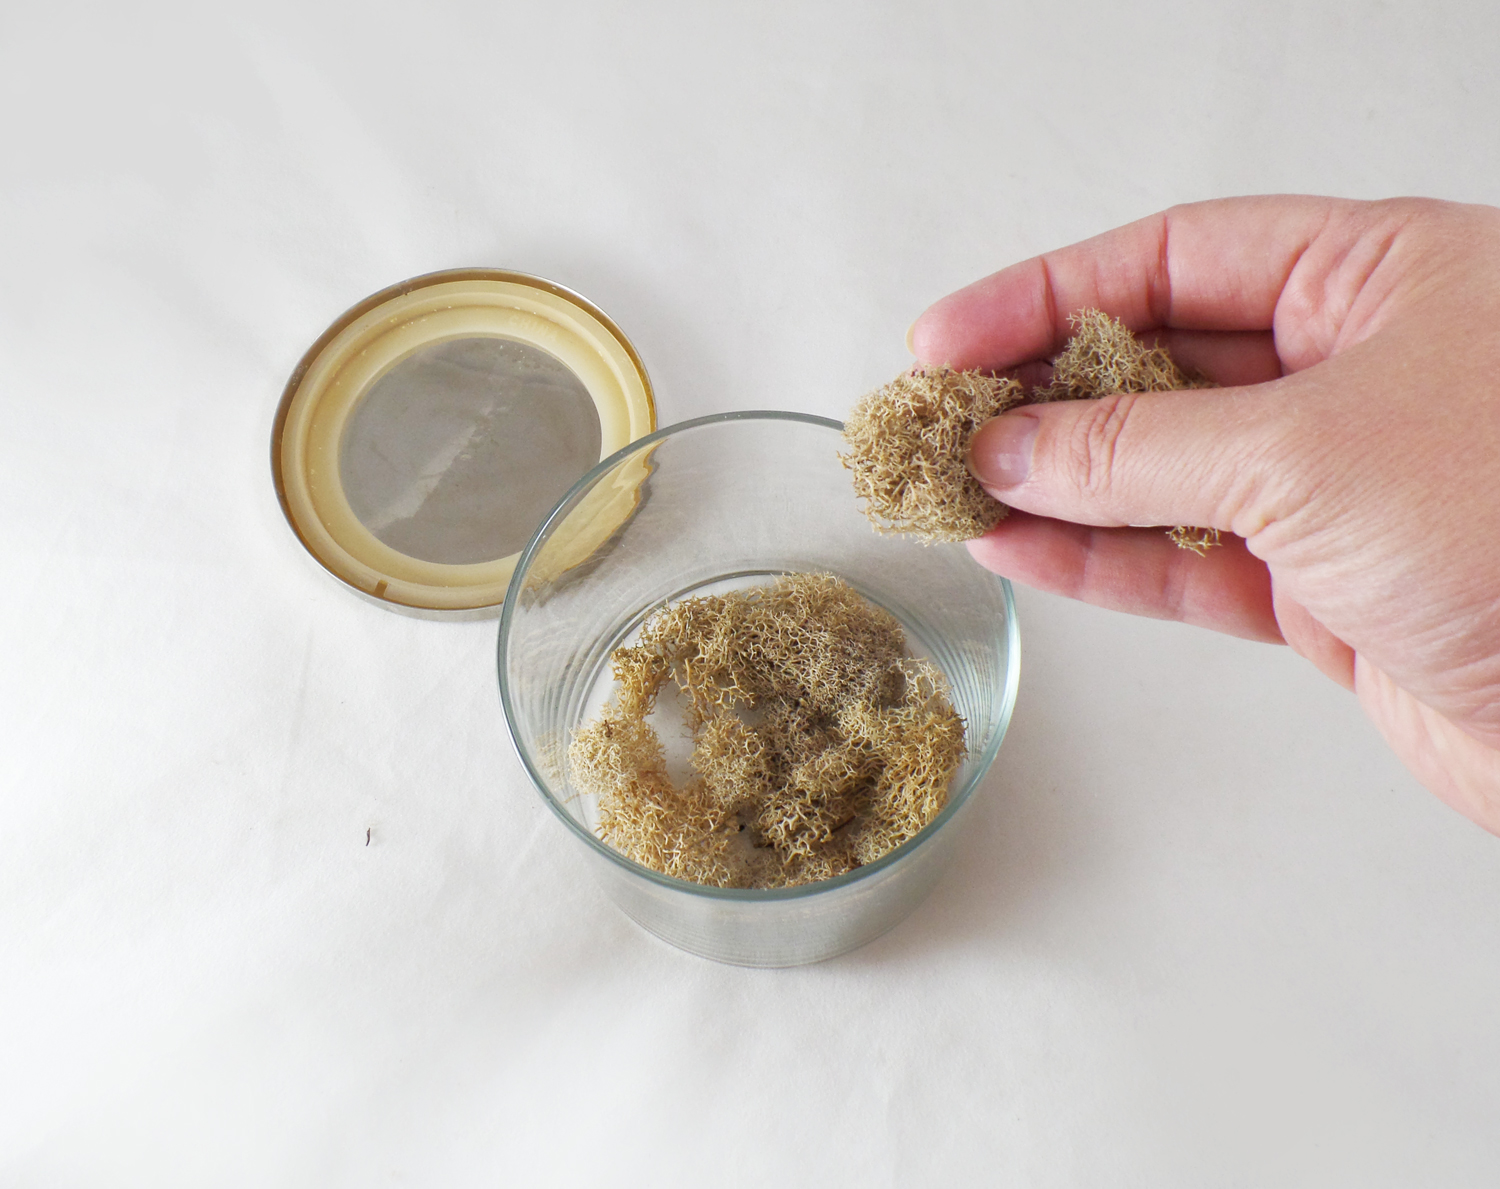
I put some dried moss at the bottom of the jar to add some visual contrast. It would also help with adding some textured base to prop the fake eyes on so they wouldn’t all sink to the bottom.
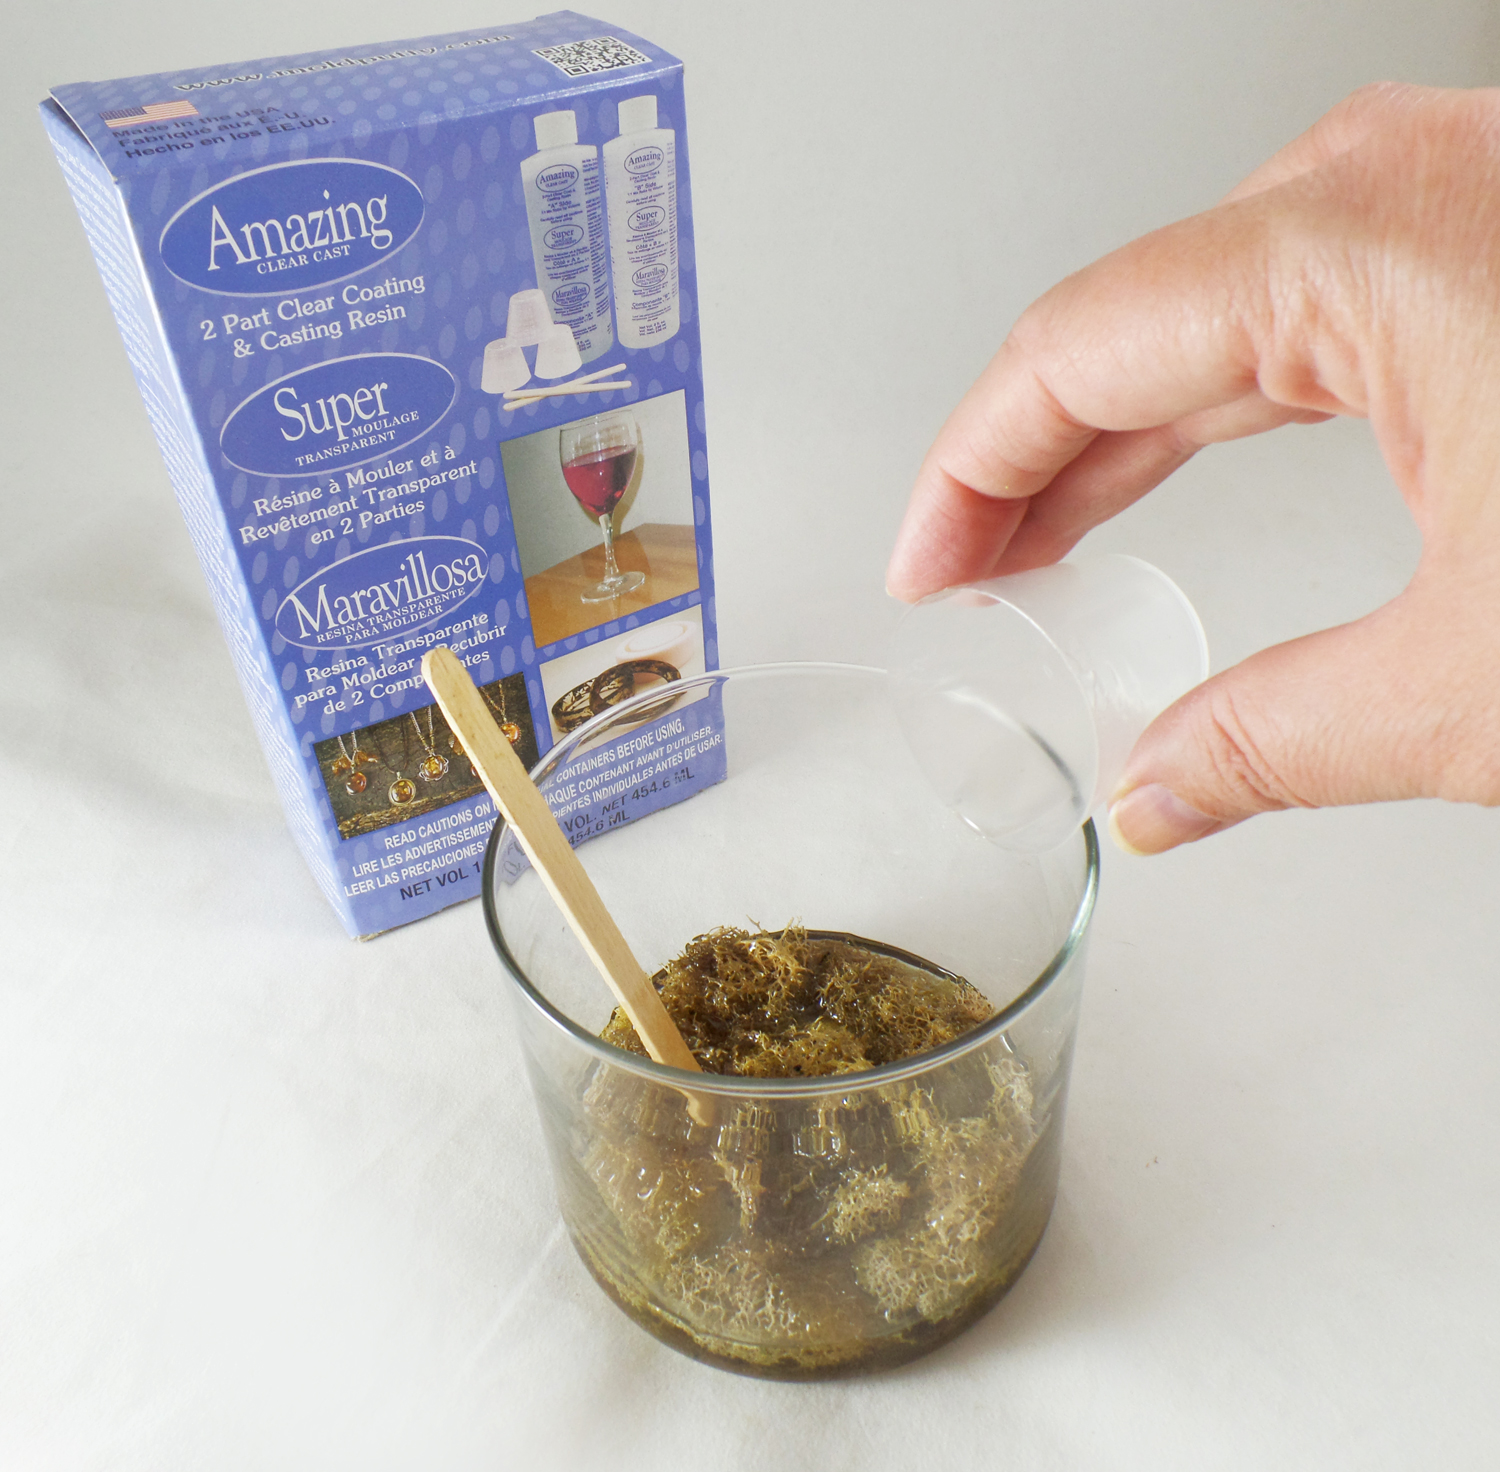
I mixed up 3 fluid ounces of Amazing Clear Cast Resin and slowly poured it on top of the moss to cover it.
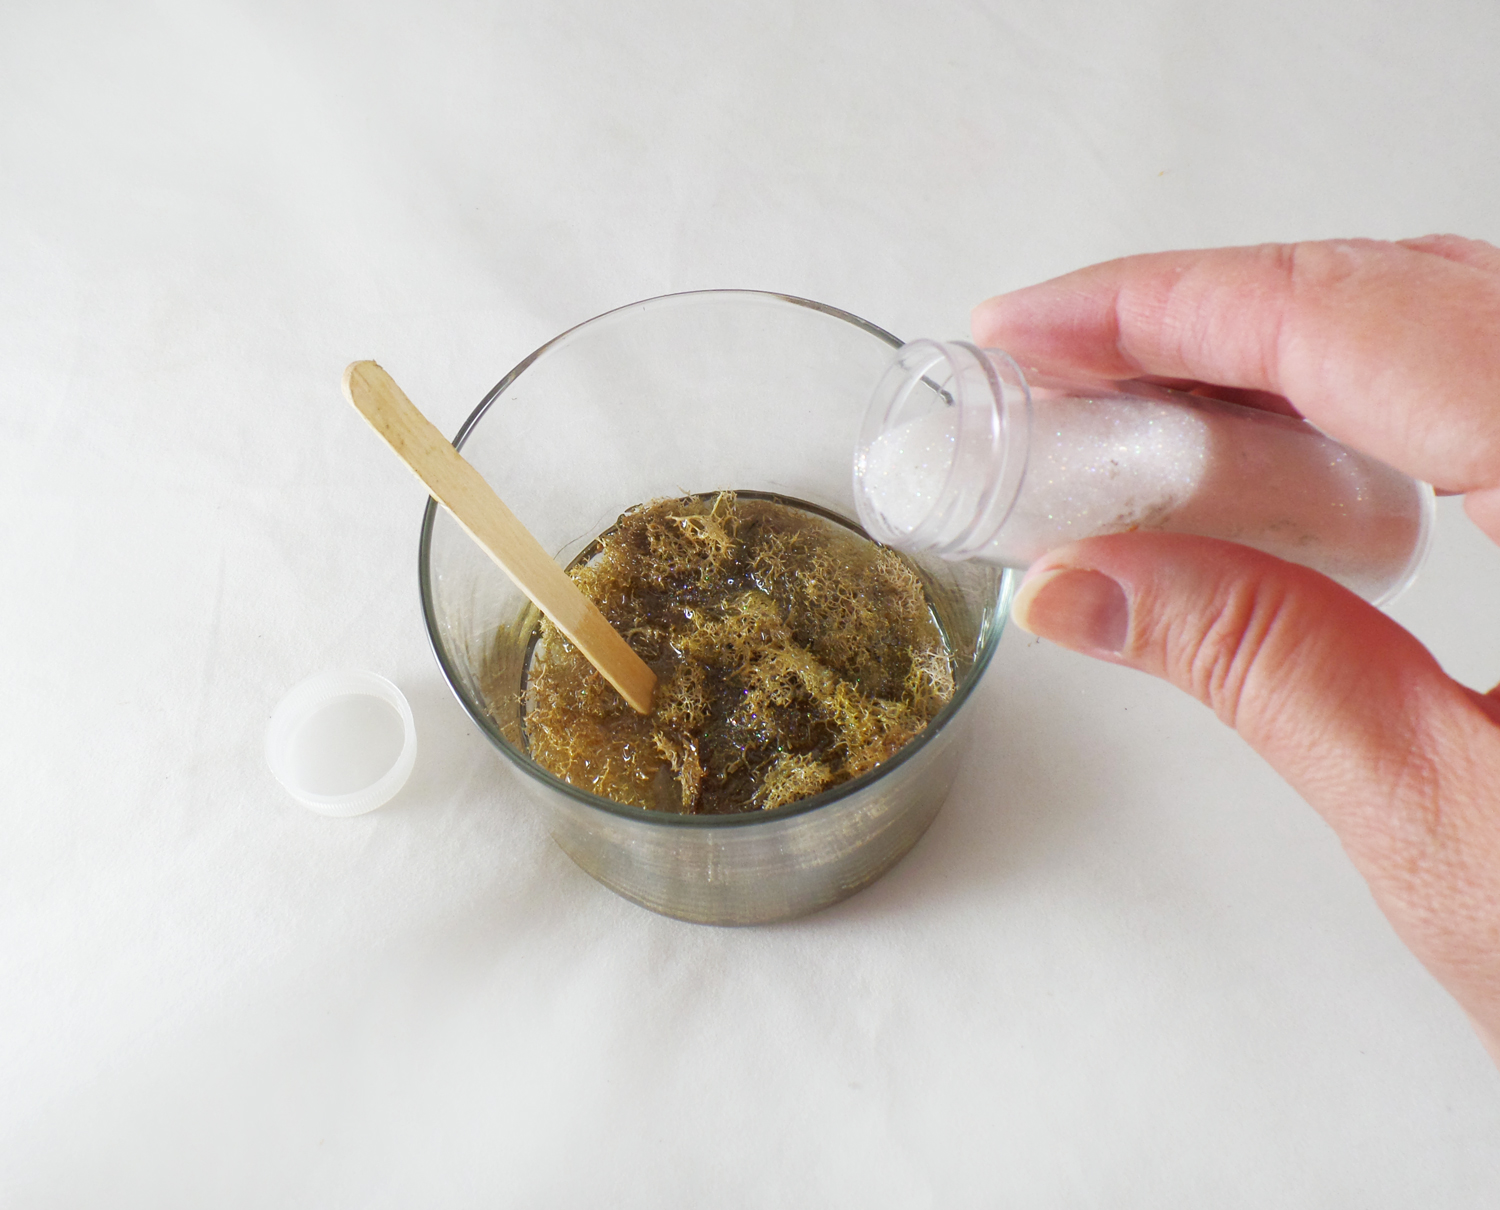
The moss became a bit dark after the resin started to soak into it, so before the resin layer started to cure I sprinkled a bit of micro crystal glitter* to give just a slight shimmer to the moss layer.
*The glitter is an optional step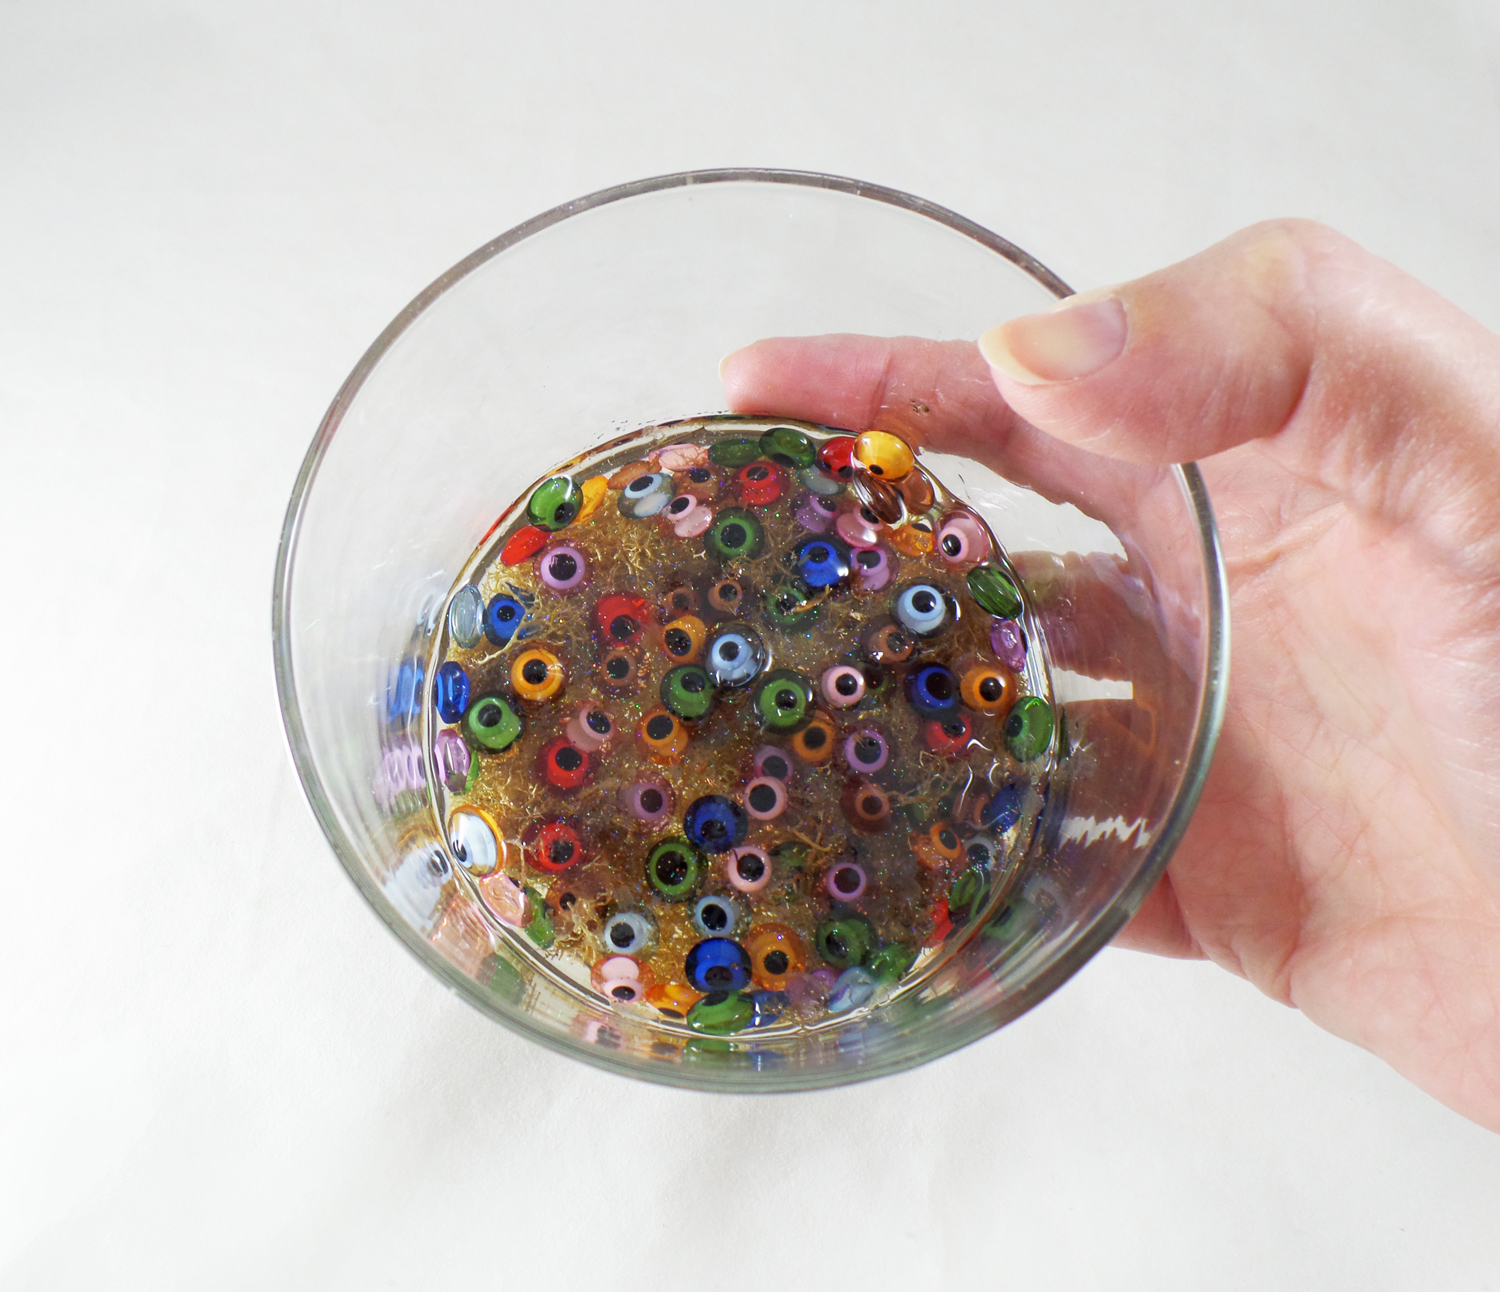
For newt eyes I used transparent acrylic Eye of Warding beads carefully placed in the still wet resin. Recent popularity of the beads has had a lot of bead manufacturers making all kinds of the Eye of Warding beads out of glass, acrylic, clay and even recycled plastic.
*Take a trip to your favorite craft store to check out what types of beads they might have for you to use!
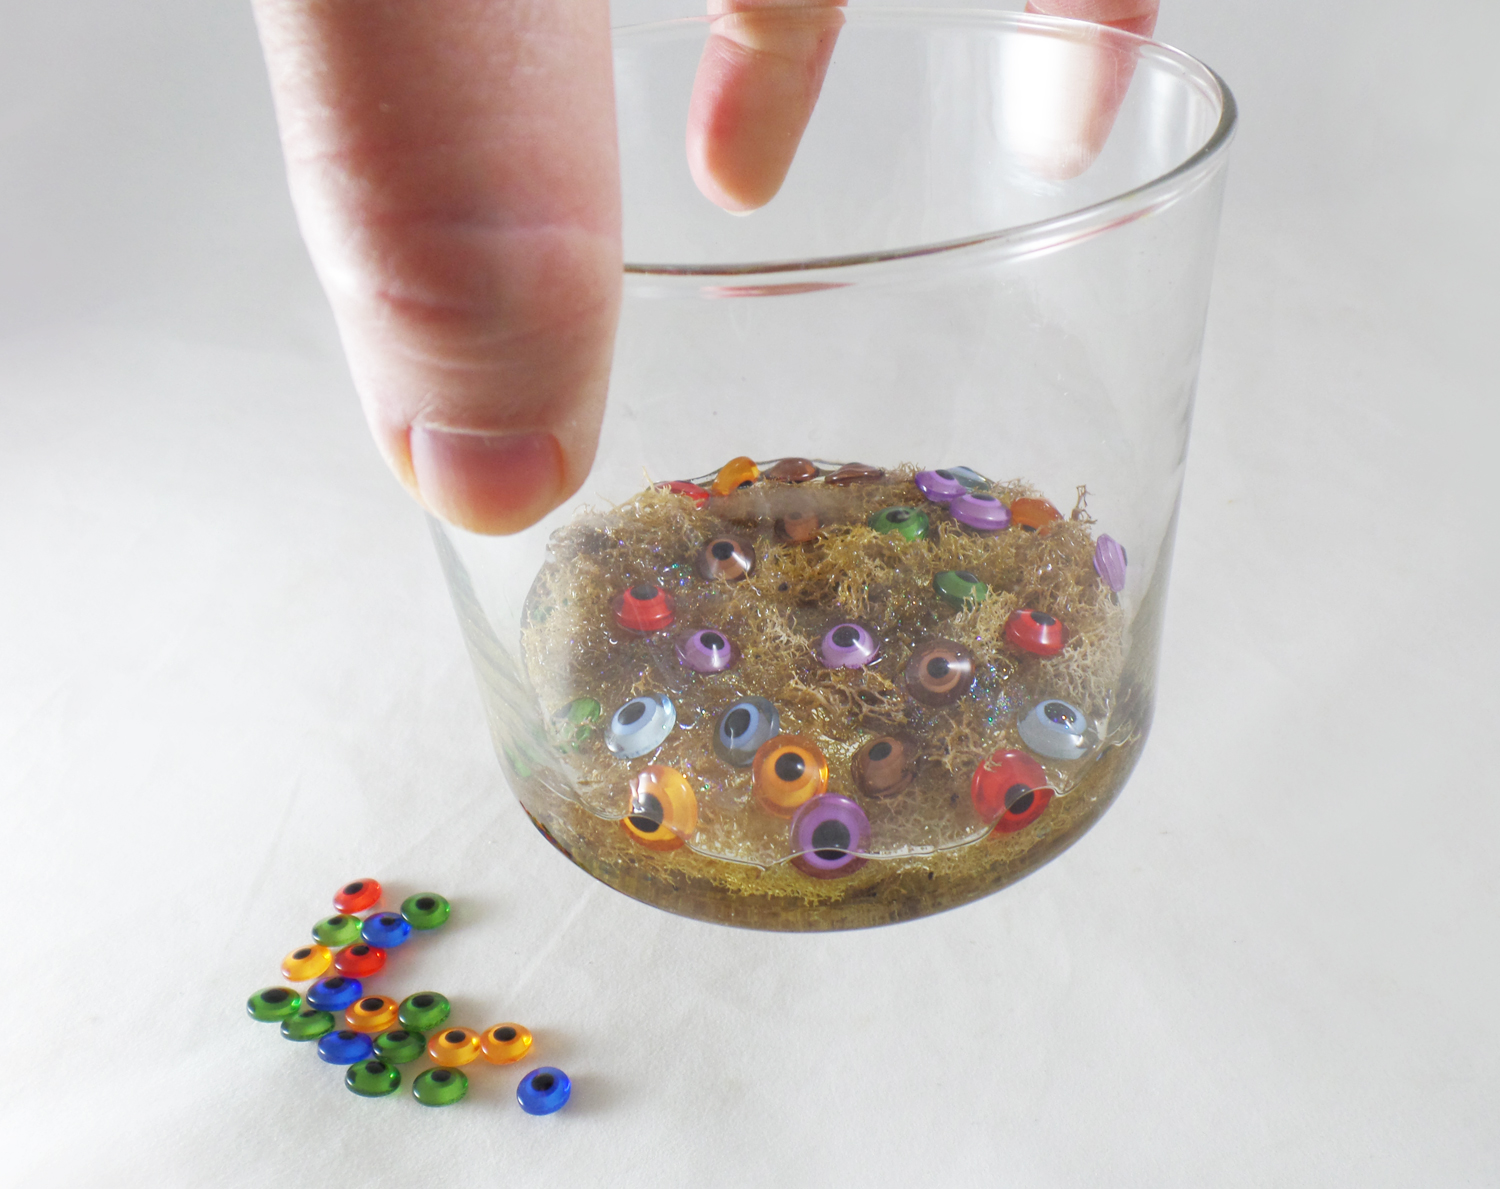
Once I let the first layer of resin cure for about an hour I added some more eye beads and little snippets of moss. I didn’t want to add too much. I wanted it to look like someone used the “newt eyes” a lot in their spells.
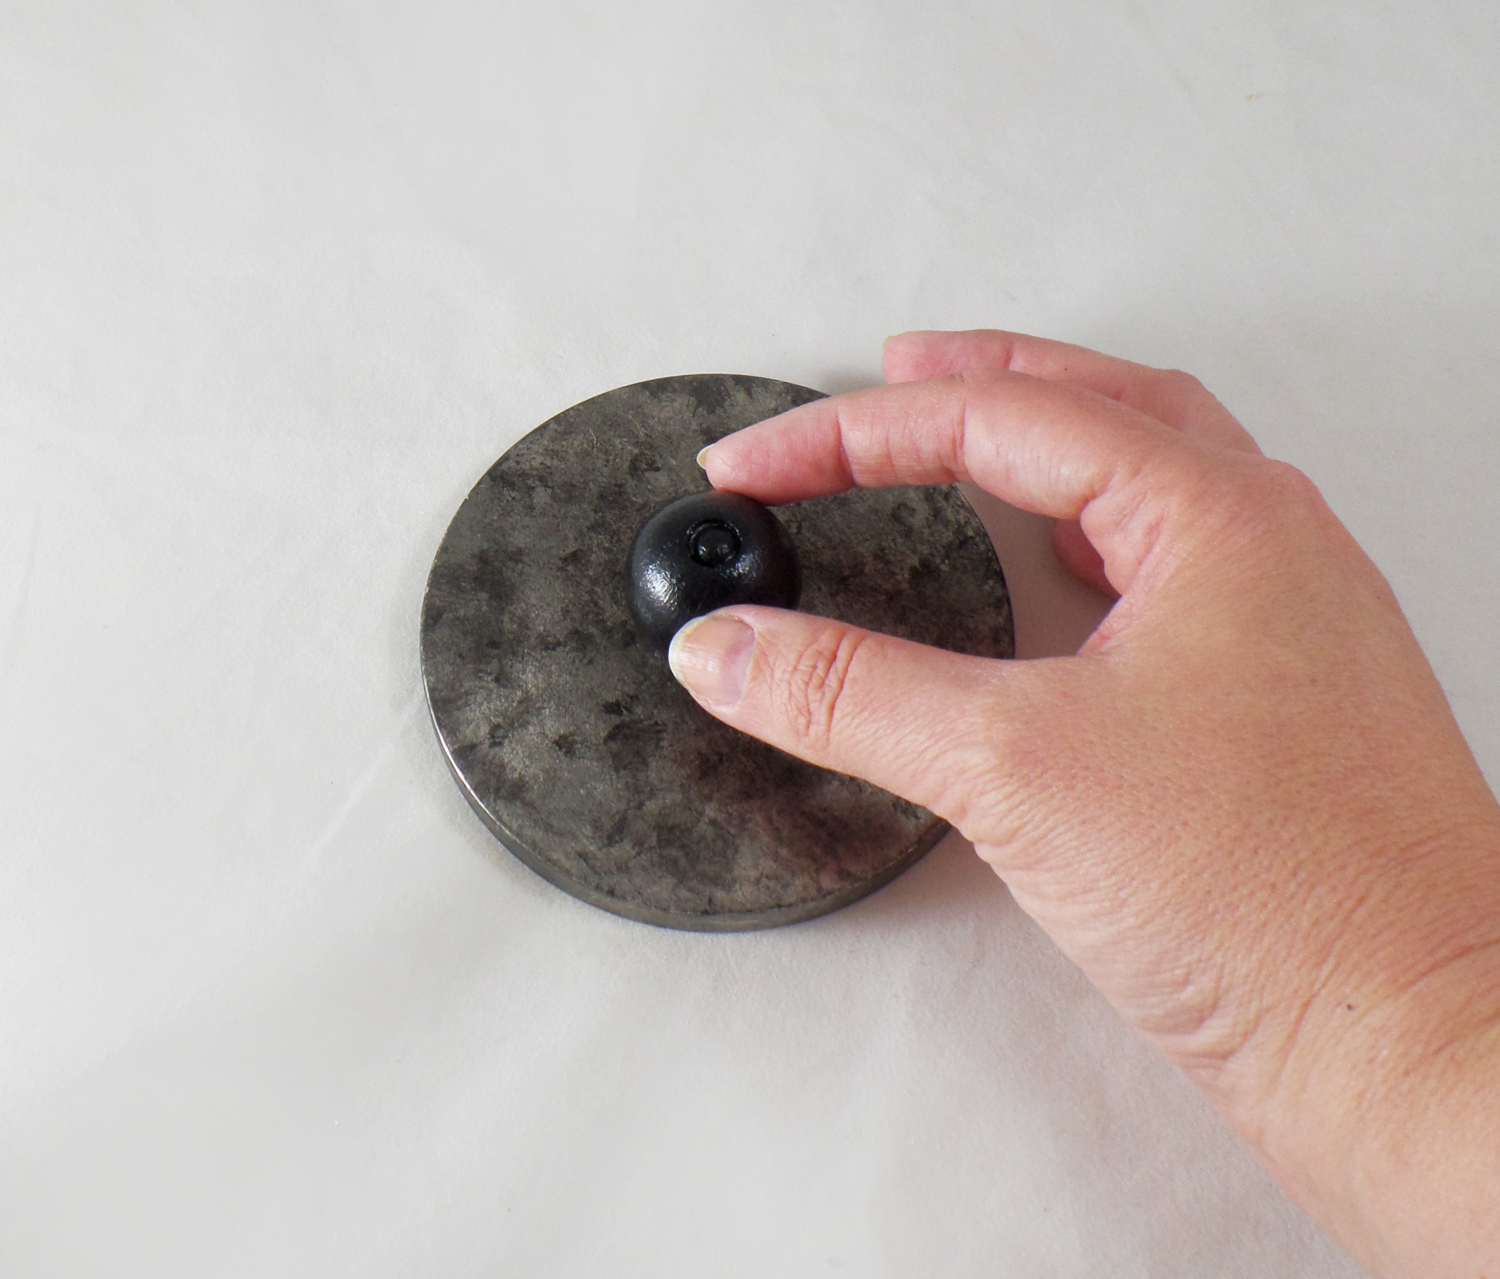
While the final layer of resin cured I worked on the lid to the jar. To bring down some of the bright silver tone of the lid I used some sandpaper and little bit of chalk paint to give it an aged look. A painted wooded bead, glued on top of the lid, gave it a pull knob.
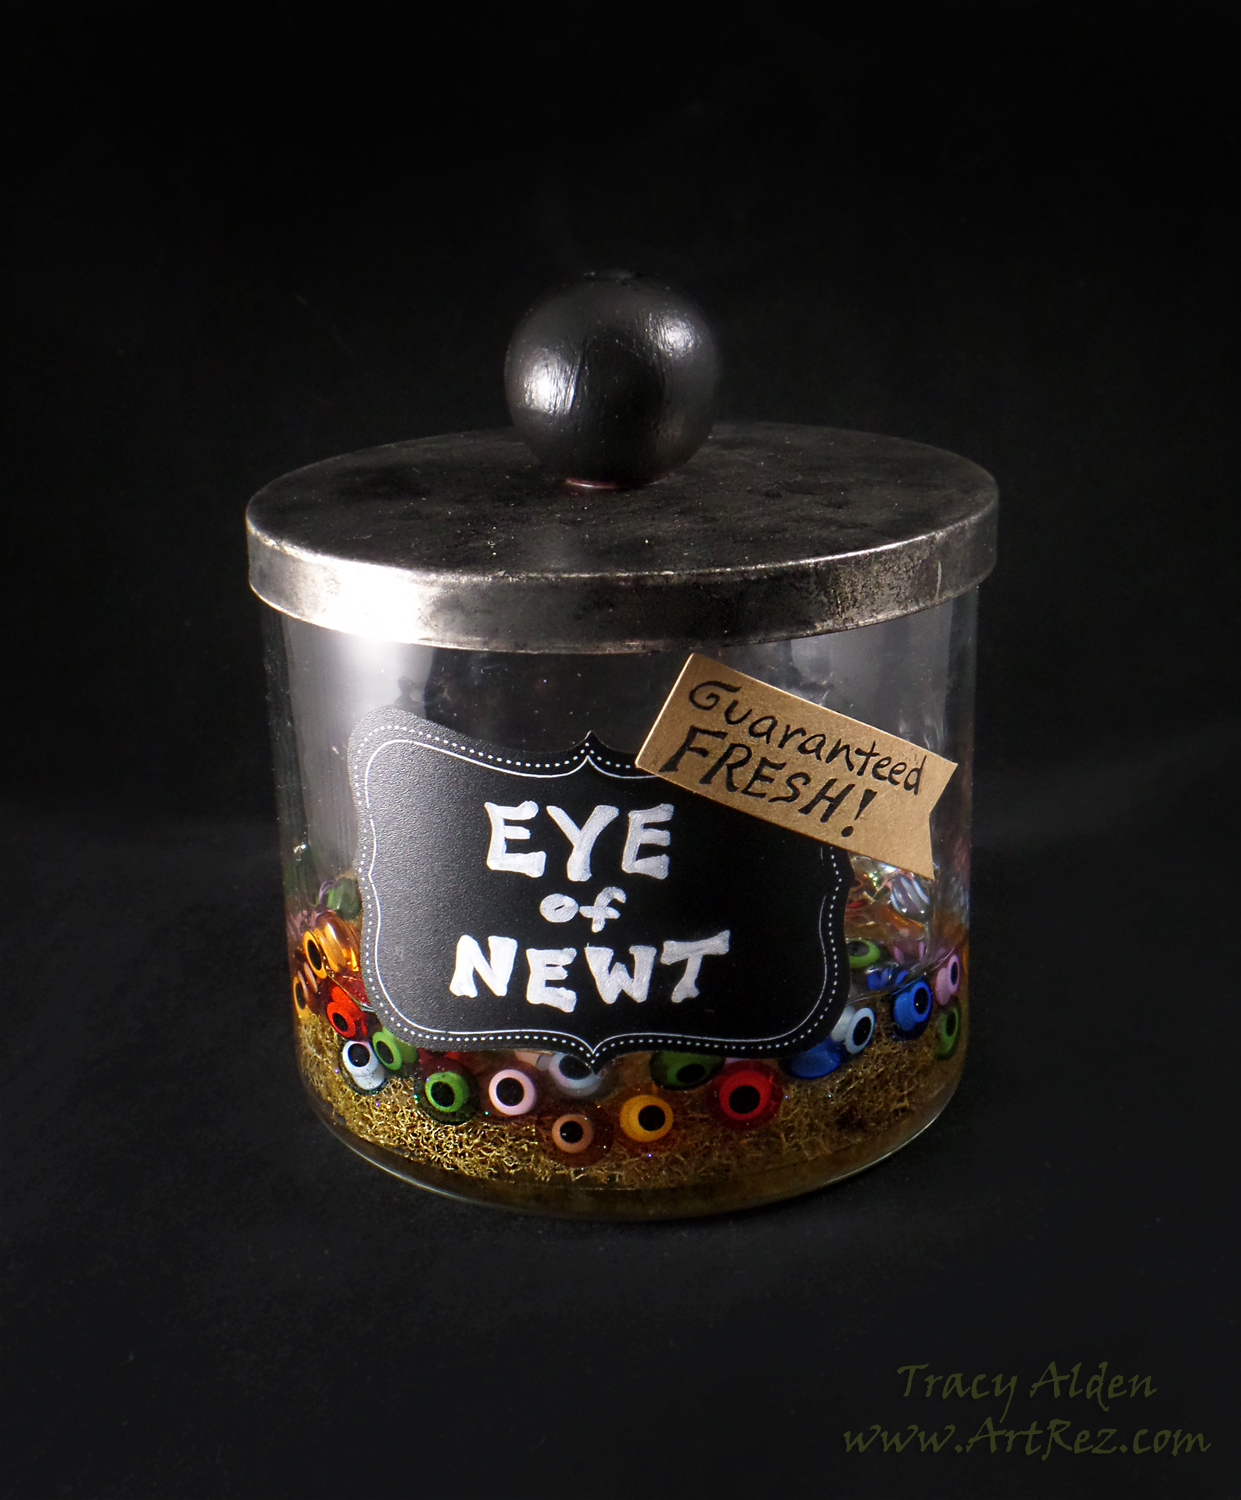
With a chalk board sticker for a label the jar was finished and not a single newt harmed! 🙂
Until next time, safe travels!
*This is an affiliate post, which means I received an assortment of products as a compensation for the creation of art. To read my full disclosure, click here.
