#TBT Sit for a Spell! DIY Eye of Newt Apothecary Jar

Kicking off my Throwback Thursday posts with one of my favorite upcycling Halloween crafts. Posted in 2015 on the Amazing Casting Products blog, this quick and easy project is perfect with Halloween coming up fast.
Taking inspiration from one of William Shakespeare’s most famous plays, Macbeth:
“Eye of newt, and toe of frog,
Wool of bat, and tongue of dog,
Adder’s fork, and blind-worm’s sting,
Lizard’s leg, and howlet’s wing,–
For a charm of powerful trouble,
Like a hell-broth boil and bubble.”That part of the play has a wonderful spooky quality, often inspiring all types of ghoulish displays and decor for Halloween. The interesting part is that most of those names of ingredients were not intended to be taken literal, but were herbalist or folk terms for common herbs and plants. In the case of “Eye of newt” it was referring to a type of mustard seed. However thanks to pop culture more often than not most people think of real newt eyes in a jar. So knowing some seeds in a jar isn’t that ghoulish of a Halloween decoration I decided to go with the pop culture version of making a jar with faux newt eyes.
Supplies:
A Glass Jar previously used for a candle
Resin
Moss
Eye Beads
Glitter (optional)
Chalk Sticker
Chalk Pen
Wood Bead
Black Chalk Paint
Sandpaper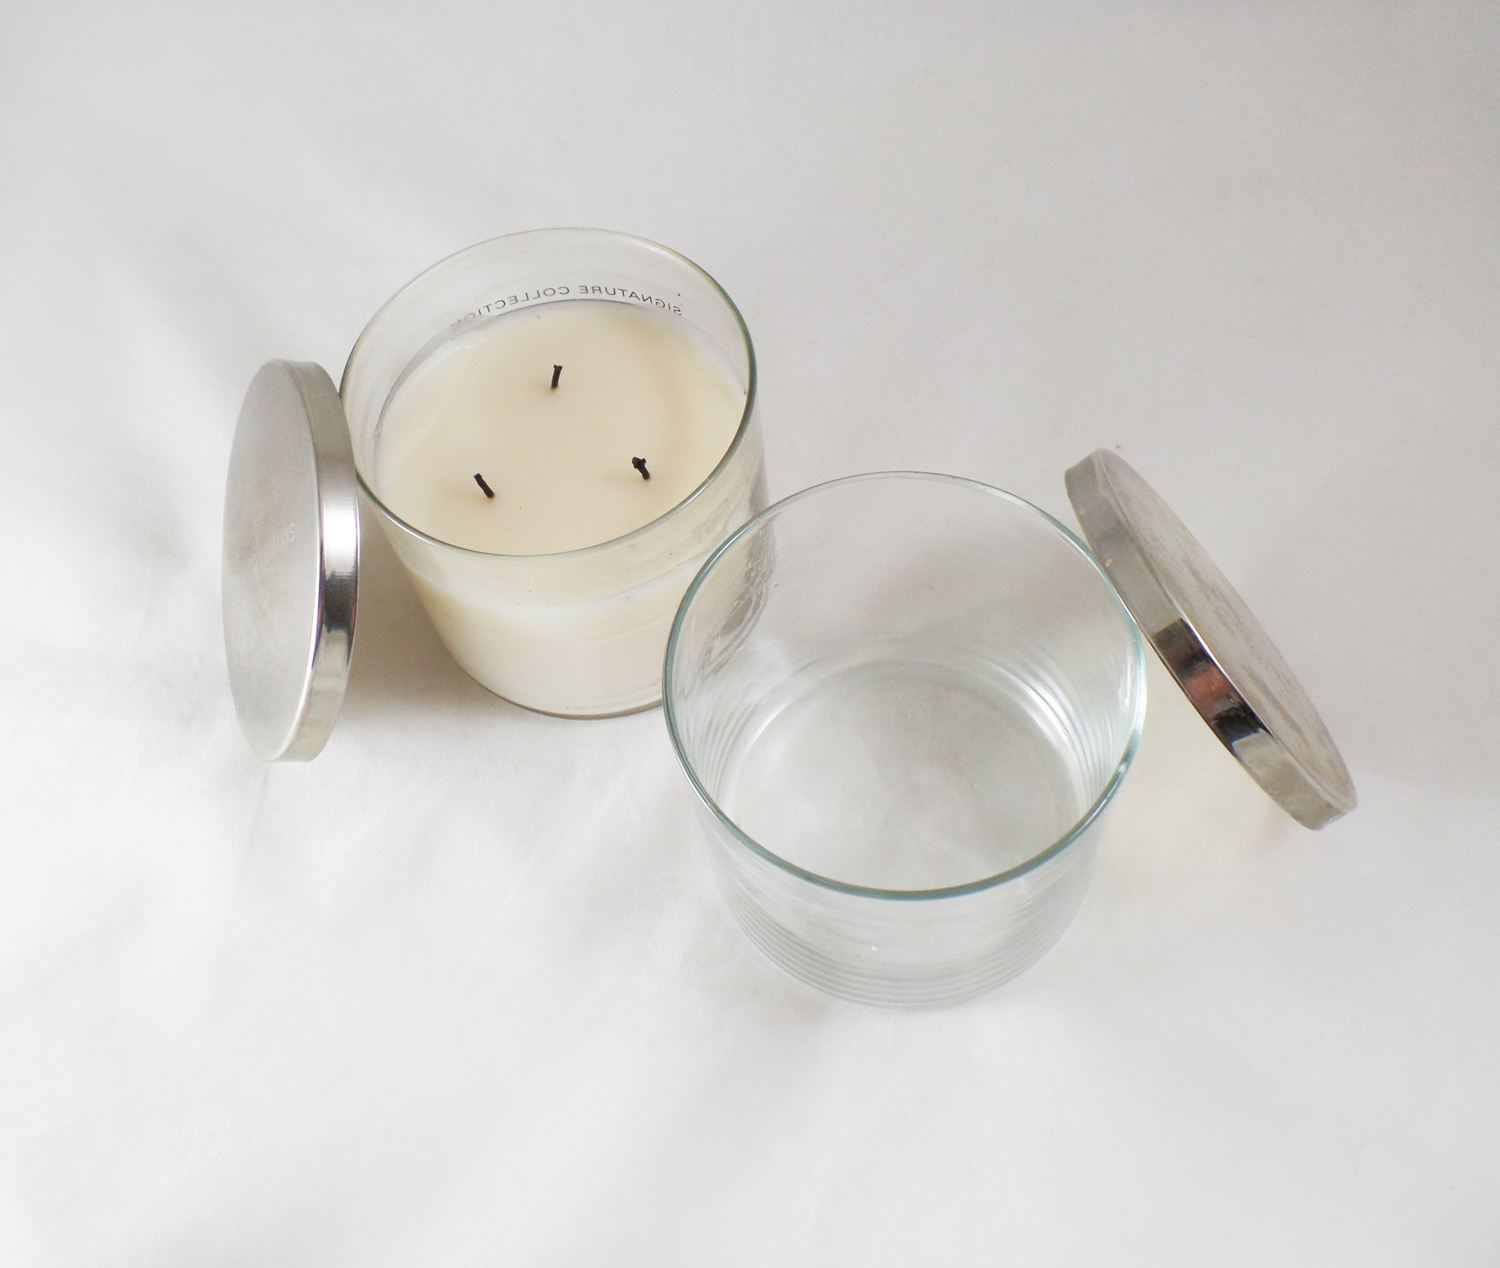
I cleaned up a old jar that previously had a three wick candle with a metal lid, making it perfect for an apothecary jar. I picked this type of glass because it is tempered and can handle the heat often created by thick pours of curing resin.
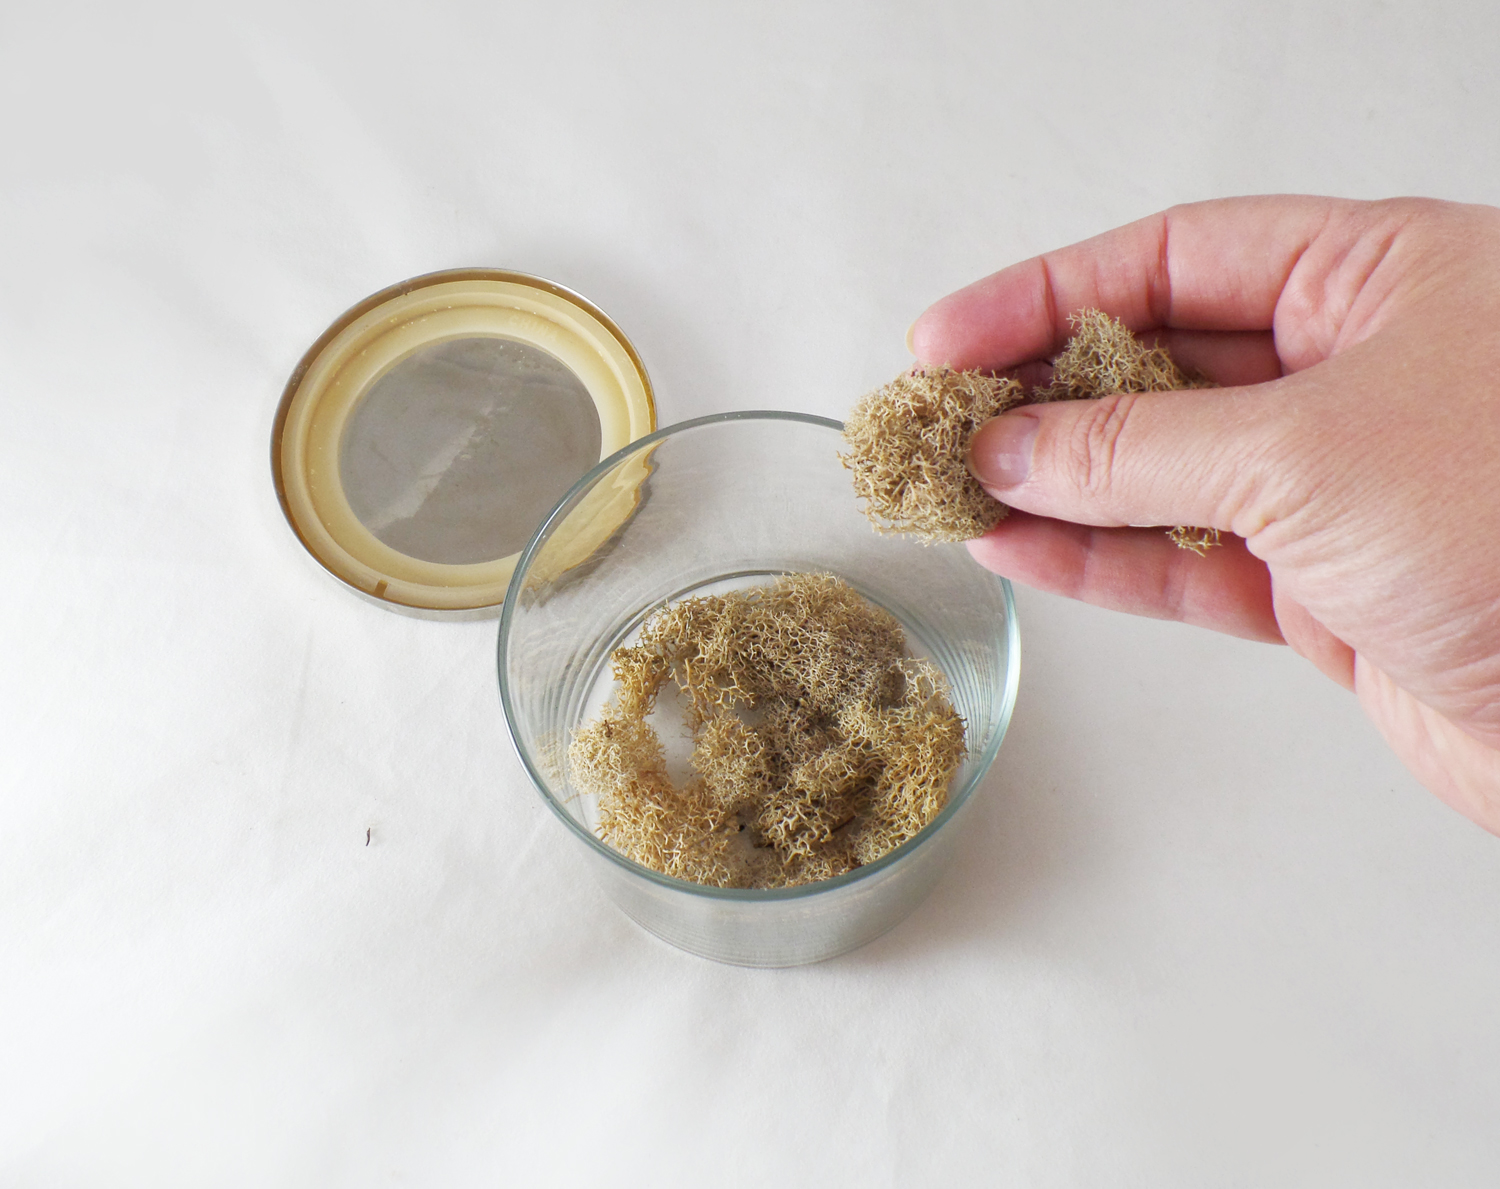
I put some dried moss at the bottom of the jar to add some visual contrast. It would also help with adding some textured base to prop the fake eyes on so they wouldn’t all sink to the bottom.
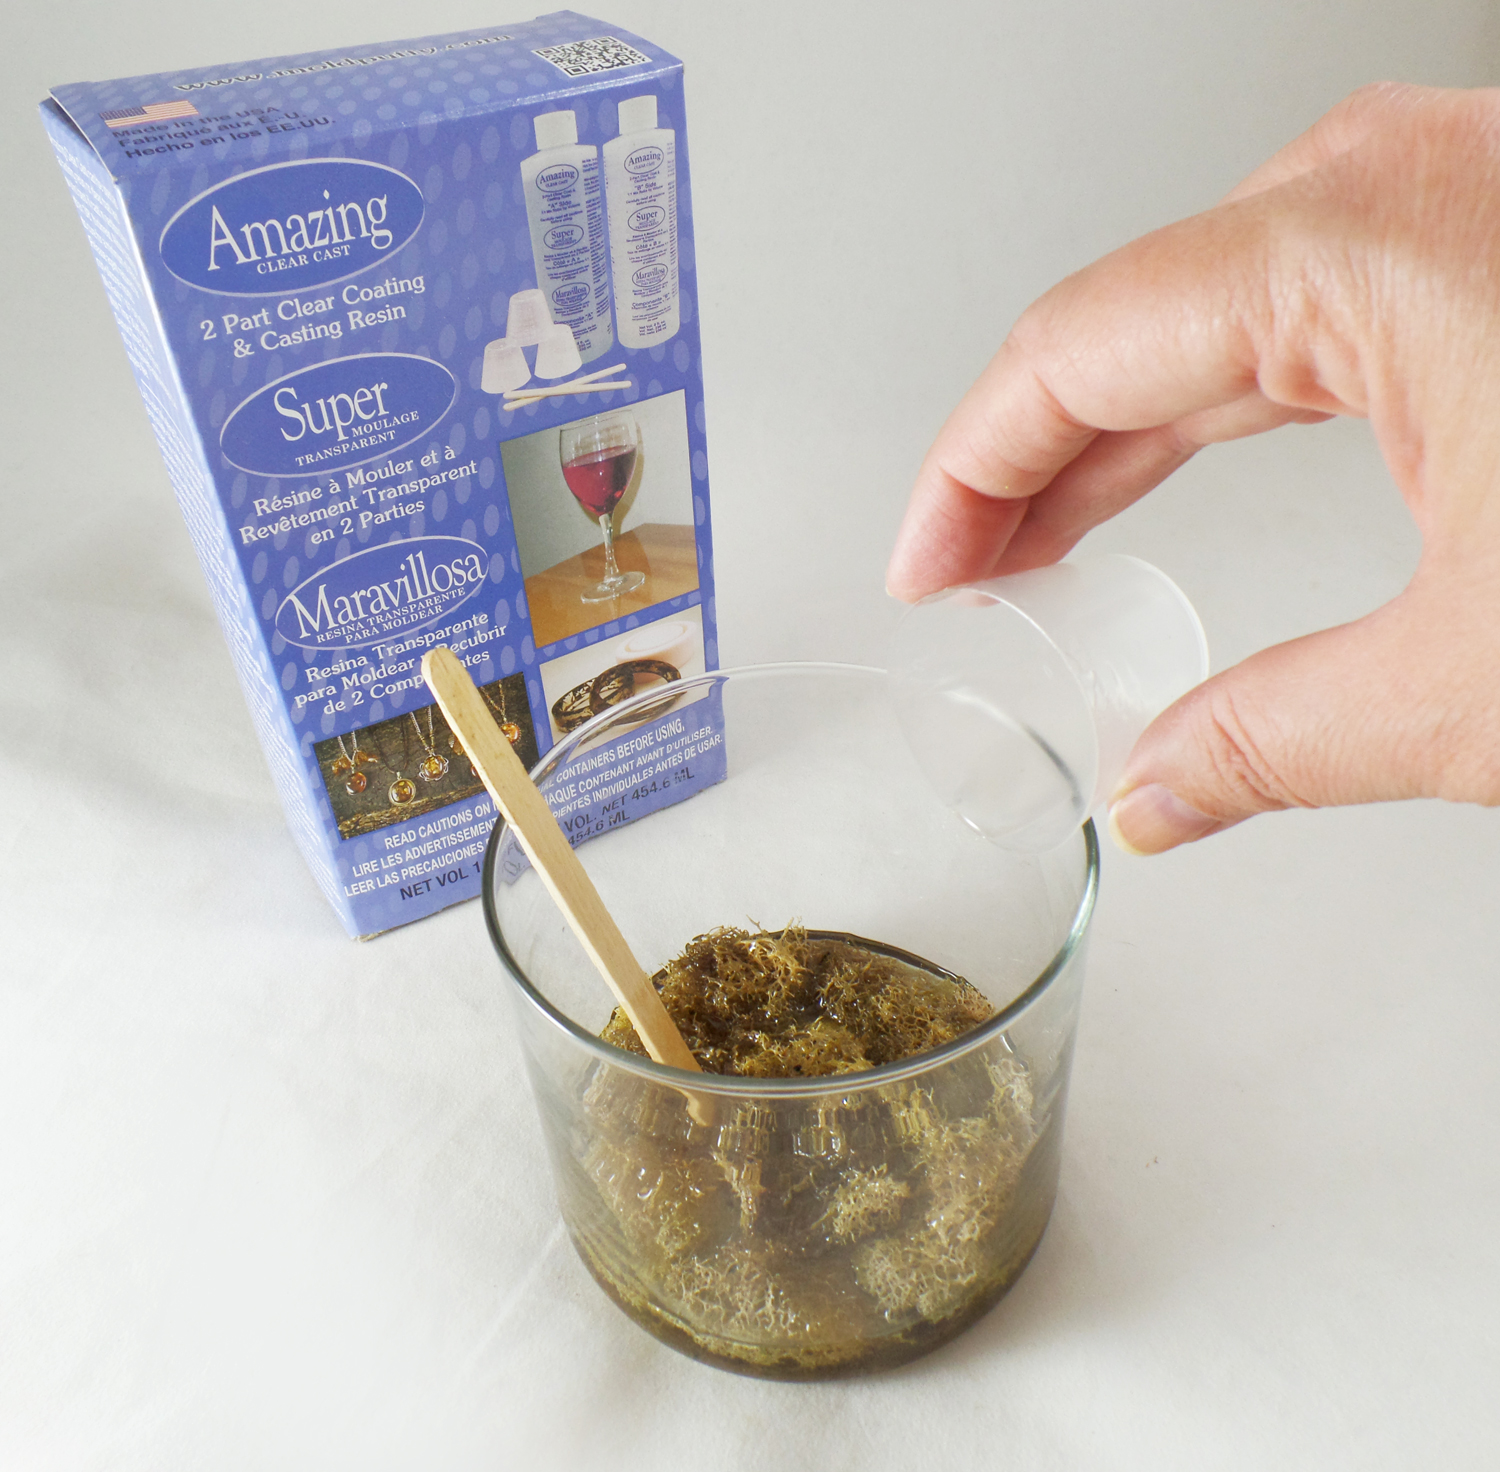
I mixed up 3 fluid ounces of Amazing Clear Cast Resin and slowly poured it on top of the moss to cover it.
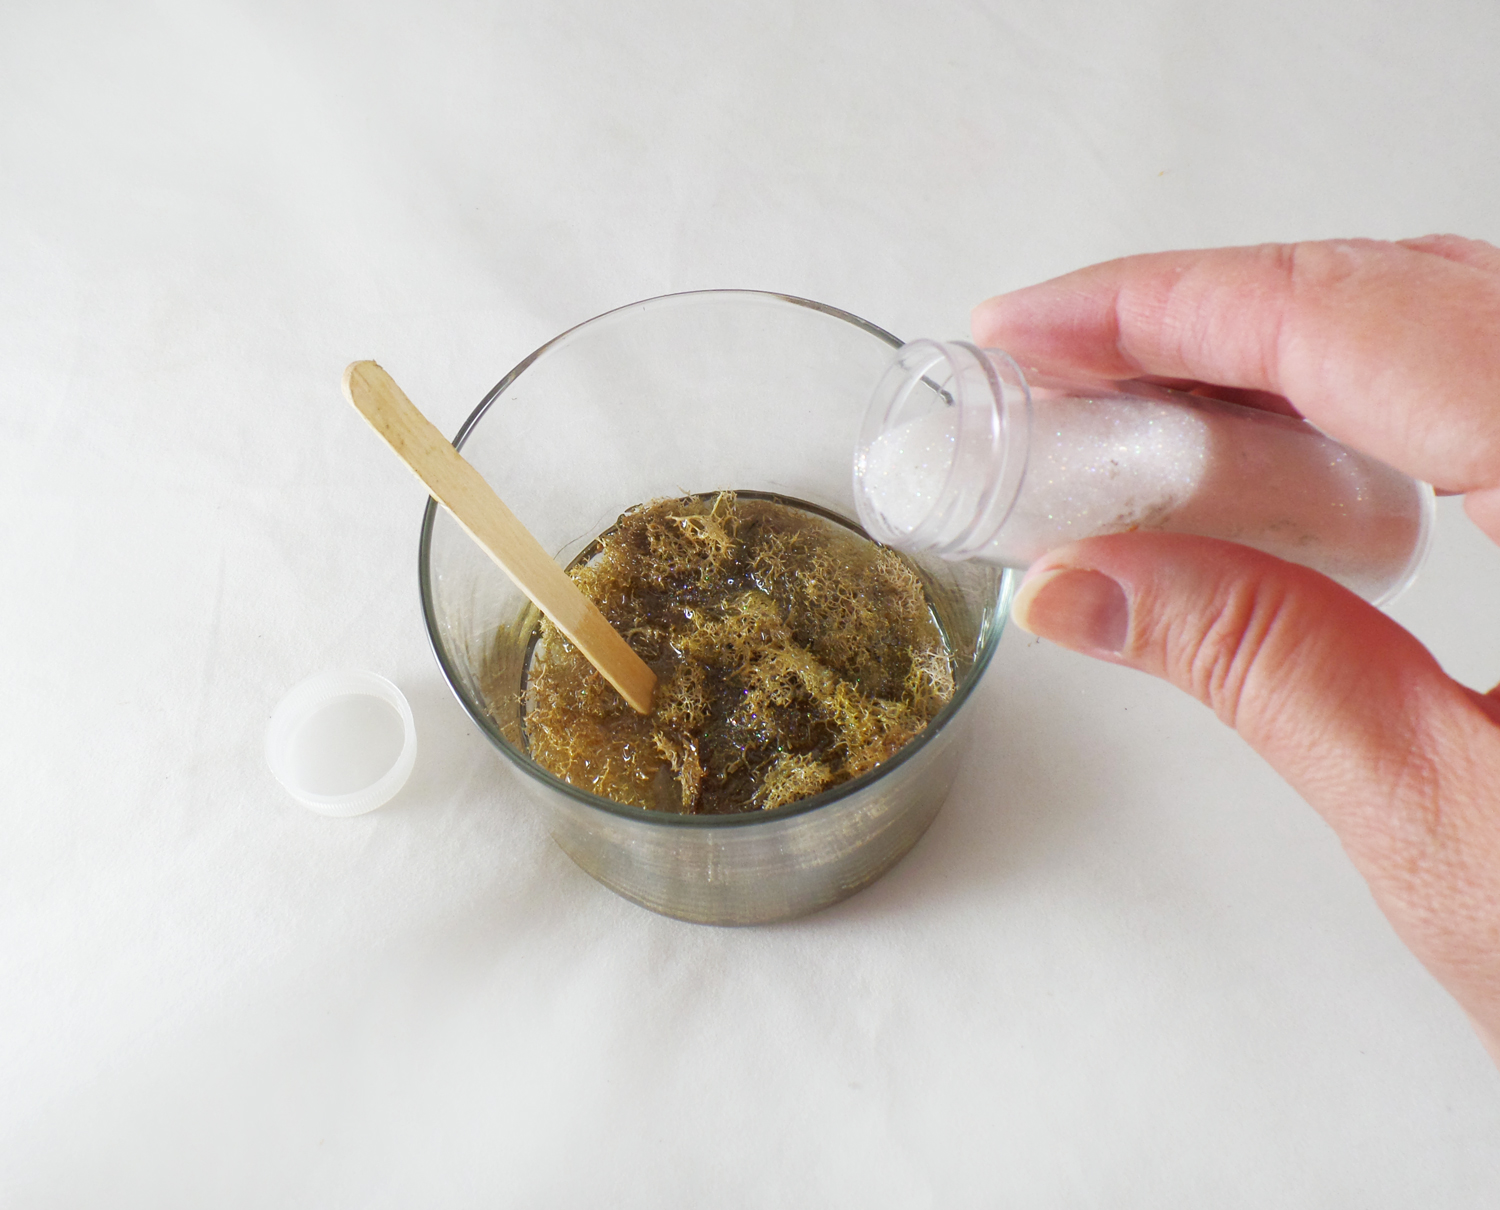
The moss became a bit dark after the resin started to soak into it, so before the resin layer started to cure I sprinkled a bit of micro crystal glitter* to give just a slight shimmer to the moss layer.
*The glitter is an optional step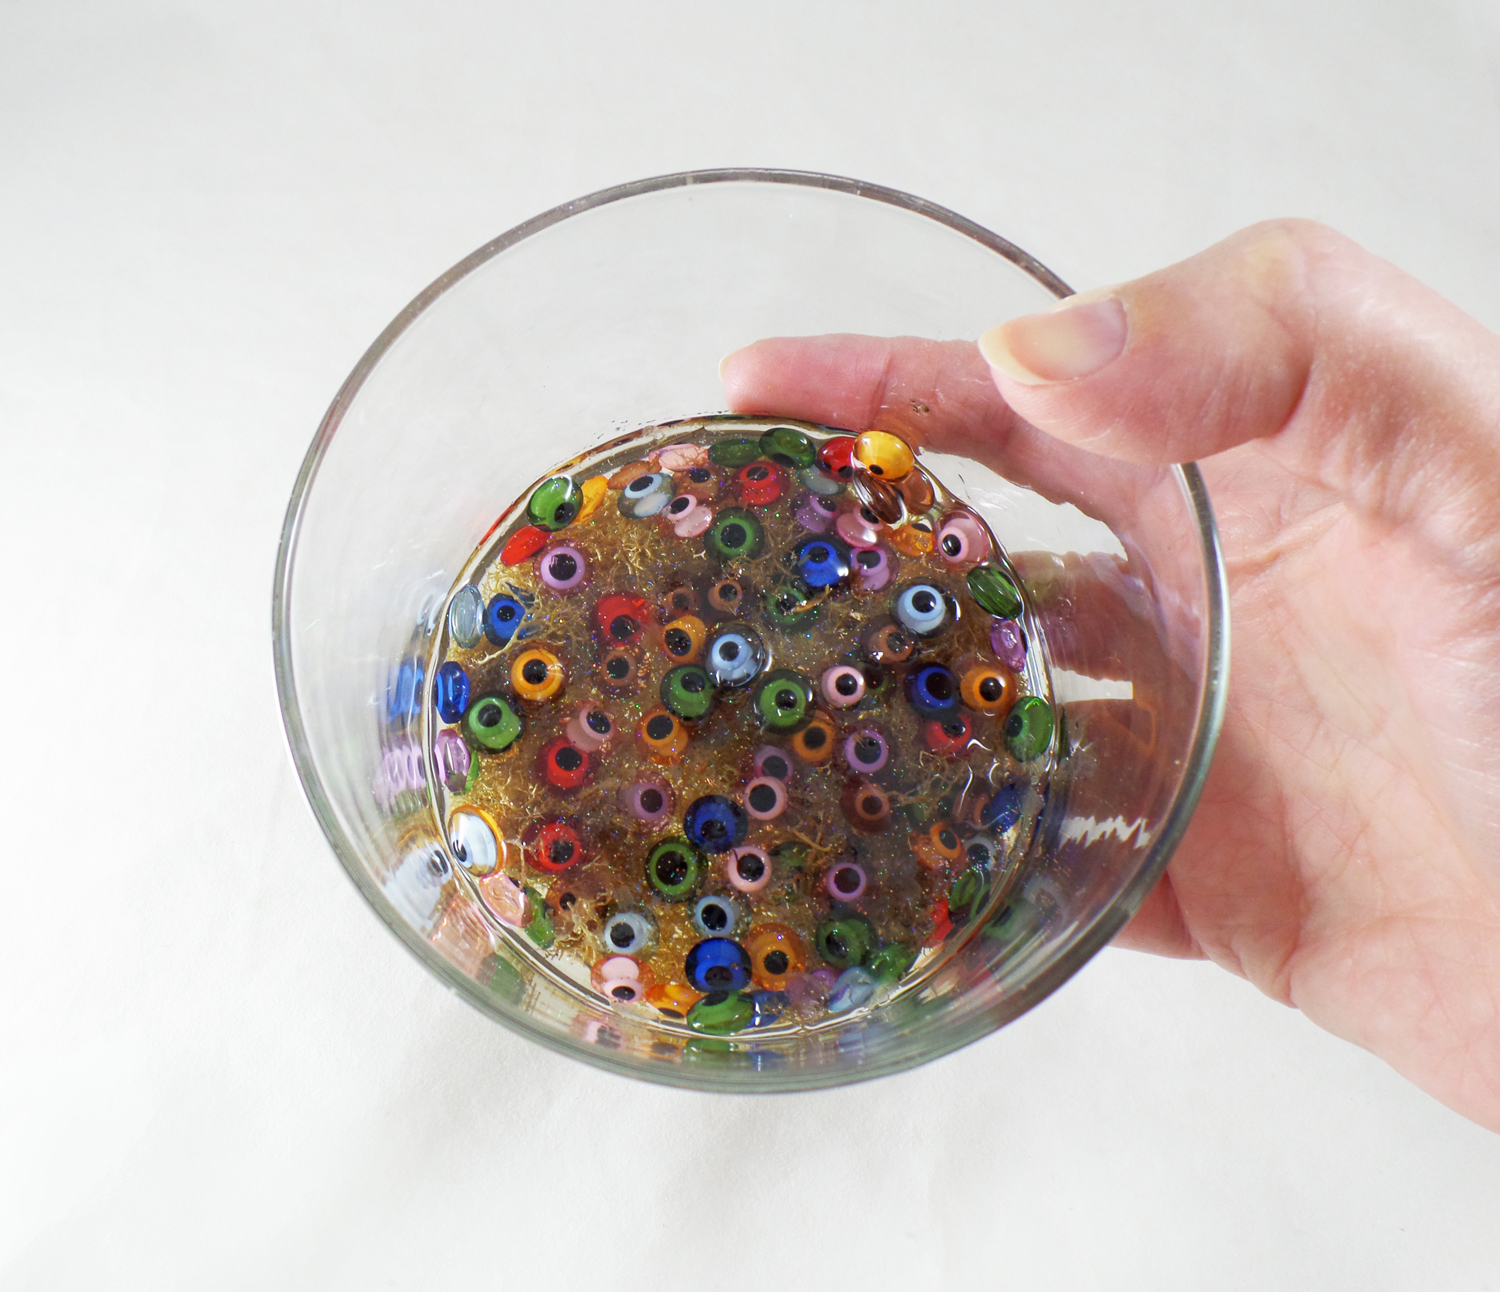
For newt eyes I used transparent acrylic Eye of Warding beads carefully placed in the still wet resin. Recent popularity of the beads has had a lot of bead manufacturers making all kinds of the Eye of Warding beads out of glass, acrylic, clay and even recycled plastic.
*Take a trip to your favorite craft store to check out what types of beads they might have for you to use!
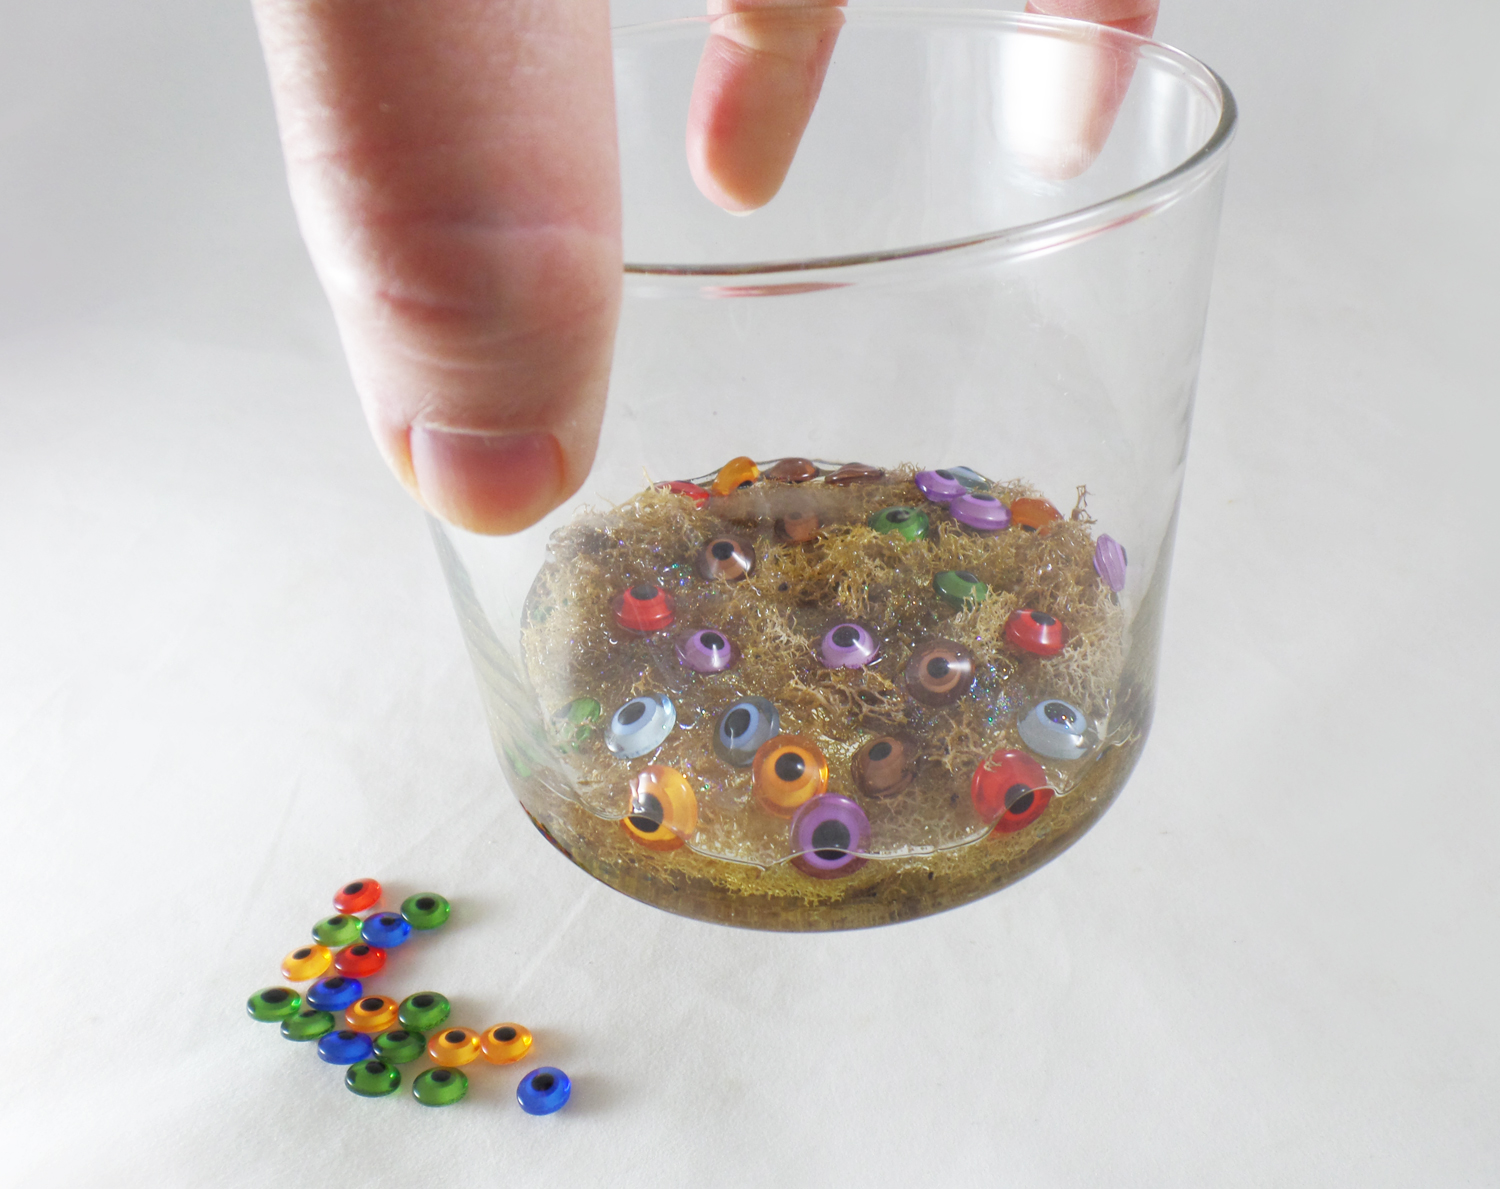
Once I let the first layer of resin cure for about an hour I added some more eye beads and little snippets of moss. I didn’t want to add too much. I wanted it to look like someone used the “newt eyes” a lot in their spells.

While the final layer of resin cured I worked on the lid to the jar. To bring down some of the bright silver tone of the lid I used some sandpaper and little bit of chalk paint to give it an aged look. A painted wooded bead, glued on top of the lid, gave it a pull knob.
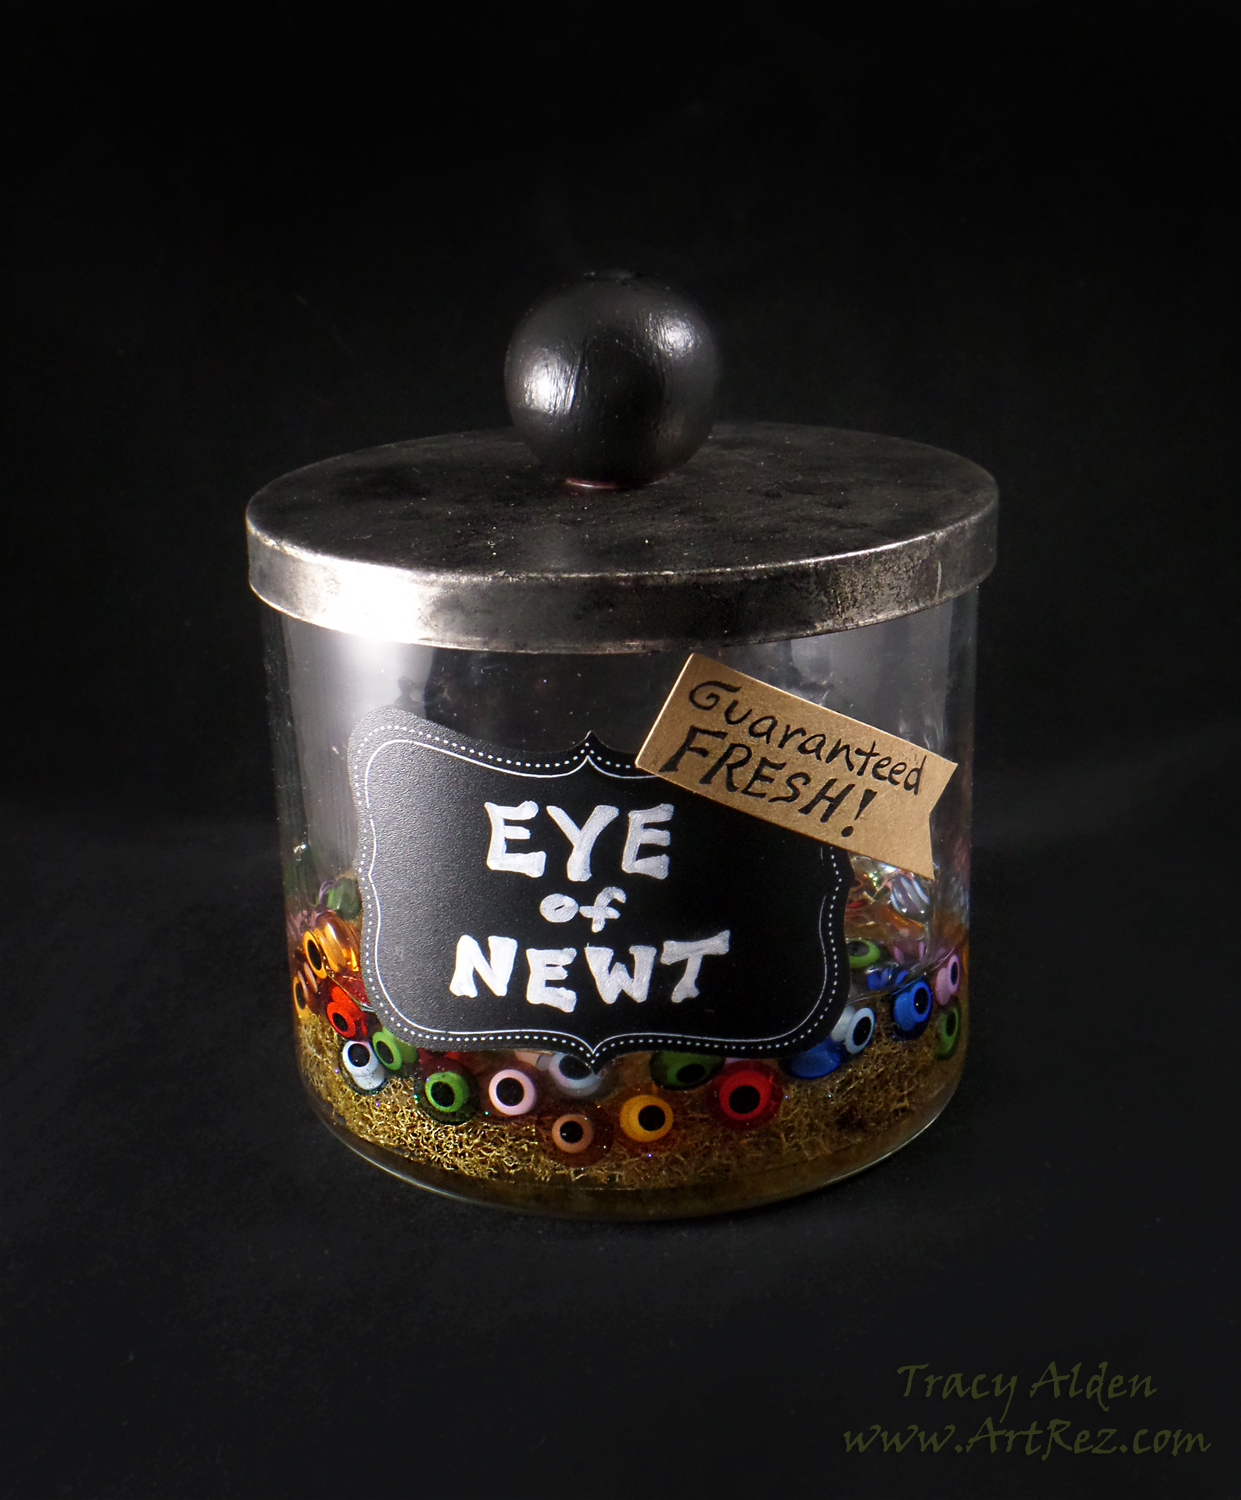
With a chalk board sticker for a label the jar was finished and not a single newt harmed! 🙂
Until next time, safe travels!
*This is an affiliate post, which means I received an assortment of products as a compensation for the creation of art. To read my full disclosure, click here.
- Amazing Casting Products, Beads, Fiona Accessories, Halloween, Home Decor, Jewelry, Mixed Media, Paint, Recycling, Resin
An Artistic Halloween Haunting Recap!
Welcome to my Artistic Halloween Haunting Recap! The month of October and all of the Halloween goodness flew by so fast, but I wanted to share some of my ghoulish crafting fun before Halloween is just a faint promise of next year.

Using some wonderful chains, crystals and beads from Fiona Accessories I created this jewelry assemble for my spellbinding costume of a Gothic witch. The sterling silver snake pendant was hand crafted in Nepal and really played well with the raven skull I had bought recently.
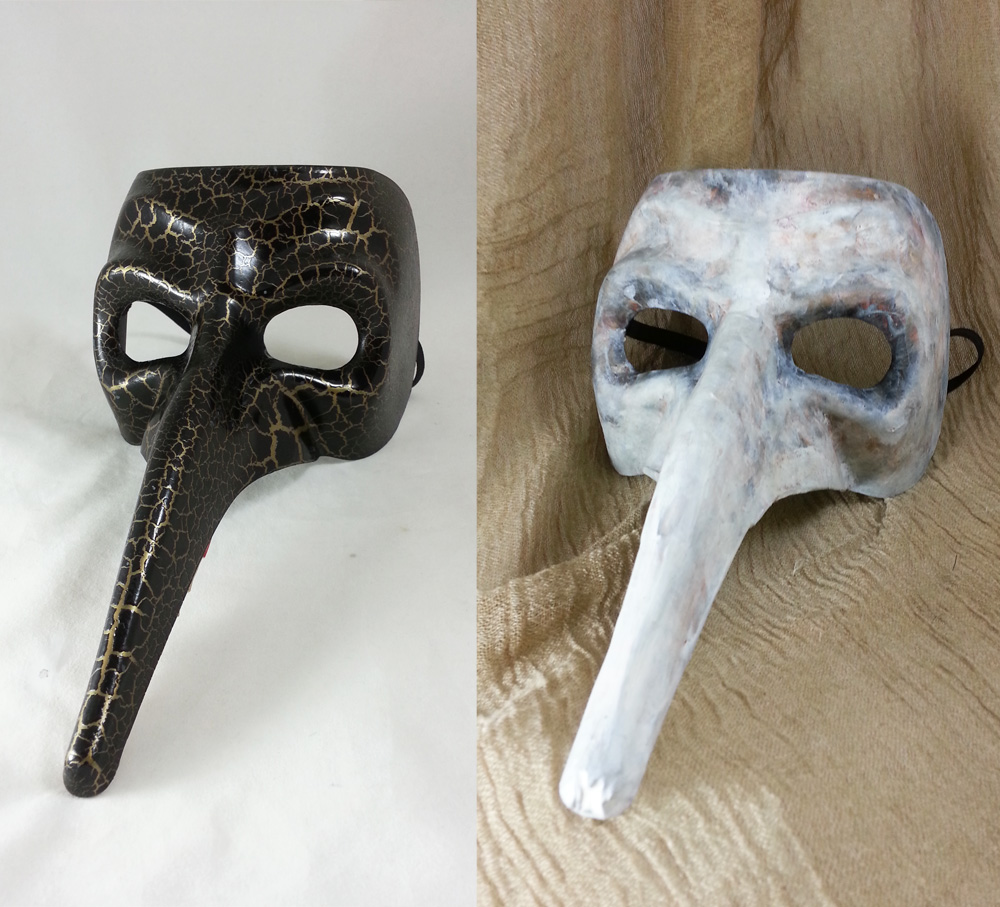
I transformed this plastic Italian Carnival mask into a Plague Doctor mask using paper mache, paint and Liquitex Matte Varnish. However I wasn’t finished there and created the rest of the look:
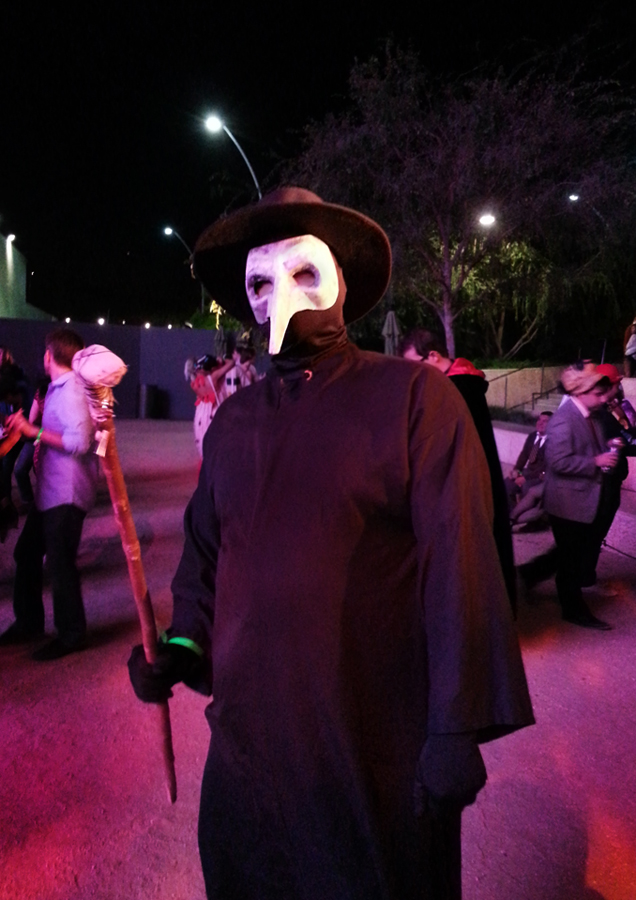
With the addition of a black heavy weight line robe, hood, gloves, hat and walking stick it made a perfectly frightening Plague Doctor costume for my husband.
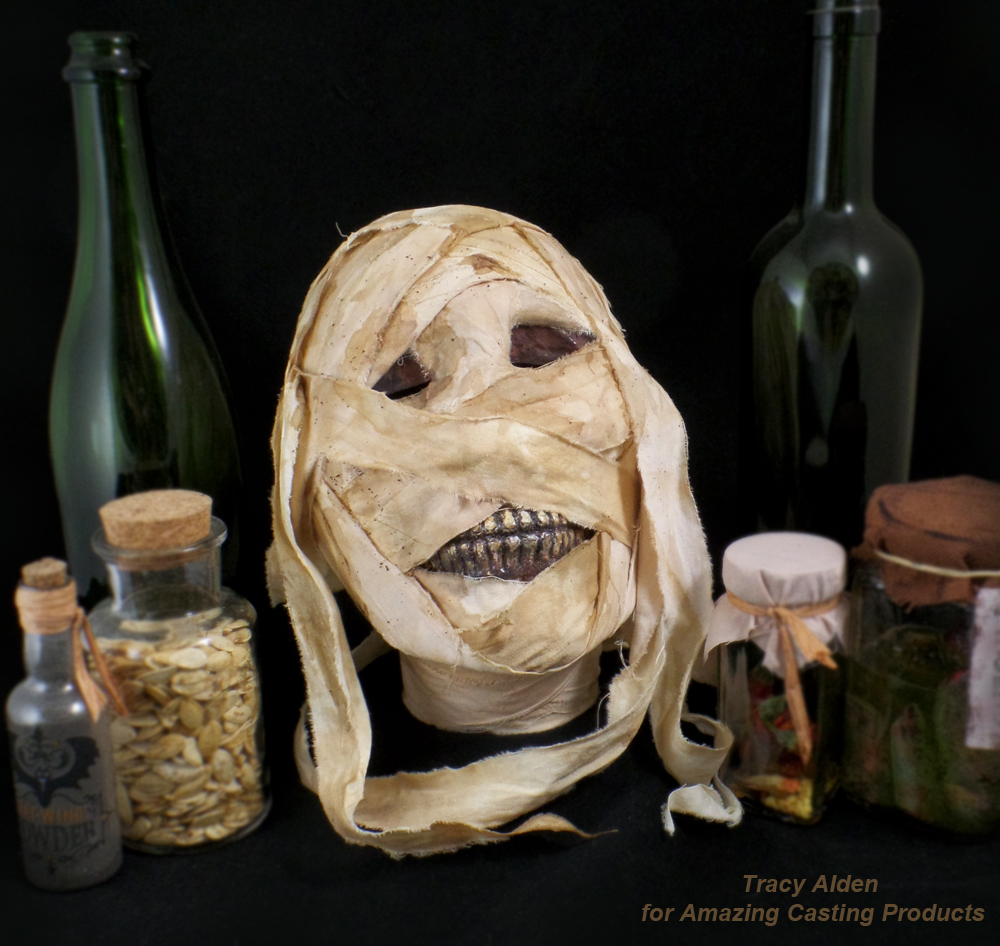
I created a replica mummy head using a plastic Halloween skull and the help of Amazing Casting Products. Clicj HERE for this Upcycled Mummy’s Curse!
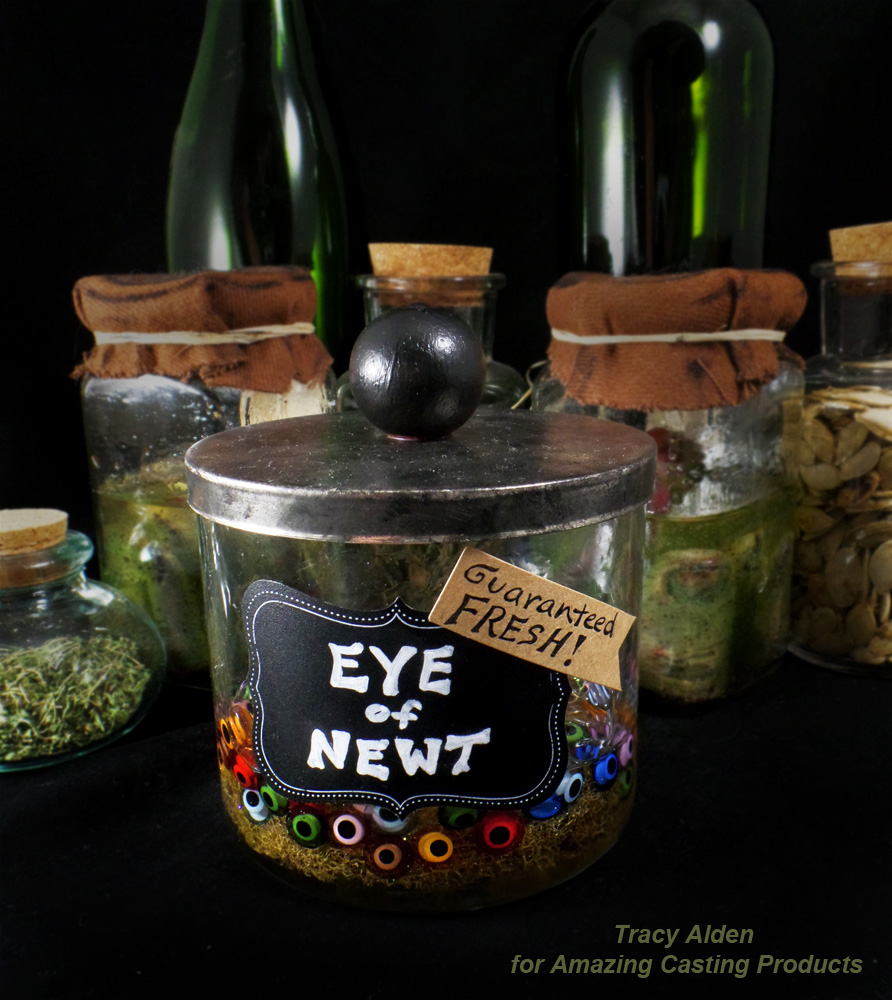
Taking inspiration from one of William Shakespeare’s most famous plays, Macbeth, I created a Eye of Newt Apothecary Jar, spooky enough to keep any monster happy!
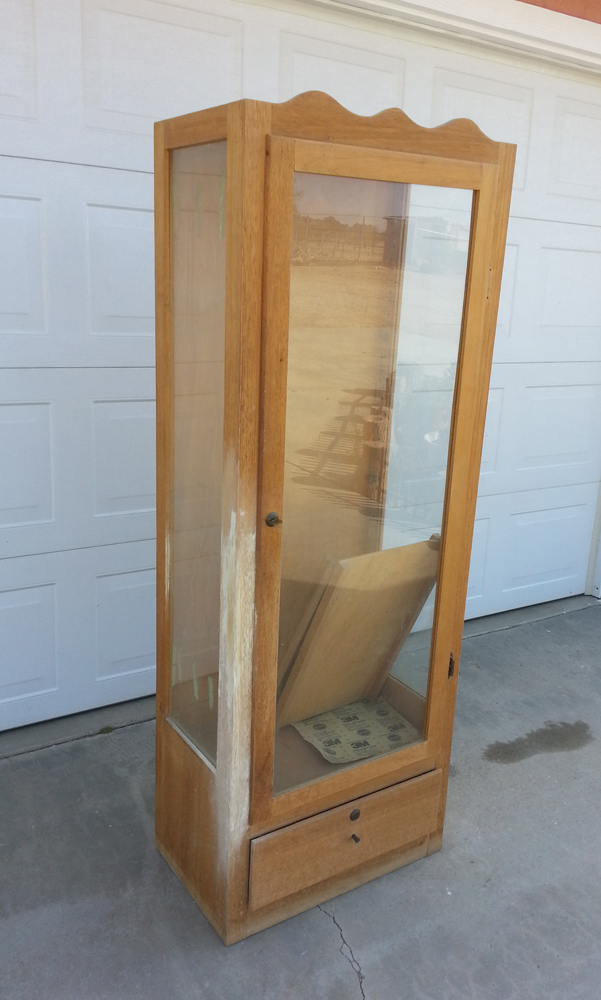
Last but not least my husband and I finally took the time to refinish a old cabinet that had been in the family longer than me. After patching, sanding, staining and varnish it was ready to become a Halloween curio cabinet!
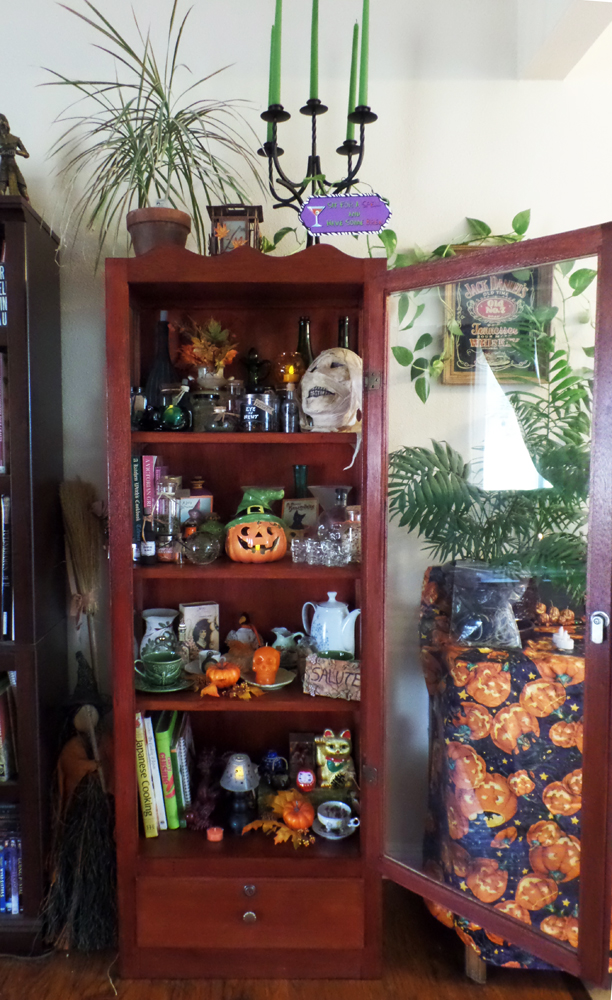
Not bad for our first attempt at giving new life to an old piece. Once filled with fun holiday decor it made a perfectly frightening Halloween decoration. With Halloween gone and past now I can fill it with with antiques and little curios befitting of Fall.Now to start on art projects for Fall and the coming Winter!
Until Next Time, Safe Travels!
Upcycle Plastic Skulls into Ghoulish Glam Decor
The first day of October: the leaves are starting to fall and the temperatures are slowly starting to drop at night! With only a month left to get all of my Halloween projects, I have been traveling to all sorts of places for interesting supplies. One of my favorites is the many local Thrift Stores in our area that support local charities. At this time of year many will get in all kinds of Halloween items and one store had a lot of plastic skulls. I noticed that while the paint job on the skulls wasn’t particularly grand the sculpting of the skulls was nice. It got me thinking how they would look if I changed the paint and finish, replicating the look of ceramic!
Supplies:
Plastic Skulls and Metal Candle Stands
Liquitex Gloss and Matte Varnish
Black Chalk Board Paint
iZink Pigment Ink bottle – Gold
Fiona Accessories Red Crystal Drop Beads, Black and Red Crystal Rondelle beads
Beadsmith 1 Step Looper Tool
Black enameled chain, jump rings and headpins
Paint Brushes
Cosmetic Sponges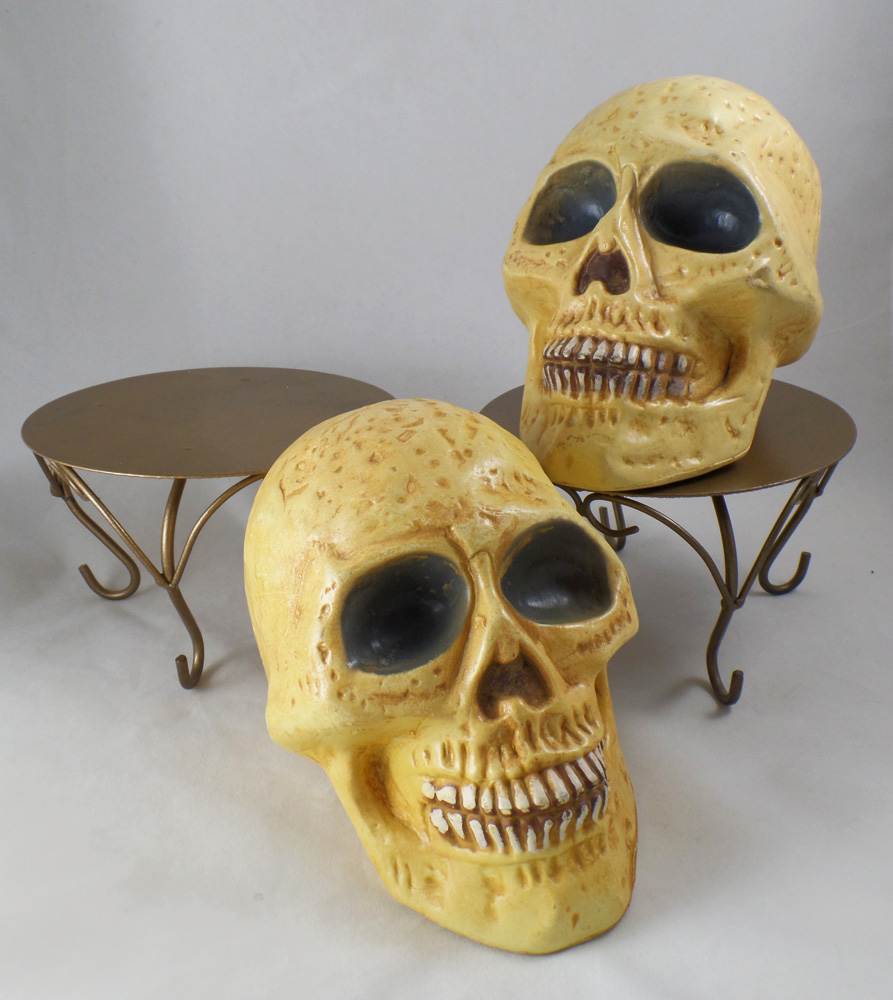
Along with the skulls I found some old candle stands with a old bronze finish. I noticed the skull fit perfectly on them so I bought them along with the skulls. I scrubbed the plastic skulls and candle stands, removing any dust, stickers and uneven edges.
While I could have easily spray painted the pieces, I wanted to go with a nontoxic and child friendly direction by using chalk paint. I painted the skulls and candle stands with 3 layers of black chalk paint. Most chalk paints require a 1-2 hour dry time between coats of paint for best coverage and adhesion of the paint.
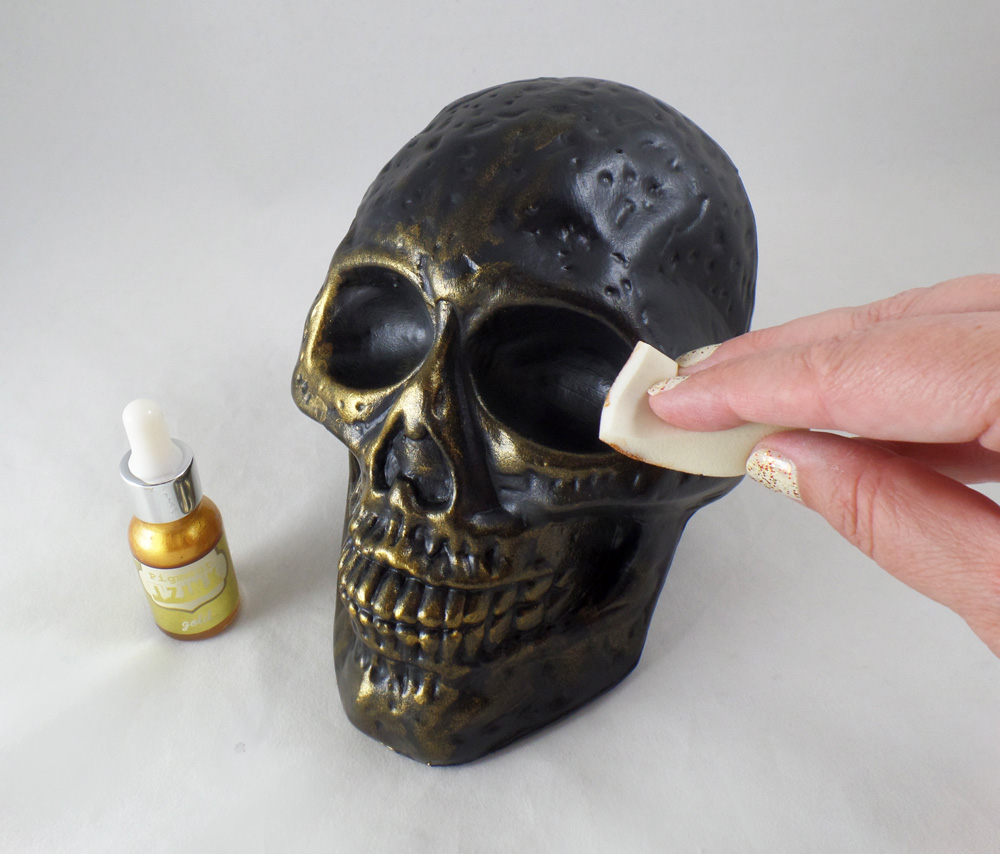
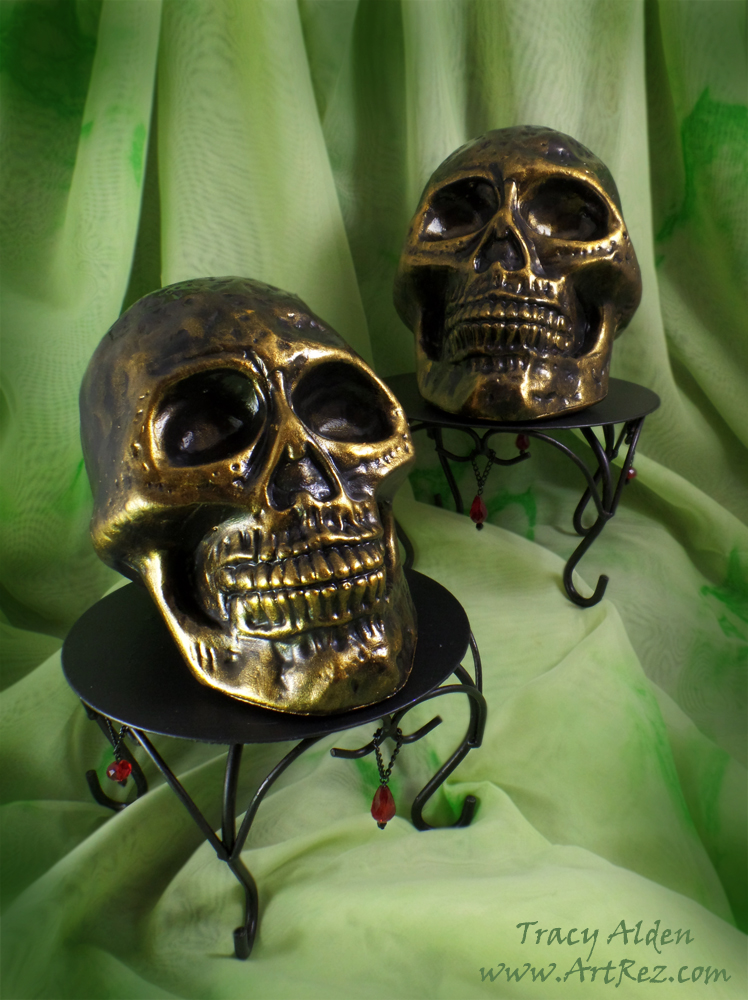
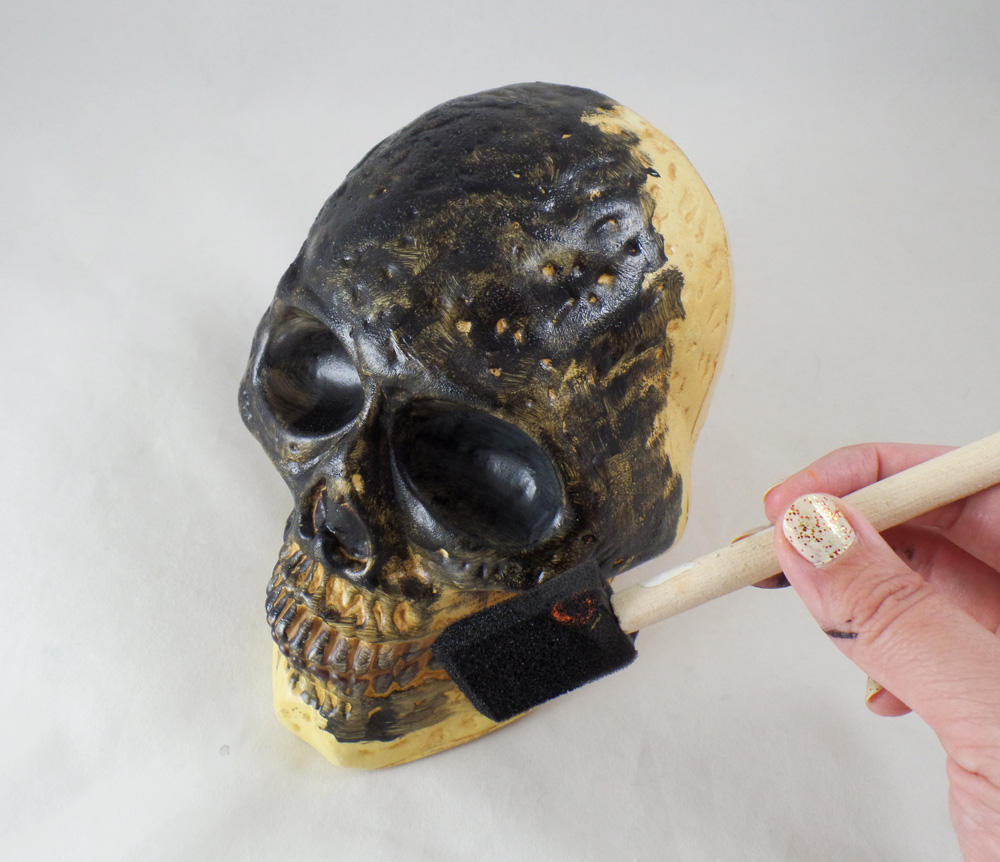
The skulls already looked better than they used to but I wanted them to look more like ceramic. Using a cosmetic sponge I applied Gold iZink Pigment Ink to the raised portions and detailed parts of the painted skulls. The ink dries rather quickly allowing me to add several layers on sections for a dramatic effect.
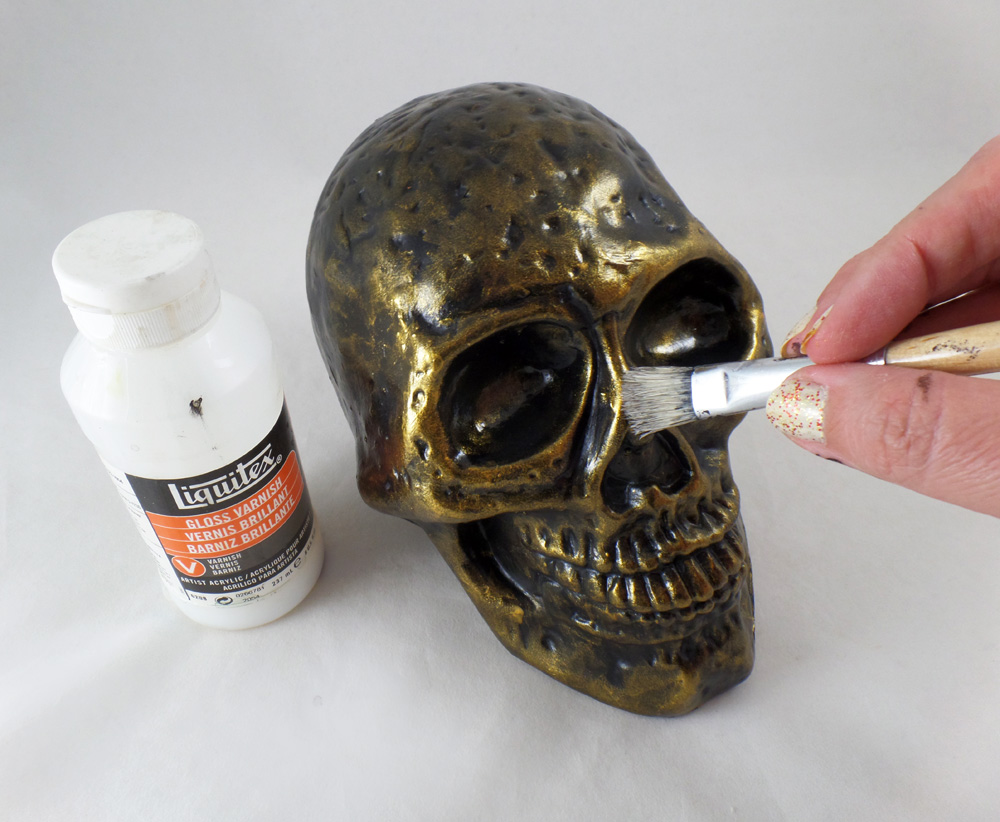
I applied Liquitex Gloss Varnish to the sections on the skulls with gold ink to make the gold tone visually stand out more and give the illusion of ceramic.
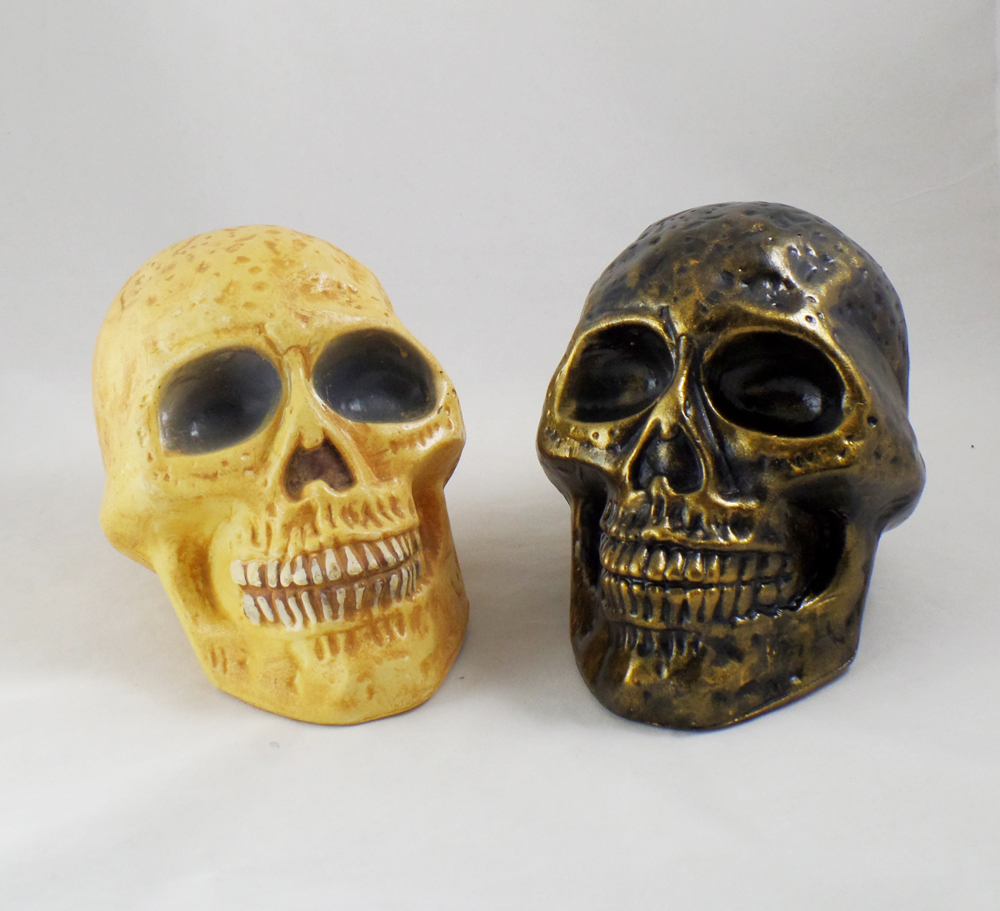
Compared to the original factory paint I was pretty happy with the new version, replicating the look for ceramic. However I felt the skulls needed something more.
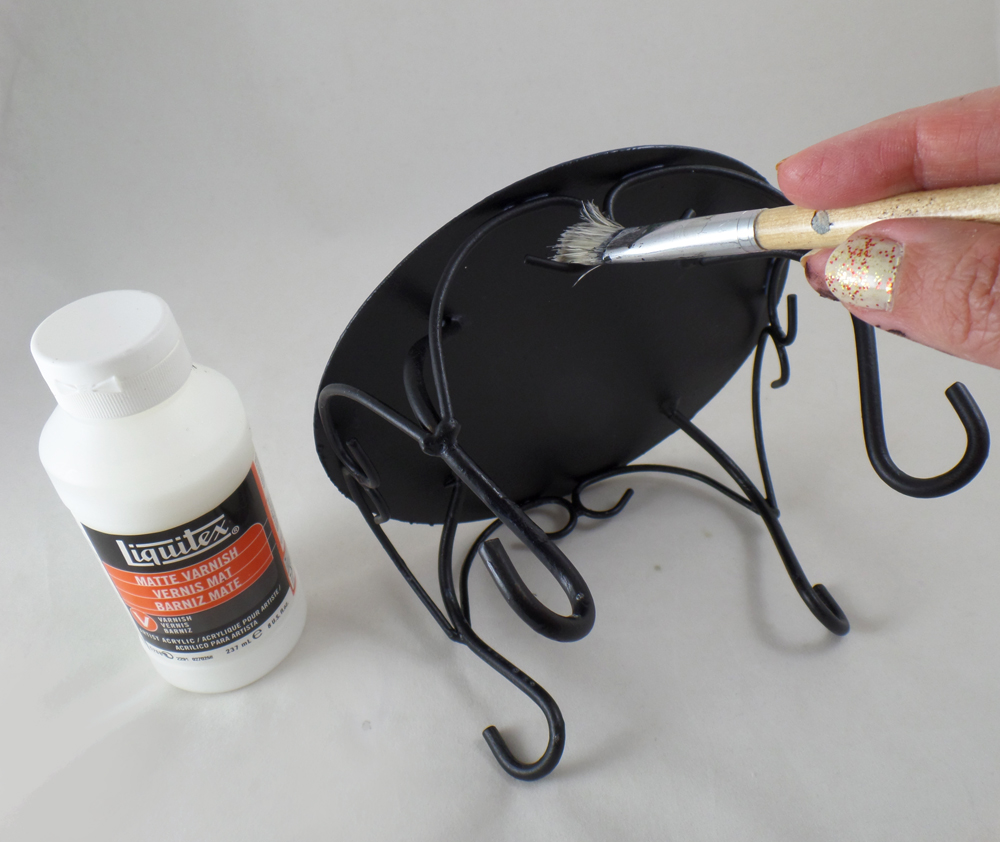
With the candle stands already painted with black chalk paint all I needed to do was paint them with Liquitex Matte Varnish to seal and protect the stands.
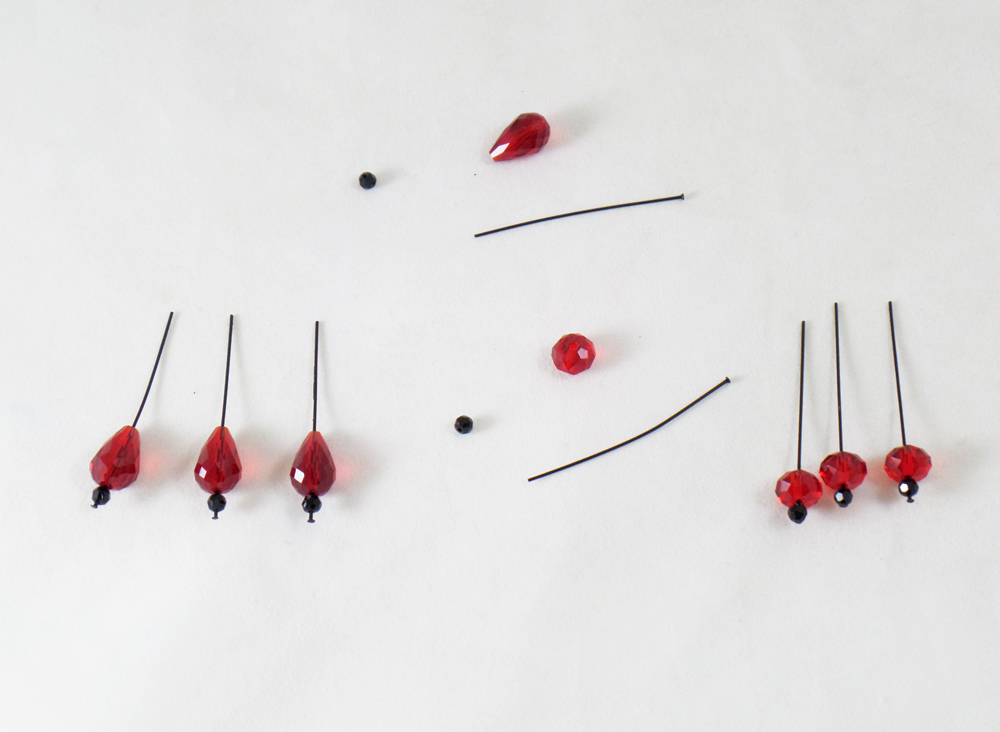
On four black enameled headpins I threaded on one black crystal rondelle and one red drop. On four more black enameled headpins I put one black crystal rondelle and one red rondelle. These will become embellishments for the candle turned skull stands.
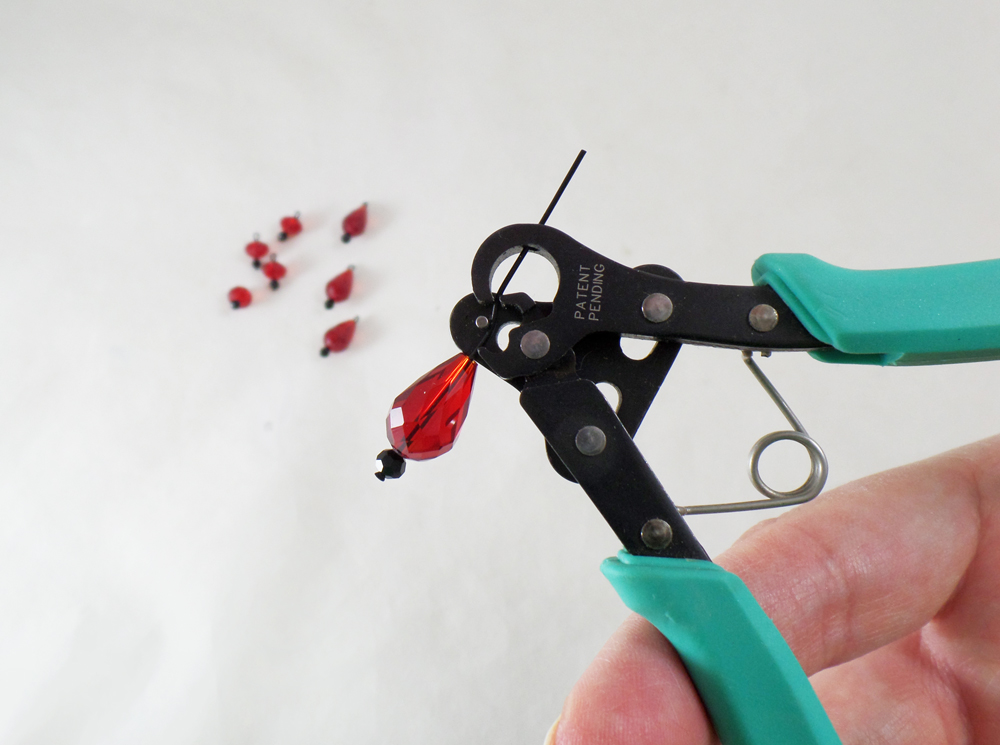
Starting with two beads threaded on a headpin I threaded the wire through the Beadsmith 1 Step Looper Tool, cutting and creating the loop I needed for the start of the beaded dangles. I repeated this the rest of crystal drops and rondelle beads on the headpins.
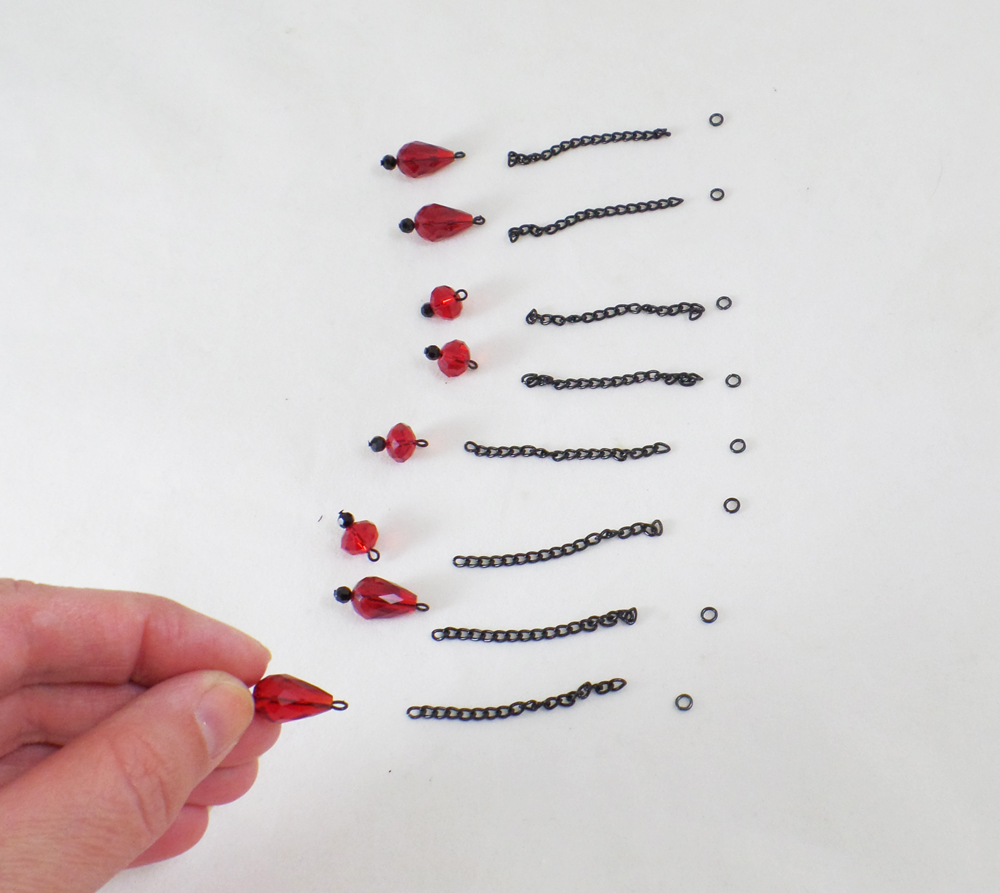
I cut black enamled chain into 2 inch lengths and placed eight black enamel jump rings with each chain and crystal bead drop.
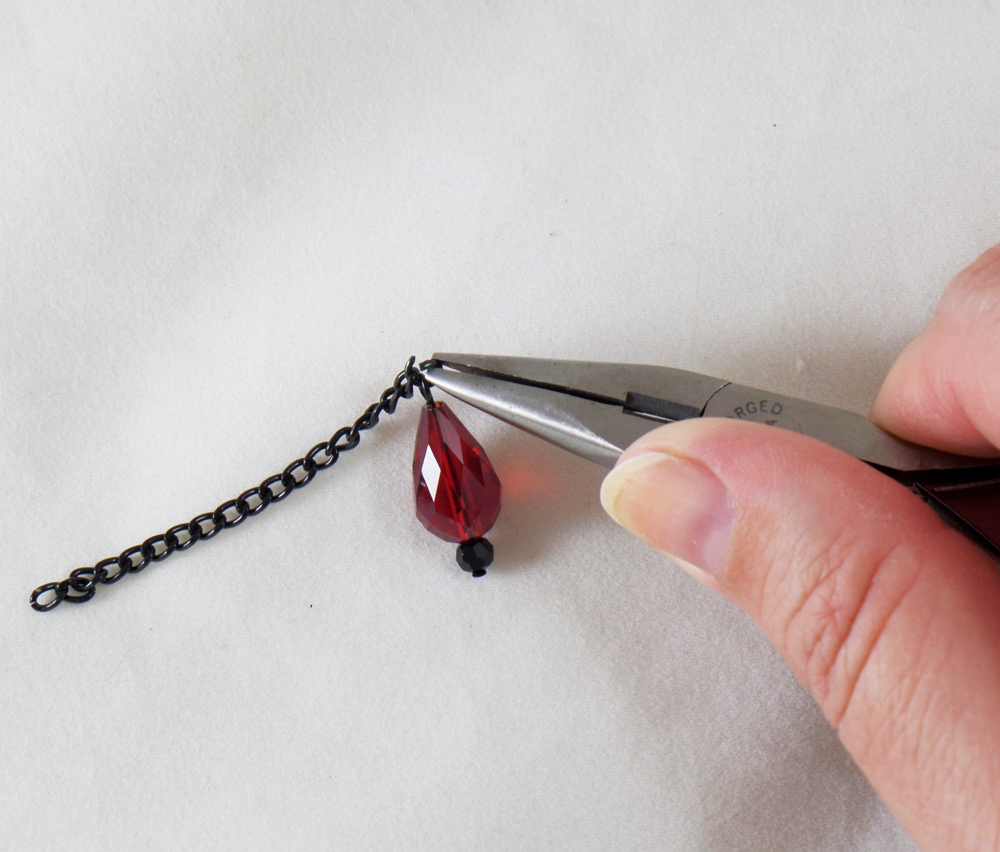
I opened up a jumpring with flat nose pliers and put the jumpring through one of the crystal bead headpins, and one of the cut lengths of chain.
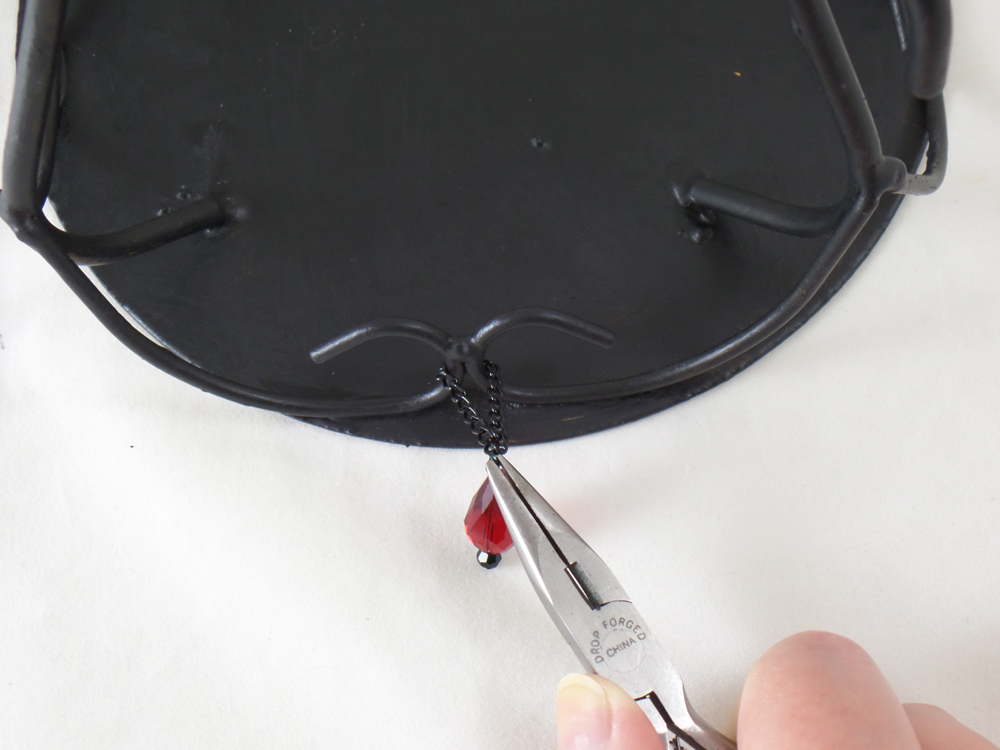
Flipping over a candle/skull stand I lopped the chain around one of the metal curls. I picked up the end of the chain not looped on the jump ring and carefully hooked the still open jump ring on it. I closed the jump ring with the pliers, making sure both ends of the chain and beaded headpin were threaded on the ring. Chain and beaded headpins were added to all four sides of the stand, then the stands were flipped over allowing the chain and beads to become a decorative element.
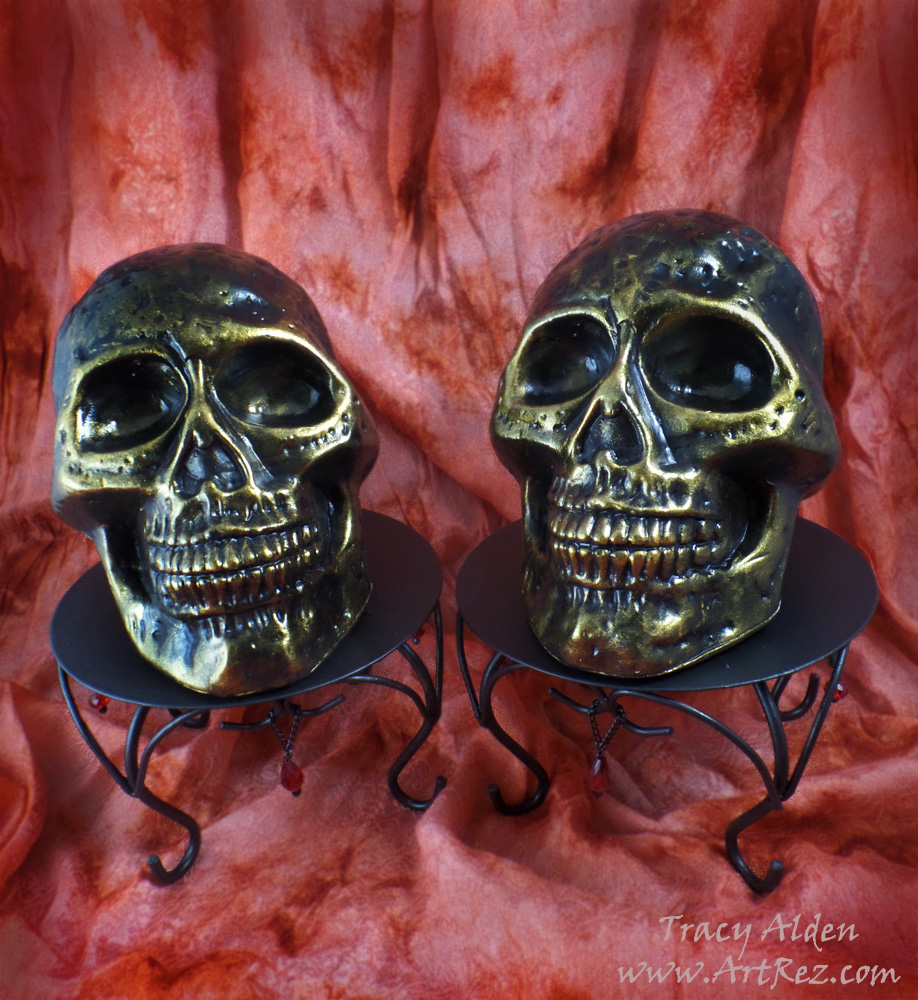
I placed the plastic skulls on their stands and placed them along with my ever growing collection of Halloween decor!
What old decorations might you find in your travels that you can upcycle?
Until Next Time, Safe Travels!
Craft & Hobby Association Mega Show 2014
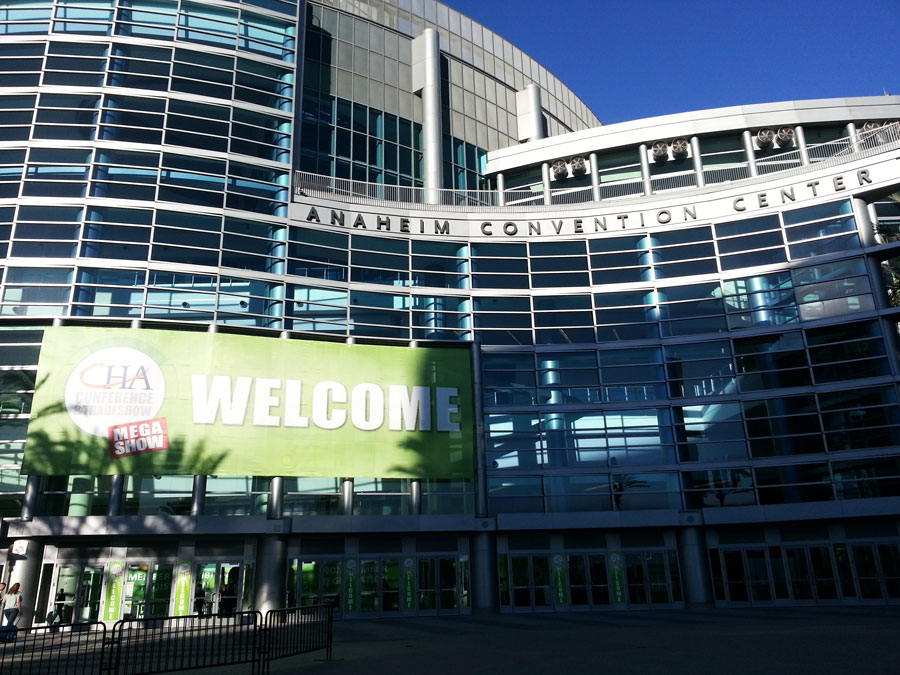
It is that time of year again: my CHA Trade Show recap! CHA, otherwise know as the Craft and Hobby Association, decided to change it a bit this year by not having a Winter and Summer show but one big mega show! There were so many vendors, new products, demos, make n takes and networking opportunities at this show! I had a great time and met so many wonderful talented people but it was a very busy show! While this is not by far covering everything and everyone I saw at CHA, the following is some of the highlights I was able to take photos of.
This year I was asked to do demonstrations at the Amazing Crafting Products/Alumilite Booth, showing people how to make their own Art Themed Lapel Pins. I finally got to meet, in person, some of the other members of the Amazing Crafting Products design team.
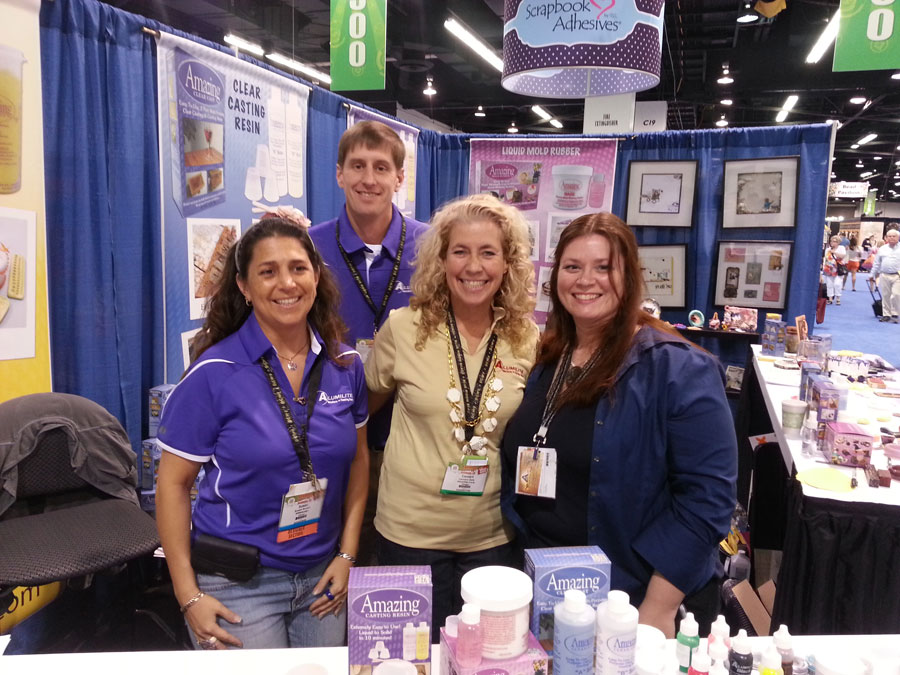
Here is President of Alumilite Mike Faupel, Design Team Leader Susan M. Brown {sbartist}, staff member Carolyn Daly, and I at the Amazing Crafting Products booth.
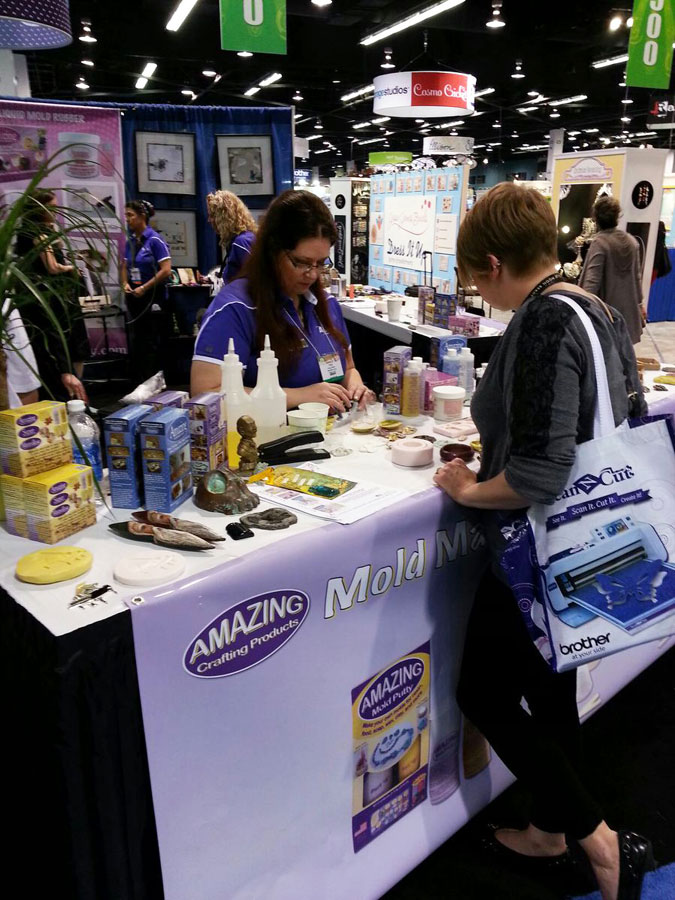
Here I am demoing Amazing Mold Putty. It was wonderful to find so many people with interests in molding and casting their own artwork.
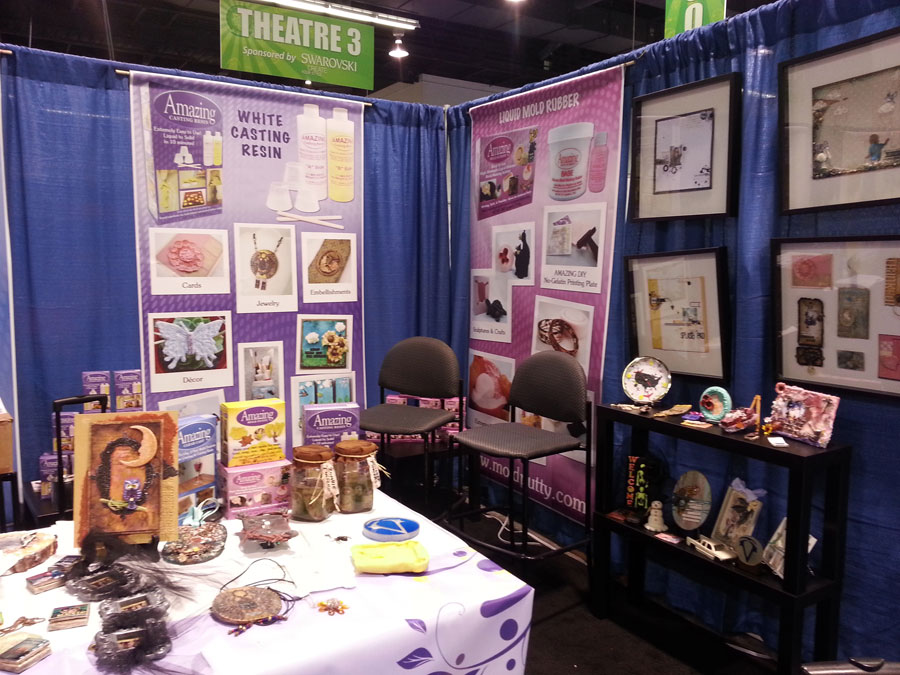
Artwork from the talented design team was on display at the Amazing Crafting Products booth, showcasing the detail and beautiful pieces they were able to make with the products.

Here is one of the demo tables at the Amazing Crafting Products booth, highlighting products and their many uses.

I got to see again the talented and ever gracious Mark Montano. He was signing his book line at the Eclectic Products booth and doing demos of crackle art frames at the DecoArt booth. I now have all of his books!
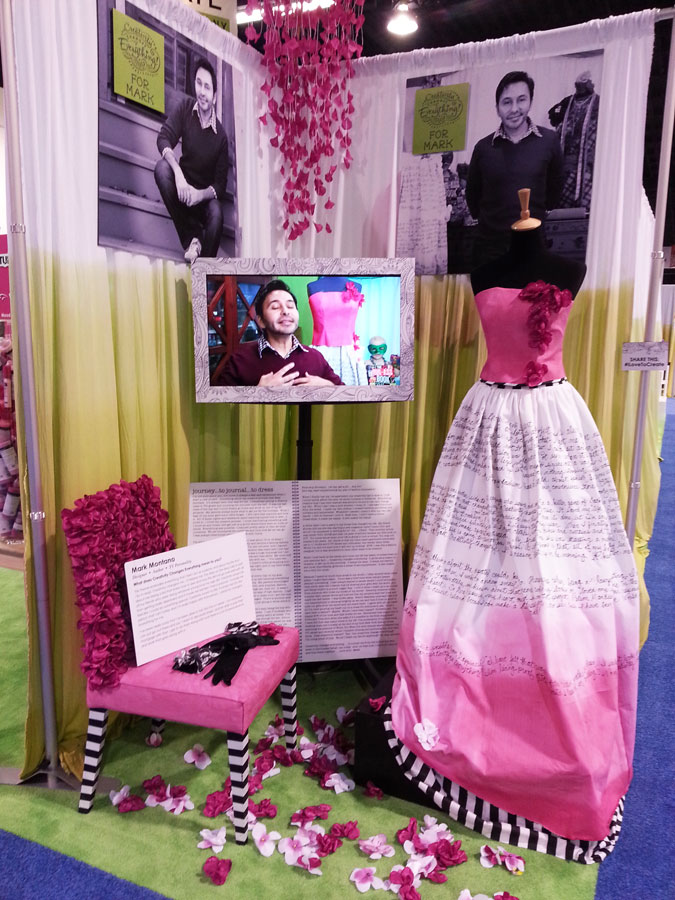
At the iLoveToCreate booth showcased several artists’ work in “Creativity Changes Everything” display. Mark Montano’s work was part of this display. He had created a lovely vignette, representing his creative career in home decor and fashion, along with a diary about his creative life printed directly on a dip-dyed dress.
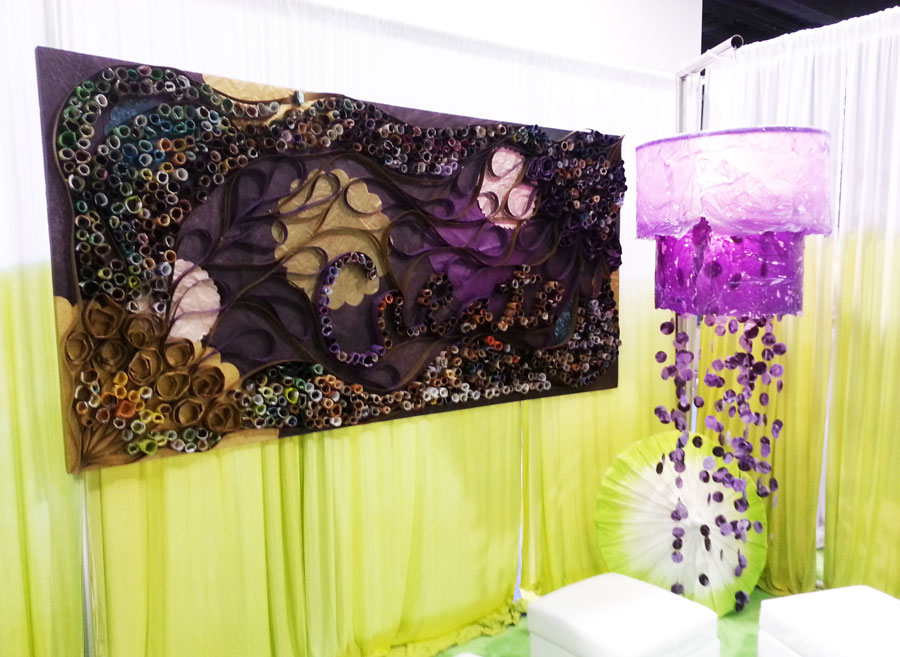
ILoveToCreate booth also had this lovely decopauge piece made from rolled magazines. The lantern was made using Tulip One-Step Tie-Dye, Aleene’s Tacky Glue, and tissue paper!
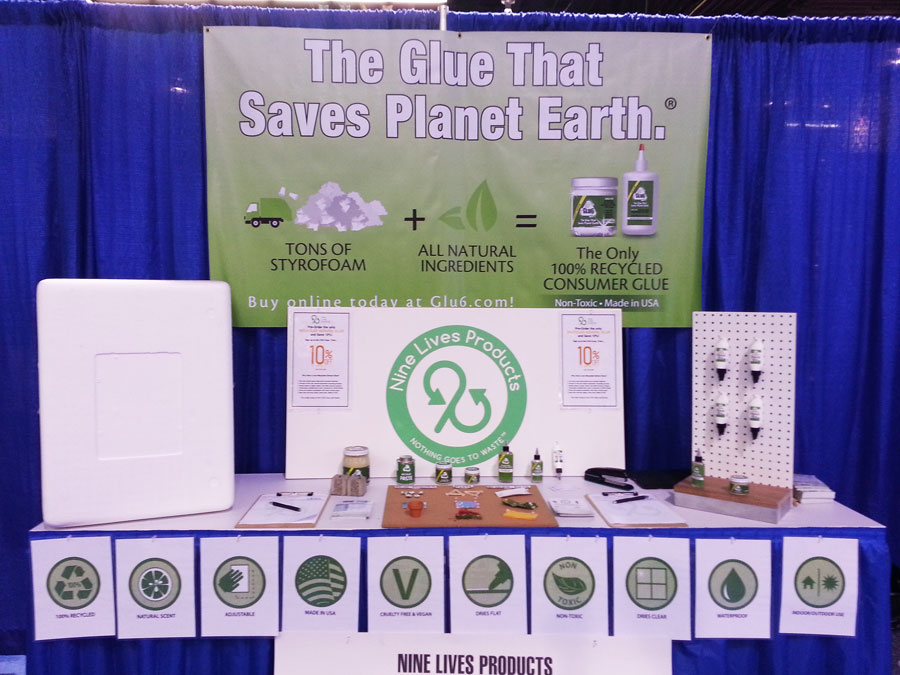
I stumbled across the Nine Lives Products glue booth and was I glad I did! They make glue out of recycling styrofoam waste. They create three types of glue: Glu6 Nonporous, Glu6 Paste and Nine Live School Glue.
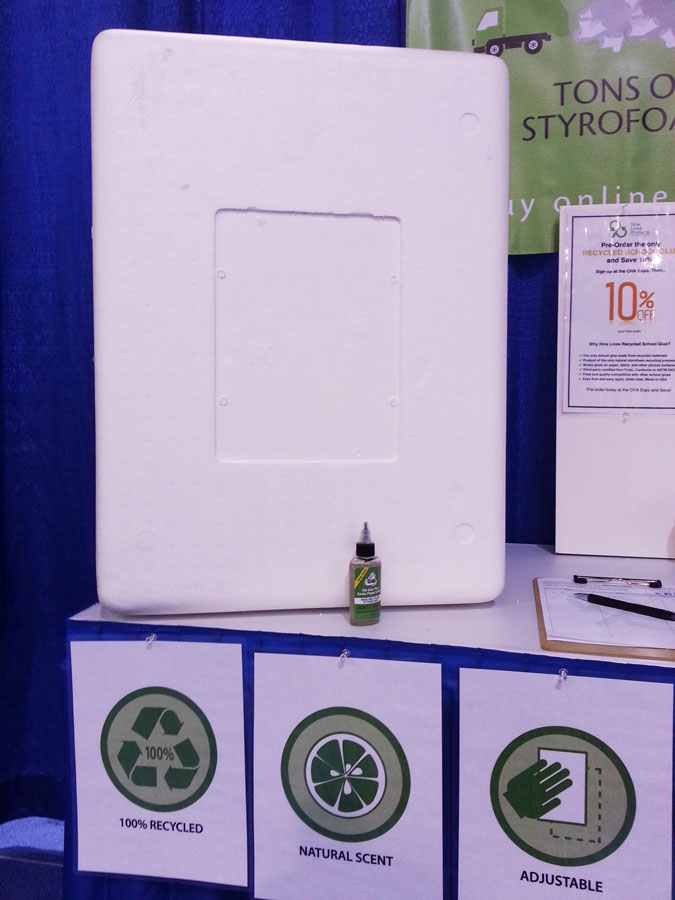
The Glu6 Non-Porous Glue is made from all-natural ingredients that non-toxically dissolve styrofoam waste, shrinking it by more than 30x its original size. The goo left over from this process they turn into non-toxic glue! Styrofoam piece shown in the photo is what goes into one tiny bottle of their glue.

The talented Suzann Sladcik Wilson, book author and CEO of Beadphoria, Inc. was at the Buttons Galore and More booth debuting her beautiful new button jewelry line. Her line of button jewelry kits come in all kinds of different themes, and include everything you need to make lovely rings and pendants.
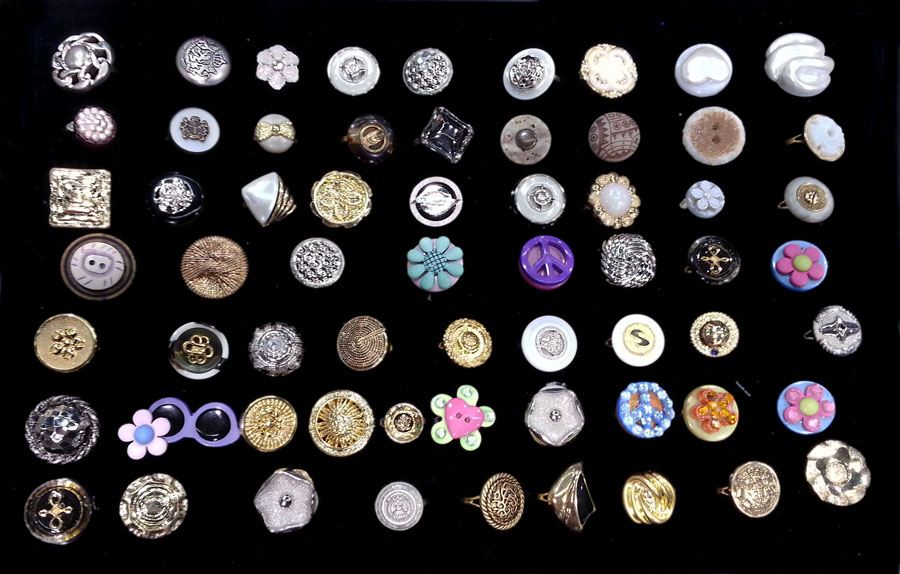
Suzann was doing some demos at the booth. Here is just a small sample of what she made with her wonderful kits.
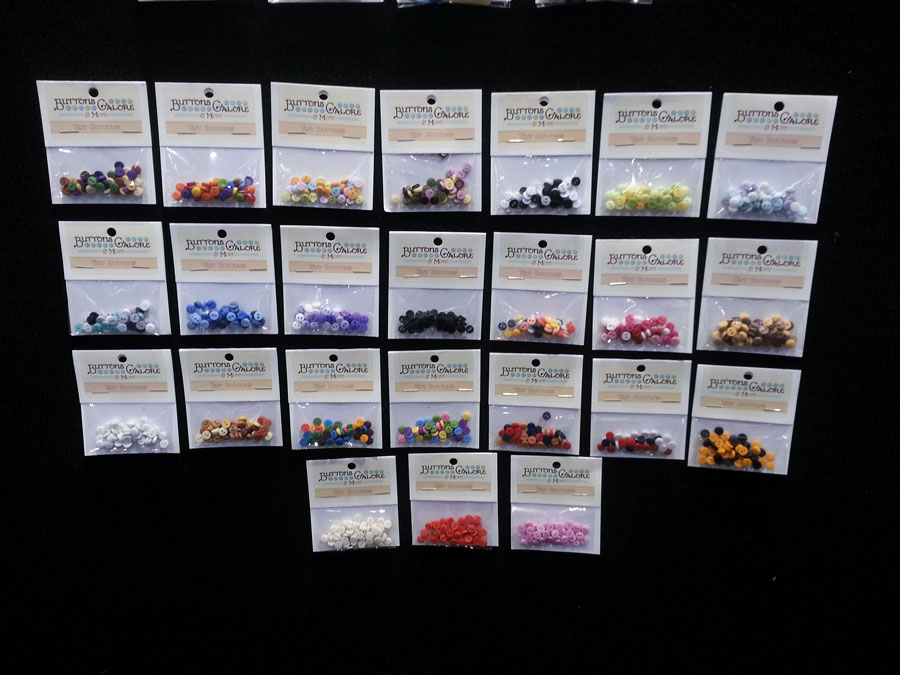
Buttons Galore and More also had a great line of miniature buttons for your mini crafting needs. I just had to buy some samples of to play with!
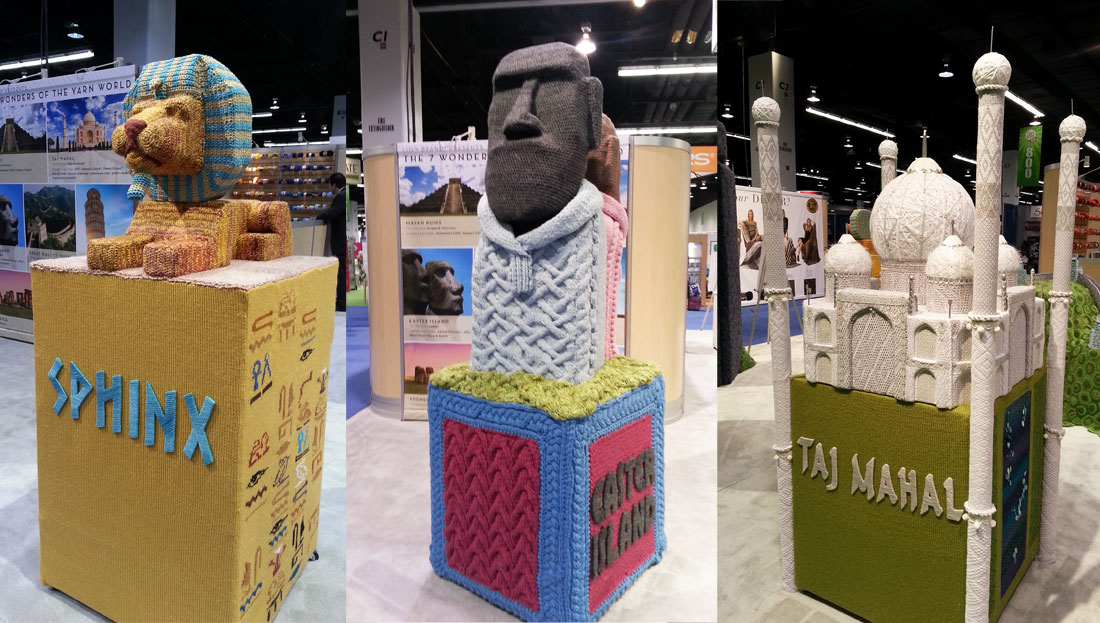
Lion Brand Yarn had a stunning “7 Wonders of the Yarn World” installation created by fiber-artist Nathan Vincent. I only got photos of 6 of the 7 wonders because of the crowds. You can go to the Lion Brand Yarn Blog to see more photos!
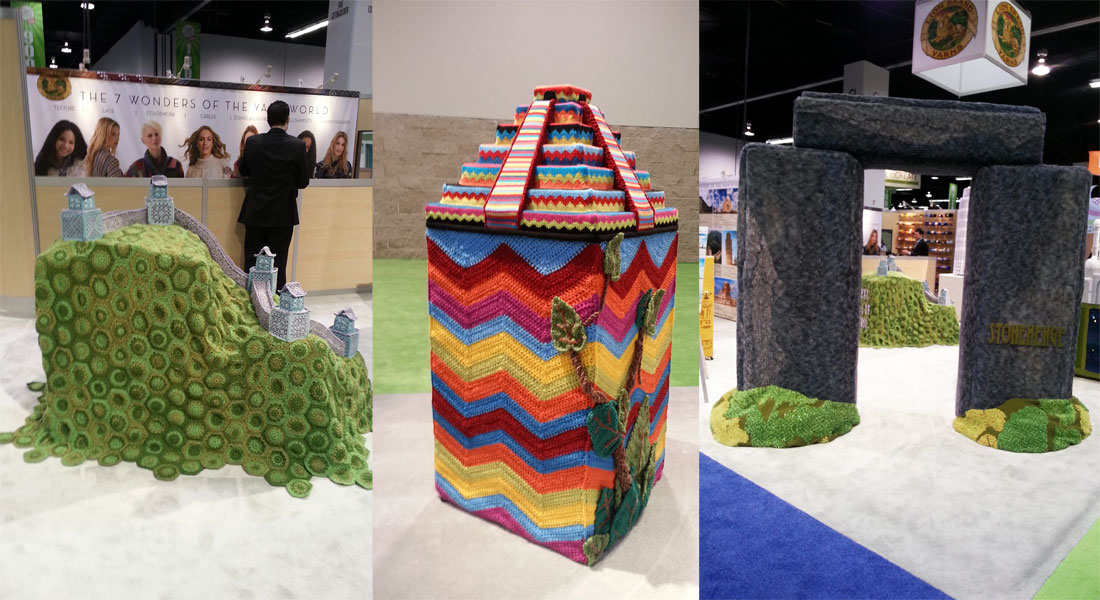
The installations that represent the “7 Wonders of the Yarn World” theme stand about 5 feet high or taller!
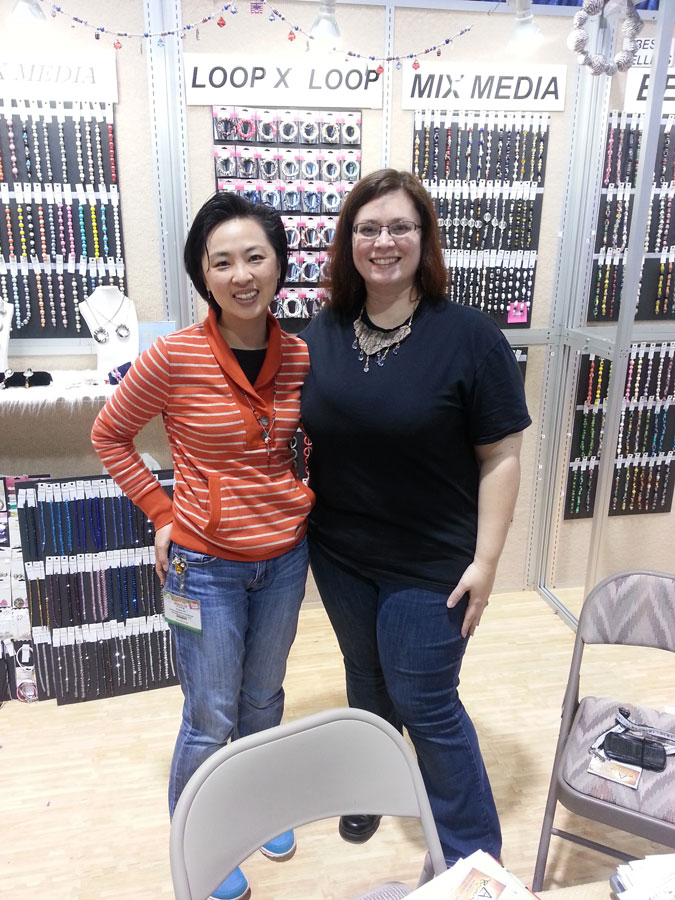
While doing resin demos I met a very nice lady, Fiona Lin of Linpeng International Inc. Her family’s company Fiona Accessories (named after her) had a bead booth with a wide selection of both loose beads and finished beaded accessories. Their specialty line is a series of hand painted beads and bracelets. While they often sell to museums, gift shops and supply beads for craft stores Fiona was more than willing to sell beads to me for my artwork.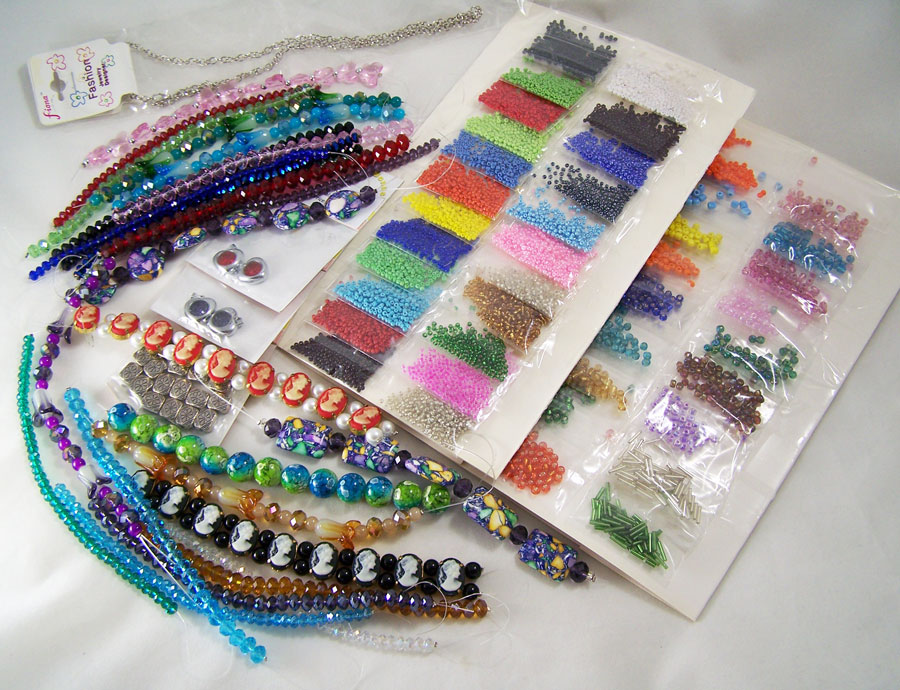
I bought quite few strands of beads from Fiona to make new jewelry with. They had a wide variety of shapes, patterns and cuts of beads I had not seen elsewhere.
While wandering around the CHA show floor I came across this darling polar bear sculpture at the Activa booth. While they had this sculpture displayed at past shows I never got a chance to stop and see the detail. I was glad I did and I found out about all the different clay and sculpting materials they carry. I even ended up realizing I had been using some of their products while in college and had no idea! When they heard I did sculpture and mold work they gave me samples of Hearty, a non toxic air dry modeling clay and CelluClay, a non-toxic papier mache recycled paper medium to try out.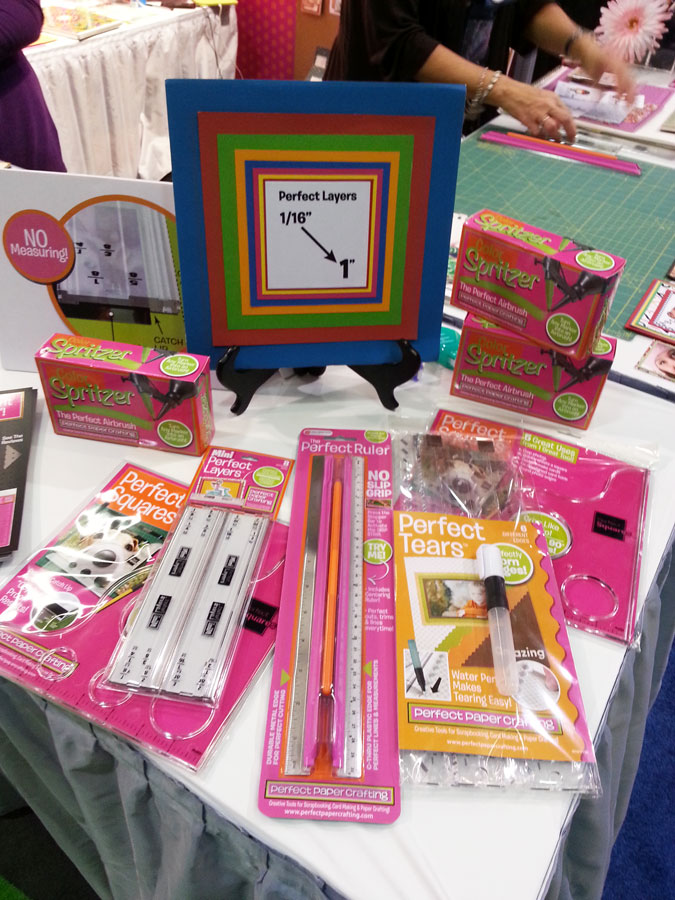
Seeing demos of making perfectly torn paper for paper crafting made me stop by the Perfect Paper Crafting booth. While marketed mostly towards paper crafting I see their tools having wonderful uses in mixed media art. My two favorite tools they carry is the Perfect Airbrush, that turns almost any marker into an airbrush and the Perfect Tears, that helps you make controlled, beautiful, soft, torn-paper-edges.I saw so much more that I didn’t get to photograph but in the next few months I hope to test out and show you all the new products I found.
Until next time, safe travels!
Mod Podge + Recycling = Home Decor
This time of year many people get gifts wrapped in tissue paper, and most of the time it ends up in the trash. Why not recycle into a beautiful piece of home decor or if you are a crafter that vends, booth decor? In a few short hours you can have a rather nice piece of decor that looks far more valuable that what it once was. 🙂


Ancient and Contemporary Inspired Artistry