DIY Leprechaun Wee Folk Door

I have always loved the idea of the wee Folk or faery, be the good bad or just odd folk that roamed about. One of my favorite faery movies from my childhood was Darby O’Gill and the Little People. The costumes, sets and the illusion of the miniature world of the leprechauns had me entranced Leaving out small gifts or useable objects for them in hopes of getting the favor of the faery was always a magical idea to me. So I got to thinking, why not make a Leprechaun door to add a bit of magic to a home for Spring!Supplies:
G&P Classic Victorian Oval Bookboard Frame
G&P Burnt Umber 3D Enamel Gel
G&P Glastique Matte Finishing Glaze
G&P Medium Flourishes Piccolos
G&P Shamrock Dreams Enamel Powder
G&P Vintage Gold Enamel Powder
G&P Mossy Glen Enamel Powder
G&P Piccolo Embossing Powder Adhesive
Piccolo Easy Grip Tweezers
Green crystal sticker gems
Sizzix Tim Holtz Alterations embossing folder Woodgrain
Dye ink pads in Black and Deep Brown
Small foam squares
Sharp scissors or craft knife
Carefully remove the frame from the package, put aside the globe and easel. Save those pieces for future projects.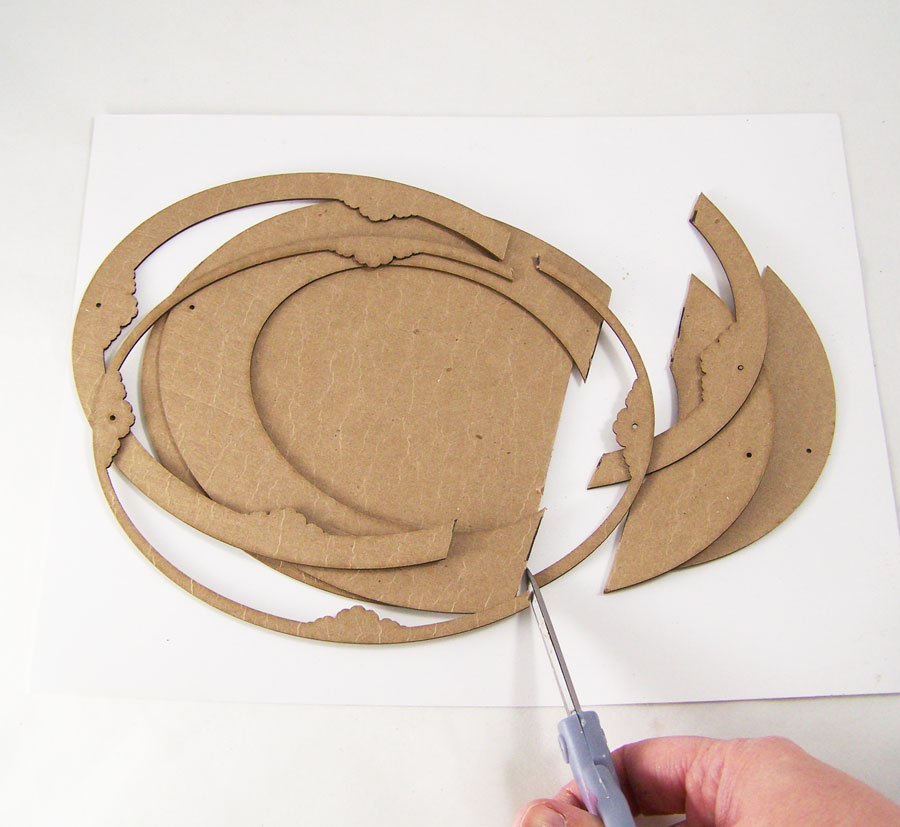
Using a ruler, mark a straight line about 2 inches from the bottom on the frame pieces. Using a sharp scissors or a craft knife, cut the bottom portion off.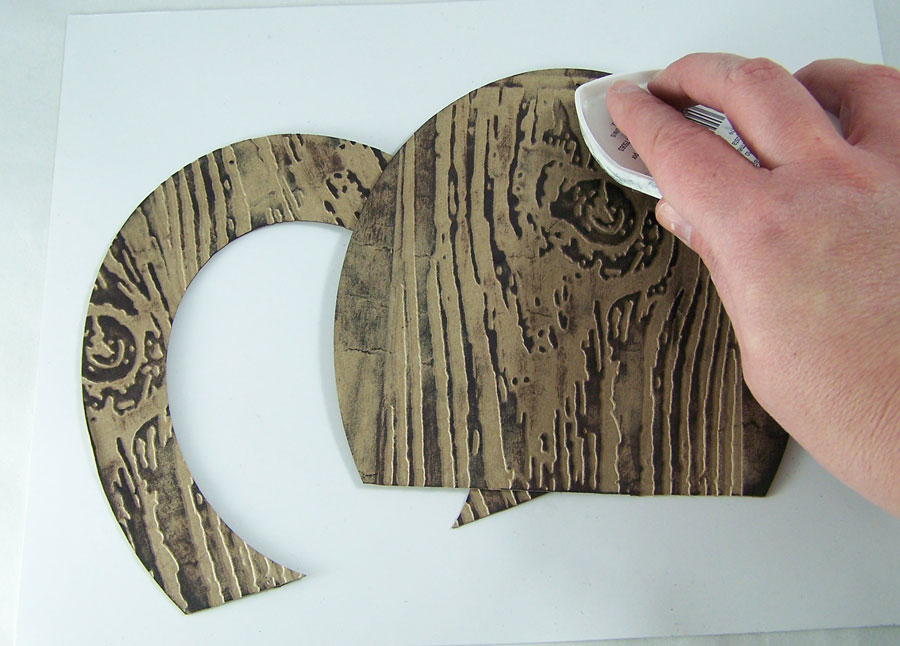
Run the back plate and bottom frame sections through an embossing machine using the woodgrain embossing folder. Taking the brown and black dye ink pads, rub them on the embossed sections of the frame.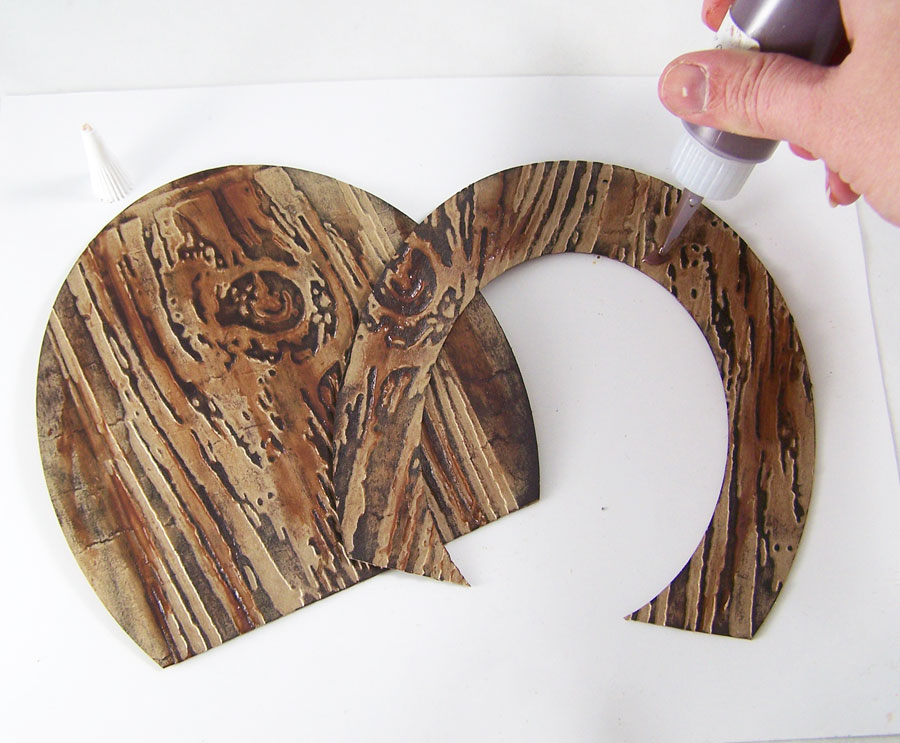
Apply G&P Burnt Umber 3D Enamel Gel to the embossed and now inked sections. Smear the enamel gel in the wood grain pattern with your finger or a cosmetic sponge in a up and down pattern.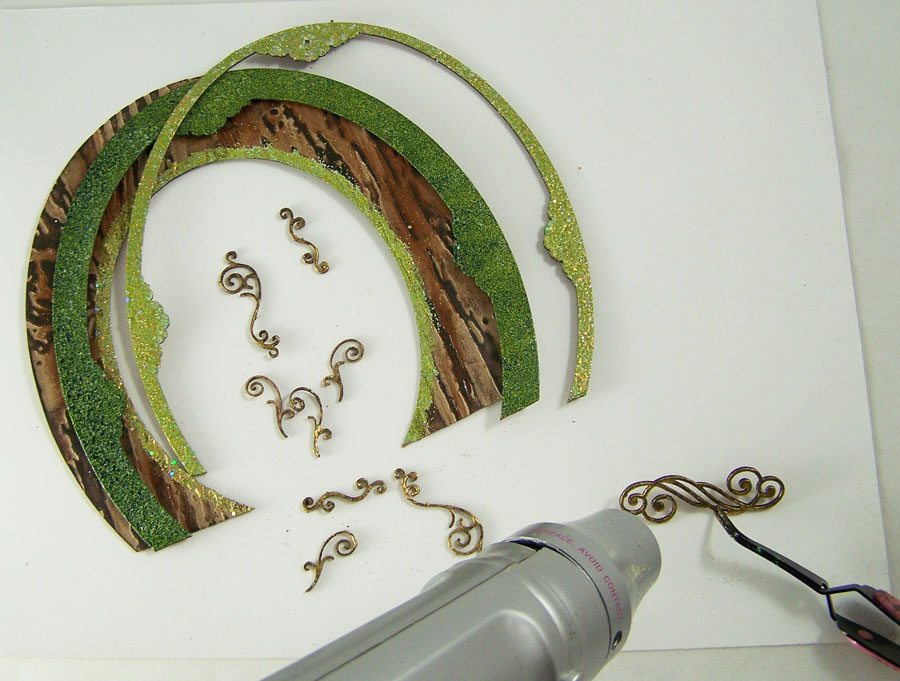
Apply Embossing Powder Adhesive to the top and middle pieces of the frame, the Piccolos and a thin line on the bottom frame. Apply Mossy Glen Enamel Powder to the middle frame, Shamrock Dreams powder to the top frame and thin line on the inner frame, Vintage Gold powder to the Piccolos. Heat to set.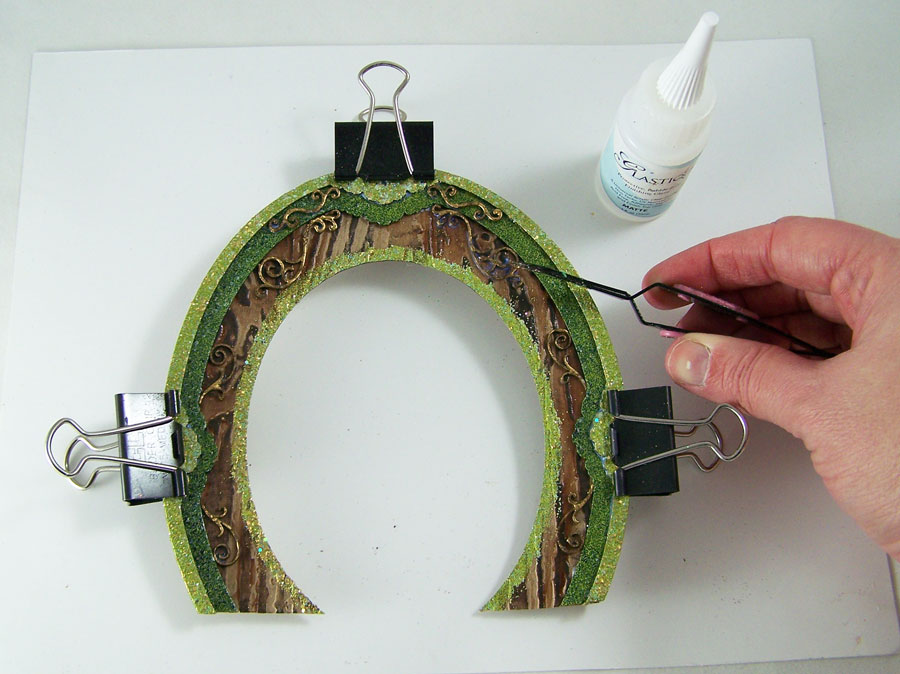
Adhere all three sections of the frame together with Glastique Matte Finishing Glaze, using office clips to keep the frame pieces in place while it dries. Apply Glastique Matte to the back of the Piccolos, place them on the frame and let dry.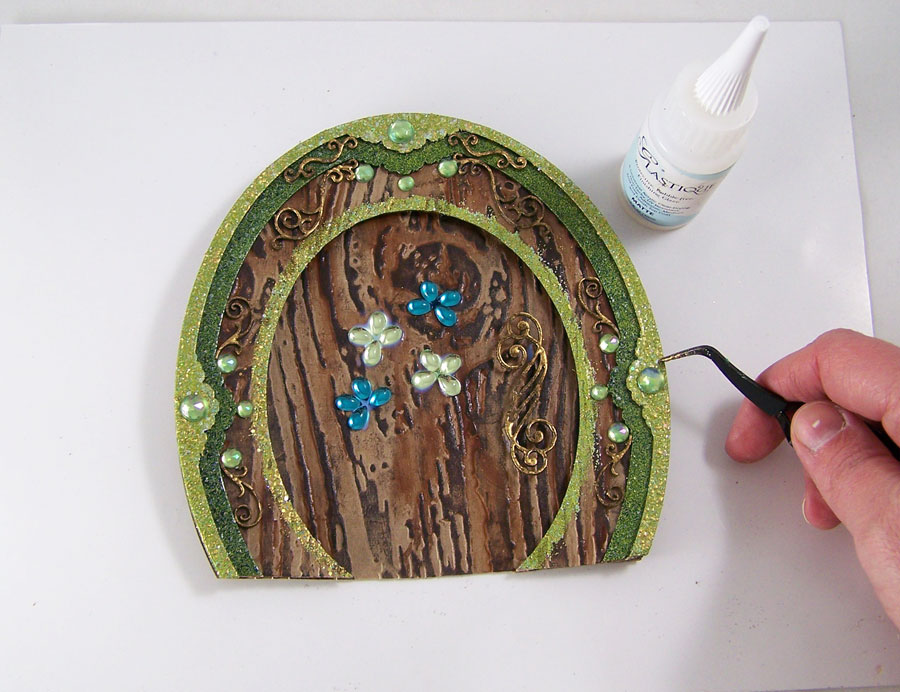
Adhere the back plate to the top frame portion with foam squares. Apply the large swirl Piccolo to the back plate with foam squares to give the illusion of a door handle. Apply the green sticker gems to the faux door with Glastique Matte Finishing Glaze and let dry.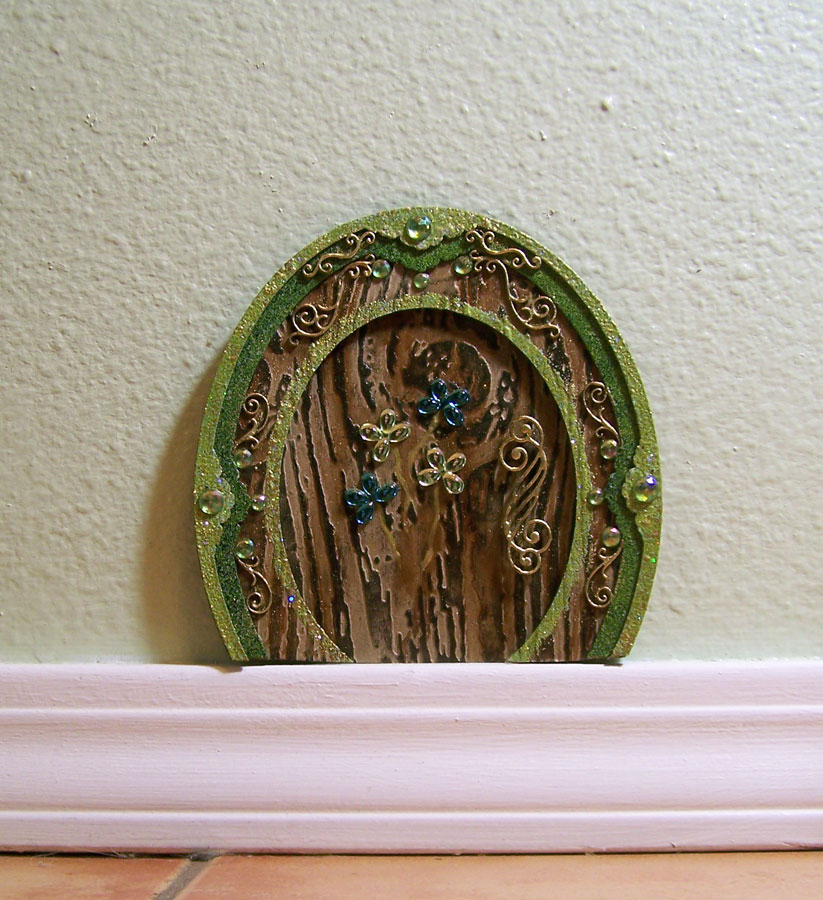
Apply removable poster adhesive to the back of the now completed faux door. Place at the bottom of a wall on the molding, a shelf or anywhere you think a leprechaun might like a magical door! May you have many lucky days ahead!Until next time, safe travels!
Mushrooms and Merriment…
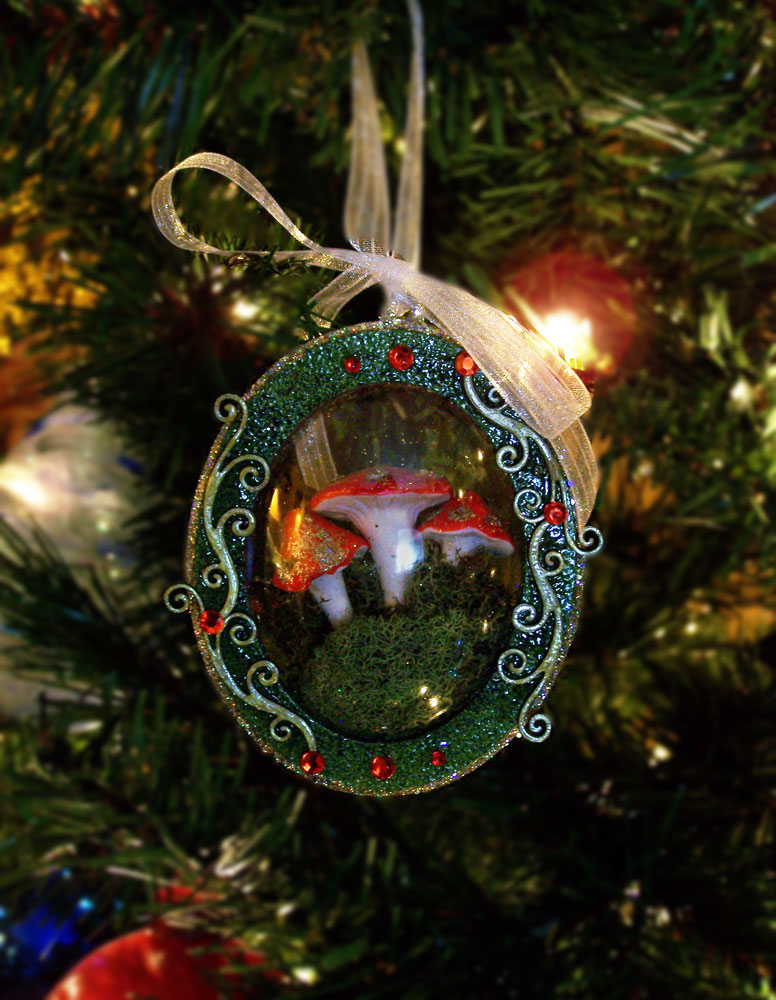
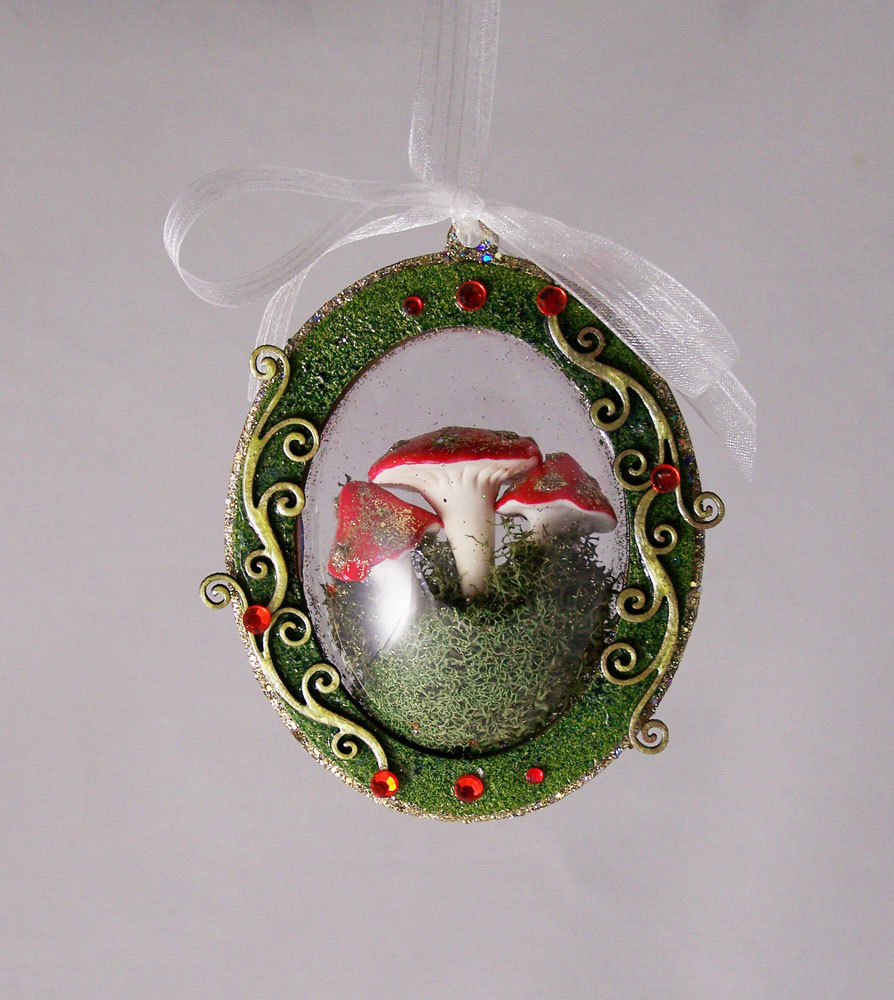
As a young child one of my favorite Christmas decorations was glass mushroom ornaments. They were typically red with white dots and wonderful highlights of pearls, silver, gold and glitter. To me it was like a little frozen bit of fairyland. Traditionally the mushroom ornament was seen as a good luck symbol. In Germany they were seen as a symbol of a person’s love of nature and hope for good tidings in the New Year. Well that got me thinking I just had to make one of my own!Supplies:
Globecraft & Piccolo DIY Portrait Ornament
Globecraft & Piccolo 3D Enamel Gel Satin Honeydew
Globecraft & Piccolo 3D Enamel Gel Napthol Red
Globecraft & Piccolo Piccolo Enamel/Embossing Powder Adhesive
Globecraft & Piccolo Mossy Glen Enamel Powder
Globecraft & Piccolo Pure Sparkle Gold Glitter
Globecraft & Piccolo Glastique Gloss Finishing Glaze
Globecraft & Piccolo Medium FlourishesReindeer Moss
Polymer Clay Mushrooms
Ribbon
Red Sticker Gems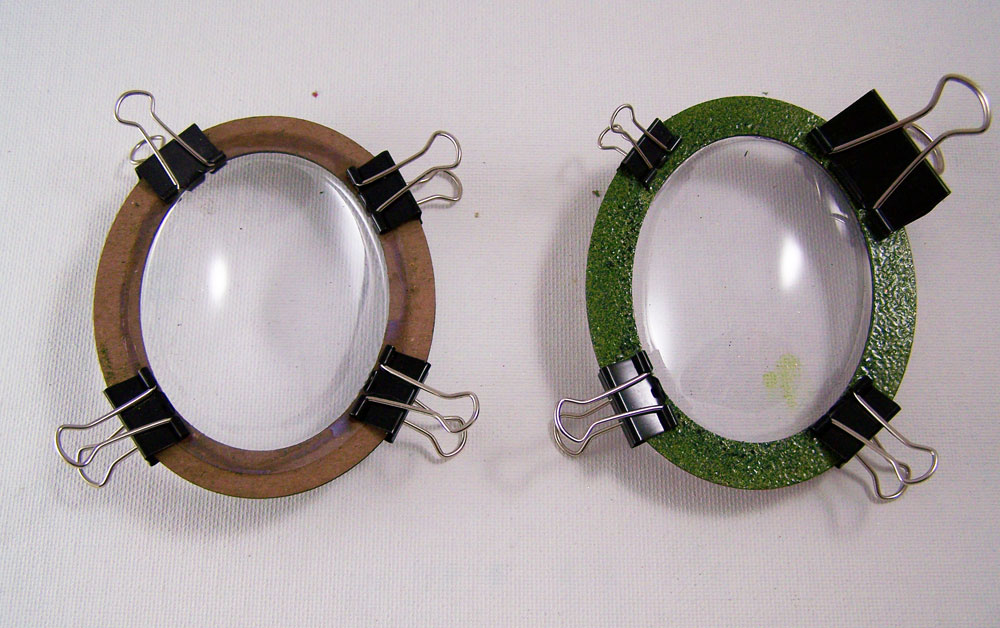
I started with applying the Piccolo Enamel Adhesive to the outer rings of the ornament. I then coated the rings with Mossy Glen Enamel Powder and heat set with heat gun. I then drew a thin bead of Glastique Gloss Finishing Glaze around the inside of the ovals, placed the globes in each half and clipped into place.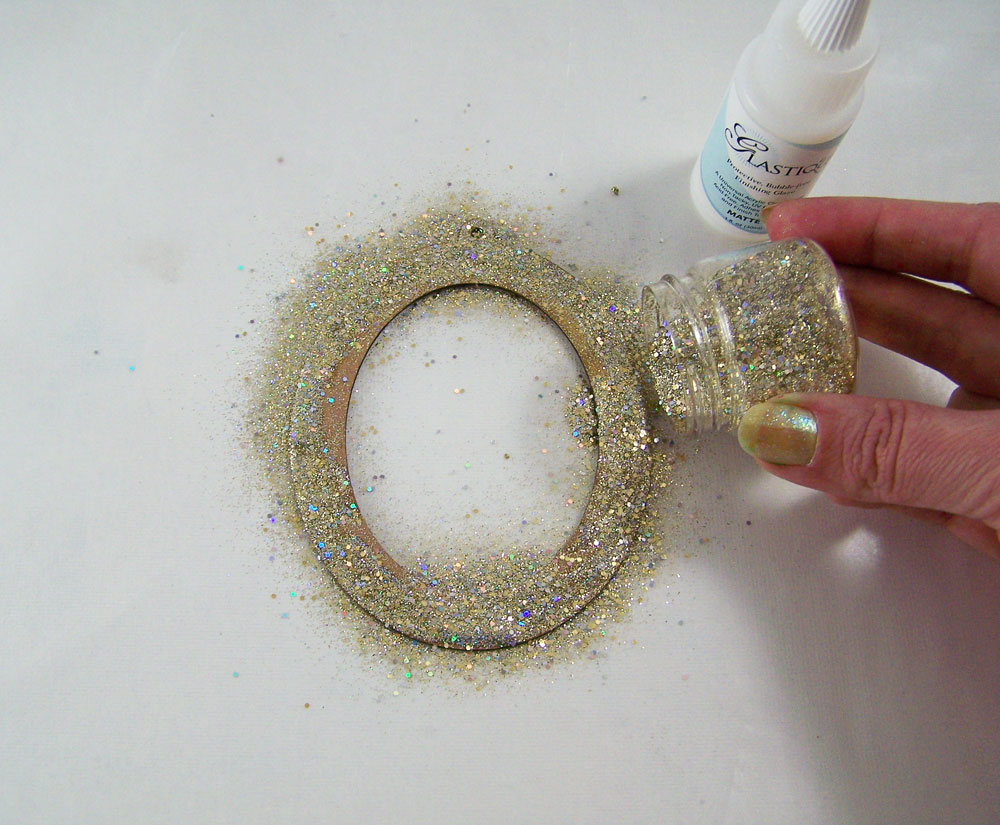
Taking the inner ring, I applied Glastique Gloss around the edge and sprinkled on Pure Sparkle Gold Glitter.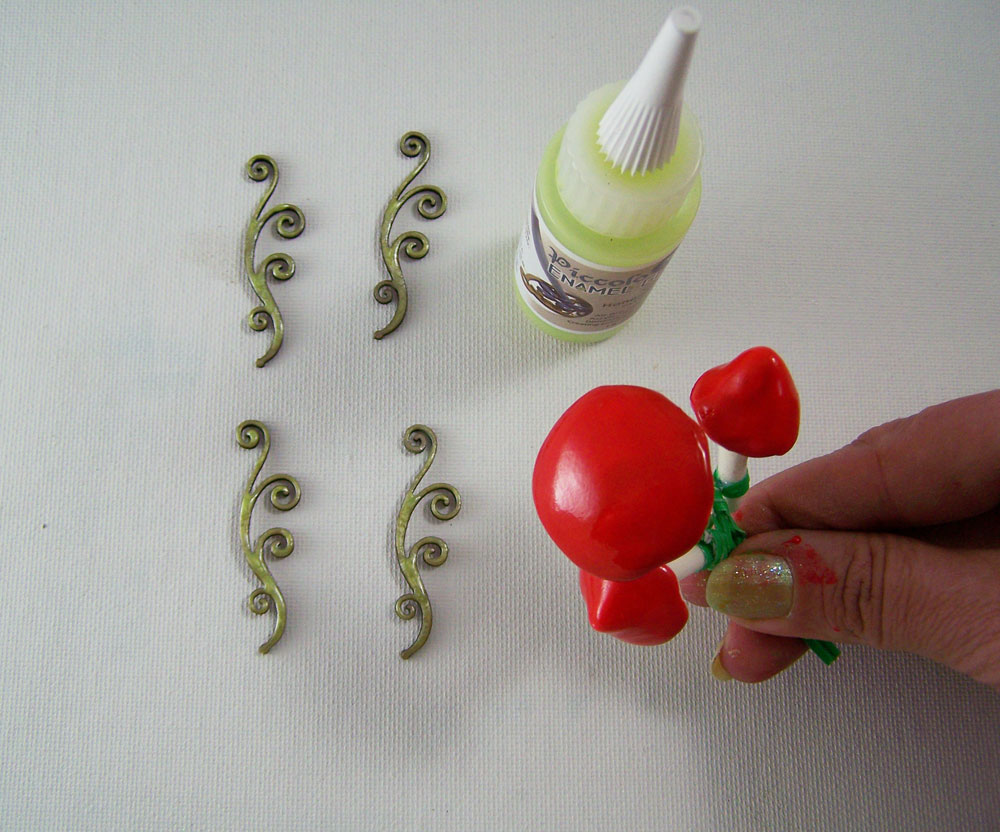
The flourishes got a coat of 3D Enamel Gel Satin Honeydew and the polymer clay mushrooms caps had a layer of 3D Enamel Gel Napthol Red applied. Let dry. Then little dots of Glastique Gloss on the mushroom caps and a sprinkle of Pure Sparkle Gold Glitter on top.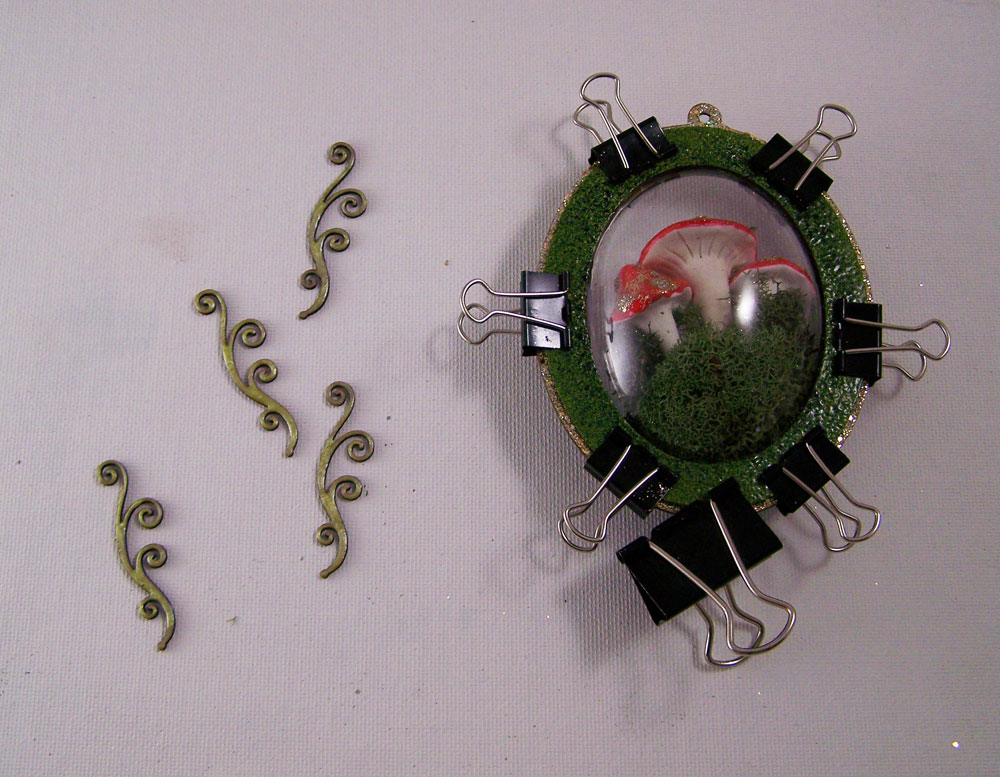
Once the mushroom are completely dry I bundled them together and wrapped Reindeer Moss around them tightly. I glued all the pieces of the ornament together with Glastique, carefully sandwiching the mushrooms and moss. I left them clipped in place until dry.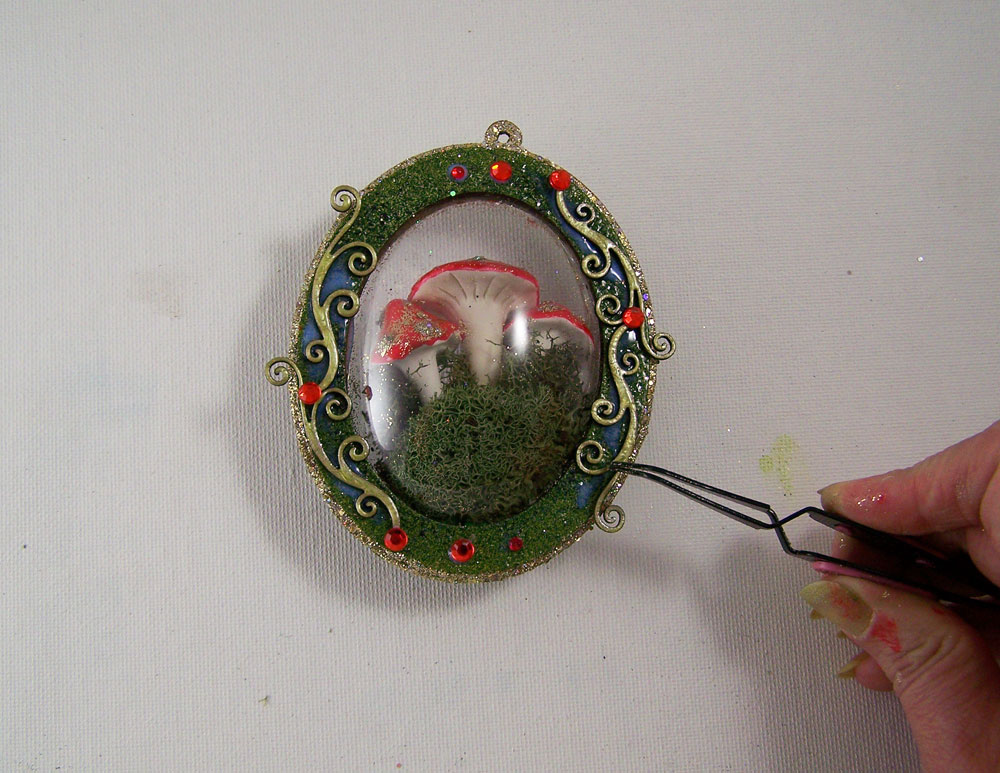
Using Glastique as glue once again, I added the flourishes and sticker gems to the ornament. Once dry I added the ribbon to the top!Hop on over to the Globecraft & Piccolo blog today to see my Christmas Airship Express tutorial!
Websites, Miniatures and Happiness!
So many new things to talk about and so little time.
I went on vacation for my birthday with my husband and a group of friends. We decided to go to Vegas to enjoy the Fremont Street Experience, it was a great time. One of my friends suggested the Paris buffet, oh my goodness was it good! Other than a bit of sun sickness from the heat it was a fun and if not a trifle silly time in Vegas.
After I got back from vacation I decided to get a massive overhaul of my website, I wanted it to be easier to work on, cleaner layout and search engine optimized. The lovely and talented Debra from Kittyloaf Designs did a wonderful job of that! She got everything up in running in less than 2 hours and has walked me through setting up more content on the site. I am still learning and adding things to the site but Debra has been such a wonderful person about it all. Besides being a web designer she also happens to be a very talented seamstress and artist.
My only issue as of late is that locally we have been having a lot of lighting and rain storms, a rarity in the beautiful high desert that we live in. Which makes working on electrical devices somewhat difficult if there is a fear of power outages. So while be prevented from adding new things to my website I got to working on some polymer clay projects. I was given some wonderful polymer clay books for my birthday, so while watching the flash floods and keeping as many electrical items turned off I made some minis!
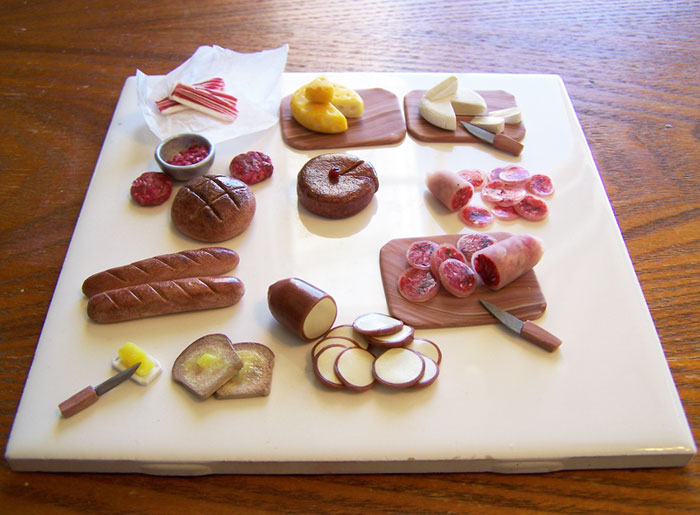
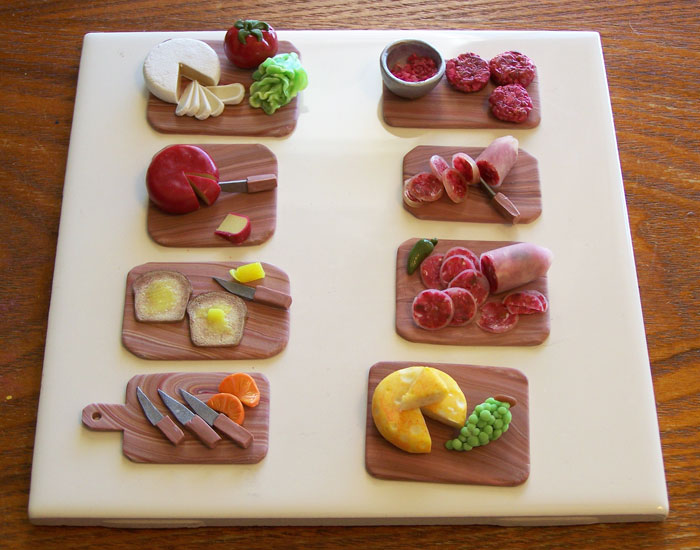
1 inch scale (1 inch equals 1 scale foot) miniature food made out of polymer clay.
From top left bacon strips, swiss cheese, brie cheese, summer sausage, gouda cheese, toast with butter, baguettes, sourdough loaf, ground beef and a fruit cake in the middle.From top left brie with lettuce and tomato. Ground Beef and patties. Summer sausage slices. Swiss cheese and grapes. Knives and oranges. Toast and butter. Cheddar and slices.
I got quite a few more projects in the works and will be posting about them shortly!
Safe Travels!Recycled mixed media artwork….
I love doing mixed media artwork. I often feel confined if stuck using one form of media. Art like nature, in my mind, should be flowing, entrancing, organic in thought and in form. The inclusion of recycled elements in art not only helps the environment but gives a second life to pieces once forgotten. In my travels I am constantly looking for things to use in my artwork, such as dried plants, sticks, metal, stones, anything that might catch my fancy.
One of my favorite ancient Egyptian myths was how those long past and forgotten would live again if people would repeat their name and talk of their life. When I make recycled art I try to pick ancient ideas and stories to replay with modern recycled goods. I feel I am giving people glimpses of stories and worlds long forgotten, whispering ideas of times past using the tools of unwanted items of today.
The Recycled Princess:
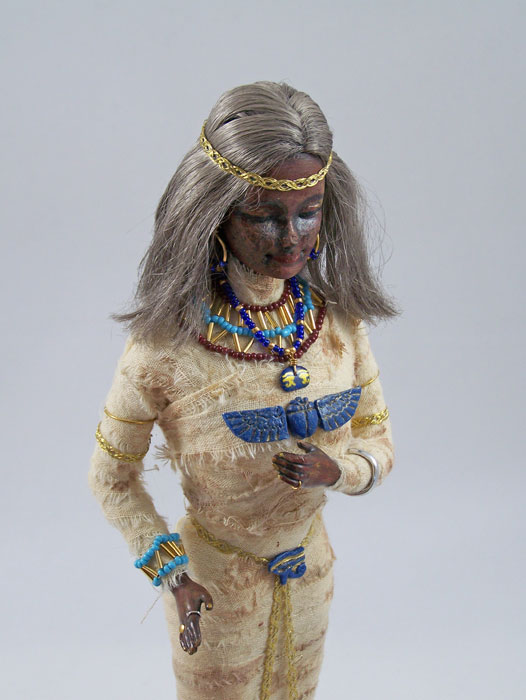
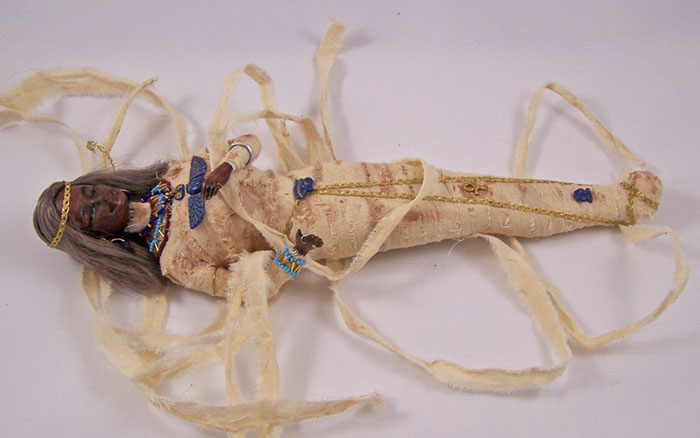
In her former life this was a rather badly damaged Barbie doll. The toy had a major amount of gouges, scratches and was apparently chewed on. While I know many other people have done mummy dolls before I often find them grotesque and not well made. I wanted this one to be as realistic as possible, just in miniature format. Her wrappings are muslin scraps dyed with used tea leaves. Her jewelry is made from old earrings and all her pendants and amulets are made from polymer clay. All of the acrylic pant is from old paint bottles I found at a yard sale; they were somewhat on the “chunky” side but when layered on the plastic of the Barbie it looked like mummified skin. Her hair was also dyed with the old acrylic paints. To bend the arms into new positions I put them in a boiling water bath to re-shape.
Now this once forgotten toy tells a story of a ancient princess, carefully mummified, silently resting throughout eternity.
Beautiful Crone Maiden:
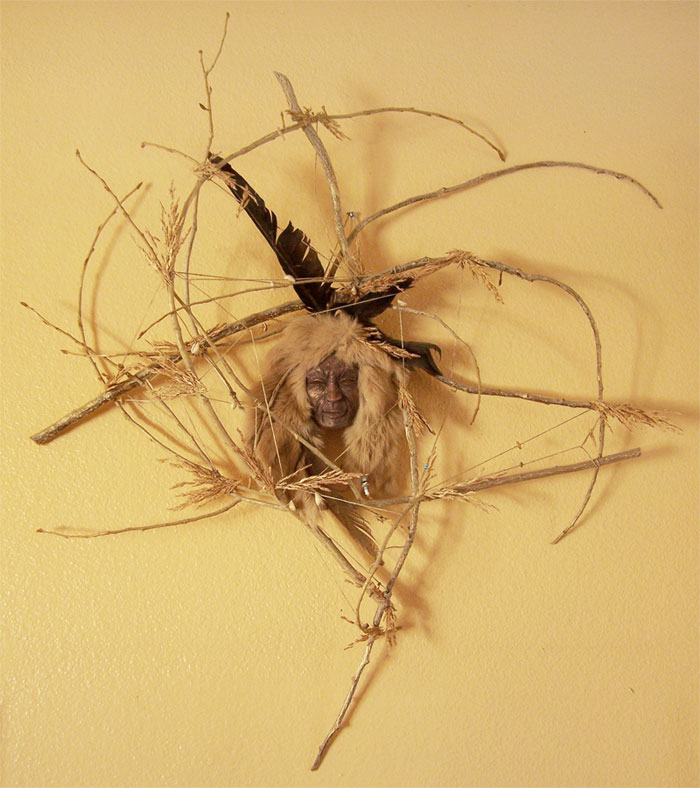
Found poplar tree sticks laying on the ground in a circular pattern was my inspiration for this piece. I collected those sticks and tried to arrange them as I had found them, using old hemp twine. The addition of beads and shells from broken old necklaces, dried weeds and found raven feathers all helped to give meaning. It took me tinkering around with polymer scrap clay to create the center piece. I gave her a headdress of rabbit fur salvaged from a rotting fur coat. I only use old recycled leather and fur in my pieces.
A story of a medicine woman, ever seeing but sightless, dreaming of visions of the future build on the past.
What wonderful stories might you create out of found objects and scraps?
Until next time, safe travels!

