Craft & Hobby Association Create & Connect Conference and Trade Show
Another Craft and Hobby Association Summer show has come and gone! This year it was called the Create & Connect Conference and Trade Show and was held in Las Vegas. While this was by far a much smaller show than the Winter CHA yearly show, it was still a great show to attend. There were better opportunities to talk and network with vendors and designers. There was also plenty of new products and artwork to see! I got there a day late due to health concerns and forgot my camera so I had to take photos with my phone but here is a few of the booths that I just loved and have to share with you.

As per normal Die Cuts With a View (otherwise known as DCWV) had a stunning display of papers, bead, embellishments and artwork! These three lovely shadow boxes were attached to the outside of their booth showcasing some of their products and talented designers.
DCWV had both their Summer and Winter collections up and were doing wonderful make-n-take canvas and necklace art.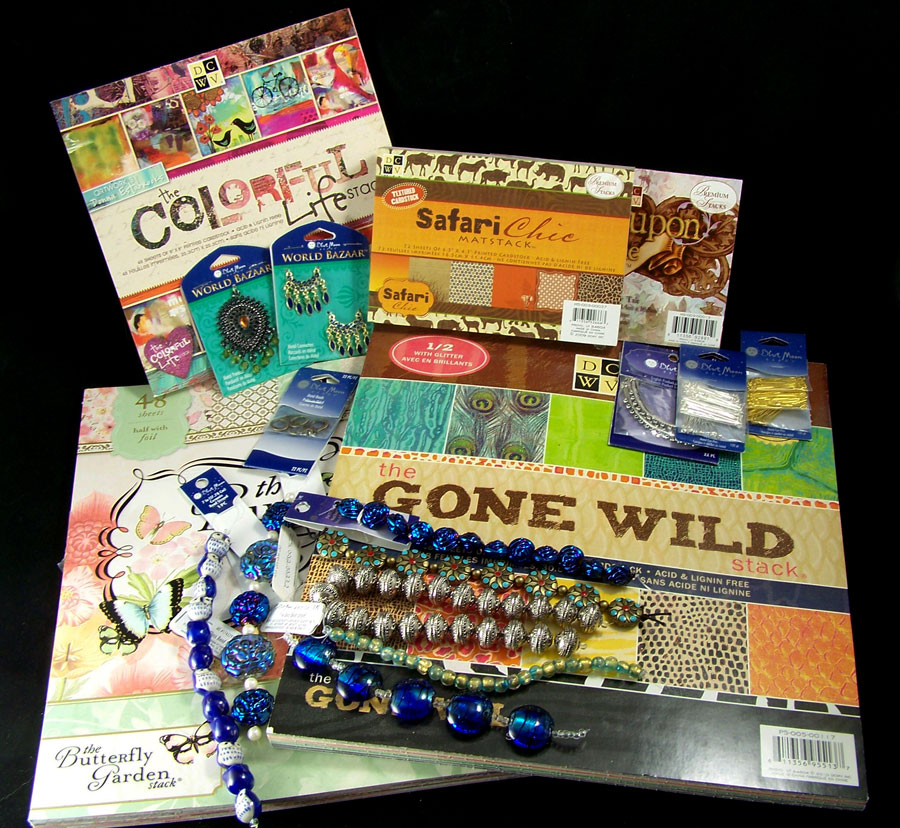
Those lucky enough to be there the last day of the trade show and the last few hours had the chance to buyDCWV papers and Blue Moon Beads. Here is some of the items I was able to purchase from them the last hour. 🙂
The talented Suzann Sladcik Wilson, book author and CEO of Beadphoria, Inc. was at the Buttons Galore and More booth doing demos on how to turn their whimsical line of buttons into wearable art!
Here is some of the Buttons Galore and More buttons turned into rings!They have so many designs and styles of buttons that could be used as embellishments in many art forms.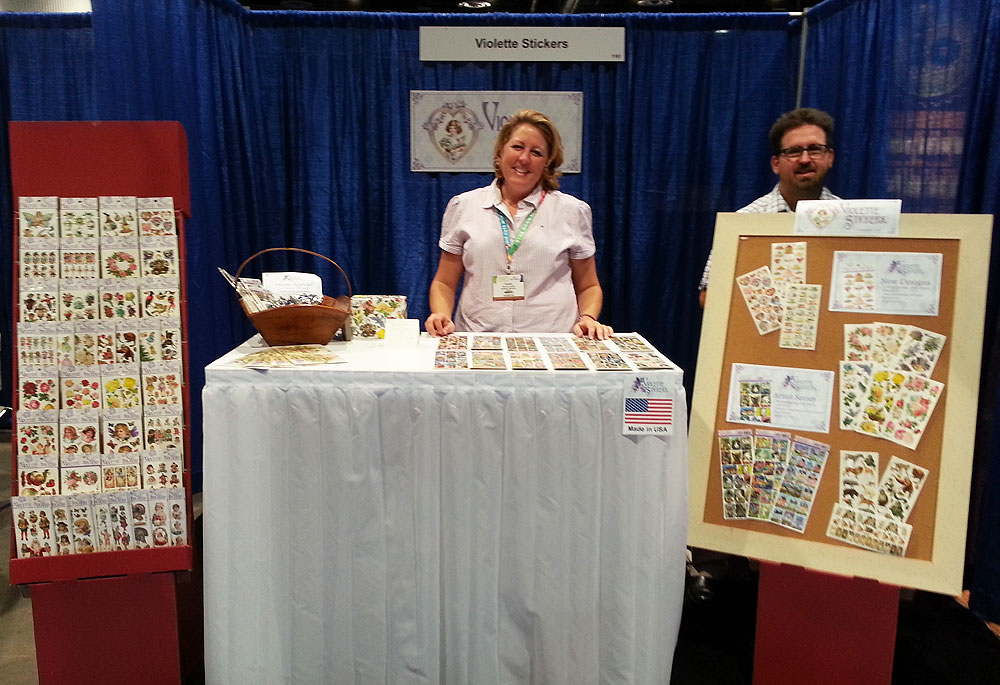
Next we have the awesome Violette Stickers, a small but growing sticker company with some of the most beautiful stickers. They were at the Winter CHA this year but I somehow didn’t see them. I am glad I got a chance to really look at their stickers this time! They have lovely reproduction Victorian art stickers and fun and funky modern art stickers.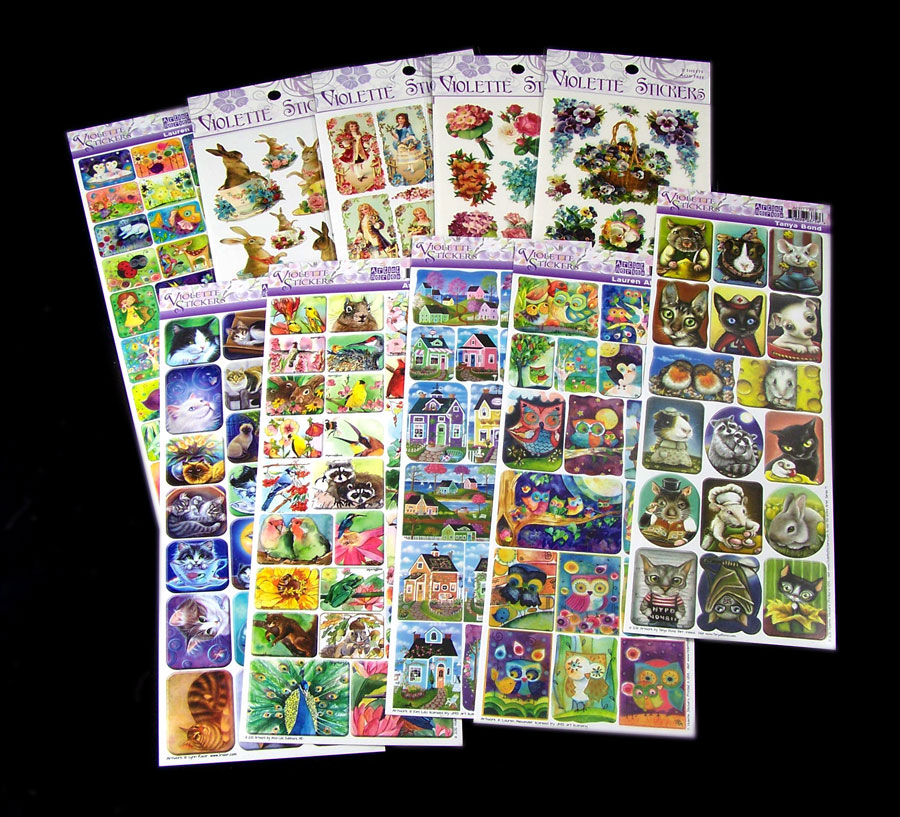
Here is some of their sticker selection I bought. The photo does not do them justice. They have vivid colors, sharp detail and some of their lines of stickers have clear backing making them perfect for layering in resin!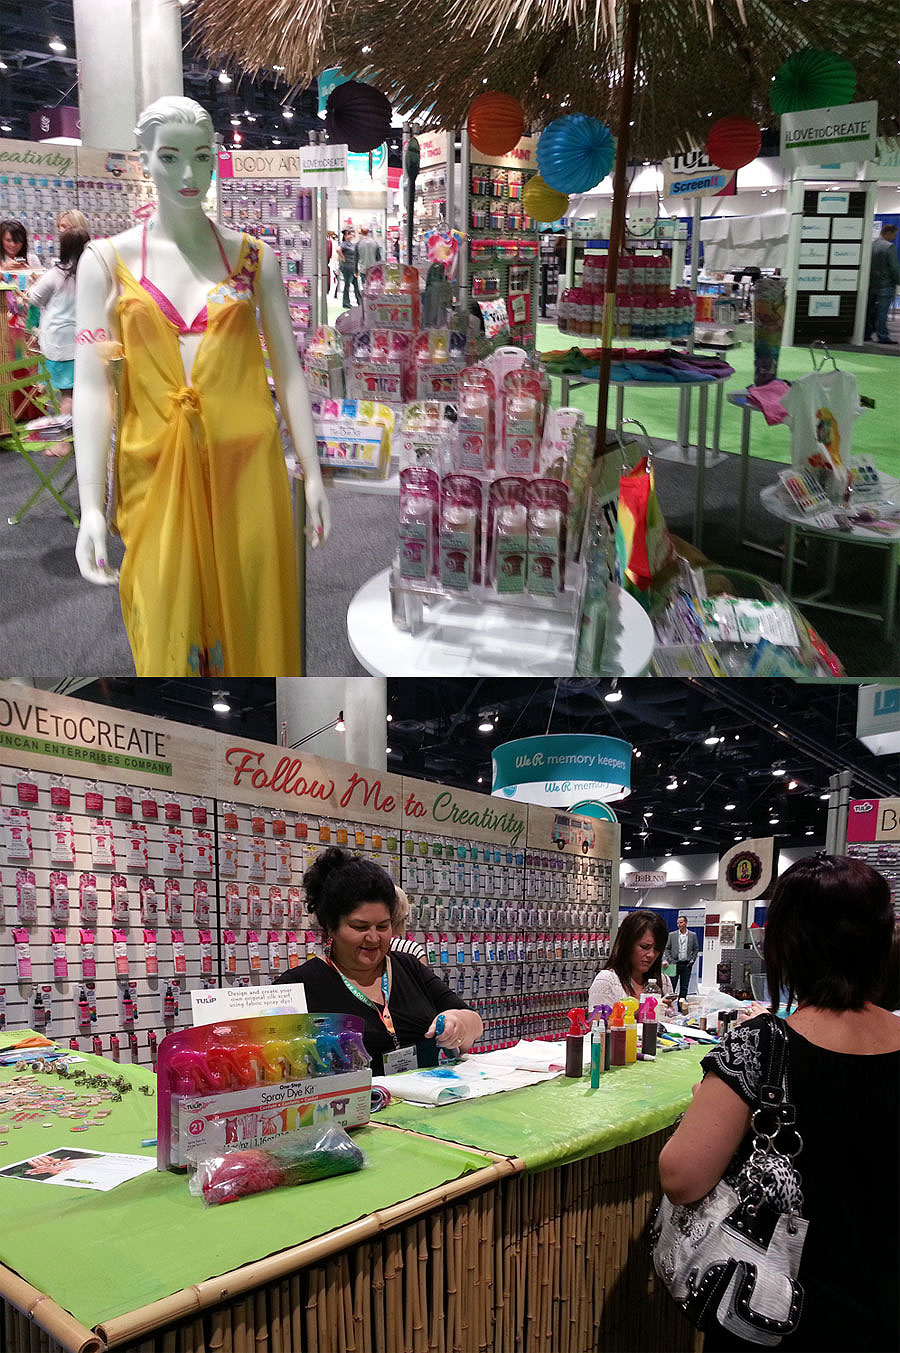
I love to Create booth had a wonderful collection of Summer themed art using their line of products. The talented Kathy Cano-Murillo founder of CraftyChica.com was doing demos at their booth of all kinds of wearable art! The Tulip One-Step Spray Dye Kit they are now selling is a no fuss way of dying fabrics. I love the ease of use and vibrancy of the colors!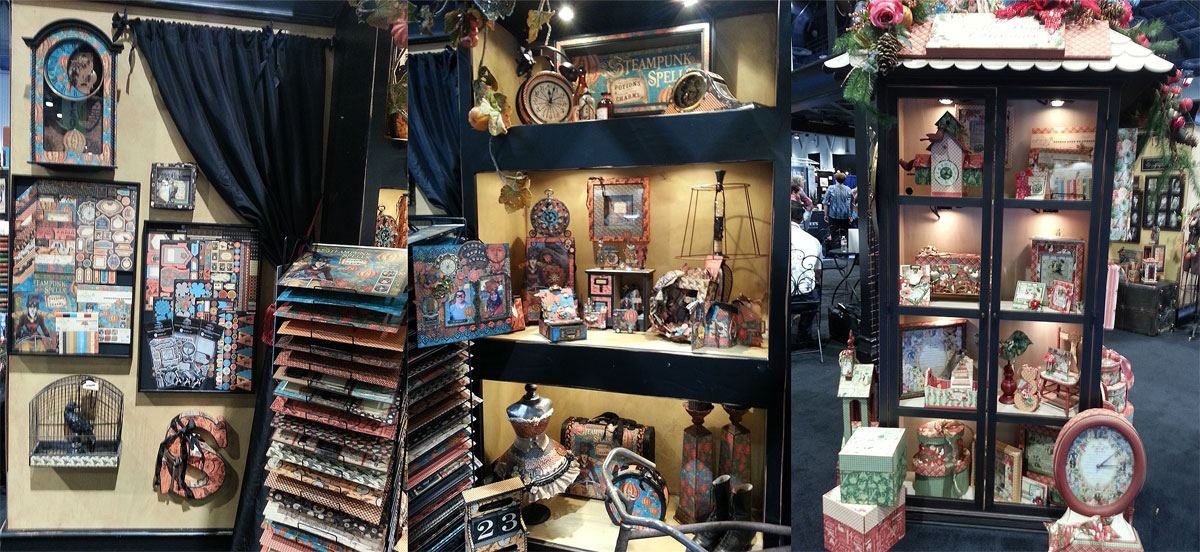
The ever popular Graphic 45 had a gorgeous booth full of Steampunk and vintage print papers and embellishments. The display of finished art using their products was just beautiful and I love that they are doing more home decor tutorials using their products!In the next few months I will be using all of the wonderful products I got at the show in new artwork. 🙂
Until next time safe travels!
DIY Butterflies on the green

I have a country garden on my property and I have fun growing all types of herbs, flowering plants and vegetables. Each year depending on the season I can see variety of wildlife coming into the garden to collect nectar, seeds and water. I make it a point to take as many breaks as possible to go work or watch the garden. Earlier this season I found a butterfly sitting on top of my flowering rosemary. I watched it fly about the garden for a bit, I then noticed a second one, then another and another! Soon the yard was full of butterflies! They look to be a butterfly known as the American Lady (Vanessa virginiensis), they have a rather “fuzzy” body and long antennae. I was able to take some photos of these lovely creatures with my camera. It got my mind whirling on how lovely these bright orange butterflies looked on the green plants, could I make something based off of this enchanting contrast?
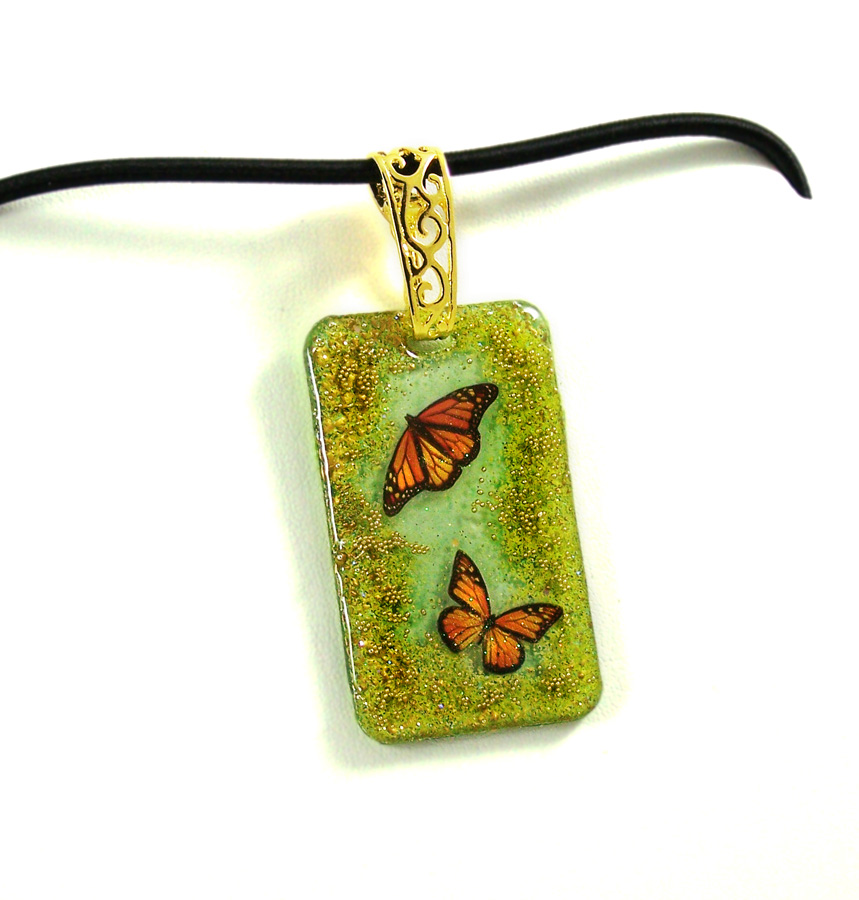
The Globecraft & Piccolo Design team challenge this month is to create projects using their UV Resin and their bezels. I thought why not try to create the look of flying butterflies on a field of green. This time instead of doing my standard still photos I thought why not try out a video tutorial!
Hop on over to the Globecraft and Piccolo Blog for my UV Resin Butterfly Pendant video tutorial with Globecraft and Piccolo products!
Until next time, safe travels!
Inspire Art lapel pins
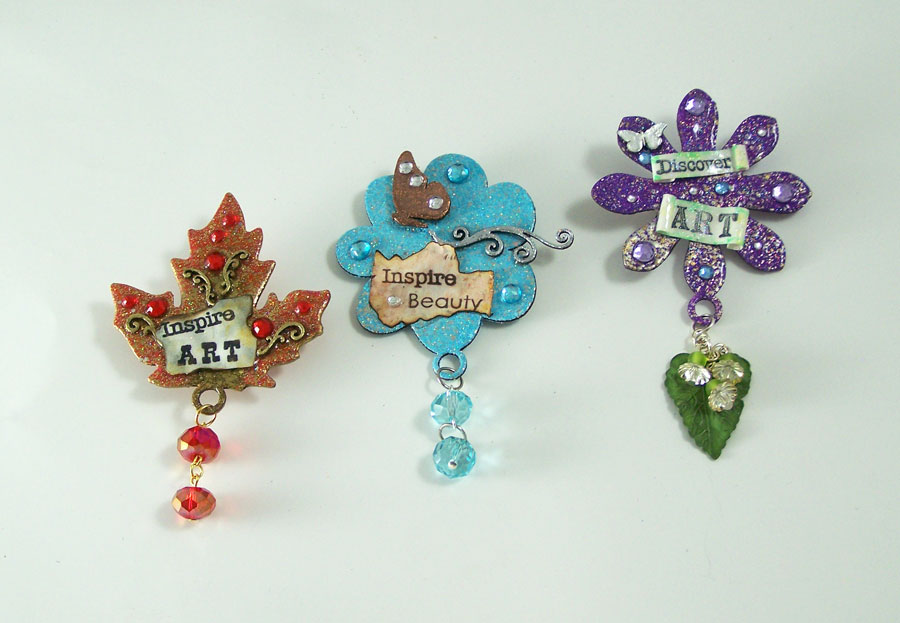
Positive affirmations, inspirational art and things that make one smile can really help with the creative process. Why not make and wear a little bit of inspiration? Today I want to show how to make your own Inspire Art lapel pins, such as the blue above with the copper butterfly.
Supplies:
G&P Assorted Bookboard Charm Bezel Shapes
G&P Bookboard Birds & Butterflies Accents
G&P Glastique Gloss Finishing Glaze
G&P Burnt Umber 3D Enamel Gel
G&P Yellow Ochre 3D Enamel Gel
G&P Metallic Copper 3D Enamel Gel
G&P Turquoise Lagoon Enamel Powder
G&P Copper Kettle Enamel Powder
G&P Siam Silver Enamel Powder
G&P Piccolo Embossing Powder Adhesive
Piccolo Easy Grip Tweezers
Heat Gun
2 Connie Crystal 10mm Crystal beads
2 Silver jumprings
1 Charm Brooch Pin
Crystal sticker gems
Small foam squares
2 Flat nose pliers
1 round nose plier
1 headpin
1 eyepin
Sentiment stamps or sticker
For this project we are using the large round flower bezel from the Charm Bezel Shapes set. Carefully remove one butterfly and swirl from the bookboard Accents set.
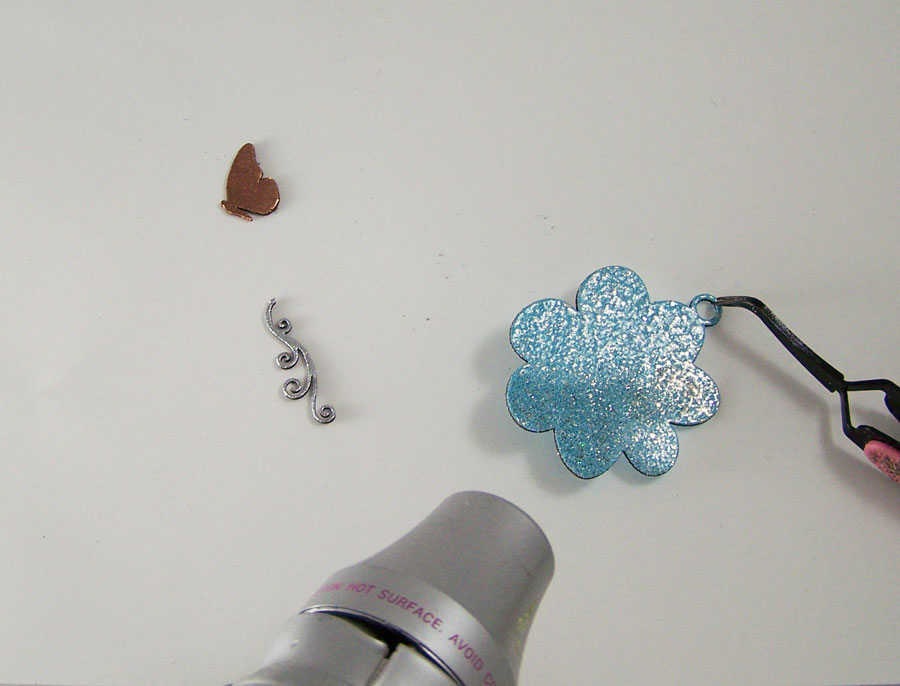 Apply Piccolo Enamel Adhesive to all of the bookboard pieces. Apply G&P Copper Kettle to the butterfly, G&P Siam Silver to the swirl and G&P Turquoise Lagoon Enamel Powder to the flower bezel. Heat set.
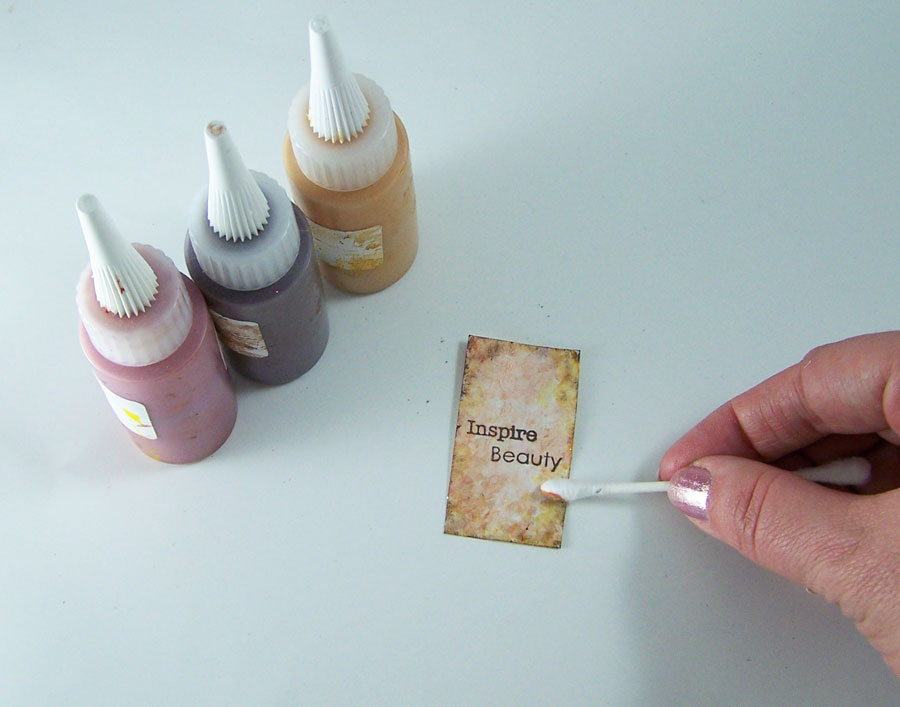 Stamp a sentiment on a 1inch by 2inch piece of paper. Apply G&P Burnt Umber. G&P Yellow Ochre, and G&P Metallic Copper 3D Enamel Gel with a cotton swap to the paper front and back to give an aged look.
*Ignore this step if you rather use a sentiment sticker.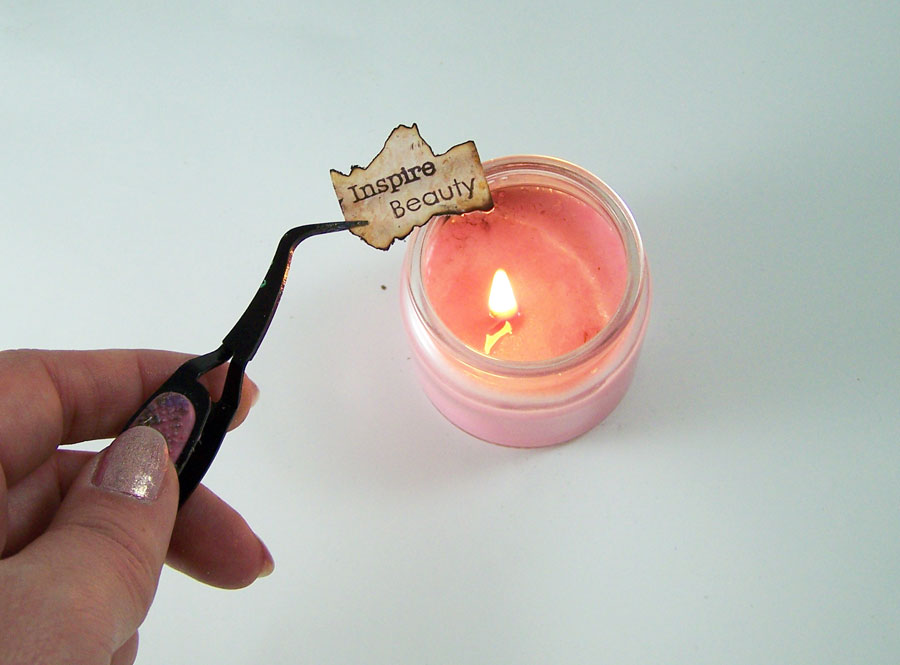 Using the tweezers grip the edge of the stamped paper and very carefully scorch the edges with a small candle flame.
*Ignore this step if you rather use a sentiment sticker.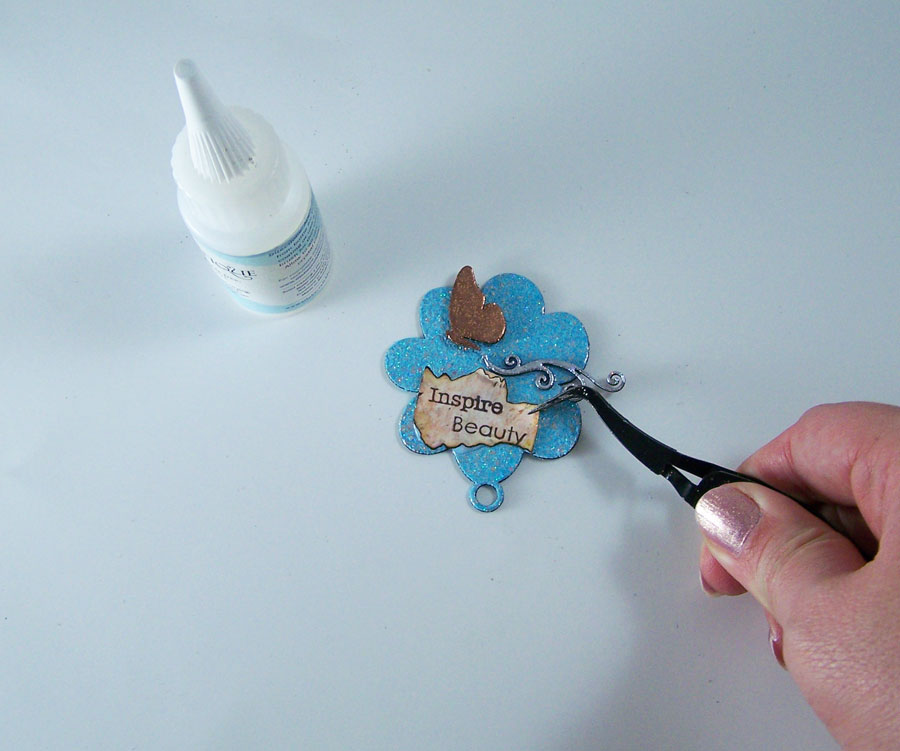
Use Glastique Gloss Finishing Glaze coat the flower bezel with a thin layer. Let dry. Adhere foam squares to the back of the butterfly and the sentiment, press onto the bezel. Attach the swirl Piccolo with Glastique Gloss and coat the assembled pieces with a thin coat of Glastique Gloss.
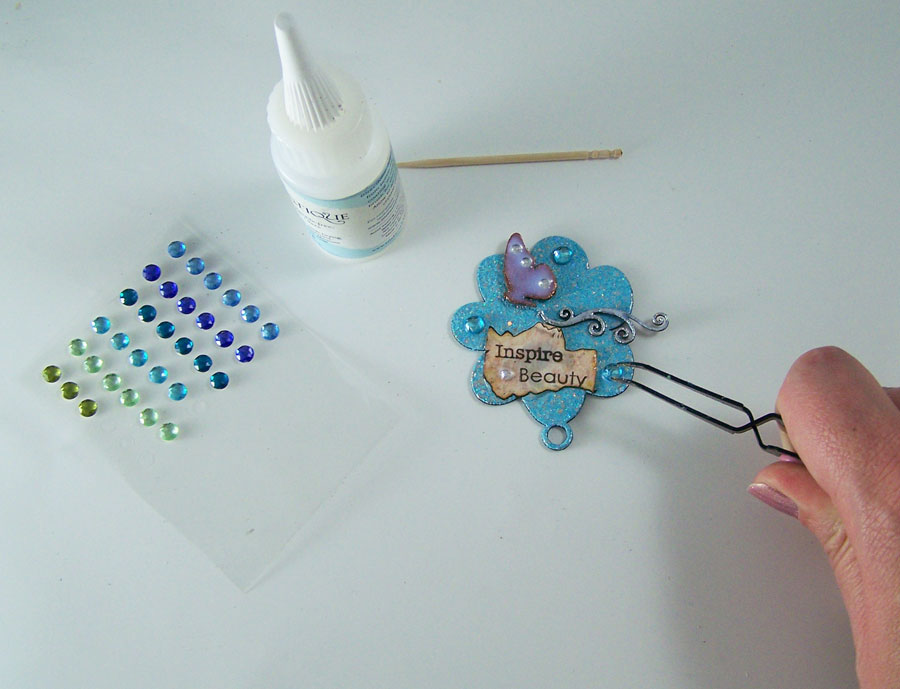 Use Glastique Gloss Finishing Glaze to glue on the sticker gems to the bezel as shown. Let dry.
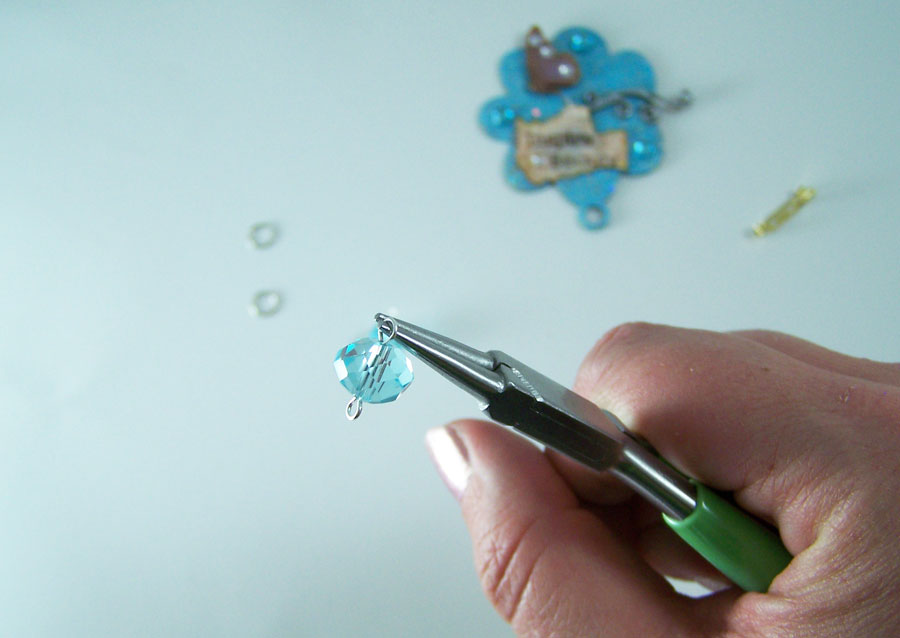 Thread one crystal bead onto the jewelry eyepin and one on the headpin. Using the round nose pliers curl over the remaining wire to form a loop on both jewelry pins.

Open up jump rings with the flat nose pliers and put one jumpring through the loop on the headpin and eyepin, close jumpring. Use the other open jumpring to connect the crystals to the bezel as shown, close jump ring.
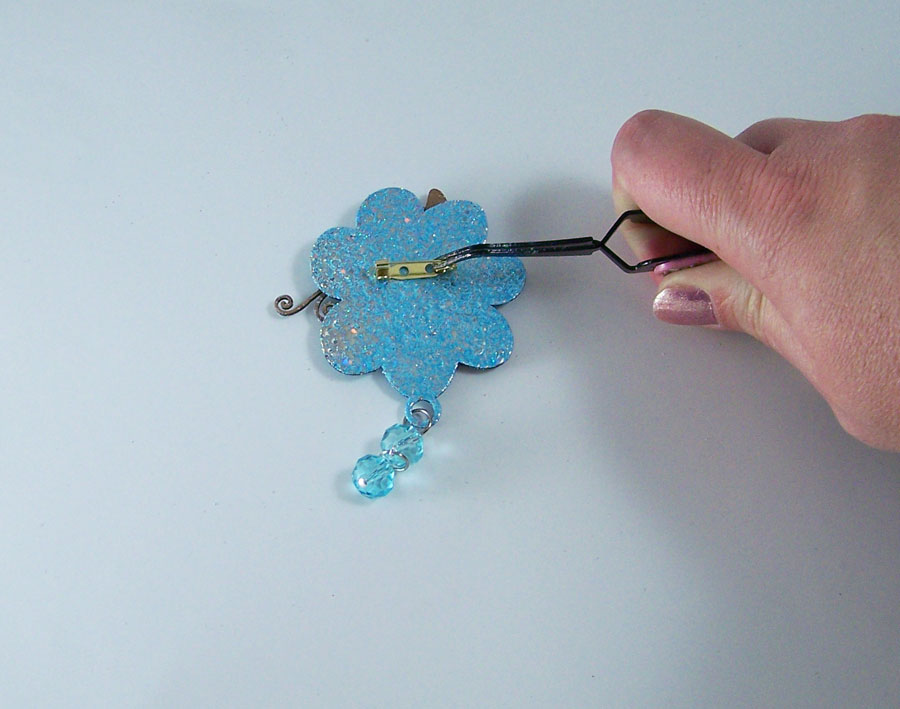 Glue charm brooch pin to the back of the bezel with jewelry glue. Let dry.
The inspire art pin is now ready to wear or give as a gift!
Until next time, safe travels!
CHA Winter Show 2013
Another Craft and Hobby Association Winter show has come and gone. While there were less vendors this year, I honestly feel this was one of the best I attended. This show was amazing! The classes, networking and show floor events were wonderful. I was able to make new accounts with several vendors and got to meet up with some seriously talented artists.
The wonderful Globecraft & Piccolo had a booth again at CHA. I am proud to be part of their Design Team and a part of product design & development! Members of the G&P design team, Jami Bostjancic (of Accent Allusions) and I were honored to be asked to do demos at the booth for three of the four days of CHA.
Here is some of the cool G&P products we got to demo at the show:
NEW Globecraft & Piccolo UV Resin: It cures in 3 minutes in UV light, scratch resistant, self leveling and not affected by humidity (in fact it can set up underwater). It works wonderful on top of chipboard, acrylic, paper, polymer clay, fabric, vellum and so much more!
NEW Globecraft & Piccolo Acrylic Bezels and Tags: Clear acrylic bezels and tags come in so many shapes and sizes. Perfect for making jewelry, mixed media and card decor! Looks lovely stamped and with paper backings.
NEW additions to the Globecraft & Piccolo Embossing powder line: These powders are specially designed to look awesome on large and small projects. G&P Embossing Powders are made of varying-sized particles that create a unique depth and dimension not available with traditional embossing powders. These wonderful colors can mimic stone, metal, natural elements and aged surfaces. The new colors are Real Rust, Ruby Red Slippers, Shamrock Dreams, Turquoise Lagoon, and Platinum!
New Piccolo Chipboard Elements: Now in many different sizes, great for home decor, card making, mixed media, jewelry and more! From holiday, seasonal, steampunk, animals, swirls, and elaborate corner and edge elements.

The Globecraft & Piccolo booth at CHA.
G&P display showcasing all of their embossing powders and chipboard charm sets. All of the charm sets on the velvet boards are my work. 🙂

G&P acrylic and chipboard bezels samples by the talented design team, the Secrist family (G&P) and I.
Just beautiful card decor work with Piccolos by the design team!
G&P Ornament sets. The lovely mixed media piece on the left is made by the talented Linda Neff (part of the G&P design team) from ornaments and a lampshade.
An overview of the booth.
Some samples of the demo work showing the new UV Resin and acrylic bezels! Pieces by Pat Secrist (Of G&P), Jami Bostjancic and I.The following photos are close up of booth display samples to show you how many new styles and techniques you can use with the new G&P products.

G&P acrylic bezel, G&P UV Resin, mica powder, permanent ink, paper and sticker gems.
Mini oval acrylic bezels with Pure Sparkle Glitter in Gold, mica powder, 3D Enamel Gel and sticker gems. Faux glass technique.
Top left and bottom bezels are acrylic and top right bezel is bookboard. 3D Enamel Gels, Pure Sparkle Glitter in Gold and Silver, mica powder and sticker gems. Glastique Gloss is used to seal each layer. Topped with the new UV resin. Nebula/night sky technique.
G&P acrylic bezel, G&P UV Resin, G&P Piccolo Gears, mica powder, permanent ink, paper and sticker gems. Piccolo layer technique.
G&P acrylic bezel, G&P UV Resin, mica powder, 3D Enamel Gels, Origami foil paper and sticker gems. Faux glass technique.Until next time safe travels!
Let it snow…..

Even though it is not Winter yet, it sure feels like it. We have a cold weather front moving in and there is some talk of snow! It is the perfect weather to stay inside, decorate for the holidays and make gifts. Today I am going to show you how to make a snowflake jewelry set that can be put in a card set using Globecraft &Piccolo products.Supplies for earrings and necklace:
2 packages of Globecraft & Piccolo Snowflake Accents
Globecraft & Piccolo Pure Sparkle Silver Glitter
Globecraft & Piccolo Glastique Gloss Finishing Glaze
Globecraft & Piccolo Titanium White 3D Enamel Gel
Piccolo Easy Grip Tweezers
Pale Blue Sticker gems
Silver jumprings
Silver chain
2 Earring wires
Jewelry clasp
Flat nose pliers
Wire cutter

Carefully remove all of the snowflake Piccolos from the chipboard frame. Coat one side of all of the snowflake Piccolos with Titanium White 3D Enamel Gel. Let dry. Now coat the other side of only 1 large snowflake, 2 mediums, 2 smalls and 2 minis. The pieces with both sides coated will be for the jewelry and the snowflakes with only one side with enamel will be used for the card (or other projects if you like).
Carefully apply Glastique Gloss Finishing Glaze to all of the snowflakes and sprinkle Pure Sparkle Silver Glitter on top. Let dry.
Now apply two more coats of Glastique Gloss Glaze to the snowflakes. Let dry. The layers of glaze will give the snowflakes a glass like finish and help the glitter “pop”.

Now apply Glastique Gloss Glaze to two of the small snowflakes. Carefully position the mini snowflakes in a manner to create a enclosed space to put a silver jump ring through. Let dry. Go back and seal the areas where the snowflakes touch with Glastique. Let dry.
Use Glastique Gloss Finishing Glaze to glue on the pale blue sticker gems to the large, medium and small snowflakes. Let dry.
Open up oval jump rings and put through the small triangles in 2 of the medium, the space in small and mini glued pieces and 1 large snowflakes; close jump rings.

Cut 2 separate lengths (two inches long) of silver chain and attach each length to a medium snowflake with a small jump ring. Add another jump ring on top and attach the earring wire.
Cut two lengths of silver chain (1/2 inch long) and attach to the small and mini snowflakes glued together with a small jump ring. Add another jump ring on top and attach to the earring wire with the medium snowflake. Cut 16 inches of silver chain and string the large snowflake on it. Attach jewelry clasp to chain with small jump rings.
You can give the jewelry set as is or you can make a matching card to place the jewelry in. Use the left over snowflakes for embellishments on the card. 🙂Supplies for card:
White card stock
Pale Blue card stock
Globecraft &Piccolo Blue Pearl 3D Enamel Gel
Globecraft &Piccolo Glastique Gloss Finishing GlazeUntil Next Time, Safe Travels!

Ancient and Contemporary Inspired Artistry