The Gift of Sparking Winter Jewelry, Handmade of Course!
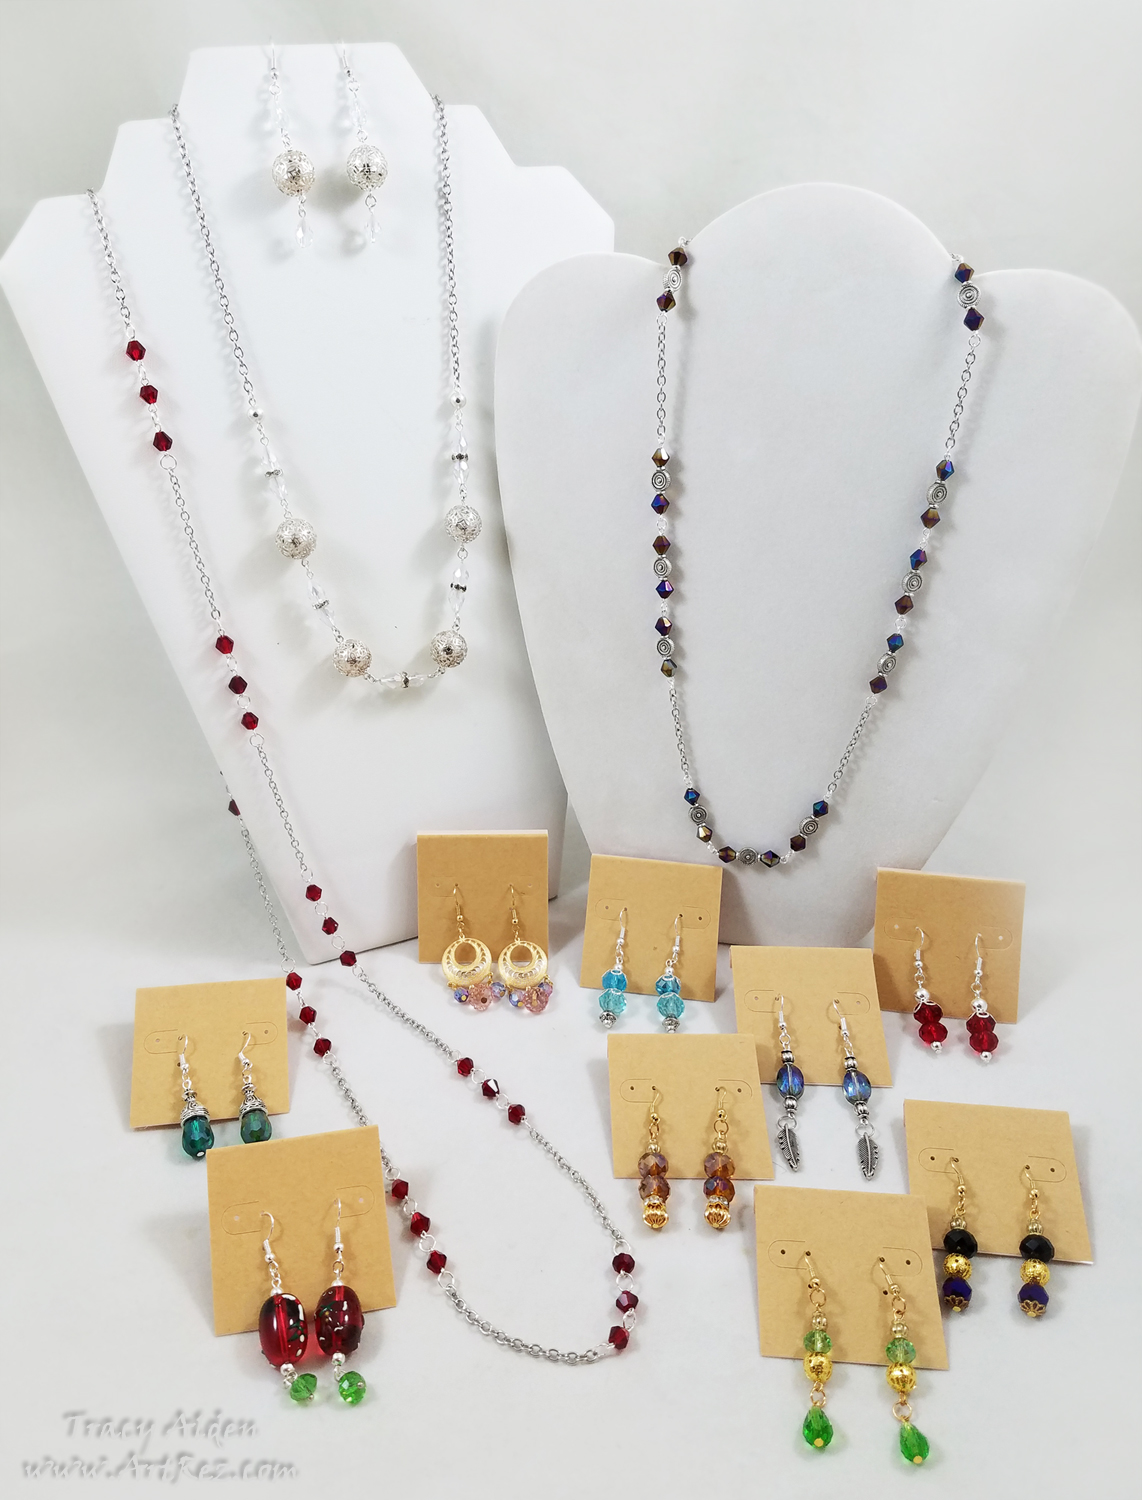
With the past few months speeding past, with projects, orders, shows and daily life, I still make time to create handmade gifts for friends and family. No matter how much planning involved I always seem to end up making a few things last minute, but now that most of these pieces are on their merry little way I can share a few of my favorites.
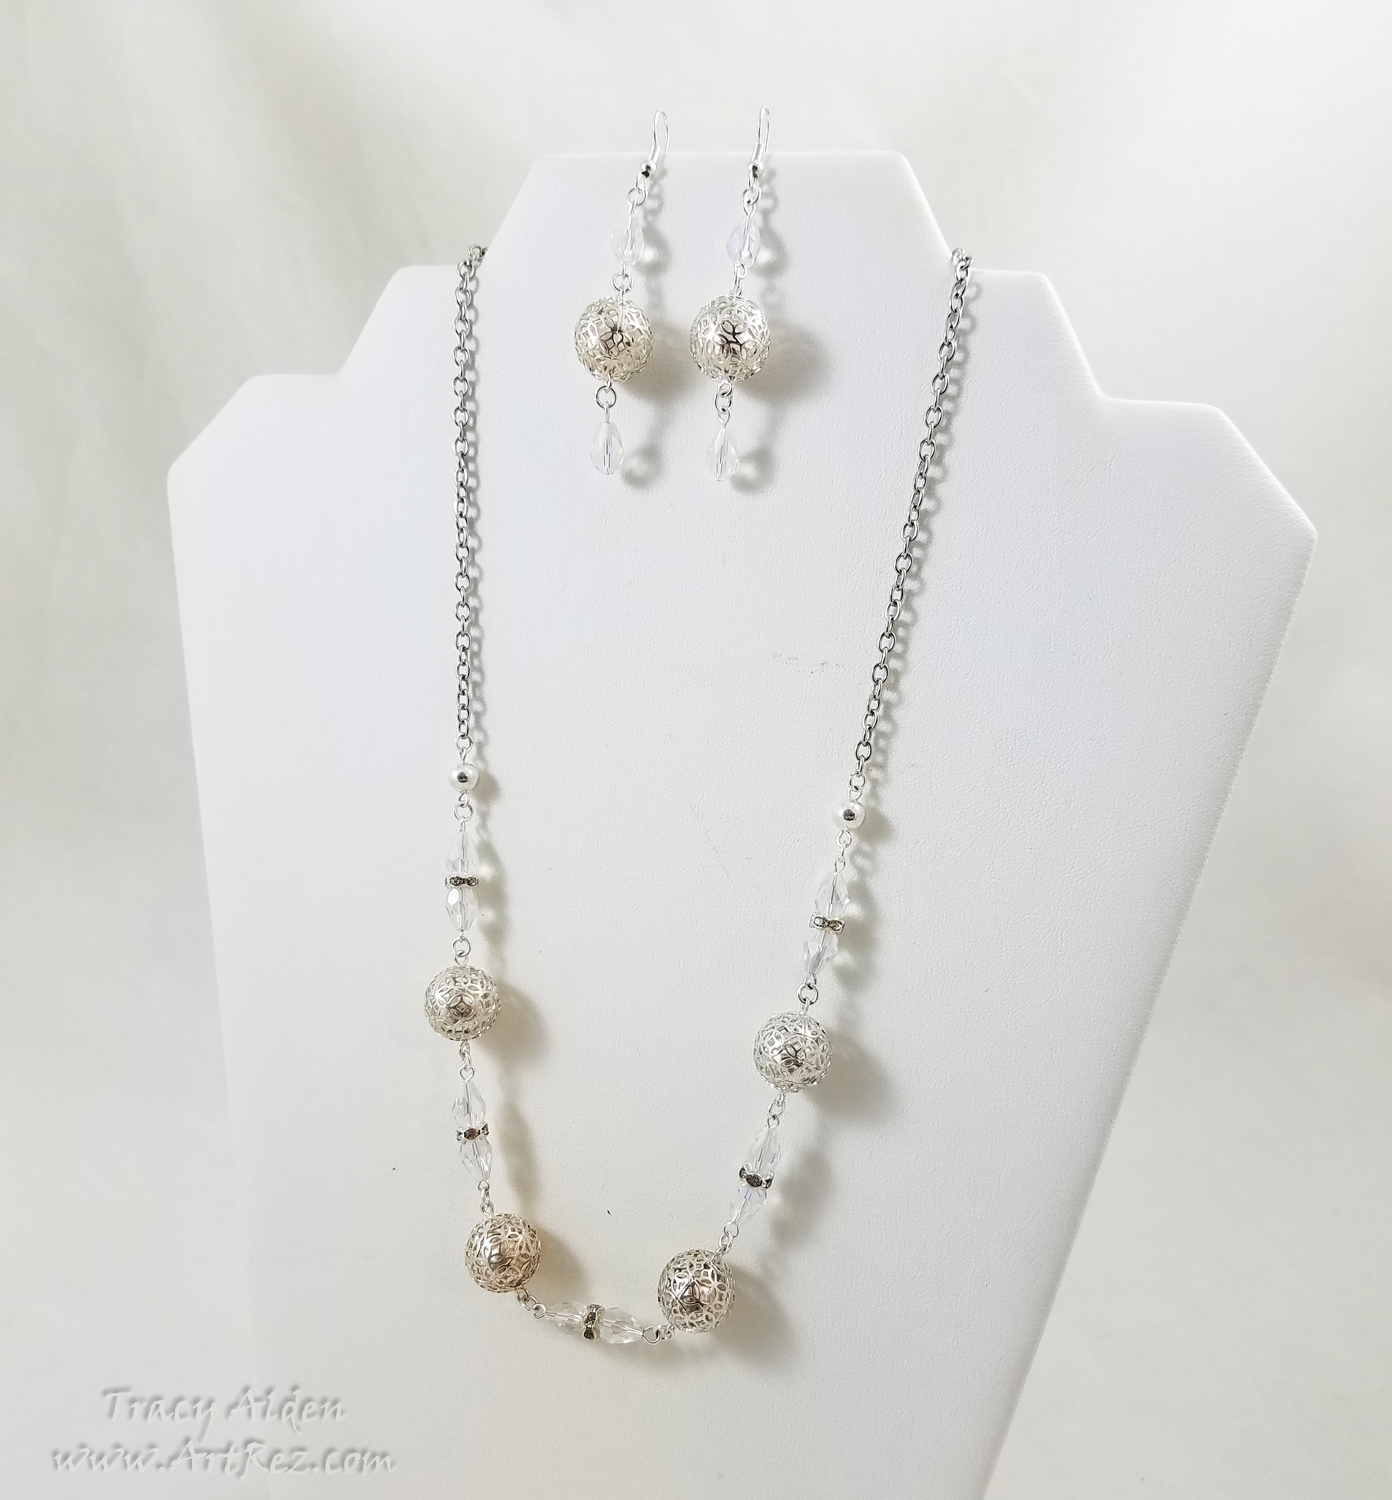
I love getting random bead assortments from Fire Mountain Gems. In one of my last orders I received some sterling silver filigree bell beads. Hoping to create some form of jewelry set, I was not sure what to put with them. Pulling out of my bead stash I found clear crystals and chain from Fiona Accessories. They were the perfect addition to the bells, creating a delicate but beautiful mix of sparkle and sound in a Princess length necklace.
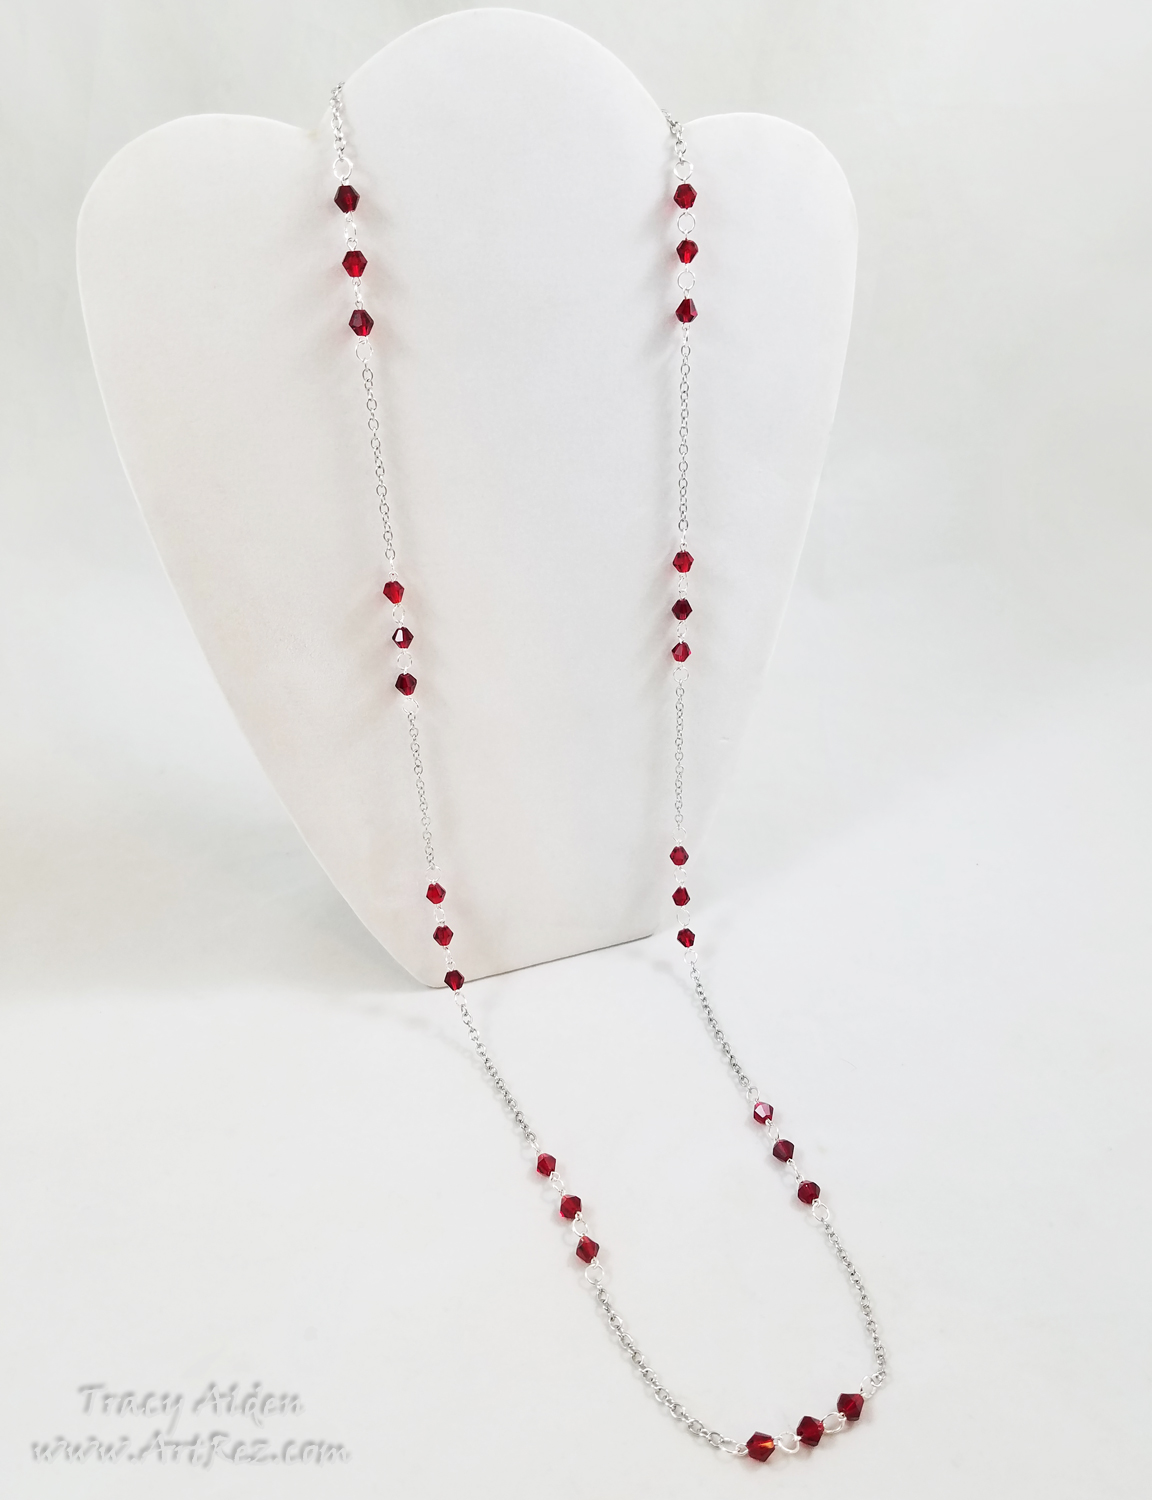
Taking inspiration from the 1920s jewelry styles I wanted to create a simple Opera length necklace. Once again using chain from Fiona Accessories and red crystals from Michael’s Bead Landing™ a graceful and lightweight necklace was created. While the red color is fitting for the holidays it also works well as a nice addition to dressy causal attire.
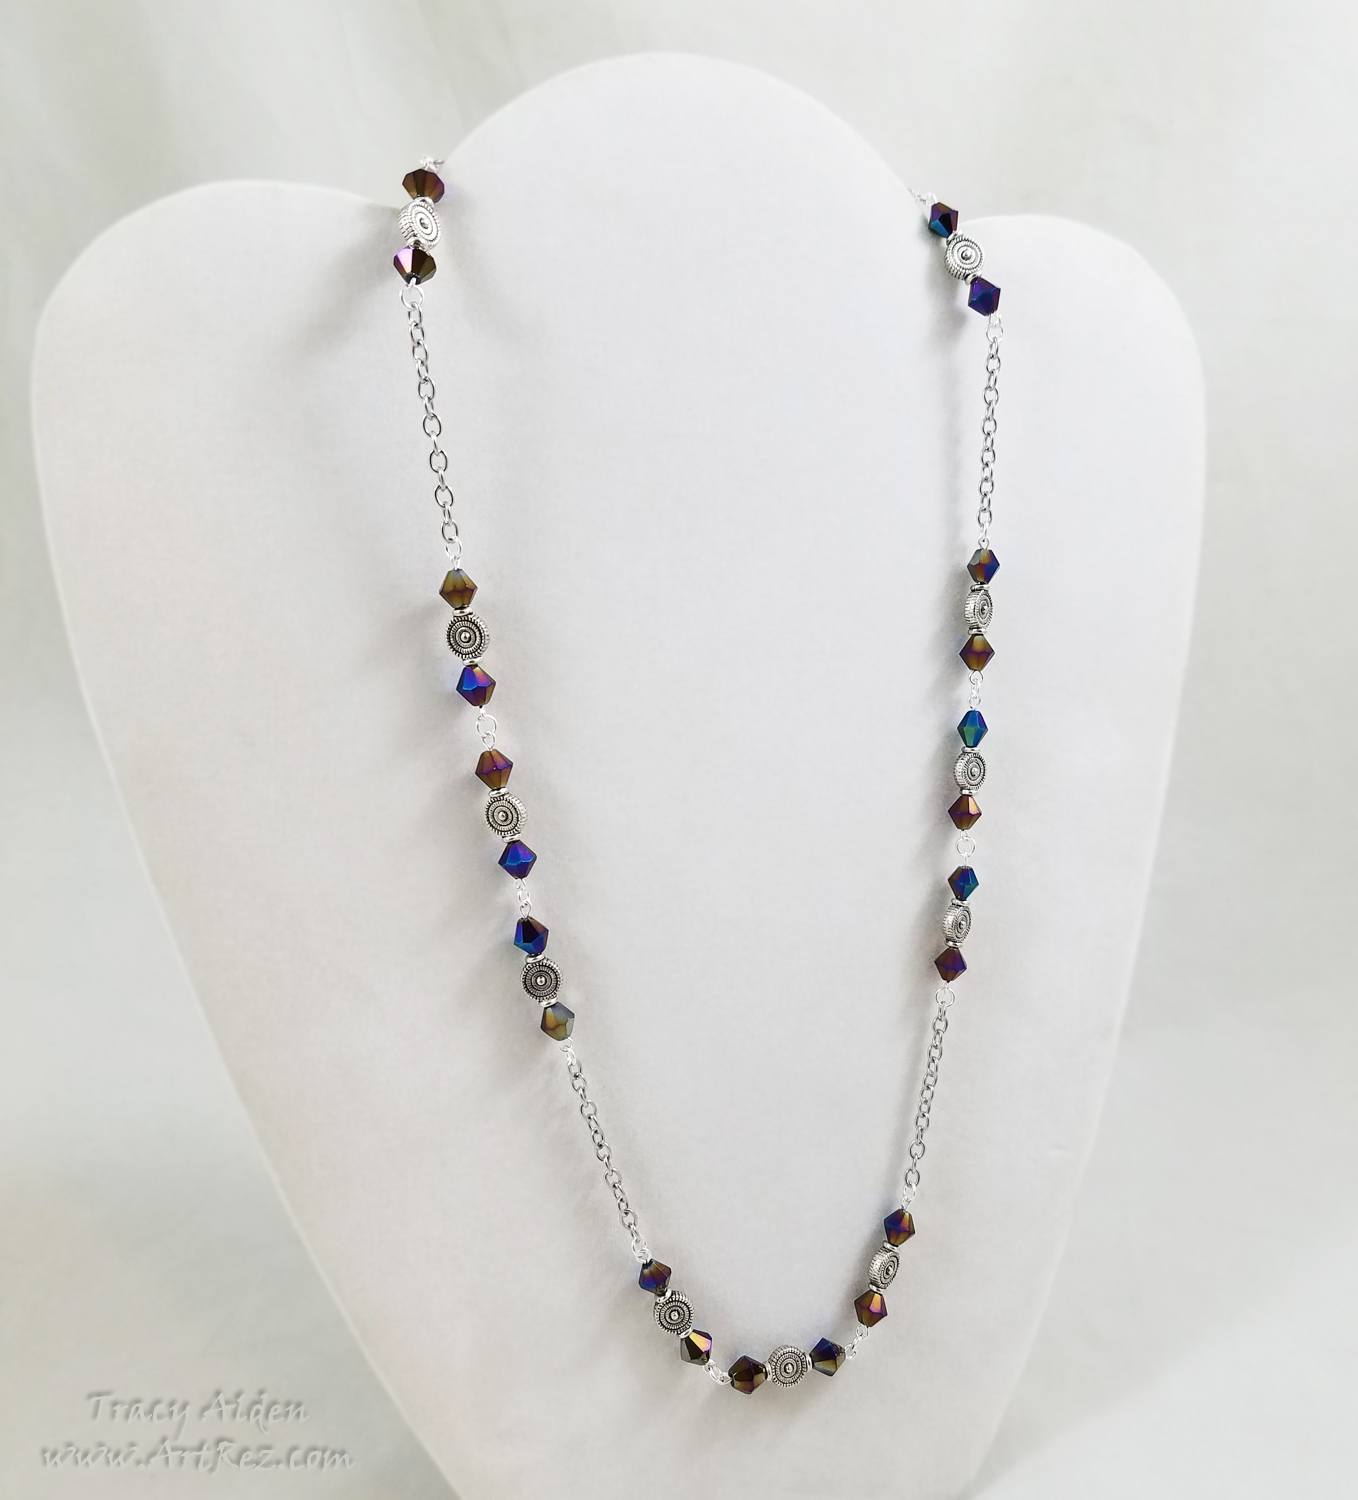
For this Matinee length necklace I used a mixture of miscellaneous findings left over from previous projects. The Aurora Borealis blue crystal beads went perfect with the patterned spacer beads. While the chain adds a more modern feel, the colors and spacers hark back to more ancient times.
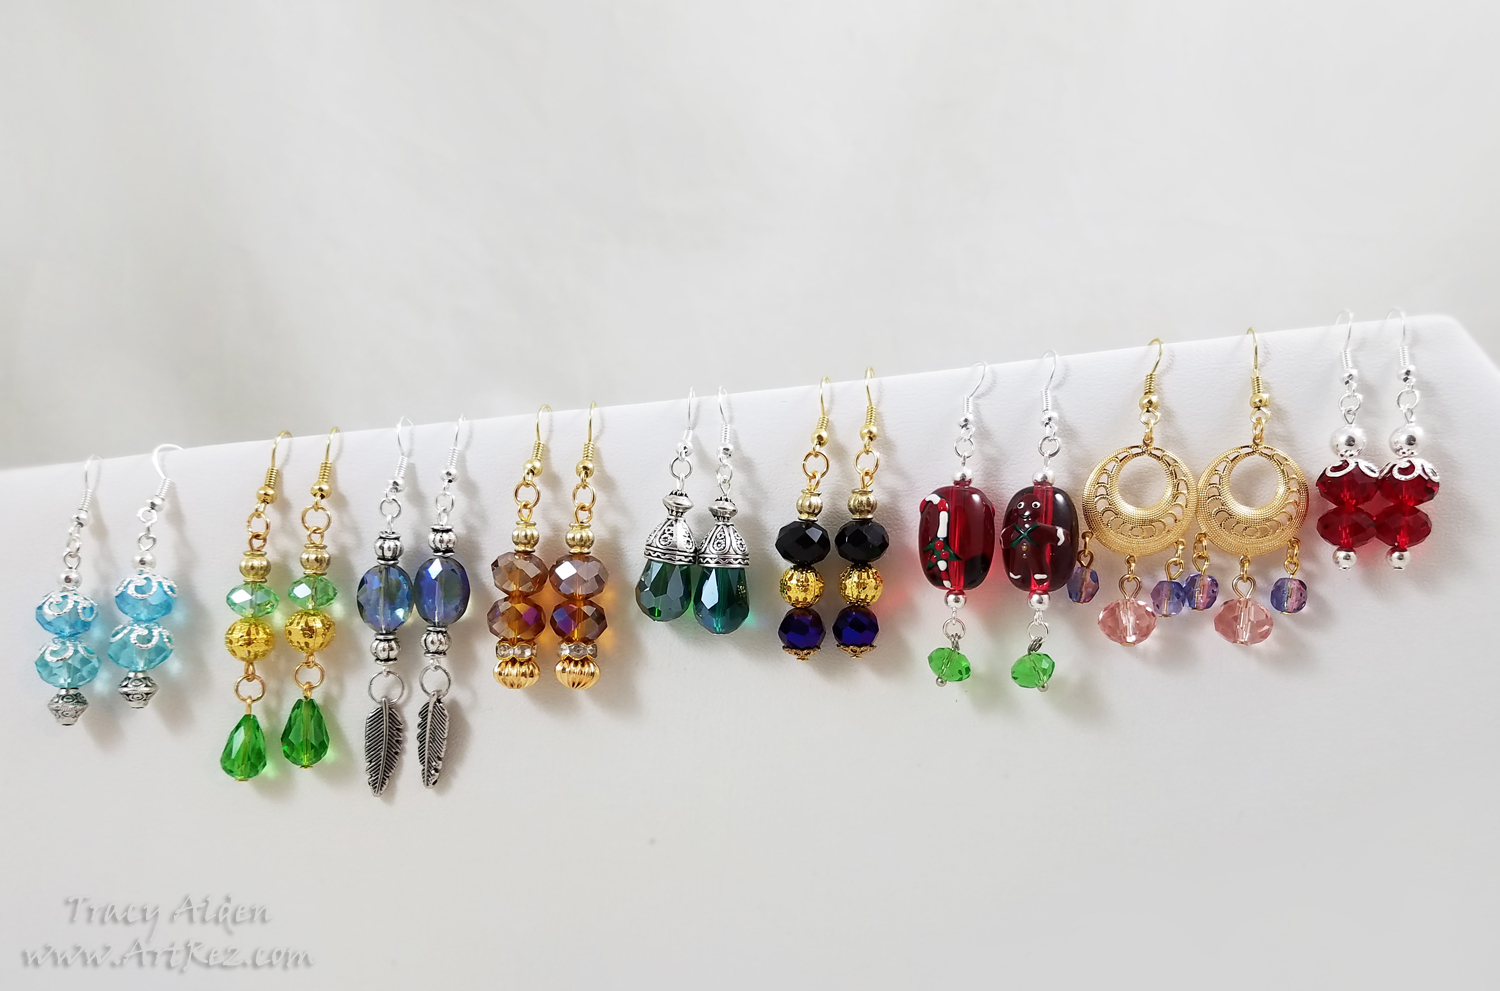
When making jewelry gifts I just have to make earrings. Some beads just lend themselves to something delicate or have just the perfect flash of color to be made into earrings. Using beads and findings from Fire Mountain Gems, Fiona Accessories, Michael’s and many more jewelry suppliers these earrings were quick to make. A few almost could pass for tree ornaments, others found treasures and old heirlooms, making them perfect gifts for young or old.
What handmade gifts have you made or are making this Holiday Season?
Wishing you all a Happy and Healthy New Year!
Until Next Time, Safe Travels!
#Cre8time Jewelry Creations Inspired by Art History

Hello! With Spring in full swing I have been cleaning the plethora of crafting supplies I seem to always have. While I destash I can’t help but notice I seem to add to the collection without noticing! So this time I set myself the goal of using my more coveted supplies to create jewelry on a more regular basis. Today I wanted to show with you some of those jewelry creations inspired by Art History.
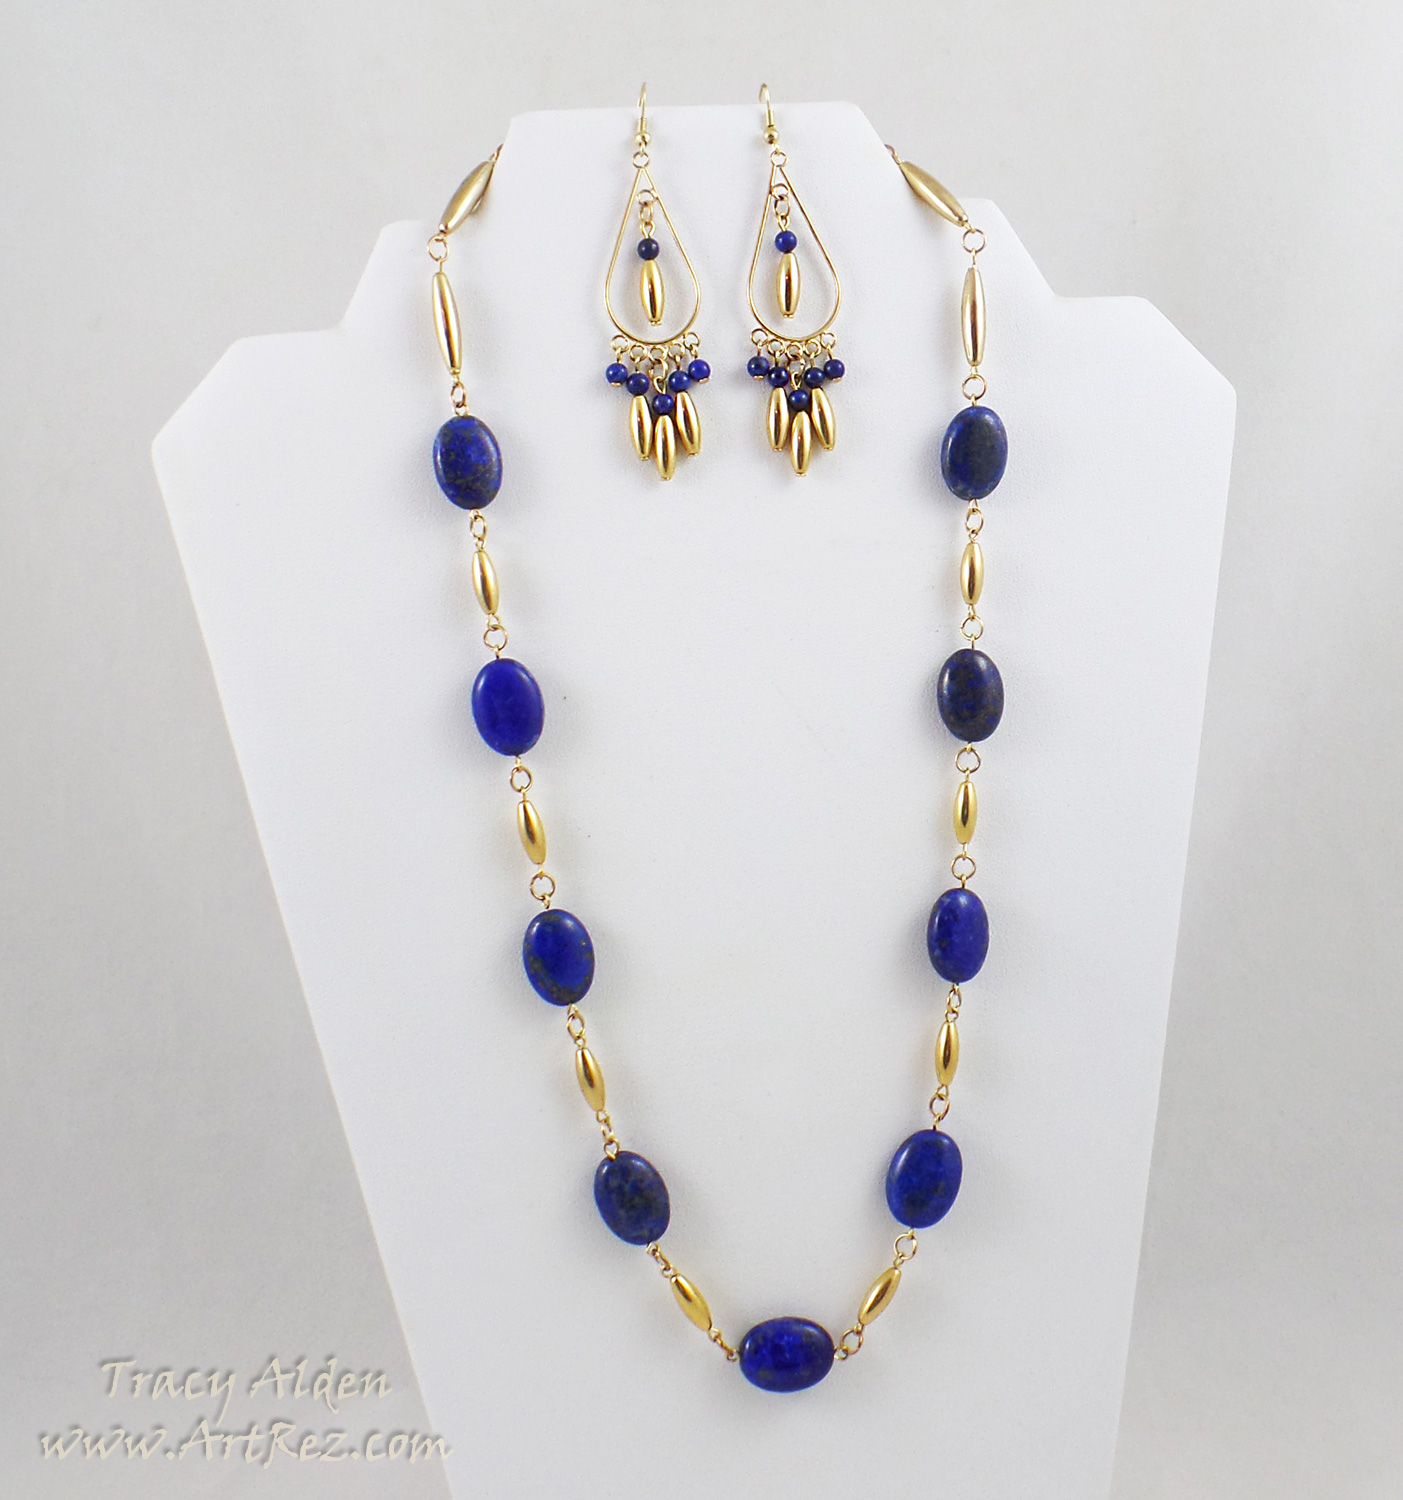
“Imhotep’s Gift”, vintage gold plated beads, Lapis Lazuli beads and vintage gold plated findings.
I have a serious love of Lapis Lazuli; the tiny highlights of naturally occurring Iron Pyrite always gives it a wonderful sparkle. Taking my inspiration from ancient Egypt, a matching set of chandler earrings and necklace was born.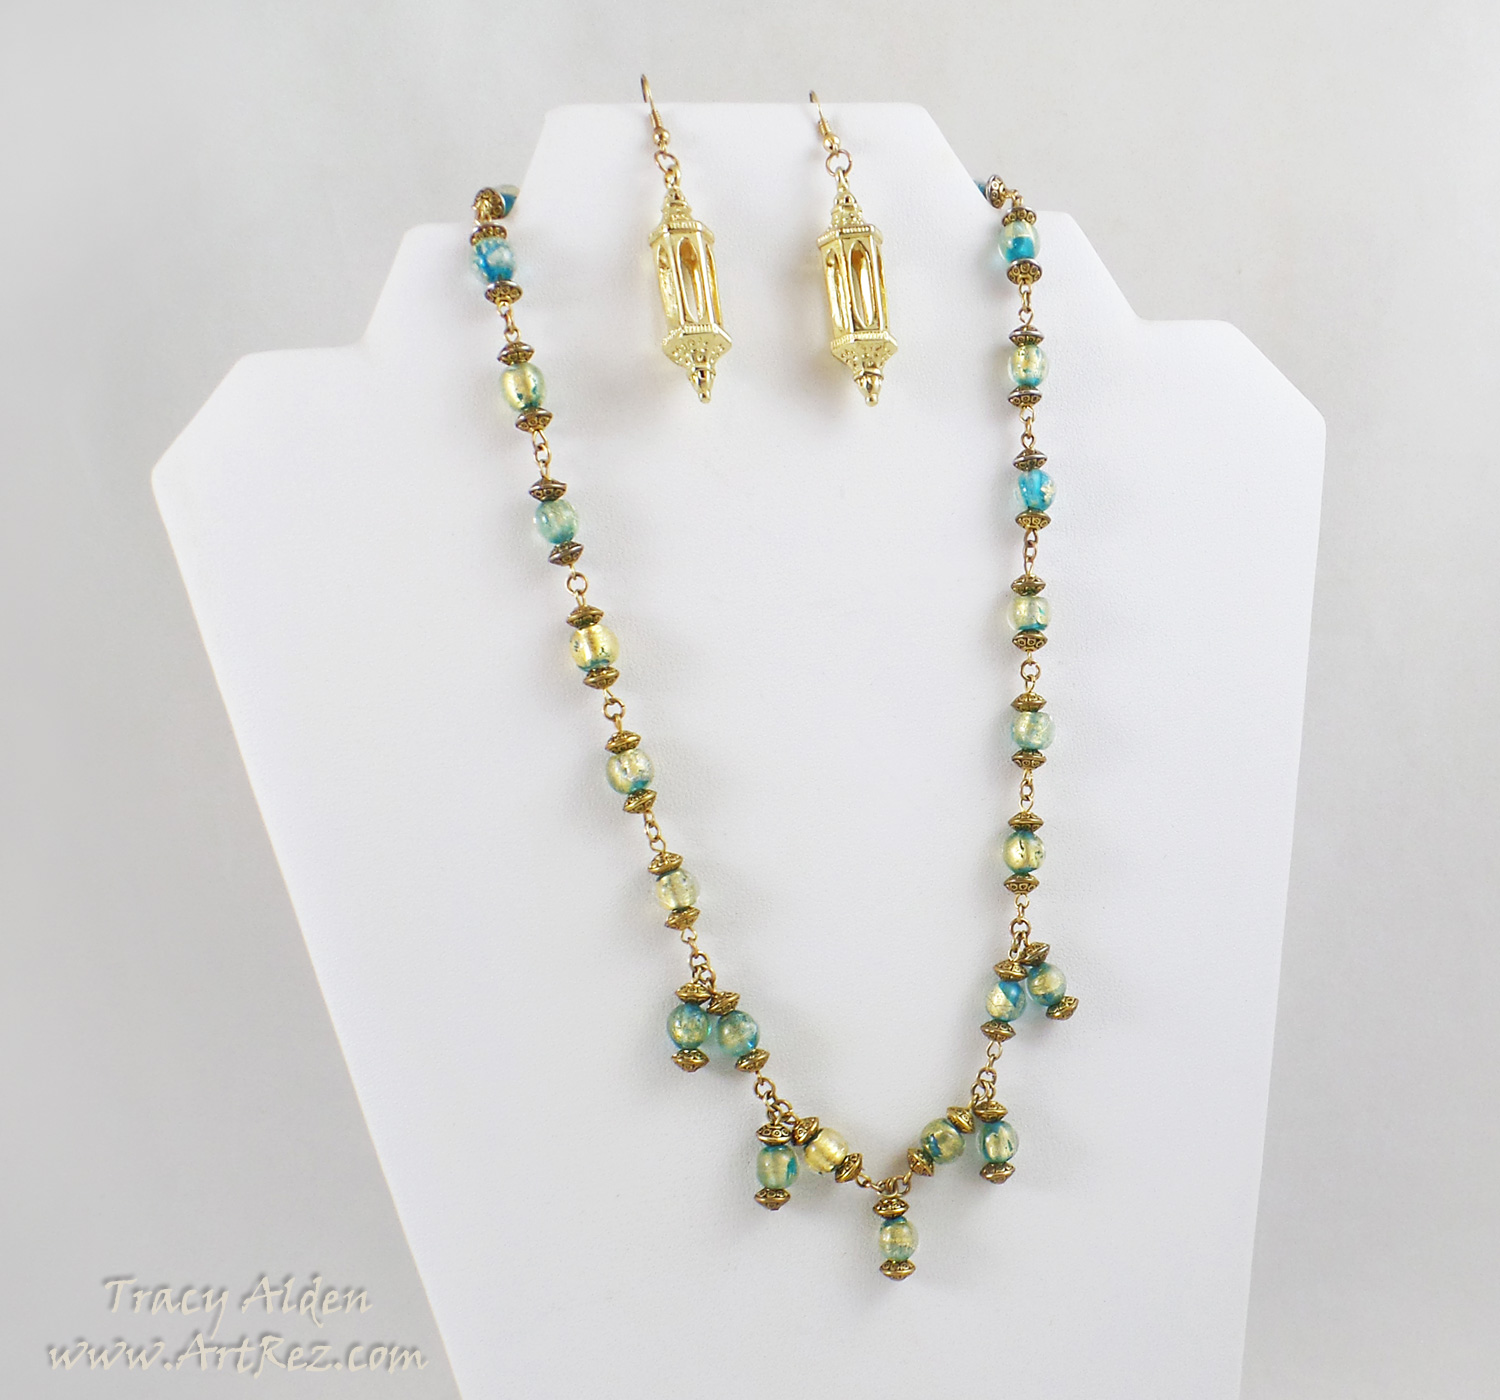
“Roman villa”, gold foil and turquoise colored lamp-worked beads, Bead Gallery® gold rondelle beads, vintage gold plated findings and Blue Moon Beads® gold lantern focals from JoAnns.
The gold foil lamp-worked beads immediately reminded me of how ancient Roman glass looks when unearthed at archaeology digs. Using surviving Roman necklaces as a guide I used a link and drop design to create this necklace. I felt using the same beads would look a bit much for earrings so I went with lantern focal drops instead.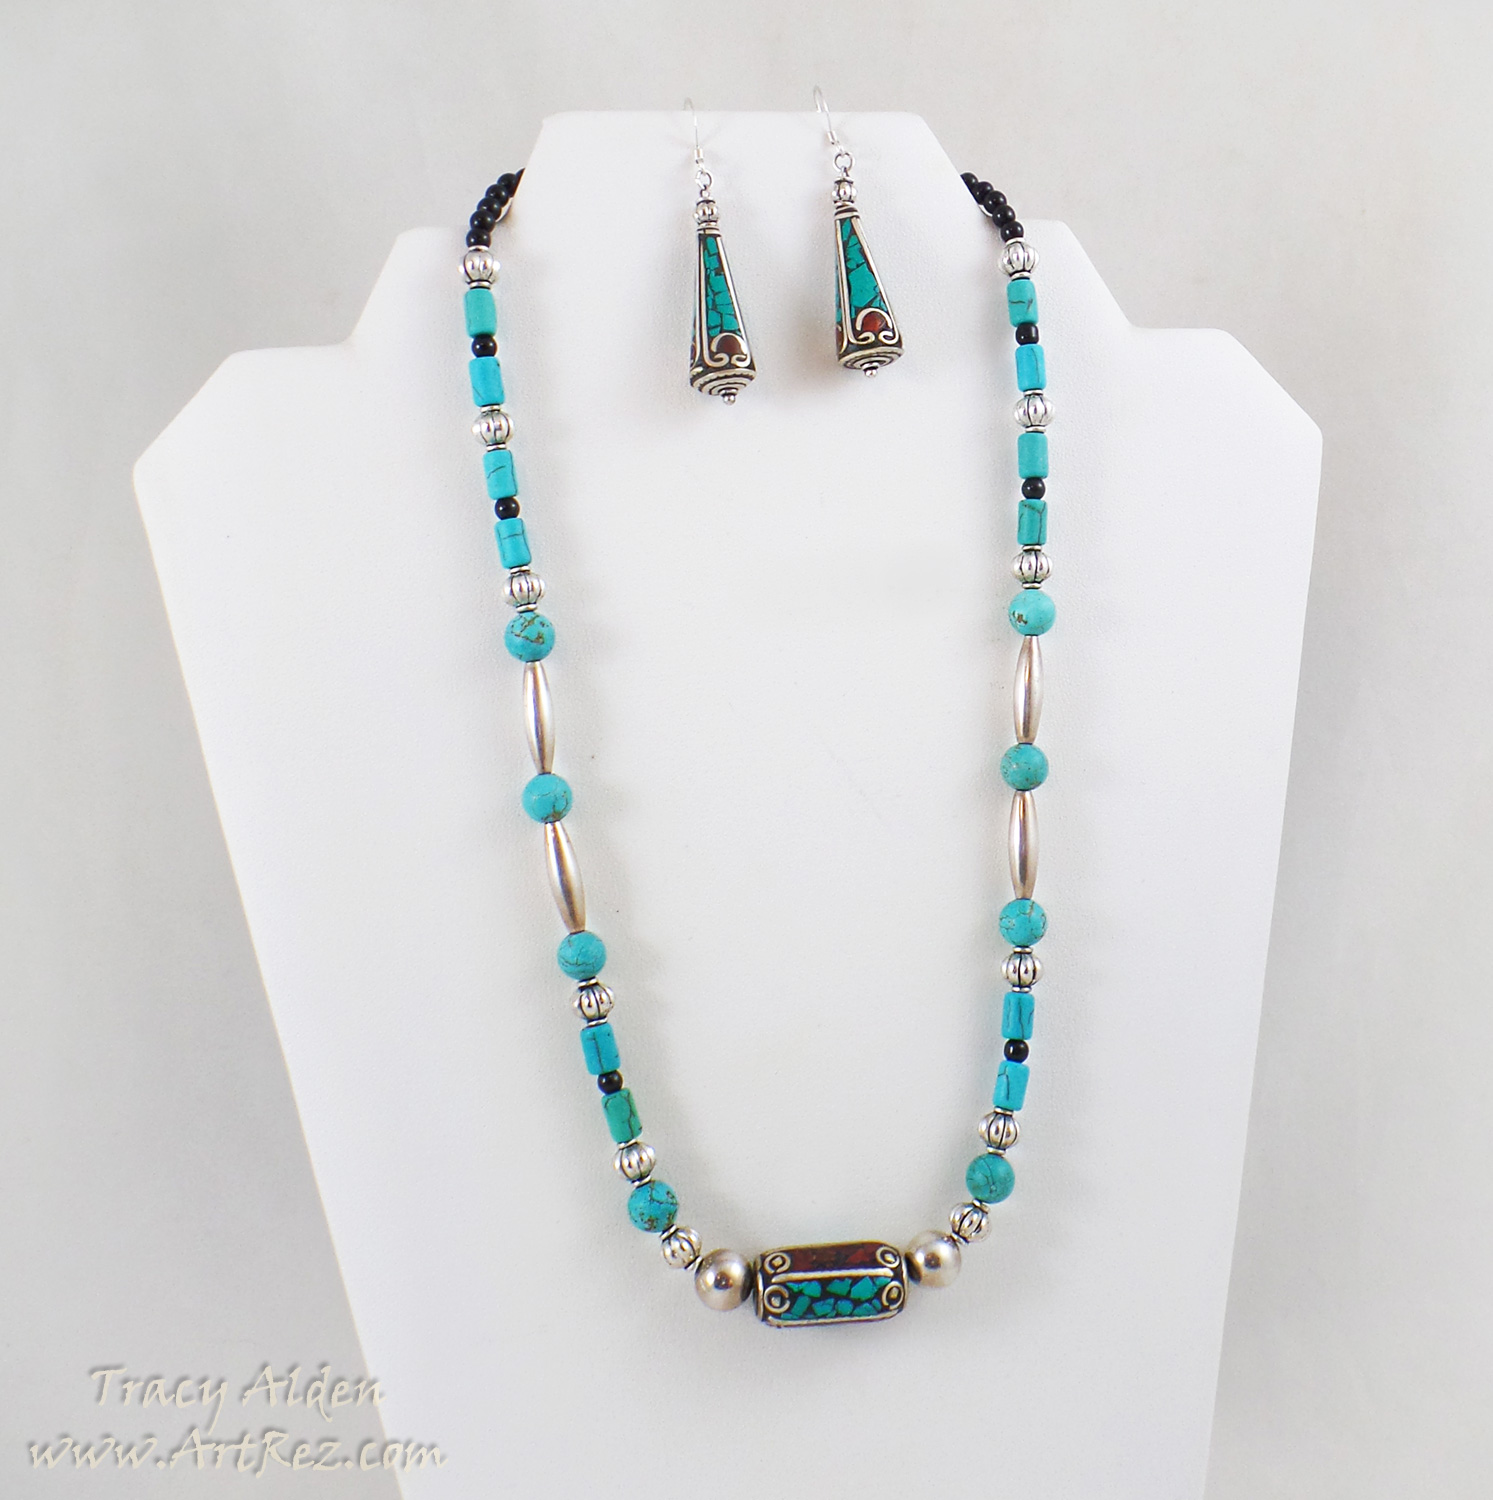
“Nepal Spring”, Sterling Silver Fair Trade beads from Nepal, vintage Sterling Silver spacer beads, Fiona Accessories black glass beads, Bead Gallery® turquoise tone Magnesite beads and vintage Sterling Silver findings.
I had bought the Nepal Fair Trade beads some years ago but could never think of what to do with them. I realized putting all the beads on one strand would be too heavy, so using only one bead as my focal I created a simple but stylish layout. The two additional beads from Nepal had their intricate details highlighted as earrings.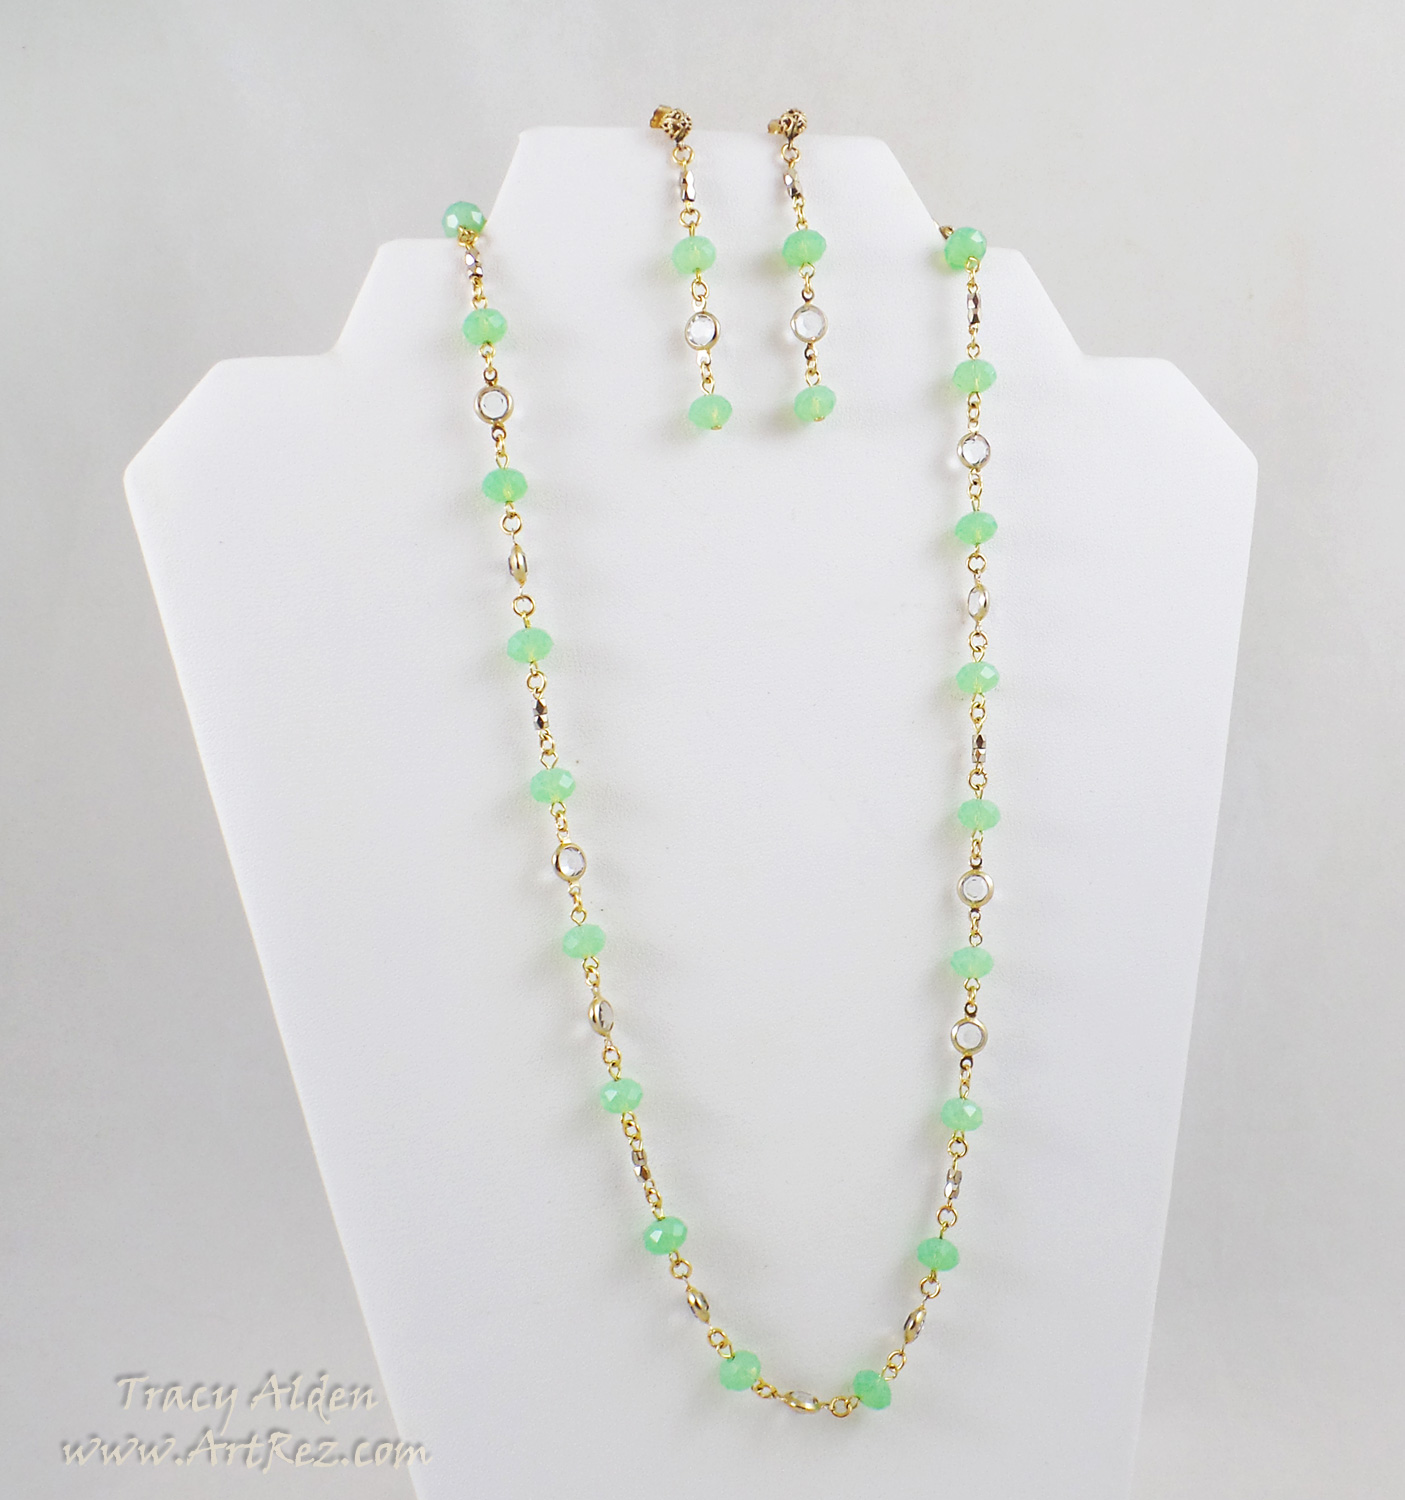
“Uranium Ball”, Neon green crystal beads (a discontinued line of crystals from Bead Gallery®?), vintage crystal and gold plated links, vintage gold plated spacer beads and vintage gold plated findings.
Once again the beads were my starting point of the design, the odd, almost glowing hue of the crystal beads made me think of Uranium glass. Uranium glass (also known as Vaseline glass), was glass tinted with Uranium to striking tones of green, was made into tableware and household items in the 1800 and early 1900s. Taking inspiration from the jewelry styles of the 1910-20s I created this set using mostly broken vintage jewelry pieces I have collected over the years.What type of wearable art could you create with a Spring destash of supplies?
Until Next Time, Safe Travels!
Craft & Hobby Association Mega Show 2016 part 1
Time for my Craft & Hobby Association Mega Show 2016 recap, part 1! CHA, otherwise know as the Craft and Hobby Association, has a Mega Trade Show once a year, full of arts and crafts manufacturers, new products, tech, demos, classes, designer showcases, new trends and networking galore.
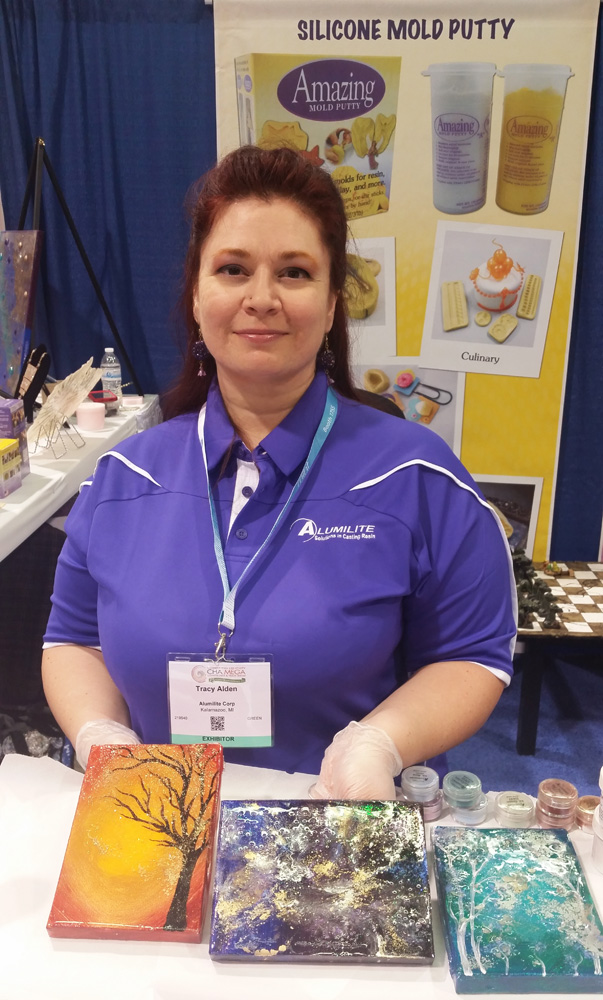
In this part of the recap I will be focusing on the Amazing Casting Products/Alumilite Corp booth at CHA. The Amazing Casting Products Design Team, of which I am proud member of, was asked to submit some of our best projects to be showcased at their booth and to do demos. I took loads of photos of the booth so lets take a tour of the booth, see the artwork and meet the artists showcased!
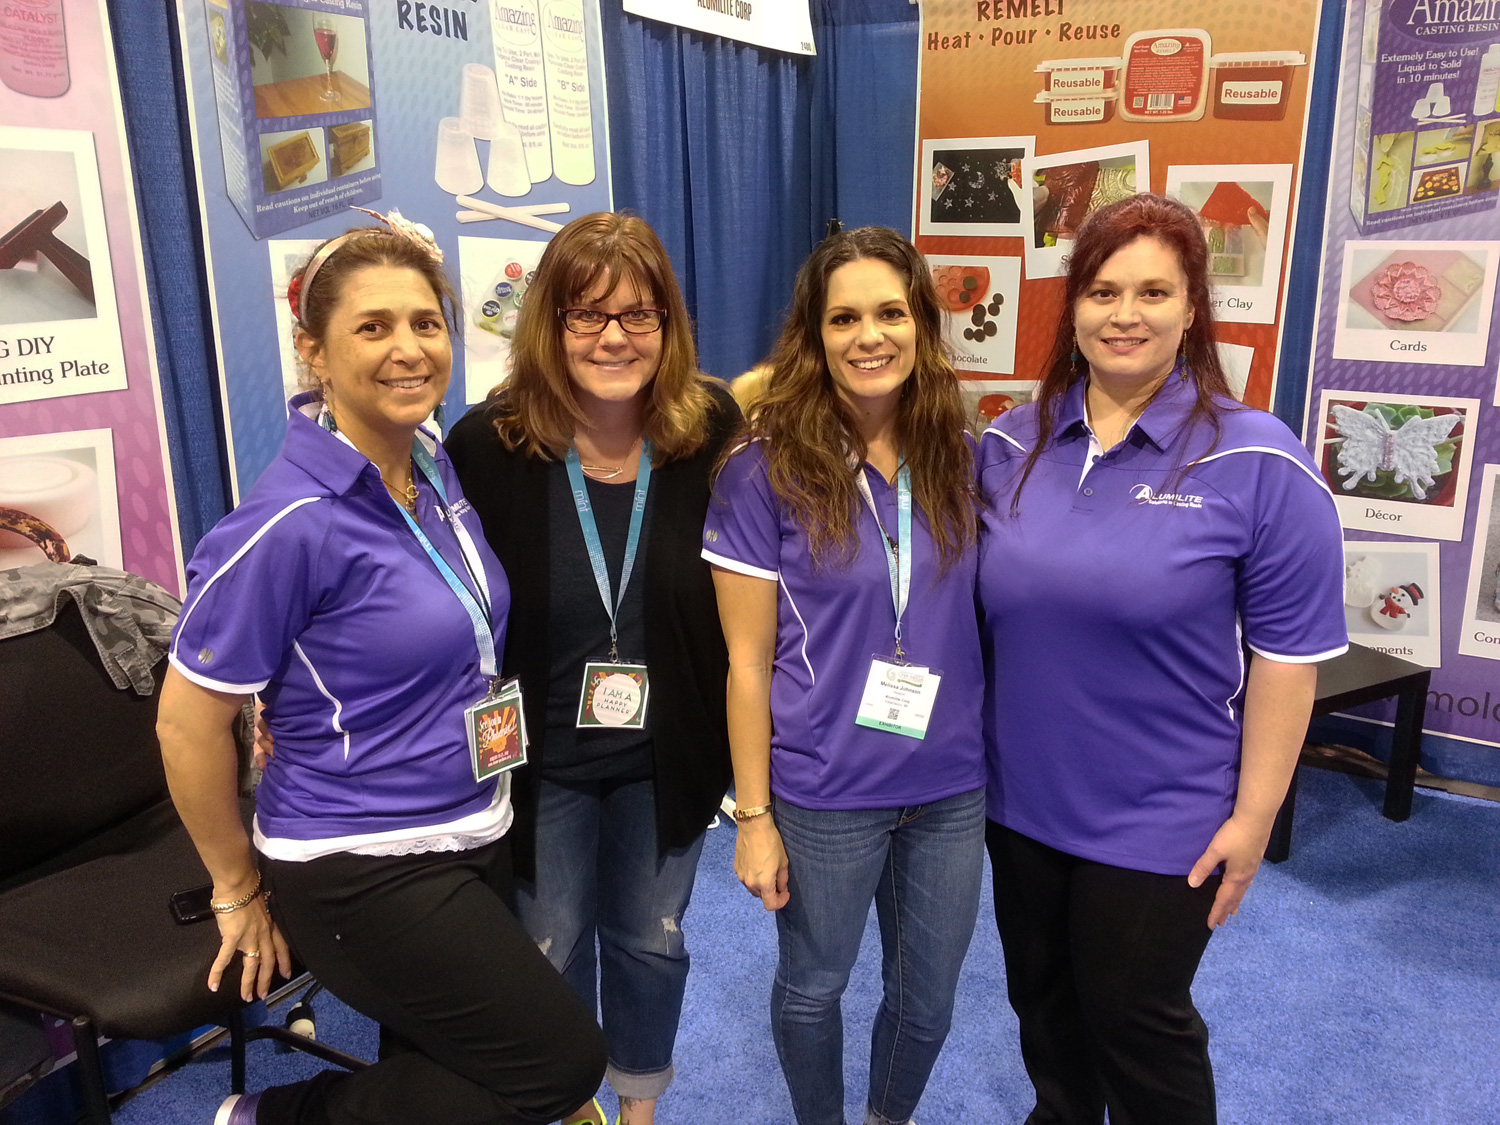
First day of artists doing demos at the booth, Design Team Leader Susan M. Brown, Tina Walker, Melissa Johnson and I. It was so wonderful to see Susan again and finally meet Tina and Melissa in person!
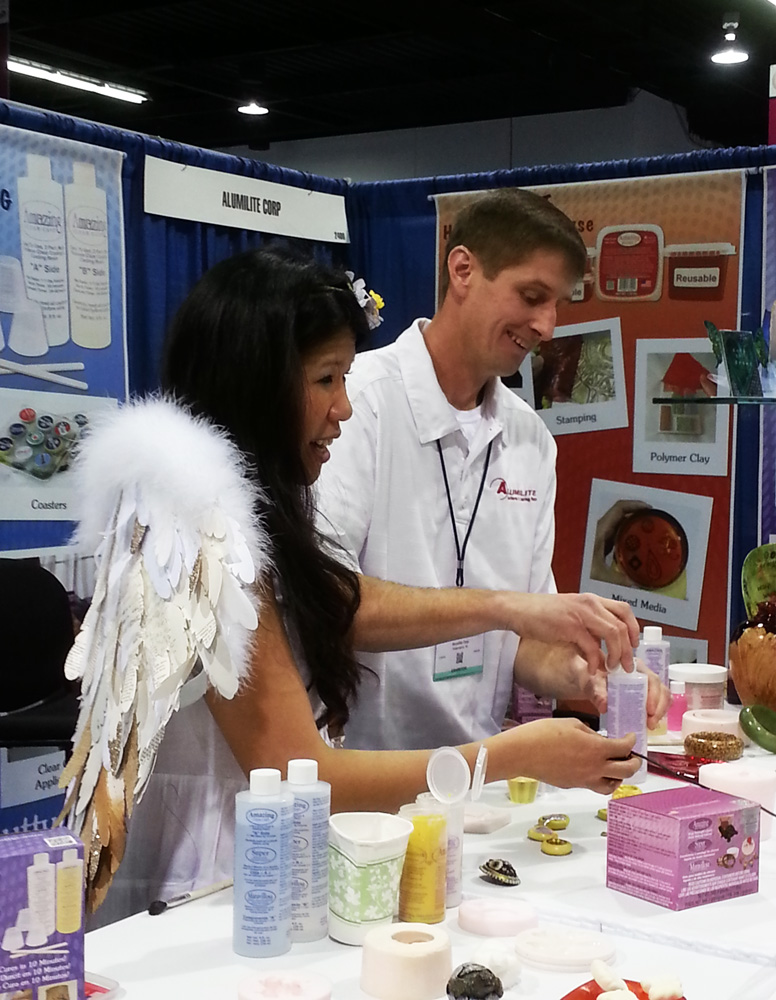
Elena Lai Etcheverry of Charity Wings stopped by the booth to talk to President of Alumilite, Mike Faupel, about all of the crafty applications and products of the amazing Casting Products line!
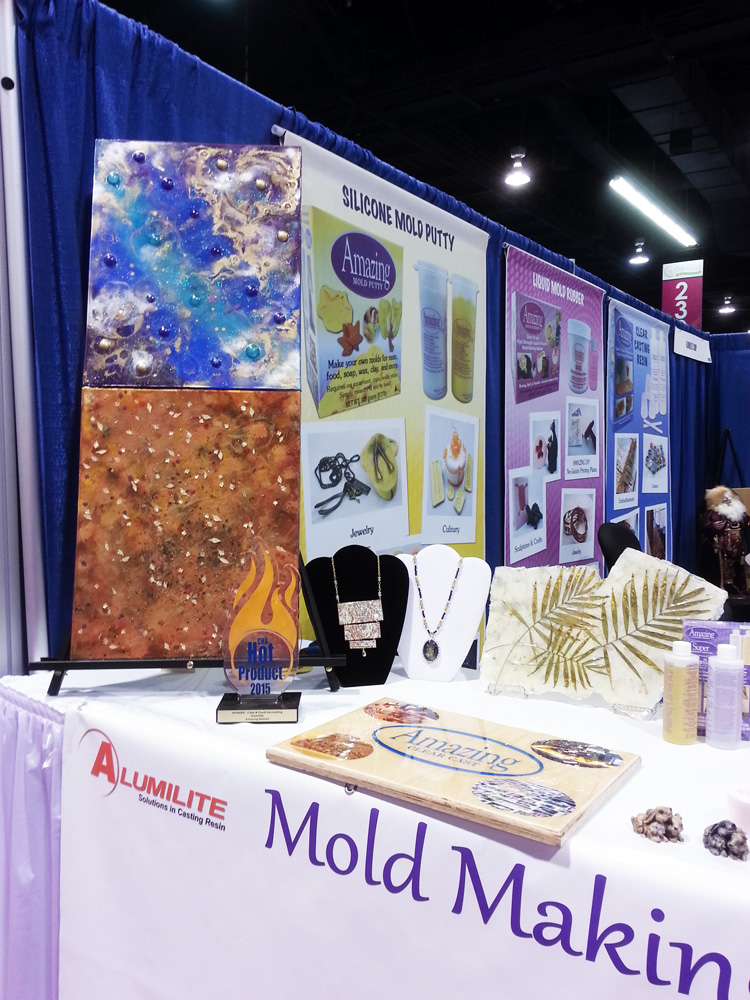
This year I decided to create some booth samples showing not just traditional uses for resin but how Amazing Clear Cast can be applied to paper, canvas and dried plant life.
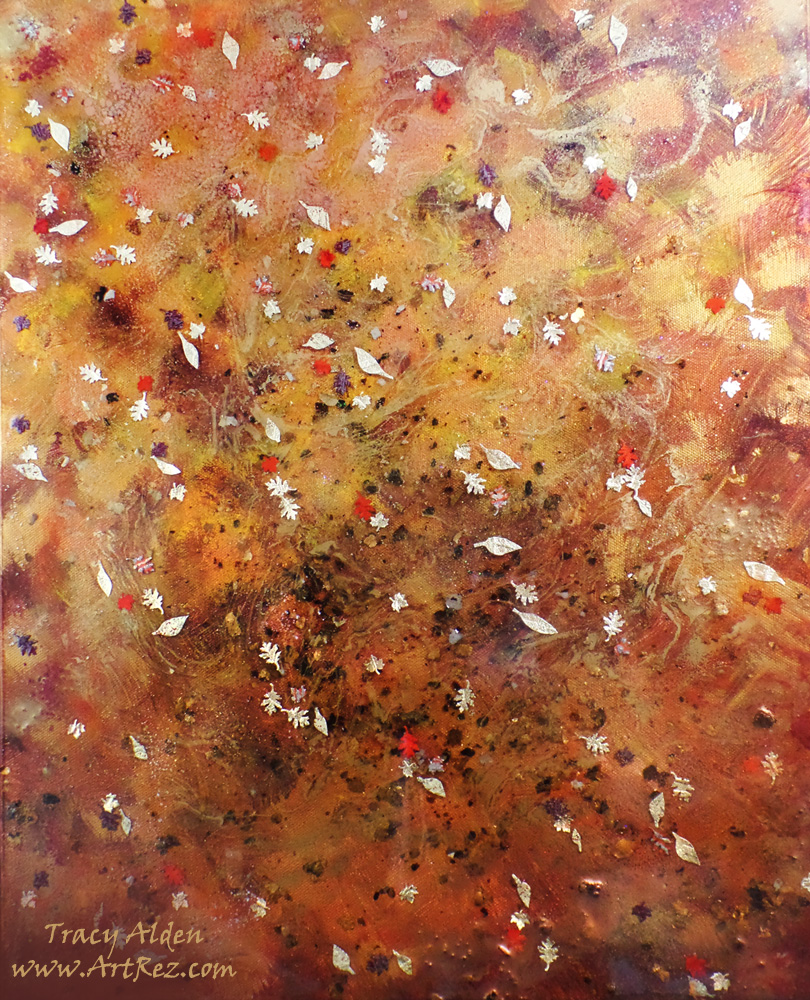
Here is a close up of my 16X20 Autumn canvas, I wanted to show how simple papercrafting supplies could create a lovely home decor piece. The base layer is canvas painted with acrylic paint, with a thin layer of Amazing Clear Cast, some glitter and tiny gold beads. To the second layer of resin I added Alumidust powders, more glitter, mica flakes and tiny paper leaves. The third and final layer had a base of glitter and top layer of resin to seal all of the embellishments in.
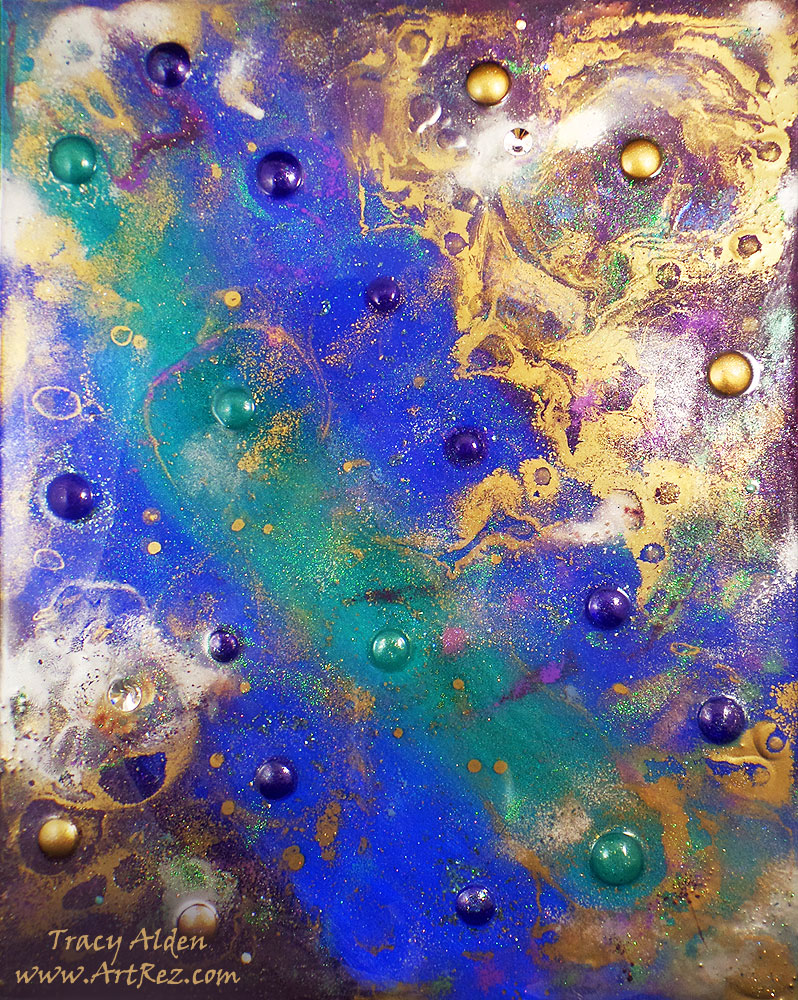
Here is my 16X20 Abstract canvas, which reminds me of a Nebula. I started by casting some cabochons in Amazing Casting Resin and Amazing Clear Cast tinted with Alumilite’s Dyes and metallic powders. I painted the canvas with acrylic paint and poured a layer of clear resin, placing the cabochons on the canvas, along with different glitters and small beads. The next two layers were applied in a manner similar to the Autumn canvas.
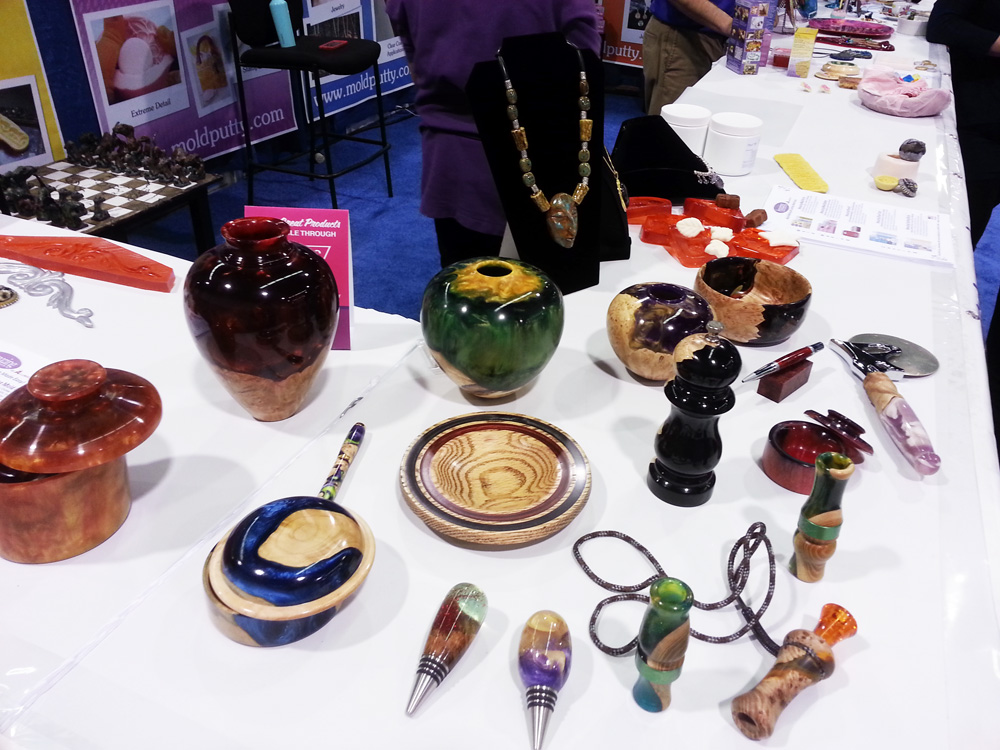
Mike Faupel commissioned these stunning wood and dyed resin pieces from an artist in Michigan. They were created by pouring Amazing Clear Cast over wood and carved on a wood lathe.
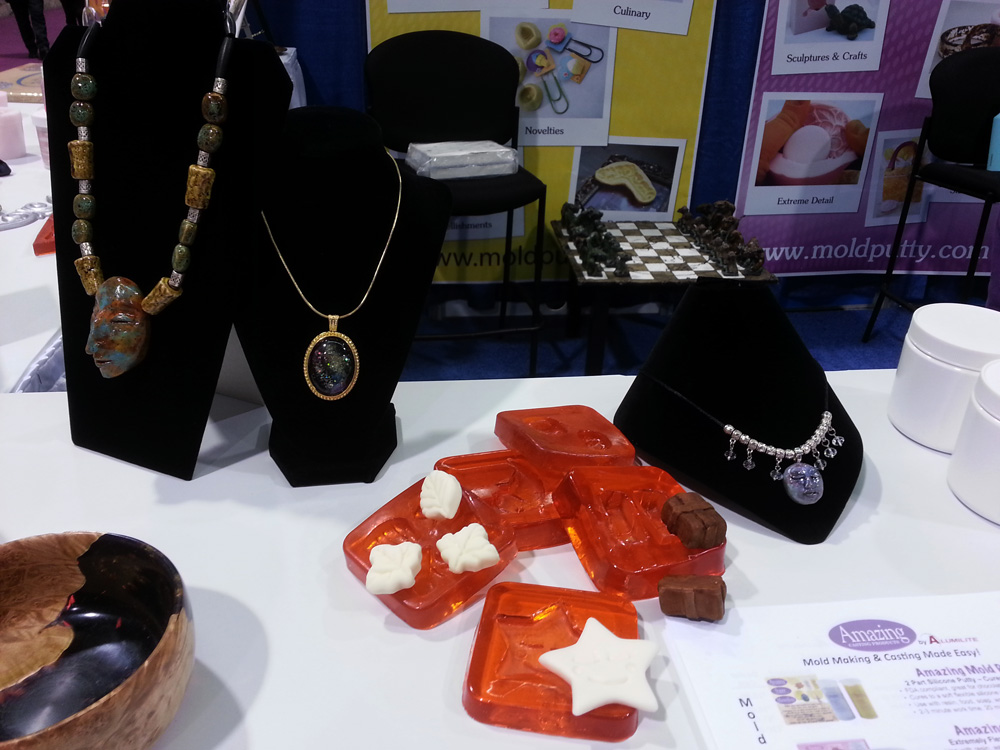
More of my jewelry and Remelt samples on display at the booth. The Mesoamerican necklace tutorial can be found here.
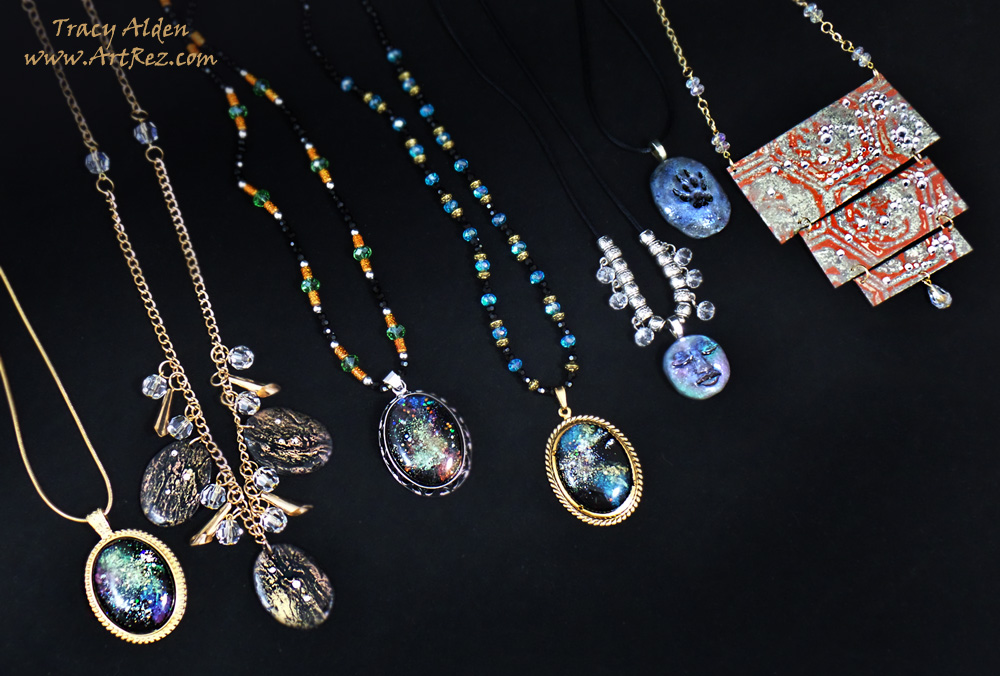
Here is a close up of some of the new resin jewelry pieces I made as booth samples for this year’s CHA show.
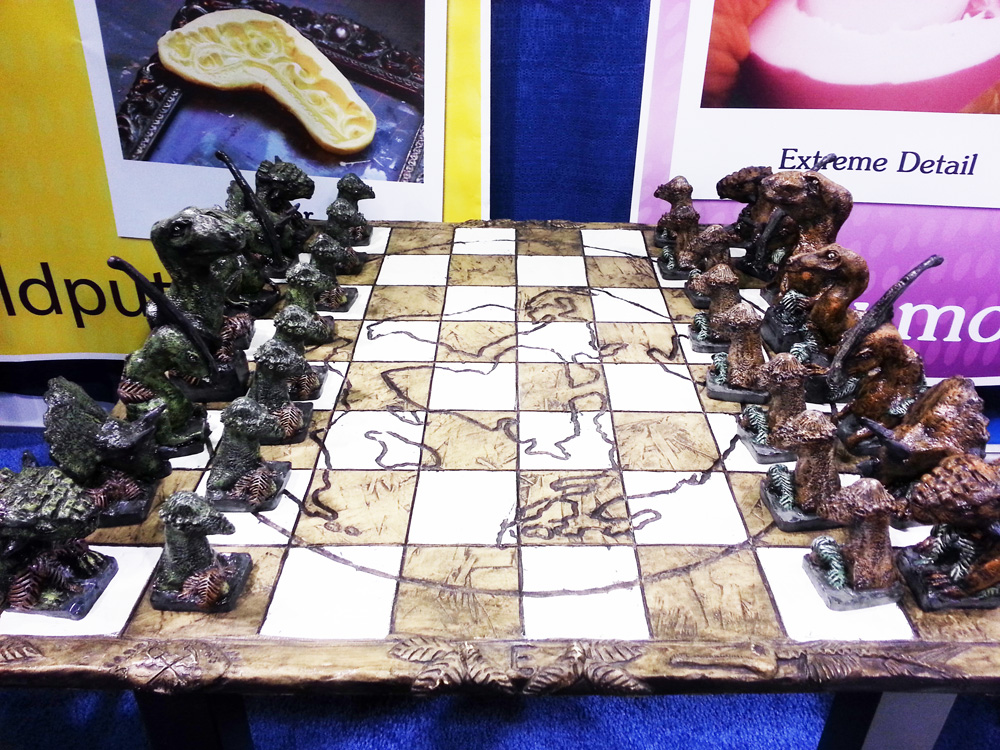
An associate of Mike Faupel created this wonderful and rather fun Pangaea chess set. It’s all made out of Amazing Casting Resin and molds made of Amazing Mold Rubber. The artist who created the set made sure each dinosaur had a different facial expression and were all hand painted!
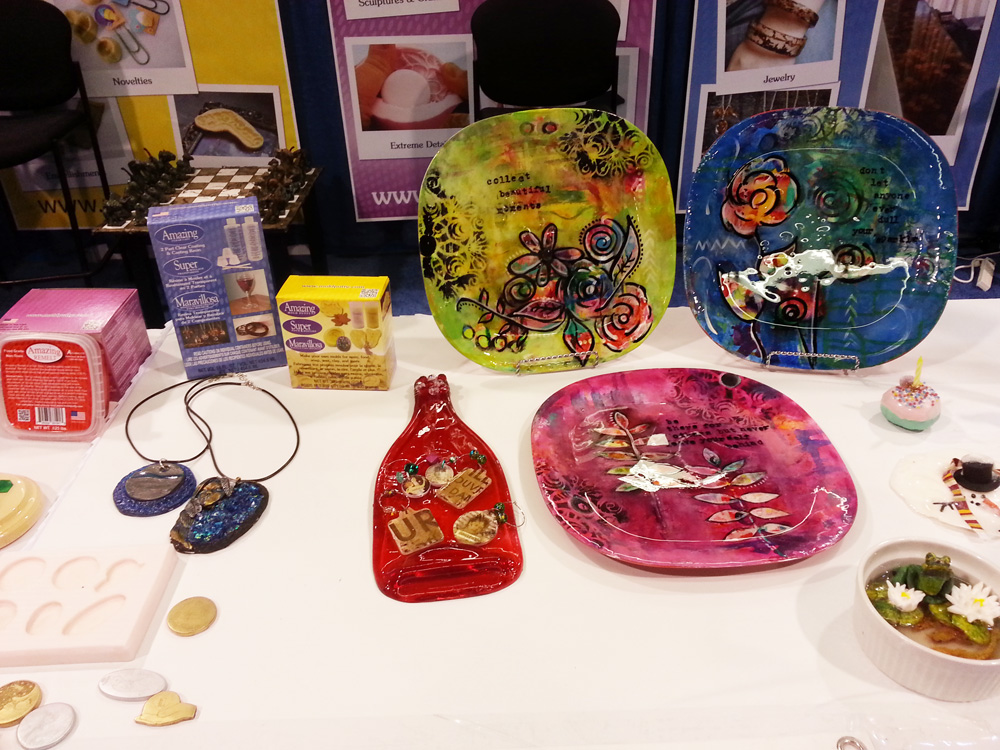
Melissa Johnson‘s beautiful food safe hand painted resin plates were just lovely in person. You can see one of Brenda Burfeind‘s wine bottle shaped resin cheese platters next to the plates, to the left one of Lyn Gill‘s polymer and resin pendants, and on the right you can see one of Sandra Strait‘s hand painted mini fish ponds.
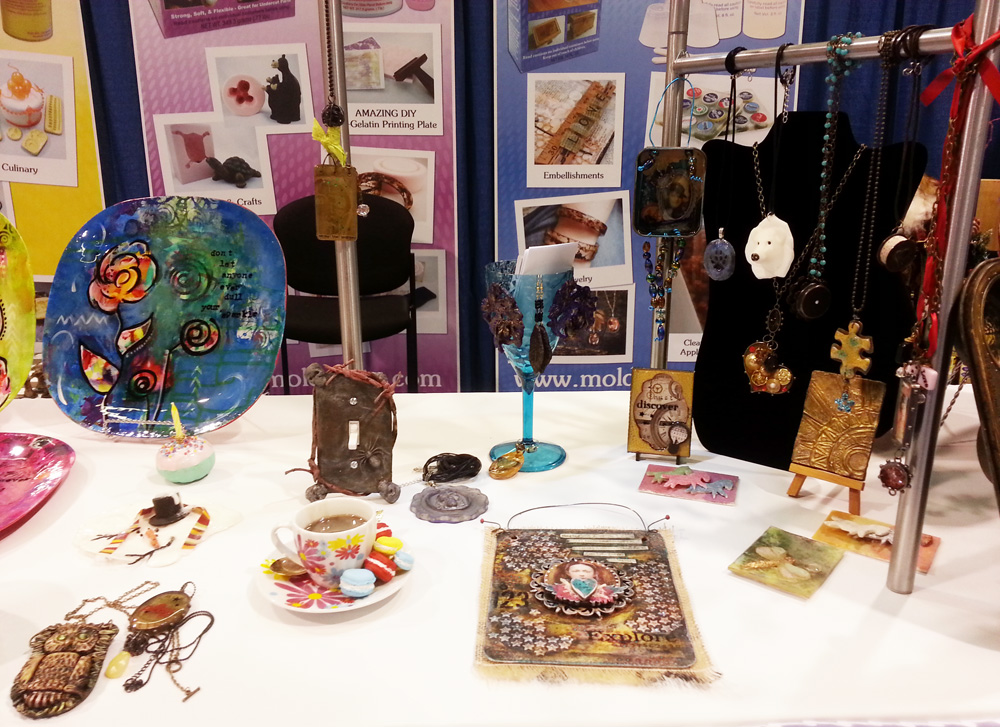
The booth was just full of beautiful Design Team artwork, from Susan M. Brown, Melissa Johnson, Lyn Gill, Maria Soto, Rachel Whetzel and more, along with pieces made by Cat Kerr; my photo doesn’t do her work justice so please make sure to hope over to her blog to see her work!
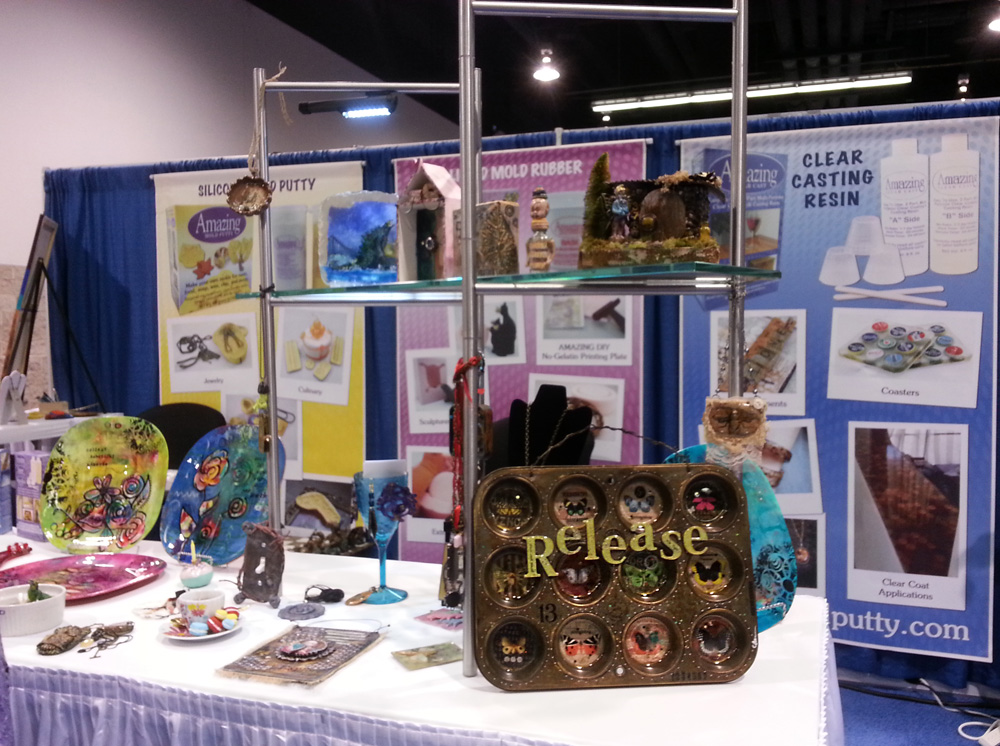
There was even more amazing work from Cat Kerr, Tina Walker, Sandra Strait, and Aimée Wheaton.
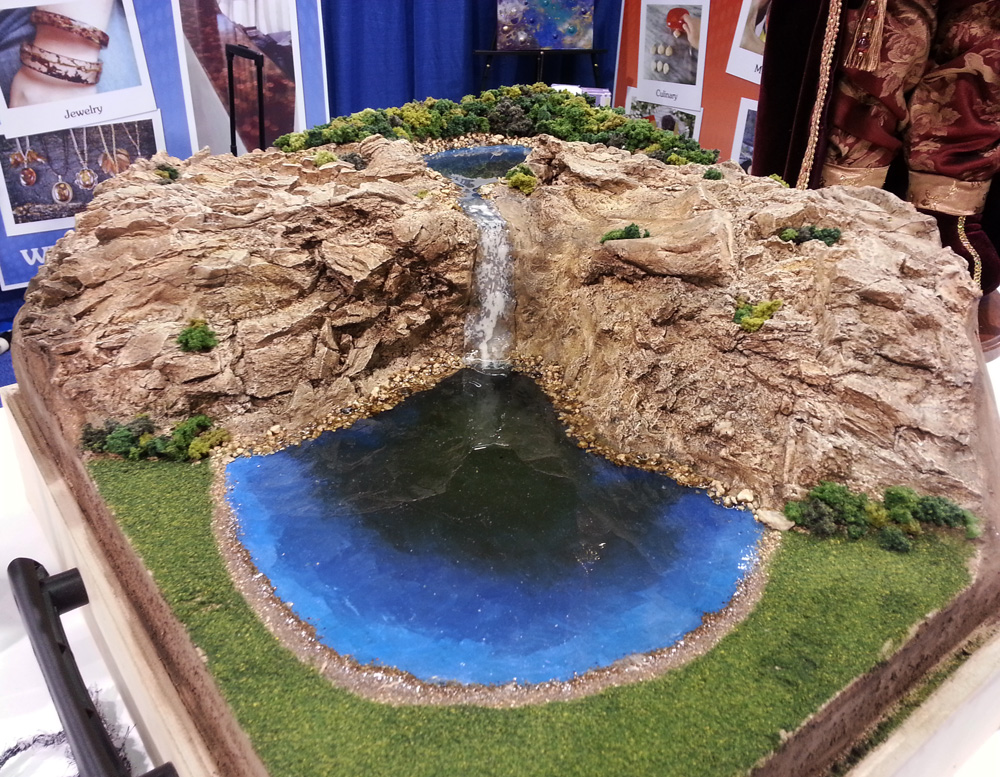
This beautiful model miniature was made of out Amazing Casting Products, from the rocks, water and inner core by the very talented Lloyd’s Layouts. Their use of resin and mold making products to create realistic miniature scenes is outstanding!
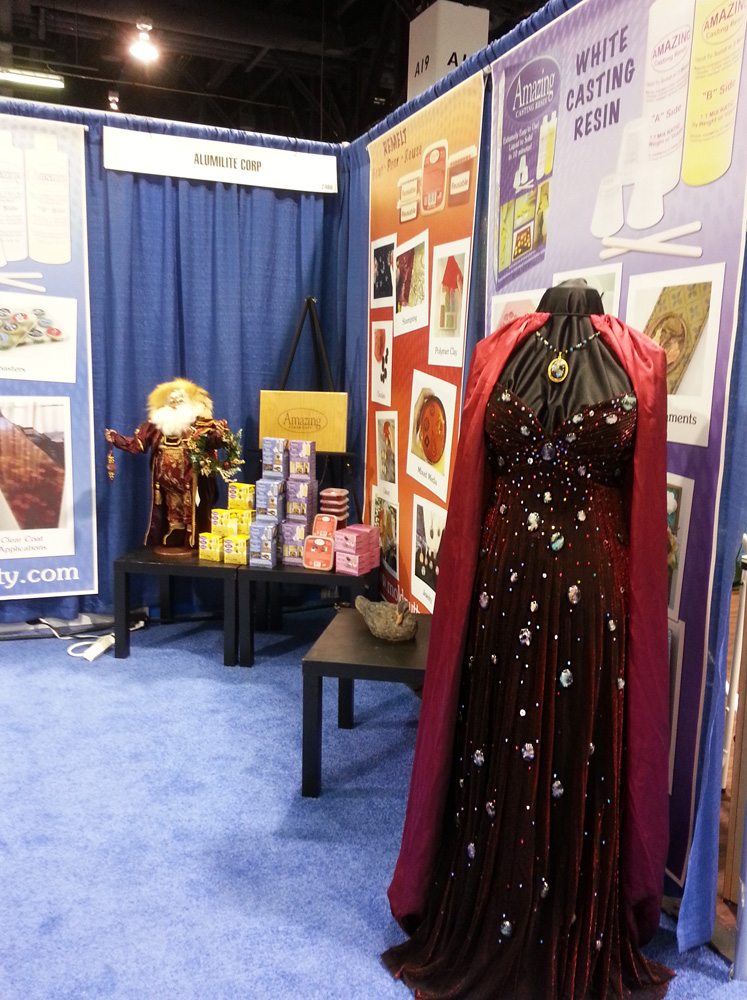
The handsome Santa in the background was made with Amazing Casting Resin and my “Cosmic Radiation” gown was on on display again at the booth
For demos at CHA I decided to show how to apply resin, powders, glitters and beads to acrylic painted mini 5X7 canvases. Each day of the show I showed to apply a new layer of resin with embellishments. People responded so well the demos I already have two orders for the mini canvas art!
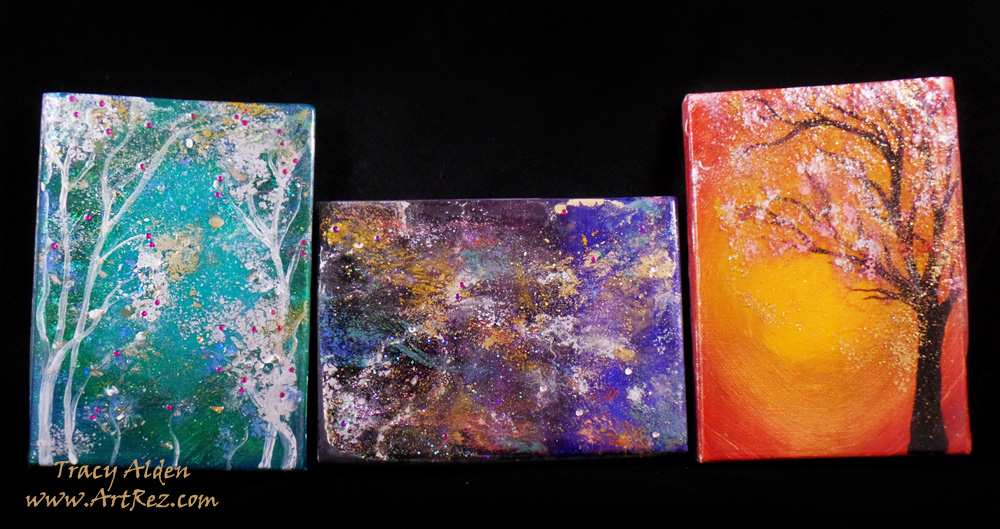
Once home I sanded the edges of the canvases and prepared them for the final coat of resin. I can’t wait to make more.
Come back later for Craft & Hobby Association Mega Show 2016 post, part 2!
Until Next Time, Safe Travels!
- Amazing Casting Products, Beads, Fiona Accessories, Halloween, Home Decor, Jewelry, Mixed Media, Paint, Recycling, Resin
An Artistic Halloween Haunting Recap!
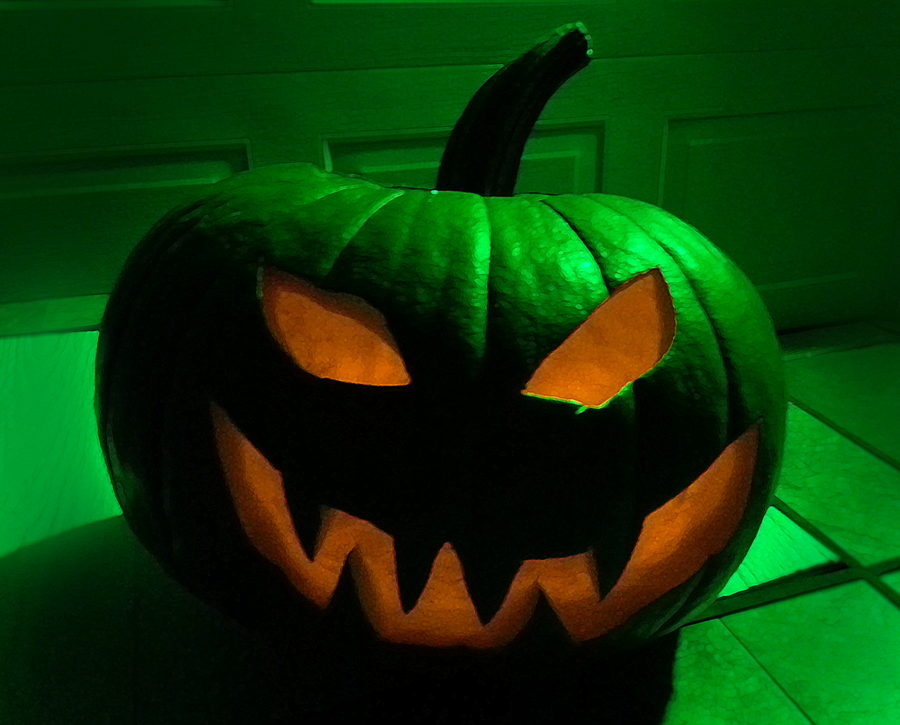
Welcome to my Artistic Halloween Haunting Recap! The month of October and all of the Halloween goodness flew by so fast, but I wanted to share some of my ghoulish crafting fun before Halloween is just a faint promise of next year.
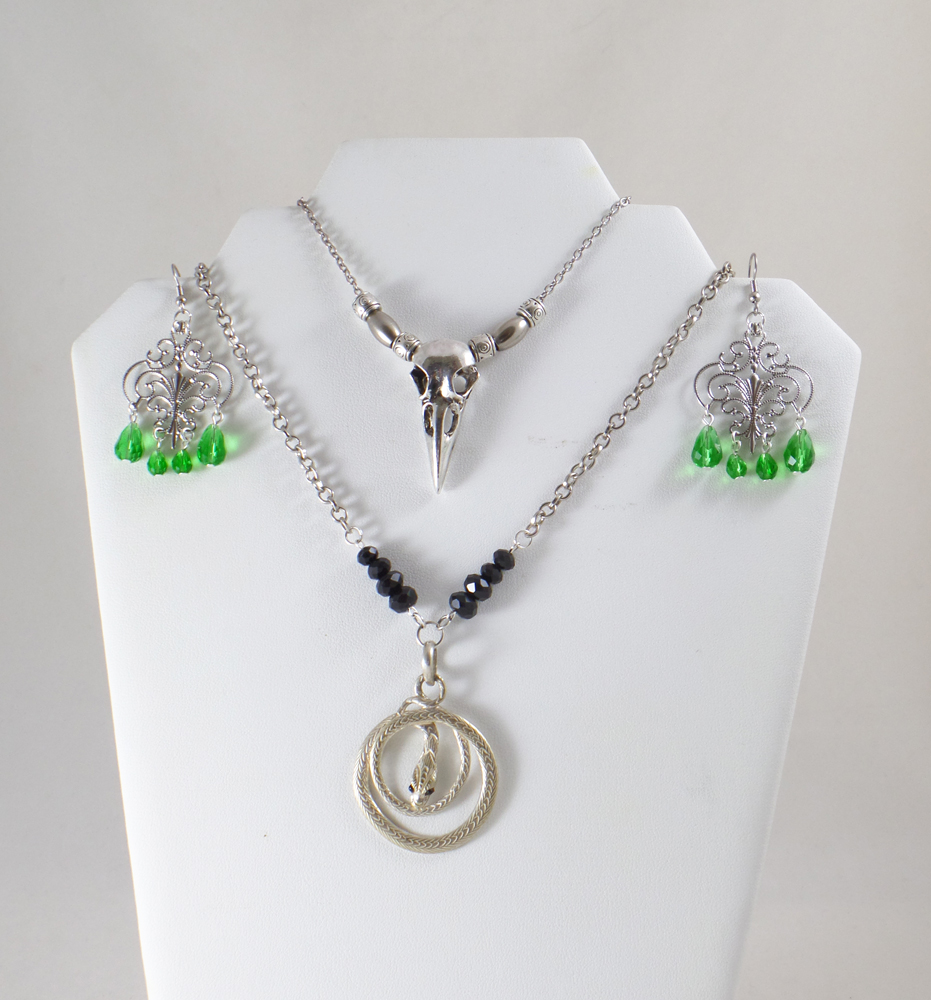
Using some wonderful chains, crystals and beads from Fiona Accessories I created this jewelry assemble for my spellbinding costume of a Gothic witch. The sterling silver snake pendant was hand crafted in Nepal and really played well with the raven skull I had bought recently.
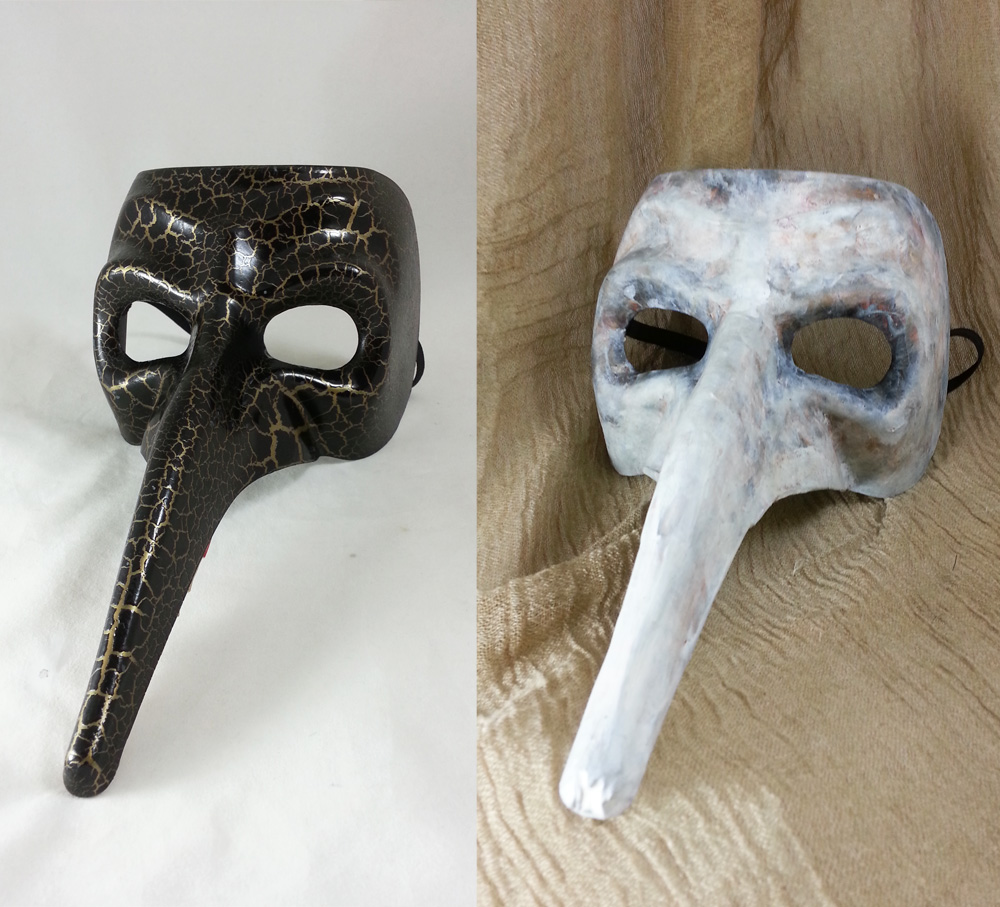
I transformed this plastic Italian Carnival mask into a Plague Doctor mask using paper mache, paint and Liquitex Matte Varnish. However I wasn’t finished there and created the rest of the look:
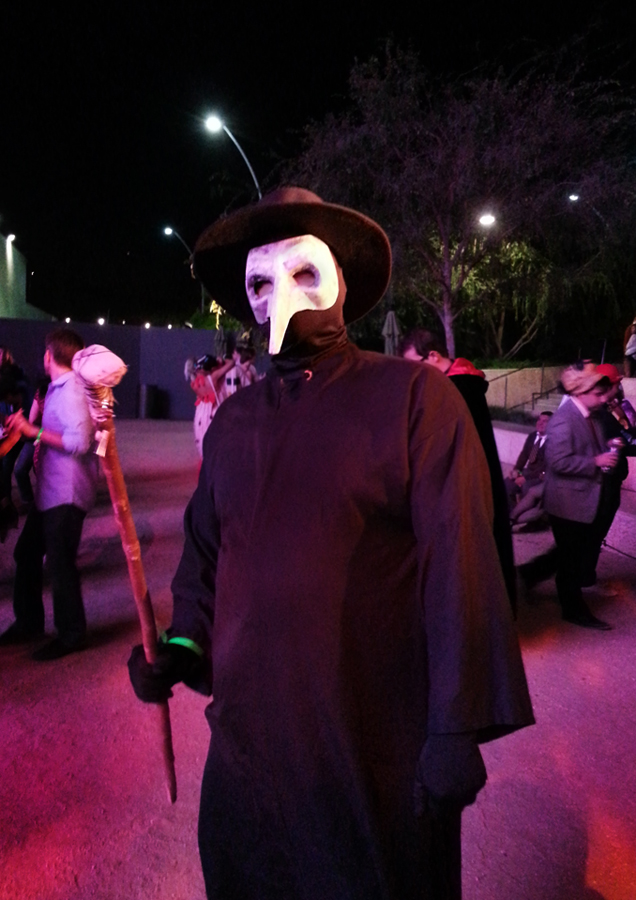
With the addition of a black heavy weight line robe, hood, gloves, hat and walking stick it made a perfectly frightening Plague Doctor costume for my husband.
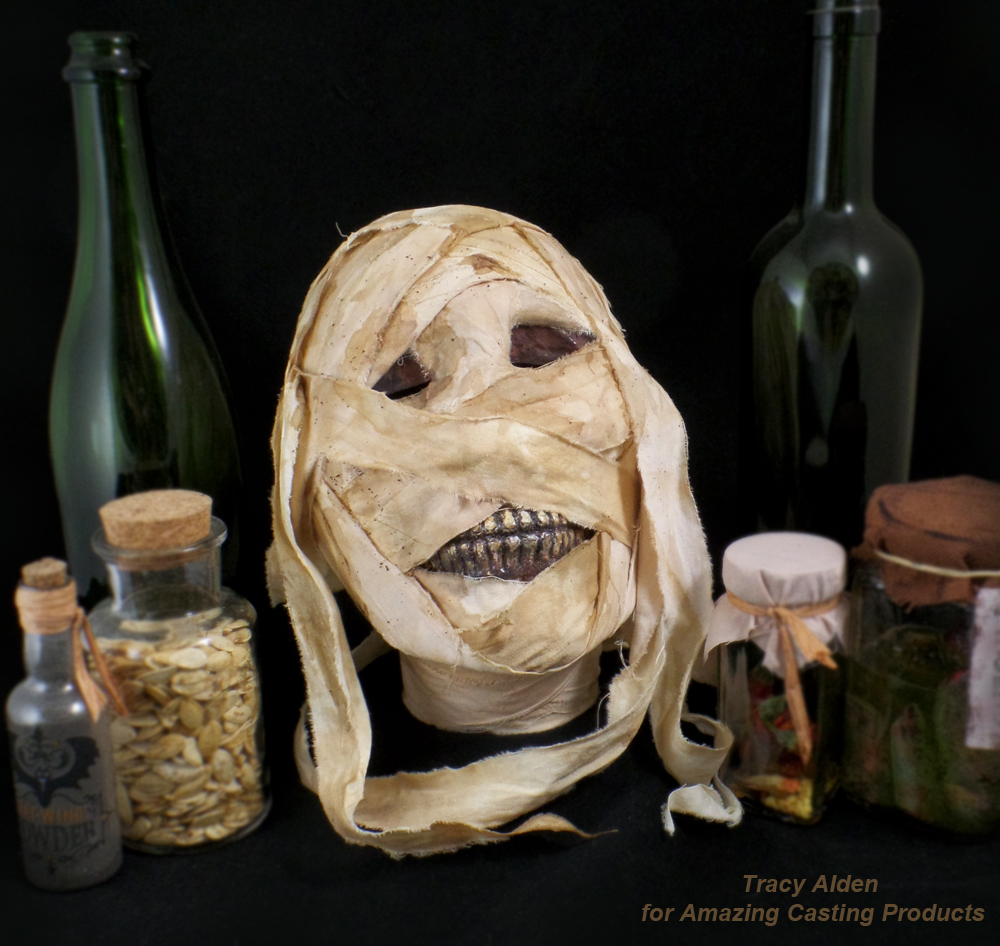
I created a replica mummy head using a plastic Halloween skull and the help of Amazing Casting Products. Clicj HERE for this Upcycled Mummy’s Curse!
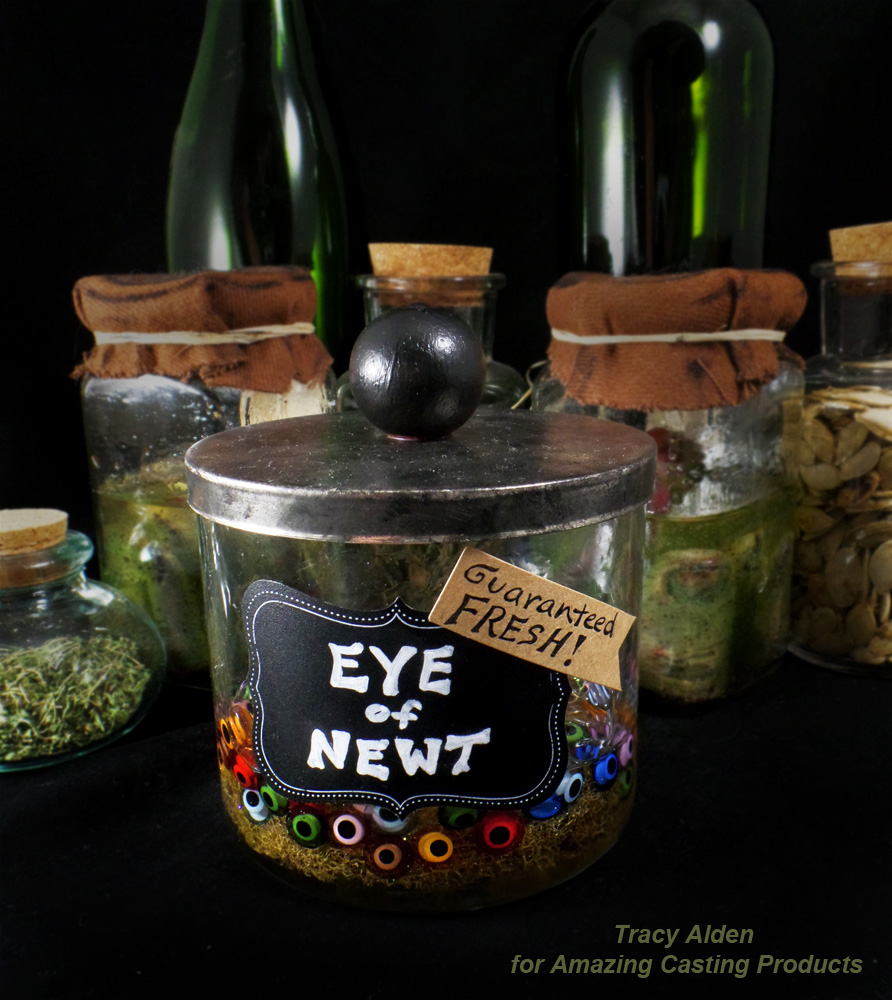
Taking inspiration from one of William Shakespeare’s most famous plays, Macbeth, I created a Eye of Newt Apothecary Jar, spooky enough to keep any monster happy!
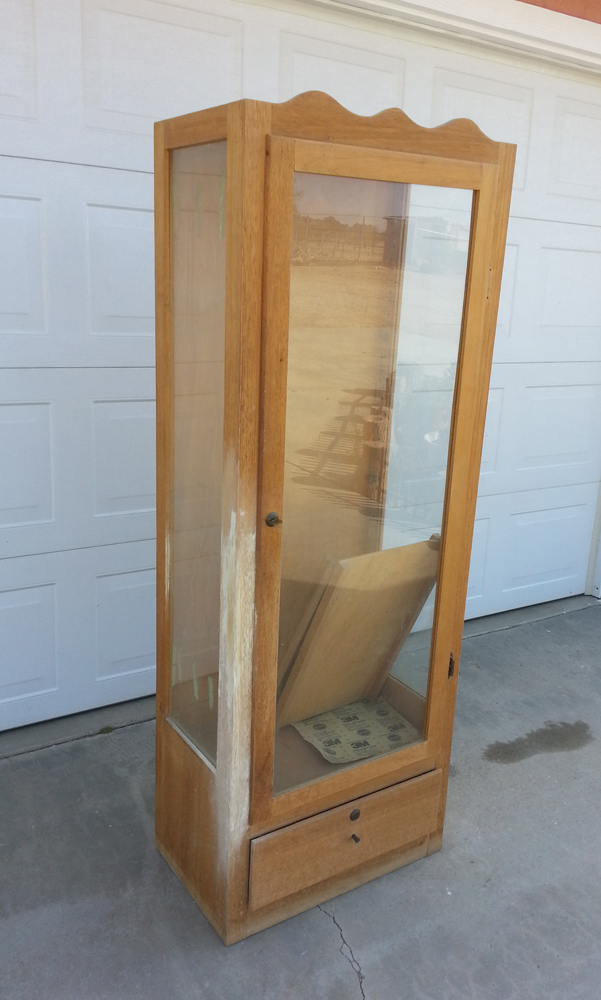
Last but not least my husband and I finally took the time to refinish a old cabinet that had been in the family longer than me. After patching, sanding, staining and varnish it was ready to become a Halloween curio cabinet!
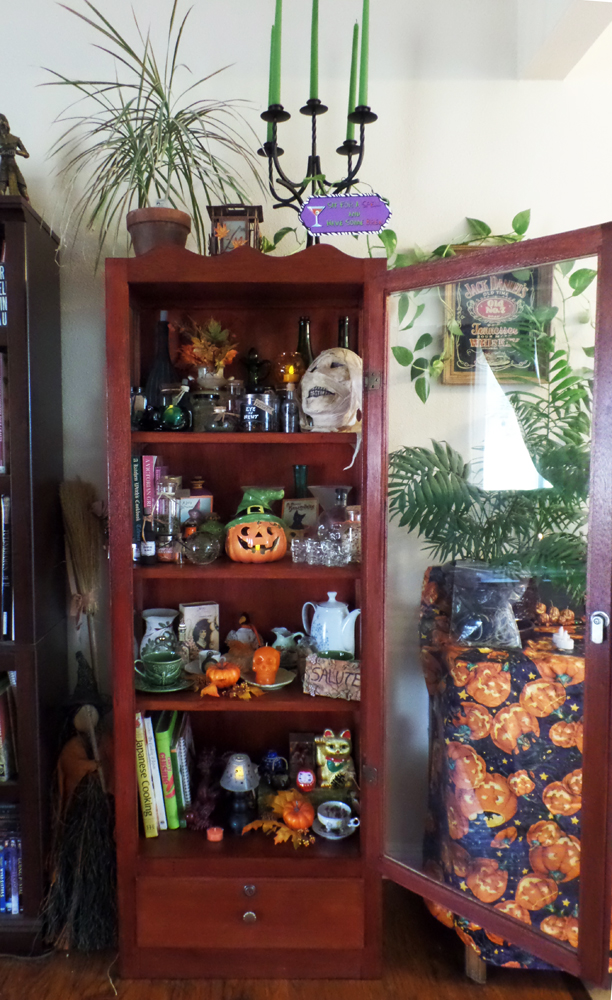
Not bad for our first attempt at giving new life to an old piece. Once filled with fun holiday decor it made a perfectly frightening Halloween decoration. With Halloween gone and past now I can fill it with with antiques and little curios befitting of Fall.Now to start on art projects for Fall and the coming Winter!
Until Next Time, Safe Travels!
- Acrylic, Day of the Dead, Día de los Muertos, Fiona Accessories, Home Decor, Mixed Media, Paper Crafts
Day of the Dead Papier-mâché #Cre8time Inspiration
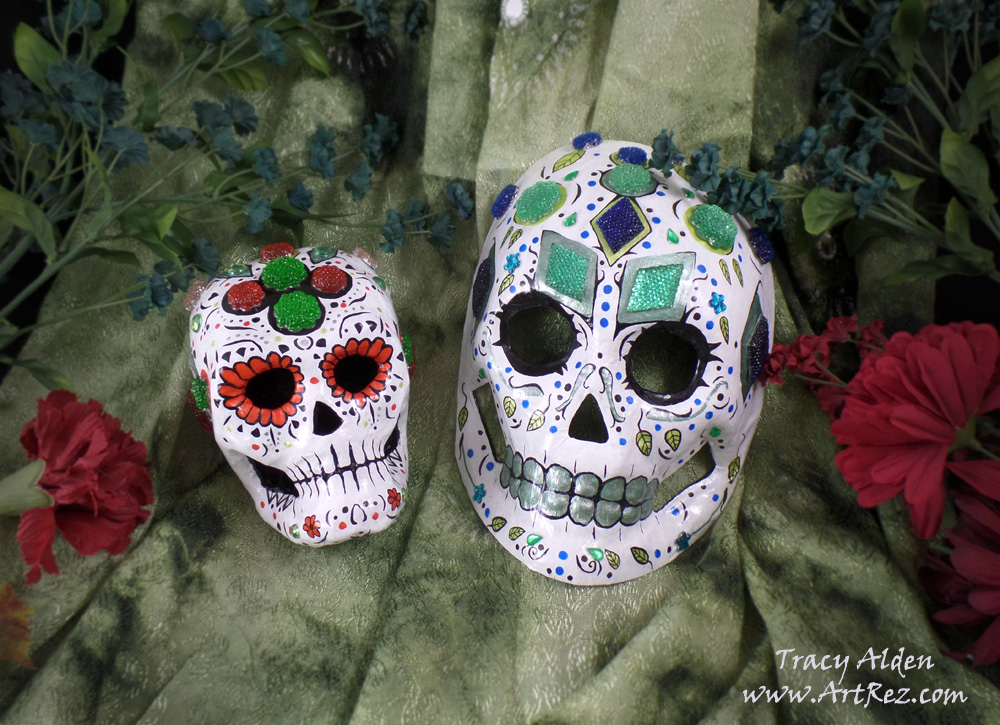
I am a huge fan of Day of the Dead festivals and artwork, even if it is a wee bit ahead of the calendar date! I was inspired to create these pieces after going to Linpeng International Inc./Fiona Accessories to visit with Fiona and Jimmy Lin. They are truly wonderful and talented people with a dedication to creating beautiful hand painted beads, jewelry and beading supplies, and I am grateful for meeting Fiona at the Craft and Hobby Association Trade Show in 2014. At this visit, as usual, we discussed beads and jewelry, went over new ideas and displays, but Jimmy showed me something a bit different this time: little packages of Acrylic flat back gems, normally used for scrapbooking, in a wide variety of colors. He asked me if I could think of any other applications and the first thing that came to mind was covering papier-mâché skulls with the gems for Day of the Dead decor.
Supplies:
Fiona Accessories Acrylic flat back gems Flower and Diamond shaped in sizes 14mm, 19mm, 22 mm and 20x30mm
Mini acrylic flat backed gems (normally for scrapbooking, nail or shoes)
Liquitex Gloss Varnish
Acrylic Paint
Paint Brushes
Papier-mâché mask and skull by Darice and often sold at Michaels late Summer into Fall
Beacon Gem-Tac (Great stuff, non-toxic and flexible)
Sakura Pigma Micron Pen Set (I just love using their pen sets for any illustrations I do)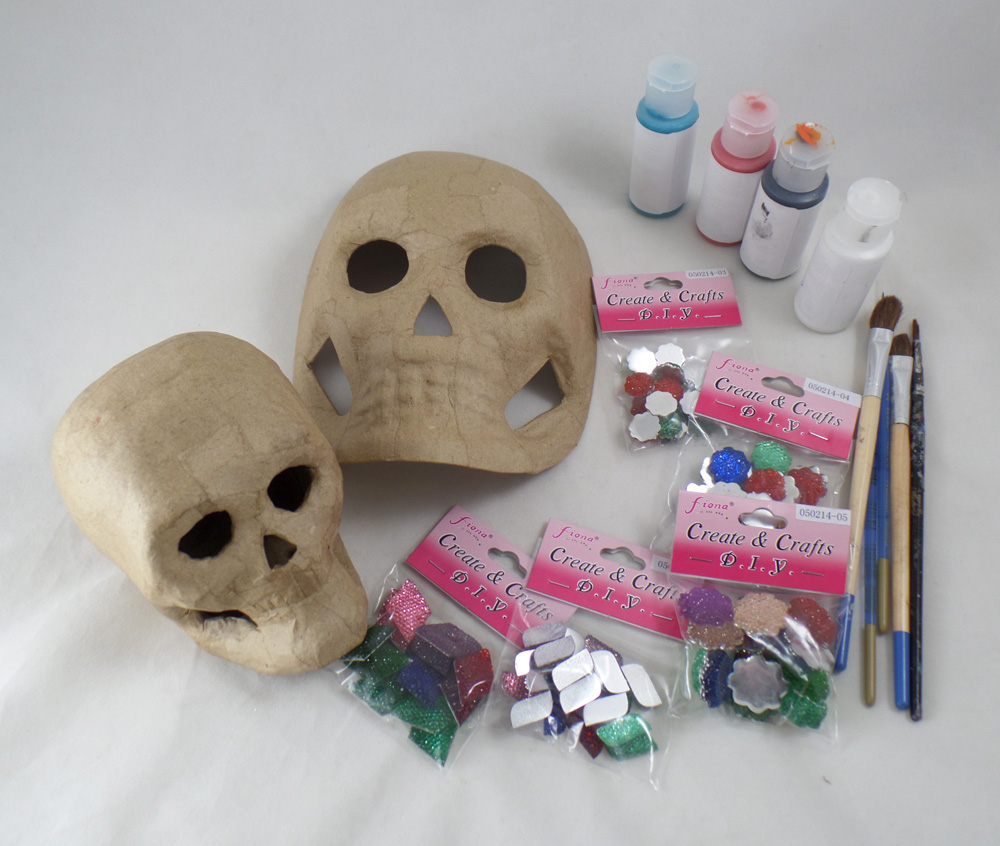
First I gathered all of my supplies, picking colors of paint, acrylic gems, brushes and which papier-mâché pieces I felt would look the best for what I had in mind.
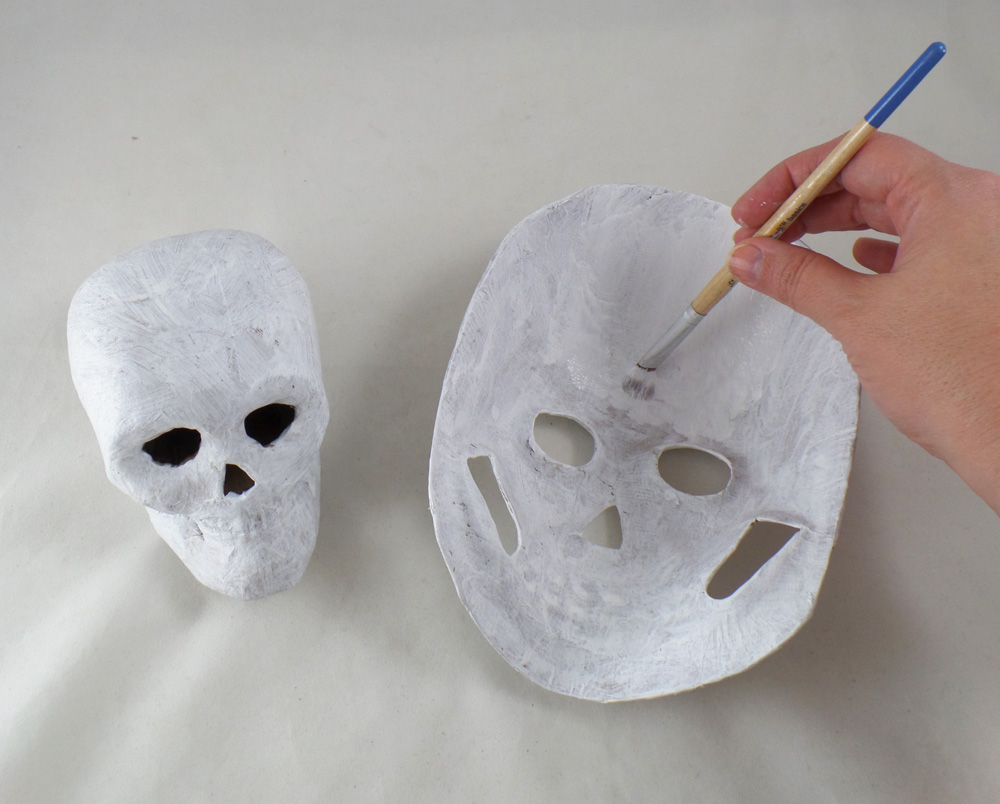
I started by applying white acrylic paint to the entire surface of the papier-mâché skulls. I let each layer of the paint dry completely before adding the next layer to prevent the papier-mâché from getting too wet and losing shape. I noticed that 2-3 coats of paint are normally required to get complete coverage.
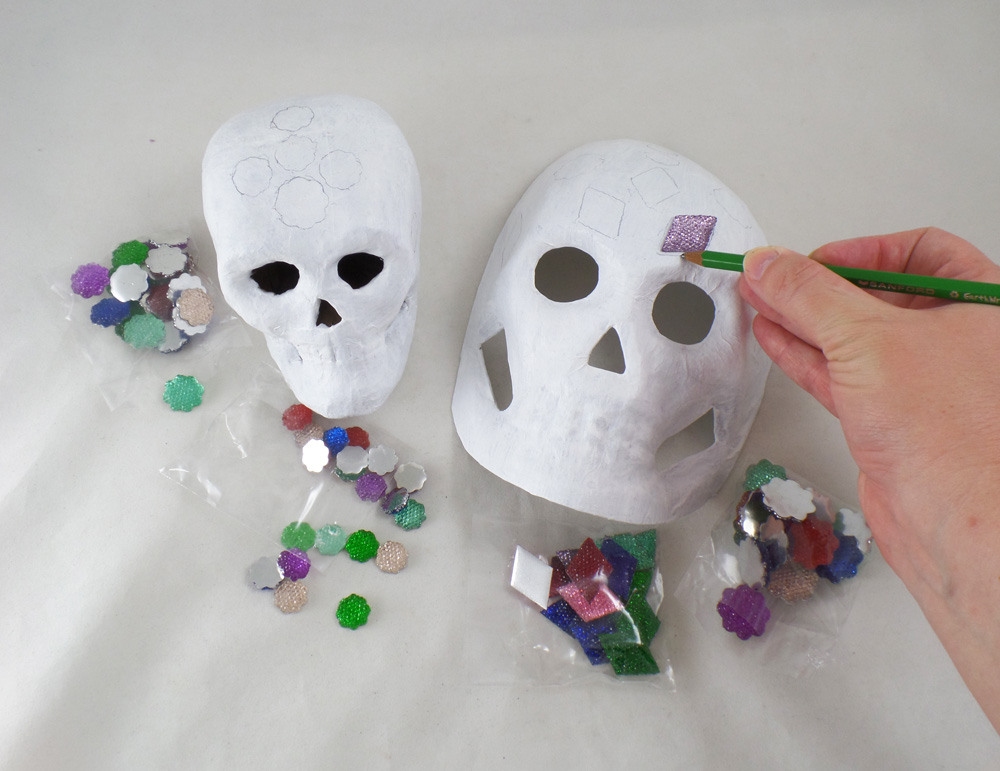
I started to loosely place where I would like the Fiona Accessories Acrylic flat back gems to sit on the papier-mâché and traced outlines in pencil, but I did not glue them on at this point. This would give me outlines to follow and color in with the pens and paint before applying the gems.
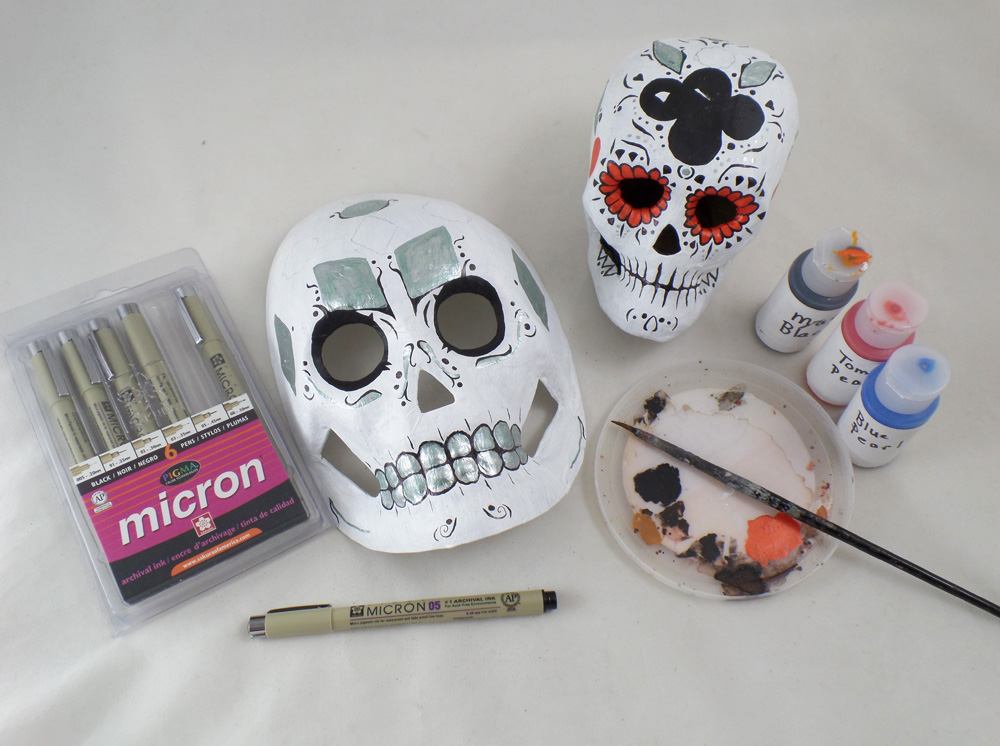
There is no set pattern or design to Day of the Dead masks, as it is a wonderfully free form style of art, allowing the artist to put any variety of shapes, symbols and scroll-work on their pieces. I have a fondness for plant life and organic shapes so I painted flowers, vines and geometric patterns across the pieces in silver, black, red and blue. I outlined key elements with Sakura Pigma Micron pens to make them visually pop more.
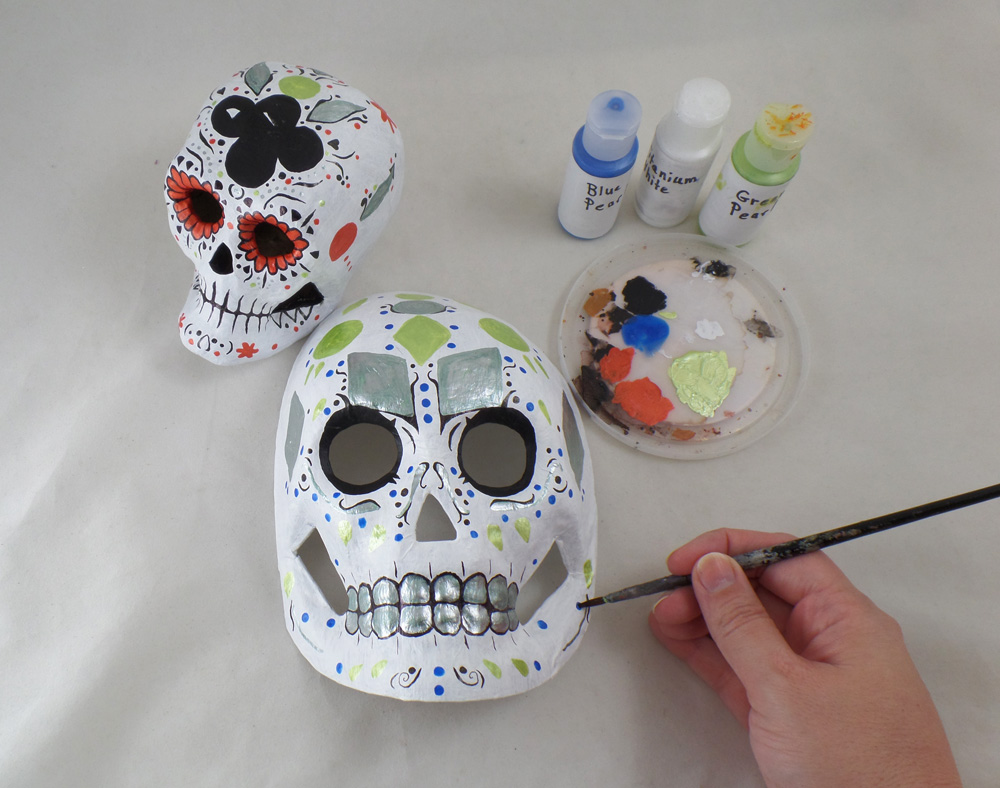
Since I really liked how the silver paint looked I added some leaves and geometric shapes in green pearl paint, along with flowers in red pearl paint. The paint having a slight shimmer would play off the sparkle of the acrylic gems. Applying the paint and drawing with the pens can take some time but I find it rather relaxing and meditative.
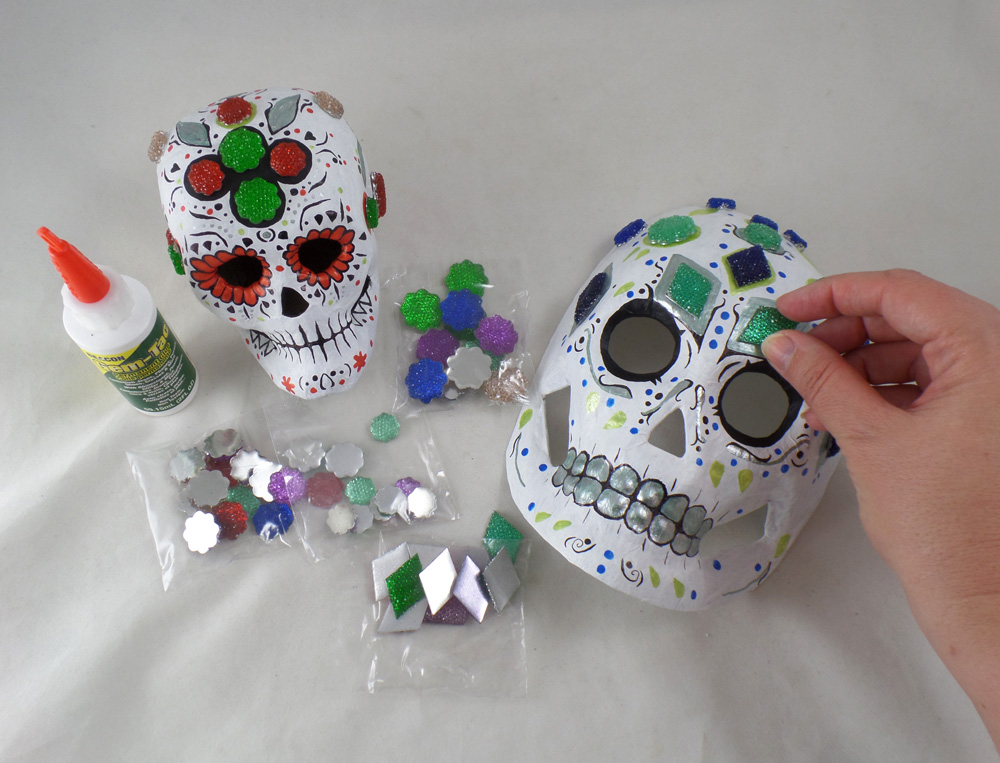
Once the paint was fully dry I applied the Fiona Accessories Acrylic flat back gems to the papier-mâché skulls with Beacon Gem-Tac. A small drop of the Beacon Gem-Tac will go a long way and dry perfectly clear; just holding the gem in place for a few seconds is all that is needed to get the gem to stick to the skulls.
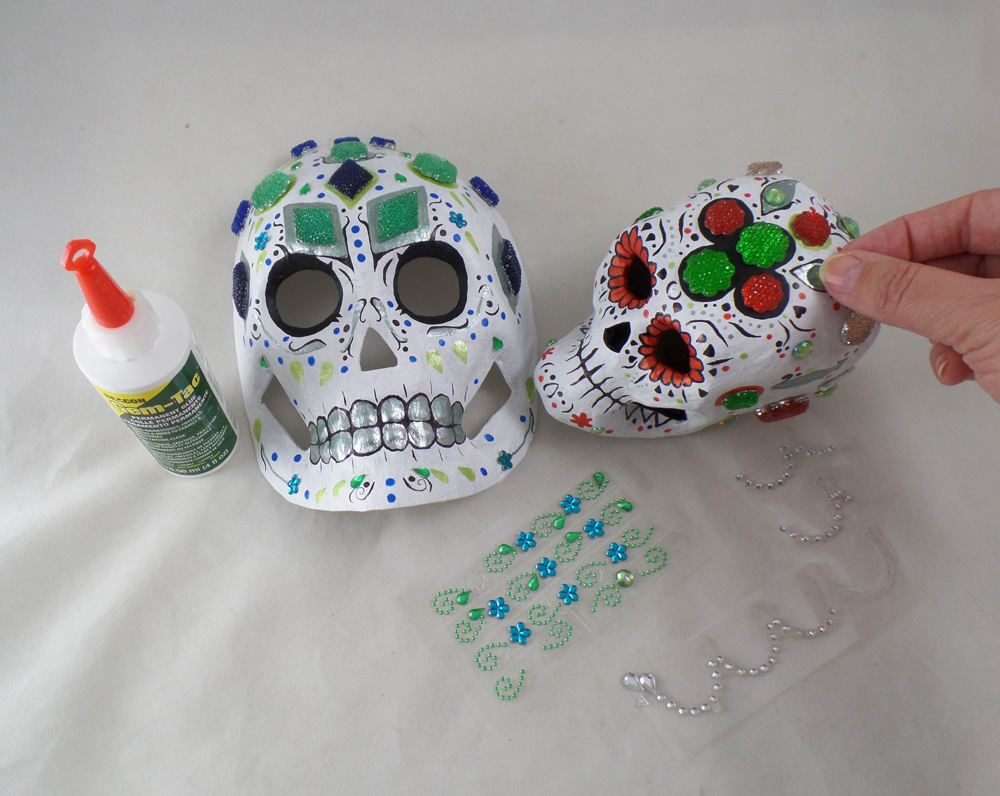
Once all the large acrylic gems were applied to the papier-mâché skulls I filled in the open areas with more paint and pen details, then adding mini acrylic gems with more Beacon Gem-Tac. I let the glue fully dry before going onto the next step.
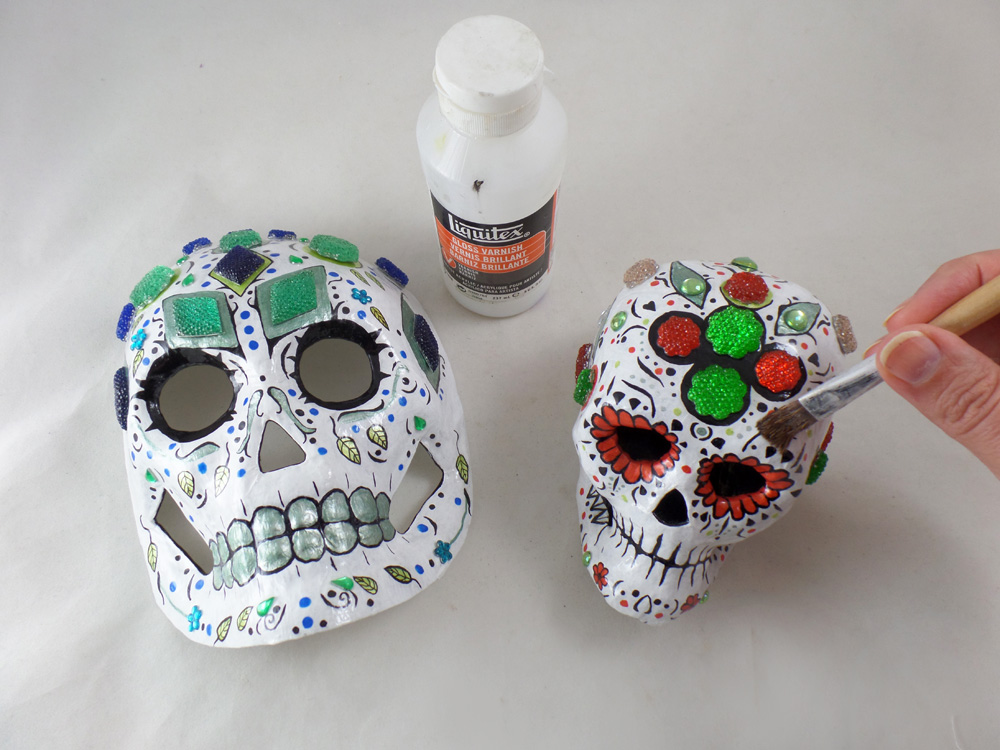
To make sure all of the detail and gems were protected I applied three coats of Liquitex Gloss Varnish to the skulls, letting each layer dry completely before applying the next.
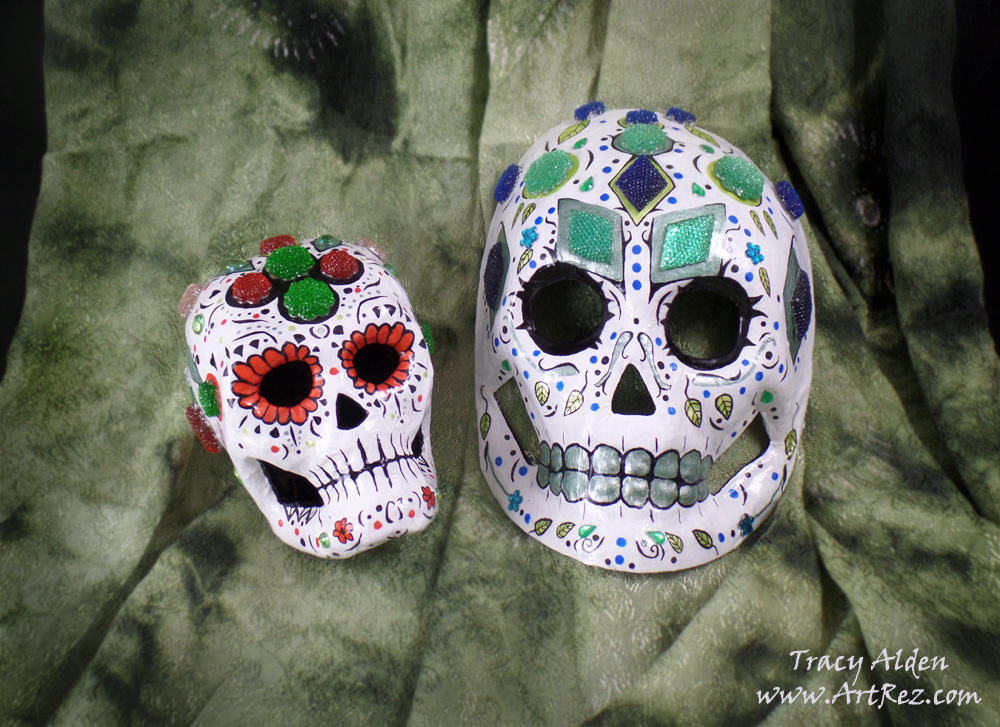
Once the varnish was dry I was able to add them to the rest of my Day of the Dead artwork collection!
Want to share your projects with Fiona Accessories‘s products? Post any projects and ideas on their Facebook Page! 🙂
Until Next Time, Safe Travels!
