A #Cre8time trip to Ancient Greece with Amazing Casting Products and Stencil Girl Products
Hello! Tracy here with something special this month, a wonderful collaboration between Amazing Casting Products and Stencil Girl Products! Showcasing projects by incorporating Stencil Girl stencils along with Amazing Mold Putty and Amazing Clear Cast.
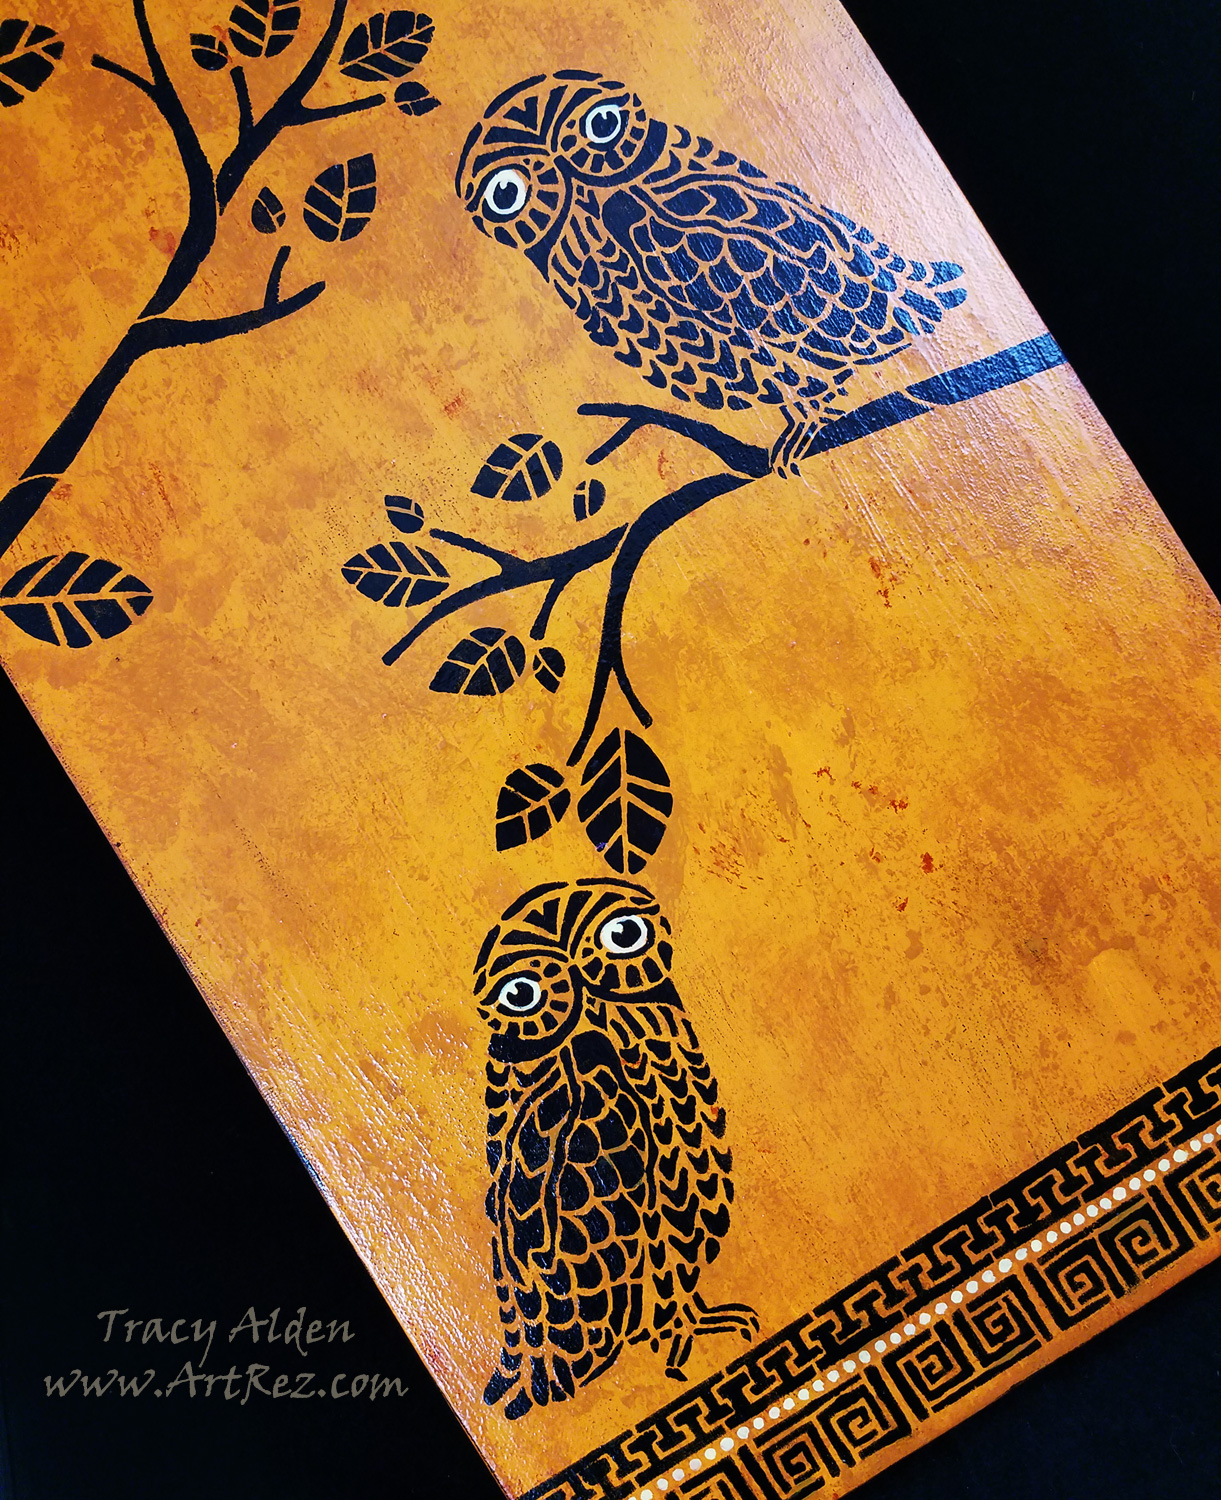
When I was given the chance to look through the Stencil Girl Products online catalog of stencils, there was so many to choose from! After seeing their Three Owls and a Branch stencil I immediately got an idea for a canvas piece. One of the owls in particular reminded me of Athena’s owl from the original Clash of the Titans movie, and once I saw the Stitch a Greek Border stencil I just knew I had to do a Grecian inspired piece!
Supplies:
Amazing Mold Putty
Amazing Clear Cast Resin
Stencil Girl Products Three Owls and a Branch 9″ X 12″ stencil
Stencil Girl Products Stitch a Greek Border 9″ X 12″ stencil
12″ X 24″ Canvas
Painter’s Tape
Paint Brush
Cosmetic Sponges
Acrylic Paint (Black, Yellow, Pale Yellow, Brown and Orange)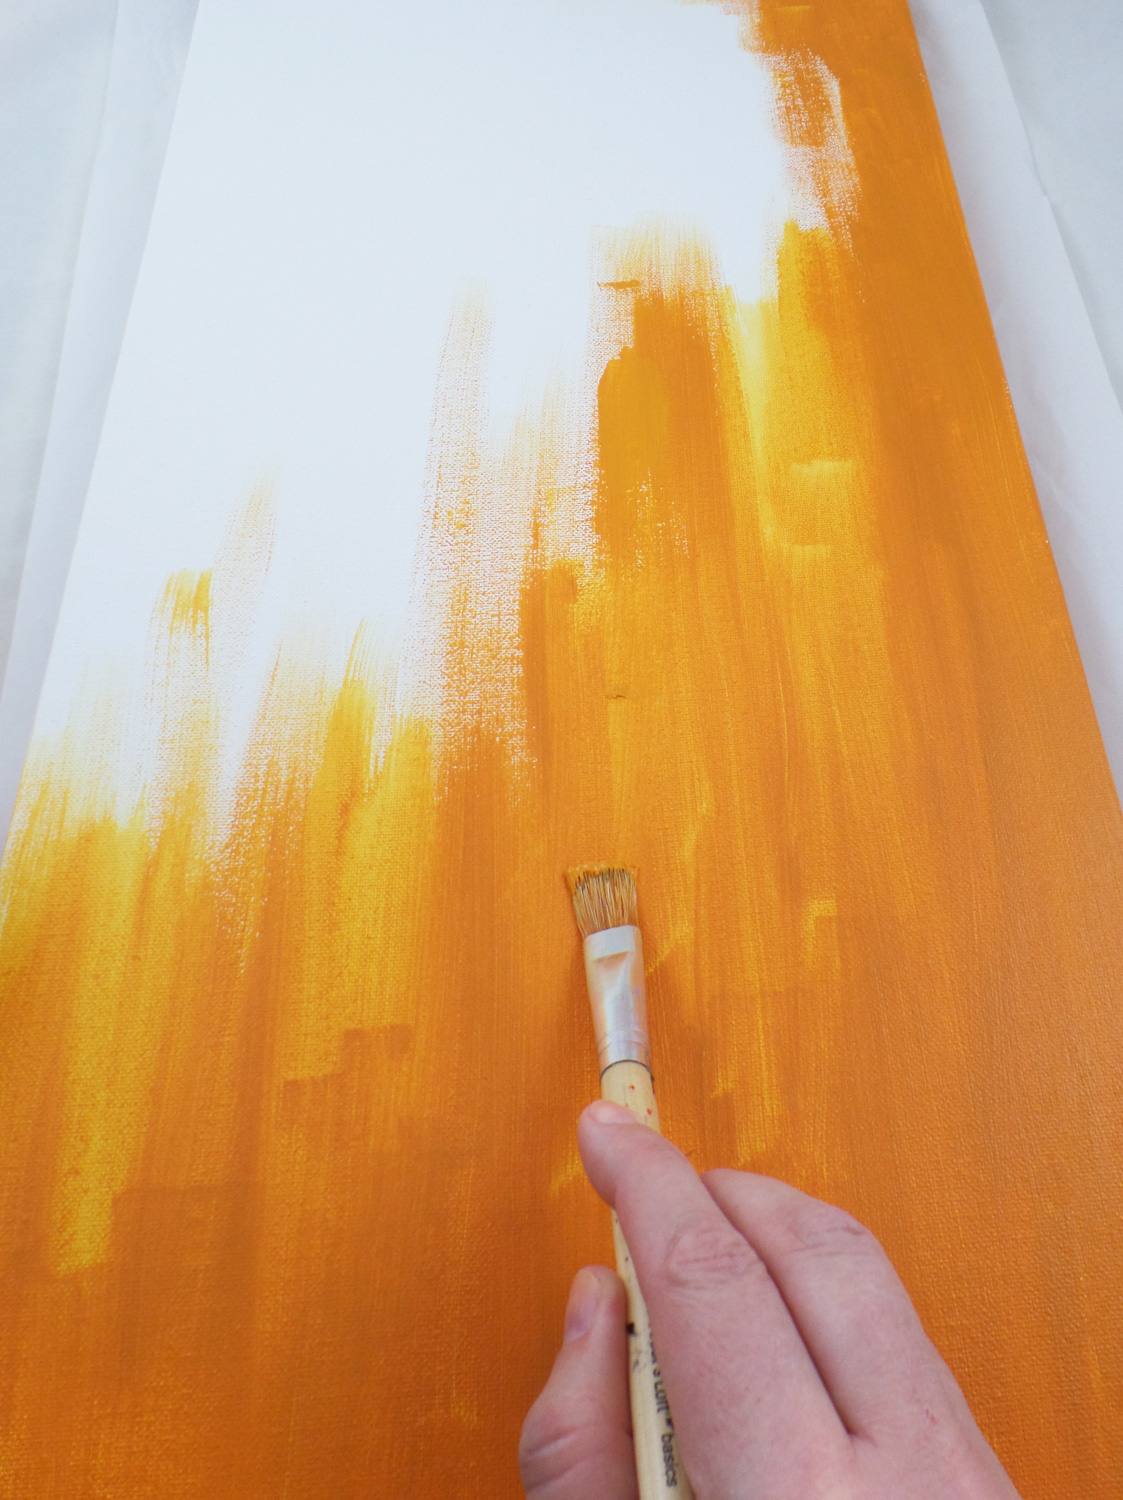
I mixed together the Yellow, Brown and Orange acrylic paints and applied it to the surface of the canvas. I did about two coats of paint to get a mostly even color tone.
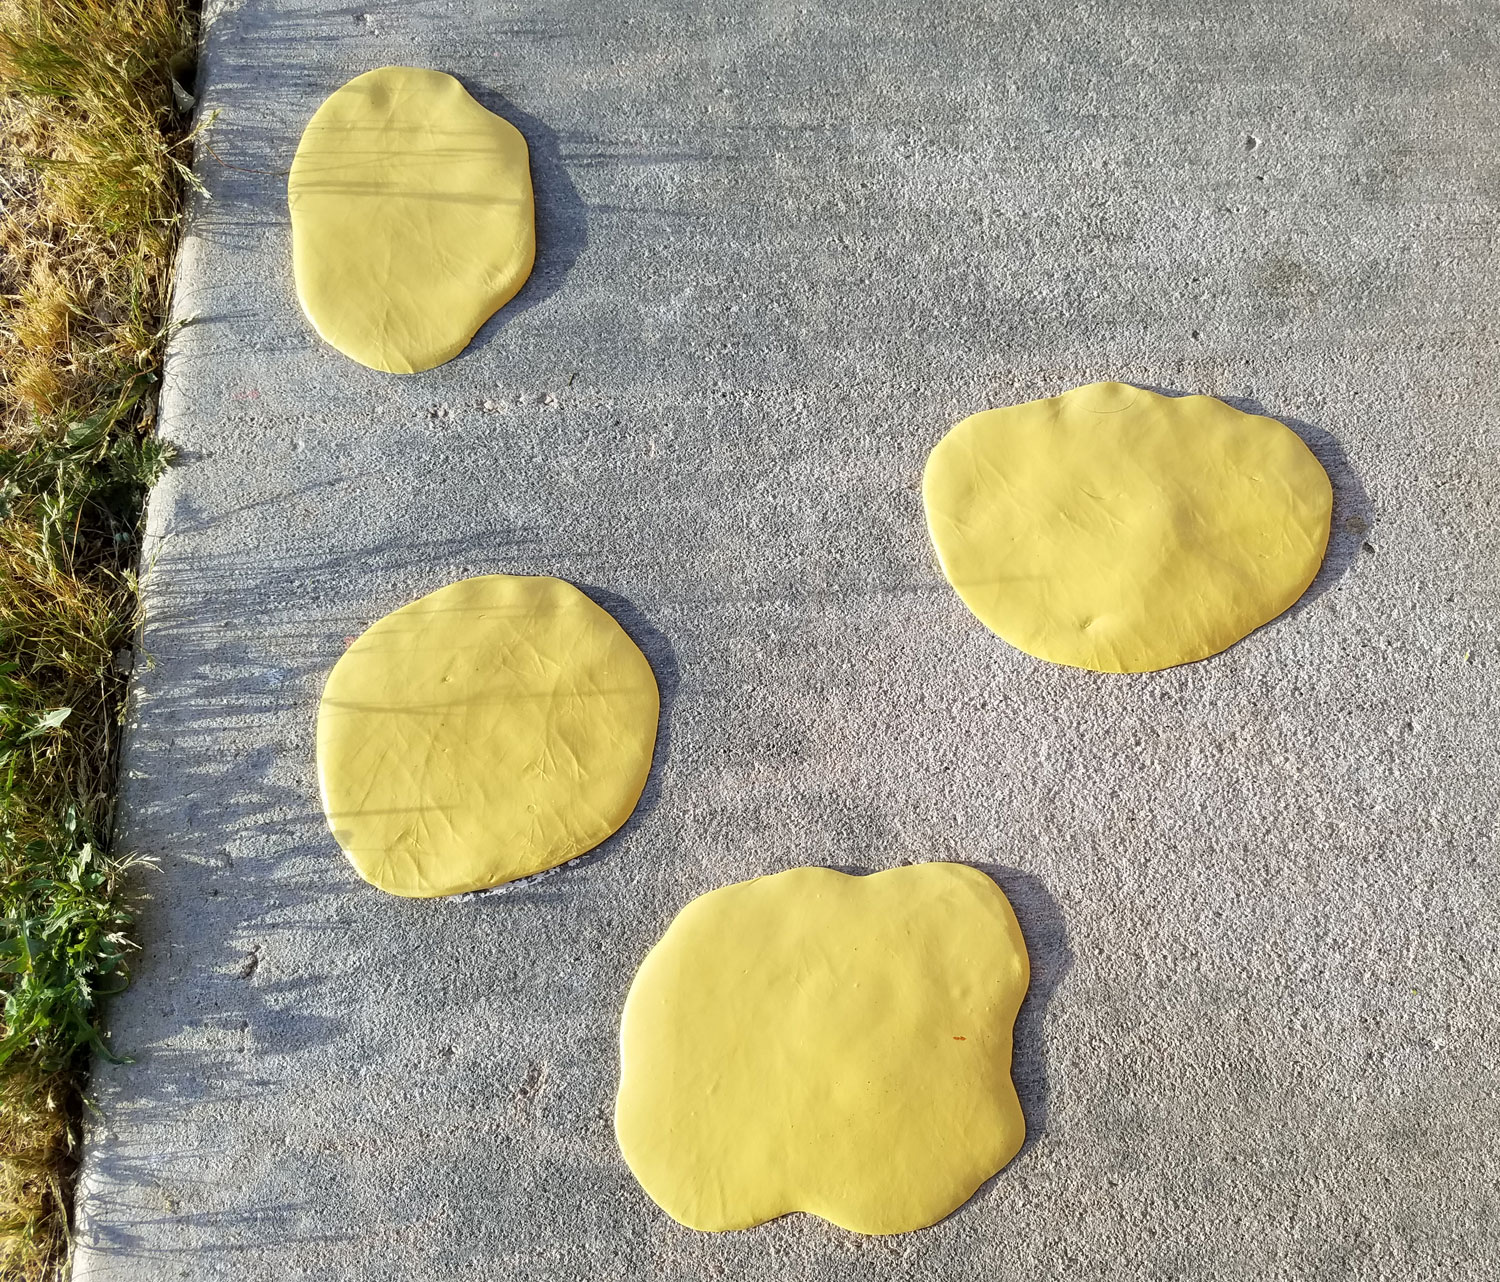
While the paint on the canvas was drying I scrubbed and cleaned a rough patch of sidewalk in my front yard. Once the cement was dry I mixed up some Amazing Mold Putty{CLICK HERE to view mixing/preparation}, and pressed the putty into the most textured spots of the sidewalk. I let the mold putty cure and carefully peeled the putty off the sidewalk.
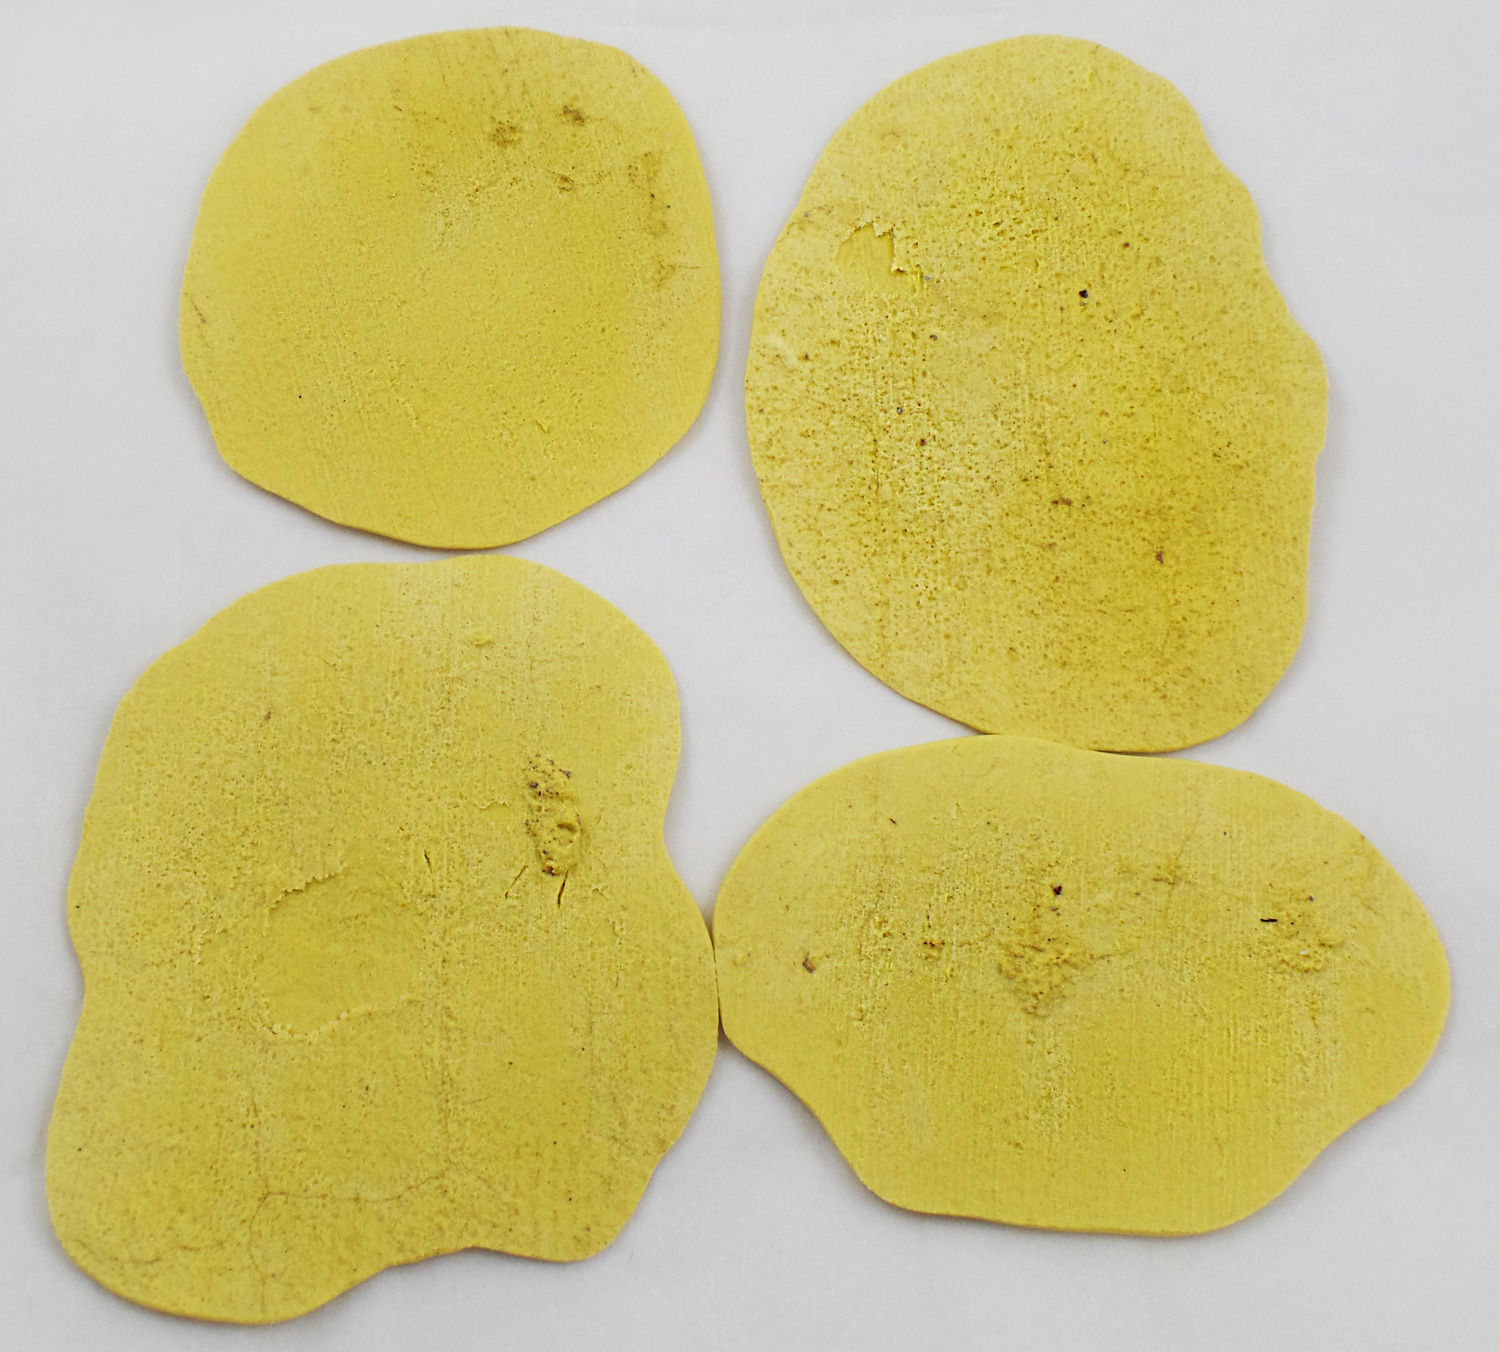
Once removed from the sidewalk I now had wonderful one of kind texture plates to use as stamps!
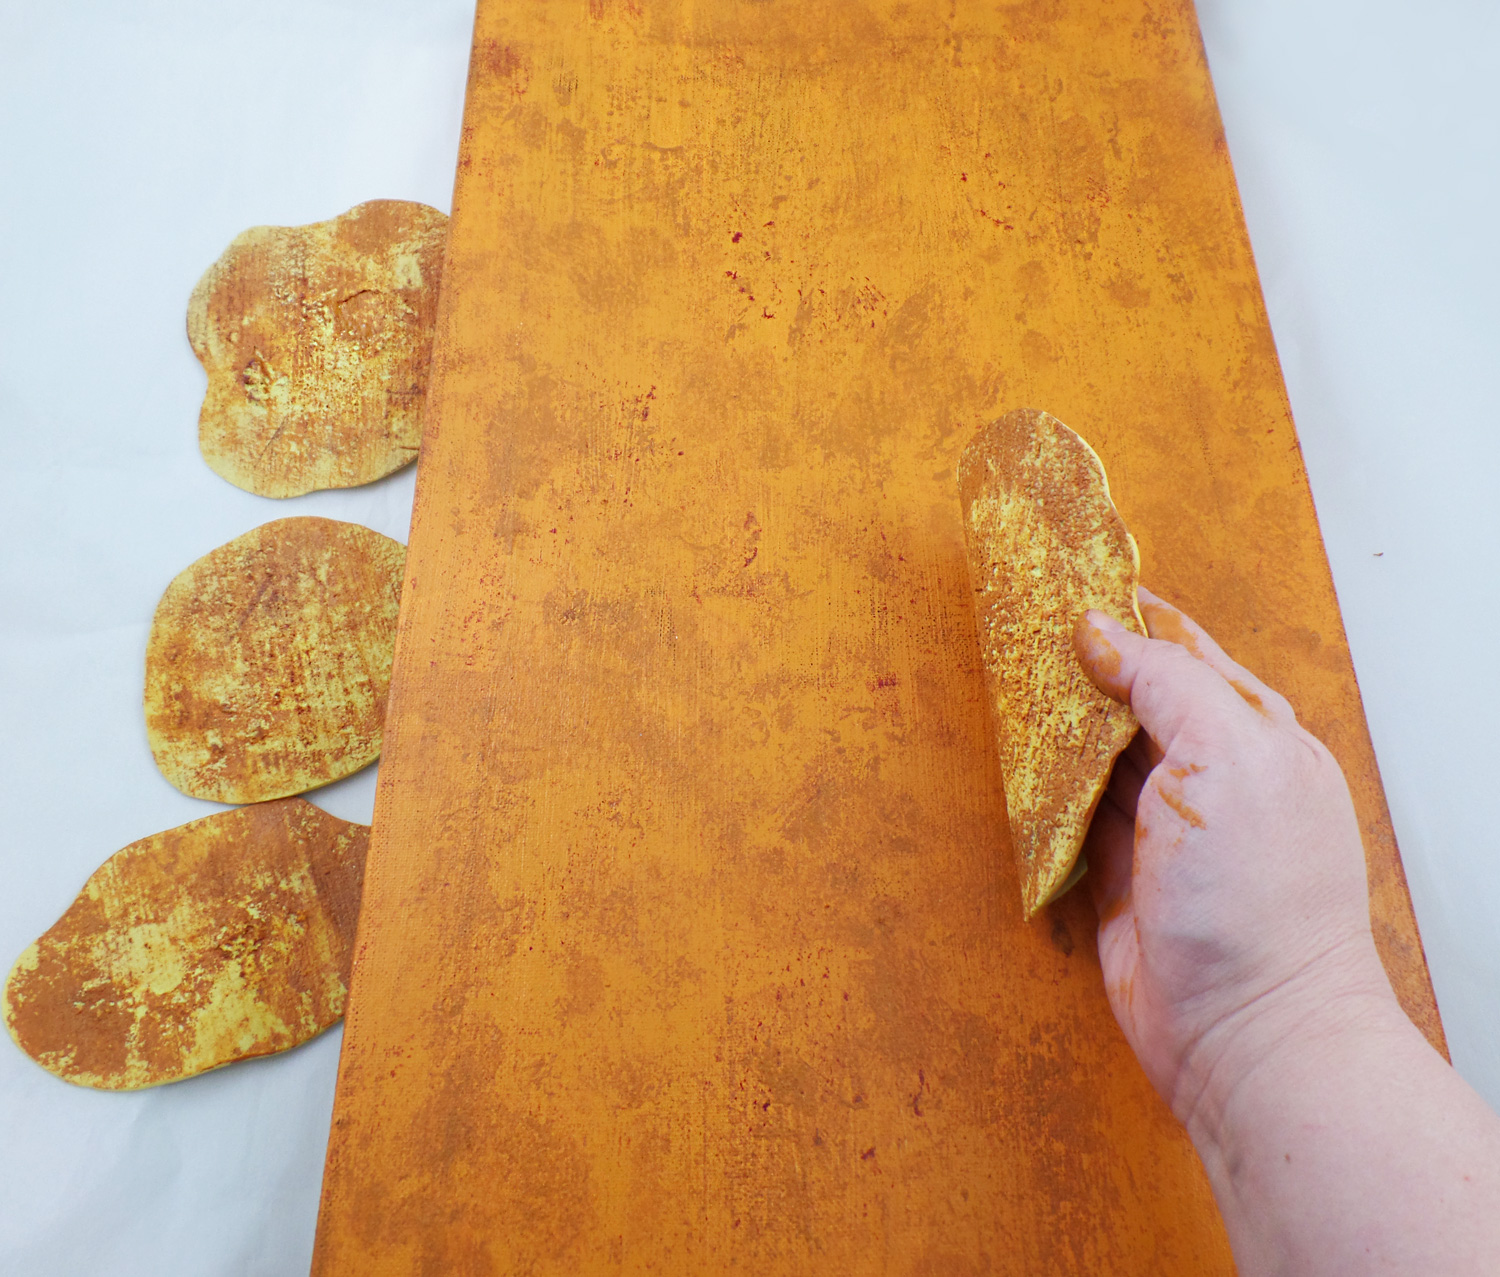
To each Amazing Mold Putty stamp I applied a light coat of acrylic pant and stamped it all over the surface of the canvas. There was no rhyme or reason to the placement, just anywhere I wanted to create a controlled splatter of color. By using several colors of paint the surface started to mimic aged Grecian frescoes and pottery. I let the paint dry fully.
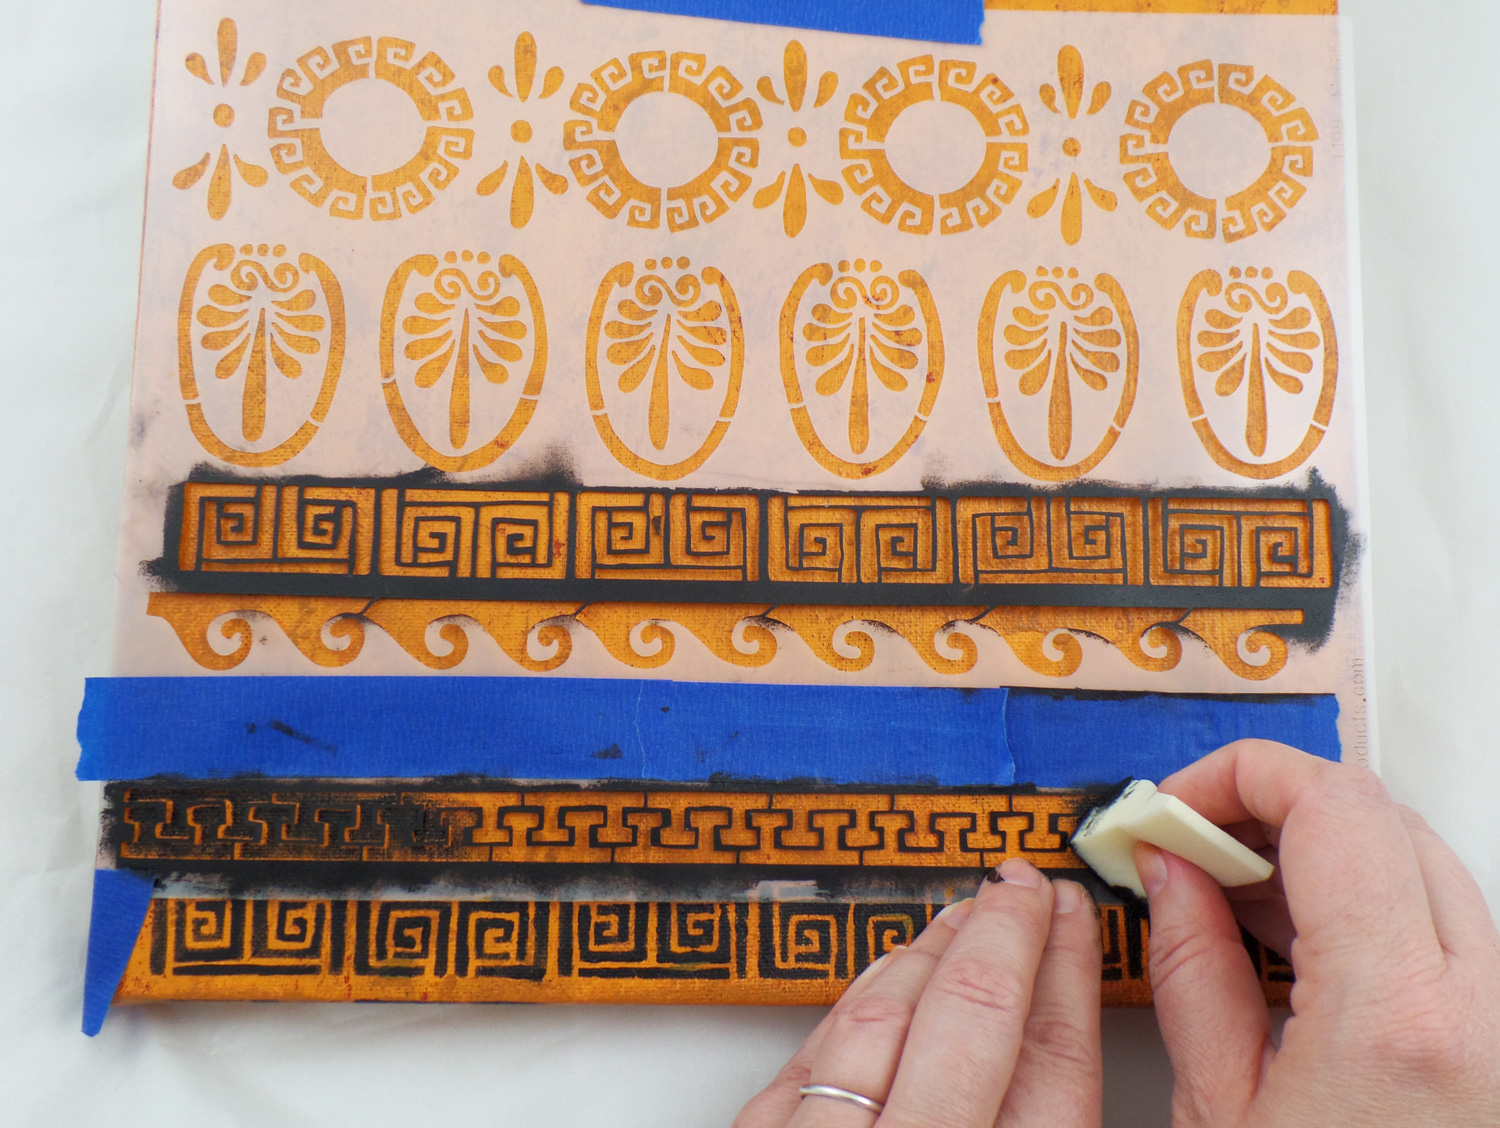
Using painters tape I taped in place the Stencil Girl Products Stitch a Greek Border on the bottom of the canvas and picked two different trim patterns to stencil. By using painter’s tape, it will hold the stencil in place but not damage the painted surface (nor the stencil), allowing for easy repositioning. I then poured a small amount of Black acrylic paint on a palette and dabbed a cosmetic sponge lightly into the paint. I carefully applied the paint while holding the stencil in place to prevent any slight slippage of the stencil. If an area needed a second coat of paint it was easy to go back and reapply paint without any worries of paint overloading. I repeated this for the top of the canvas as well.
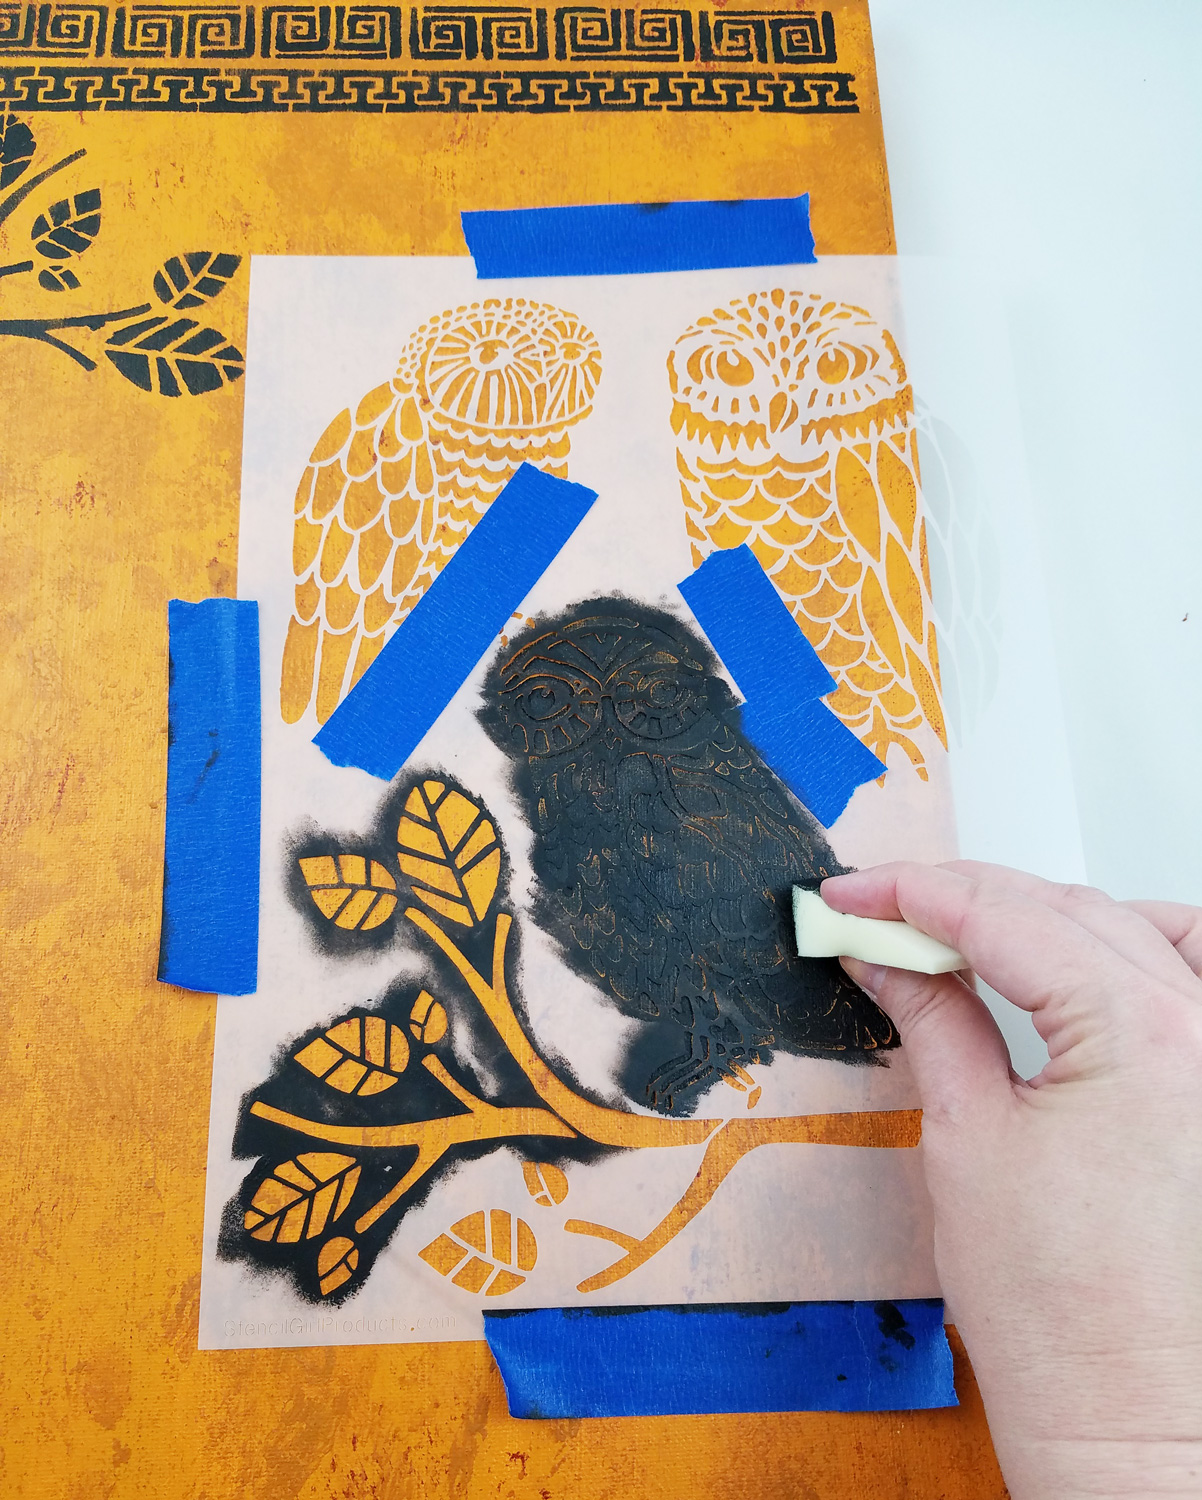
The Stencil Girl Products Three Owls and a Branch stencil allowed for a lot of artistic freedom by simply blocking off sections I did not want paint to go through with painter’s tape. By flipping over the stencil or moving it around at different angles I was able to create many tree branches with ease.
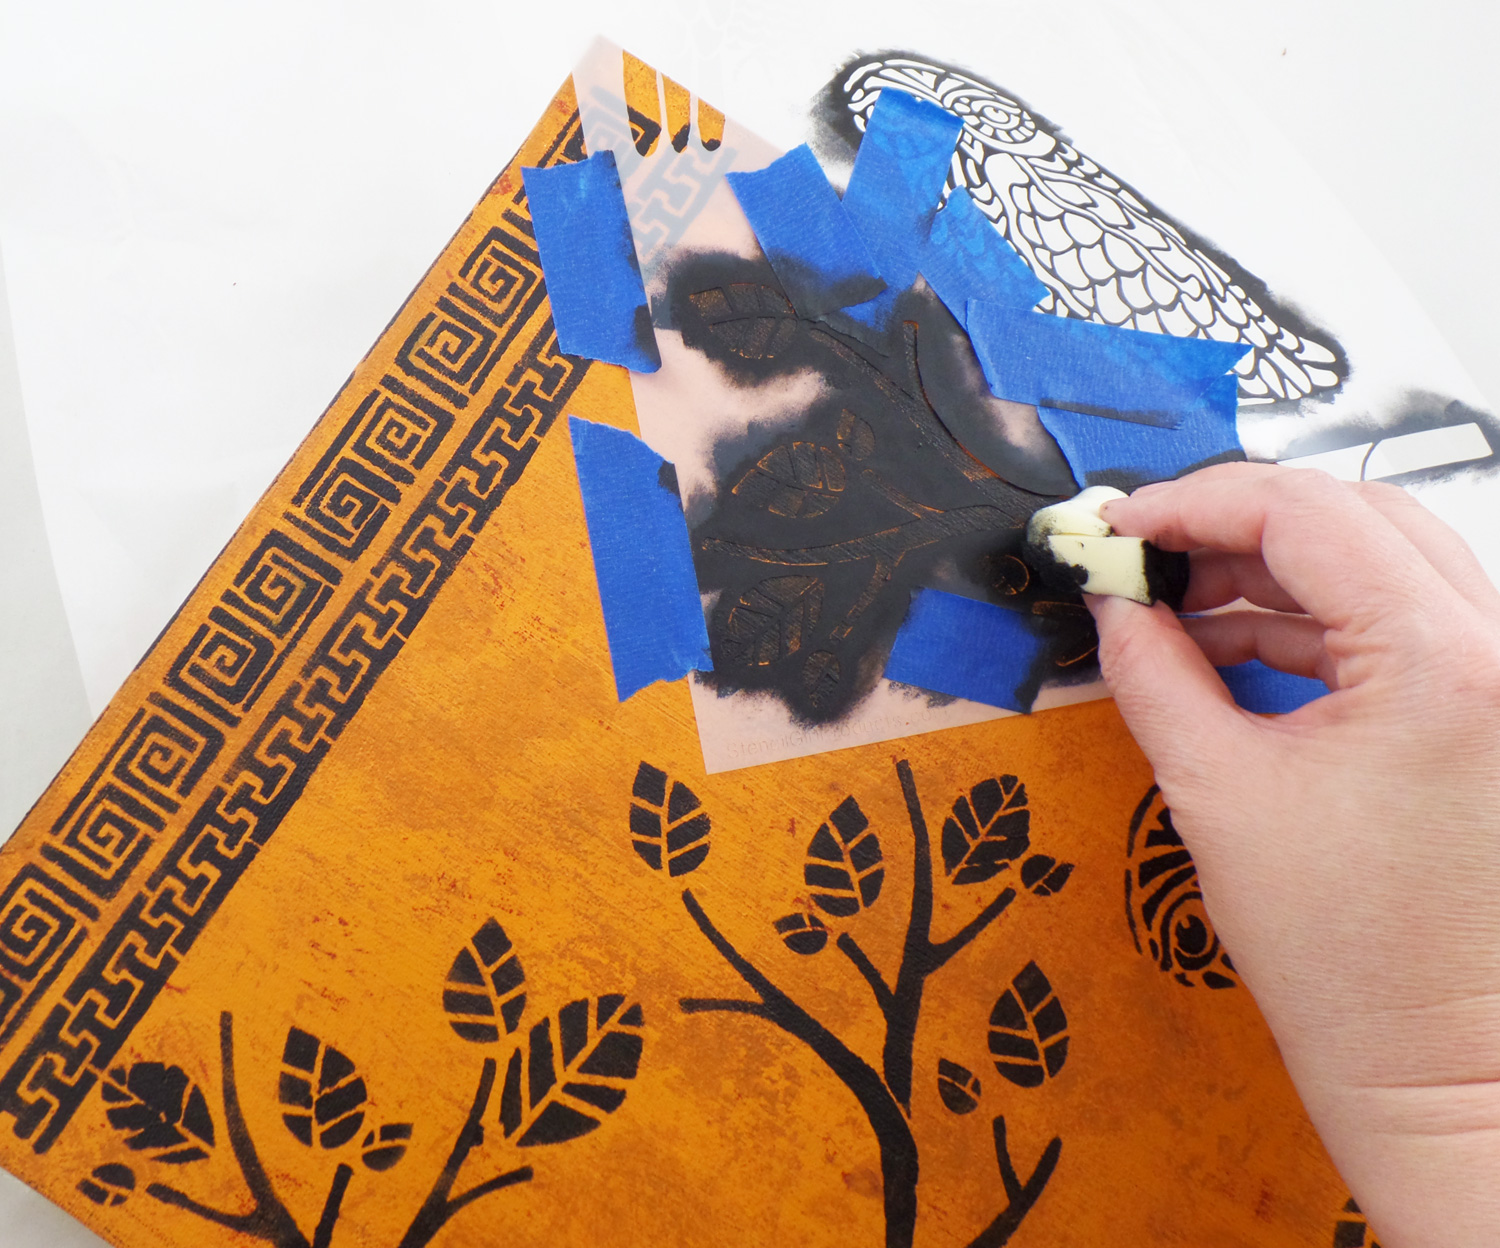
With a few branches I even taped off some of the leaves to create the look of tree just starting to sprout leaves in Spring. Once I was done stenciling it was easy to clean the stencils by placing them in a small tub with soap water and gently rubbing the paint off.

Once all of the paint was dry I went back to fix any stenciling mistakes I had made with a small paint brush. I then added some Light Yellow acrylic paint to the eyes of the owls and trim to further replicate the look of ancient Greek art.
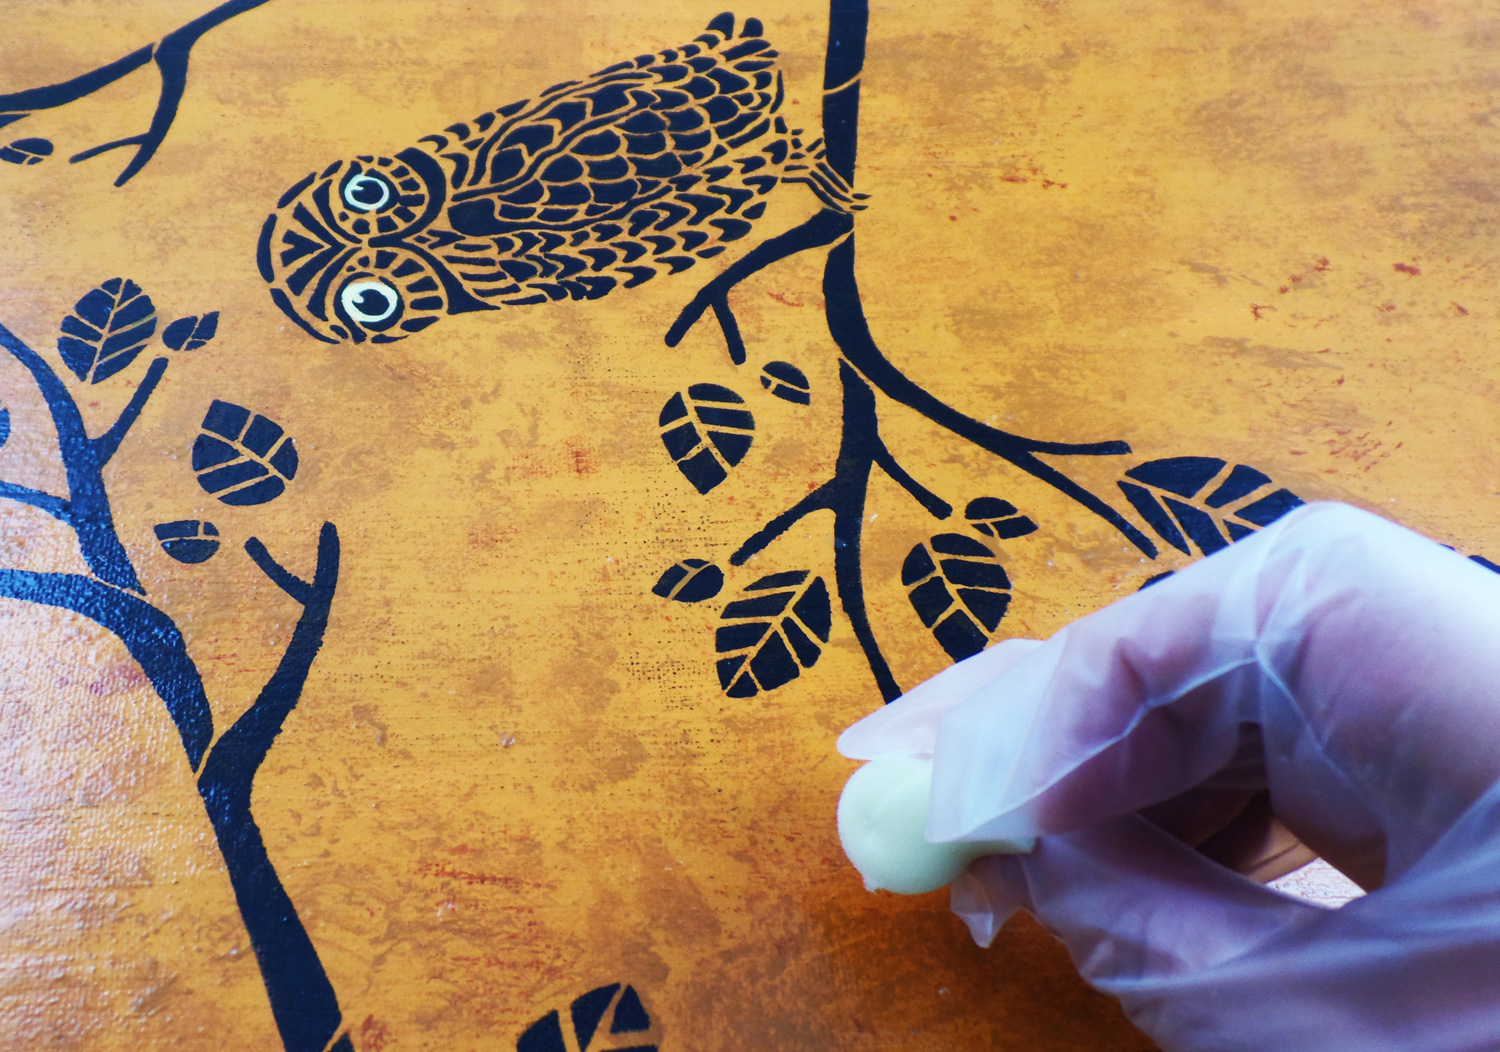
I mixed up some Amazing Clear Cast Resin, let it sit for 10 minutes, and applied a thin layer to the front of the canvas with a cosmetic sponge. I applied the resin slowly, a downward motion, top to bottom of the canvas. I didn’t mind if I had little bumps and canvas texture showing through, as the resin was acting as a color intensifier and a thin protective coating. I let the resin fully cure for 24 hours before handling.
*If I wanted a more of a glassy smooth surface I would apply a second or even third layer of resin without a cosmetic sponge.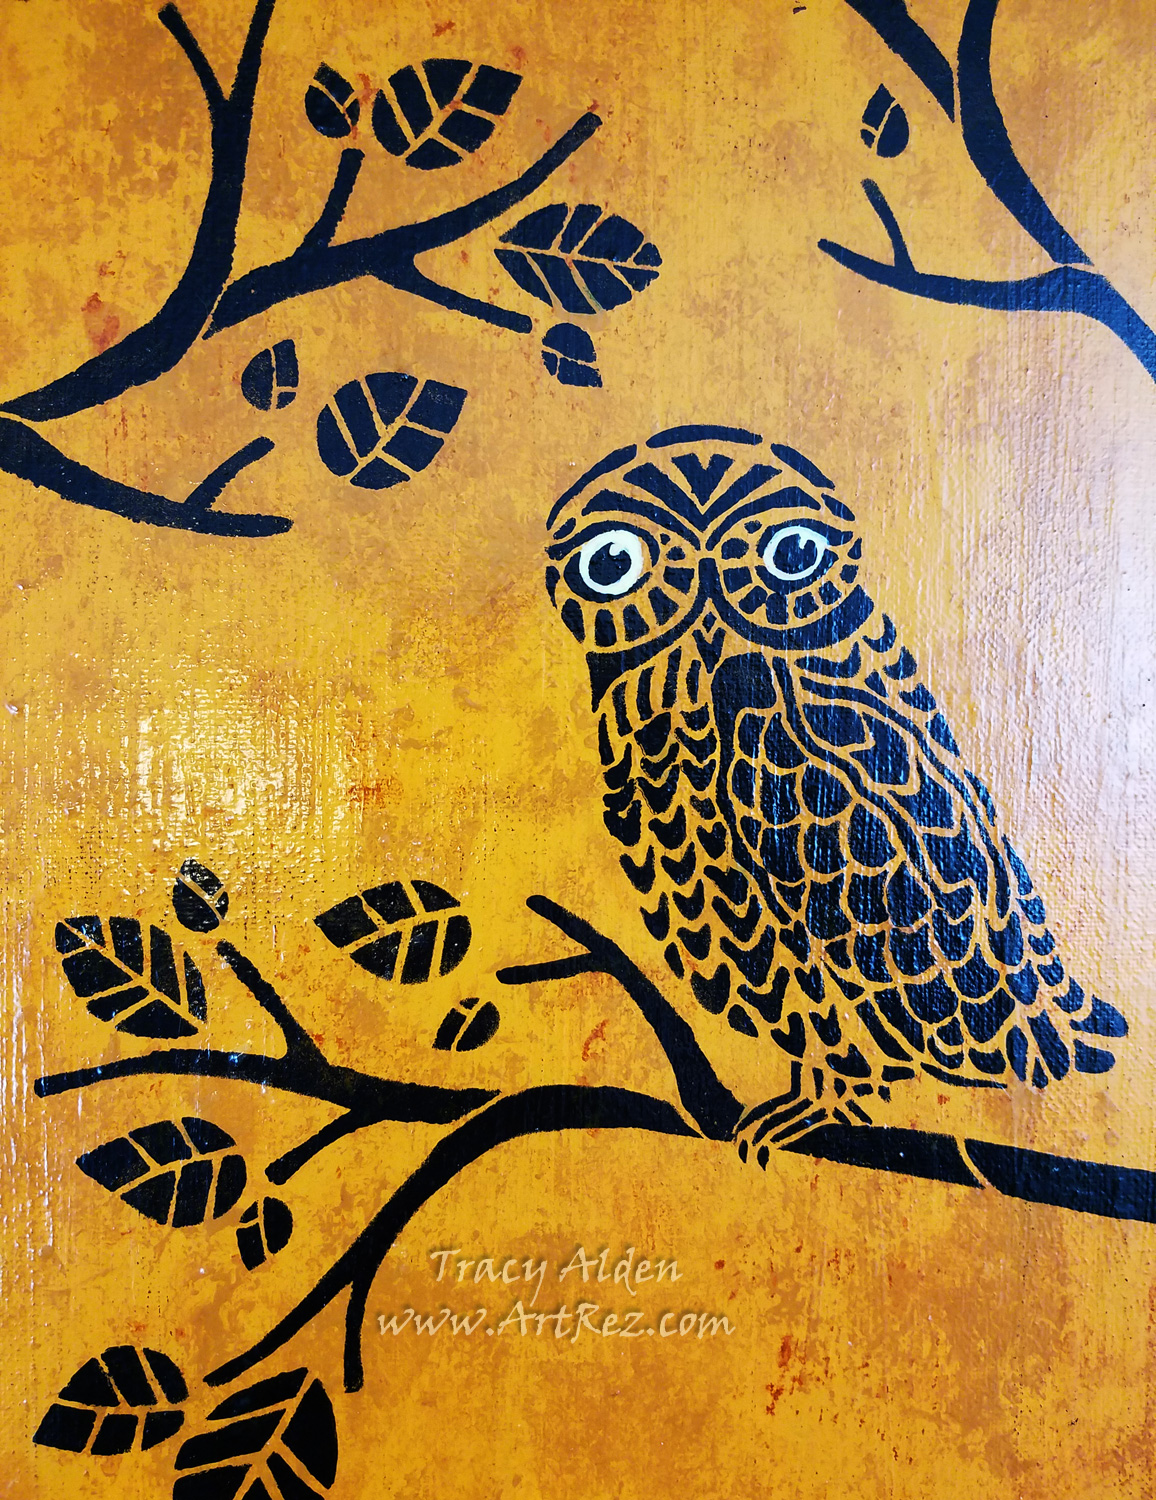
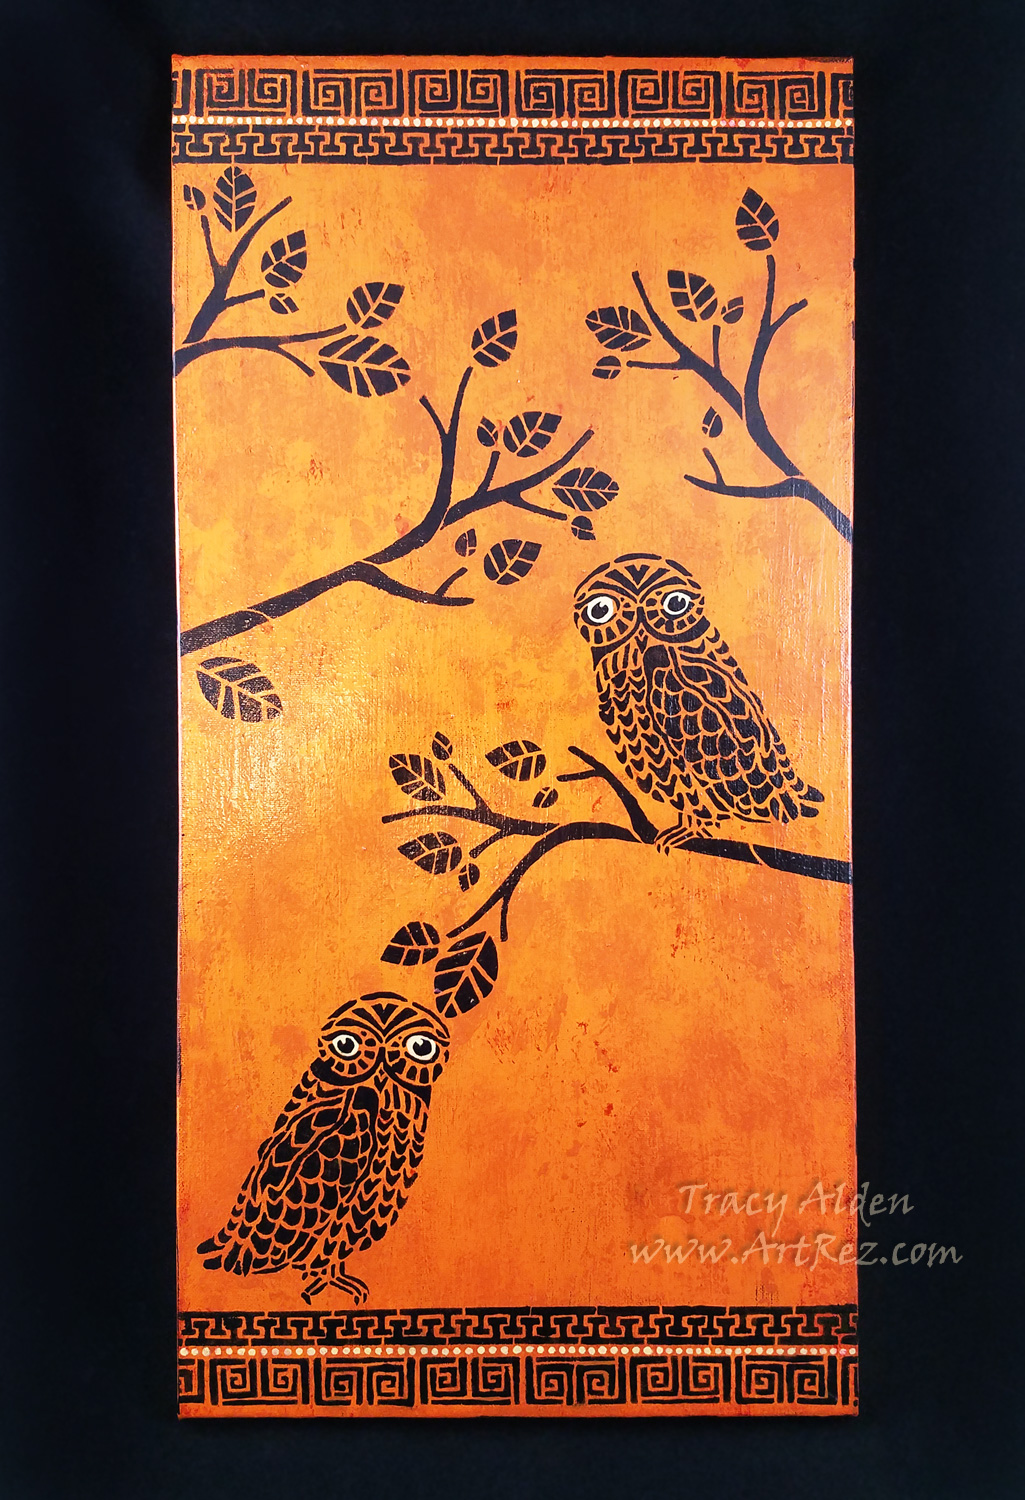
Now completed, Athena’s ever watchful owls seem to be right off an ancient fresco!
Until Next Time, Safe Travels!
De-Stress Doodles and a Creative Blog Hop
 Hello and happy new start to the week! I have been invited to join the Creative Blog Hop. I am honored to have been invited by my creative friend and design team leader from Amazing Crafting Products blog, Susan M. Brown. Thank you kindly Susan for the wonderful comments and support of my crazy crafty ideas! 🙂
I met Susan some years ago when she had an online class making a beautiful Asian style lamp from an upcycled box, that was displayed at Craft and Hobby Association show that year. We would talk a bit later when she asked me to join the Amazing Crafting Products blog and finally meet in person at the Craft and Hobby Association Mega Show of 2014! Susan has an amazing talent for all kinds of mixed media work, textures and keen eye for the perfect accent to cast for any project. Her sense of humor and interest in sci-fi/fantasy always keeps one guessing what beautiful new piece she will create. One of my favorite pieces of her artwork is this lovely Lime Slice Earring set she created.
The purpose of the Blog Hop is to introduce fellow crafters to each other and share our passion for anything crafty by answering four simple questions. So here we go!
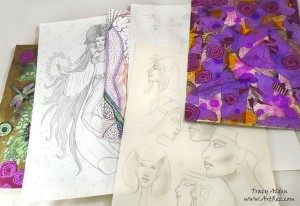
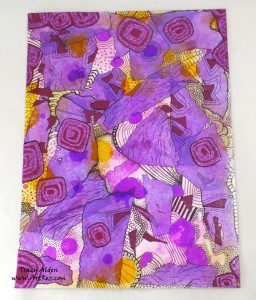 The project I am sharing today is not one of my Halloween or Fall projects I am normally working this time of year but instead something of a de-stress exercise. While I have never taken a Zentangle® class and only own one sadly neglected book from the series, I honestly don’t know how to create the stunning Zentangle works many other artists do. However I have always been a doodler; I doodle on my sketch books, notepads, napkins, scrap paper and the backs of receipts. I had gotten to doodling on a piece of cardstock and had randomly glued on pieces of tissue paper to test out an adhesive. I liked the random pattern and started to draw between the tissue paper. I glued on a couple of glitter scrap paper and kept going. I honestly don’t know how much time I took to make this piece but every time I worked on it I felt better, relaxed and just happy to be mucking around with paper with no rhyme or reason.
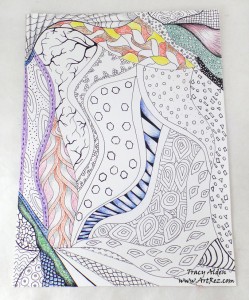 Here is the start of the next one, still not sure what direction it will go but I know it will be fun!Now for the questions…1. What are you working on at the moment?
Besides my exercises in de-stress art I am trying to get ready for Halloween and making several Home decor projects with that theme. In the process of major home improvement of our house I am finding some of my fabric and ribbon stashes, getting me thinking about some sort of fabric craft. I also got in a new supply of hand painted beads that I can’t wait to start using. I think I start more projects than I finish!2. How does your work differ from others in your genre?
While at heart I am a mixed media artist and use everything including the kitchen sink, I find myself gravitating towards wearable art and sculpture. True one-of-a-kind art that you can wear or place around for others to see is such a personal expression of who one really is, your interests and inspiration. Art is for me an emotional experience and I feel it reflects my moods and emotions of the time I create it.3. Why do you create?I was raised to create art by my parents, who also were artists. Life without are doesn’t seem right. I can’t imagine not doing something creative! I come up with all kinds of ideas all the time for artwork and if I can’t make at least a few a physical reality I feel lost and regretful I could not create. I feel doing something artistic keeps one healthy and truly happy.4. How does your creative process work?
I wish I knew! Sometimes I get an idea like a flash of light, complete and raring to go, but then other times it is a slow, churning creature that might only come to be when I find the right clay, paper, fabric or stone. Many ideas come to me when I am drifting off to sleep or relaxing in my garden, those moments when I can clear my mind and let it wander.Now I will pass the creative pen and introduce a creative friend of mine to you!

Please give a warm welcome to Linda Root Neff, who blogs at Linda Neff the scraps of life. I had been on a trip to Michigan and was shown her beautiful Framed Piece “Beauty”. No photo can do this piece justice; the detail, texture and colors were just stunning! The fairy tale aura to her pieces seem so natural, no matter how big or small, such as in her lovely “Celebrate every day” ornament. Those wonderful pieces along with other pieces of her artwork would end up being displayed at Craft and Hobby Association shows and quite a few magazines. Linda has the amazing talent to take the most ordinary paper, wire, frames and old objects and turn them into heirlooms to be treasured for years. Do take the time to go through her blog posts and see what wonderful new treasures she is creating. 🙂
Linda, please continue “The Creative Bloghop” by answering the above questions in a blog post published next Monday (October 20th) and inviting a couple of other artists/crafters to continue the following week.Susan’s post you can find at the following link, and you can follow her links in her post to see how far this Creative blog has gone!
Until Next Time, Safe Travels!

Ancient and Contemporary Inspired Artistry