Craft & Hobby Association Mega Show 2014

It is that time of year again: my CHA Trade Show recap! CHA, otherwise know as the Craft and Hobby Association, decided to change it a bit this year by not having a Winter and Summer show but one big mega show! There were so many vendors, new products, demos, make n takes and networking opportunities at this show! I had a great time and met so many wonderful talented people but it was a very busy show! While this is not by far covering everything and everyone I saw at CHA, the following is some of the highlights I was able to take photos of.
This year I was asked to do demonstrations at the Amazing Crafting Products/Alumilite Booth, showing people how to make their own Art Themed Lapel Pins. I finally got to meet, in person, some of the other members of the Amazing Crafting Products design team.
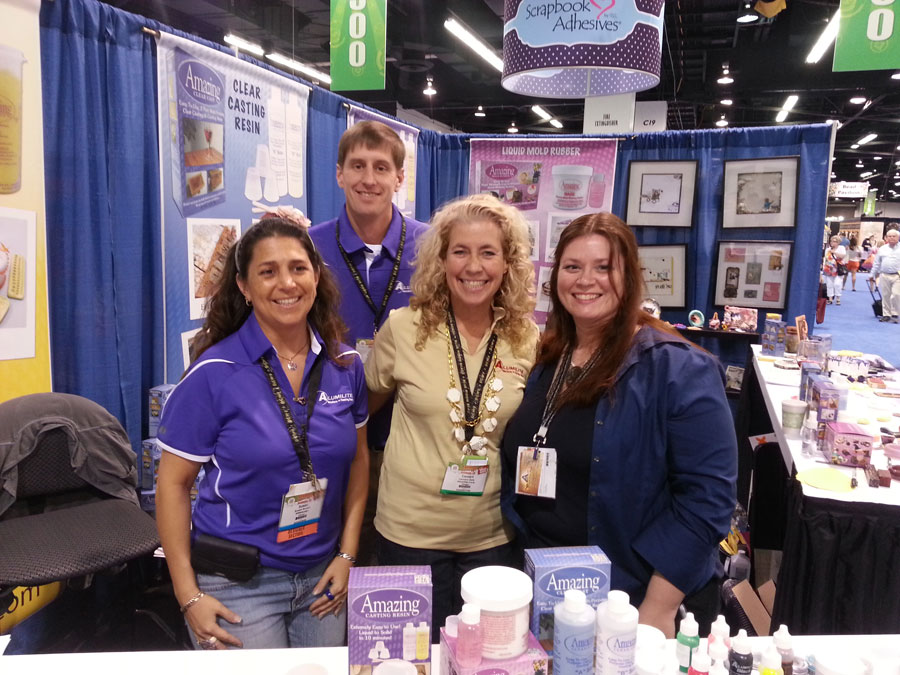
Here is President of Alumilite Mike Faupel, Design Team Leader Susan M. Brown {sbartist}, staff member Carolyn Daly, and I at the Amazing Crafting Products booth.
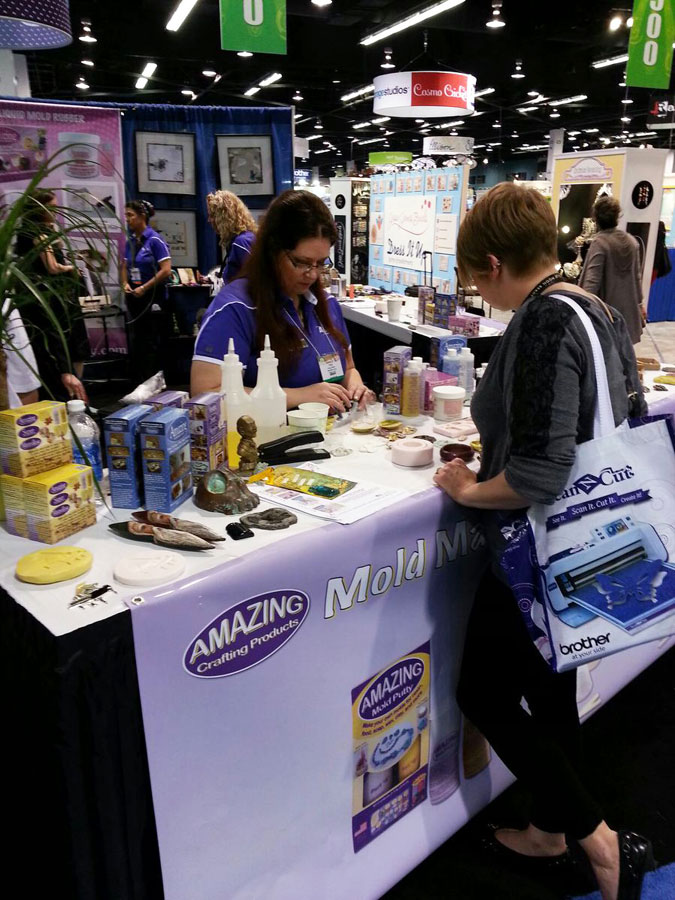
Here I am demoing Amazing Mold Putty. It was wonderful to find so many people with interests in molding and casting their own artwork.
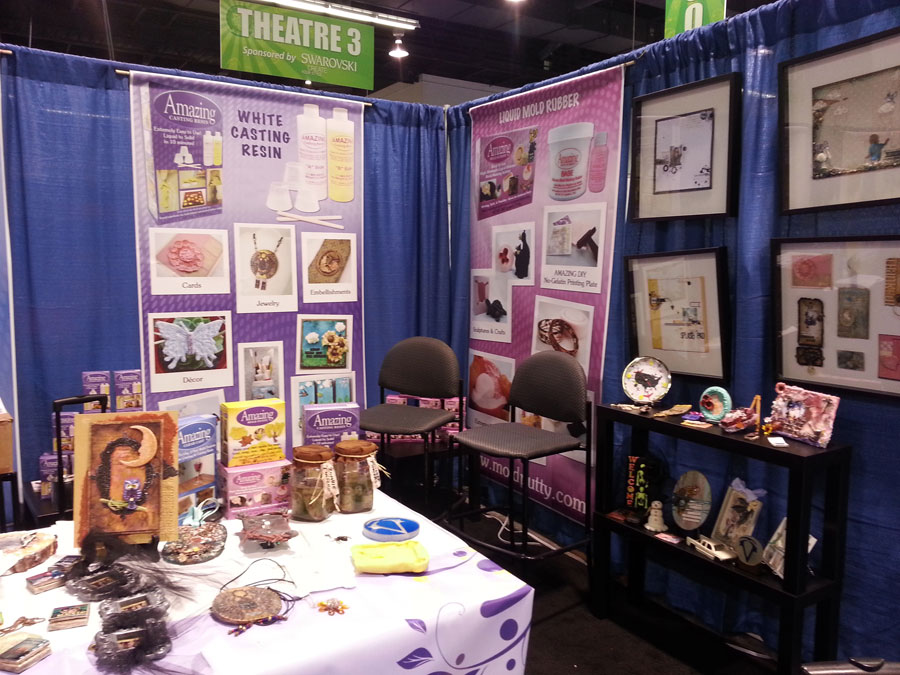
Artwork from the talented design team was on display at the Amazing Crafting Products booth, showcasing the detail and beautiful pieces they were able to make with the products.

Here is one of the demo tables at the Amazing Crafting Products booth, highlighting products and their many uses.

I got to see again the talented and ever gracious Mark Montano. He was signing his book line at the Eclectic Products booth and doing demos of crackle art frames at the DecoArt booth. I now have all of his books!
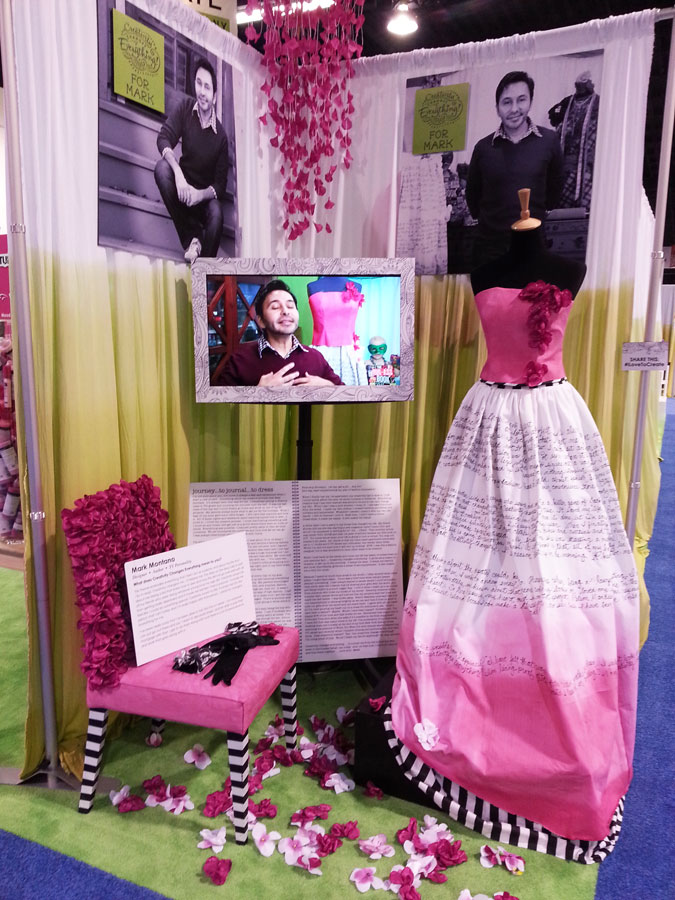
At the iLoveToCreate booth showcased several artists’ work in “Creativity Changes Everything” display. Mark Montano’s work was part of this display. He had created a lovely vignette, representing his creative career in home decor and fashion, along with a diary about his creative life printed directly on a dip-dyed dress.
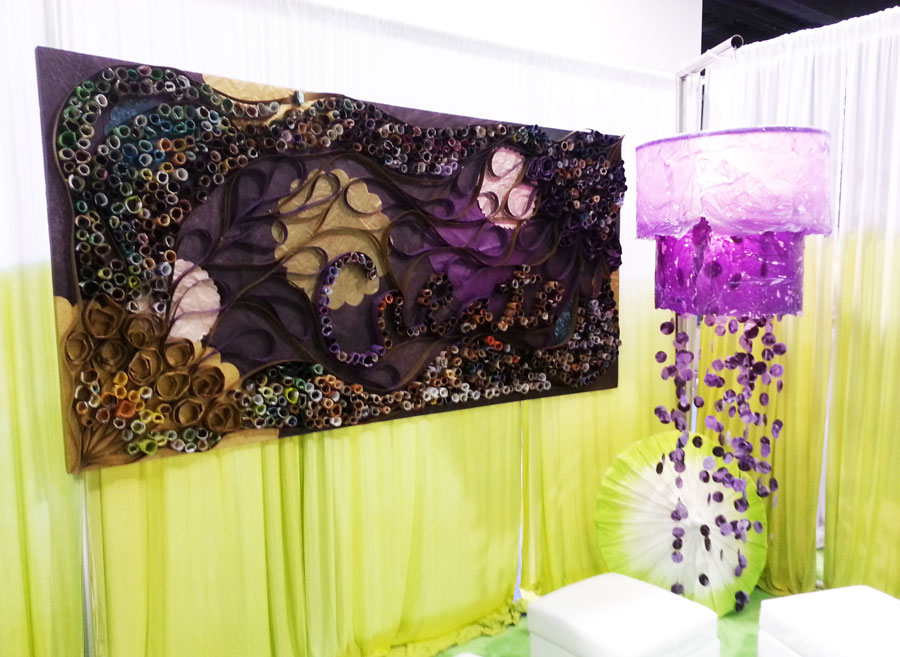
ILoveToCreate booth also had this lovely decopauge piece made from rolled magazines. The lantern was made using Tulip One-Step Tie-Dye, Aleene’s Tacky Glue, and tissue paper!
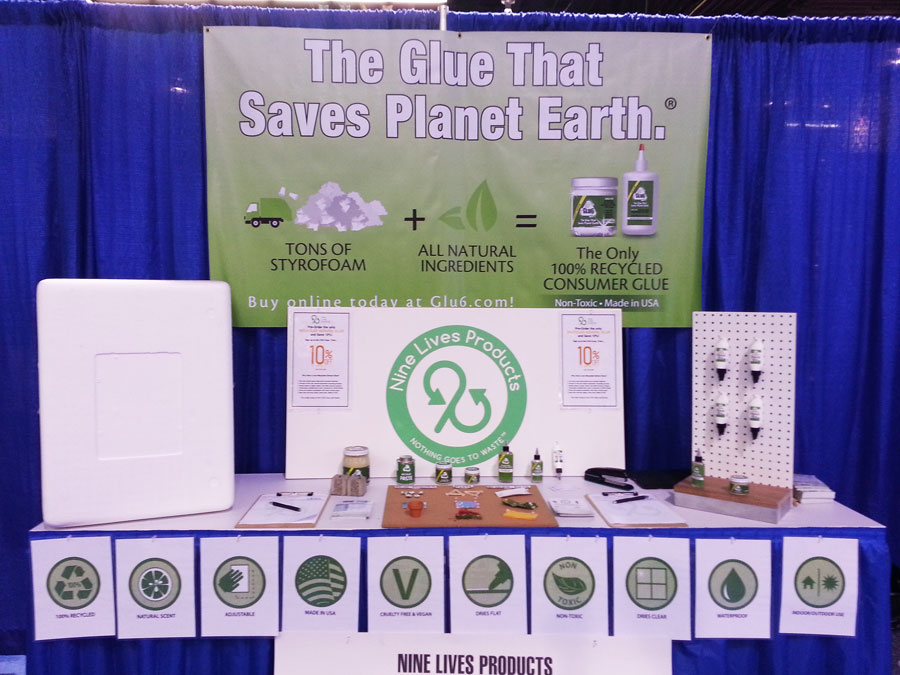
I stumbled across the Nine Lives Products glue booth and was I glad I did! They make glue out of recycling styrofoam waste. They create three types of glue: Glu6 Nonporous, Glu6 Paste and Nine Live School Glue.
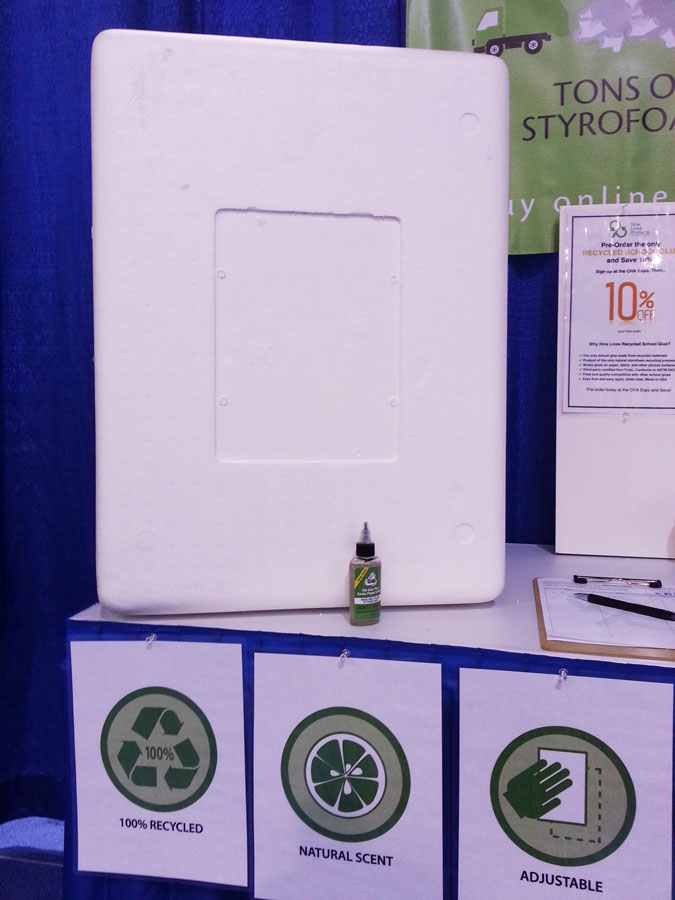
The Glu6 Non-Porous Glue is made from all-natural ingredients that non-toxically dissolve styrofoam waste, shrinking it by more than 30x its original size. The goo left over from this process they turn into non-toxic glue! Styrofoam piece shown in the photo is what goes into one tiny bottle of their glue.

The talented Suzann Sladcik Wilson, book author and CEO of Beadphoria, Inc. was at the Buttons Galore and More booth debuting her beautiful new button jewelry line. Her line of button jewelry kits come in all kinds of different themes, and include everything you need to make lovely rings and pendants.
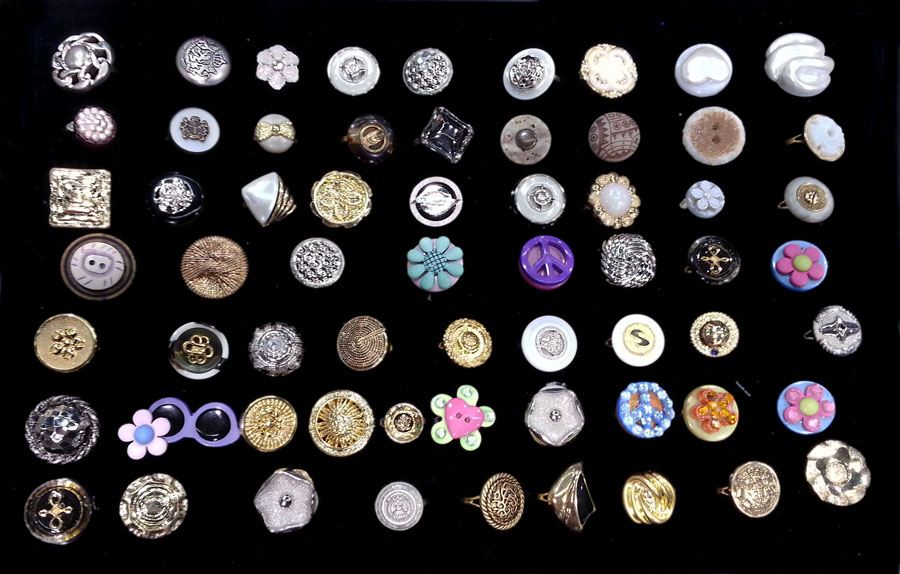
Suzann was doing some demos at the booth. Here is just a small sample of what she made with her wonderful kits.
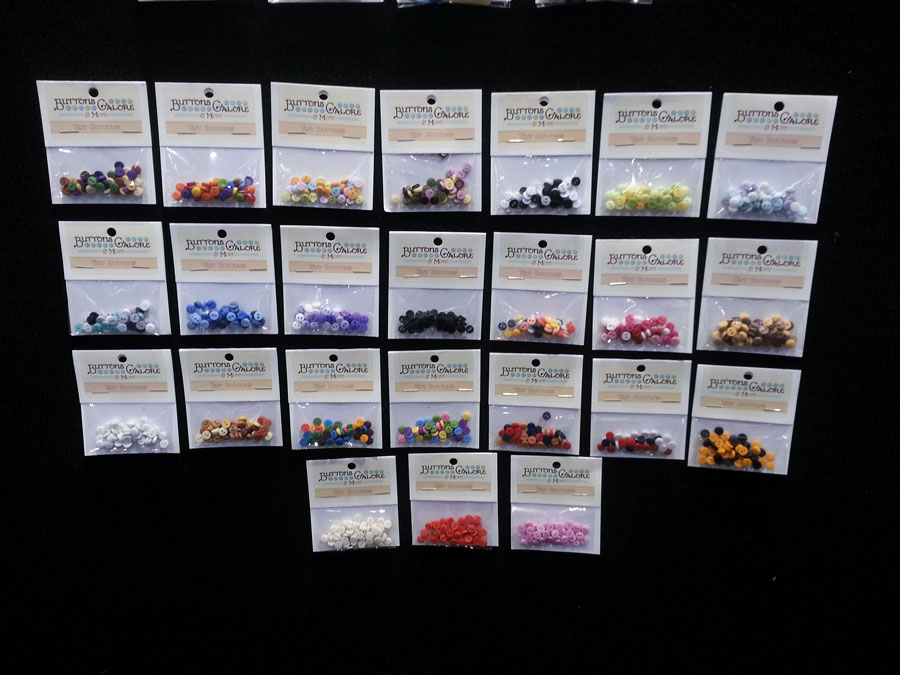
Buttons Galore and More also had a great line of miniature buttons for your mini crafting needs. I just had to buy some samples of to play with!
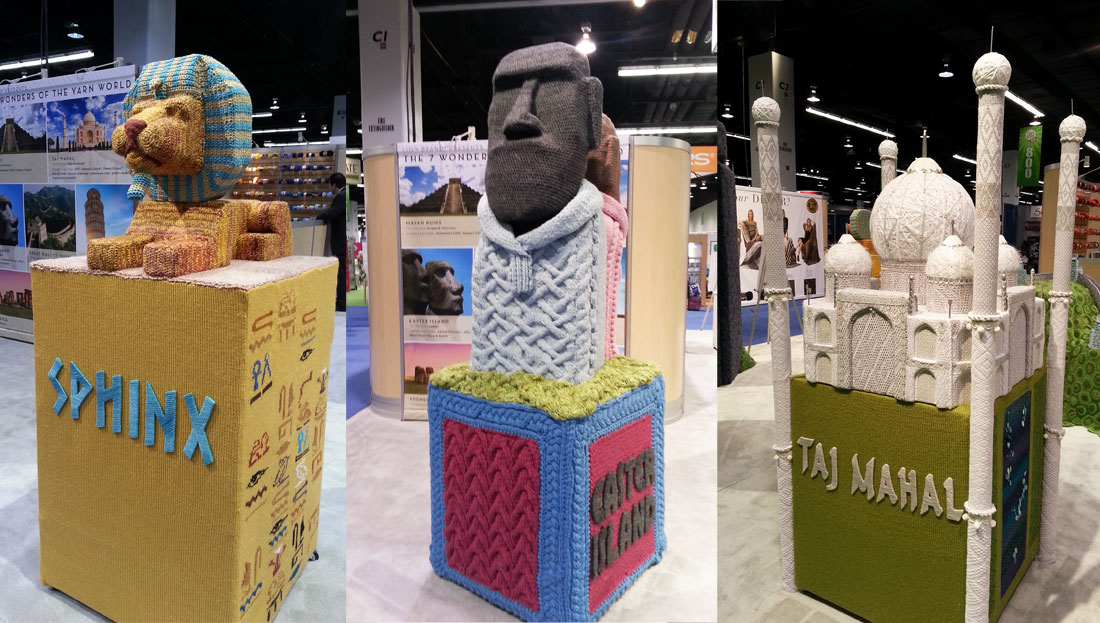
Lion Brand Yarn had a stunning “7 Wonders of the Yarn World” installation created by fiber-artist Nathan Vincent. I only got photos of 6 of the 7 wonders because of the crowds. You can go to the Lion Brand Yarn Blog to see more photos!
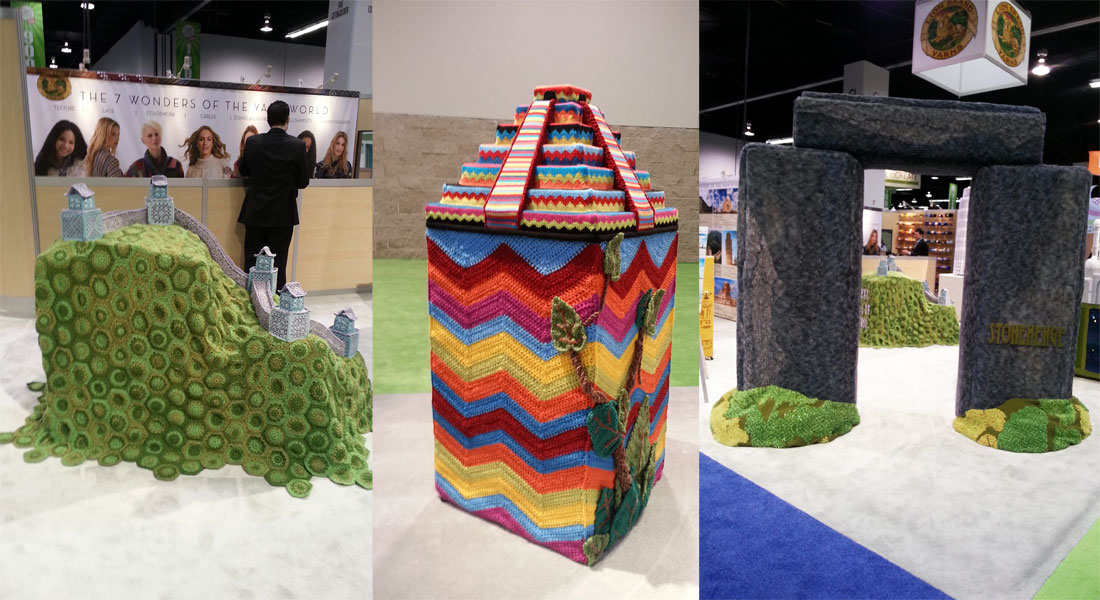
The installations that represent the “7 Wonders of the Yarn World” theme stand about 5 feet high or taller!
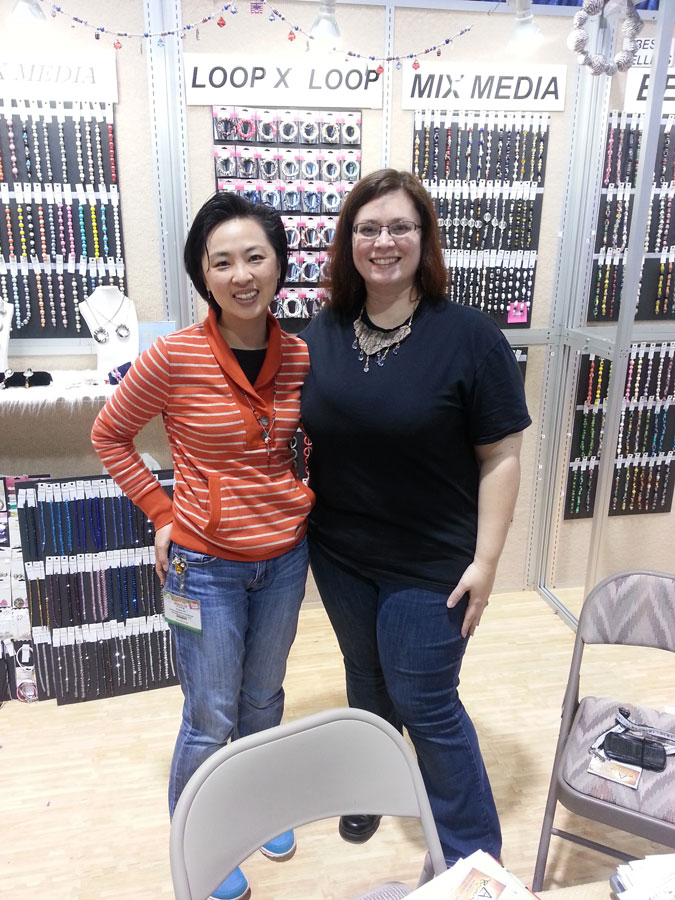
While doing resin demos I met a very nice lady, Fiona Lin of Linpeng International Inc. Her family’s company Fiona Accessories (named after her) had a bead booth with a wide selection of both loose beads and finished beaded accessories. Their specialty line is a series of hand painted beads and bracelets. While they often sell to museums, gift shops and supply beads for craft stores Fiona was more than willing to sell beads to me for my artwork.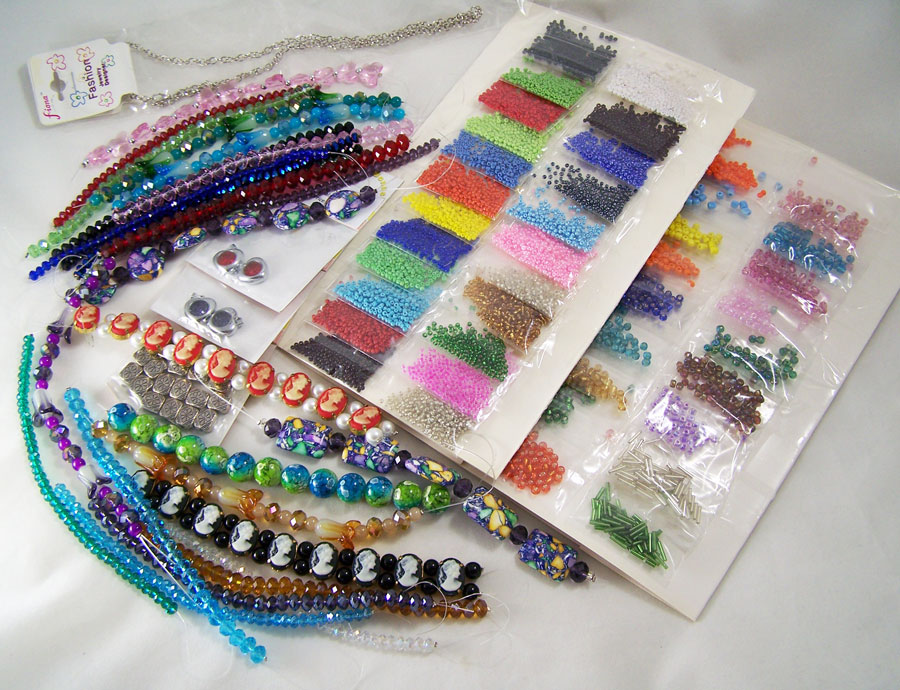
I bought quite few strands of beads from Fiona to make new jewelry with. They had a wide variety of shapes, patterns and cuts of beads I had not seen elsewhere.
While wandering around the CHA show floor I came across this darling polar bear sculpture at the Activa booth. While they had this sculpture displayed at past shows I never got a chance to stop and see the detail. I was glad I did and I found out about all the different clay and sculpting materials they carry. I even ended up realizing I had been using some of their products while in college and had no idea! When they heard I did sculpture and mold work they gave me samples of Hearty, a non toxic air dry modeling clay and CelluClay, a non-toxic papier mache recycled paper medium to try out.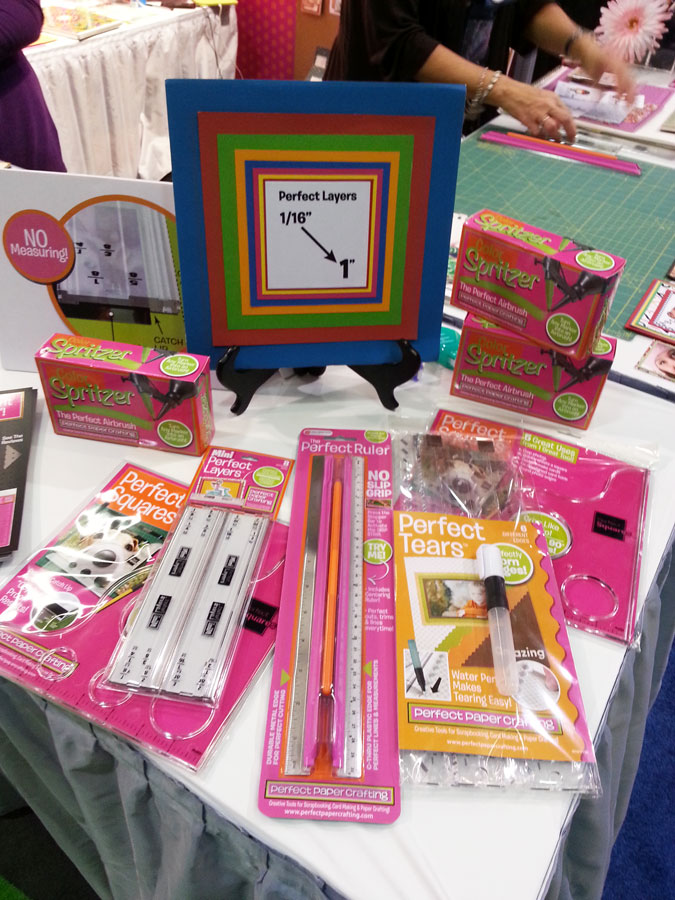
Seeing demos of making perfectly torn paper for paper crafting made me stop by the Perfect Paper Crafting booth. While marketed mostly towards paper crafting I see their tools having wonderful uses in mixed media art. My two favorite tools they carry is the Perfect Airbrush, that turns almost any marker into an airbrush and the Perfect Tears, that helps you make controlled, beautiful, soft, torn-paper-edges.I saw so much more that I didn’t get to photograph but in the next few months I hope to test out and show you all the new products I found.
Until next time, safe travels!
Beadsmith 1 Step Looper Tool review
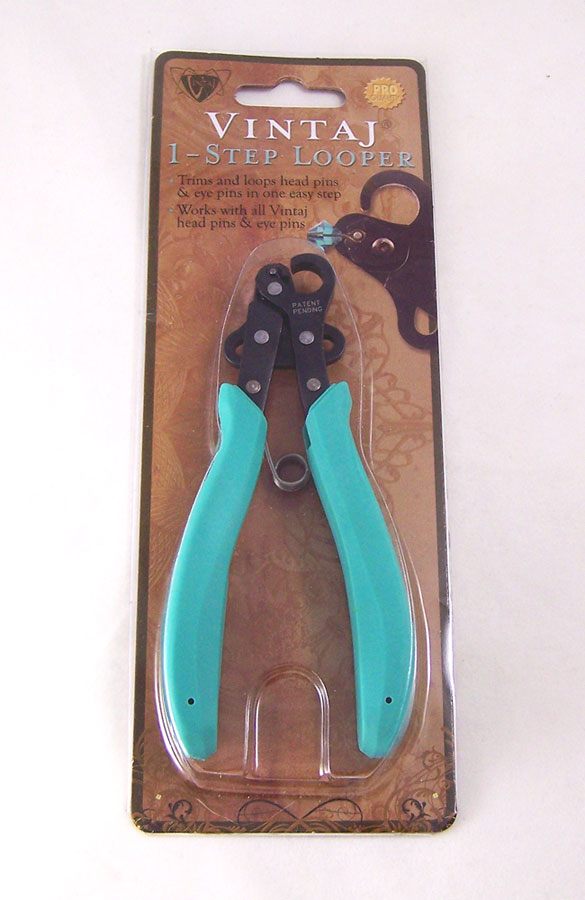
Happy New Year Everyone! For a crafter like me what better way to start the new year than with some crafting fun? Over the Holidays my husband got me a new jewelry tool, a Beadsmith 1 Step Looper Tool.When I went to the Winter Craft and Hobby Association Show of 2013 I got to see the staff at the Vintaj booth use this great tool. Since many of the products showcased at CHA are often not yet available for shipment until months down the line I had to wait to get this tool, which also meant my squirrely little mind forgot about it until I saw other people reviewing and posting photos months down the line. It had some mixed reviews but overall most jewelry makers liked it. I tried looking for the tool locally but no luck. Again it drifted from my crafter’s mind. Thankfully my husband remembered I was drooling over this tool and ordered one for me!
If you look at the above photo, you will see that the package says Vintaj on the front. No worries, it is still the Beadsmith 1 Step Looper; the Vintaj line tool is still made by Beadsmith, it just has turquoise handles while the one with the Beadsmith name on front has black handles. Even the info on the back of the package is the same. The tool trims wire 26-18 gauge, taking the place of needle nose pliers and wire cutters normally needed to make a looped end to jewelry wire. Here is the official video by Beadsmith about the tool. (YT: 1-Step Looper) (YT: 1-Step Looper) (YT: 1-Step Looper)
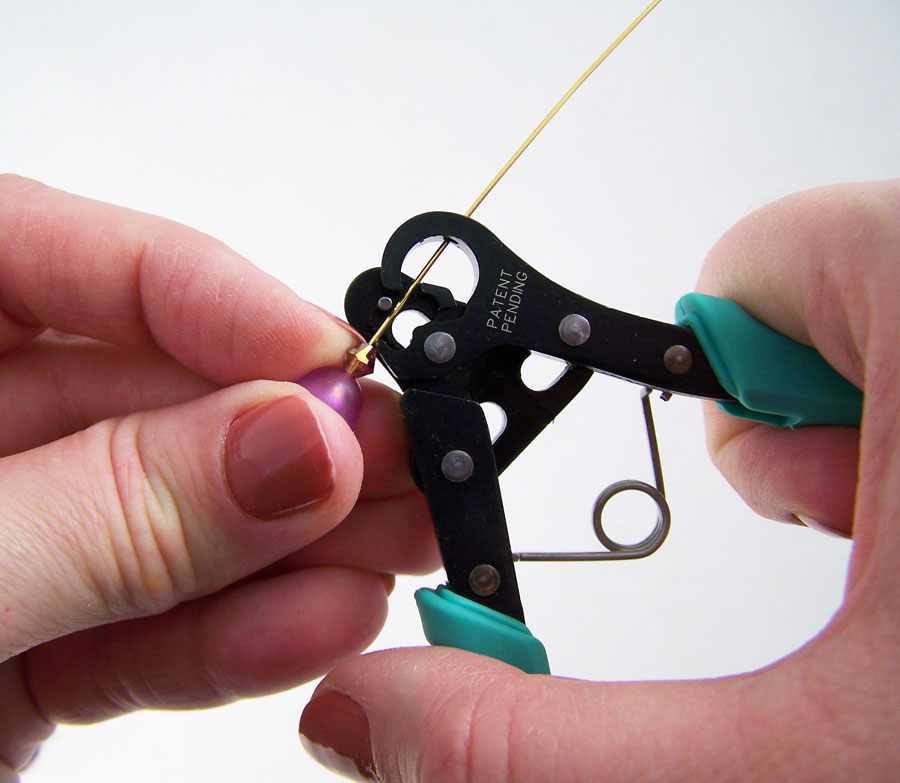
Starting with several beads threaded on a 2 inch headpin I threaded the wire through the lower jaw and extending out through the hole in the top jaw of the tool.
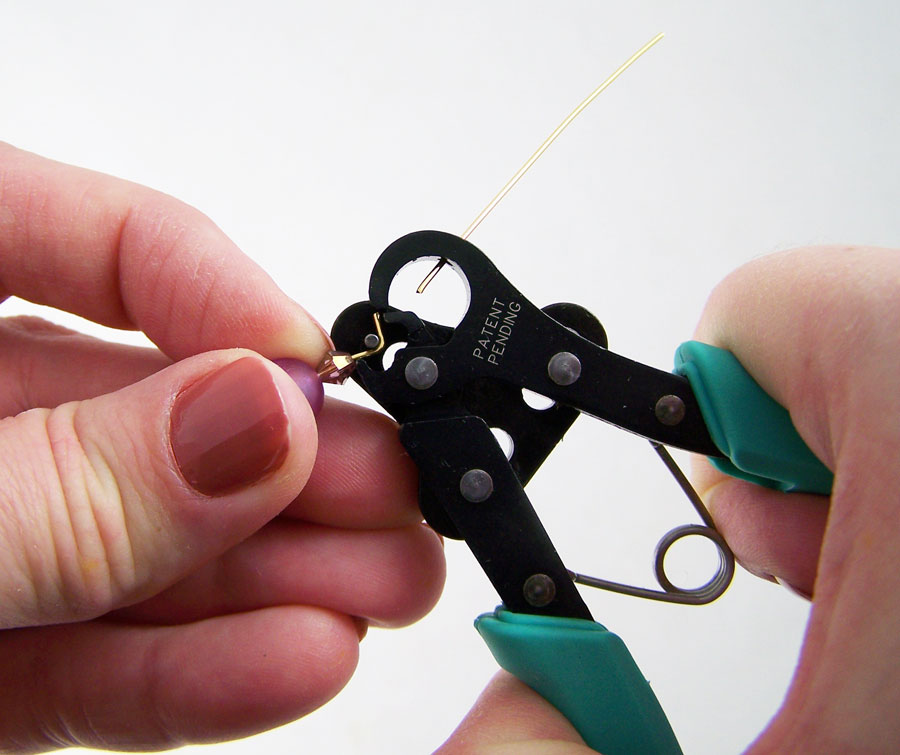
I squeezed the handles together and the wire gets cut by the tool. In fact it did it so quickly I was rather shocked at how easy it was and how little pressure I needed.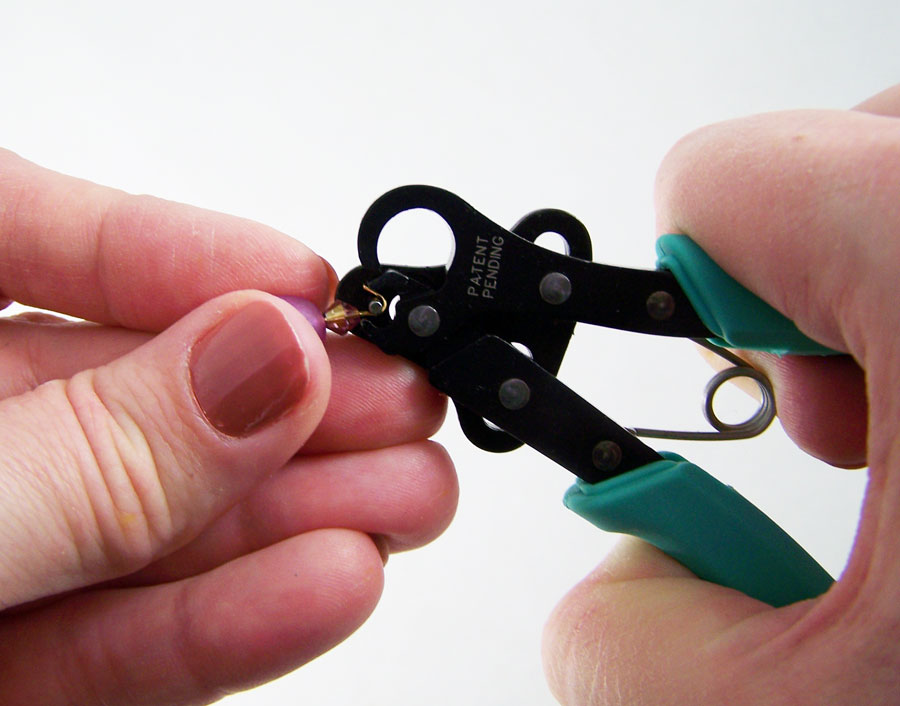
I continued to squeeze the handles and it curled the wire into a very neat and even loop.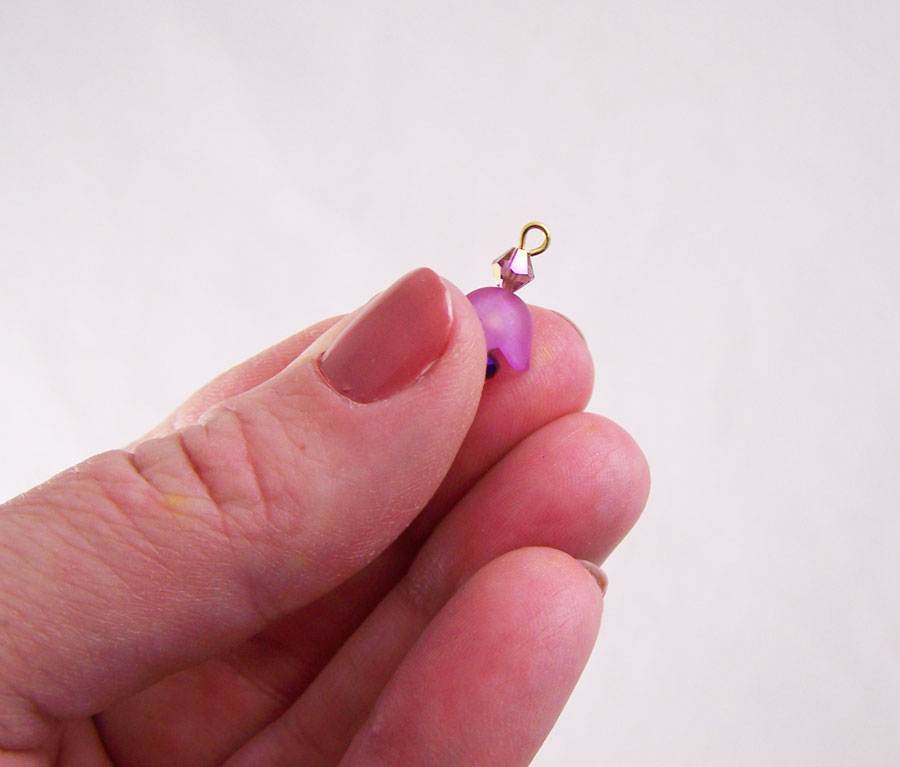
Normally making a loop like that requires me eyeballing the length of wire to cut it in the right area, using a wire cutter, getting a pair of round nose pliers to curl a loop and sometimes squeezing it into place with a flat nose pliers. This can take a minute of so for me and a necklace requiring a lot of loops can take some time. This tool made the loop in seconds.While I was very happy with the results I had heard some complaints that the tool sometimes didn’t always close the loop tight. I tried making several loops and all of them came out with neat closed loops. I started to try out all kinds of beads and wire, finally I was able to reproduce an open loop.
Sure enough when you have a large or odd shaped bead the wire loop doesn’t always loop closed. After looking over what I was doing I realized the issue was the bead shape and/or how close the beads are pushed on the wire to lower jaw of the tool before the handles are squeezed.
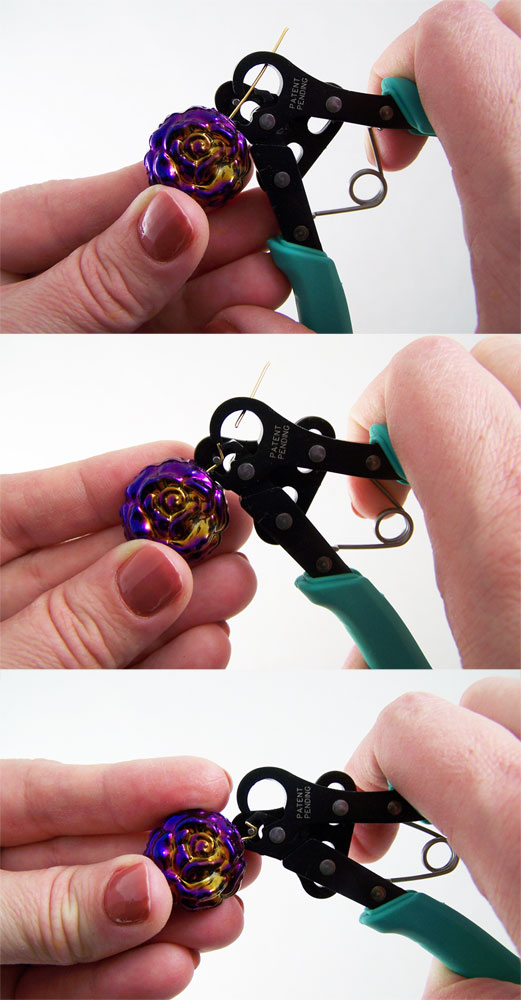
Here is the odd shaped rose bead next to a small crystal bead. An oddly shaped bead can prevent the wire from laying even against the tool, and there will be a slight gap in the final loop. This can even happen with more even-sized beads if you are not careful how plumb the piece is. However there is a very nice upside to it not being a tightly closed loop; If you are working with clay, glass or wood beads you can risk the chance of the wire loop digging into if not out right chipping the bead if the loop is made too tightly, but with the loop slightly open you can carefully close the loop with a pair of round nose pliers and have perfectly shaped loops every time. You can also use the slight opening to add more links or rings onto the piece before closing it with pliers. I plan on using the slightly open looping aspect to my advantage with future projects.
I made this earring and necklace set in about 15 minutes using the Looper Tool. I honestly took me longer to pick the beads and thread them on the wire than to use the tool and assemble. It is so easy on the hands if you get muscle cramps in your hands (like I do) or even arthritis this will make jewelry making easier.I would rate this tool as must have for any jewelry maker who makes lots of wire loops and wants awesome results every time.
Until next time, safe travels!
Creative Crystals
I often get into these creative modes where I get focus on a specific medium or supply. My recent craze is using crystals, be it vintage, natural, glass, anything with a sparkle to it. I am testing my boundaries with this because I generally do not use crystals in my work, I always get so worried I will break the delicate pieces or chip them. But a few months back at the Winter CHA I came across the Connie Crystal booth. The booth had this gorgeous dress made from paper and crystals, it was such an eye catcher I had to walk in and look at the crystals.

Connie herself was teaching make-and-takes and invited me to try making one of her projects. I was pleasantly surprised by the high quality of the crystal beads and focal pieces she had in a stunning array of colors. The crystals did not chip while working with jewelry tools and they had amazing clarity. I bought some of the floor samples and carefully packed them away. I would take them out now and then just to look at the beautiful beads but still not sure what type of jewelry I would like to make of them. After seeing some some other artists work in crystal I got inspired. I researched some ancient jewelry patterns and I came up with these necklaces and earring sets:
Sterling silver chain, size: 12mm and 10mm Connie Crystal beads. A simple design but I was going for a fantasy piece that brought to mind a female warrior’s adornment.

Gold plate vintage chain with 10mm Connie Crystal beads. With this piece I went with the theme of the the Leo horoscope sign and the colors often attributed to the sign.

Silver plate chain and findings, vintage green crystals, lampwork glass beads and 14mm circle Connie Crystal beads. I love to put animal themes in my artwork whenever I can and with this one I used a lovely snake toggle as one of the many focals on this asymmetrical piece. It hints back to ancient myths and legends so I named the set “Snakes of the Crystal”.
After making all of these pieces and using Connie Crystal beads I can honestly say they work very well, have amazing color and can handle being moved around a lot. I tend to adjust my jewelry pieces, connecting and moving about elements until I am happy with the design, and these beads came through it looking beautiful. If you do bead work or mixed media and want something different to add to a piece, go to their website. 🙂
Until next time, Safe Travels!

Ancient and Contemporary Inspired Artistry