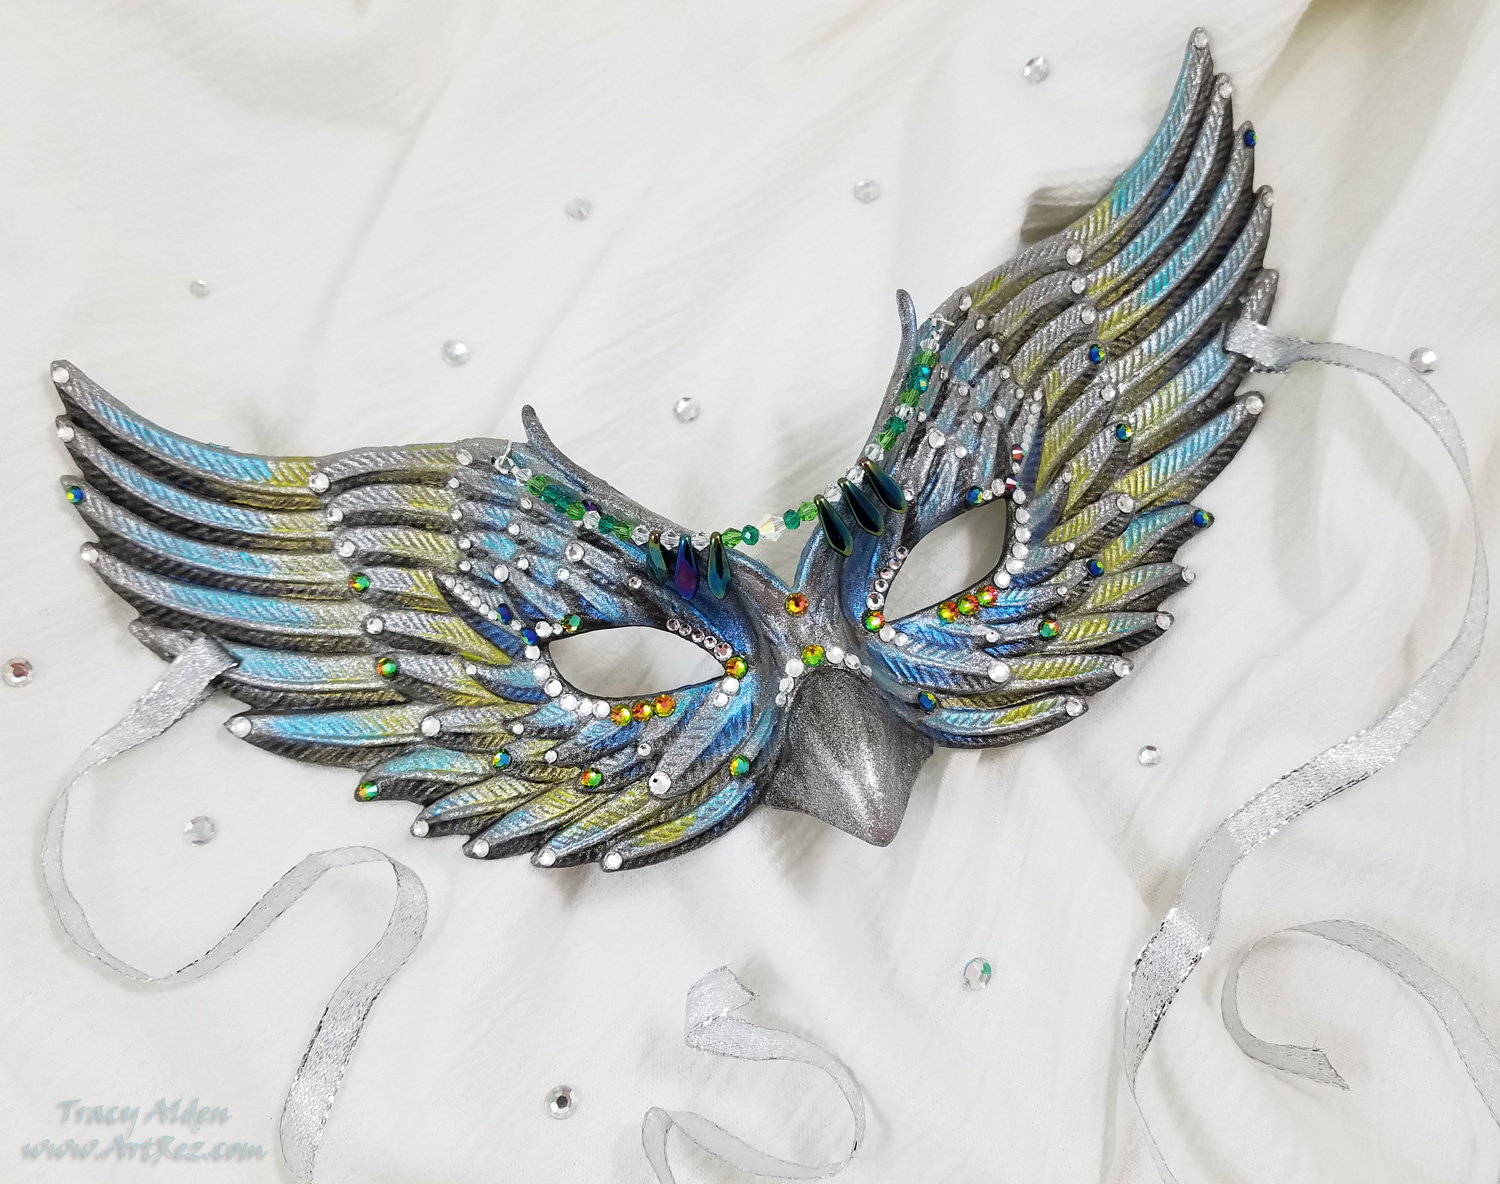
Sparkling Masquerade Mask with Testors Craft Intense Glitter Paint
My last two blog posts, found Here and Here I talked about the 6th annual Prime Networking Event in January. At this event, bloggers, designers, authors and brands in the craft industry came together to network, make new partnerships, and learn about new product information. Educational, informative, with food, drinks and free product samples provided by this year’s sponsors. Afterward, the event attendees were encouraged to try out and create art for the Favecrafts Best Blogger Craft Event.
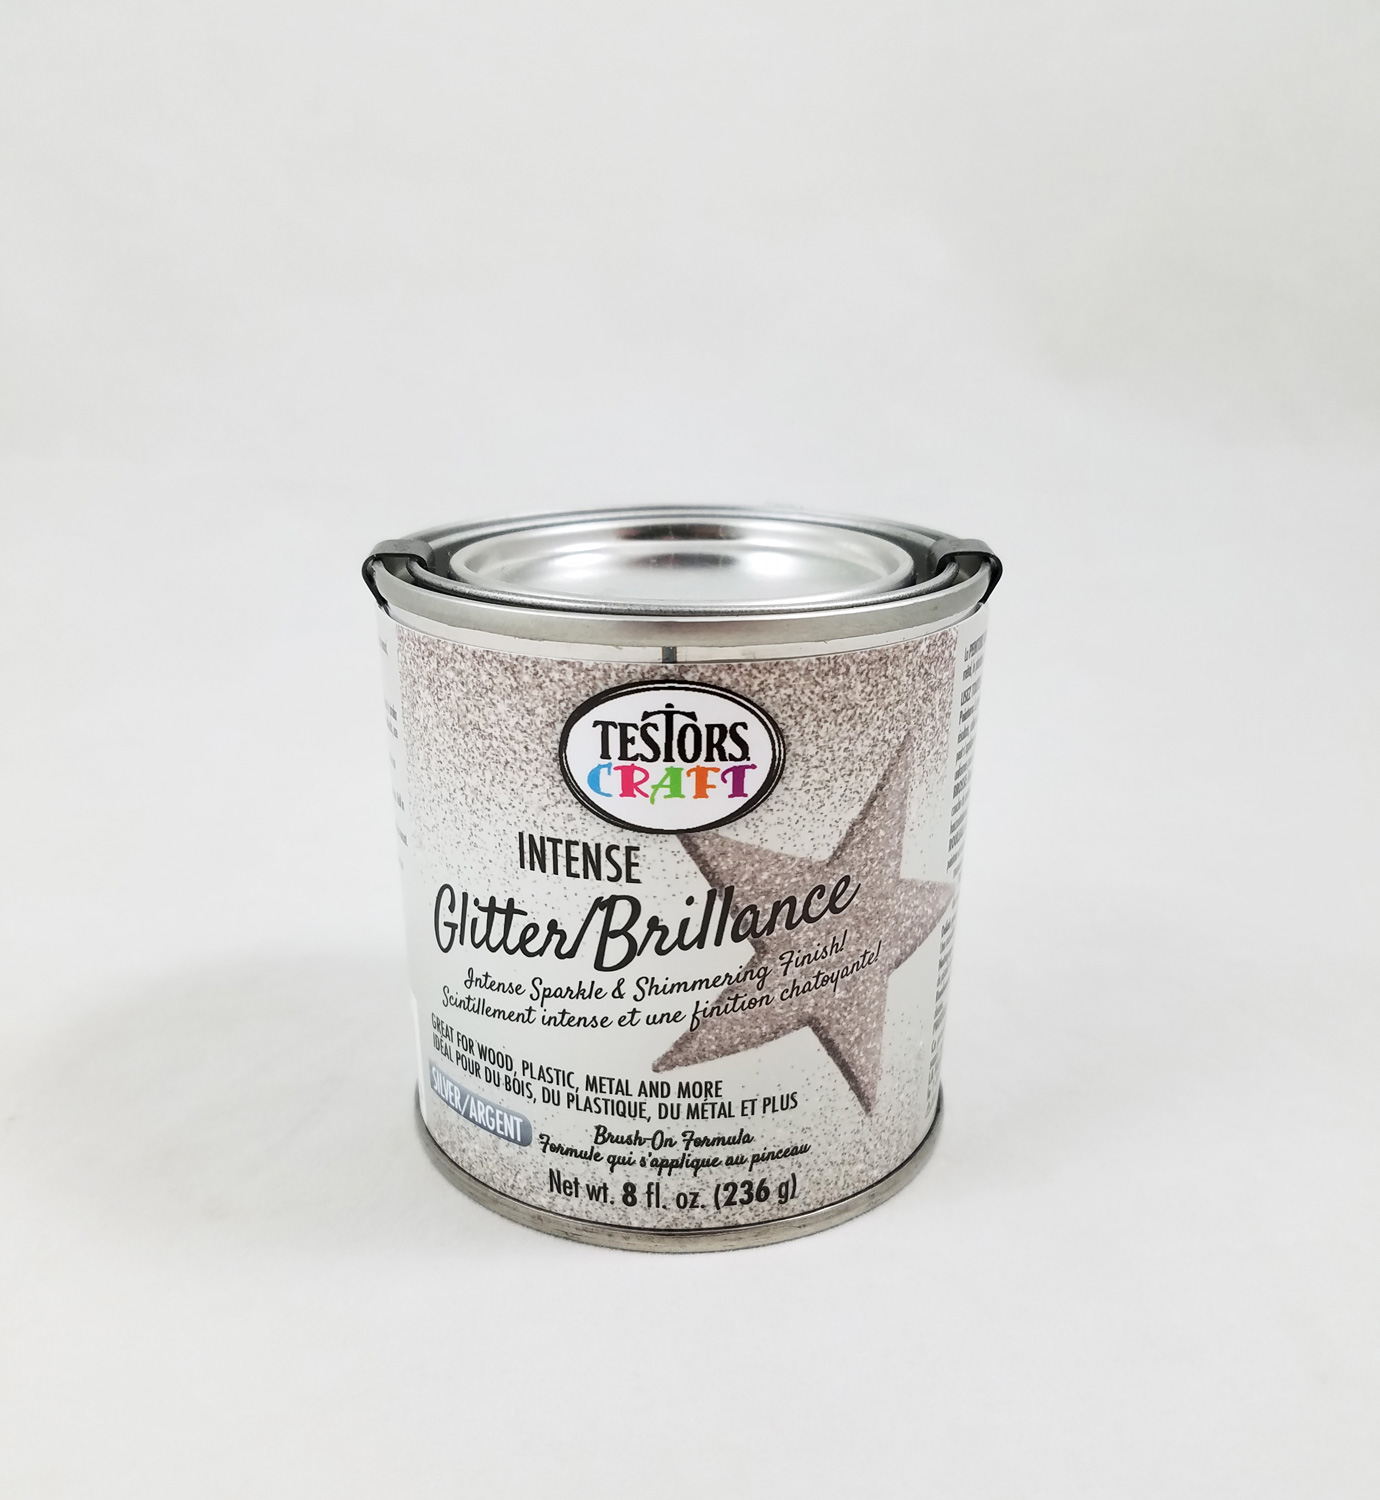
A sponsor at the event was Rust-Oleum with the Testors paint brand (Testors once its own company is now part the Rust-Oleum Group). During the blogger event attendees were asked to cast a vote for their favorite new Testors Craft/Rust-Oleum product. The winner of that vote was the Testors Craft Intense Glitter paint. As per the label it can be applied to wood, plastic, metal and more, with excellent adhesion, perfect for special occasion tablescapes and home accessories. Testors Intense Glitter paint is water based, low VOC and the glitter is made out of very small Mica particles (Mica is a naturally occurring mineral found in granite, rocks and crystals).
Many at the event were excited with this new paint and were excited to try it. However I will let you in on a secret: while a fan of the Rust-Oleum/Testors paint lines I am not a huge fan of glitter. I know I probably broke a crafting world rule by saying that but I have never found myself using much glitter in my projects. I use it mostly as a highlight, a minor shimmer or a tiny amount encased by resin. I have found many glitter paints in the past to be messy, have bad adhesion and not cover well. That being said I wanted to give this new paint a chance.
Upon opening the can of paint I realized how tiny the particles of glitter were. I painted a small swatch onto plastic, which it coated smoothly and even, when dry it looked amazing. I was staring to understand why so many were eager to try this paint. Inspiration for this project came from not wanting to coat furniture or small wood objects with glitter. I wanted to try turning something common into something beautiful. Grabbing a plastic Halloween mask from a .99 cent store I wanted to give this paint a true test, only to be very happy with my end results!Supplies:
Testors Craft Intense Glitter Paint
Plastic Owl Mask from a .99 cent store
Multi Surface Acrylic Paint in Grey and Black
Metallic Multi Surface Acrylic Paint in Blue and Green
2 Paint Brushes
Beacon Gem-Tac Glue
Swarovski Rhinestones Flatback Vitrail Medium SS20
Clear Crystal Rhinestone Flatback 4mm and 3mm
Crayon
Silver Ribbon
Beads, Bead Thread and Jumprings *optional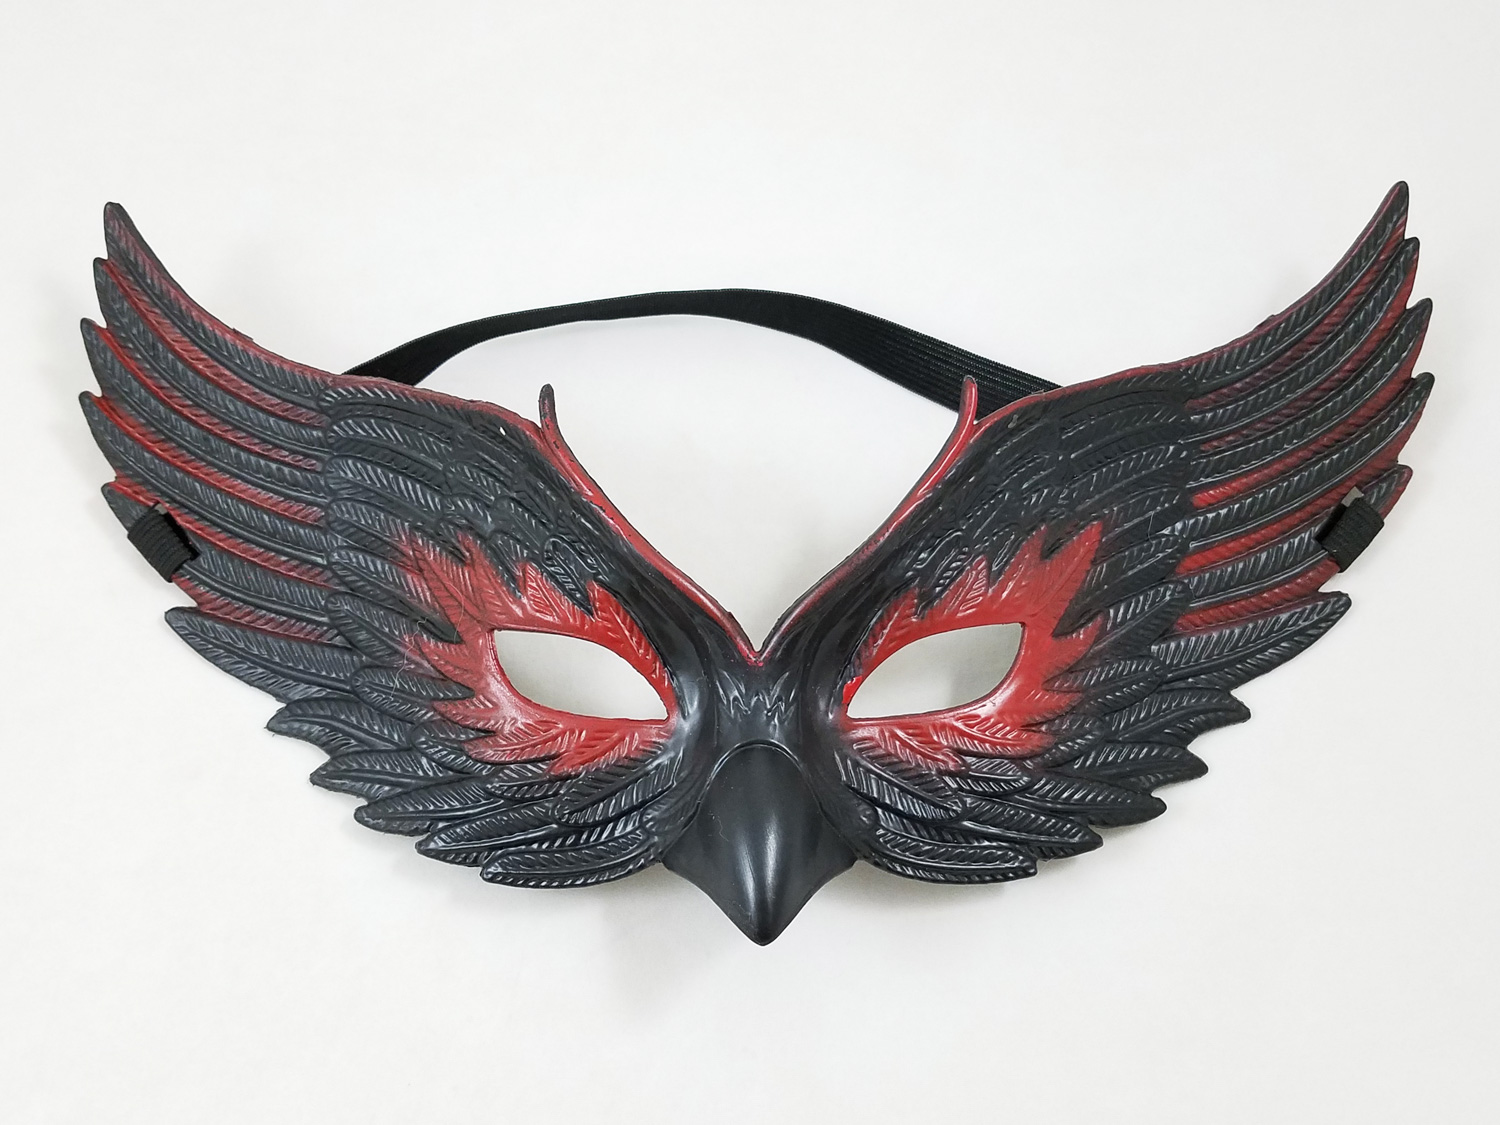
Starting by cleaning the plastic Halloween mask with soap and water, I made sure to remove any oils or dirt left from the manufacturing process. I cut off the elastic headband and filed any sharp edges.
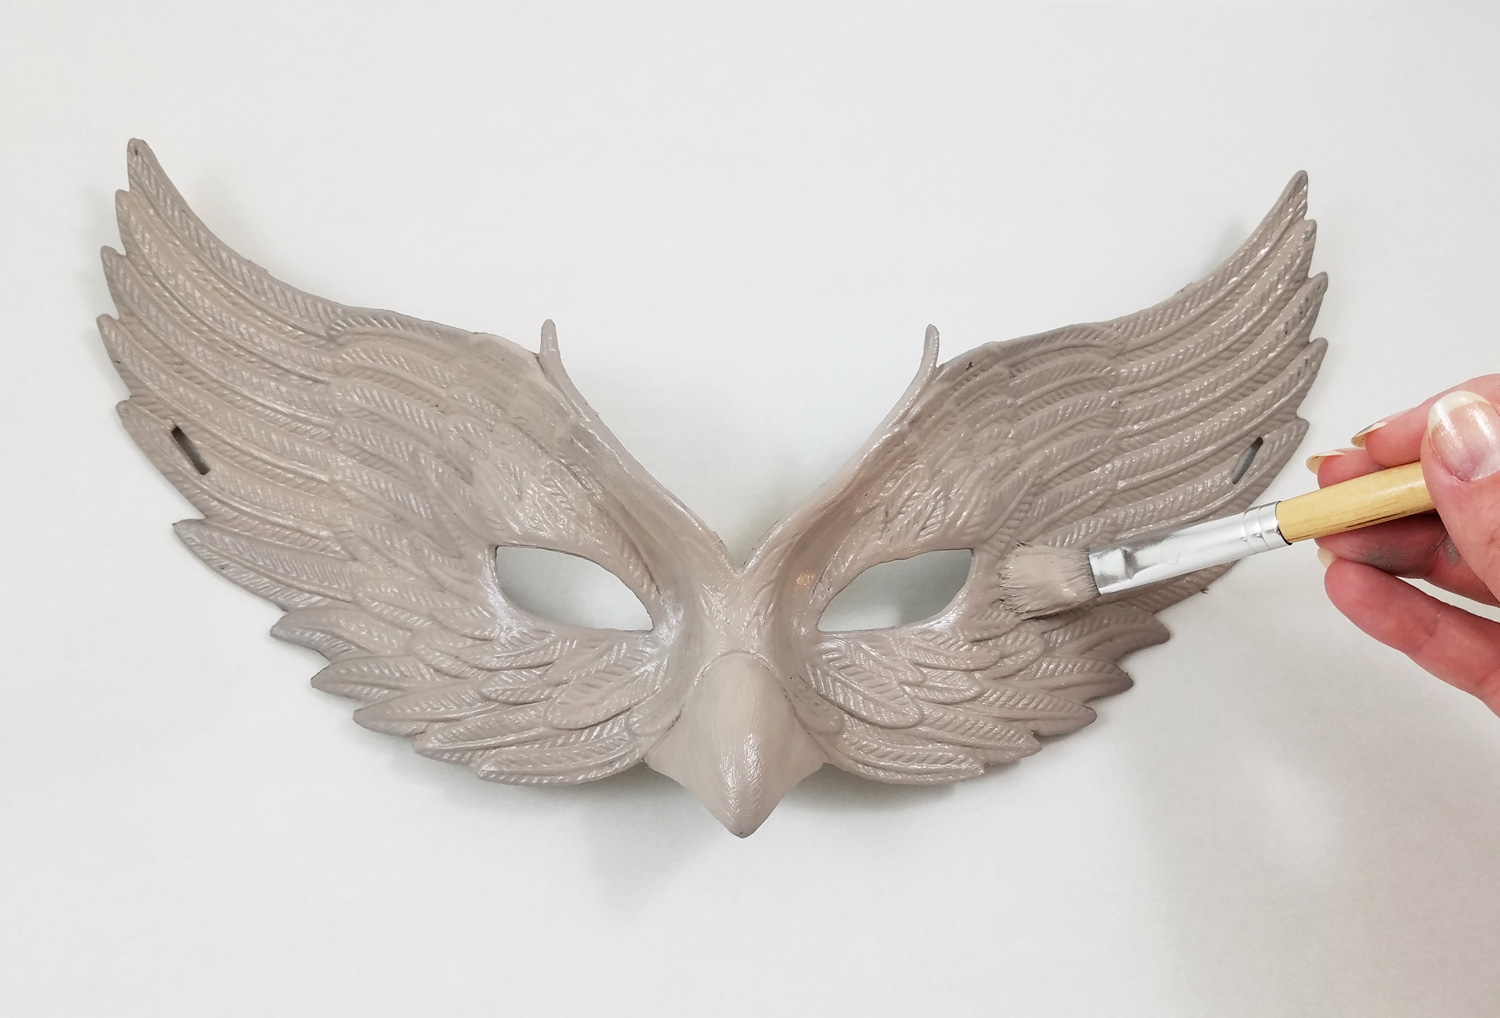
I noticed on the can of Testors Craft paint it said for best results to use a acrylic paint base coat similar in color to the glitter. Using a multi surface acrylic paint I painted the front and back of the mask, making sure to get complete coverage over the original black plastic.
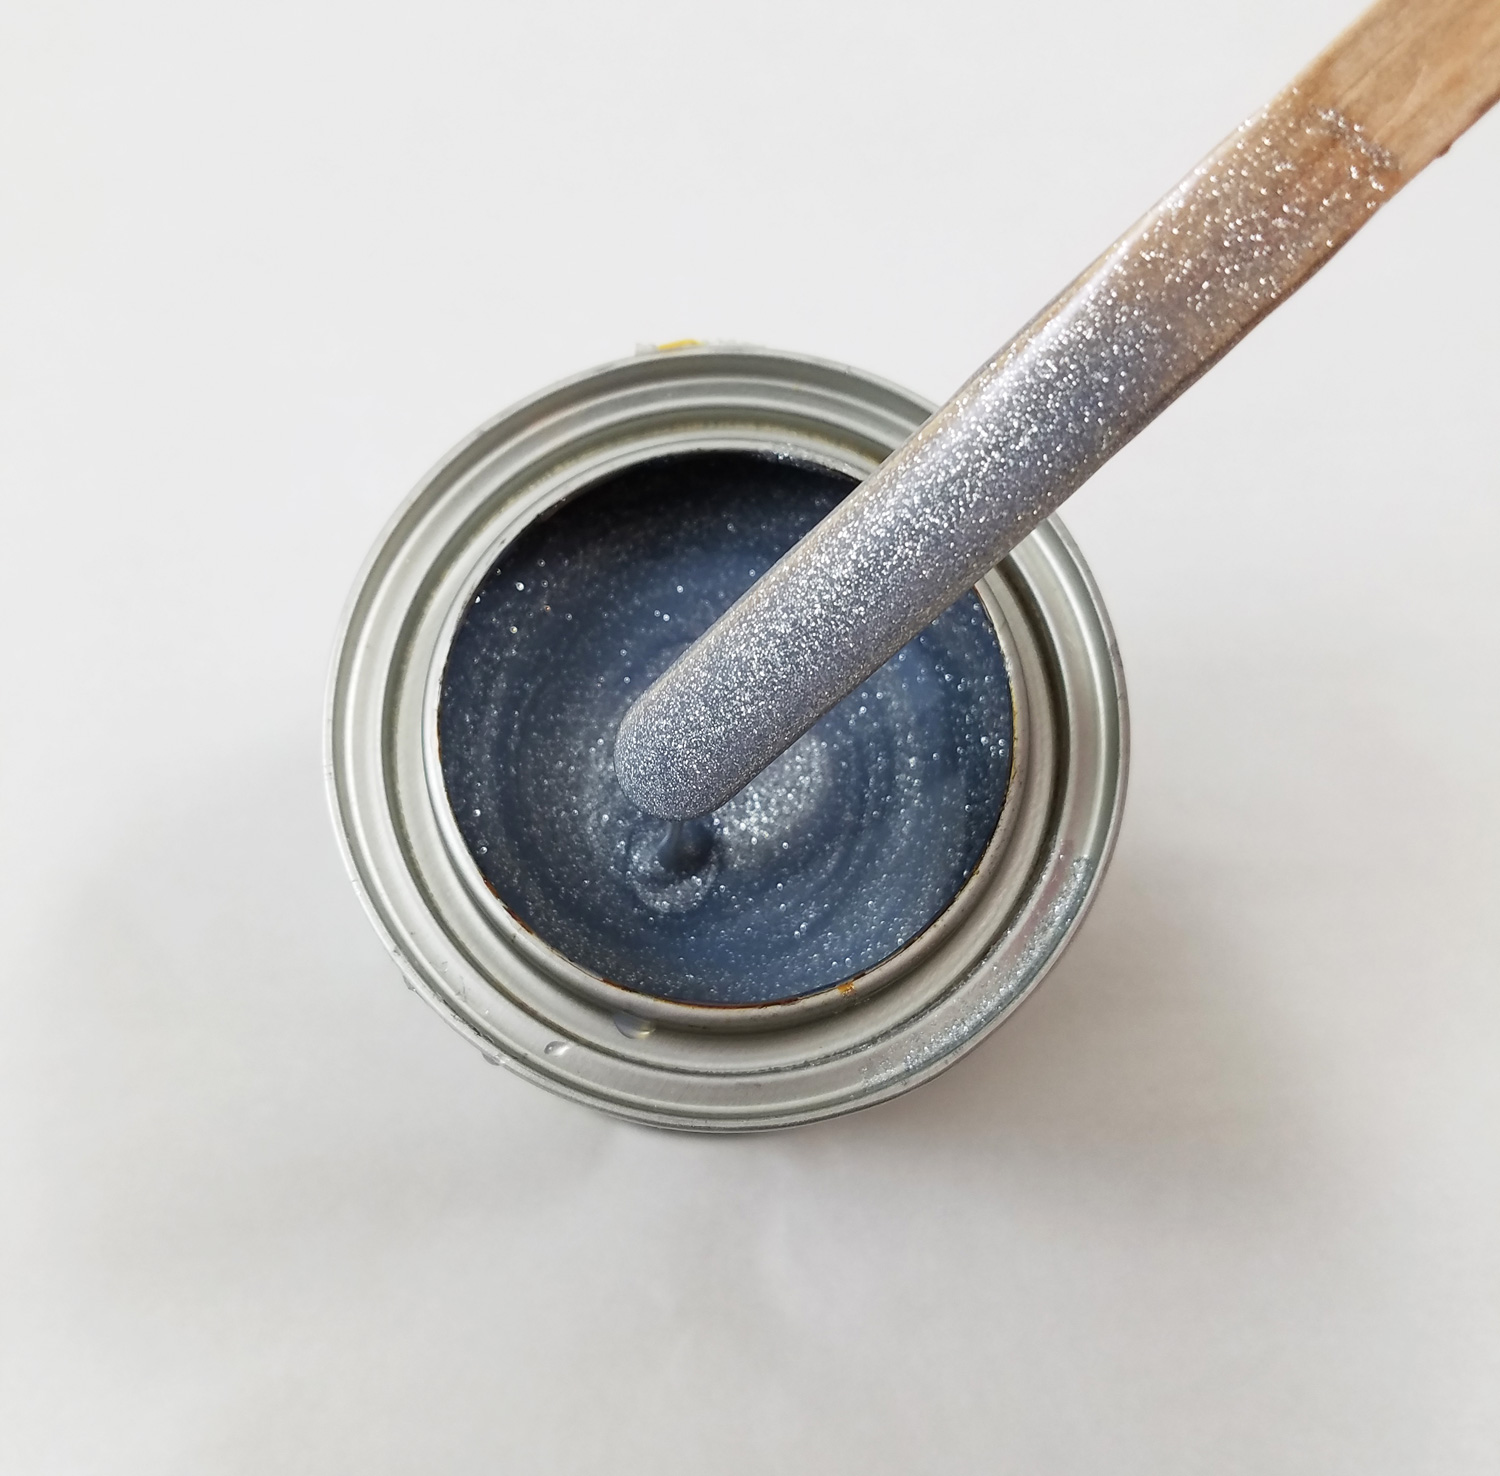
As you can see from the photo there is a intense amount of glitter in this paint. Before applying the paint to any surface make sure to stir thoroughly the Testors Craft Intense Glitter paint. This step MUST be repeated before each application because there is so much glitter in the paint it settles to the bottom when resting.
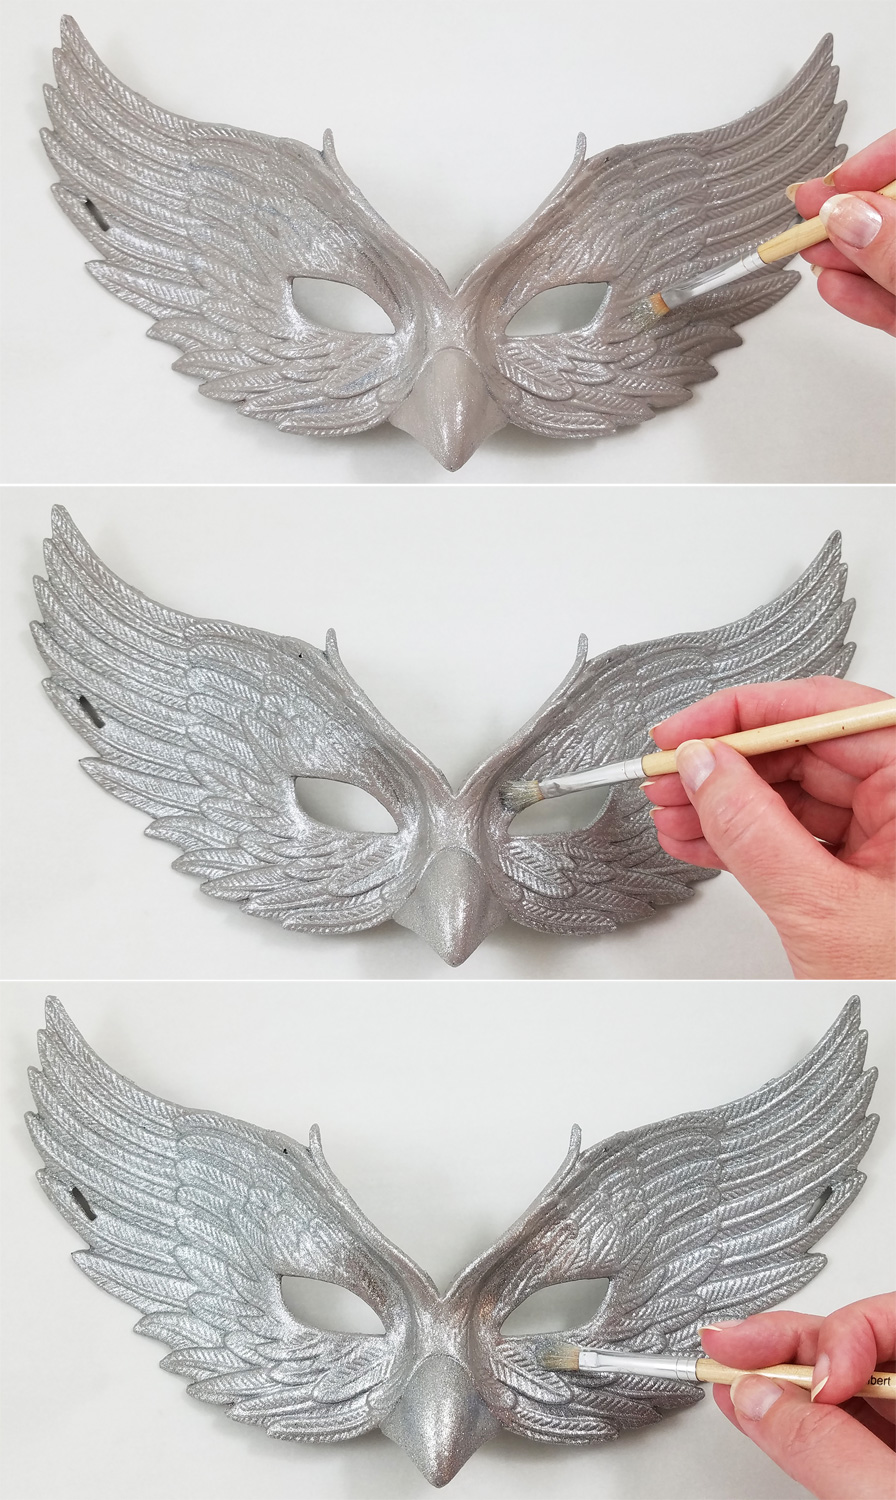
I applied one coat of paint brushing it on in uniform direction. With no need to rush, slow, steady and even brush strokes got the best and most even application of the paint. As long as you do not overload the brush the paint is not a messy paint and sticks well to the plastic surface. It dries in about one hour to touch and can be painted with a second coat in 4 hours. In the top photo you can see one coat of paint, each additional image with another coat of paint. I chose to paint three coats to get the most vibrant and intense glitter coverage, though I could have easily gotten away with 2 coats of paint.
By applying a light color wash of black multi surface acrylic paint in the groves of the feather details, it added more contrast to the mask. I let the paint dry fully.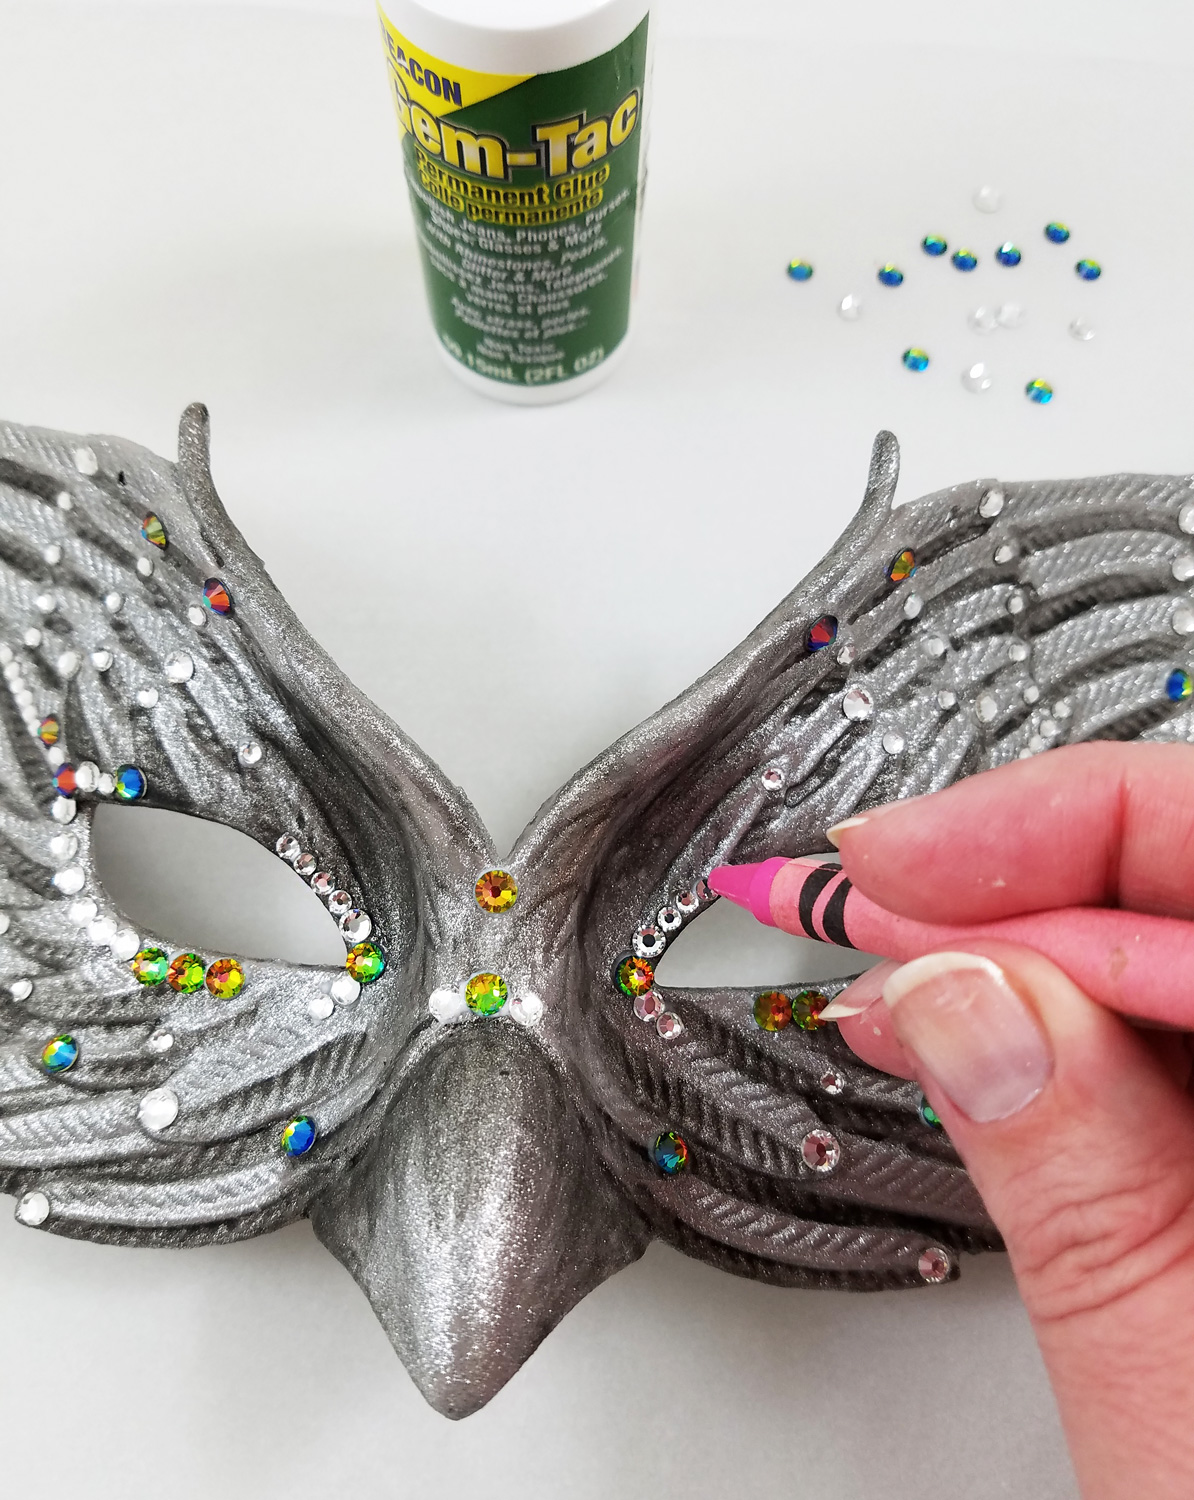
Beacon’s Gem-Tac is my go-to glue for applying small decorative elements to most craft surfaces. By squeezing small dots of glue on different portions of the mask I added flatback crystal rhinestones to add that extra special sparkle and shine. Applying flat backed rhinestones can be tedious but using an old costuming trick you can quickly apply them: pick up each rhinestone by pressing the top of each stone with a crayon. The wax is soft enough it temporarily sticks to the rhinestone allowing you to move it to wherever you would like it applied.
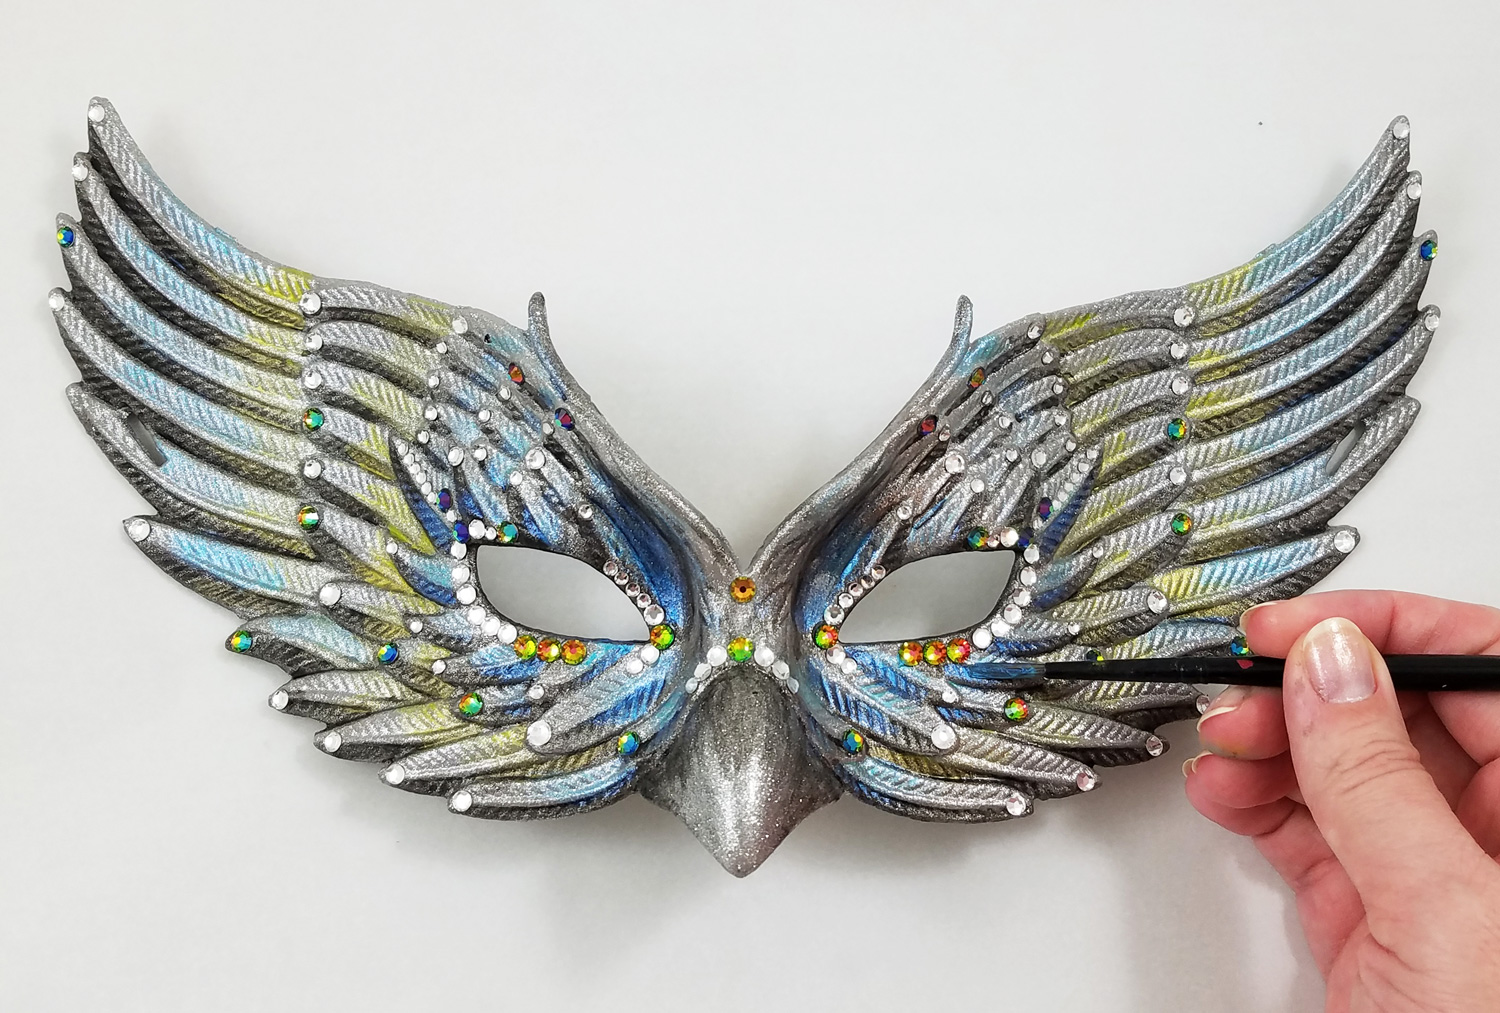
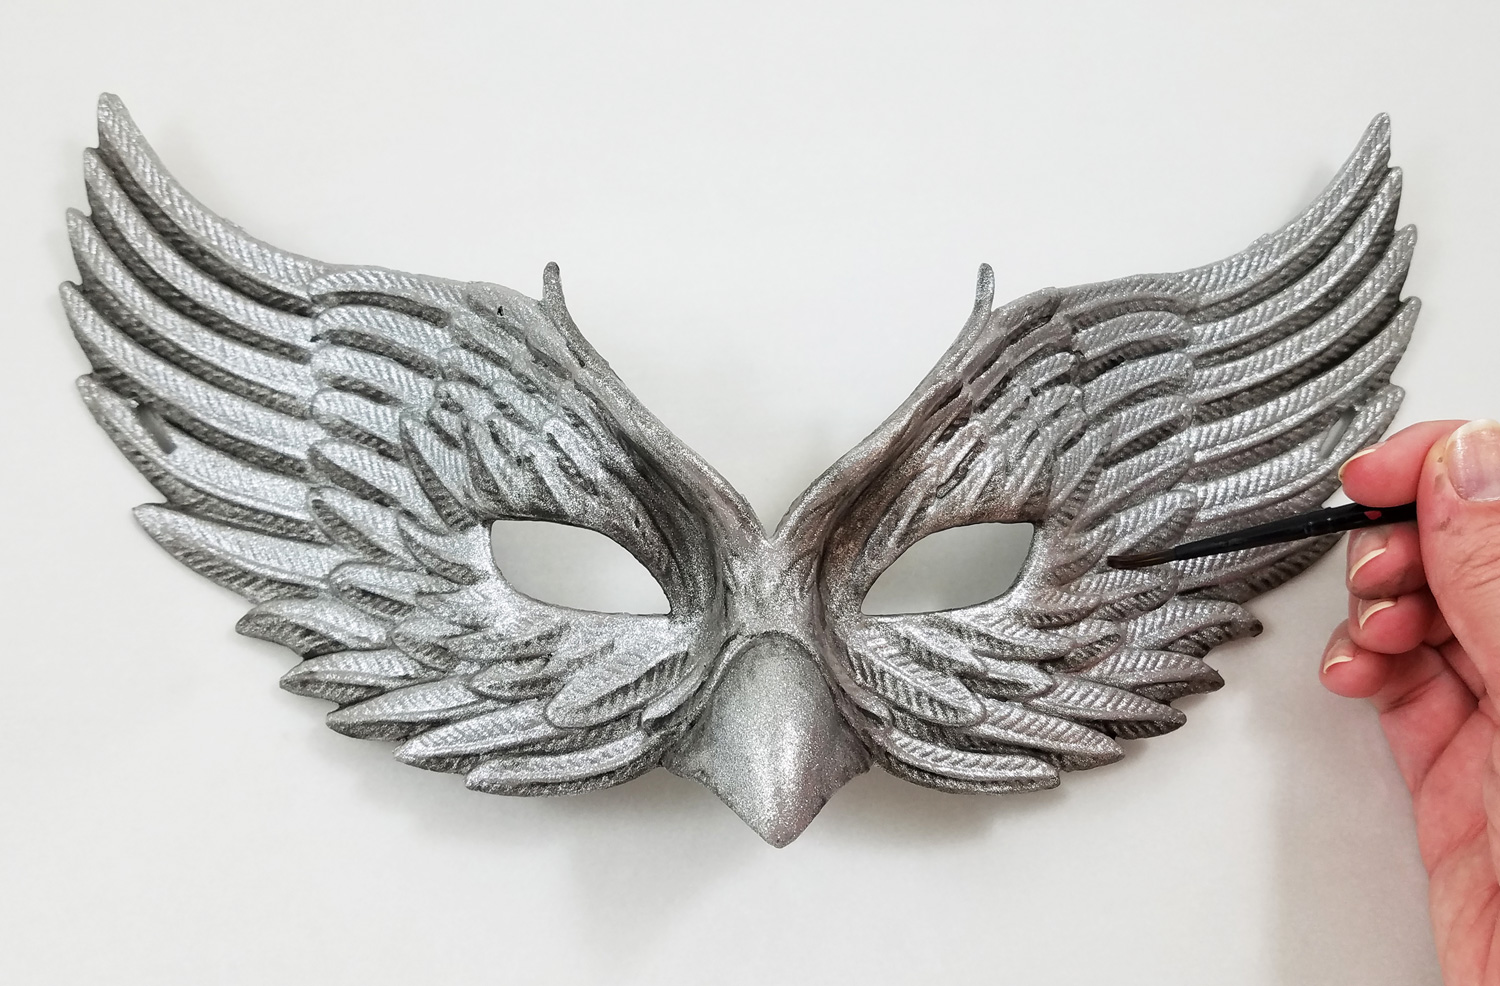
I loved the look of the rhinestones to the mask but I felt it was missing a little something. I went ahead and created a second acrylic paint color wash but this time with metallic blue and green paint. I applied this color directly on top of each glittered feather element of the mask and in the eyelid creases. This created a lovely transparent metallic hue. I let the paint dry fully.
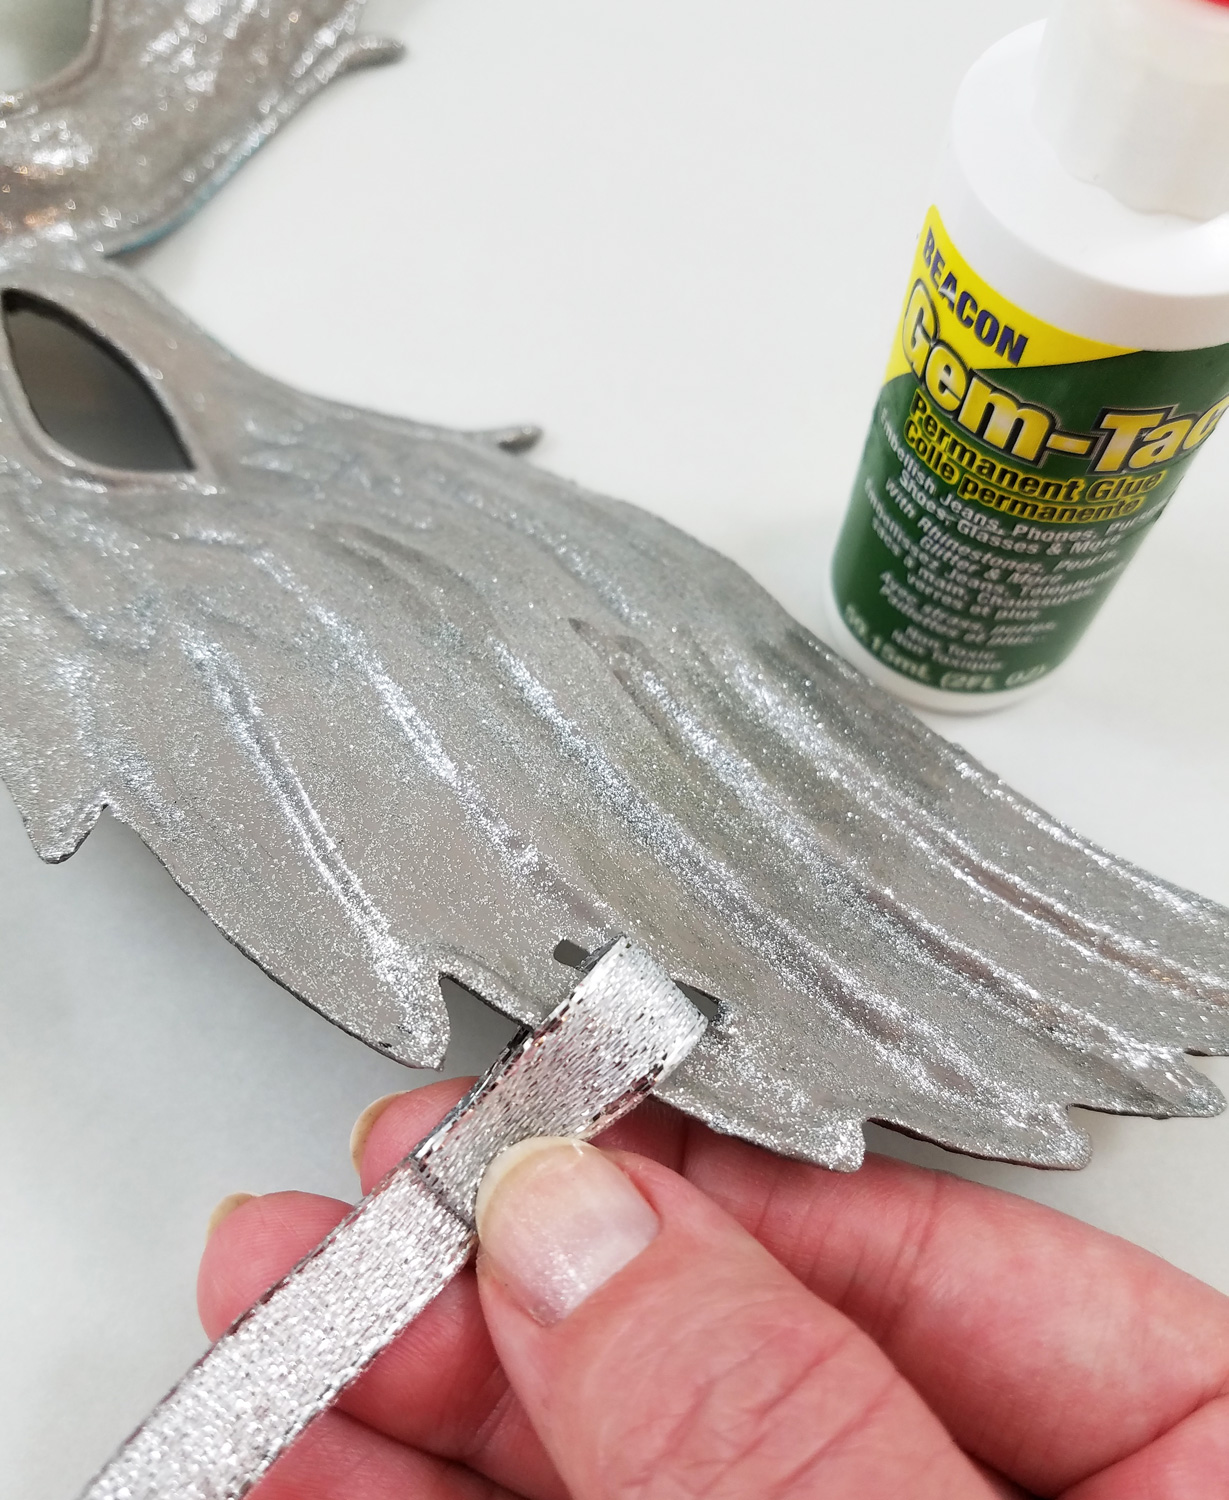
Silver ribbon was threaded through each side of the mask where the black elastic use to be. I folded the end of the ribbon under and glued it in place, pressing down firmly with my fingers and used a clothespin to hold in place while the glue dried.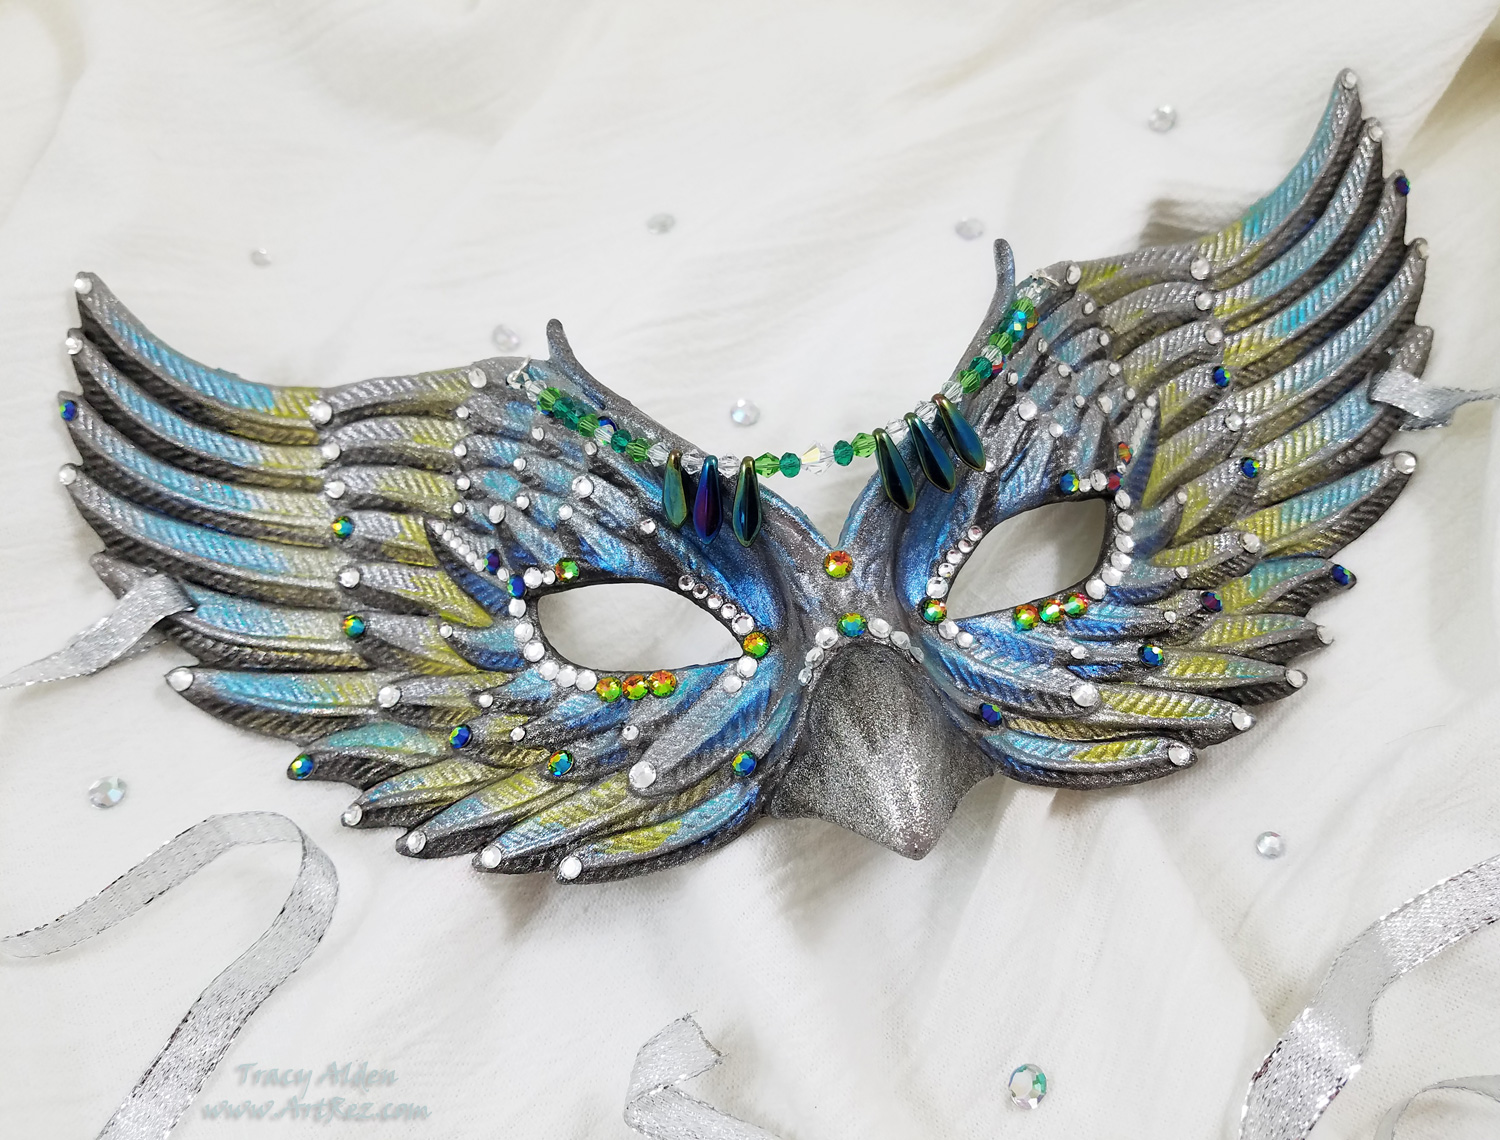
One more element of sparkle was added by stringing some crystal beads onto a 9 inch length of beading thread and threading it through two tiny holes that were part of the original mask. Now the masquerade mask was finished, ready to be worn or displayed.Testors Craft Intense Glitter paint truly won me over and I look forward to finding out what other paint applications I can try!
Until Next Time, Safe Travels!
Palm Frond Stencil Art with FolkArt Color Shift Paints
In my last Blog Post I talked about attending the 6th annual Prime Networking Event. The event was educational, informative, had great food and drinks and free product samples provided by this year’s sponsors. At this event, bloggers, designers, authors and brands in the craft industry came together to network, make new partnerships, and learn about new product information. Afterward, the event attendees were encouraged to try out and create art for the Favecrafts Best Blogger Craft Event.
One of the sponsors was Plaid, who supplied a wonderful assortment of their water-based, non-toxic FolkArt Color Shift Paints. These paints indeed do shift color and luminosity with light. In low lighting they produce a soft shimmer and in bright light the color is just stunning.
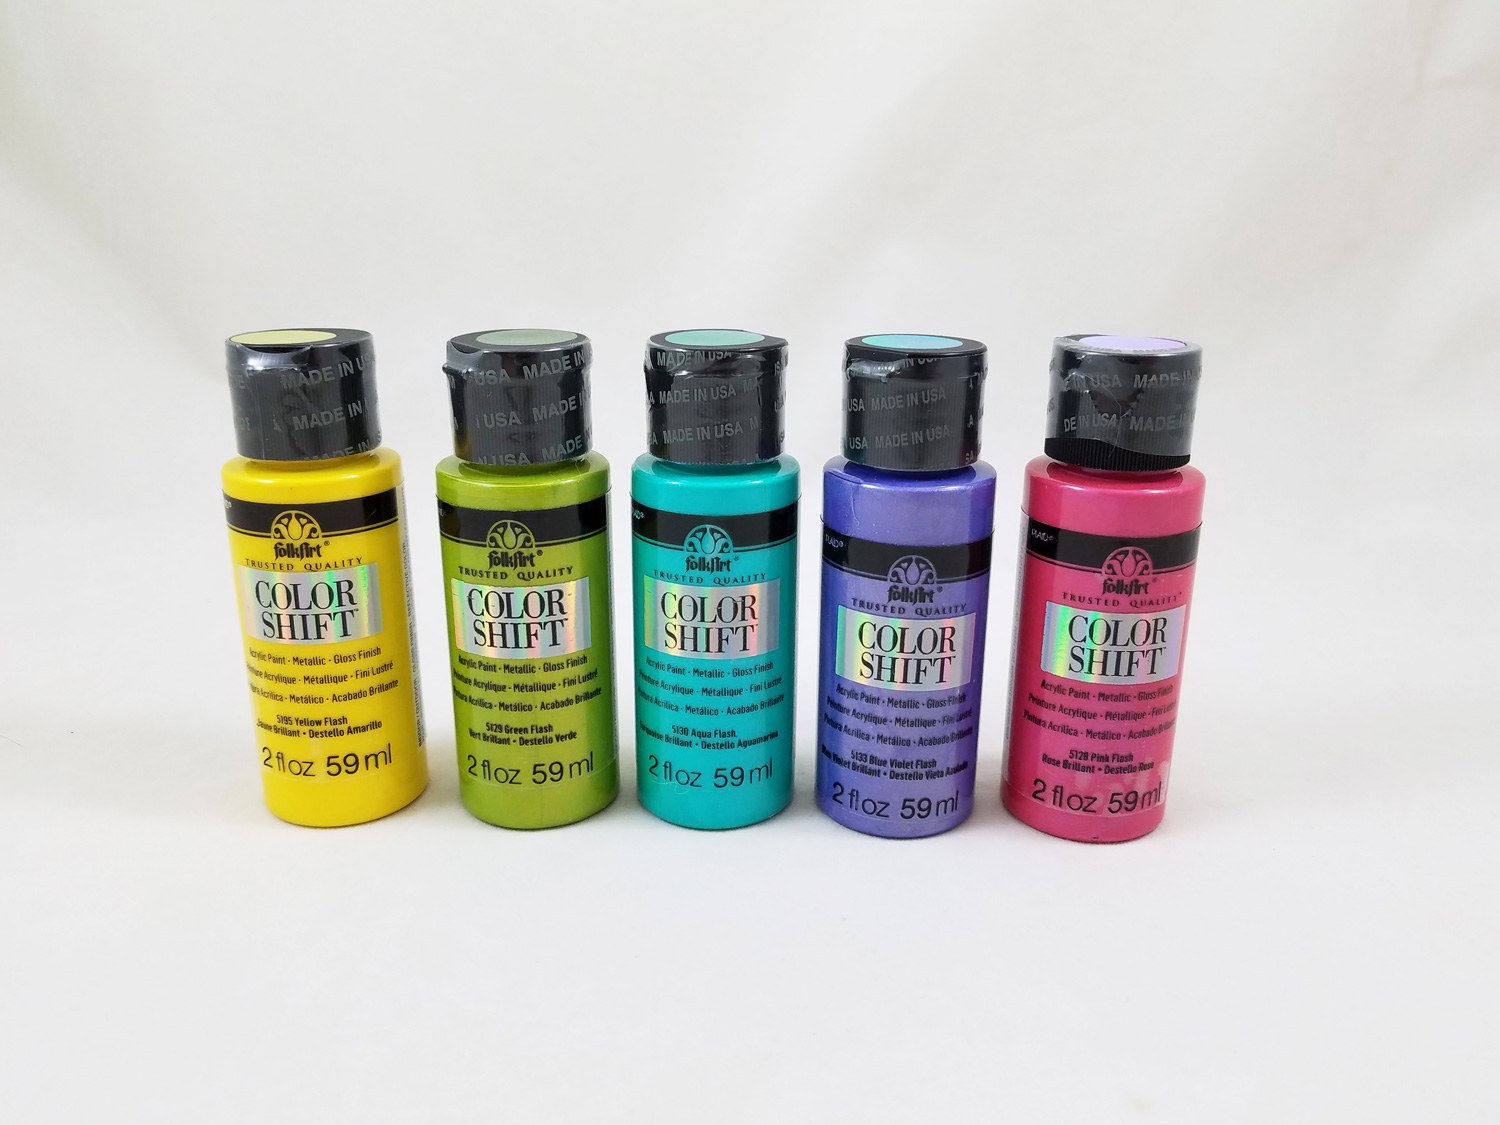
While the paints can be applied to any number of surfaces and base colors I noticed they have the most impressive result when painted on a dark or black hued surface. Keep in mind each color will dry a bit different from how they look wet. In some cases becoming brighter and in others softer when dry but any color will end up having a metallic shimmer, reminiscent of a lovely mica coating.
The bright and cheerful color selection of the paints made me think of Spring and with the trimming of my plants to encourage growth I got an idea to create a quick and easy stencil art.Supplies:
FolkArt Color Shift Paints in Yellow Flash, Green Flash, Aqua Flash, Blue Violet Flash and Pink Flash
10×20 Canvas
Paint Brush
Acrylic Paint in Black
Mini Paint Roller
Plastic Salad Lid
Gloss Varnish
Palm Fronds or other fresh plant trimmings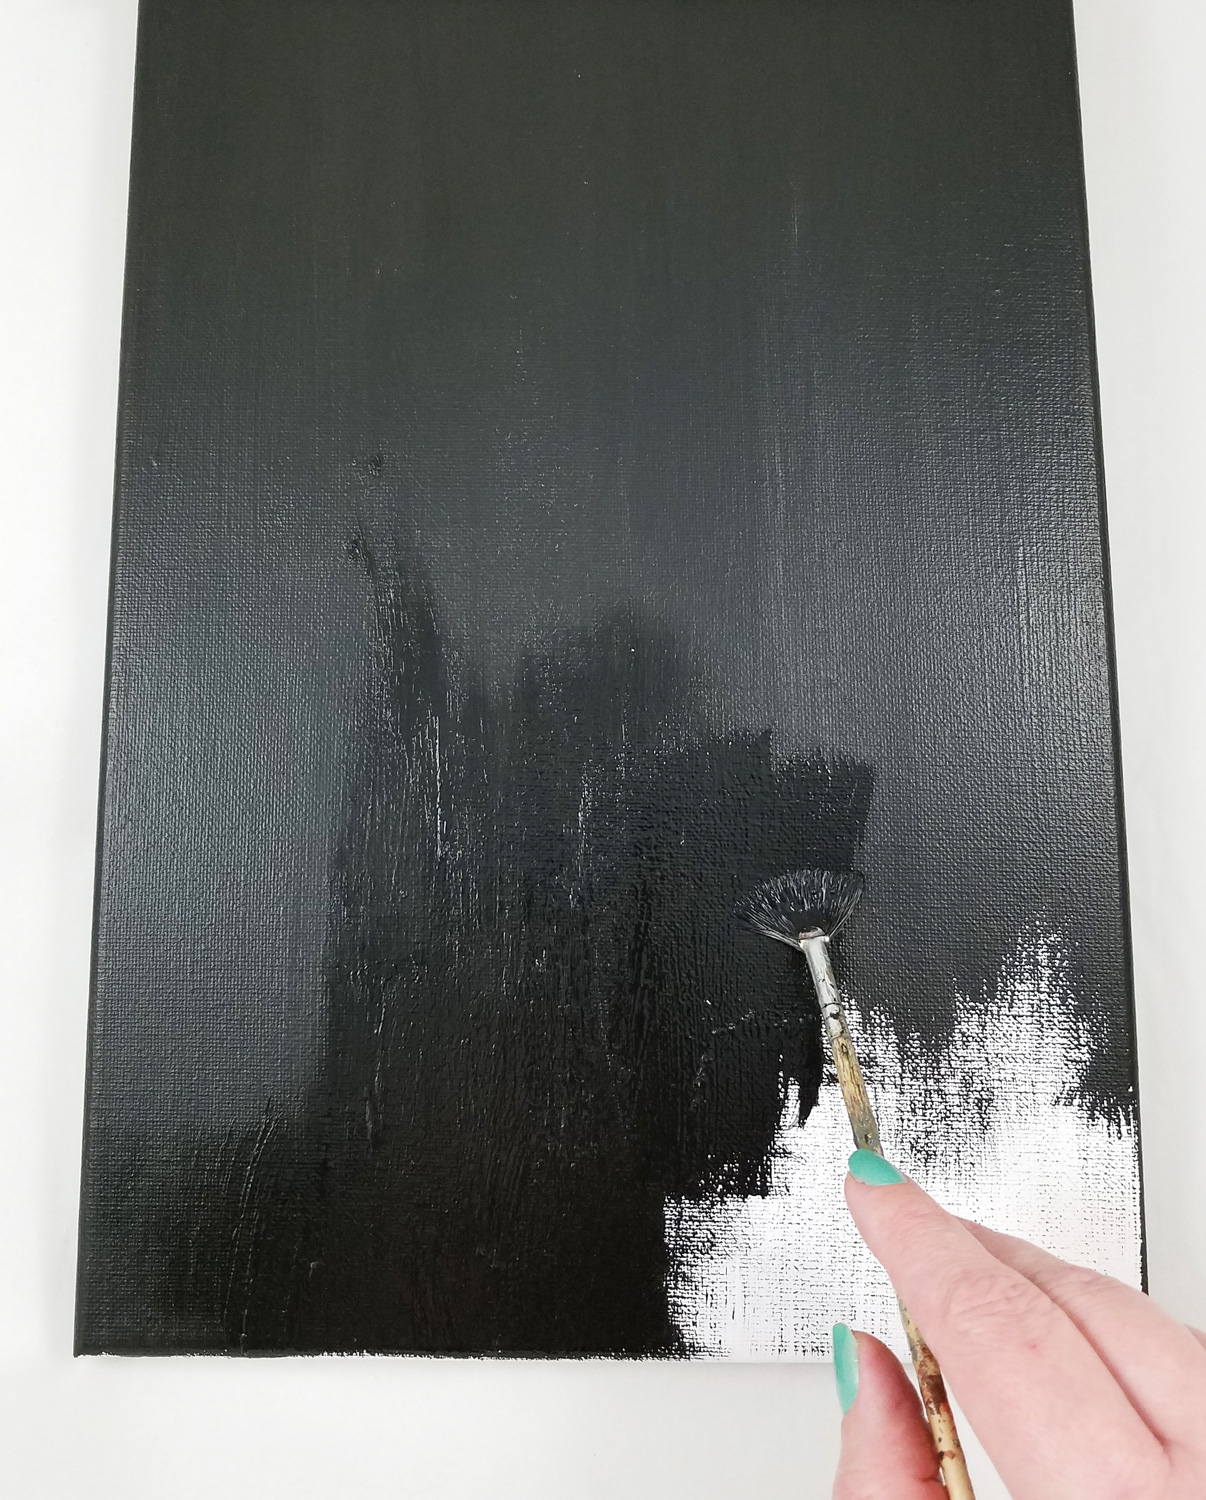
I started with applying a coat of black acrylic paint to a 10×20 Canvas. I made sure to get good coverage of paint and let it dry as per manufacturer’s instructions.
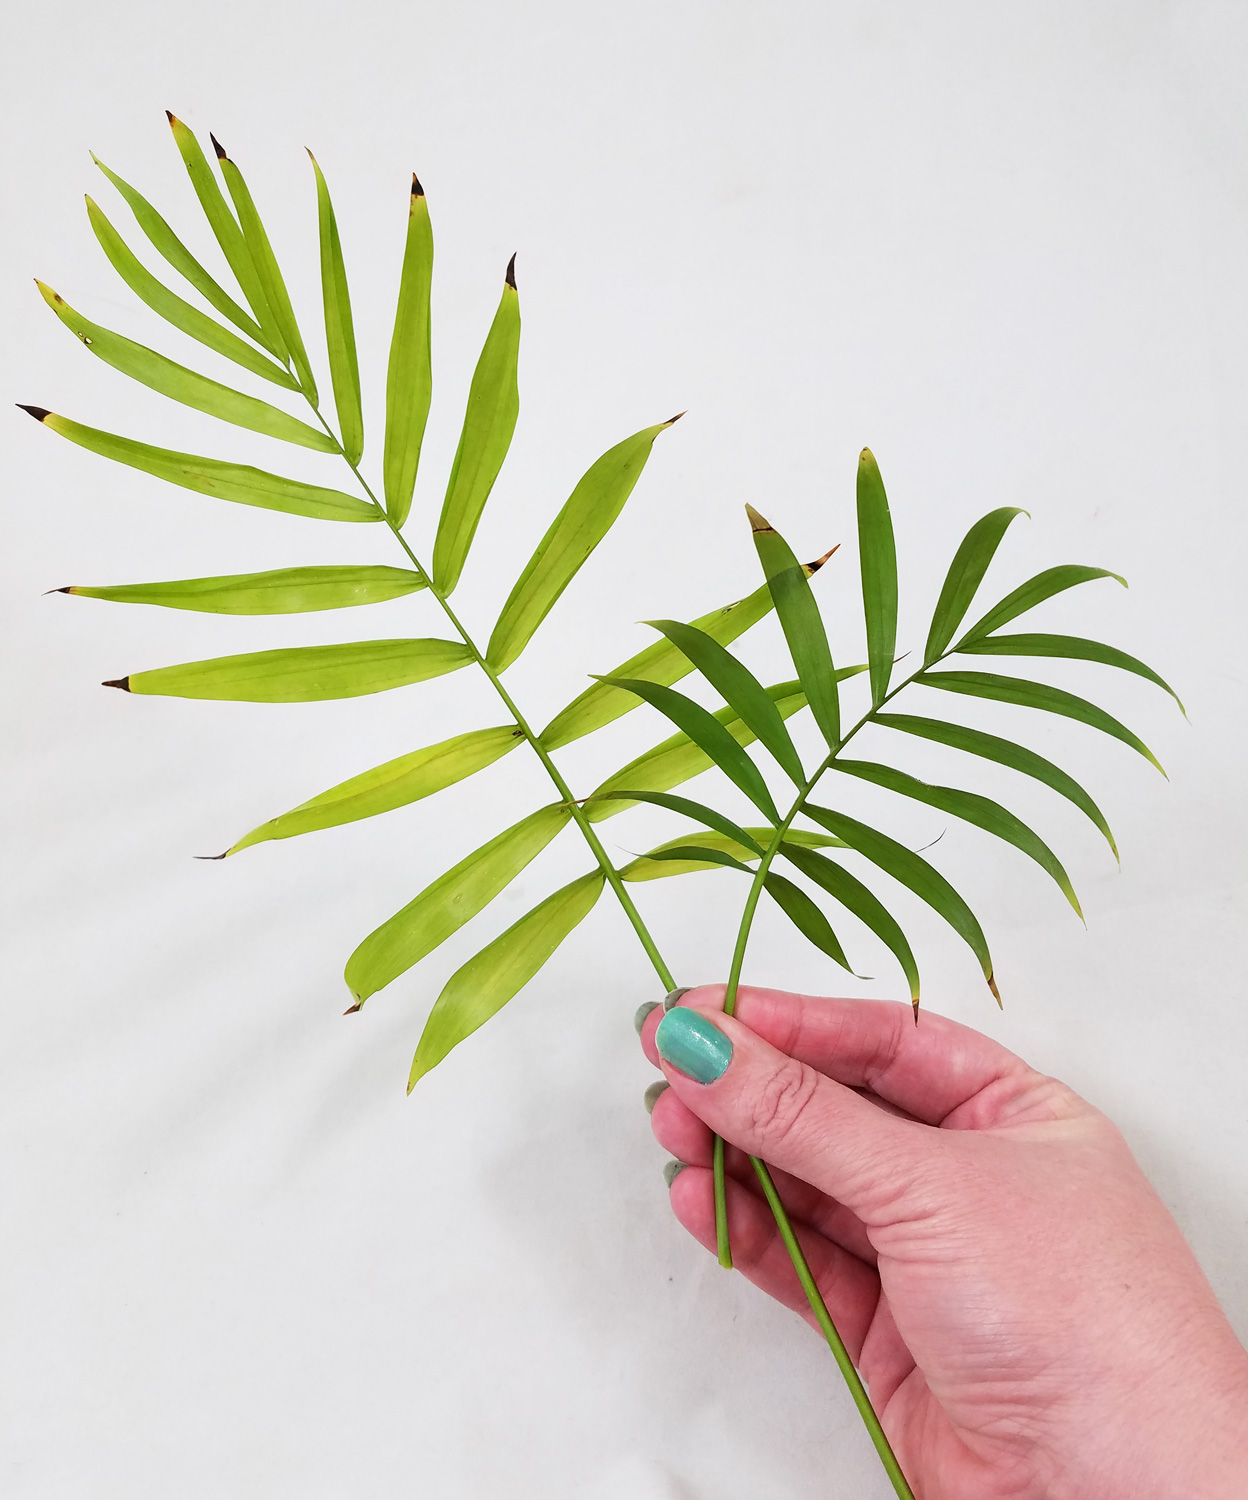
To be able to turn fresh palm fronds into flexible yet not brittle stencils I placed them between two pieces of parchment paper and then placed several heavy books on top and let it sit overnight. This way they would be easier to lay flat and yet still be green enough to not break with repeat paint applications.
*In more humid climates you might need to let the plant material sit for 2-3 days pressed by books.
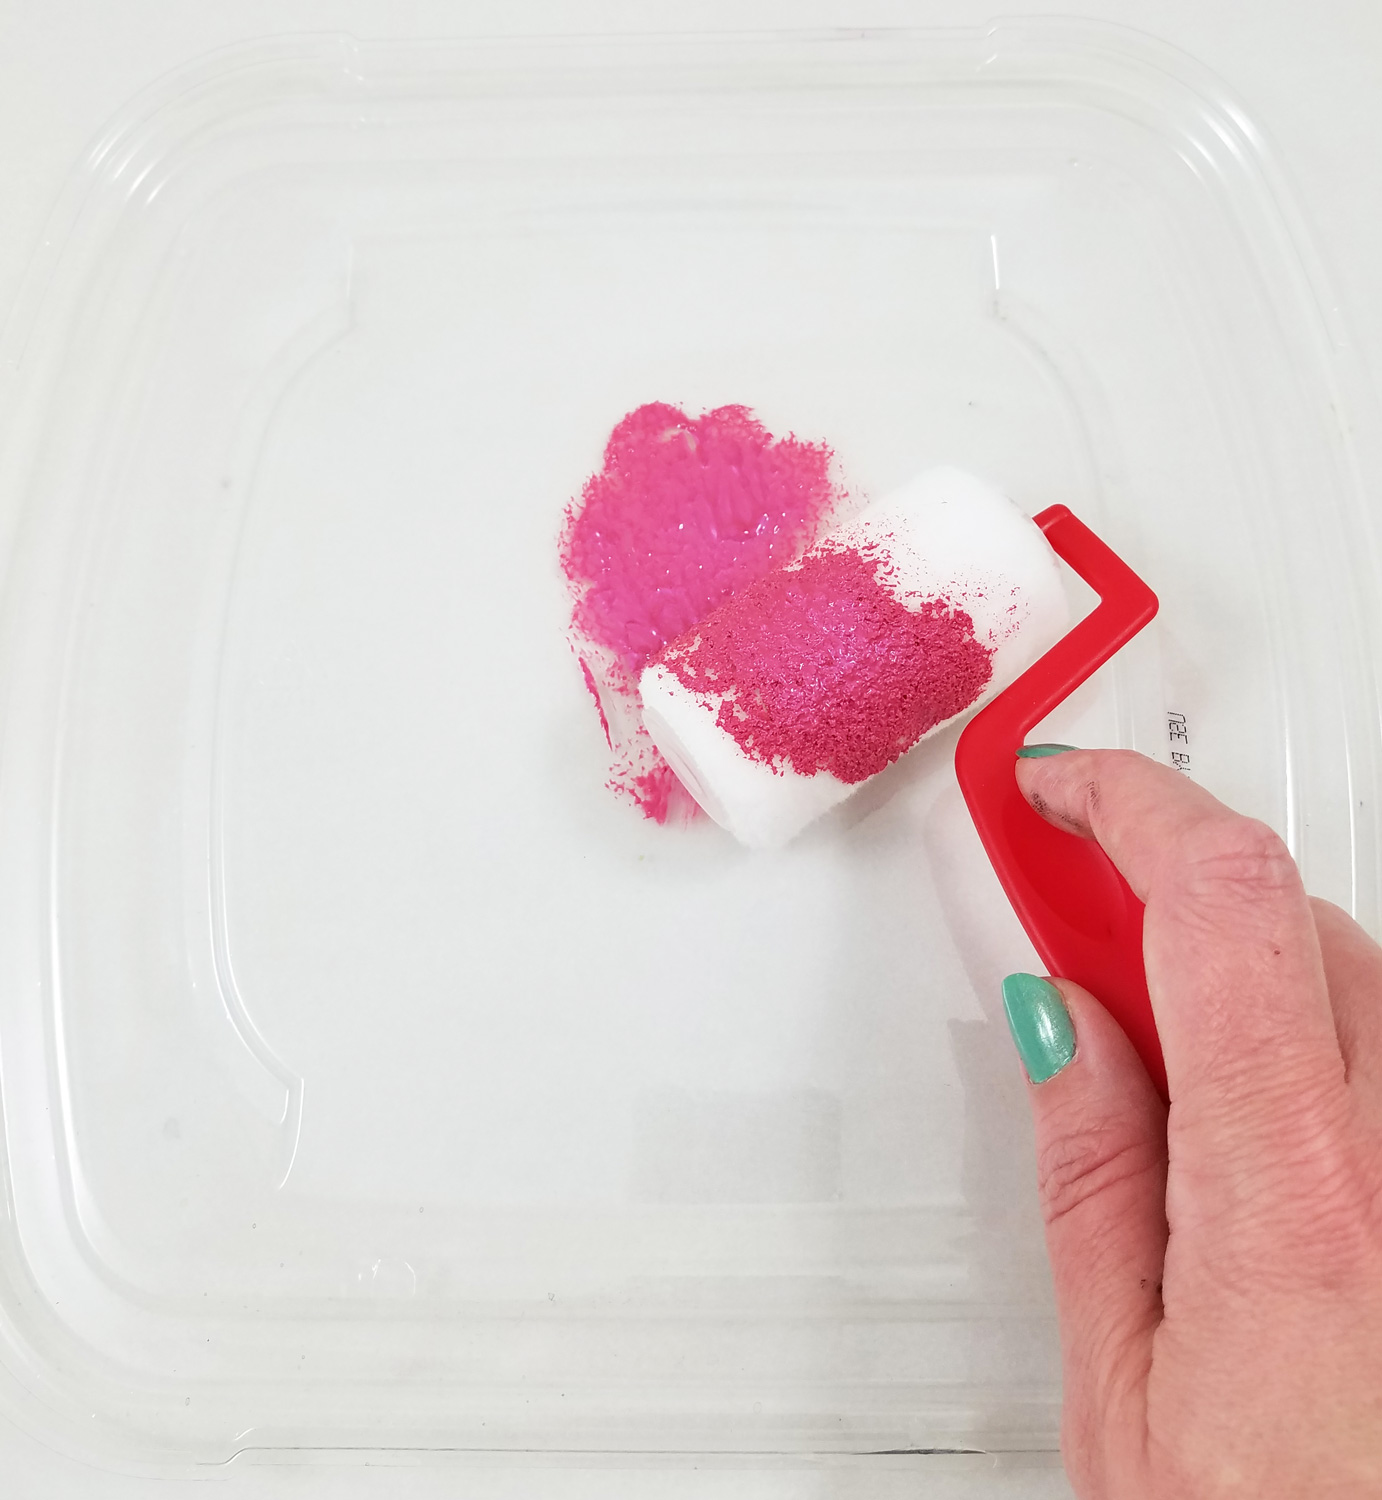
A single use plastic salad container lid got a second life as paint pallet in this project. The lid being flat with some grooves around the edges makes a perfect paint pan to apply paint to the roller and catch any excess paint in the groves. I squeezed out a little of Pink Flash FolkArt Color Shift Paint and moved the roller back and forth to get splotchy coverage, I didn’t want to over-saturate the roller with paint so I used a little at a time.
*A plate or nonstick craft mat will also work.
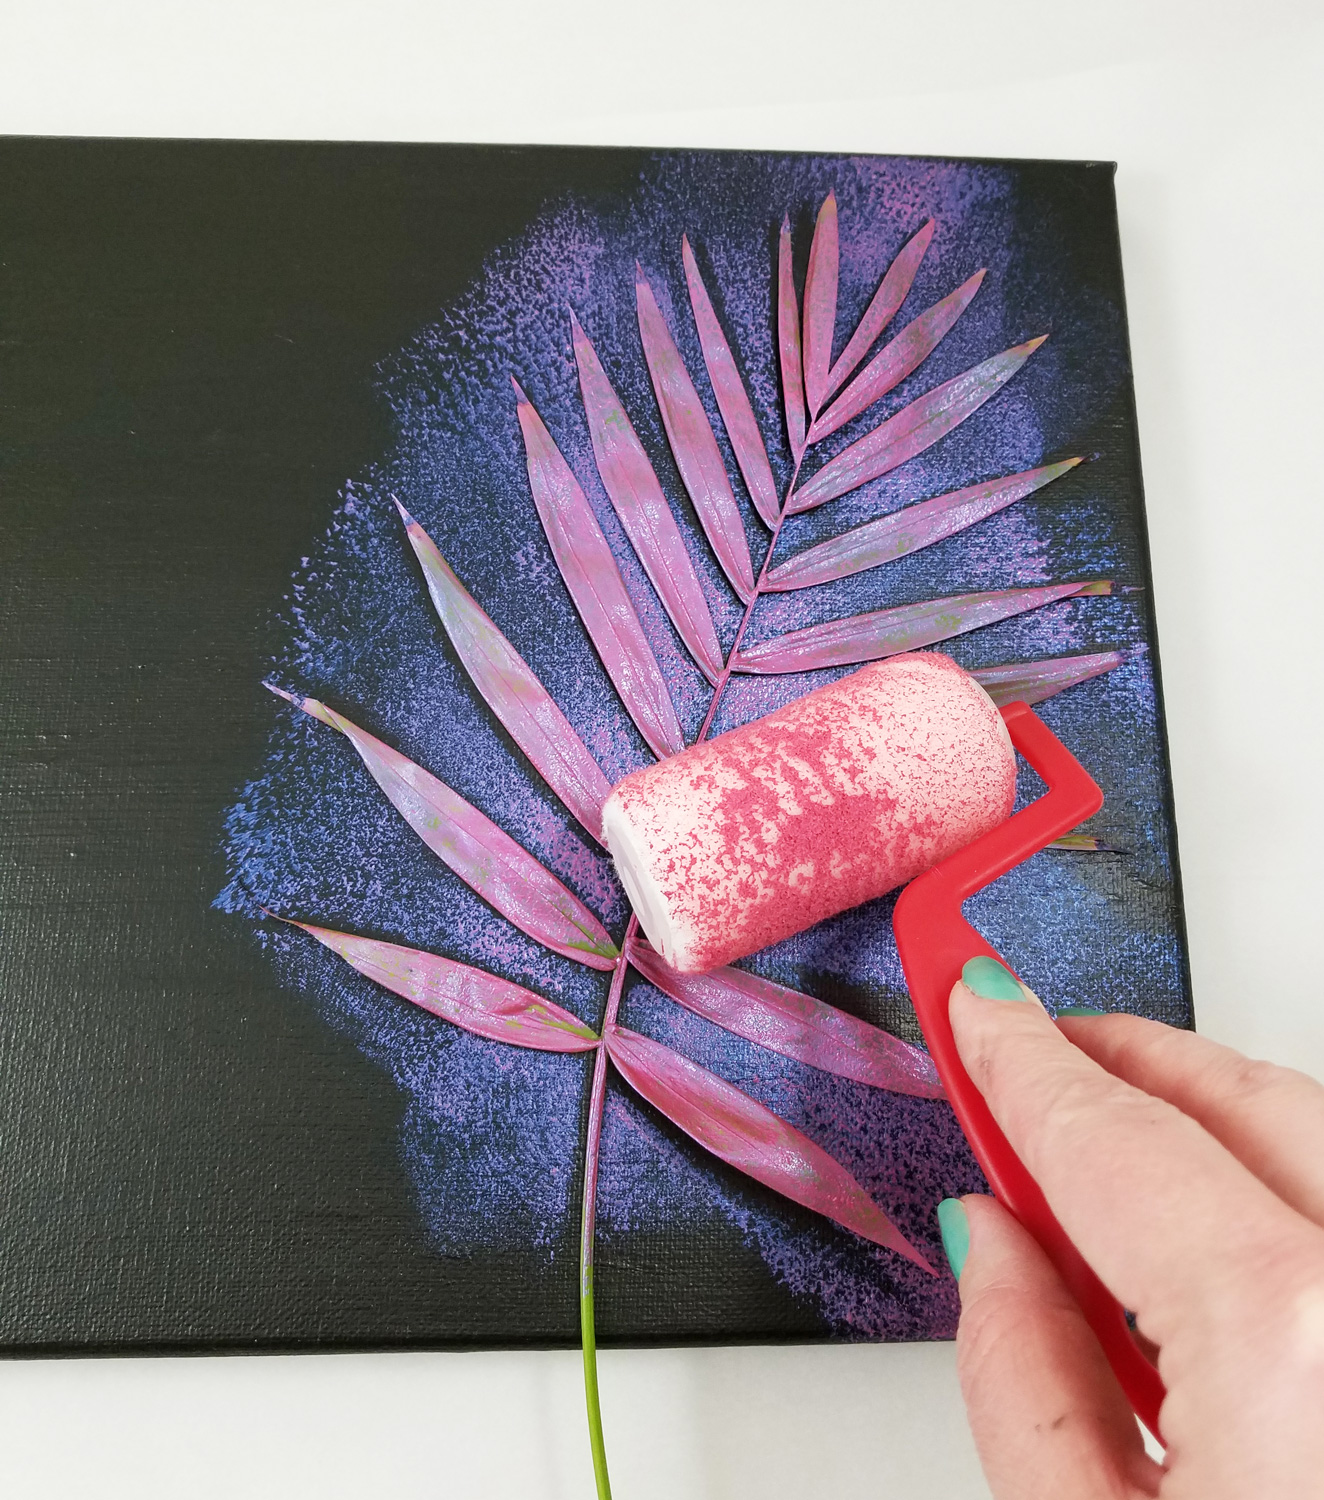
I placed the pressed palm frond on the canvas and rolled the paint coated roller over the frond carefully. A temporary adhesive was not necessary to keep the frond from shifting as I didn’t mind if I got a little paint seepage around the frond as it gave it a softer edge to the painted image.
I then carefully removed the frond to see how the paint application turned out.
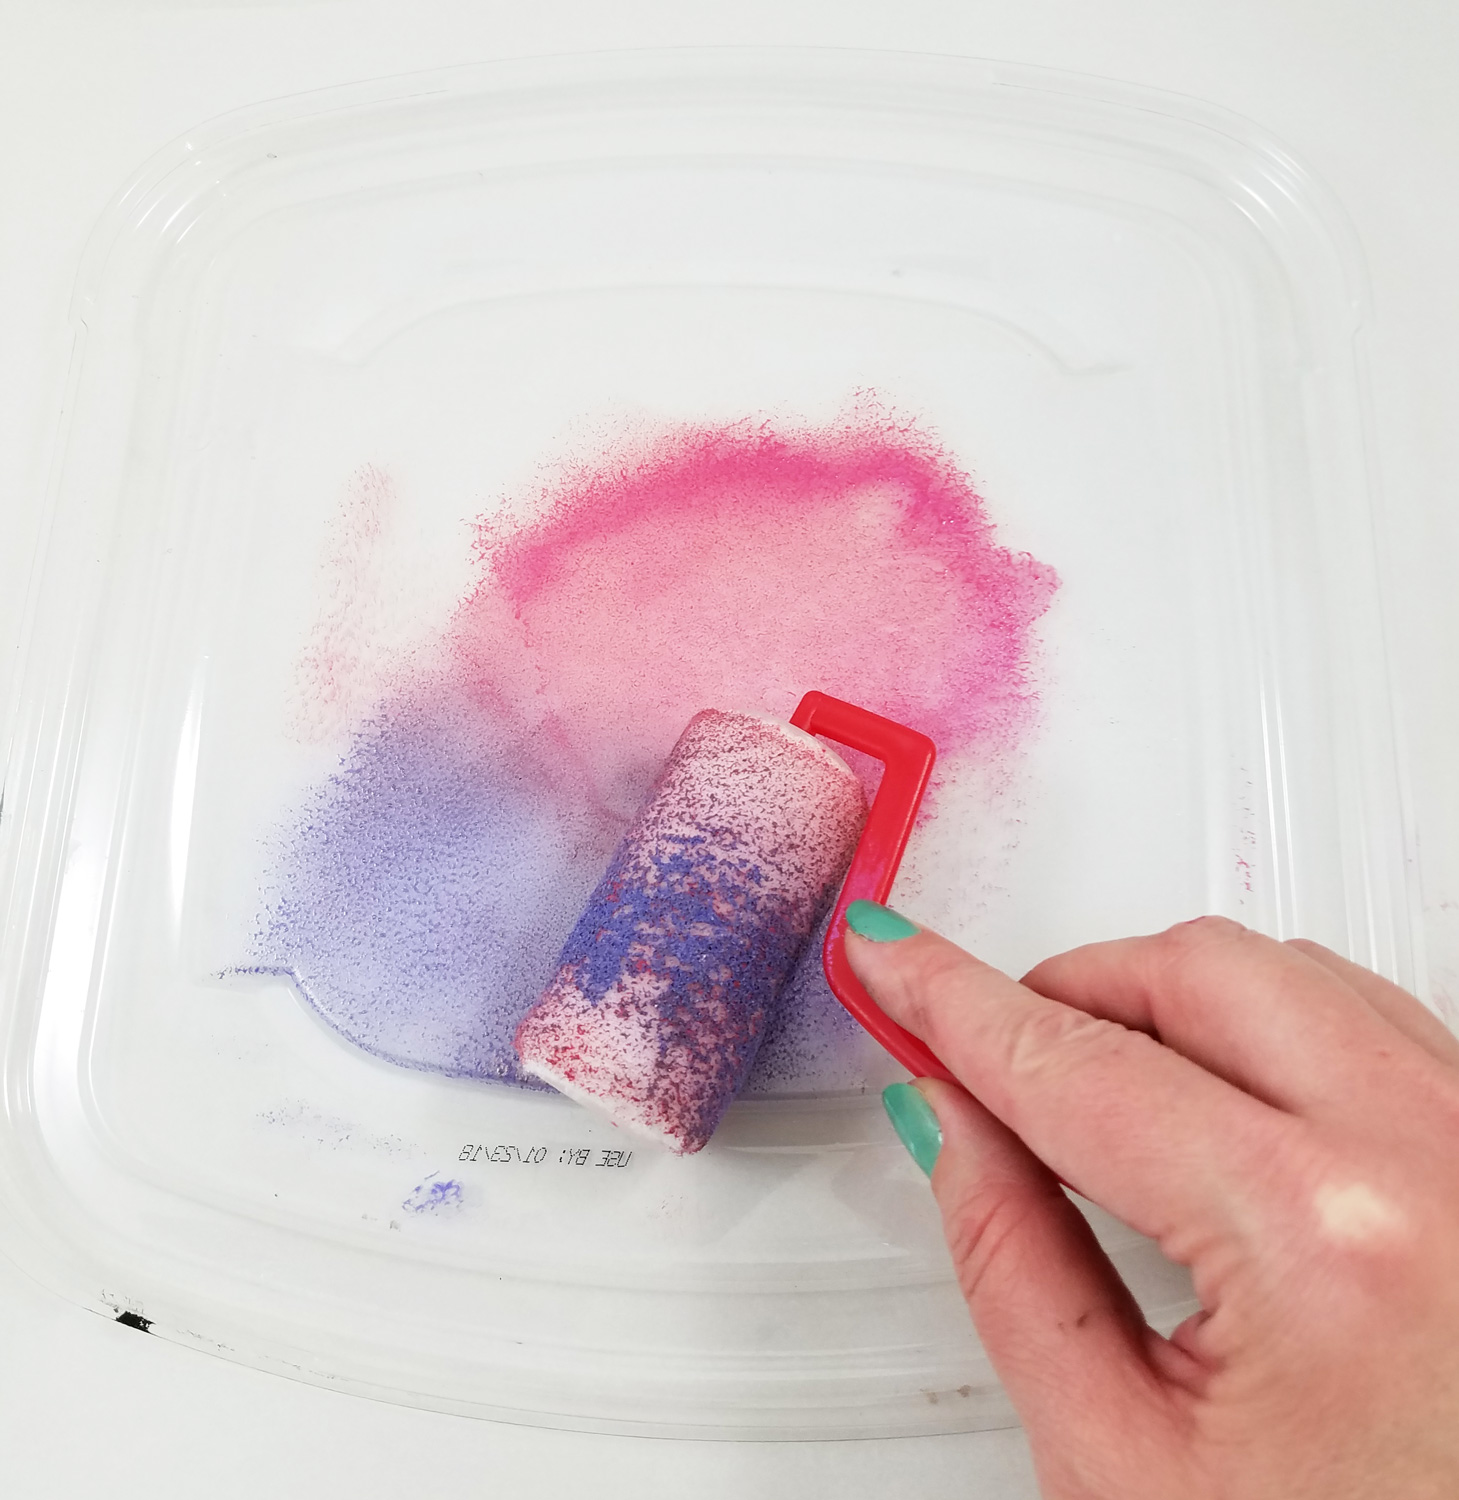
I blotted the roller lightly with a paper towel to remove any excess paint. I then added a little of Blue Violet Flash FolkArt Color Shift Paint to the side of the pink paint on the pallet and moved the roller back and forth to get splotchy coverage, making sure once again not to over-saturate the roller.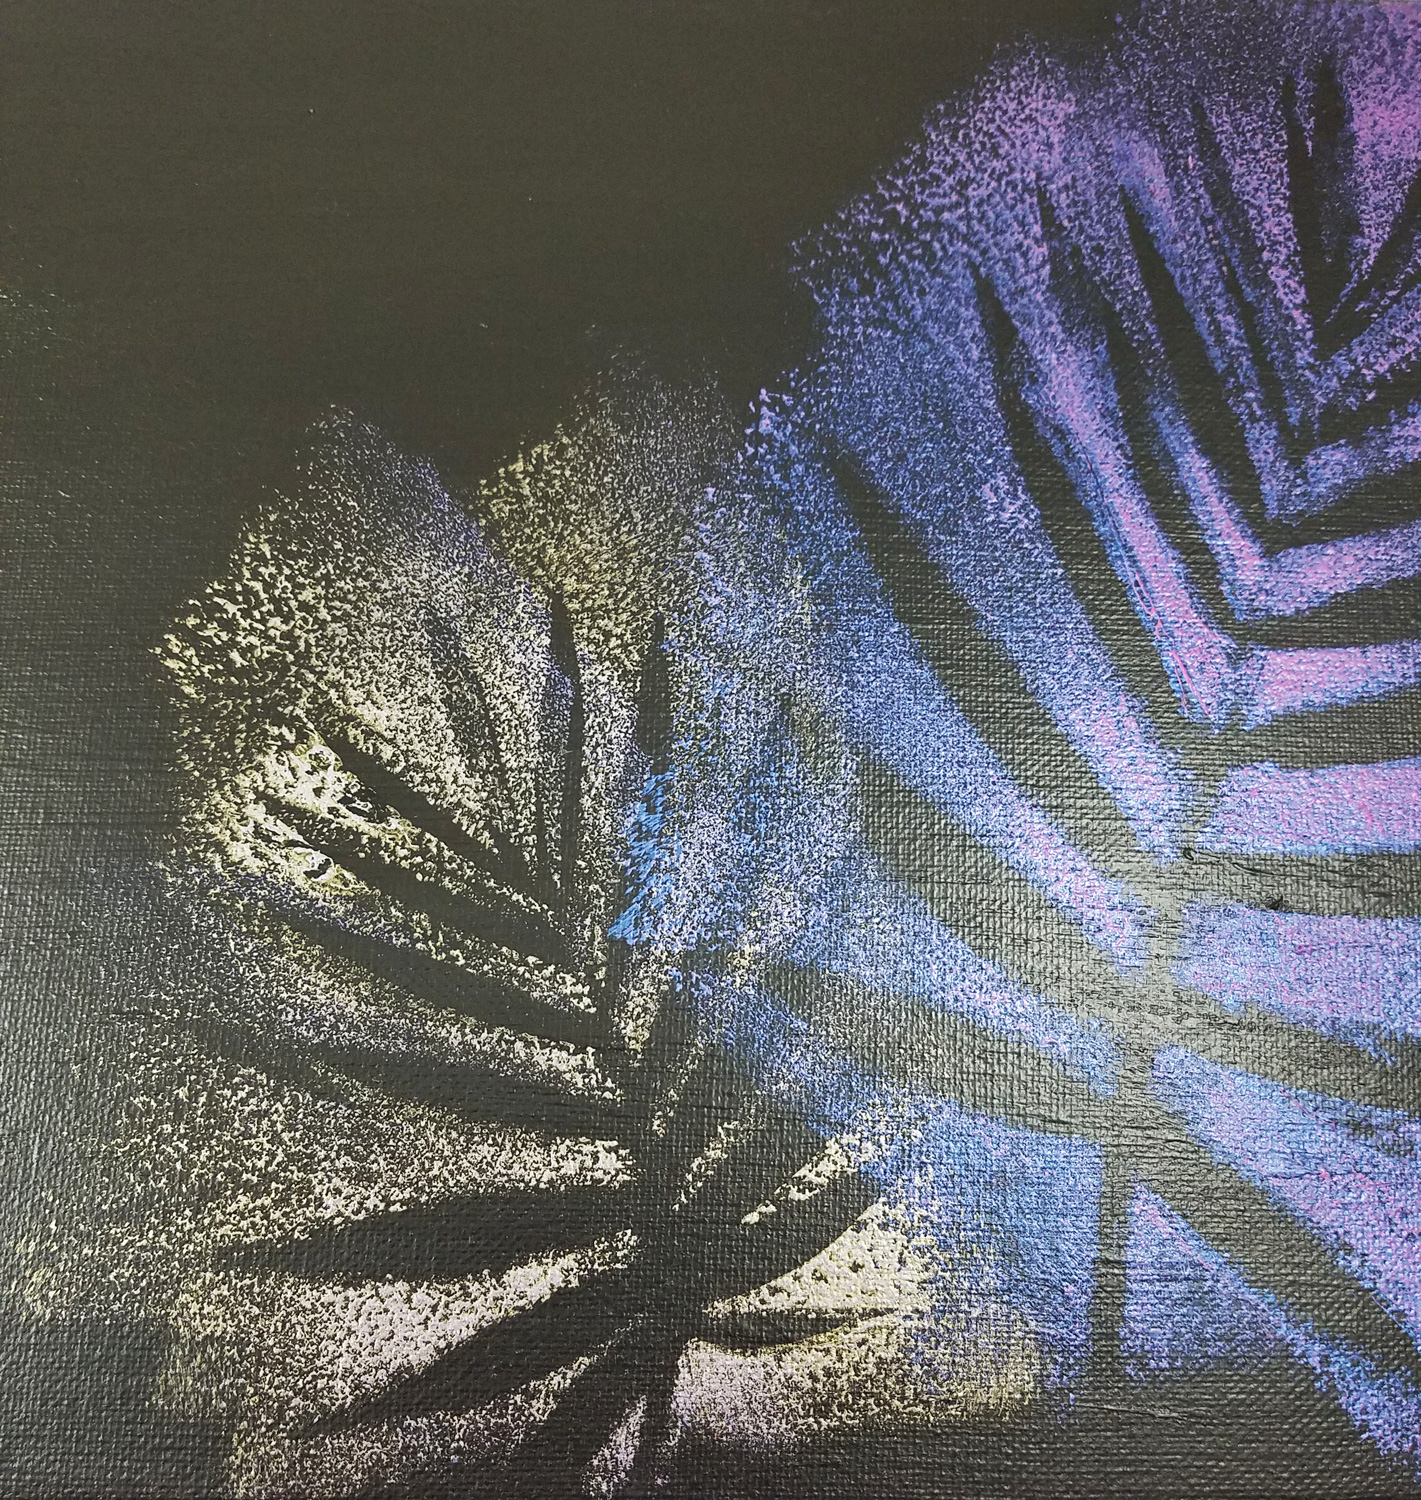
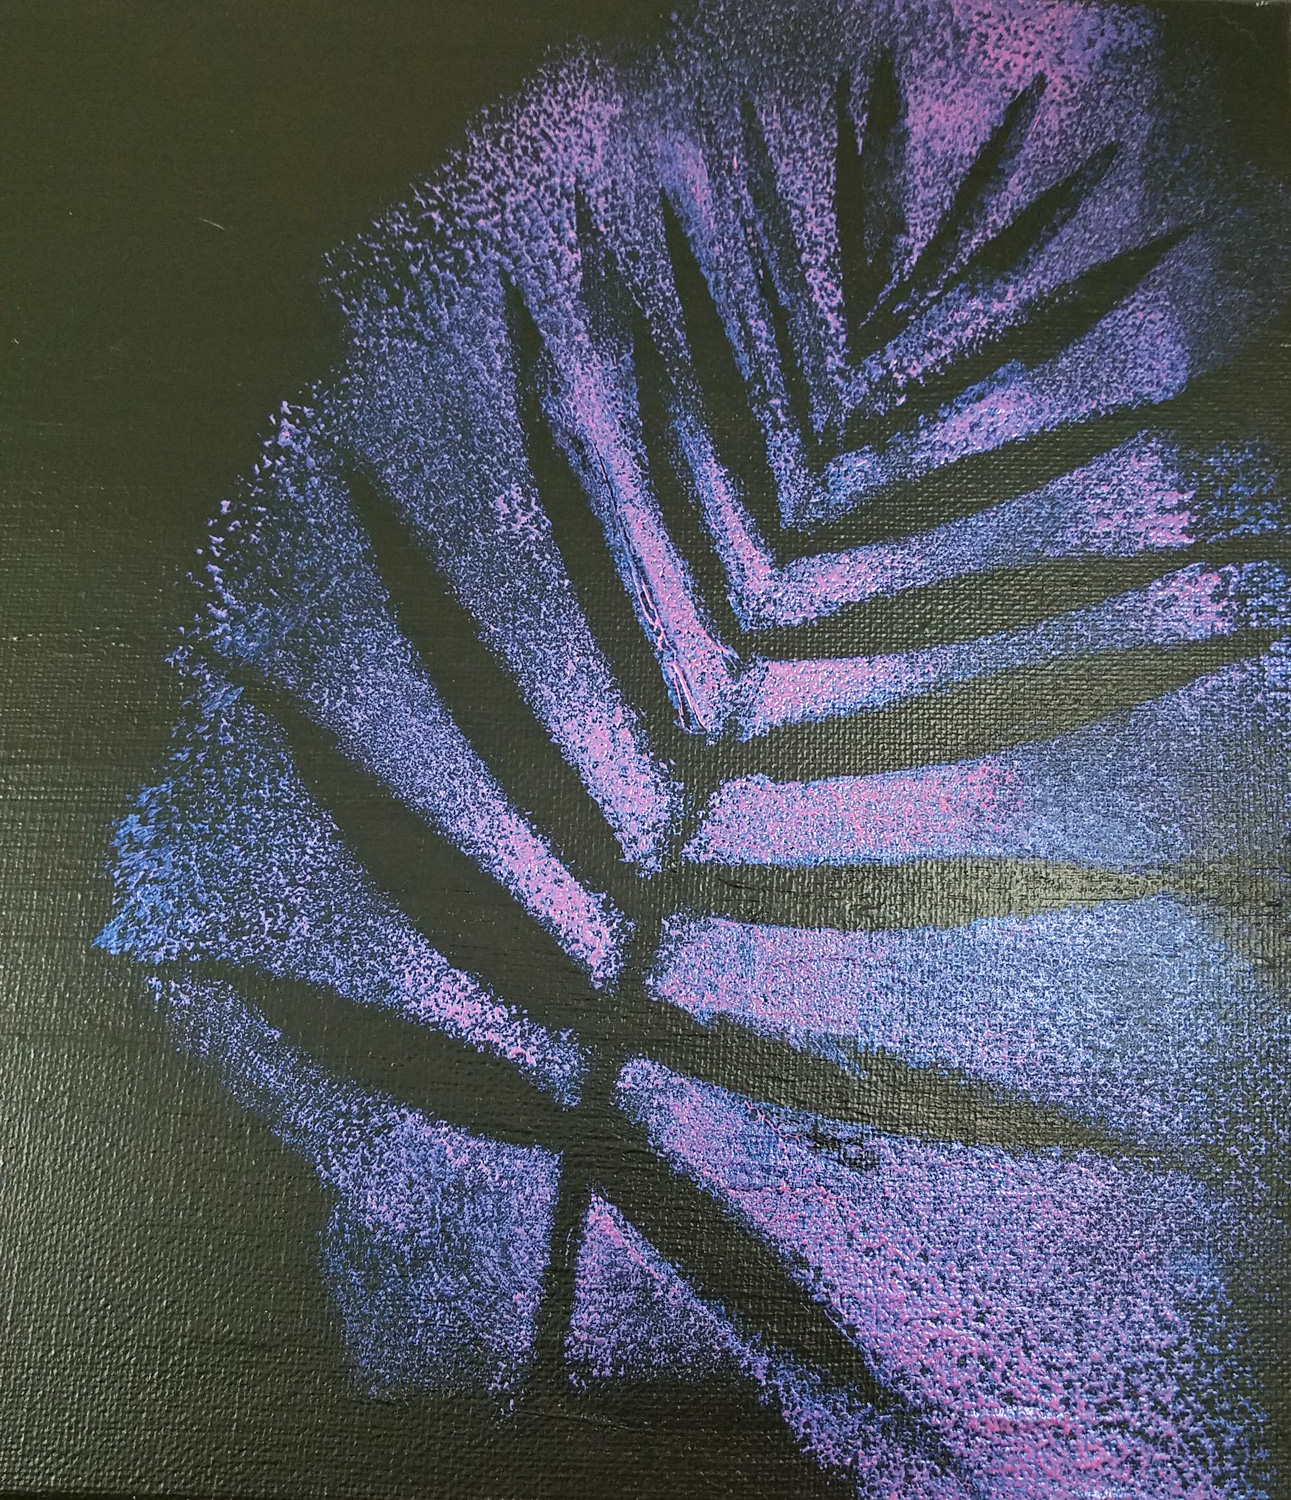
Using the smaller palm frond as my stencil I applied the Blue Violet Flash paint with the paint covered roller carefully. As you can see in this photo the Blue Violet Flash paint turns a gold with a blue hue on the black painted canvas.
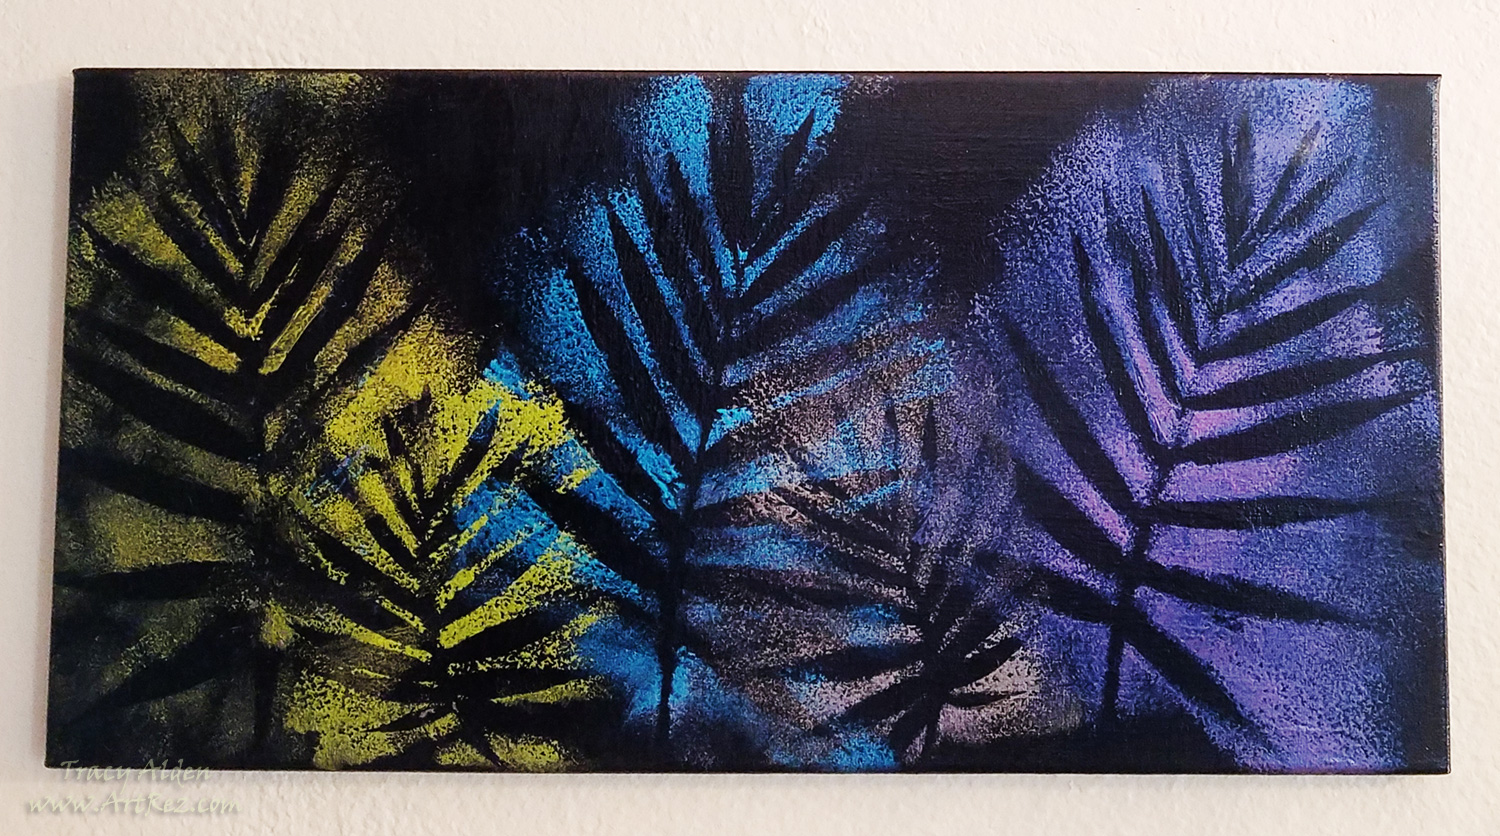
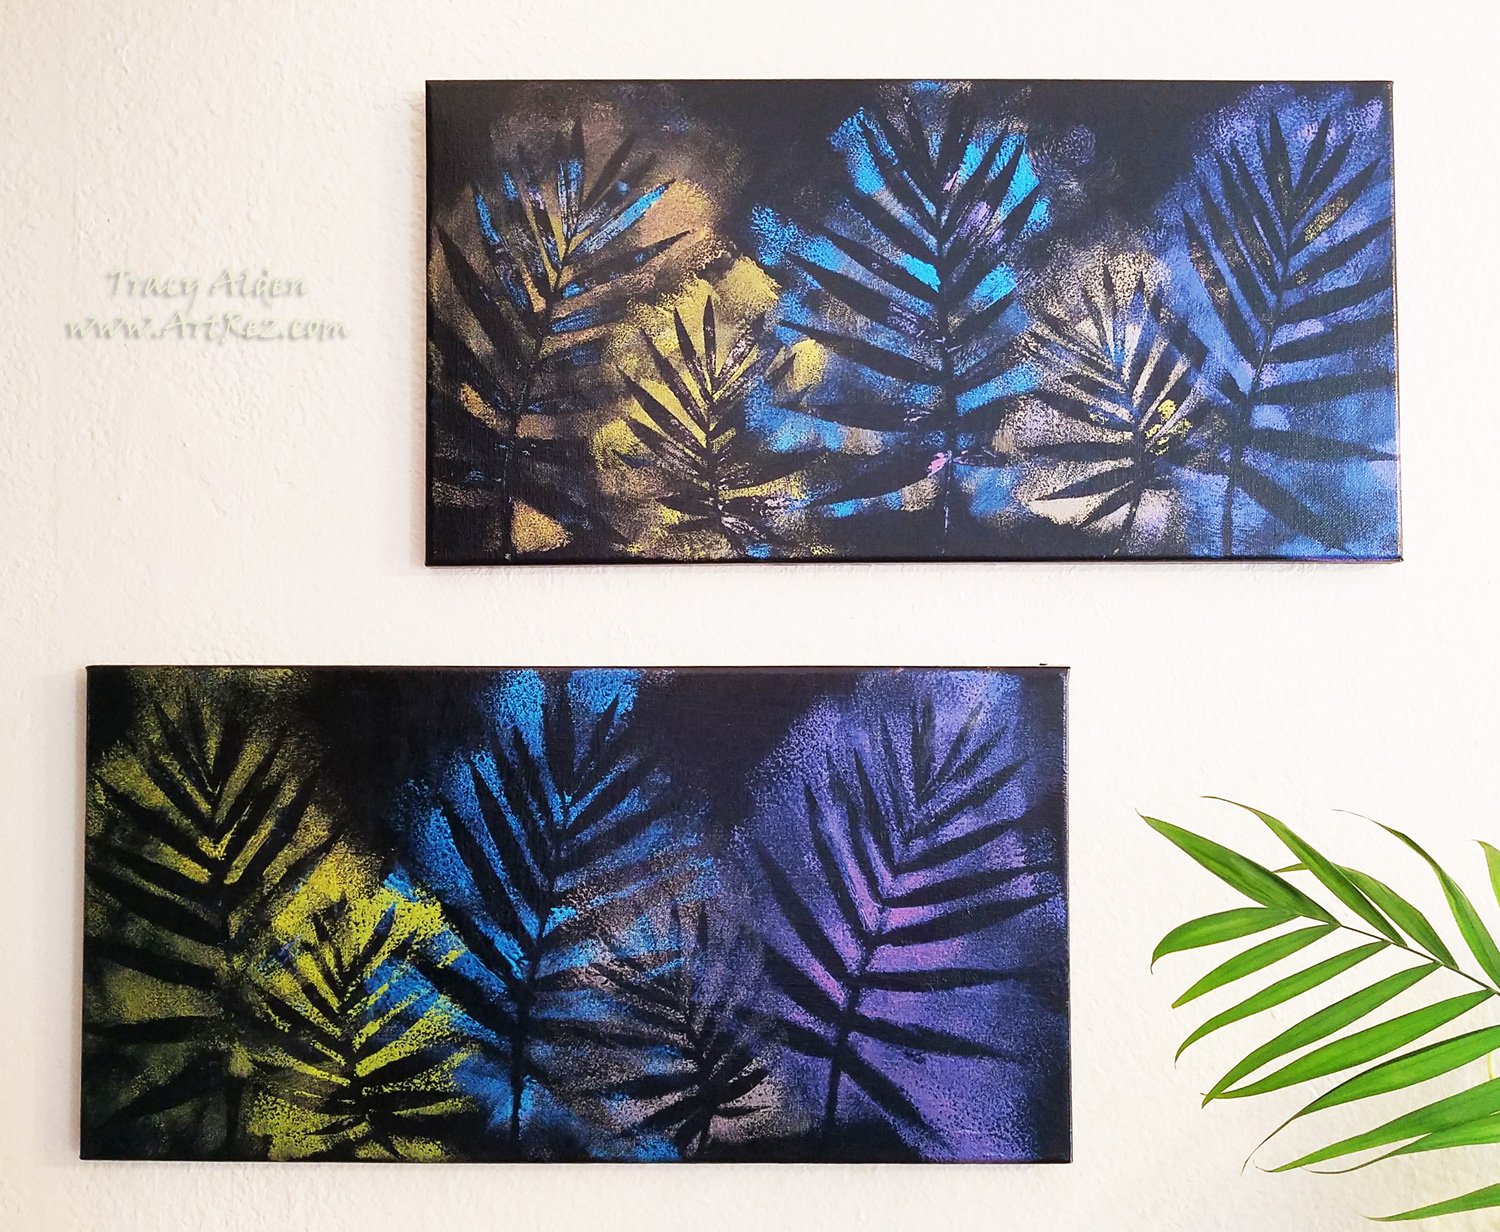
I repeated using the palm fond as a stencil with the other FolkArt Color Shift paints until I covered the canvas and let it dry as per the manufacturer’s instructions. To enhance the color and help the metallic shimmer become a touch more intense I applied a coat of gloss varnish and let dry.
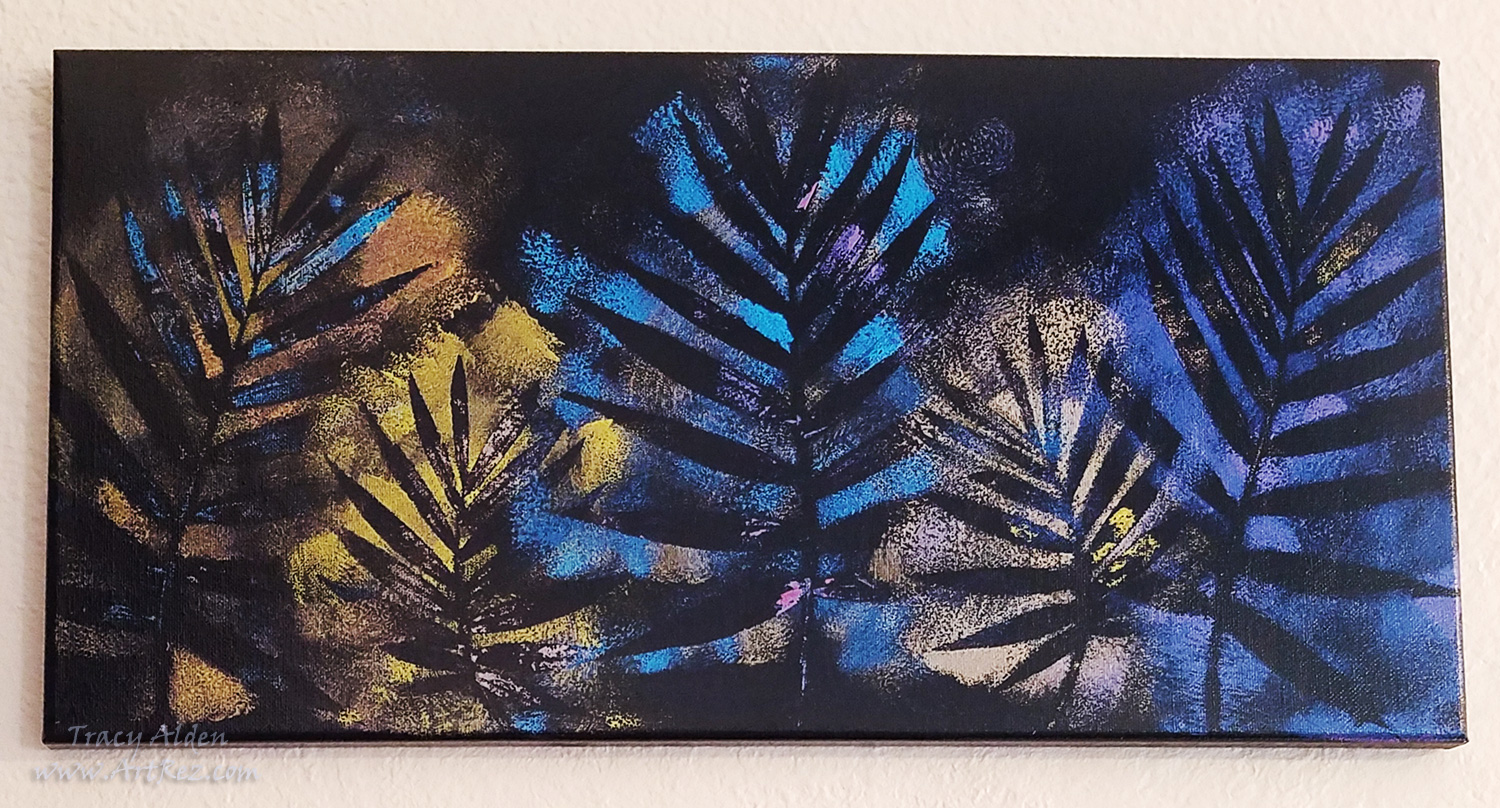
Noticing that when I used the same two palm fronds as my stencils without cleaning them there was at times slight paint transfer if I flipped over the frond quickly enough and used it as stencils before letting the paint dried. So using another black painted canvas I repeated the same paint application process as the previous piece. This time I got even more paint transfer and slight blending of the different FolkArt Color Shift paints, creating a variant of the original project.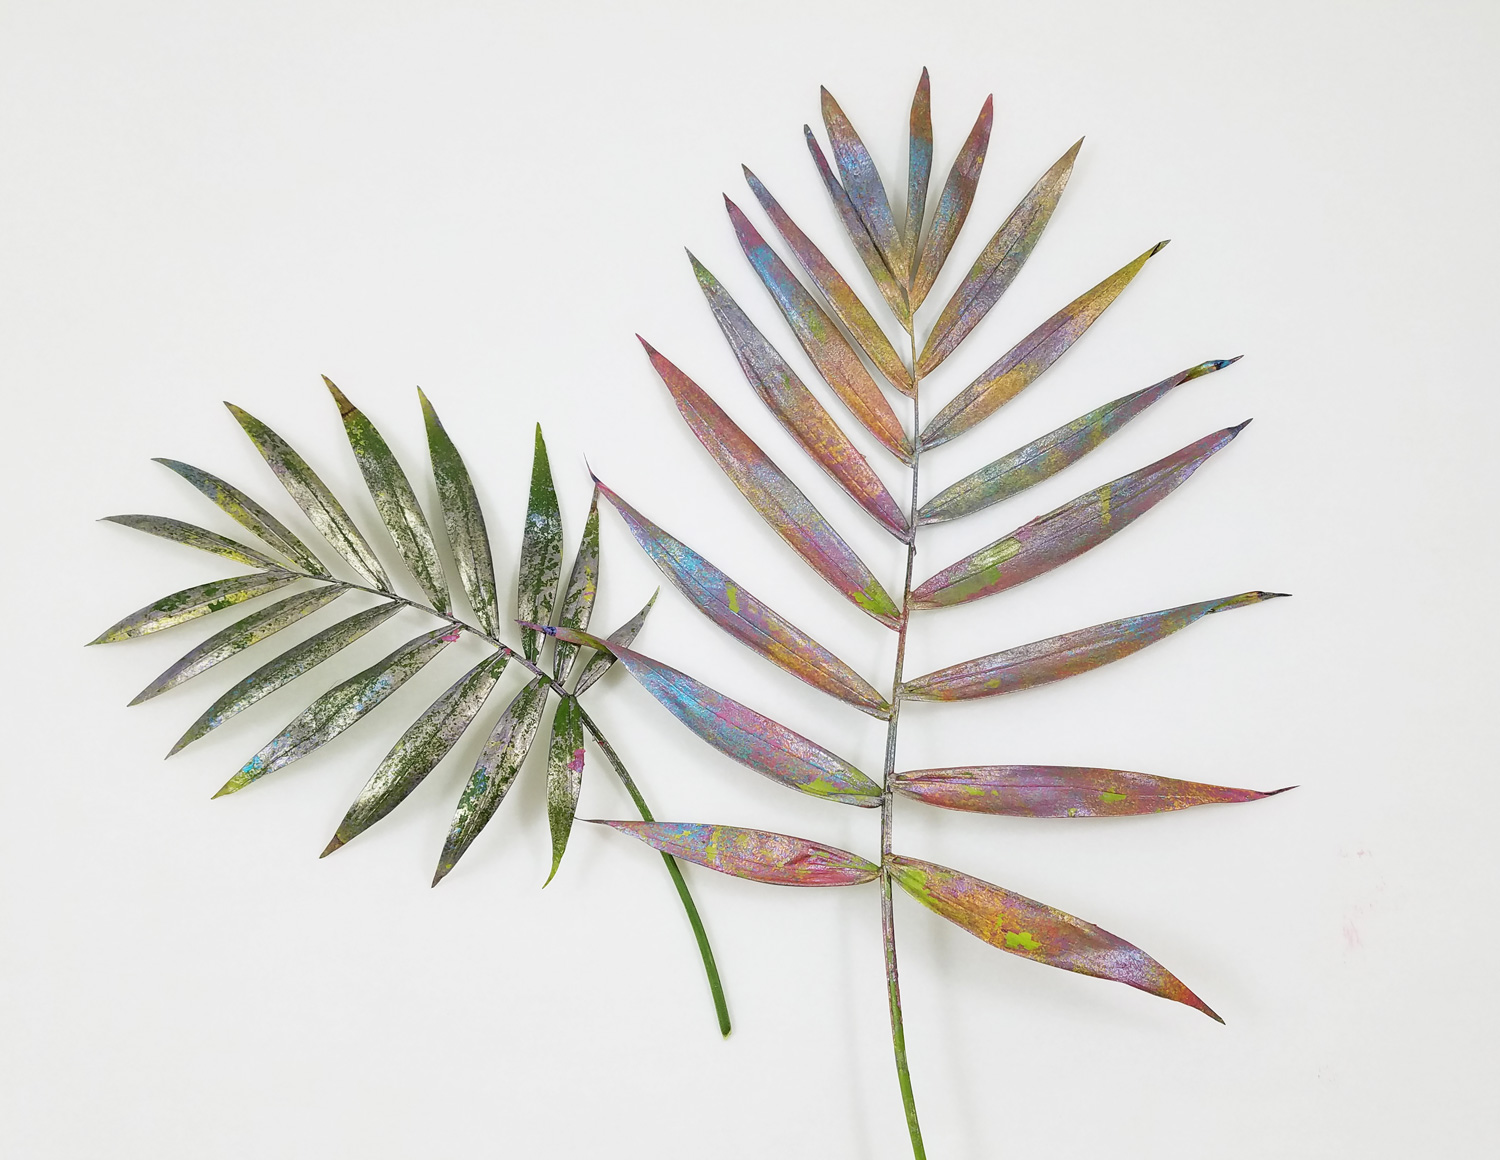
After creating my two canvas pieces I noticed the Palm fronds were covered in paint but looked too good to throw away! I put them back between the two piece of parchment paper, with books on top to fully dry out so I could use them in future art projects!
I really love the vibrancy of color and shimmer created by Plaid‘s FolkArt Color Shift Paints and I look forward to using these paint in future projects.
Until Next Time, Safe Travels!
Feather Inspired Boho Necklace with Sculpey Soufflé
In January I traveled to the Creativation Trade show, in Phoenix, Arizona. Held by Association For Creative Industries or AFCI, during the show I was invited to the 6th annual Prime Networking Event. At this event, bloggers, designers, authors and brands in the craft industry came together to network, make new partnerships, and learn about new product information. The event was Educational, informative, had great food and drinks and free product samples provided by this year’s sponsors. After the event attendees were encouraged to try out and create art for the Favecrafts Best Blogger Craft Event.
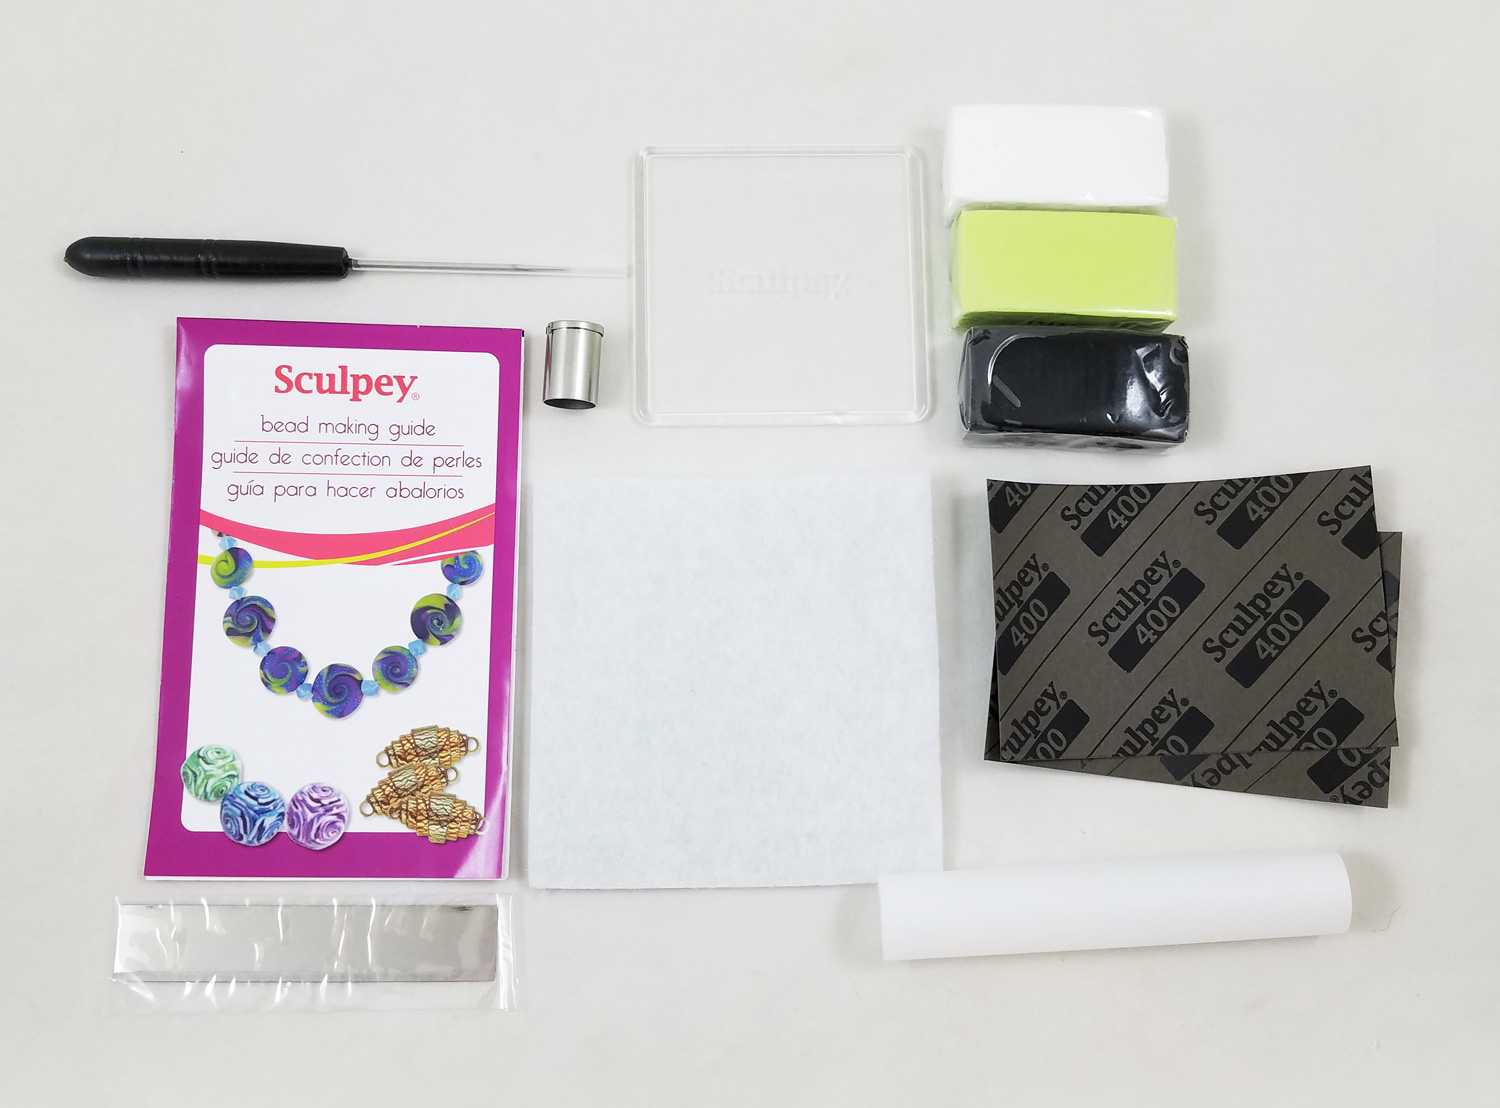
One of the sponsors was Polyform Products, who supplied a wonderful kit including a Sculpey® Bead Making Kit and three half bricks of Sculpey® Soufflé™ in Igloo, Pistachio and Poppy Seed.
The Souffle clay colors of the kit reminded me of the feathers of the Great Green Macaw. In particular the neck and chest feathers, in tones of green, black and fluffy white, that many Macaws can be seen preening while relaxing. This color inspiration helped me visualize a Boho necklace, faux leather in style, since Souffle Clay once baked in an oven has a matte finish, somewhat like leather.
Supplies:
Sculpey® Soufflé™ in Igloo, Pistachio and Poppy Seed
Sculpey® Bead Making Kit
Ceramic tiles
1 Coffee Straw
Pasta Machine
Paper Towels
Metal Spacer Beads
Cone Tin Beads
Toothbrush
Darice 100% Natural Hemp Cord, 20 lb. Assorted Brights
Cord Faux Suede Olive-Brown 3MM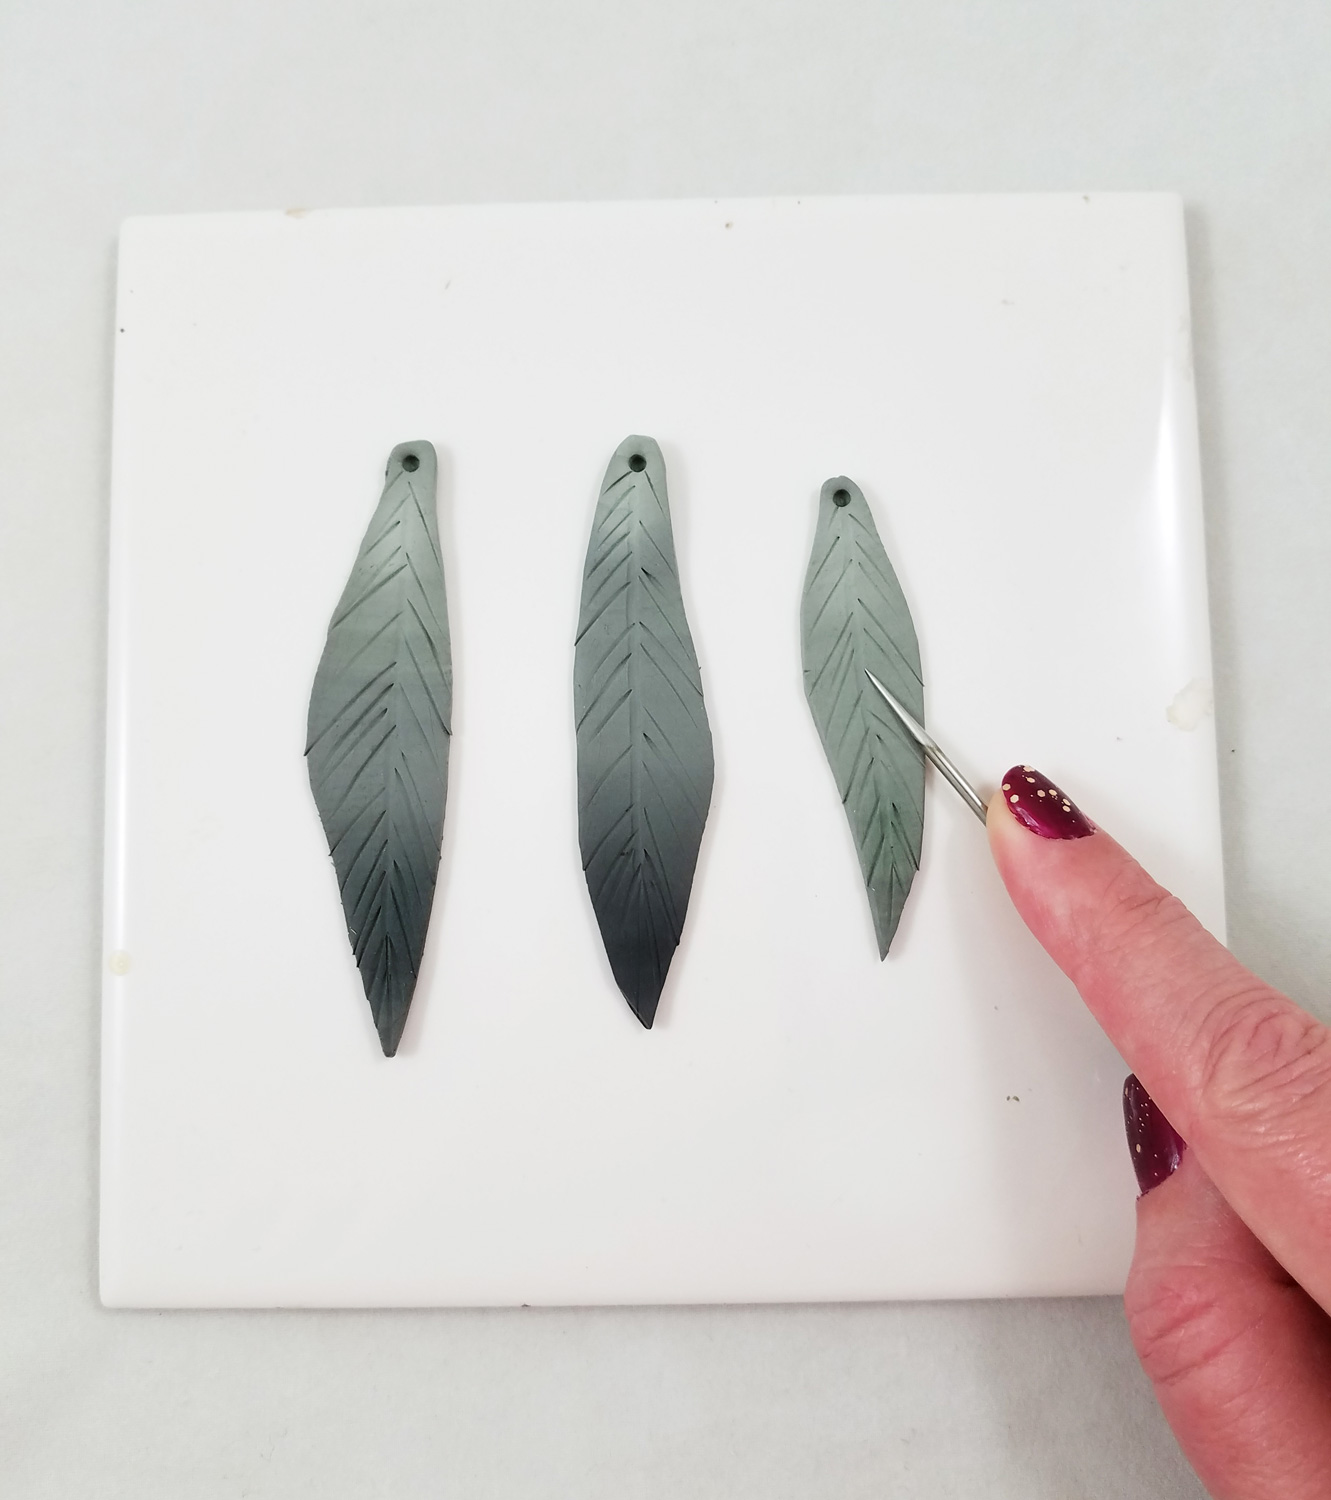
Working with the Sculpey Soufflé I quickly learned it is softer than most polymer clay, requiring little to no conditioning. Using the cutting blade, included in the bead making kit, I cut each brick in half, saving half of each clay brick for the second part of the project. I rolled out each half brick of clay with a pasta machine (devoted to craft use only) set on the thickest setting.
Using the Skinner Blend technique, which creates beautiful gradients in clay, I blended two of each color of clay. Now having pieces of clay with blends of green with black, white with black, green with white, I cut out 14 feather shapes using the cutting blade. I didn’t need to use a template because I wanted the organic look of naturally fallen feathers. Using a coffee straw I punched out a hole on the top of each feather. To give detail to the clay feathers I used the needle tool, included in the bead making kit, to draw on the clay, not going too deep but just enough to get create lines as shown in the photo above.
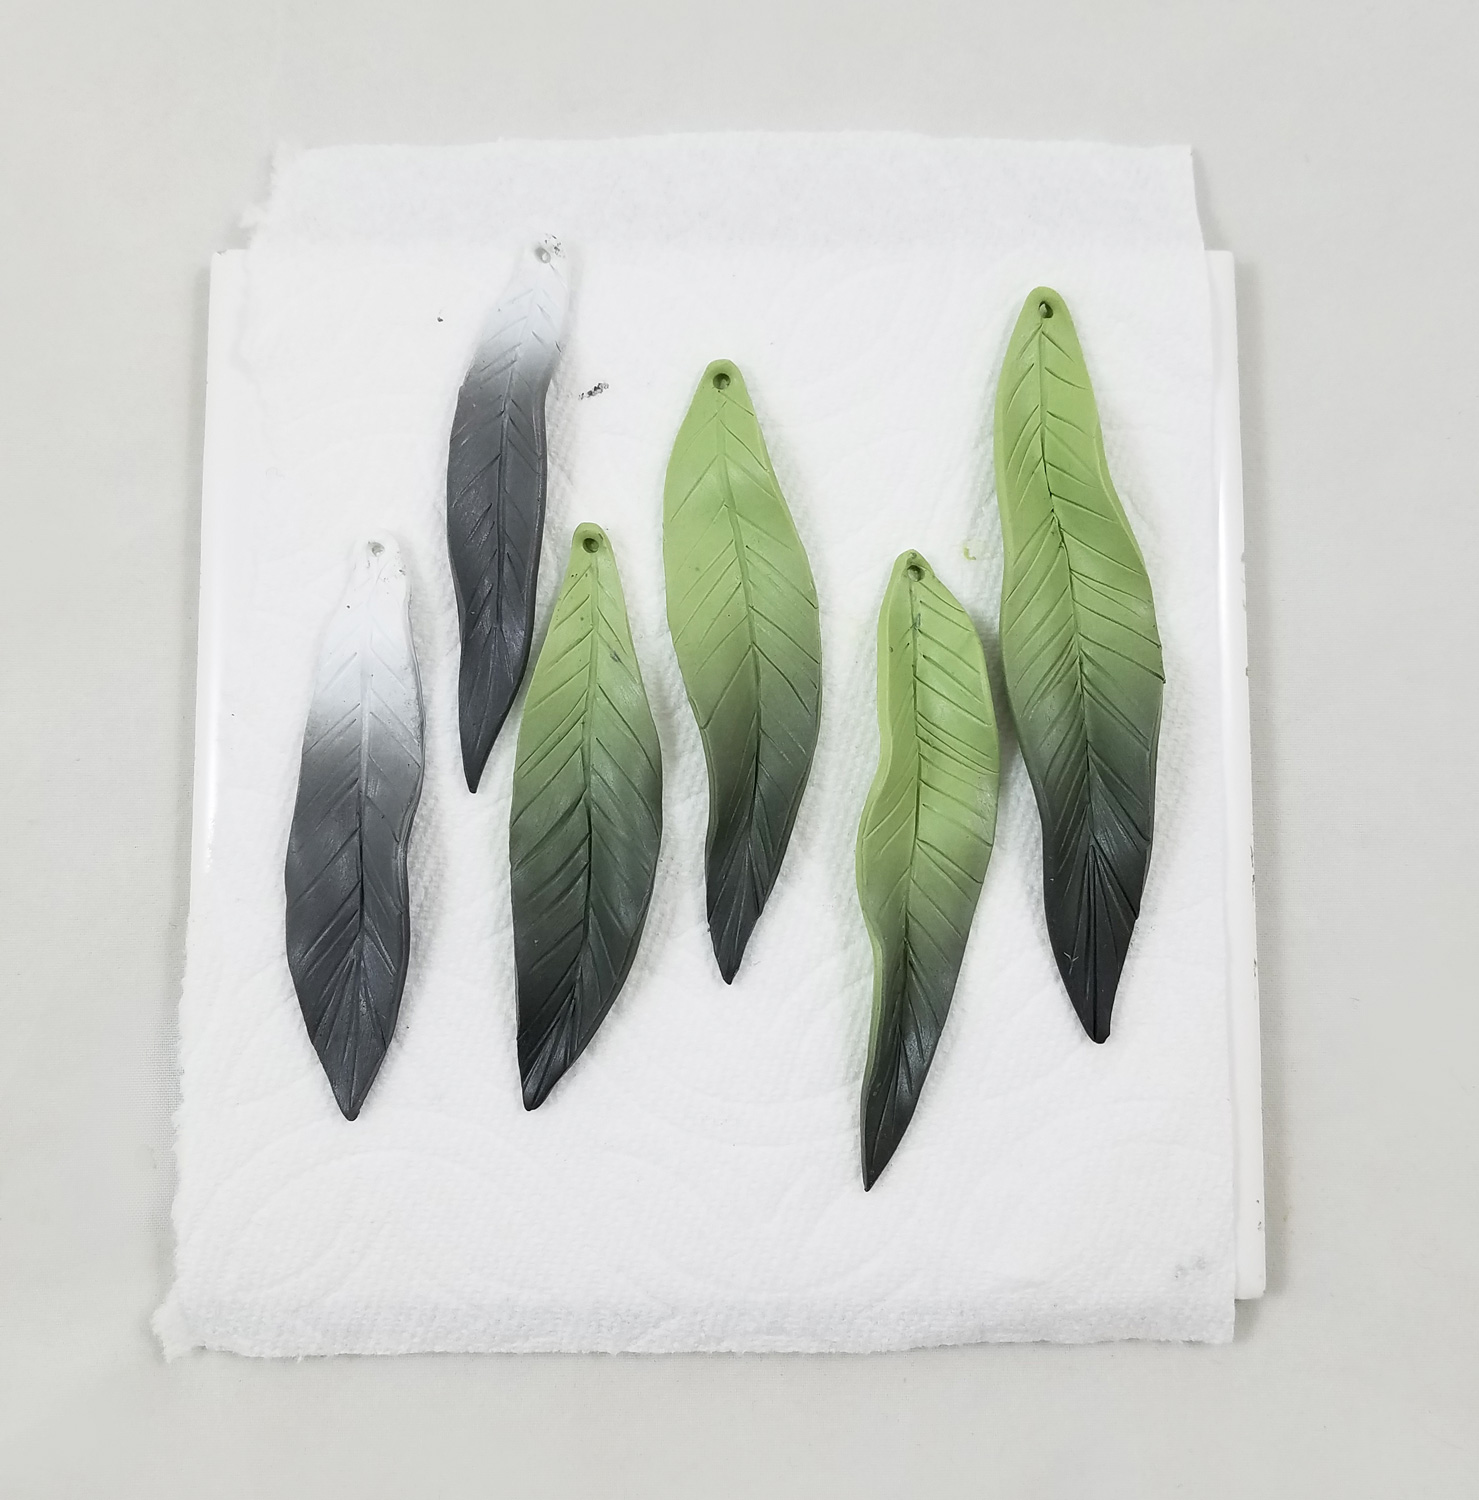
I placed a paper towel on a ceramic tile and carefully put my detailed feather pieces on top. I bent and curved the feather to give them a more natural flow. I baked the clay feathers on the tile as per the manufacturers instructions.
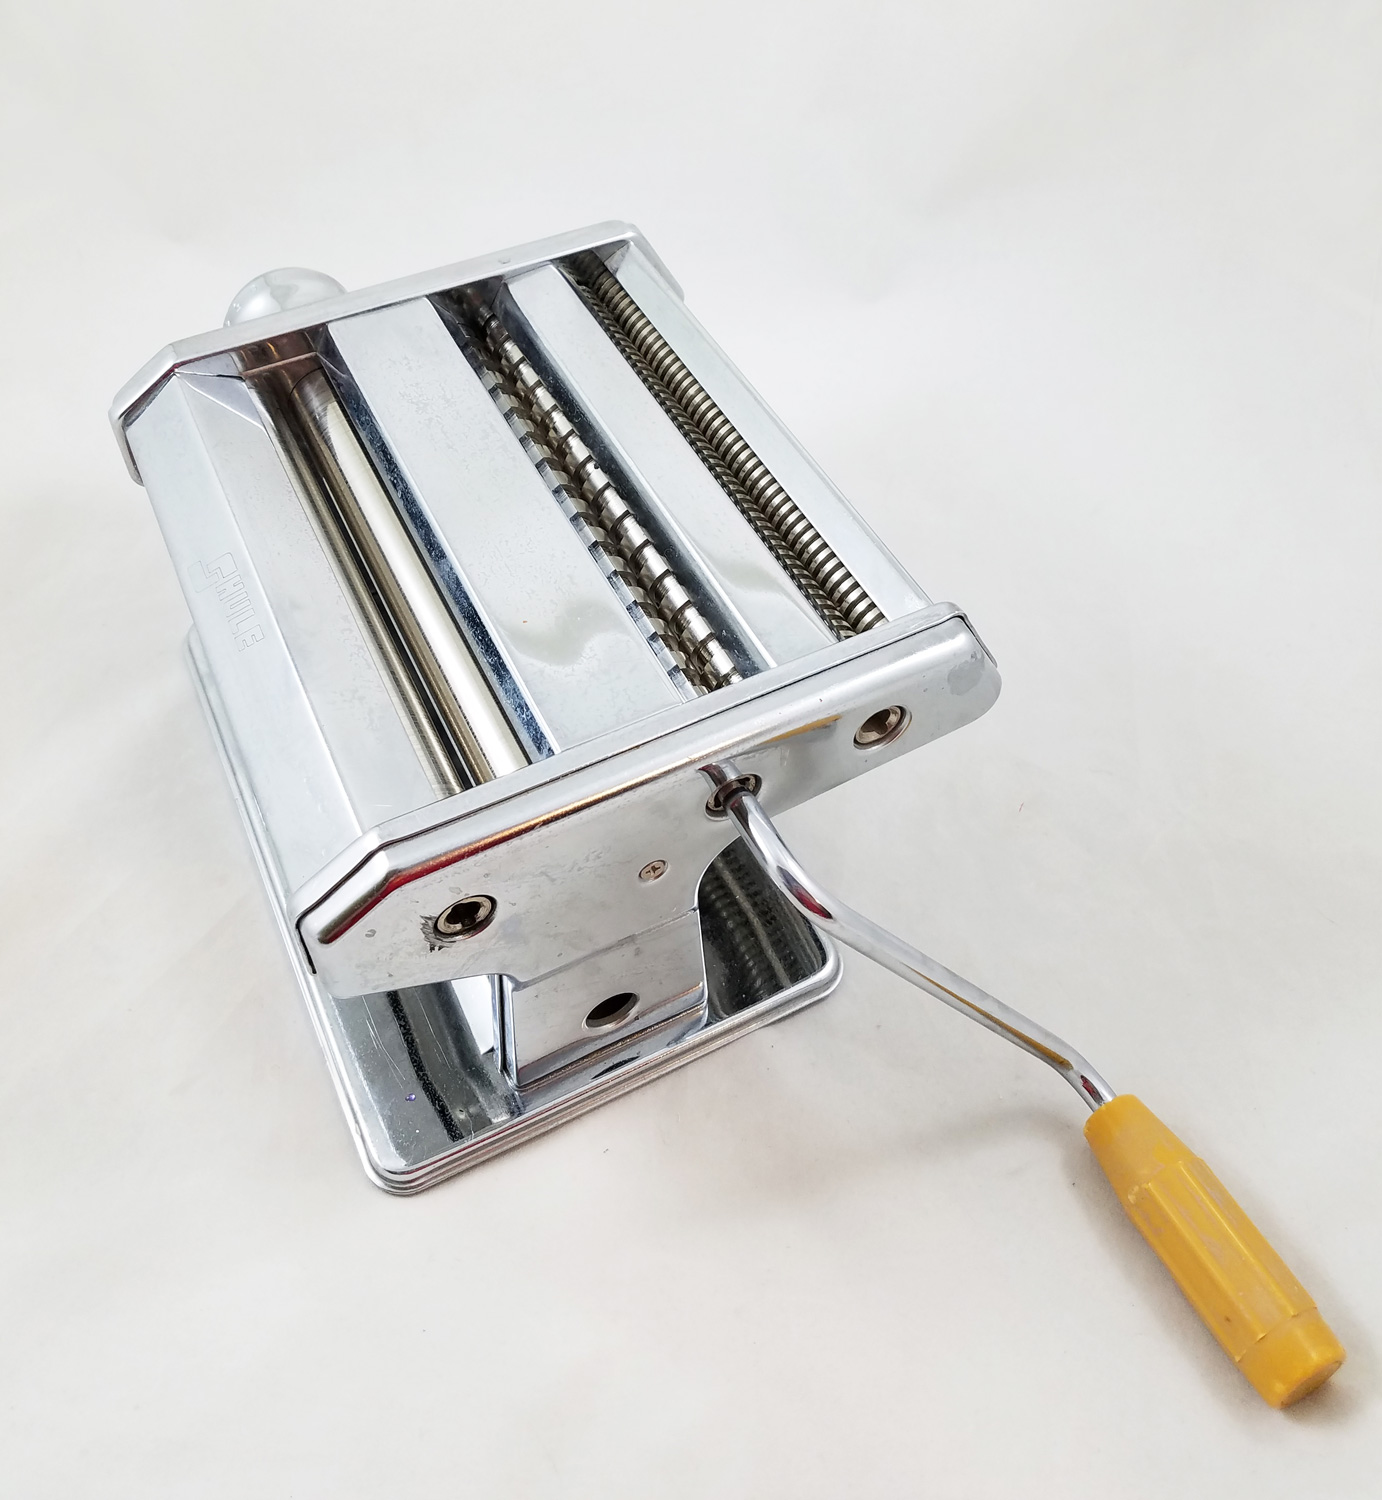
To condition and roll out polymer clay easier I use a Pasta Machine I got at a kitchen supply store. It also happens to have two noodle cutting rollers, that normally I ignore when using for clay. However the Fettuccine noodle roller was about to become very handy for the next part in my project.
*The use of a pasta machine with noodle cutting rollers is not necessary if you rather cut each strip out by hand.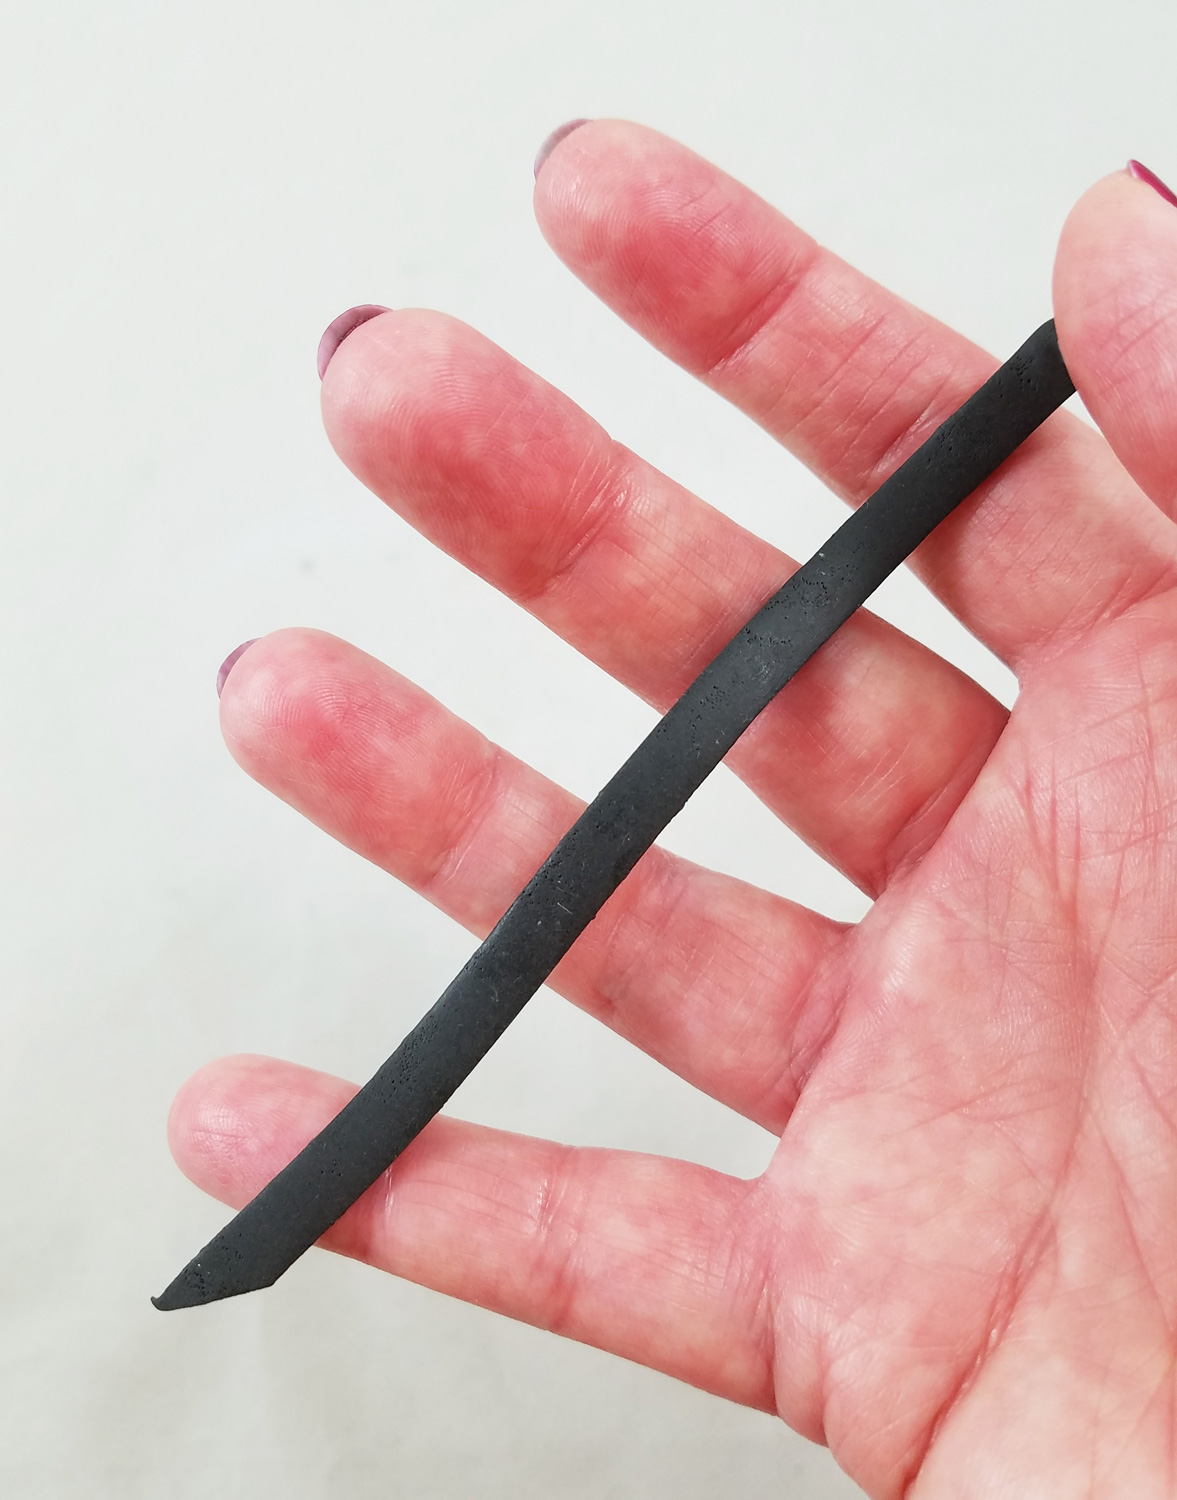
I rolled out the reserved half bricks of clay with the pasta machine on the thickest setting. Then I ran each portion of clay through the Fettuccine cutting roller, making sure to run the white, then green and black clay last to avoid color transfer of clay. Each strip of clay was easily textured with a tooth brush to emulate the appearance of leather. Using a coffee straw I punched out a hole on the top of each strip of clay.
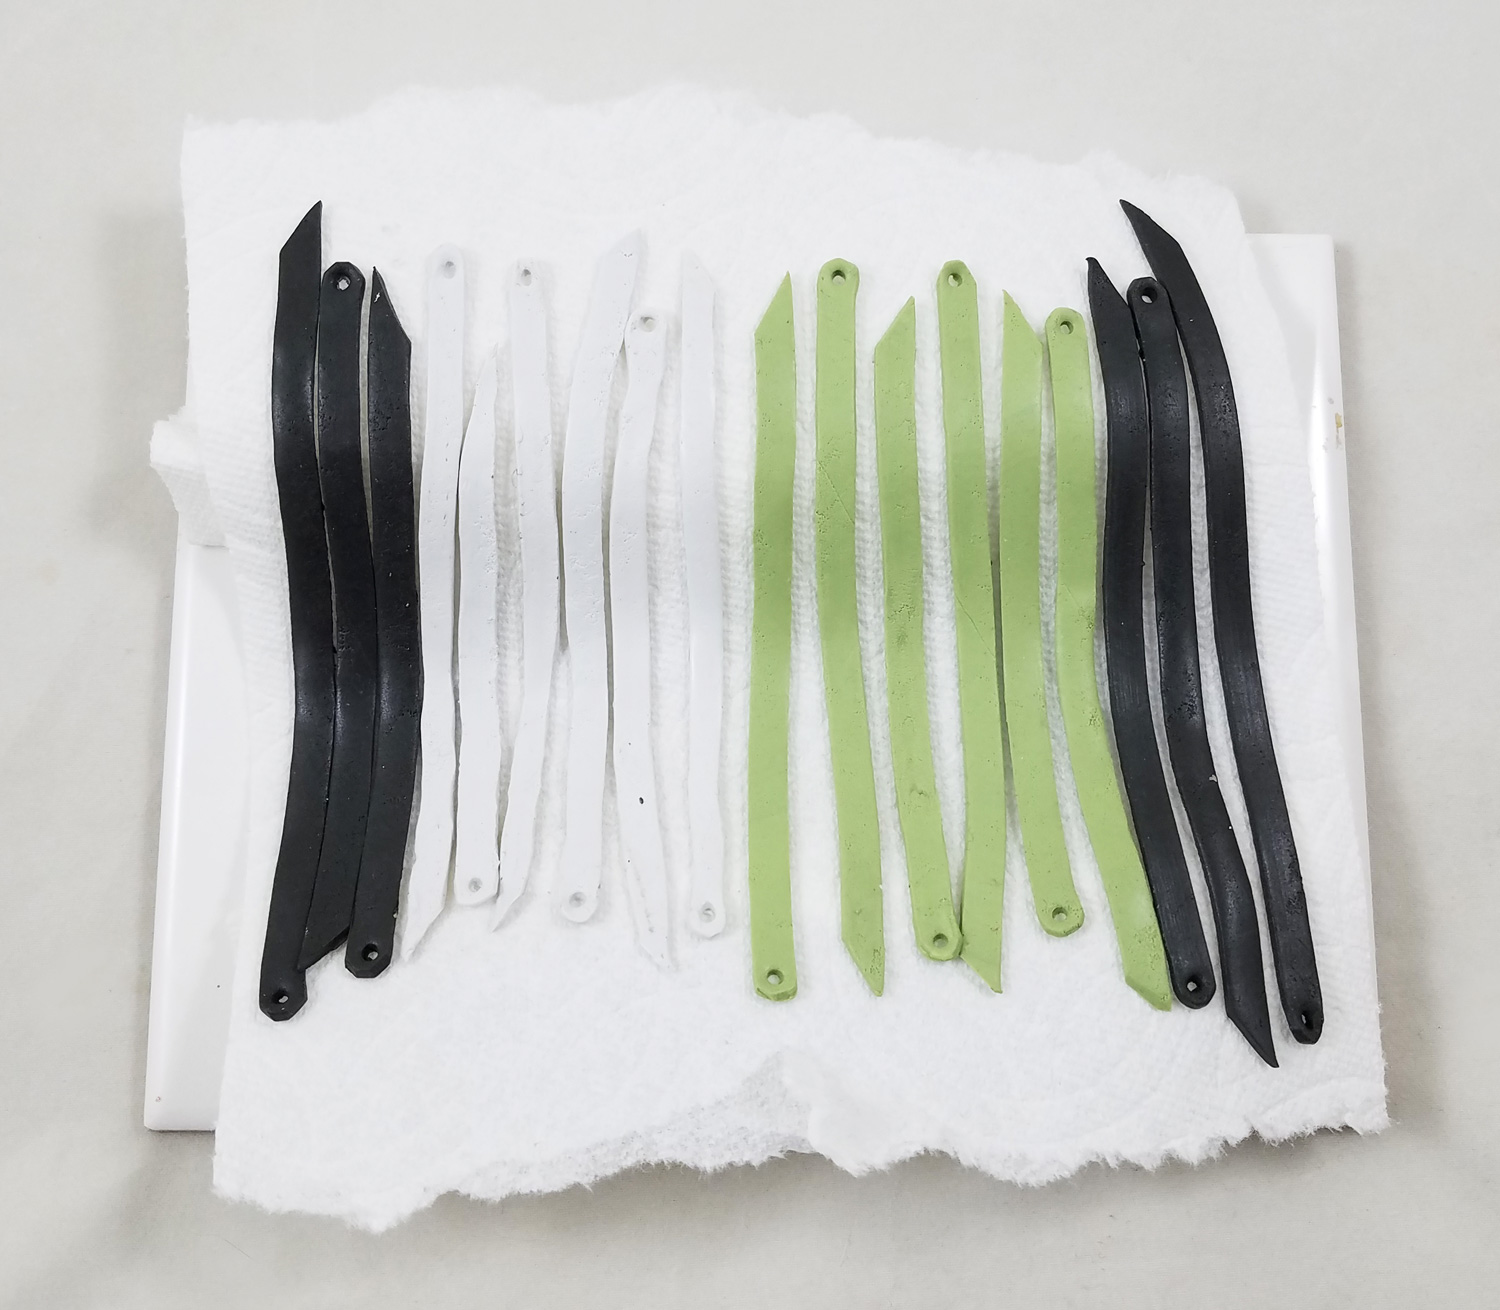
I crumpled two paper towels into rolls and placed a third paper towel on top of a ceramic tile. I carefully placed my strips of clay on the paper towels. I baked the clay strips on the tile as per the manufacturers instructions. Sculpey Soufflé once baked is more flexible than traditional polymer clay allowing for long and/or large art pieces to be created, yet be still resistant to cracking and breaking.
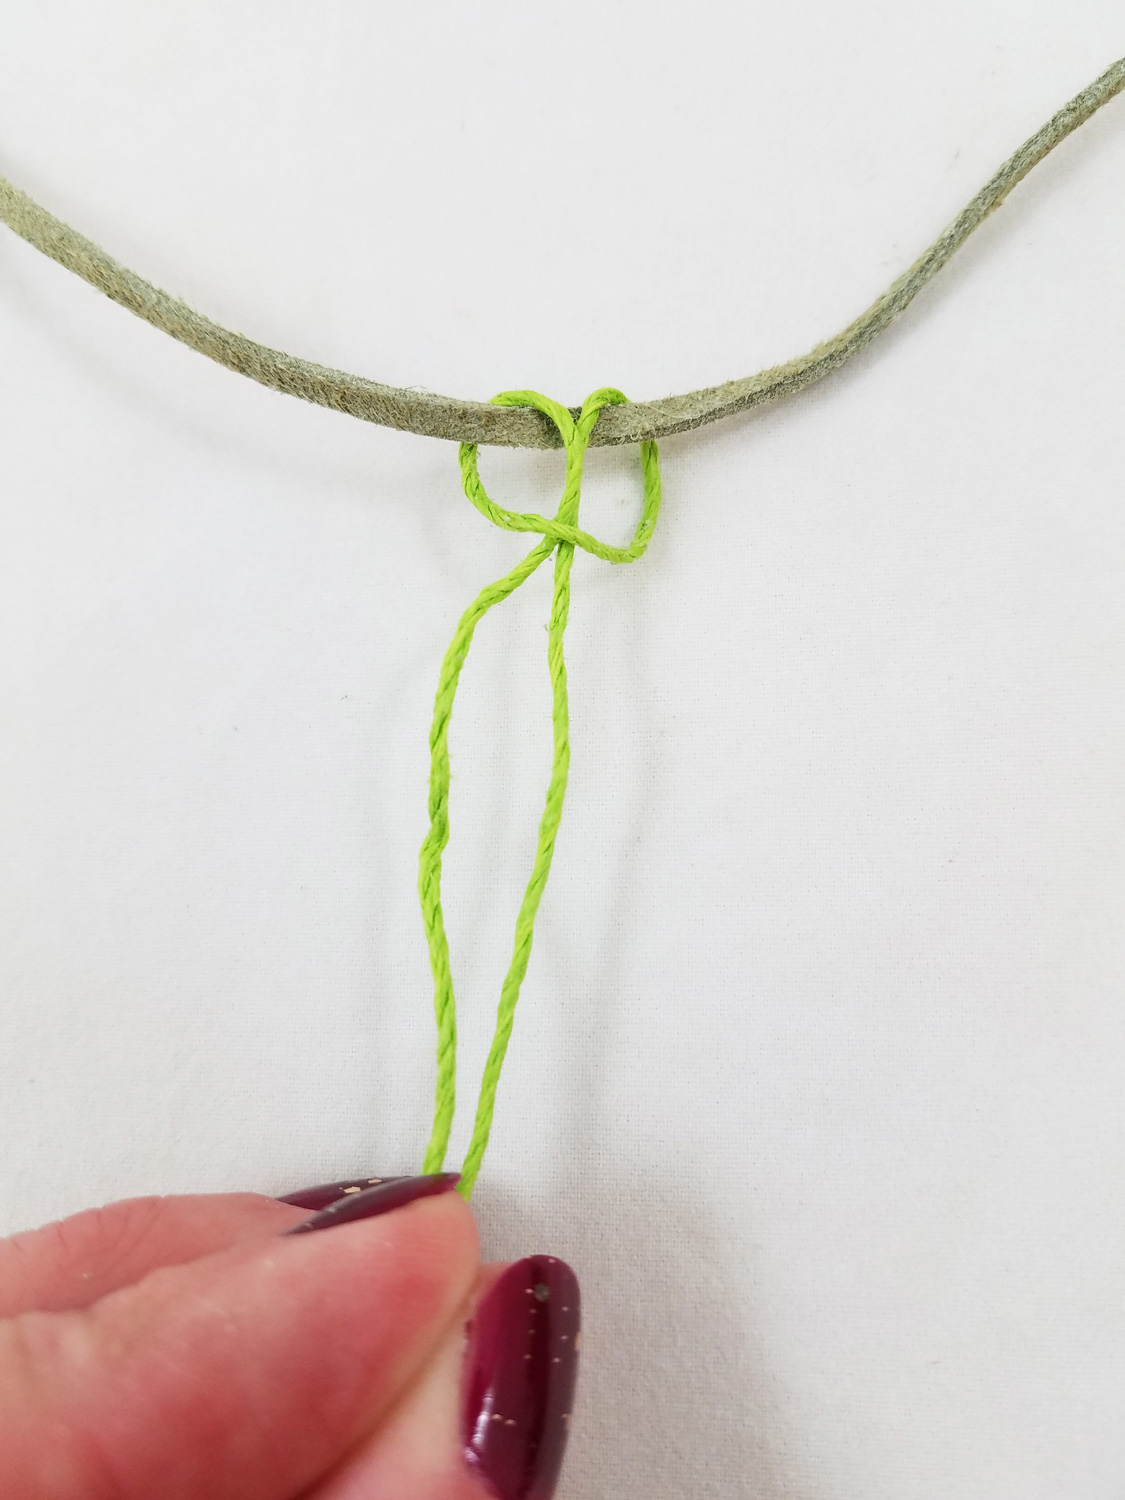
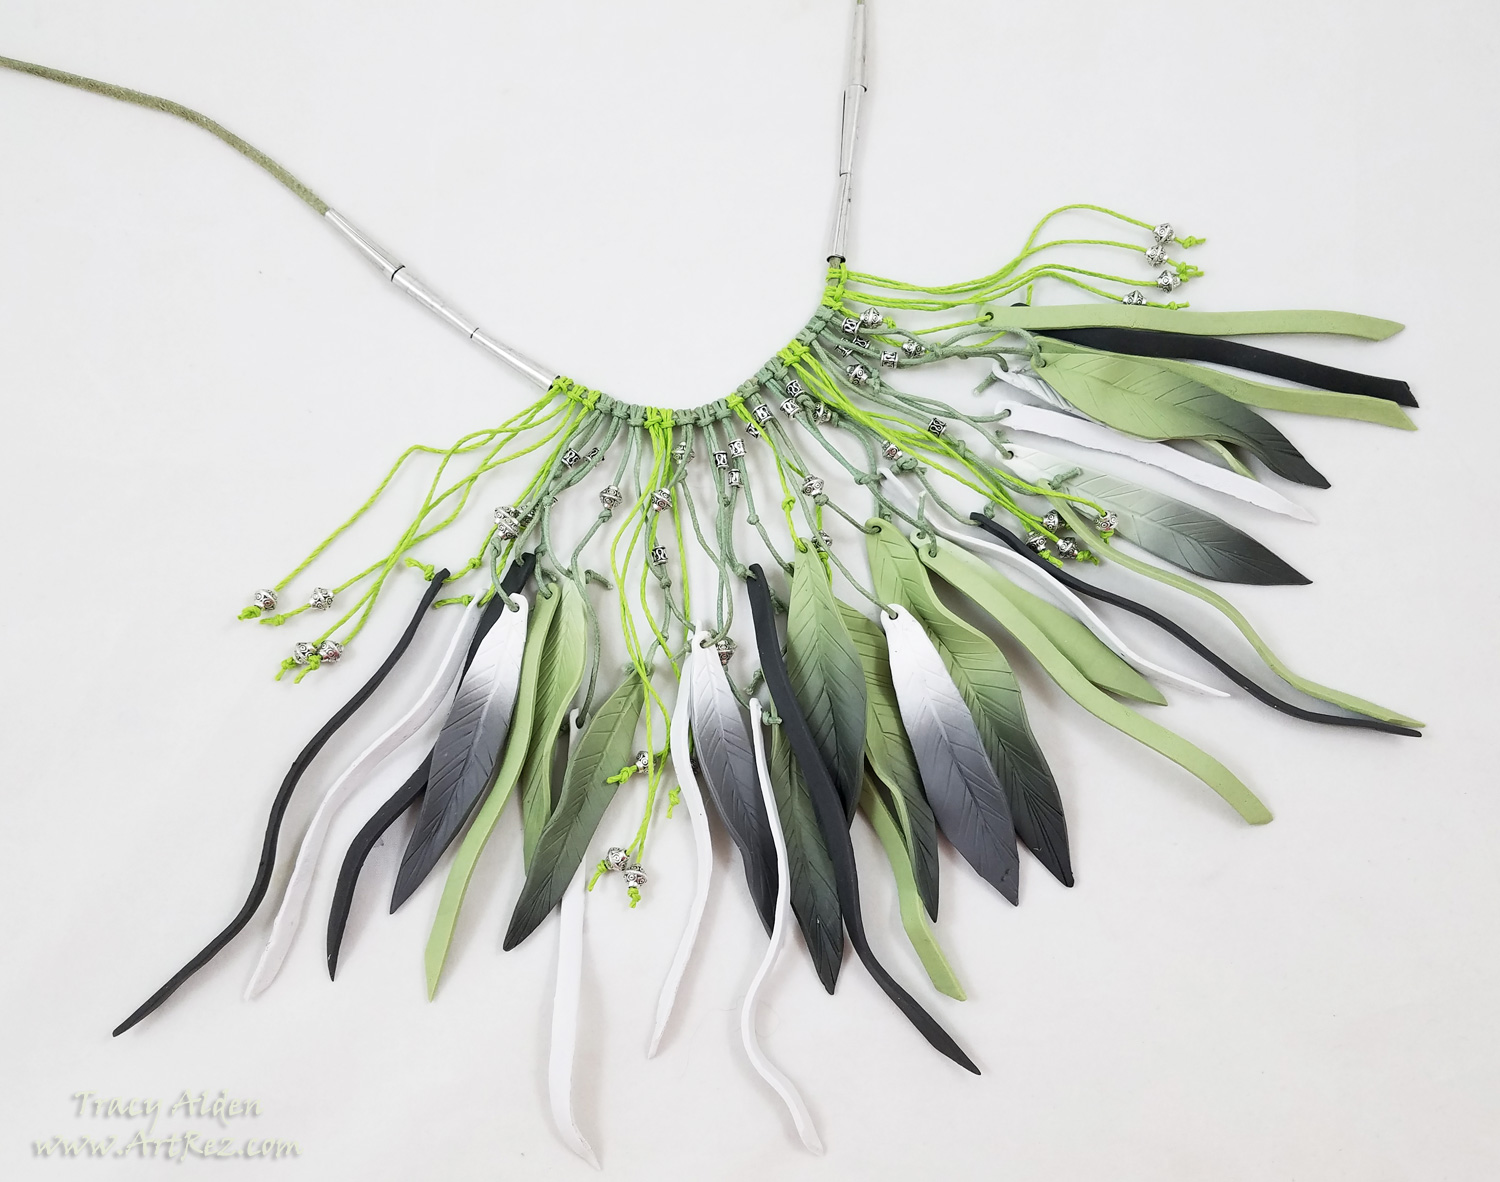
I cut a 24 inch portion of Faux Suede Olive-Brown Cord to be the start of my necklace. I cut a 10 inch portion of green Natural Hemp Cord and attached it to the suede cord using a Lark’s head (Cow Hitch) knot.
I slid a metal bead onto the hemp cord and did a overhand knot at the end of the cord. I repeated this on the second portion of the cord.
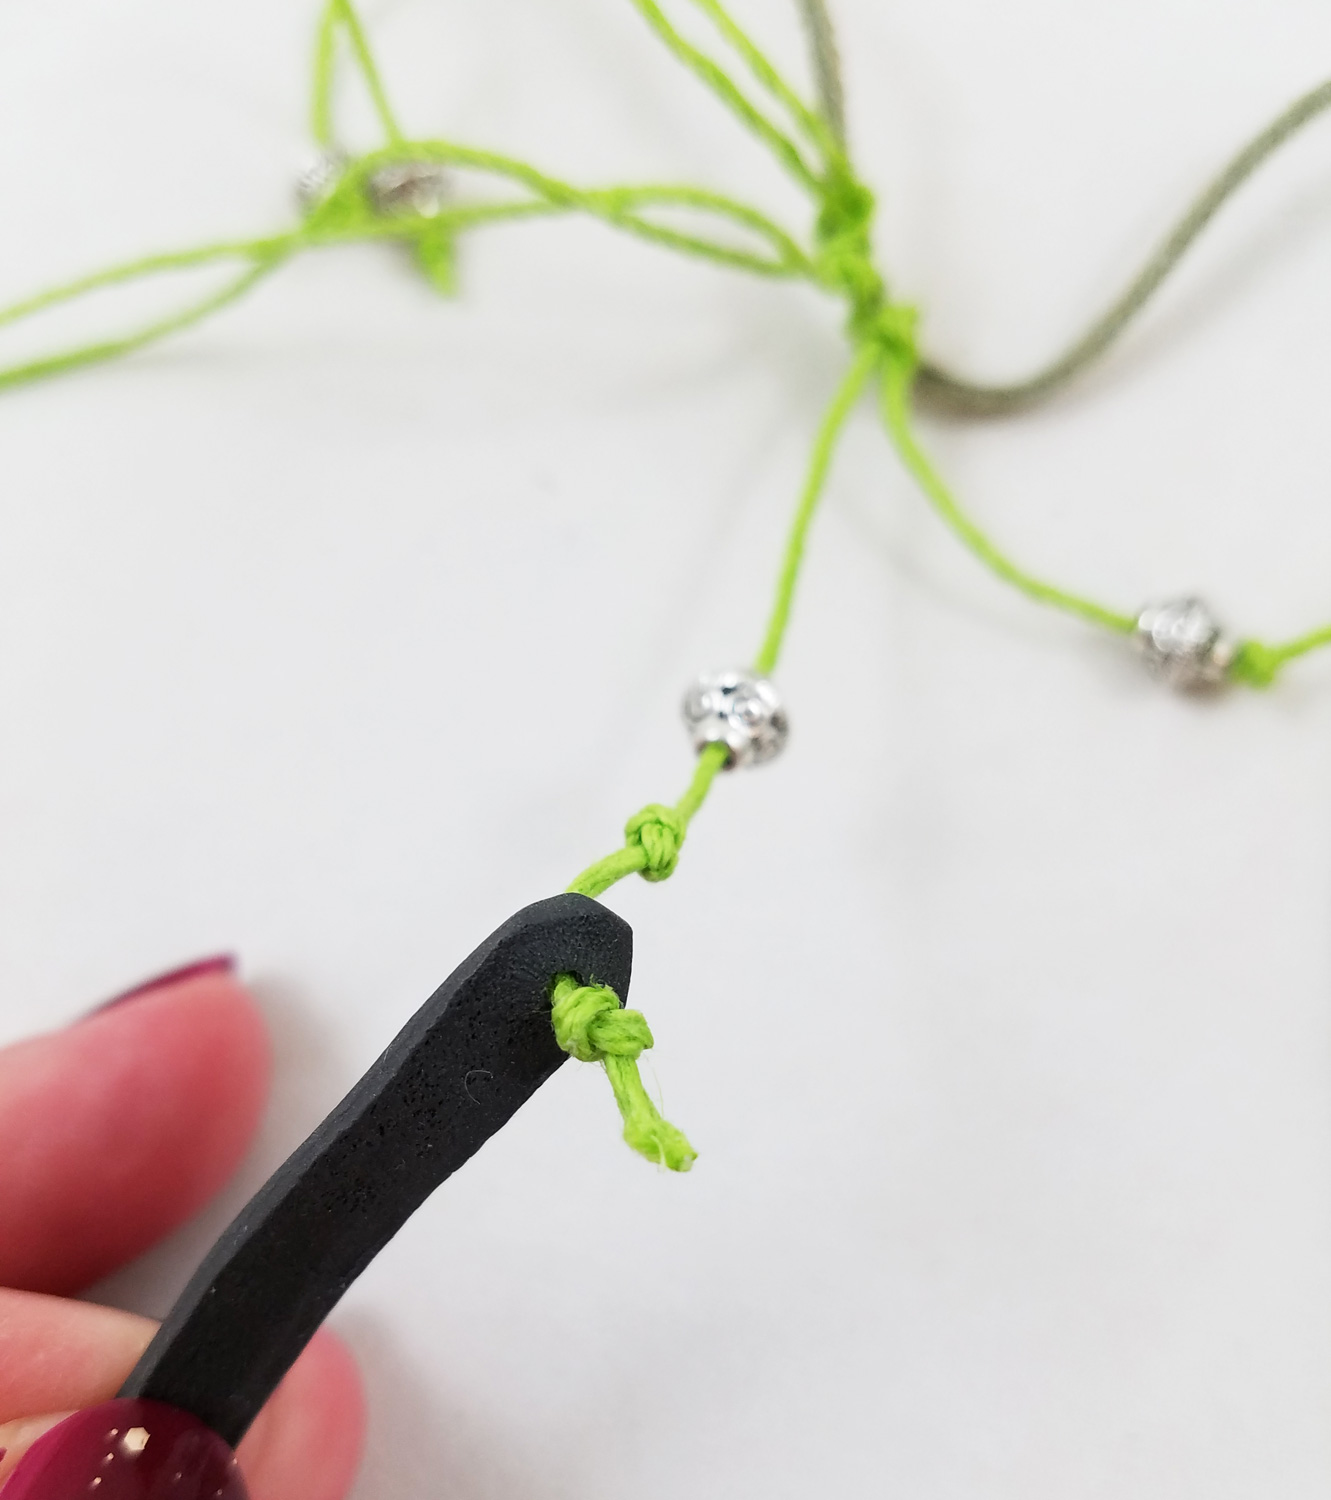
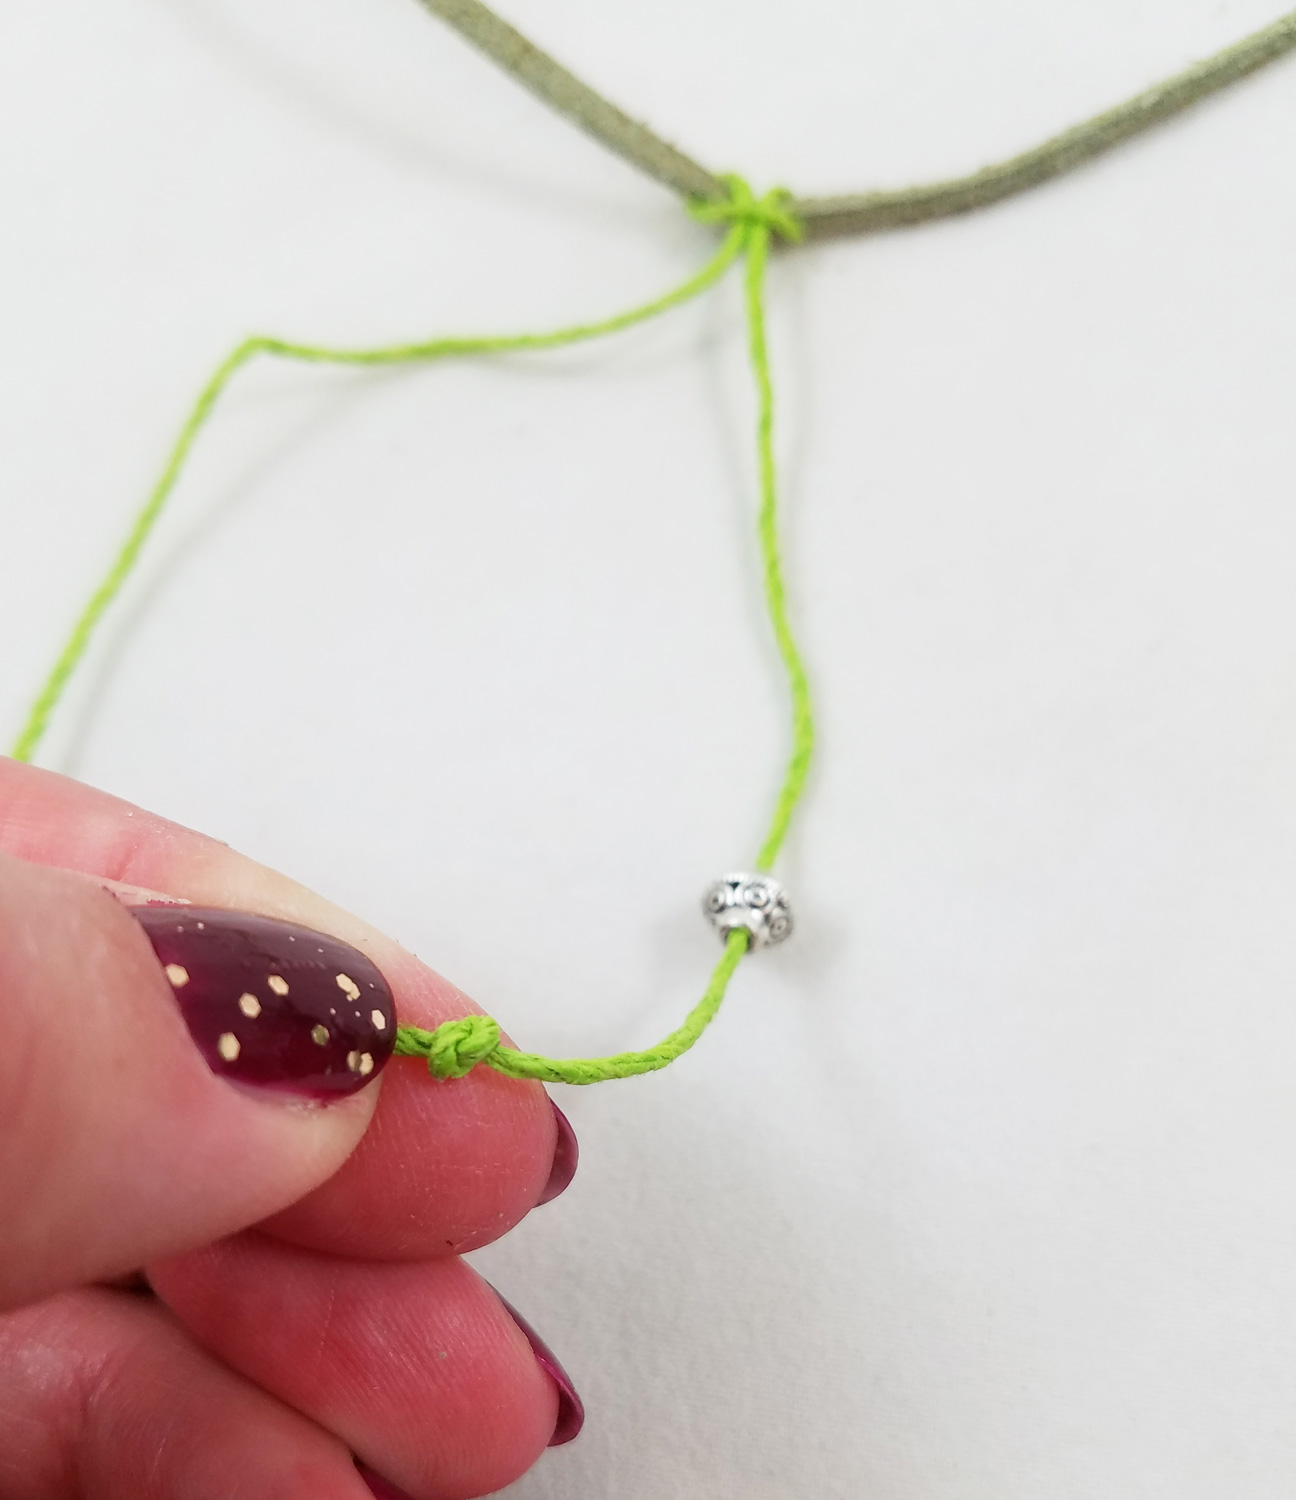
I added an additional 10 inch hemp cord length to the suede using a Lark’s Head knot, adding metal beads and securing them with overhand knots. Adding another hemp cord length I slid metal bead further down the cord, towards the Lark’s head knot. I did an overhand knot, slid on a strip of baked polymer Souffle clay and secured it with a overhand knot. I repeated this process for all of the other cured clay pieces.
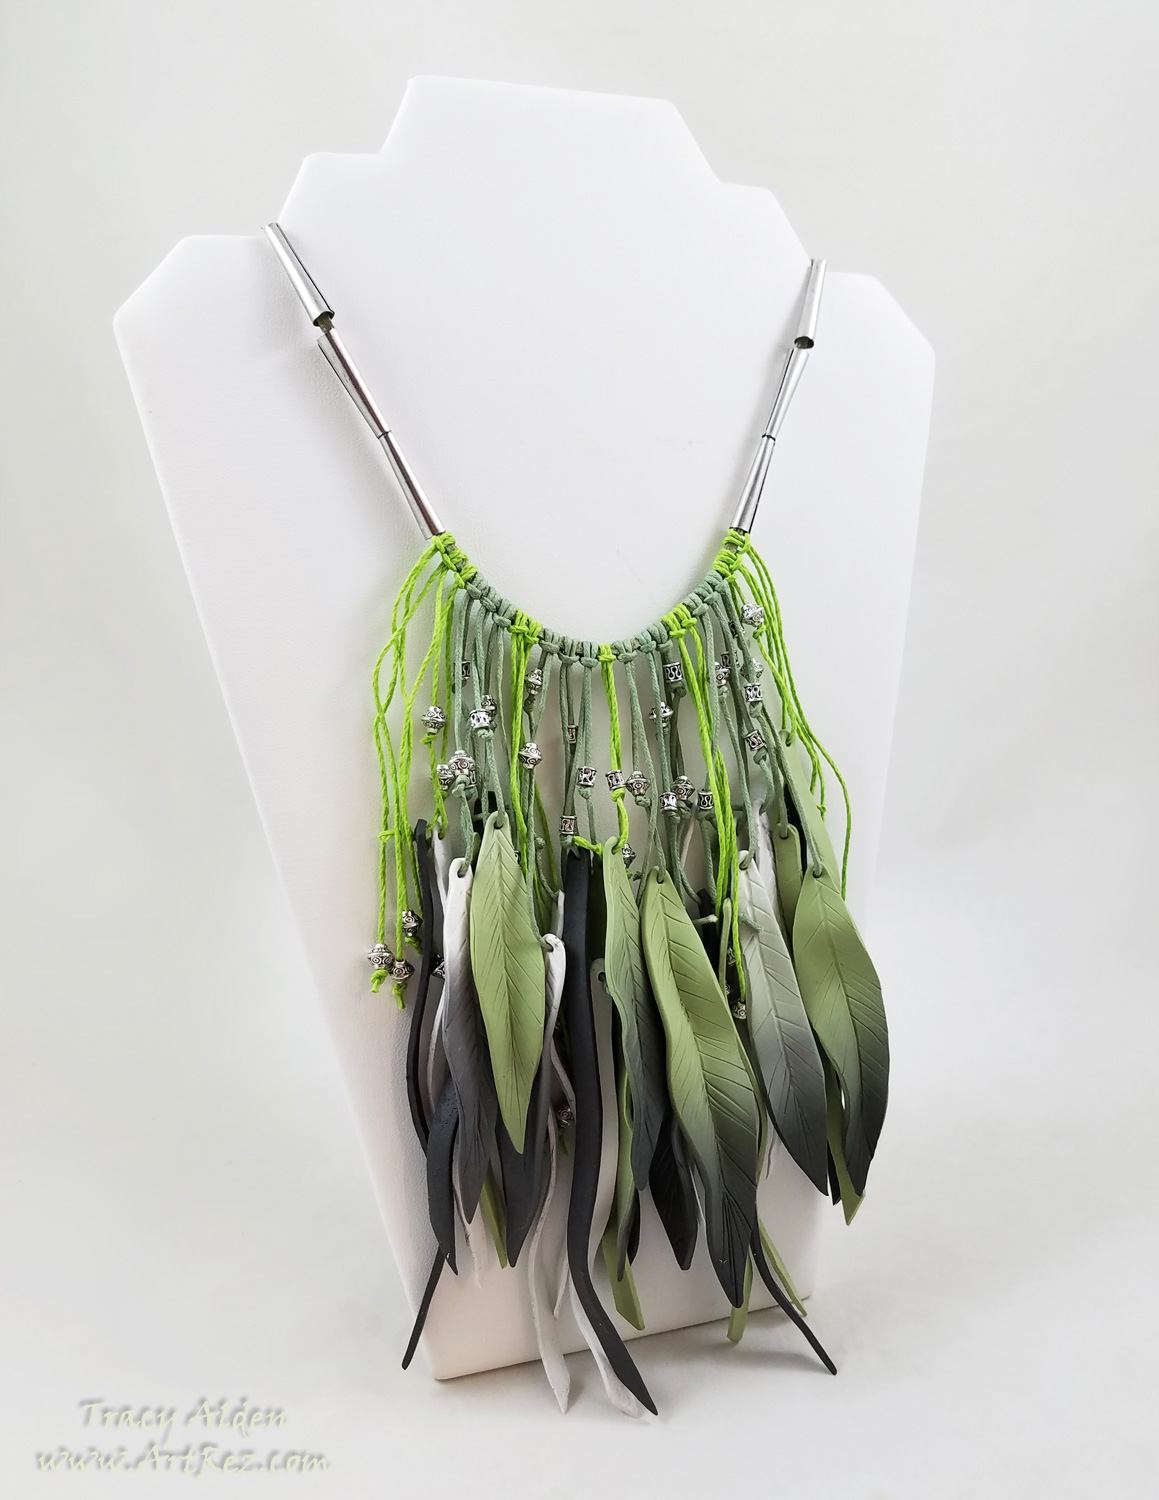
I slid on three Cone Tin Beads on each side of the suede and did a simple slide knot to finish the necklace.
I am now a huge fan of Sculpey Soufflé, with its flexibility and matte finish it allows this cascade of cord, clay and metal beads to be lightweight, durable and fashionable!Until Next Time, Safe Travels!
2018 Creativation Trade Show with Amazing Casting Products
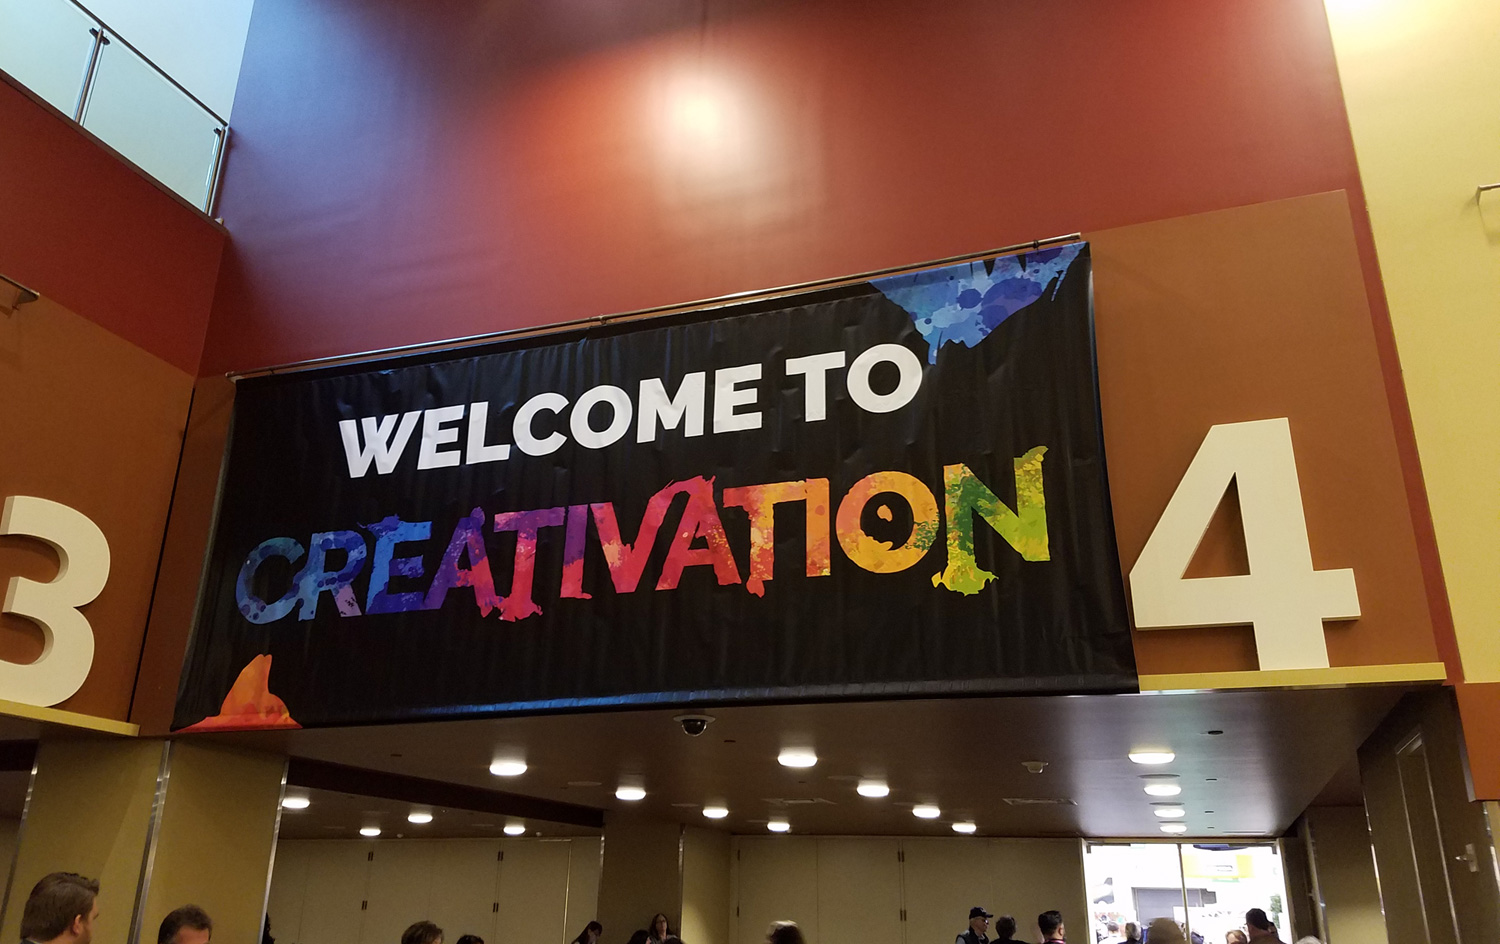
The Creativation Trade show, held in Phoenix, Arizona is the must-go event for craft and hobby industry professionals. It is held by Association For Creative Industries or AFCI, showcasing the many facets of the creative industries from edible arts, painting & drawing, kids crafts, sewing & fabric, paper crafts and more. This year’s 2018 show was a plethora of arts and crafts manufacturers, new products, demos, classes, and networking opportunities.
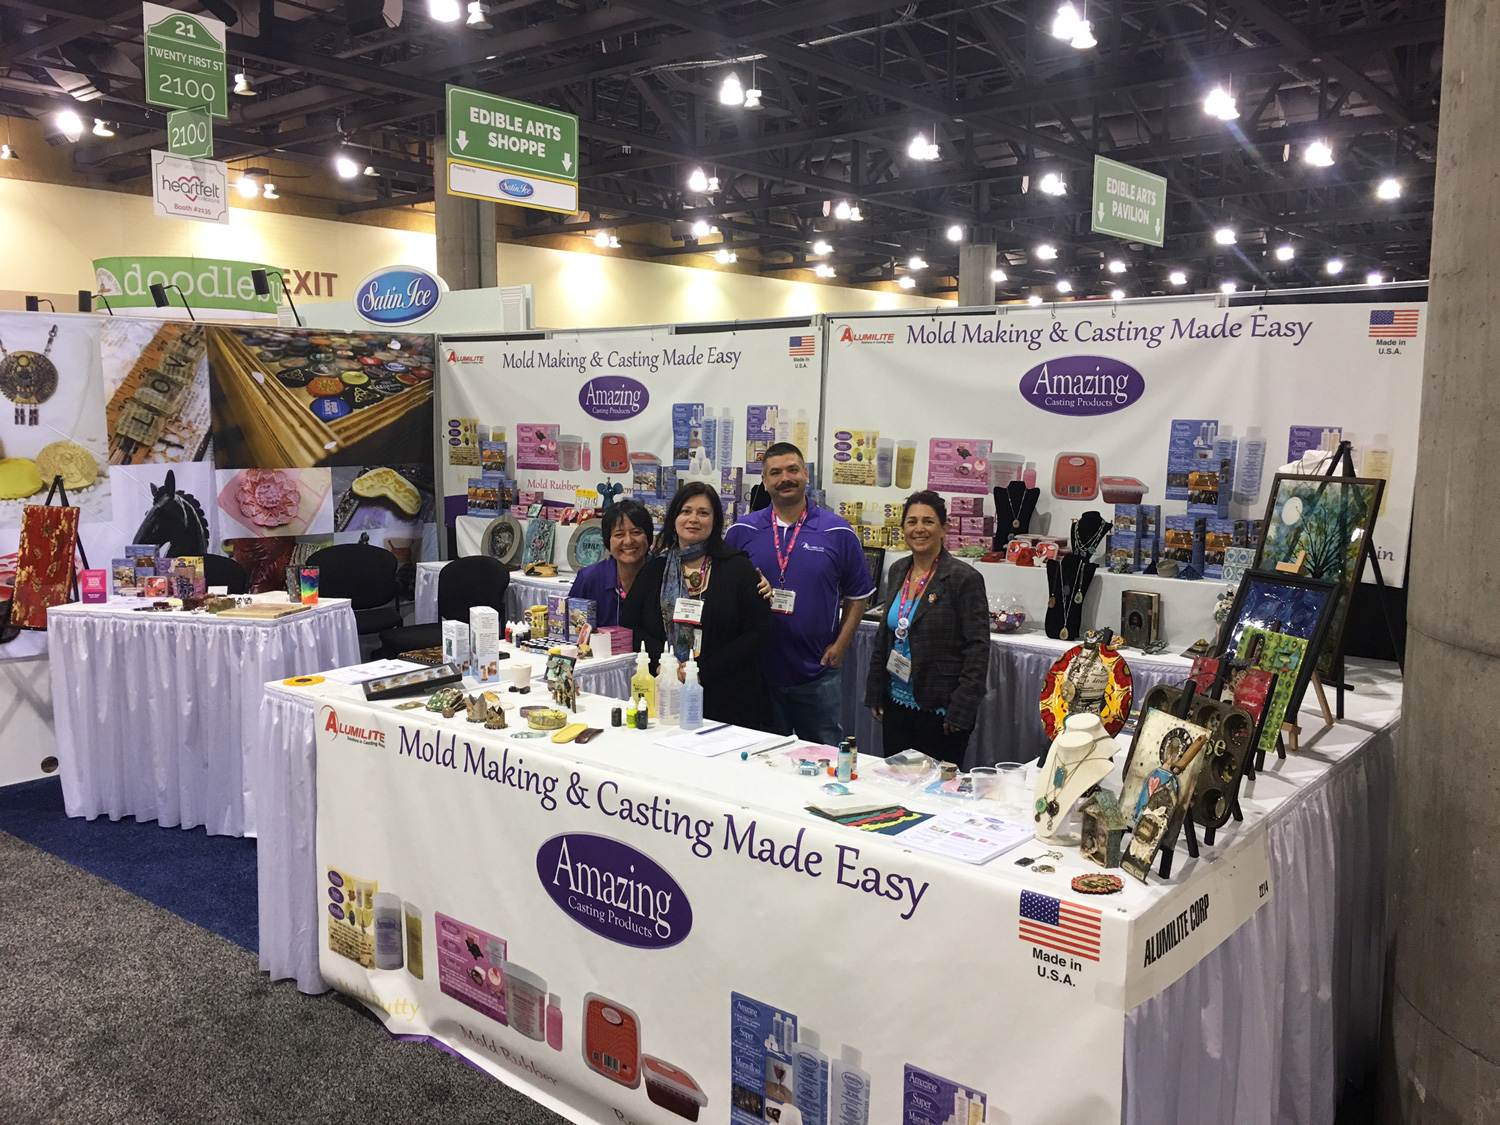
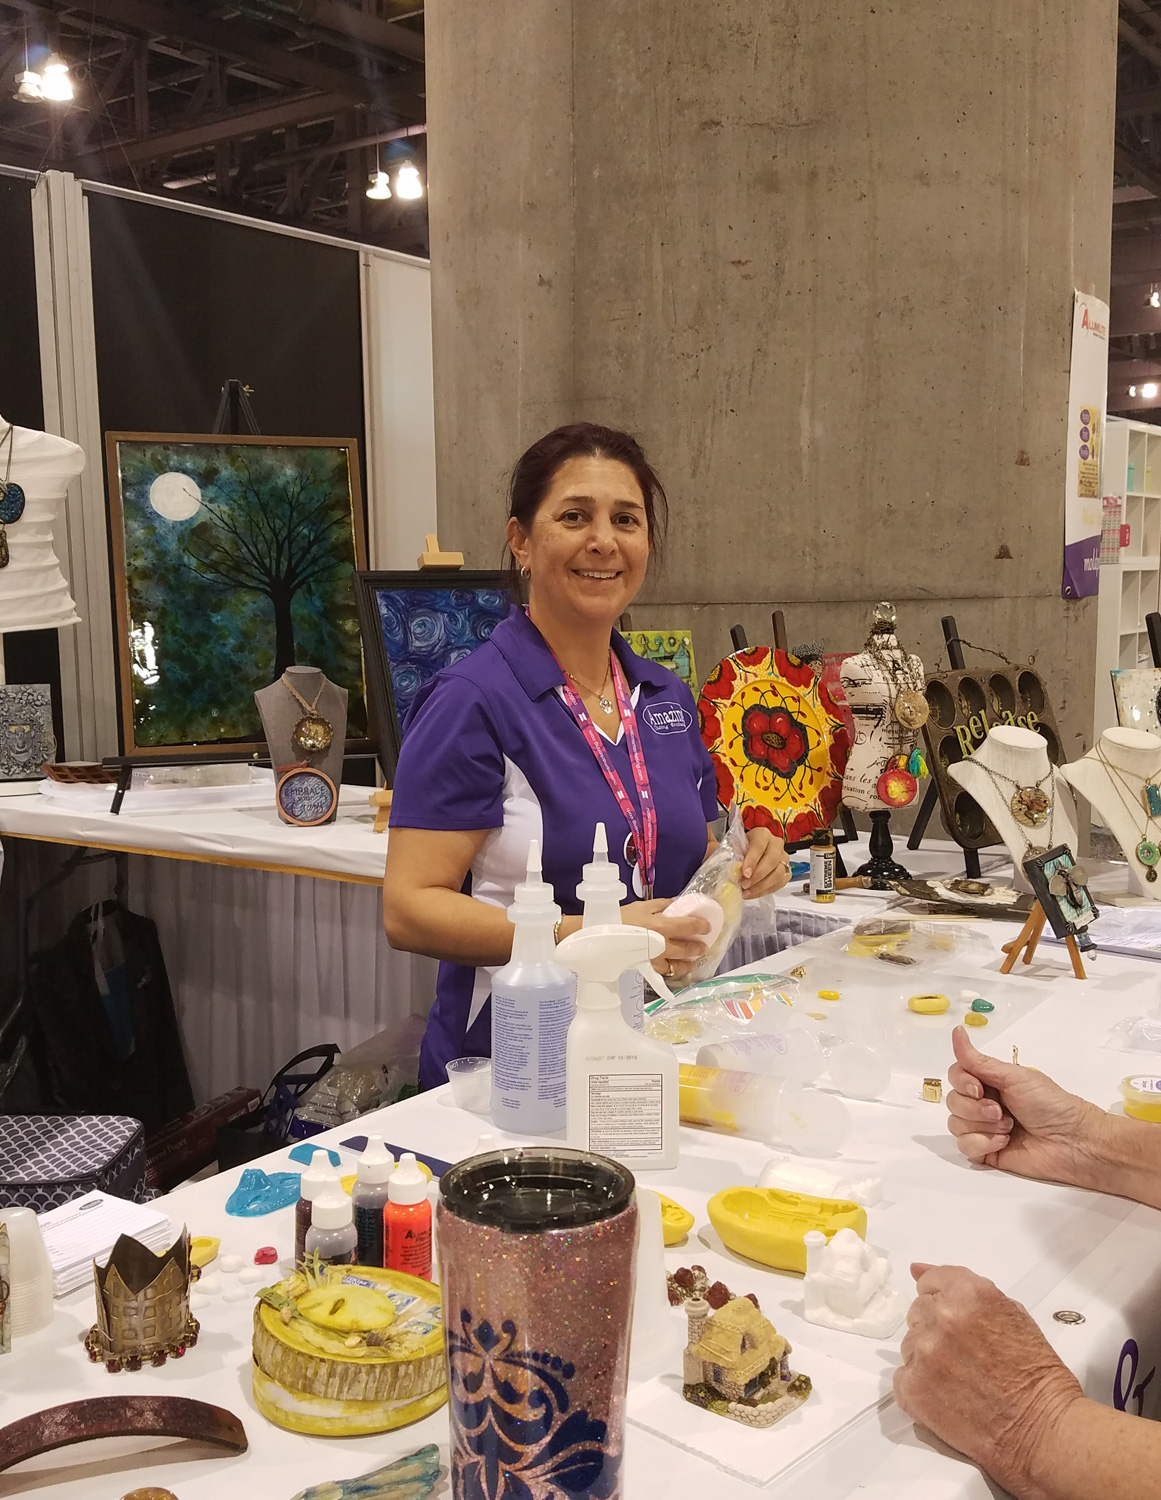
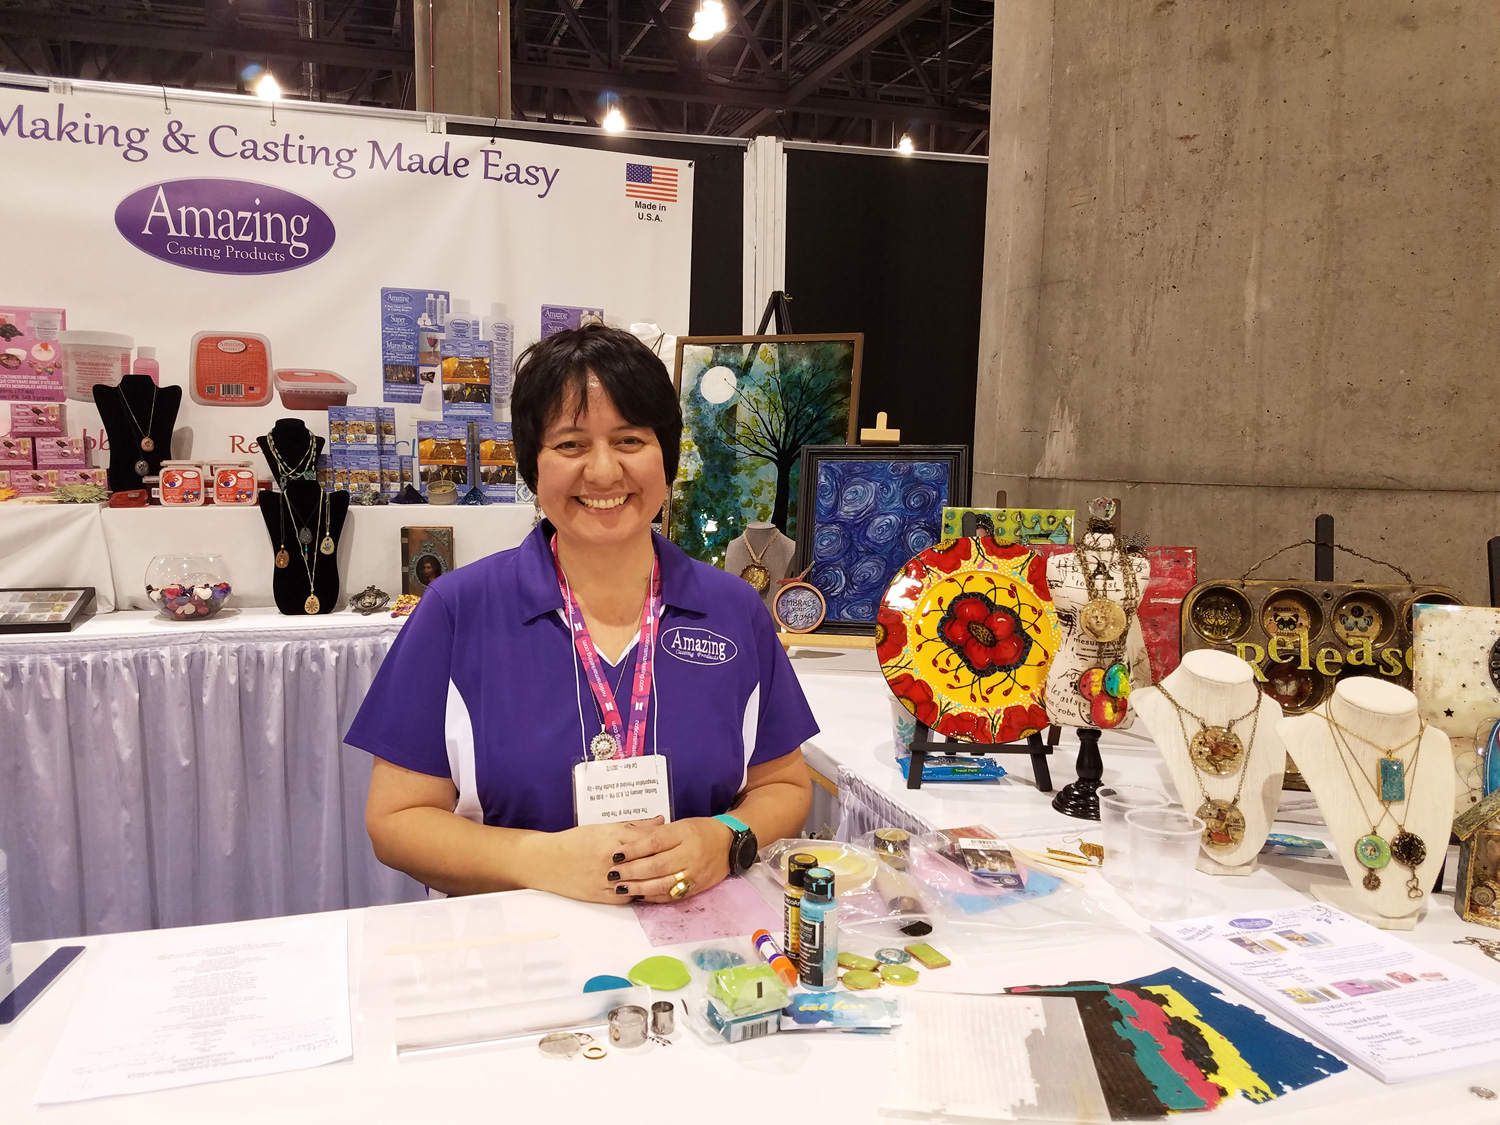
Once again I was a demonstrator at the Amazing Casting Products/Alumilite Corp booth at Creativation! Here we are first day, right before show floor opening happy to have the booth up and running before the rush of attendees. It was a pleasure and honor to being working with such talented and devoted people!
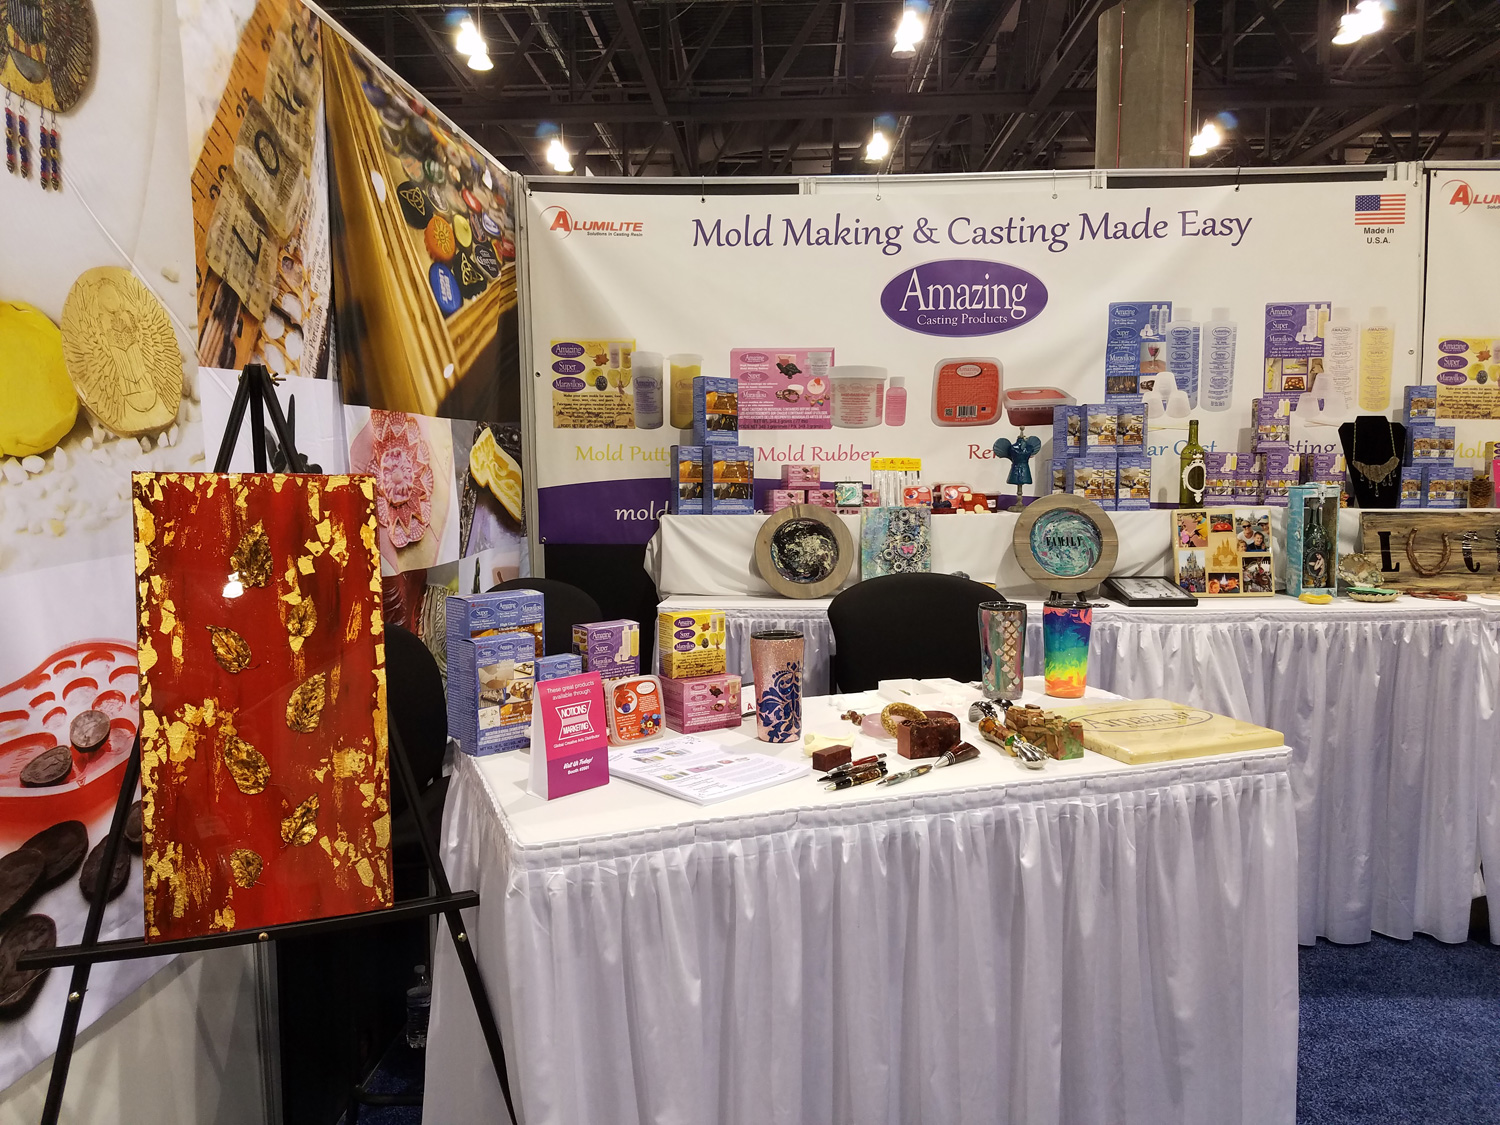
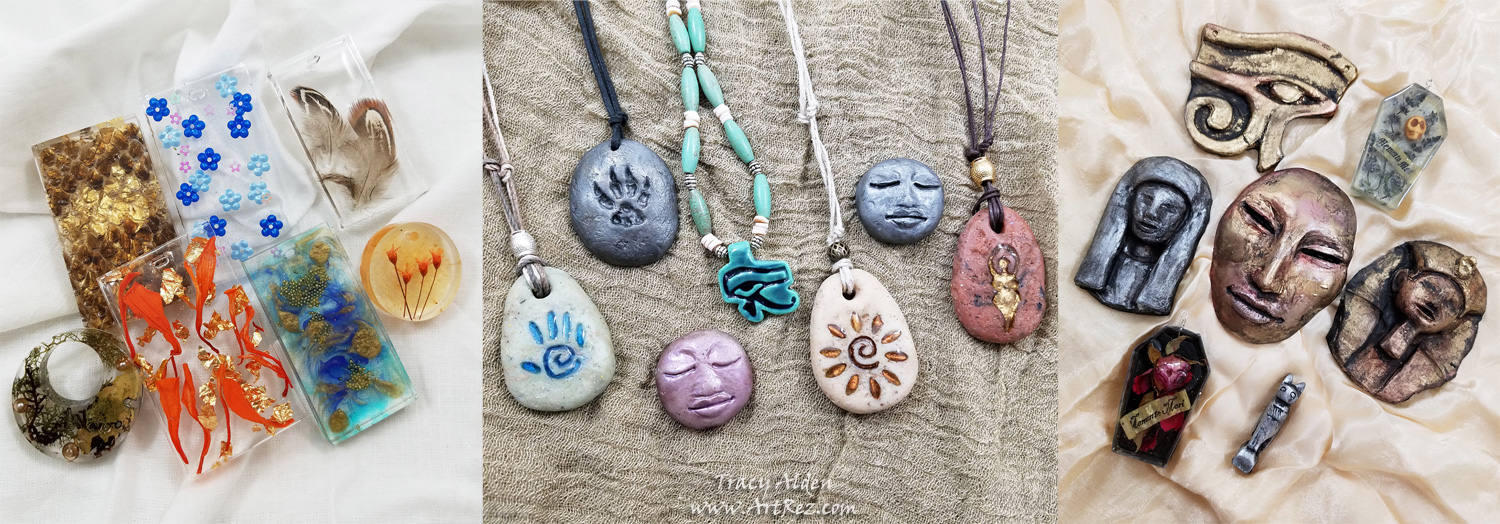
So many samples were showcased in every corner of the booth!
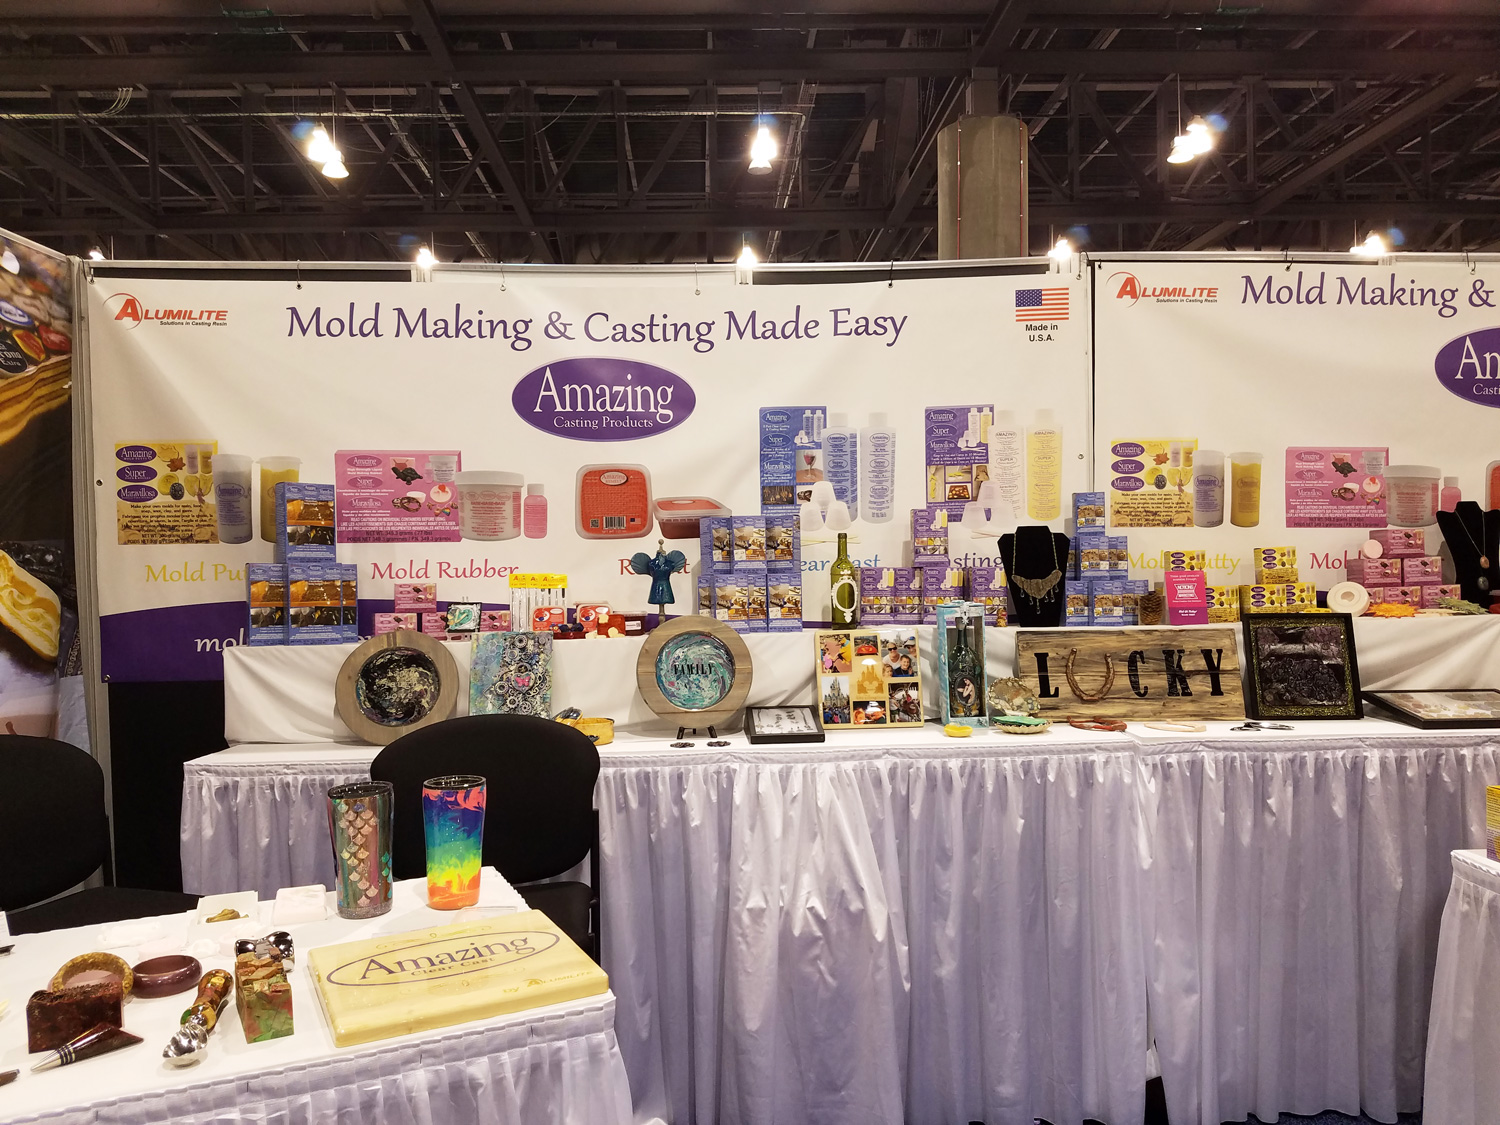
The Amazing Casting Products Design Team had sent in a wonderful array of projects.
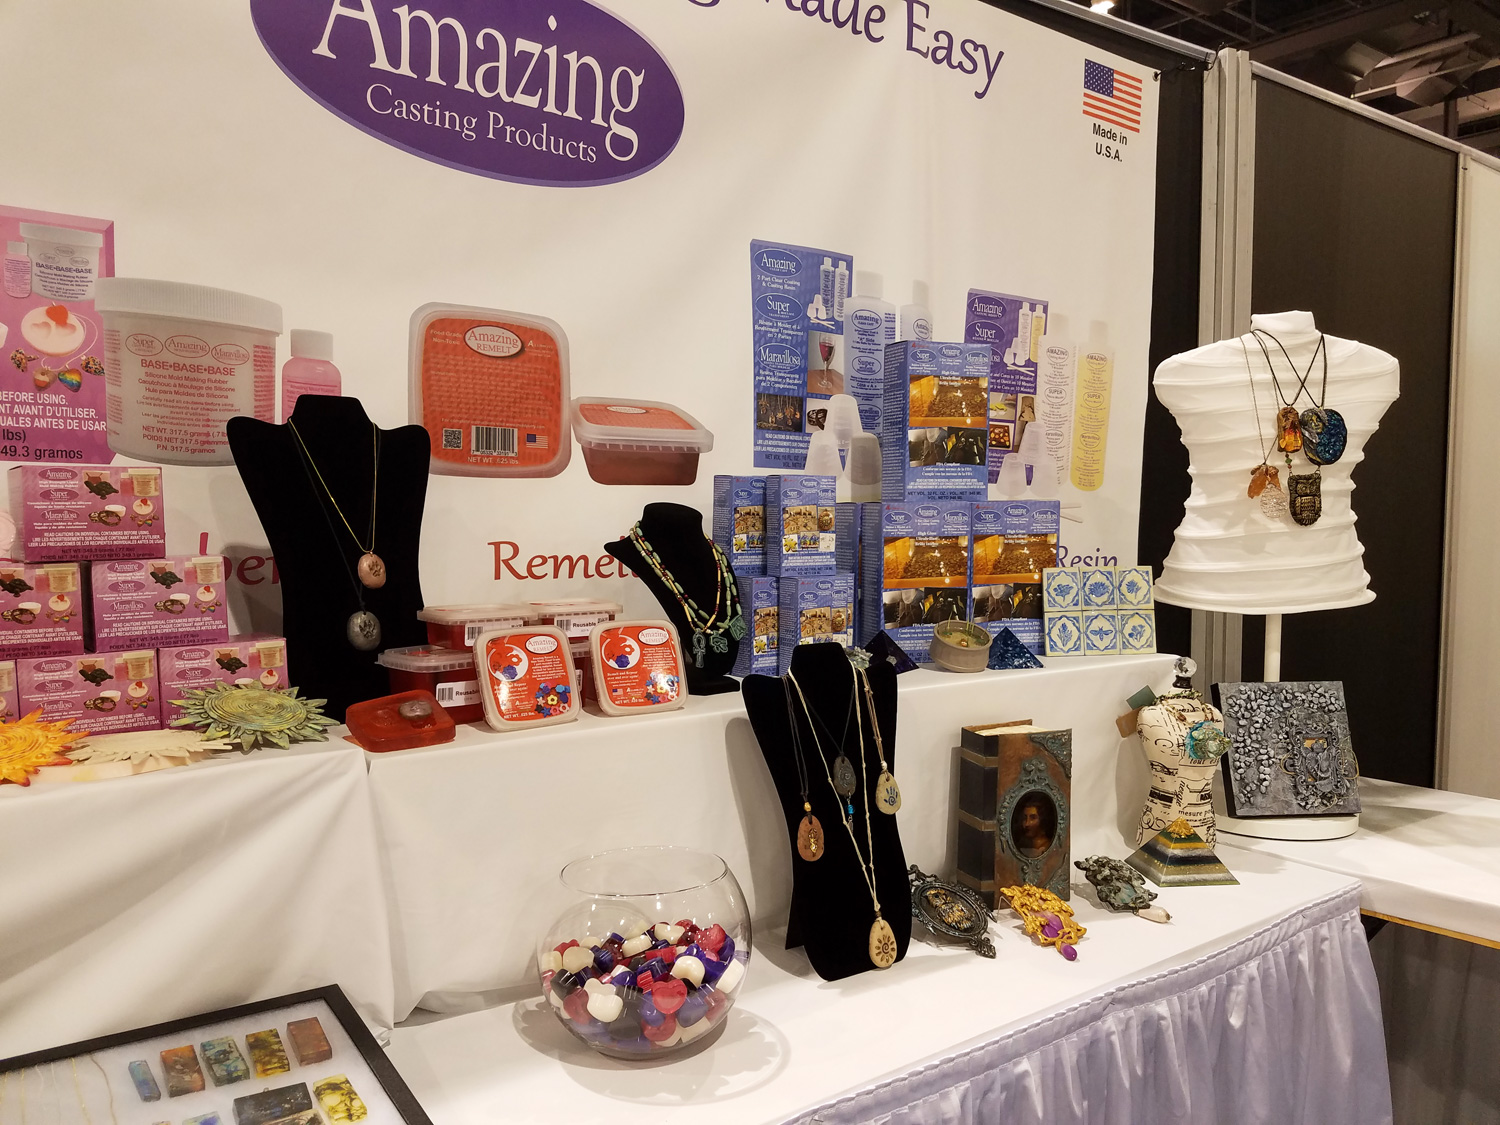
Anything from home decor, kitchen wear, mixed media, jewelry, toys, garden decor, and fine art applications could be found in the booth.
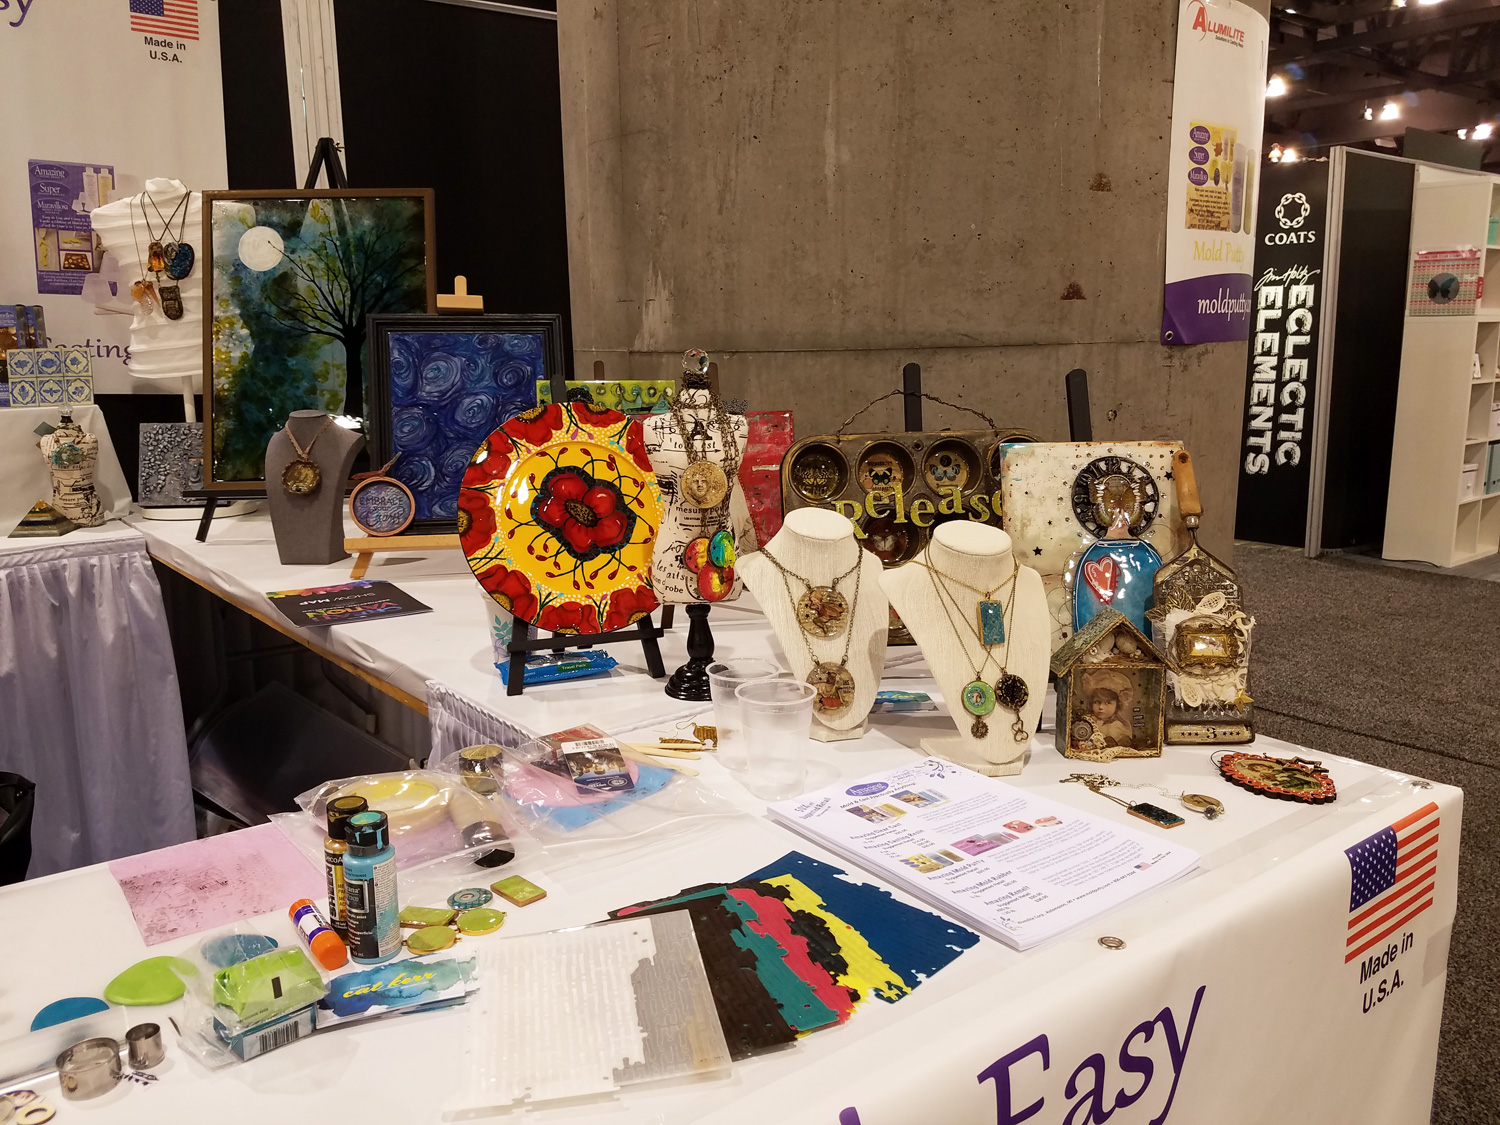
The demo area always had some sort art going on.
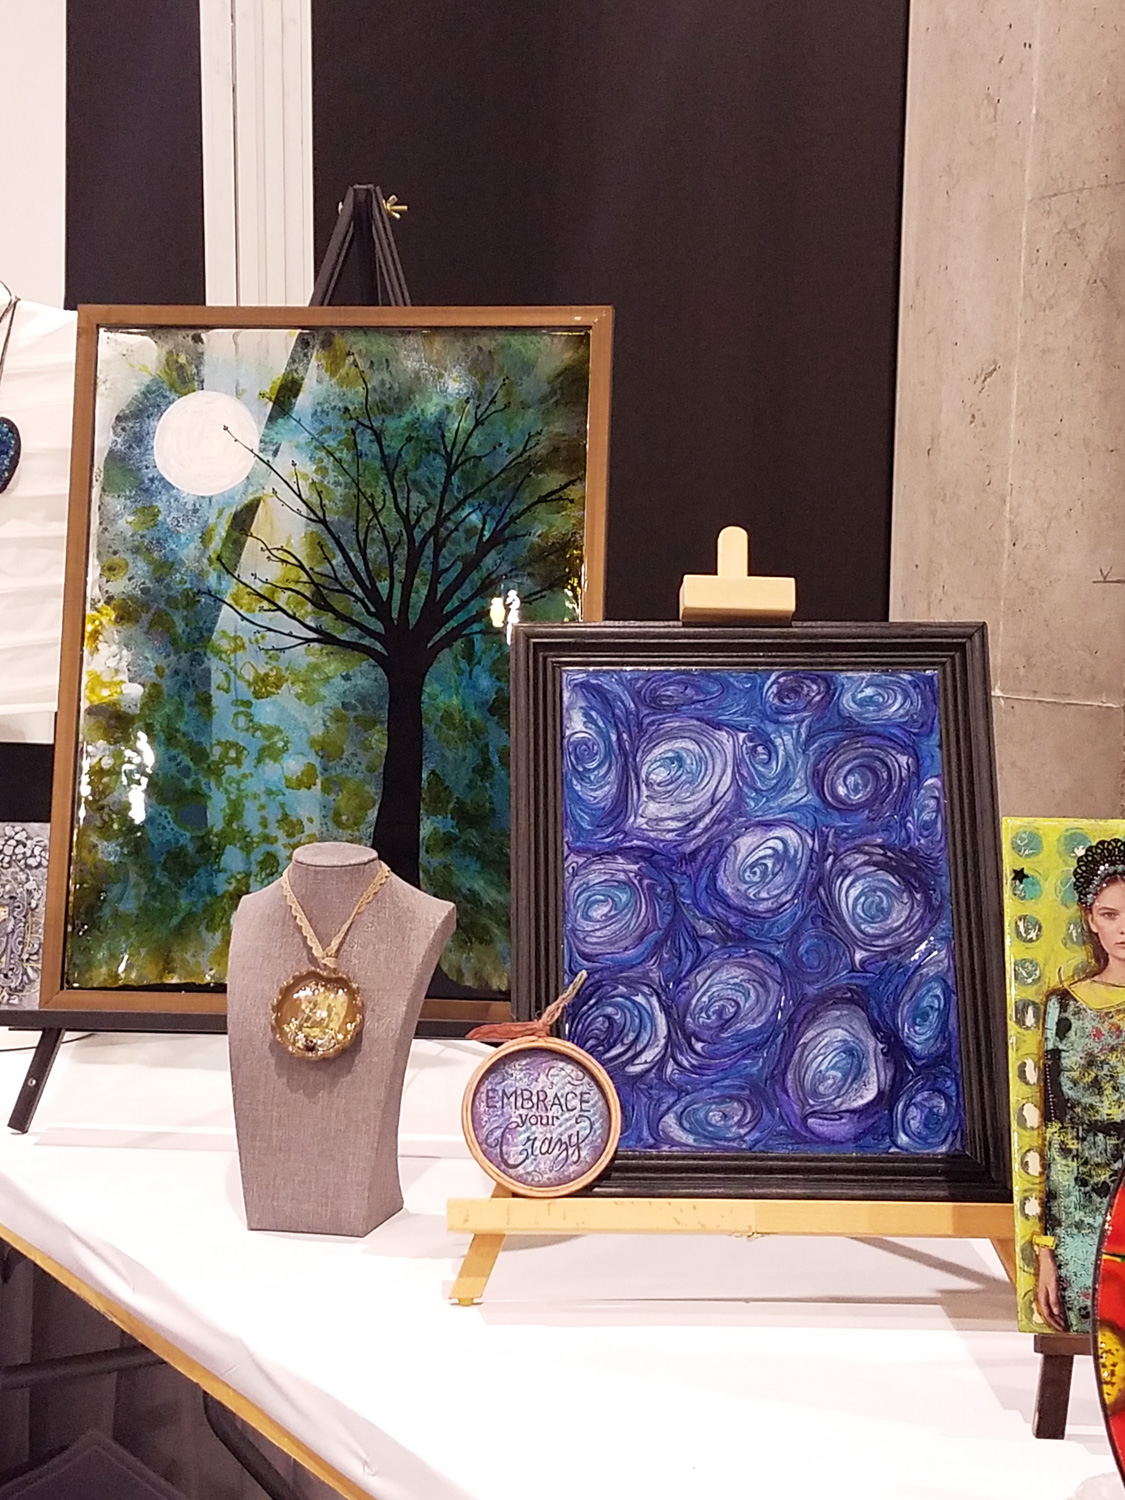
With so many samples there was bound to be some art application that would catch the interest of an attendee.
All three days I did demos; First day “Frozen in Time” How to embellish mixed media projects combining Amazing Clear Cast Resin with powders, dyes, stamps, found objects and more! Second day “Crafting Conversation Curios” How to mold and create unique handmade resin pendants, charms and curios with Amazing Casting Products! Third day “Wearable Art, Clay Time” Exploring the creative possibilities of wearable art that can be achieved using Amazing Casting Products and polymer clay! Manufacturer partner, Polyform Products
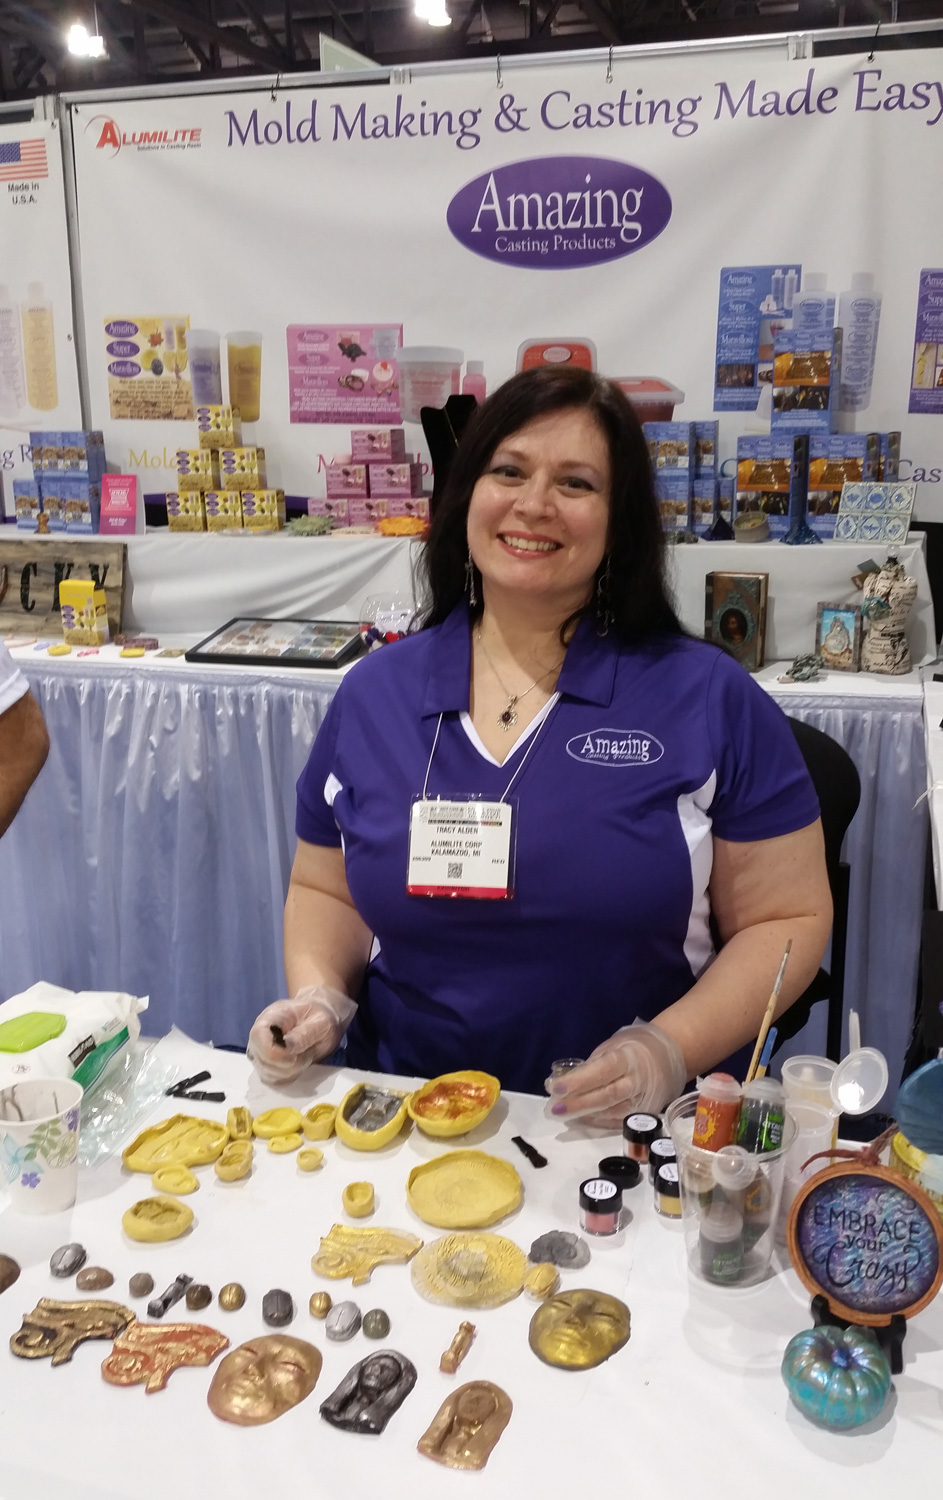
Yours truly working on the “Crafting Conversation Curios” demo.
Amazing Casting Products Design Team Leader Susan M. Brown starting with her “Moldmaking 101” demo. At this demo people learned how to make quick and easy push molds using Amazing Mold Putty that could be used with Amazing Casting Resin, polymer clay, chocolate, fondant, plaster, soap, and more! Susan also did a fun interactive game “Texture THIS?!” exploring texture plates with polymer clay while learning quick and easy techniques to make and use texture in varied mediums/applications. Game entrants were entered to win a prize package of Alumilite Corp/Amazing Casting Products & Polyform Products.
The wonderful and talented mixed-media artist Cat Kerr‘s demo “Bezel Bonanza” on the first day of the show. Demonstrating three resin bezel techniques that add dazzling dimension and texture to empty bezels combining Amazing Casting Resin, Amazing Clear Cast Resin, and polymer clay. Manufacturer partners, Polyform Products and Nunn Design. A video tutorial of her demo have be found here: Clay and Resin Dimensional Pendant
Cat’s second day of demos was “Personalized Photo Holders” was about making quick and fun personalized gifts using Amazing Mold Putty and Amazing Casting Resin.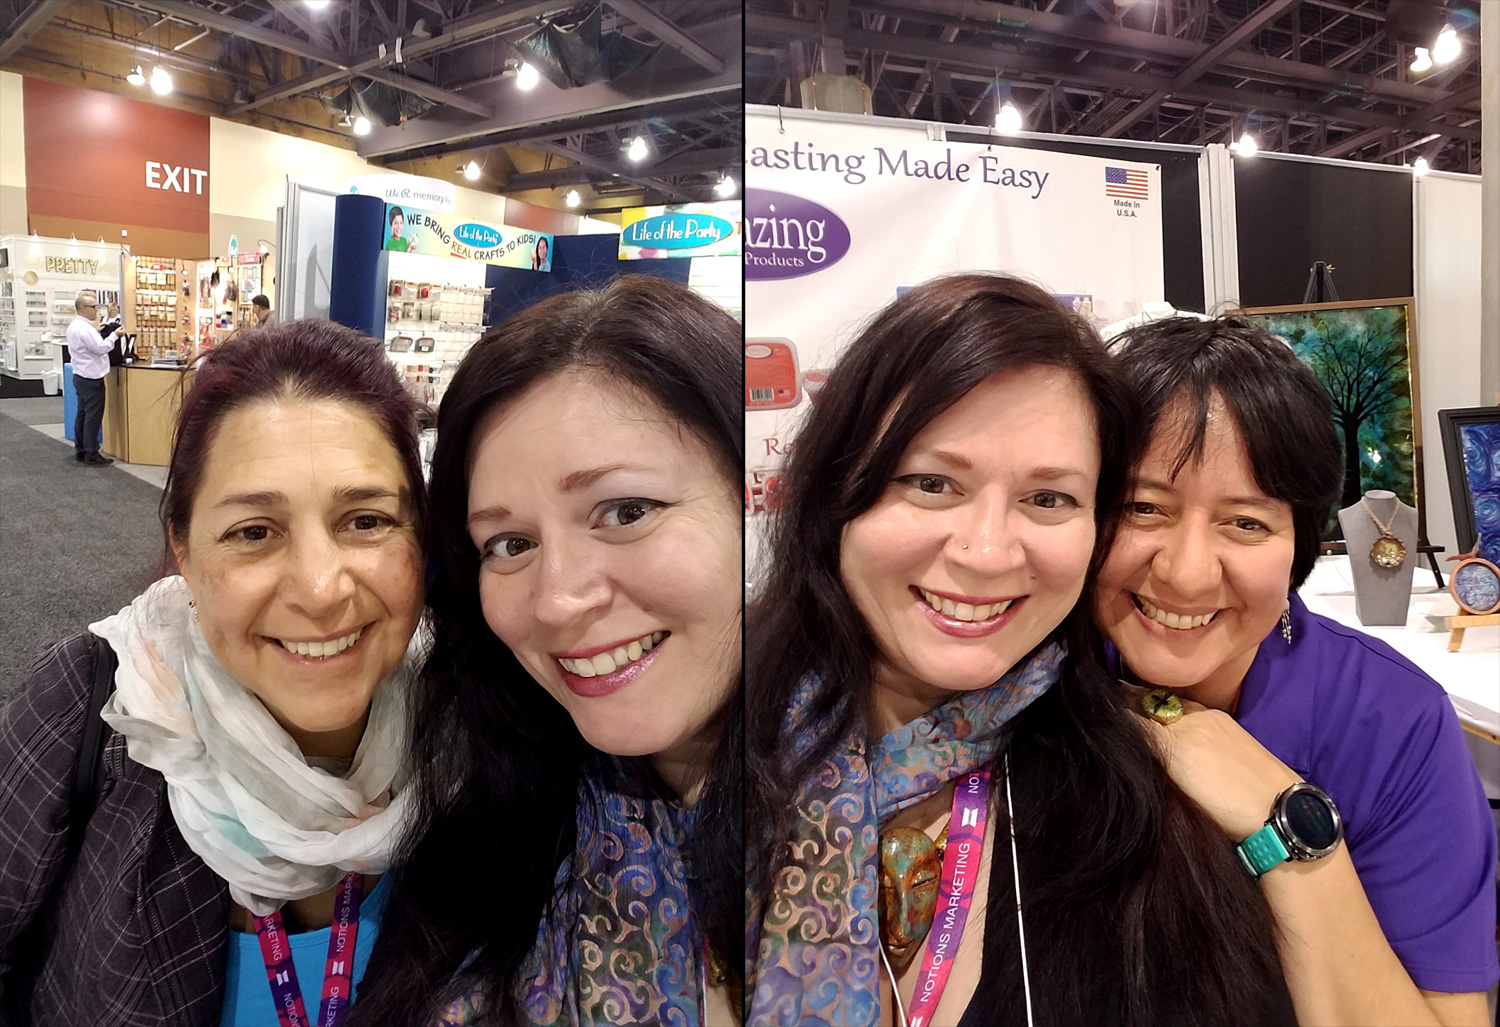
Creativation came and went so quickly it almost seems a dream filled with good times, amazing creative people, inspiration and a gateway into the creative industries. Hope to see you there next year!
Until Next Time, Safe Travels!
The Gift of Sparking Winter Jewelry, Handmade of Course!
With the past few months speeding past, with projects, orders, shows and daily life, I still make time to create handmade gifts for friends and family. No matter how much planning involved I always seem to end up making a few things last minute, but now that most of these pieces are on their merry little way I can share a few of my favorites.
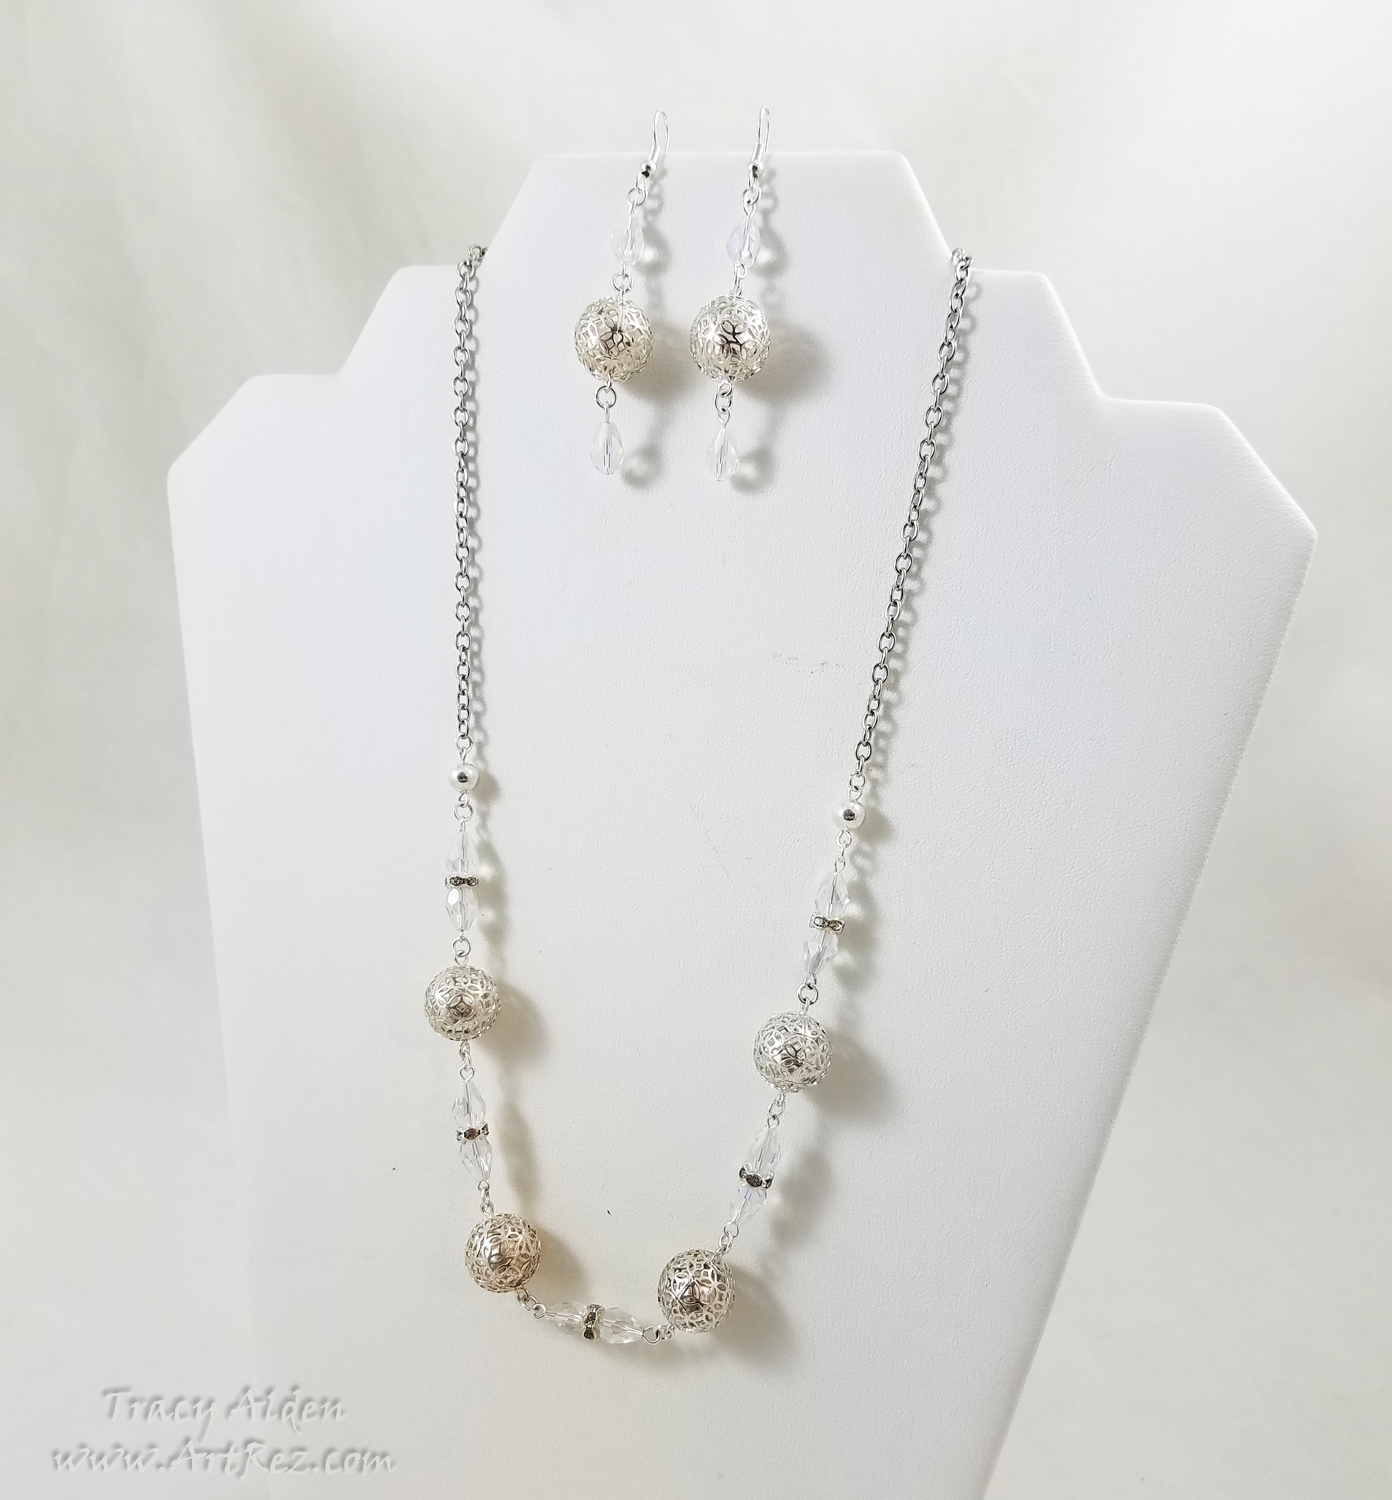
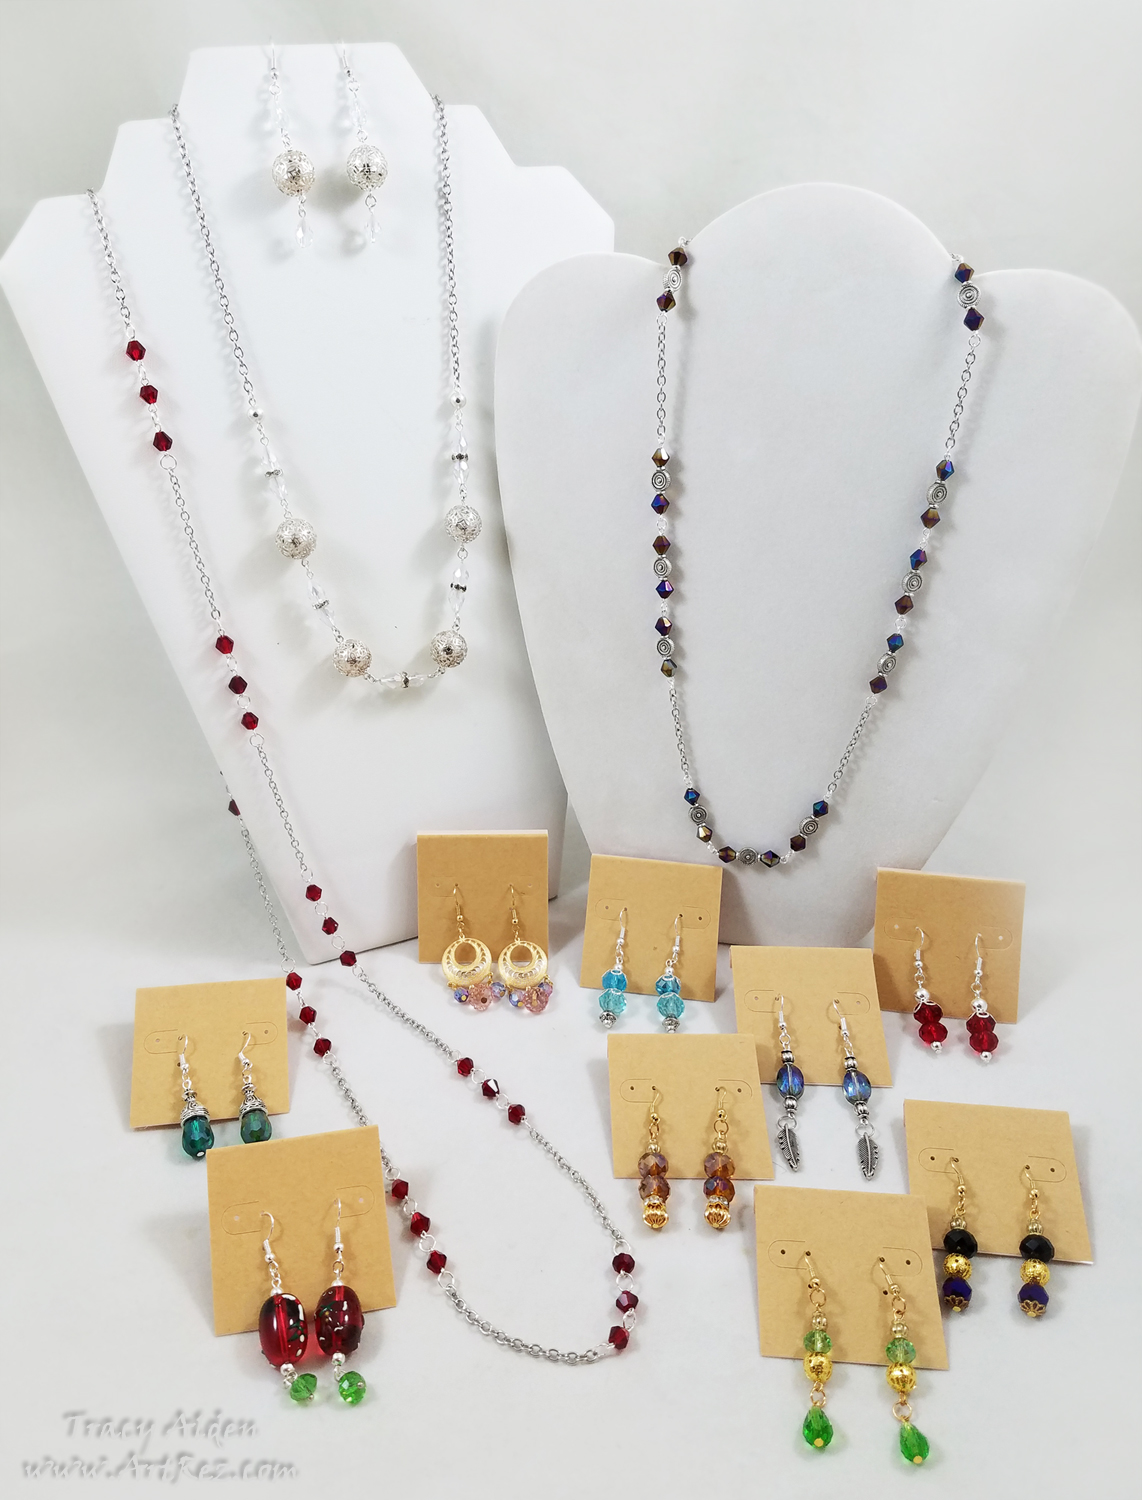
I love getting random bead assortments from Fire Mountain Gems. In one of my last orders I received some sterling silver filigree bell beads. Hoping to create some form of jewelry set, I was not sure what to put with them. Pulling out of my bead stash I found clear crystals and chain from Fiona Accessories. They were the perfect addition to the bells, creating a delicate but beautiful mix of sparkle and sound in a Princess length necklace.
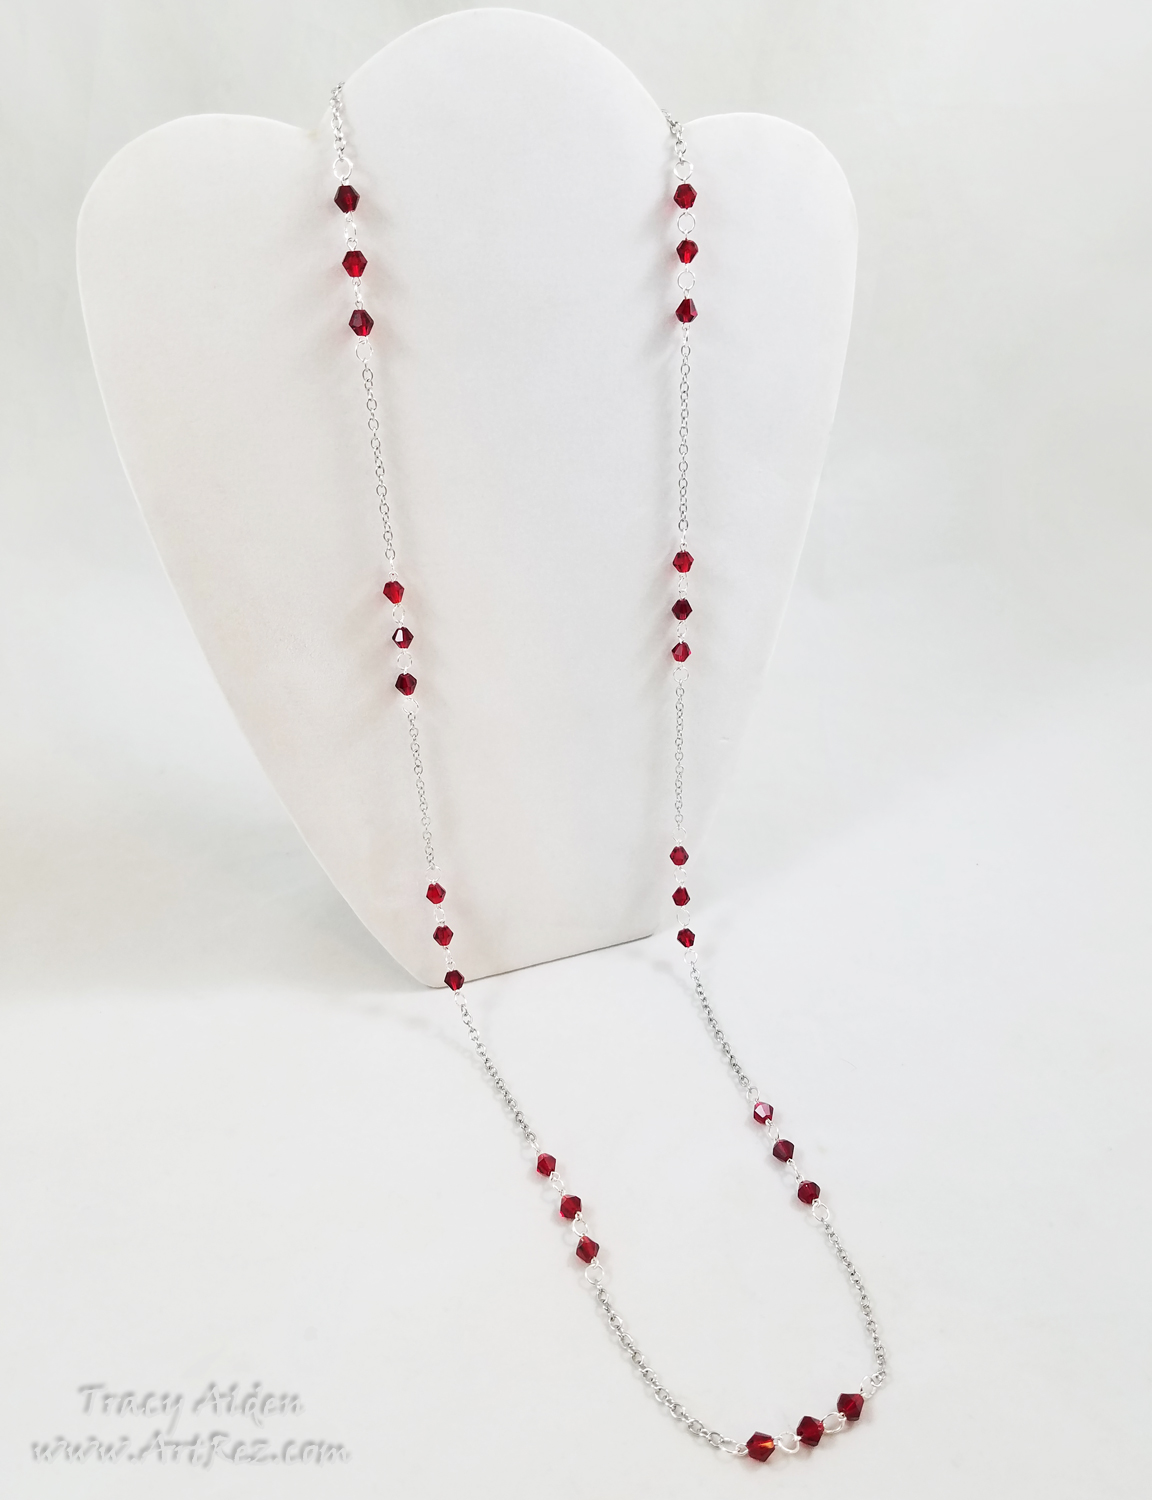
Taking inspiration from the 1920s jewelry styles I wanted to create a simple Opera length necklace. Once again using chain from Fiona Accessories and red crystals from Michael’s Bead Landing™ a graceful and lightweight necklace was created. While the red color is fitting for the holidays it also works well as a nice addition to dressy causal attire.
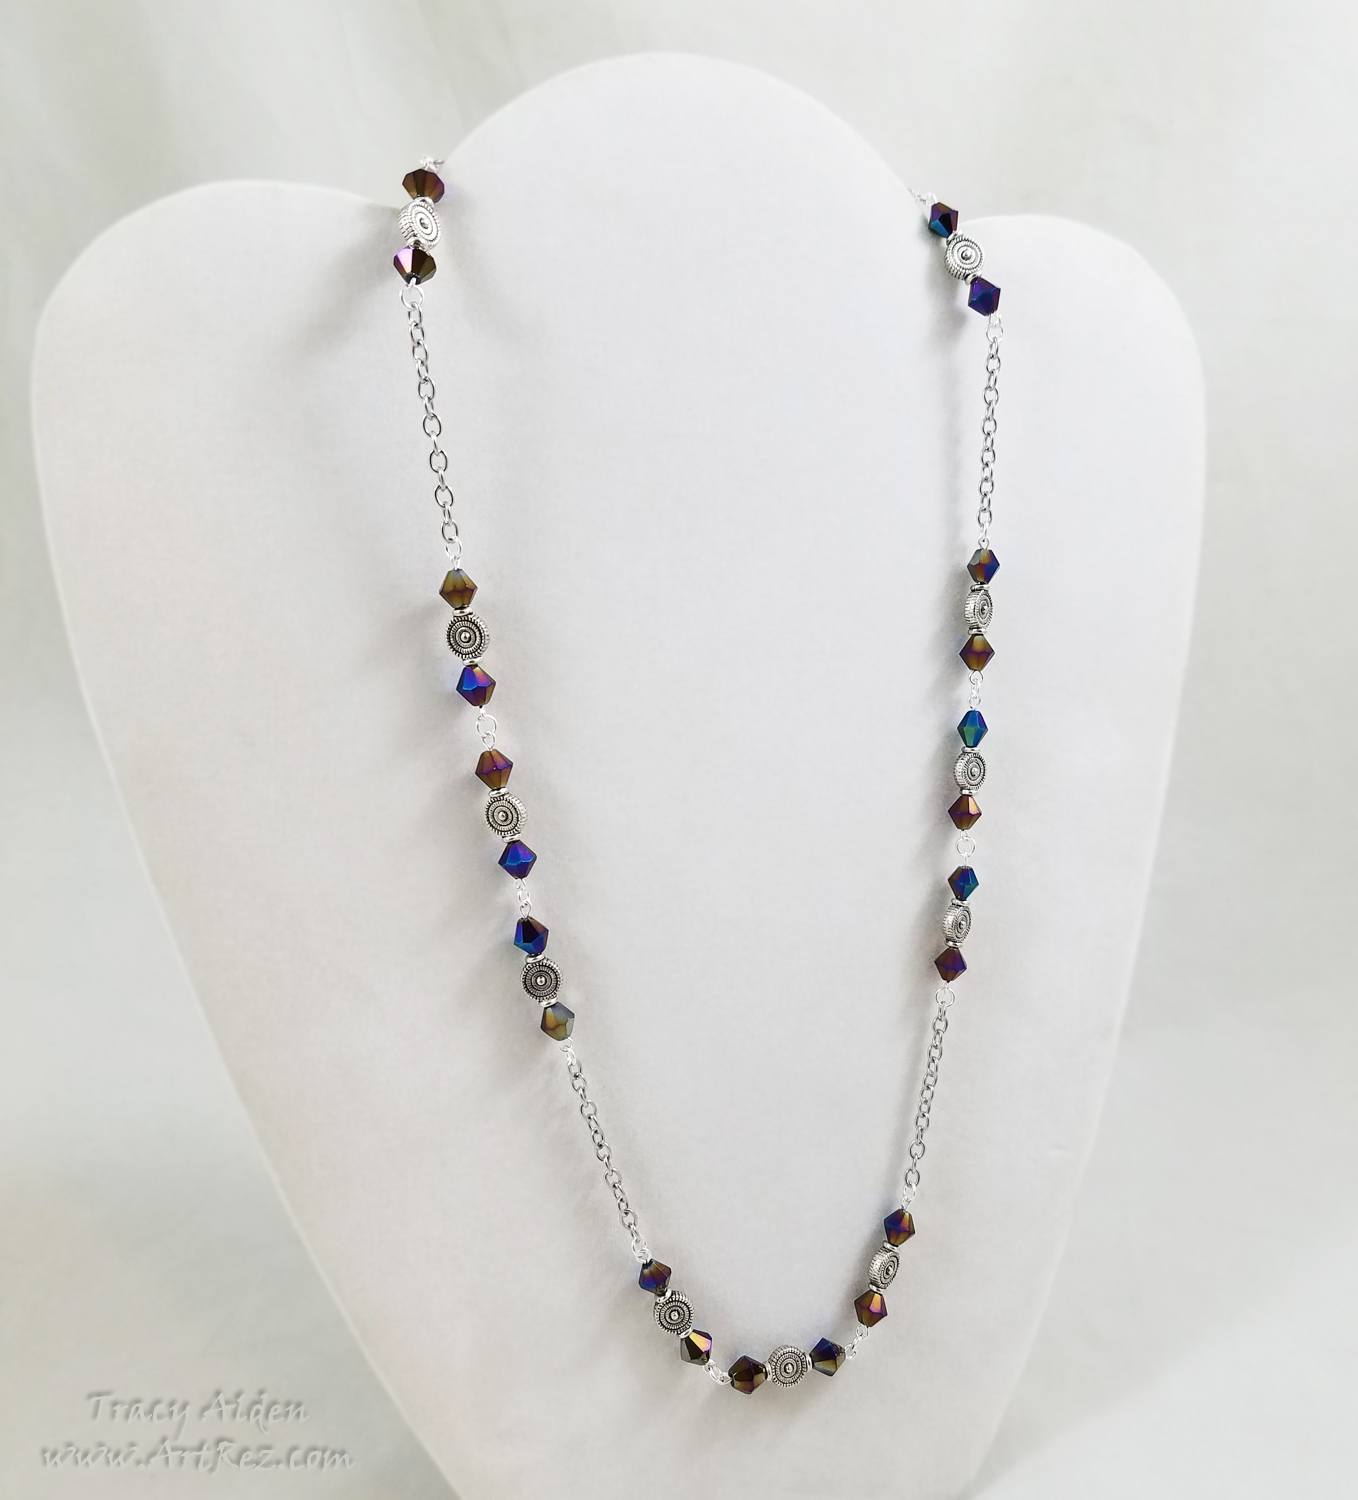
For this Matinee length necklace I used a mixture of miscellaneous findings left over from previous projects. The Aurora Borealis blue crystal beads went perfect with the patterned spacer beads. While the chain adds a more modern feel, the colors and spacers hark back to more ancient times.
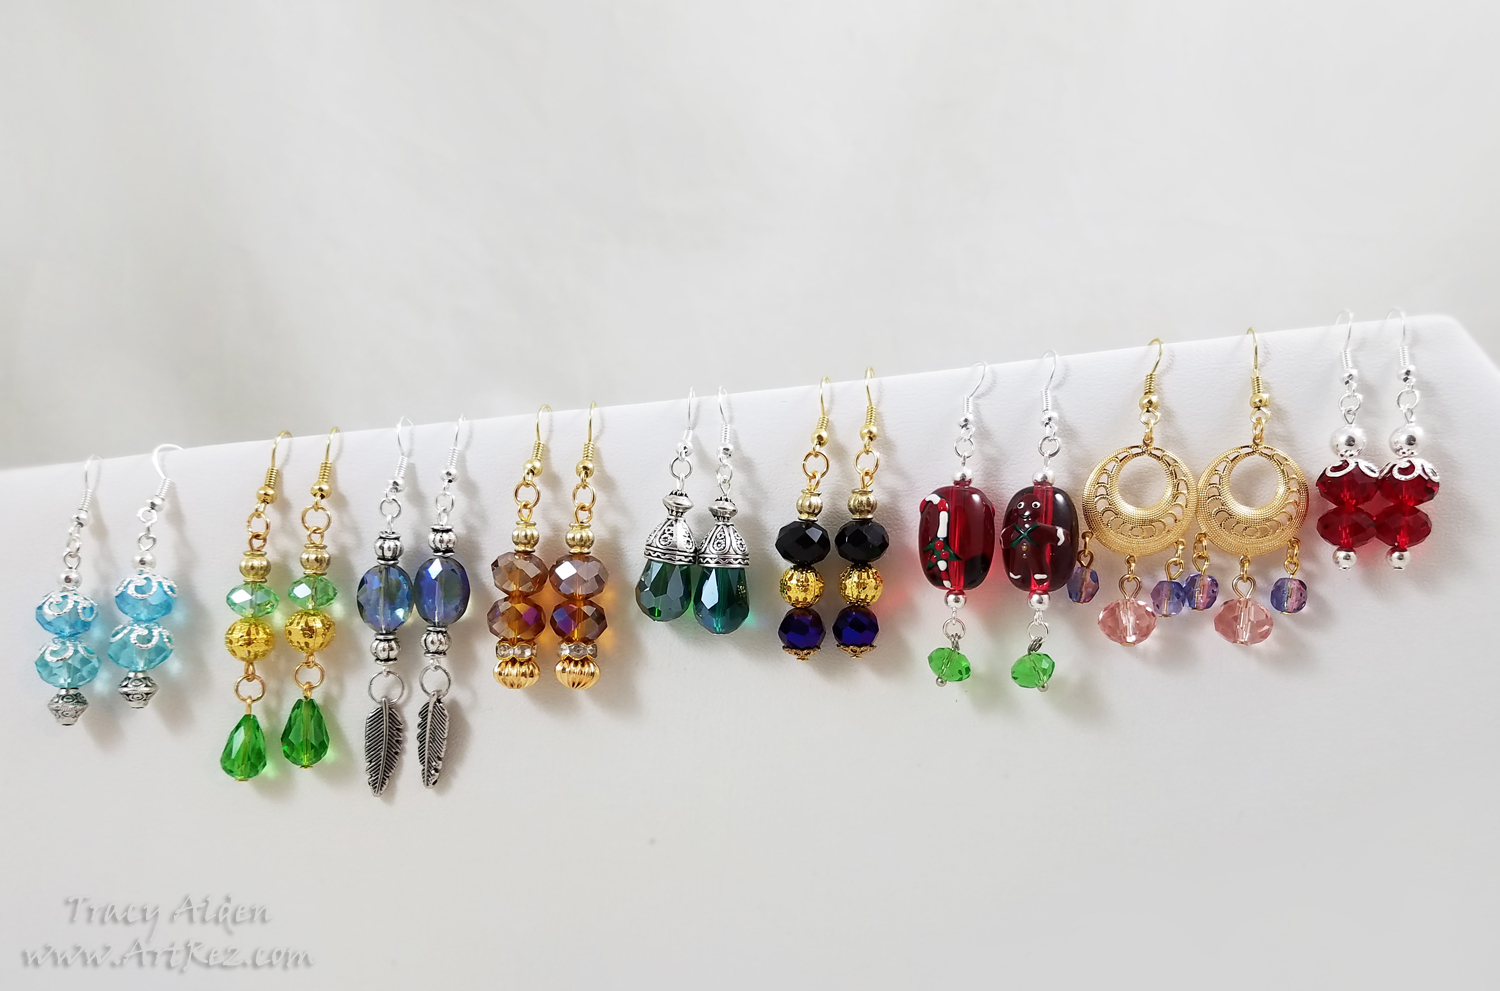
When making jewelry gifts I just have to make earrings. Some beads just lend themselves to something delicate or have just the perfect flash of color to be made into earrings. Using beads and findings from Fire Mountain Gems, Fiona Accessories, Michael’s and many more jewelry suppliers these earrings were quick to make. A few almost could pass for tree ornaments, others found treasures and old heirlooms, making them perfect gifts for young or old.
What handmade gifts have you made or are making this Holiday Season?
Wishing you all a Happy and Healthy New Year!
Until Next Time, Safe Travels!

Ancient and Contemporary Inspired Artistry