Let it snow…..
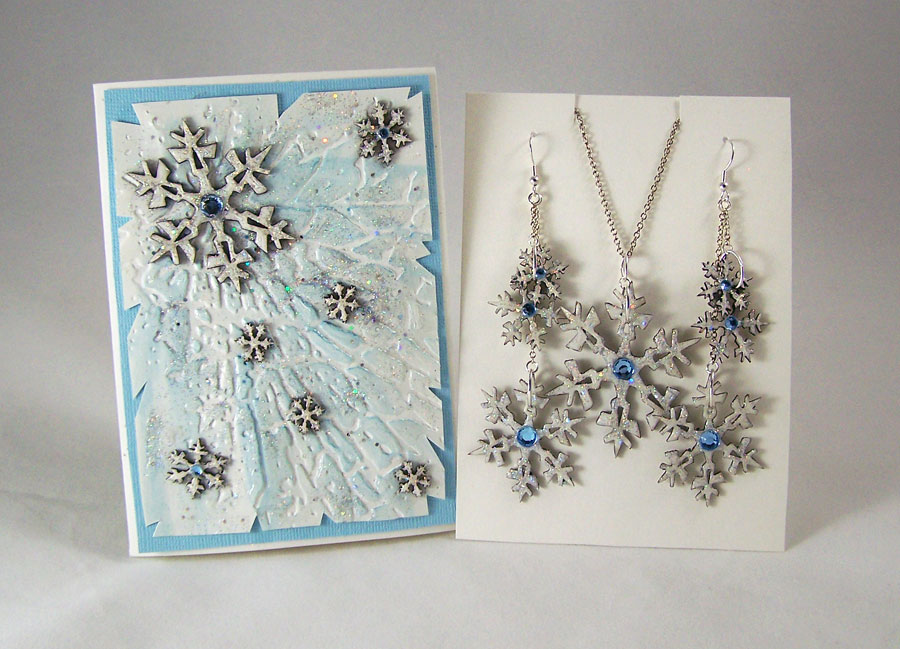
Even though it is not Winter yet, it sure feels like it. We have a cold weather front moving in and there is some talk of snow! It is the perfect weather to stay inside, decorate for the holidays and make gifts. Today I am going to show you how to make a snowflake jewelry set that can be put in a card set using Globecraft &Piccolo products.
Supplies for earrings and necklace:
2 packages of Globecraft & Piccolo Snowflake Accents
Globecraft & Piccolo Pure Sparkle Silver Glitter
Globecraft & Piccolo Glastique Gloss Finishing Glaze
Globecraft & Piccolo Titanium White 3D Enamel Gel
Piccolo Easy Grip Tweezers
Pale Blue Sticker gems
Silver jumprings
Silver chain
2 Earring wires
Jewelry clasp
Flat nose pliers
Wire cutter
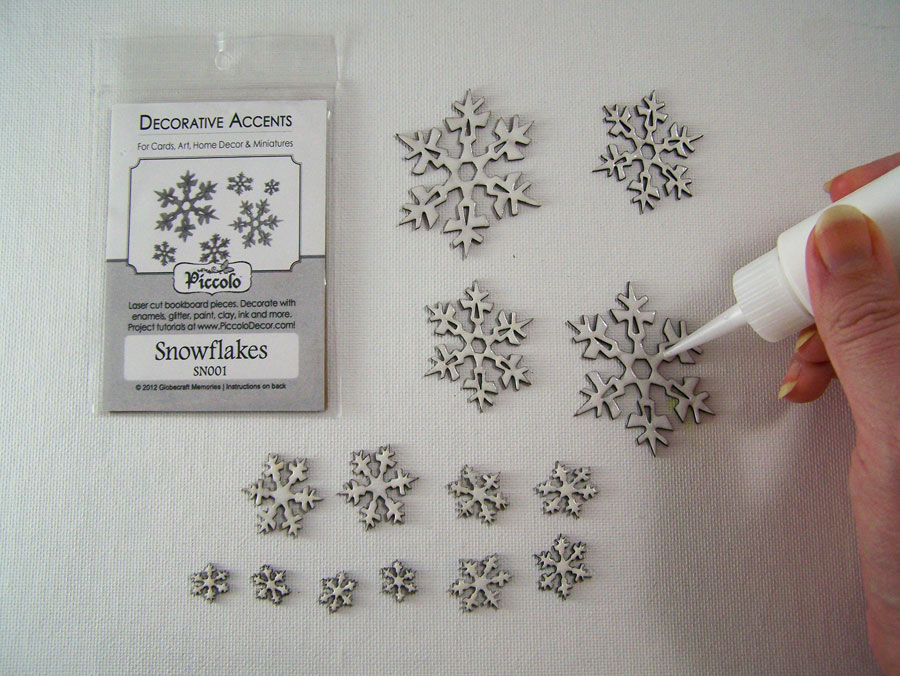
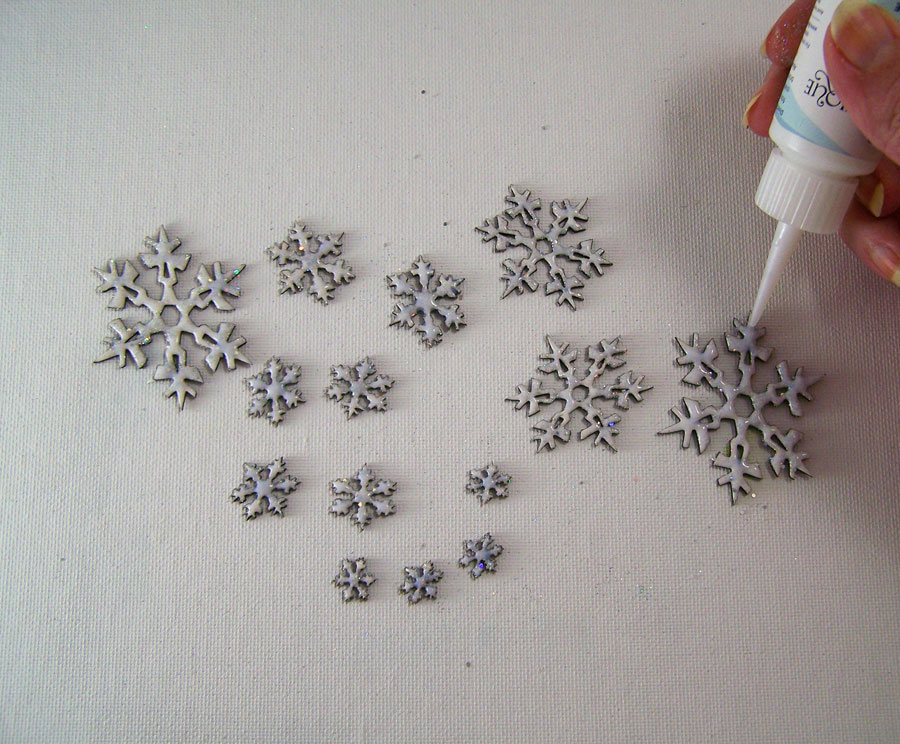
Carefully remove all of the snowflake Piccolos from the chipboard frame. Coat one side of all of the snowflake Piccolos with Titanium White 3D Enamel Gel. Let dry. Now coat the other side of only 1 large snowflake, 2 mediums, 2 smalls and 2 minis. The pieces with both sides coated will be for the jewelry and the snowflakes with only one side with enamel will be used for the card (or other projects if you like).
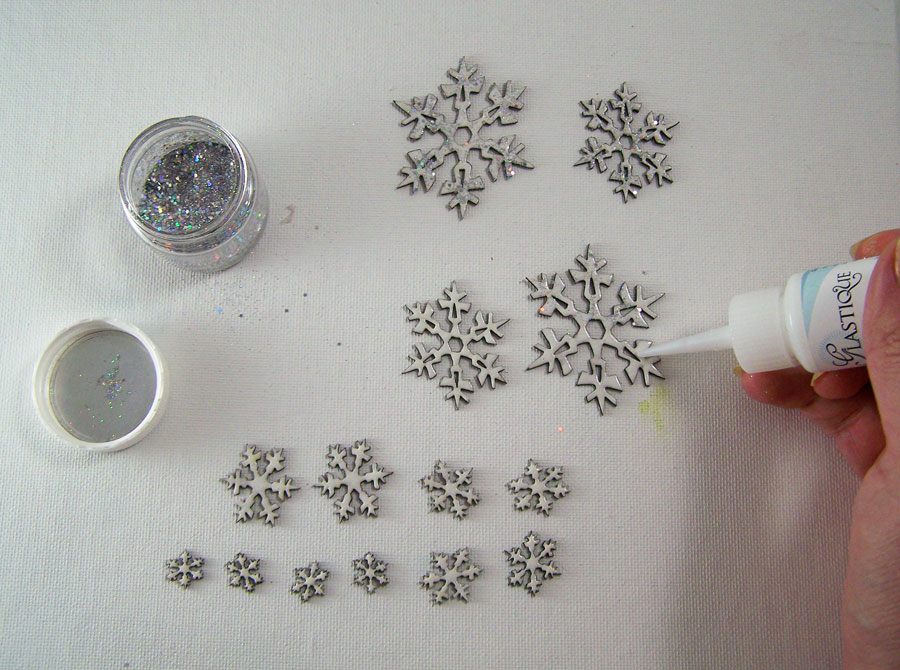
Carefully apply Glastique Gloss Finishing Glaze to all of the snowflakes and sprinkle Pure Sparkle Silver Glitter on top. Let dry.
Now apply two more coats of Glastique Gloss Glaze to the snowflakes. Let dry. The layers of glaze will give the snowflakes a glass like finish and help the glitter “pop”.
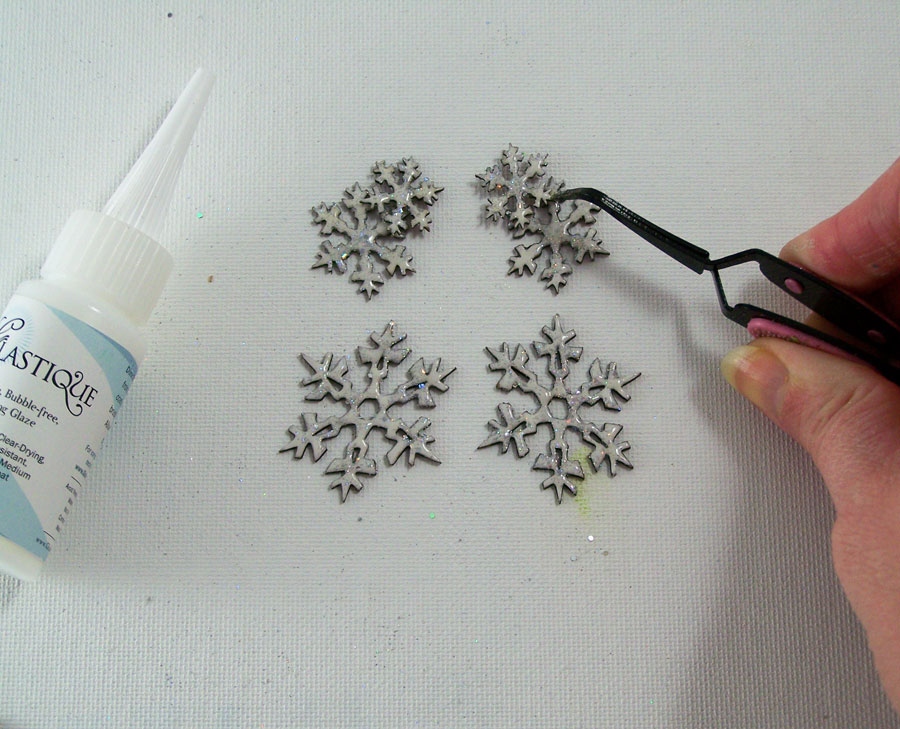
Now apply Glastique Gloss Glaze to two of the small snowflakes. Carefully position the mini snowflakes in a manner to create a enclosed space to put a silver jump ring through. Let dry. Go back and seal the areas where the snowflakes touch with Glastique. Let dry.
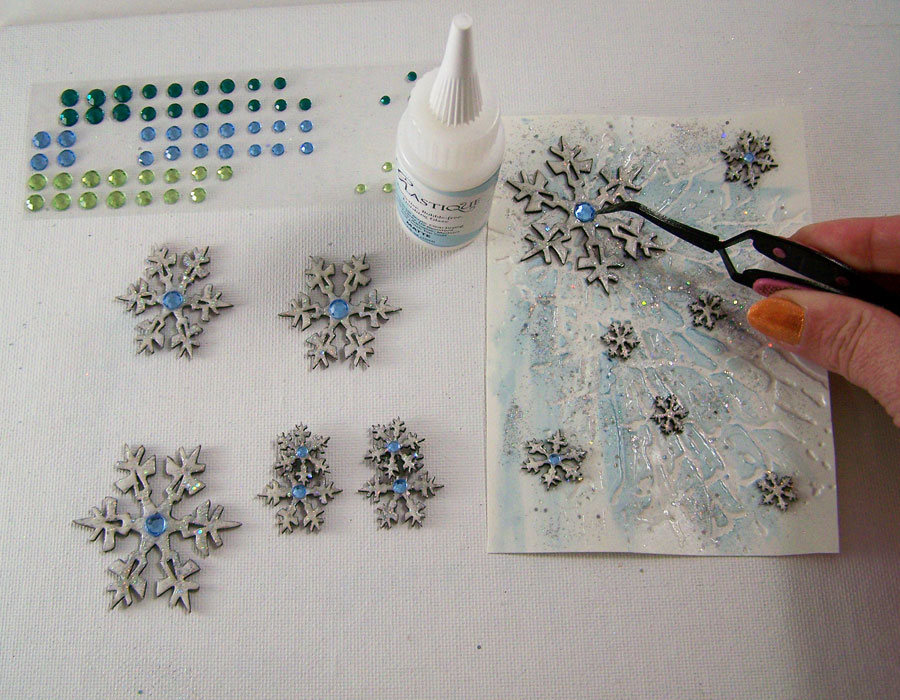
Use Glastique Gloss Finishing Glaze to glue on the pale blue sticker gems to the large, medium and small snowflakes. Let dry.
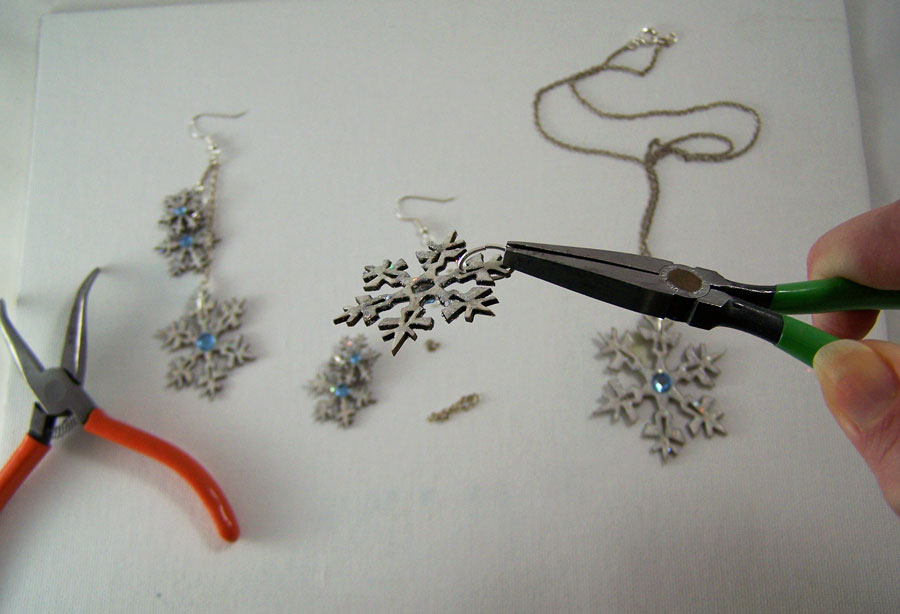
Open up oval jump rings and put through the small triangles in 2 of the medium, the space in small and mini glued pieces and 1 large snowflakes; close jump rings.
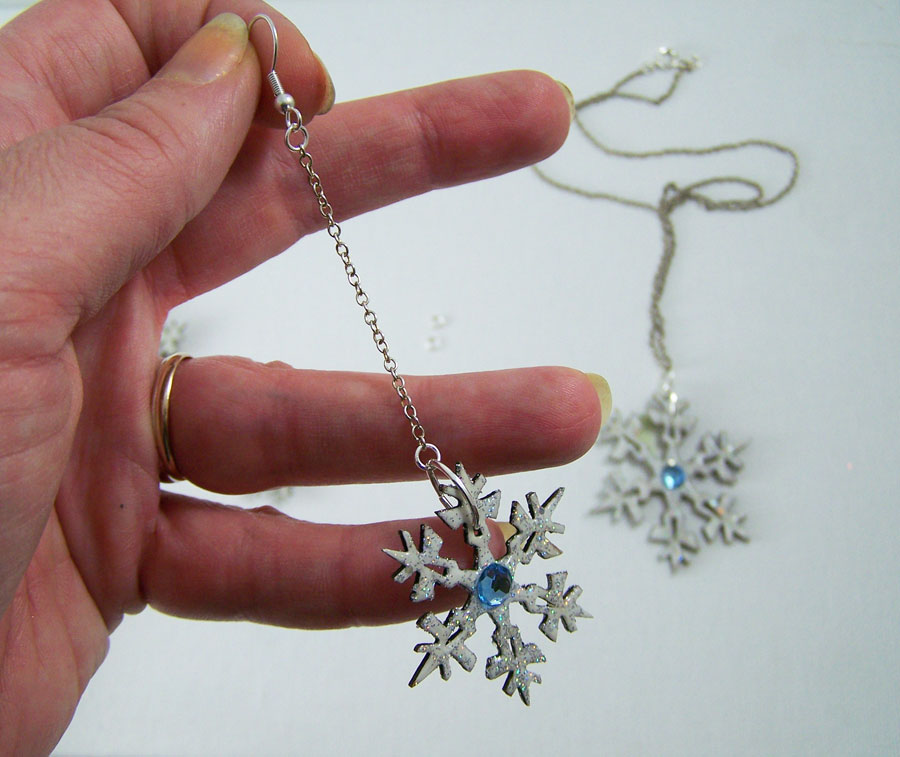
Cut 2 separate lengths (two inches long) of silver chain and attach each length to a medium snowflake with a small jump ring. Add another jump ring on top and attach the earring wire.
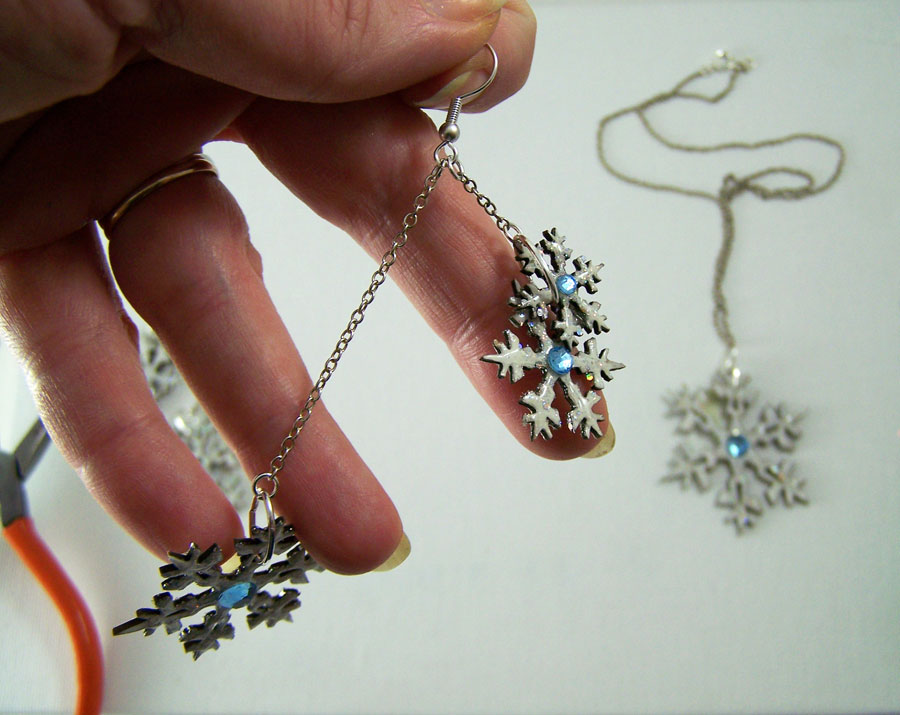
Cut two lengths of silver chain (1/2 inch long) and attach to the small and mini snowflakes glued together with a small jump ring. Add another jump ring on top and attach to the earring wire with the medium snowflake. Cut 16 inches of silver chain and string the large snowflake on it. Attach jewelry clasp to chain with small jump rings.
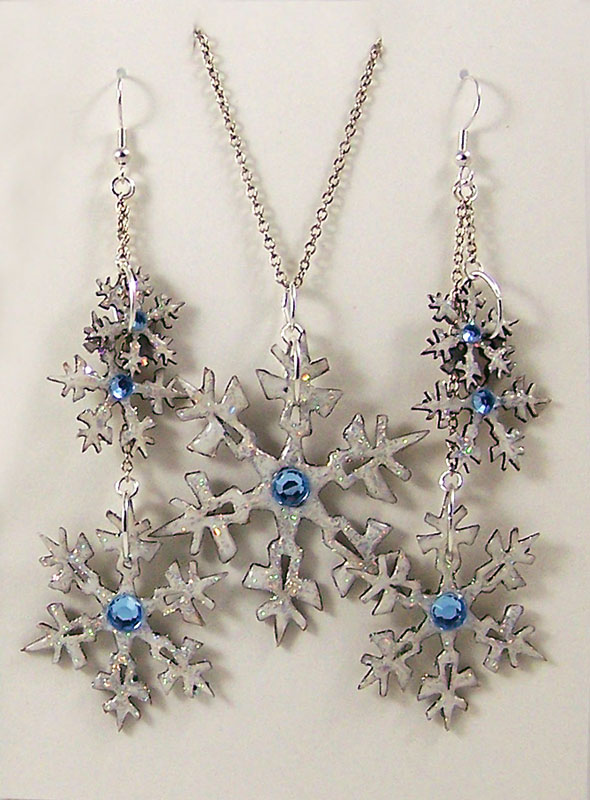
You can give the jewelry set as is or you can make a matching card to place the jewelry in. Use the left over snowflakes for embellishments on the card. 🙂
Supplies for card:
White card stock
Pale Blue card stock
Globecraft &Piccolo Blue Pearl 3D Enamel Gel
Globecraft &Piccolo Glastique Gloss Finishing Glaze
Until Next Time, Safe Travels!

9 Comments
Rebecca
WOW gorgeous!
linda
Wow! those snowflakes are gorgeous! Love the way the leftover pieces were used on the beautiful cards. Great jewelry piece for Winter wear.
Artresurrected
Thank you ladies for the kind words! 🙂
With some of my projects I often have leftover and spare Piccolos. Using them up to tie the many pieces of a project together seems to complete the look more. 🙂
Deb
So pretty Tracy! I think you have a typo though where you cut the chain fr the earrings- 1/2″ can’t be right… lol.
Deb
Erm.. Never mind. I just skipped reading an entire step. O.o My brain must be fried from playing with beads!
Artresurrected
Thank you Debra! Yeah the chain for the front snowflakes is rather short but they have to be otherwise they would cover up the medium snowflake. I wanted to get the look of snow falling for the earrings. Completed they end up being shoulder dusters earrings which for some reason I just love right now. 🙂
Deb
LOL For some reason I was reading it as a 1/2″ chain for the whole thing- both parts of the earring chain. O.o Then after I posted it I read it again and realized i just can’t read! haha
mae
I would wear these in a heartbeat, they are so beautiful!
Artresurrected
Thank you Mae! 🙂