#TBT Traveling a Forgotten Path, with Diamond Art
Hello! Continuing my Throwback Thursday posts, this time only going back to January, when I once again traveled to the Creativation Trade show, in Phoenix, Arizona. Held by Association For Creative Industries or AFCI, during the show I was honored to once again be invited to the 7th annual Prime Networking Event. This event gives bloggers, designers, authors and brands in the craft industry a chance to come together to network, make new partnerships, and learn about new product information. The event was fun, informative, and free product samples were provided by this year’s sponsors. After the event attendees were encouraged to try out and create art for the Favecrafts Best Blogger Craft Event. This year I won runner up in the Best Blogger Contest 2019 for my project!
For my entry I decided to use products from these sponsors: Diamond Art by Leisure Arts, Tribe Design, Mod Podge Ultra Matte Spray, FolkArt Crackle Medium and Home Decor™ Chalk Paint along with supplies from my personal collection of art supplies.
Supplies:
Diamond Art by Leisure Arts Diamond Painting Kit – Tribe Design
Mod Podge ® Ultra Matte Spray
FolkArt ® Mediums – Crackle Medium
FolkArt ® Home Decor™ Chalk Paint in Java, Parisian Grey, White Adirondack and Black
Liquid Fusion ® Clear Urethane Glue
9 inch x 12 inch Cradled Wood Board
Assortment of artificial tropical plants
1 Flat Paint Brush
1 Round Paint Brush
Scissors
Ruler
Pencil
Cotton swabs
Isopropyl alcohol
Used and dried coffee groundsSince it took a few hours to finish the Diamond Art kit by Leisure Arts, I had time to consider the pattern. In my mind it needed something more than to just be framed. It reminded me of patterns of old, and FolkArt Chalk Paint would help me with that. To have it look like a wall fragment I would need it to be on a board, Mod Podge Spray would help apply the canvas. For water damaged cracks, I would need a Crackle Medium.
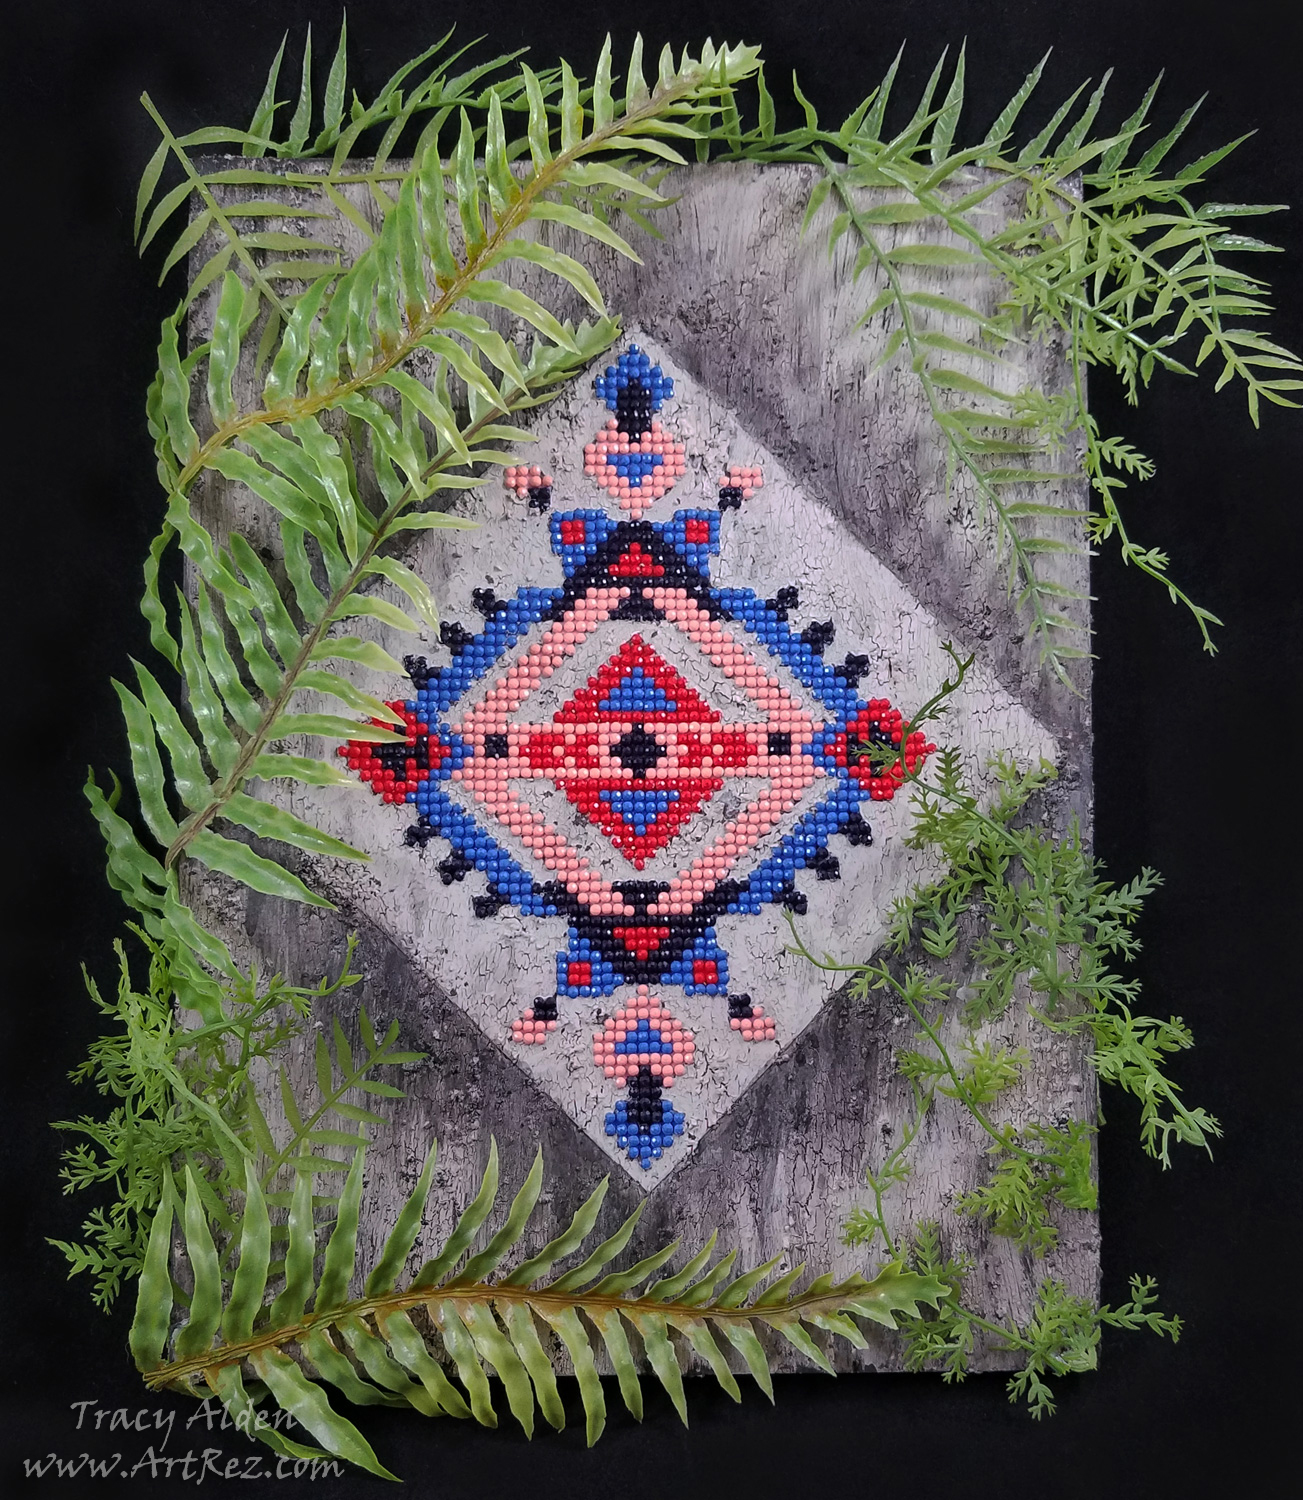
Maybe it could be a forgotten image, now found once again? Slowly a story formed in my mind…..
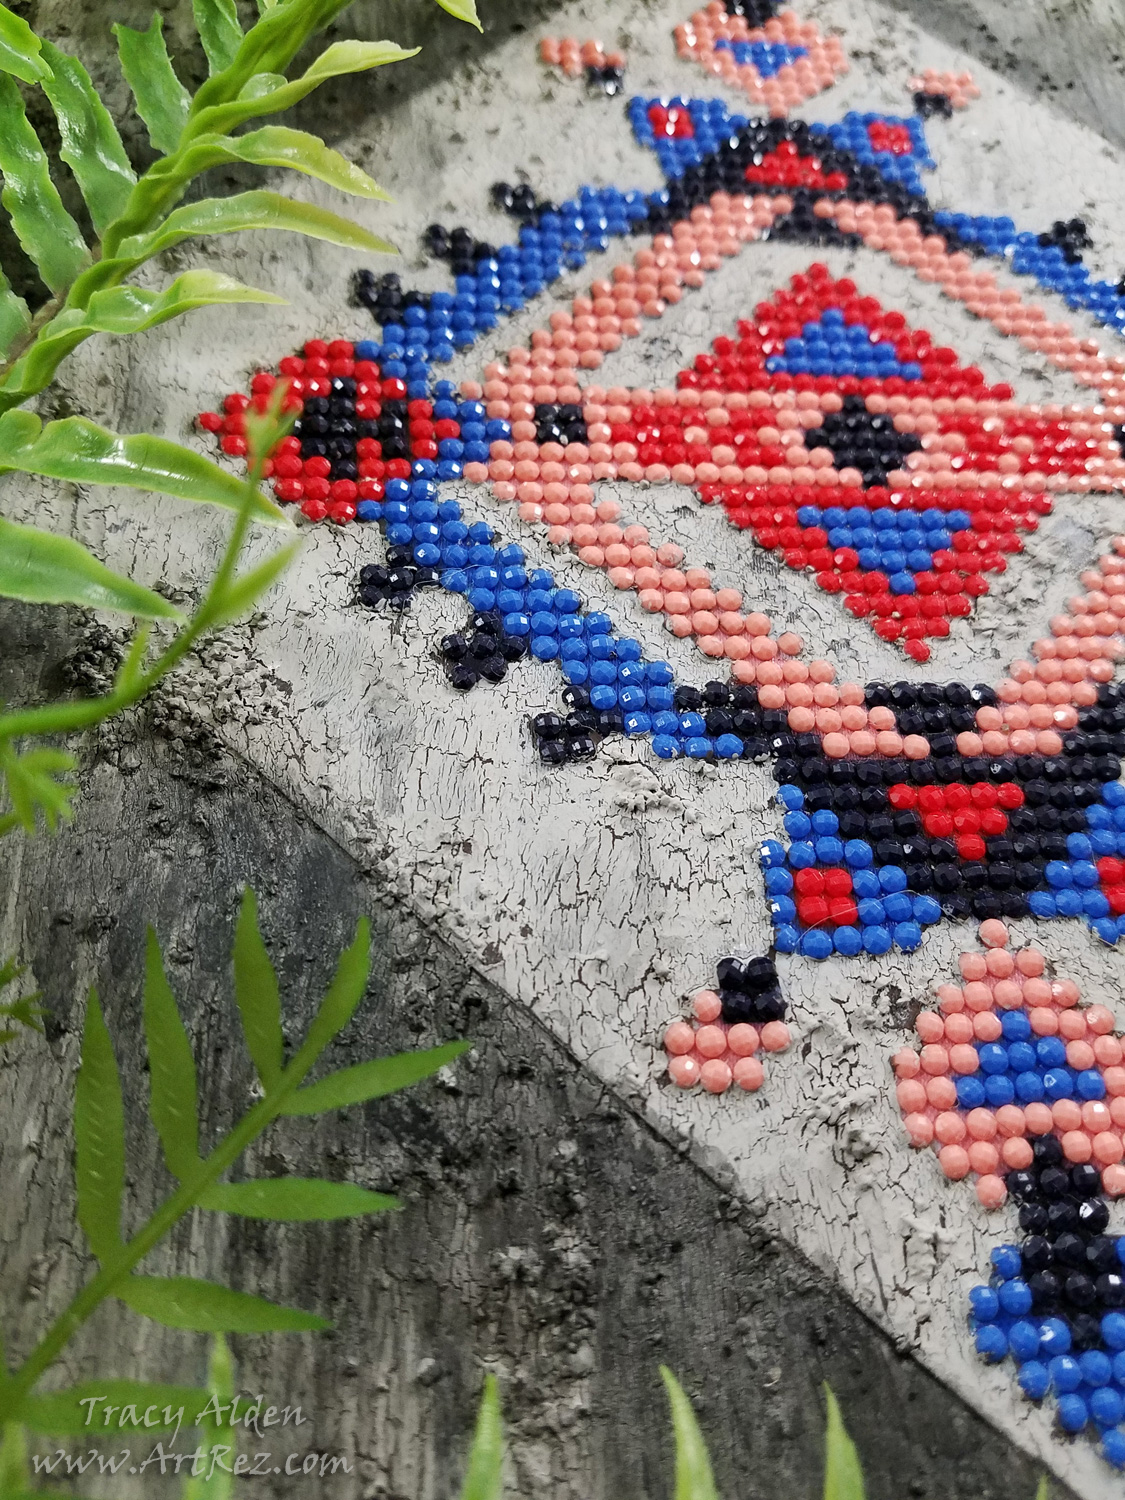
After traveling many miles, you start seeing the remnants of a once mighty city, now taken over by nature. Slowly walking through the dense forest a fragment of a patterned wall slowly appears. What ancient artist created this image and who was it intended for?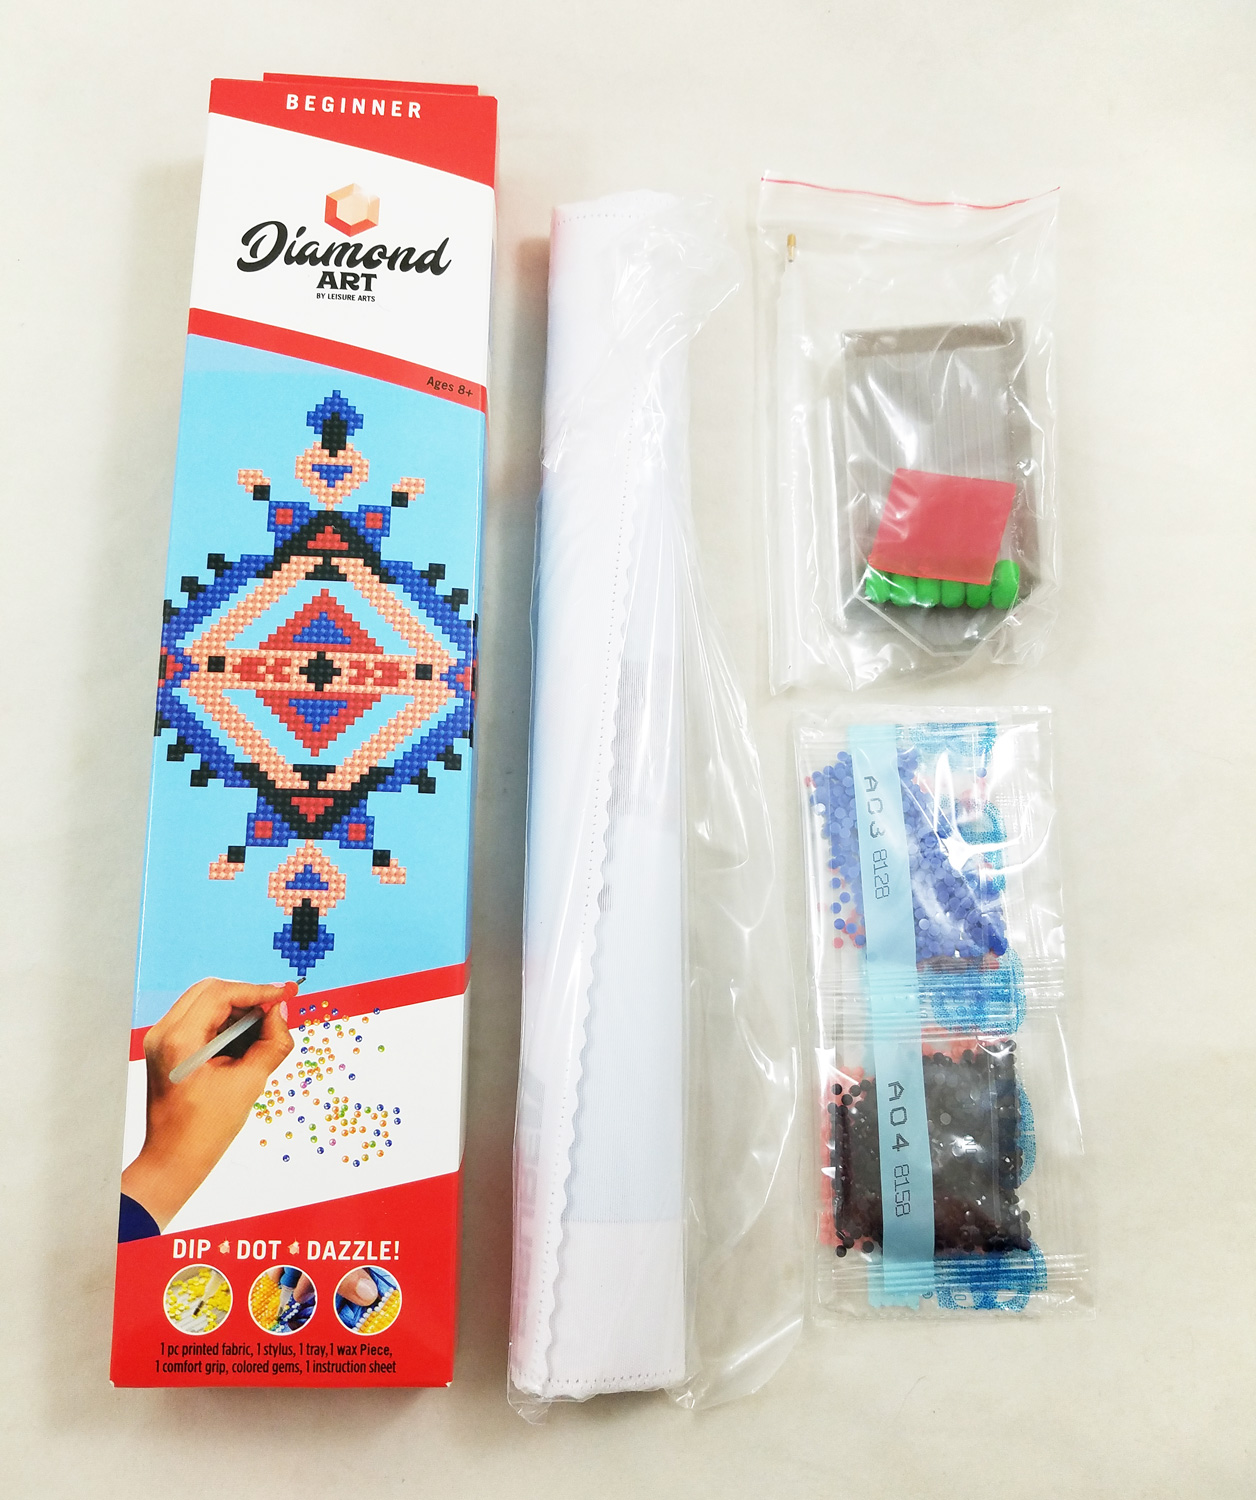
I opened up my Leisure Arts Diamond Painting Kit and made sure I had all of the required parts. The printed canvas needed to be flattened a bit before I started so making sure to leave the sticky film cover on the canvas, I placed a book on top of my canvas for a few hours before starting.
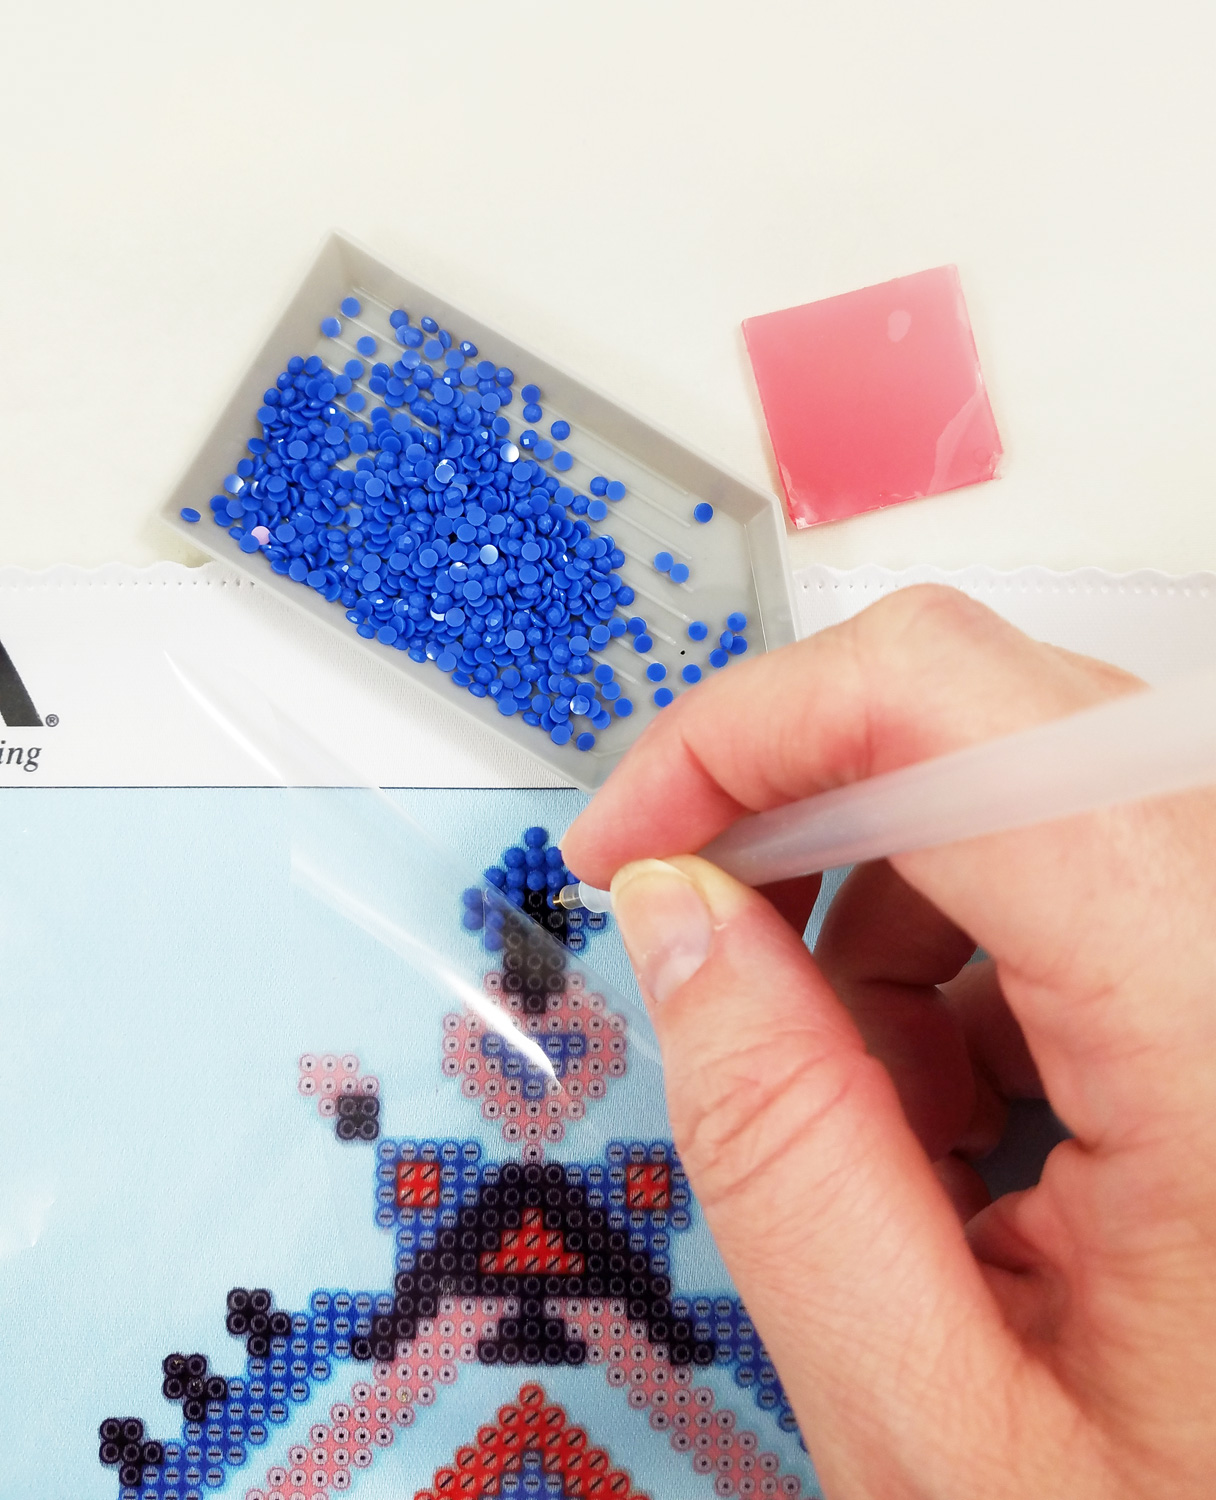
Following the instructions included with the Diamond Art I applied all of the flat backed diamonds to the canvas. It took me only a few hours to complete.
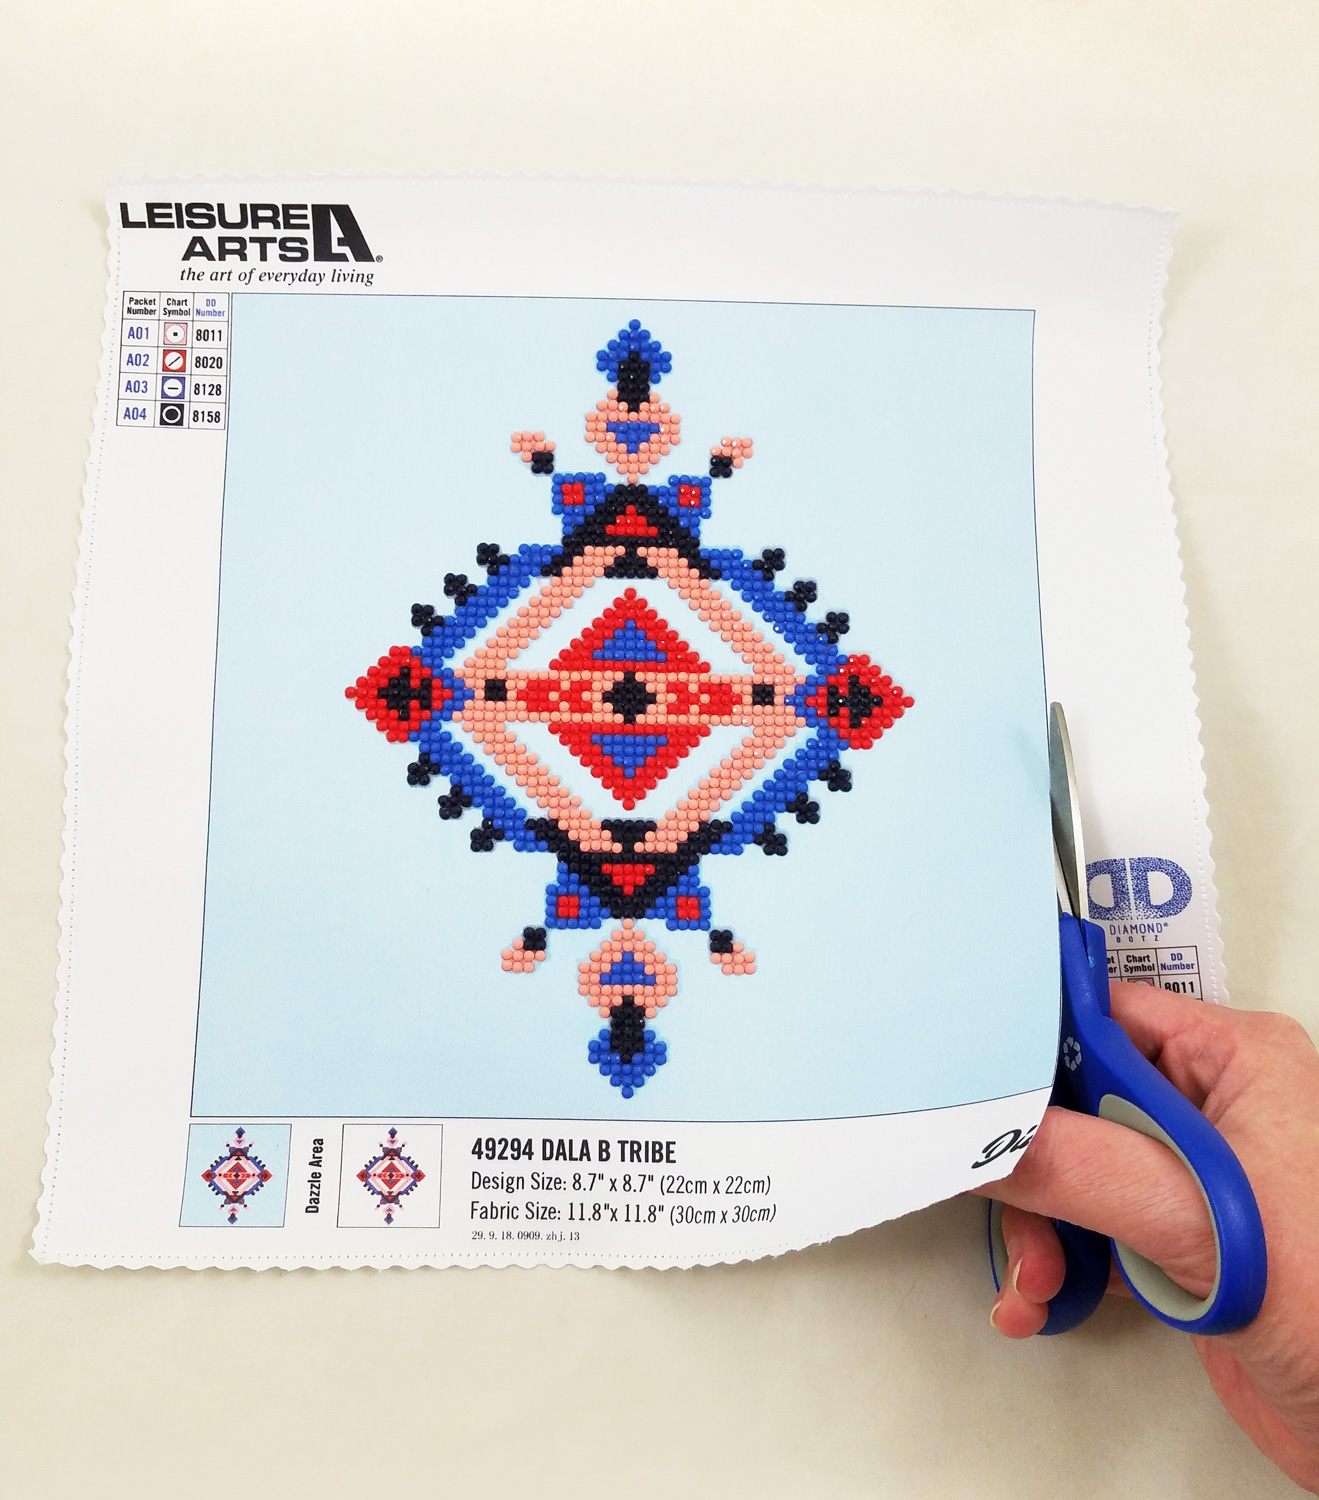
Next I trimmed the Diamond Art canvas to the very edge of the blue background with a pair of sharp scissors.

I carefully used a pencil and ruler to mark as close as possible to the Tribe Design pattern, creating a slightly elongated diamond outline. I then trimmed the canvas further with the scissors, using my pencil lines as my guide.
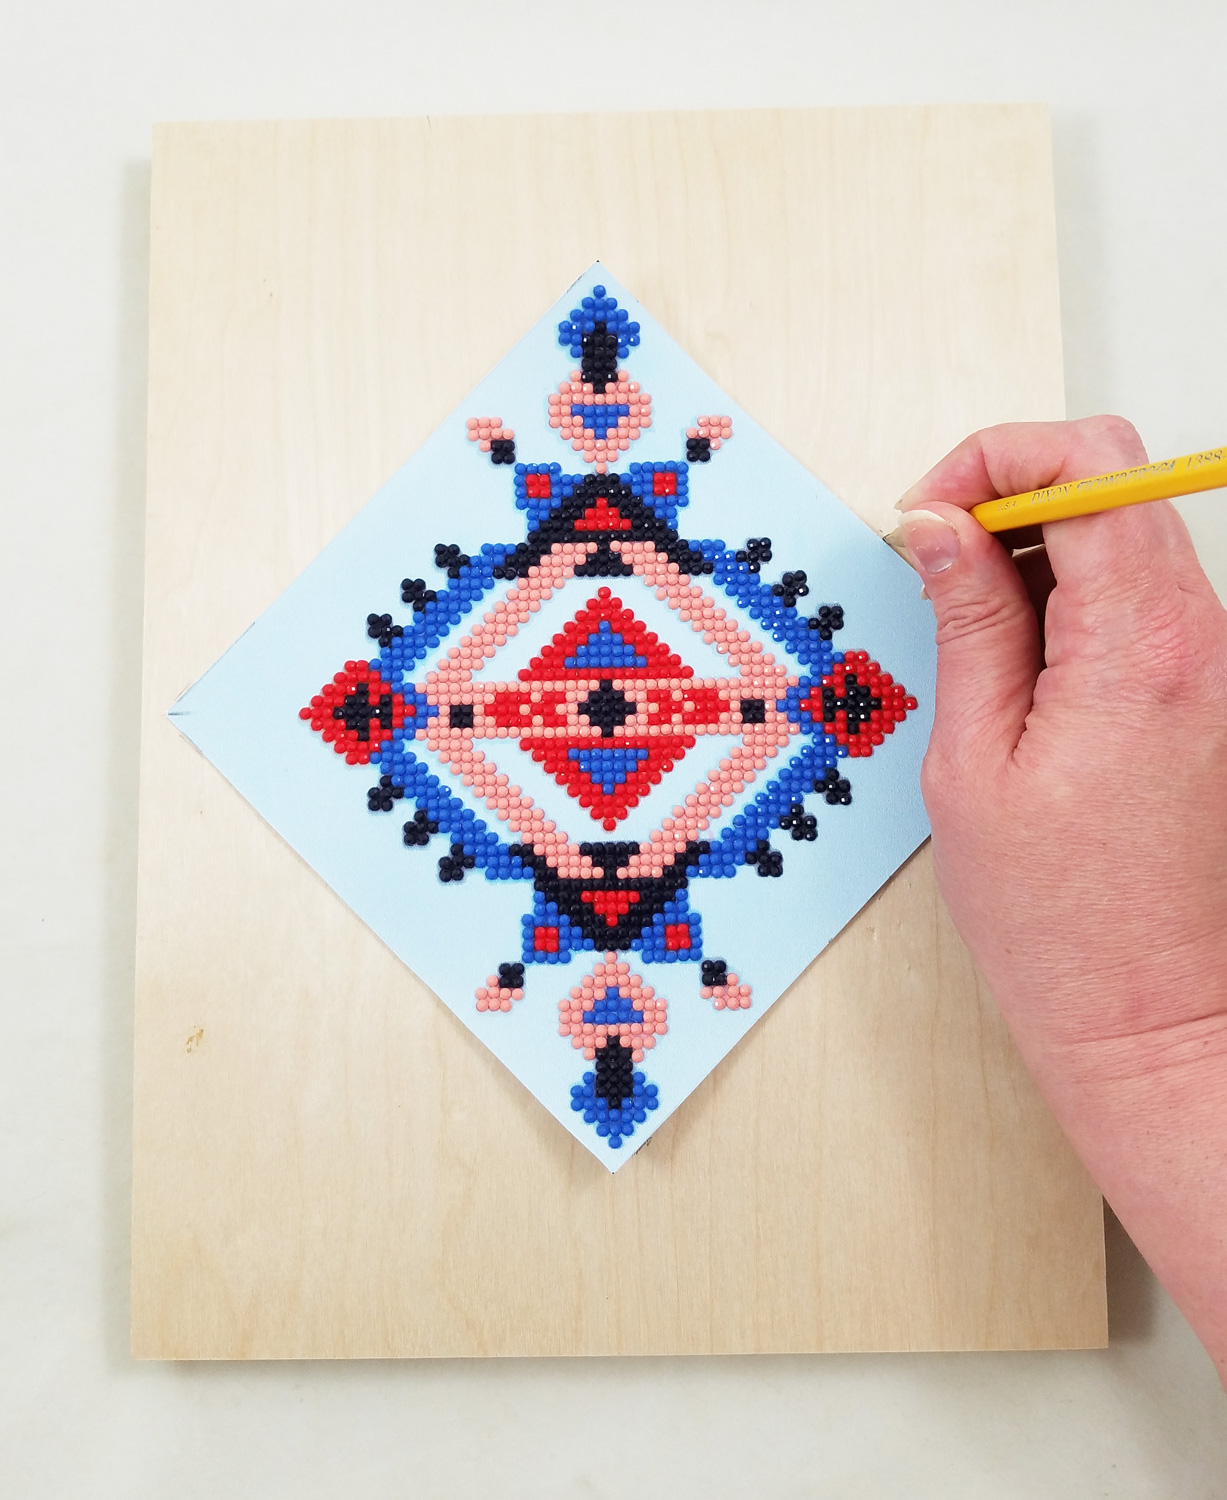
Now that the Diamond Art canvas was cut to size, it fit neatly on the wood board I wanted to attach it to. Once again, I used my pencil to mark out the exact placement of my canvas on the wood board.
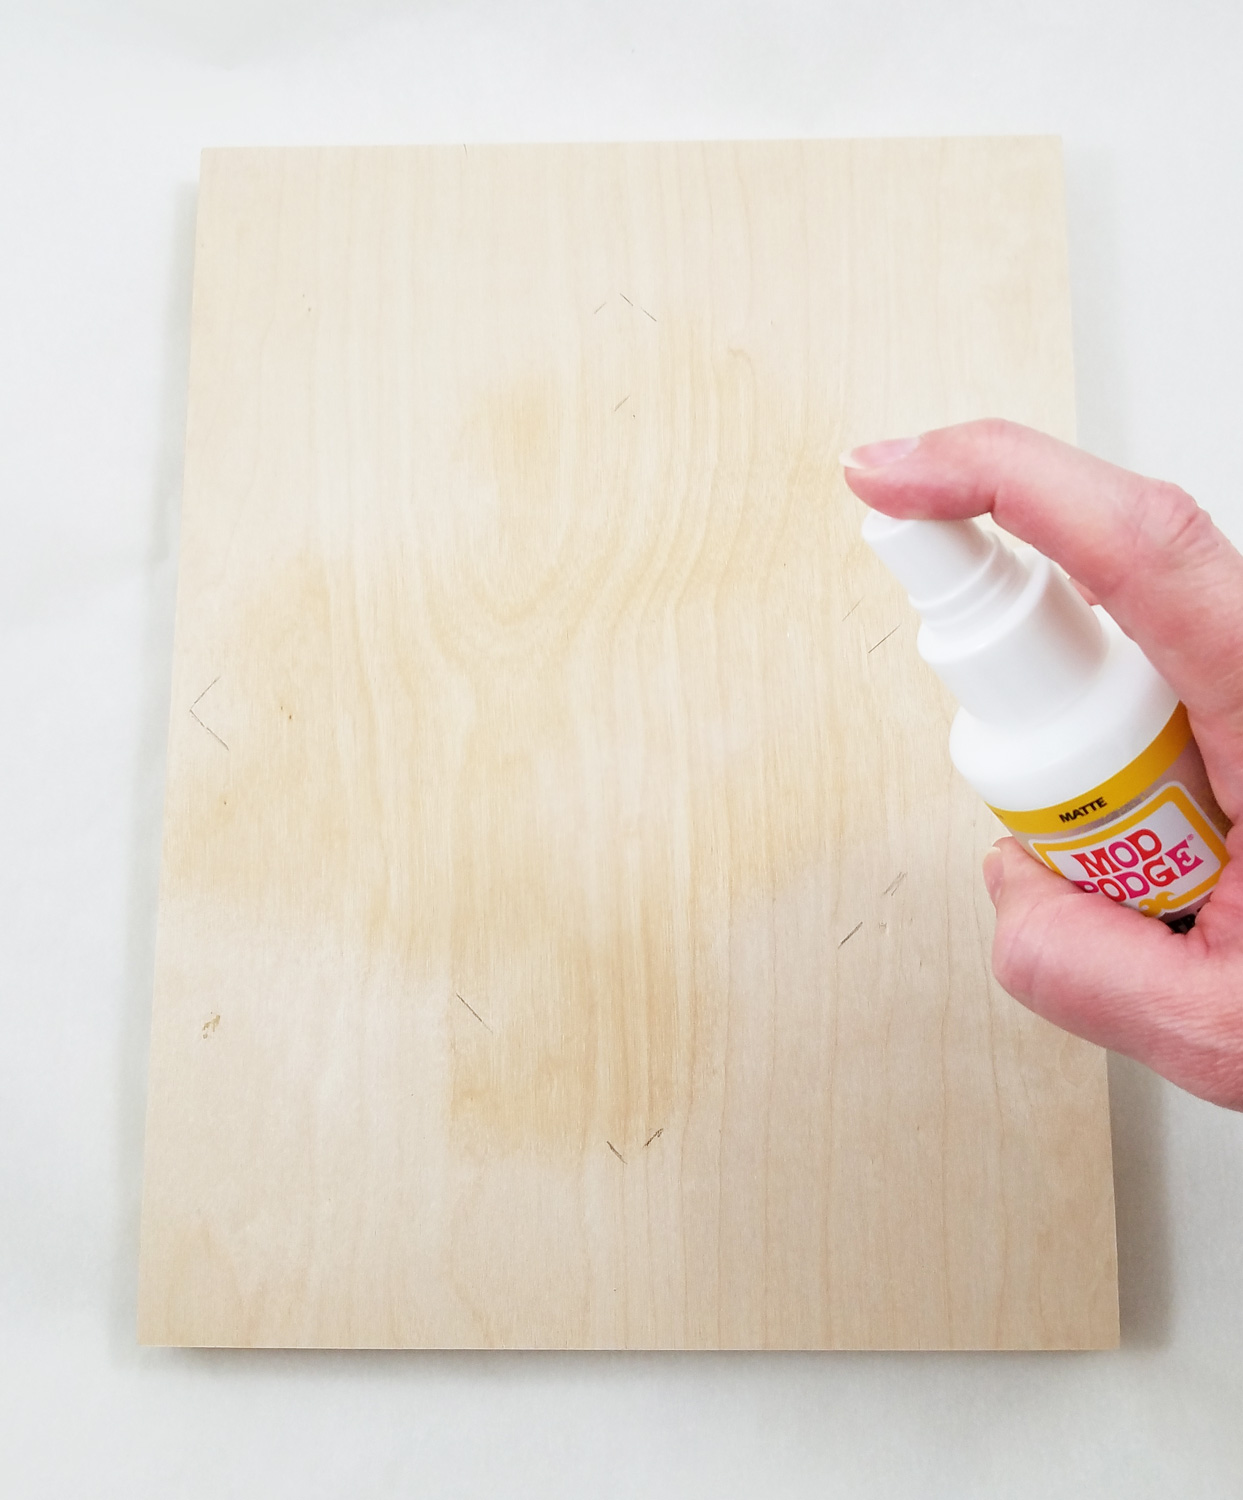
Making sure my wood board was clean of dust or particles I sprayed it with Mod Podge Ultra Matte in the pencil outline of the diamond.
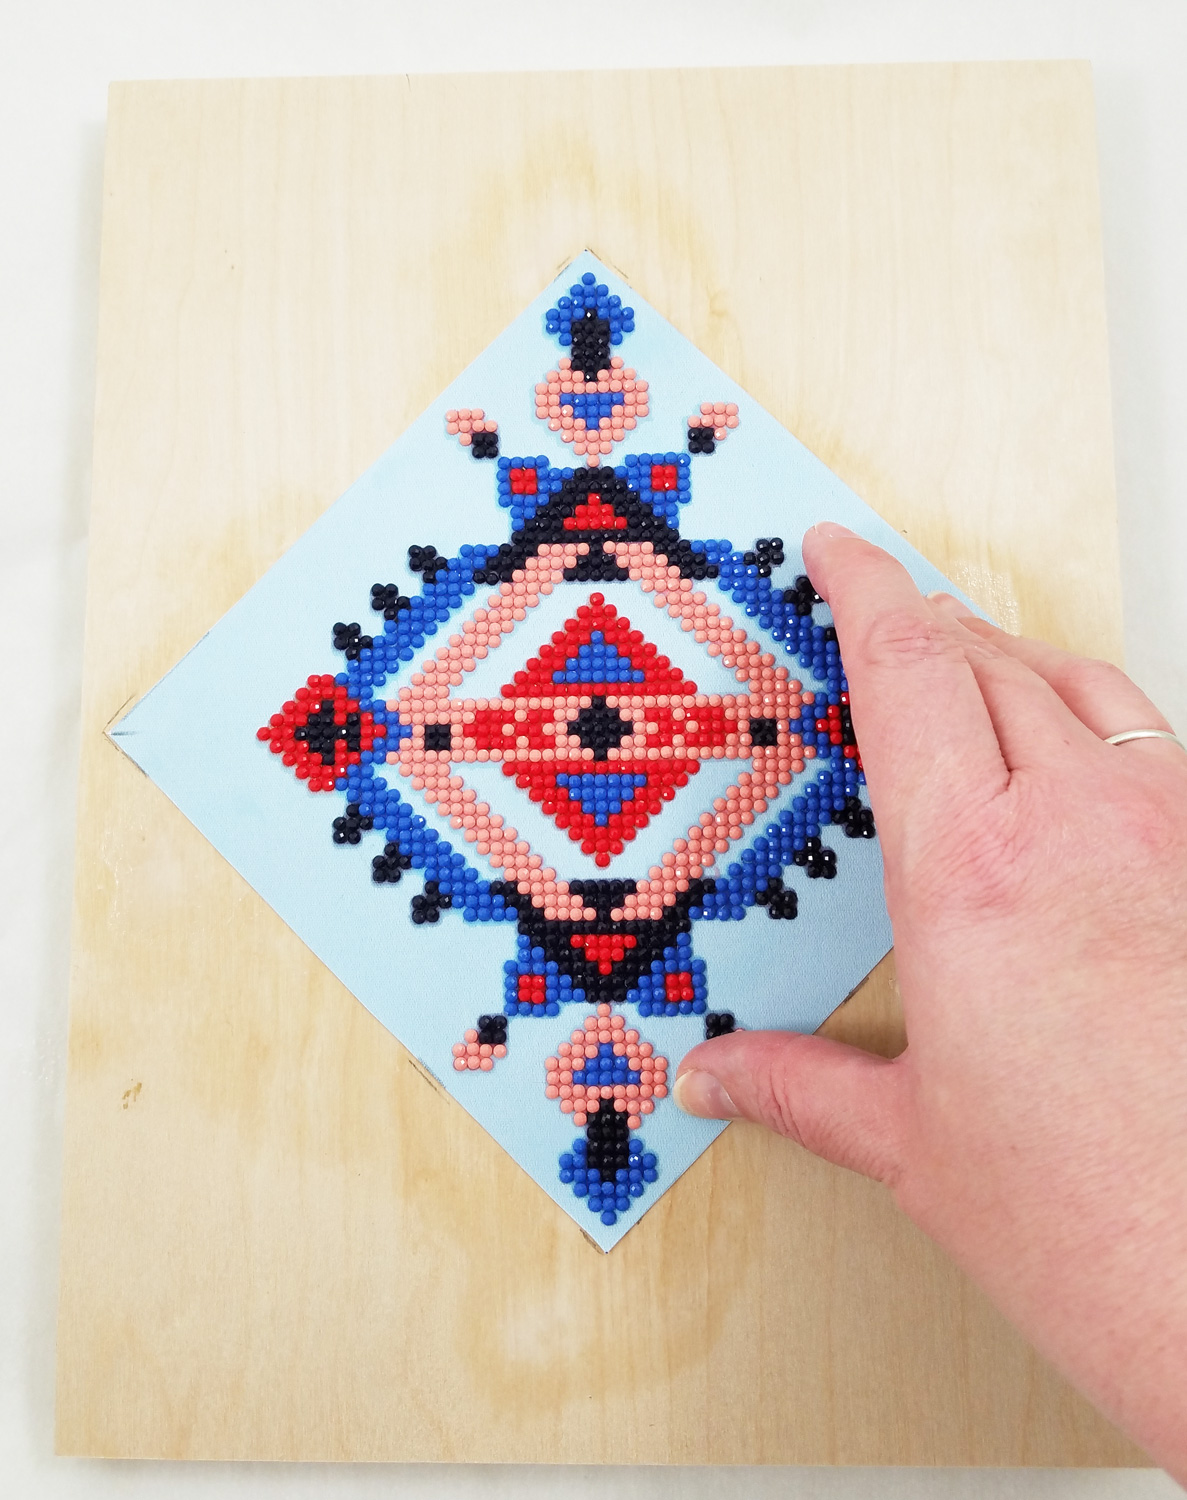
Quickly and carefully I applied the diamond canvas to the coated wood board. I applied firm pressure to the canvas. The spray version of Mod Podge Matte makes it much easier to apply fabric without a worry of oversaturation or bubbles forming. I let the Mod Podge fully dry.
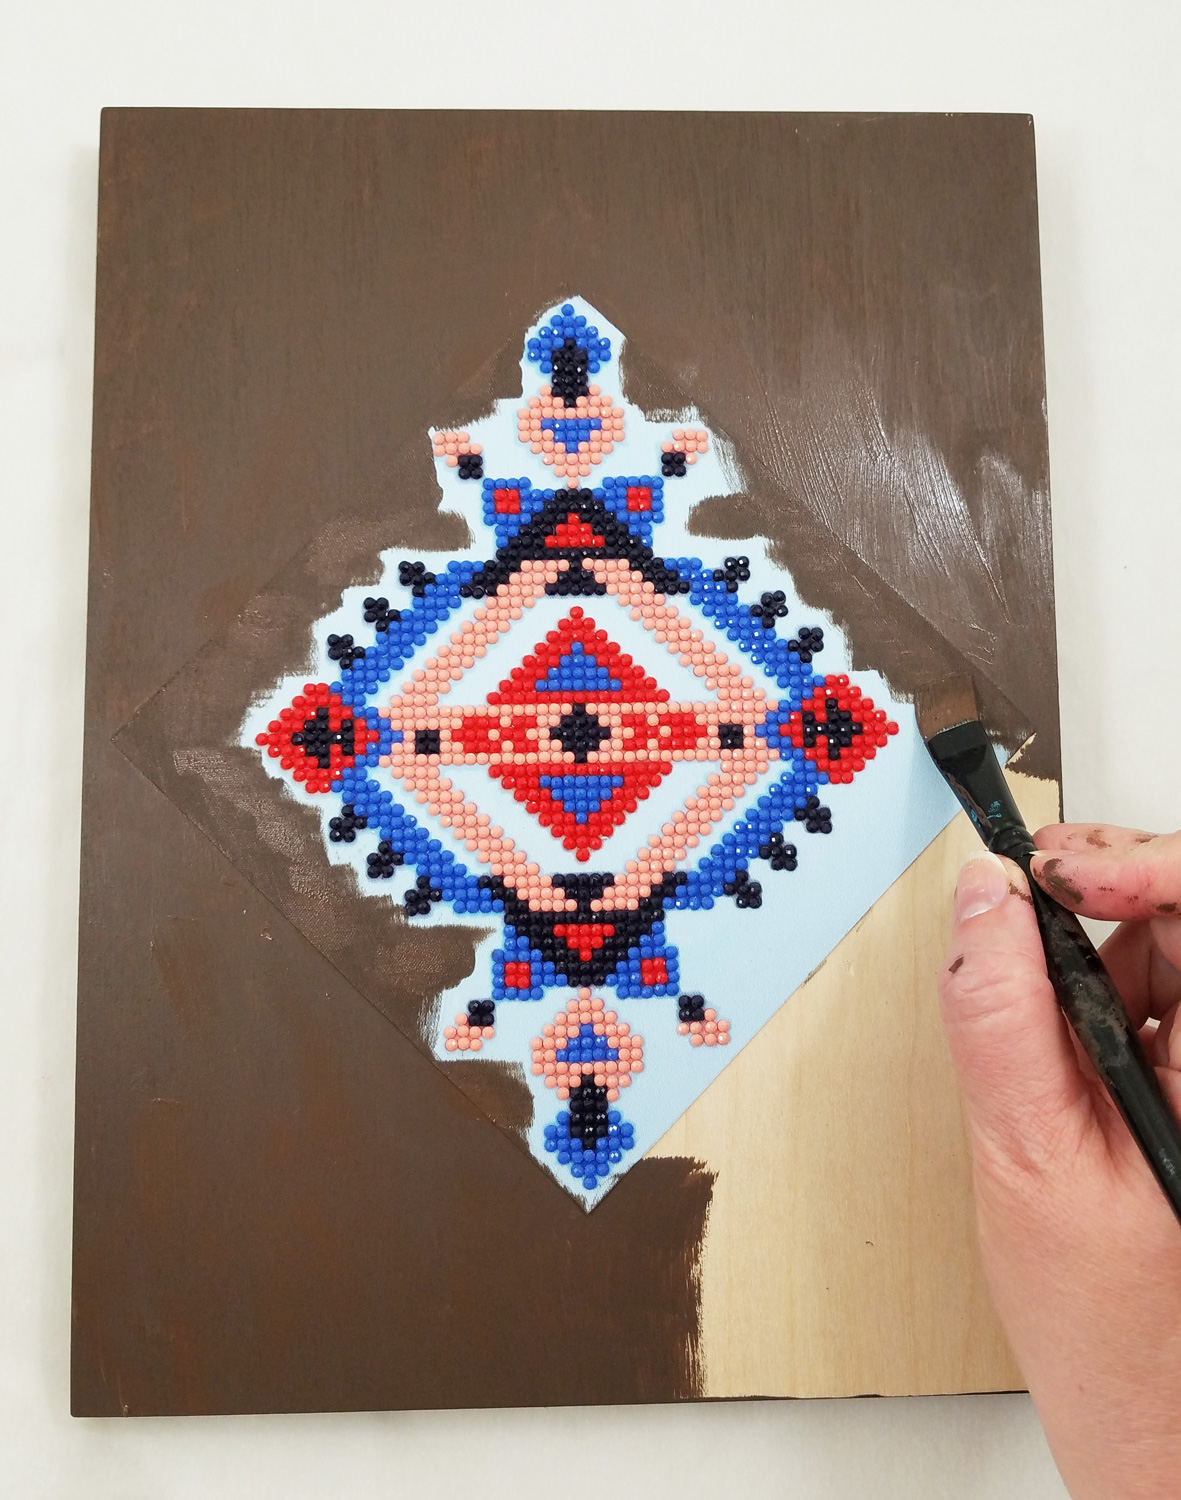
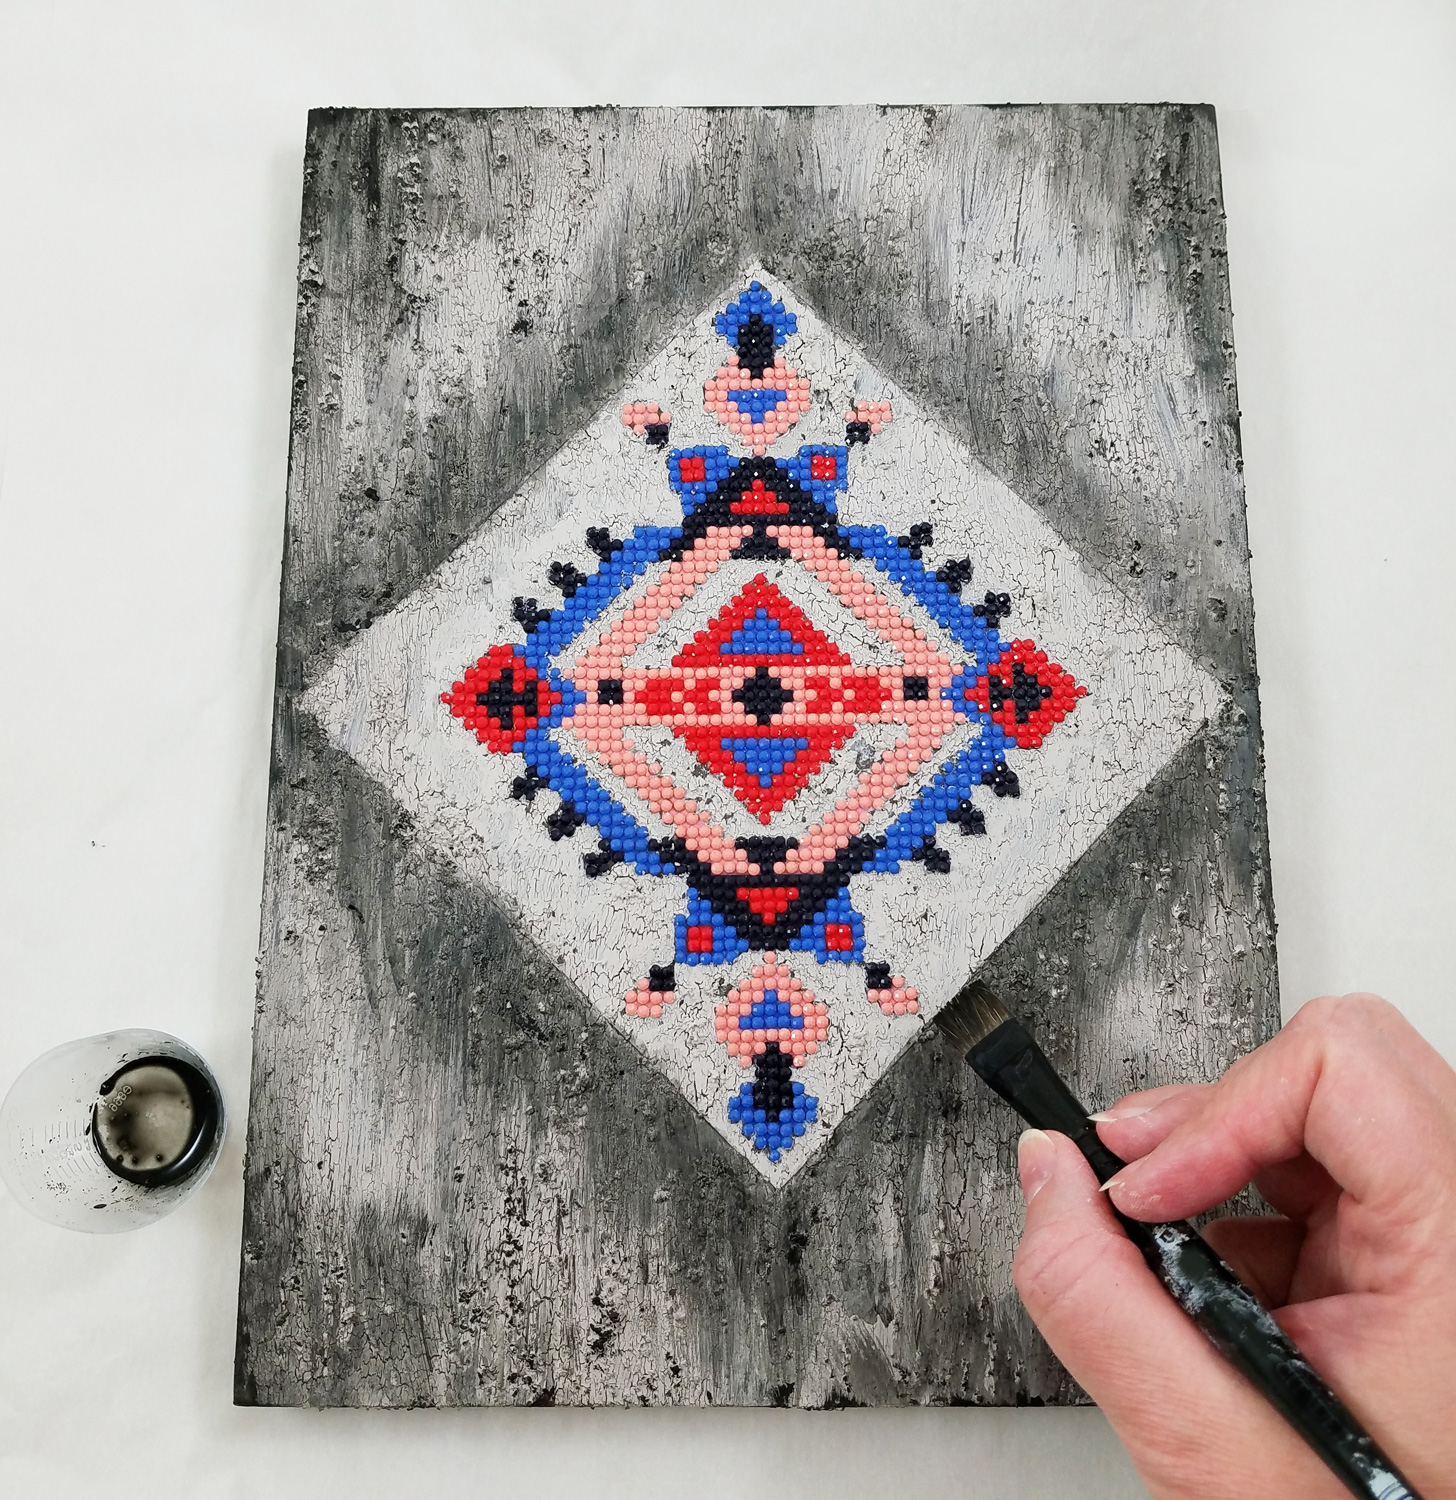
Making sure to cover the sides and front of the wood board I applied on FolkArt Home Deco Chalk Paint in Java. Using the flat paint brush to apply paint to the open sections of the wood board and the round brush for the detailed sections around the diamonds. The Tribe Design canvas had a tendency to soak up more paint, so I applied a bit more paint to make sure there was even coverage.
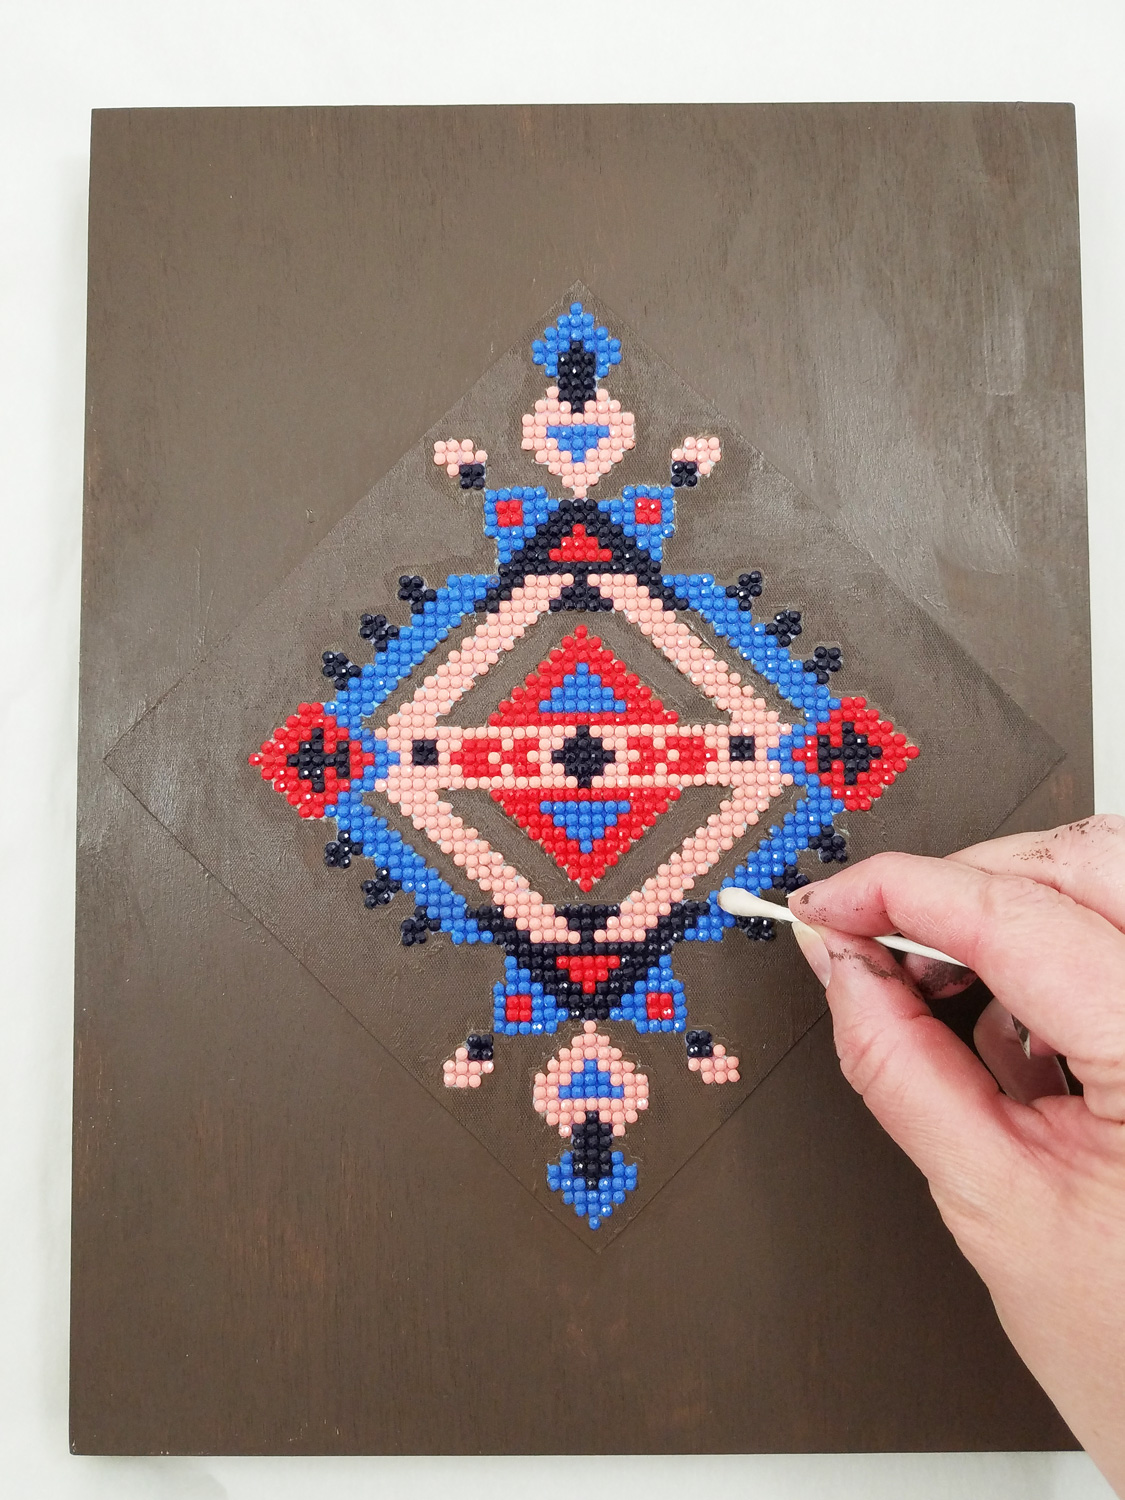
Before the paint fully cured I used cotton swabs dipped in isopropyl alcohol to remove any paint that accidently covered the diamonds. I then let the paint fully cure before the next step.
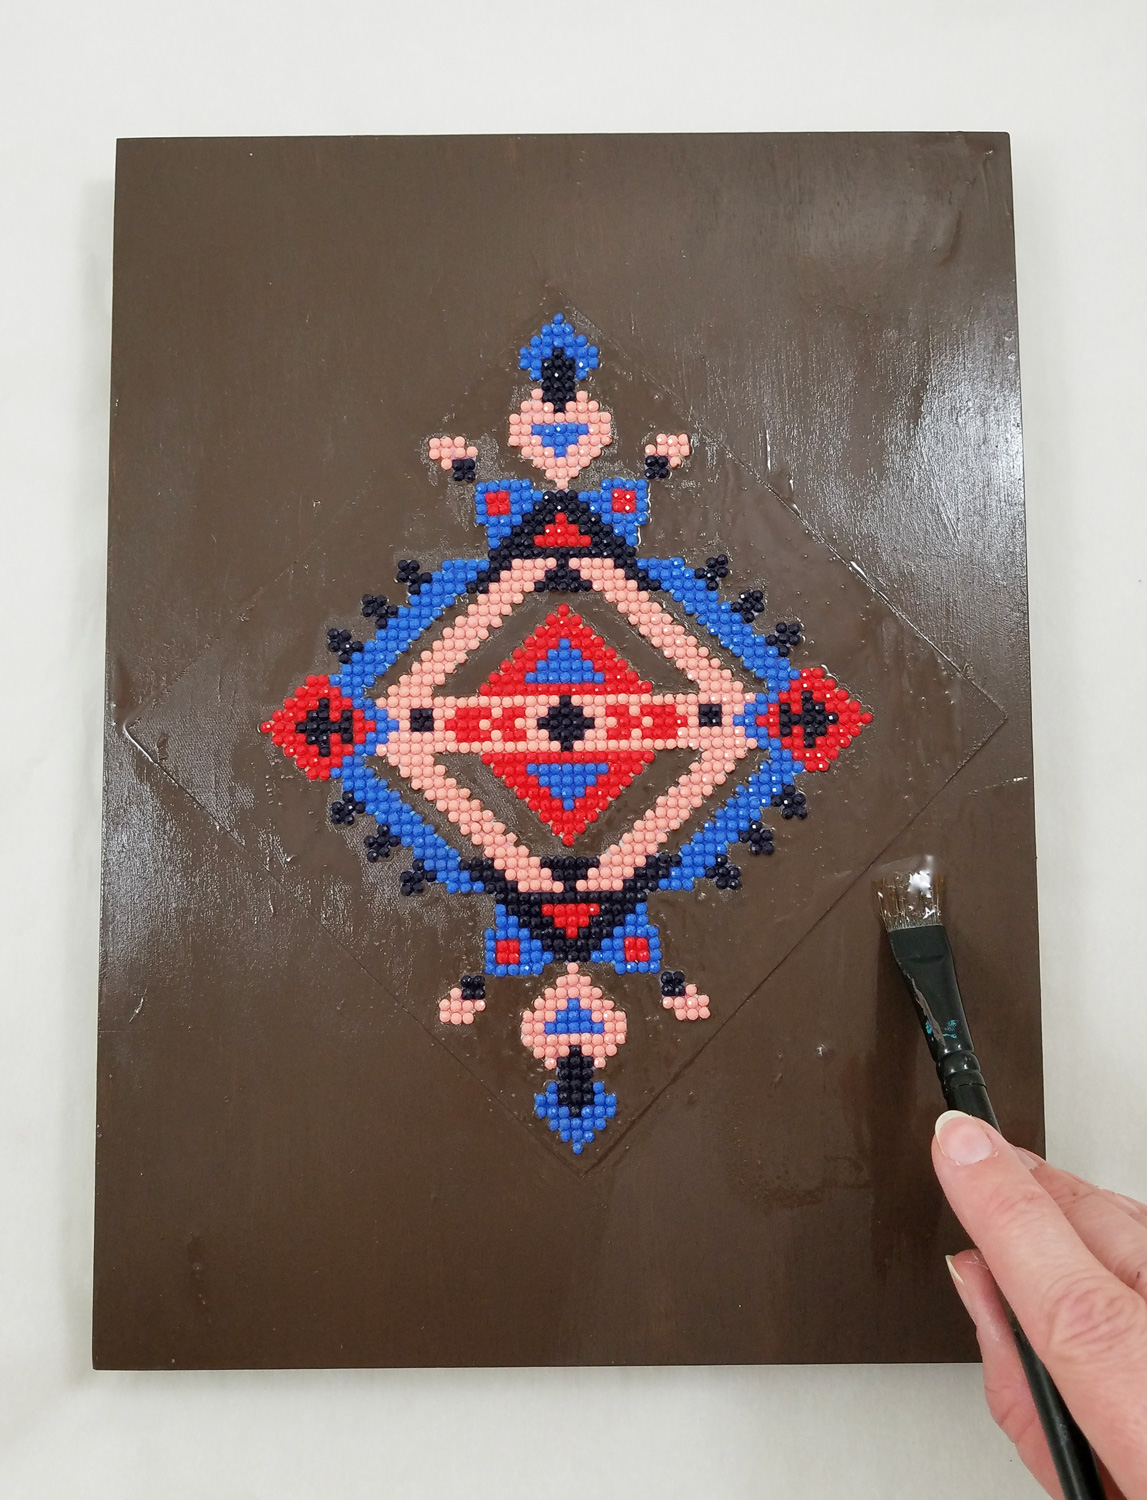
On the now dry paint I applied FolkArt Crackle Medium, careful to not over brush and to only apply the medium in one direction. This would ensure a better crackle formation later on. I let this layer fully dry.
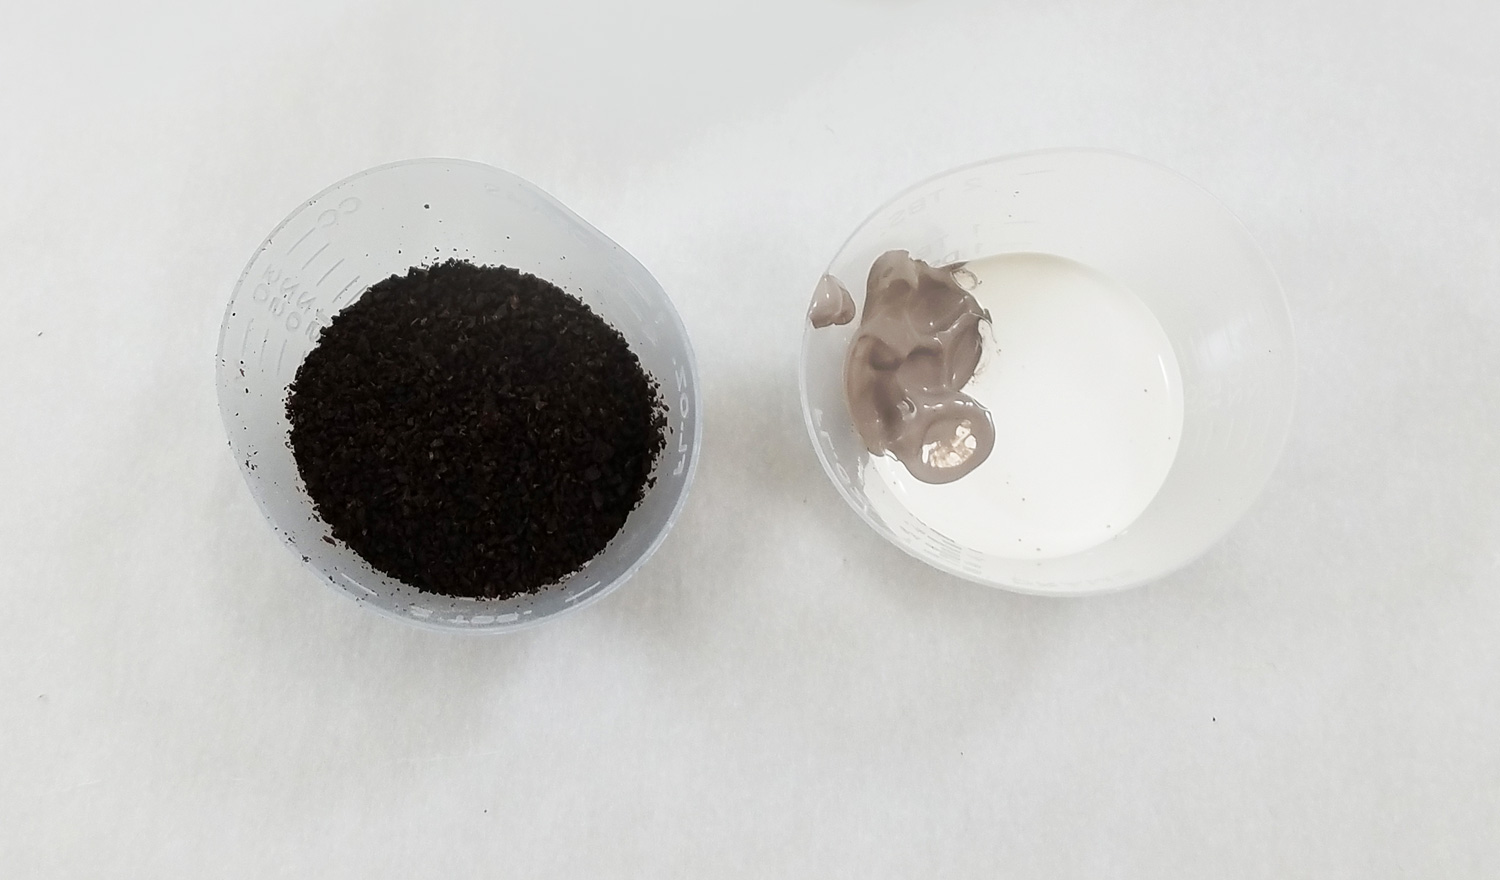
To create a highly textured topcoat I mixed a tablespoon of used and dried coffee grounds in a small cup, with 4 parts FolkArt Home Decor Chalk Paint in White Adirondack, with 1 part Parisian Grey.
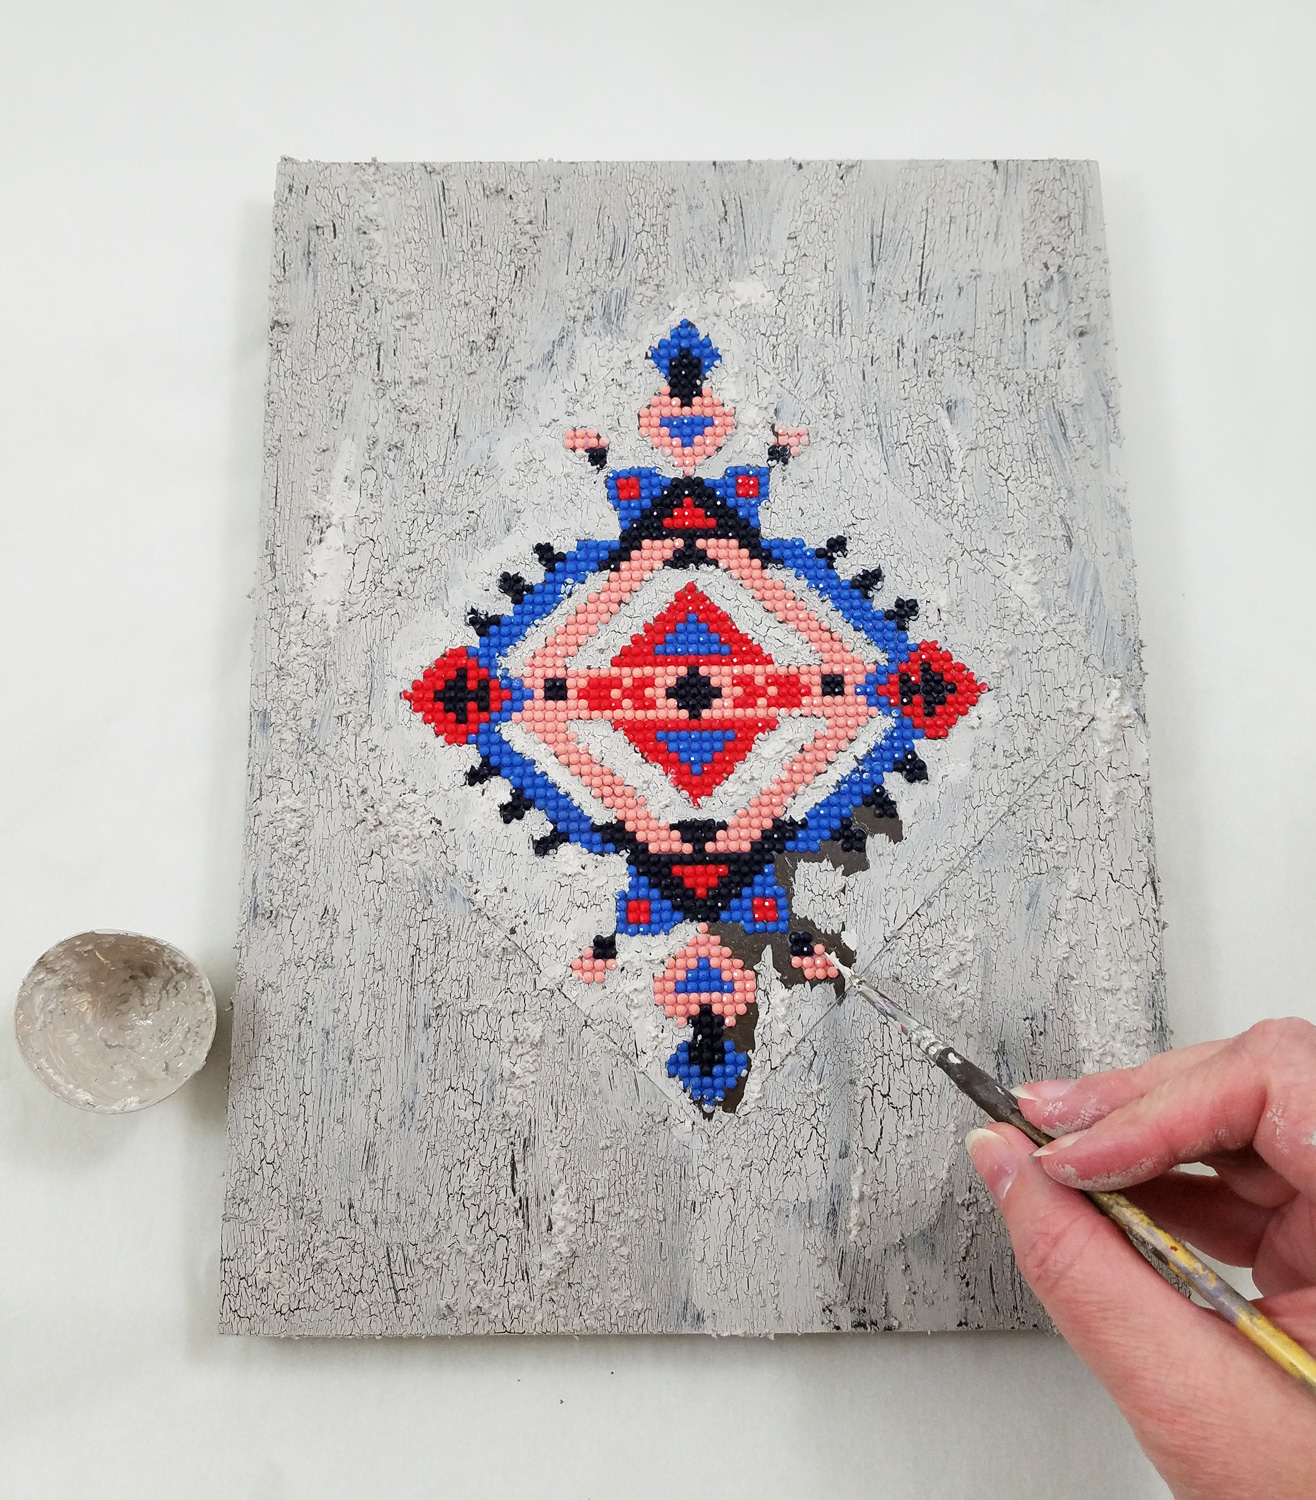
I quickly applied my textured topcoat to the crackle layer, making sure once again to not over paint, and for the most part, go only one direction with the brush strokes. Any time the paint built up too much on the brush I cleaned the paint brush with a paper towel and then reapplied fresh paint mixture to the brush.
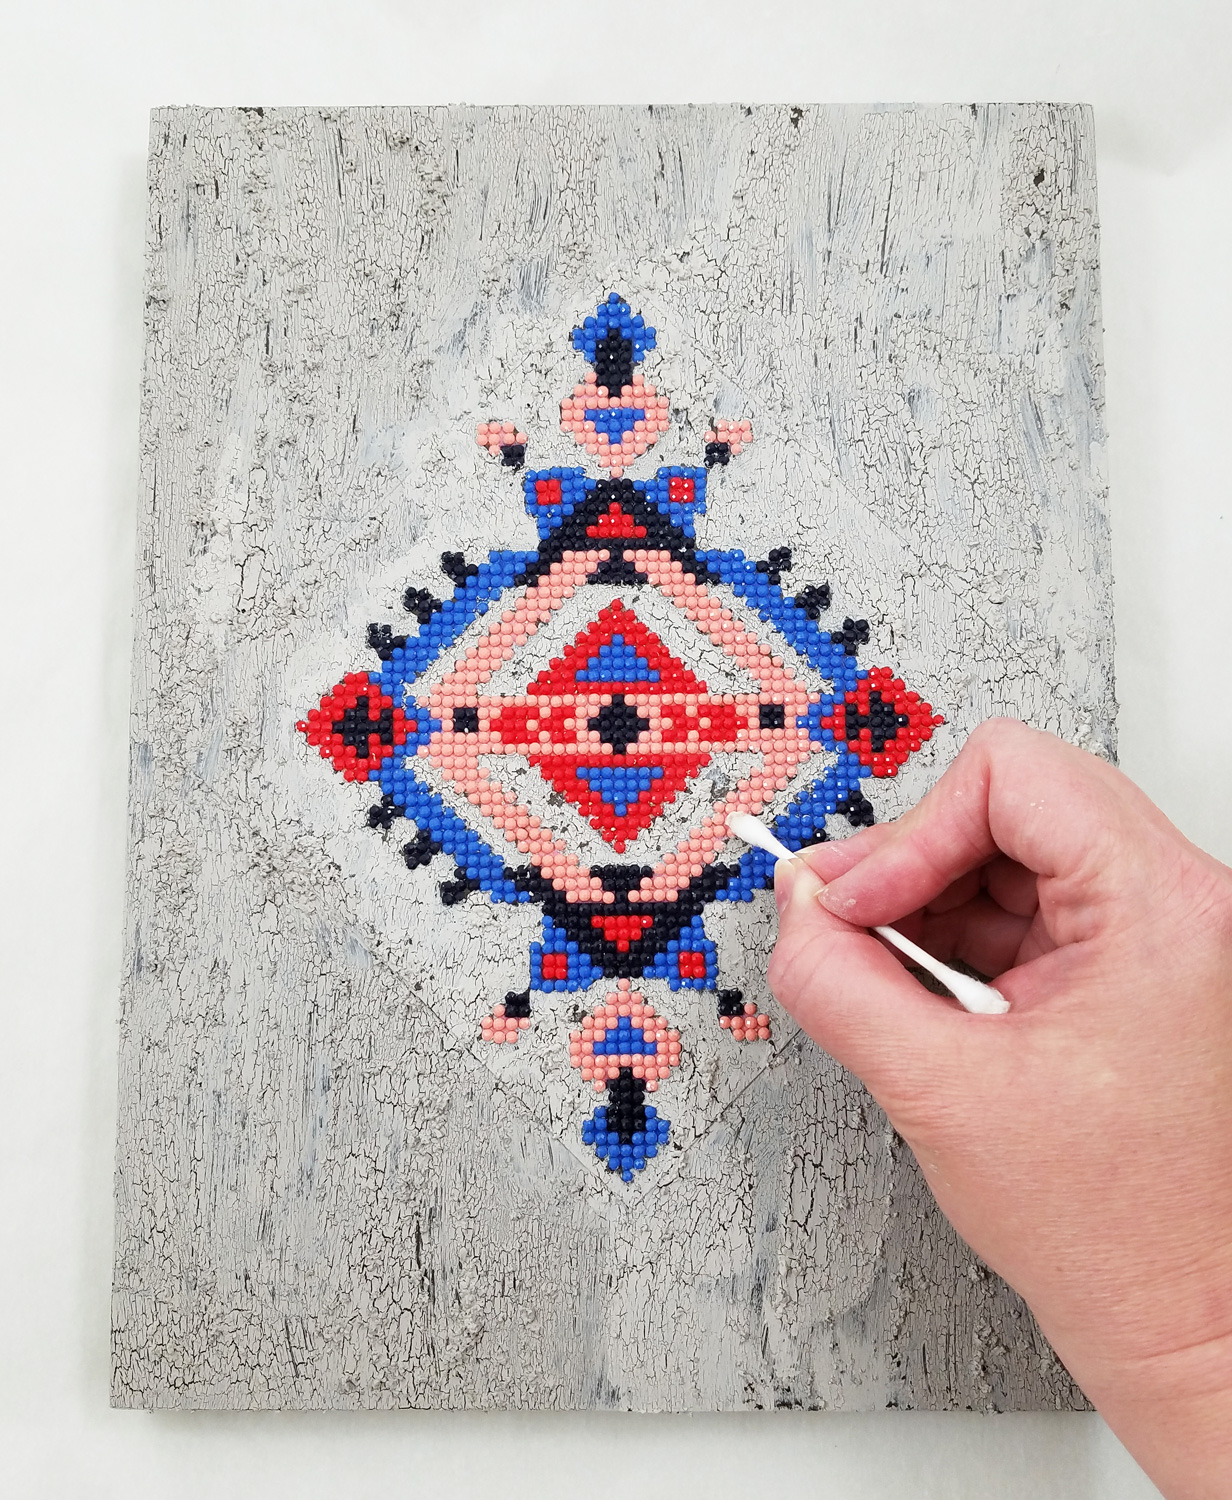
Once again before the paint fully cured I used cotton swabs dipped in isopropyl alcohol to remove any paint that accidentally covered the diamonds. I then let the paint fully cure before the next step.
In a small cup I heavily diluted some Black FolkArt Home Decor Chalk Paint with some water and applied it to the cracks, textured elements and raised portions of the wood board, careful to avoid the flat backed diamond pattern. I left the paint to fully dry.
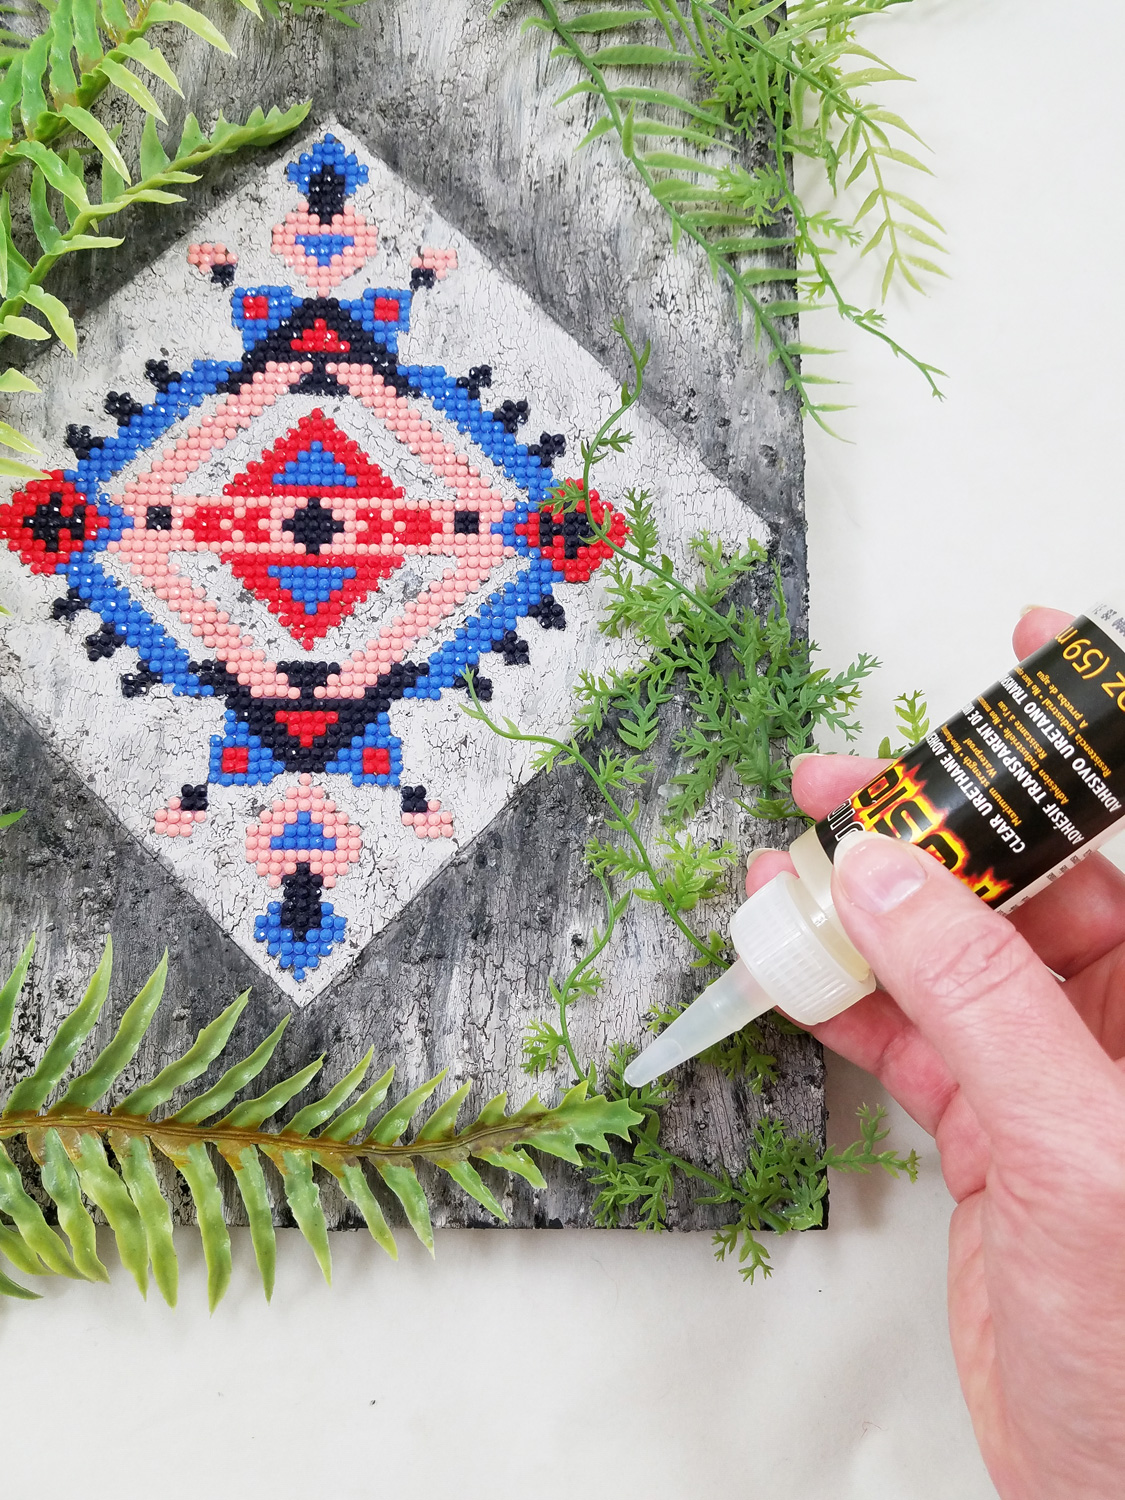
I cut and placed the artificial tropical plants on the board, finding the placement I liked best, gluing the plants in place with Liquid Fusion Clear Urethane Glue. Once the glue was fully cured my pieces was ready to be displayed.
Until next time, safe travels!
*This is an affiliate post, which means I received an assortment of products as a compensation for the creation of art. To read my full disclosure, click here.Upcycled Fabric Cedar Sachets

Since I was a child I was raised to save fabric. My childhood was full of stories from my grandmother, who lived through the Great Depression and my mother, who lived through WWII, on how they learned to be frugal and resourceful, saving things to turn into something new. Outgrow a shirt? Pants have too many holes? Curtains sun damaged? Fabric left over from making a dress? Save the fabric! The years have sped by, and in this modern world the ease and access to any number of arts and crafts supplies is astounding. However there is a want and even a need to reduce, reuse, or recycle long forgotten craft supplies.
One of my favorite upcycled crafts I was raised on making was fabric sachets. Both pretty and practical, these little bits of fabric, crafted into any number of shapes, stuffed with cedar, would decorate the house, protect our clothing from insects and remind us of loved ones present and past.Supplies:
Fabric scraps
Small pieces of lace and/or trim
Small lengths of ribbon or thin strips of fabric such as linen or muslin
Thread
Sewing needle
Buttons
Fabric Scissors
Cedar shavings (many pet shops and hardware stores have large bags available)
Cedar Essential oil
Mixing bowl
Sewing Machine *if not hand stitching
Ruler
Pencil
Paper
Craft scissors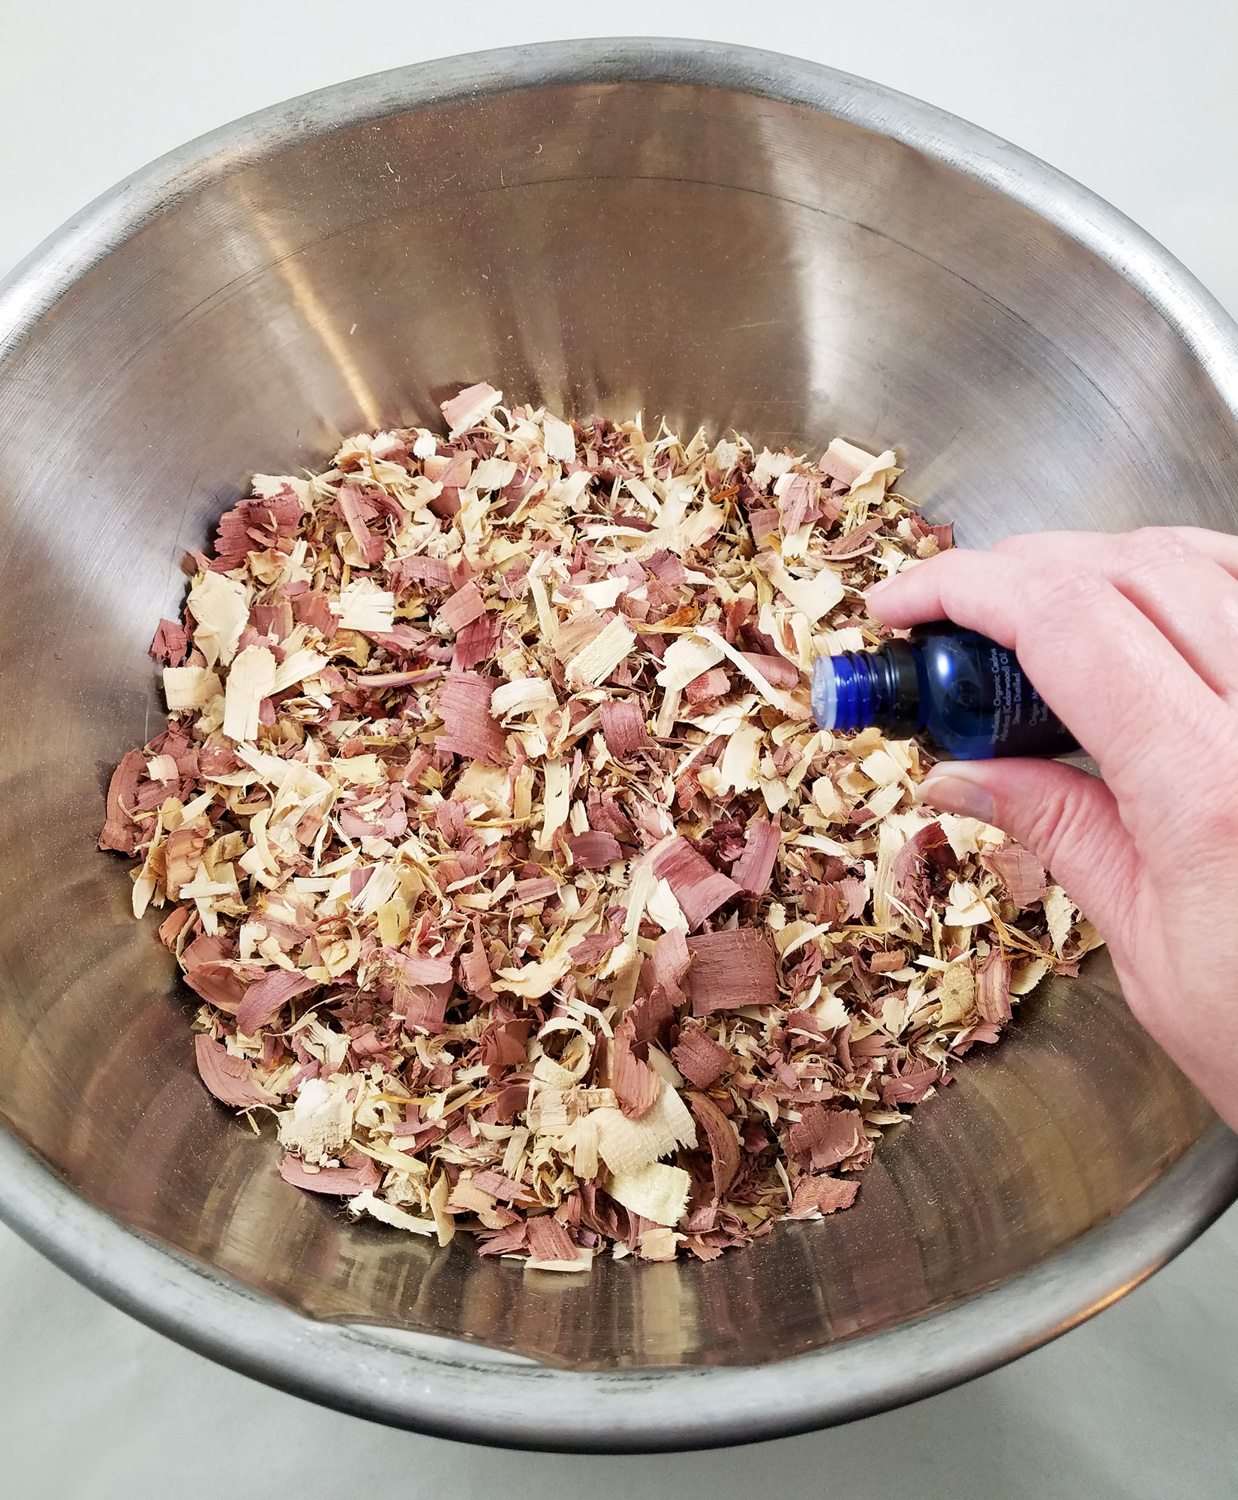
Pour the cedar shavings into the mixing bowl and remove any large chunks of wood or bark from the mix. Sprinkle lightly the cedar essential oil and stir the shavings. Repeat this about 4 times to make sure the shavings have an extra boost of cedar scent. Let the shavings sit and soak up the oil, which can take 5 to 10 hours.
In this pile I have fabric scraps, remnants, old bed linen, swatches of clothing, table cloths and more. The only requirement for any fabric pieces to use in this project is that is to be lightweight and ideally cotton, hemp, linen, muslin or other plant fiber based materials. These will allow the scent of the cedar to release easier over time.
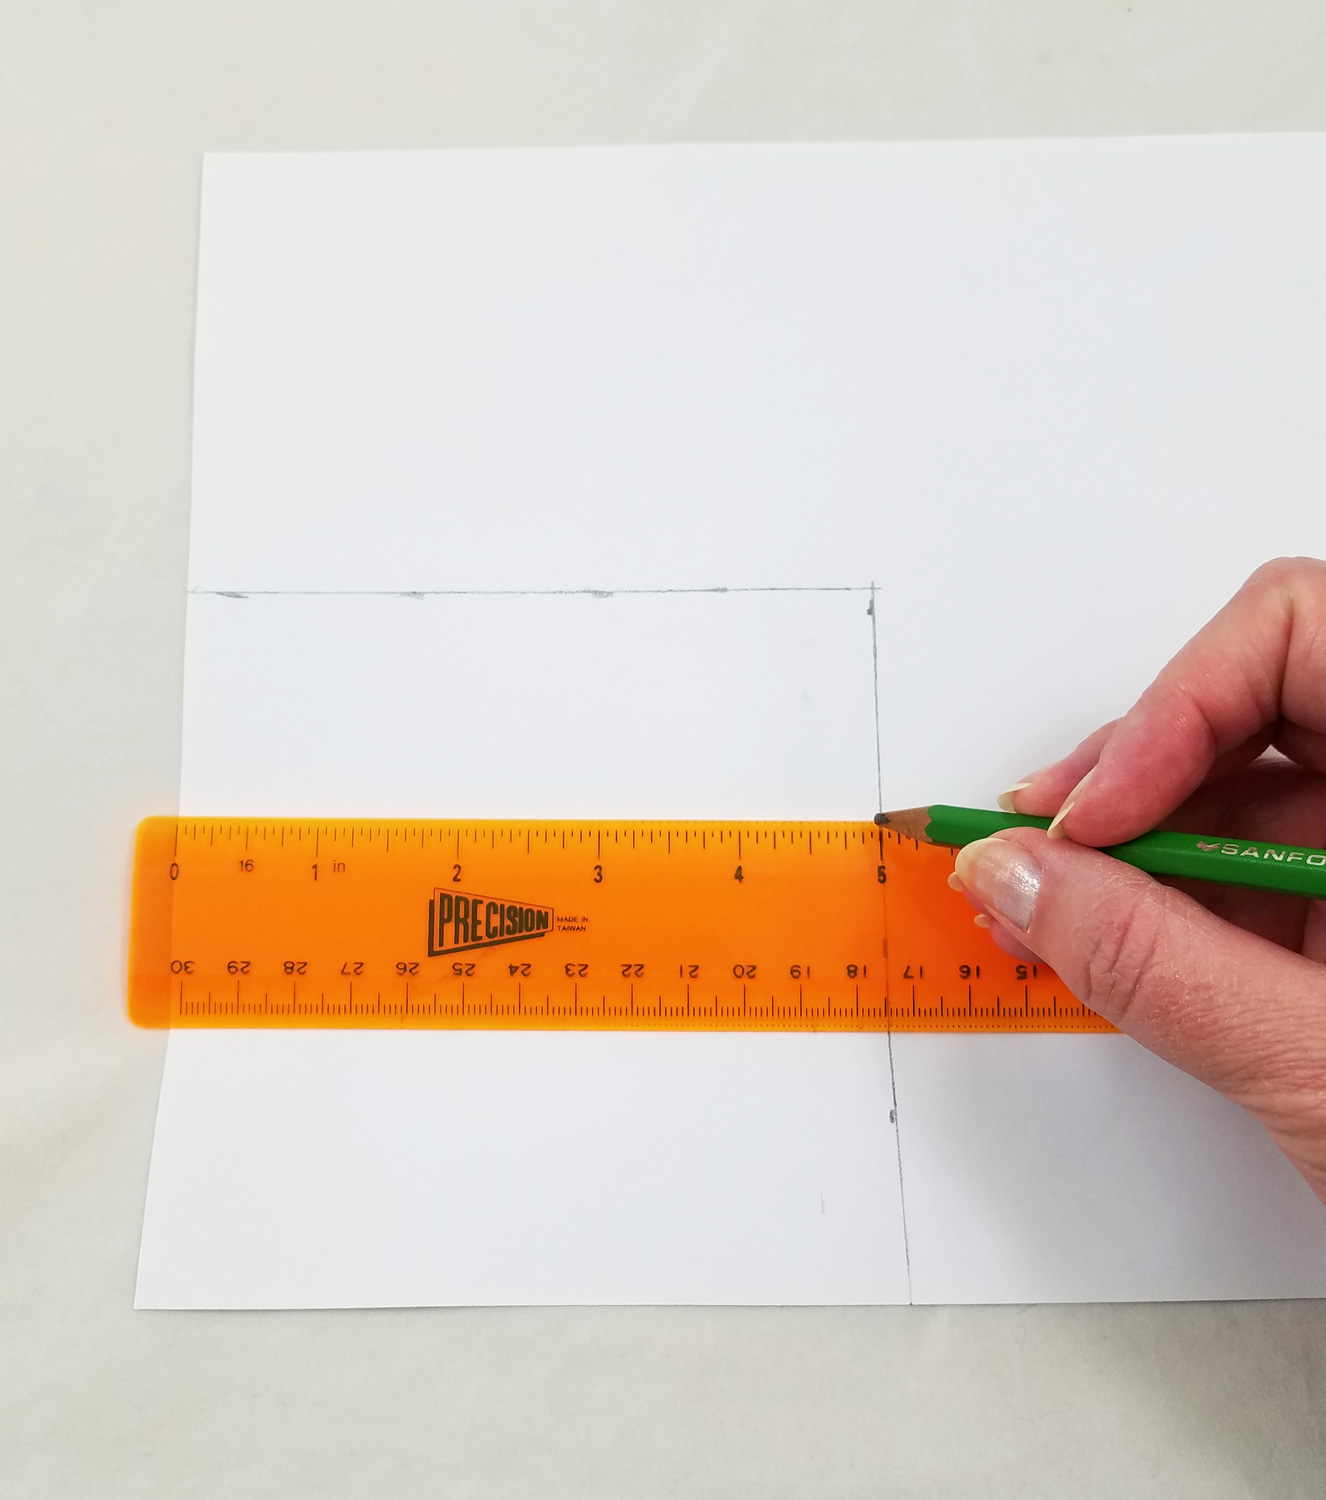
Using a ruler and pencil draw a 5 inch by 5 inch square. This is the starting size for the heart pattern.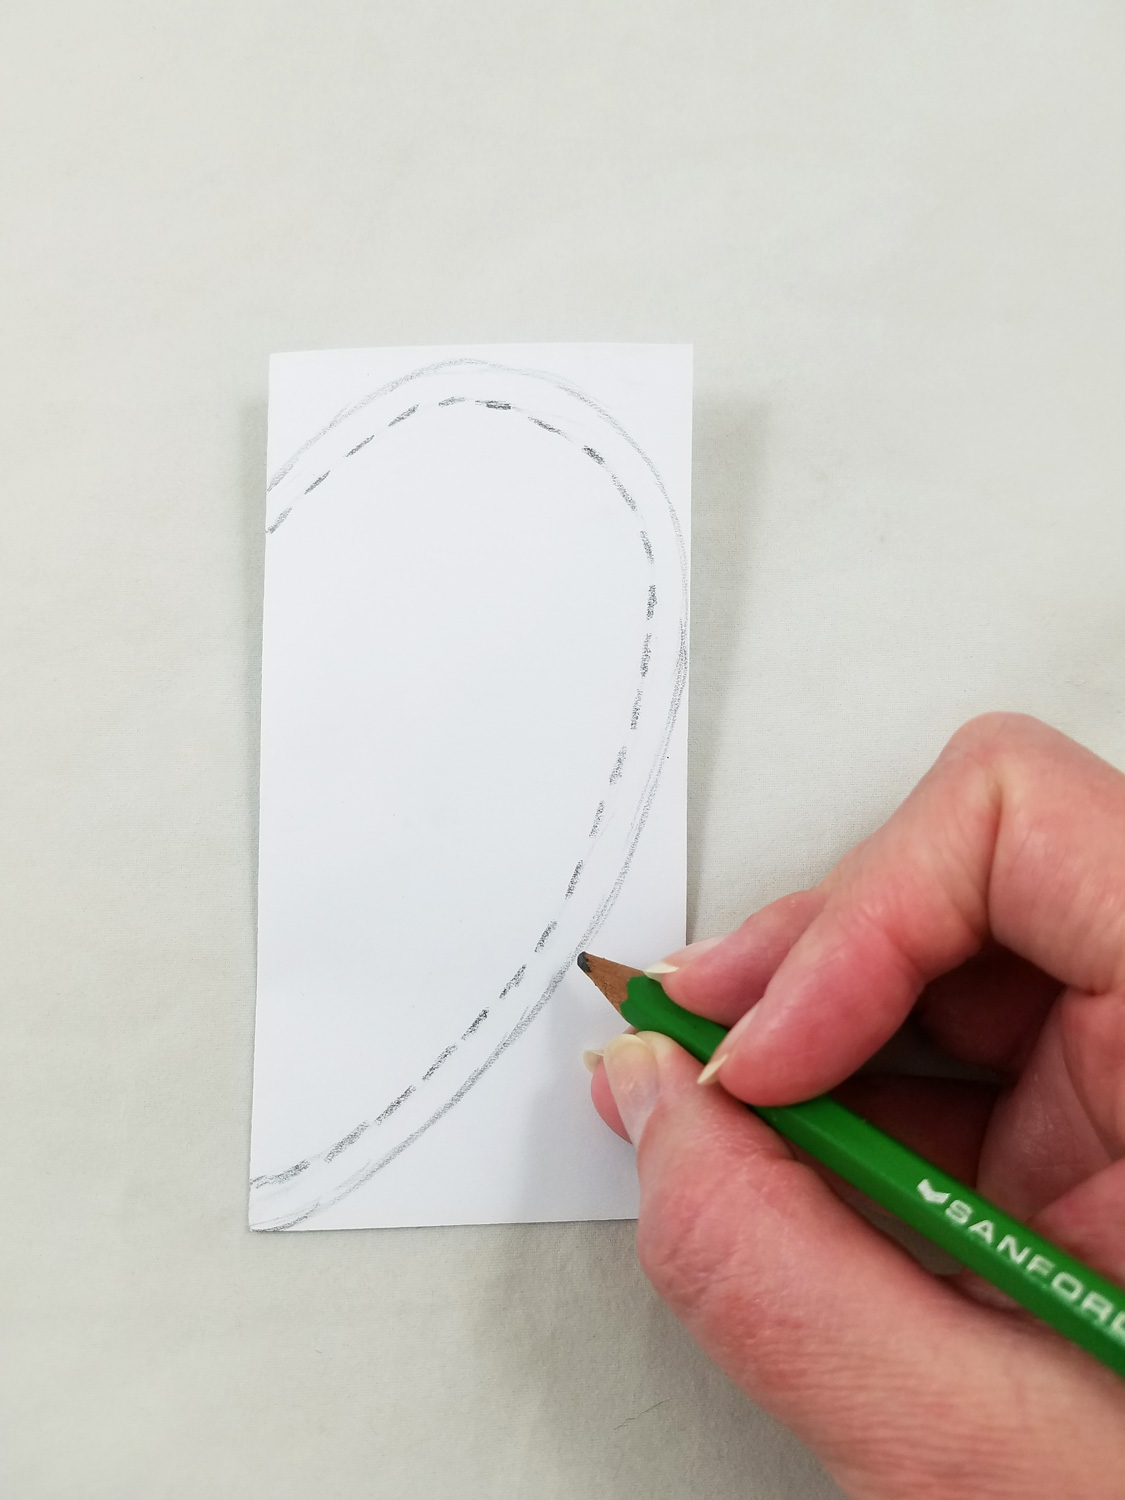
Cut out the 5inch square and fold in half. Staying just within the lines of the paper, draw half a heart. Then within that line draw a second dotted line, ¼” width. This will be the guide for a ¼” seam.
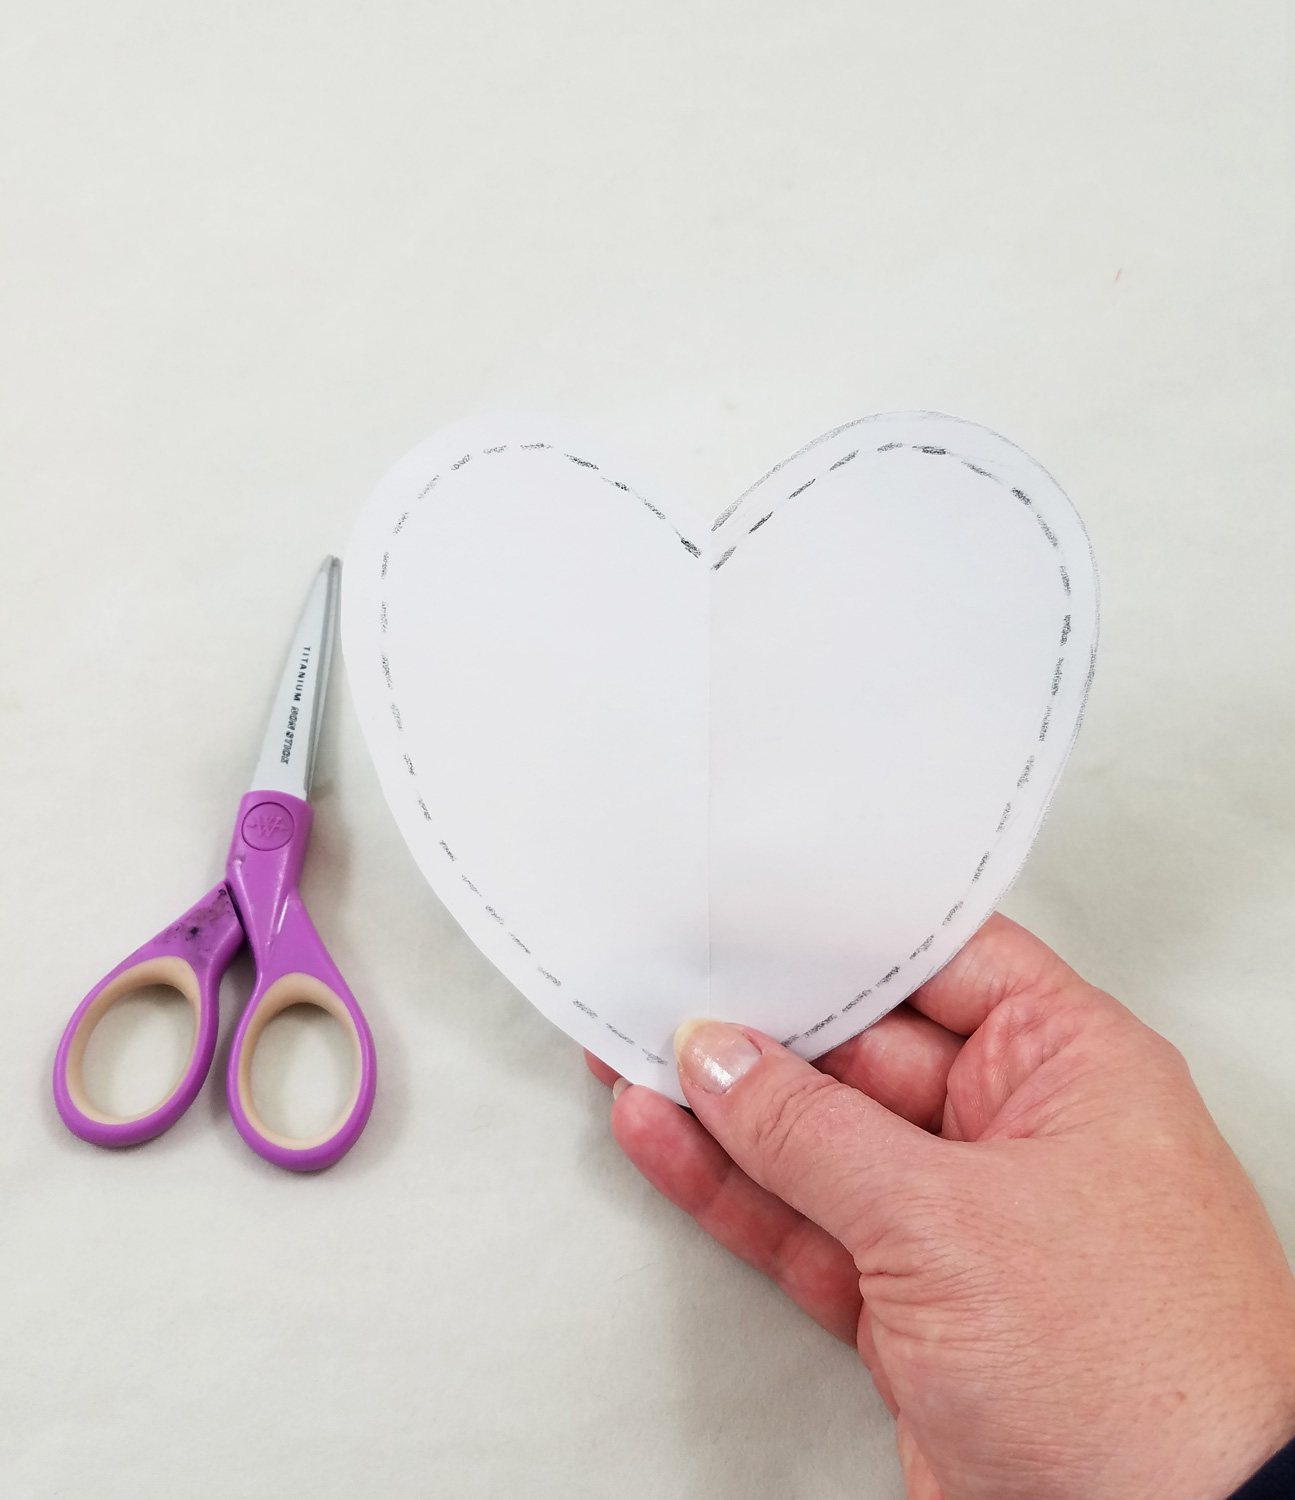
Cut out the paper heart and draw in the ¼” seam allowance dotted line on the second side.
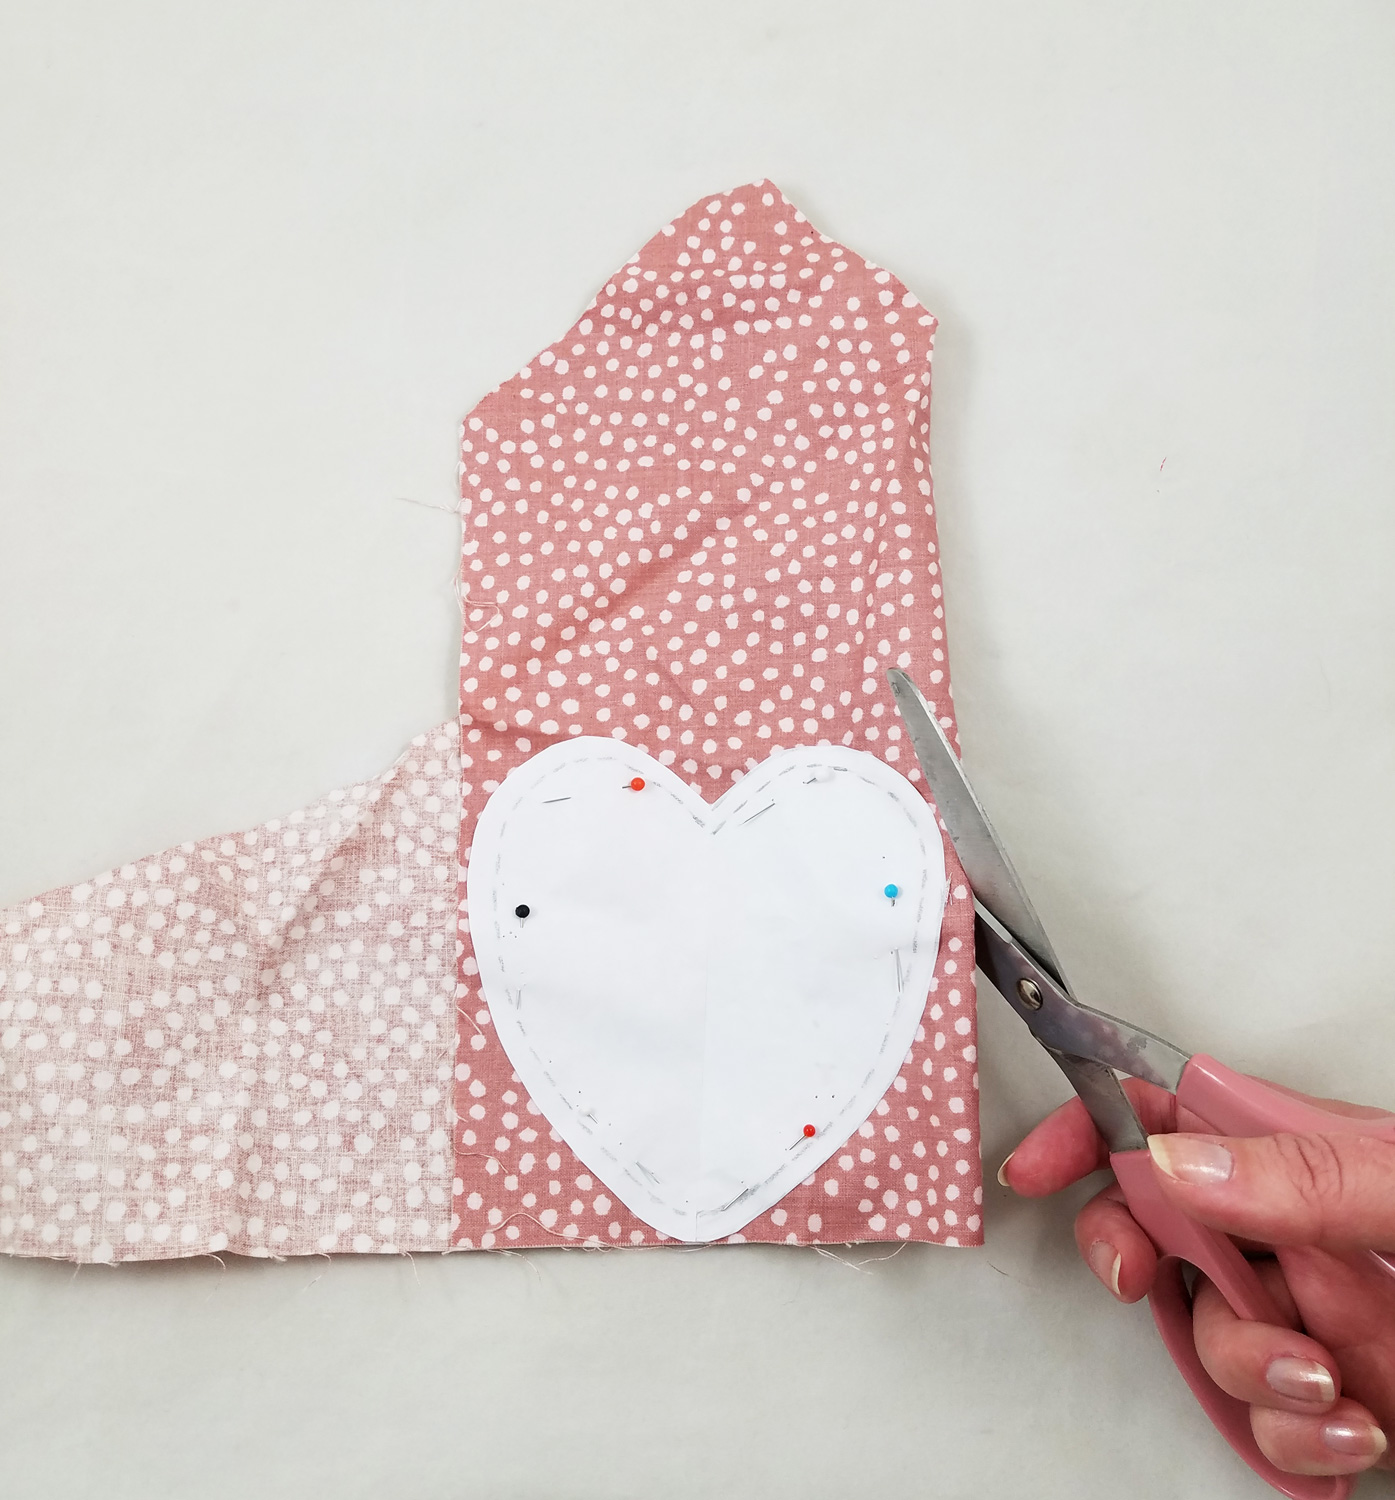
Use the pattern to cut out 2 fabric hearts for each sachet. If possible fold fabric and pin the pattern onto the fabric to cut two fabric hearts at a time if the remnants are large enough.

Do not worry if the fabric pieces are only wide enough to cut one heart out, as you can always cut more of a contrasting or complementary fabric.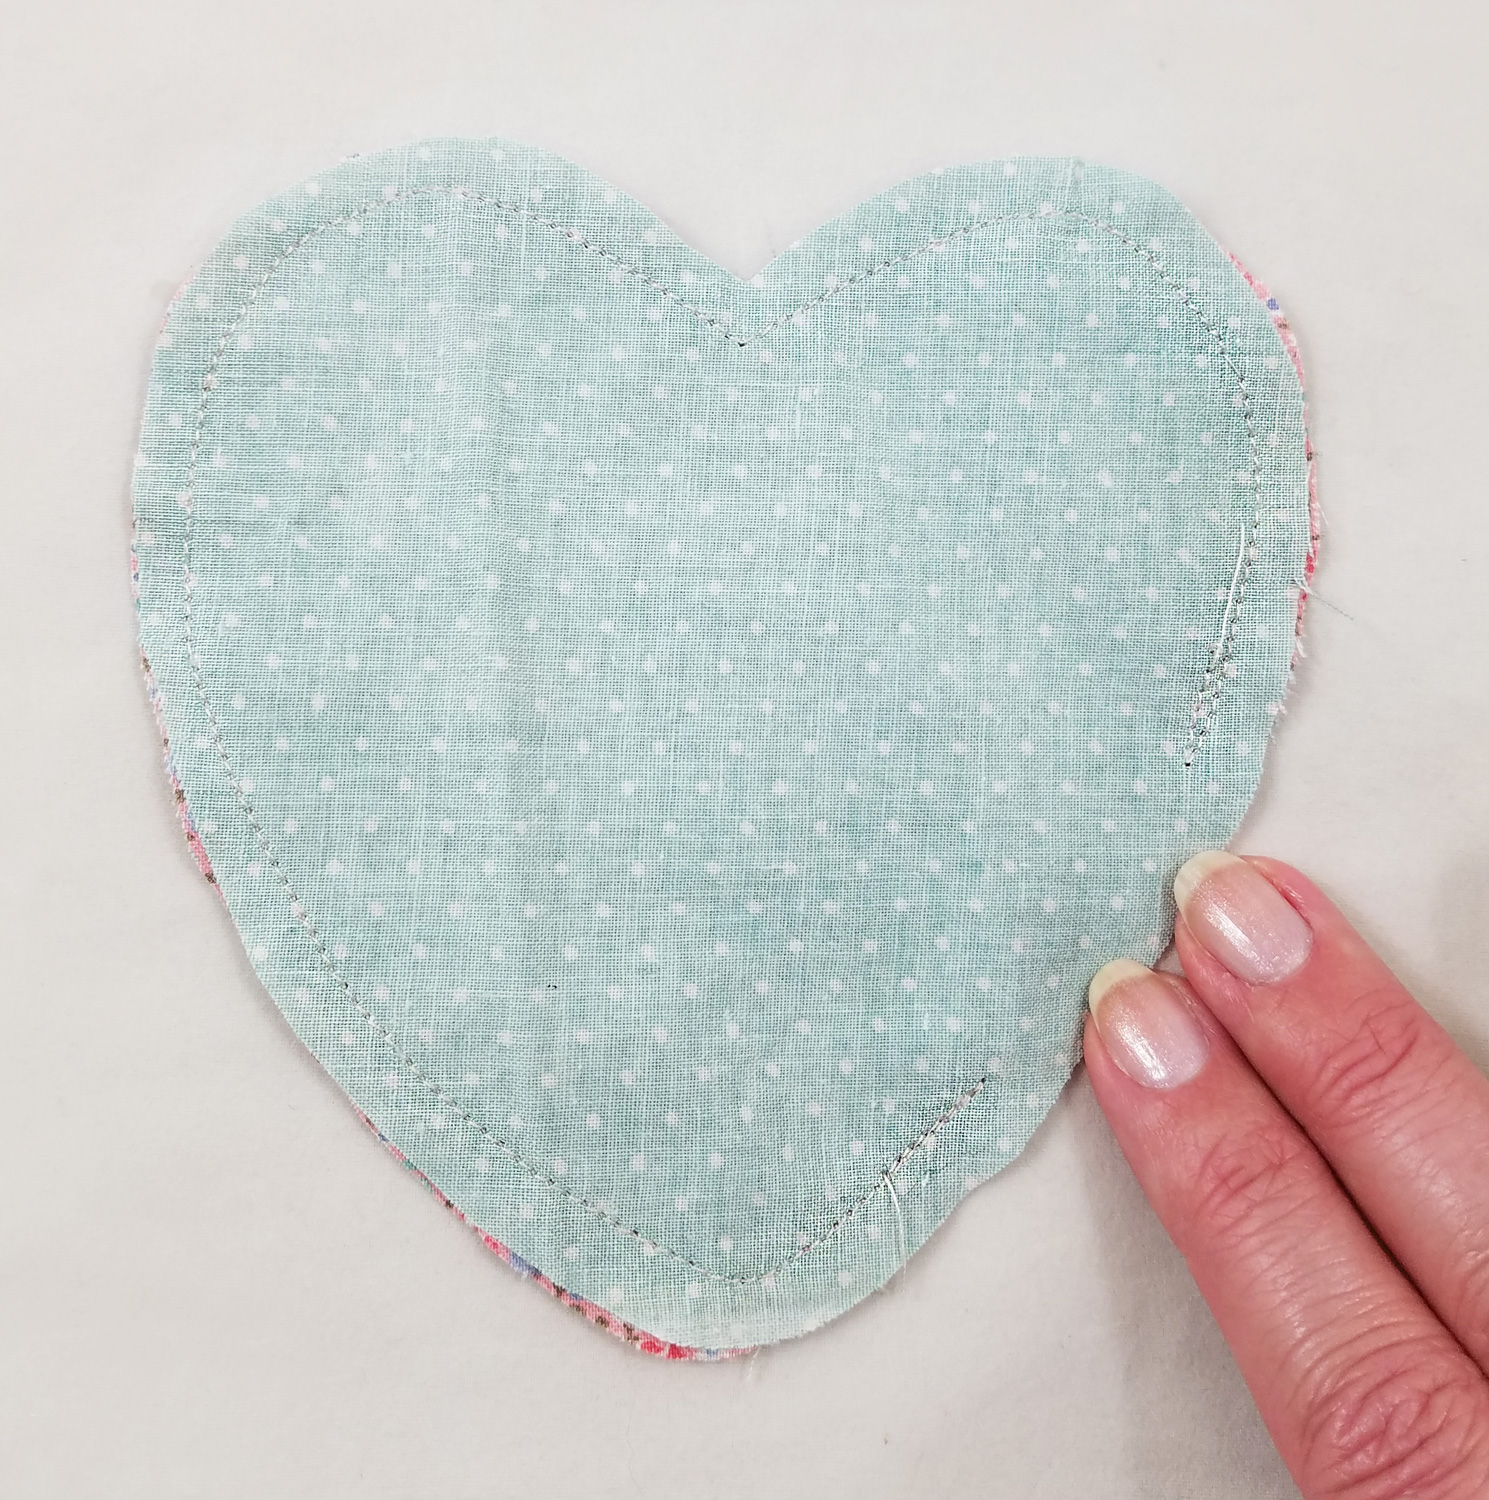
Place the right sides of the fabric hearts together and stitch around the heart with a ¼” seam. Make sure to do a reverse stitch when you start to sew and at the end, as it will strengthen the stitch and prevent it from unraveling when turning rightside out and stuffing the fabric heart. Make sure to leave a portion unstitched, making an opening to turn the fabric heart rightside out.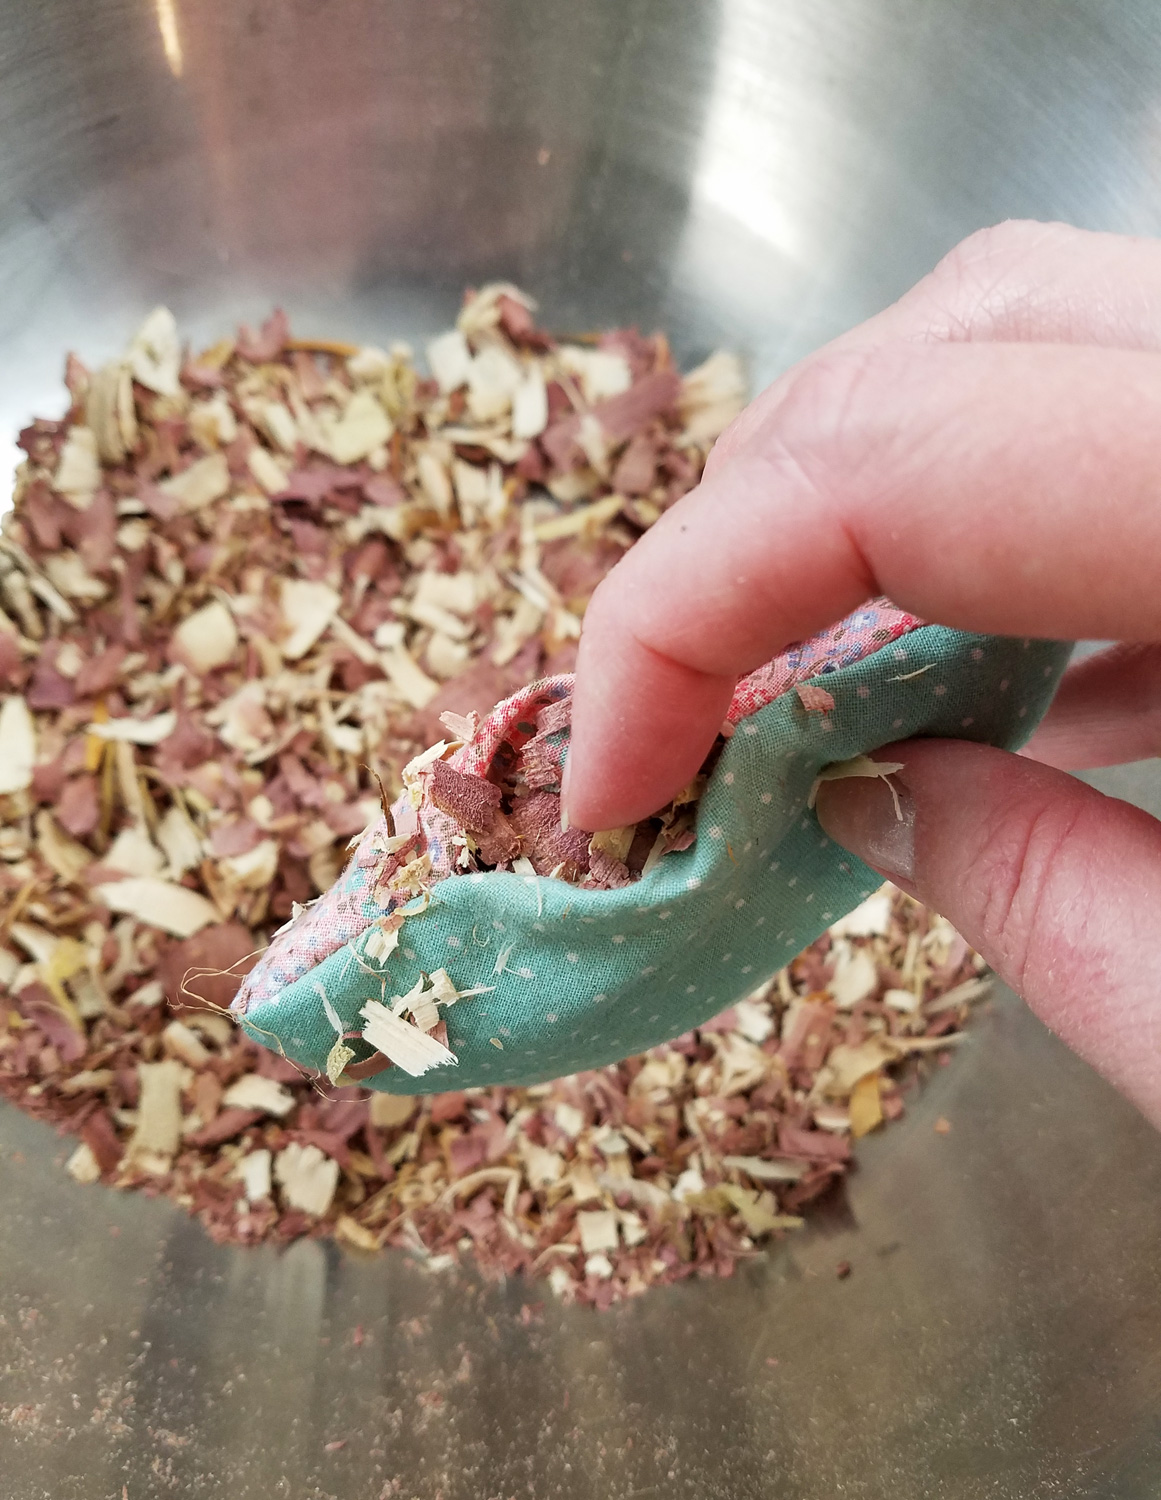
Snip any corners of fabric that might pull or tuck when turned rightside out, such as the dip in the heart or the point of the heart. Turn rightside out and use the eraser end of a pencil to push the heart into shape. Stuff each heart with cedar shavings.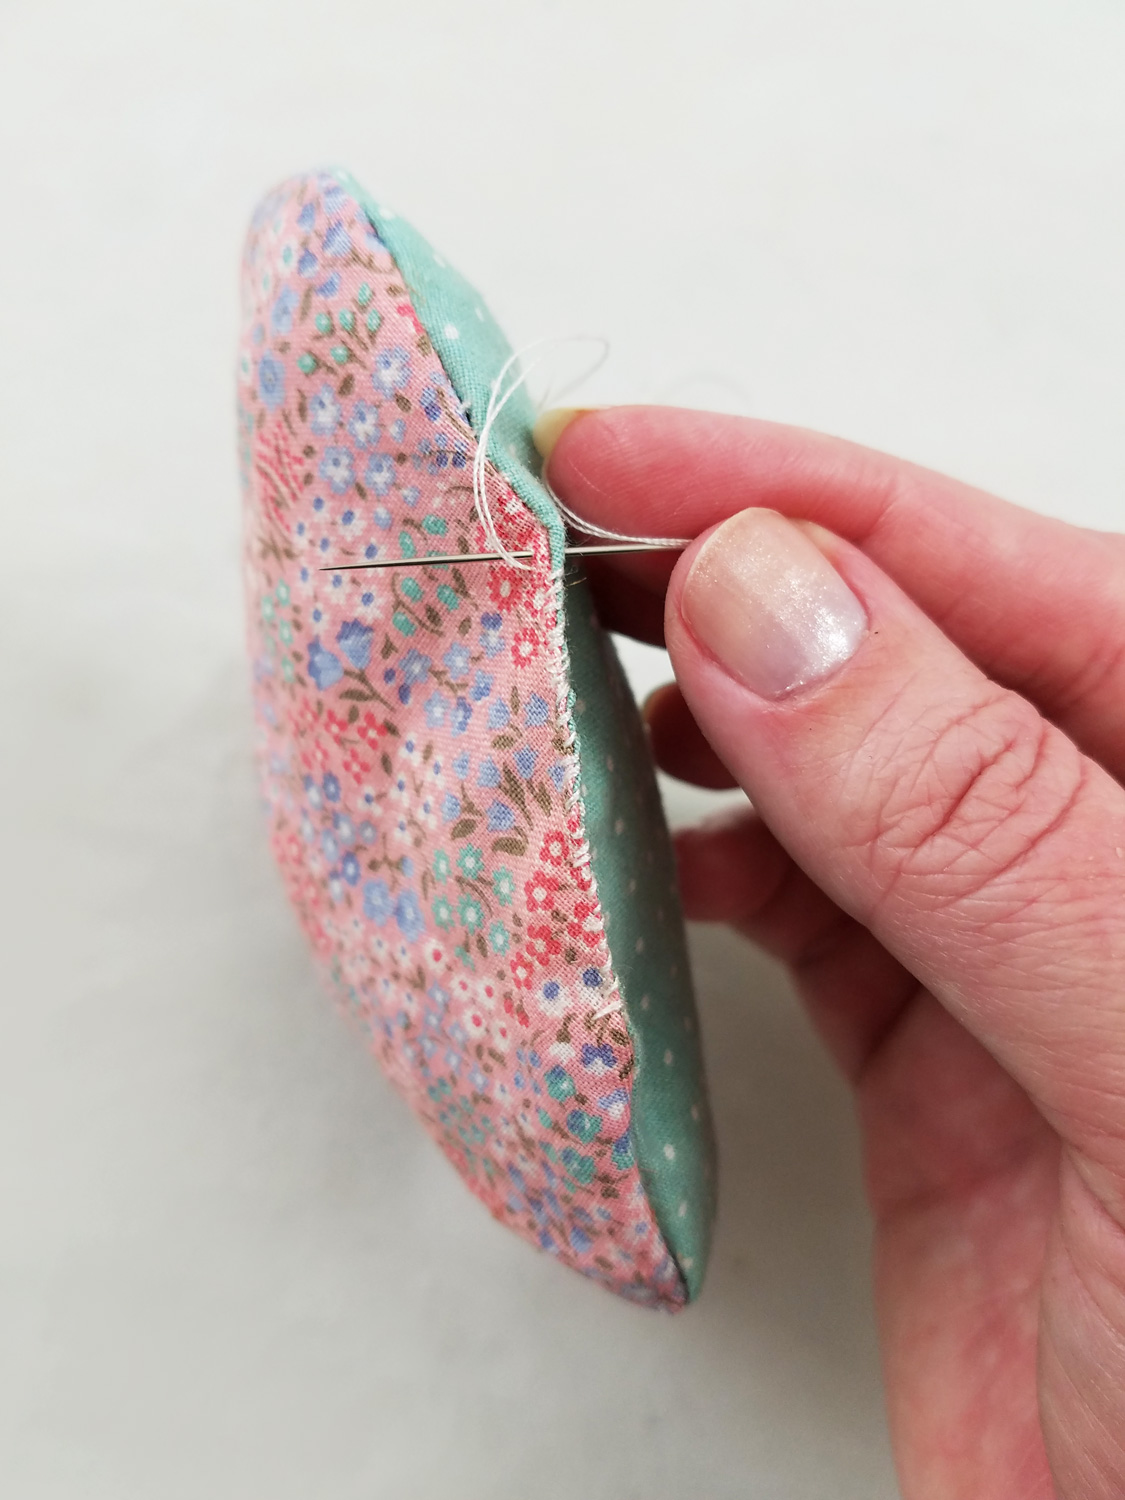
I used an Overcast Stitch to sew up the open part of the heart, as any lace or trim later will cover up the stitches. If you do not want to add lace or trim later, use a Slip Stitch to sew shut the heart.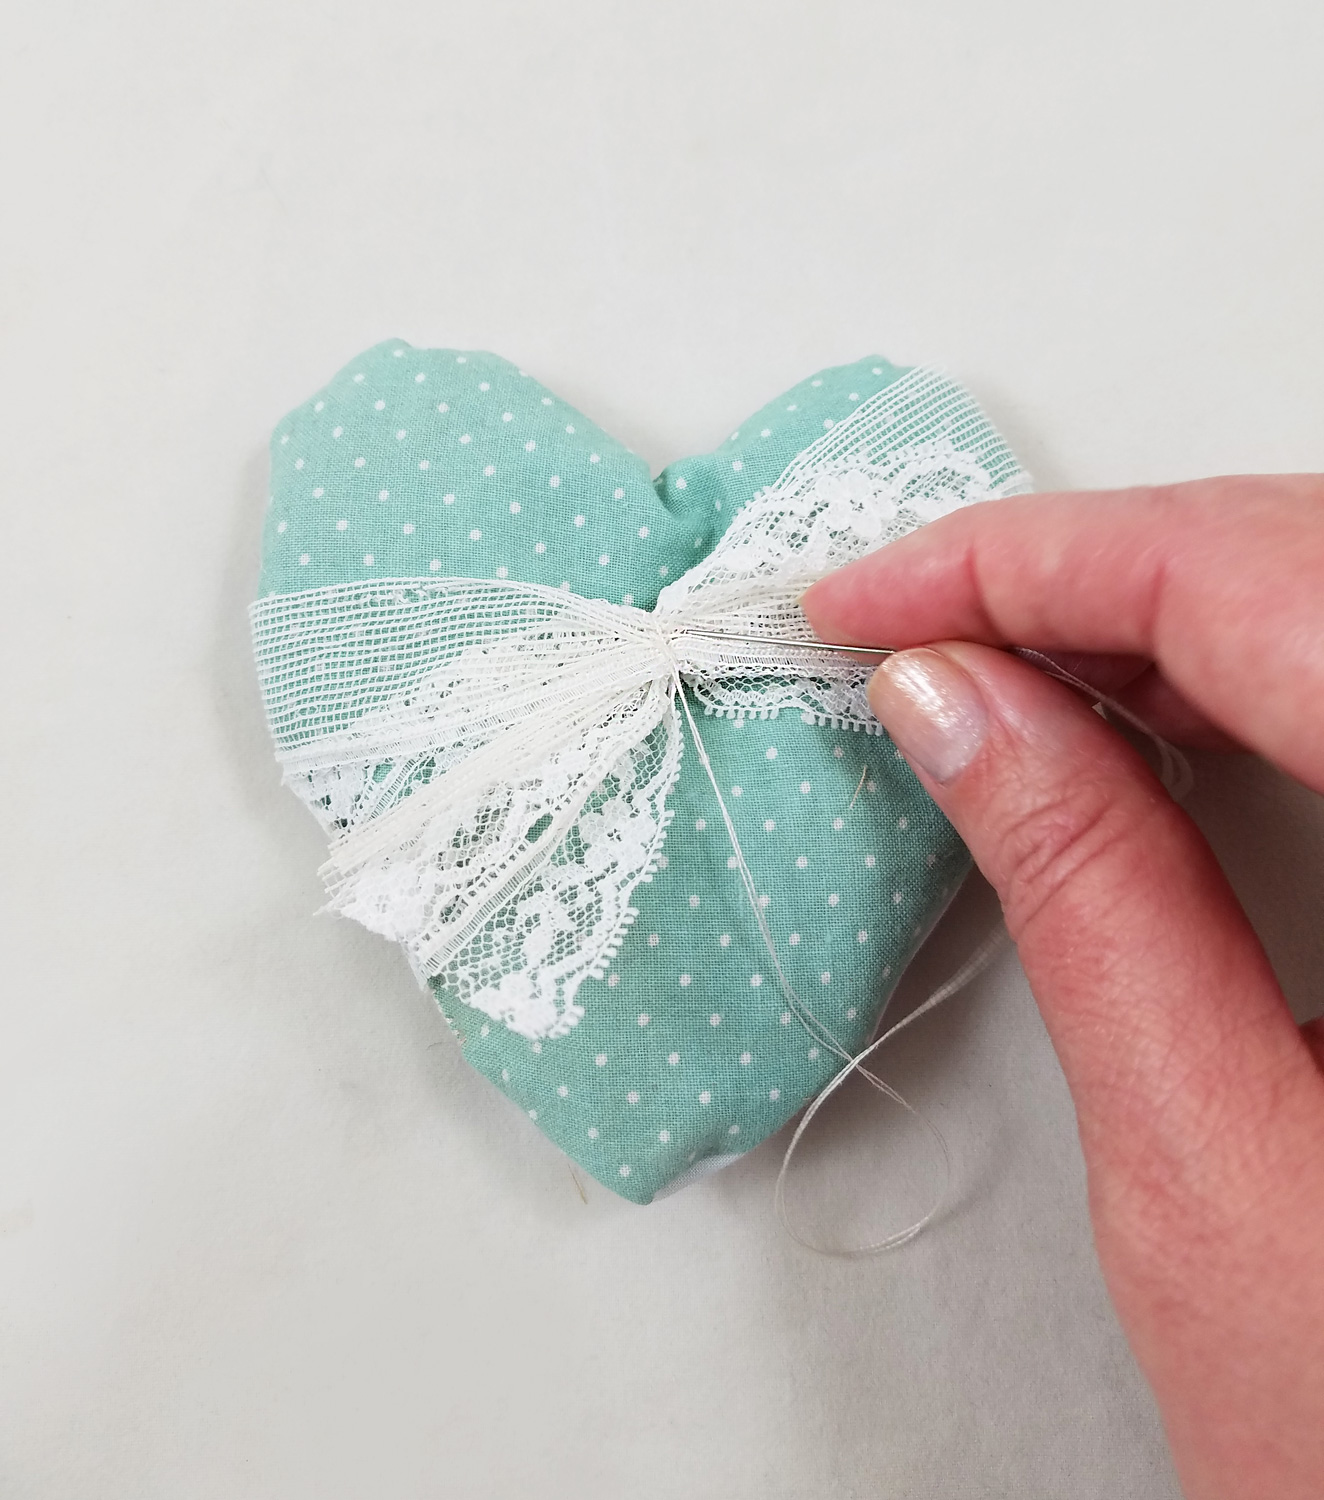
Using a small piece of lace or fabric create a sash that goes around both sides of the heart, making sure to cover the stitch that closed the heart. Gather and stitch together the sash, in the front of the heart. If you do not want a gathered front sash you can always stitch closed the sash on the back of the fabric heart.
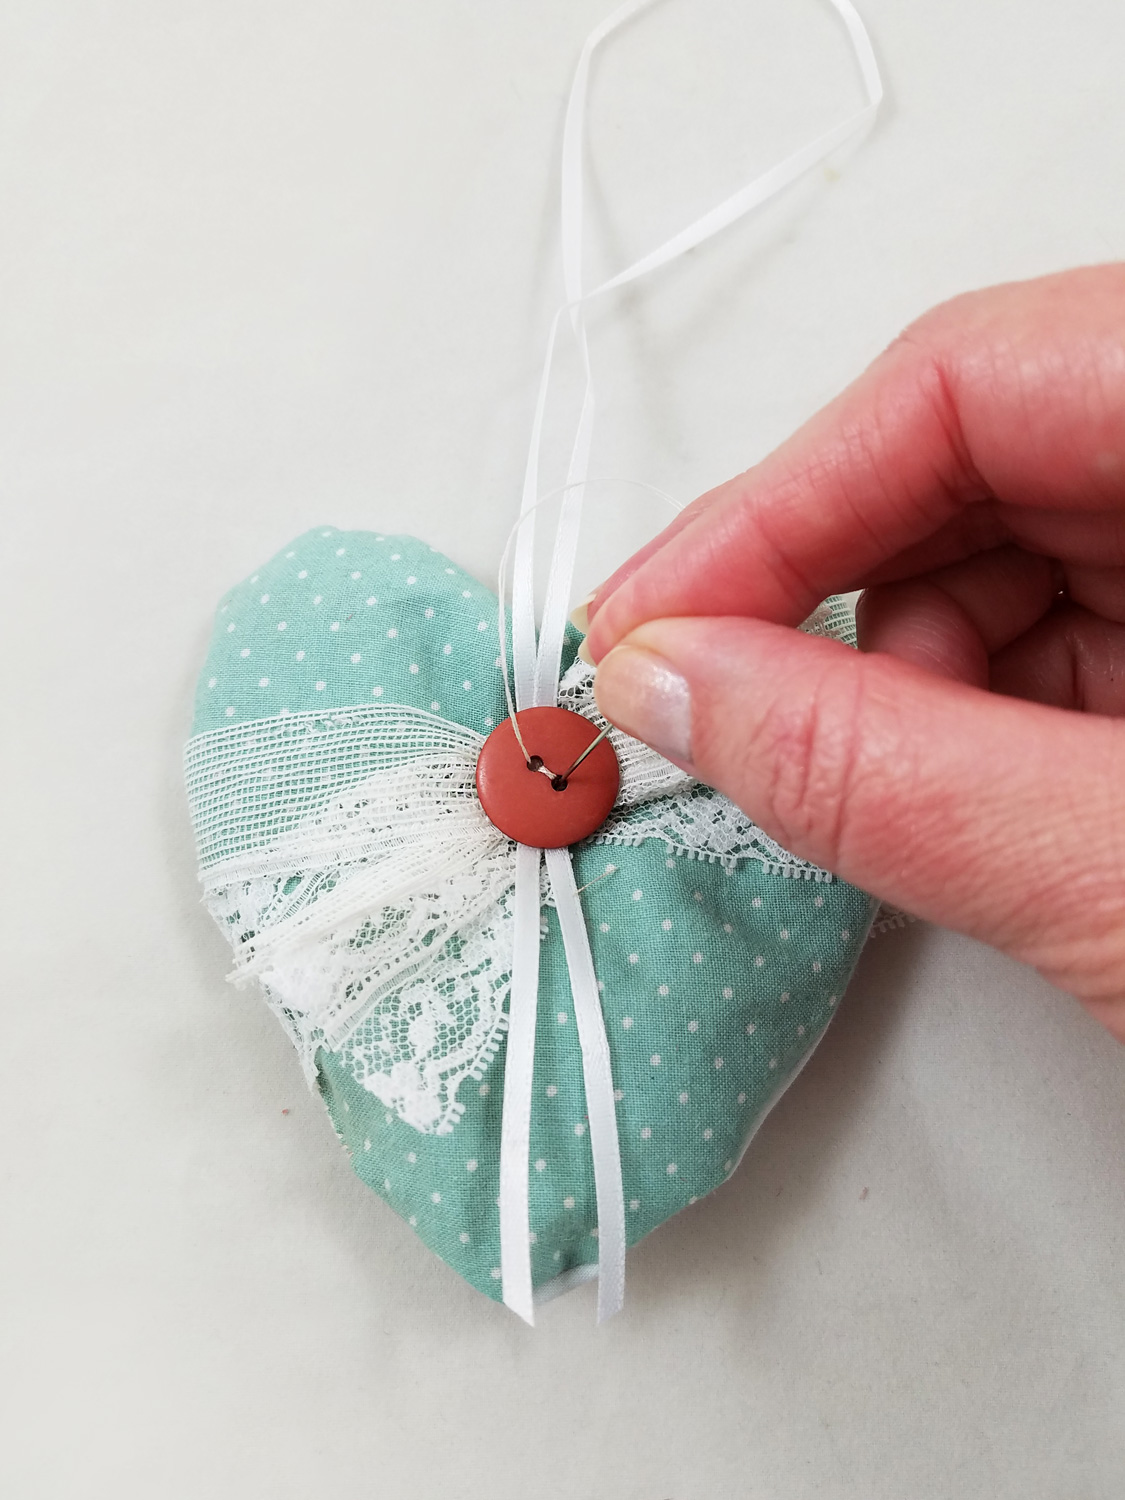
Loop a piece of ribbon and stitch the ribbon and a button through the sash and the fabric heart to create a secure hanger for the sachet. Hang your newly created sachet on doorknobs, hangers, coat racks or in boxes or dressers
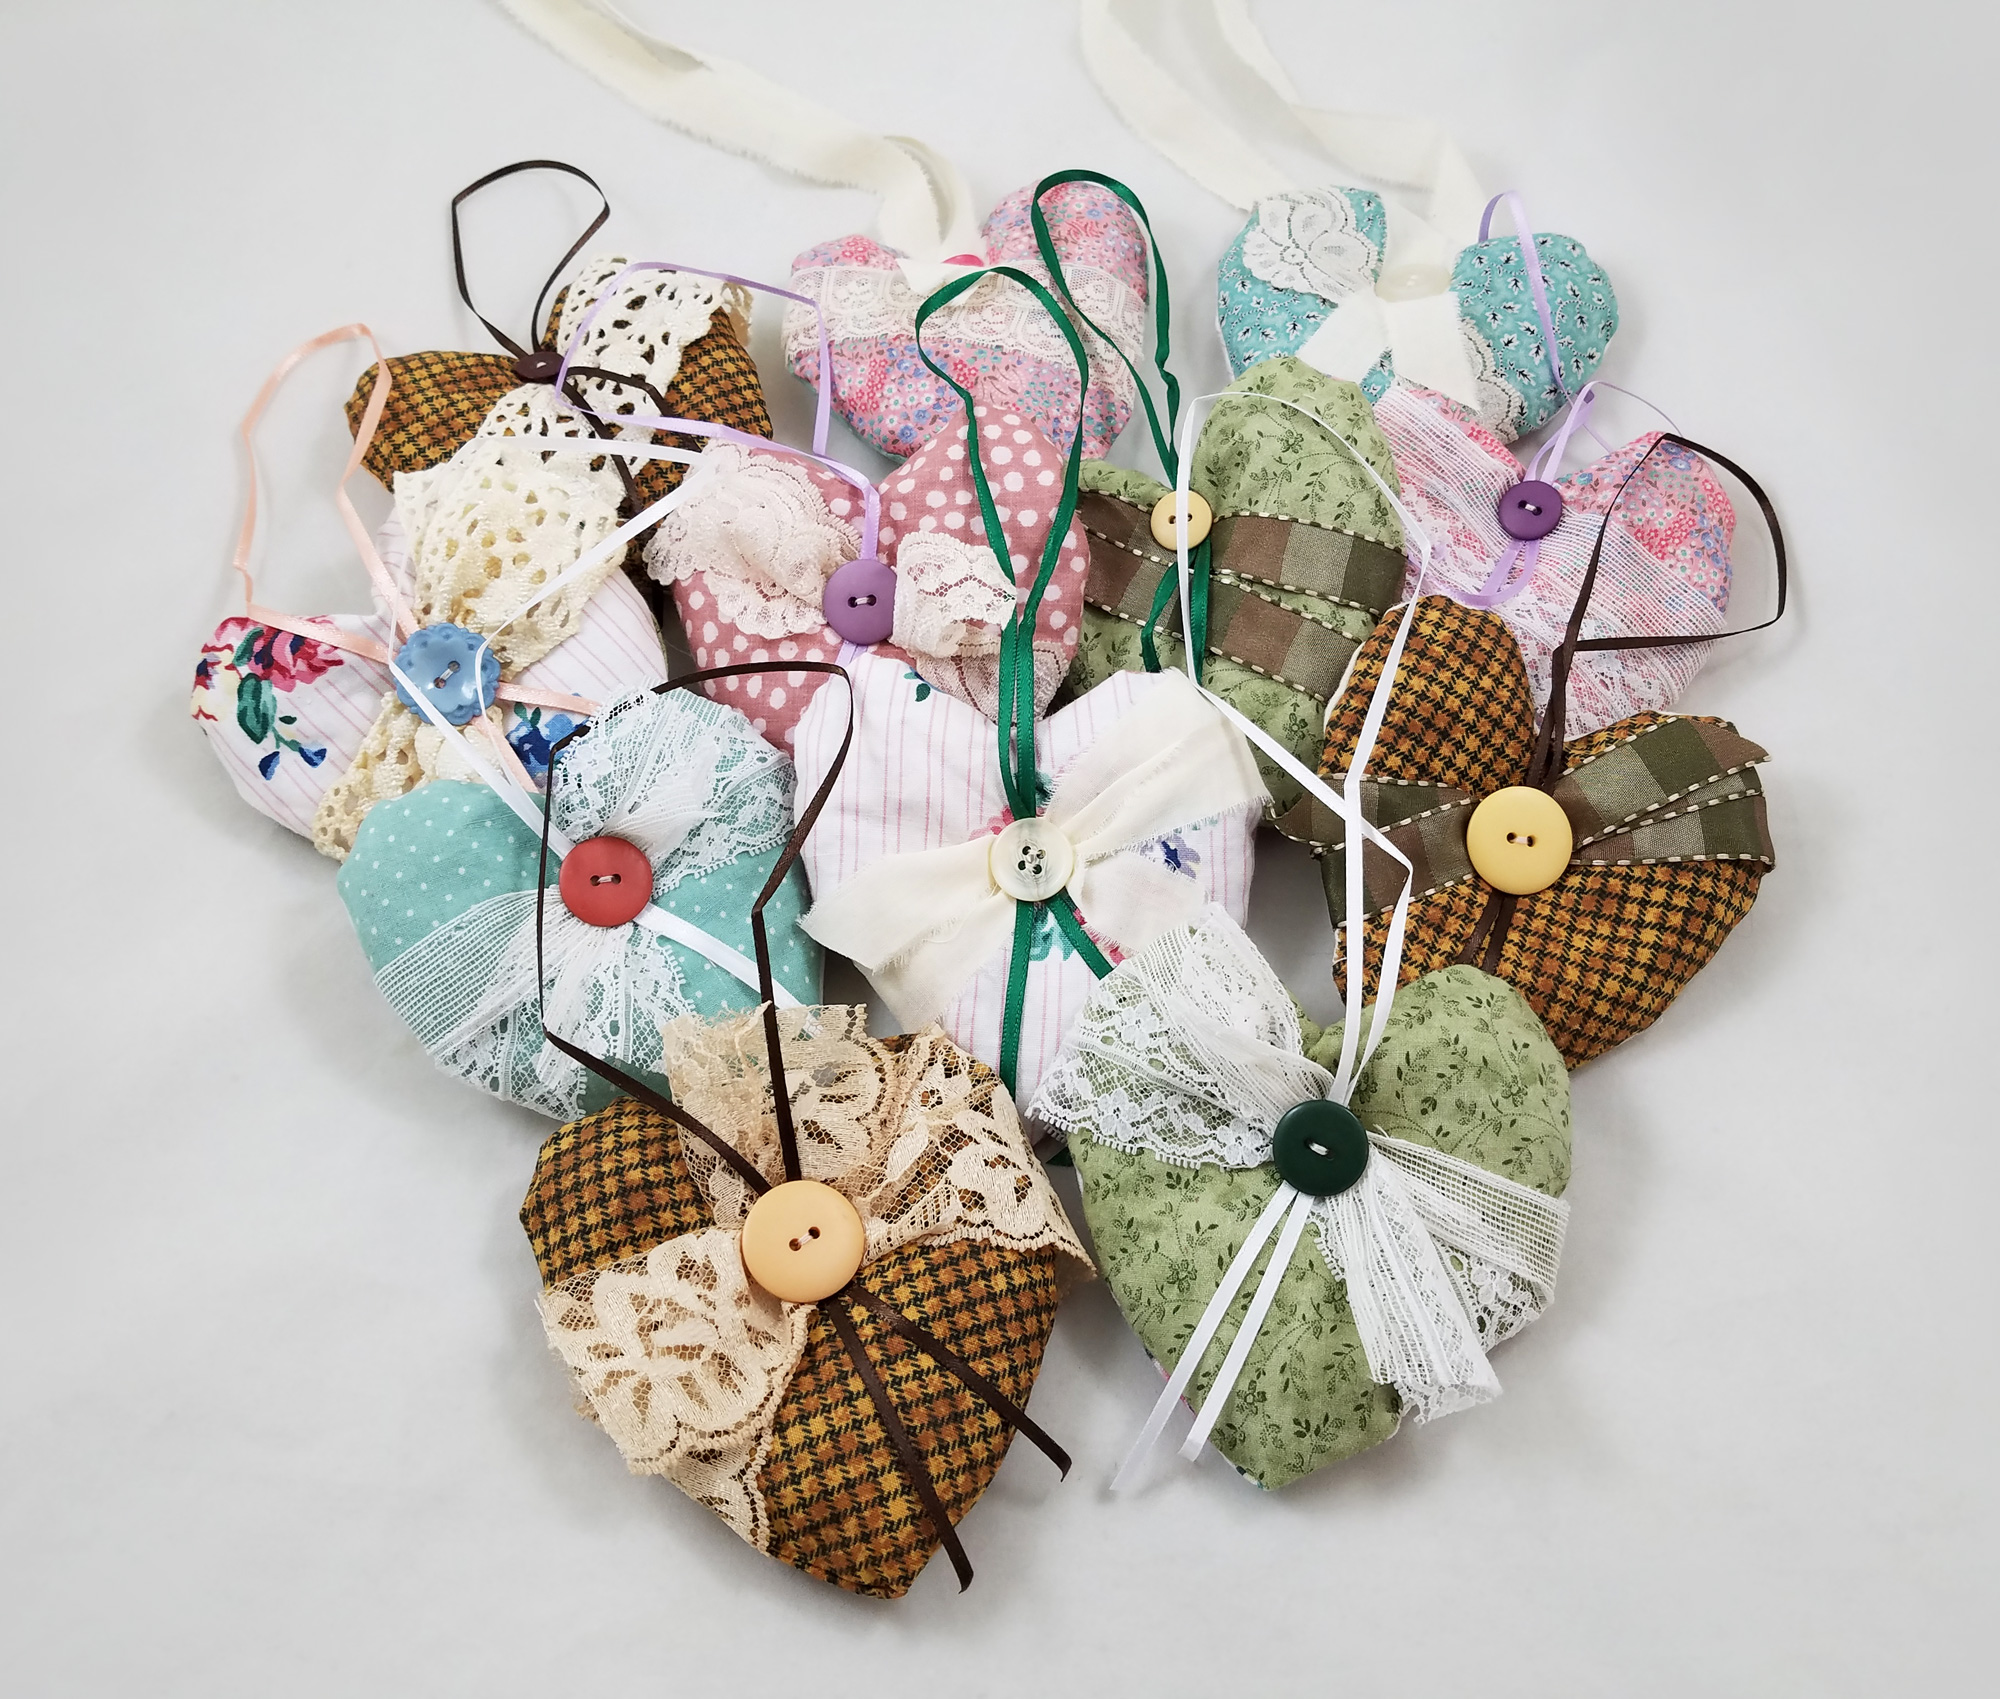
Different lace and trim placements make each sachet a unique piece. Try making sachets in different shapes, sizes and fabrics. Not a fan of cedar? Switch out the cedar for dried rose petals, rosemary or lavender!Happy Holidays and until next time, safe travels!
Day of the Dead Papier-mâché #Cre8time Inspiration
I am a huge fan of Day of the Dead festivals and artwork, even if it is a wee bit ahead of the calendar date! I was inspired to create these pieces after going to Linpeng International Inc./Fiona Accessories to visit with Fiona and Jimmy Lin. They are truly wonderful and talented people with a dedication to creating beautiful hand painted beads, jewelry and beading supplies, and I am grateful for meeting Fiona at the Craft and Hobby Association Trade Show in 2014. At this visit, as usual, we discussed beads and jewelry, went over new ideas and displays, but Jimmy showed me something a bit different this time: little packages of Acrylic flat back gems, normally used for scrapbooking, in a wide variety of colors. He asked me if I could think of any other applications and the first thing that came to mind was covering papier-mâché skulls with the gems for Day of the Dead decor.
Supplies:
Fiona Accessories Acrylic flat back gems Flower and Diamond shaped in sizes 14mm, 19mm, 22 mm and 20x30mm
Mini acrylic flat backed gems (normally for scrapbooking, nail or shoes)
Liquitex Gloss Varnish
Acrylic Paint
Paint Brushes
Papier-mâché mask and skull by Darice and often sold at Michaels late Summer into Fall
Beacon Gem-Tac (Great stuff, non-toxic and flexible)
Sakura Pigma Micron Pen Set (I just love using their pen sets for any illustrations I do)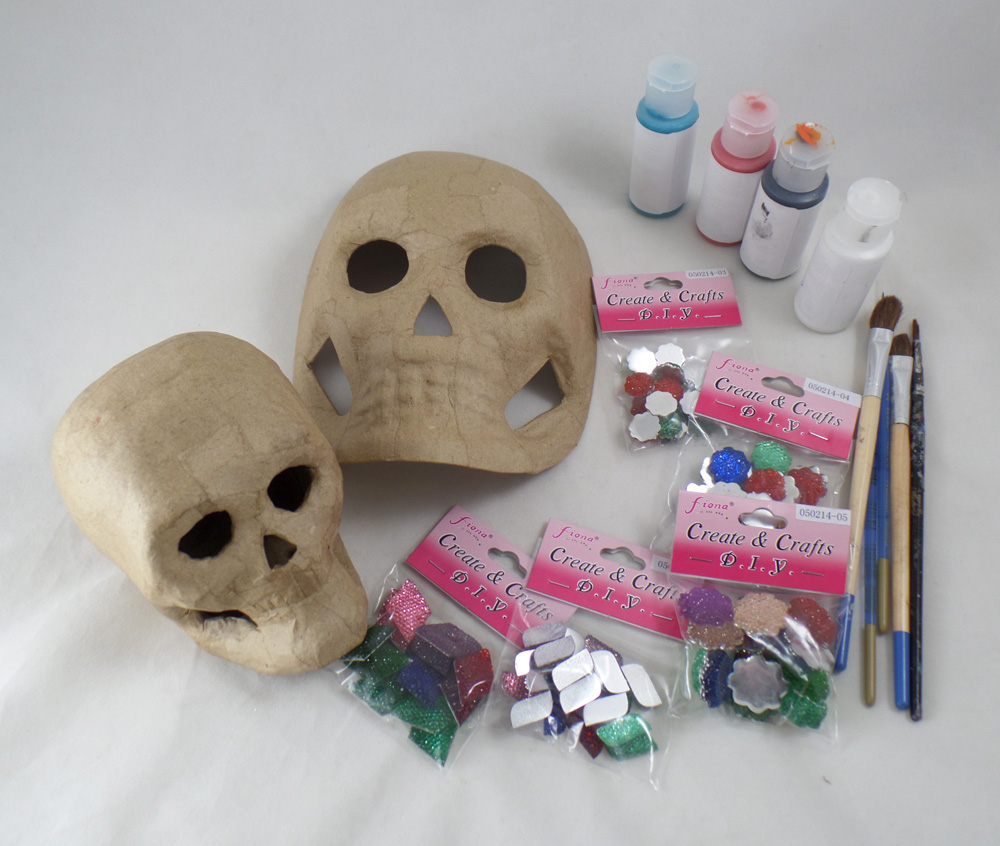
First I gathered all of my supplies, picking colors of paint, acrylic gems, brushes and which papier-mâché pieces I felt would look the best for what I had in mind.
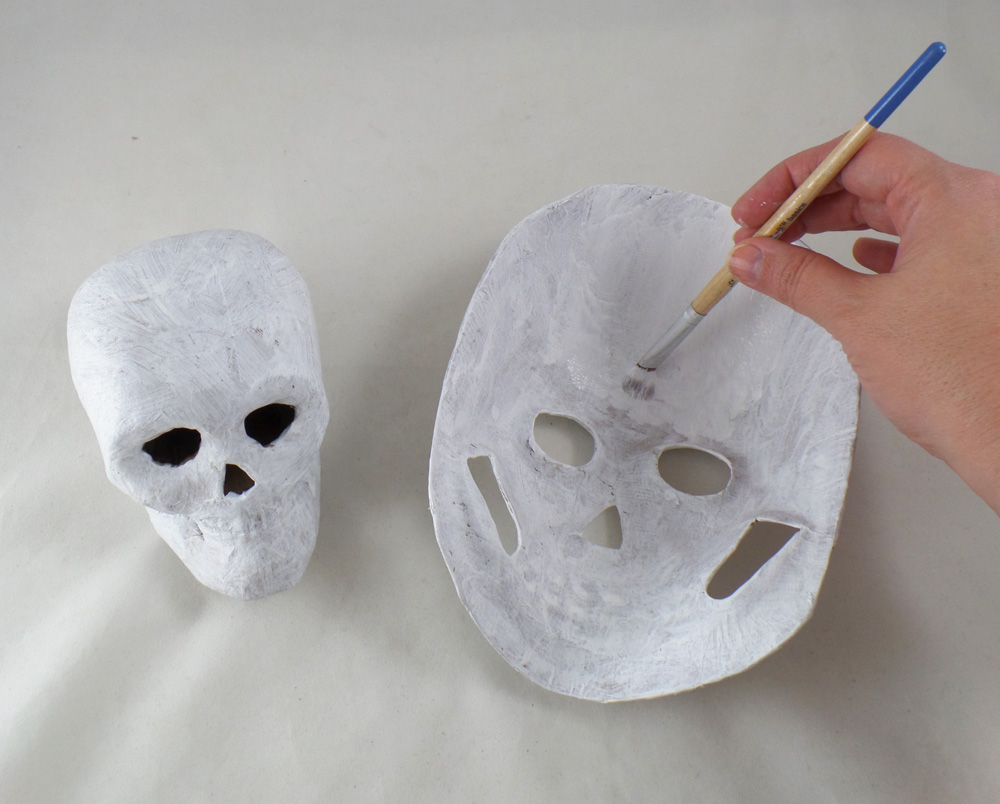
I started by applying white acrylic paint to the entire surface of the papier-mâché skulls. I let each layer of the paint dry completely before adding the next layer to prevent the papier-mâché from getting too wet and losing shape. I noticed that 2-3 coats of paint are normally required to get complete coverage.
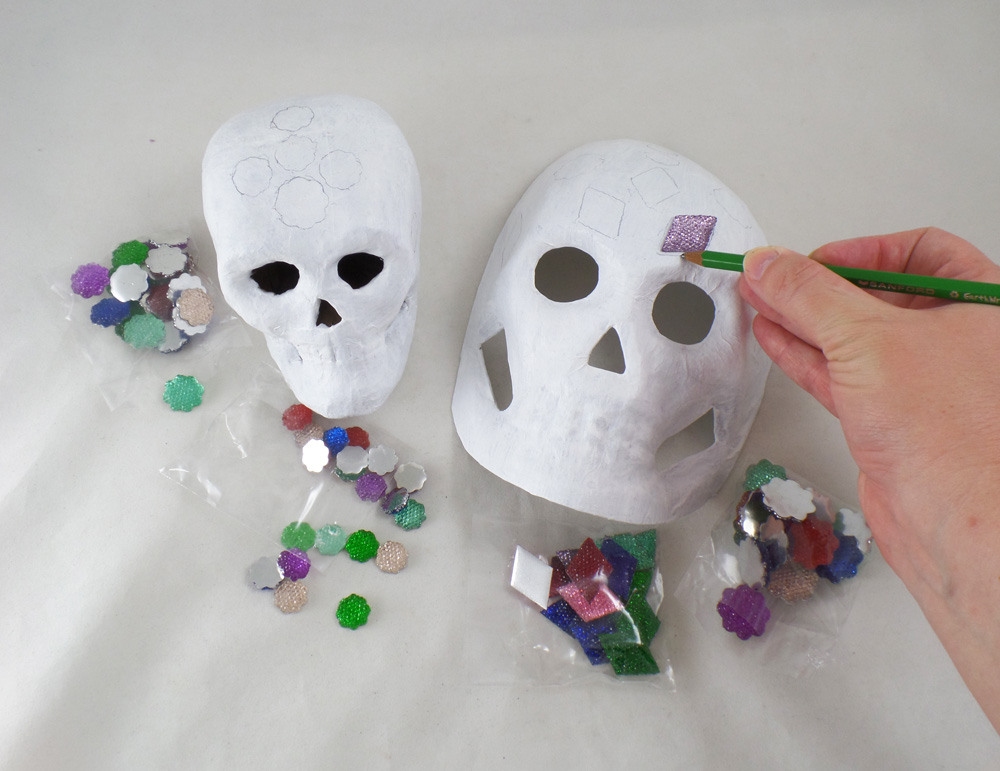
I started to loosely place where I would like the Fiona Accessories Acrylic flat back gems to sit on the papier-mâché and traced outlines in pencil, but I did not glue them on at this point. This would give me outlines to follow and color in with the pens and paint before applying the gems.
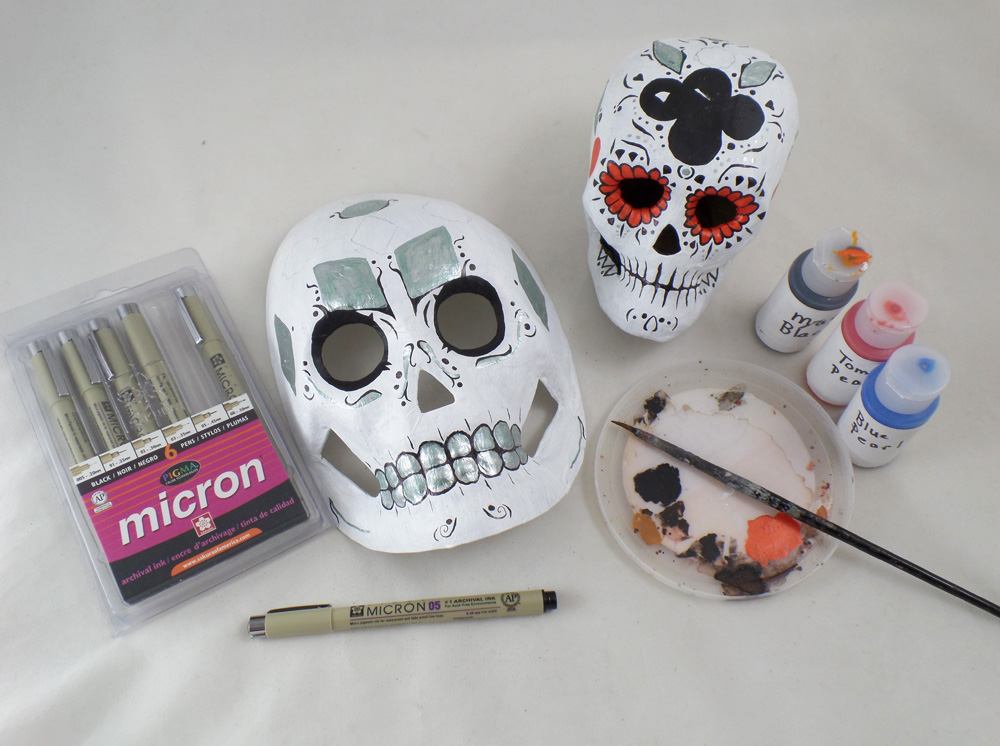
There is no set pattern or design to Day of the Dead masks, as it is a wonderfully free form style of art, allowing the artist to put any variety of shapes, symbols and scroll-work on their pieces. I have a fondness for plant life and organic shapes so I painted flowers, vines and geometric patterns across the pieces in silver, black, red and blue. I outlined key elements with Sakura Pigma Micron pens to make them visually pop more.
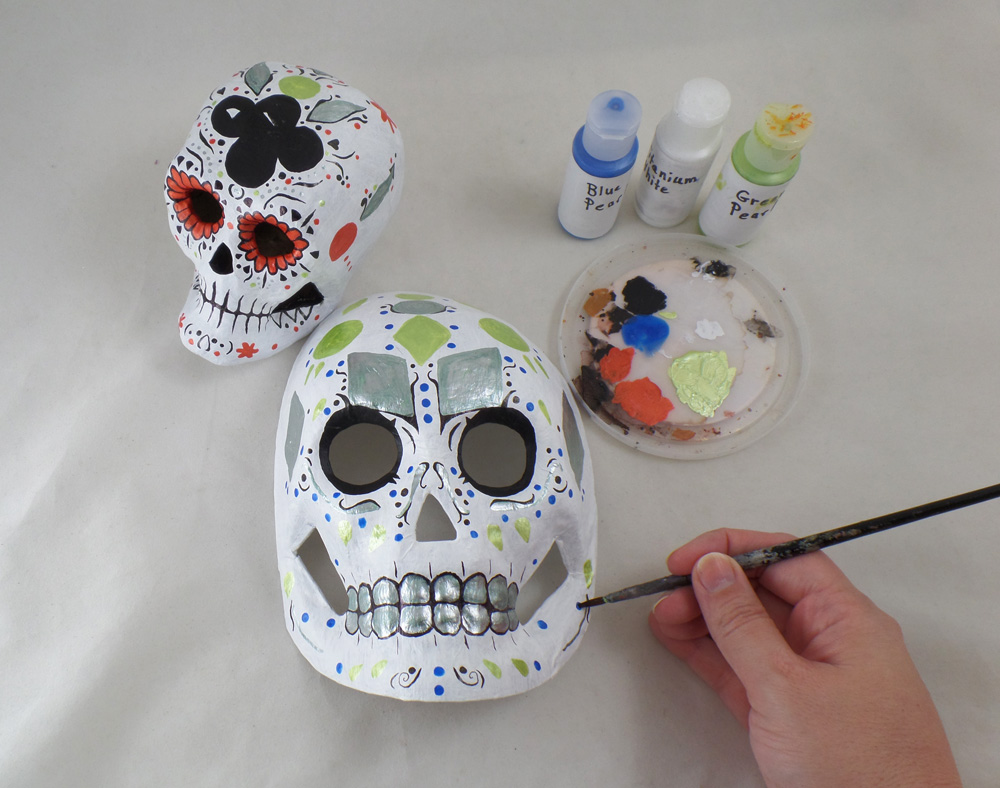
Since I really liked how the silver paint looked I added some leaves and geometric shapes in green pearl paint, along with flowers in red pearl paint. The paint having a slight shimmer would play off the sparkle of the acrylic gems. Applying the paint and drawing with the pens can take some time but I find it rather relaxing and meditative.
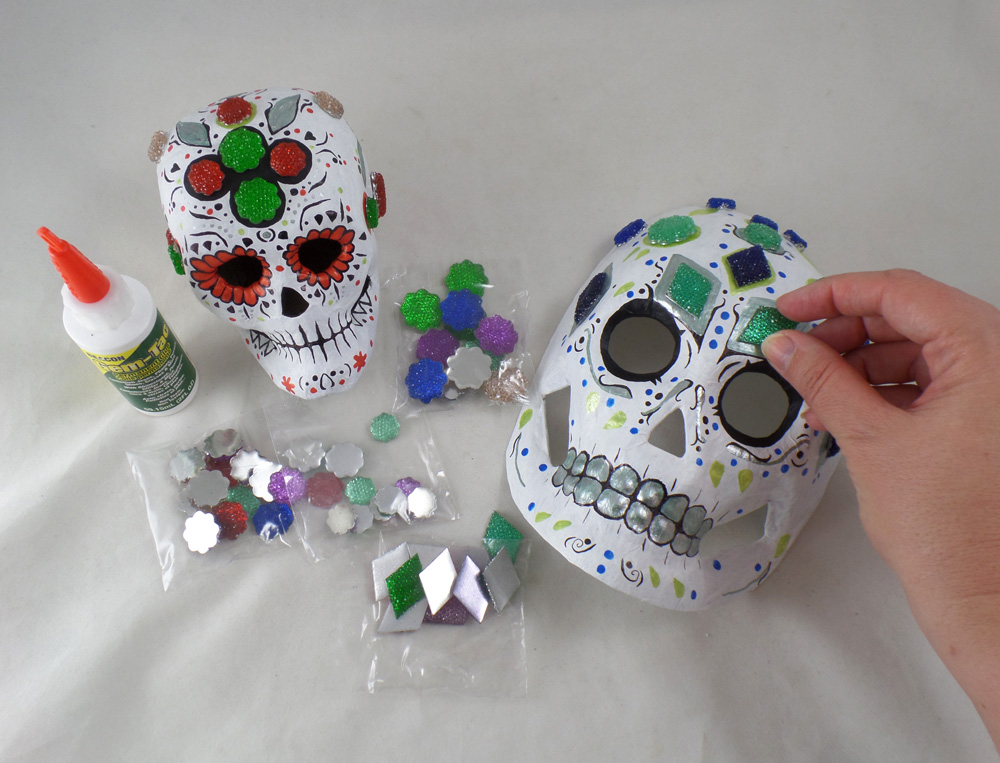
Once the paint was fully dry I applied the Fiona Accessories Acrylic flat back gems to the papier-mâché skulls with Beacon Gem-Tac. A small drop of the Beacon Gem-Tac will go a long way and dry perfectly clear; just holding the gem in place for a few seconds is all that is needed to get the gem to stick to the skulls.
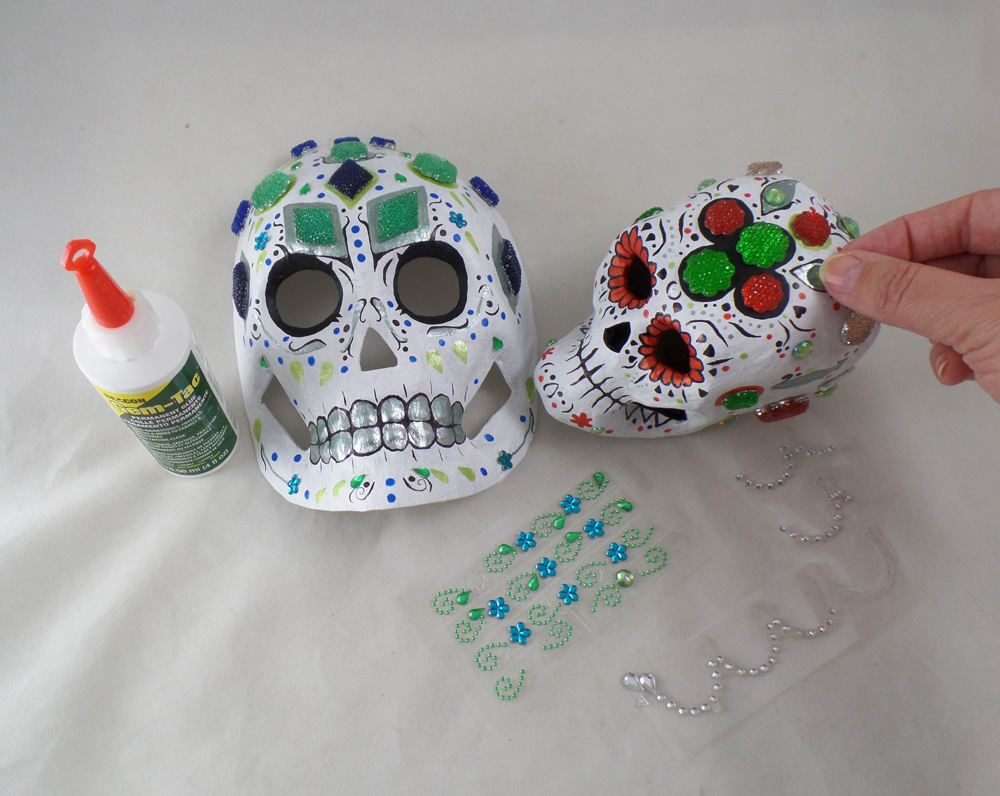
Once all the large acrylic gems were applied to the papier-mâché skulls I filled in the open areas with more paint and pen details, then adding mini acrylic gems with more Beacon Gem-Tac. I let the glue fully dry before going onto the next step.

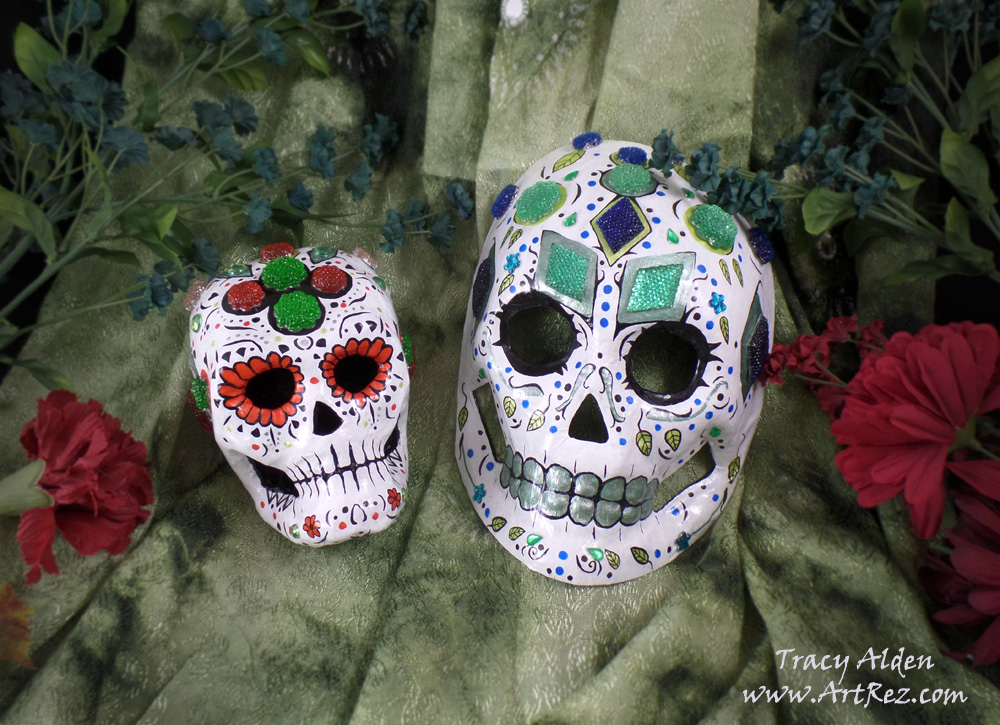
To make sure all of the detail and gems were protected I applied three coats of Liquitex Gloss Varnish to the skulls, letting each layer dry completely before applying the next.
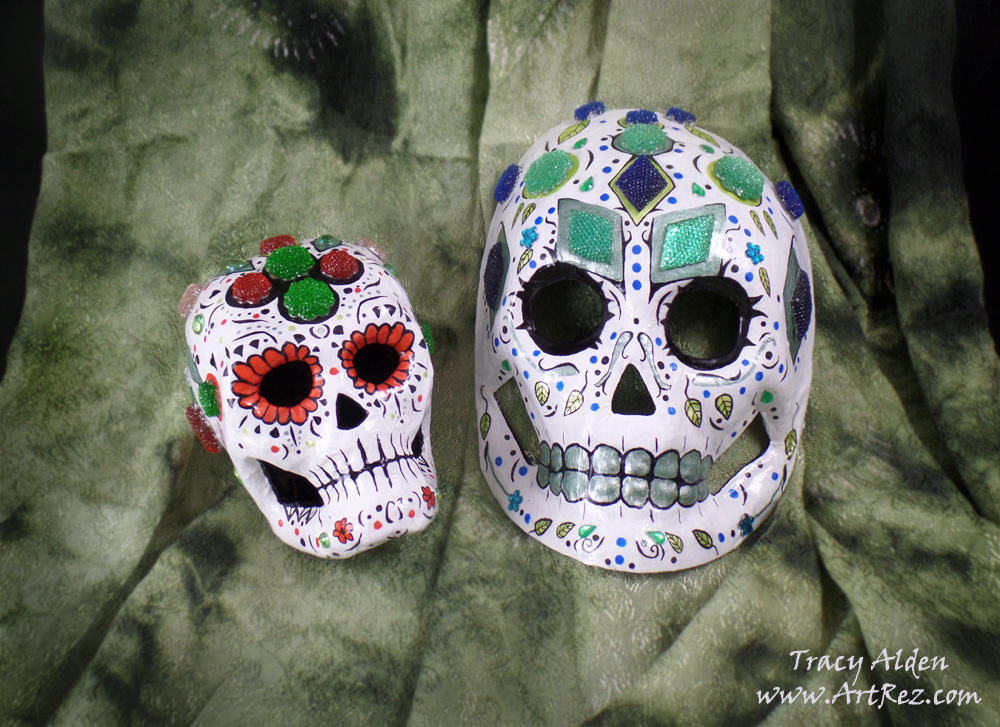
Once the varnish was dry I was able to add them to the rest of my Day of the Dead artwork collection!
Want to share your projects with Fiona Accessories‘s products? Post any projects and ideas on their Facebook Page! 🙂
Until Next Time, Safe Travels!
CHA Winter show 2012 part 1
This year’s winter Craft and Hobby Association show was awesome! While this show was a touch smaller than past Winter CHA shows I can honestly say it was still a great and positive show to attend. There were so many new products, designs, workshops and wonderful contacts; this show sure was a busy one! It was a bit different for me because this was my first time doing demos at the CHA Globecraft Memories booth.
At the last winter CHA in 2011 I had gotten some information about a new company called Globecraft Memories. They had wonderful chipboard frame and globe sets that people could decorate with paper, fabric, paints, stamps or clay and place photos or family treasures inside. I saw one of their globes with a miniature polymer clay baby in it and I felt these would be prefect for my miniature work. I ended up finding out the baby sculpture was from their other company Secrist Dolls, which carries only the best vinyl doll kits, polymer clay doll sculpting tools and doll paints on the market. I left my business card and eagerly awaited the catalog to be sent to me. I ended up being contacted by the owner Mr. Pat Secrist because he had noticed I listed myself as a designer on my business card. They had some openings in their design team and they were looking for some new ideas. We got to talking and I ended up making a few samples for the website. Mr. Secrist then started to get in some new products to expand the line, they sent me and their other designers some to test. I was sent frames to start making samples for the CHA winter show. I was excited to be then asked to demonstrate products at CHA in their booth! Mr. Secrist wanted to show people that the globe kits and frames could be so much more. The idea was to make these frames more than just a card making or a scrapbooking element but something that could appeal to paper crafters, home decor artists and even mixed media artists like myself. The end result was a wonderful line of products designed to make chipboard look like expensive metal wall decor, enameled art and stonework but for fraction of the cost.
I can honestly say I love their new line of products:
New Frame Chipboard Kits: A new line of frames and elements for all interests. Be it for scrapbooking, papercrafting, home decor or mixed media they have styles and elements you will love. They also have a line of Steampunk Airships that are just too cute, which come in Large, Medium and Mini. The chipboard elements before assembling can be put through an embossing machine like Sizzix or Cuttlebug for more texture and detail.
Piccolo Chipboard Elements: Both as mini chipboard elements to be used on frames, paper or card these wonderful little patterns and shapes come in so many styles. From Steampunk gears, birds, cats, swirls, butterflies to delicate corner elements. They also have Toppers that are small tags and elements that would be wonderful for cards, scrapbooks and mixed media art.
Glastique – Flexible Finishing Glaze: comes in Gloss and Matte. This is water based and non-toxic. It can be applied to chipboard, fabric, paper, glitter, paint, it can act as a glue and a clear glaze. In fact, when coated on pieces of chipboard that has been coated in embossing powder it makes the chipboard flexible! I have even put thick layers of the Glastique on rubbers stamps; once dried and peeled off the stamp, I have a clear flexible piece to be added to mixed media work or paper crafting.
Halo Glitter: comes in Gold and Silver. A wonderful fine glitter with several different sized particles for a more reflective effect. Layer it with Glastique and you have gorgeous color reflection.
Mica Powders: They carry so many colors I can’t list them all! Super fine mica powder for all you craft needs, from paper crafting, resin work to even polymer clay. They add no binders to the mica so there is no worries about odd chemical reactions like other products on the market. Layer it with Glastique to get a dichroic glass effect.
Mica Powders with Glitter: Super fine powder and glitter in vibrant colors. Stunning selection of colors for so many uses.
Super pigment rich acrylic paint and glazes: While this is a slightly more expensive paint than your standard craft store bottle paint it is well worth the cost. Their colors are luscious, they dry the same color they are when wet, their metallic paints only need one coat for full coverage and the glazes are just stunning on paper or wood.
Globecraft Memories Enamel powders: These powders are specially designed to cover larger areas such as the chipboard frames Globecraft Memories is known for. The nice thing is the powders still look wonderful on detail elements such as their Piccolos. I love these powders but then again I am a bit partial to them. I ended up making a portion of the new recipes of enamel powders for Globecraft Memories and one of my colors, Girls Night Out ended up being their 3rd best seller at the Winter CHA! These wonderful colors can mimic stone, metal, natural elements and aged surfaces. In fact these powders worked did it so well for the first two days of CHA people walked past the Globecraft Memories booth thinking they were selling real metal and wood frames, not coated chipboard! A sign had to be placed in front to tell everyone everything in the booth was chipboard. 😛
The following is the few photos I was able to take while doing demos at CHA.

Mr. Pat Secrist the owner of Globecraft Memories.

Some of the wall displays in the Globecraft Memories booth, the music sheet, solar, ambers and 4 globe sayings frames are my work.

The flower bouquet and apple basket sets are based on my illustrations and the samples shown are my completed work.

Part of the Globecraft Memories booth at the CHA winter show.

A close up of the sea frame set made into a mirror wall hanging.

Some of my completed airships hanging from the booth. Some of the Piccolo chipboard element packs are on the right.

Close up of one of the completed airships.
The following photos are some the prototype photos I took while making the samples for the show. You will notice in some of the photos the globes are not attached because it is easier to ship without the globes in place. If you would like to see more prototype photos check out my Facebook fan page. All of the frames are from Globecraft Memories.

My music frame that was picked as a booth sample. Classic Grand Rectangle backplate with other chipboard elements and Glastique Flexible Finishing Glaze Matte.

Prototype photo of my version of the seascape frame that was picked as a booth sample. This was before the mirrors replaced the globes for the final sample. Frame is covered in my enamel powder recipes. Seascape Wall Decor Kit.

A saying frame set that was picked as a booth sample. Inner frames are covered in my enamel powder recipes “Mardi Gras” and “24 K gold”. Little Fancy Rectangle, chipboard elements and Glastique Flexible Finishing Glaze.

Vintage airship that was picked as a booth sample. I used the Large Airship and chipboard elements.

Mini airship that was picked as a booth sample. This is a finished piece I used the Mini Airship, the pigment rich paints and Glastique Flexible Finishing Glaze.

Vintage airship that was picked as a booth sample. This is a finished piece. Mini Airship kit, enameling powder and paint.

Apple frame set that is based on my illustration. This version was picked as a booth sample. This is the Apples of My Eye Wall Decor Kit.

Birdcage piccolo that was picked as a booth sample. The globe is not attached in this photo because it is easier to ship without the globe in place. Classic Fancy Oval and Piccolo chipboard elements.

Dino amber frame that was picked as a booth sample. Frame is covered in my enamel powder recipe “Brown Stone”. I used the Classic Grand Rectangle backplate.

Museum frame, this is the first version. I put the label inside the frame and that version was picked as a booth sample. Frame is covered in my enamel powder recipe “Vintage Copper”. I used the Classic Grand Rectangle backplate with Piccolo chipboard elements and Glastique Flexible Finishing Glaze.

Flower frame set loosely based on a illustration of mine. This version was picked as a booth sample. Frame is covered in my enamel powder recipes. Big Bouquet Wall Decor Kit.
Until next time safe travels!

Ancient and Contemporary Inspired Artistry