#Cre8time Jewelry Creations Inspired by Art History

Hello! With Spring in full swing I have been cleaning the plethora of crafting supplies I seem to always have. While I destash I can’t help but notice I seem to add to the collection without noticing! So this time I set myself the goal of using my more coveted supplies to create jewelry on a more regular basis. Today I wanted to show with you some of those jewelry creations inspired by Art History.
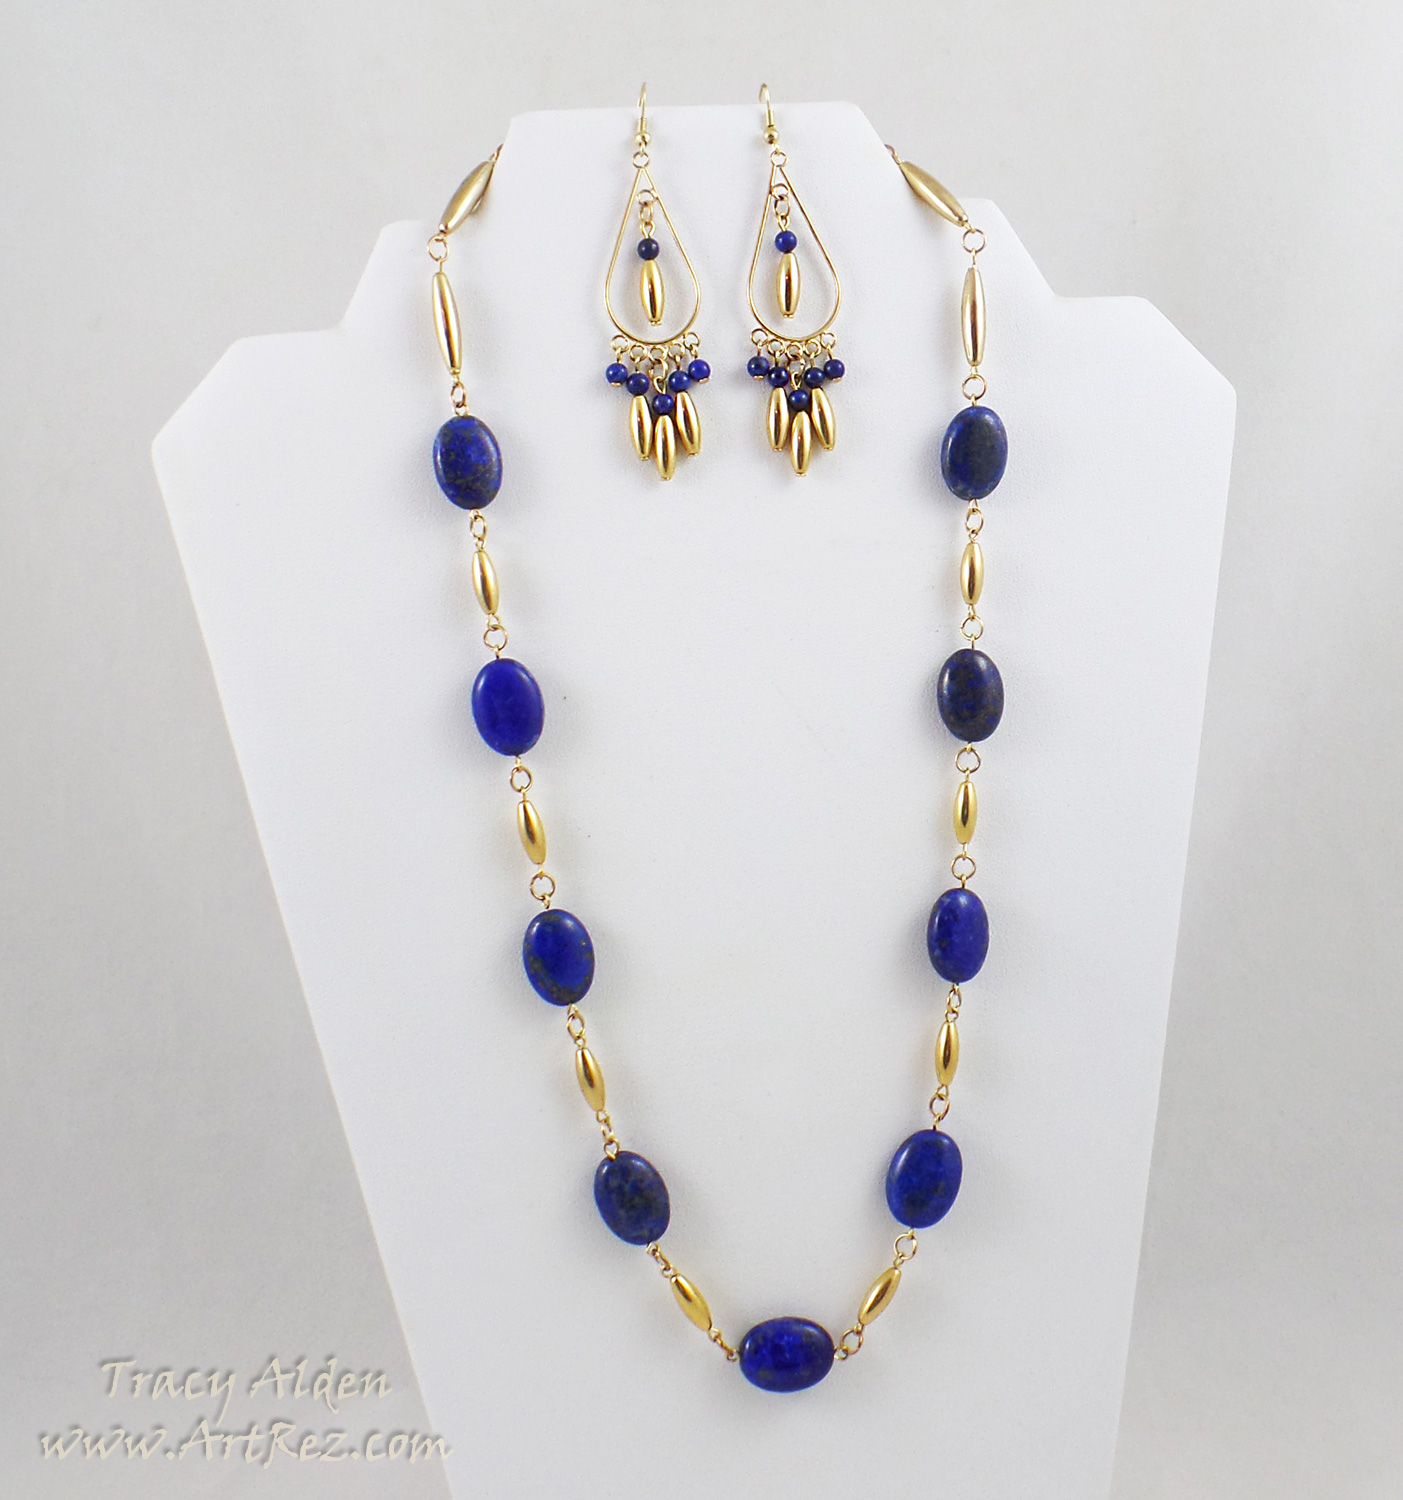
“Imhotep’s Gift”, vintage gold plated beads, Lapis Lazuli beads and vintage gold plated findings.
I have a serious love of Lapis Lazuli; the tiny highlights of naturally occurring Iron Pyrite always gives it a wonderful sparkle. Taking my inspiration from ancient Egypt, a matching set of chandler earrings and necklace was born.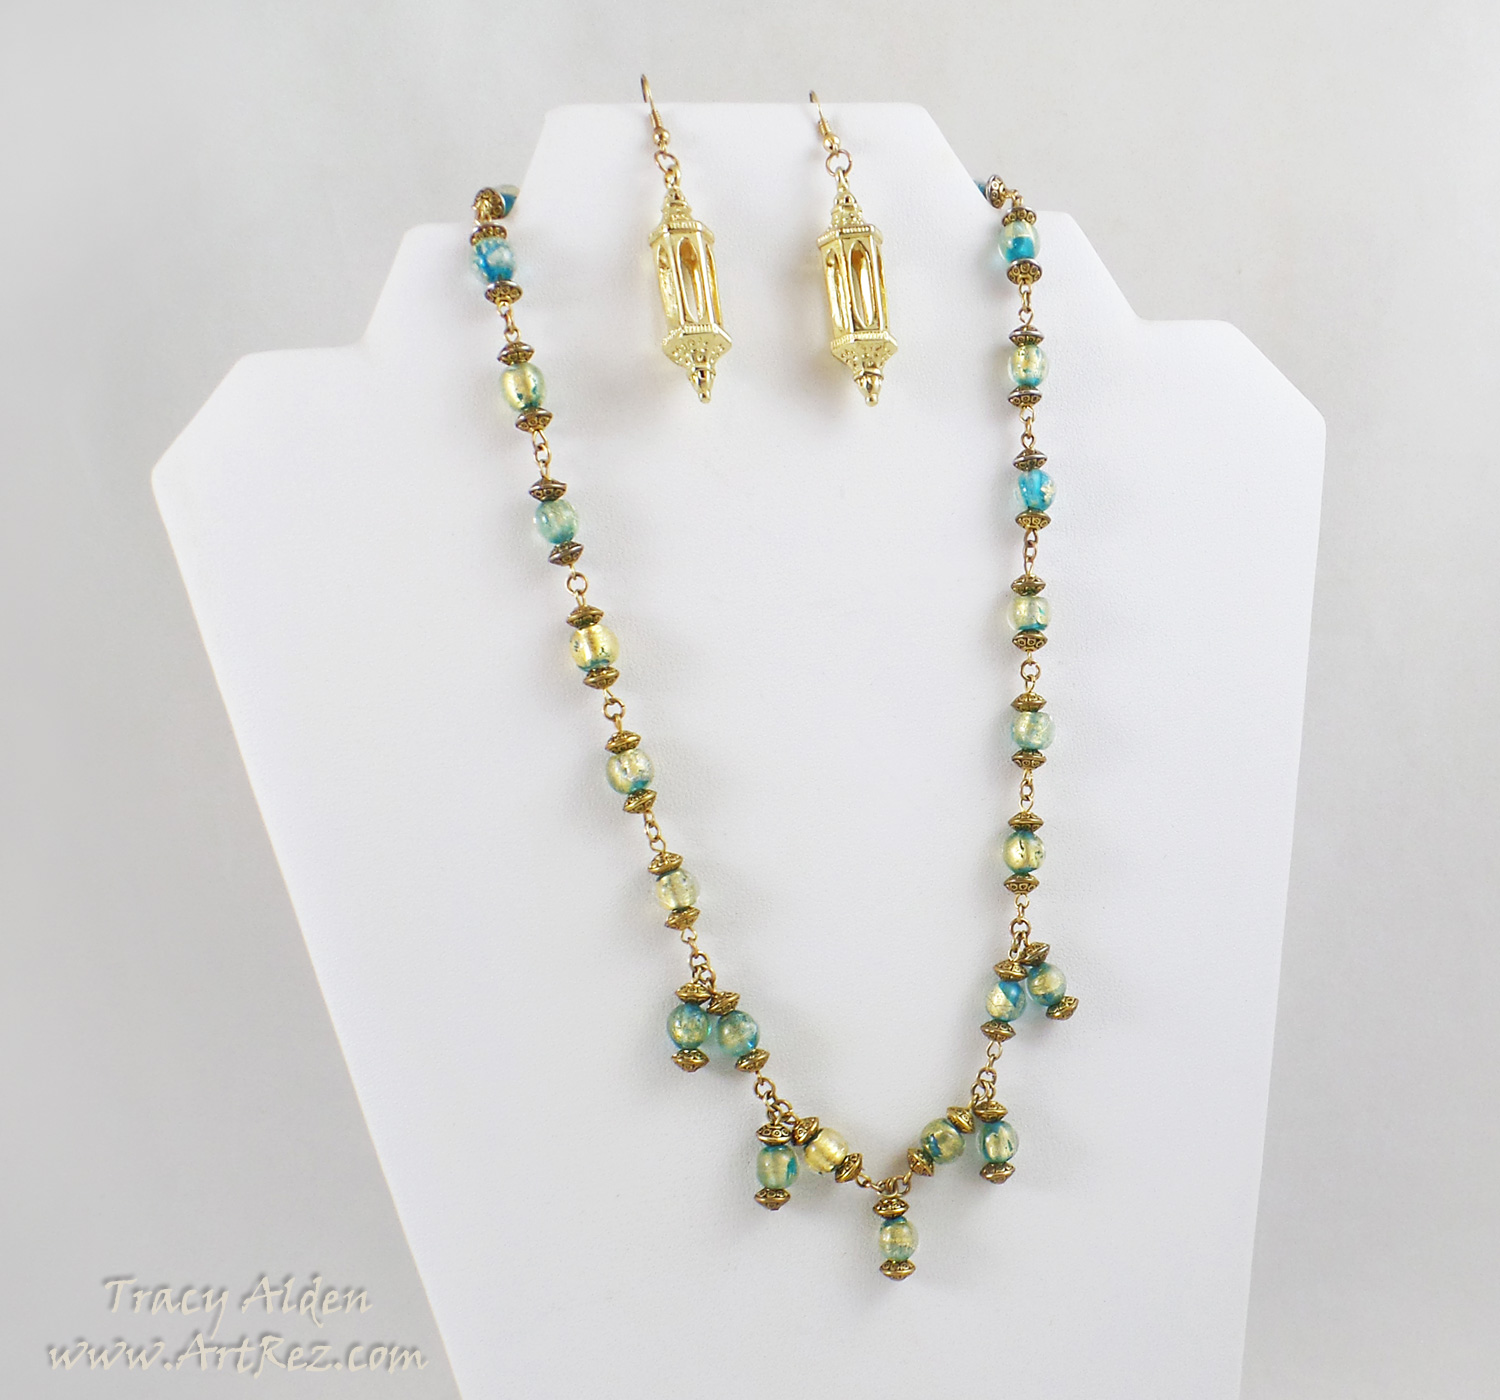
“Roman villa”, gold foil and turquoise colored lamp-worked beads, Bead Gallery® gold rondelle beads, vintage gold plated findings and Blue Moon Beads® gold lantern focals from JoAnns.
The gold foil lamp-worked beads immediately reminded me of how ancient Roman glass looks when unearthed at archaeology digs. Using surviving Roman necklaces as a guide I used a link and drop design to create this necklace. I felt using the same beads would look a bit much for earrings so I went with lantern focal drops instead.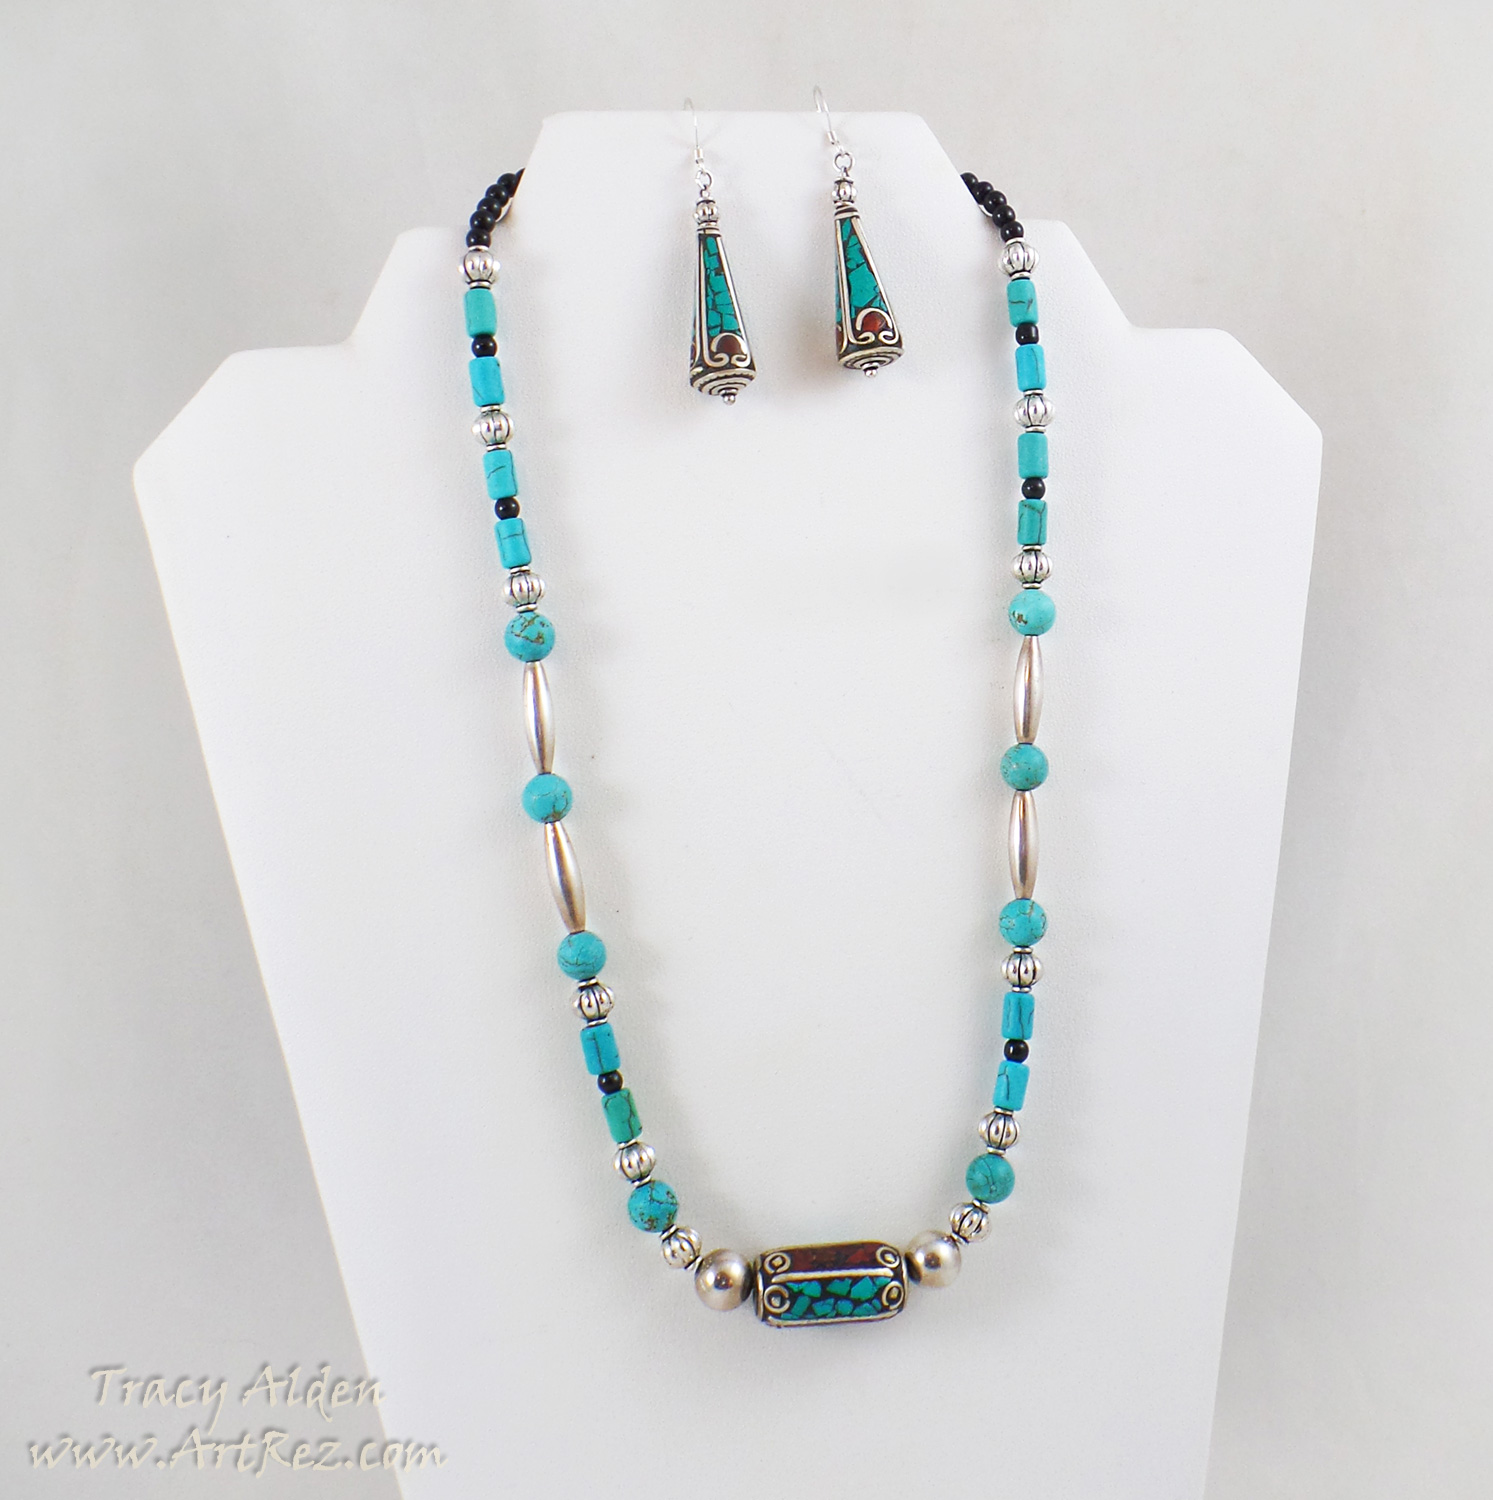
“Nepal Spring”, Sterling Silver Fair Trade beads from Nepal, vintage Sterling Silver spacer beads, Fiona Accessories black glass beads, Bead Gallery® turquoise tone Magnesite beads and vintage Sterling Silver findings.
I had bought the Nepal Fair Trade beads some years ago but could never think of what to do with them. I realized putting all the beads on one strand would be too heavy, so using only one bead as my focal I created a simple but stylish layout. The two additional beads from Nepal had their intricate details highlighted as earrings.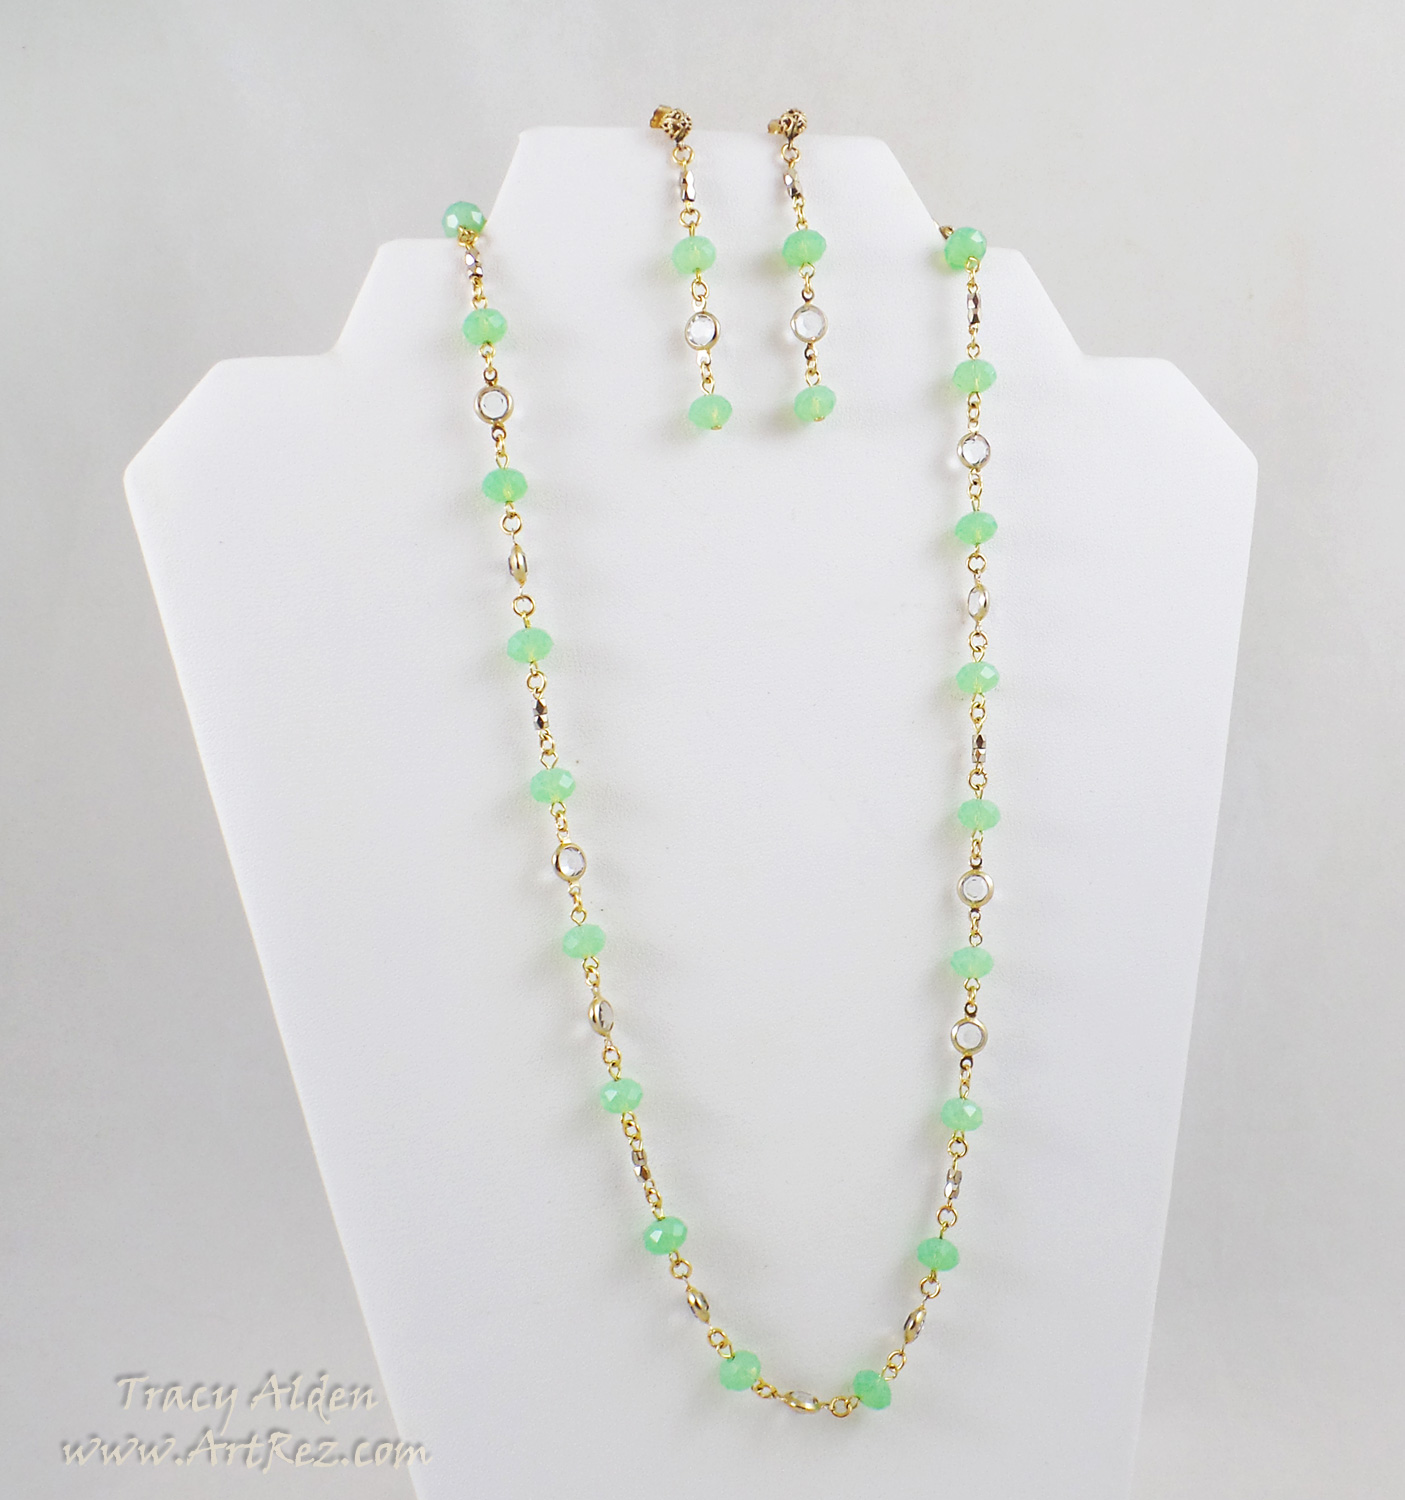
“Uranium Ball”, Neon green crystal beads (a discontinued line of crystals from Bead Gallery®?), vintage crystal and gold plated links, vintage gold plated spacer beads and vintage gold plated findings.
Once again the beads were my starting point of the design, the odd, almost glowing hue of the crystal beads made me think of Uranium glass. Uranium glass (also known as Vaseline glass), was glass tinted with Uranium to striking tones of green, was made into tableware and household items in the 1800 and early 1900s. Taking inspiration from the jewelry styles of the 1910-20s I created this set using mostly broken vintage jewelry pieces I have collected over the years.What type of wearable art could you create with a Spring destash of supplies?
Until Next Time, Safe Travels!
Faux Ancient Egyptian Pendants

One of my favorite pastimes is to go visit museums and flip through books with ancient jewelry collections. The ingenuity, craftsmanship and raw talent in ancient work is a true inspiration.
One of those ancient testaments to ingenuity is Ancient Egyptian Faience, known as the world’s oldest known form of glazed ceramic and a precursor to the earliest forms of glass making. While it shares the name faience with the tin-glazed pottery associated with Faenza in northern Italy, it is not true faience. Ancient Egyptian Faience is not made of clay at all but type of frit, a mixture of sand, quartz, silica, calcite lime and a mixture of alkalis. To the ancient Egyptians, it was known was known as “tjehnet” which means brilliant or dazzling. Often crafted into beads, pendants, figures, tiles and other small objects, using push molds or sculpted by hand, then heated to create lovely glazed pieces of art. It was used as a imitation of semi precious stones, such as lapis lazuli and turquoise, though many colors could be achieved by changing some of the ingredients of the frit mixture.
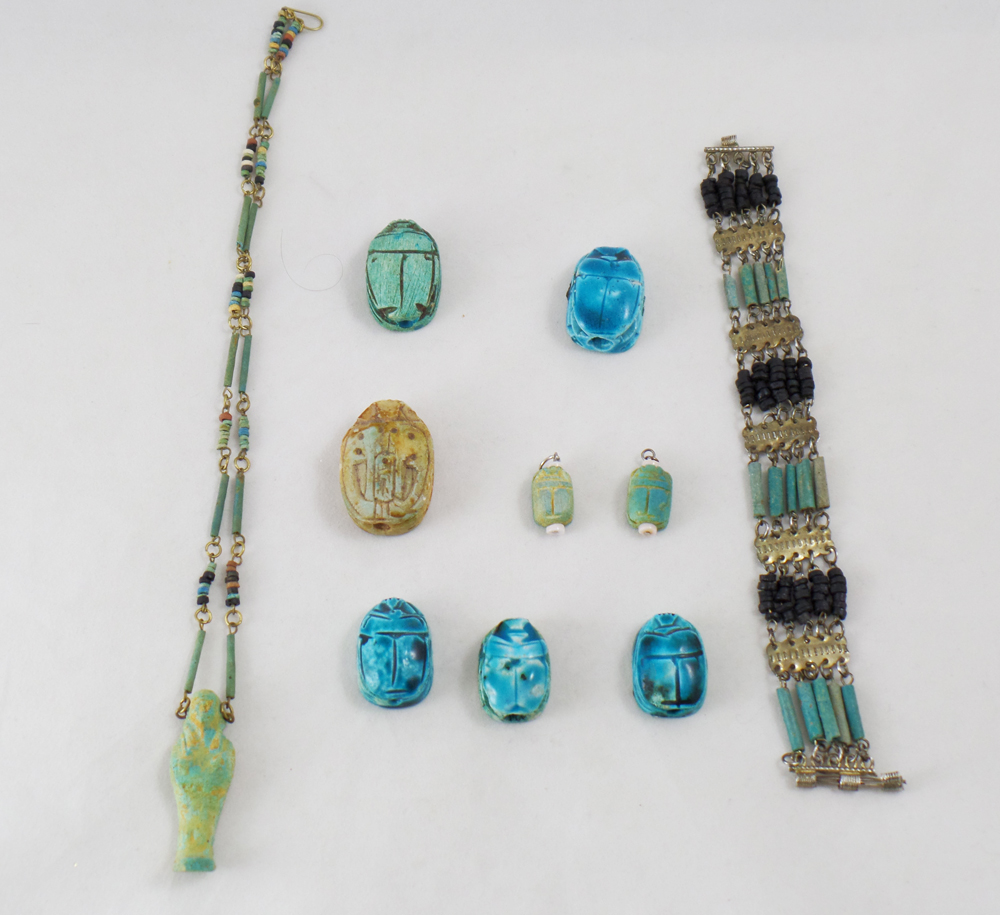
I wondered, how I could make something that looked like Ancient Egyptian Faience but without the need of a kiln? Using real Egyptian Faience as my model, such as those in the above photo, gave me a good idea of what colors and textures I wanted to match. While it is very easy to create the shapes out of any number of air dry and oven bake clays, the glazed appearance of much of the Ancient Egyptian Faience was going to be tricky. I got to thinking how Amazing Casting Products’s Amazing Clear Cast Resin on top of polymer clay could appear like a glaze and more akin to the lovely ancient work.
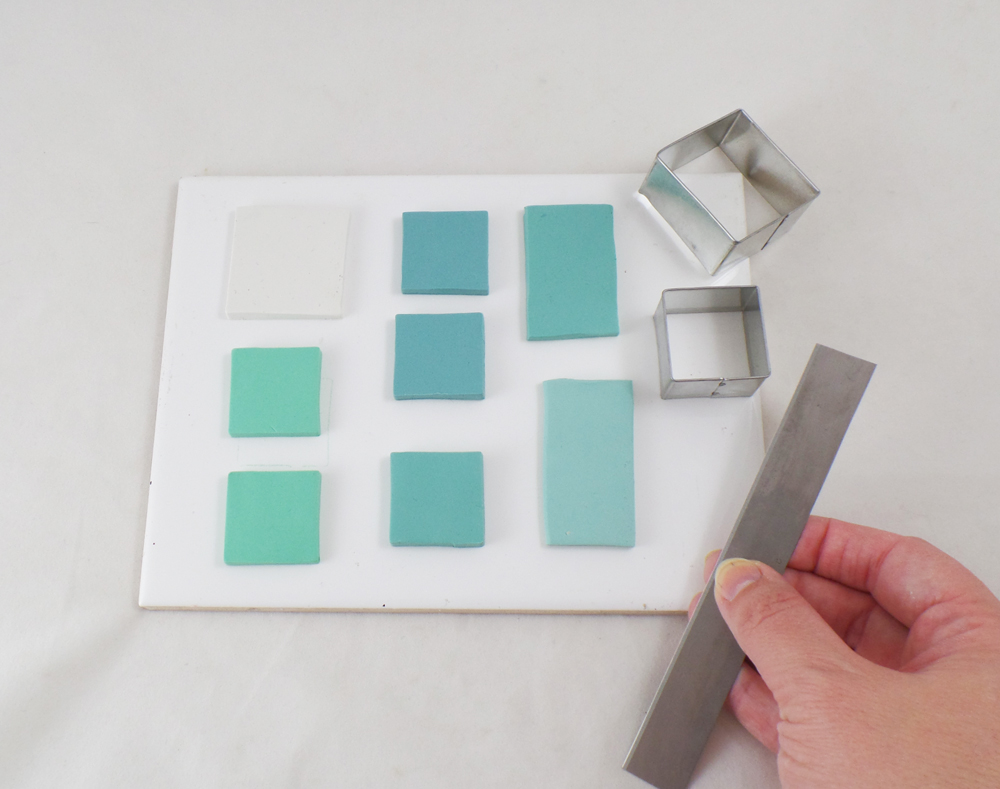
I started with conditioned polymer clay, in the color tones of blues and greens, betting that a base color of those hues would give me the best results. I also conditioned a piece of white polymer clay as a color test. I then cut all pieces into sizes and shapes good for pendents.
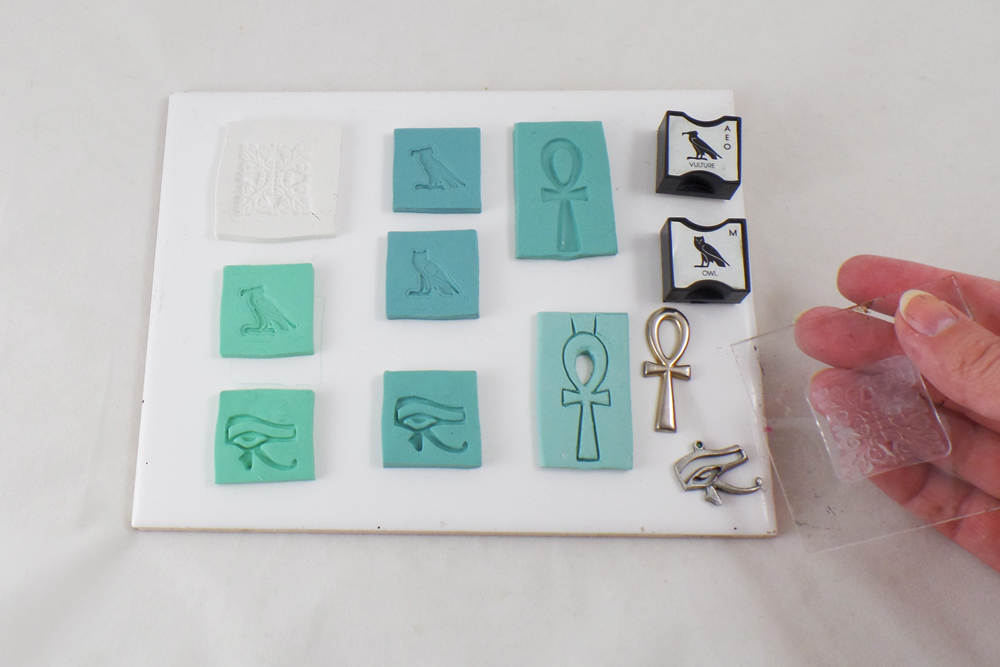
I went through my collection of stamps and charms, picking ones that were Egyptian themed. I sprayed the object to be pressed in the clay with water to act as a stamp release from the clay and pressed firmly into the clay.
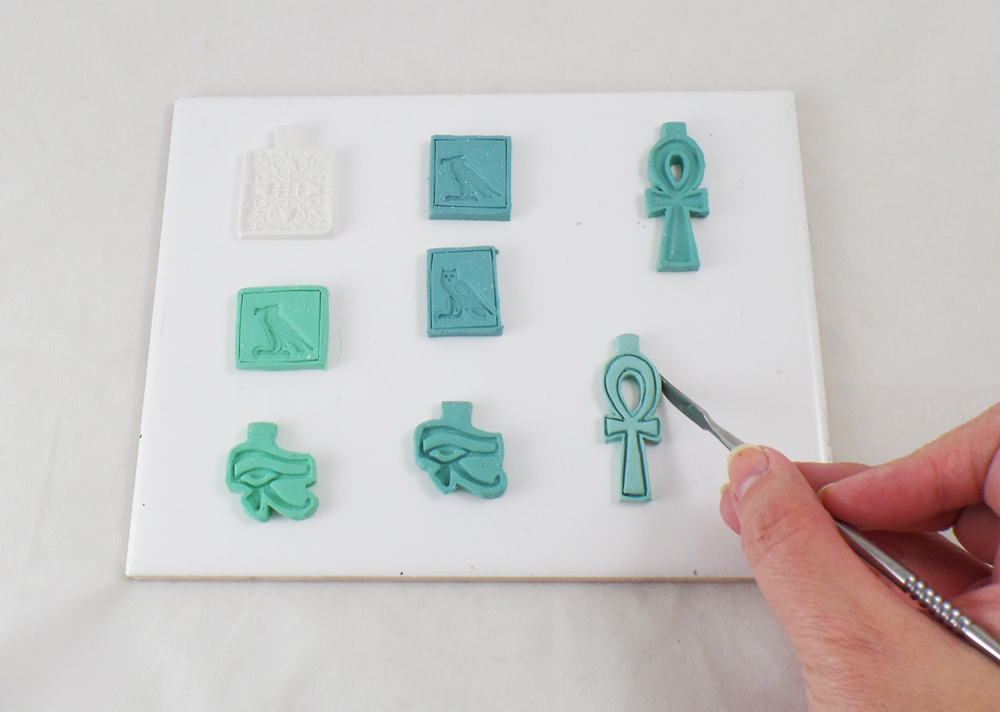
I trimmed the pieces of clay close to the stamped images, smoothing edges and defining details of the stamped images.
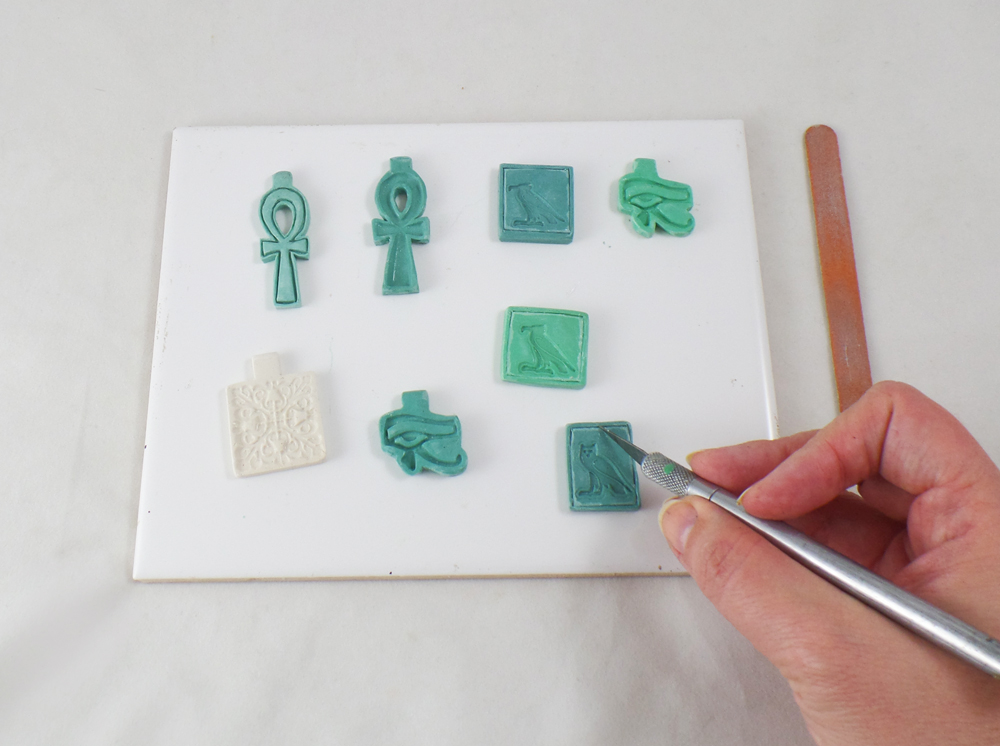
After curing the polymer clay by manufacturer’s instructions, and once the pieces were cool, I trimmed off any rough edges on the clay pieces with a craft knife.
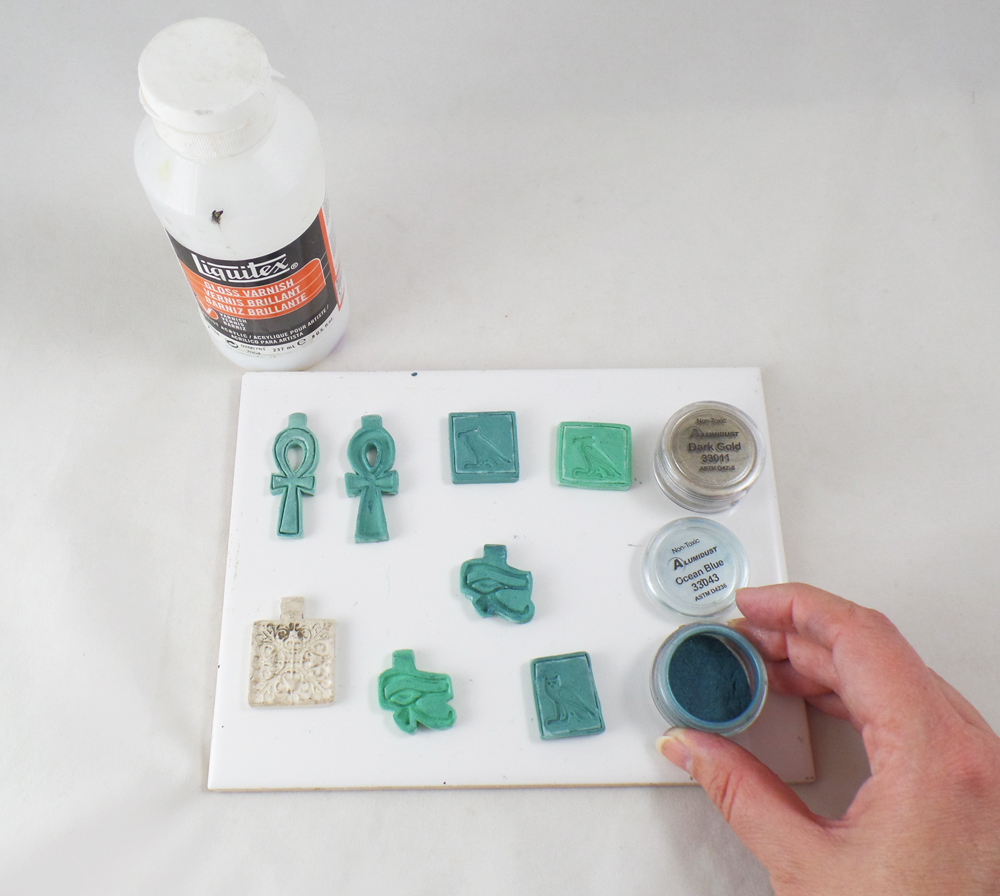
I applied a thin layer of Liquitex Gloss Varnish to all of the pieces and before they dried rubbed on a light layer of Alumidust.
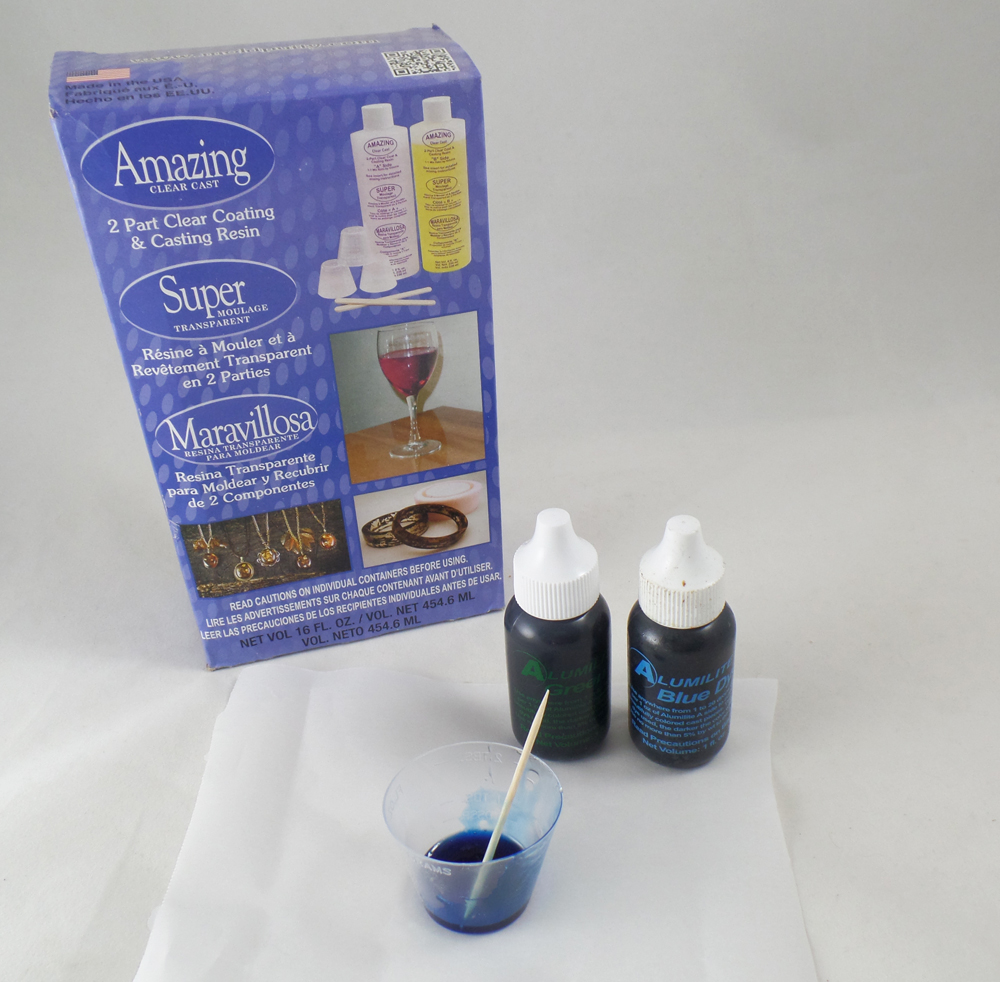
I mixed a very small amount of blue and green Alumilite Dyes with Amazing Clear Cast Resin, making sure to fully stir the dyes into the resin and let it sit for 10 minutes.
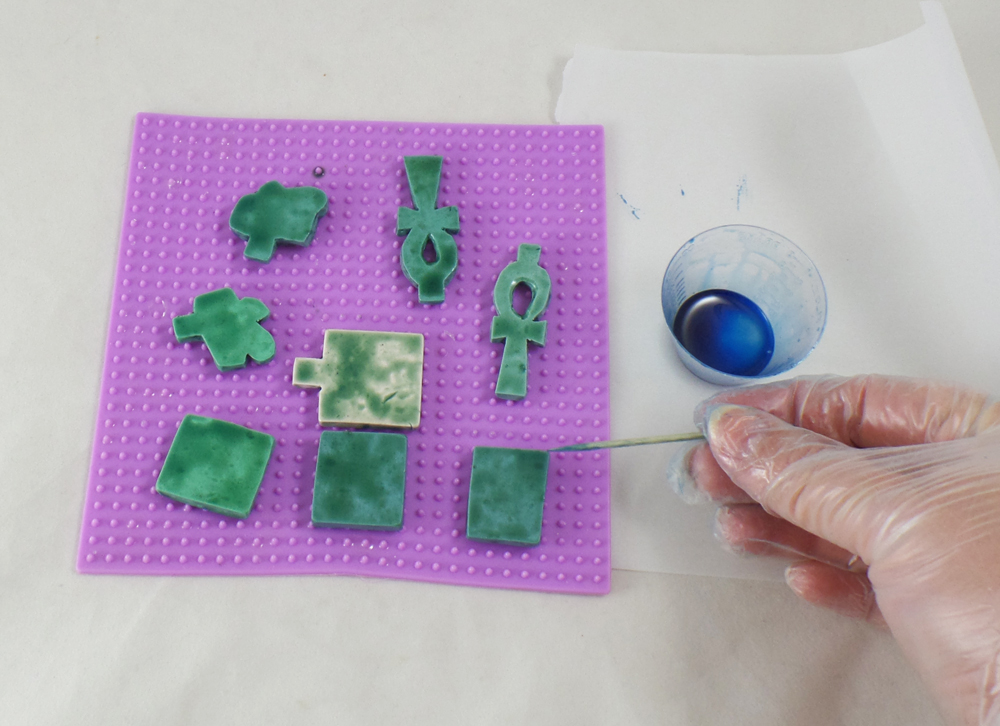
By letting the resin sit for 10 minutes, the resin will be thicker and stick more to the polymer clay pieces. I carefully applied the resin to the back and sides of the pendants with a toothpick first and let them cure completely, as per manufacture instructions, before moving onto the next step.
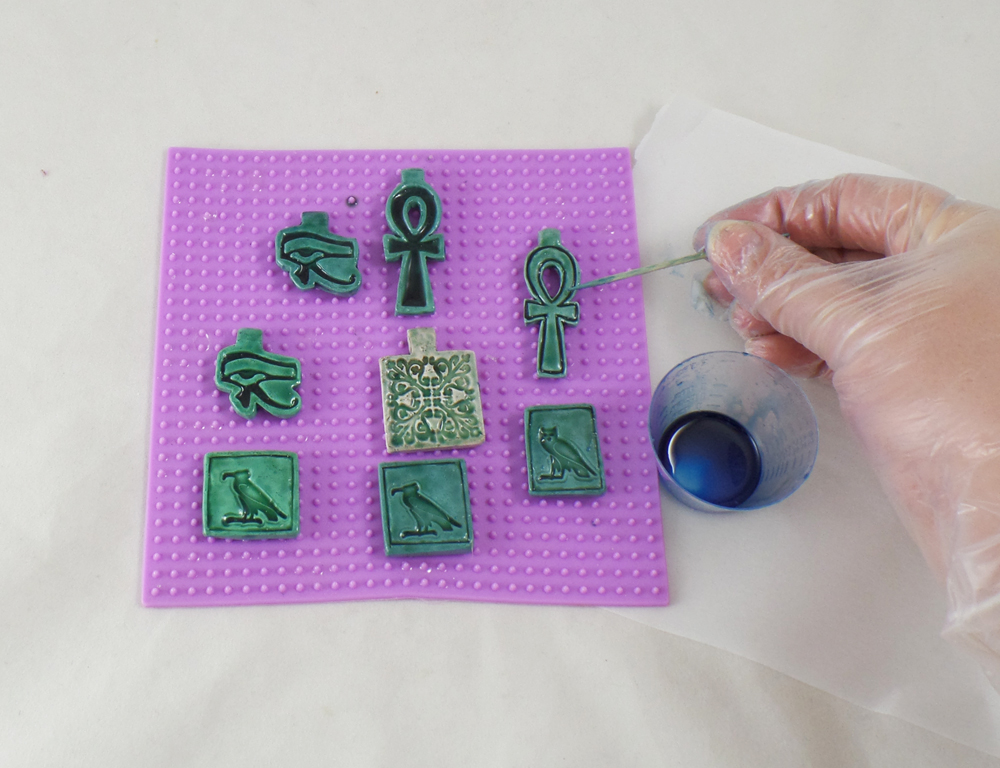
After the back of the polymer clay pieces were dry I applied resin to the front of the pieces with a toothpick, making sure to get all the groves and indents of the stamped images. I let this layer of resin cure completely.
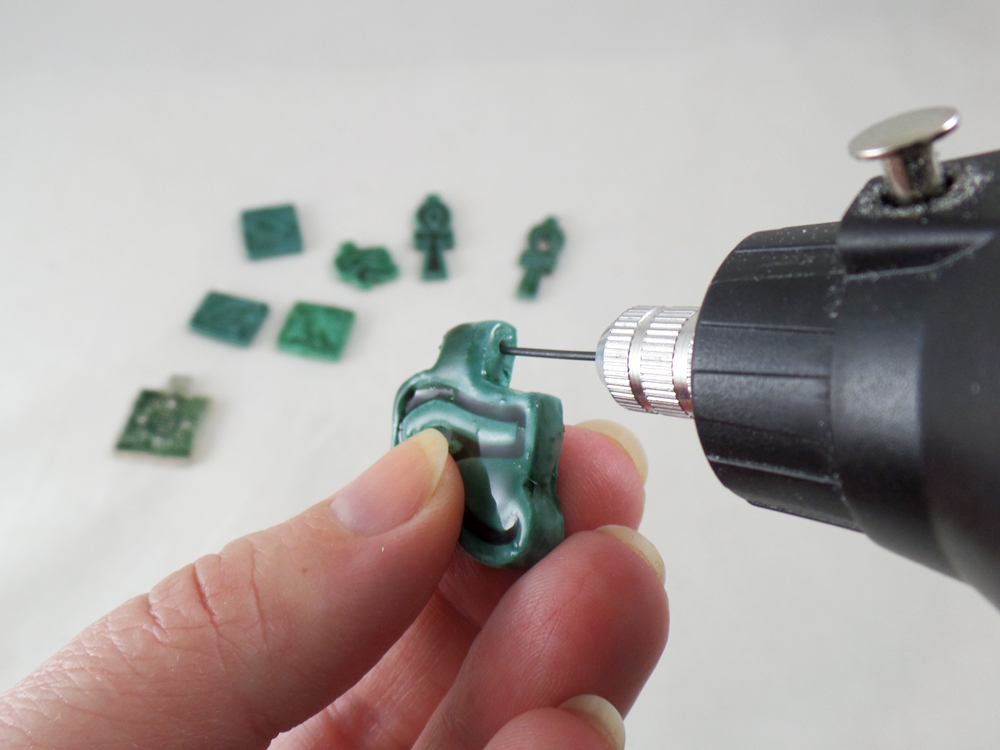
Once all of the pieces were fully cured I carefully drilled holes to put beading wire and thread through each piece.
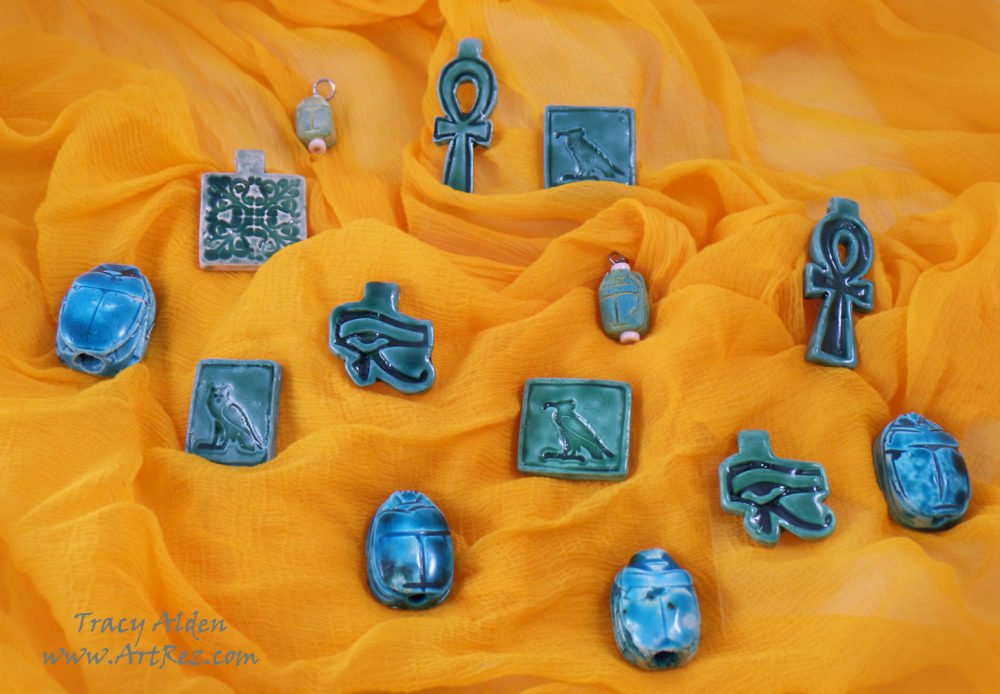 Here are the finished Faux pieces with the real Egyptian Faience, a pretty close match if I do say so!
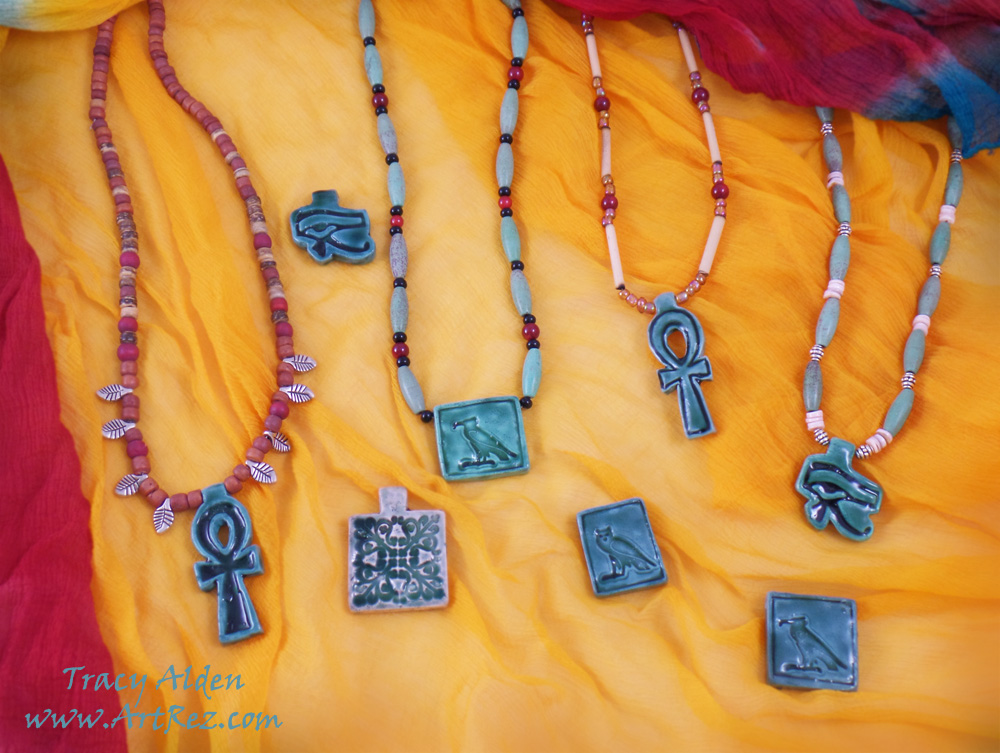 The addition of wood, glass, semi precious stones and shell makes these pieces look straight out of ancient jeweler’s marketplace!Want to see more of Amazing Casting Products tutorials and inspiration? Hop on over to their Blog to see all kinds of Amazing Artists’ Designs!Until Next Time, Safe Travels!

Ancient and Contemporary Inspired Artistry