Moments and a card to remember
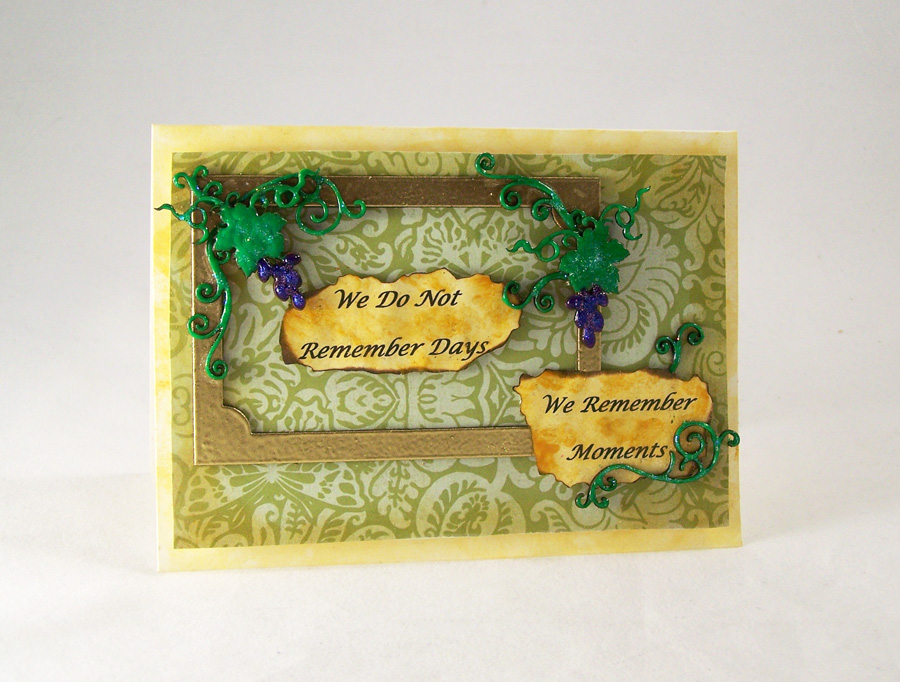
Lately I have been reminded how important it is to enjoy the good things in life. A quote by Italian poet and novelist Cesare Pavese “We do not remember days, we remember moments” has haunted my mind as of late. I have been ill lately but thankfully I can still do my artwork. I am so grateful for my family and their never ending support. So I thought why not put that quote on a card to give to those that matter the most. I went with a Tuscan style theme in remembrance of my Italian side of my family. 🙂
Supplies:
G&P Vintage Grape Vine Flourishes
G&P Floral Whimsy Accents
G&P Glastique Gloss Finishing Glaze
G&P Glastique Matte Finishing Glaze
G&P Micro Gold Embossing Powder
G&P Piccolo Embossing Powder Adhesive
G&P Leafy Green 3D Enamel Gel
G&P Purple Mist 3D Enamel Gel
G&P Yellow Ochre 3D Enamel Gel
Piccolo Easy Grip Tweezers
Art Glitter Ultra Fine Glitter Hydragnea and Angel Dust
DCWV The Mariposa Matstack
Blank card
Cosmetic Sponge
Foam squares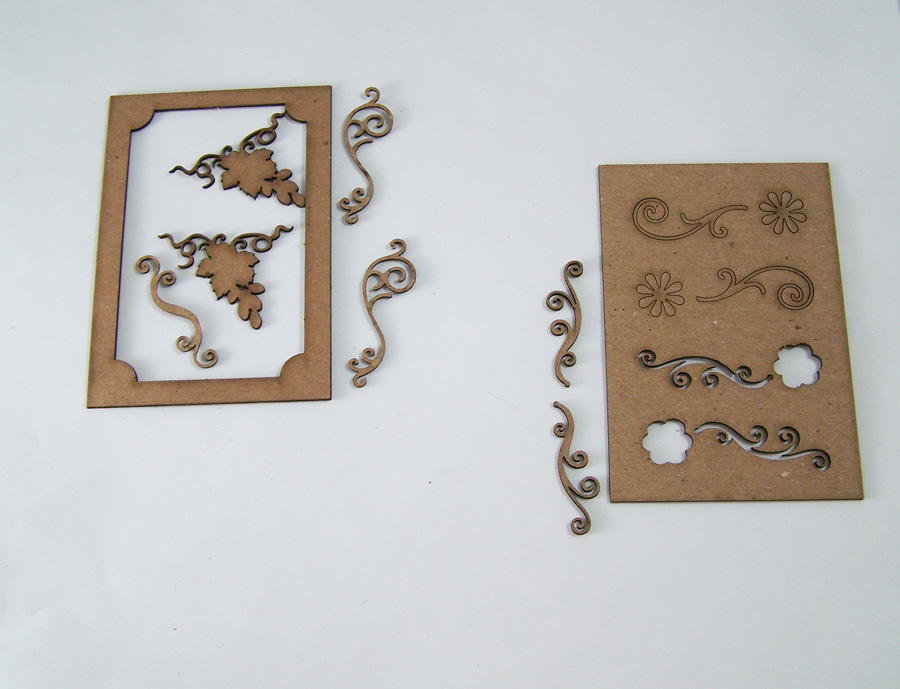
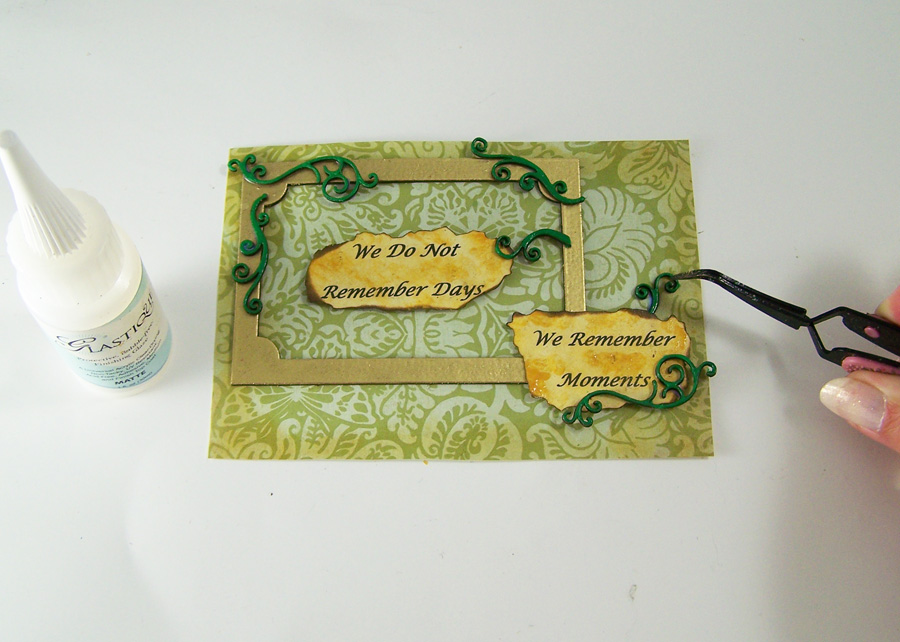
Carefully remove all of the Piccolos from the chipboard frames. You will be using all of the Vintage Grape Vine Flourishes and two of the swirls from the Floral Whimsy Accents. Place the remaining pieces to the side for the Flight of Butterflies Pendant, check out the Globecraft & Piccolo blog for that tutorial.
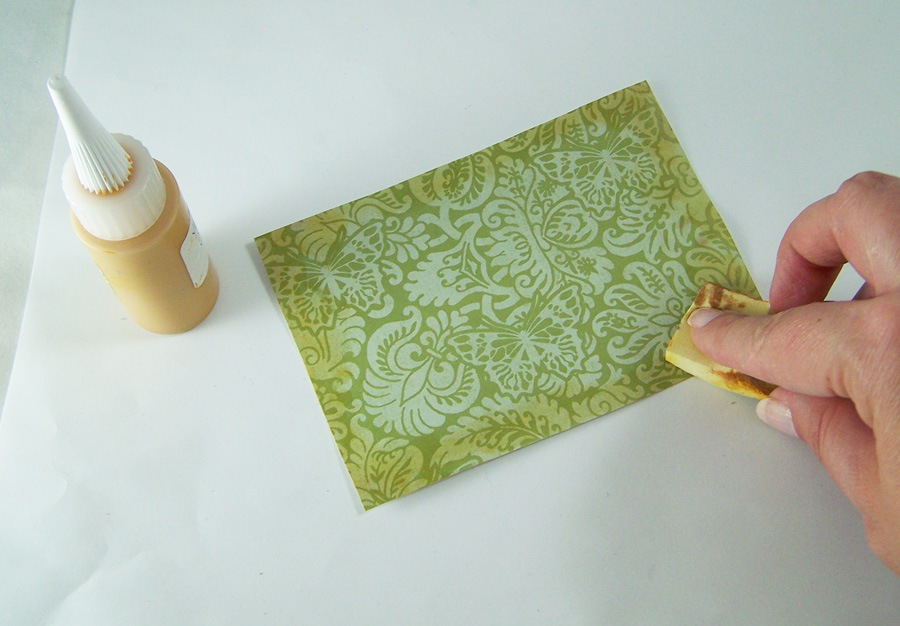
Pick a piece of cardstock to be the front of your card and cut to fit on the front of your card. Blot on G&P Yellow Ochre 3D Enamel Gel with a cosmetic sponge to the piece of card stock. This will give it an aged, Tuscan wall look.
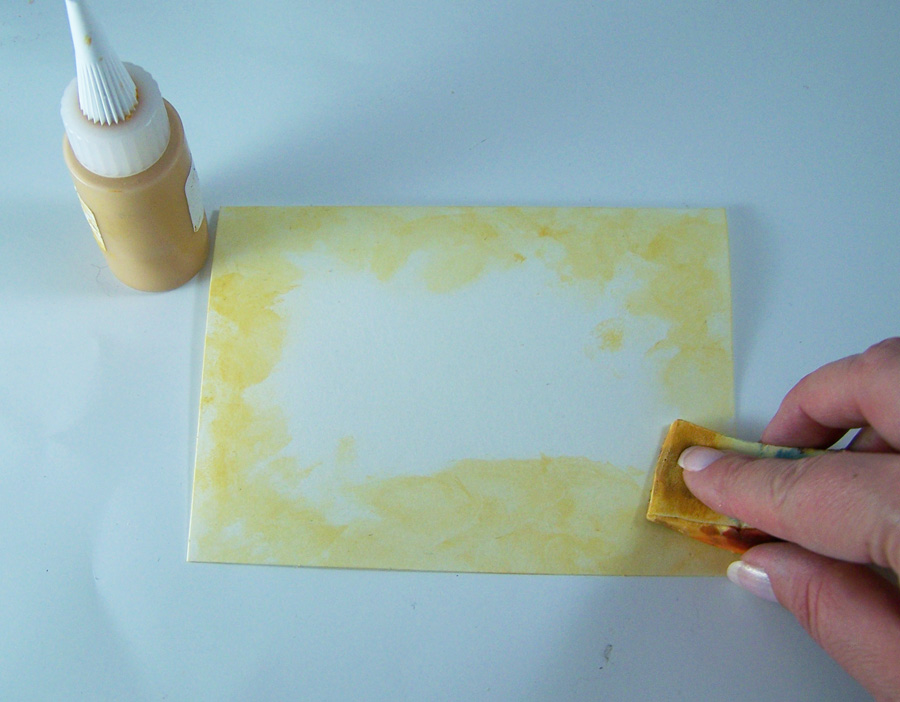
Blot on G&P Yellow Ochre 3D Enamel Gel to the front of your blank card with a cosmetic sponge. Repeating the Tuscan wall look.
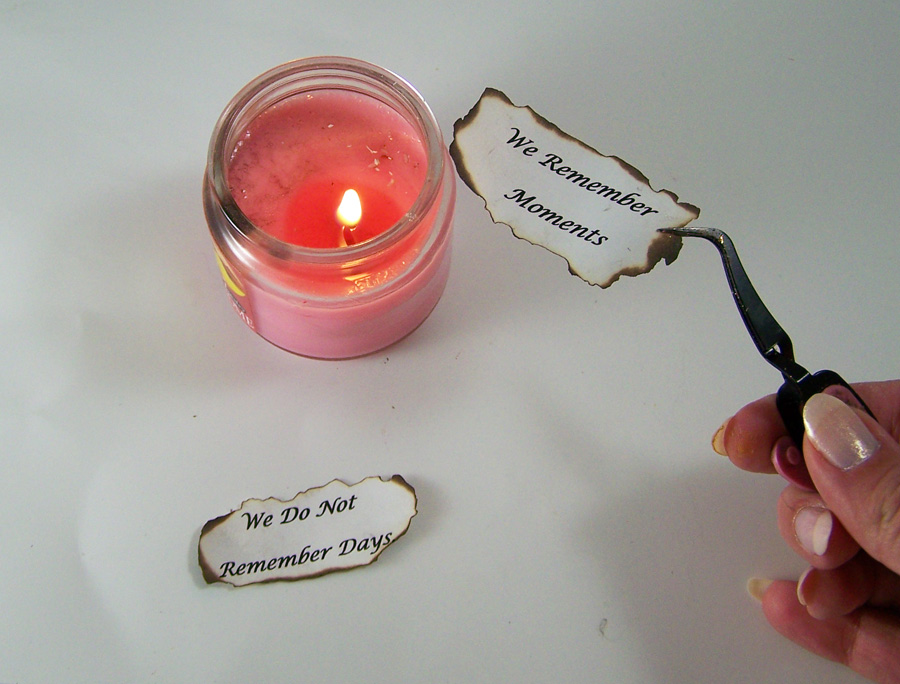
Print a sentiment on regular printer paper and cut to size. Using the tweezers grip the edges of the papers and very carefully scorch the edges with a small candle flame.
*Ignore this step if you rather use a sentiment sticker.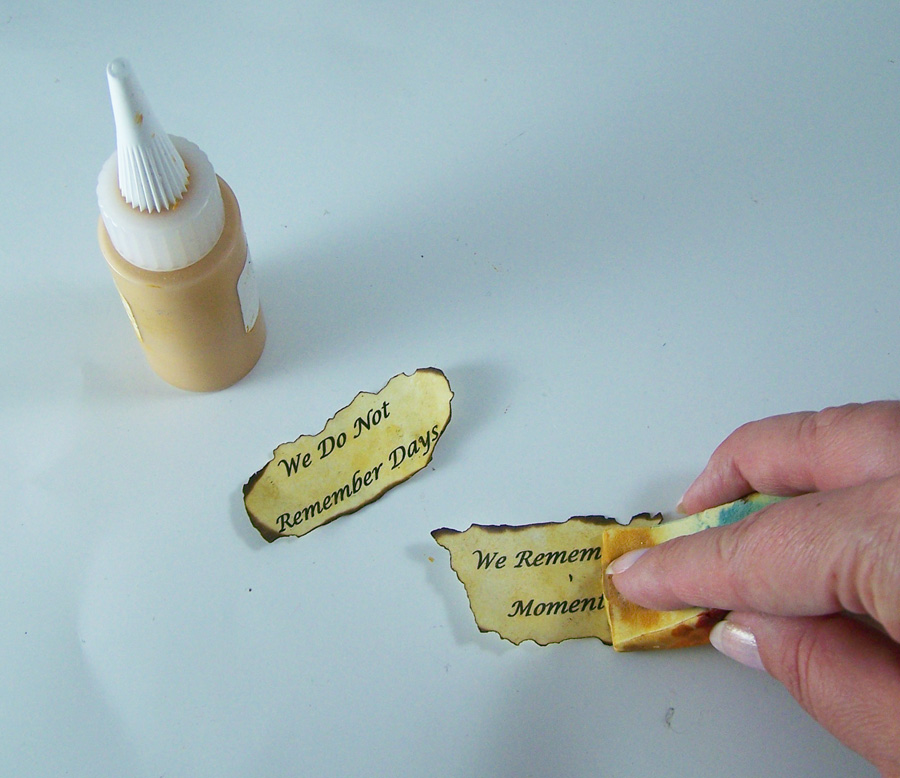
Blot on G&P Yellow Ochre 3D Enamel Gel to the front of your sentiment strips. Let dry.

Apply Piccolo Enamel Adhesive to the frame.

Apply two coats of the G&P Micro Gold Embossing Powder and heat to set.
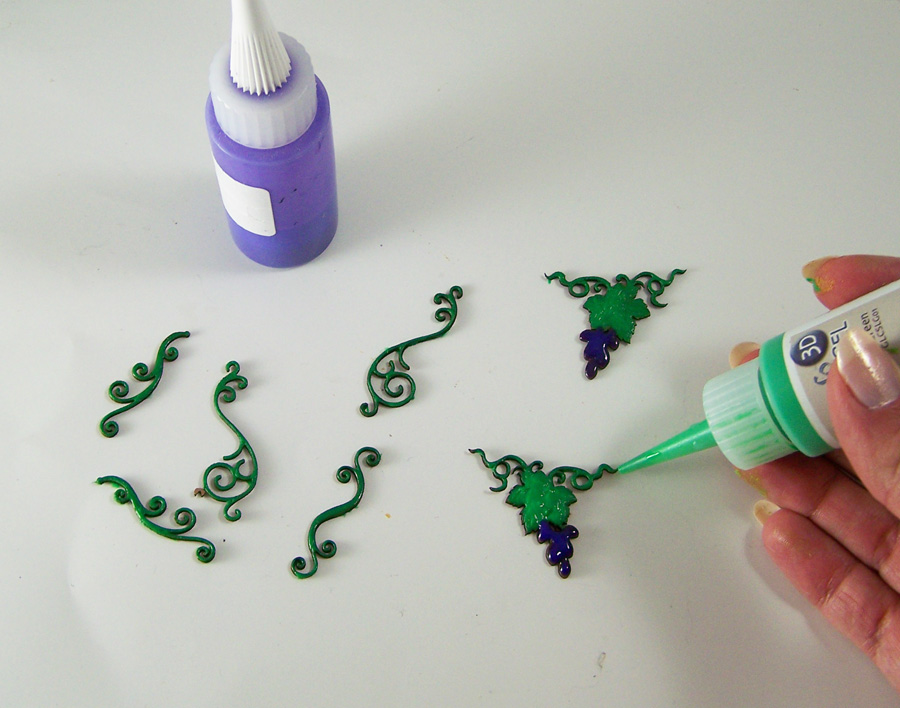
Apply G&P Leafy Green 3D Enamel Gel to all of the swirls and the leaf portions of the grape vines. Apply G&P Purple Mist 3D Enamel Gel to the grapes and let dry.
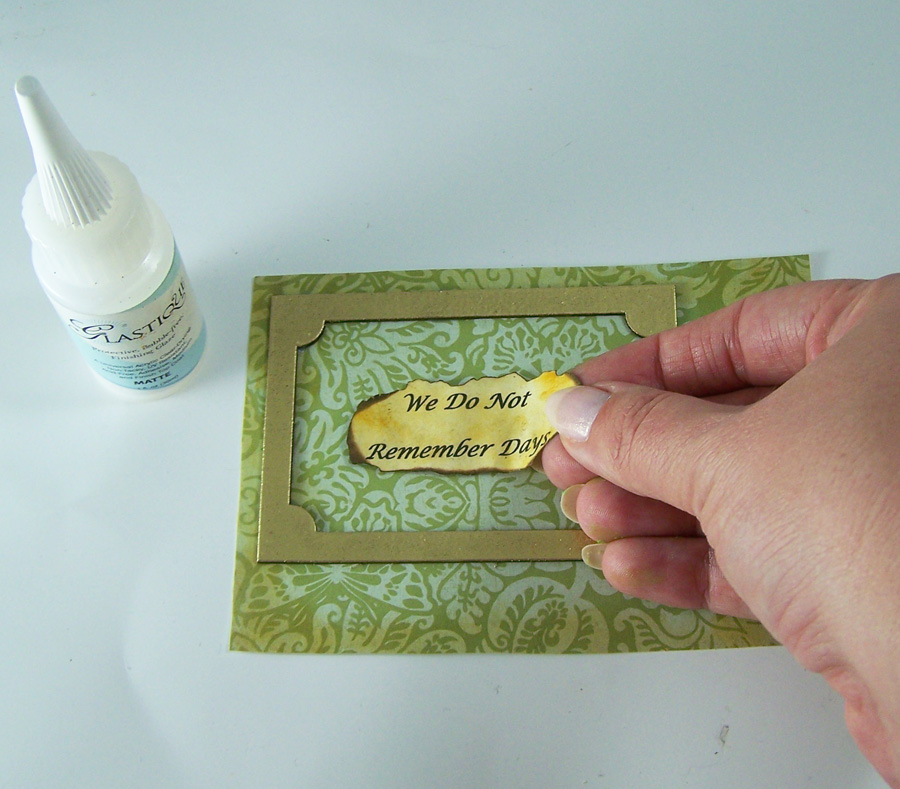
Carefully adhere the frame to the card stock with G&P Glastique Matte Finishing Glaze. Put foam squares on the first portion of the sentiment and place in the middle of the frame.
Carefully glue the swirl Piccolos to the front of the card using the G&P Glastique Matte Finishing Glaze. Using foam squares place the second portion of the sentiment to the right of the frame, overlapping a bit.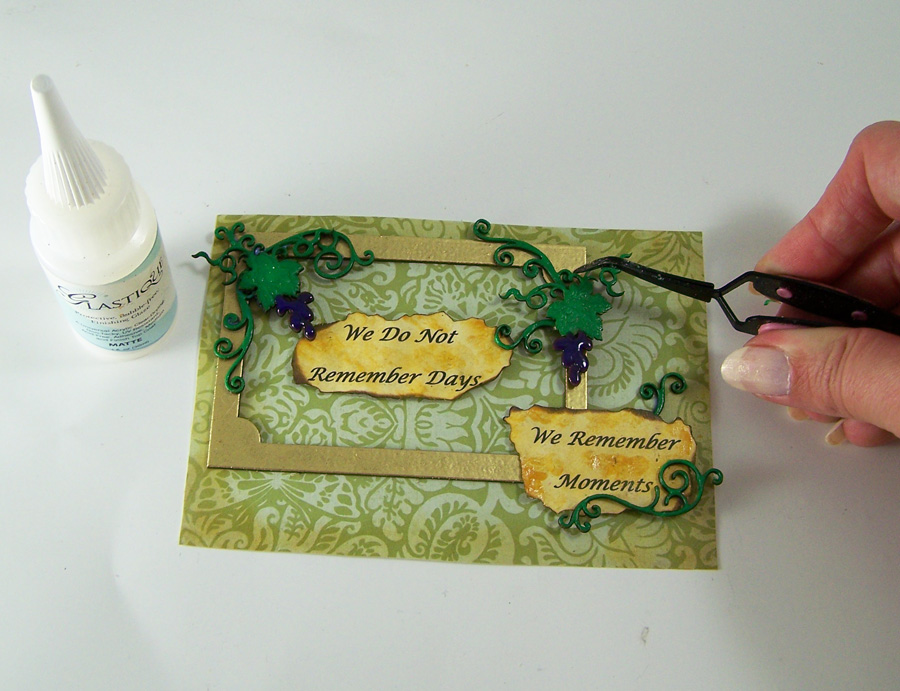
Carefully glue the grape vine Piccolos to the front of the card using the G&P Glastique Matte Finishing Glaze, let dry.

Coat all of the Piccolos with G&P Glastique Gloss Finishing Glaze and sprinkle Art Glitter Ultra Fine Hydragnea glitter on the grapes and Angel Dust glitter on the greenery. Let dry.
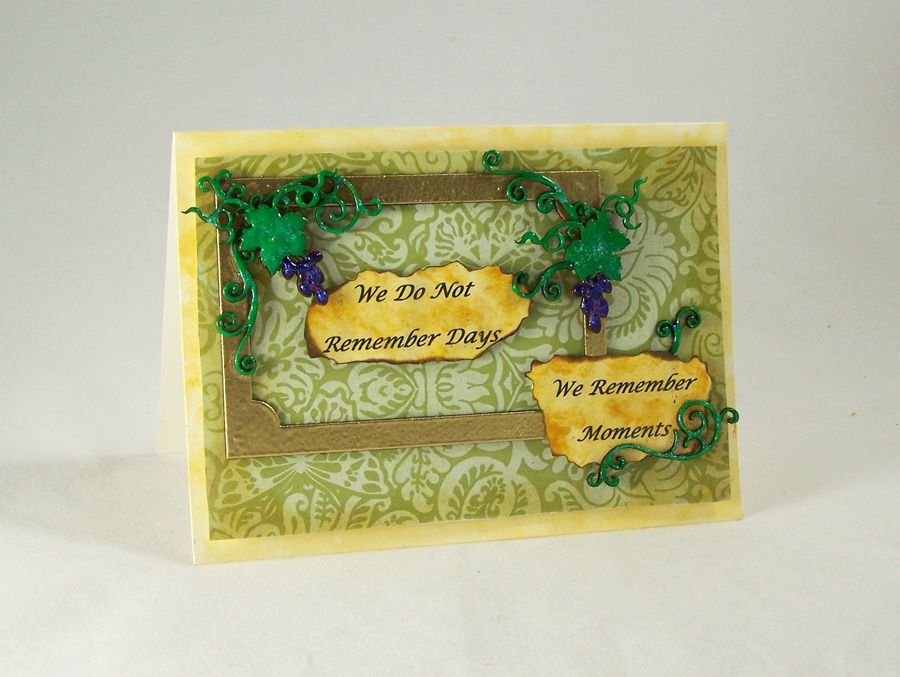
Attach the card stock with all of the Piccolos to the front of the card with foam squares. Stamp or write your favorite sentiment inside. 🙂Hop on over to the Globecraft and Piccolo Blog for my Flight of Butterflies Pendant tutorial using the new Piccolo Instant UV Resin!
Until next time, safe travels!Vintage Copper Tag
Recently I have been noticing the paper crafting boards I follow on Pinterest are pinning new types of tag art. From fun and funky to just beautiful, I am loving the variety of art being shown on these little “mini” canvases. I felt inspired to start working on more tags to build up a collection for gifts, paper embellishments and jewelry.
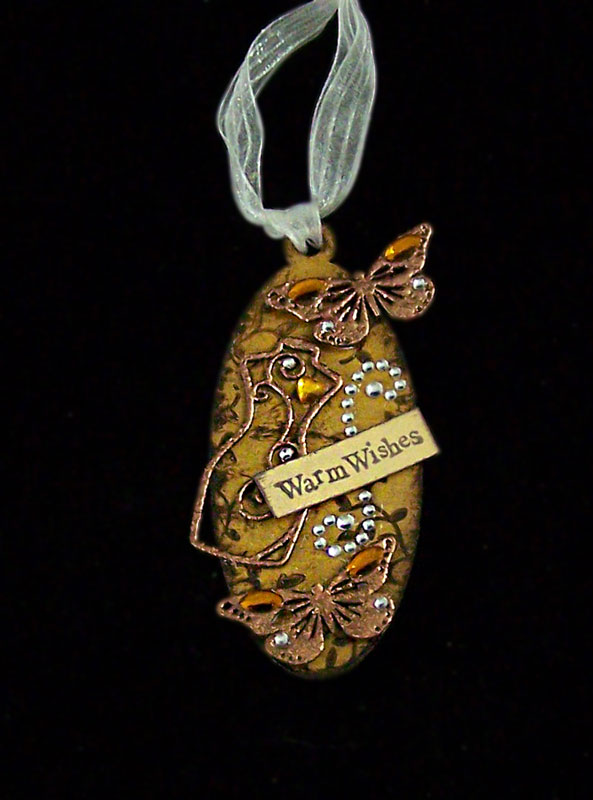
This tutorial is for a simple but lovely Vintage Copper Tag.Supplies:
G&P Butterfly Charm Set
G&P Vintage Dress Forms Accents
G&P Glastique Gloss Finishing Glaze
G&P Copper Kettle Embossing Powder
G&P Piccolo Embossing Powder Adhesive
G&P Yellow Ochre 3D Enamel Gel
G&P Oval Bezel with 1-Loop
Piccolo Easy Grip Tweezers
Brown ink stamp pad
Mini Adhesive Foam squares
Crystal stickers
Heat gun
Vine and sentiment stamps
Small piece of cardstock
Ribbon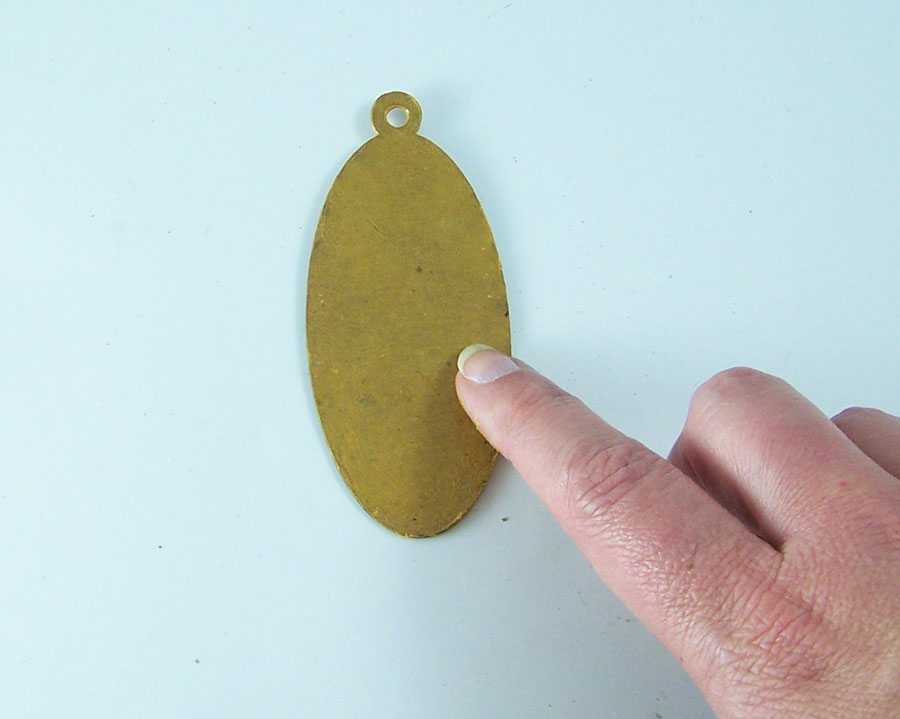
Smear G&P Yellow Ochre 3D Enamel Gel both on the front and back of the bezel. Let dry.
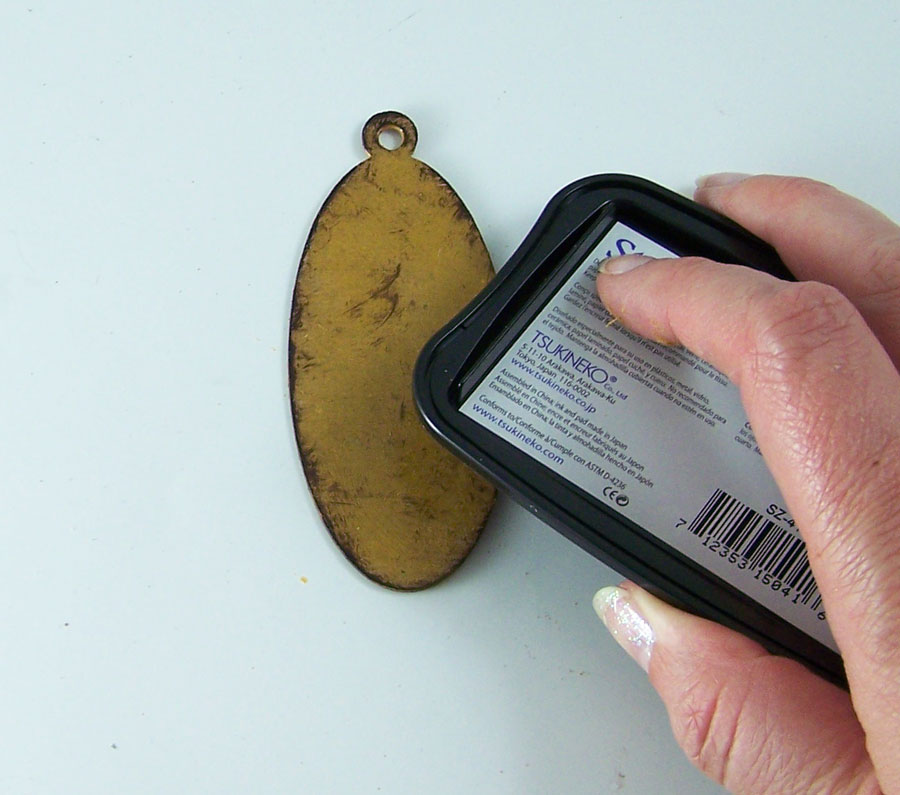
Take the brown dye ink pad, rub it on the edges and sides of the bezel.
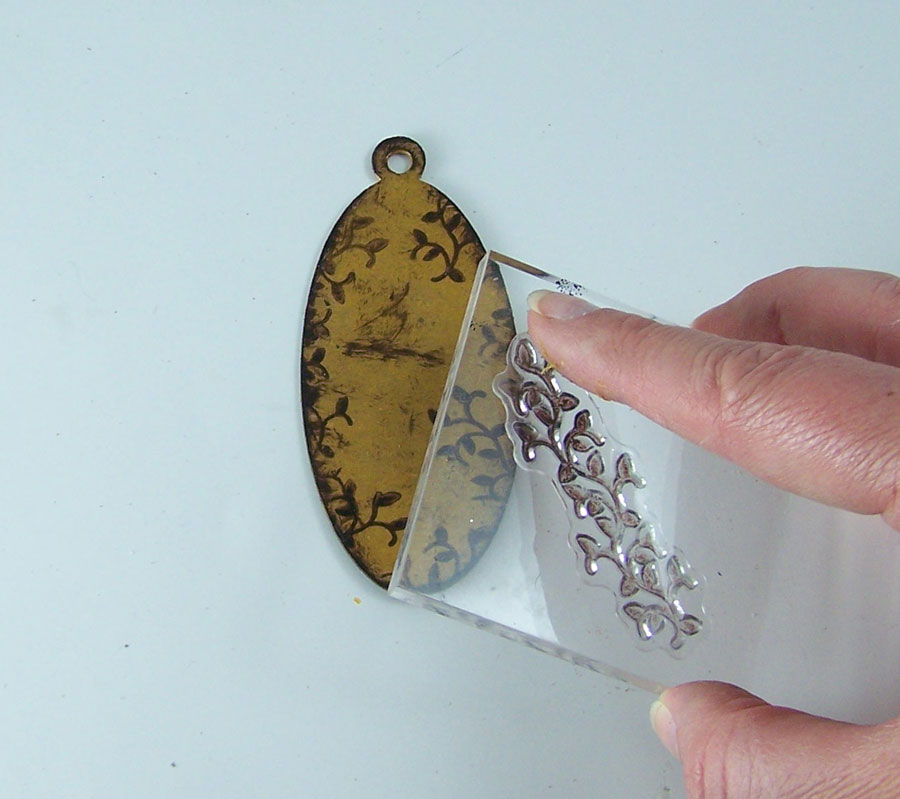
Ink the vine stamp with the brown ink and stamp around the edges of the tag.

Carefully remove the two small butterflies from the G&P Butterfly Charm Set. Remove the loops on both butterflies with a craft knife.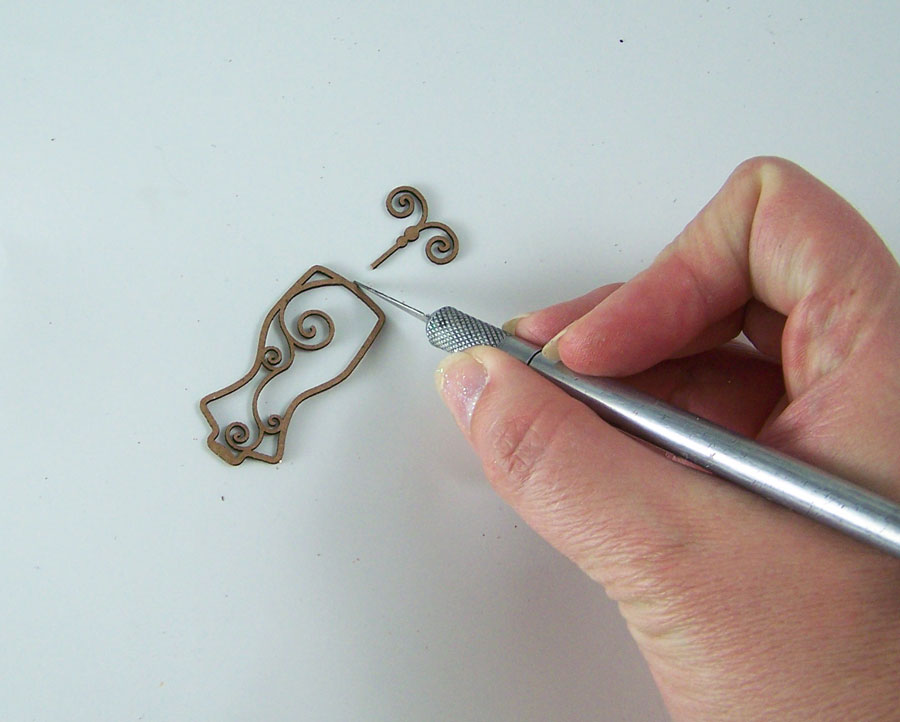
Carefully remove the swirl dress form G&P Vintage Dress Forms Accents set. Using a craft knife remove the stand from the dress form. Save the stand piece and all of the other kit pieces for A time for Nature tutorial; check out the Globecraft & Piccolo blog for instructions. 🙂
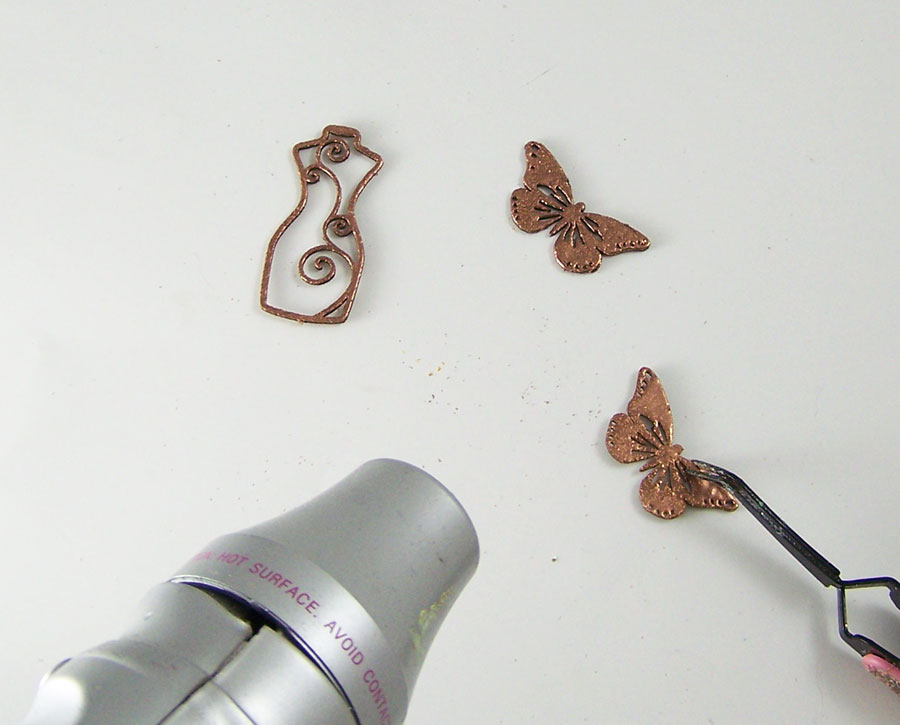
Apply Piccolo Enamel Adhesive to the dress form and butterflies. Apply G&P Copper Kettle to the butterflies and dress form. Heat to set.
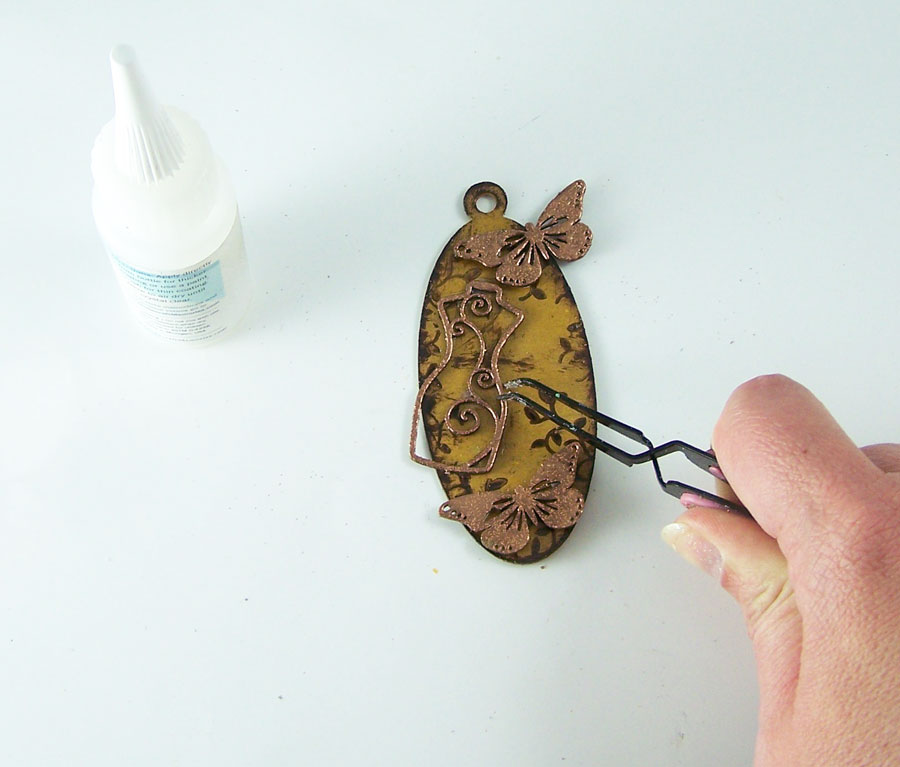
Use Glastique Gloss Finishing Glaze to attach the butterflies and dress from to the tag. Let dry.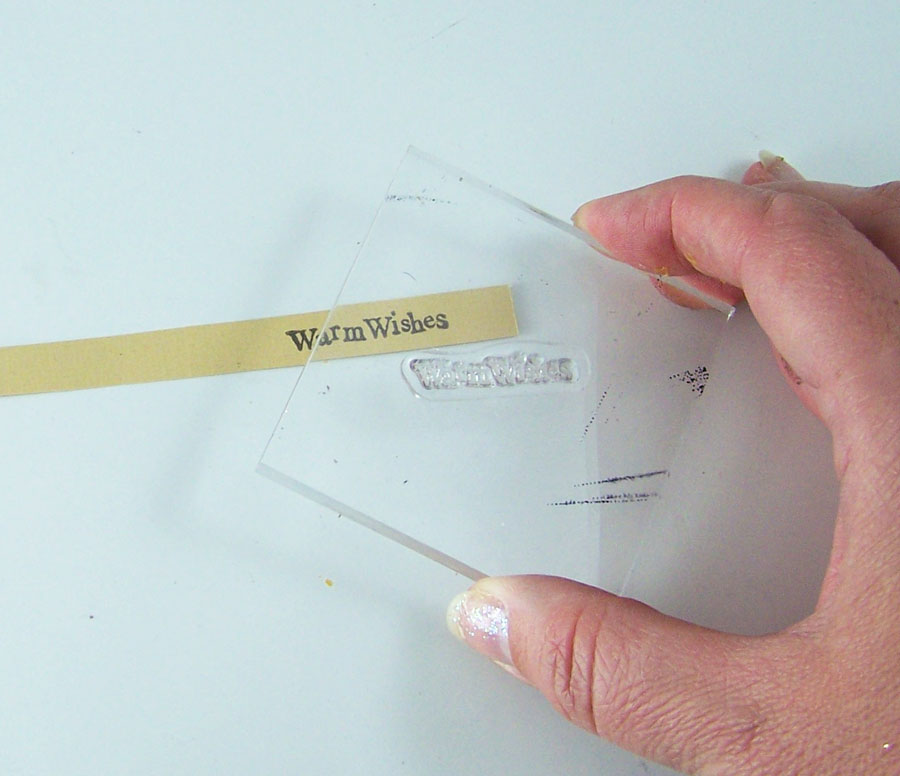
Stamp a sentiment on the small piece of card and cut to fit the tag. Rub the brown ink on the edges of the card stock to give it an aged look.
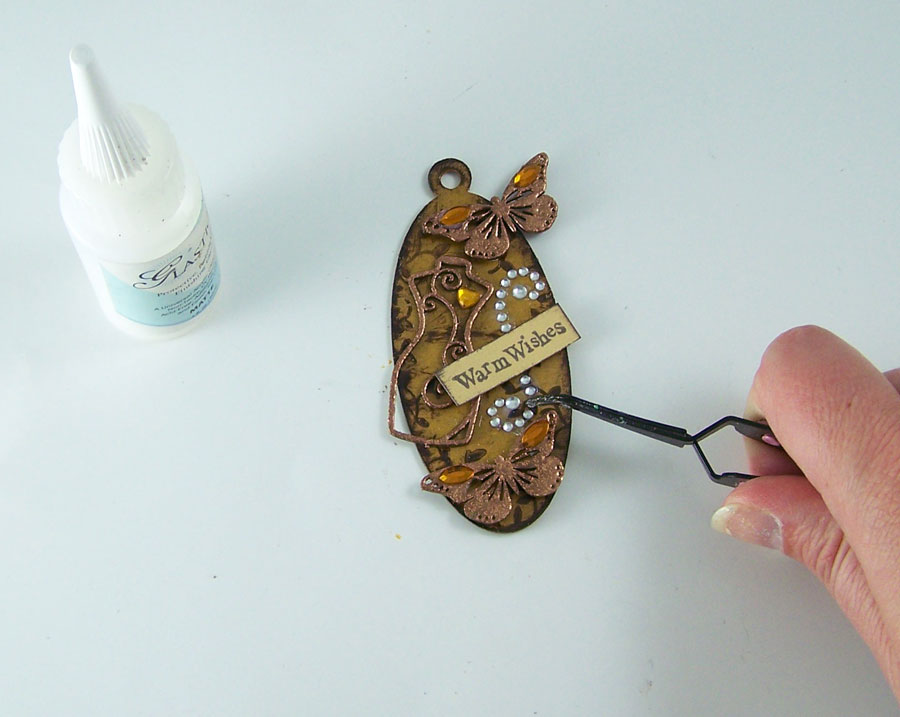
Use Glastique Gloss Finishing Glaze to glue on the sticker gems to the tag as shown. Let dry.
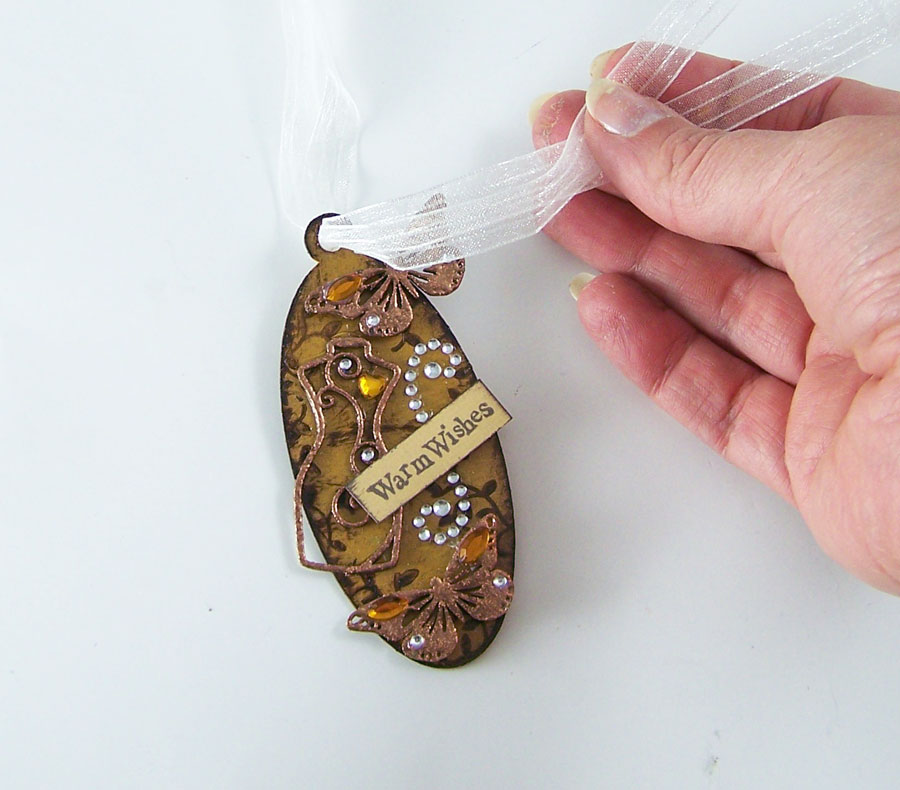
Thread the ribbon through the loop on the top of the tag and tie.
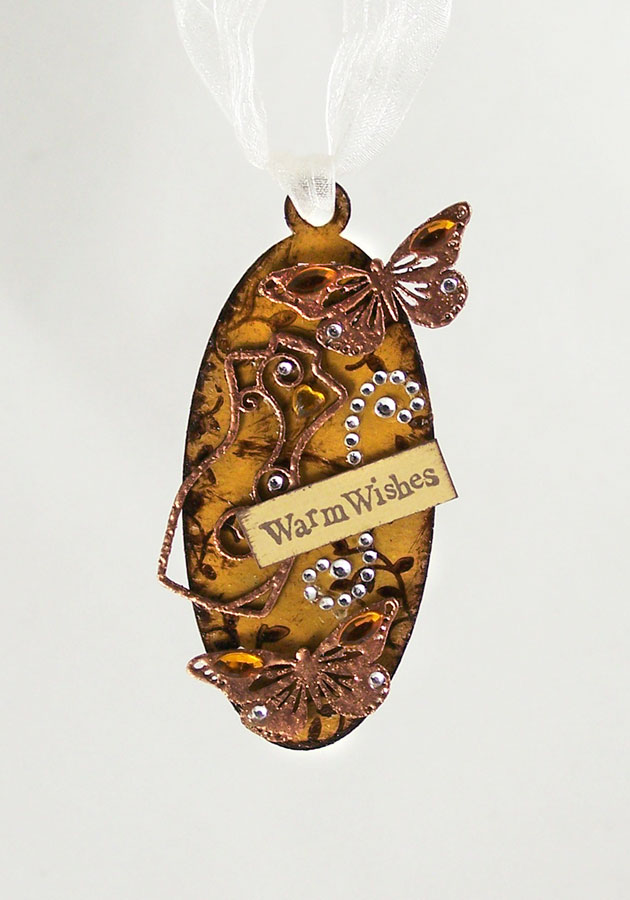
Now you have an embellishment to add to a gift or paper craft.
Hop on over to the Globecraft and Piccolo Blog for my A Time for Nature tutorial!
Until next time, safe travels!
CHA Winter Show 2013
Another Craft and Hobby Association Winter show has come and gone. While there were less vendors this year, I honestly feel this was one of the best I attended. This show was amazing! The classes, networking and show floor events were wonderful. I was able to make new accounts with several vendors and got to meet up with some seriously talented artists.
The wonderful Globecraft & Piccolo had a booth again at CHA. I am proud to be part of their Design Team and a part of product design & development! Members of the G&P design team, Jami Bostjancic (of Accent Allusions) and I were honored to be asked to do demos at the booth for three of the four days of CHA.
Here is some of the cool G&P products we got to demo at the show:
NEW Globecraft & Piccolo UV Resin: It cures in 3 minutes in UV light, scratch resistant, self leveling and not affected by humidity (in fact it can set up underwater). It works wonderful on top of chipboard, acrylic, paper, polymer clay, fabric, vellum and so much more!
NEW Globecraft & Piccolo Acrylic Bezels and Tags: Clear acrylic bezels and tags come in so many shapes and sizes. Perfect for making jewelry, mixed media and card decor! Looks lovely stamped and with paper backings.
NEW additions to the Globecraft & Piccolo Embossing powder line: These powders are specially designed to look awesome on large and small projects. G&P Embossing Powders are made of varying-sized particles that create a unique depth and dimension not available with traditional embossing powders. These wonderful colors can mimic stone, metal, natural elements and aged surfaces. The new colors are Real Rust, Ruby Red Slippers, Shamrock Dreams, Turquoise Lagoon, and Platinum!
New Piccolo Chipboard Elements: Now in many different sizes, great for home decor, card making, mixed media, jewelry and more! From holiday, seasonal, steampunk, animals, swirls, and elaborate corner and edge elements.

The Globecraft & Piccolo booth at CHA.
G&P display showcasing all of their embossing powders and chipboard charm sets. All of the charm sets on the velvet boards are my work. 🙂

G&P acrylic and chipboard bezels samples by the talented design team, the Secrist family (G&P) and I.
Just beautiful card decor work with Piccolos by the design team!
G&P Ornament sets. The lovely mixed media piece on the left is made by the talented Linda Neff (part of the G&P design team) from ornaments and a lampshade.
An overview of the booth.
Some samples of the demo work showing the new UV Resin and acrylic bezels! Pieces by Pat Secrist (Of G&P), Jami Bostjancic and I.The following photos are close up of booth display samples to show you how many new styles and techniques you can use with the new G&P products.

G&P acrylic bezel, G&P UV Resin, mica powder, permanent ink, paper and sticker gems.
Mini oval acrylic bezels with Pure Sparkle Glitter in Gold, mica powder, 3D Enamel Gel and sticker gems. Faux glass technique.
Top left and bottom bezels are acrylic and top right bezel is bookboard. 3D Enamel Gels, Pure Sparkle Glitter in Gold and Silver, mica powder and sticker gems. Glastique Gloss is used to seal each layer. Topped with the new UV resin. Nebula/night sky technique.
G&P acrylic bezel, G&P UV Resin, G&P Piccolo Gears, mica powder, permanent ink, paper and sticker gems. Piccolo layer technique.
G&P acrylic bezel, G&P UV Resin, mica powder, 3D Enamel Gels, Origami foil paper and sticker gems. Faux glass technique.Until next time safe travels!
Mushrooms and Merriment…

As a young child one of my favorite Christmas decorations was glass mushroom ornaments. They were typically red with white dots and wonderful highlights of pearls, silver, gold and glitter. To me it was like a little frozen bit of fairyland. Traditionally the mushroom ornament was seen as a good luck symbol. In Germany they were seen as a symbol of a person’s love of nature and hope for good tidings in the New Year. Well that got me thinking I just had to make one of my own!Supplies:
Globecraft & Piccolo DIY Portrait Ornament
Globecraft & Piccolo 3D Enamel Gel Satin Honeydew
Globecraft & Piccolo 3D Enamel Gel Napthol Red
Globecraft & Piccolo Piccolo Enamel/Embossing Powder Adhesive
Globecraft & Piccolo Mossy Glen Enamel Powder
Globecraft & Piccolo Pure Sparkle Gold Glitter
Globecraft & Piccolo Glastique Gloss Finishing Glaze
Globecraft & Piccolo Medium FlourishesReindeer Moss
Polymer Clay Mushrooms
Ribbon
Red Sticker Gems
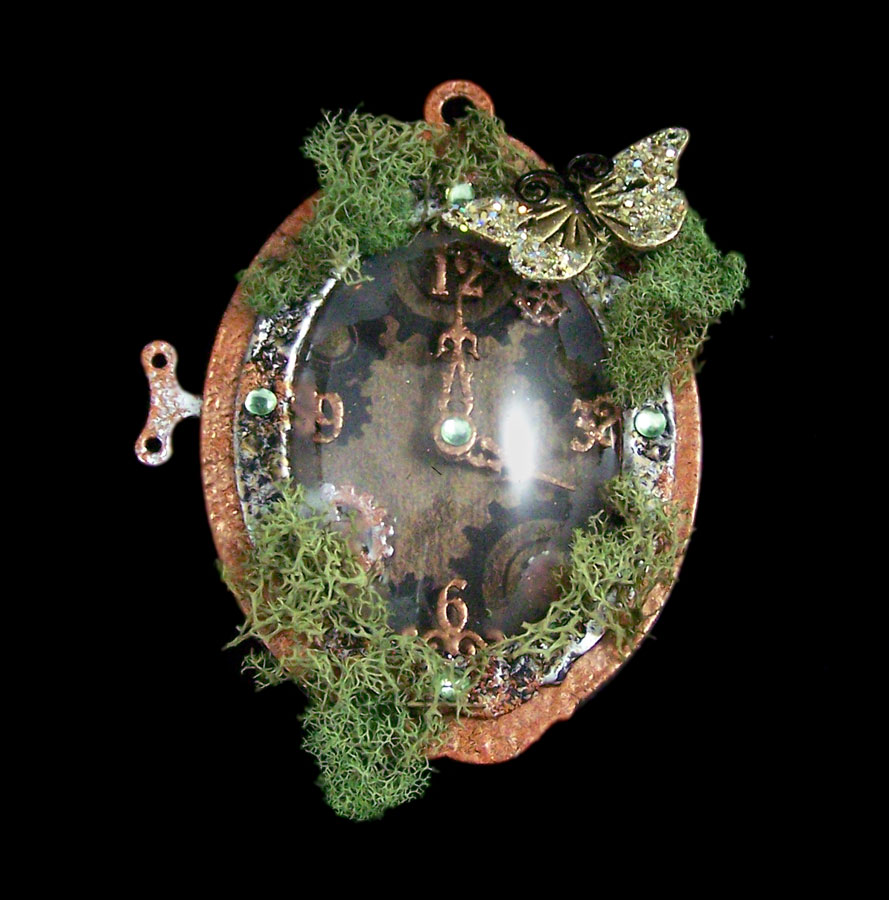
I started with applying the Piccolo Enamel Adhesive to the outer rings of the ornament. I then coated the rings with Mossy Glen Enamel Powder and heat set with heat gun. I then drew a thin bead of Glastique Gloss Finishing Glaze around the inside of the ovals, placed the globes in each half and clipped into place.
Taking the inner ring, I applied Glastique Gloss around the edge and sprinkled on Pure Sparkle Gold Glitter.
The flourishes got a coat of 3D Enamel Gel Satin Honeydew and the polymer clay mushrooms caps had a layer of 3D Enamel Gel Napthol Red applied. Let dry. Then little dots of Glastique Gloss on the mushroom caps and a sprinkle of Pure Sparkle Gold Glitter on top.
Once the mushroom are completely dry I bundled them together and wrapped Reindeer Moss around them tightly. I glued all the pieces of the ornament together with Glastique, carefully sandwiching the mushrooms and moss. I left them clipped in place until dry.
Using Glastique as glue once again, I added the flourishes and sticker gems to the ornament. Once dry I added the ribbon to the top!
Hop on over to the Globecraft & Piccolo blog today to see my Christmas Airship Express tutorial!

Until Next Time, Safe Travels!Globecraft & Piccolo Design Team and 3D Enamel Gels!

As you all know I have been a proud member of product design and development for Globecraft Memories for over a year now. I love the work and always look forward to testing new products. So I was pleasantly surprised when they graciously invited me to join their Globecraft & Piccolo online design team! There’s an amazing amount of talented ladies in this team and many diverse styles. I can’t wait to see what everyone makes! Please make sure to check out their blog often!
One of the new products we are getting to showcase and use in the design team is Piccolo 3D Enamel Gels. They are non-toxic, have no odor, are easy to clean up and have wonderful pigment-rich colors. They can be applied to chipboard, paper, plastic and fabrics with ease (I’m willing to bet there are even more applications that I have yet to try).
A new product they carry, blank Bookboard Bezels, are just perfect to coat with the 3D Enamel and turn into jewelry. A single coat on a bezel gives you a lovely transparency, two coats give a opaque glass like finish. When you apply a single coat on top of Globecraft’s Enamel Powders it has a wonderful stained glass effect, but you can also put a layer of 3D Enamel down first, let dry and then sprinkle a layer of Enamel Powders on top.

The 3D Enameling Gel does not boil when you pass the heat gun over to set the Enameling powders if the gel is fully cured. On this Skinny Tag bezel I used Mars Black 3D Enamel Gel and a overlay of Girls Night Out Enamel Powder.
If you layer the Enamel Gel between layers of Glastique Gloss Finishing Glaze you can get an amazing level of depth. Mars Black, Ultramarine Blue, Purple Mist 3D Enamel Gels, Pure Sparkle Silver Glitter and Mica for this celestial sky set.
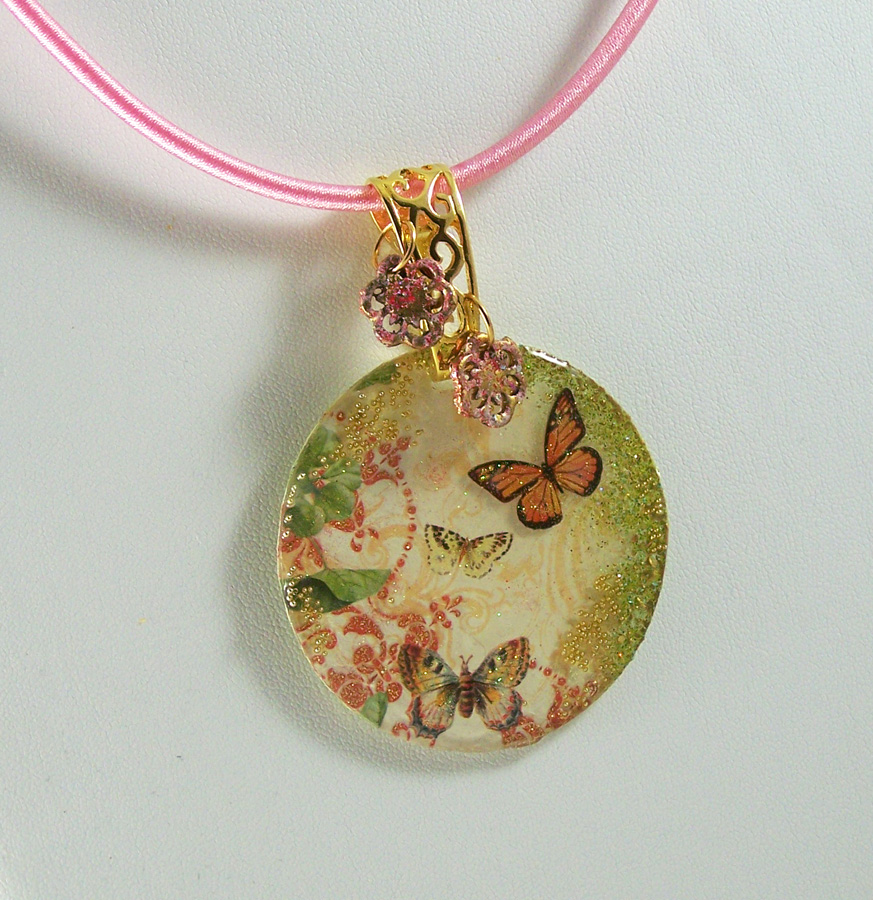
You can get the illusion of glass when you add Glastique Gloss Finishing Glaze and Art Glitter Ultrafine Angel Dust glitter on top of the 3D Enamel. I used a Flower drop bezel , Dark Green, Metallic Gold, Purple Mist 3D Enameling Gels, and sticker gems for this piece.
The 3D Enamel Gel has a natural gloss finished if applied straight from the bottle but if you use a cosmetic sponge to stipple it on you can get a satin finish. For this Graffiti Art necklace I used a Square Tag bezel, Glastique Gloss Finishing Glaze and 3D Enameling Gel (Titanium White, Orange, Cobalt Turquoise, Bright Yellow, Napthol Red, Metallic Silver, Metallic Copper, Mars Black).
The new Enamel Gel is perfect for when you want just a touch of color. The tiny applicator tip on all of the Gel bottles makes it easy to apply it to any Piccolo element. With this Steampunk Gear Bezel, the Bright Yellow, Metallic Silver and Metallic Copper 3D Enameling Gels give it that perfect touch of color.Until Next Time, Safe Travels!

Ancient and Contemporary Inspired Artistry
