Globecraft & Piccolo Design Team and 3D Enamel Gels!
As you all know I have been a proud member of product design and development for Globecraft Memories for over a year now. I love the work and always look forward to testing new products. So I was pleasantly surprised when they graciously invited me to join their Globecraft & Piccolo online design team! There’s an amazing amount of talented ladies in this team and many diverse styles. I can’t wait to see what everyone makes! Please make sure to check out their blog often!
One of the new products we are getting to showcase and use in the design team is Piccolo 3D Enamel Gels. They are non-toxic, have no odor, are easy to clean up and have wonderful pigment-rich colors. They can be applied to chipboard, paper, plastic and fabrics with ease (I’m willing to bet there are even more applications that I have yet to try).
A new product they carry, blank Bookboard Bezels, are just perfect to coat with the 3D Enamel and turn into jewelry. A single coat on a bezel gives you a lovely transparency, two coats give a opaque glass like finish. When you apply a single coat on top of Globecraft’s Enamel Powders it has a wonderful stained glass effect, but you can also put a layer of 3D Enamel down first, let dry and then sprinkle a layer of Enamel Powders on top.
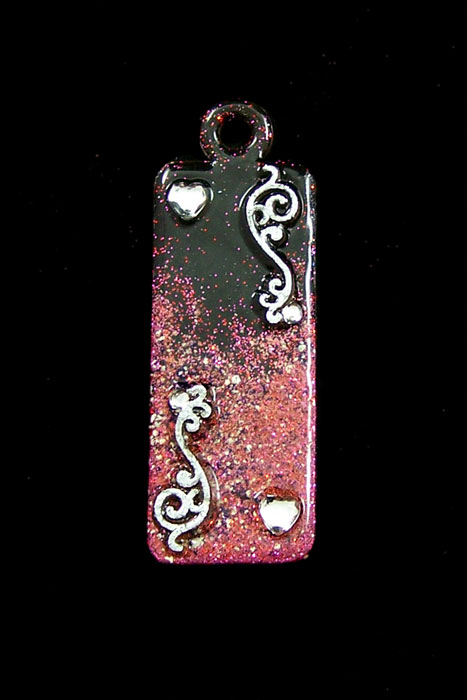
The 3D Enameling Gel does not boil when you pass the heat gun over to set the Enameling powders if the gel is fully cured. On this Skinny Tag bezel I used Mars Black 3D Enamel Gel and a overlay of Girls Night Out Enamel Powder.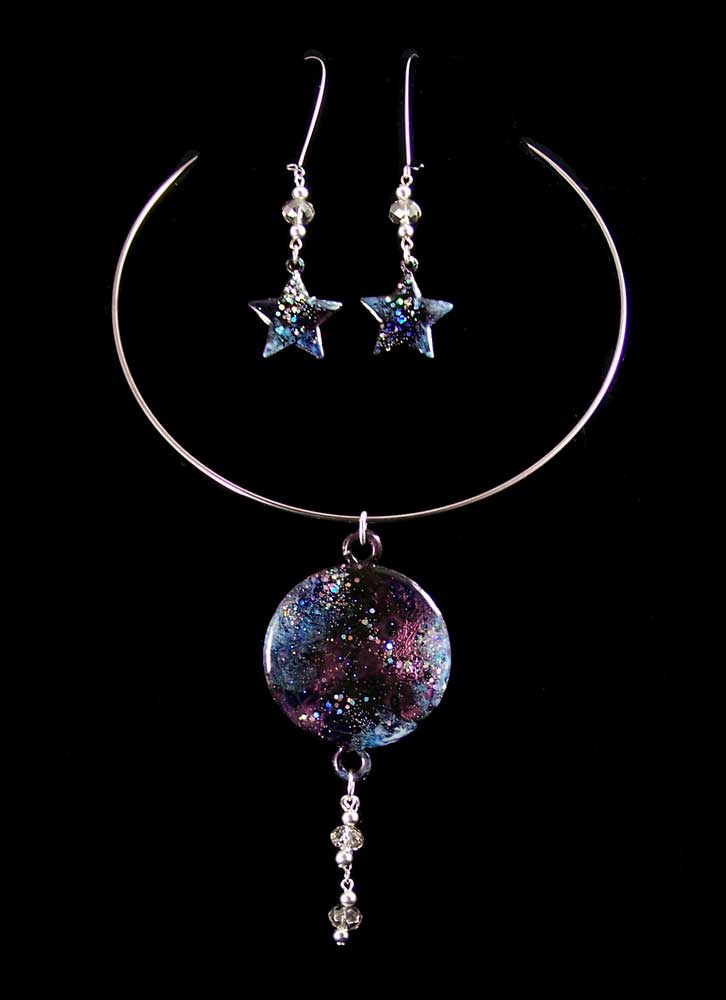
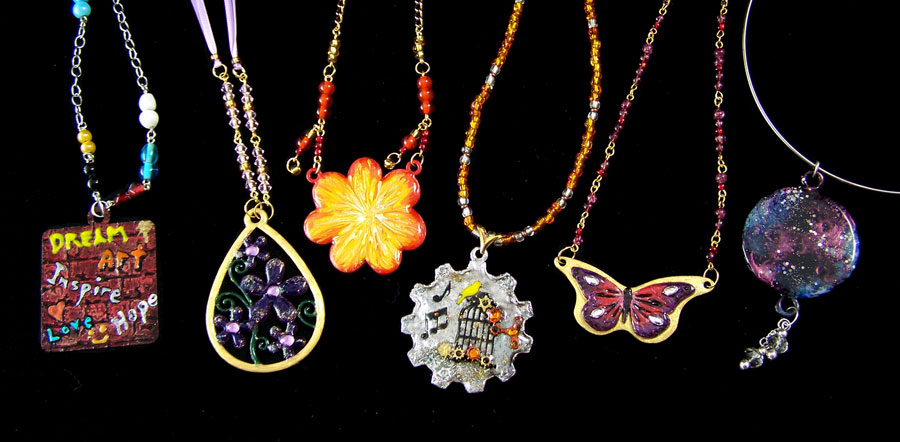
If you layer the Enamel Gel between layers of Glastique Gloss Finishing Glaze you can get an amazing level of depth. Mars Black, Ultramarine Blue, Purple Mist 3D Enamel Gels, Pure Sparkle Silver Glitter and Mica for this celestial sky set.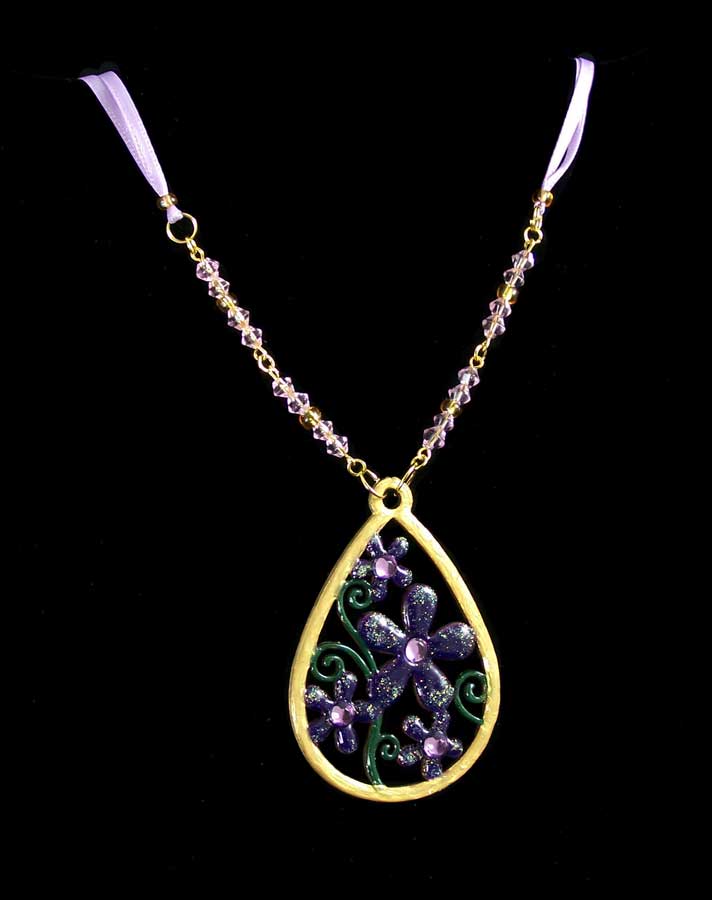
You can get the illusion of glass when you add Glastique Gloss Finishing Glaze and Art Glitter Ultrafine Angel Dust glitter on top of the 3D Enamel. I used a Flower drop bezel , Dark Green, Metallic Gold, Purple Mist 3D Enameling Gels, and sticker gems for this piece.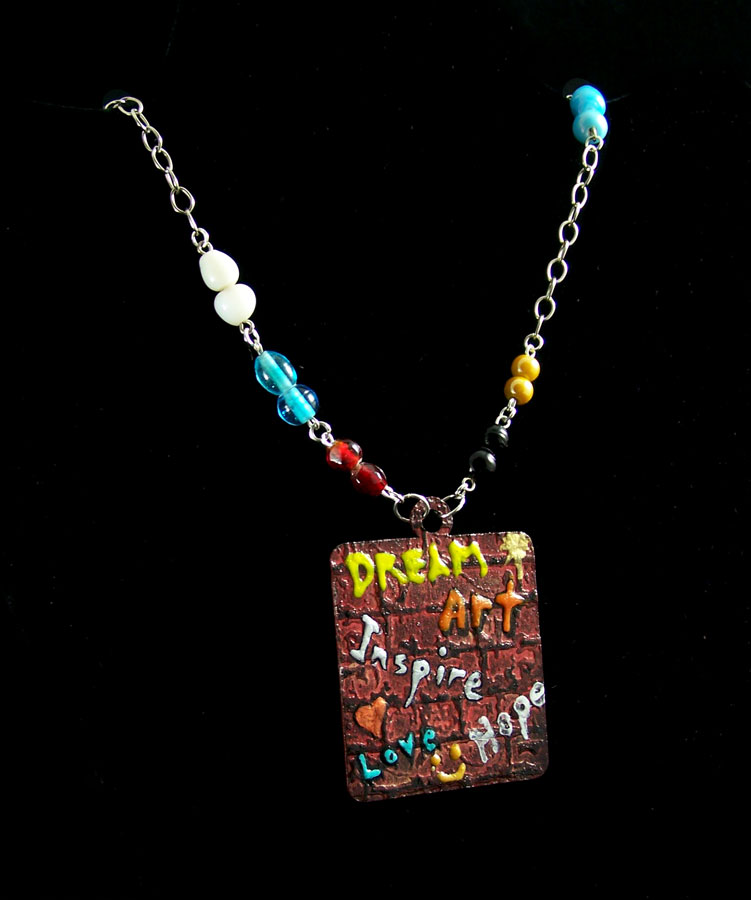
The 3D Enamel Gel has a natural gloss finished if applied straight from the bottle but if you use a cosmetic sponge to stipple it on you can get a satin finish. For this Graffiti Art necklace I used a Square Tag bezel, Glastique Gloss Finishing Glaze and 3D Enameling Gel (Titanium White, Orange, Cobalt Turquoise, Bright Yellow, Napthol Red, Metallic Silver, Metallic Copper, Mars Black).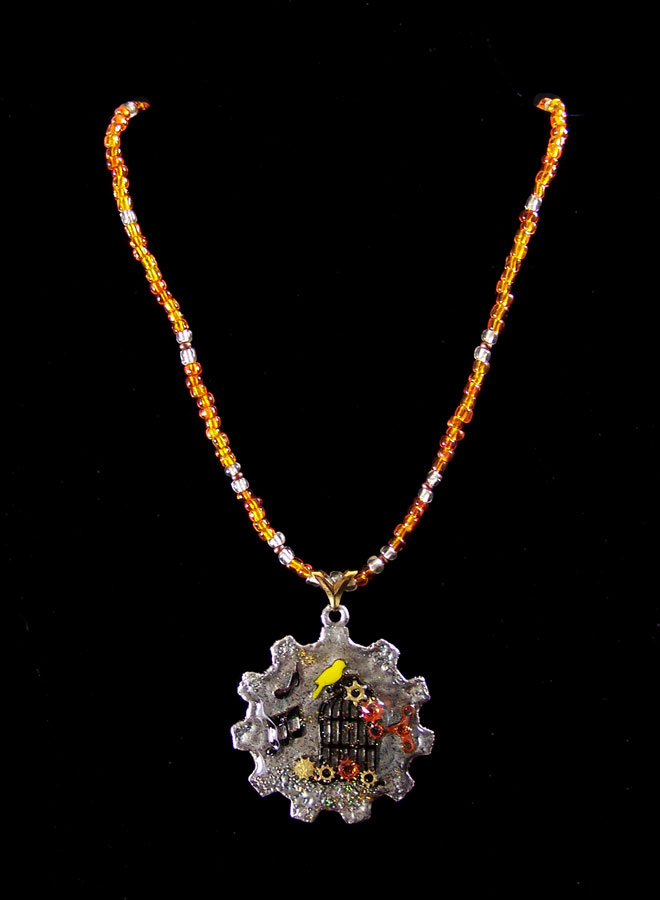
The new Enamel Gel is perfect for when you want just a touch of color. The tiny applicator tip on all of the Gel bottles makes it easy to apply it to any Piccolo element. With this Steampunk Gear Bezel, the Bright Yellow, Metallic Silver and Metallic Copper 3D Enameling Gels give it that perfect touch of color.Until Next Time, Safe Travels!
Family of Pumpkins
I have pumpkins on the brain lately (sounds like a condition doesn’t it? LOL). I am trying to grow a pumpkin patch, wanting to make pumpkin pie, finding vintage ads of pumpkins and creating pumpkins out of polymer clay. I have always had fond memories of carving pumpkins, making pumpkin cakes and cookies with my family. To me they are what Fall, Halloween and harvest festivals are about.
This year I am making all kinds of Fall crafts but I wanted to make something showcasing pumpkins and the happy feeling of family together for the seasons. I started with making a cute little family of pumpkins out of polymer clay. I really liked how they came out but felt I could use them on so many projects such as cards, magnets, jewelry and wall decor. So I decided to make a mold of them so I could do all the projects I thought of and more.
For the pumpkin family mold I used:
Polymer clay (any brand or color will do since I made a mold from the original polymer piece)
Amazing Mold Putty
Amazing Casting Resin
Martha Stewart Crafts 2oz Multi-Surface Satin Acrylic Craft Paint Carrot, Jonquil and Beetle Black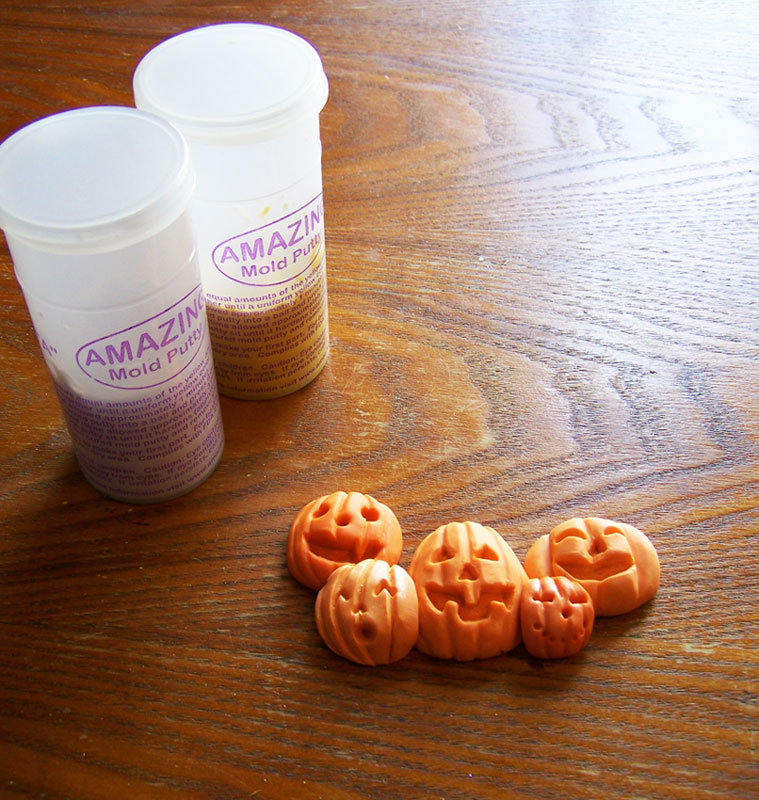
Here is the original pumpkin family made out of poly clay. I gave them deep smiles and happy faces, I don’t have to worry about any detail being lost since the Amazing Mold Putty does wonderful with anything with high detail.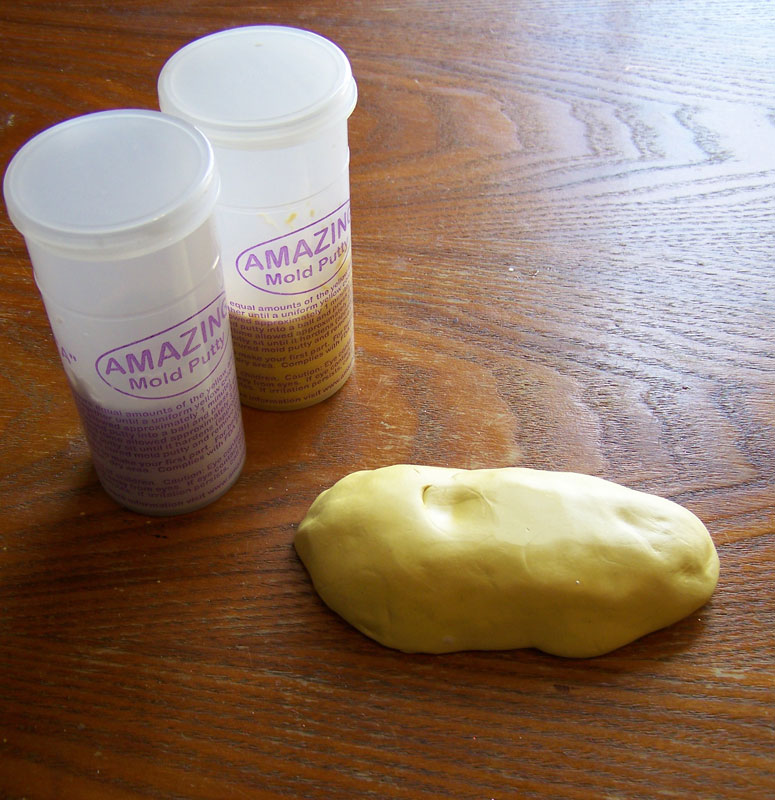
I mixed the putty according to the manufacture’s instructions, though the Amazing Mold Putty is rather forgiving if there is not exact amounts used. I do not attempt to remove the mold for at least 20 minutes to make sure the mold has set.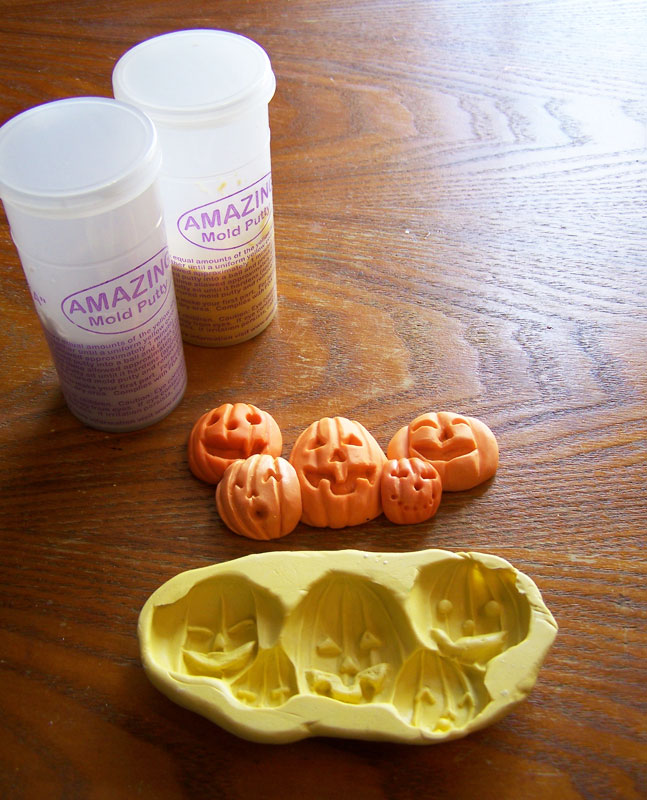 While the cure time for the molds is 20 minutes I like to leave the orignal in the molding putty for longer, making sure the mold is a rigid as possible (but keep in mind it is silicon and very flexible once cured) before trying to make any replicas. The mold can be cleaned with mild soap and water before you make any replicas to remove any loose particles left by the original.
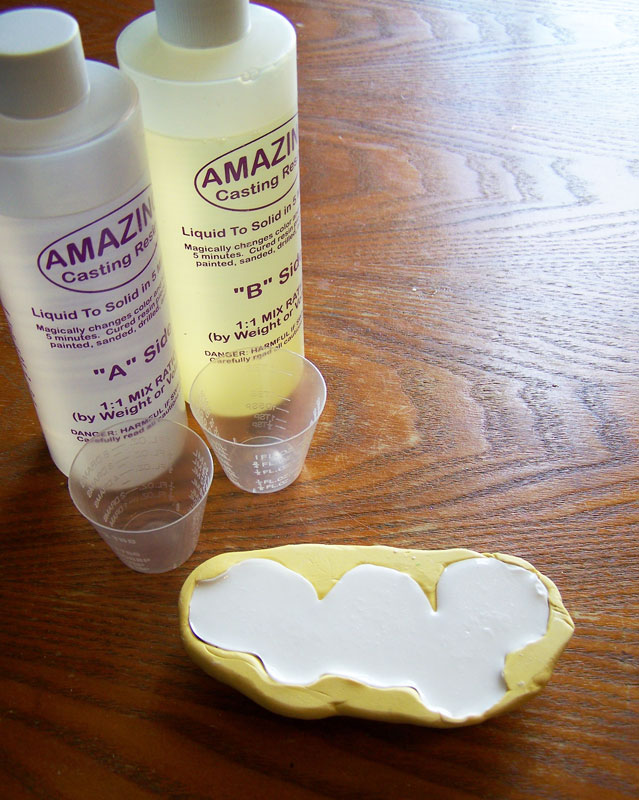 When mixing the Amazing Casting Resin I have to be careful about stirring too fast and for too long. Once the two parts are combined stir carefully until clear, scraping sides, about 15-20 seconds. I then immediately start to pour the resin into the mold; be careful not to pour too quick as you will increase the amount of air bubbles. It will set in 10 minutes, but keep in mind that the thicker the piece the faster the cure time. In this case the pumpkin family is a thick piece and set in about 8 minutes.
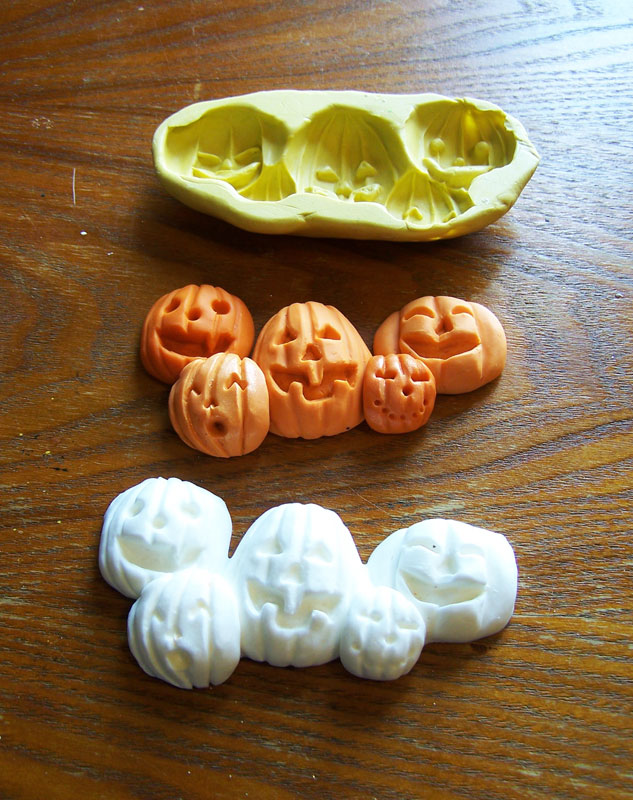 Here the resin copy is next to the original and the mold. Once the piece is cured I demold, trim any rough edges, sand and started painting.
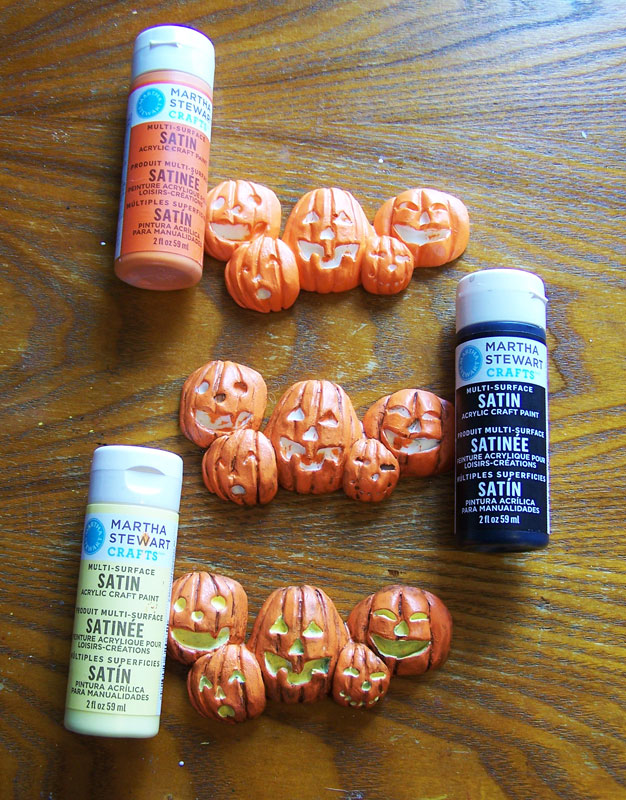
Here I show the 3 stages of painting. I have found that the Martha Stewart Crafts Multi-Surface acrylic paint bonds well with the resin replicas. I start with the Carrot, then a color wash of Beetle Black and then paint the Jonquil paint only in the eyes, noses and mouths of the pumpkin family.The first project I wanted to make with a pumpkin family was a home decor piece for my mother. She loves the holidays and always likes to have the family home to celebrate.
For the home decor piece I used:
Globecraft Memories Classic Fancy Rectangle
Globecraft Memories Glastique Gloss Finishing Glaze
Globecraft Memories Enamel powders 24K Gold and Mossy Glen
Globecraft Memories Piccolo Accents
Cardstock (any color or brand will work, I used orange, metallic white and black)
Mini Fall Leaves (most local craft stores carry small bags of fabric or paper leaves in the scrapbooking or floral sections)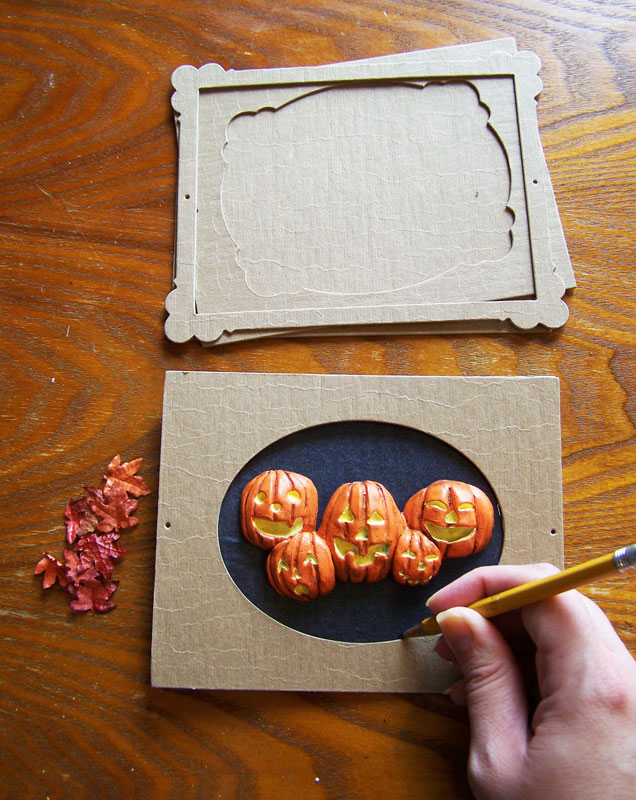 Using one of the finished pumpkin resin pieces, I placed it in the middle of the Classic Fancy Rectangle and traced along the inside of the oval to make sure the background paper, pumpkins and a leaf embellishments fit inside the globe.
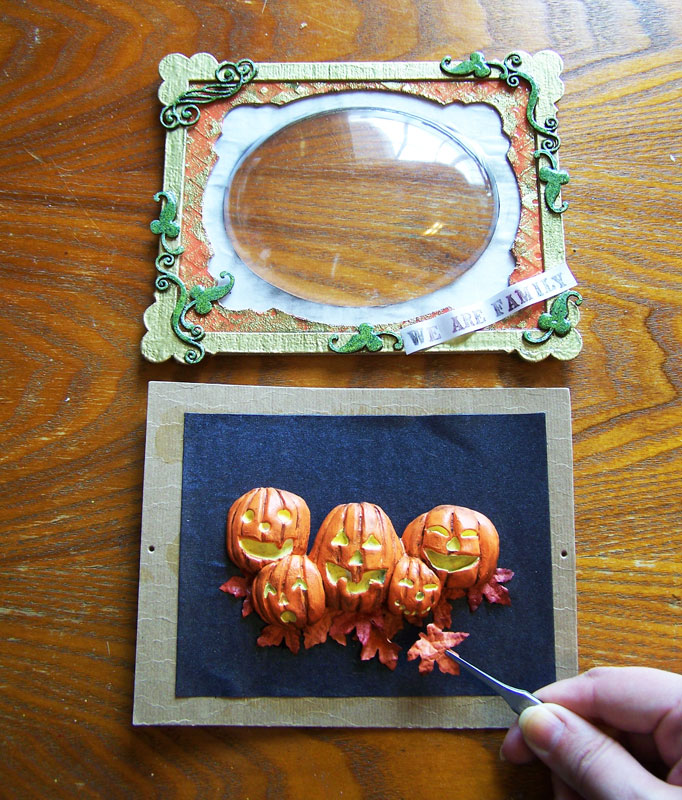 Once I decorated the outer layers of the frame with the paper, enamel and Piccolos, I coated the outside layers with two coats Glastique Gloss glaze. Once completely dry I glued the layers and globe with Glastique together. I then glued the pumpkin resin piece to the backplate of the frame with a thick layer of Glastique. I carefully added the mini leaves around the bottom of the pumpkin family to give them a “bed” of leaves to be on.
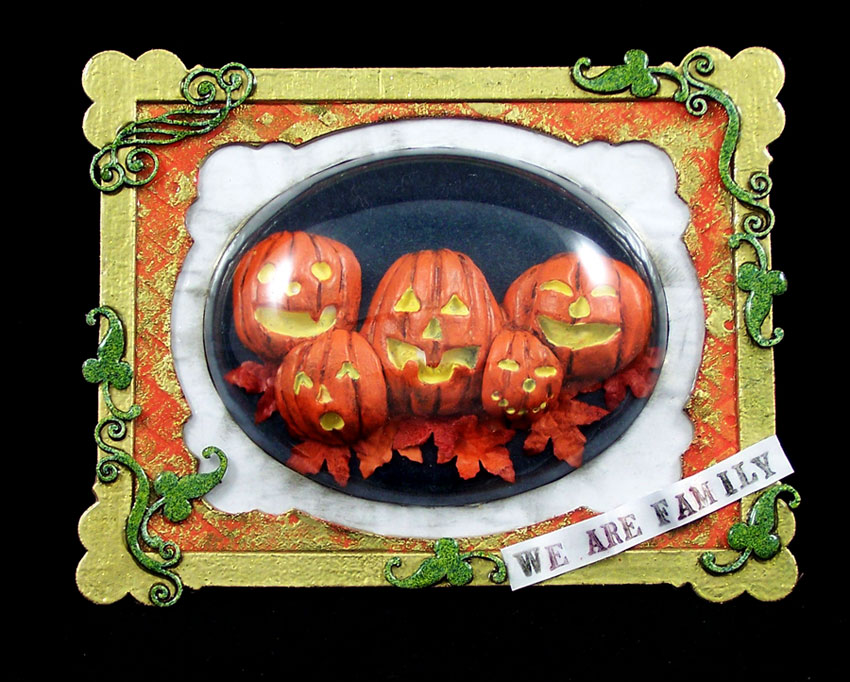
Glue the top layers of the the frame to the backplate with Glastique and once dry it is now ready to hang on the wall! 🙂Until next time, Safe Travels!
Globecraft Memories New Piccolo Charm line!
I have been working on so many art projects that I am lucky I had the time to take photos of them before they were sent off! I once again had the wonderful opportunity to work with Globecraft Memories as a designer/product design and development on of their new line of Piccolo charms. By now you know about the Piccolo Card Toppers and the Piccolo embellishments. They have added a new Piccolo Charm line! Steampunk gears, hearts, kitties, sea life, angels, butterflies, horses, keys and silhouettes are just a few of the new kit themes in the charm line. With each kit you can make anything from a necklaces, earrings, lapel pins, wineglass charms, curtain tiebacks, rear view mirror dangles and much more!
Like all of the Piccolo Card Toppers and the Piccolo embellishments, the Piccolo Charm line is made from a high quality chipboard. To make the charms more durable and able to handle daily wear and tear I use Glastique Flexible Finishing Glaze (Gloss) on all of the pieces to give it flexibility, strength and a enamel-like finish. The Piccolo Charm sets will be available soon at Globecraft Memories, so watch their website for product updates. I have been merrily making up product samples of this new line to be displayed at upcoming shows for Globecraft Memories, and here is a few:
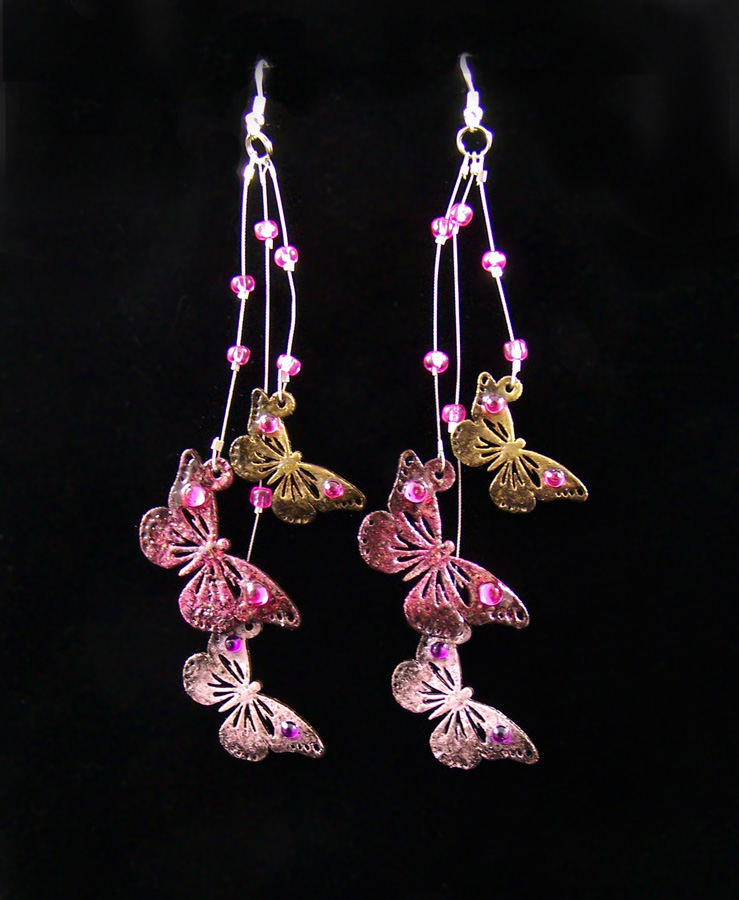
This set I turned into Butterfly shoulder duster earrings. Sticker gems, stamp-pad ink and Globecraft Memories’s Piccolo Enamel Powders.
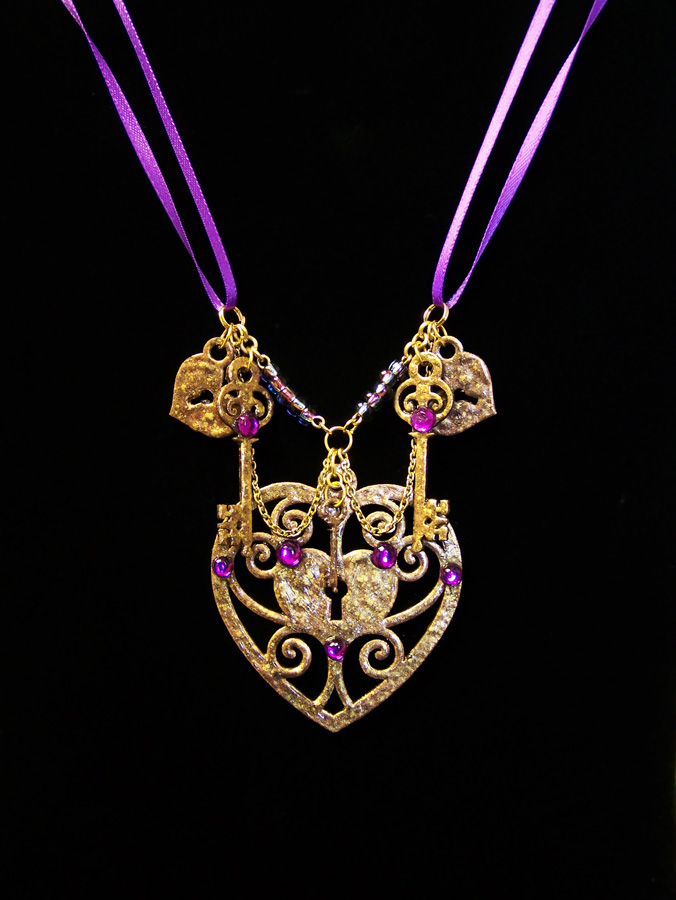
This lovely Heart lock and key set I felt would be perfect for a faux vintage necklace. Sticker gems and Globecraft Memories’s Piccolo Enamel Powders.
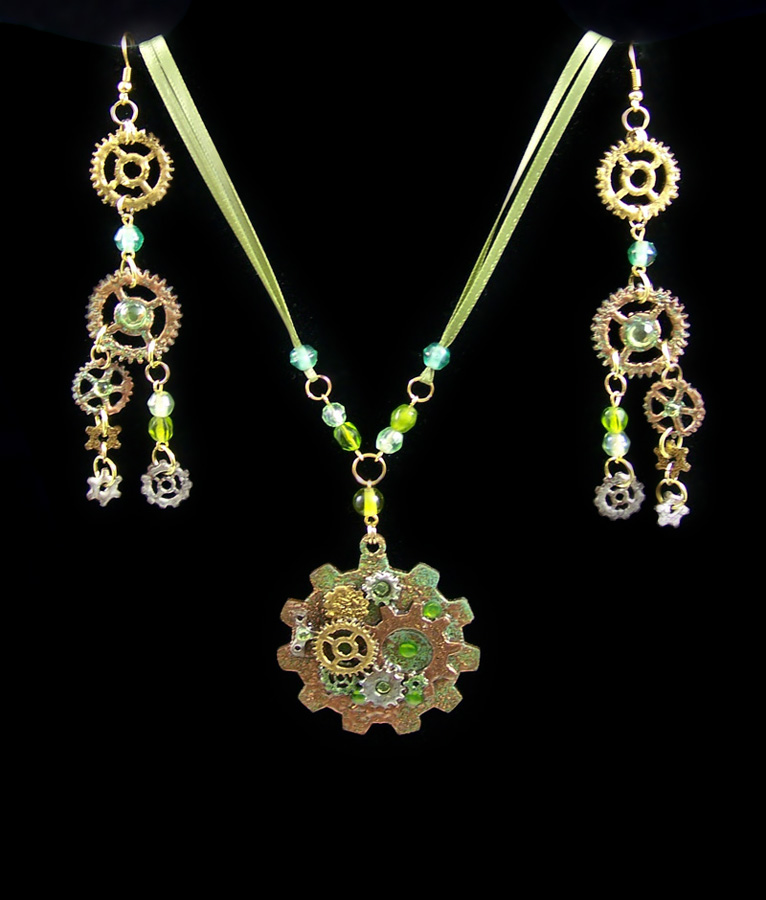
I love Steampunk gears and I wanted to something different with a Emerald City themed necklace and earring set. Sticker gems and Globecraft Memories’s Piccolo Enamel Powders.
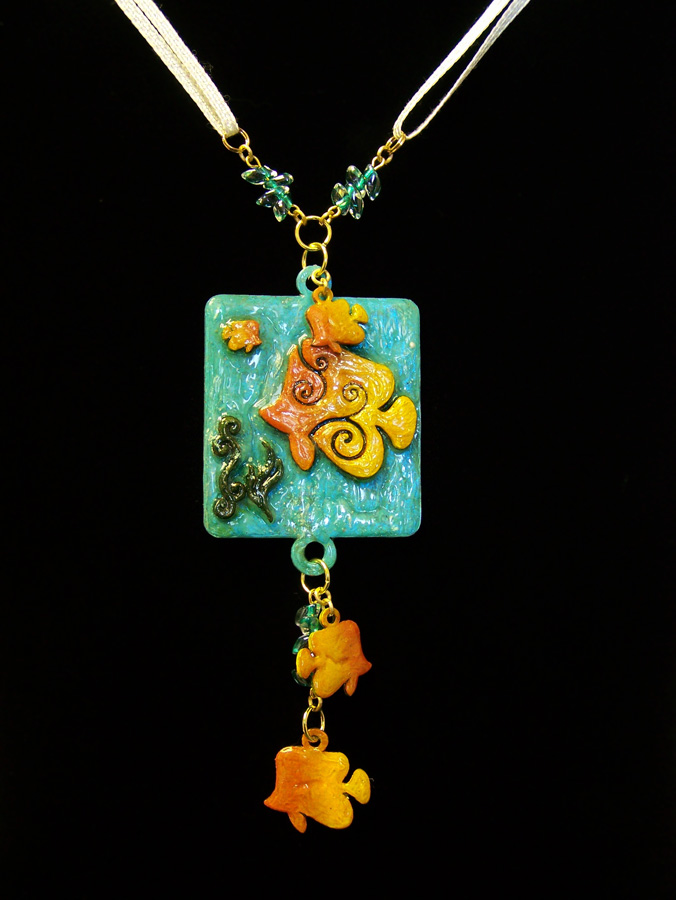
The Sea-life set is perfect for Summer and I put a textured heavy coat of Glastique on this piece to mimic the look of water. Acrylic paint and Globecraft Memories’s Piccolo Enamel Powders.
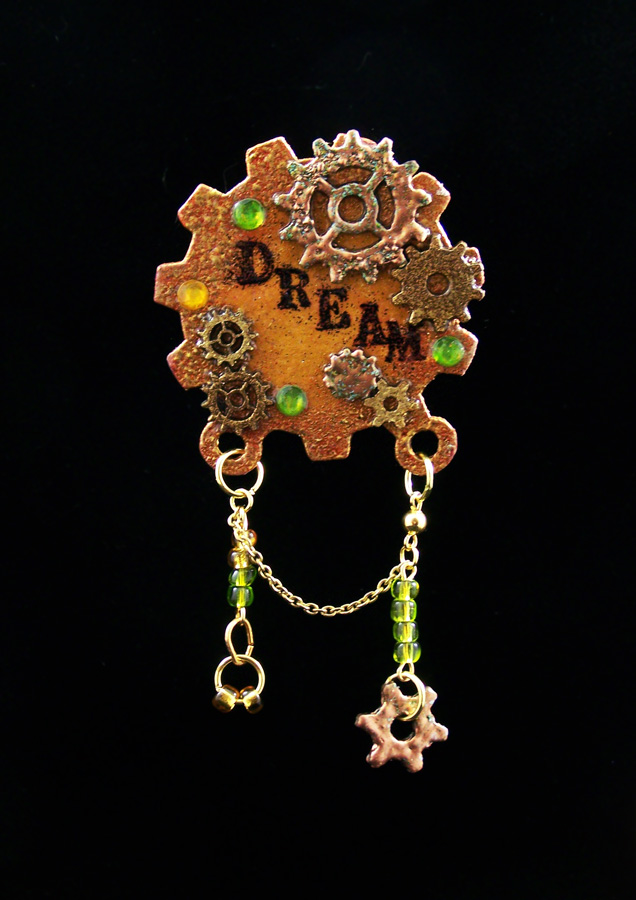
Another lovely Steampunk gears kit that I turned into a lapel pin. Acrylic paint, sticker gems, stamp-pad ink and Globecraft Memories’s Piccolo Enamel Powders.
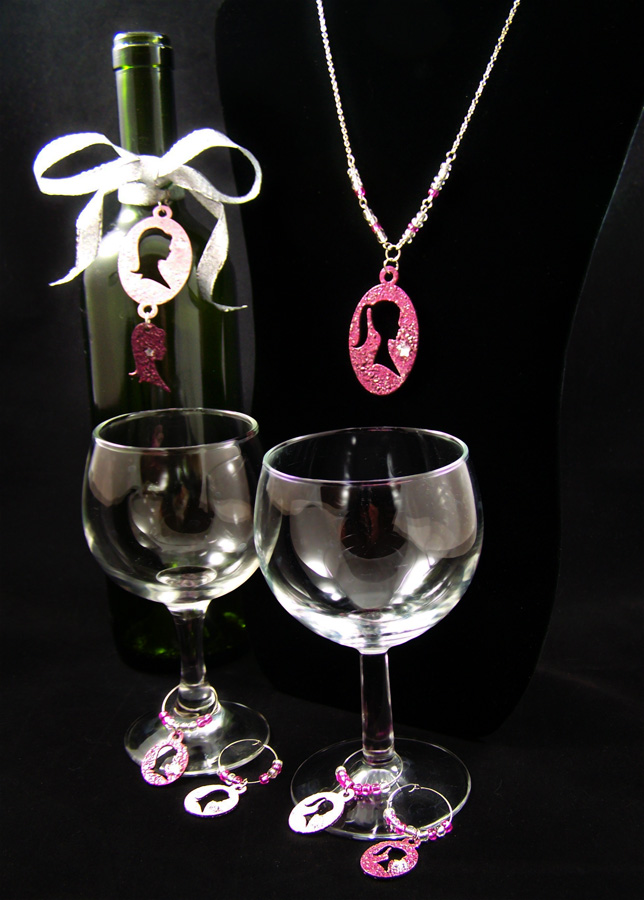
The Silhouette set I made into a hostess gift set, with a wine bottle tag, matching hostess necklace and wine glass charms. Barbie meets Girls Night! Sticker gems and Globecraft Memories’s Piccolo Enamel Powders.
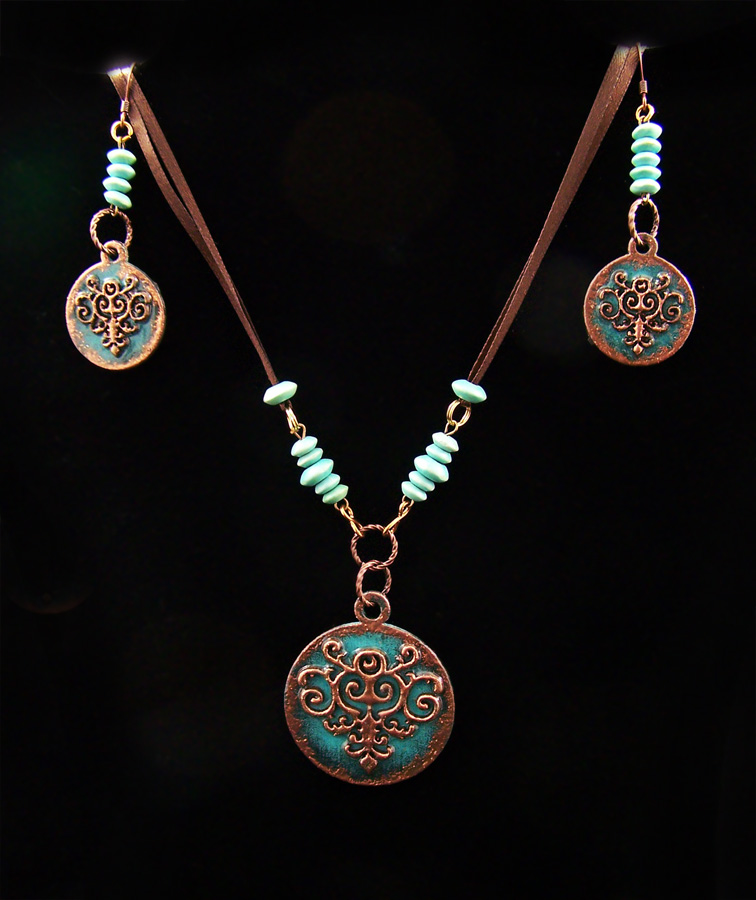
One of the many lovely Flourish sets, I wanted to try a faux vintage look with copper highlighting the amazing detail in the flourishes. Acrylic paint and Globecraft Memories’s Piccolo Enamel Powders.
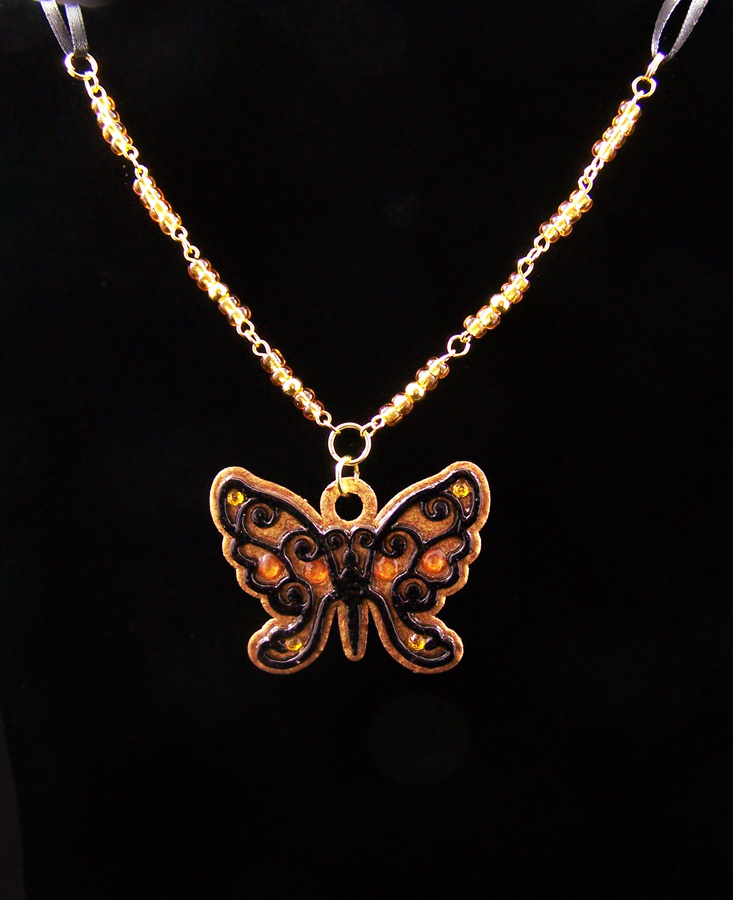
They have so many butterfly sets, though this set is one of my favorites since it lends so well to faux enamel. Sticker gems and Globecraft Memories’s Piccolo Enamel Powders.
Untill next time, Safe Travels!
CHA Winter show 2012 part 1
This year’s winter Craft and Hobby Association show was awesome! While this show was a touch smaller than past Winter CHA shows I can honestly say it was still a great and positive show to attend. There were so many new products, designs, workshops and wonderful contacts; this show sure was a busy one! It was a bit different for me because this was my first time doing demos at the CHA Globecraft Memories booth.
At the last winter CHA in 2011 I had gotten some information about a new company called Globecraft Memories. They had wonderful chipboard frame and globe sets that people could decorate with paper, fabric, paints, stamps or clay and place photos or family treasures inside. I saw one of their globes with a miniature polymer clay baby in it and I felt these would be prefect for my miniature work. I ended up finding out the baby sculpture was from their other company Secrist Dolls, which carries only the best vinyl doll kits, polymer clay doll sculpting tools and doll paints on the market. I left my business card and eagerly awaited the catalog to be sent to me. I ended up being contacted by the owner Mr. Pat Secrist because he had noticed I listed myself as a designer on my business card. They had some openings in their design team and they were looking for some new ideas. We got to talking and I ended up making a few samples for the website. Mr. Secrist then started to get in some new products to expand the line, they sent me and their other designers some to test. I was sent frames to start making samples for the CHA winter show. I was excited to be then asked to demonstrate products at CHA in their booth! Mr. Secrist wanted to show people that the globe kits and frames could be so much more. The idea was to make these frames more than just a card making or a scrapbooking element but something that could appeal to paper crafters, home decor artists and even mixed media artists like myself. The end result was a wonderful line of products designed to make chipboard look like expensive metal wall decor, enameled art and stonework but for fraction of the cost.
I can honestly say I love their new line of products:
New Frame Chipboard Kits: A new line of frames and elements for all interests. Be it for scrapbooking, papercrafting, home decor or mixed media they have styles and elements you will love. They also have a line of Steampunk Airships that are just too cute, which come in Large, Medium and Mini. The chipboard elements before assembling can be put through an embossing machine like Sizzix or Cuttlebug for more texture and detail.
Piccolo Chipboard Elements: Both as mini chipboard elements to be used on frames, paper or card these wonderful little patterns and shapes come in so many styles. From Steampunk gears, birds, cats, swirls, butterflies to delicate corner elements. They also have Toppers that are small tags and elements that would be wonderful for cards, scrapbooks and mixed media art.
Glastique – Flexible Finishing Glaze: comes in Gloss and Matte. This is water based and non-toxic. It can be applied to chipboard, fabric, paper, glitter, paint, it can act as a glue and a clear glaze. In fact, when coated on pieces of chipboard that has been coated in embossing powder it makes the chipboard flexible! I have even put thick layers of the Glastique on rubbers stamps; once dried and peeled off the stamp, I have a clear flexible piece to be added to mixed media work or paper crafting.
Halo Glitter: comes in Gold and Silver. A wonderful fine glitter with several different sized particles for a more reflective effect. Layer it with Glastique and you have gorgeous color reflection.
Mica Powders: They carry so many colors I can’t list them all! Super fine mica powder for all you craft needs, from paper crafting, resin work to even polymer clay. They add no binders to the mica so there is no worries about odd chemical reactions like other products on the market. Layer it with Glastique to get a dichroic glass effect.
Mica Powders with Glitter: Super fine powder and glitter in vibrant colors. Stunning selection of colors for so many uses.
Super pigment rich acrylic paint and glazes: While this is a slightly more expensive paint than your standard craft store bottle paint it is well worth the cost. Their colors are luscious, they dry the same color they are when wet, their metallic paints only need one coat for full coverage and the glazes are just stunning on paper or wood.
Globecraft Memories Enamel powders: These powders are specially designed to cover larger areas such as the chipboard frames Globecraft Memories is known for. The nice thing is the powders still look wonderful on detail elements such as their Piccolos. I love these powders but then again I am a bit partial to them. I ended up making a portion of the new recipes of enamel powders for Globecraft Memories and one of my colors, Girls Night Out ended up being their 3rd best seller at the Winter CHA! These wonderful colors can mimic stone, metal, natural elements and aged surfaces. In fact these powders worked did it so well for the first two days of CHA people walked past the Globecraft Memories booth thinking they were selling real metal and wood frames, not coated chipboard! A sign had to be placed in front to tell everyone everything in the booth was chipboard. 😛
The following is the few photos I was able to take while doing demos at CHA.
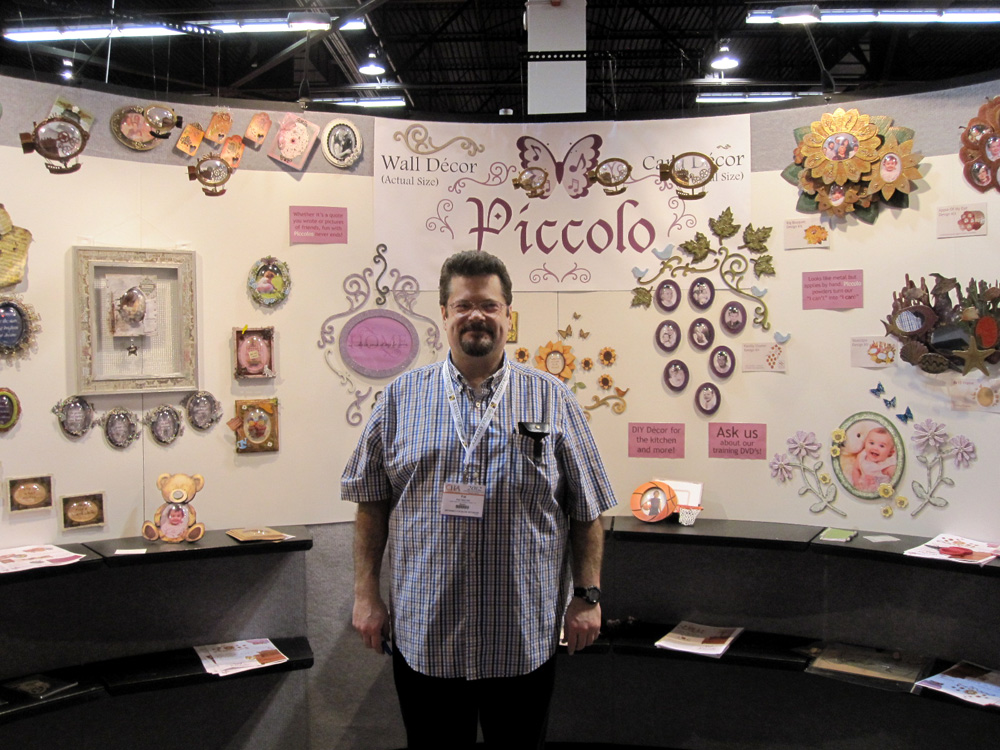
Mr. Pat Secrist the owner of Globecraft Memories.
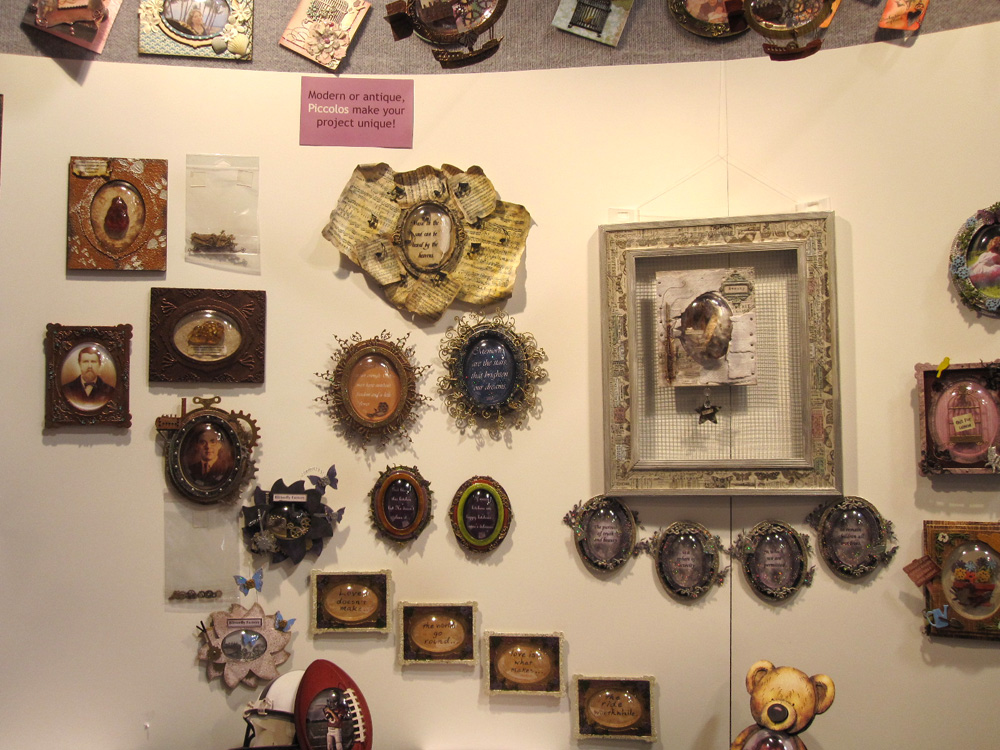
Some of the wall displays in the Globecraft Memories booth, the music sheet, solar, ambers and 4 globe sayings frames are my work.
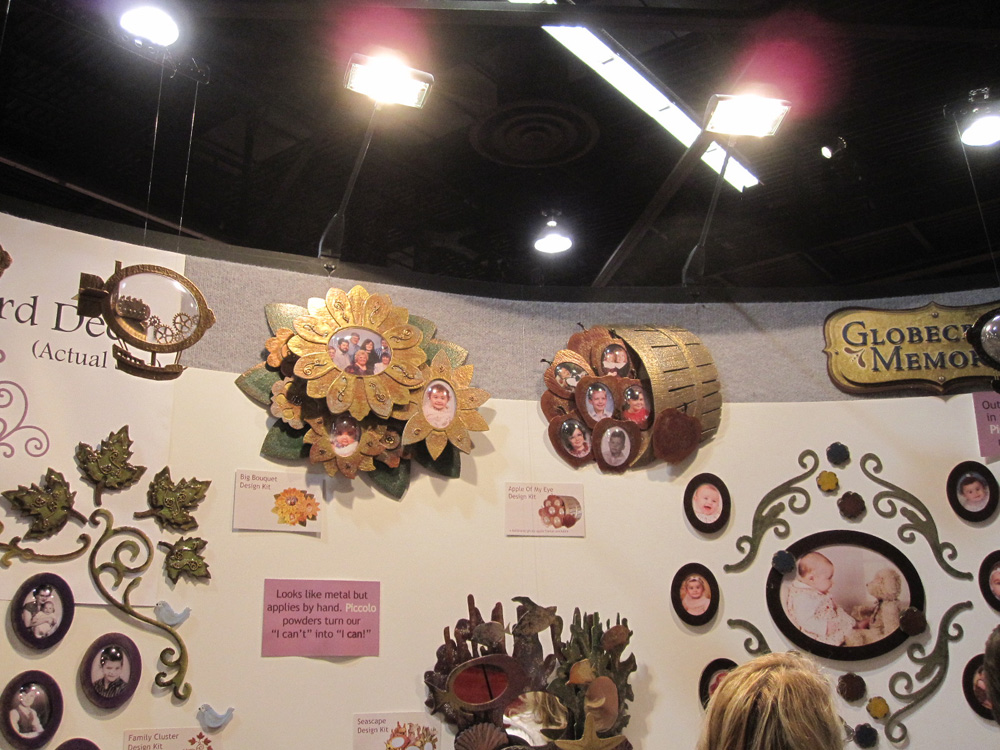
The flower bouquet and apple basket sets are based on my illustrations and the samples shown are my completed work.
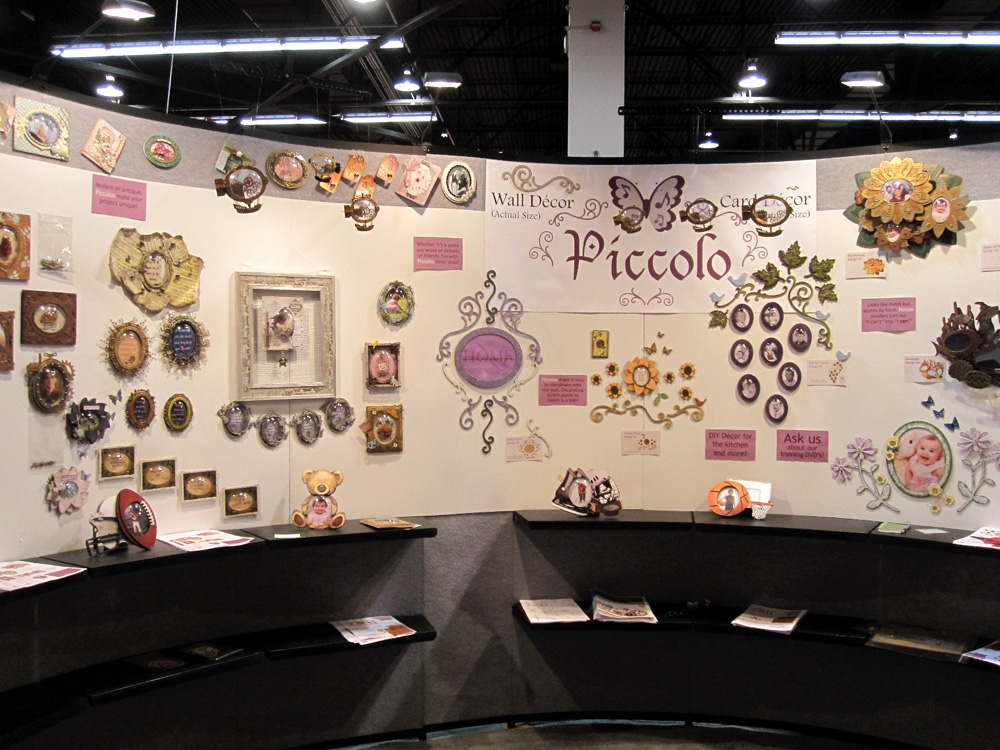
Part of the Globecraft Memories booth at the CHA winter show.
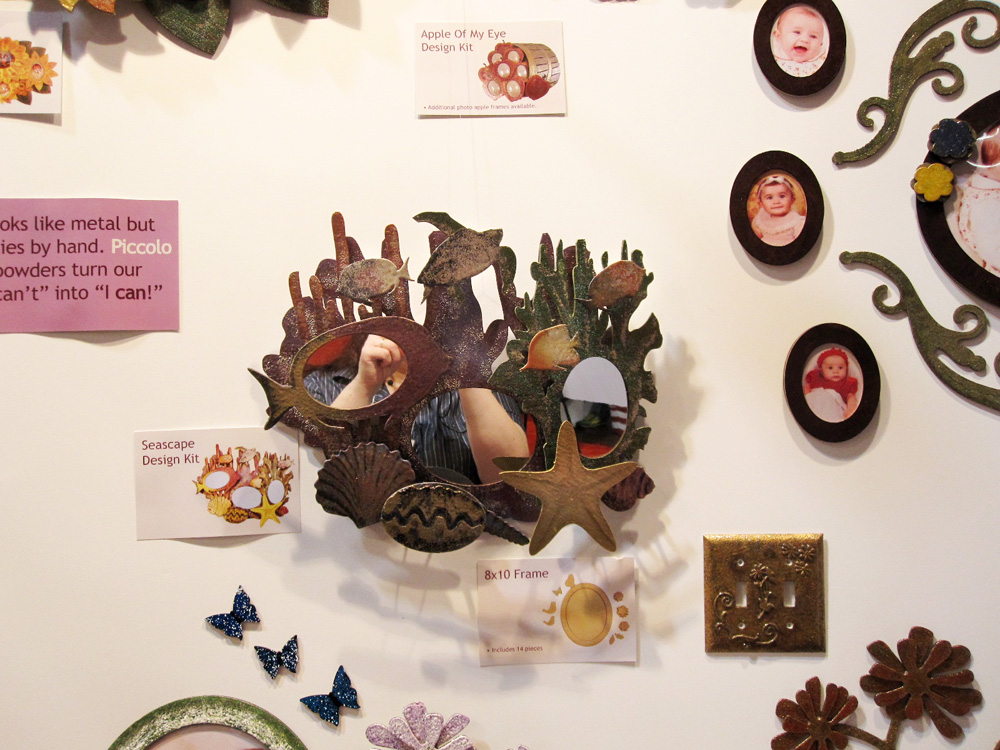
A close up of the sea frame set made into a mirror wall hanging.
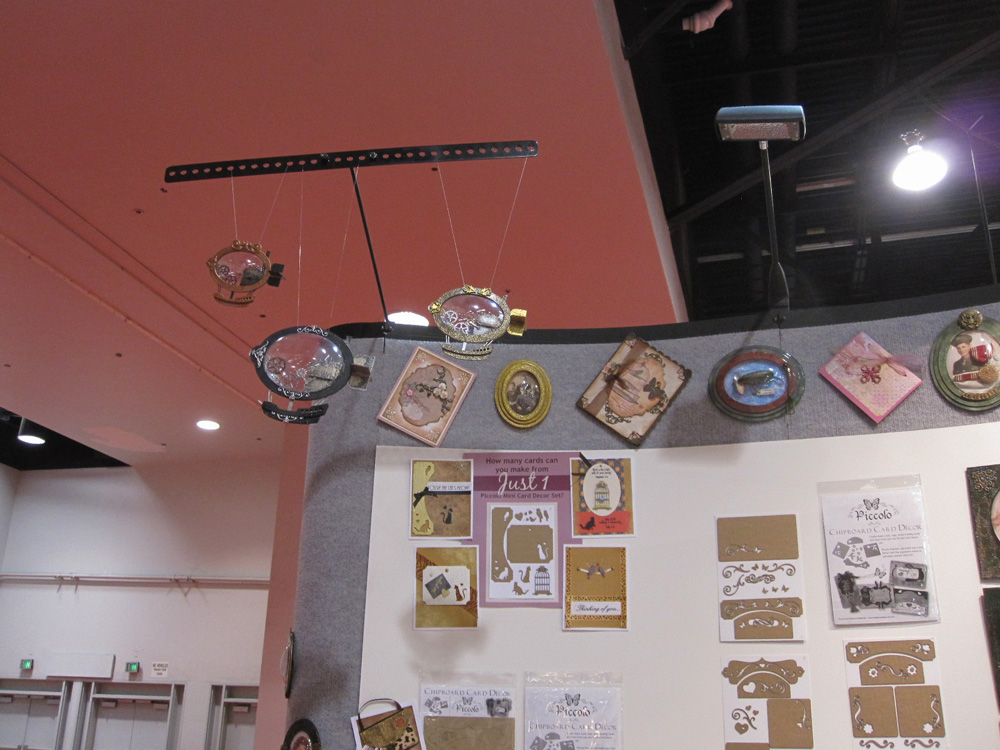
Some of my completed airships hanging from the booth. Some of the Piccolo chipboard element packs are on the right.
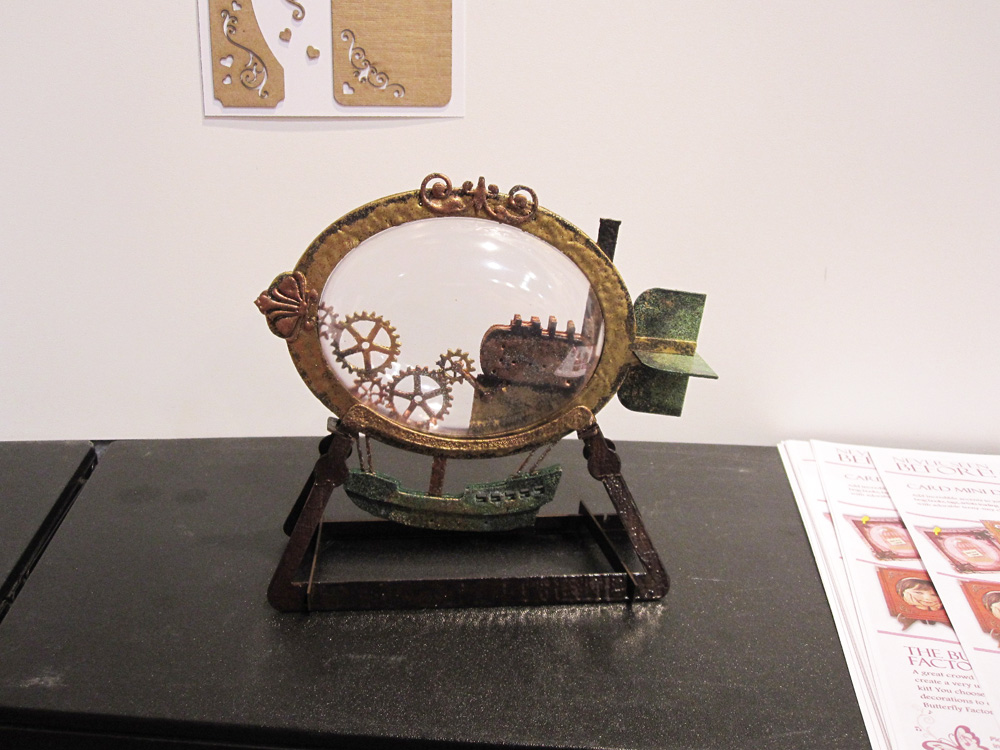
Close up of one of the completed airships.
The following photos are some the prototype photos I took while making the samples for the show. You will notice in some of the photos the globes are not attached because it is easier to ship without the globes in place. If you would like to see more prototype photos check out my Facebook fan page. All of the frames are from Globecraft Memories.
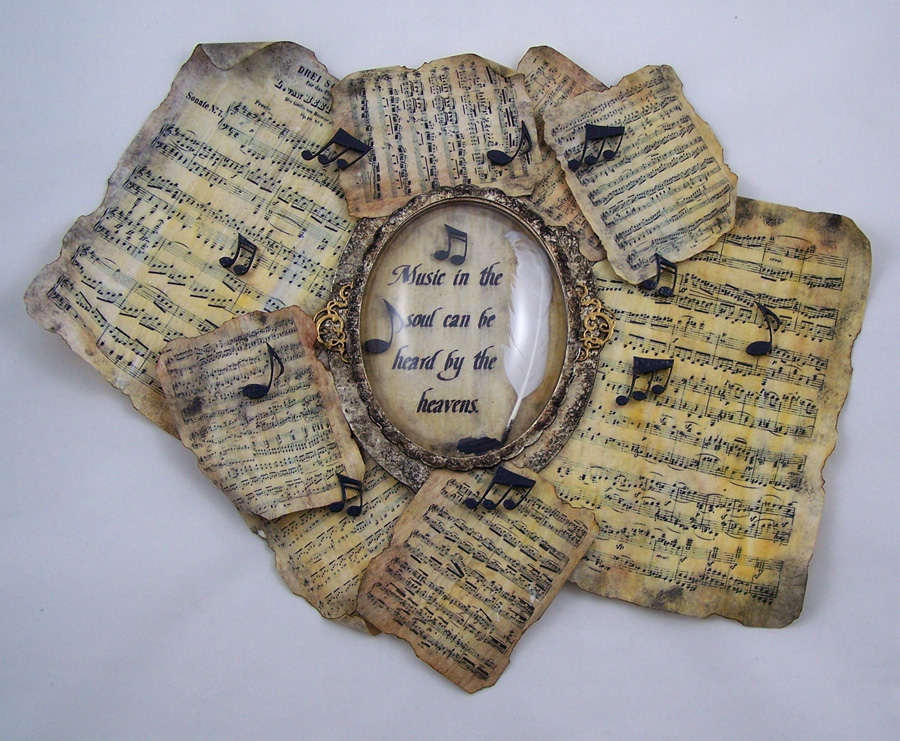
My music frame that was picked as a booth sample. Classic Grand Rectangle backplate with other chipboard elements and Glastique Flexible Finishing Glaze Matte.
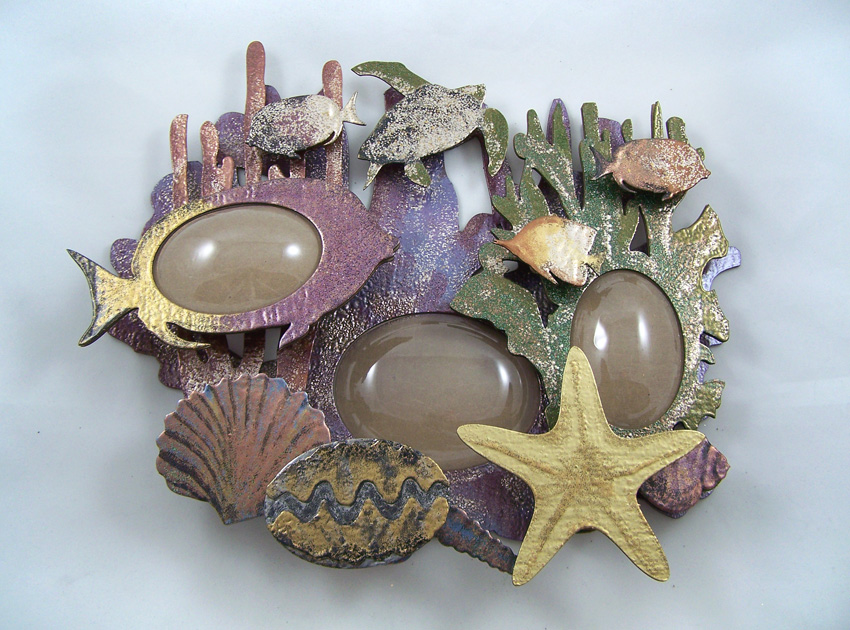
Prototype photo of my version of the seascape frame that was picked as a booth sample. This was before the mirrors replaced the globes for the final sample. Frame is covered in my enamel powder recipes. Seascape Wall Decor Kit.
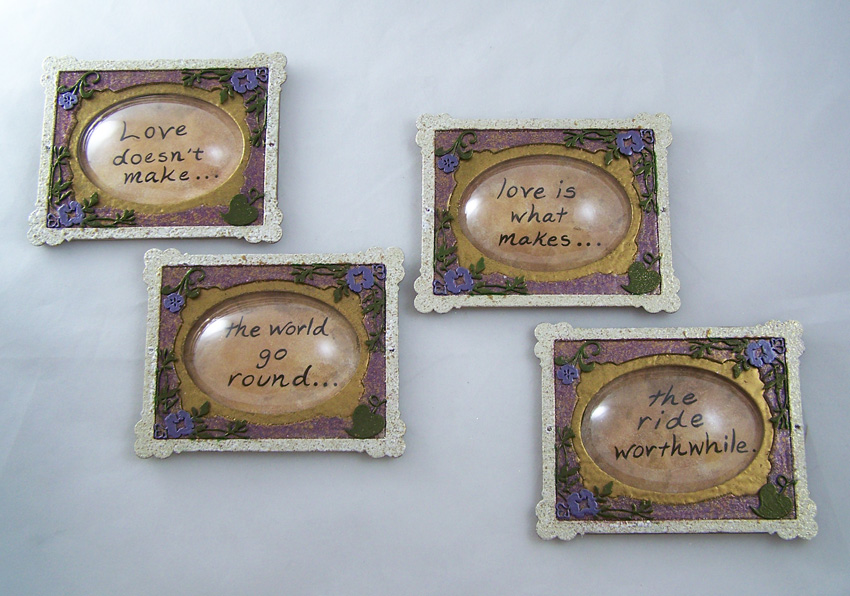
A saying frame set that was picked as a booth sample. Inner frames are covered in my enamel powder recipes “Mardi Gras” and “24 K gold”. Little Fancy Rectangle, chipboard elements and Glastique Flexible Finishing Glaze.
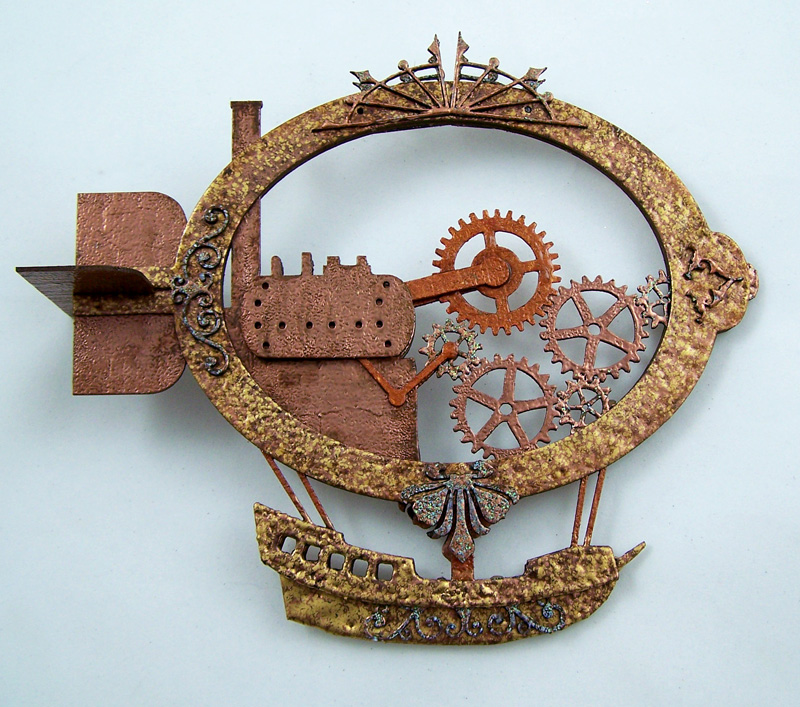
Vintage airship that was picked as a booth sample. I used the Large Airship and chipboard elements.
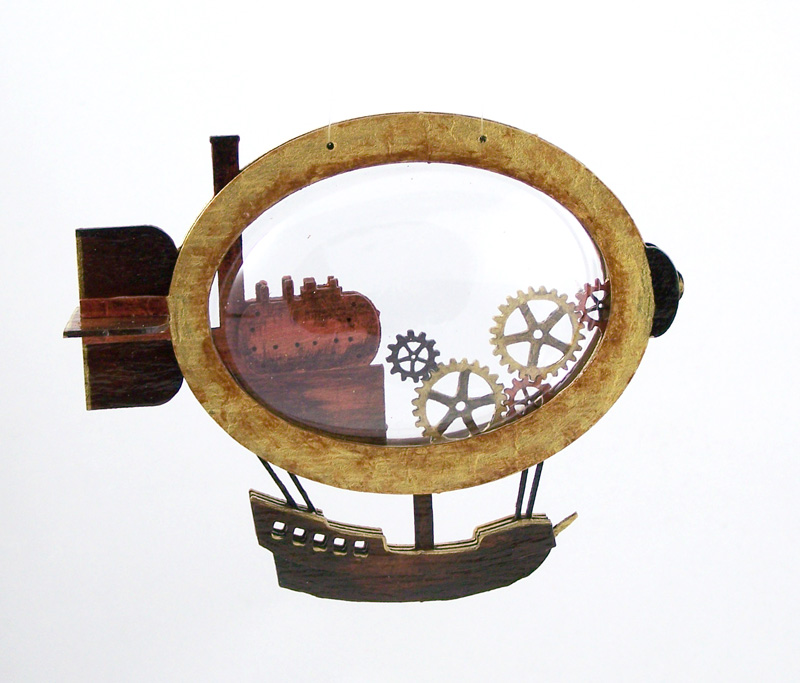
Mini airship that was picked as a booth sample. This is a finished piece I used the Mini Airship, the pigment rich paints and Glastique Flexible Finishing Glaze.
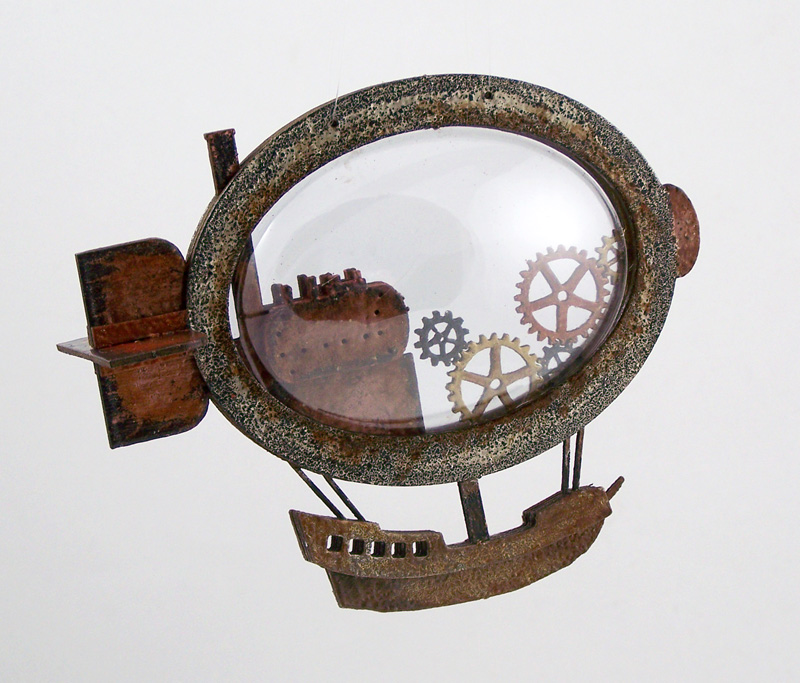
Vintage airship that was picked as a booth sample. This is a finished piece. Mini Airship kit, enameling powder and paint.
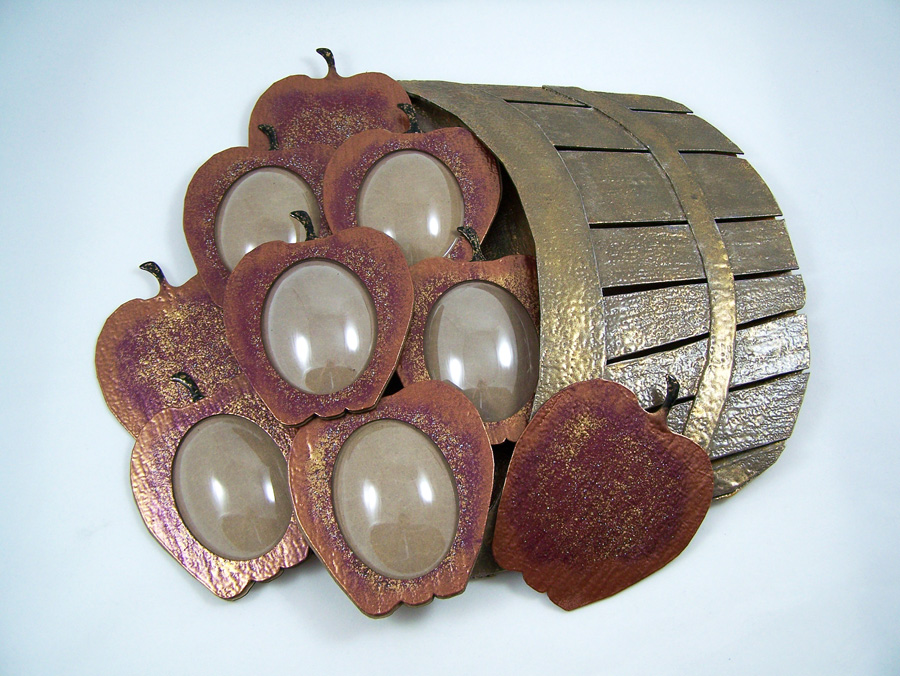
Apple frame set that is based on my illustration. This version was picked as a booth sample. This is the Apples of My Eye Wall Decor Kit.
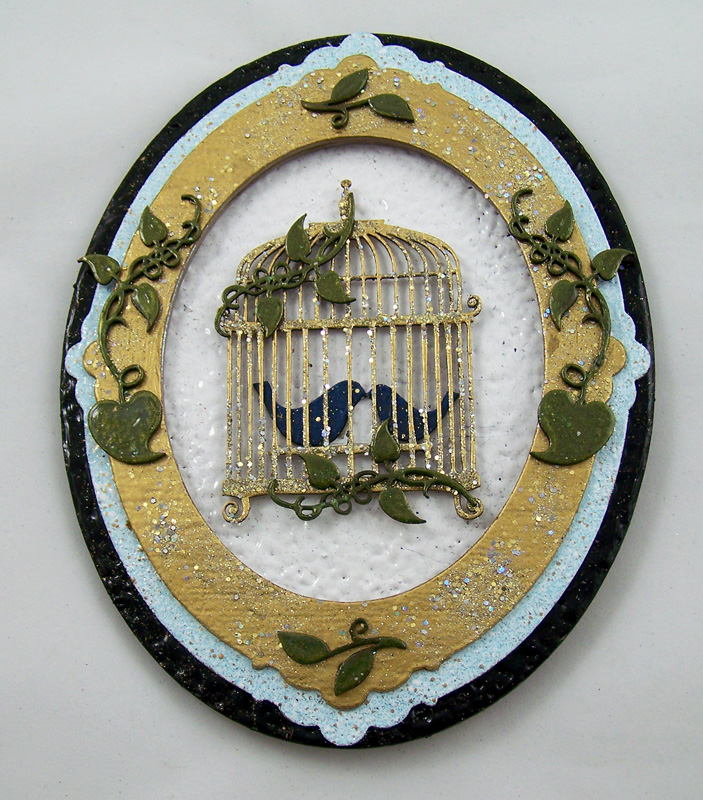
Birdcage piccolo that was picked as a booth sample. The globe is not attached in this photo because it is easier to ship without the globe in place. Classic Fancy Oval and Piccolo chipboard elements.
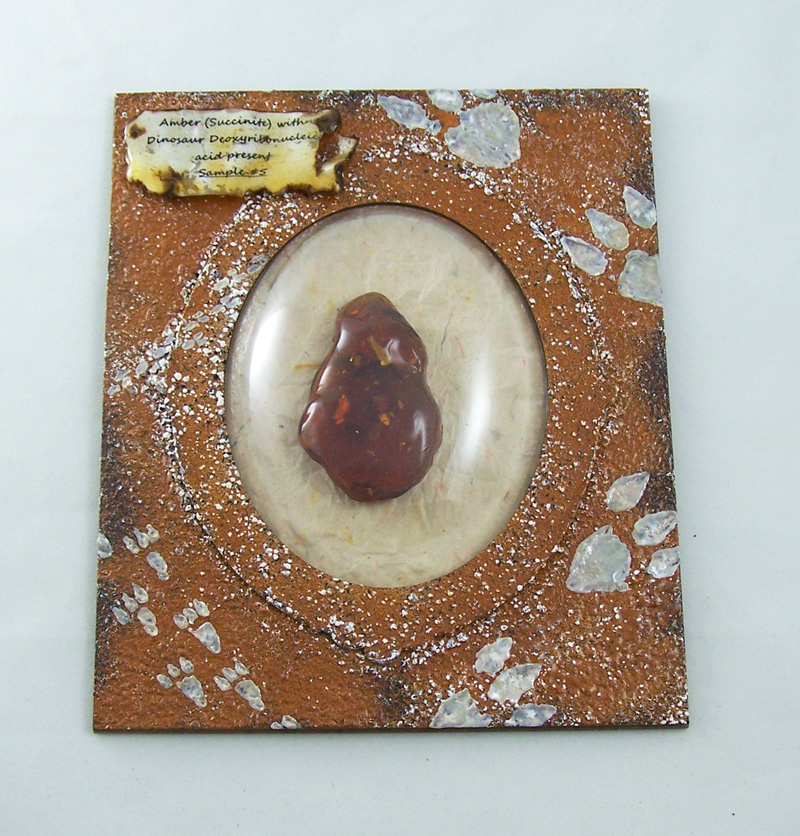
Dino amber frame that was picked as a booth sample. Frame is covered in my enamel powder recipe “Brown Stone”. I used the Classic Grand Rectangle backplate.
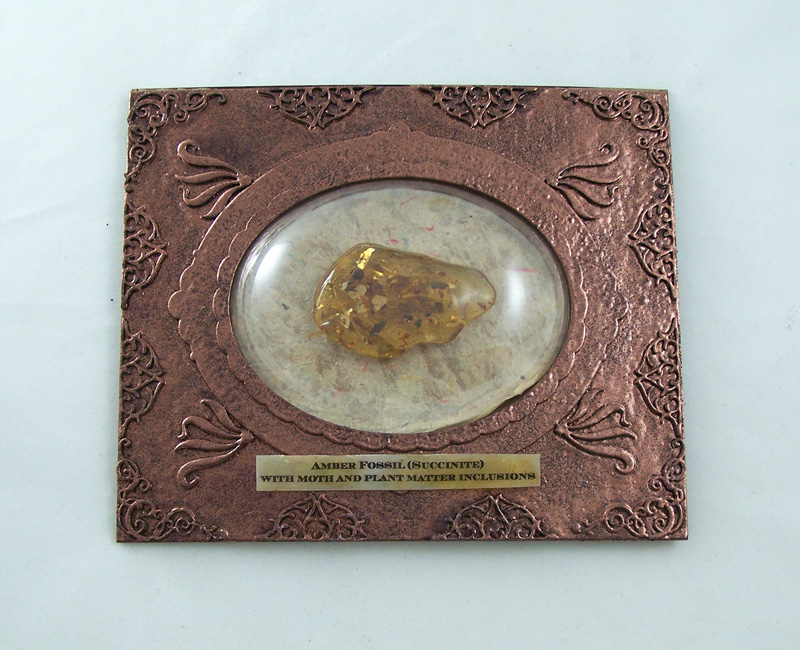
Museum frame, this is the first version. I put the label inside the frame and that version was picked as a booth sample. Frame is covered in my enamel powder recipe “Vintage Copper”. I used the Classic Grand Rectangle backplate with Piccolo chipboard elements and Glastique Flexible Finishing Glaze.
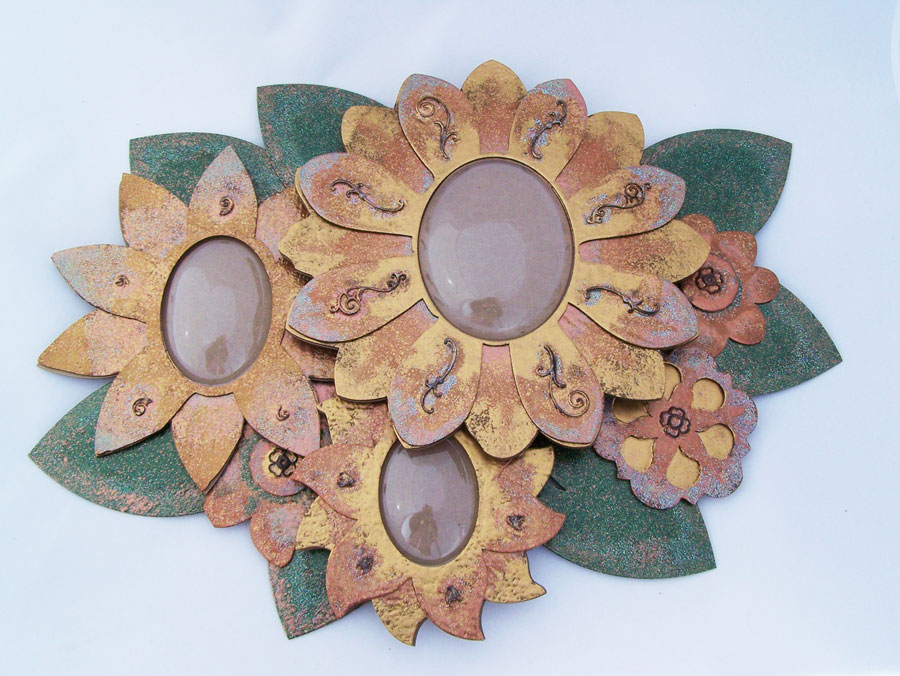
Flower frame set loosely based on a illustration of mine. This version was picked as a booth sample. Frame is covered in my enamel powder recipes. Big Bouquet Wall Decor Kit.
Until next time safe travels!

