CHA Winter Show 2013
Another Craft and Hobby Association Winter show has come and gone. While there were less vendors this year, I honestly feel this was one of the best I attended. This show was amazing! The classes, networking and show floor events were wonderful. I was able to make new accounts with several vendors and got to meet up with some seriously talented artists.
The wonderful Globecraft & Piccolo had a booth again at CHA. I am proud to be part of their Design Team and a part of product design & development! Members of the G&P design team, Jami Bostjancic (of Accent Allusions) and I were honored to be asked to do demos at the booth for three of the four days of CHA.
Here is some of the cool G&P products we got to demo at the show:
NEW Globecraft & Piccolo UV Resin: It cures in 3 minutes in UV light, scratch resistant, self leveling and not affected by humidity (in fact it can set up underwater). It works wonderful on top of chipboard, acrylic, paper, polymer clay, fabric, vellum and so much more!
NEW Globecraft & Piccolo Acrylic Bezels and Tags: Clear acrylic bezels and tags come in so many shapes and sizes. Perfect for making jewelry, mixed media and card decor! Looks lovely stamped and with paper backings.
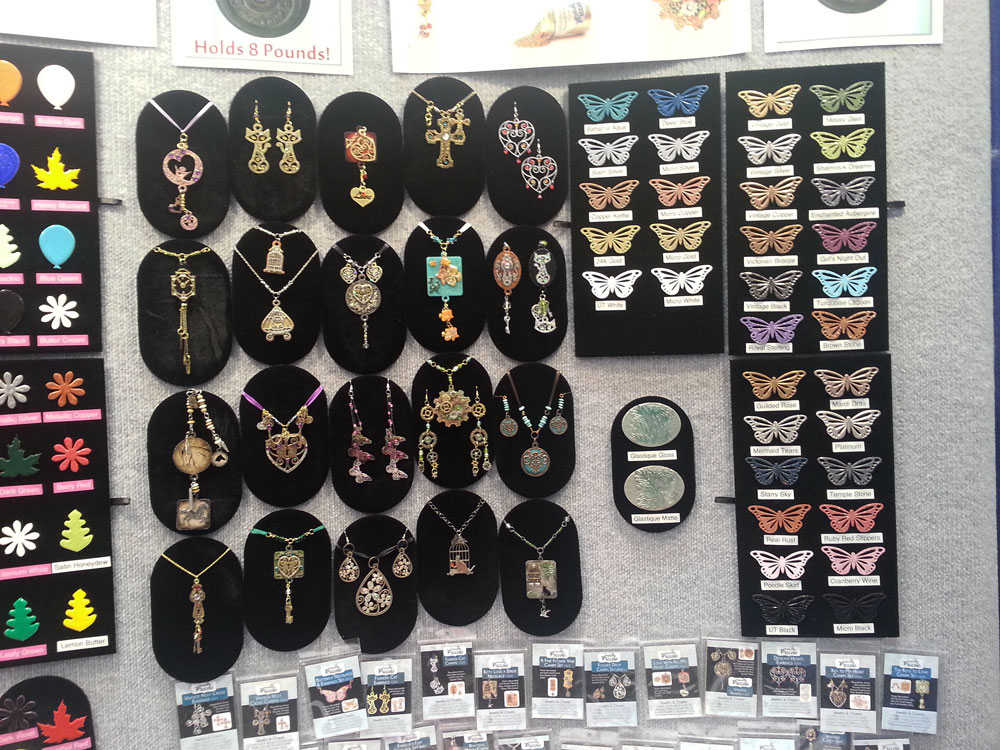
NEW additions to the Globecraft & Piccolo Embossing powder line: These powders are specially designed to look awesome on large and small projects. G&P Embossing Powders are made of varying-sized particles that create a unique depth and dimension not available with traditional embossing powders. These wonderful colors can mimic stone, metal, natural elements and aged surfaces. The new colors are Real Rust, Ruby Red Slippers, Shamrock Dreams, Turquoise Lagoon, and Platinum!
New Piccolo Chipboard Elements: Now in many different sizes, great for home decor, card making, mixed media, jewelry and more! From holiday, seasonal, steampunk, animals, swirls, and elaborate corner and edge elements.
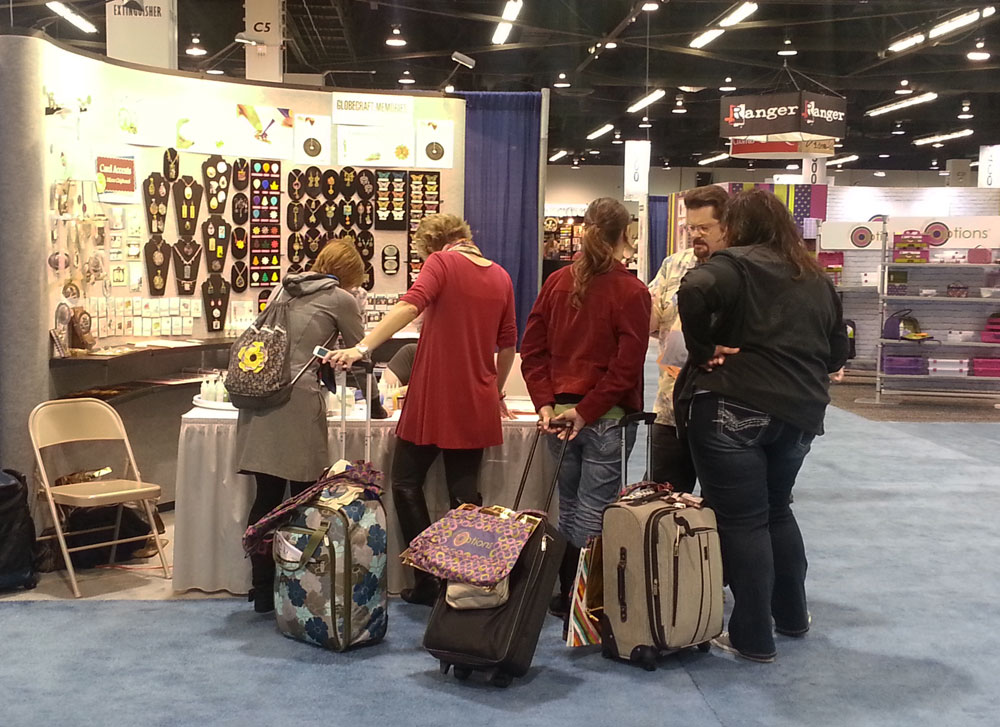
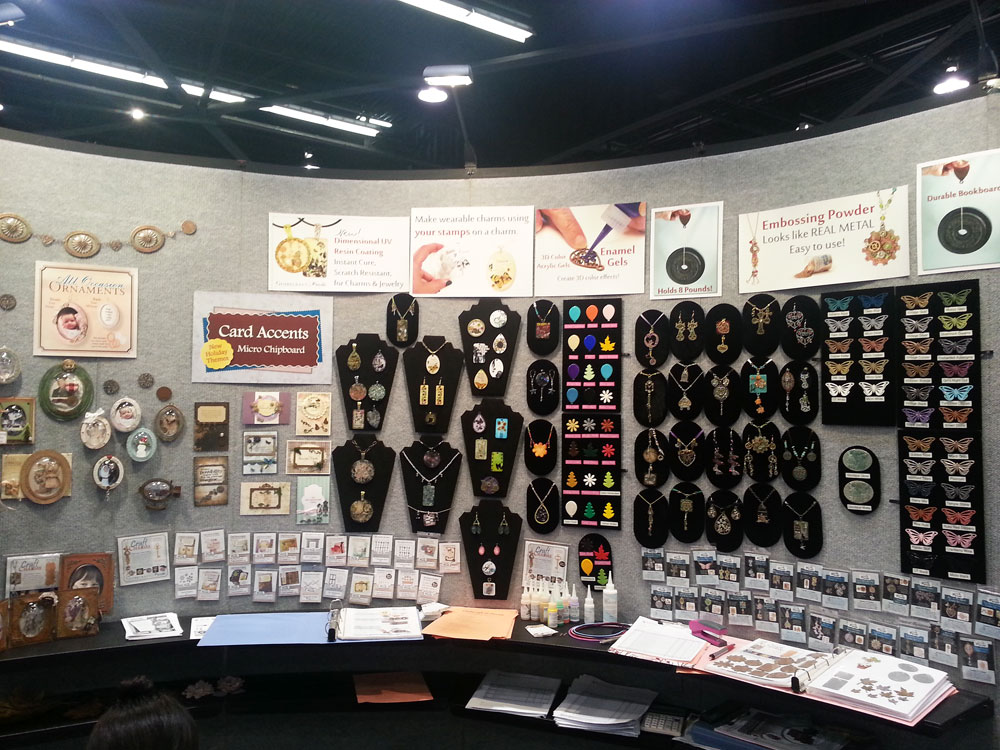
The Globecraft & Piccolo booth at CHA.G&P display showcasing all of their embossing powders and chipboard charm sets. All of the charm sets on the velvet boards are my work. 🙂
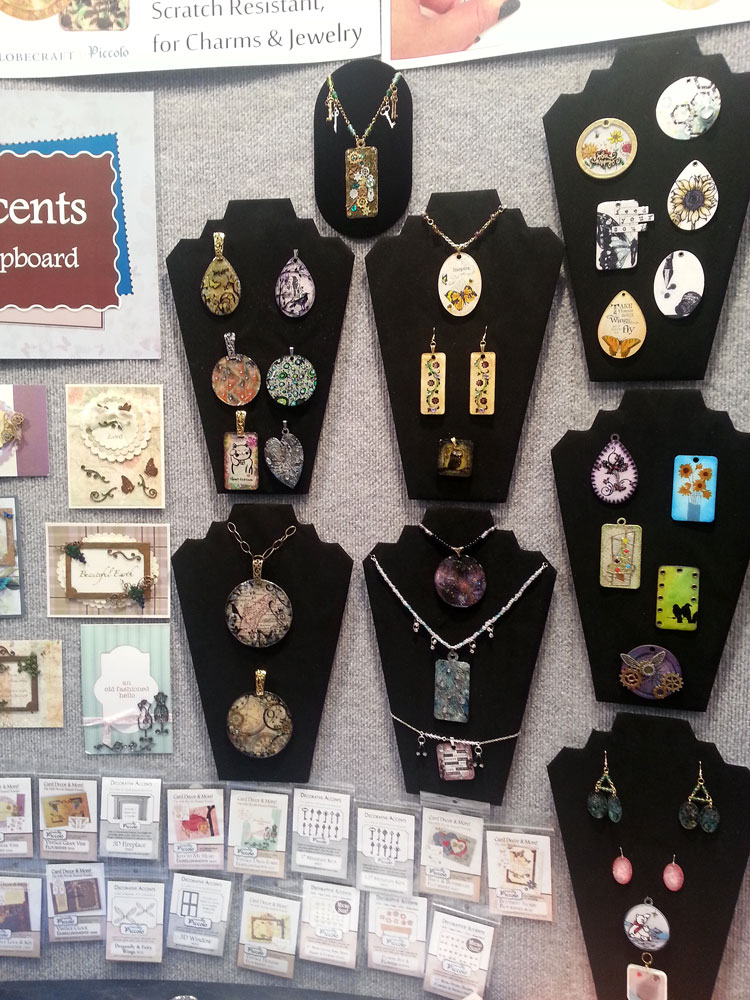
G&P acrylic and chipboard bezels samples by the talented design team, the Secrist family (G&P) and I.
Just beautiful card decor work with Piccolos by the design team!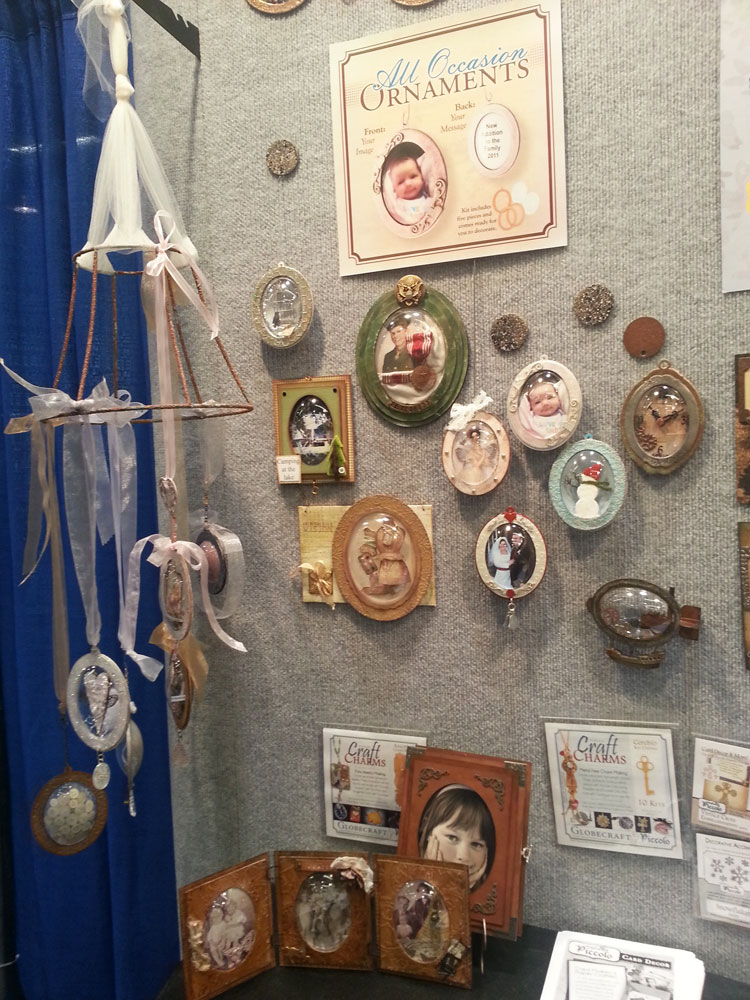
G&P Ornament sets. The lovely mixed media piece on the left is made by the talented Linda Neff (part of the G&P design team) from ornaments and a lampshade.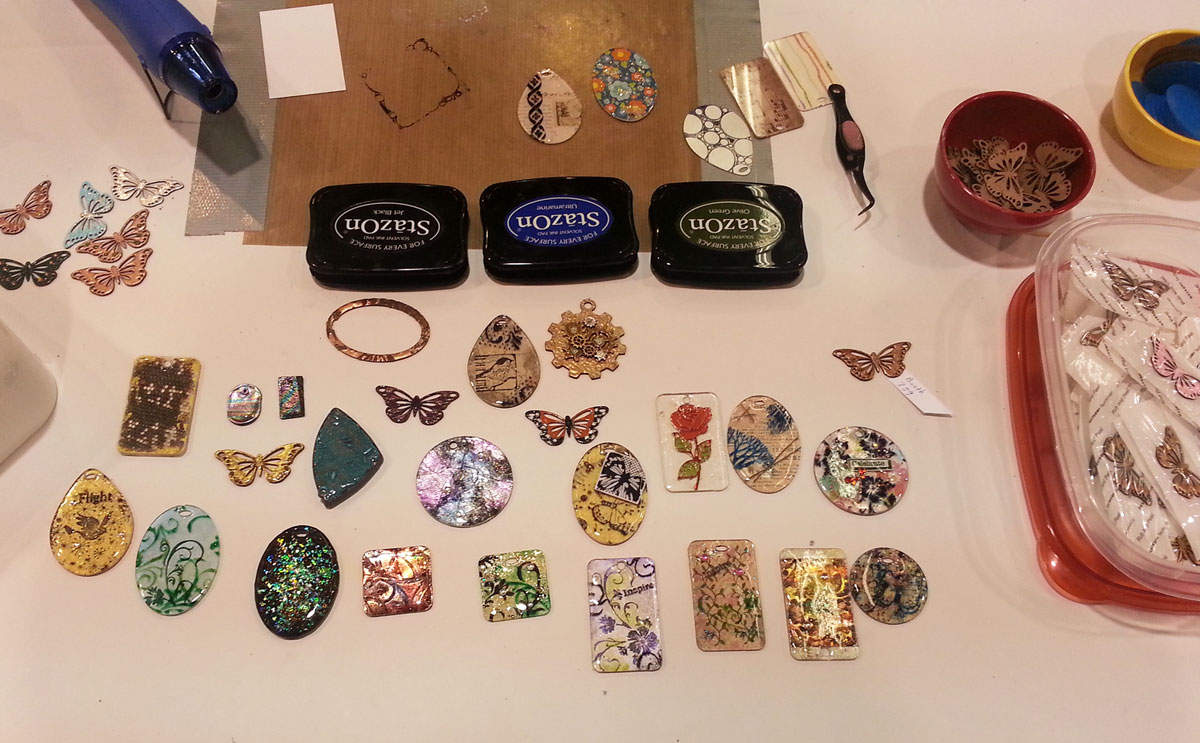
Some samples of the demo work showing the new UV Resin and acrylic bezels! Pieces by Pat Secrist (Of G&P), Jami Bostjancic and I.The following photos are close up of booth display samples to show you how many new styles and techniques you can use with the new G&P products.
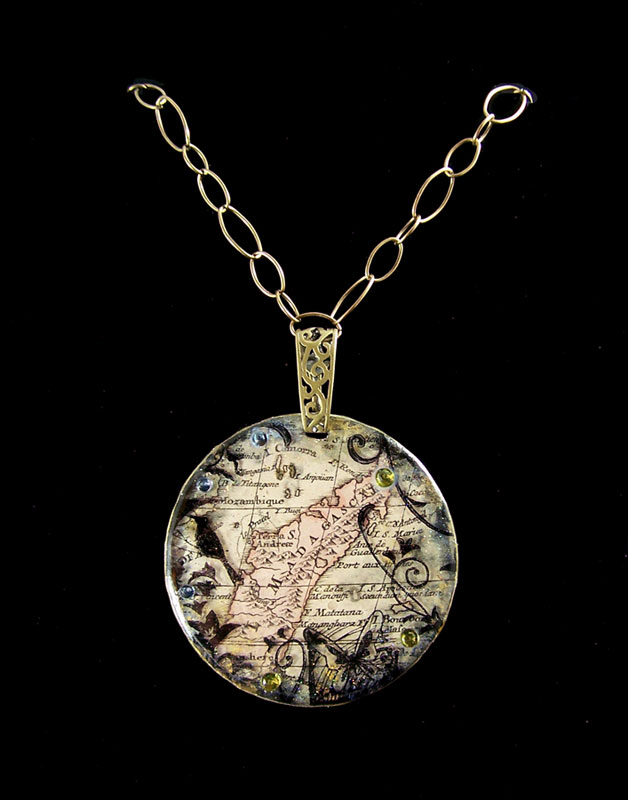
G&P acrylic bezel, G&P UV Resin, mica powder, permanent ink, paper and sticker gems.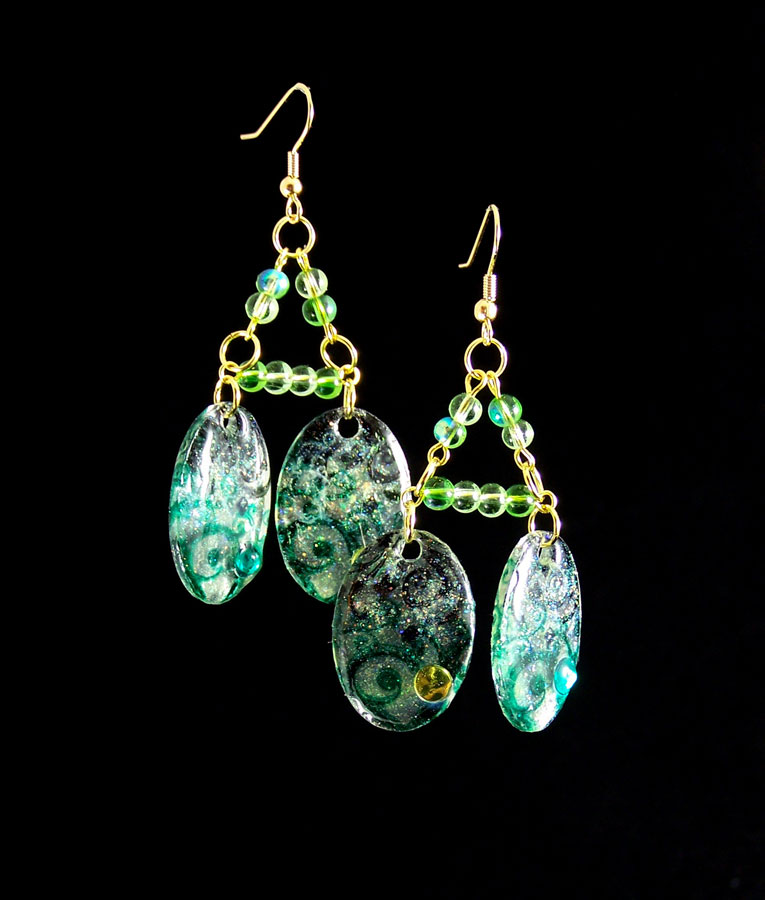
Mini oval acrylic bezels with Pure Sparkle Glitter in Gold, mica powder, 3D Enamel Gel and sticker gems. Faux glass technique.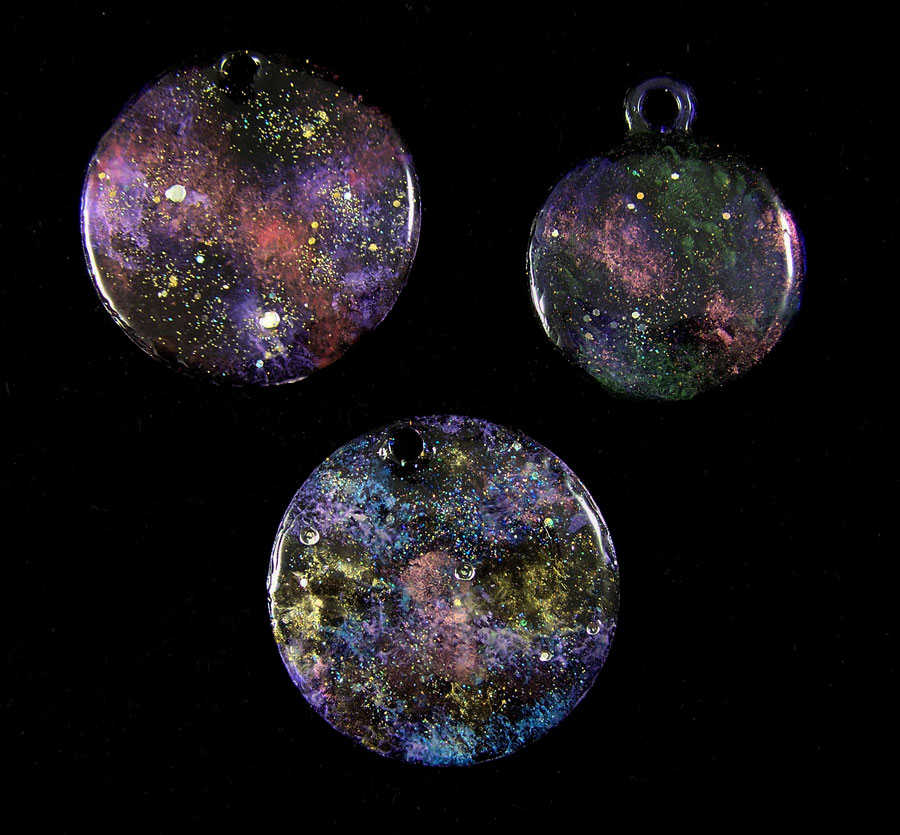
Top left and bottom bezels are acrylic and top right bezel is bookboard. 3D Enamel Gels, Pure Sparkle Glitter in Gold and Silver, mica powder and sticker gems. Glastique Gloss is used to seal each layer. Topped with the new UV resin. Nebula/night sky technique.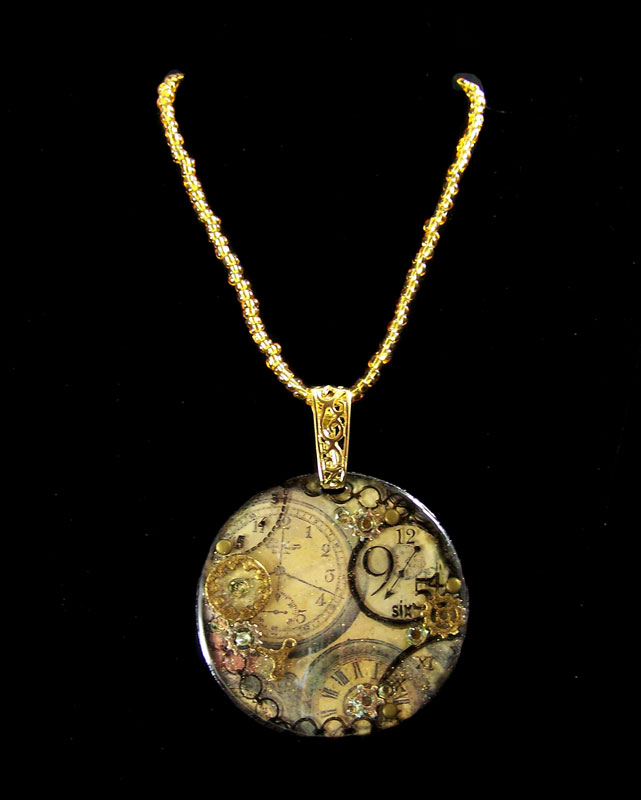
G&P acrylic bezel, G&P UV Resin, G&P Piccolo Gears, mica powder, permanent ink, paper and sticker gems. Piccolo layer technique.
G&P acrylic bezel, G&P UV Resin, mica powder, 3D Enamel Gels, Origami foil paper and sticker gems. Faux glass technique.Until next time safe travels!
CHA Winter show 2012 part 2
As I noted in my last post this year’s winter Craft and Hobby Association show was awesome! My last post was mostly about Globecraft Memories and my first time doing demos at the CHA. This post will be about some of the new products, designs and workshops at CHA!
First I would like to talk about the DCWV booth which had some of the most beautiful paper and bead booth decor at the Winter CHA. DCWV Inc. is known for their very popular scrapbooking papers, cards, brads, stickers, albums, and embellishments. In 2010, the Blue Moon Beads brand was acquired by DCWV, so the booth was showing a wonderful fusion of these companies. I have used both DCWV and Blue Moon Beads products before, mostly for artwork at small shows. I must say though after seeing their booth decor and product samples I just had to get wholesale catalogs to use their products for classes.
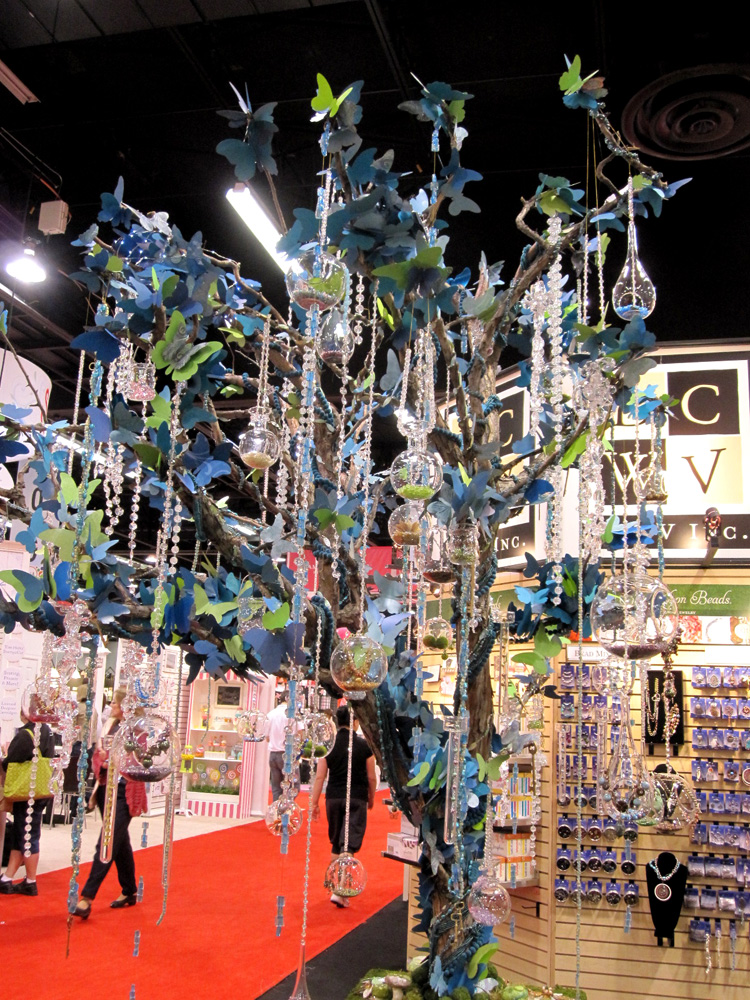
The blue color tone tree was one of my favorites. It looked right out of a fairy tale. I keep trying to think how in the world I could make a tree of my own and where to put it.! LOL
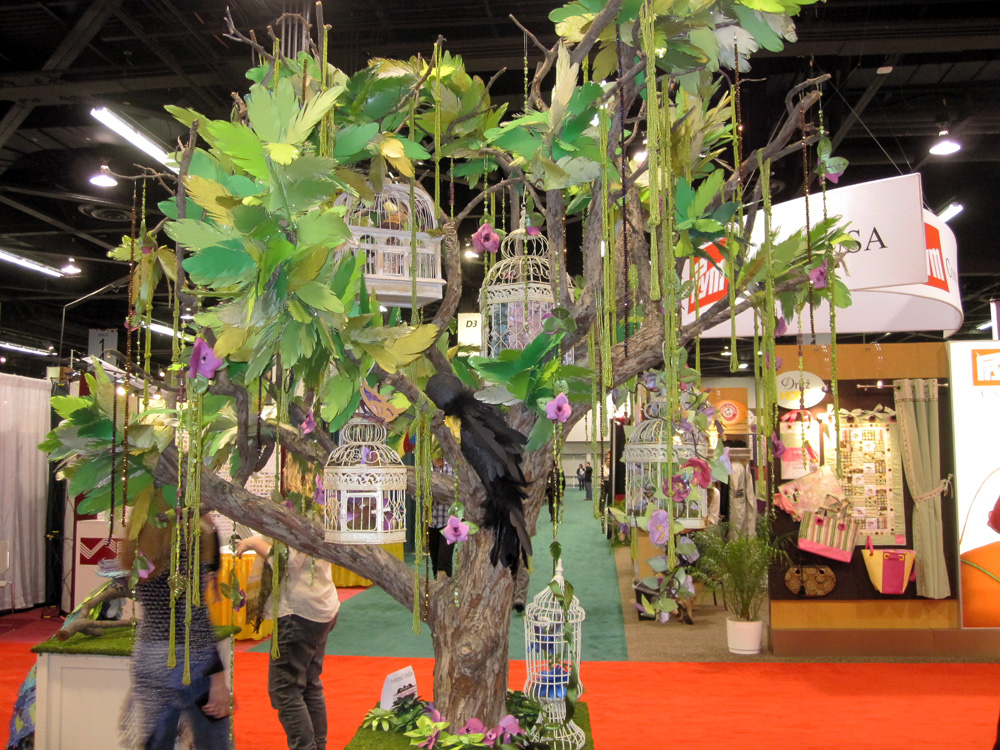
The green beads on this tree are just gorgeous, and the photo does not do it justice.
I ended up wandering around, several isles over, and once again to stopping at a booth just because of how stunning booth decor was. In this case a glittering, full size gown made from crystal beads, paper and chain. I had to stop to see what this booth was about!
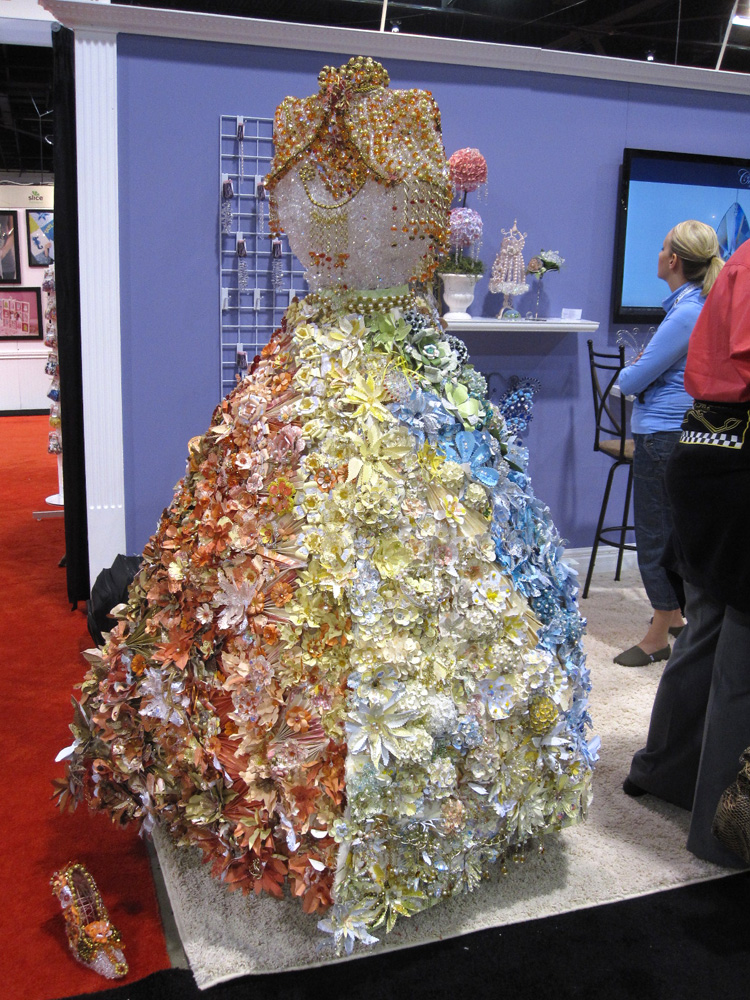
As I ended up finding out this beautiful piece of art was part of Connie’s Crystal booth. They carry genuine, high quality crystal beads and focal pieces in a stunning array of colors.
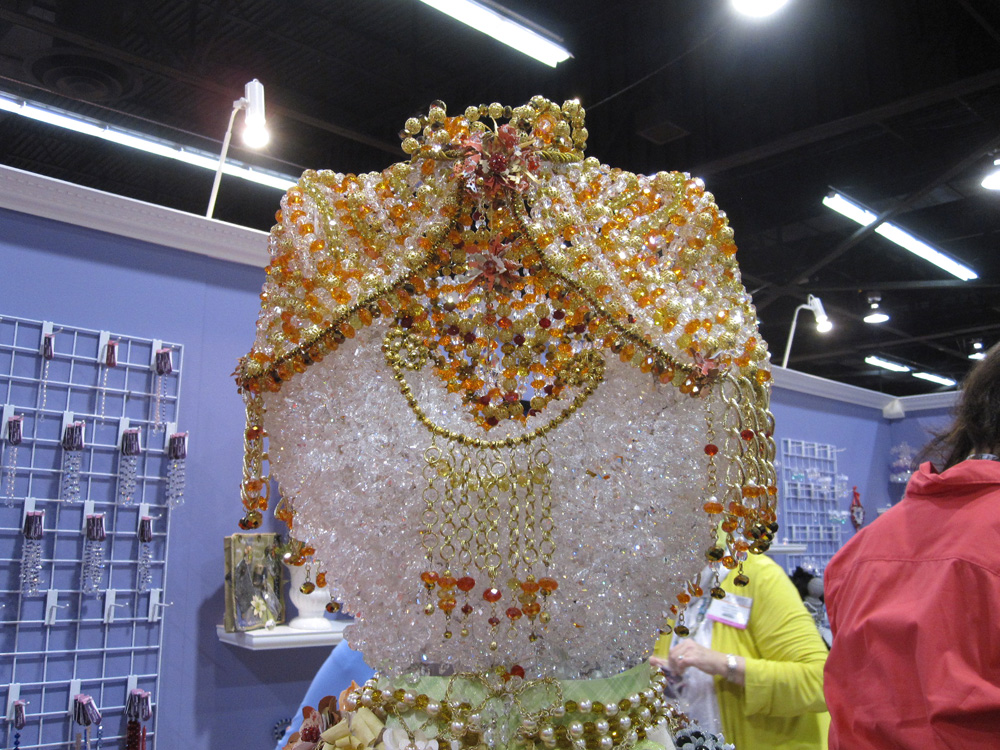
A close up of the bodice of the wonderful booth display at Connie’s Crystals.
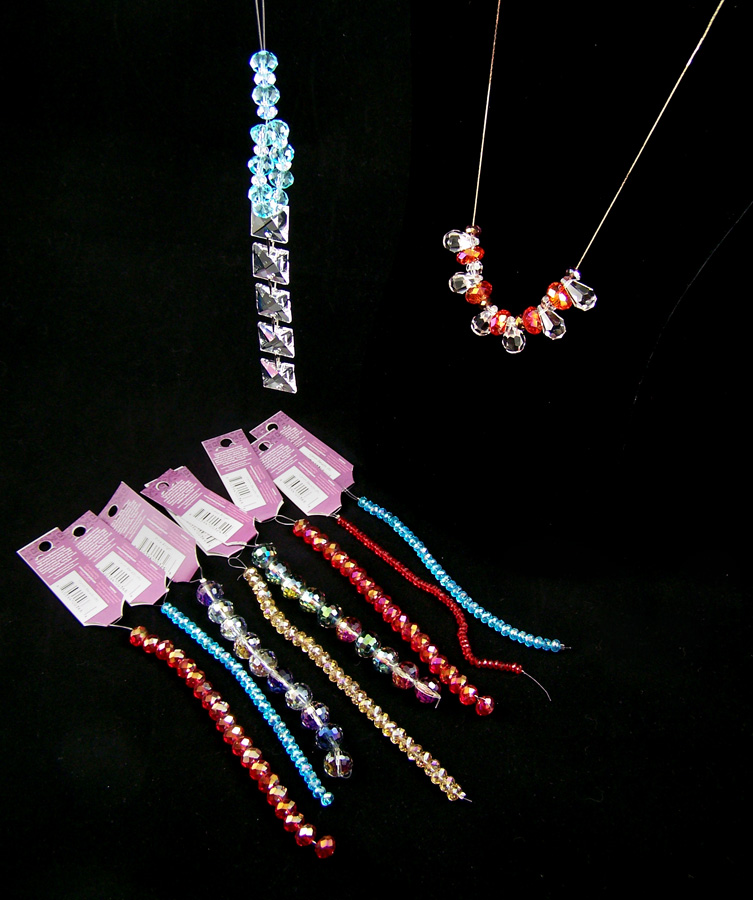
I wandered by their booth on the last day and noticed they were selling out the booth crystals, so of course I had to buy some. Sadly I did not get there early enough to get all of the colors I wanted but I did buy some beauties. The reflection of light with their sun-catcher line is amazing. If you do bead work, mixed media or even just want lovely sun-catchers go to their website and request a catalog!
While I normally do not have time to attend many workshops at CHA, when I heard about Makin’s Clay Explore the Possibilities class I had to take it! Makin’s Clay produces a no-bake polymer clay providing an alternative modeling medium to oven-bake type polymer clays, environmentally safe, biodegradable and user friendly. The workshop, which was instructed by designer Ann Butler, explored the applications of Makin’s Clay and helped those who attended gain hands-on experience using Makin’s Brand products.
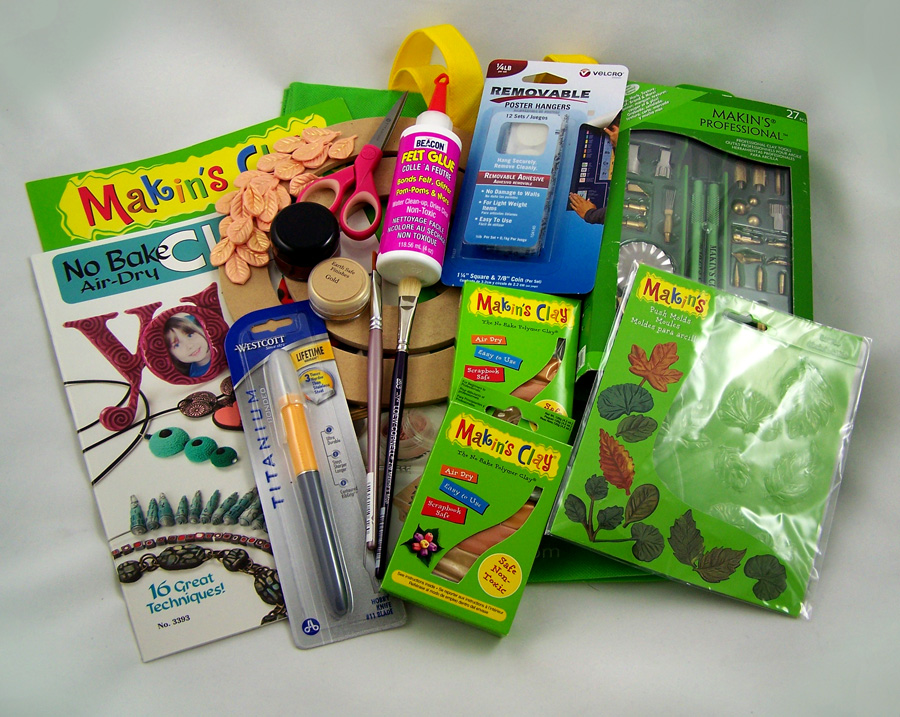
Each workshop participant received this seriously awesome complimentary Makin’s Clay gift bag just stuffed with goodies! I even ended up winning a Makin’s Professional Clay Tools set in class as well!
While I have not used Makin’s Clay polymer clay line in the past I do use their tool line a lot and I can say it is some of the best on the market. After trying out their clay and finding out they make some rather nice new color lines I will be using their clay with projects in the future. 🙂
Until next time, safe travels!
CHA Winter show 2012 part 1
This year’s winter Craft and Hobby Association show was awesome! While this show was a touch smaller than past Winter CHA shows I can honestly say it was still a great and positive show to attend. There were so many new products, designs, workshops and wonderful contacts; this show sure was a busy one! It was a bit different for me because this was my first time doing demos at the CHA Globecraft Memories booth.
At the last winter CHA in 2011 I had gotten some information about a new company called Globecraft Memories. They had wonderful chipboard frame and globe sets that people could decorate with paper, fabric, paints, stamps or clay and place photos or family treasures inside. I saw one of their globes with a miniature polymer clay baby in it and I felt these would be prefect for my miniature work. I ended up finding out the baby sculpture was from their other company Secrist Dolls, which carries only the best vinyl doll kits, polymer clay doll sculpting tools and doll paints on the market. I left my business card and eagerly awaited the catalog to be sent to me. I ended up being contacted by the owner Mr. Pat Secrist because he had noticed I listed myself as a designer on my business card. They had some openings in their design team and they were looking for some new ideas. We got to talking and I ended up making a few samples for the website. Mr. Secrist then started to get in some new products to expand the line, they sent me and their other designers some to test. I was sent frames to start making samples for the CHA winter show. I was excited to be then asked to demonstrate products at CHA in their booth! Mr. Secrist wanted to show people that the globe kits and frames could be so much more. The idea was to make these frames more than just a card making or a scrapbooking element but something that could appeal to paper crafters, home decor artists and even mixed media artists like myself. The end result was a wonderful line of products designed to make chipboard look like expensive metal wall decor, enameled art and stonework but for fraction of the cost.
I can honestly say I love their new line of products:
New Frame Chipboard Kits: A new line of frames and elements for all interests. Be it for scrapbooking, papercrafting, home decor or mixed media they have styles and elements you will love. They also have a line of Steampunk Airships that are just too cute, which come in Large, Medium and Mini. The chipboard elements before assembling can be put through an embossing machine like Sizzix or Cuttlebug for more texture and detail.
Piccolo Chipboard Elements: Both as mini chipboard elements to be used on frames, paper or card these wonderful little patterns and shapes come in so many styles. From Steampunk gears, birds, cats, swirls, butterflies to delicate corner elements. They also have Toppers that are small tags and elements that would be wonderful for cards, scrapbooks and mixed media art.
Glastique – Flexible Finishing Glaze: comes in Gloss and Matte. This is water based and non-toxic. It can be applied to chipboard, fabric, paper, glitter, paint, it can act as a glue and a clear glaze. In fact, when coated on pieces of chipboard that has been coated in embossing powder it makes the chipboard flexible! I have even put thick layers of the Glastique on rubbers stamps; once dried and peeled off the stamp, I have a clear flexible piece to be added to mixed media work or paper crafting.
Halo Glitter: comes in Gold and Silver. A wonderful fine glitter with several different sized particles for a more reflective effect. Layer it with Glastique and you have gorgeous color reflection.
Mica Powders: They carry so many colors I can’t list them all! Super fine mica powder for all you craft needs, from paper crafting, resin work to even polymer clay. They add no binders to the mica so there is no worries about odd chemical reactions like other products on the market. Layer it with Glastique to get a dichroic glass effect.
Mica Powders with Glitter: Super fine powder and glitter in vibrant colors. Stunning selection of colors for so many uses.
Super pigment rich acrylic paint and glazes: While this is a slightly more expensive paint than your standard craft store bottle paint it is well worth the cost. Their colors are luscious, they dry the same color they are when wet, their metallic paints only need one coat for full coverage and the glazes are just stunning on paper or wood.
Globecraft Memories Enamel powders: These powders are specially designed to cover larger areas such as the chipboard frames Globecraft Memories is known for. The nice thing is the powders still look wonderful on detail elements such as their Piccolos. I love these powders but then again I am a bit partial to them. I ended up making a portion of the new recipes of enamel powders for Globecraft Memories and one of my colors, Girls Night Out ended up being their 3rd best seller at the Winter CHA! These wonderful colors can mimic stone, metal, natural elements and aged surfaces. In fact these powders worked did it so well for the first two days of CHA people walked past the Globecraft Memories booth thinking they were selling real metal and wood frames, not coated chipboard! A sign had to be placed in front to tell everyone everything in the booth was chipboard. 😛
The following is the few photos I was able to take while doing demos at CHA.
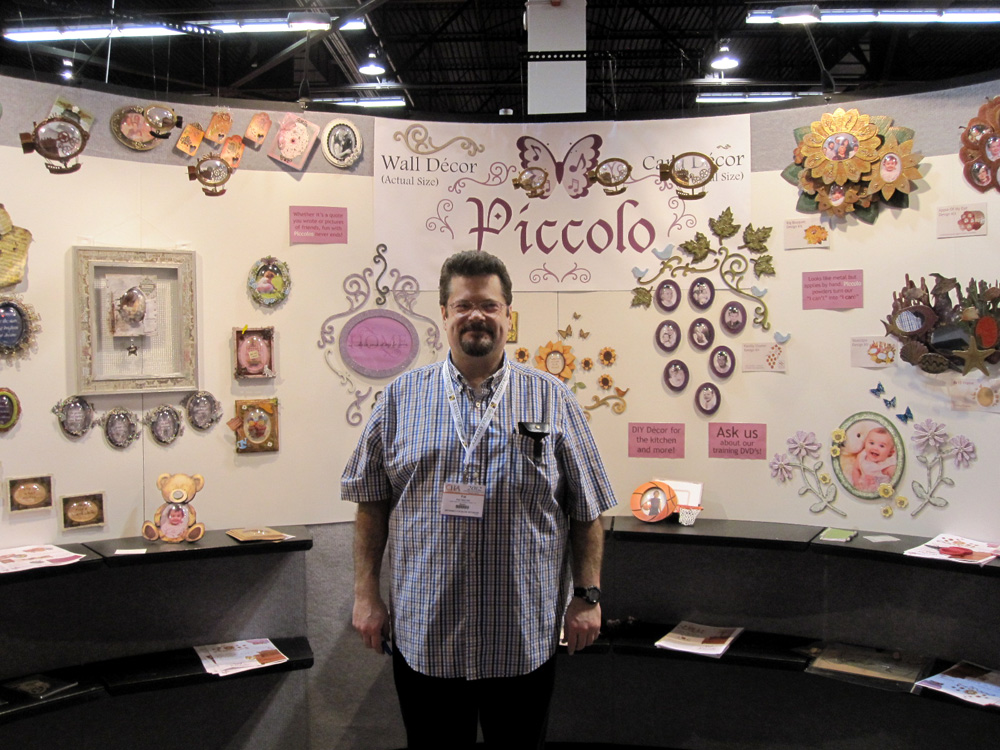
Mr. Pat Secrist the owner of Globecraft Memories.
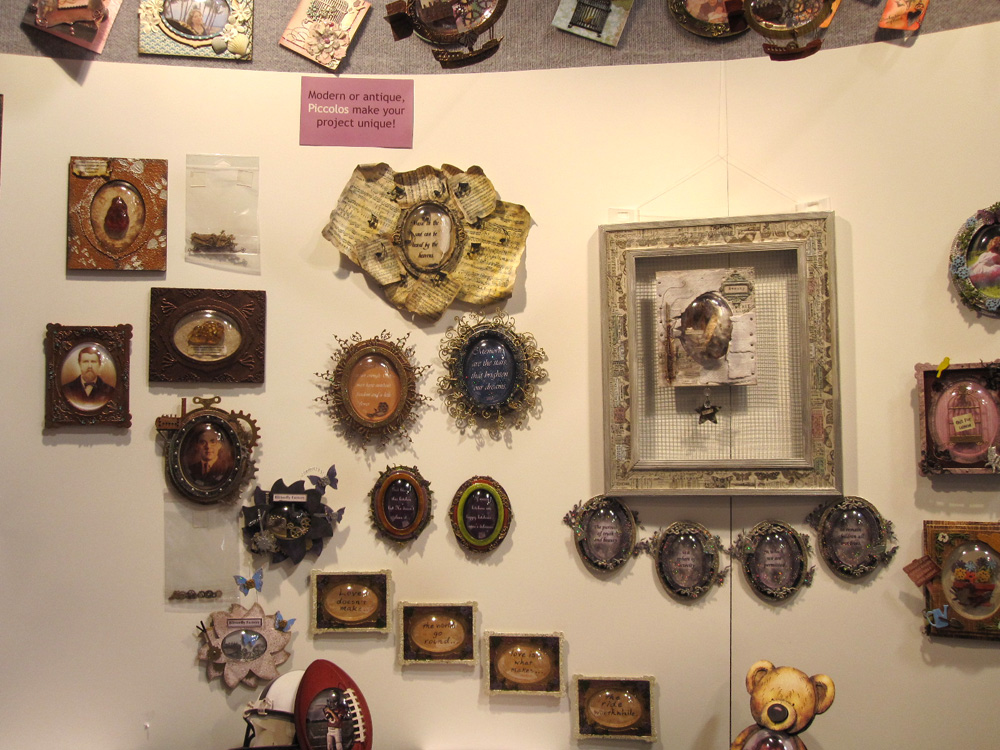
Some of the wall displays in the Globecraft Memories booth, the music sheet, solar, ambers and 4 globe sayings frames are my work.
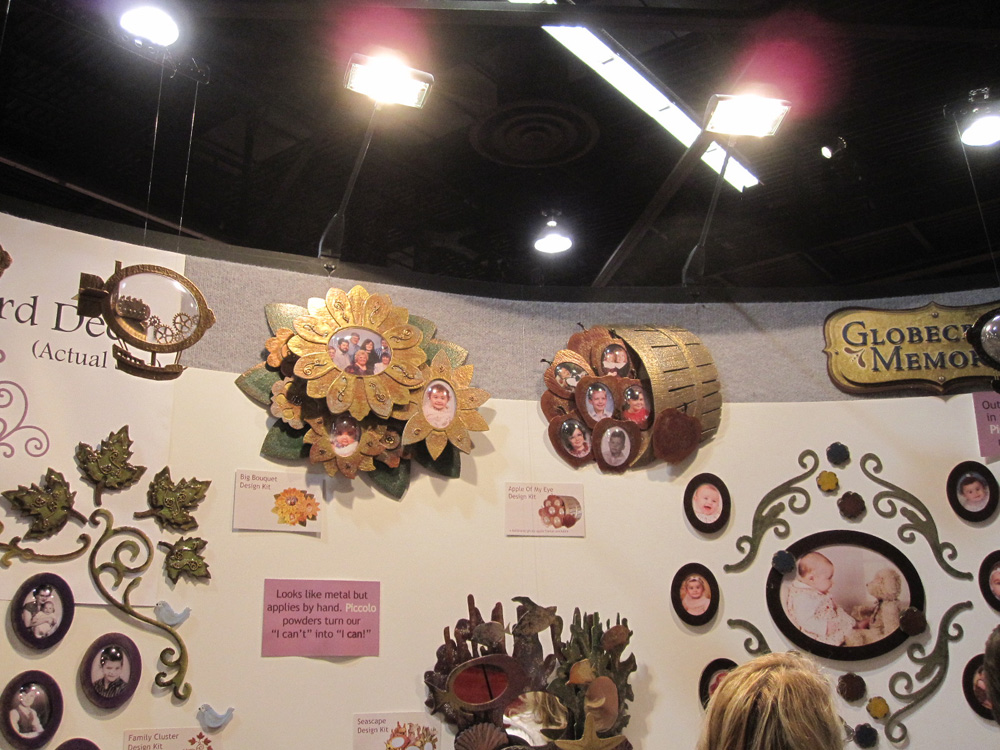
The flower bouquet and apple basket sets are based on my illustrations and the samples shown are my completed work.
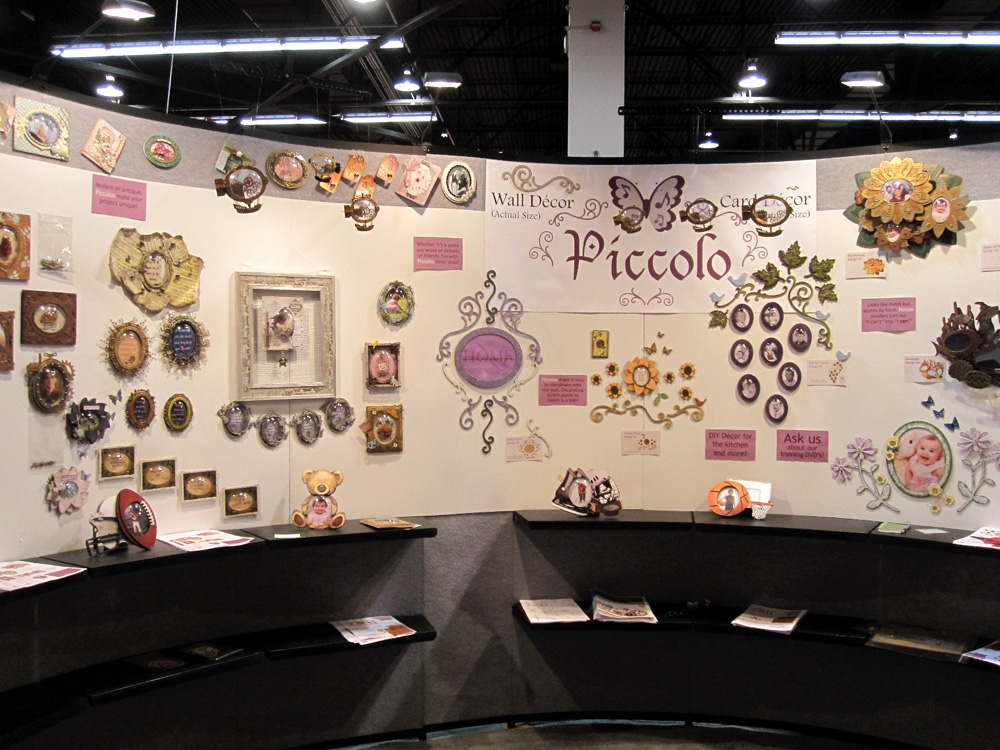
Part of the Globecraft Memories booth at the CHA winter show.
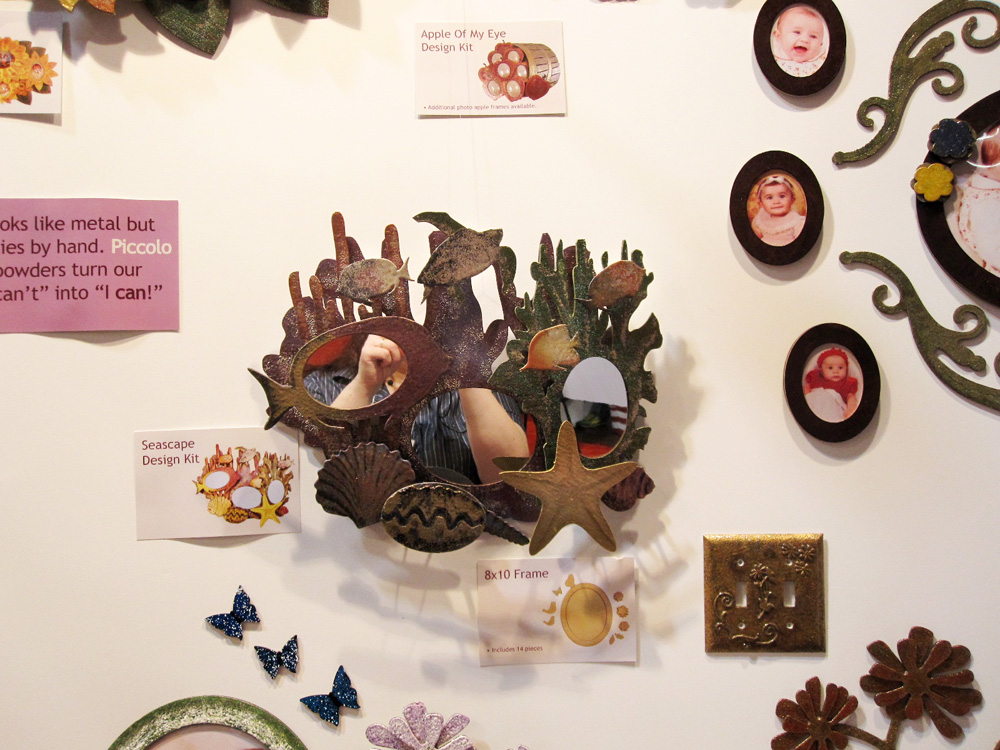
A close up of the sea frame set made into a mirror wall hanging.
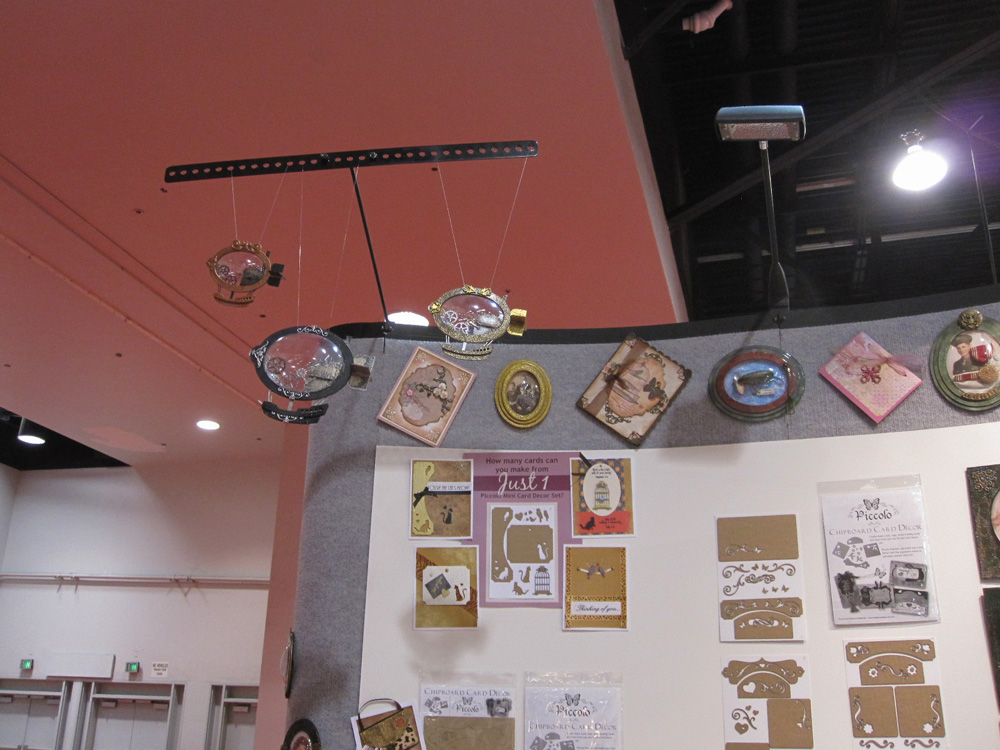
Some of my completed airships hanging from the booth. Some of the Piccolo chipboard element packs are on the right.
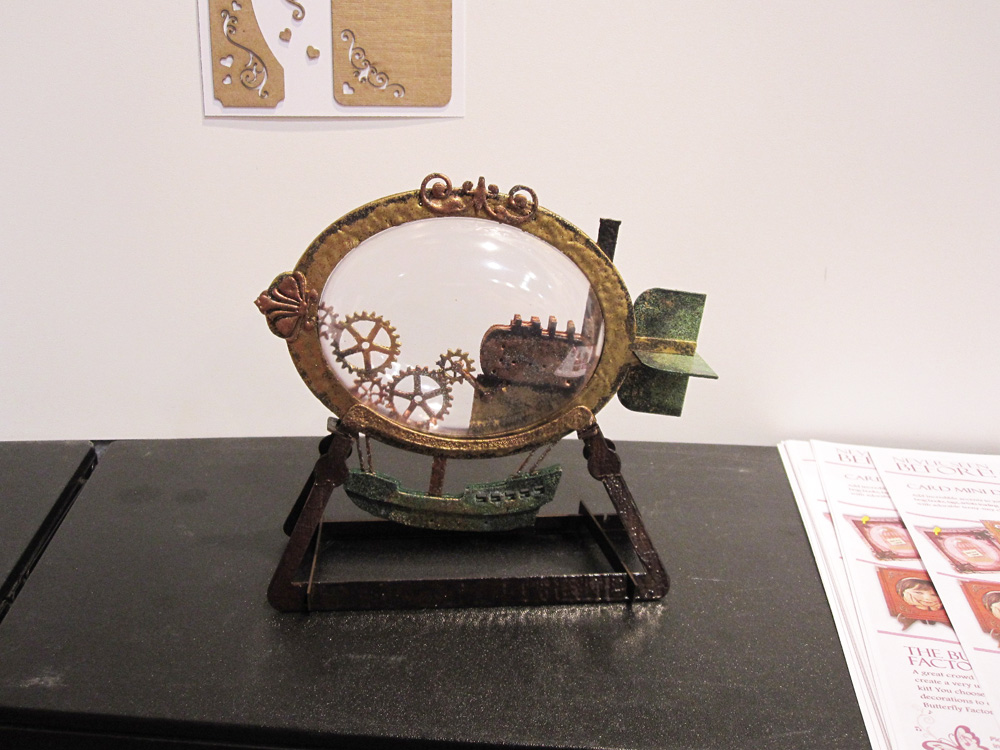
Close up of one of the completed airships.
The following photos are some the prototype photos I took while making the samples for the show. You will notice in some of the photos the globes are not attached because it is easier to ship without the globes in place. If you would like to see more prototype photos check out my Facebook fan page. All of the frames are from Globecraft Memories.
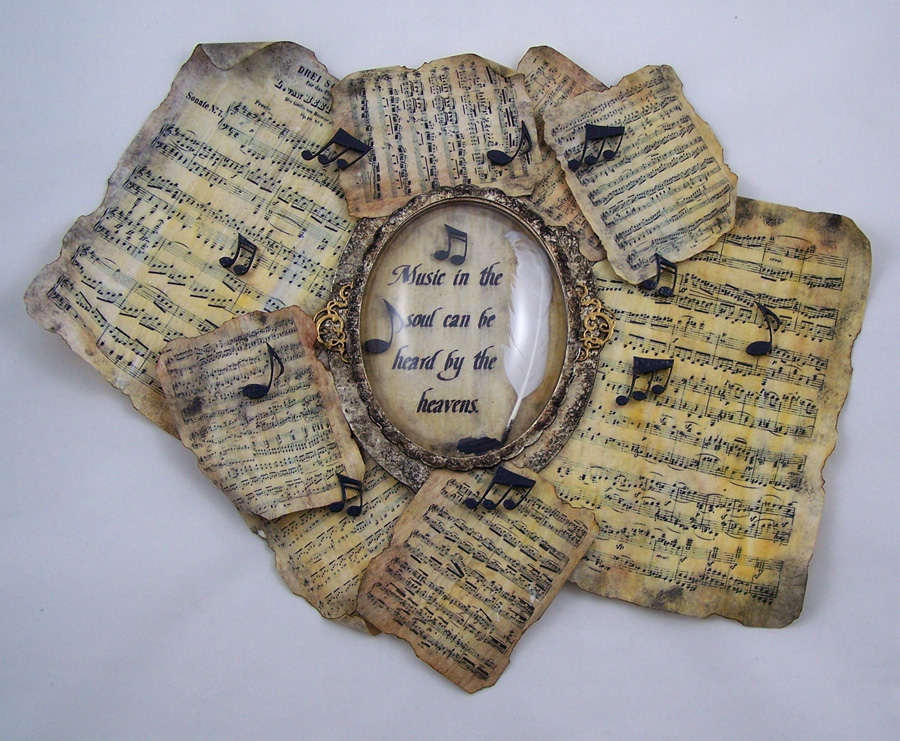
My music frame that was picked as a booth sample. Classic Grand Rectangle backplate with other chipboard elements and Glastique Flexible Finishing Glaze Matte.
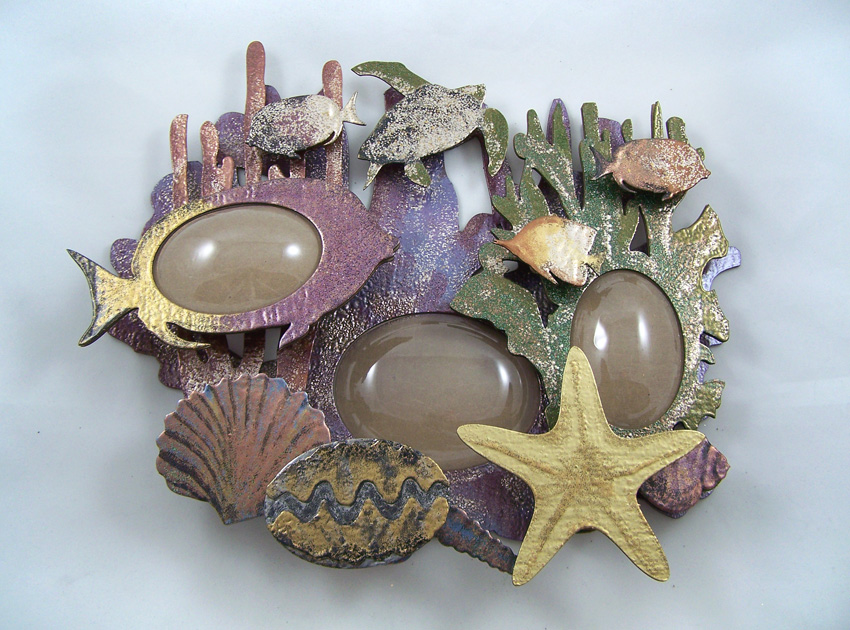
Prototype photo of my version of the seascape frame that was picked as a booth sample. This was before the mirrors replaced the globes for the final sample. Frame is covered in my enamel powder recipes. Seascape Wall Decor Kit.
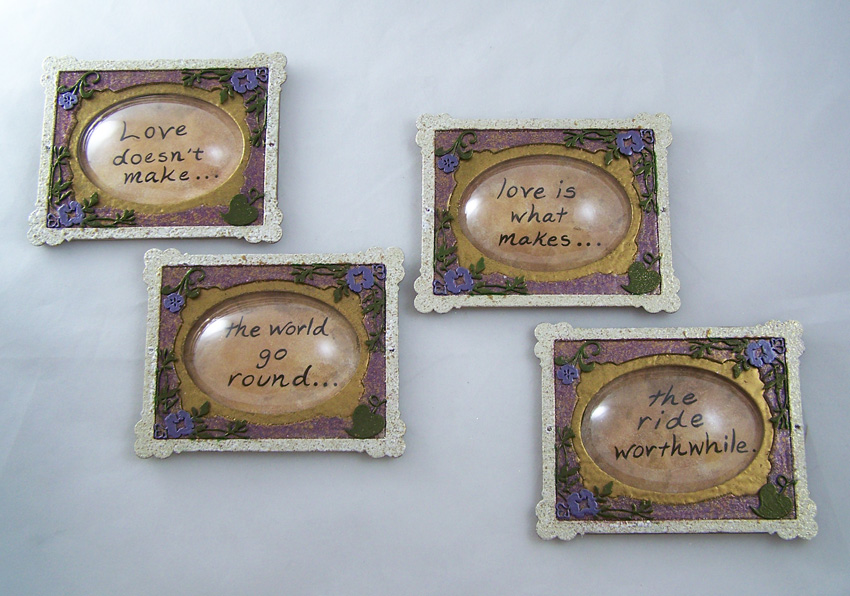
A saying frame set that was picked as a booth sample. Inner frames are covered in my enamel powder recipes “Mardi Gras” and “24 K gold”. Little Fancy Rectangle, chipboard elements and Glastique Flexible Finishing Glaze.
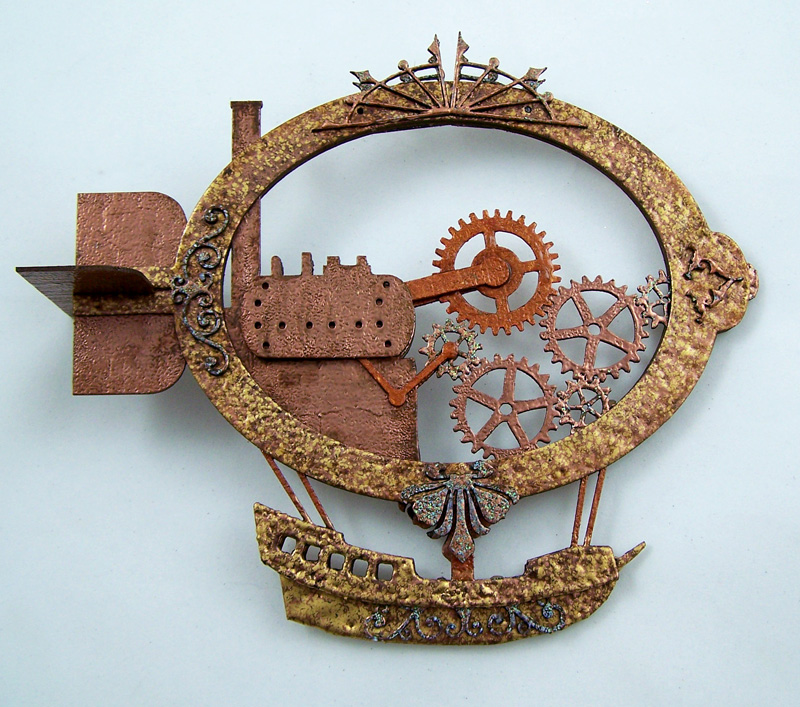
Vintage airship that was picked as a booth sample. I used the Large Airship and chipboard elements.
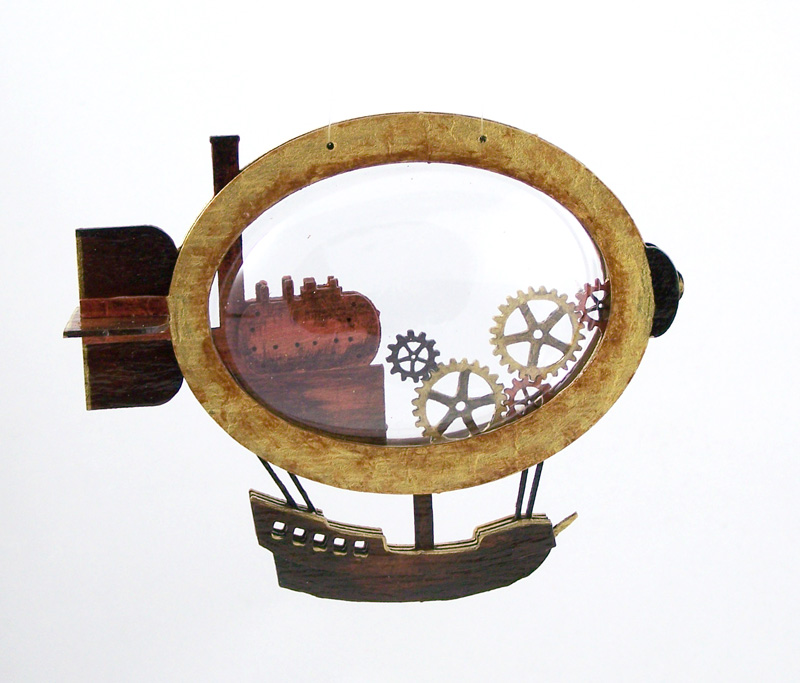
Mini airship that was picked as a booth sample. This is a finished piece I used the Mini Airship, the pigment rich paints and Glastique Flexible Finishing Glaze.
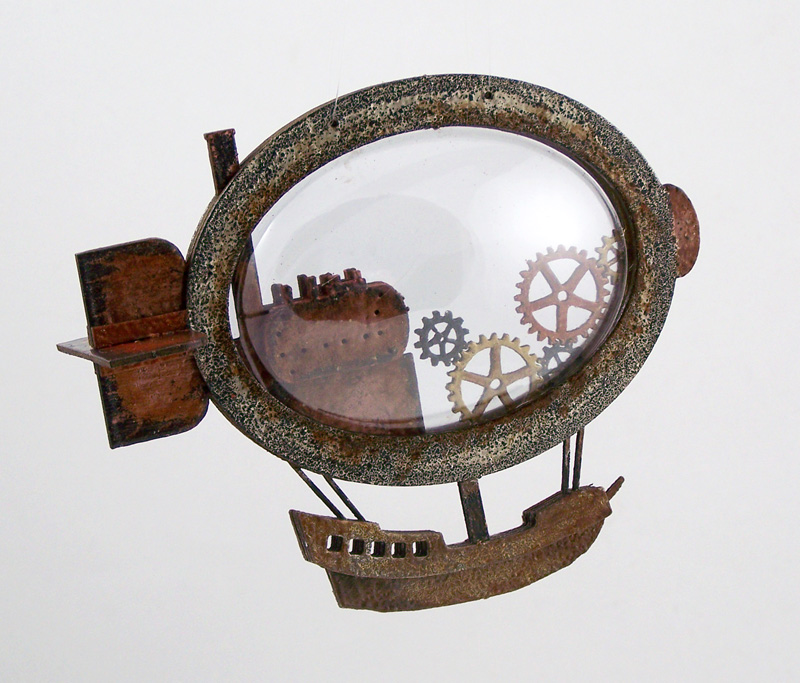
Vintage airship that was picked as a booth sample. This is a finished piece. Mini Airship kit, enameling powder and paint.
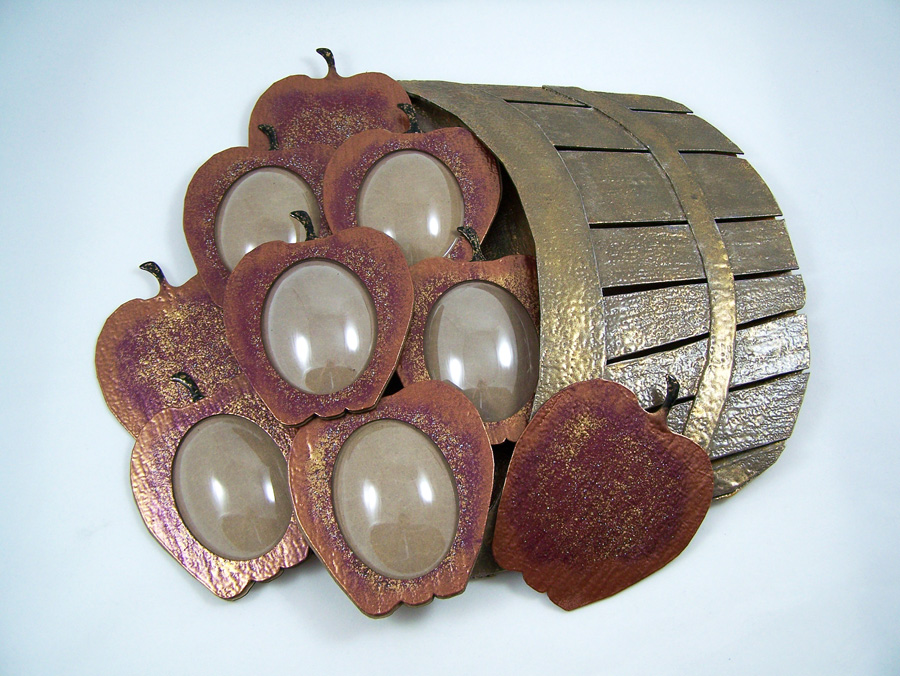
Apple frame set that is based on my illustration. This version was picked as a booth sample. This is the Apples of My Eye Wall Decor Kit.
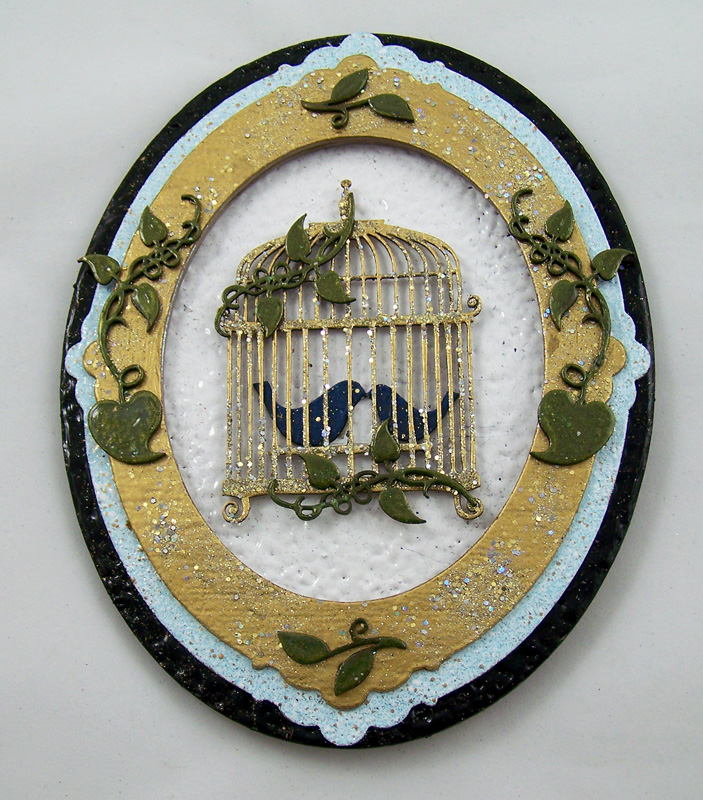
Birdcage piccolo that was picked as a booth sample. The globe is not attached in this photo because it is easier to ship without the globe in place. Classic Fancy Oval and Piccolo chipboard elements.
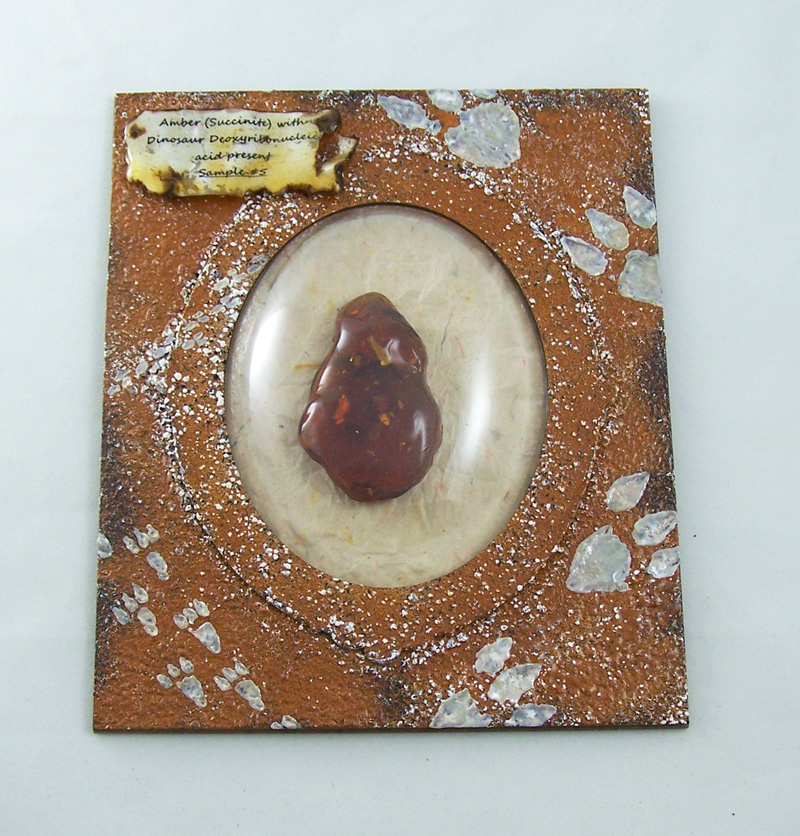
Dino amber frame that was picked as a booth sample. Frame is covered in my enamel powder recipe “Brown Stone”. I used the Classic Grand Rectangle backplate.
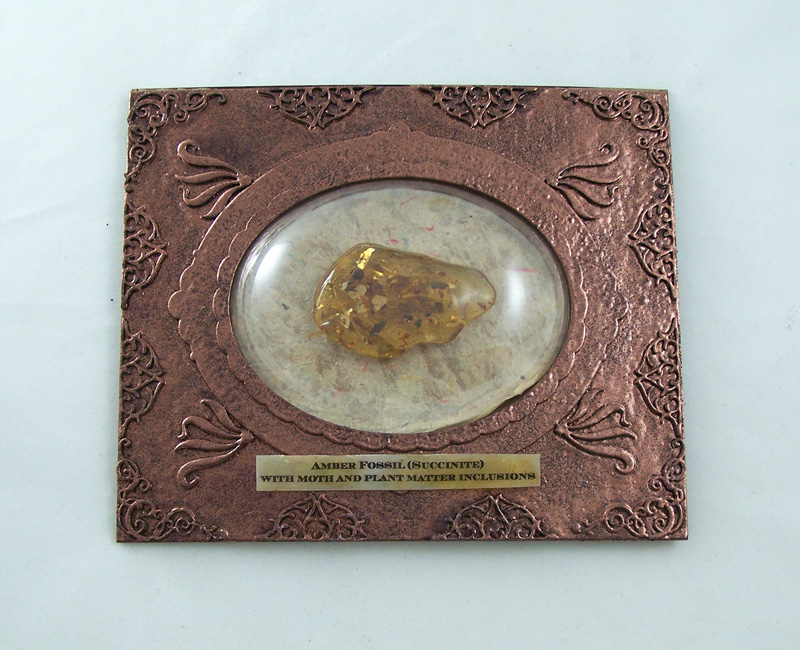
Museum frame, this is the first version. I put the label inside the frame and that version was picked as a booth sample. Frame is covered in my enamel powder recipe “Vintage Copper”. I used the Classic Grand Rectangle backplate with Piccolo chipboard elements and Glastique Flexible Finishing Glaze.
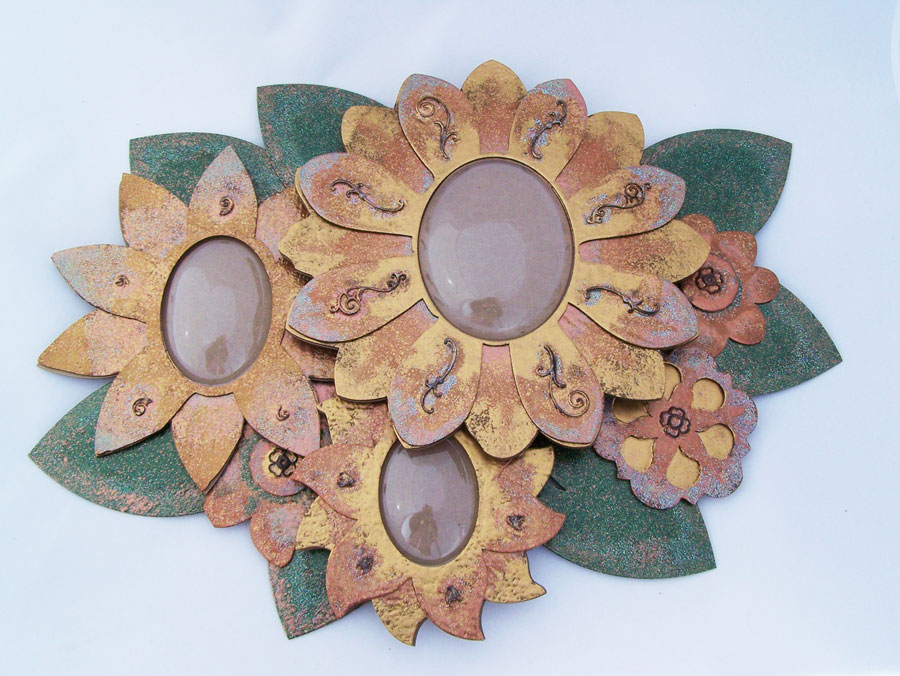
Flower frame set loosely based on a illustration of mine. This version was picked as a booth sample. Frame is covered in my enamel powder recipes. Big Bouquet Wall Decor Kit.
Until next time safe travels!
Resin work….
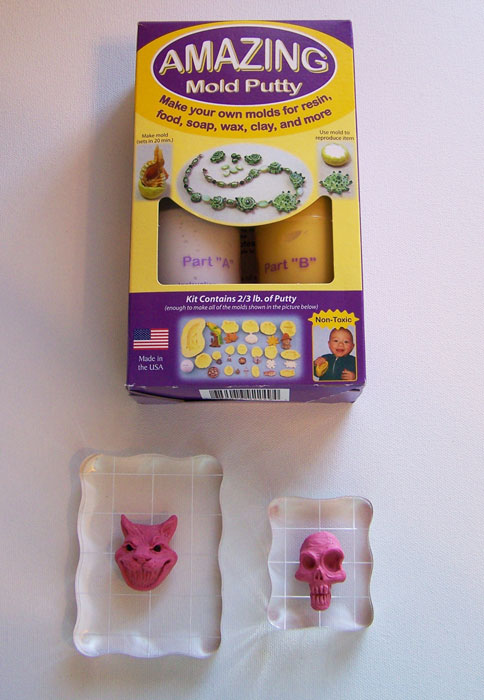
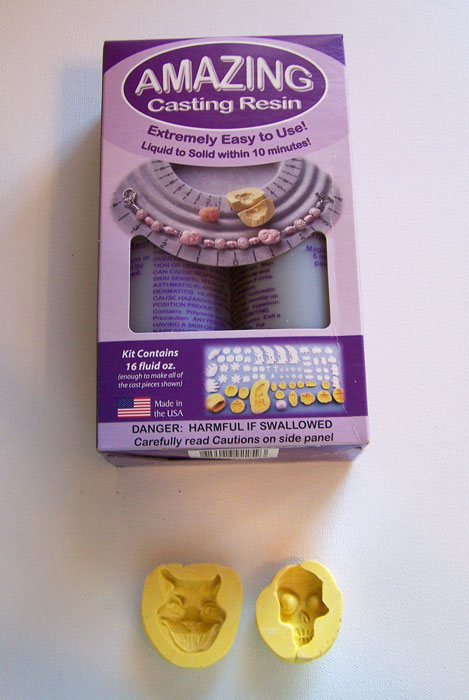
Resin work of any sort has always been an interest of mine. My parents had worked with it over 35 years ago but often complained about the odor and the “cooking” (over heating anything put into the resin) element of resin. With that in mind, I avoided working with resin, concerned about the vapors and heat. That was until I ended up talking with the people at Alumilite Corporation booth, makers of the Amazing Mold Making and Casting Products at CHA‘s 2010 Winter Trade Show. (See this blog post for 2011 CHA Winter Trade Show) They were showcasing their Amazing Mold Putty and Amazing Casting Resin as a way to create replicas of practically anything in a very short period of time. The Molding Putty is non-toxic (in fact you can make food safe molds with it) and the Casting Resin is a opaque, low odor resin and cures within 10-15 minutes. After seeing the demos I went ahead and got several kits.
I started making master pieces in polymer clay to make molds from. I generally use my junk clay, pieces left over from other projects, which for some reason always end up making pink or gray-purple color. LOL
Keep in mind while I use polymer clay as my master you can practically mold any surface or item you like. The more detail in the piece, the finer the mold.
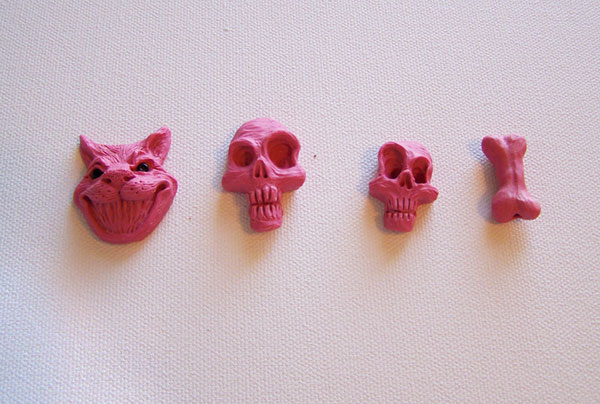
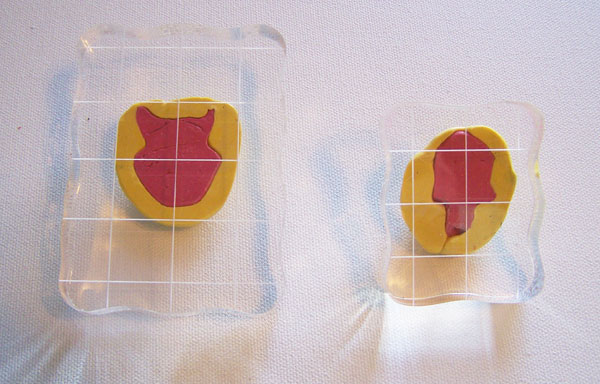
Here are the masters made out of poly clay. Keep in mind I did high detail work. The Amazing Mold Putty does wonderful with anything with high detail, and I get better molds with high detail masters. The Cheshire cat is about the size of a US Silver Dollar.
Note I place the masters on Clear Stamp Acrylic Blocks used for stamping. I use them to keep track if the molding putty is plum to the piece and make sure there is little if no creases forming when placing the molding putty on the piece. You can use small clear glass titles as well.
Make sure you mix the putty according to the manufacture’s instruction, though the Amazing Mold Putty is rather forgiving if there is not exact amounts used. I try to use as little as possible to be able to do more projects. Do not attempt to remove the mold for at least 20 minutes to make sure the mold has set.
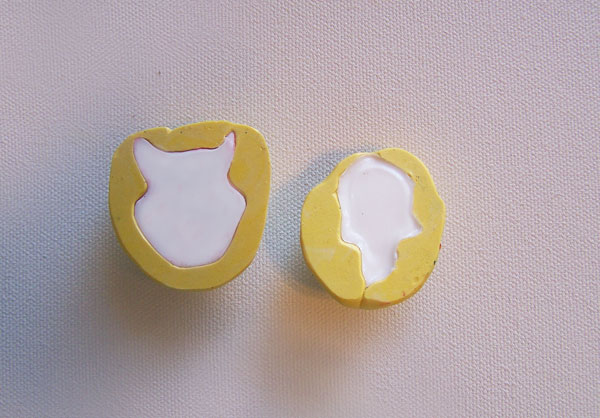
As you can see I tried to get the mold putty as plum as possible, using the Clear Stamp Acrylic Blocks as my guide.
While the cure time for the molds is 20 minutes I like to leave the master in the molding putty for longer, making sure the mold is a rigid as possible (but keep in mind it is silicon and very flexible once cured) before trying to make any replicas. The molds can be cleaned with mild soap and water before you make any replicas to remove any loose particles left by the master.
When mixing the Amazing Casting Resin be careful about stirring too fast and for too long. Once the two parts are combined stir carefully until clear, scraping sides, about 15-20 seconds. Then immediately start to pour the resin into your molds; do not pour too quick as you will increase the amount of air bubbles. It will set in 10 minutes, the thicker the piece the faster the cure time. Once the piece is cured I quickly demold, trim any rough edges, sand and either start painting or put some sort of clear protective sealer (I like to use Mod Podge); the resin will bond with the paint or sealer in those few minutes after demolding. I let them dry and sit for about an hour before I do the final sanding or drill any of the replicas.
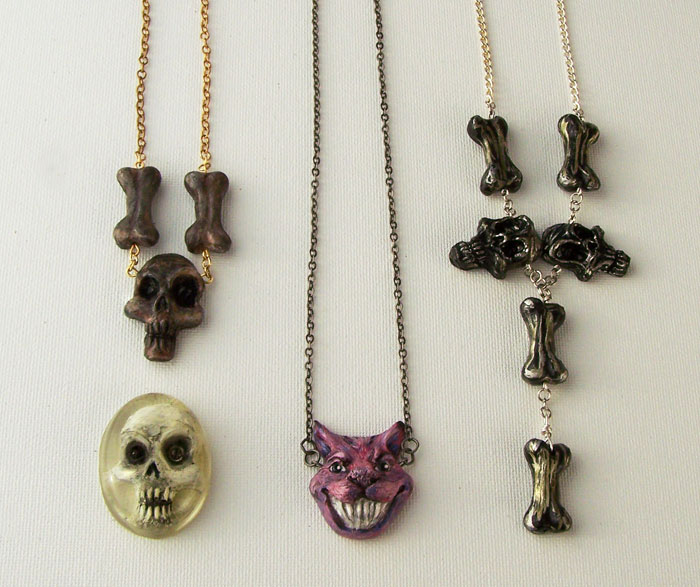
The finished replicas sanded, drilled, painted and sealed. You can even easily put this resin into clear resin as well, as you can see with the skull that I purposely caught air bubbles in the eye sockets to give it the look of eyeballs.
Until next time, Safe Travels…
Back from CHA

Finally back and unpacked from the Craft & Hobby Association Winter Conference and Trade Show put on by the Craft & Hobby Association (otherwise known as CHA)! It was as per normal an amazing show, full of new products, demos, old favorites and awesome networking. It is always one of the highlights of my year, many of a artistic friend and local art businesses! While I meet so many wonderful people and got to try so many products I must note some really did out shine the rest;
One thing a bit different for me this year was the opportunity to have on display some of my jewelry pieces at the Alumilite Corporation booth, makers of the Amazing Mold Making and Casting Products. They were very pleased with my initial test runs of their product and I am looking forward to using their products in my future artwork.
The amazingly talented Donna Kato was there at her Katopolyclay booth, friendly, funny and as willing as ever to show polyclay tips. Unbeknown to me they now carry some wonderful new colors, products and tools!
The Plaid Creative Group , makers of Mod Podge, Folk Art and Apple Barrel just to name a few, was there in full force with some wonderful make and takes. While I was there I got to meet great crafting personalities such as Mod Podge Amy, and Candie Cooper.
Got to meet the lovely Double Stitch Twins ,Erika and Monika Simmons (they are even more beautiful in person) at the 75th anniversary Red Heart Yarns booth, they had some stunning pieces of their work on display and it was just wonderful to see how many wonderful ways Red Heart Yarn can be used!
The beautiful Lisa Pavelka was there doing a book signing of her new book The Complete Book of Polymer Clay. She was as friendly as ever and even talked about some of her new techniques, designs and new polyclay line coming out.
The fabulous Mark Montano was doing demos and book signings of his new book Pulp Fiction Perfect Paper Projects, you had to do a wonderful paper demo to get a signed book, oh twist my arm. LOL
At the always classy Beadalon booth not only got to see some new products but a dazzling display of Fernando Dasilva‘s work and book signing of his new book Modern Expressions.
Another rather nice opportunity CHA was doing this year was the Annual Business Meeting & Thank-You Breakfast and the Winter Show Event: Moonlight Mixer, both wonderful networking opportunities, alerting members of upcoming trends and great food.
Hats off to CHA for another wonderful Winter Show!
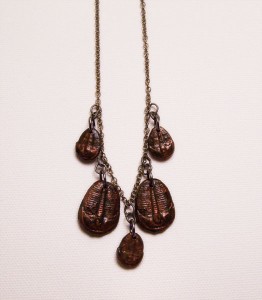
One of my jewelry pieces that was on display at the Alumilite Corporation booth, makers of the Amazing Mold Making and Casting Products. This necklace was made by making molds of Trilobite fossils (extinct marine arthropods) and then making resin replicas.
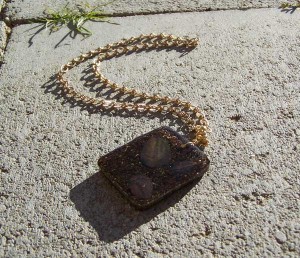
One of my other pieces that was on display at the Alumilite Corporation booth. This necklace was made by making molds of Trilobite fossils, then making resin replicas and then embedding them into clear resin to replicate fossil beds.
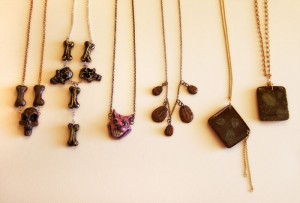
The full set that was on display at the Alumilite Corporation booth.
Safe Travels….

