Craft & Hobby Association Mega Show 2016 part 1
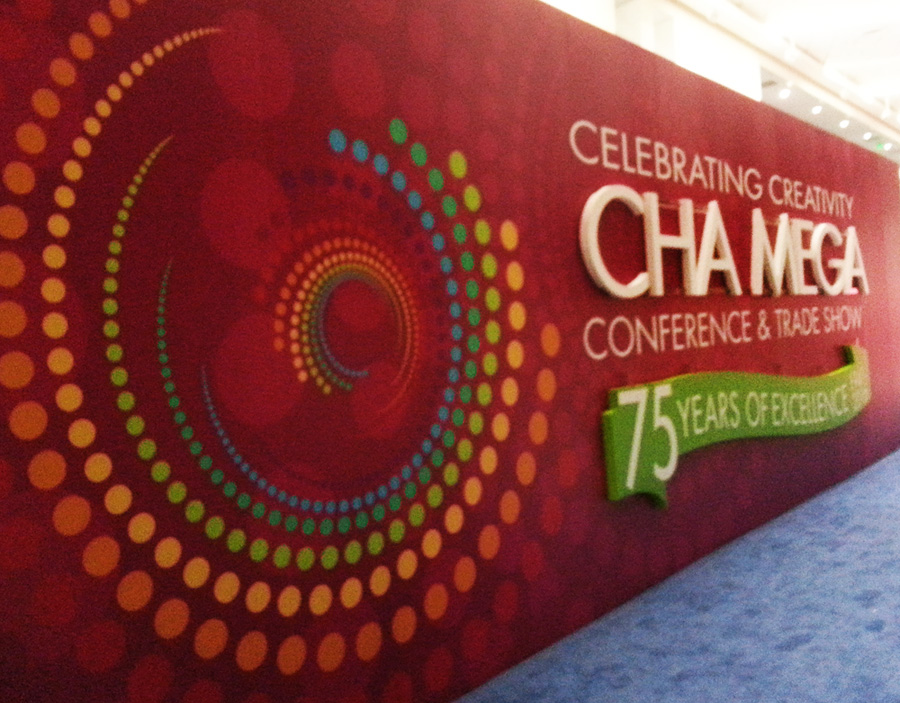
Time for my Craft & Hobby Association Mega Show 2016 recap, part 1! CHA, otherwise know as the Craft and Hobby Association, has a Mega Trade Show once a year, full of arts and crafts manufacturers, new products, tech, demos, classes, designer showcases, new trends and networking galore.
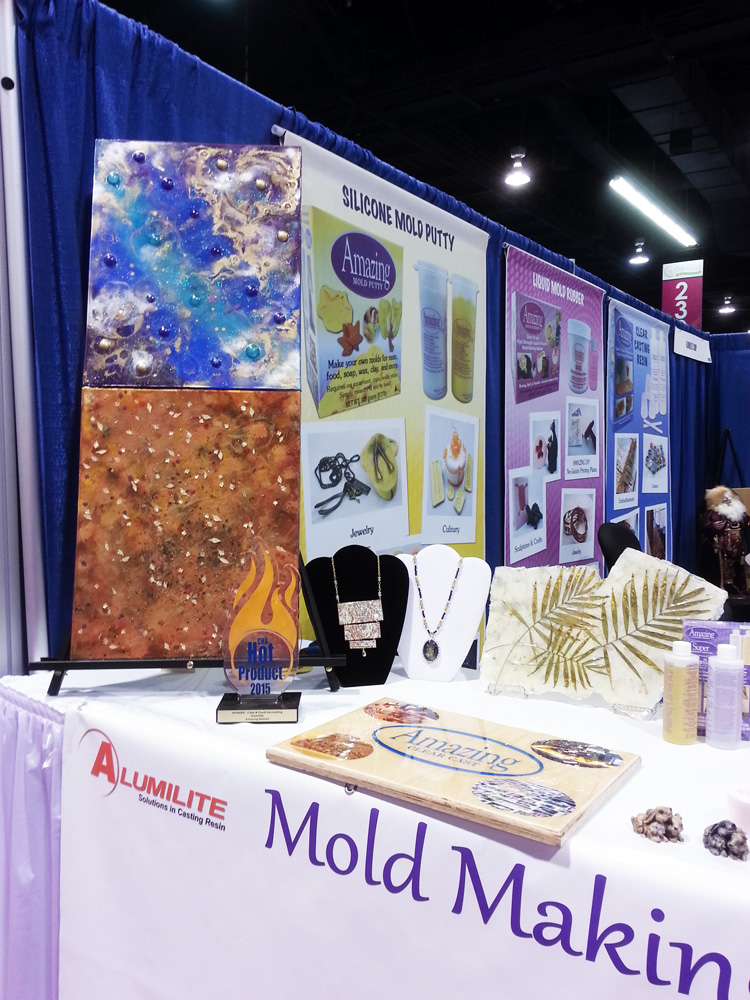
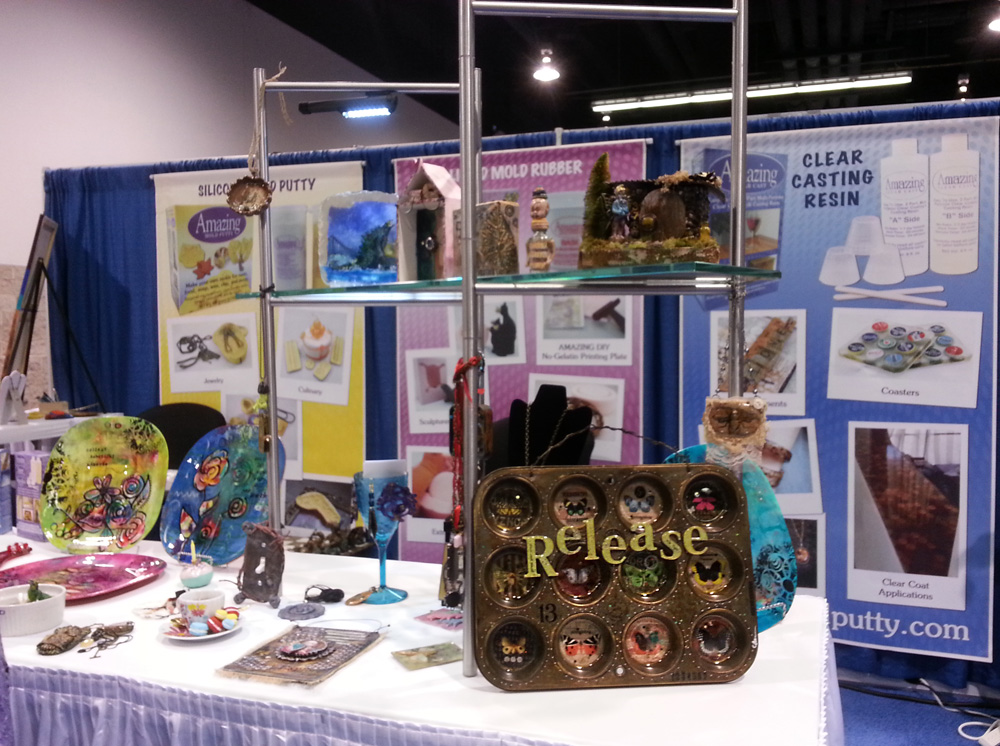
In this part of the recap I will be focusing on the Amazing Casting Products/Alumilite Corp booth at CHA. The Amazing Casting Products Design Team, of which I am proud member of, was asked to submit some of our best projects to be showcased at their booth and to do demos. I took loads of photos of the booth so lets take a tour of the booth, see the artwork and meet the artists showcased!
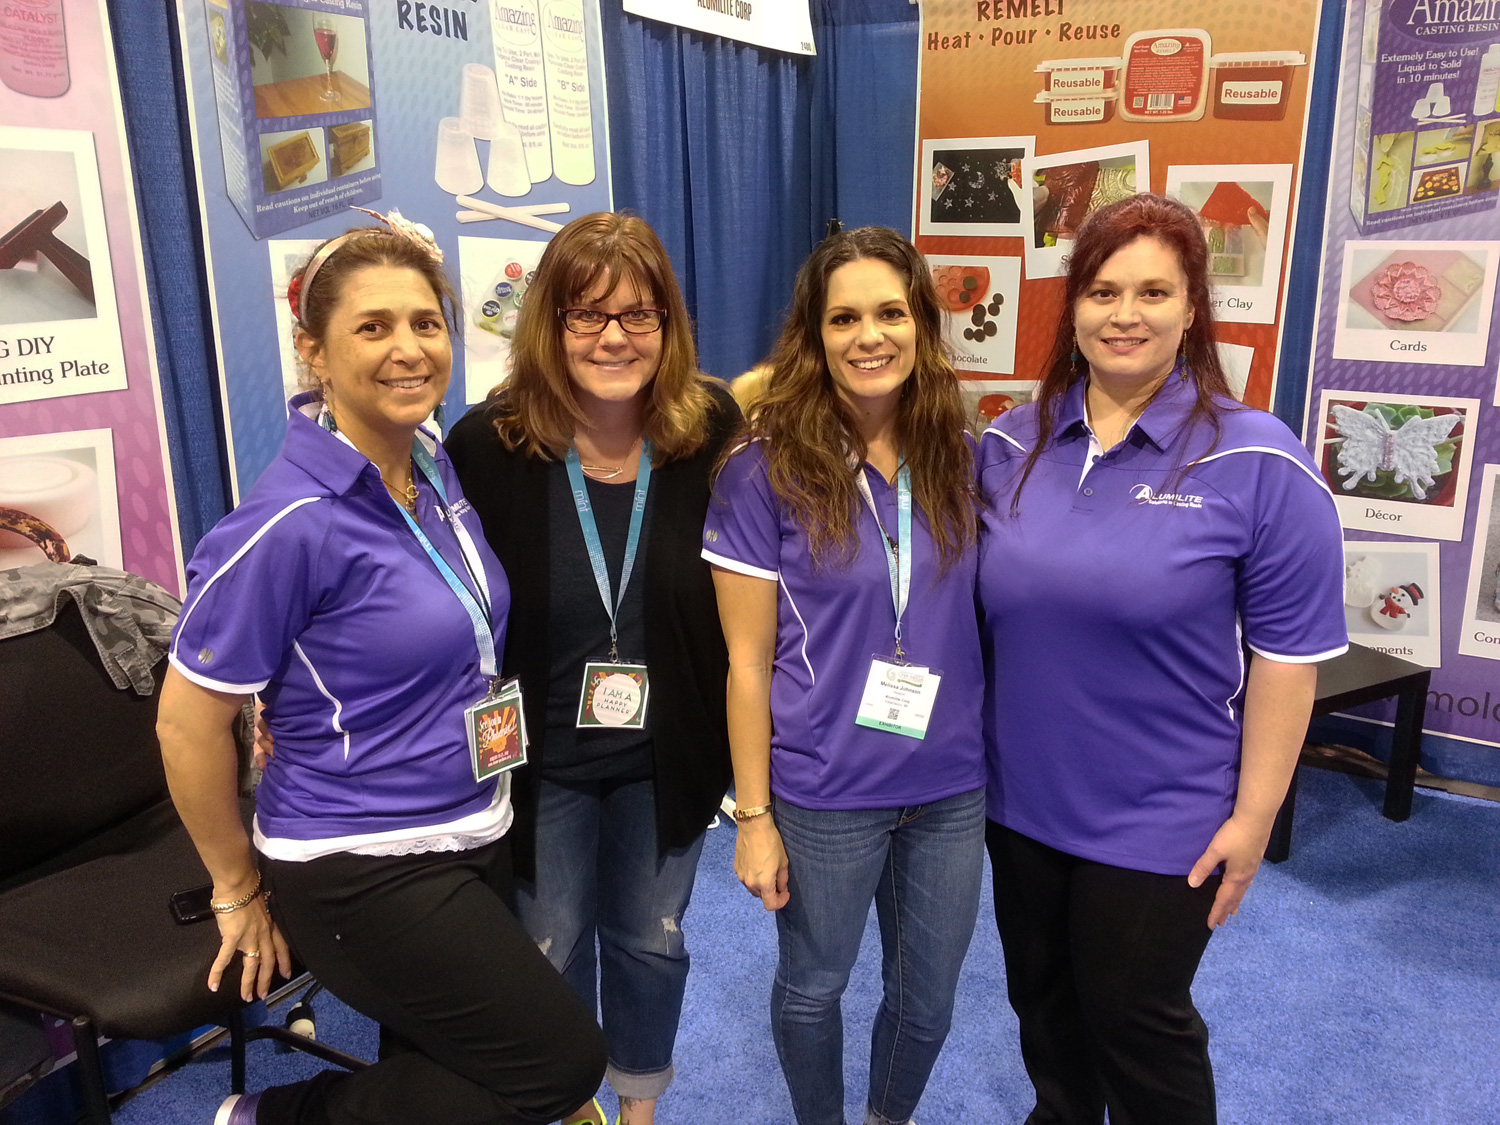
First day of artists doing demos at the booth, Design Team Leader Susan M. Brown, Tina Walker, Melissa Johnson and I. It was so wonderful to see Susan again and finally meet Tina and Melissa in person!
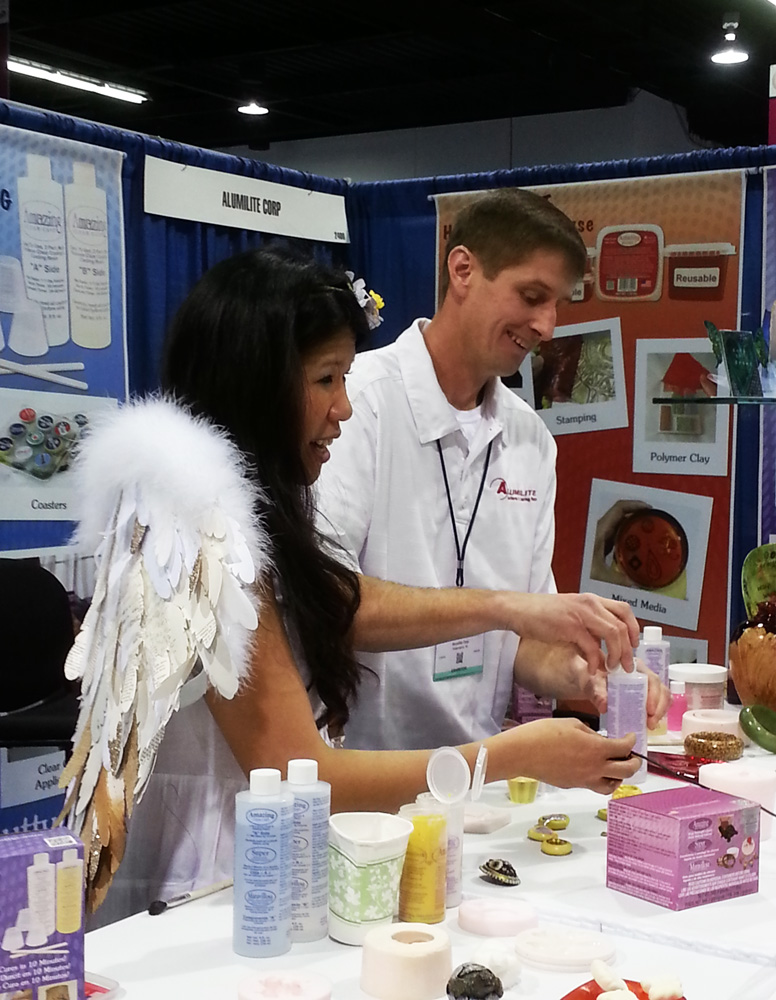
Elena Lai Etcheverry of Charity Wings stopped by the booth to talk to President of Alumilite, Mike Faupel, about all of the crafty applications and products of the amazing Casting Products line!
This year I decided to create some booth samples showing not just traditional uses for resin but how Amazing Clear Cast can be applied to paper, canvas and dried plant life.
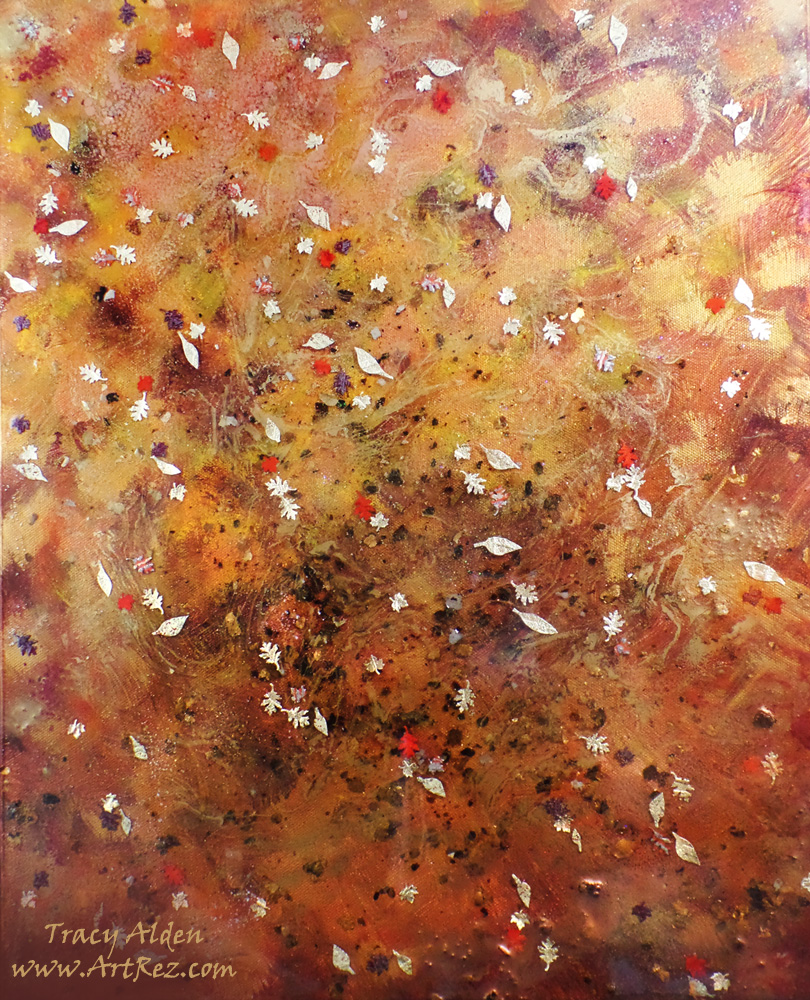
Here is a close up of my 16X20 Autumn canvas, I wanted to show how simple papercrafting supplies could create a lovely home decor piece. The base layer is canvas painted with acrylic paint, with a thin layer of Amazing Clear Cast, some glitter and tiny gold beads. To the second layer of resin I added Alumidust powders, more glitter, mica flakes and tiny paper leaves. The third and final layer had a base of glitter and top layer of resin to seal all of the embellishments in.
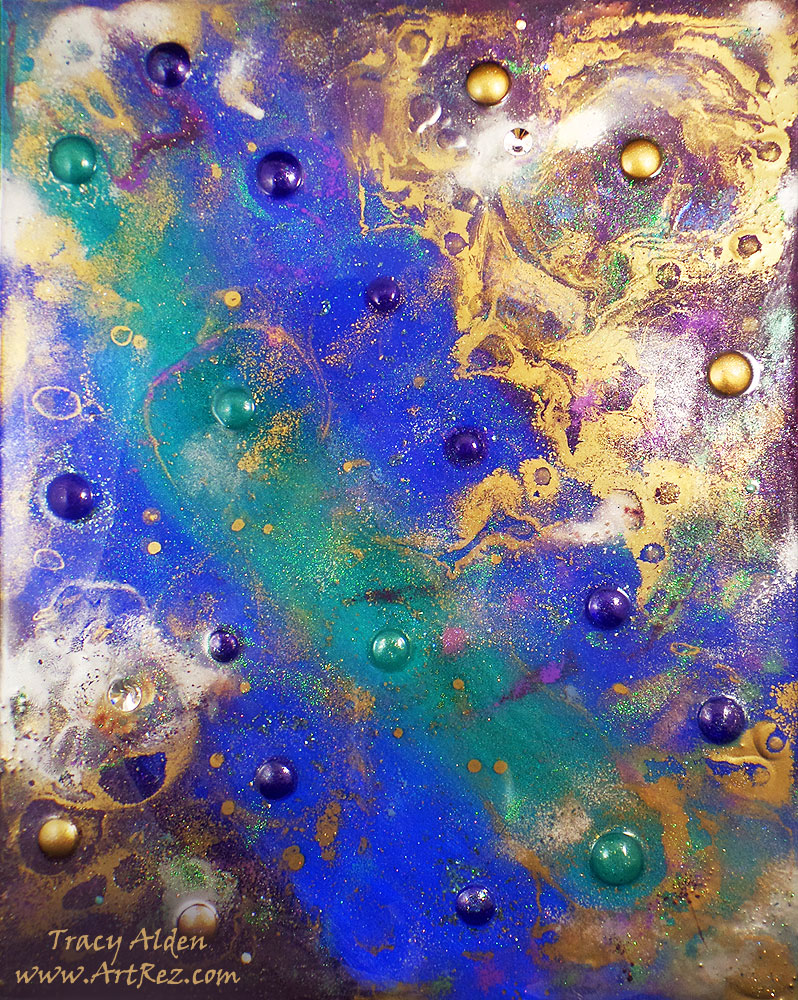
Here is my 16X20 Abstract canvas, which reminds me of a Nebula. I started by casting some cabochons in Amazing Casting Resin and Amazing Clear Cast tinted with Alumilite’s Dyes and metallic powders. I painted the canvas with acrylic paint and poured a layer of clear resin, placing the cabochons on the canvas, along with different glitters and small beads. The next two layers were applied in a manner similar to the Autumn canvas.
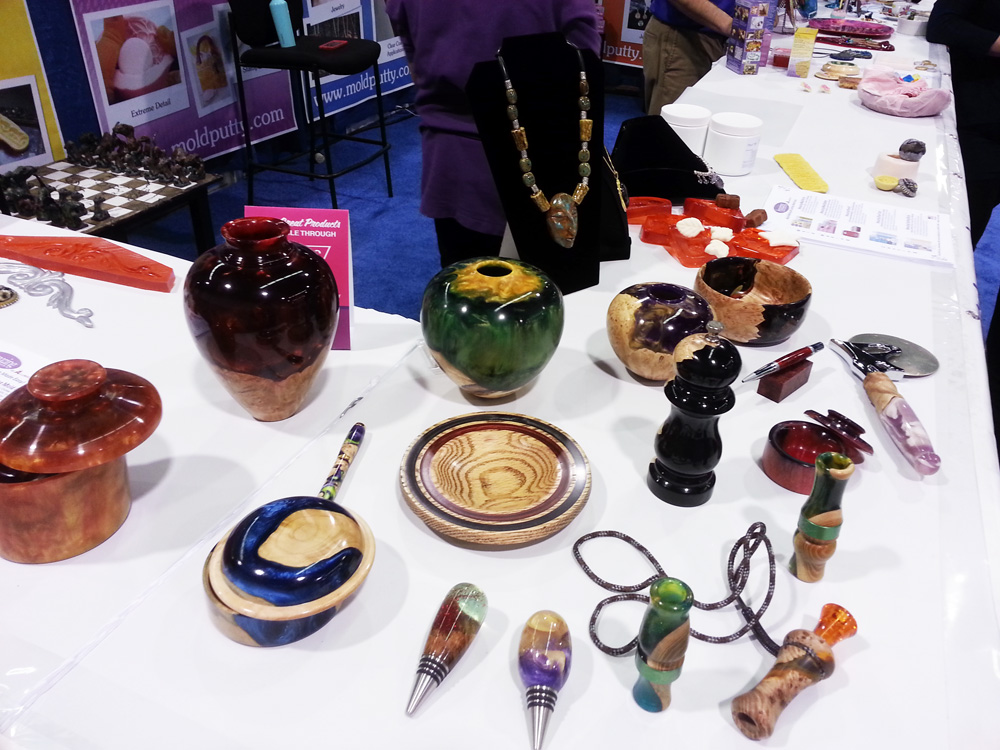
Mike Faupel commissioned these stunning wood and dyed resin pieces from an artist in Michigan. They were created by pouring Amazing Clear Cast over wood and carved on a wood lathe.
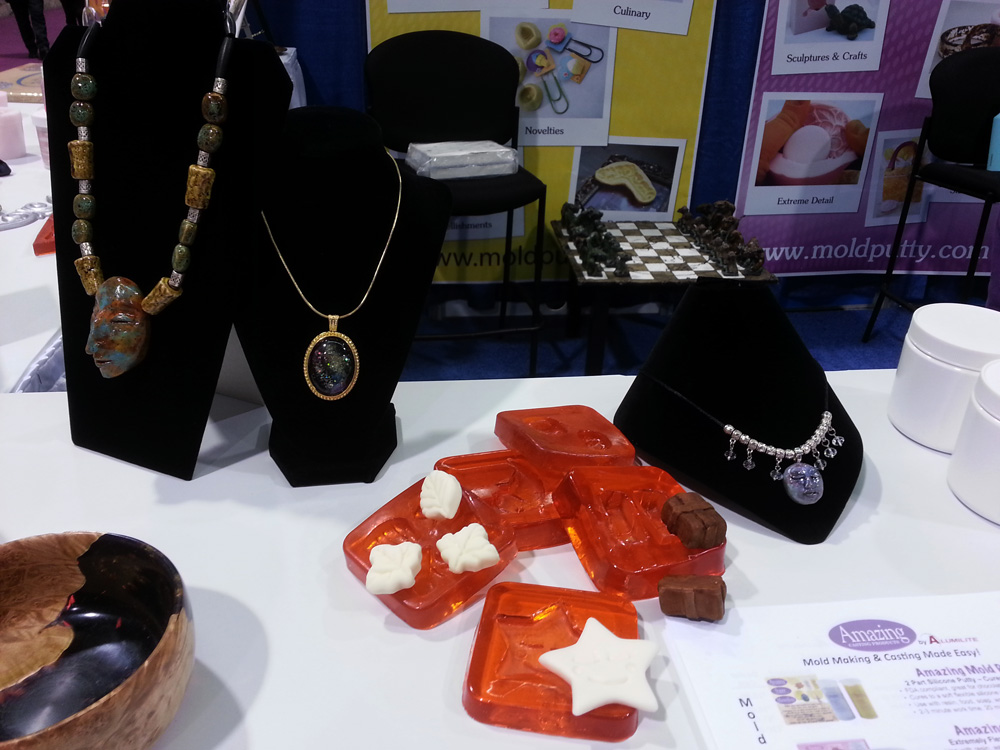
More of my jewelry and Remelt samples on display at the booth. The Mesoamerican necklace tutorial can be found here.
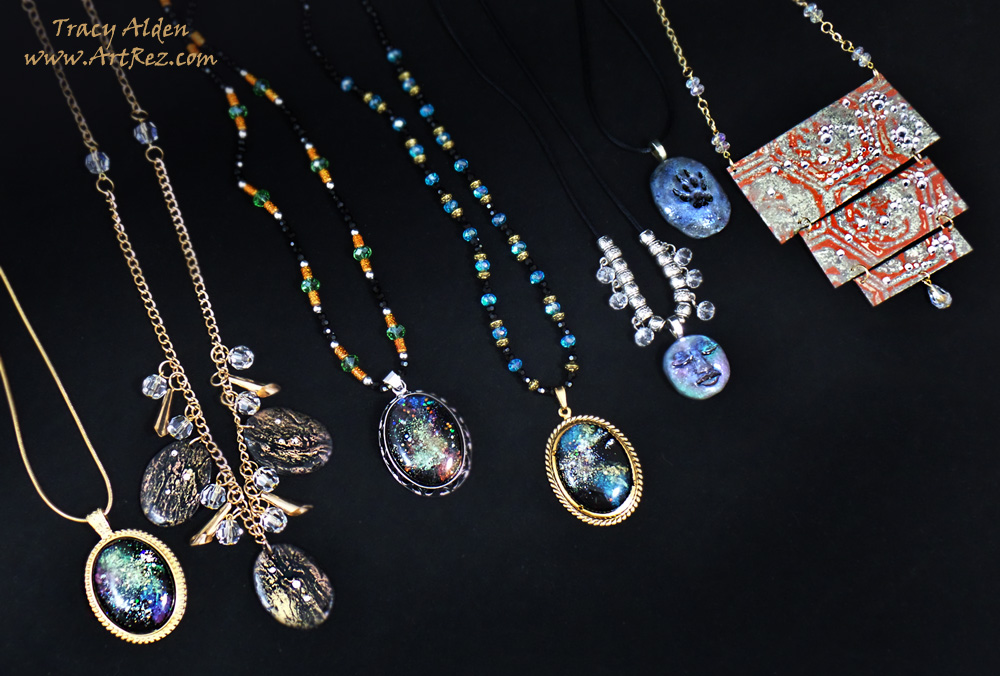
Here is a close up of some of the new resin jewelry pieces I made as booth samples for this year’s CHA show.
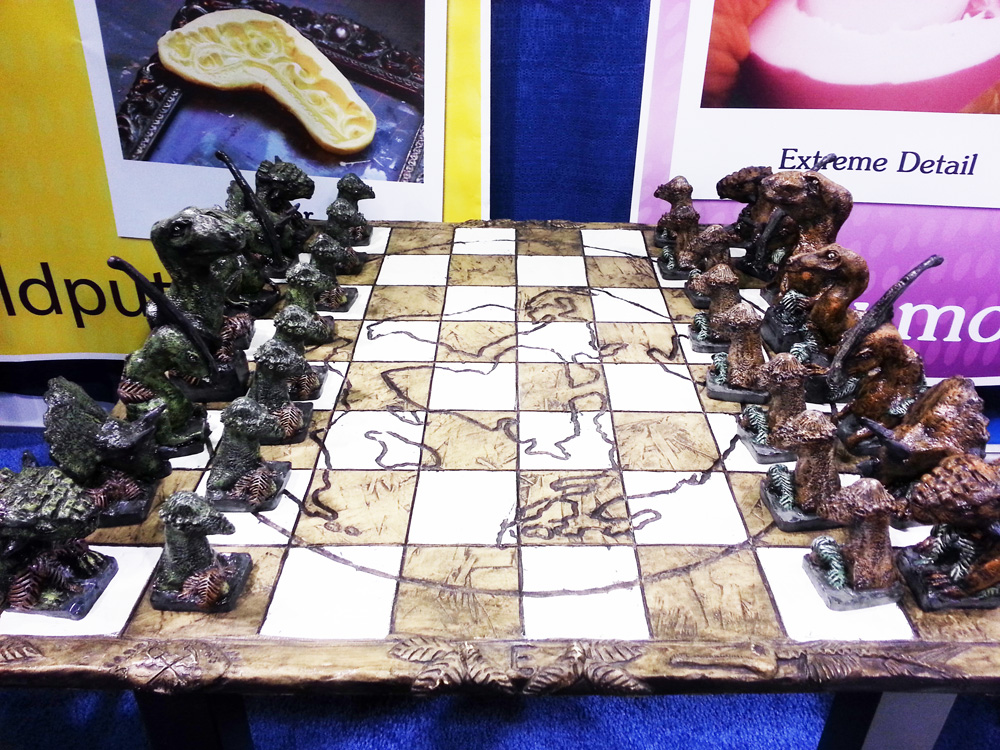
An associate of Mike Faupel created this wonderful and rather fun Pangaea chess set. It’s all made out of Amazing Casting Resin and molds made of Amazing Mold Rubber. The artist who created the set made sure each dinosaur had a different facial expression and were all hand painted!
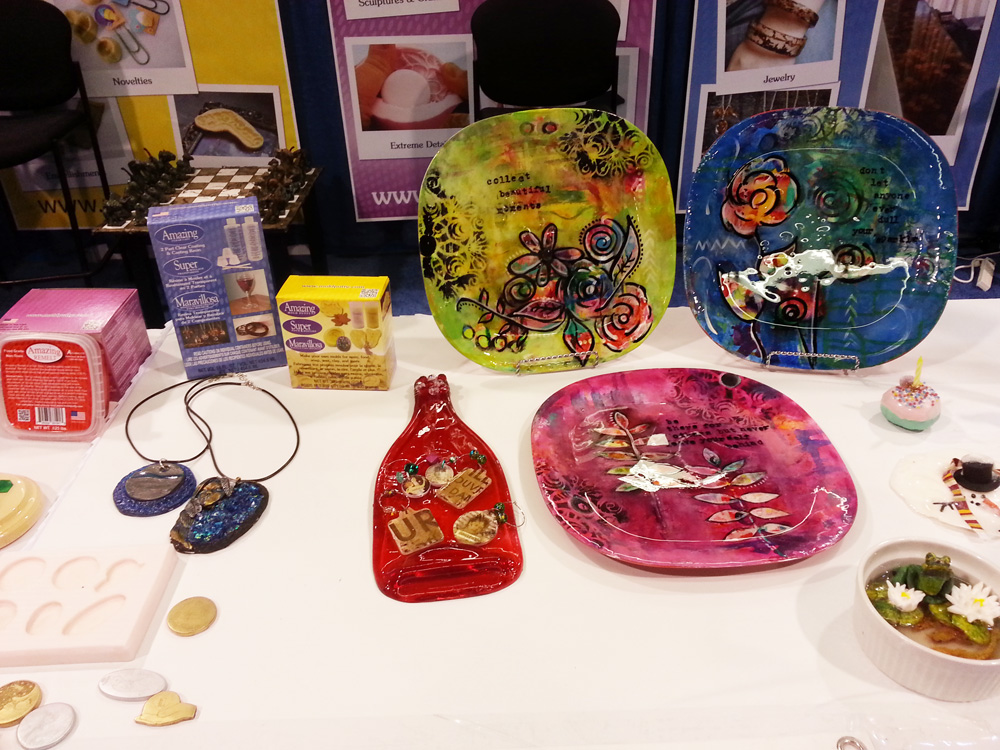
Melissa Johnson‘s beautiful food safe hand painted resin plates were just lovely in person. You can see one of Brenda Burfeind‘s wine bottle shaped resin cheese platters next to the plates, to the left one of Lyn Gill‘s polymer and resin pendants, and on the right you can see one of Sandra Strait‘s hand painted mini fish ponds.
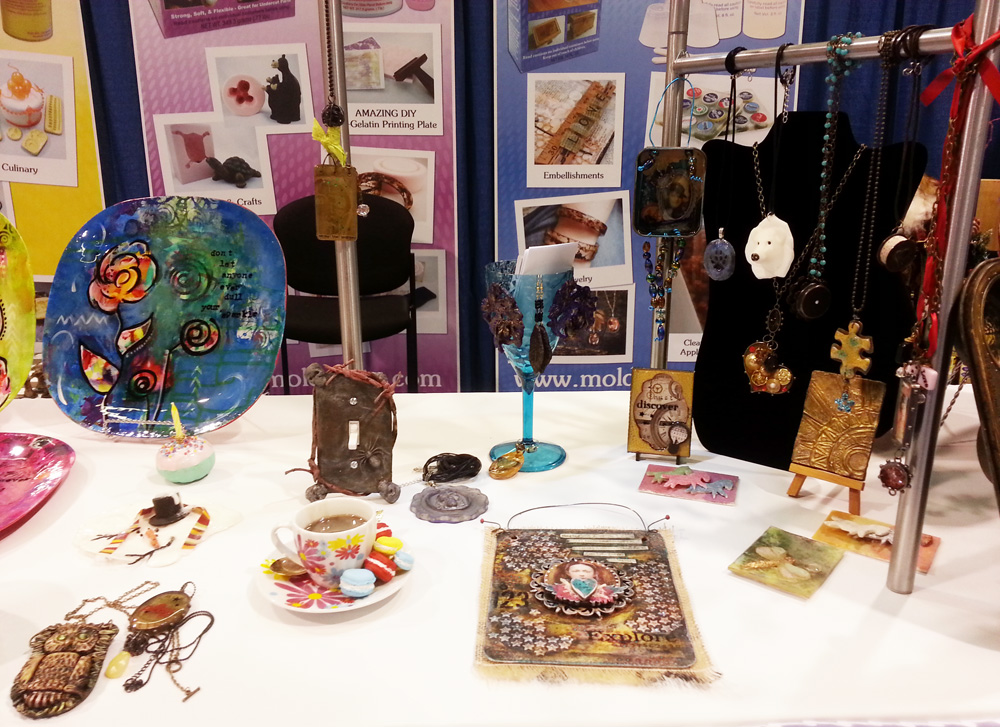
The booth was just full of beautiful Design Team artwork, from Susan M. Brown, Melissa Johnson, Lyn Gill, Maria Soto, Rachel Whetzel and more, along with pieces made by Cat Kerr; my photo doesn’t do her work justice so please make sure to hope over to her blog to see her work!
There was even more amazing work from Cat Kerr, Tina Walker, Sandra Strait, and Aimée Wheaton.
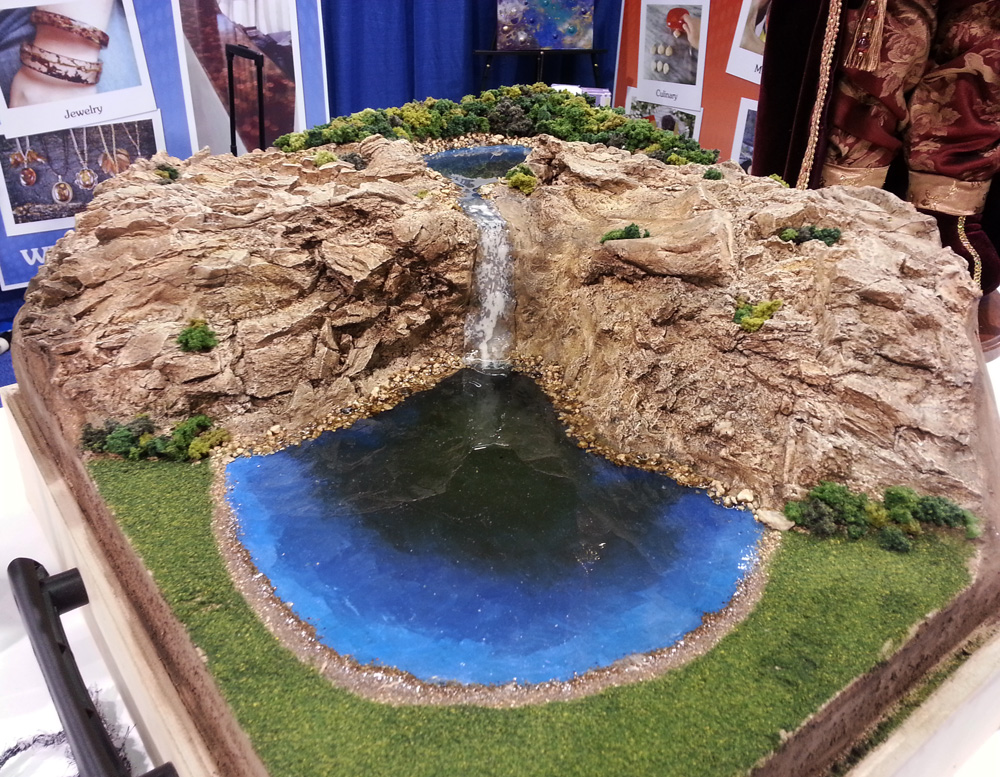
This beautiful model miniature was made of out Amazing Casting Products, from the rocks, water and inner core by the very talented Lloyd’s Layouts. Their use of resin and mold making products to create realistic miniature scenes is outstanding!
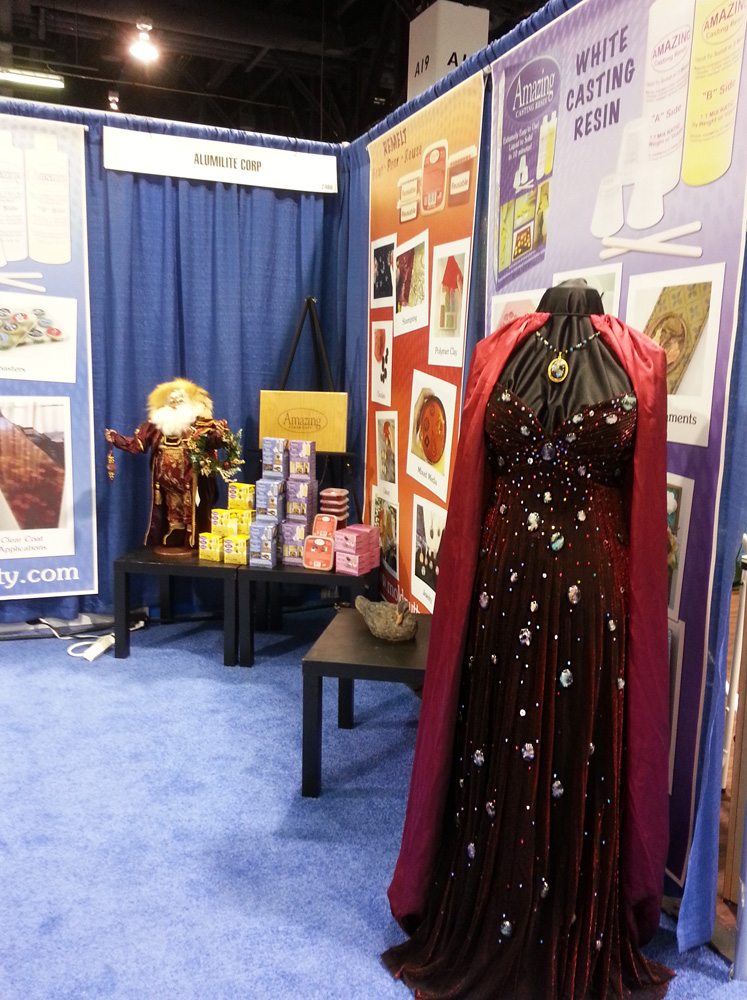
The handsome Santa in the background was made with Amazing Casting Resin and my “Cosmic Radiation” gown was on on display again at the booth
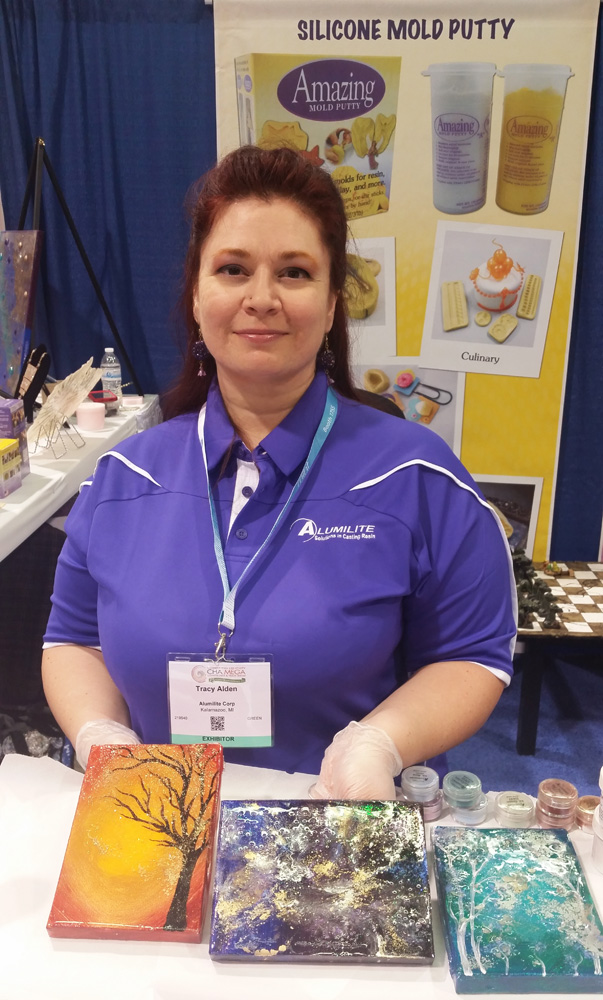
For demos at CHA I decided to show how to apply resin, powders, glitters and beads to acrylic painted mini 5X7 canvases. Each day of the show I showed to apply a new layer of resin with embellishments. People responded so well the demos I already have two orders for the mini canvas art!
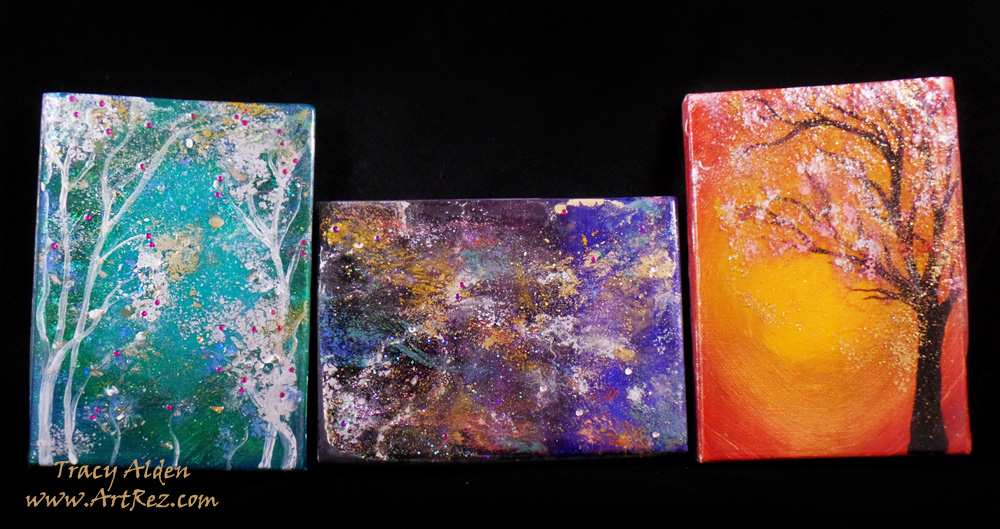
Once home I sanded the edges of the canvases and prepared them for the final coat of resin. I can’t wait to make more.
Come back later for Craft & Hobby Association Mega Show 2016 post, part 2!
Until Next Time, Safe Travels!
Day of the Dead Papier-mâché #Cre8time Inspiration
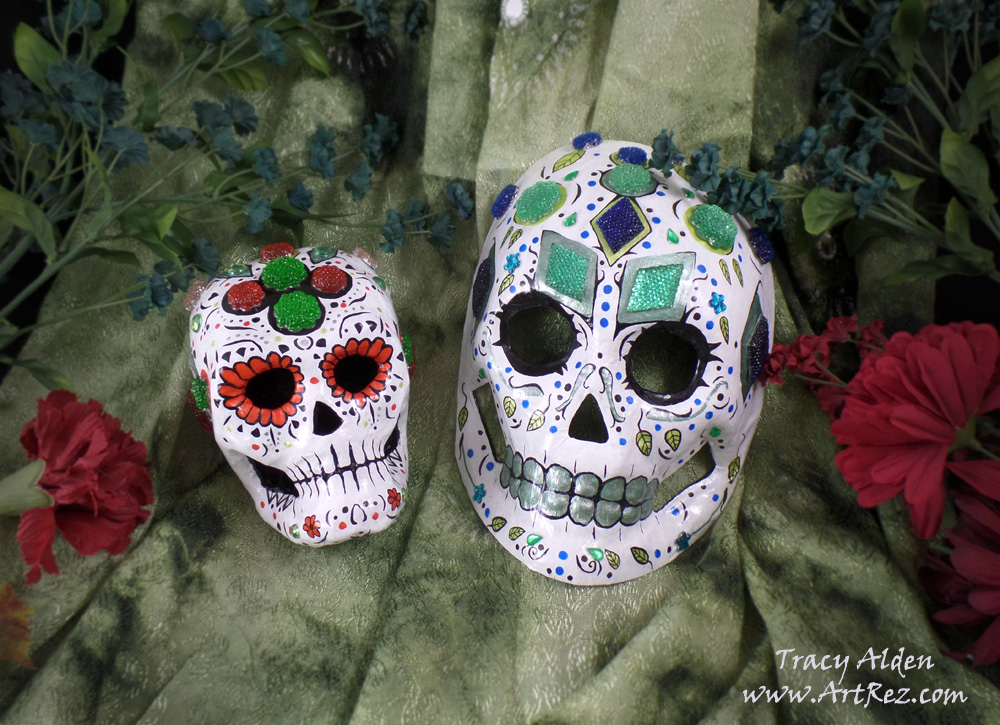
I am a huge fan of Day of the Dead festivals and artwork, even if it is a wee bit ahead of the calendar date! I was inspired to create these pieces after going to Linpeng International Inc./Fiona Accessories to visit with Fiona and Jimmy Lin. They are truly wonderful and talented people with a dedication to creating beautiful hand painted beads, jewelry and beading supplies, and I am grateful for meeting Fiona at the Craft and Hobby Association Trade Show in 2014. At this visit, as usual, we discussed beads and jewelry, went over new ideas and displays, but Jimmy showed me something a bit different this time: little packages of Acrylic flat back gems, normally used for scrapbooking, in a wide variety of colors. He asked me if I could think of any other applications and the first thing that came to mind was covering papier-mâché skulls with the gems for Day of the Dead decor.
Supplies:
Fiona Accessories Acrylic flat back gems Flower and Diamond shaped in sizes 14mm, 19mm, 22 mm and 20x30mm
Mini acrylic flat backed gems (normally for scrapbooking, nail or shoes)
Liquitex Gloss Varnish
Acrylic Paint
Paint Brushes
Papier-mâché mask and skull by Darice and often sold at Michaels late Summer into Fall
Beacon Gem-Tac (Great stuff, non-toxic and flexible)
Sakura Pigma Micron Pen Set (I just love using their pen sets for any illustrations I do)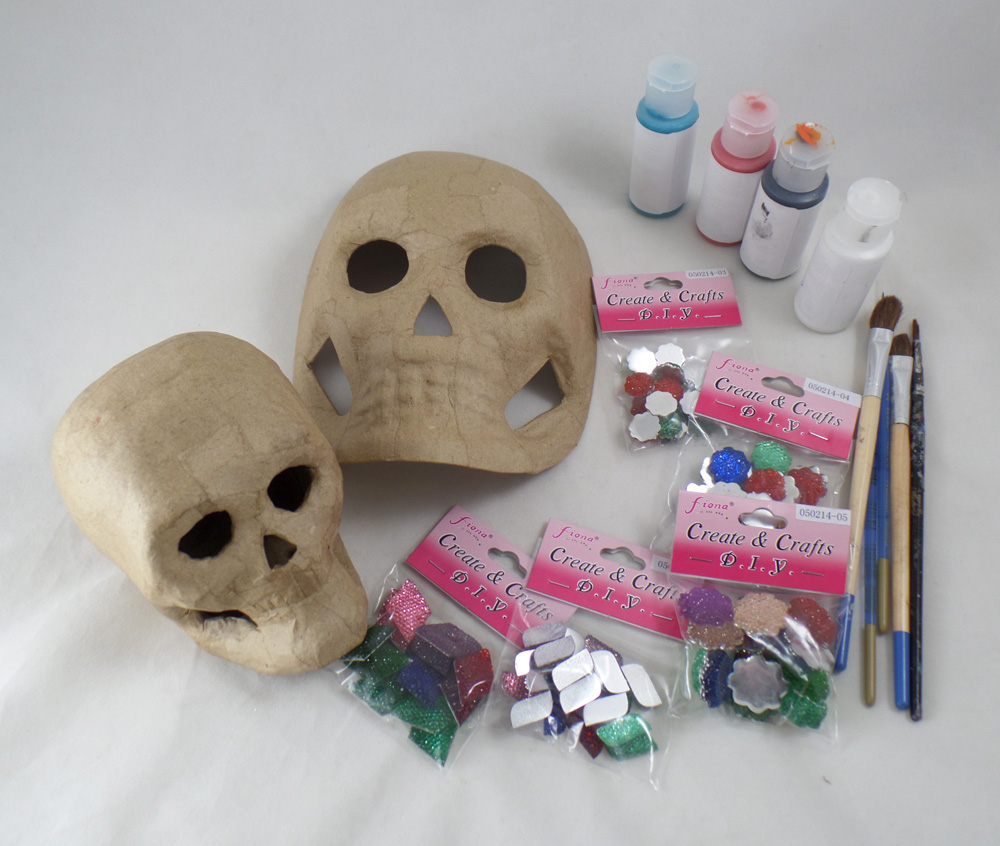
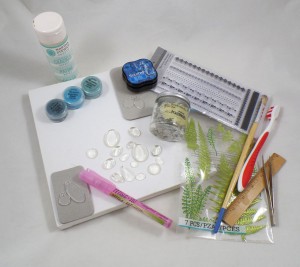
First I gathered all of my supplies, picking colors of paint, acrylic gems, brushes and which papier-mâché pieces I felt would look the best for what I had in mind.
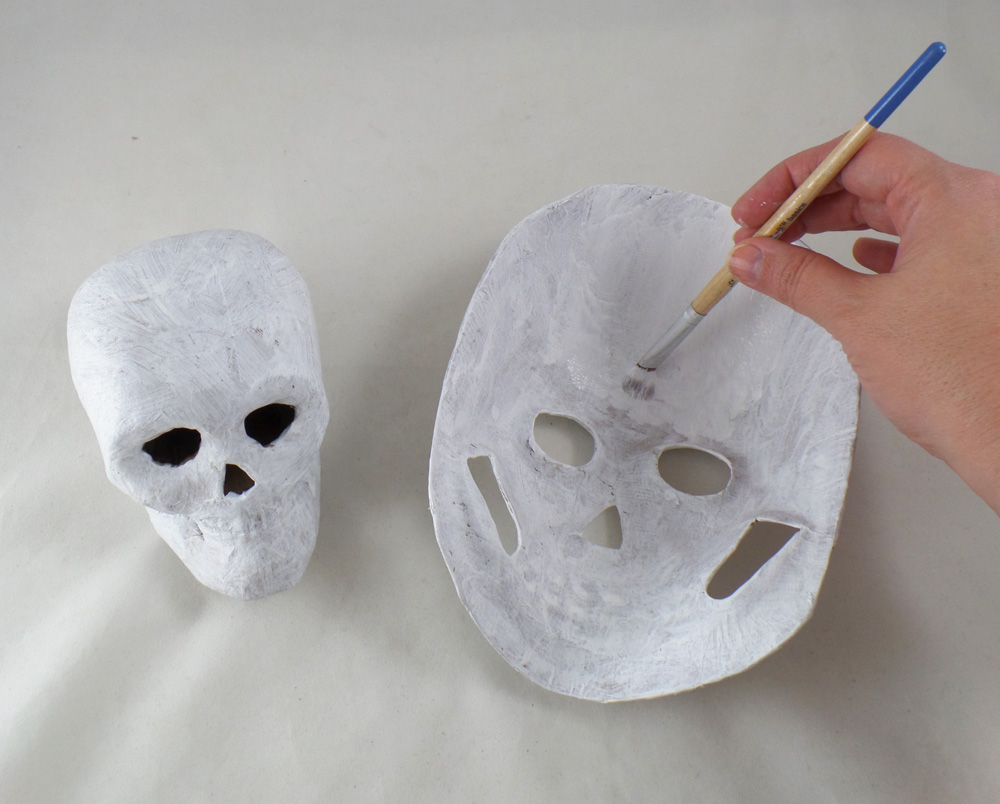
I started by applying white acrylic paint to the entire surface of the papier-mâché skulls. I let each layer of the paint dry completely before adding the next layer to prevent the papier-mâché from getting too wet and losing shape. I noticed that 2-3 coats of paint are normally required to get complete coverage.
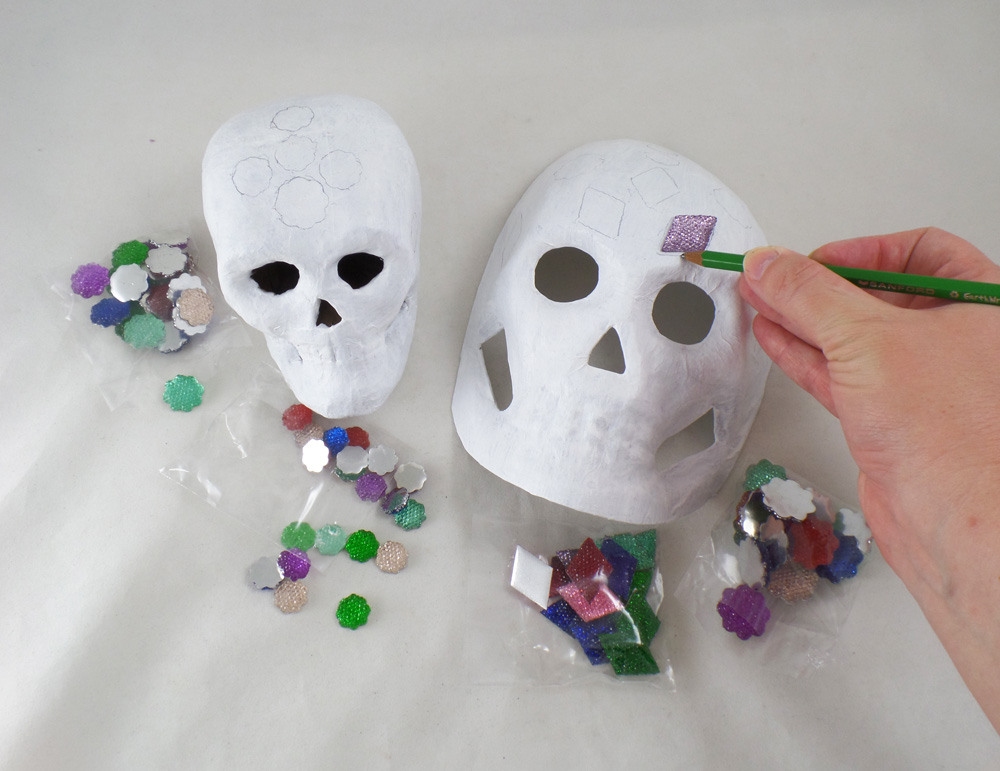
I started to loosely place where I would like the Fiona Accessories Acrylic flat back gems to sit on the papier-mâché and traced outlines in pencil, but I did not glue them on at this point. This would give me outlines to follow and color in with the pens and paint before applying the gems.
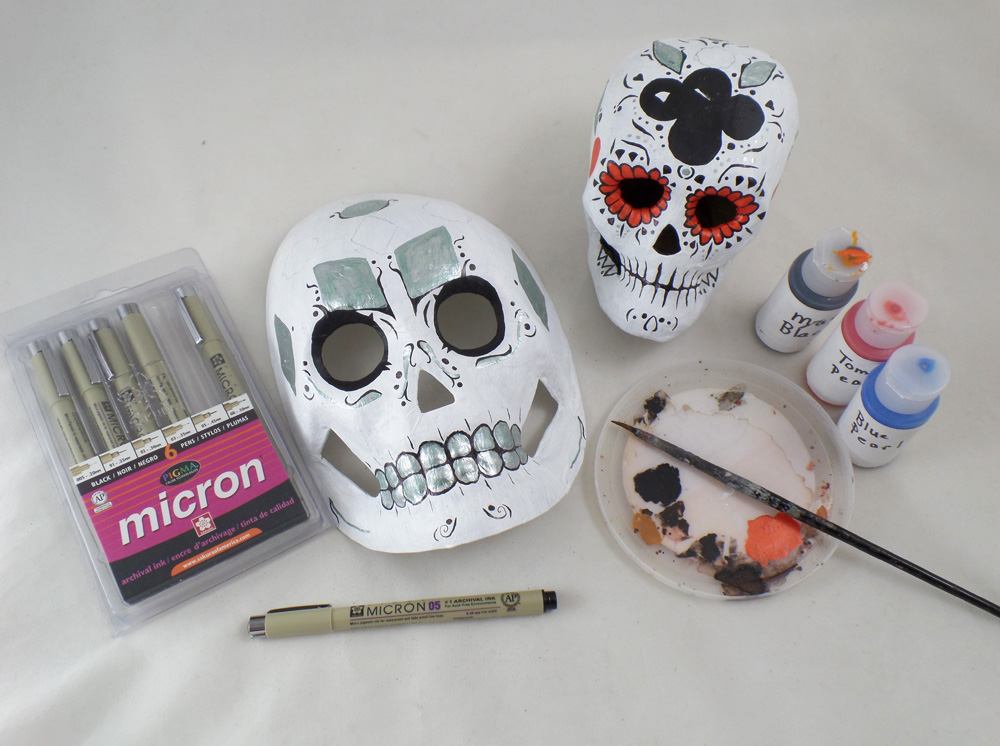
There is no set pattern or design to Day of the Dead masks, as it is a wonderfully free form style of art, allowing the artist to put any variety of shapes, symbols and scroll-work on their pieces. I have a fondness for plant life and organic shapes so I painted flowers, vines and geometric patterns across the pieces in silver, black, red and blue. I outlined key elements with Sakura Pigma Micron pens to make them visually pop more.
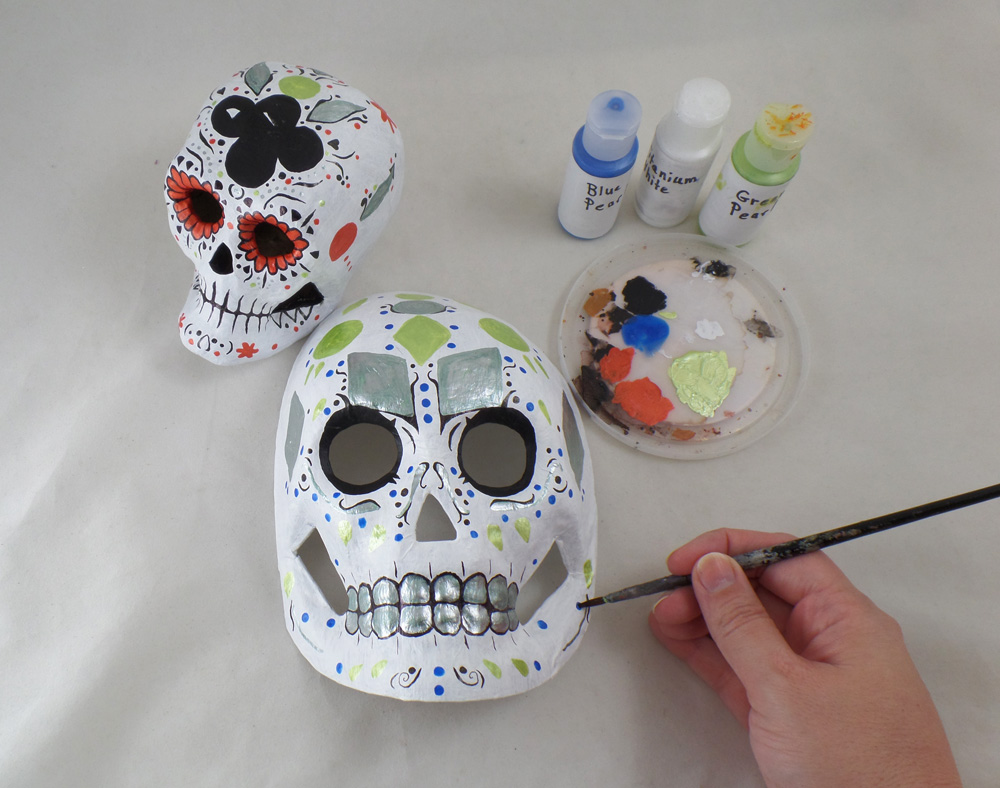
Since I really liked how the silver paint looked I added some leaves and geometric shapes in green pearl paint, along with flowers in red pearl paint. The paint having a slight shimmer would play off the sparkle of the acrylic gems. Applying the paint and drawing with the pens can take some time but I find it rather relaxing and meditative.
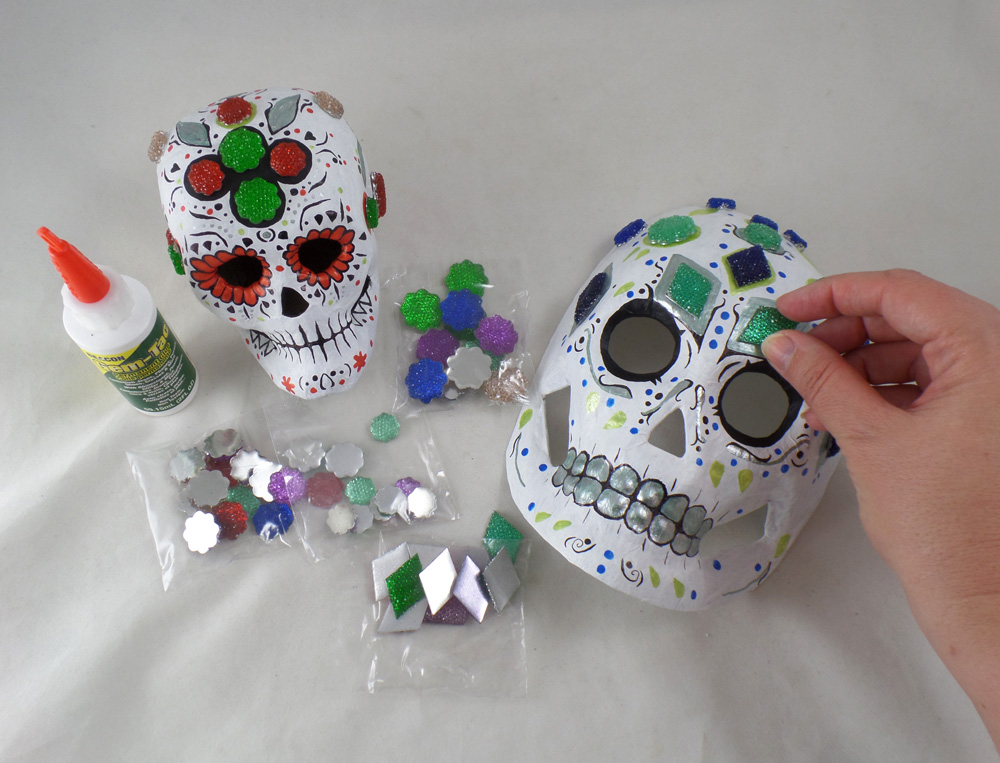
Once the paint was fully dry I applied the Fiona Accessories Acrylic flat back gems to the papier-mâché skulls with Beacon Gem-Tac. A small drop of the Beacon Gem-Tac will go a long way and dry perfectly clear; just holding the gem in place for a few seconds is all that is needed to get the gem to stick to the skulls.
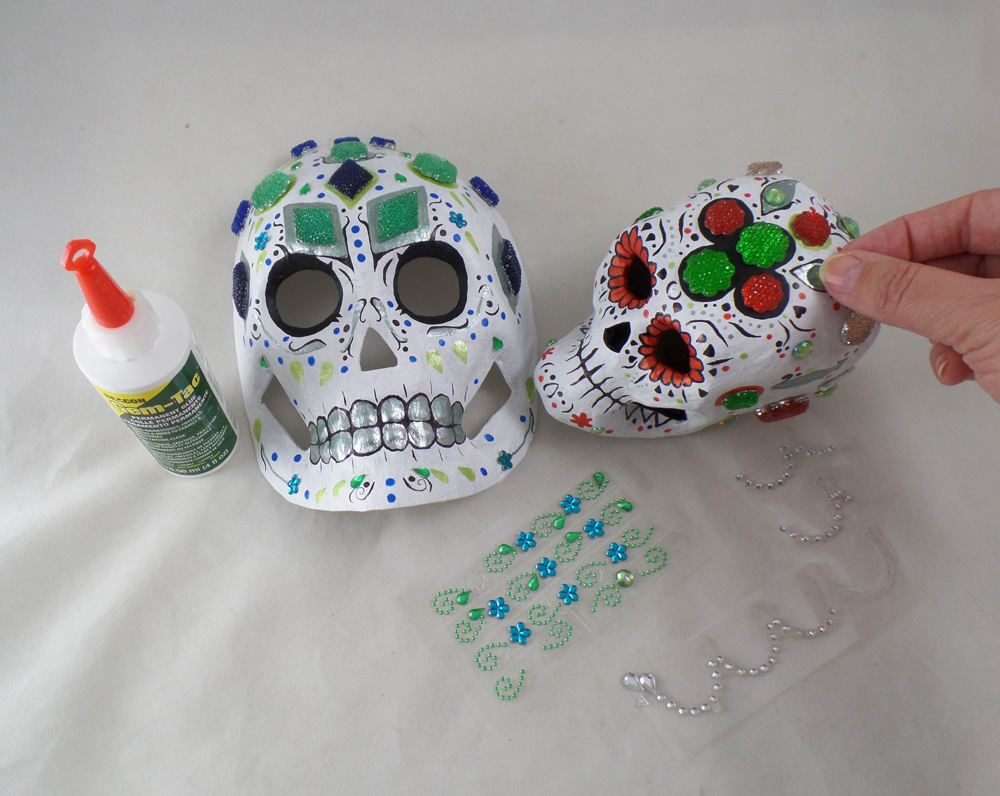
Once all the large acrylic gems were applied to the papier-mâché skulls I filled in the open areas with more paint and pen details, then adding mini acrylic gems with more Beacon Gem-Tac. I let the glue fully dry before going onto the next step.

To make sure all of the detail and gems were protected I applied three coats of Liquitex Gloss Varnish to the skulls, letting each layer dry completely before applying the next.
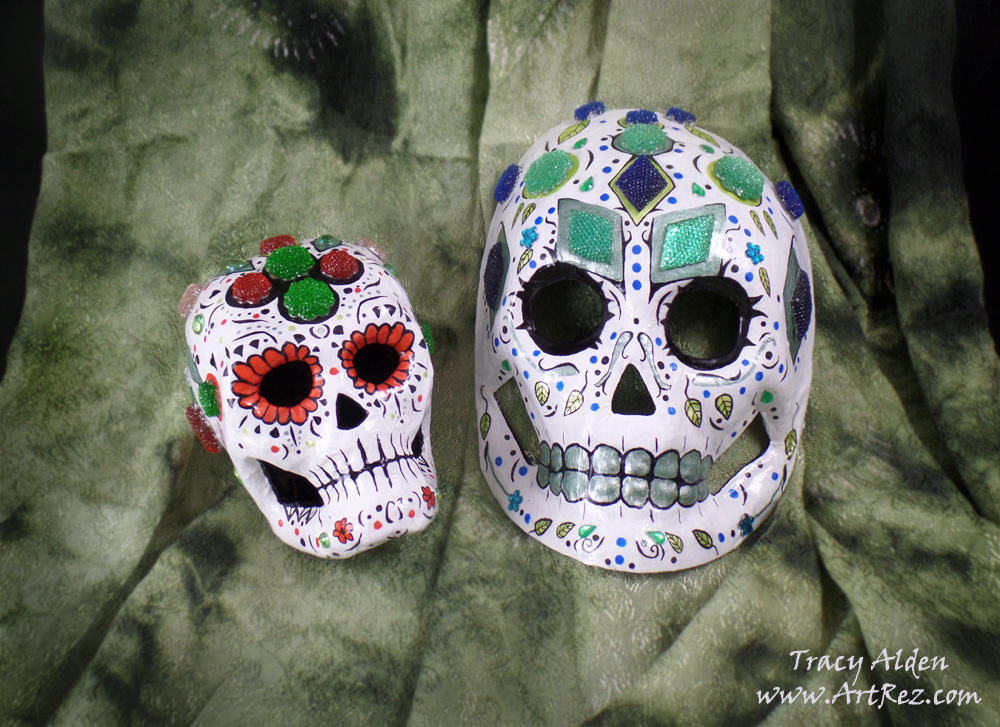
Once the varnish was dry I was able to add them to the rest of my Day of the Dead artwork collection!
Want to share your projects with Fiona Accessories‘s products? Post any projects and ideas on their Facebook Page! 🙂
Until Next Time, Safe Travels!
Temple Rain, a Mixed Media Canvas
In April I had the great opportunity to receive a Frog Dog Studio kit by being part of the Amazing Crafting Products Design Team. I was so excited when I received the kit; it had so many wonderful goodies, from ink pads, pigment ink, mica, chipboard pieces, tissue paper and more! There was enough supplies to make several projects and still have things left over.
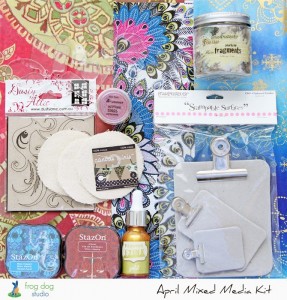
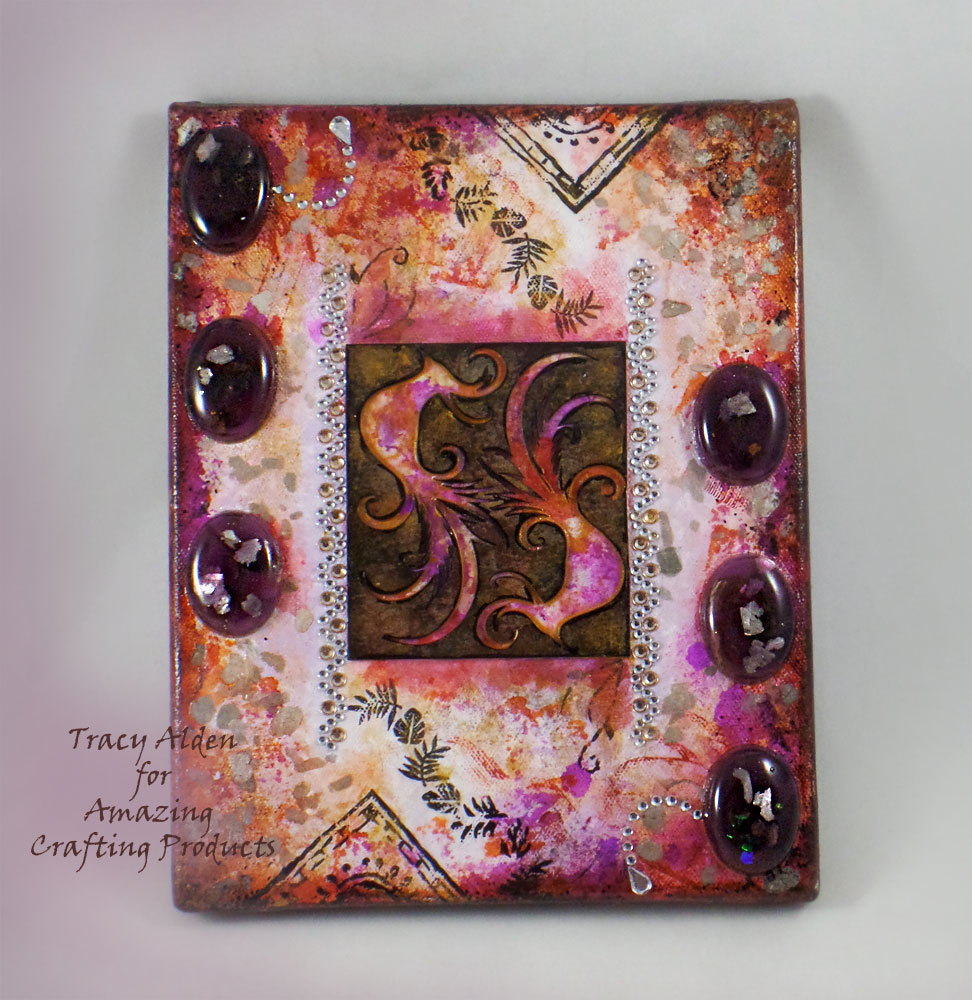
Many of the supplies in the April kit seemed to have a East Asian flair to it. It got me thinking about my trip through Asia and I was inspired to create a Mixed Media hidden story book.
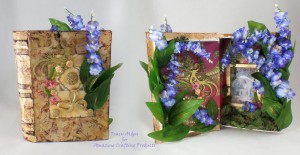
The tutorial for this project can be found here: Mixed Media Book Box
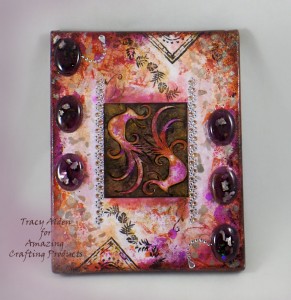
With more of the supplies left over, I created a Mixed Media Canvas piece with wild tropical colors. It was so much fun that I wanted to try making another canvas piece but with a completely different feel, and I still had supplies left over from the Frog Dog Studio kit. Sadly, I got busy with home improvement projects and had to wait until the end of May to start my new canvas.
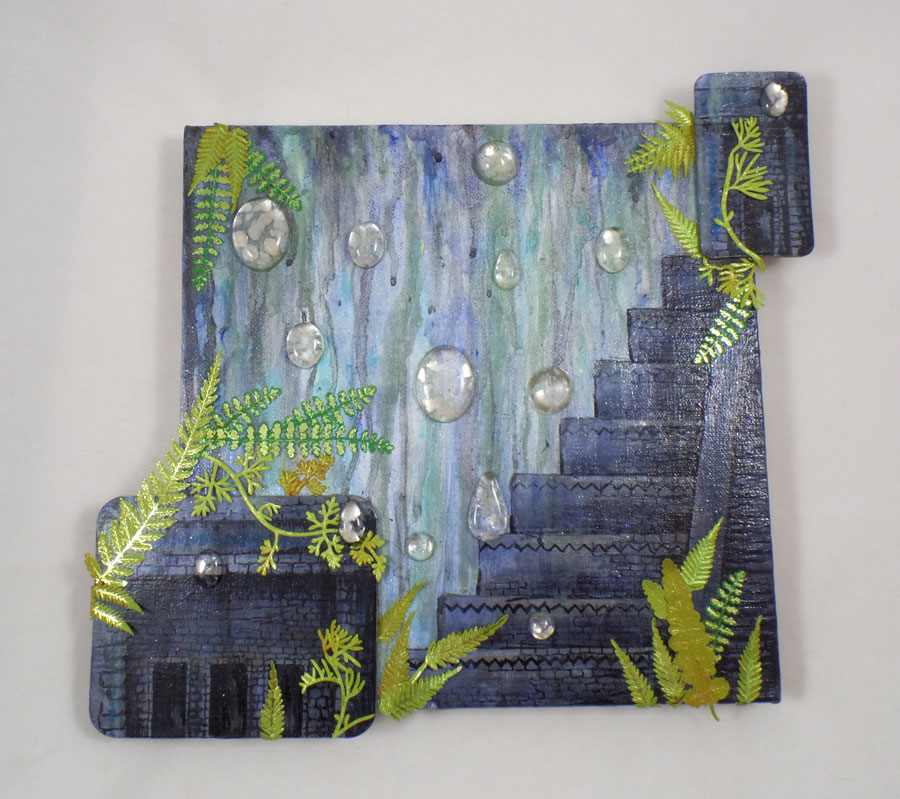
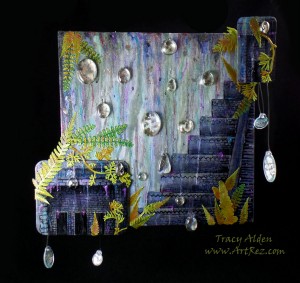
 With a portion of the extras from the kit, miscellaneous supplies from my collection and canvas, I started to lay out the project, figuring out which direction to go. I wanted to use the chipboard from the Stampendous Mini Clipboard Canvas pack, the Tim Holtz Clear Fragments and Pearlized Stampendous Mica Fragments. I placed them this way and that on the canvas and suddenly I got an idea. What if I were to try making a abstract ruins in the rain?
Just like with my previous canvas piece, I pulled out what I call my resin “save for later” bin. This bin is populated with all kinds of resin pieces, some finished, uneven pourings or even pieces I just didn’t know what to do with. I picked out resin cabs that had the look of abstract water droplets.
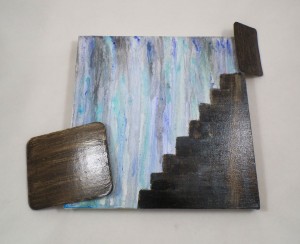 I applied water and acrylic paint to the canvas and tilted it so all the paint and water ran down to the bottom. Once dry, I painted a base dark layer for my ruins. I glued the chipboard pieces to the canvas using Nine Lives Products Glu6 Paste and let dry.
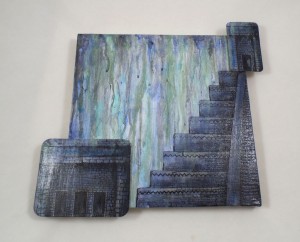
I applied a second layer of water and paint to give a look of rain falling. On went the crackle medium to the dark paint layer and once dry I added a gray-blue paint top layer that then crackled giving it the look of ancient stone. I wasn’t completely happy with the look so using a black permanent marker I drew in small bricks and shading to give detail to the ruins.

Using Nine Lives Products Glu6 Nonporous glue I glued the mica flakes to the back of the resin cabs and while the glue was still wet pressed them onto the canvas. The glue has to dry overnight but it is well worth the wait for a great bond on the resin cabs. I applied little paper leaves to look like plant overgrowth and Liquitex Gloss Varnish to seal the paper leaves and paint in place. I added some acrylic paint in blue and purple as highlights on the ruins and brown on the paper plants to give an earthy hue. A second layer of varnish in drops and dribbles gave the illusion of water to the finished canvas.
I added some acrylic paint in blue and purple as highlights on the ruins and brown on the paper plants to give an earthy hue. A second layer of varnish in drops and dribbles gave the illusion of water to the finished canvas.
Frog Dog Studio’s available kits change every month but the great variety offered in each kit is a great inspiration. What might you make with their next kit?Until next time, safe travels!Mod Podge + Recycling = Home Decor
This time of year many people get gifts wrapped in tissue paper, and most of the time it ends up in the trash. Why not recycle into a beautiful piece of home decor or if you are a crafter that vends, booth decor? In a few short hours you can have a rather nice piece of decor that looks far more valuable that what it once was. 🙂


Ancient and Contemporary Inspired Artistry