Starting a new Art Journal
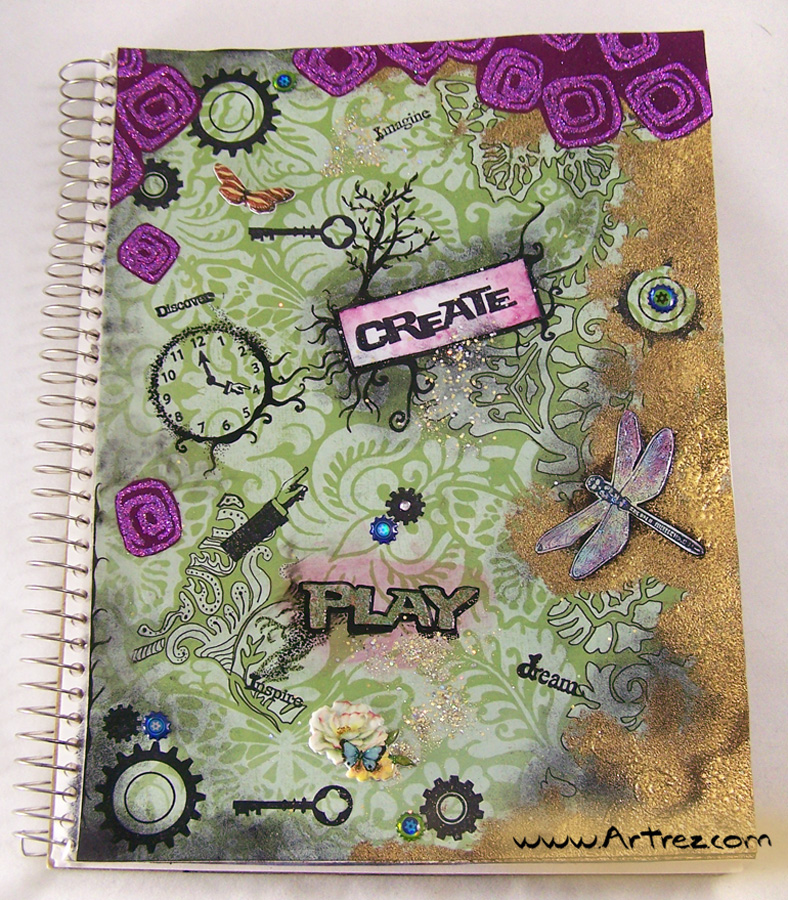
Recently I was talking to one of my clients about what I call my ideas/inspiration note and sketch pads. He laughed and said I was art journaling and didn’t even know it. I thought I wasn’t since most of my pages seemed a mess and wasn’t what I would call pretty but I was reminded that is how all creative processes start! So while I still have my beat up notebooks and pads around here I started one a little more artistic in nature by re-purposing a old sketch pad of mine.I had to start with the front cover, adding a new layer of card stock and pulling out all of my paper crafting supplies! I started with stamps and kept going!
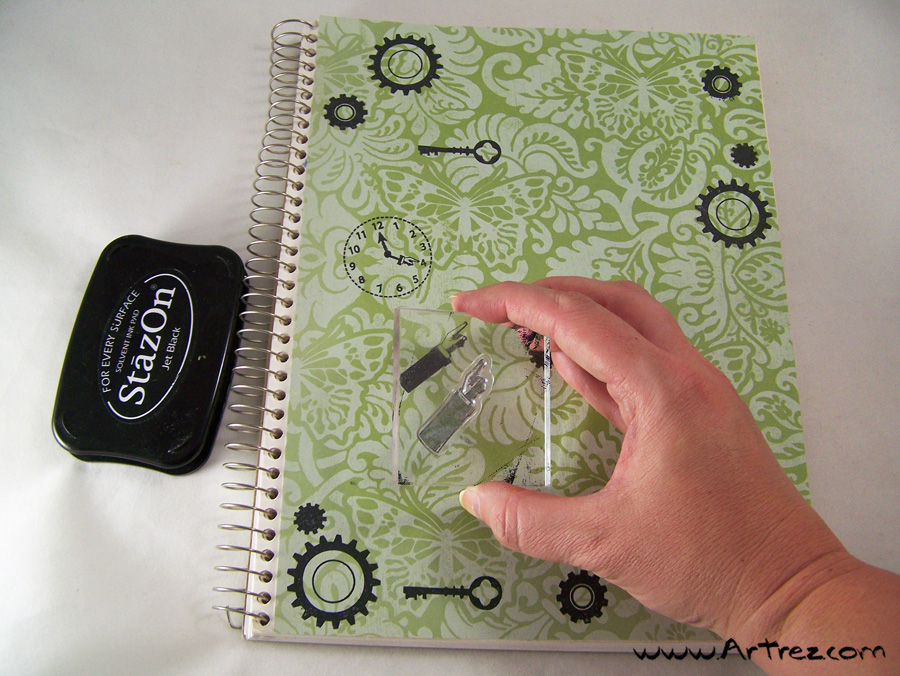
I stamped gears, a clock and words to remind me to take the time to create and let go. I used one of my favorite embossing powder recipes, added stickers, paper and doodled across the cover.
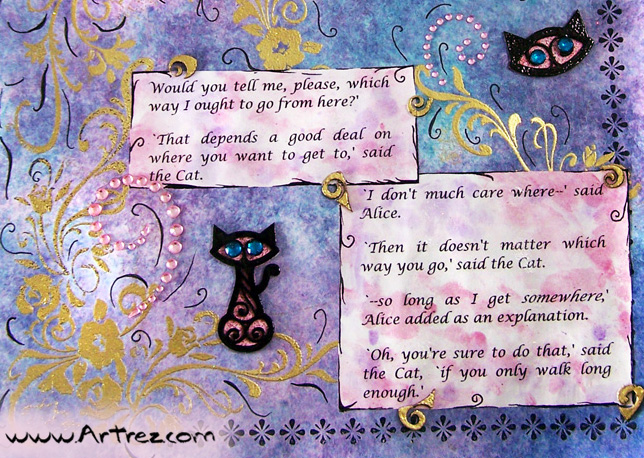
It is rather enjoyable to create a book for myself and not anyone else, a great way to relax and to highlight things I enjoy. After I worked on the front cover I wanted some of my art journal pages contain little snips of stories or themes that inspire me. Using one of my favorite quotes by Lewis Carroll from Alice in Wonderland I came up with the idea of doing a Cheshire cat page. I have always seen the cat as philosophical in nature, a reminder of how things are or could be.Hop on over to the Globecraft and Piccolo Blog for my Cheshire Cat journal page tutorial with Globecraft and Piccolo products!
If you would like to read Lewis Carroll’s Alice in Wonderland the Project Gutenberg Literary Archive Foundation has a free EBook of Alice in Wonderland.The Project Gutenberg website preserves literary and other intellectual works, and make copies of or products based on those works available free of charge or at the lowest possible cost to the people of the United States and the rest of the world. Many of the books are free because their copyright has expired.
Until next time, safe travels!
Moments and a card to remember
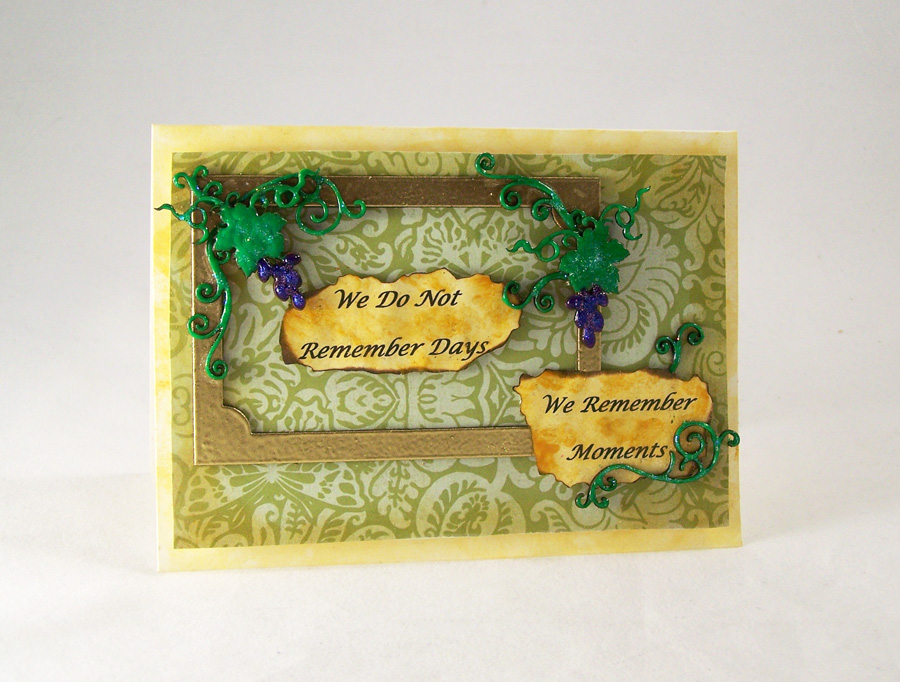
Lately I have been reminded how important it is to enjoy the good things in life. A quote by Italian poet and novelist Cesare Pavese “We do not remember days, we remember moments” has haunted my mind as of late. I have been ill lately but thankfully I can still do my artwork. I am so grateful for my family and their never ending support. So I thought why not put that quote on a card to give to those that matter the most. I went with a Tuscan style theme in remembrance of my Italian side of my family. 🙂
Supplies:
G&P Vintage Grape Vine Flourishes
G&P Floral Whimsy Accents
G&P Glastique Gloss Finishing Glaze
G&P Glastique Matte Finishing Glaze
G&P Micro Gold Embossing Powder
G&P Piccolo Embossing Powder Adhesive
G&P Leafy Green 3D Enamel Gel
G&P Purple Mist 3D Enamel Gel
G&P Yellow Ochre 3D Enamel Gel
Piccolo Easy Grip Tweezers
Art Glitter Ultra Fine Glitter Hydragnea and Angel Dust
DCWV The Mariposa Matstack
Blank card
Cosmetic Sponge
Foam squares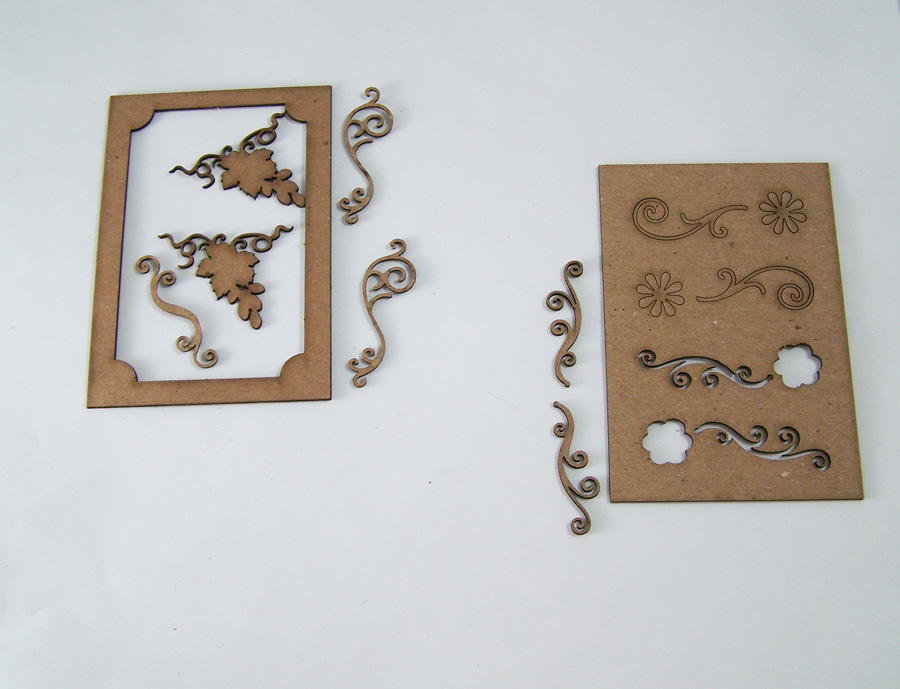
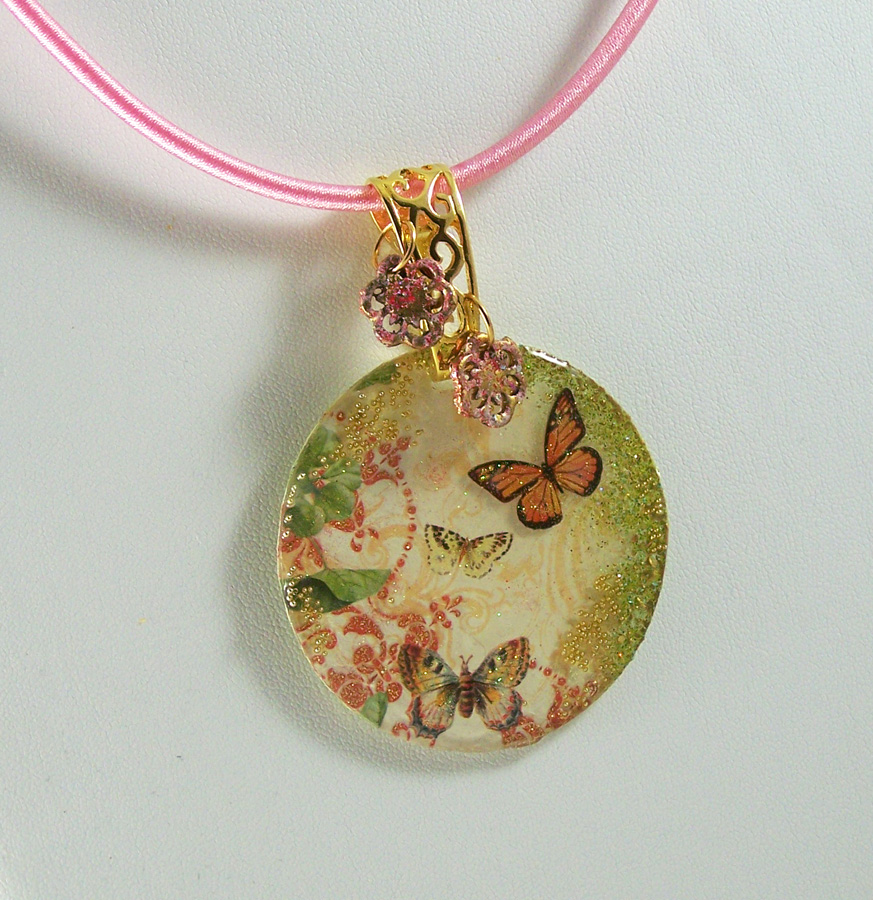
Carefully remove all of the Piccolos from the chipboard frames. You will be using all of the Vintage Grape Vine Flourishes and two of the swirls from the Floral Whimsy Accents. Place the remaining pieces to the side for the Flight of Butterflies Pendant, check out the Globecraft & Piccolo blog for that tutorial.
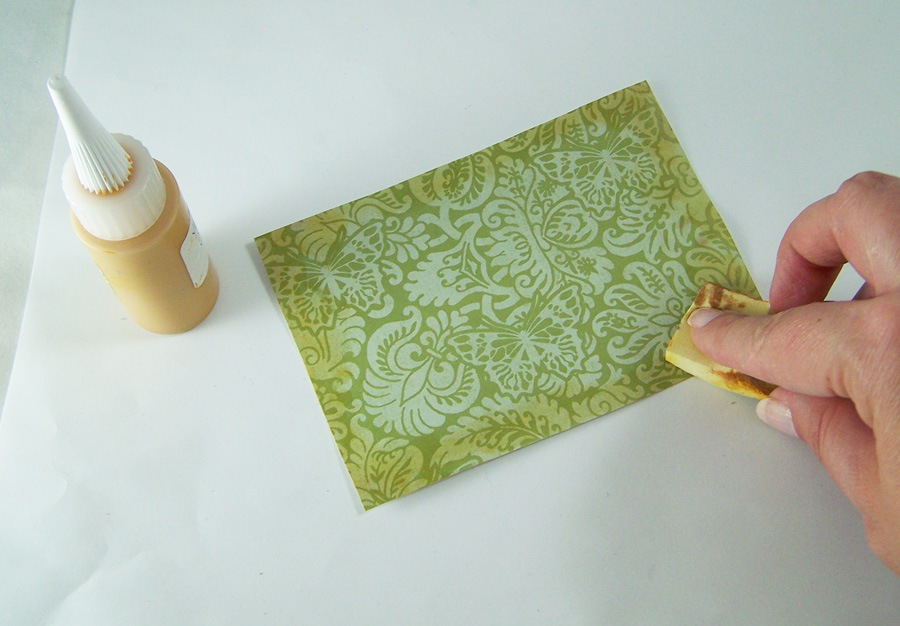
Pick a piece of cardstock to be the front of your card and cut to fit on the front of your card. Blot on G&P Yellow Ochre 3D Enamel Gel with a cosmetic sponge to the piece of card stock. This will give it an aged, Tuscan wall look.
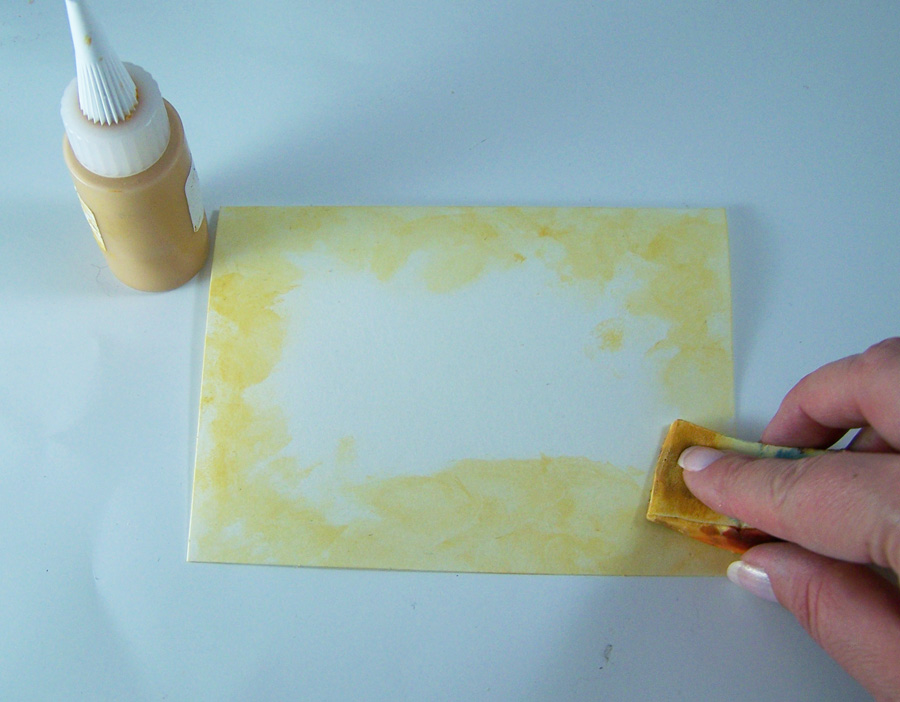
Blot on G&P Yellow Ochre 3D Enamel Gel to the front of your blank card with a cosmetic sponge. Repeating the Tuscan wall look.
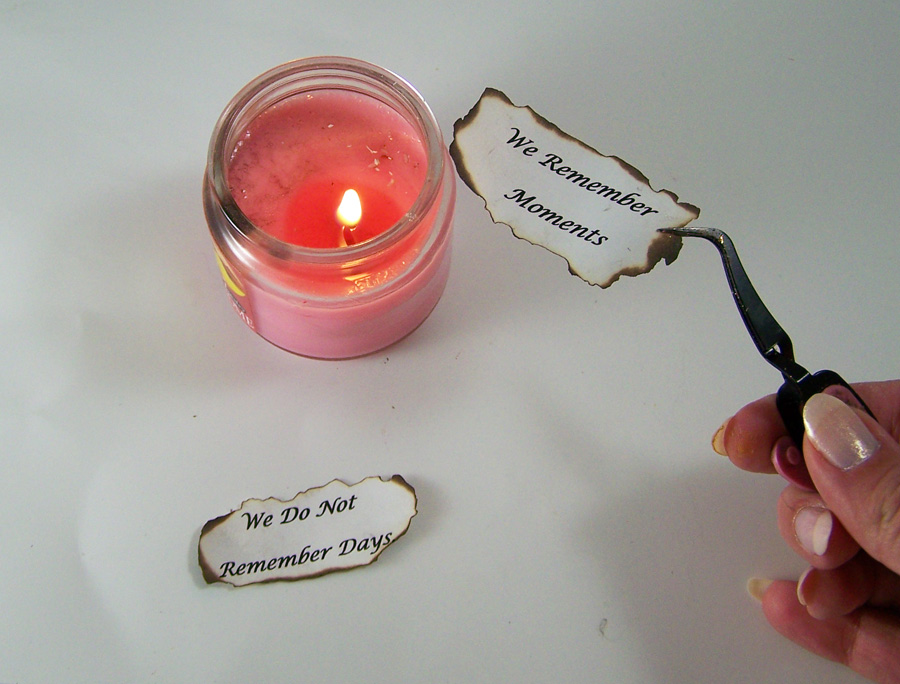
Print a sentiment on regular printer paper and cut to size. Using the tweezers grip the edges of the papers and very carefully scorch the edges with a small candle flame.
*Ignore this step if you rather use a sentiment sticker.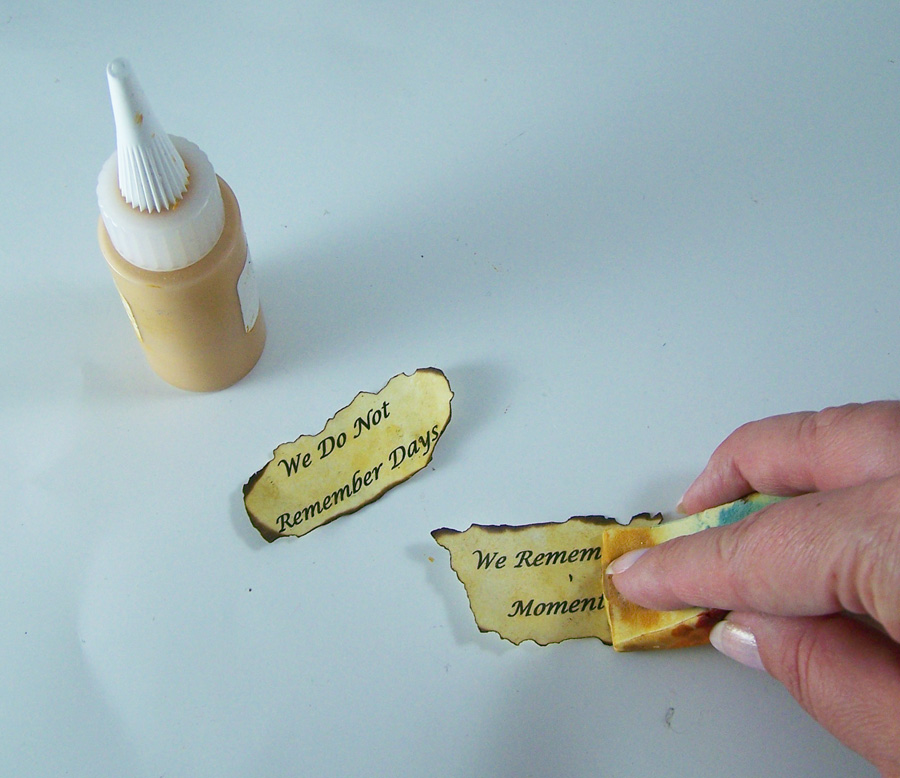
Blot on G&P Yellow Ochre 3D Enamel Gel to the front of your sentiment strips. Let dry.

Apply Piccolo Enamel Adhesive to the frame.

Apply two coats of the G&P Micro Gold Embossing Powder and heat to set.
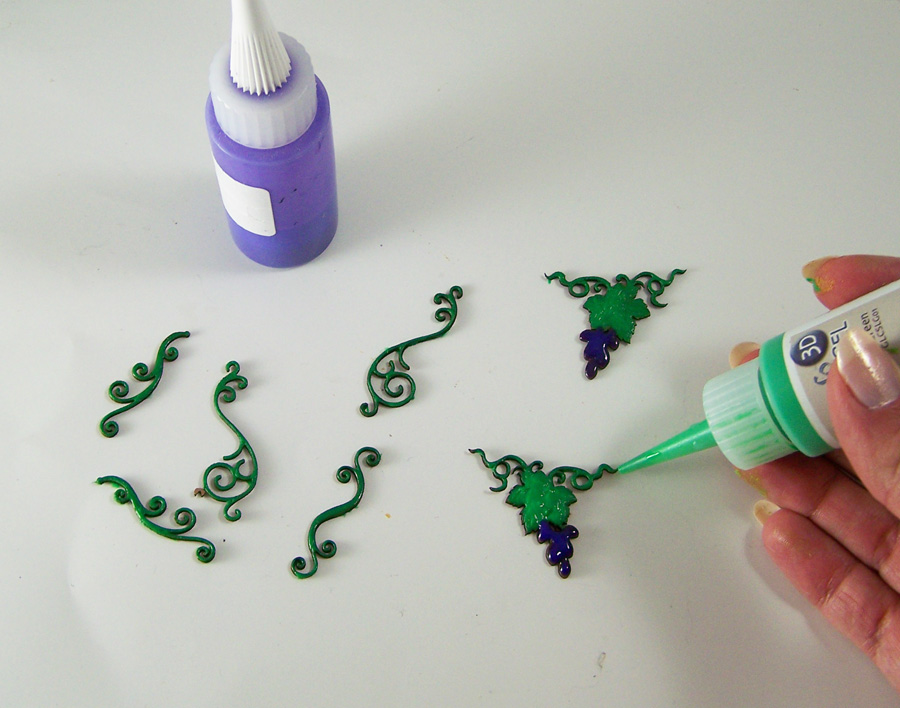
Apply G&P Leafy Green 3D Enamel Gel to all of the swirls and the leaf portions of the grape vines. Apply G&P Purple Mist 3D Enamel Gel to the grapes and let dry.
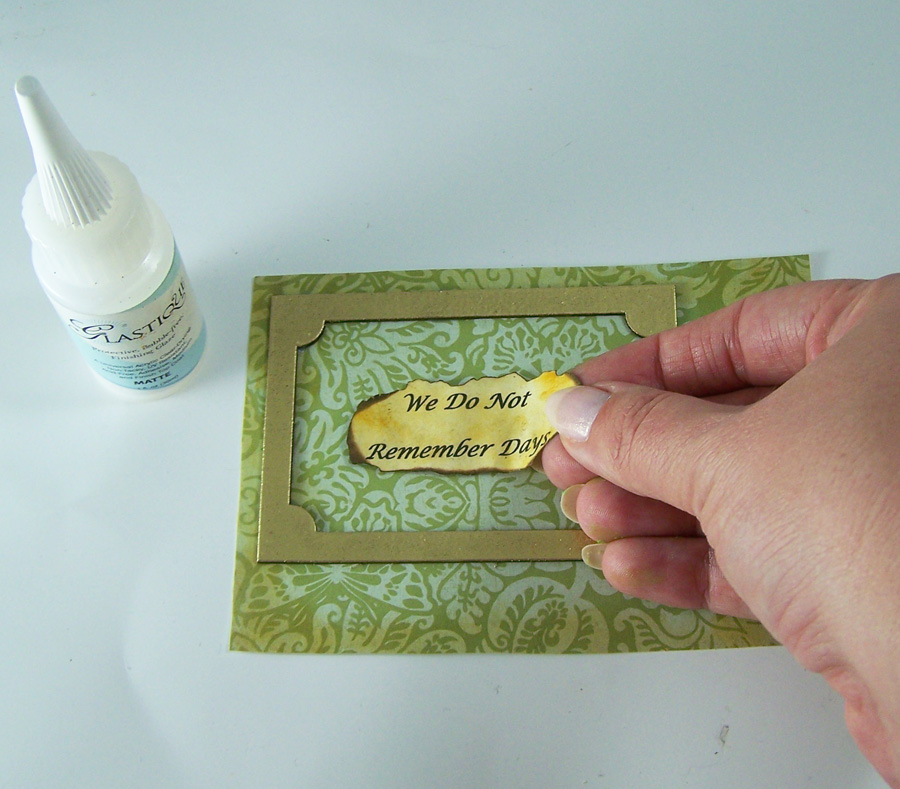
Carefully adhere the frame to the card stock with G&P Glastique Matte Finishing Glaze. Put foam squares on the first portion of the sentiment and place in the middle of the frame.
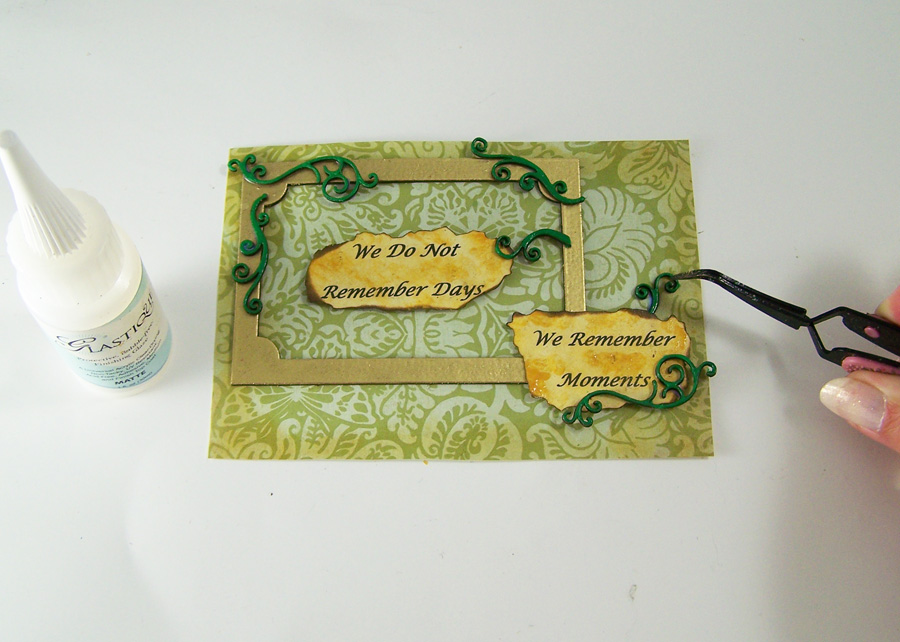
Carefully glue the swirl Piccolos to the front of the card using the G&P Glastique Matte Finishing Glaze. Using foam squares place the second portion of the sentiment to the right of the frame, overlapping a bit.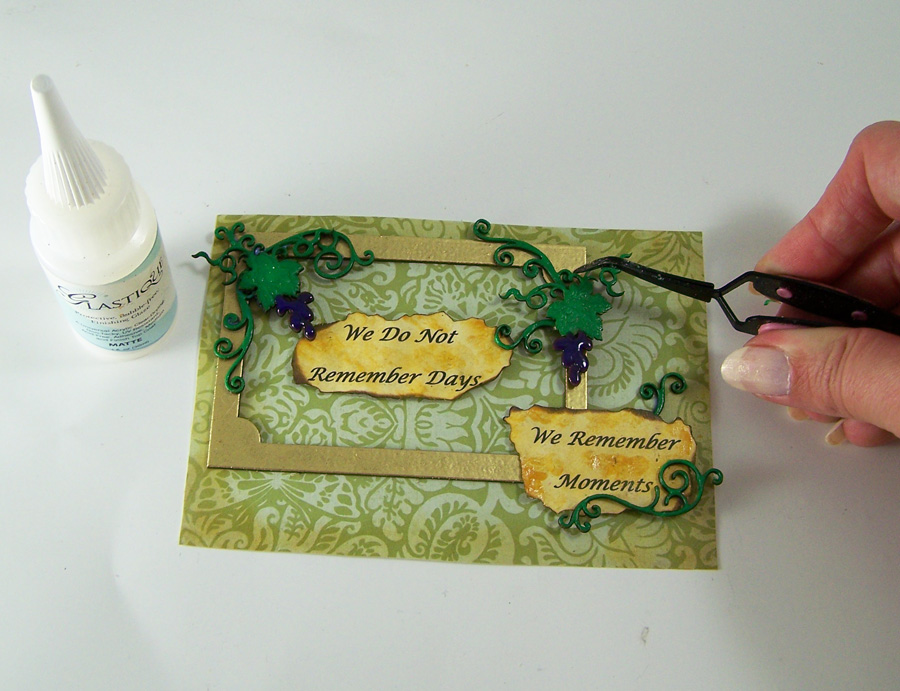
Carefully glue the grape vine Piccolos to the front of the card using the G&P Glastique Matte Finishing Glaze, let dry.

Coat all of the Piccolos with G&P Glastique Gloss Finishing Glaze and sprinkle Art Glitter Ultra Fine Hydragnea glitter on the grapes and Angel Dust glitter on the greenery. Let dry.
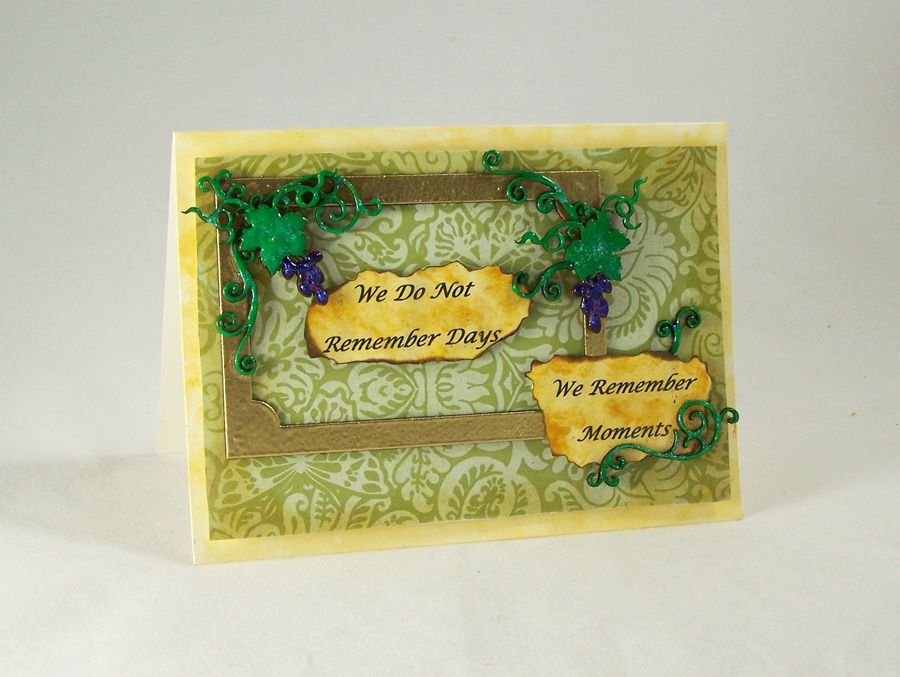
Attach the card stock with all of the Piccolos to the front of the card with foam squares. Stamp or write your favorite sentiment inside. 🙂Hop on over to the Globecraft and Piccolo Blog for my Flight of Butterflies Pendant tutorial using the new Piccolo Instant UV Resin!
Until next time, safe travels!Vintage Copper Tag
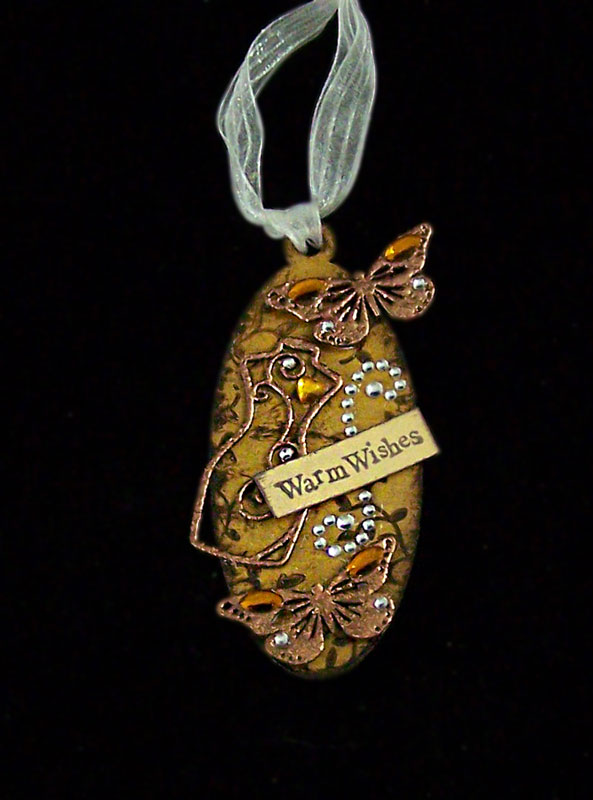
Recently I have been noticing the paper crafting boards I follow on Pinterest are pinning new types of tag art. From fun and funky to just beautiful, I am loving the variety of art being shown on these little “mini” canvases. I felt inspired to start working on more tags to build up a collection for gifts, paper embellishments and jewelry.
This tutorial is for a simple but lovely Vintage Copper Tag.Supplies:
G&P Butterfly Charm Set
G&P Vintage Dress Forms Accents
G&P Glastique Gloss Finishing Glaze
G&P Copper Kettle Embossing Powder
G&P Piccolo Embossing Powder Adhesive
G&P Yellow Ochre 3D Enamel Gel
G&P Oval Bezel with 1-Loop
Piccolo Easy Grip Tweezers
Brown ink stamp pad
Mini Adhesive Foam squares
Crystal stickers
Heat gun
Vine and sentiment stamps
Small piece of cardstock
Ribbon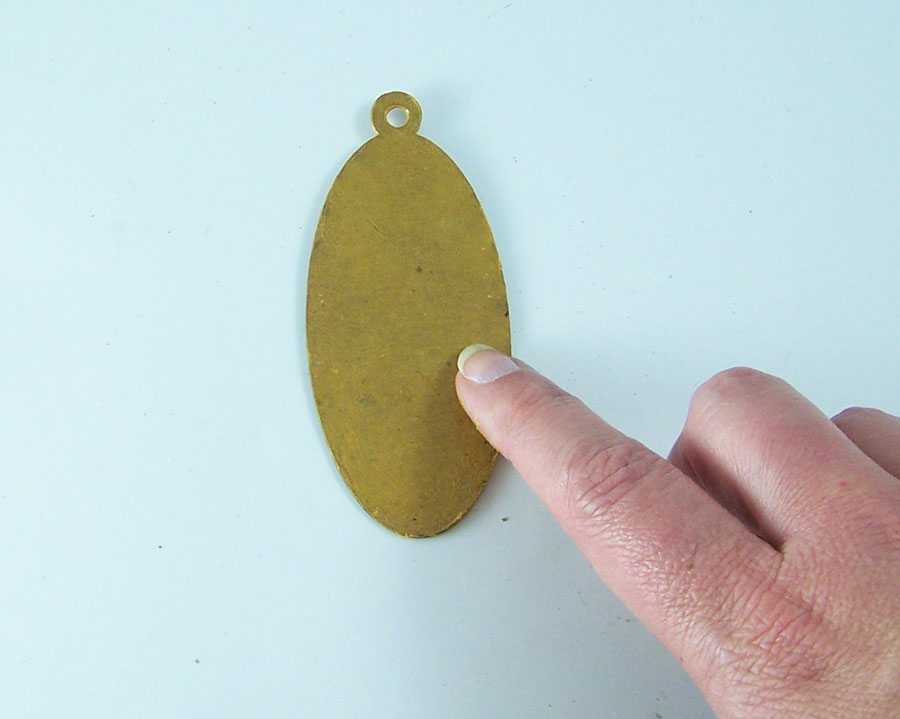
Smear G&P Yellow Ochre 3D Enamel Gel both on the front and back of the bezel. Let dry.
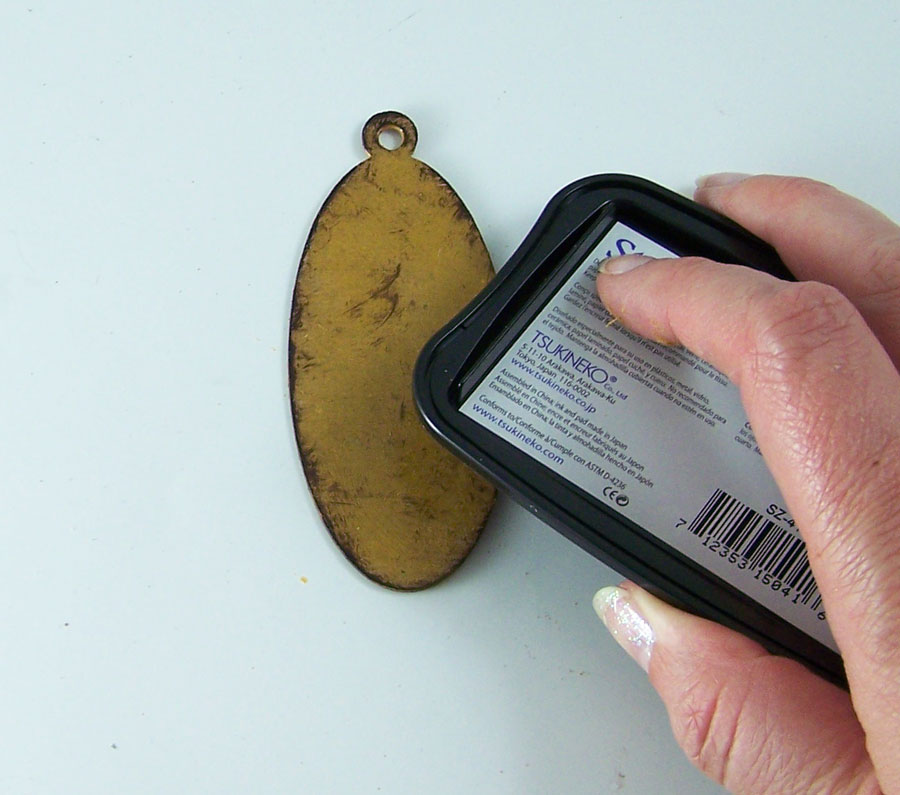
Take the brown dye ink pad, rub it on the edges and sides of the bezel.
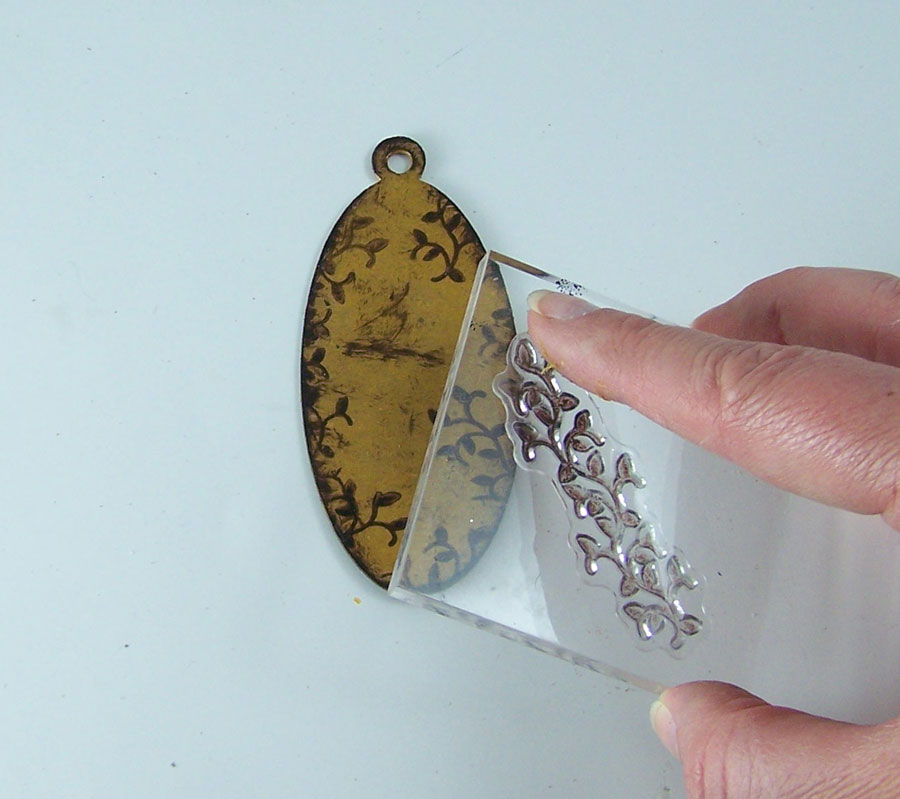
Ink the vine stamp with the brown ink and stamp around the edges of the tag.

Carefully remove the two small butterflies from the G&P Butterfly Charm Set. Remove the loops on both butterflies with a craft knife.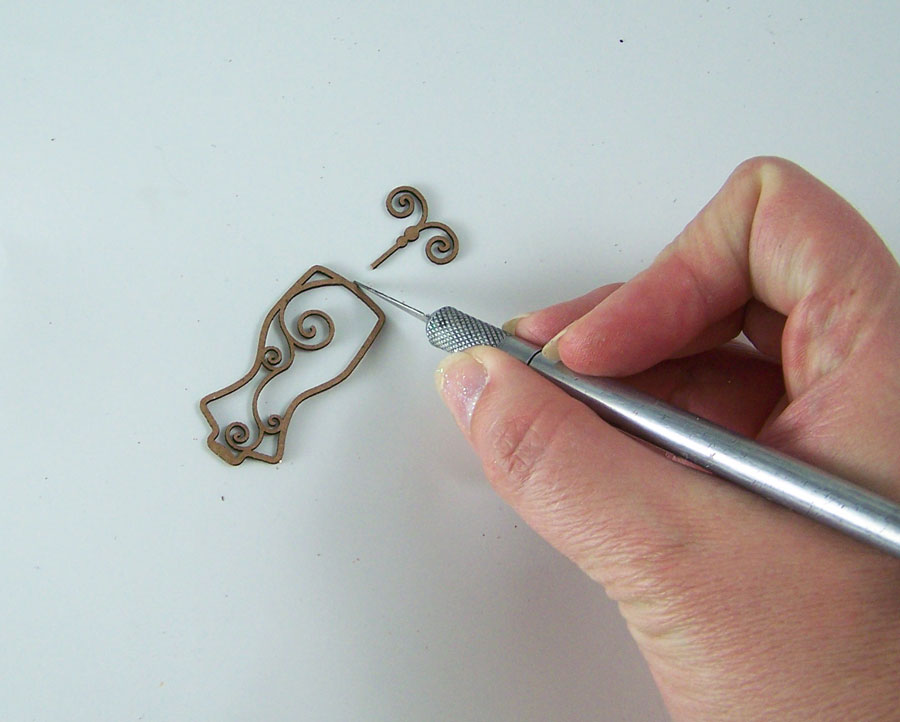
Carefully remove the swirl dress form G&P Vintage Dress Forms Accents set. Using a craft knife remove the stand from the dress form. Save the stand piece and all of the other kit pieces for A time for Nature tutorial; check out the Globecraft & Piccolo blog for instructions. 🙂
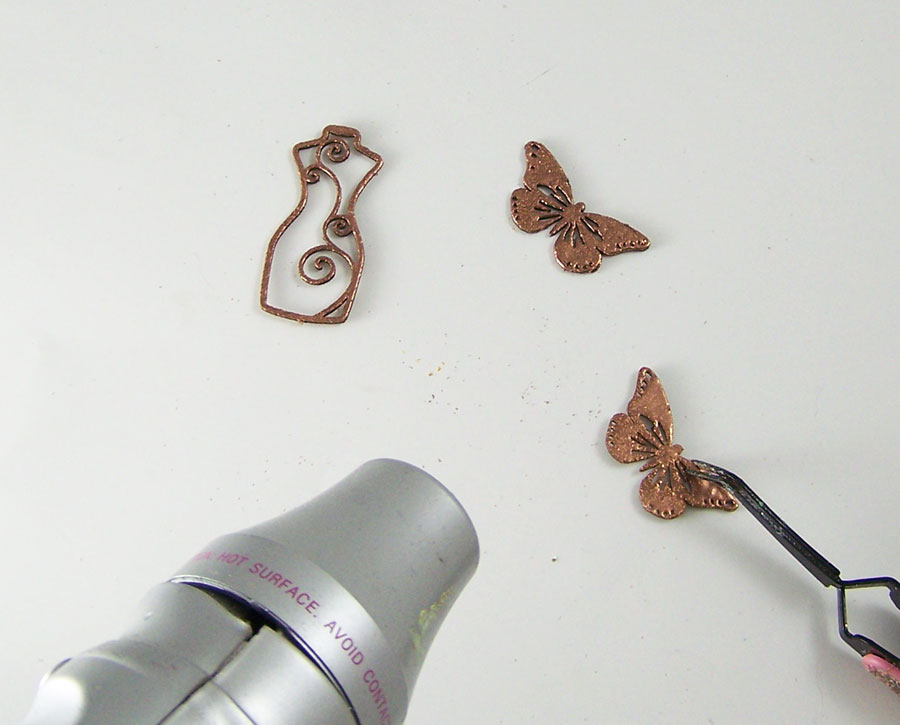
Apply Piccolo Enamel Adhesive to the dress form and butterflies. Apply G&P Copper Kettle to the butterflies and dress form. Heat to set.
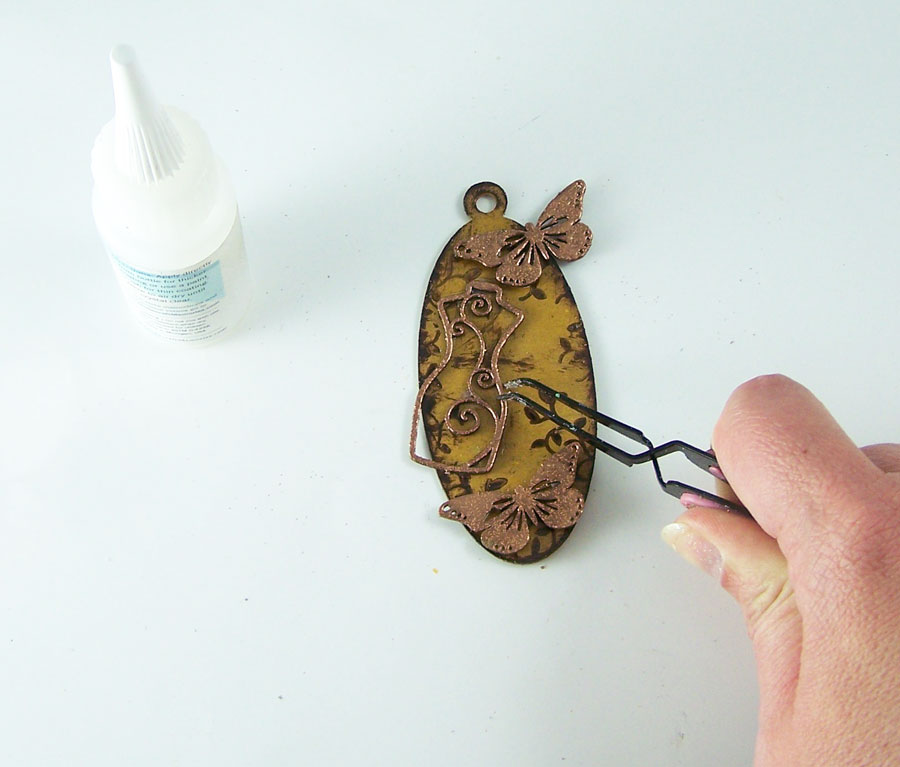
Use Glastique Gloss Finishing Glaze to attach the butterflies and dress from to the tag. Let dry.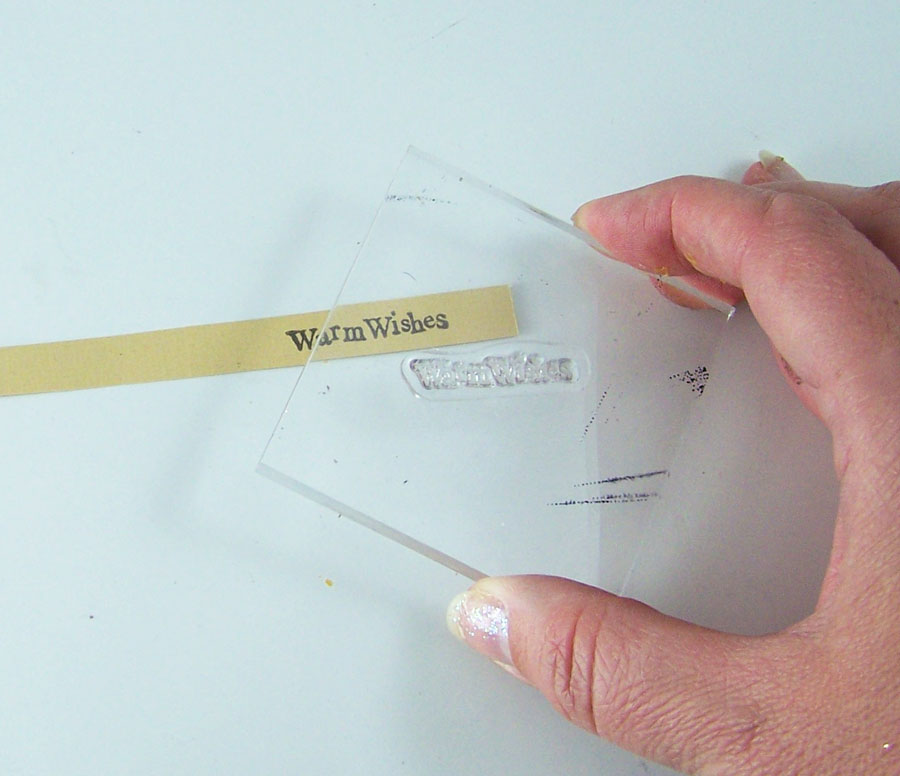
Stamp a sentiment on the small piece of card and cut to fit the tag. Rub the brown ink on the edges of the card stock to give it an aged look.
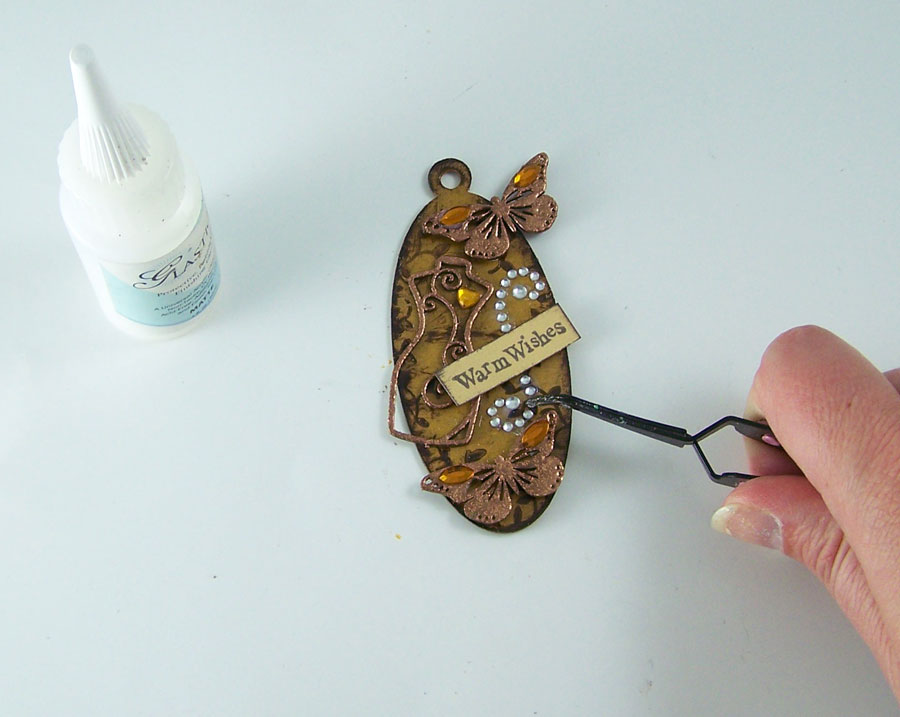
Use Glastique Gloss Finishing Glaze to glue on the sticker gems to the tag as shown. Let dry.
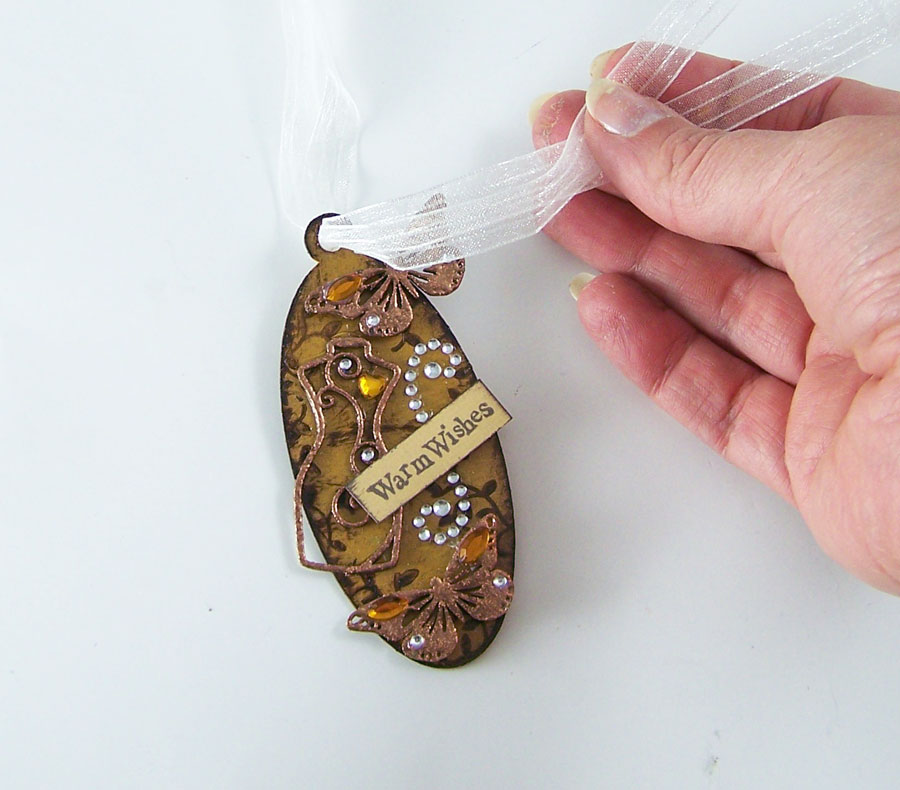
Thread the ribbon through the loop on the top of the tag and tie.
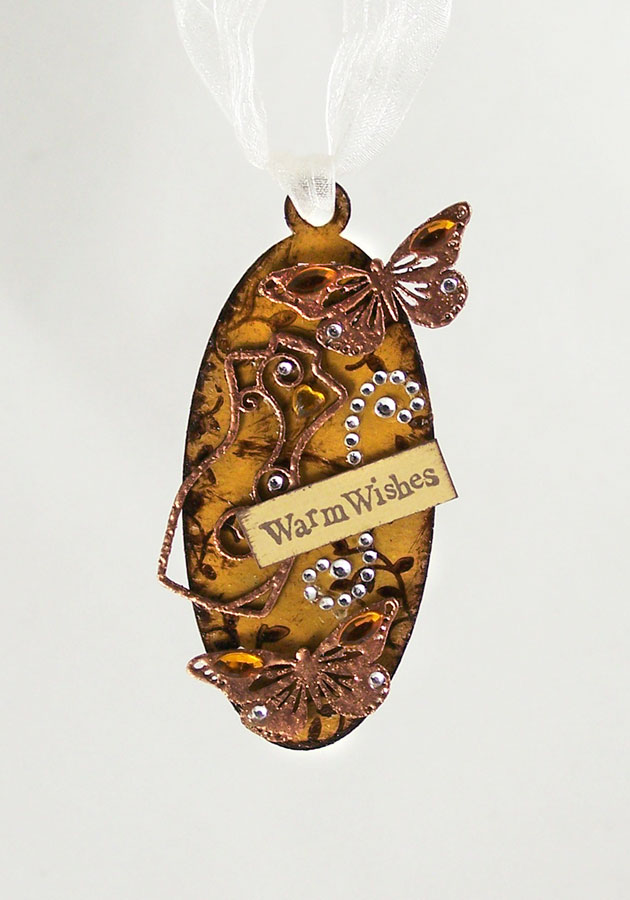
Now you have an embellishment to add to a gift or paper craft.
Hop on over to the Globecraft and Piccolo Blog for my A Time for Nature tutorial!
Until next time, safe travels!
DIY Leprechaun Wee Folk Door

I have always loved the idea of the wee Folk or faery, be the good bad or just odd folk that roamed about. One of my favorite faery movies from my childhood was Darby O’Gill and the Little People. The costumes, sets and the illusion of the miniature world of the leprechauns had me entranced Leaving out small gifts or useable objects for them in hopes of getting the favor of the faery was always a magical idea to me. So I got to thinking, why not make a Leprechaun door to add a bit of magic to a home for Spring!Supplies:
G&P Classic Victorian Oval Bookboard Frame
G&P Burnt Umber 3D Enamel Gel
G&P Glastique Matte Finishing Glaze
G&P Medium Flourishes Piccolos
G&P Shamrock Dreams Enamel Powder
G&P Vintage Gold Enamel Powder
G&P Mossy Glen Enamel Powder
G&P Piccolo Embossing Powder Adhesive
Piccolo Easy Grip Tweezers
Green crystal sticker gems
Sizzix Tim Holtz Alterations embossing folder Woodgrain
Dye ink pads in Black and Deep Brown
Small foam squares
Sharp scissors or craft knife
Carefully remove the frame from the package, put aside the globe and easel. Save those pieces for future projects.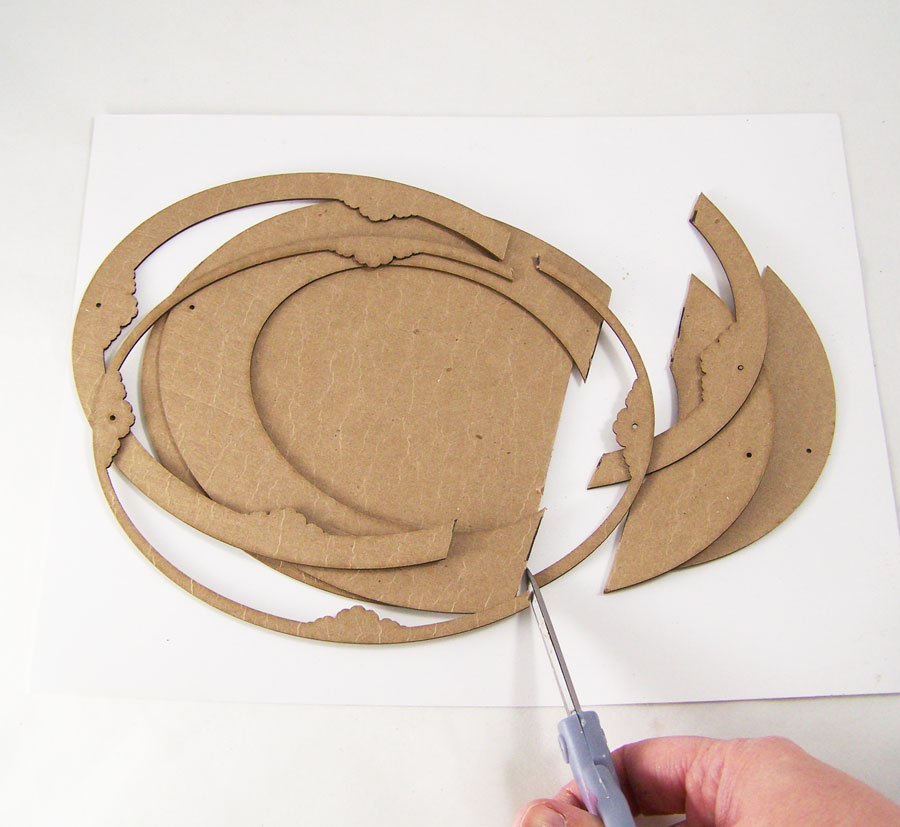
Using a ruler, mark a straight line about 2 inches from the bottom on the frame pieces. Using a sharp scissors or a craft knife, cut the bottom portion off.
Run the back plate and bottom frame sections through an embossing machine using the woodgrain embossing folder. Taking the brown and black dye ink pads, rub them on the embossed sections of the frame.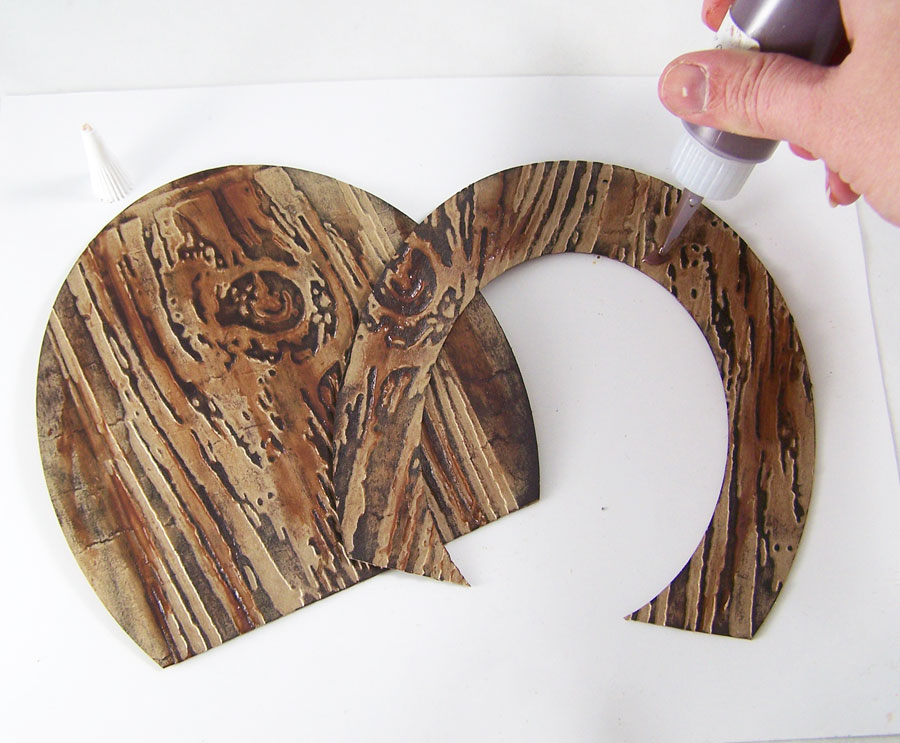
Apply G&P Burnt Umber 3D Enamel Gel to the embossed and now inked sections. Smear the enamel gel in the wood grain pattern with your finger or a cosmetic sponge in a up and down pattern.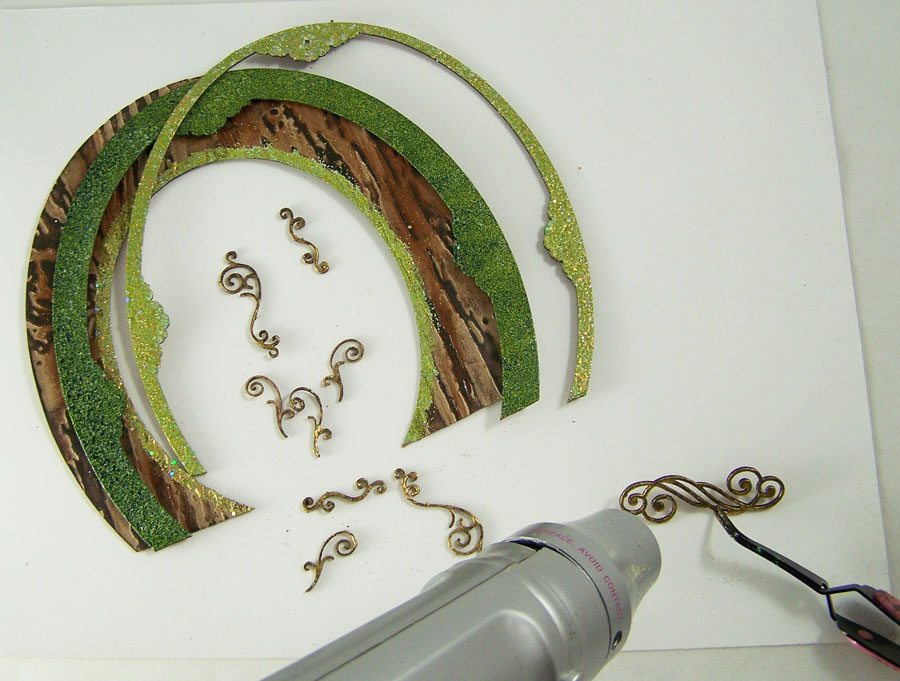
Apply Embossing Powder Adhesive to the top and middle pieces of the frame, the Piccolos and a thin line on the bottom frame. Apply Mossy Glen Enamel Powder to the middle frame, Shamrock Dreams powder to the top frame and thin line on the inner frame, Vintage Gold powder to the Piccolos. Heat to set.
Adhere all three sections of the frame together with Glastique Matte Finishing Glaze, using office clips to keep the frame pieces in place while it dries. Apply Glastique Matte to the back of the Piccolos, place them on the frame and let dry.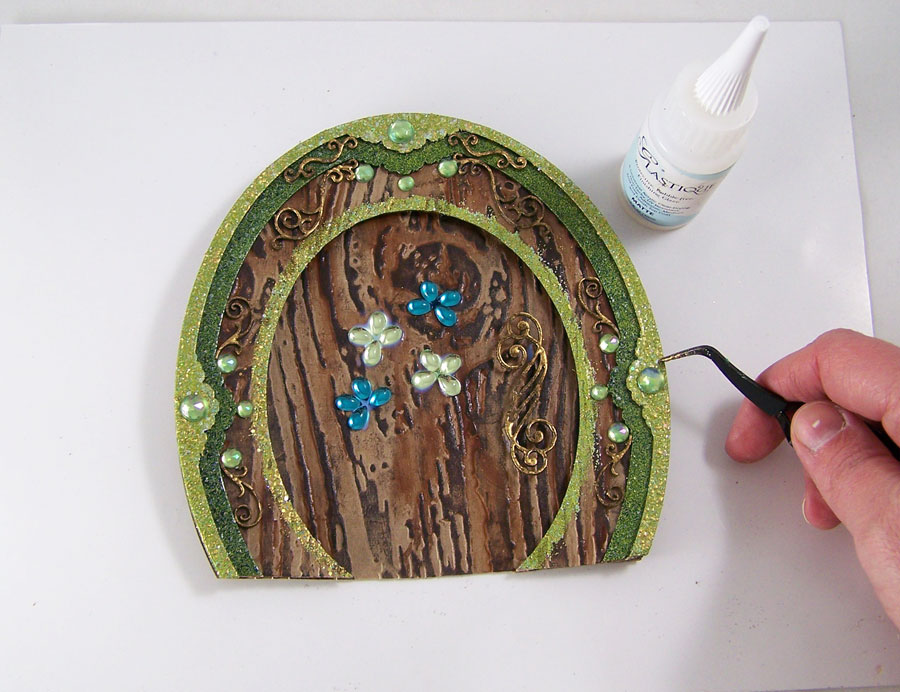
Adhere the back plate to the top frame portion with foam squares. Apply the large swirl Piccolo to the back plate with foam squares to give the illusion of a door handle. Apply the green sticker gems to the faux door with Glastique Matte Finishing Glaze and let dry.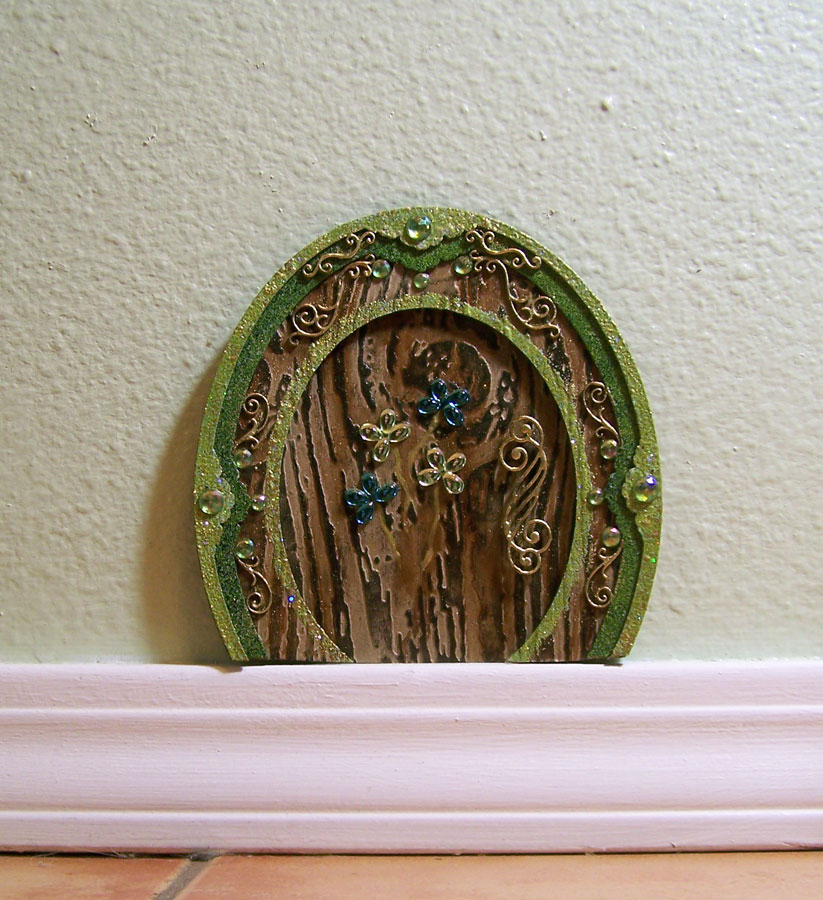
Apply removable poster adhesive to the back of the now completed faux door. Place at the bottom of a wall on the molding, a shelf or anywhere you think a leprechaun might like a magical door! May you have many lucky days ahead!Until next time, safe travels!
Mushrooms and Merriment…

As a young child one of my favorite Christmas decorations was glass mushroom ornaments. They were typically red with white dots and wonderful highlights of pearls, silver, gold and glitter. To me it was like a little frozen bit of fairyland. Traditionally the mushroom ornament was seen as a good luck symbol. In Germany they were seen as a symbol of a person’s love of nature and hope for good tidings in the New Year. Well that got me thinking I just had to make one of my own!Supplies:
Globecraft & Piccolo DIY Portrait Ornament
Globecraft & Piccolo 3D Enamel Gel Satin Honeydew
Globecraft & Piccolo 3D Enamel Gel Napthol Red
Globecraft & Piccolo Piccolo Enamel/Embossing Powder Adhesive
Globecraft & Piccolo Mossy Glen Enamel Powder
Globecraft & Piccolo Pure Sparkle Gold Glitter
Globecraft & Piccolo Glastique Gloss Finishing Glaze
Globecraft & Piccolo Medium FlourishesReindeer Moss
Polymer Clay Mushrooms
Ribbon
Red Sticker Gems
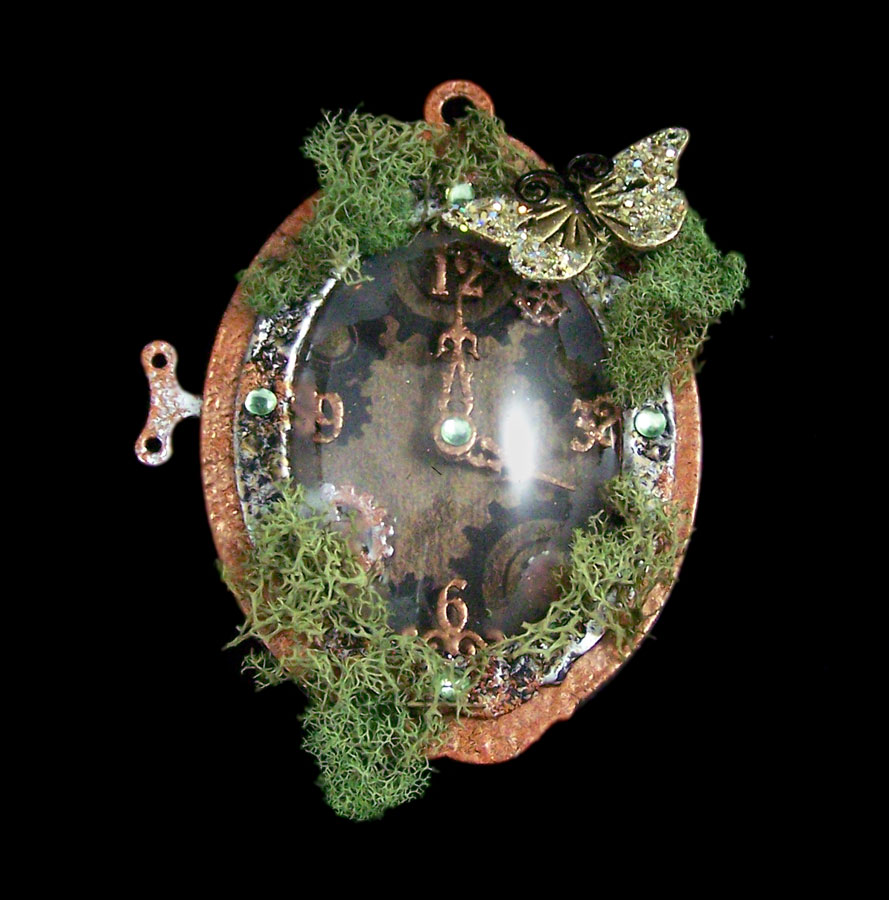
I started with applying the Piccolo Enamel Adhesive to the outer rings of the ornament. I then coated the rings with Mossy Glen Enamel Powder and heat set with heat gun. I then drew a thin bead of Glastique Gloss Finishing Glaze around the inside of the ovals, placed the globes in each half and clipped into place.
Taking the inner ring, I applied Glastique Gloss around the edge and sprinkled on Pure Sparkle Gold Glitter.
The flourishes got a coat of 3D Enamel Gel Satin Honeydew and the polymer clay mushrooms caps had a layer of 3D Enamel Gel Napthol Red applied. Let dry. Then little dots of Glastique Gloss on the mushroom caps and a sprinkle of Pure Sparkle Gold Glitter on top.
Once the mushroom are completely dry I bundled them together and wrapped Reindeer Moss around them tightly. I glued all the pieces of the ornament together with Glastique, carefully sandwiching the mushrooms and moss. I left them clipped in place until dry.
Using Glastique as glue once again, I added the flourishes and sticker gems to the ornament. Once dry I added the ribbon to the top!
Hop on over to the Globecraft & Piccolo blog today to see my Christmas Airship Express tutorial!

Until Next Time, Safe Travels!

Ancient and Contemporary Inspired Artistry
