Moments and a card to remember
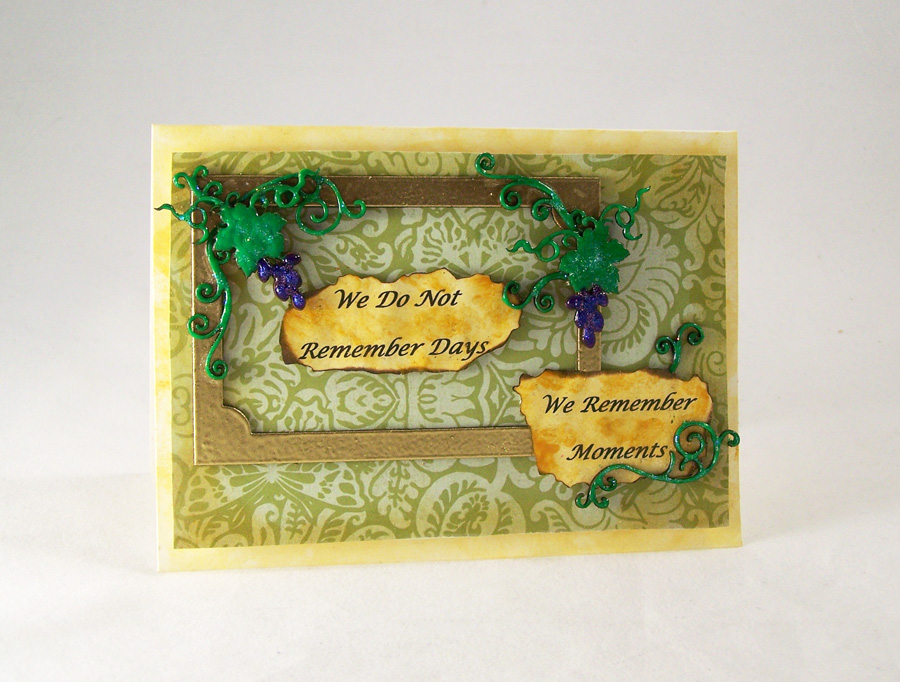
Lately I have been reminded how important it is to enjoy the good things in life. A quote by Italian poet and novelist Cesare Pavese “We do not remember days, we remember moments” has haunted my mind as of late. I have been ill lately but thankfully I can still do my artwork. I am so grateful for my family and their never ending support. So I thought why not put that quote on a card to give to those that matter the most. I went with a Tuscan style theme in remembrance of my Italian side of my family. 🙂
Supplies:
G&P Vintage Grape Vine Flourishes
G&P Floral Whimsy Accents
G&P Glastique Gloss Finishing Glaze
G&P Glastique Matte Finishing Glaze
G&P Micro Gold Embossing Powder
G&P Piccolo Embossing Powder Adhesive
G&P Leafy Green 3D Enamel Gel
G&P Purple Mist 3D Enamel Gel
G&P Yellow Ochre 3D Enamel Gel
Piccolo Easy Grip Tweezers
Art Glitter Ultra Fine Glitter Hydragnea and Angel Dust
DCWV The Mariposa Matstack
Blank card
Cosmetic Sponge
Foam squares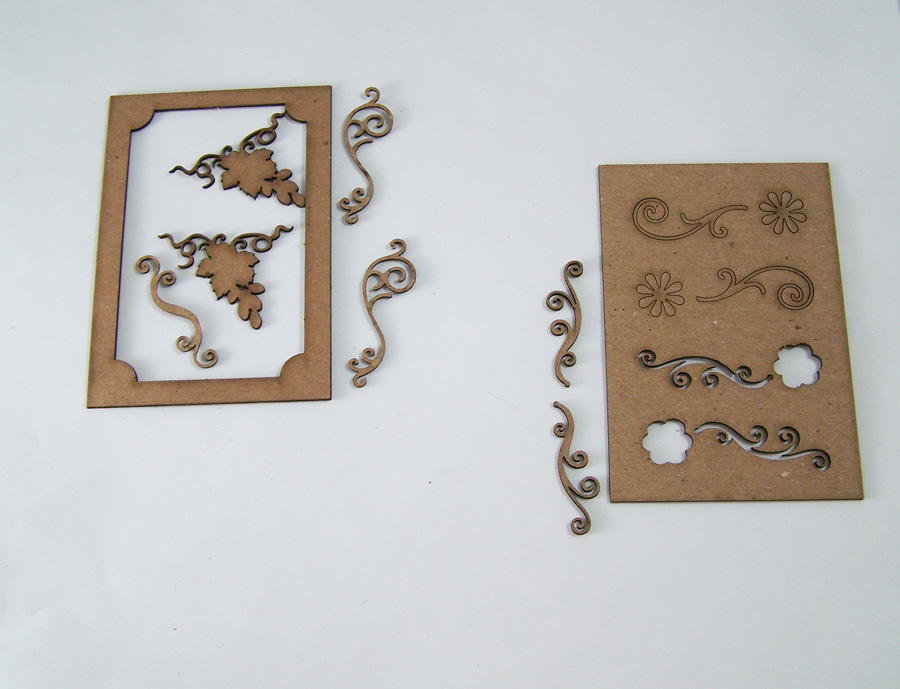
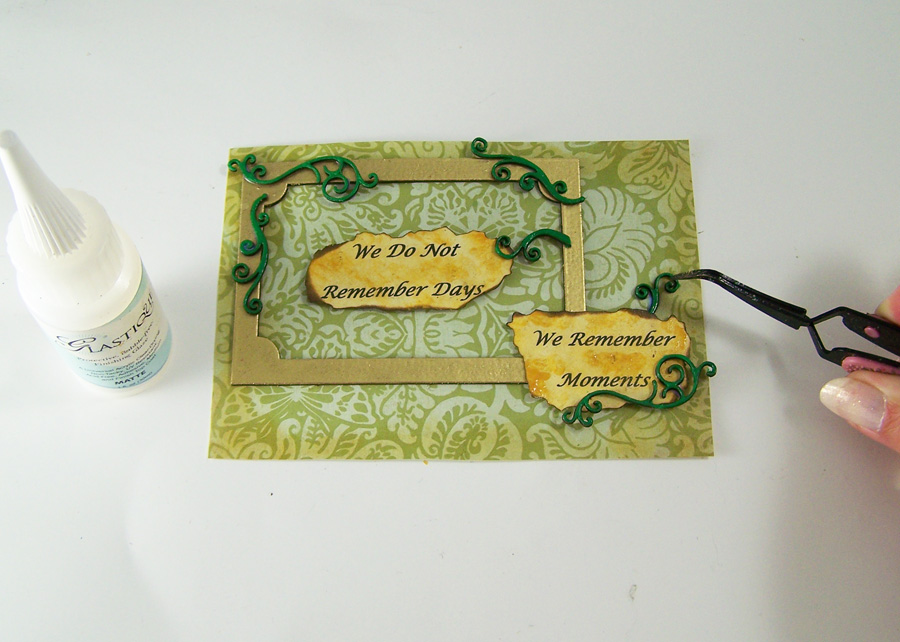
Carefully remove all of the Piccolos from the chipboard frames. You will be using all of the Vintage Grape Vine Flourishes and two of the swirls from the Floral Whimsy Accents. Place the remaining pieces to the side for the Flight of Butterflies Pendant, check out the Globecraft & Piccolo blog for that tutorial.
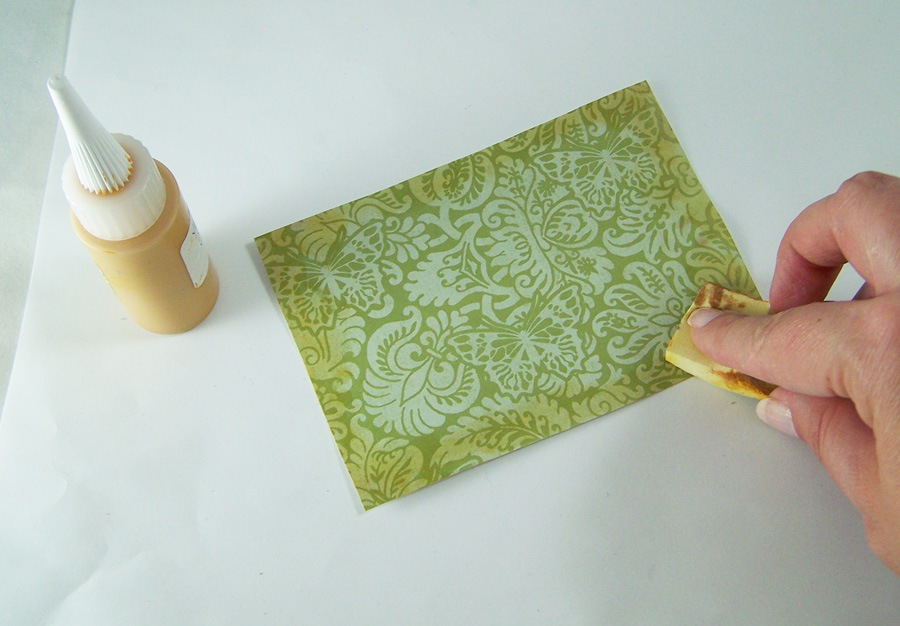
Pick a piece of cardstock to be the front of your card and cut to fit on the front of your card. Blot on G&P Yellow Ochre 3D Enamel Gel with a cosmetic sponge to the piece of card stock. This will give it an aged, Tuscan wall look.
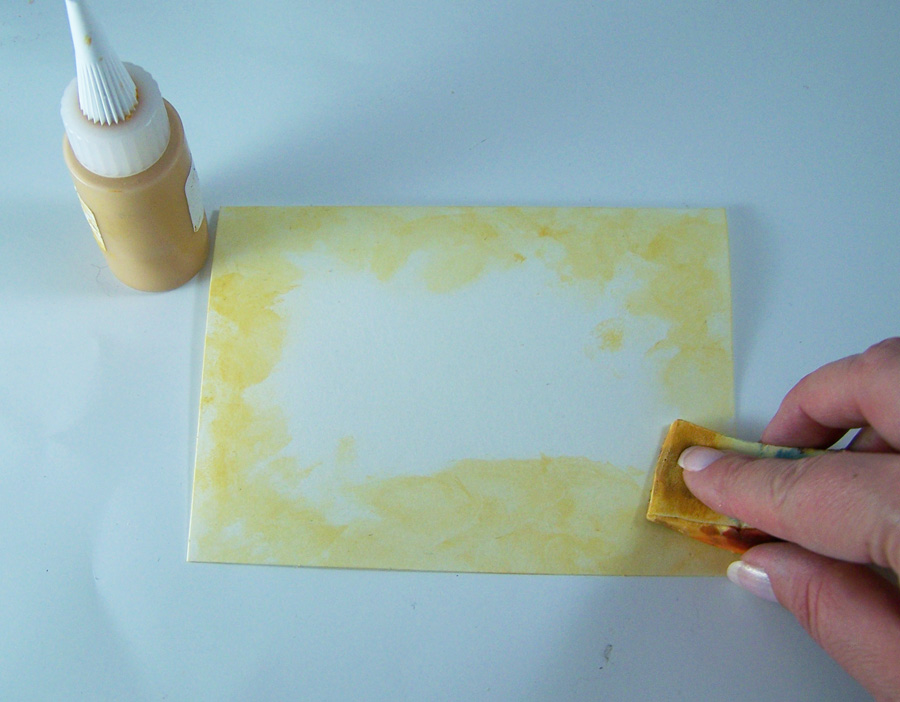
Blot on G&P Yellow Ochre 3D Enamel Gel to the front of your blank card with a cosmetic sponge. Repeating the Tuscan wall look.
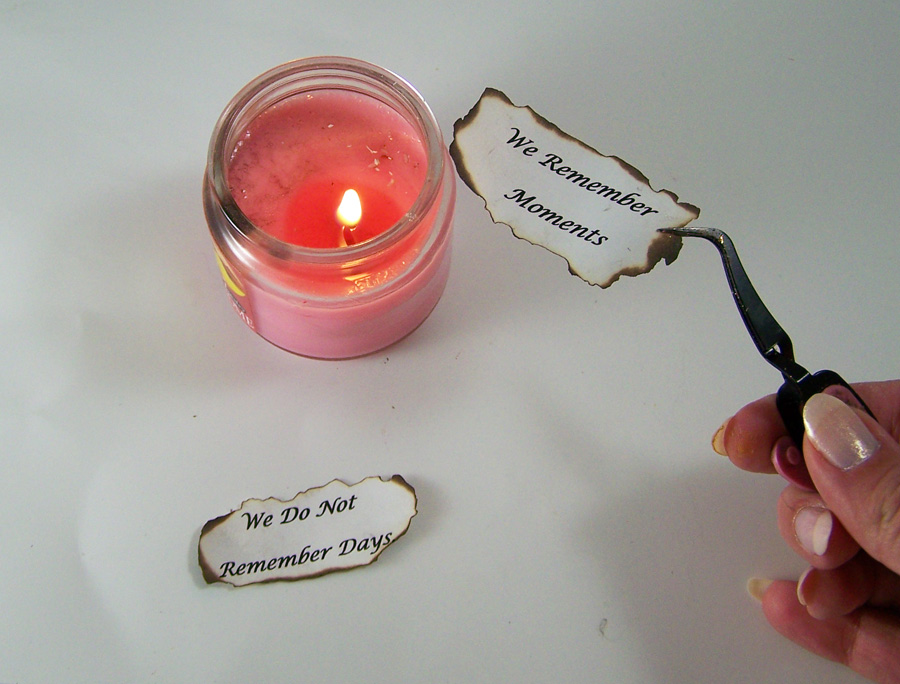
Print a sentiment on regular printer paper and cut to size. Using the tweezers grip the edges of the papers and very carefully scorch the edges with a small candle flame.
*Ignore this step if you rather use a sentiment sticker.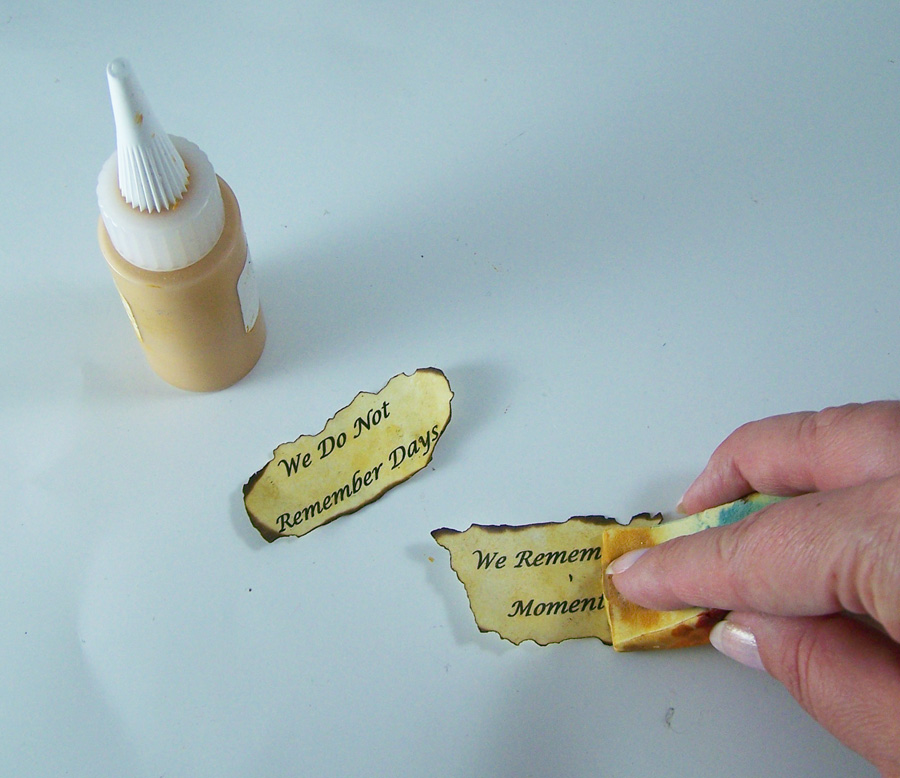
Blot on G&P Yellow Ochre 3D Enamel Gel to the front of your sentiment strips. Let dry.

Apply Piccolo Enamel Adhesive to the frame.

Apply two coats of the G&P Micro Gold Embossing Powder and heat to set.
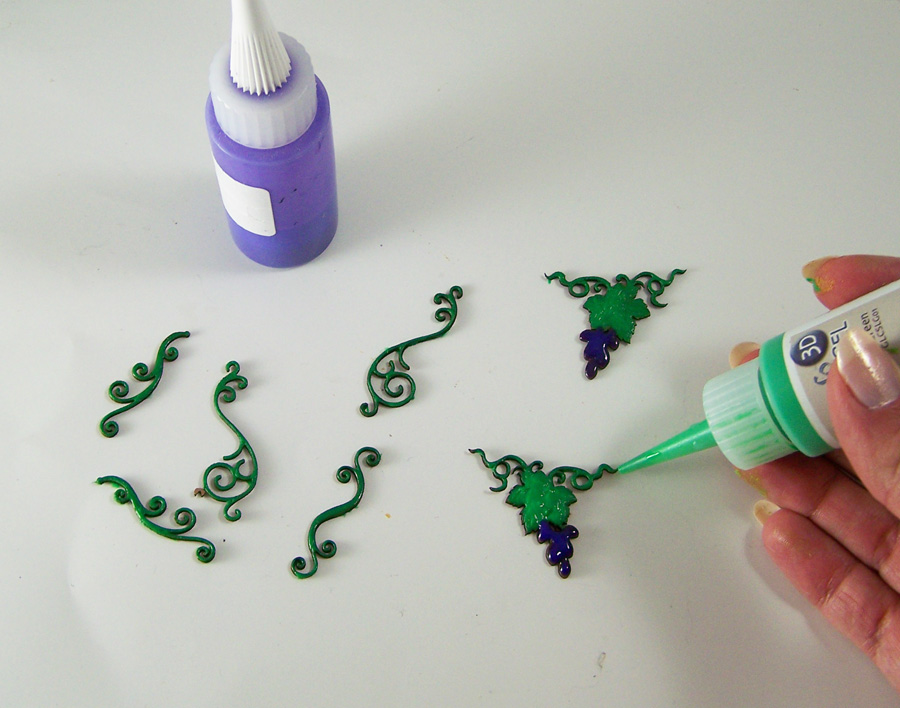
Apply G&P Leafy Green 3D Enamel Gel to all of the swirls and the leaf portions of the grape vines. Apply G&P Purple Mist 3D Enamel Gel to the grapes and let dry.
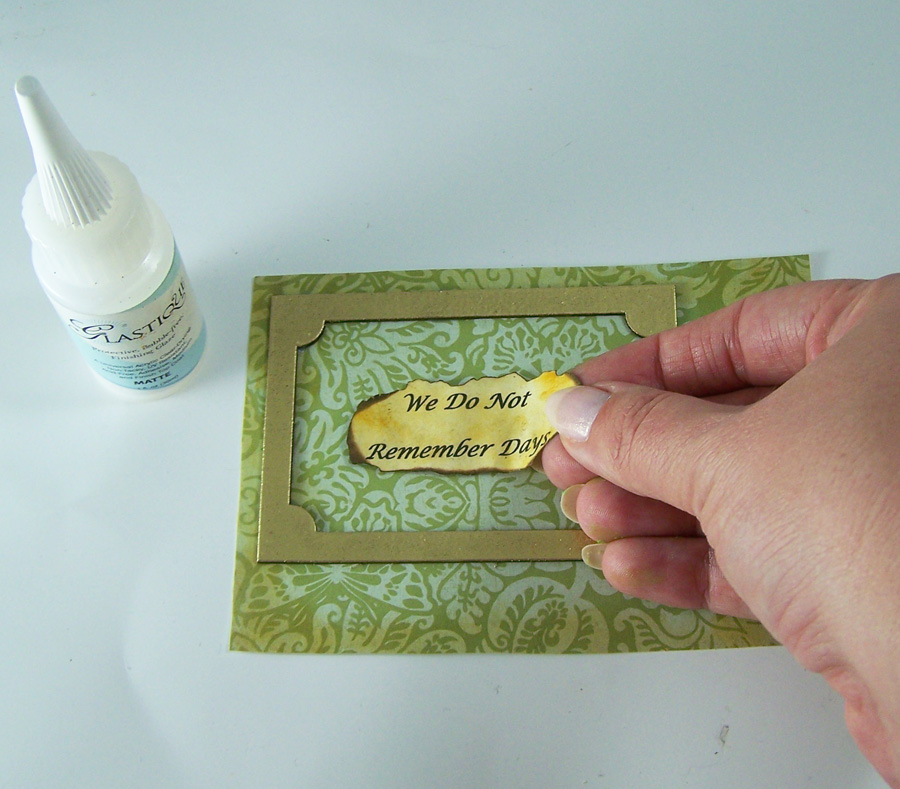
Carefully adhere the frame to the card stock with G&P Glastique Matte Finishing Glaze. Put foam squares on the first portion of the sentiment and place in the middle of the frame.
Carefully glue the swirl Piccolos to the front of the card using the G&P Glastique Matte Finishing Glaze. Using foam squares place the second portion of the sentiment to the right of the frame, overlapping a bit.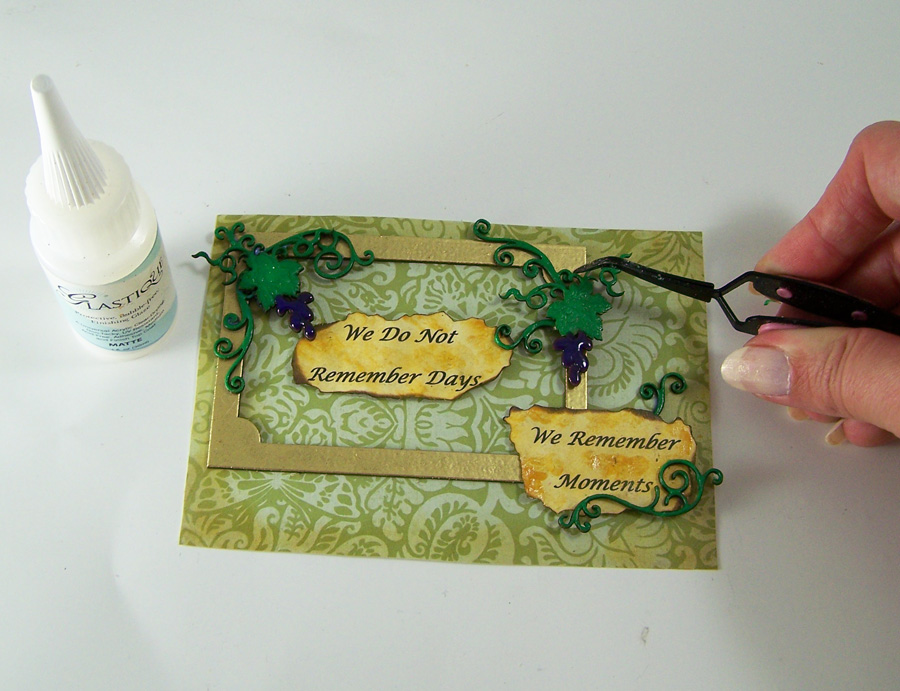
Carefully glue the grape vine Piccolos to the front of the card using the G&P Glastique Matte Finishing Glaze, let dry.

Coat all of the Piccolos with G&P Glastique Gloss Finishing Glaze and sprinkle Art Glitter Ultra Fine Hydragnea glitter on the grapes and Angel Dust glitter on the greenery. Let dry.
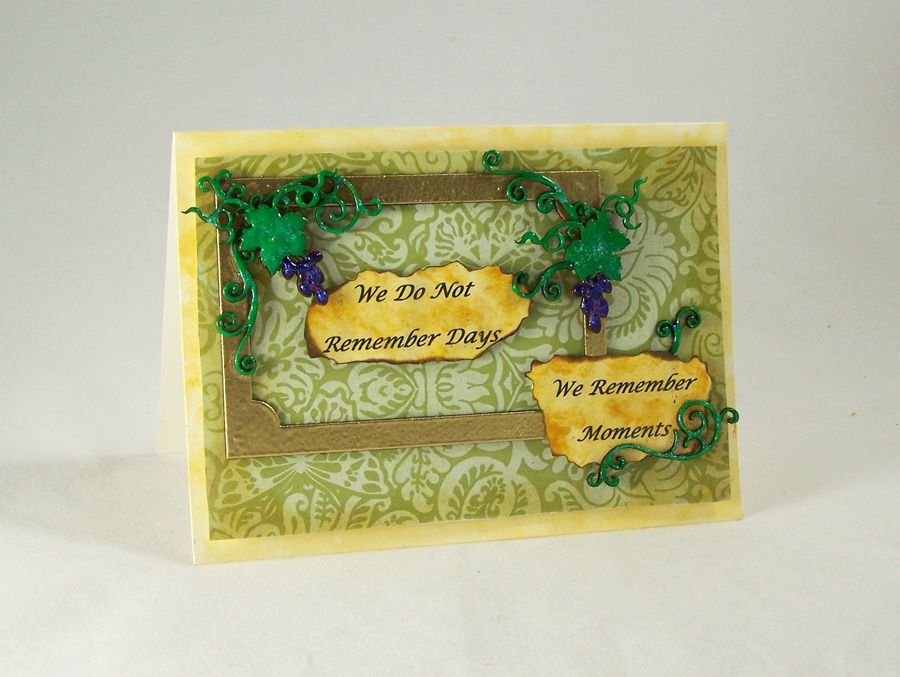
Attach the card stock with all of the Piccolos to the front of the card with foam squares. Stamp or write your favorite sentiment inside. 🙂Hop on over to the Globecraft and Piccolo Blog for my Flight of Butterflies Pendant tutorial using the new Piccolo Instant UV Resin!
Until next time, safe travels!Vintage Copper Tag
Recently I have been noticing the paper crafting boards I follow on Pinterest are pinning new types of tag art. From fun and funky to just beautiful, I am loving the variety of art being shown on these little “mini” canvases. I felt inspired to start working on more tags to build up a collection for gifts, paper embellishments and jewelry.
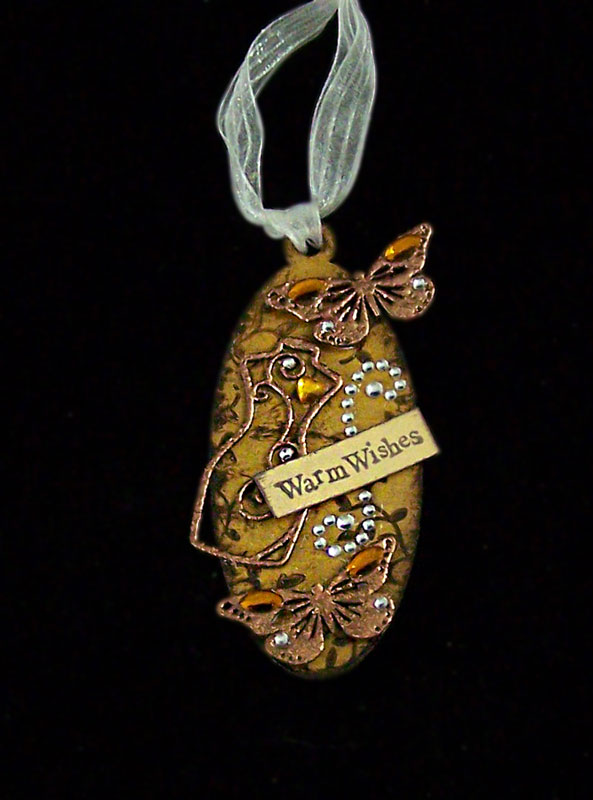
This tutorial is for a simple but lovely Vintage Copper Tag.Supplies:
G&P Butterfly Charm Set
G&P Vintage Dress Forms Accents
G&P Glastique Gloss Finishing Glaze
G&P Copper Kettle Embossing Powder
G&P Piccolo Embossing Powder Adhesive
G&P Yellow Ochre 3D Enamel Gel
G&P Oval Bezel with 1-Loop
Piccolo Easy Grip Tweezers
Brown ink stamp pad
Mini Adhesive Foam squares
Crystal stickers
Heat gun
Vine and sentiment stamps
Small piece of cardstock
Ribbon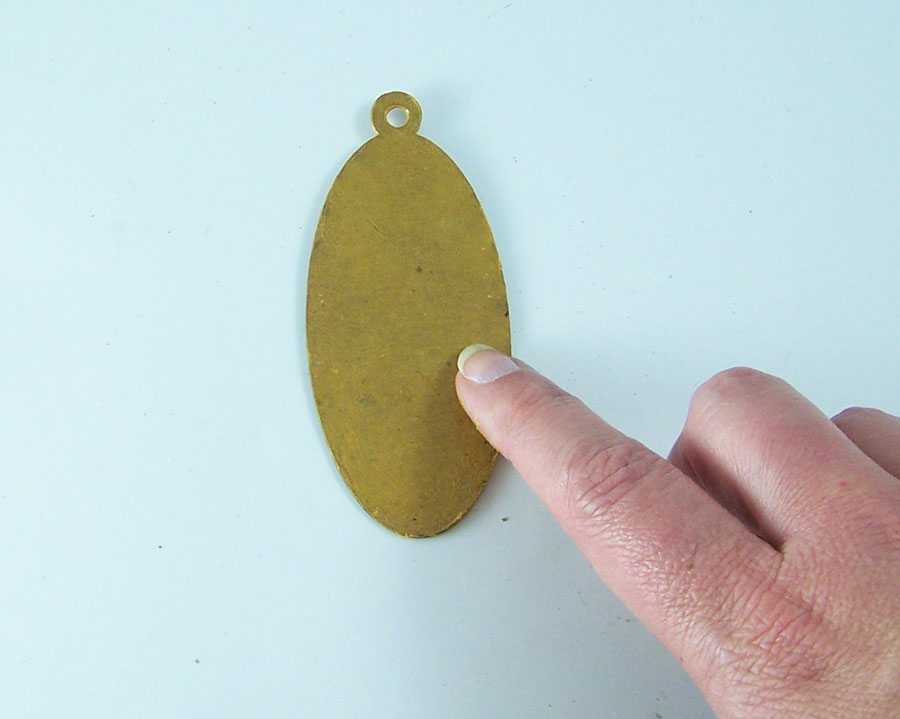
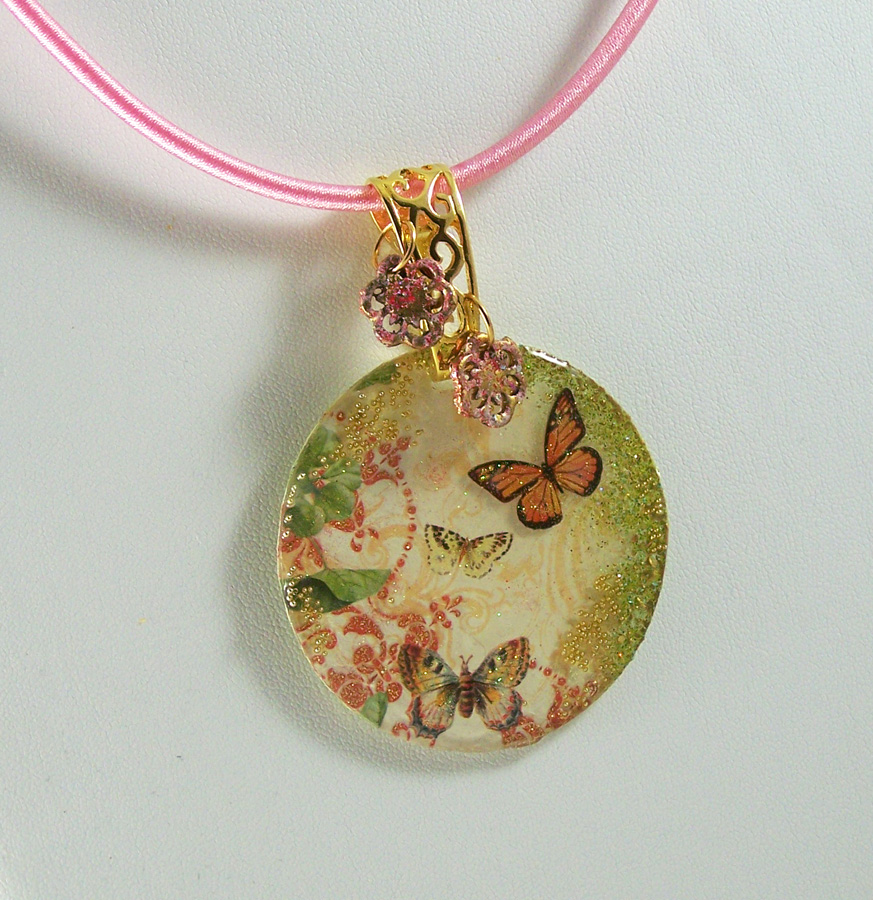
Smear G&P Yellow Ochre 3D Enamel Gel both on the front and back of the bezel. Let dry.
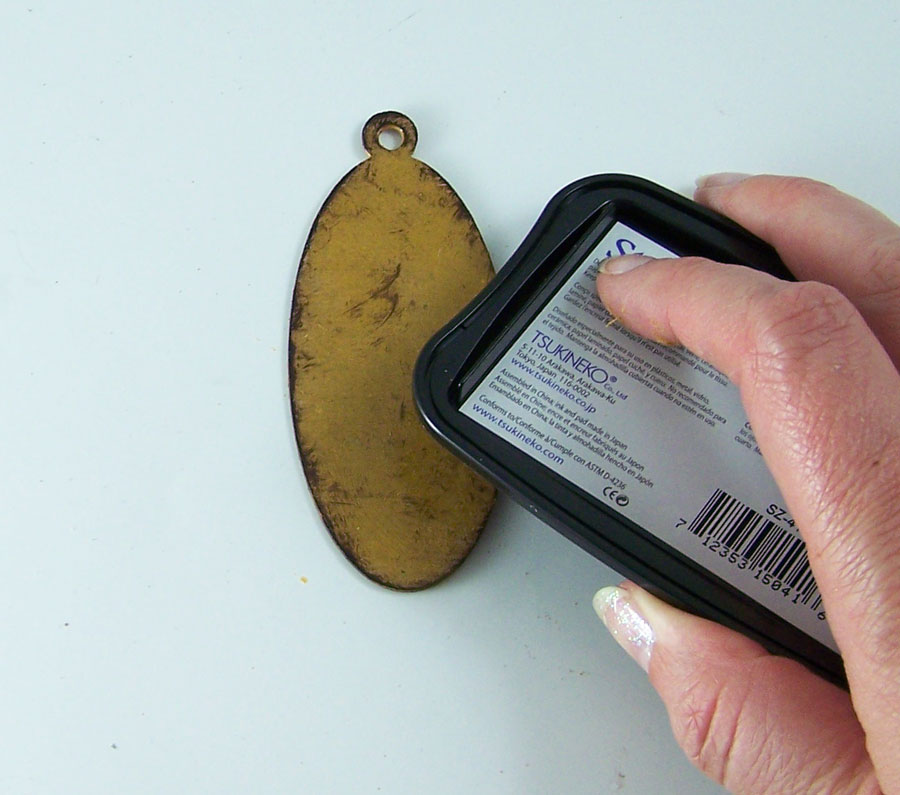
Take the brown dye ink pad, rub it on the edges and sides of the bezel.
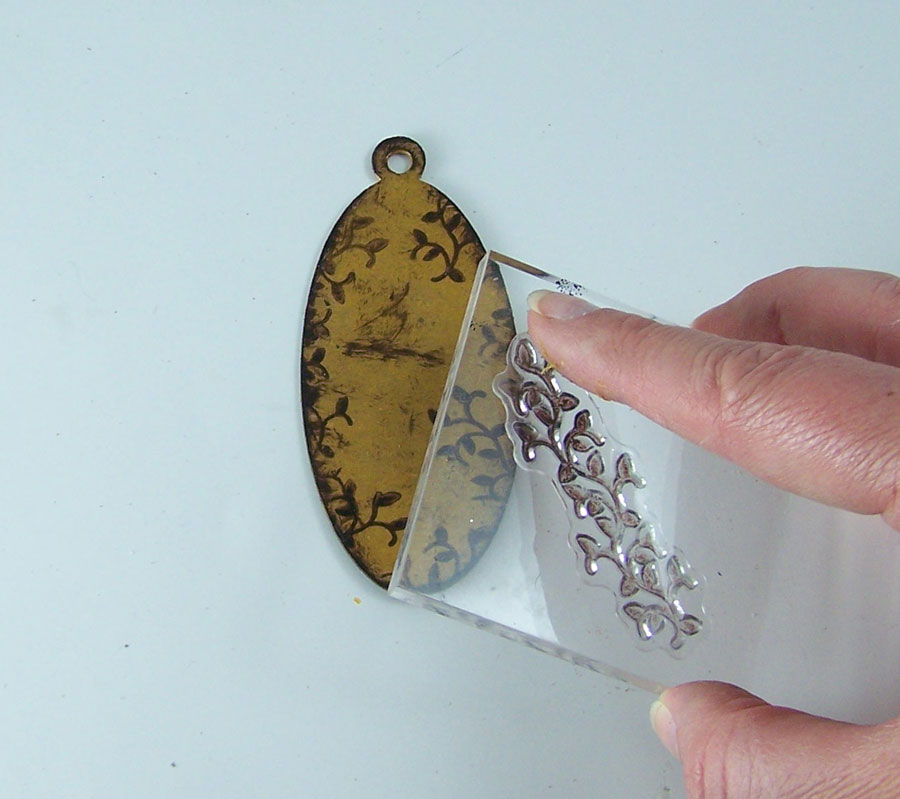
Ink the vine stamp with the brown ink and stamp around the edges of the tag.

Carefully remove the two small butterflies from the G&P Butterfly Charm Set. Remove the loops on both butterflies with a craft knife.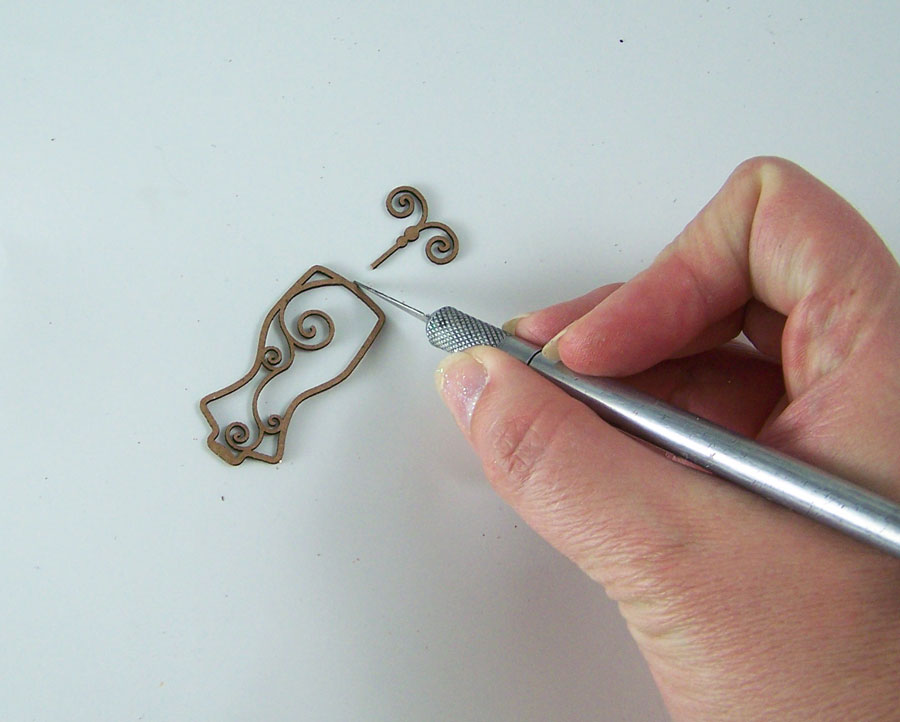
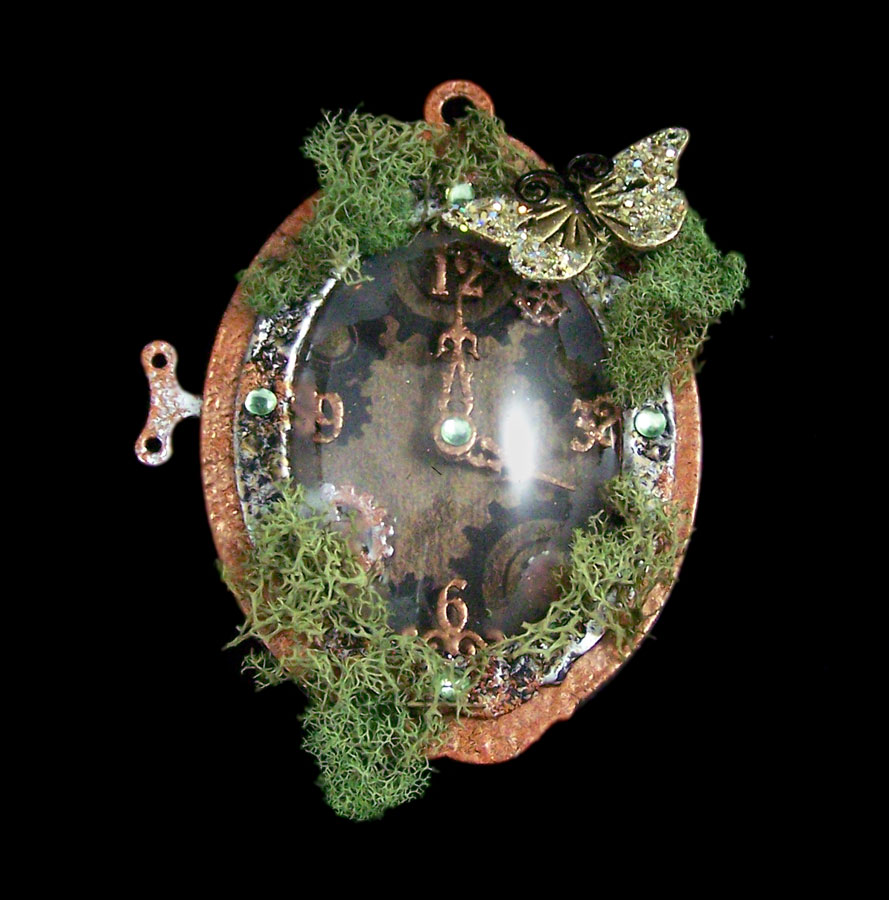
Carefully remove the swirl dress form G&P Vintage Dress Forms Accents set. Using a craft knife remove the stand from the dress form. Save the stand piece and all of the other kit pieces for A time for Nature tutorial; check out the Globecraft & Piccolo blog for instructions. 🙂
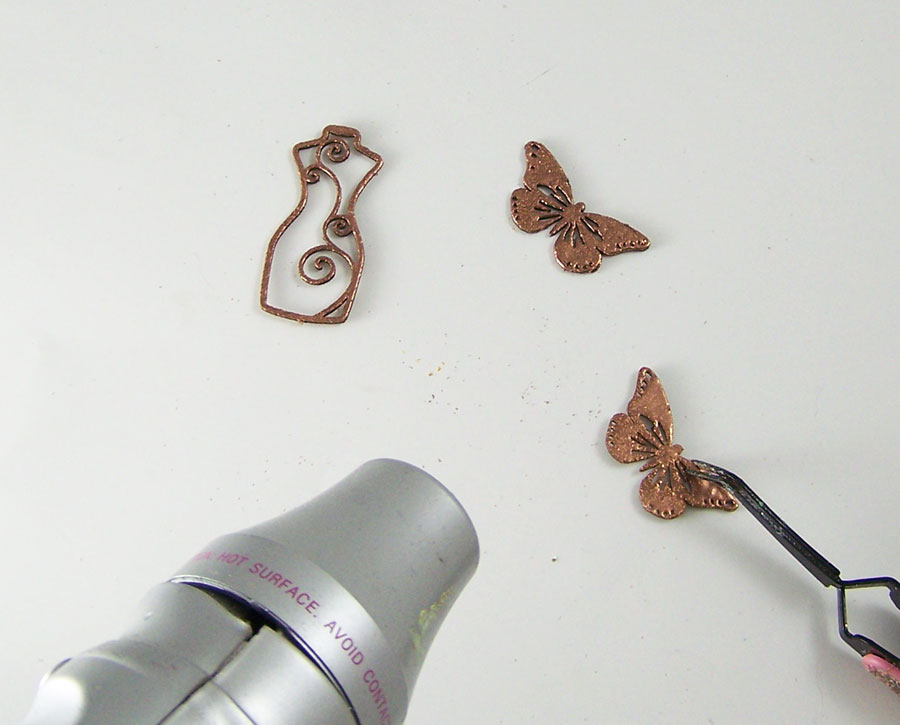
Apply Piccolo Enamel Adhesive to the dress form and butterflies. Apply G&P Copper Kettle to the butterflies and dress form. Heat to set.
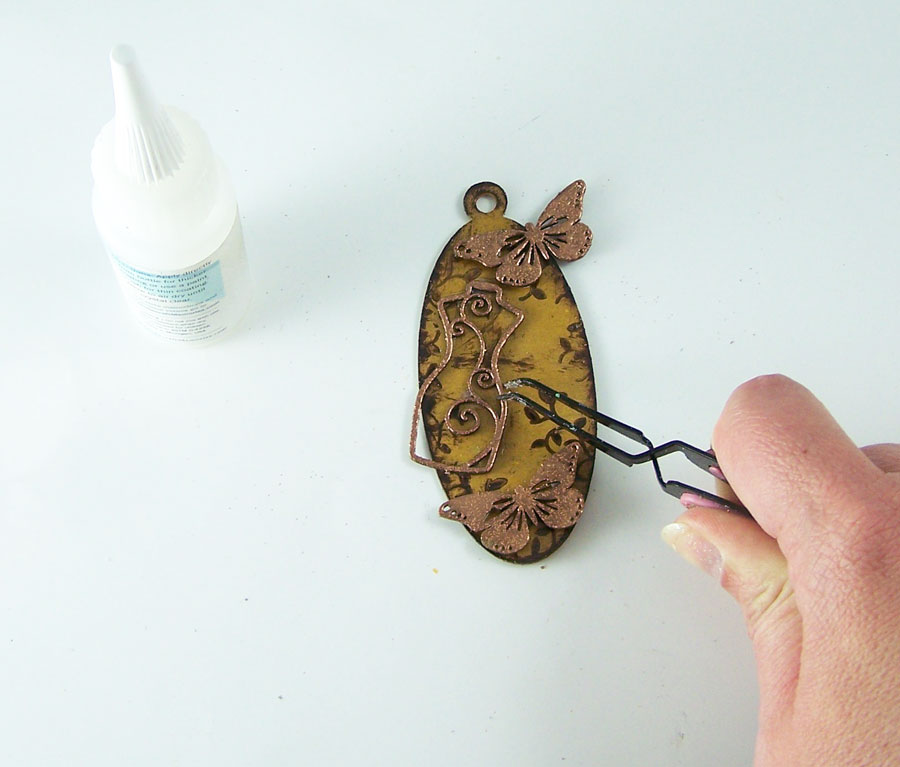
Use Glastique Gloss Finishing Glaze to attach the butterflies and dress from to the tag. Let dry.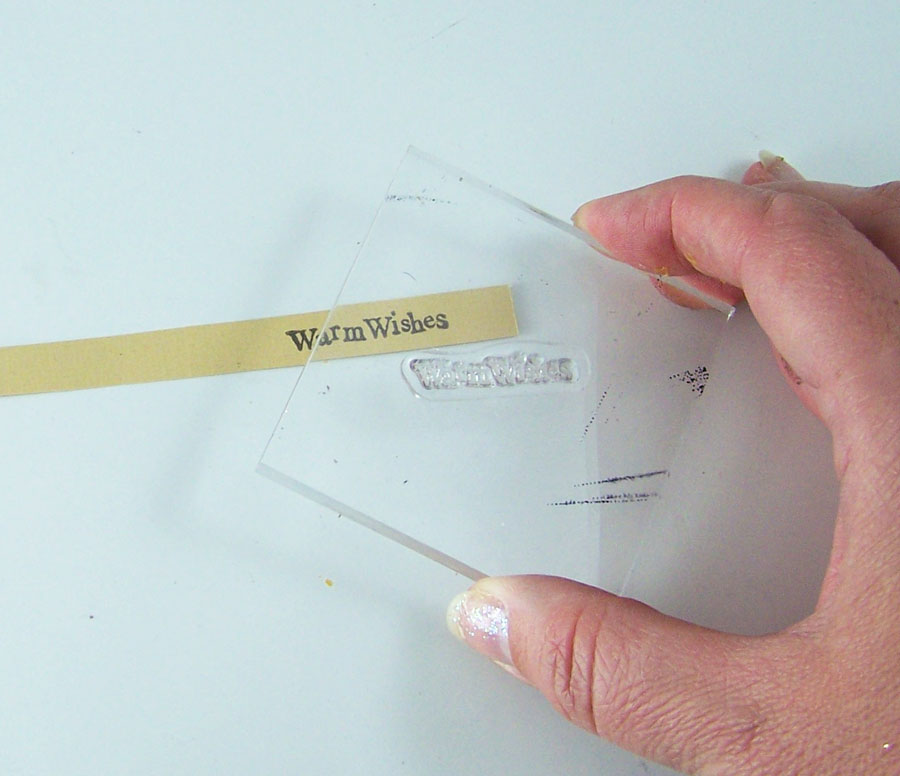
Stamp a sentiment on the small piece of card and cut to fit the tag. Rub the brown ink on the edges of the card stock to give it an aged look.
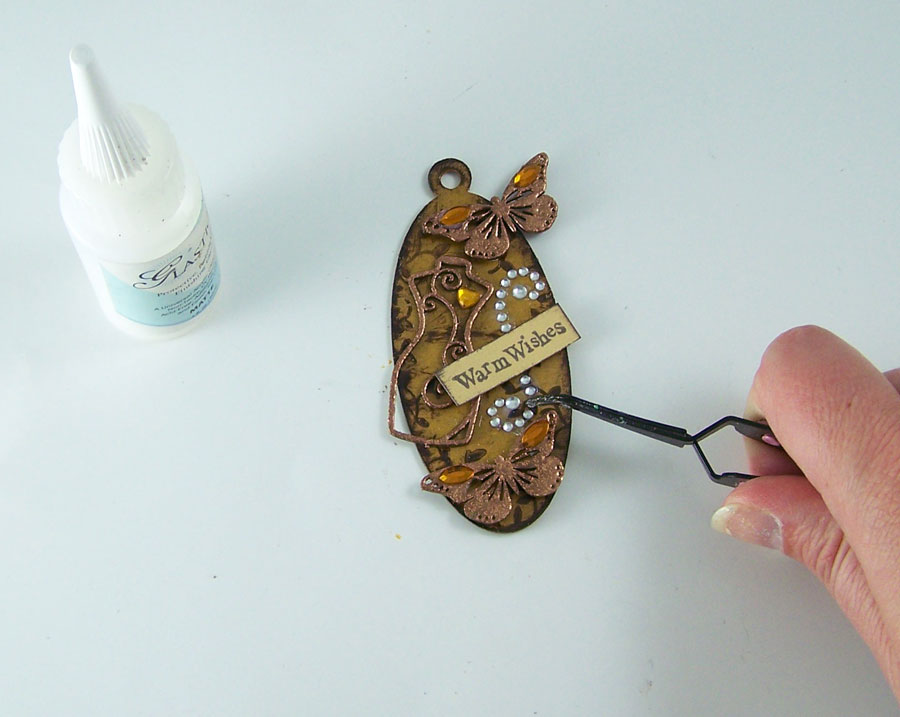
Use Glastique Gloss Finishing Glaze to glue on the sticker gems to the tag as shown. Let dry.
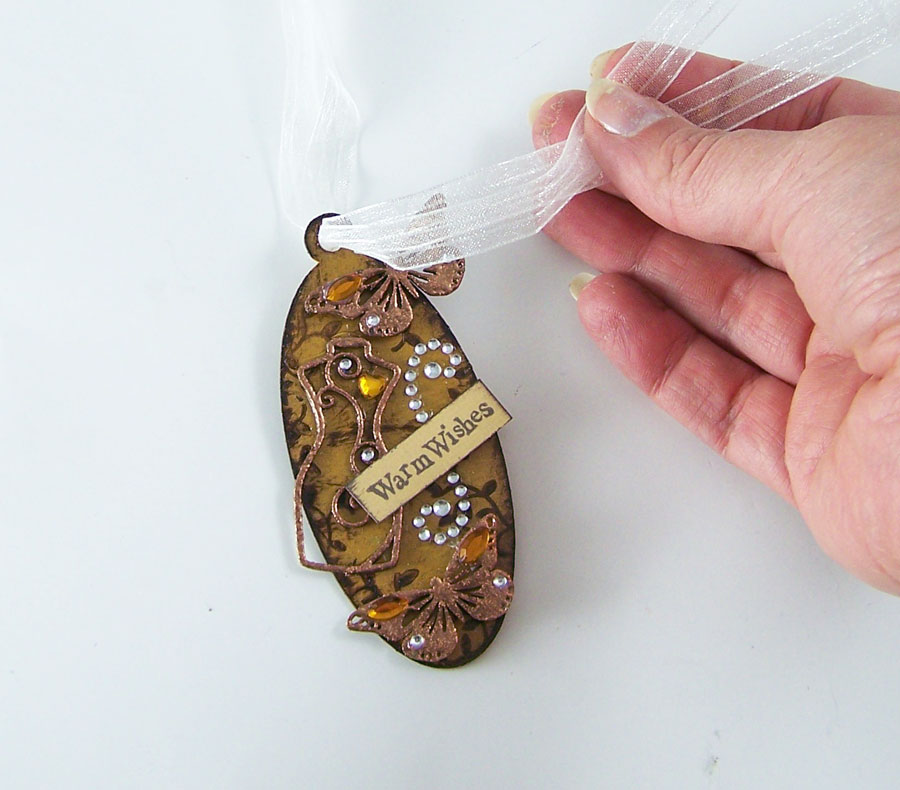
Thread the ribbon through the loop on the top of the tag and tie.
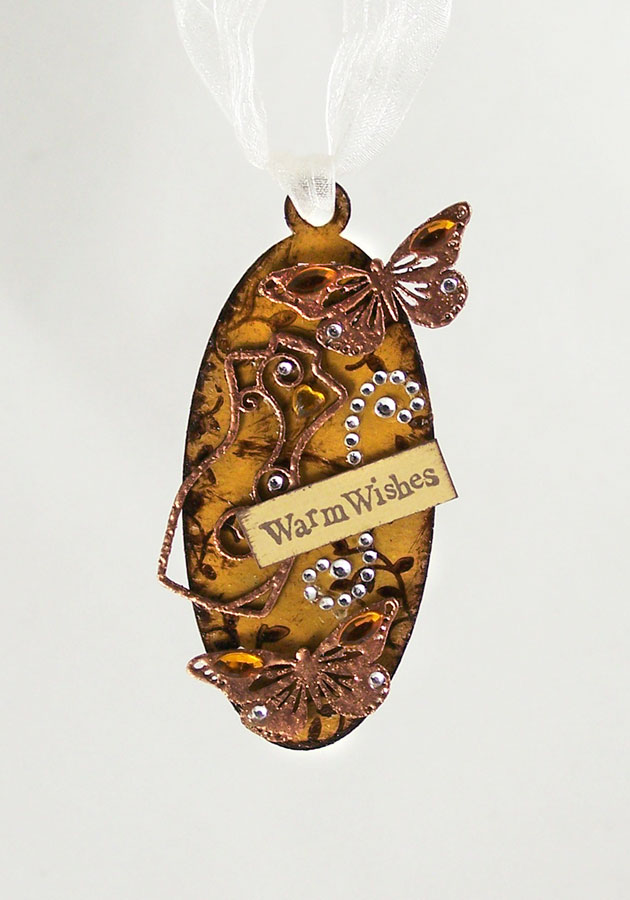
Now you have an embellishment to add to a gift or paper craft.
Hop on over to the Globecraft and Piccolo Blog for my A Time for Nature tutorial!
Until next time, safe travels!
Inspire Art lapel pins
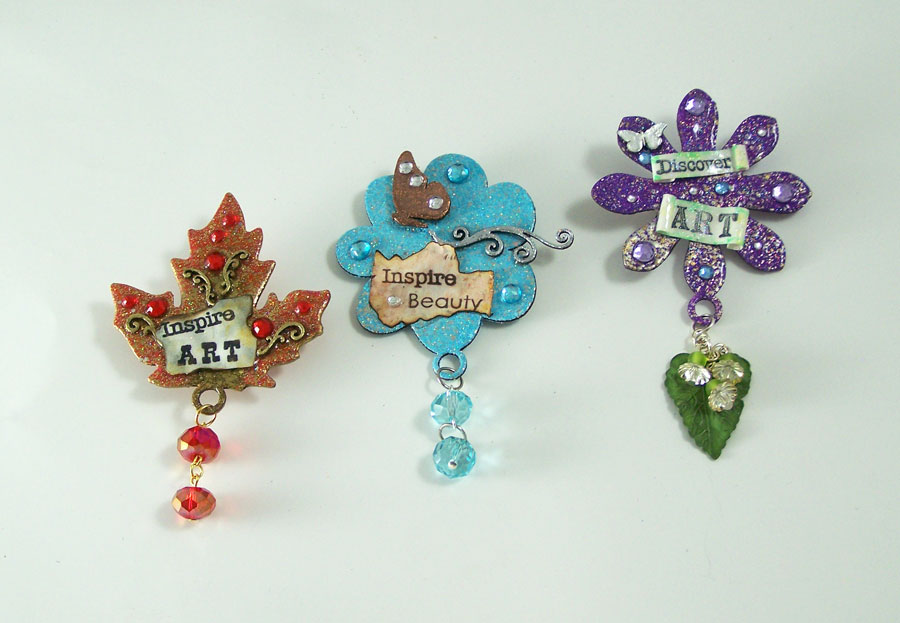
Positive affirmations, inspirational art and things that make one smile can really help with the creative process. Why not make and wear a little bit of inspiration? Today I want to show how to make your own Inspire Art lapel pins, such as the blue above with the copper butterfly.
Supplies:
G&P Assorted Bookboard Charm Bezel Shapes
G&P Bookboard Birds & Butterflies Accents
G&P Glastique Gloss Finishing Glaze
G&P Burnt Umber 3D Enamel Gel
G&P Yellow Ochre 3D Enamel Gel
G&P Metallic Copper 3D Enamel Gel
G&P Turquoise Lagoon Enamel Powder
G&P Copper Kettle Enamel Powder
G&P Siam Silver Enamel Powder
G&P Piccolo Embossing Powder Adhesive
Piccolo Easy Grip Tweezers
Heat Gun
2 Connie Crystal 10mm Crystal beads
2 Silver jumprings
1 Charm Brooch Pin
Crystal sticker gems
Small foam squares
2 Flat nose pliers
1 round nose plier
1 headpin
1 eyepin
Sentiment stamps or sticker
For this project we are using the large round flower bezel from the Charm Bezel Shapes set. Carefully remove one butterfly and swirl from the bookboard Accents set.
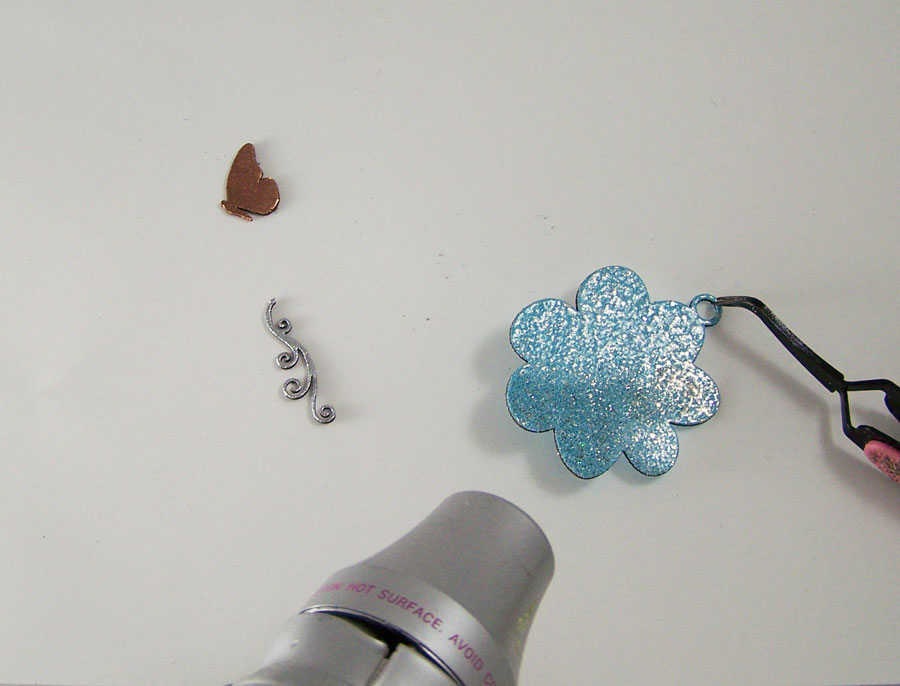 Apply Piccolo Enamel Adhesive to all of the bookboard pieces. Apply G&P Copper Kettle to the butterfly, G&P Siam Silver to the swirl and G&P Turquoise Lagoon Enamel Powder to the flower bezel. Heat set.
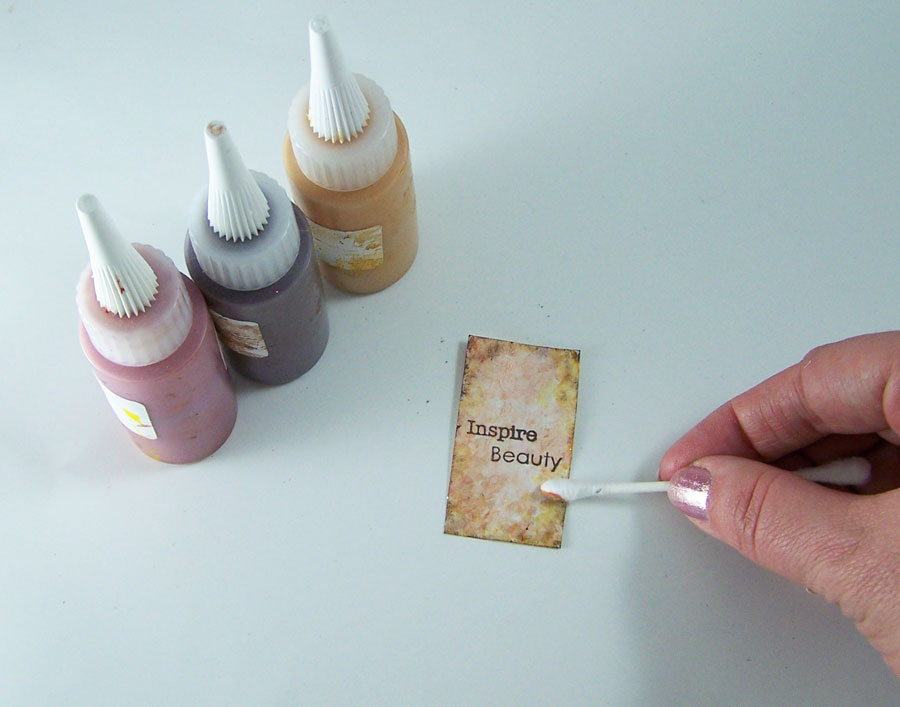 Stamp a sentiment on a 1inch by 2inch piece of paper. Apply G&P Burnt Umber. G&P Yellow Ochre, and G&P Metallic Copper 3D Enamel Gel with a cotton swap to the paper front and back to give an aged look.
*Ignore this step if you rather use a sentiment sticker.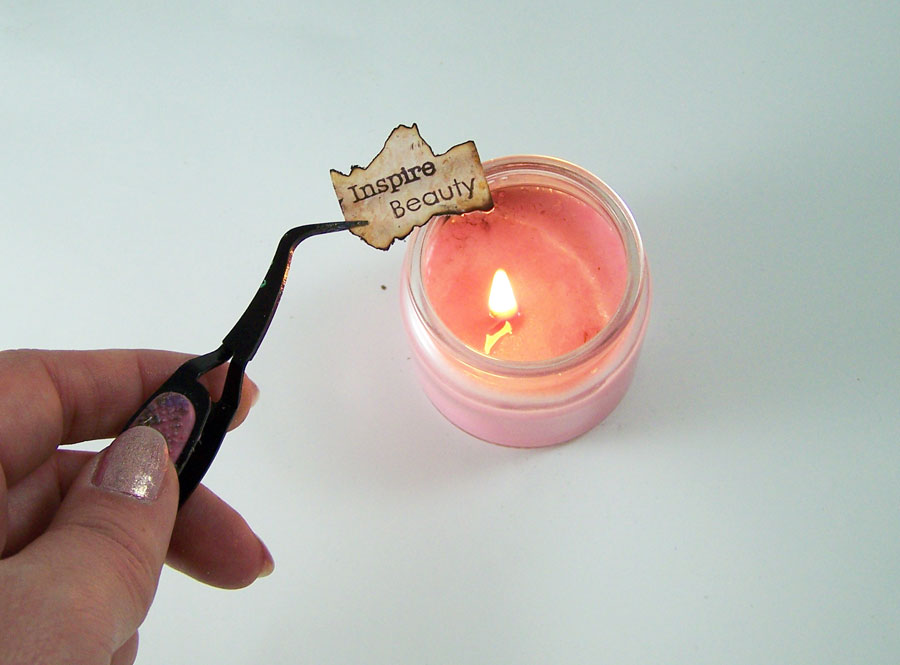 Using the tweezers grip the edge of the stamped paper and very carefully scorch the edges with a small candle flame.
*Ignore this step if you rather use a sentiment sticker.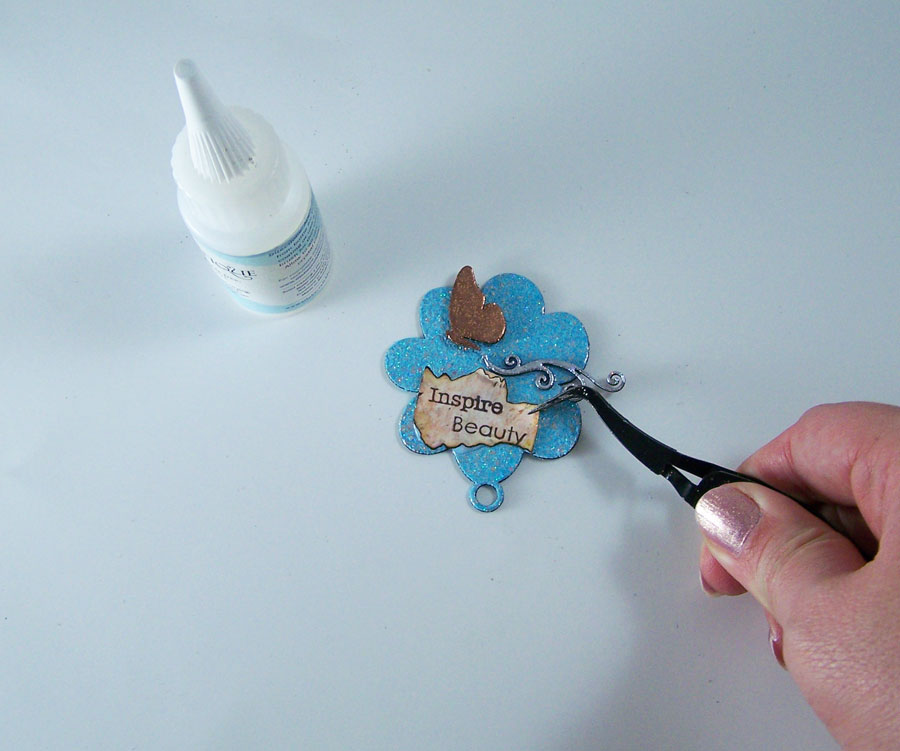
Use Glastique Gloss Finishing Glaze coat the flower bezel with a thin layer. Let dry. Adhere foam squares to the back of the butterfly and the sentiment, press onto the bezel. Attach the swirl Piccolo with Glastique Gloss and coat the assembled pieces with a thin coat of Glastique Gloss.
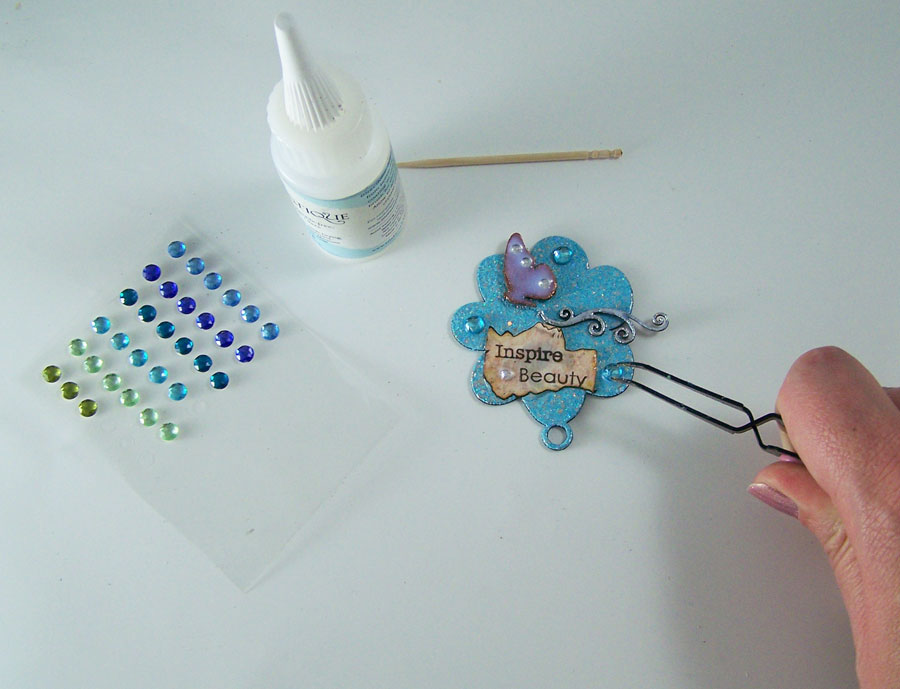 Use Glastique Gloss Finishing Glaze to glue on the sticker gems to the bezel as shown. Let dry.
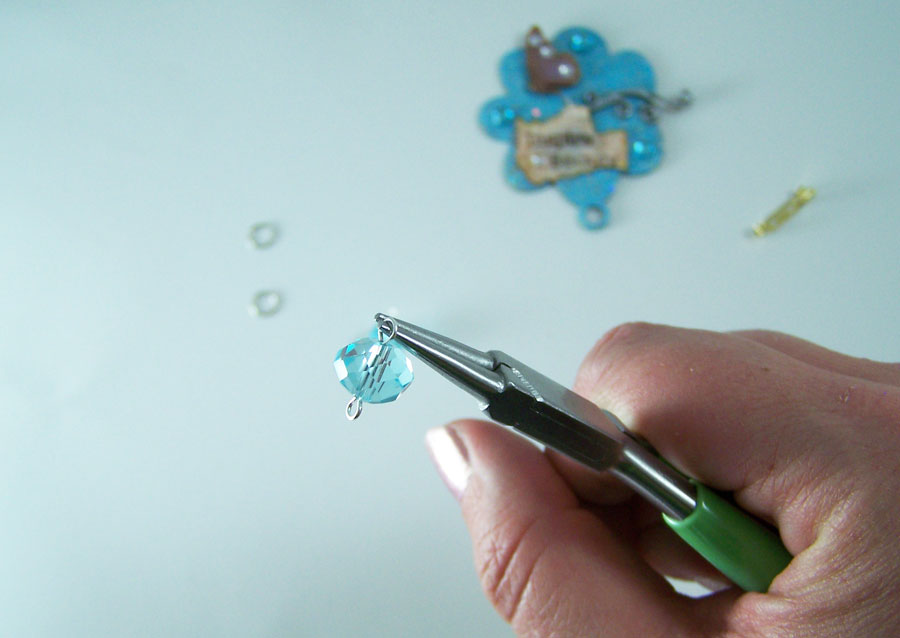 Thread one crystal bead onto the jewelry eyepin and one on the headpin. Using the round nose pliers curl over the remaining wire to form a loop on both jewelry pins.

Open up jump rings with the flat nose pliers and put one jumpring through the loop on the headpin and eyepin, close jumpring. Use the other open jumpring to connect the crystals to the bezel as shown, close jump ring.
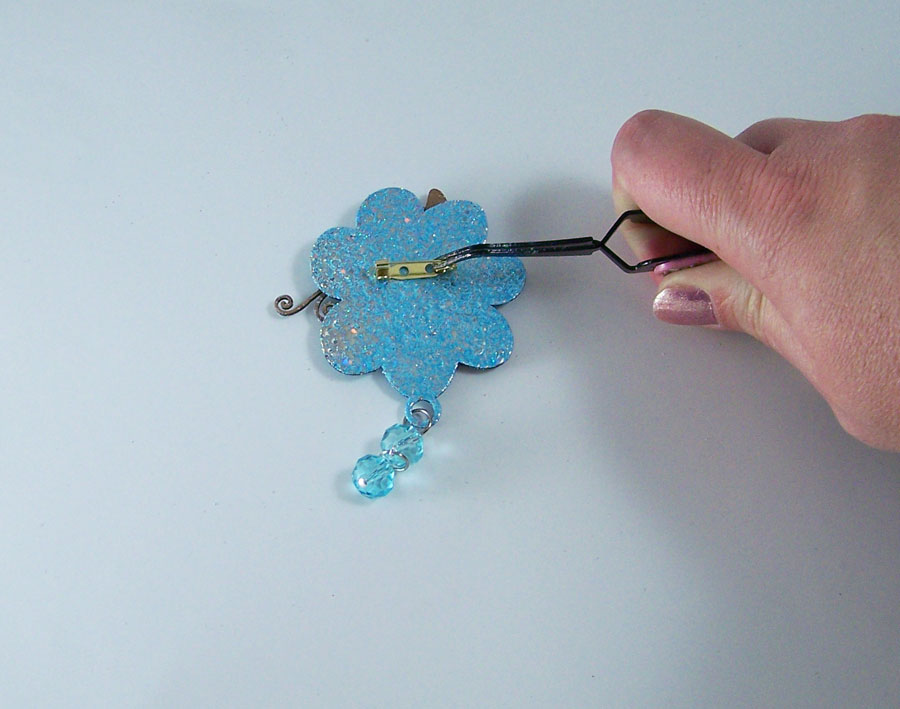 Glue charm brooch pin to the back of the bezel with jewelry glue. Let dry.
The inspire art pin is now ready to wear or give as a gift!
Until next time, safe travels!
DIY Leprechaun Wee Folk Door

I have always loved the idea of the wee Folk or faery, be the good bad or just odd folk that roamed about. One of my favorite faery movies from my childhood was Darby O’Gill and the Little People. The costumes, sets and the illusion of the miniature world of the leprechauns had me entranced Leaving out small gifts or useable objects for them in hopes of getting the favor of the faery was always a magical idea to me. So I got to thinking, why not make a Leprechaun door to add a bit of magic to a home for Spring!Supplies:
G&P Classic Victorian Oval Bookboard Frame
G&P Burnt Umber 3D Enamel Gel
G&P Glastique Matte Finishing Glaze
G&P Medium Flourishes Piccolos
G&P Shamrock Dreams Enamel Powder
G&P Vintage Gold Enamel Powder
G&P Mossy Glen Enamel Powder
G&P Piccolo Embossing Powder Adhesive
Piccolo Easy Grip Tweezers
Green crystal sticker gems
Sizzix Tim Holtz Alterations embossing folder Woodgrain
Dye ink pads in Black and Deep Brown
Small foam squares
Sharp scissors or craft knife
Carefully remove the frame from the package, put aside the globe and easel. Save those pieces for future projects.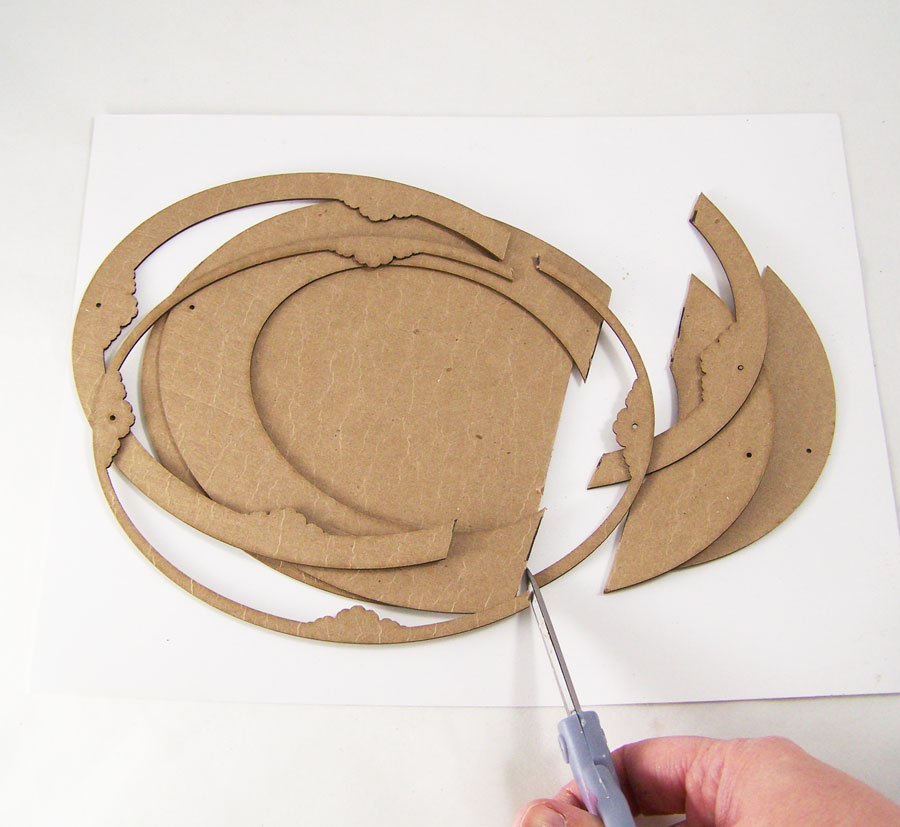
Using a ruler, mark a straight line about 2 inches from the bottom on the frame pieces. Using a sharp scissors or a craft knife, cut the bottom portion off.
Run the back plate and bottom frame sections through an embossing machine using the woodgrain embossing folder. Taking the brown and black dye ink pads, rub them on the embossed sections of the frame.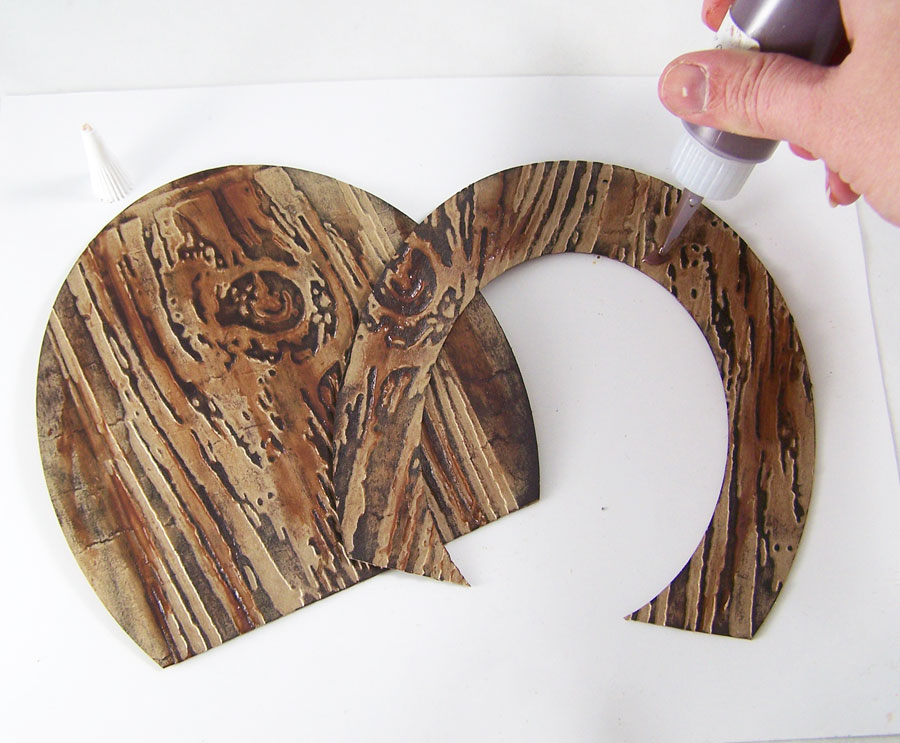
Apply G&P Burnt Umber 3D Enamel Gel to the embossed and now inked sections. Smear the enamel gel in the wood grain pattern with your finger or a cosmetic sponge in a up and down pattern.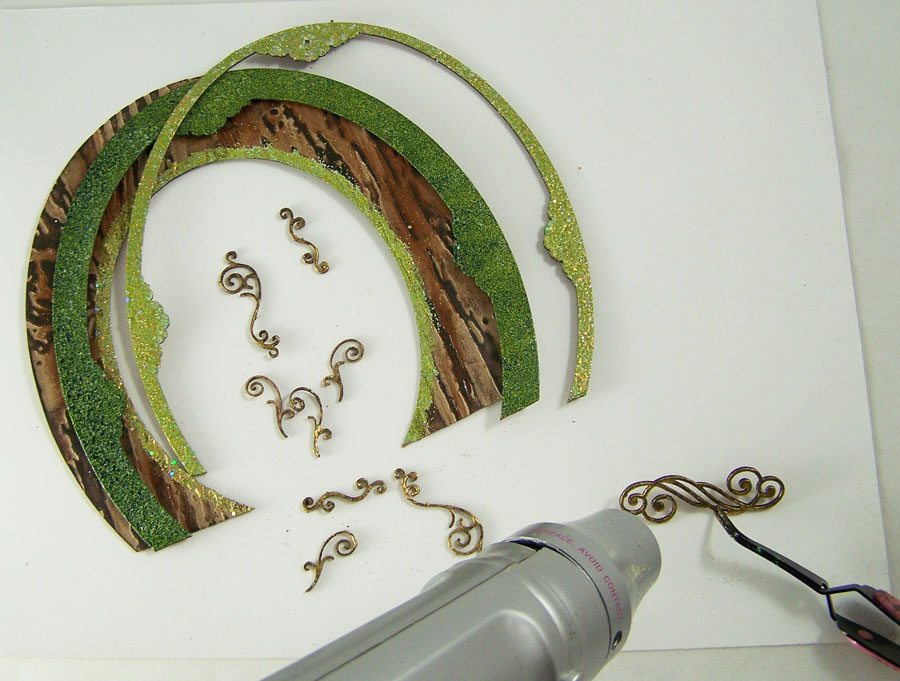
Apply Embossing Powder Adhesive to the top and middle pieces of the frame, the Piccolos and a thin line on the bottom frame. Apply Mossy Glen Enamel Powder to the middle frame, Shamrock Dreams powder to the top frame and thin line on the inner frame, Vintage Gold powder to the Piccolos. Heat to set.
Adhere all three sections of the frame together with Glastique Matte Finishing Glaze, using office clips to keep the frame pieces in place while it dries. Apply Glastique Matte to the back of the Piccolos, place them on the frame and let dry.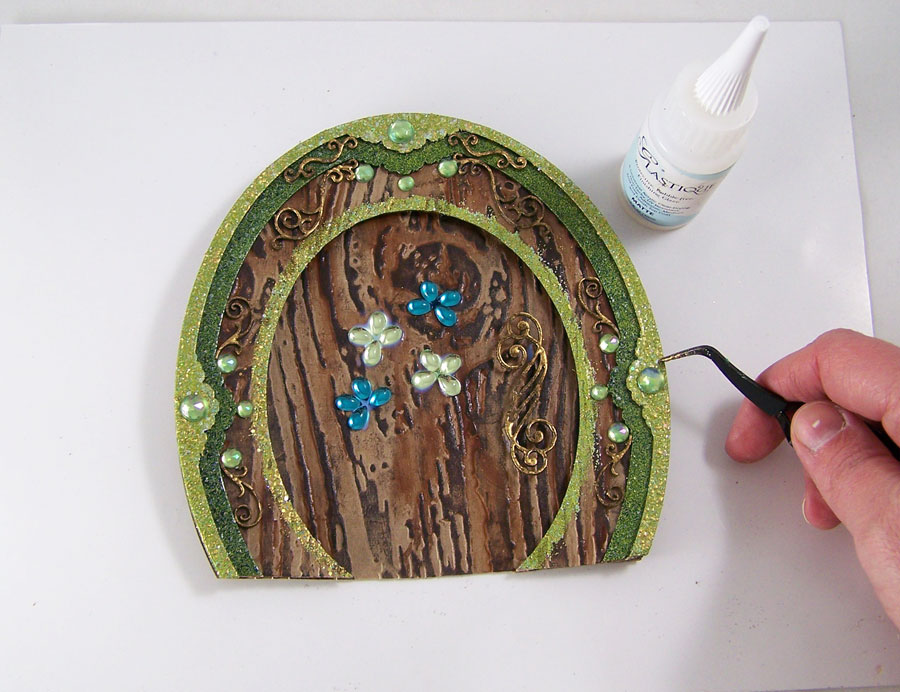
Adhere the back plate to the top frame portion with foam squares. Apply the large swirl Piccolo to the back plate with foam squares to give the illusion of a door handle. Apply the green sticker gems to the faux door with Glastique Matte Finishing Glaze and let dry.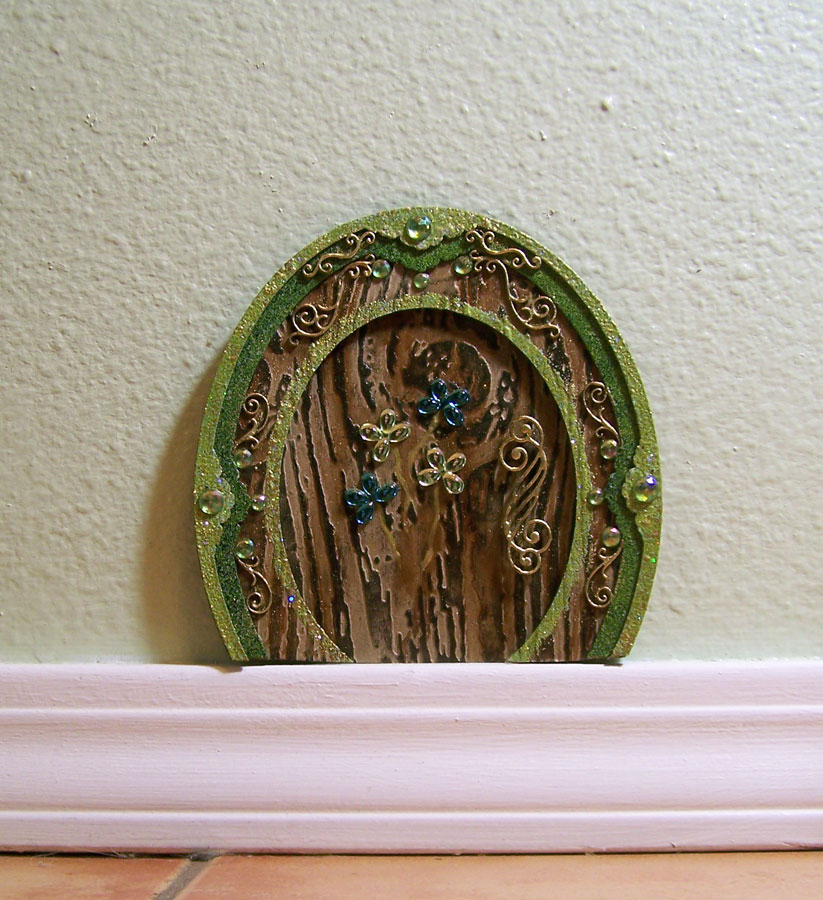
Apply removable poster adhesive to the back of the now completed faux door. Place at the bottom of a wall on the molding, a shelf or anywhere you think a leprechaun might like a magical door! May you have many lucky days ahead!Until next time, safe travels!
A Steampunk Valentine
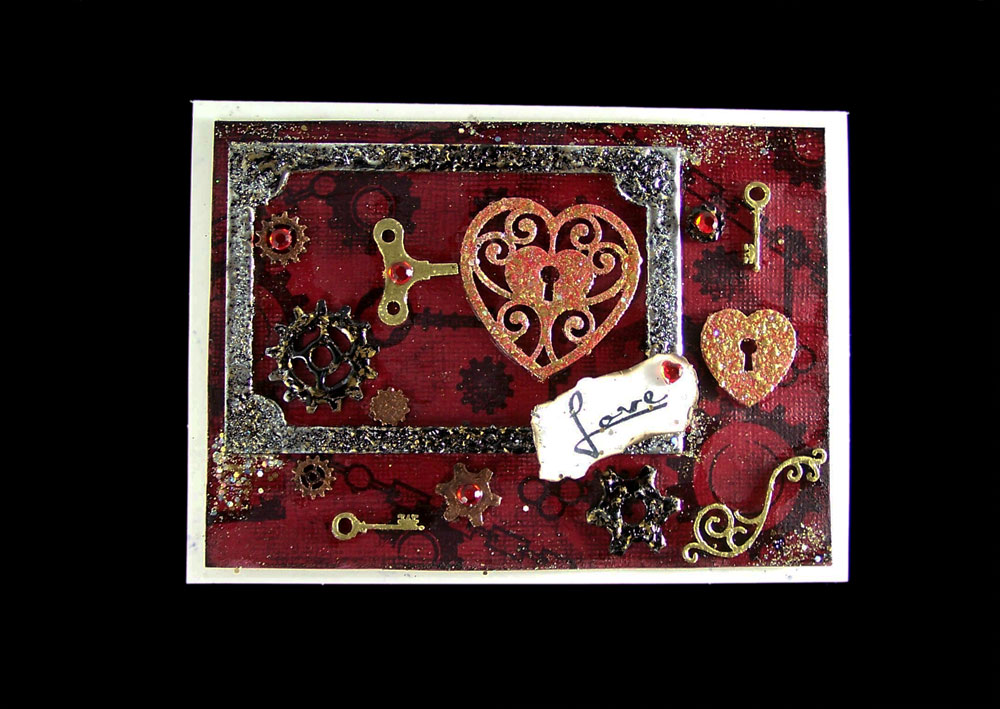
I seriously can’t get enough of Steampunk art these days. The diversity, detail and amazing styles that are being created are a wonder to behold. Continuing with this theme, I wanted to create a different form of the traditional Valentines. My feeling was, why not let a Steampunk fan know they are loved with a card? 🙂Supplies:
G&P Key to My Heart Charm Set H006
G&P Keys to My Heart Accents H009
Vintage Gears Embellishment Set ST002
G&P Glastique Gloss Finishing Glaze
G&P Glastique Matte Finishing Glaze
G&P Ruby Red Slippers Embossing Powder
G&P 24K Gold Embossing Powder
G&P Copper Kettle Enamel Powder
G&P Vintage Black Enamel Powder
G&P Piccolo Embossing Powder Adhesive
Globecraft & Piccolo Pure Sparkle Gold Glitter
Piccolo Easy Grip Tweezers
Red crystal sticker gems
Blank card
Red card stock
Gear and key Stamps
Stamp ink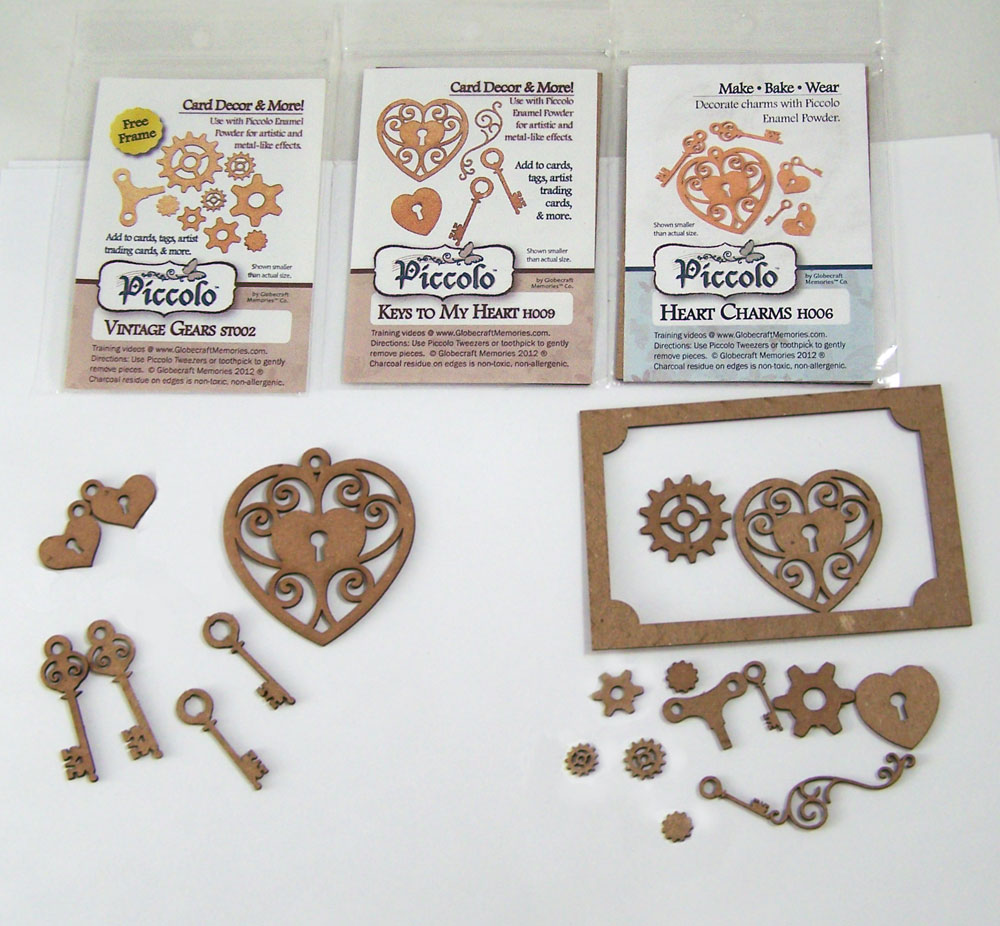
Carefully remove all of the Piccolos from the chipboard frames. Separate the frame, gears, small keys, two lock hearts without loops and the swirl. Place the remaining pieces to the side for a wearable Valentine’s Day Bling project; check out the Globecraft & Piccolo blog for that tutorial. 🙂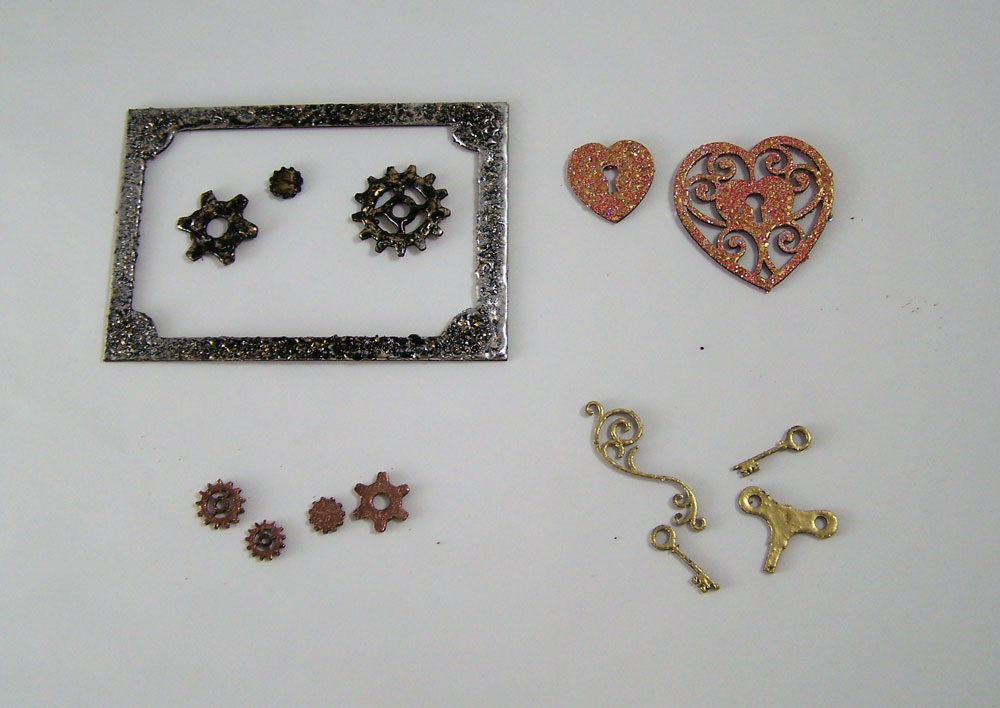
Apply Piccolo Enamel Adhesive to all of the remaining pieces. The two heart locks I coated with G&P Ruby Red Slippers Embossing Powder. The two keys, windup key and swirl with G&P 24K Gold Embossing Powder. The four tiny gears with G&P Copper Kettle Enamel Powder. The frame and remaining gears I coated with G&P Vintage Black Enamel Powder. Heat set.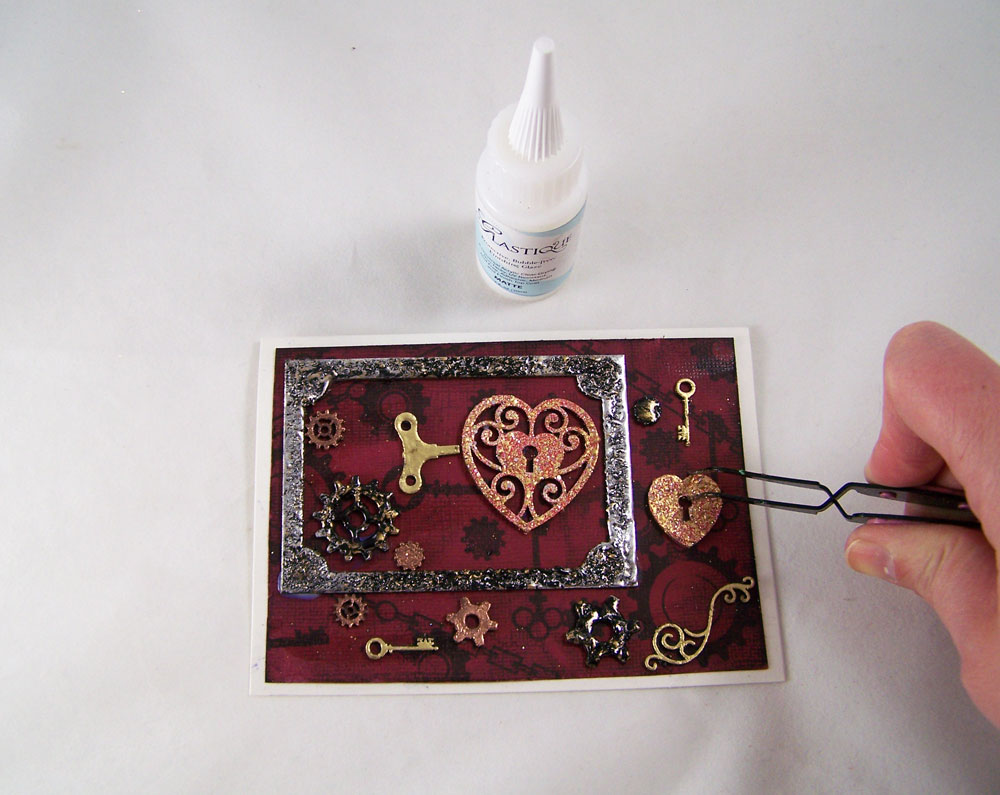
Stamp the card stock with the gears and key stamps. Adhere to the front of the blank card. Carefully glue the embossed Piccolos to the front of the card using the G&P Glastique Matte Finishing Glaze.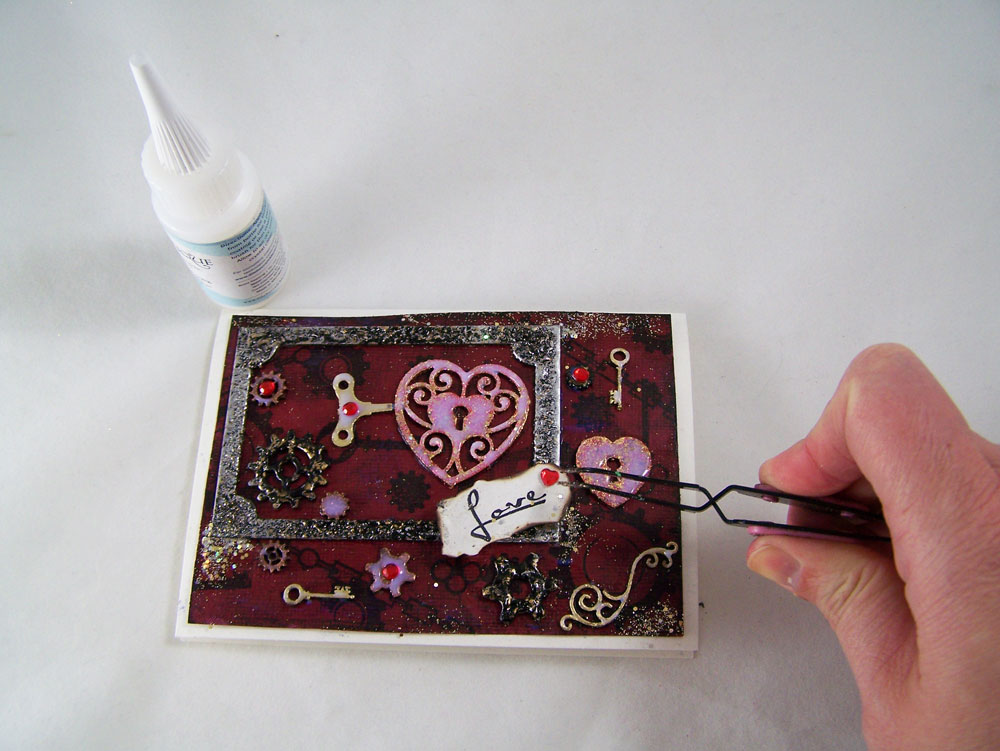
Coat all of the Piccolos with G&P Glastique Gloss Finishing Glaze and add the red sticker gems to a few of the gears. Put a few drops of Glastique Gloss on the card, smear the drops with your finger and sprinkle Globecraft & Piccolo Pure Sparkle Gold Glitter on top.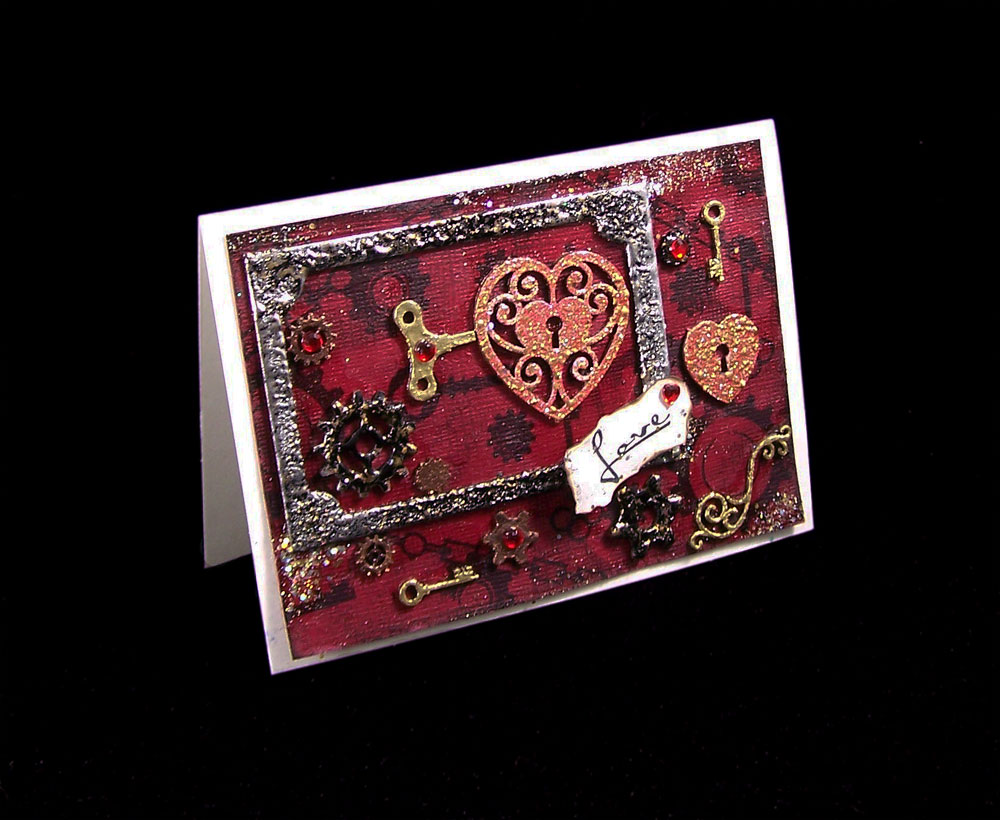
Stamp or write your favorite Valentine’s sentiment inside. 🙂Until next time, safe travels!

Ancient and Contemporary Inspired Artistry