
Crafty Adventures with Resin and Orchids
Many of my art projects are tests of both art products and my ability to create. I can collect supplies, start working on something, even get a basic idea of what I would like to do, and end up making something completely different. Being able to adapt and still make a complete project that I can be happy with is my ideal goal, and thankfully this one ended up that way.
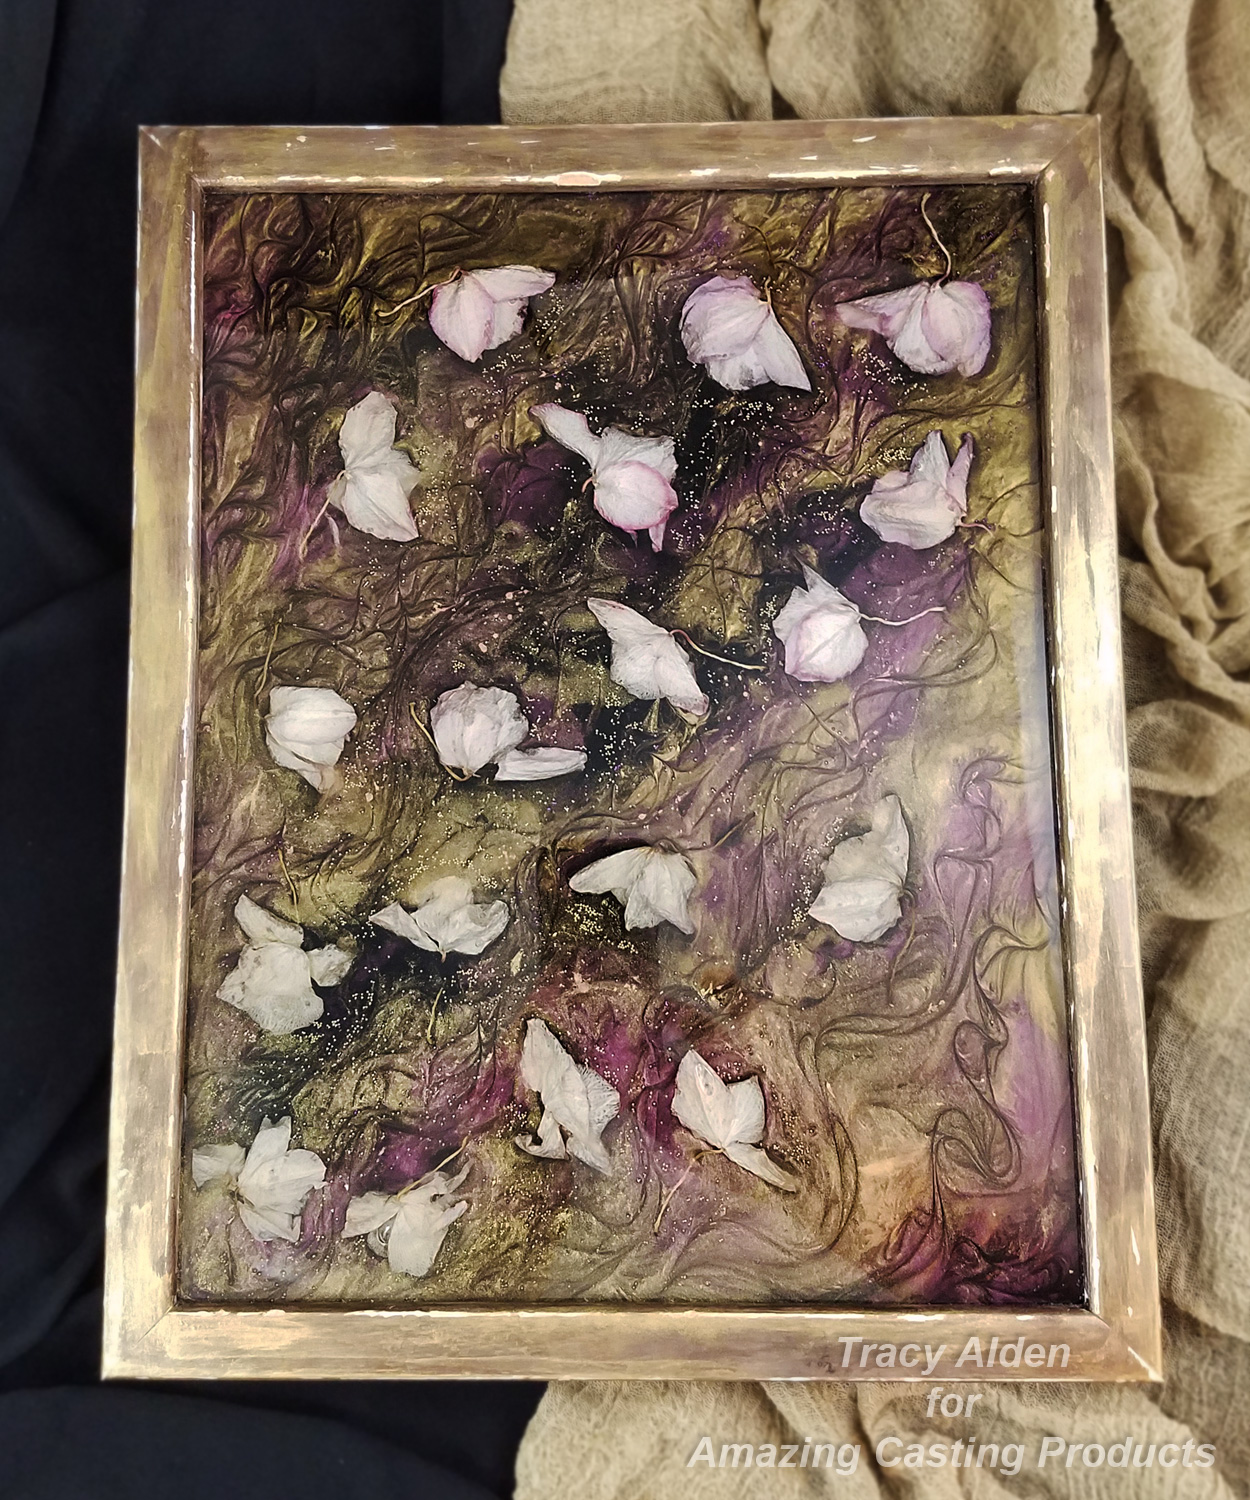
Starting with a small collection of orchid blooms that I had dried, I wanted to try to preserve in resin. Dried orchid blooms are very delicate, easily crumbling if mishandled. I decided a frame was the best choice to display the dried orchids and be able to hold the resin in place.
Supplies:
Amazing Clear Cast Resin
Black Alumilite Dye
Alumidust powders Light Pink, Interference Red, Yellow Gold and Brown
Liquitex Gloss Varnish
Dried Flowers
Toothpicks
Stir Sticks
Paint Brush
Acrylic Paint
Picture Frame
Micro Hole-less Glass Beads in Gold and Purple
Measuring Cups
Parchment Paper (Found in the Baking section of most stores) to protect work surfaces
Glue
Baby Wipes
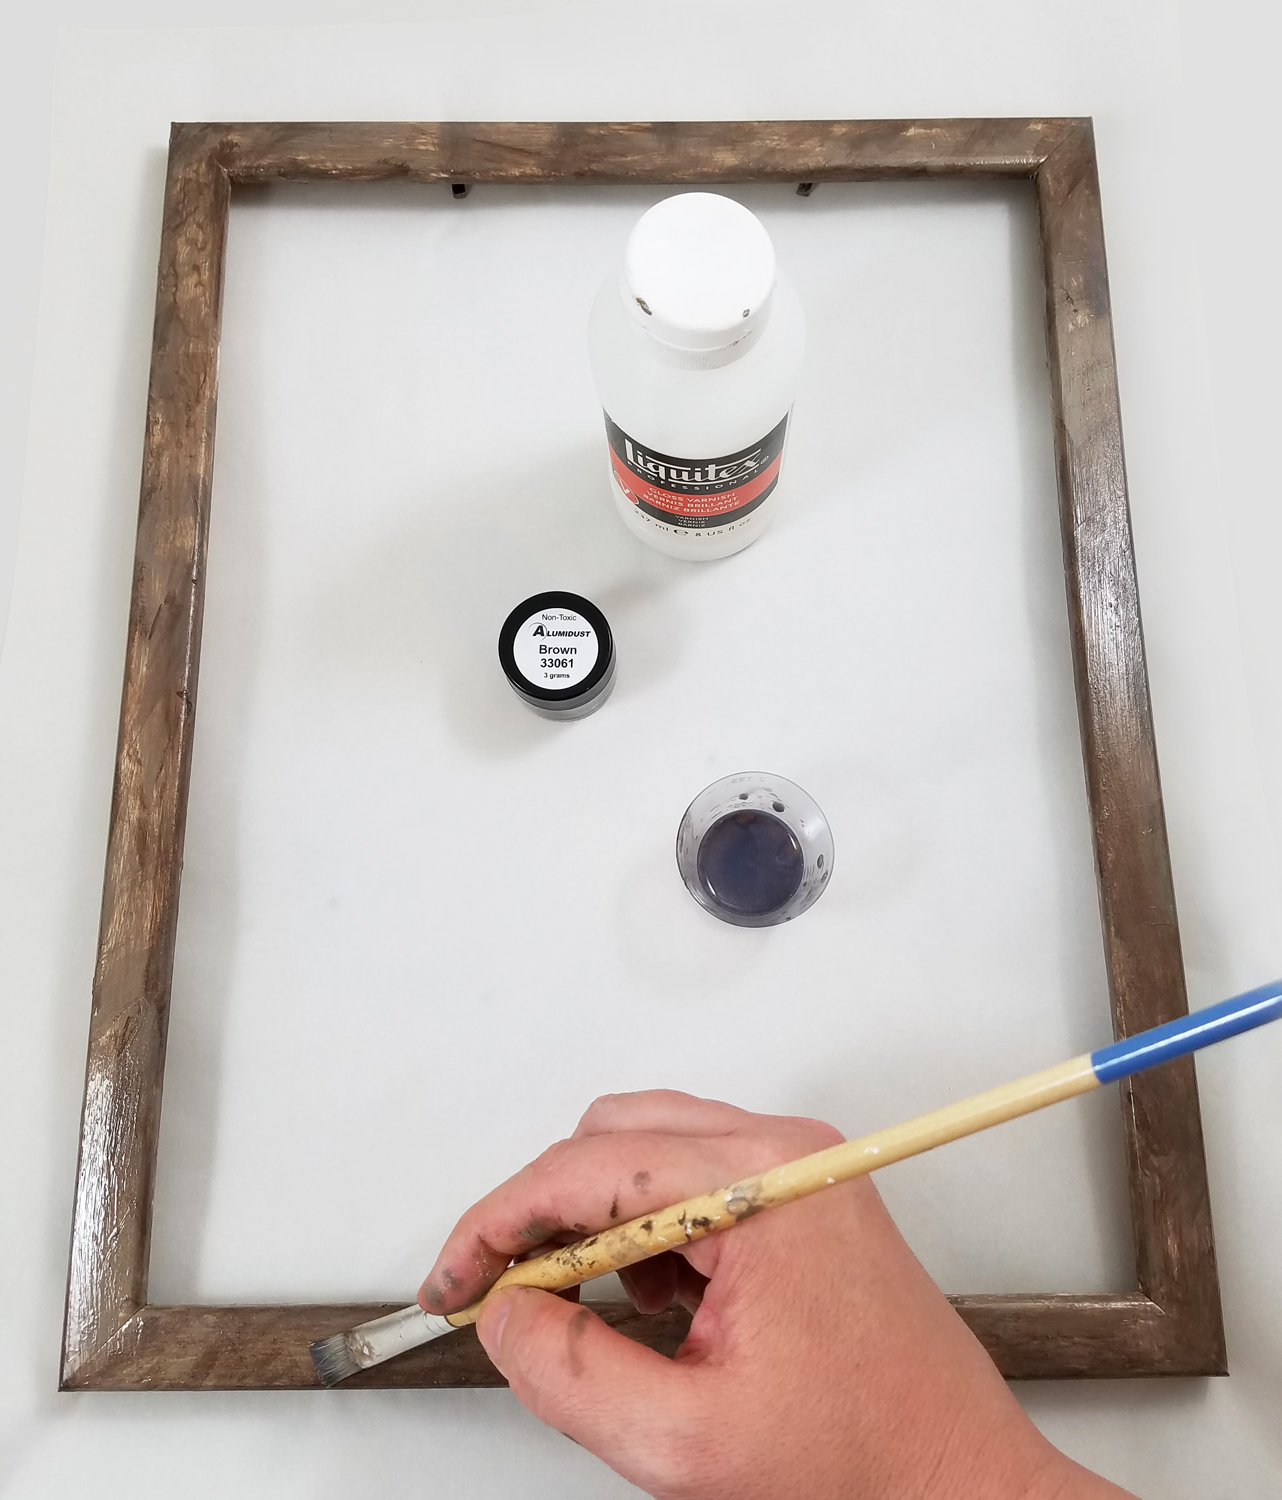
I started with removing the glass and back panel of an old frame. I scrubbed the frame clean and painted the back and front of the frame with 2 coats of paint. I mixed some Brown Alumidust powder with Liquitex Gloss Varnish, as a protective varnish layer over the paint. I let the varnish dry overnight.
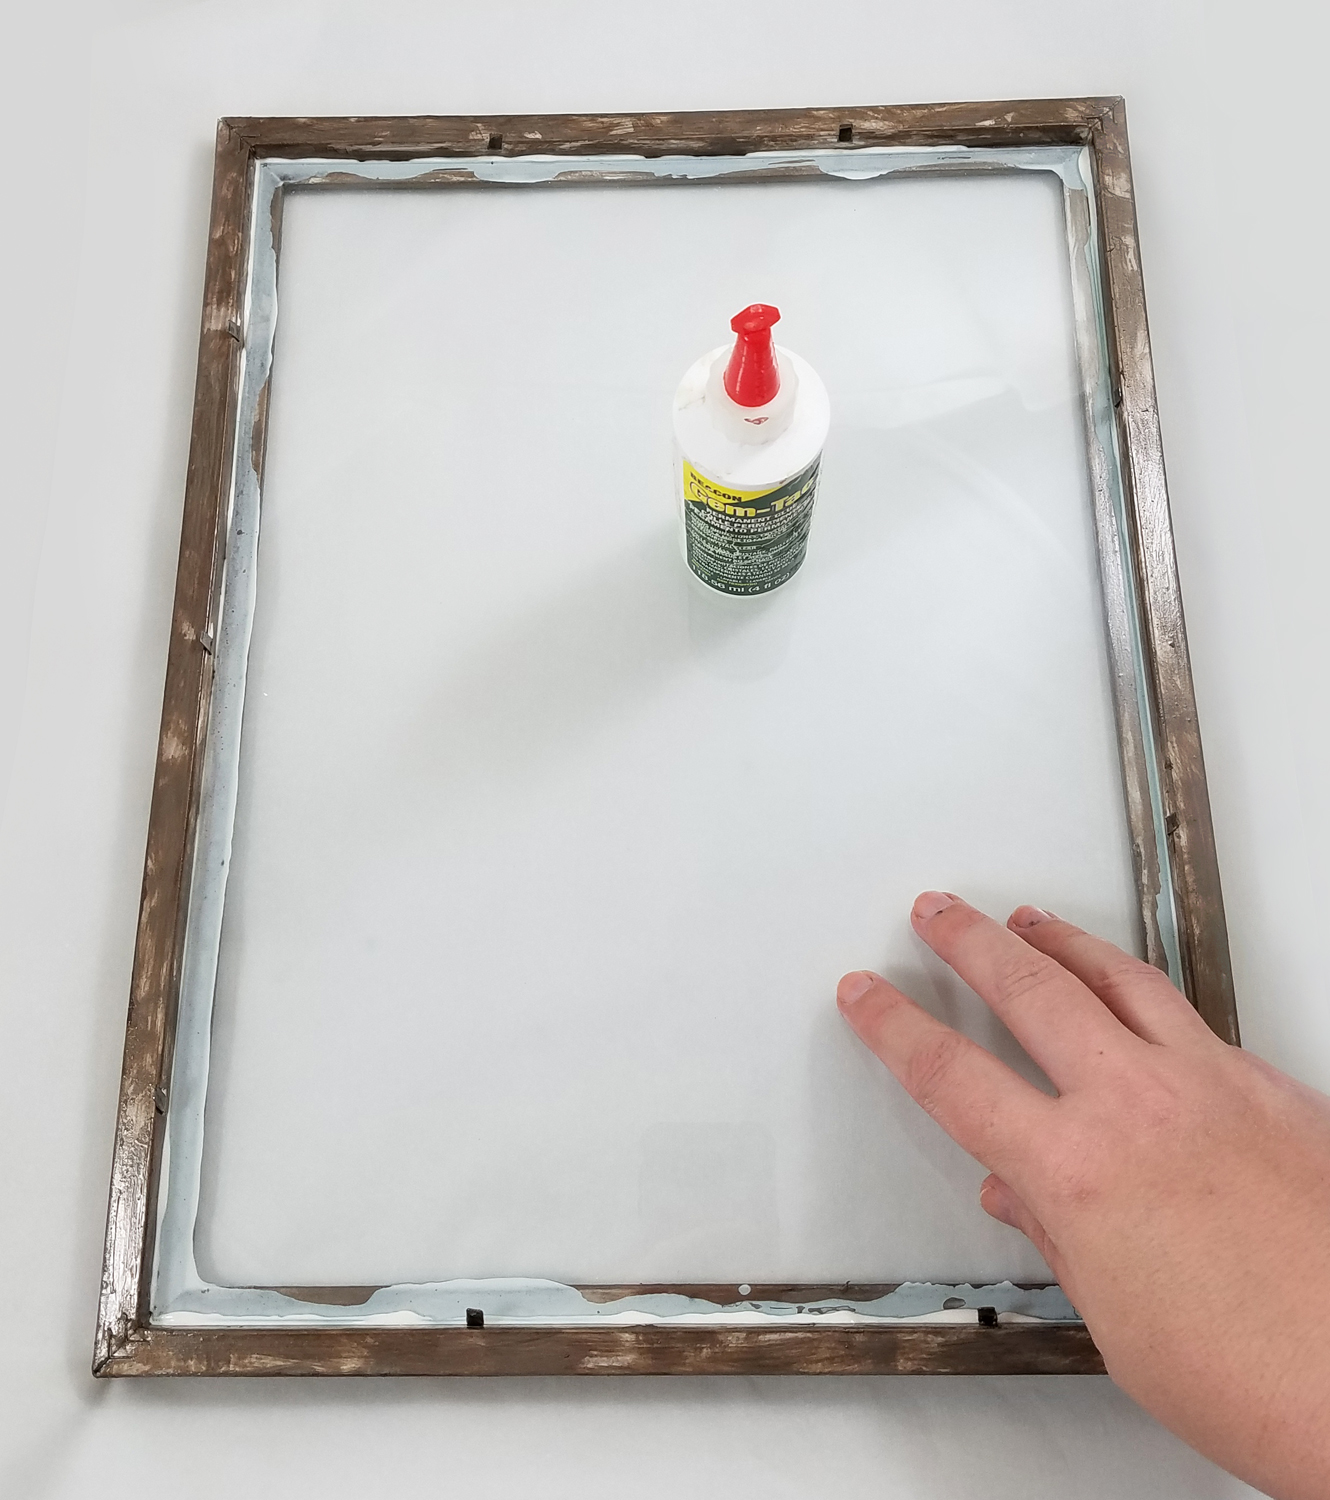
I cleaned the glass panel and put it back into the frame. I glued the glass in place to make sure it wouldn’t shift while I worked on it and so resin wouldn’t leak around the edges later. I was careful to have a solid line of glue all the way around the frame and let it dry completely.
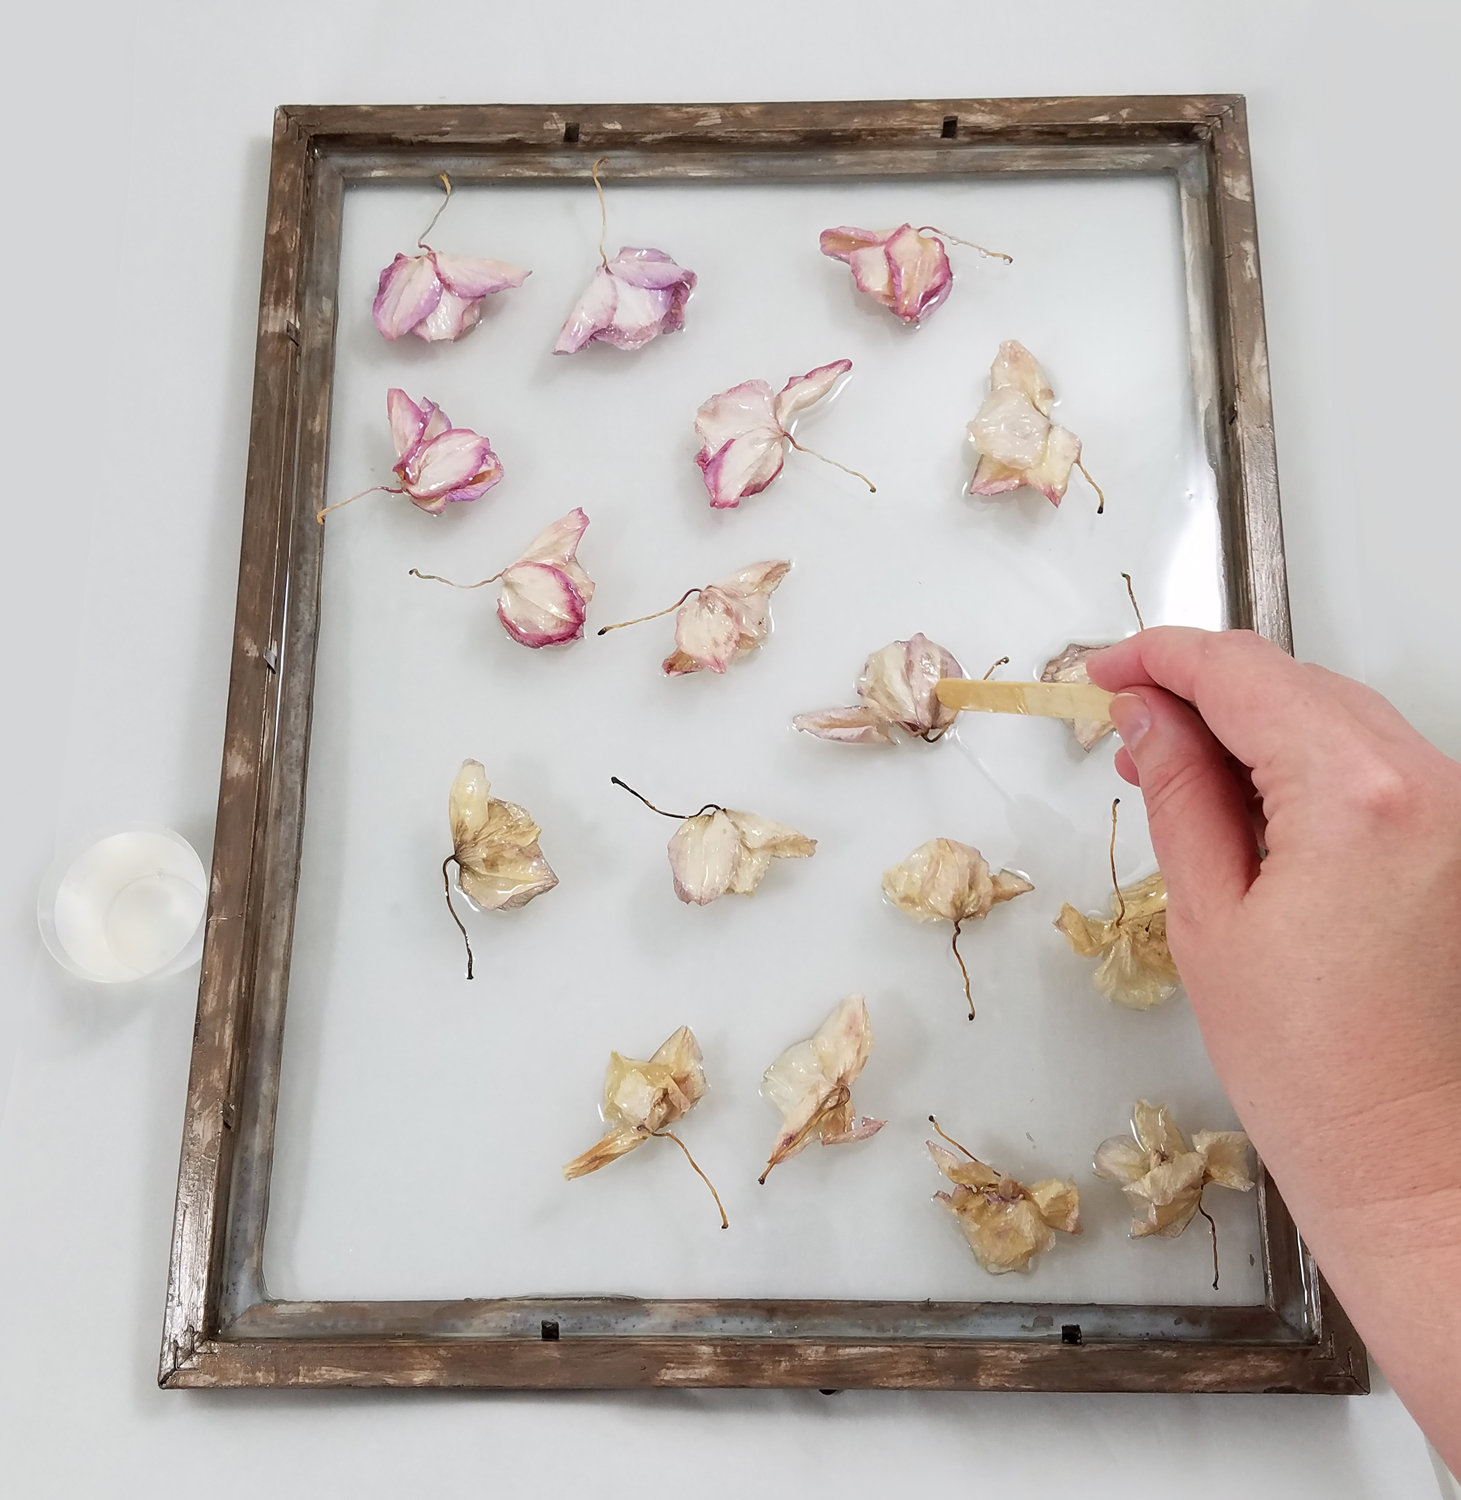
I mixed up some Amazing Clear Cast Resin, making sure to slowly stir to reduce air bubbles and let it sit for 5 minutes. I poured the resin into the frame and carefully placed the dried orchid blooms into the uncured resin. I found that with the first layer of Amazing Clear Cast Resin the orchid blooms had a tendency to shift in the resin. So the first layer of resin had to be a thin pour and I let that cure to a tacky set.
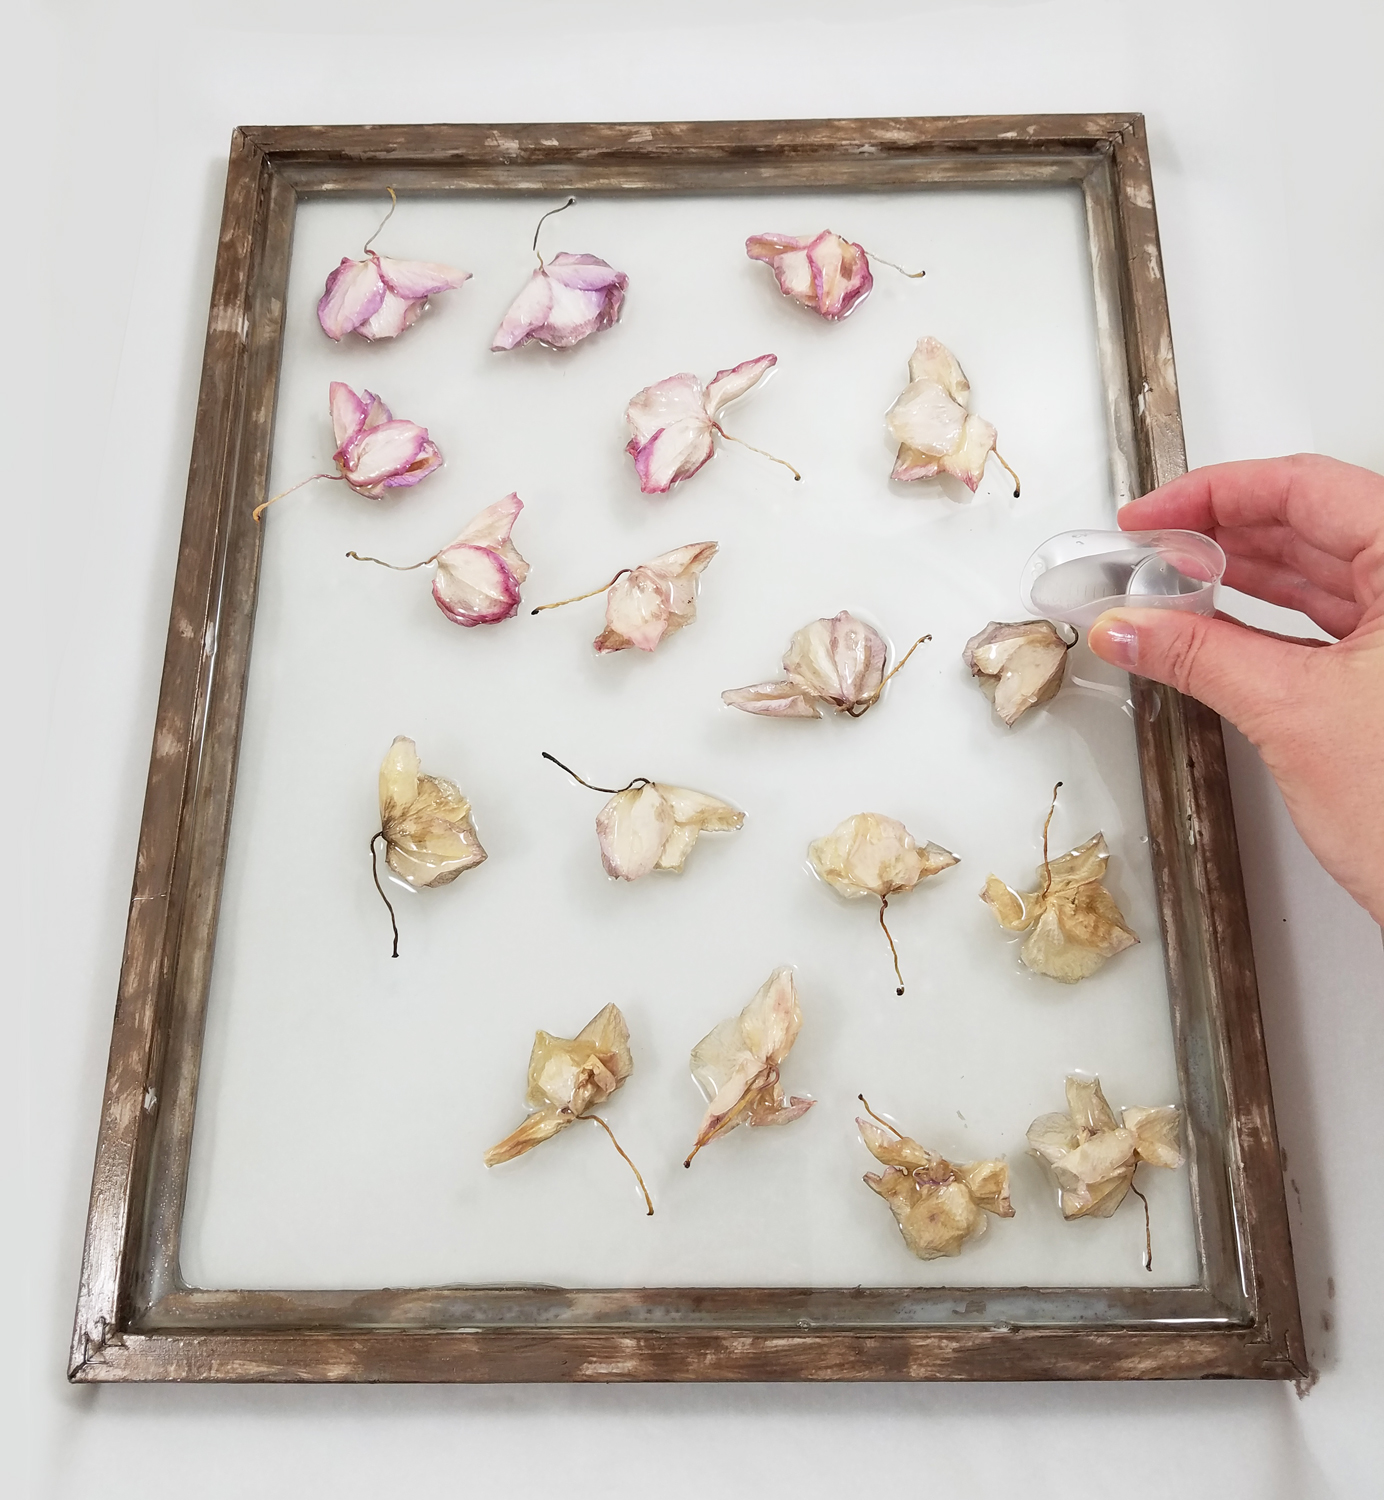
I added a second clear layer of Amazing Clear Cast Resin, to cover and protect the orchids. To make sure the resin completely encapsulated the orchids I would push some of the uncured resin around with a stir stick, moving the resin in and around the blooms. I let this layer of resin cure completely.
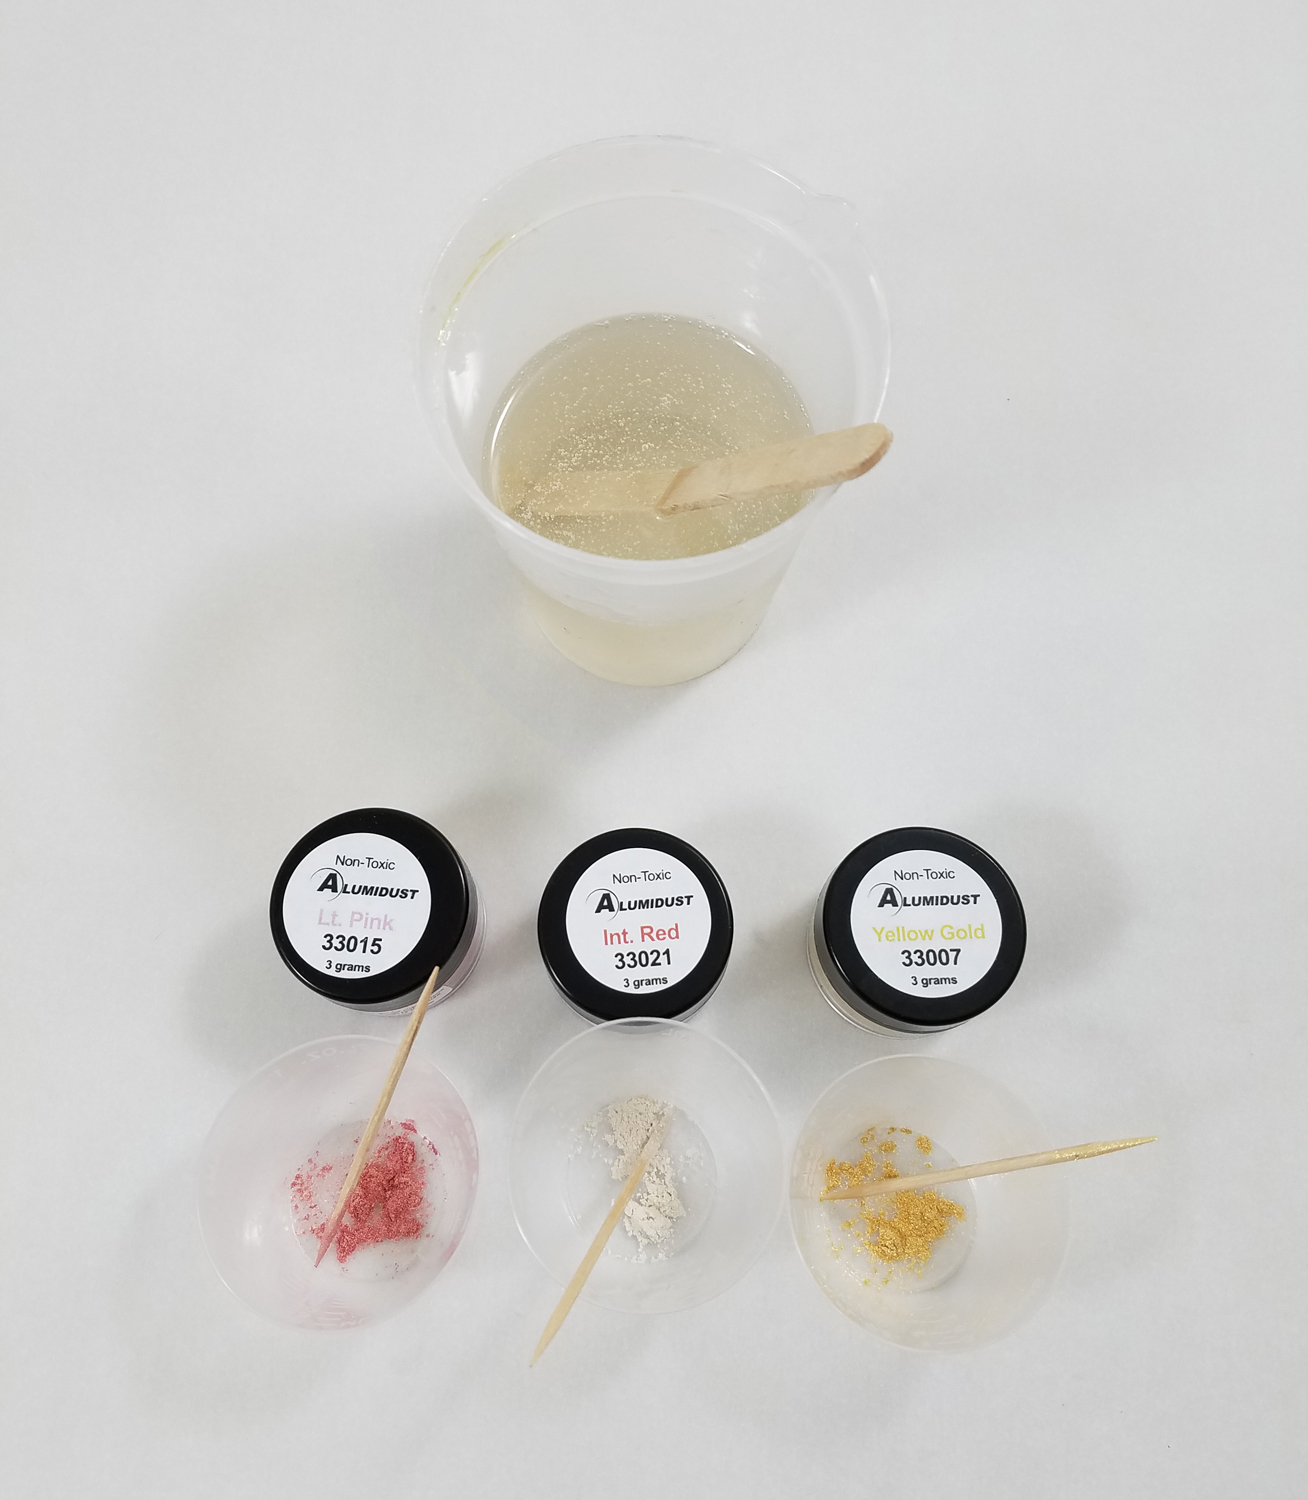
Mixing up a new batch of Amazing Clear Cast Resin, I put a pinch of Light Pink, Interference Red and Yellow Gold Alumidust in separate small measuring cups. I then carefully added the liquid resin into each cup carefully stirring with toothpicks to fully mix in the powders.
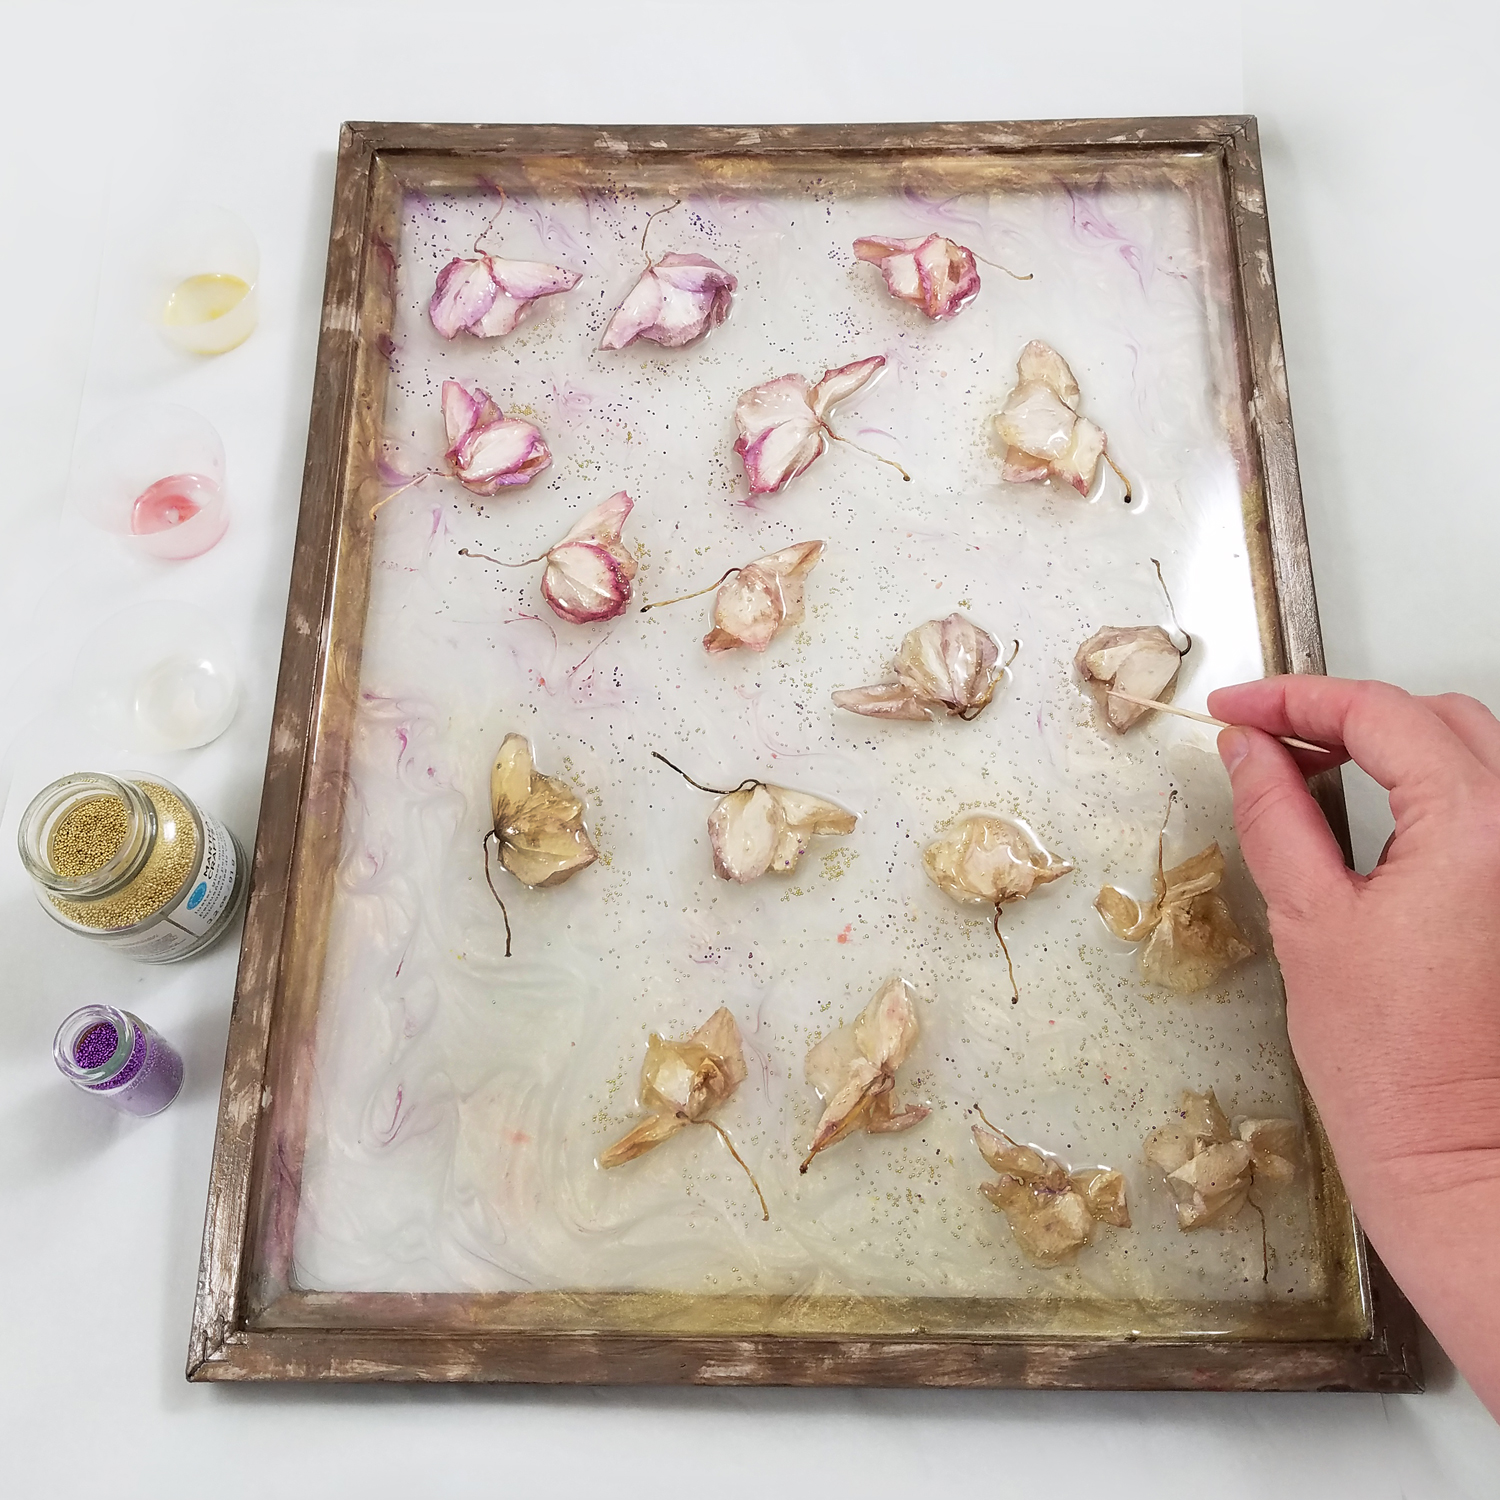
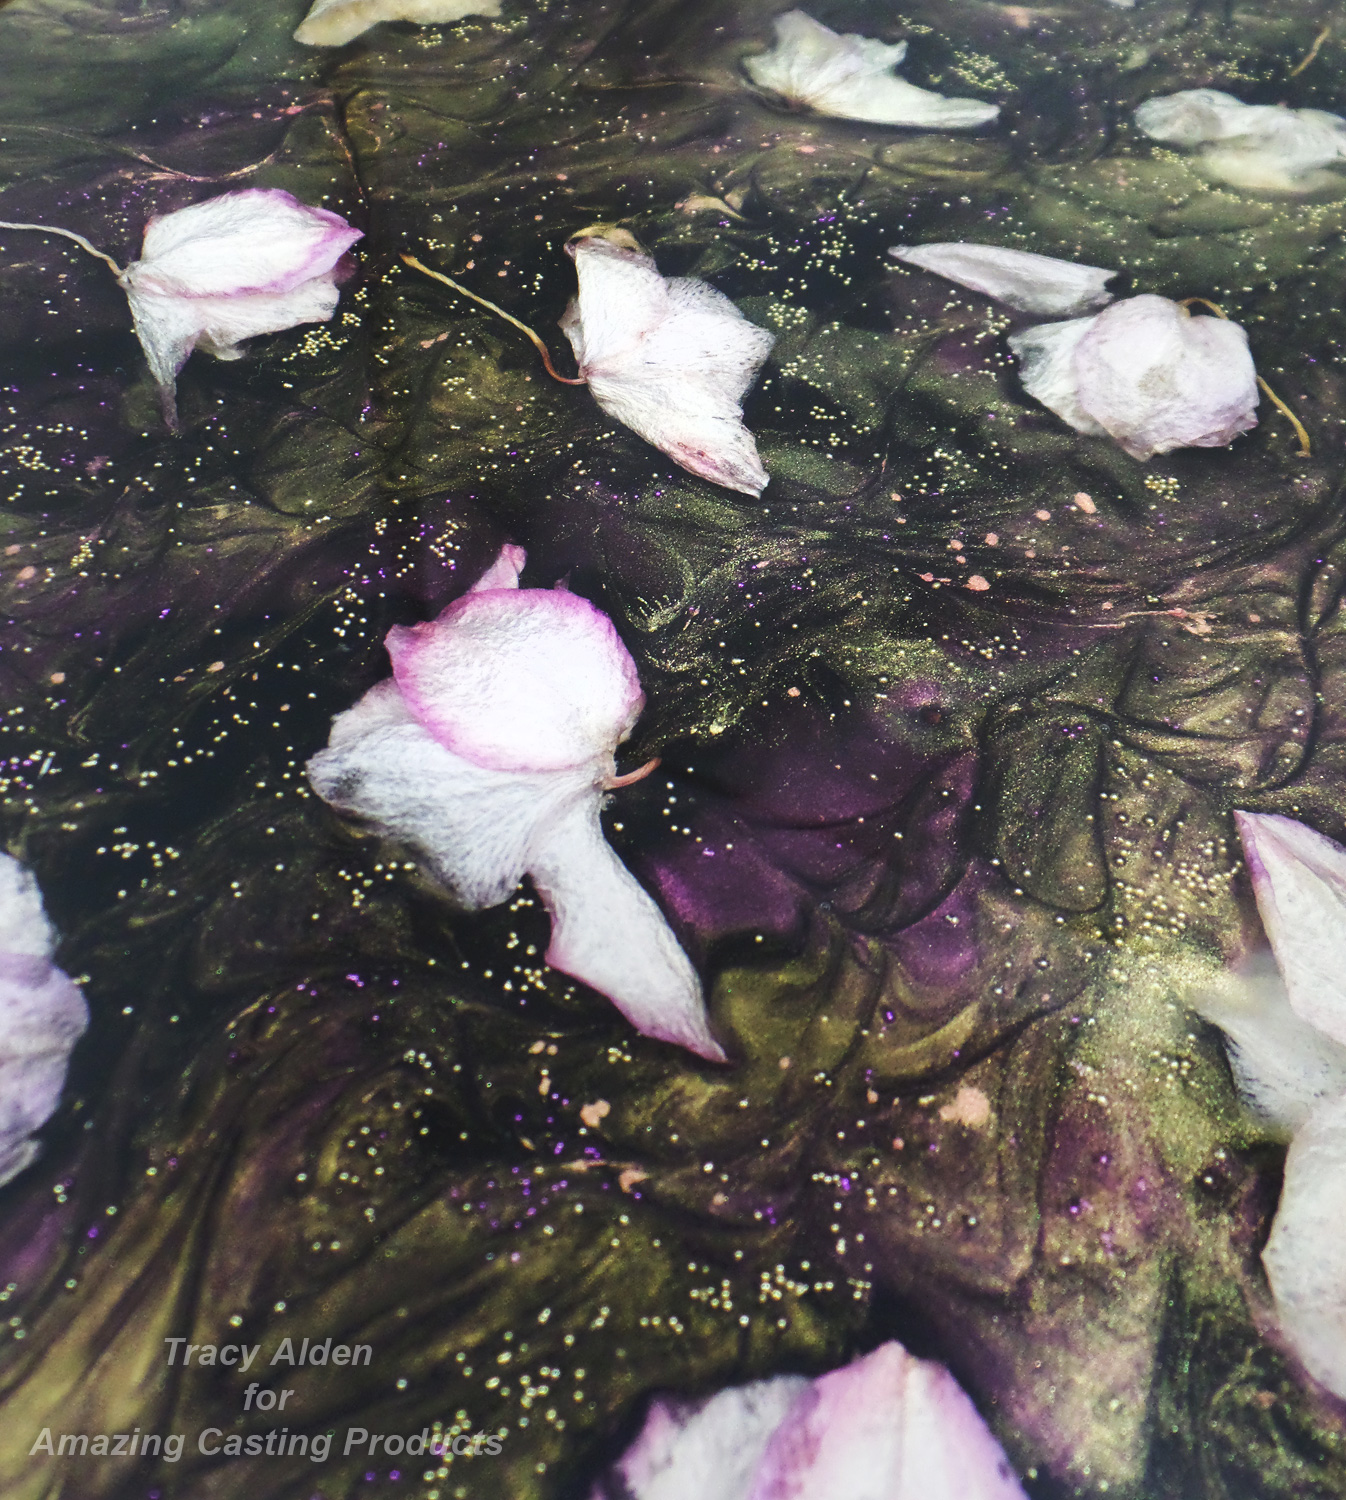
I poured the resin mixed with Alumidust in different spots all over the frame and used a toothpick to drag the colors through each other. This created a lovely ebb and flow of color to the resin, and I honestly lost track of time doing this and found it rather relaxing and meditative in nature. I sprinkled in some Micro Hole-less Glass Beads in Gold and Purple around the blooms in this layer of tinted resin before the resin cured.
I had planned on doing a final cream color tinted layer for the background, but the lovely powder layer got lost when I tried a test sheet of white paper behind it. I needed more of a color contrast, so I thought about a black tinted layer or resin, using a black cloth to mimic the look, allowing the Alumidust tinted resin layer to visually pop more.
*In the future if I want to use a cream or light colored background I just need to make sure I use more Alumidust or a few drops of Alumilite Dyes to increase the color intensity without the need of a contrasting background.
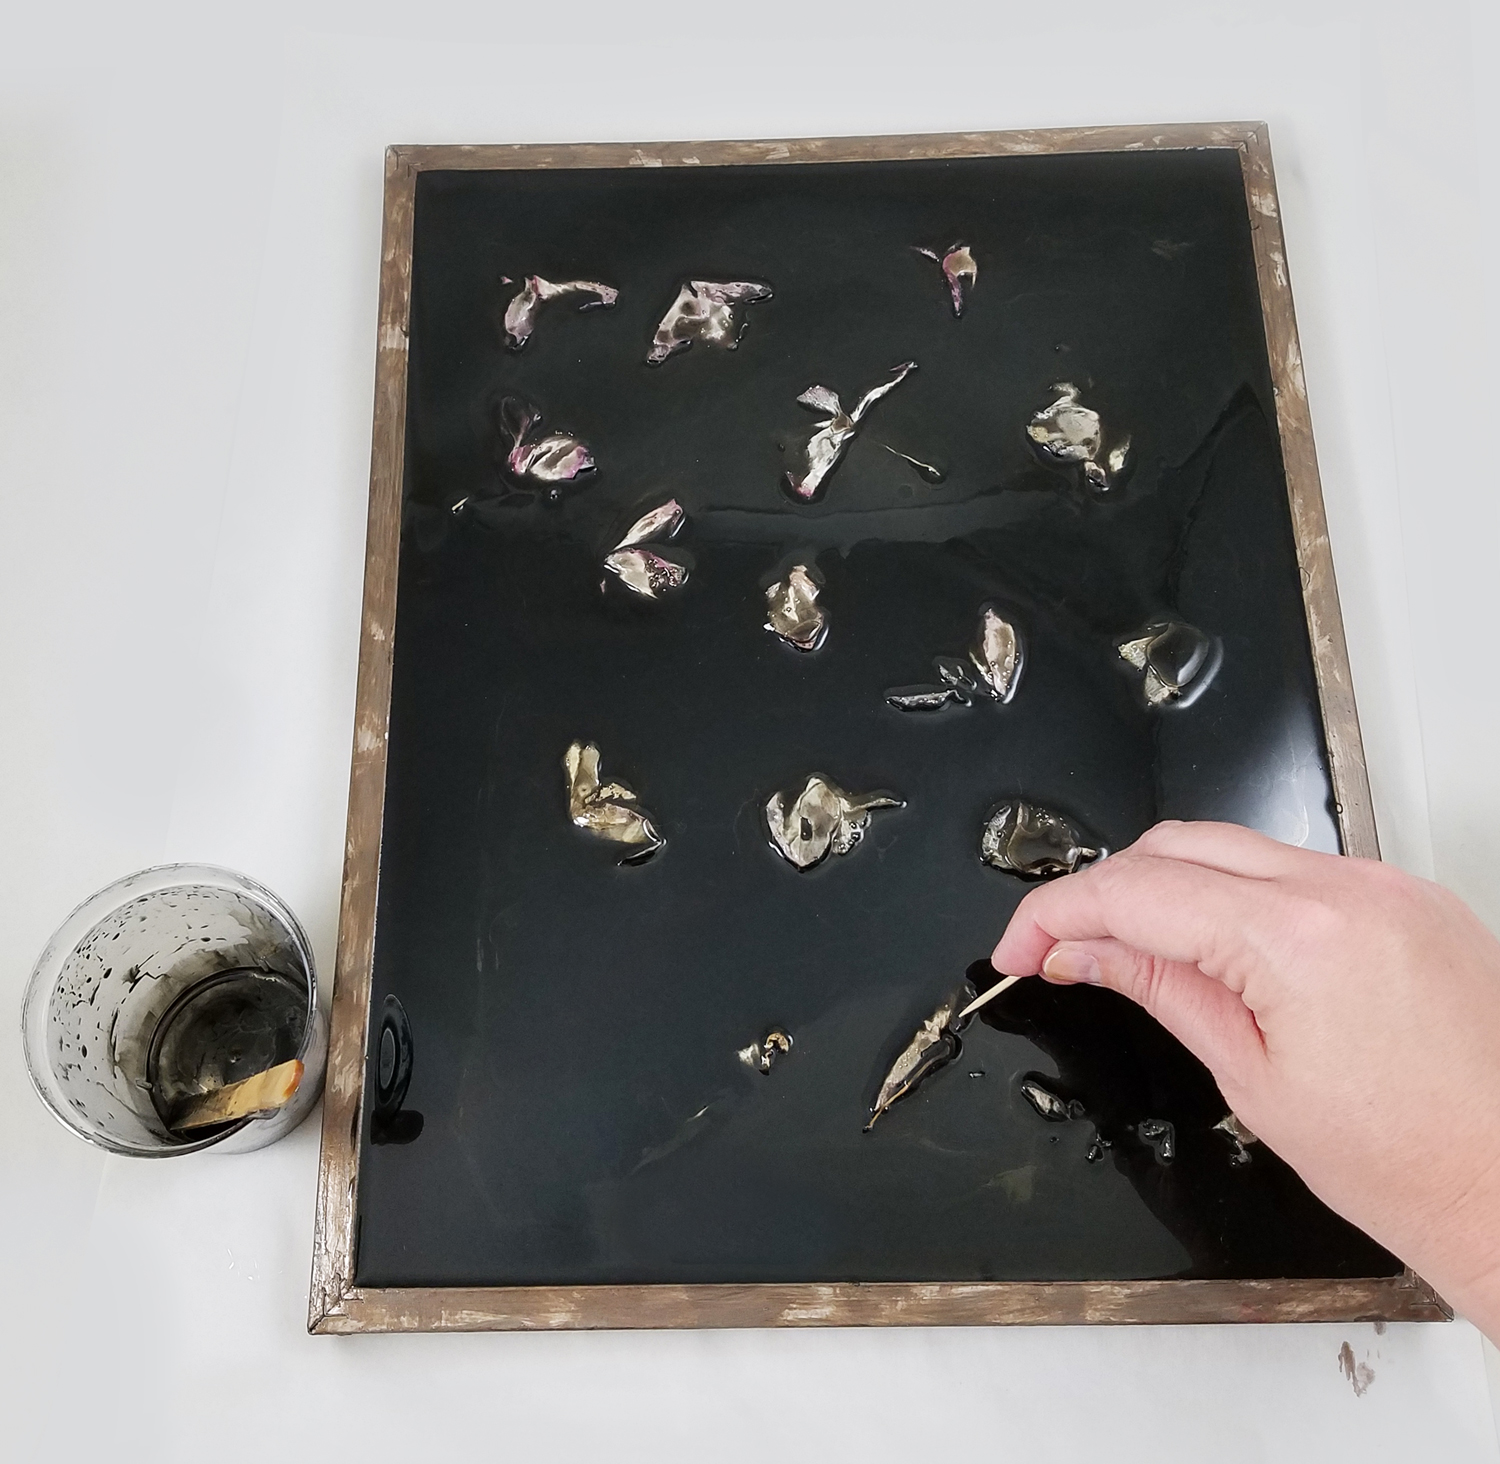
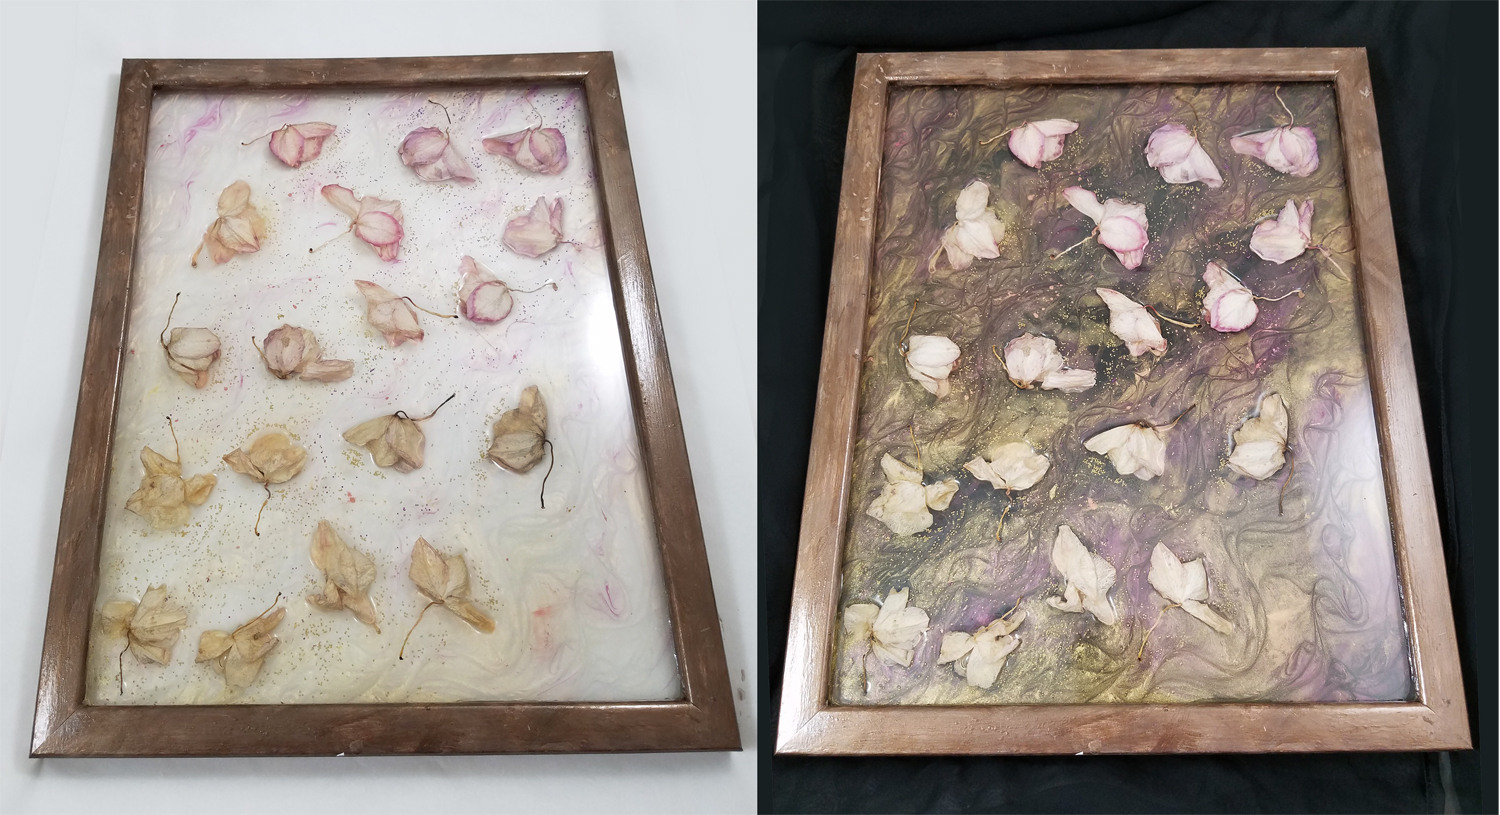
Mixing up a final batch of Amazing Clear Cast Resin I added Black Alumilite Dye Black to the resin, making sure to fully stir in all the dye. I poured the resin over the orchids and previous resin layer, carefully popping bubbles and making sure the tinted resin went into all the nooks and crannies.
*The dried orchids in this photo are slightly raised as they were not dried flat but collected already dried from a live plant. If the look of filter light going through the resin coated flowers is not the desired appearance just used pressed flowers instead.
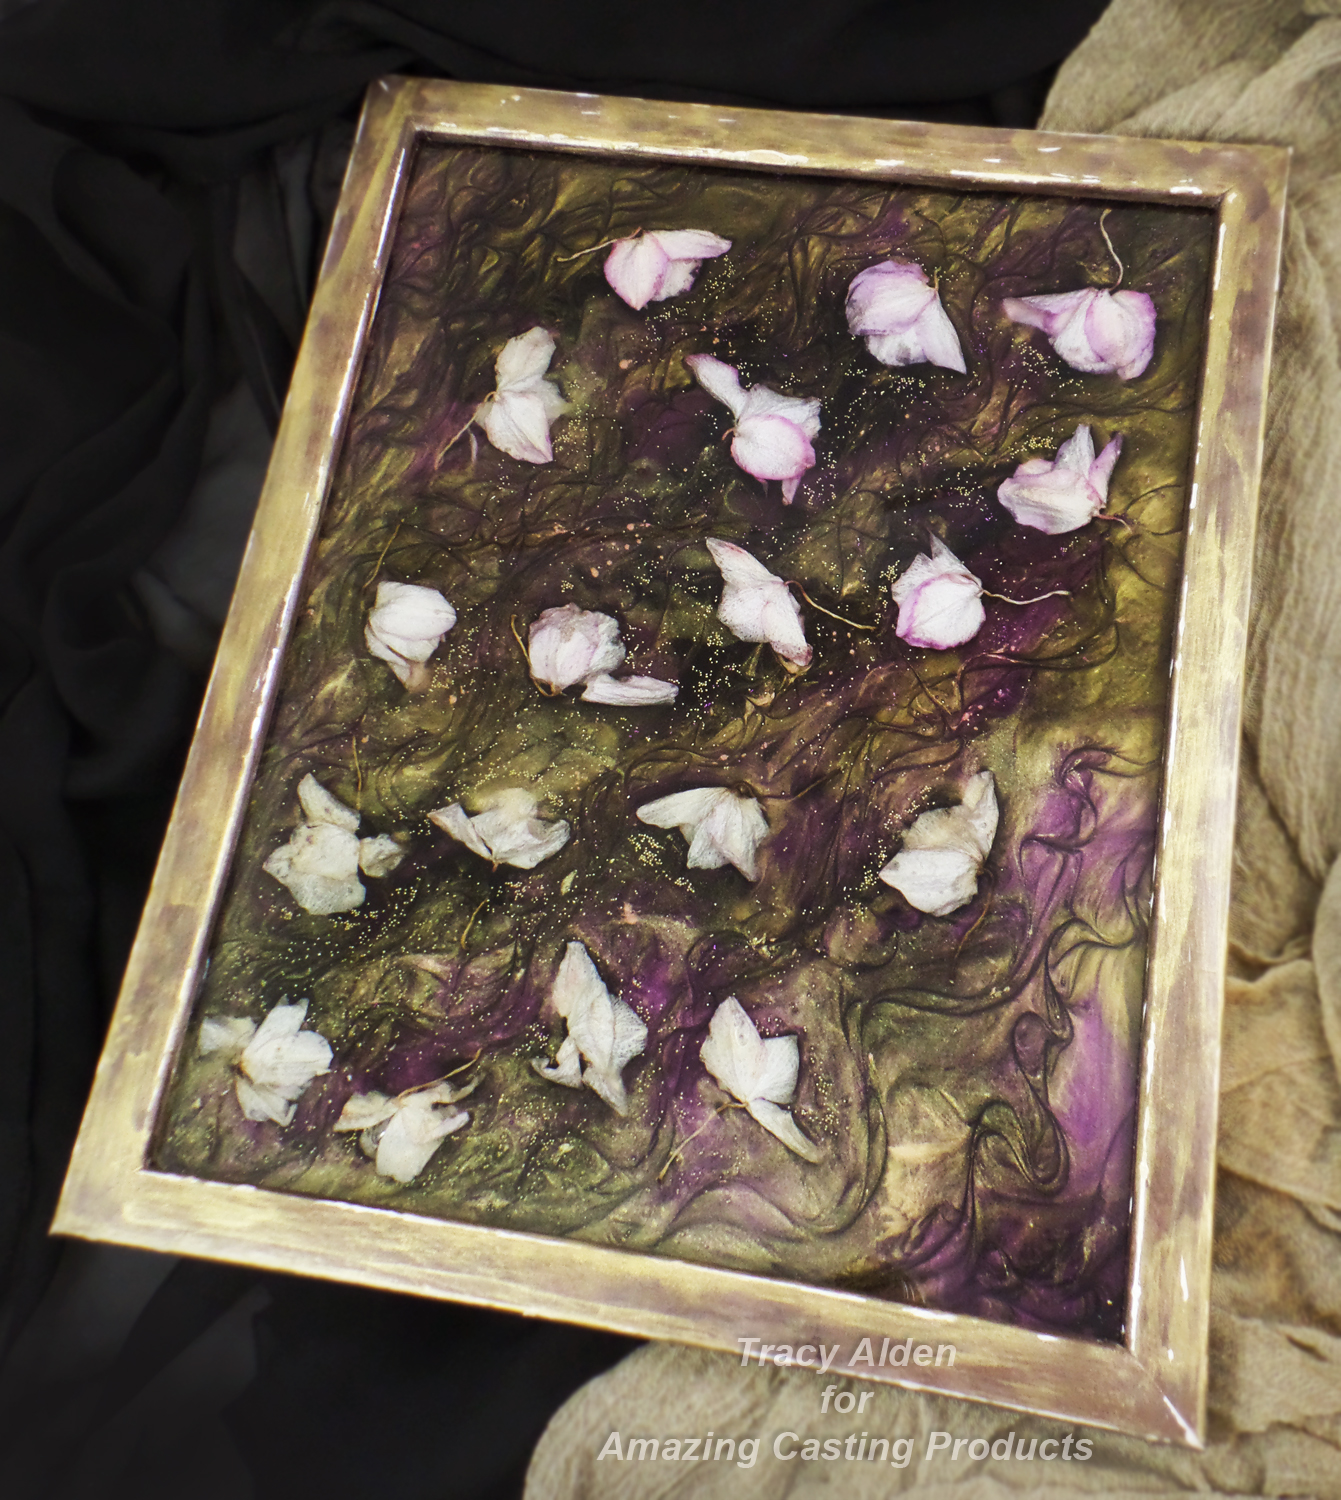
Here it is with the final layer of black tinted resin. The Alumidust not only creates a wonderful metallic shimmer but changes color and tone depending on how the frame is tilted or what type of light source is used!
This test of both dried materials and the ability to quickly change the direction of the project worked out well. The frame looks complicated but it is just four layers of resin poured. No waste of resin just a few popsicle sticks, toothpicks and clean up with baby wipes.