A #Cre8time trip to Ancient Greece with Amazing Casting Products and Stencil Girl Products
Hello! Tracy here with something special this month, a wonderful collaboration between Amazing Casting Products and Stencil Girl Products! Showcasing projects by incorporating Stencil Girl stencils along with Amazing Mold Putty and Amazing Clear Cast.

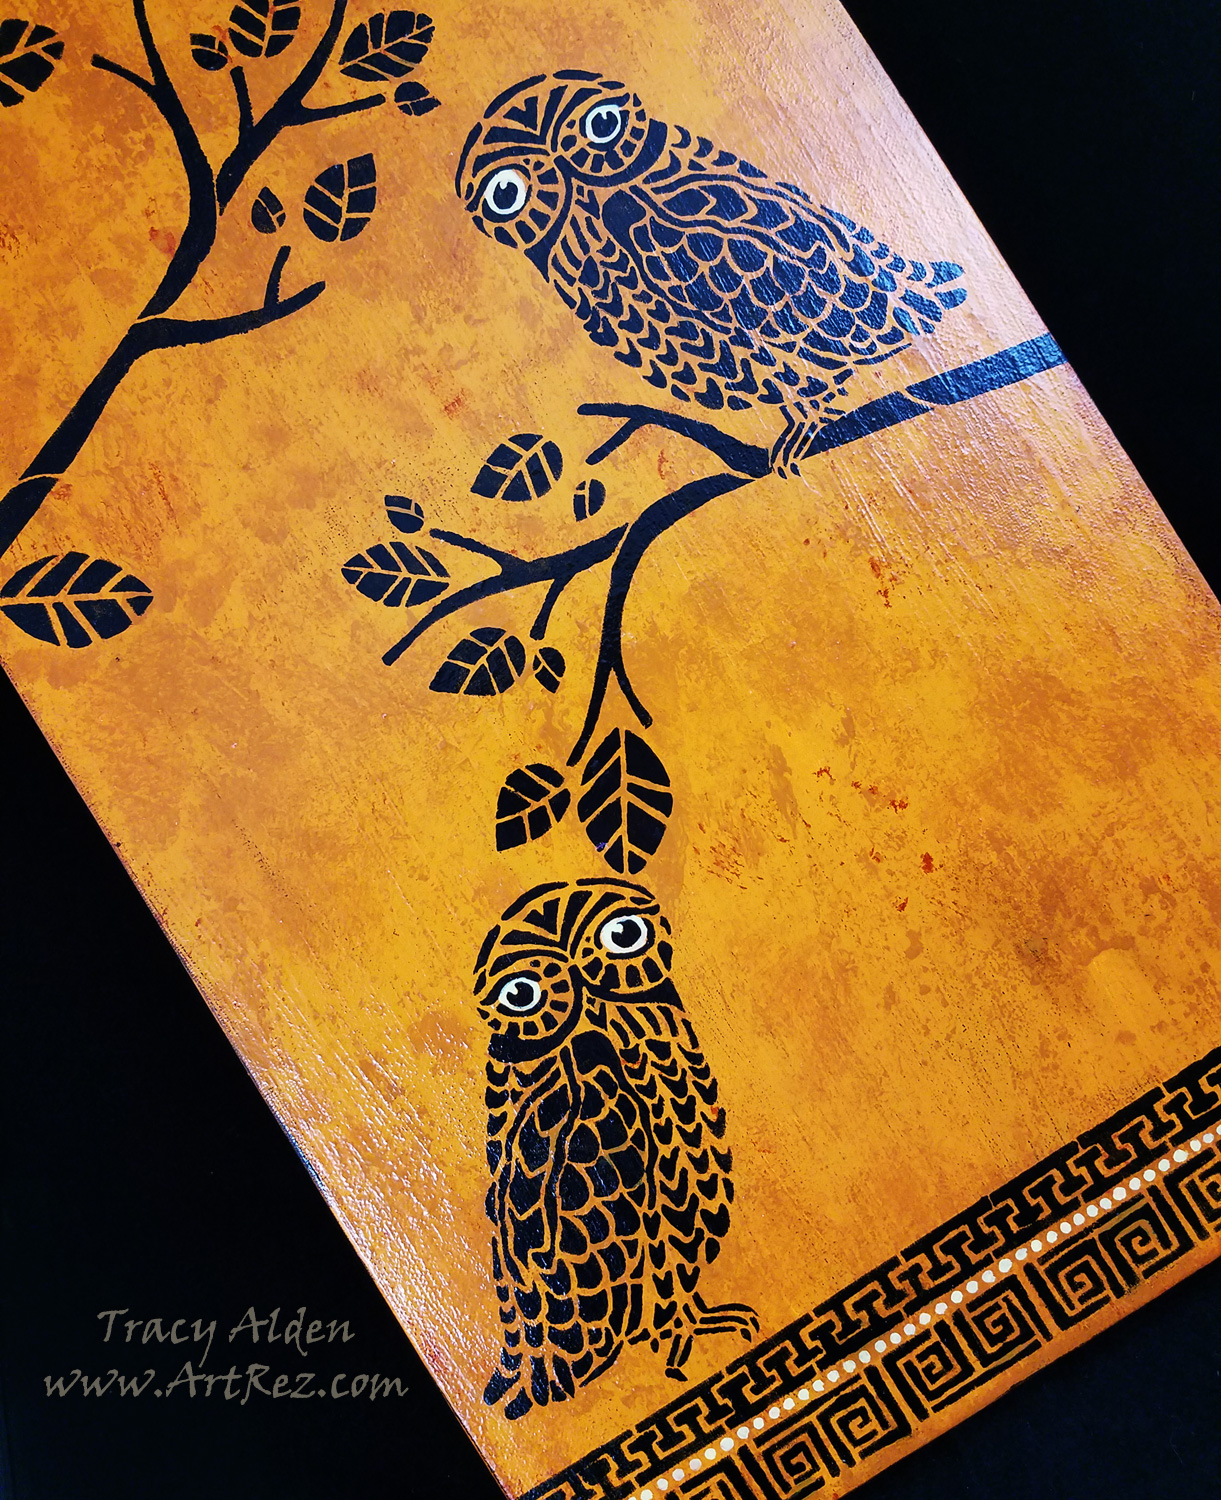
When I was given the chance to look through the Stencil Girl Products online catalog of stencils, there was so many to choose from! After seeing their Three Owls and a Branch stencil I immediately got an idea for a canvas piece. One of the owls in particular reminded me of Athena’s owl from the original Clash of the Titans movie, and once I saw the Stitch a Greek Border stencil I just knew I had to do a Grecian inspired piece!
Supplies:
Amazing Mold Putty
Amazing Clear Cast Resin
Stencil Girl Products Three Owls and a Branch 9″ X 12″ stencil
Stencil Girl Products Stitch a Greek Border 9″ X 12″ stencil
12″ X 24″ Canvas
Painter’s Tape
Paint Brush
Cosmetic Sponges
Acrylic Paint (Black, Yellow, Pale Yellow, Brown and Orange)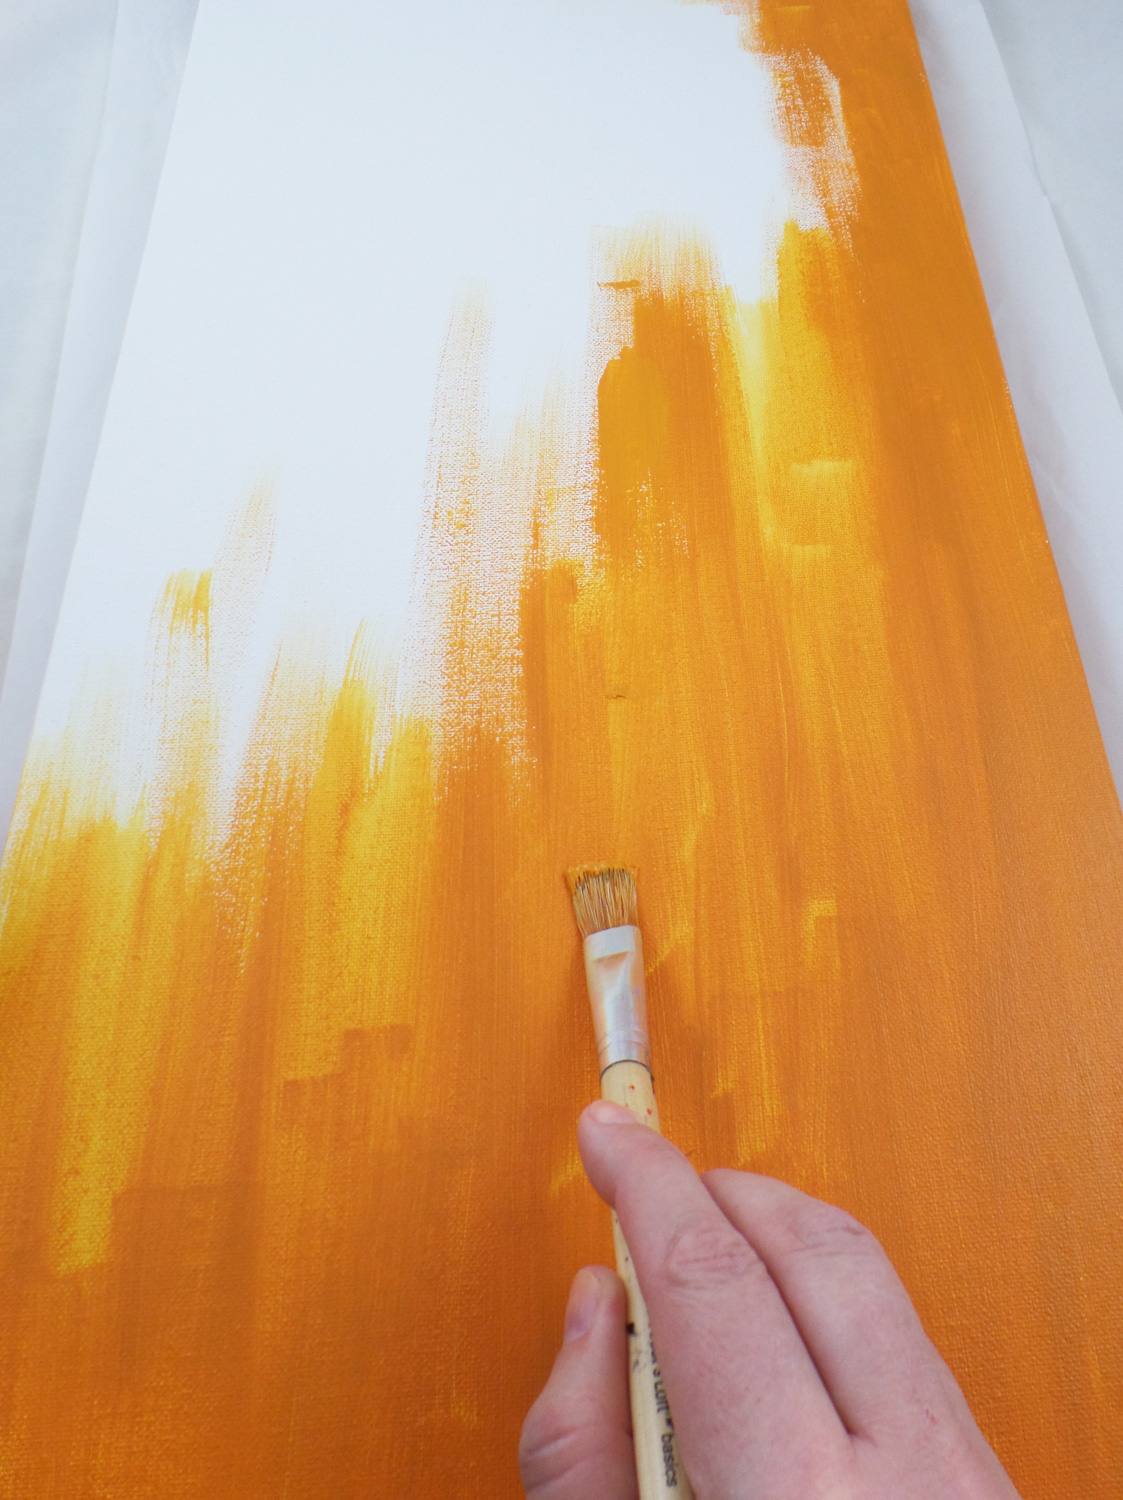
I mixed together the Yellow, Brown and Orange acrylic paints and applied it to the surface of the canvas. I did about two coats of paint to get a mostly even color tone.
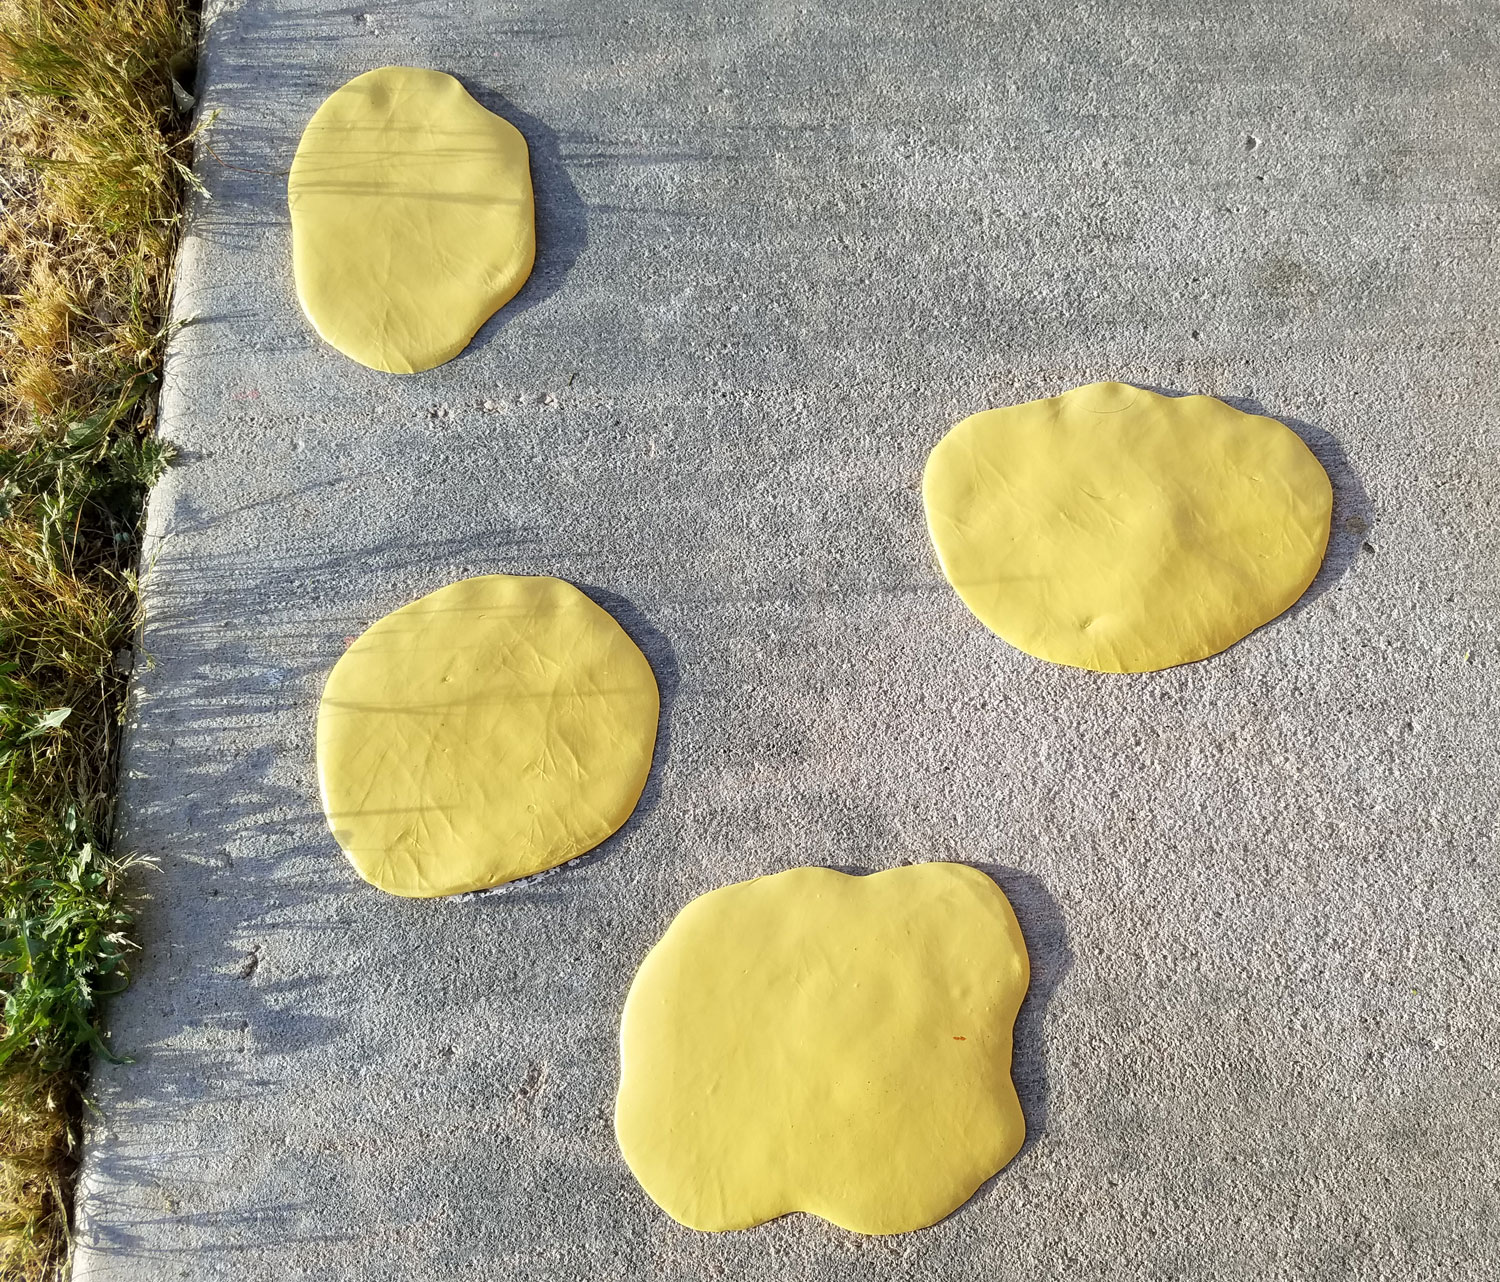
While the paint on the canvas was drying I scrubbed and cleaned a rough patch of sidewalk in my front yard. Once the cement was dry I mixed up some Amazing Mold Putty{CLICK HERE to view mixing/preparation}, and pressed the putty into the most textured spots of the sidewalk. I let the mold putty cure and carefully peeled the putty off the sidewalk.
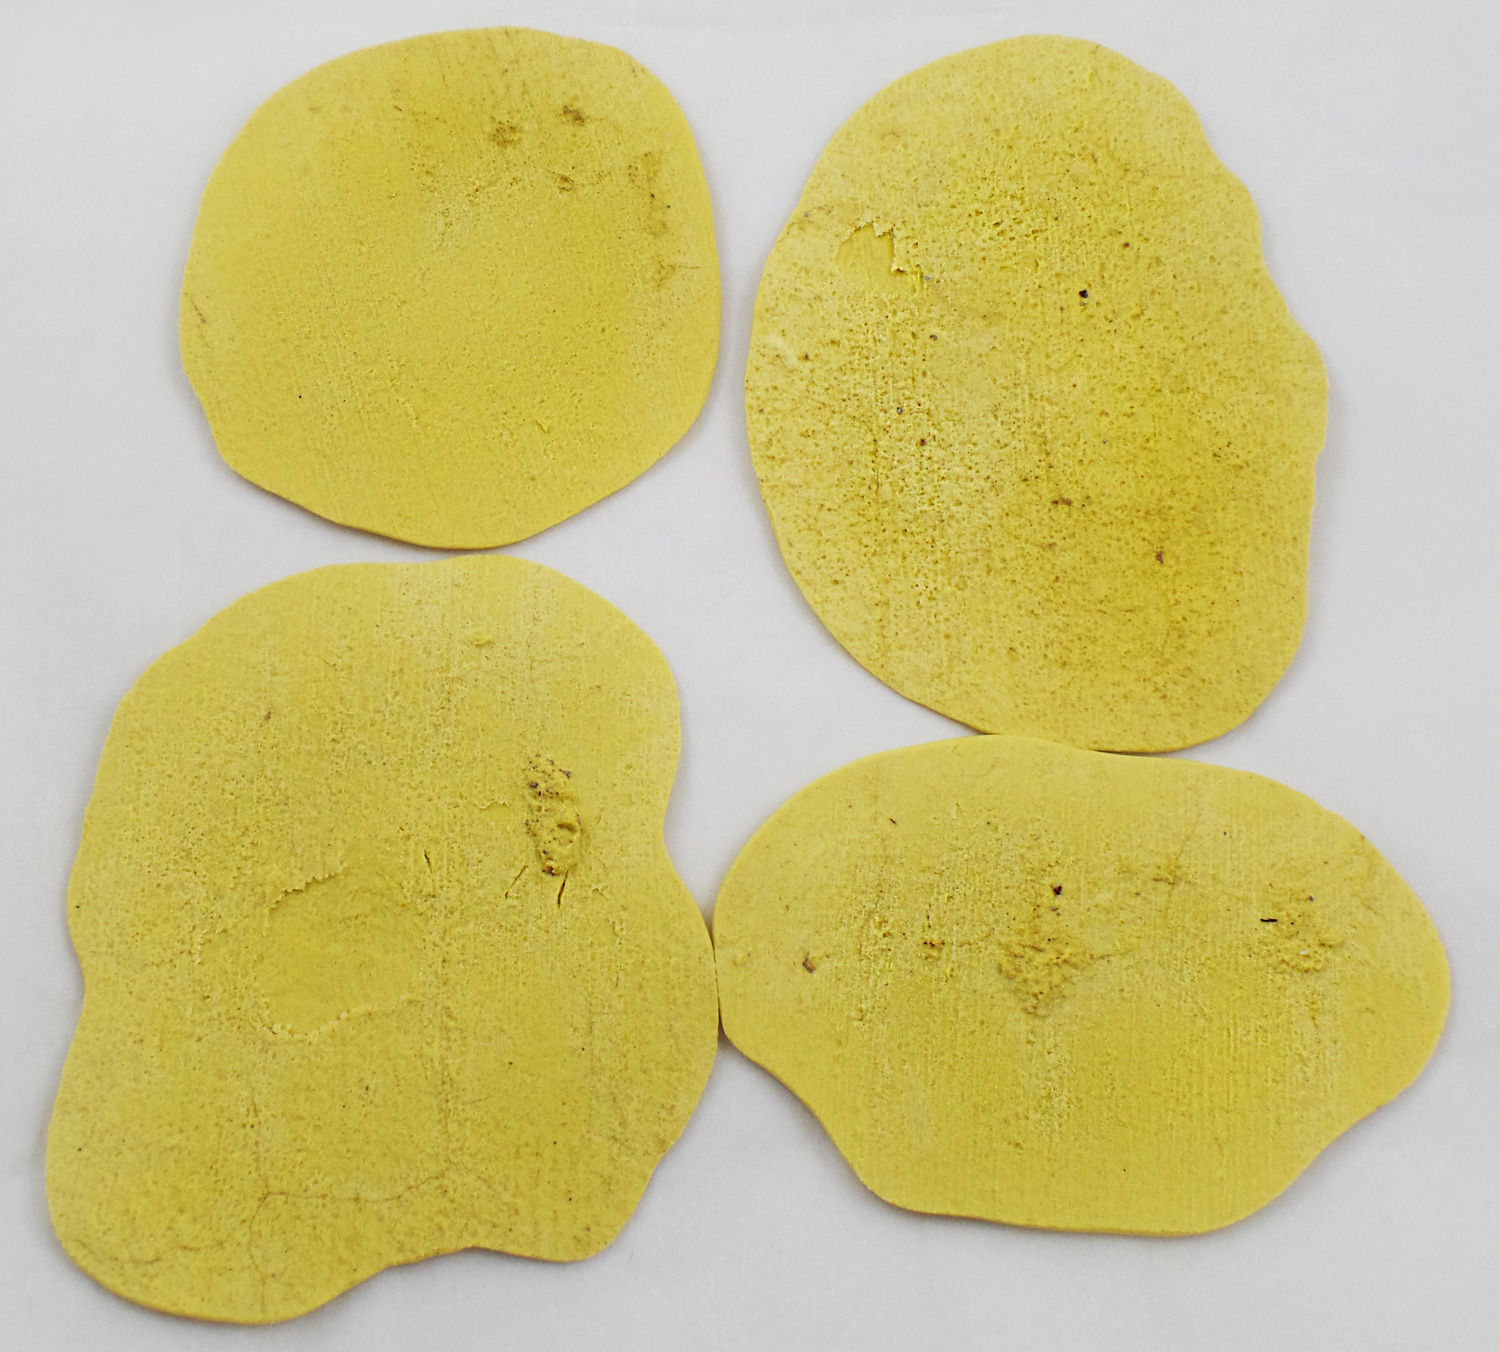
Once removed from the sidewalk I now had wonderful one of kind texture plates to use as stamps!
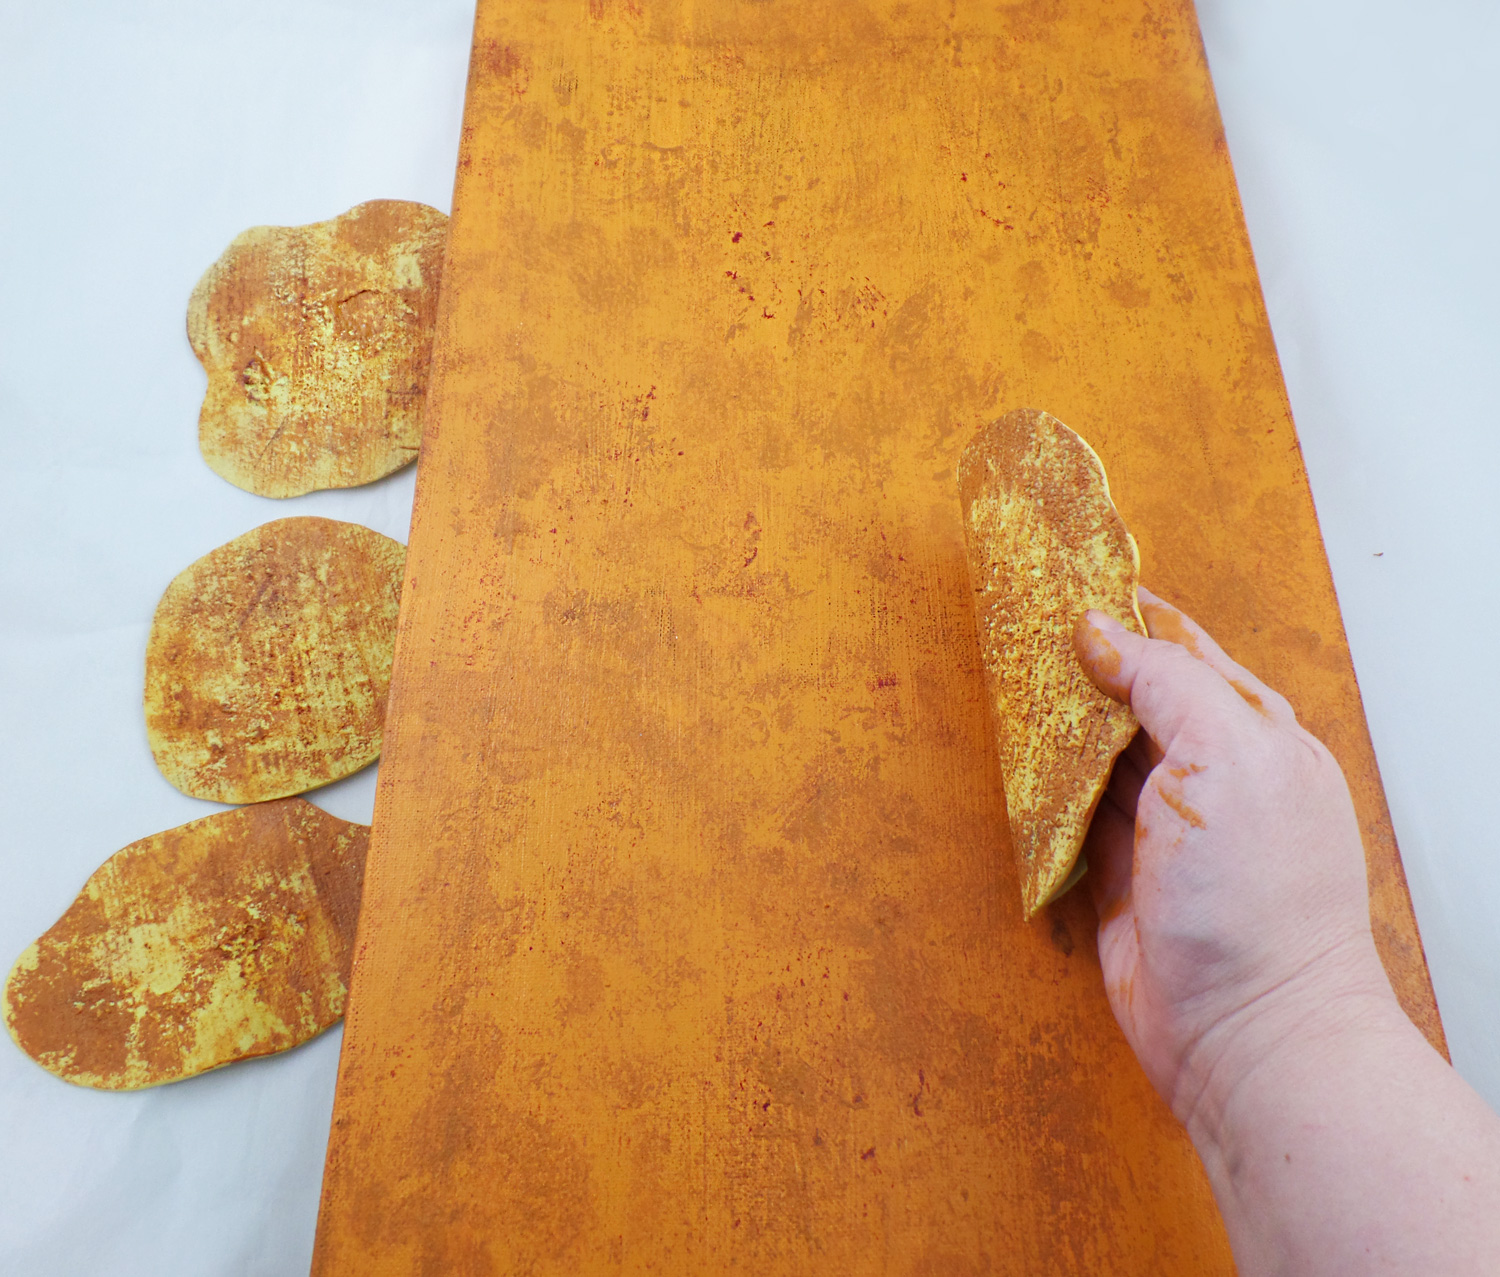
To each Amazing Mold Putty stamp I applied a light coat of acrylic pant and stamped it all over the surface of the canvas. There was no rhyme or reason to the placement, just anywhere I wanted to create a controlled splatter of color. By using several colors of paint the surface started to mimic aged Grecian frescoes and pottery. I let the paint dry fully.
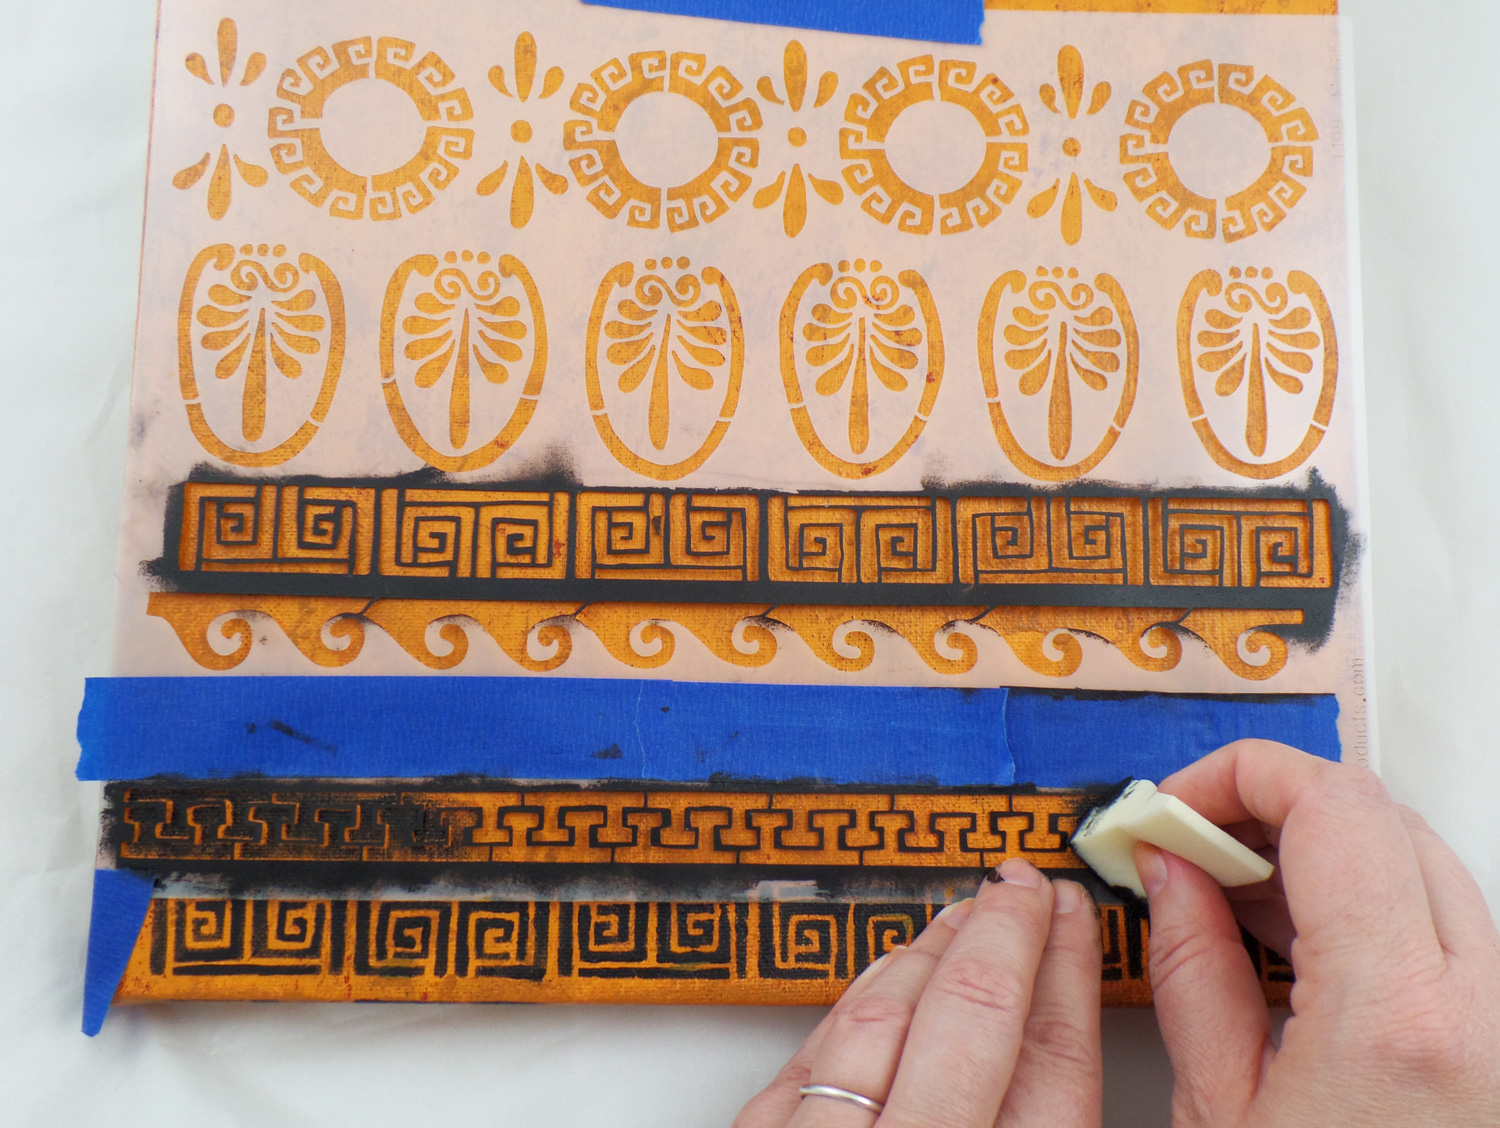
Using painters tape I taped in place the Stencil Girl Products Stitch a Greek Border on the bottom of the canvas and picked two different trim patterns to stencil. By using painter’s tape, it will hold the stencil in place but not damage the painted surface (nor the stencil), allowing for easy repositioning. I then poured a small amount of Black acrylic paint on a palette and dabbed a cosmetic sponge lightly into the paint. I carefully applied the paint while holding the stencil in place to prevent any slight slippage of the stencil. If an area needed a second coat of paint it was easy to go back and reapply paint without any worries of paint overloading. I repeated this for the top of the canvas as well.
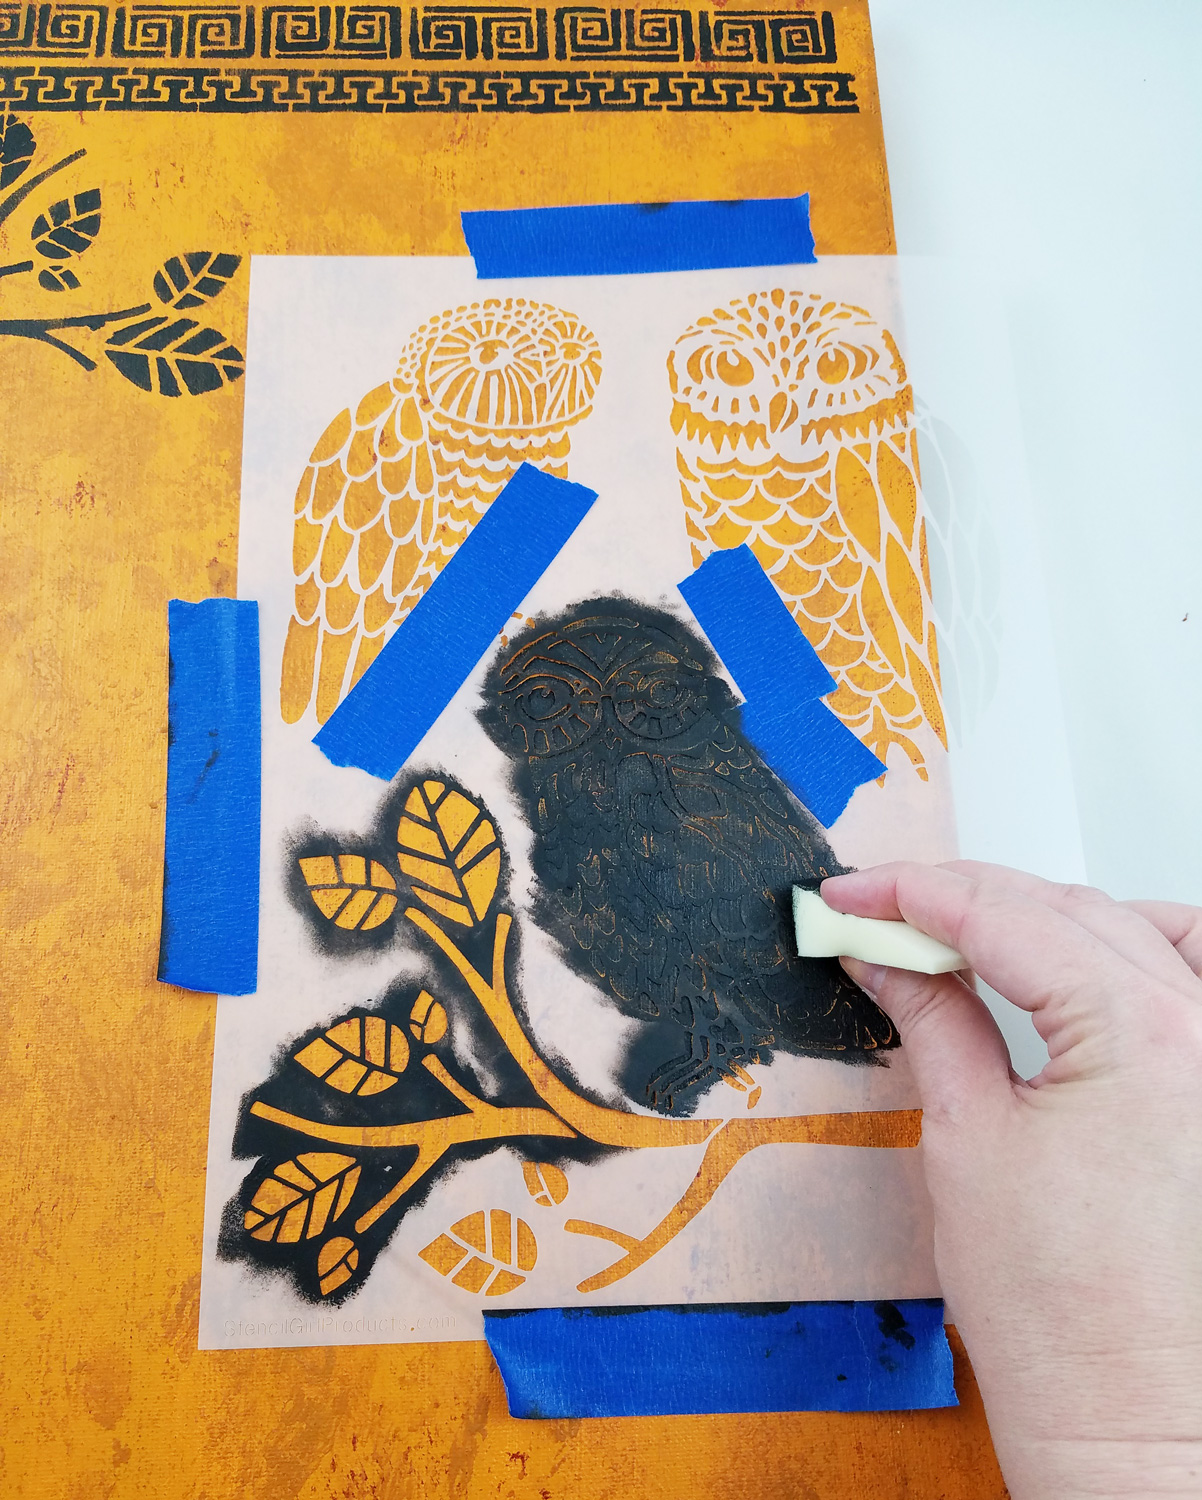
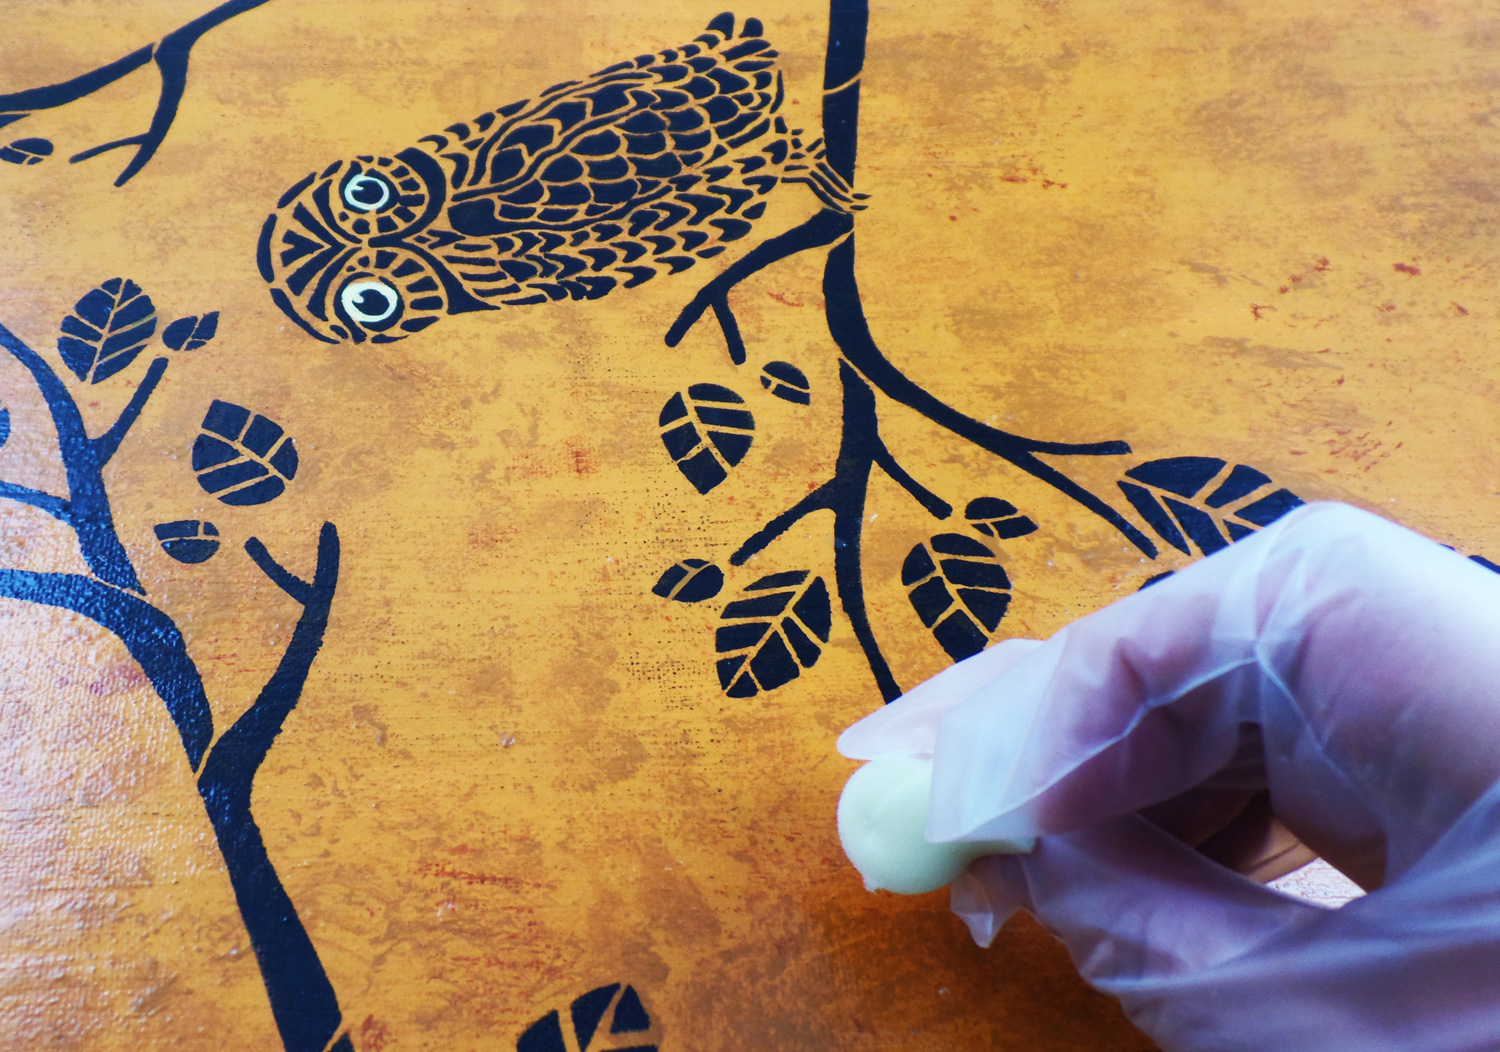
The Stencil Girl Products Three Owls and a Branch stencil allowed for a lot of artistic freedom by simply blocking off sections I did not want paint to go through with painter’s tape. By flipping over the stencil or moving it around at different angles I was able to create many tree branches with ease.
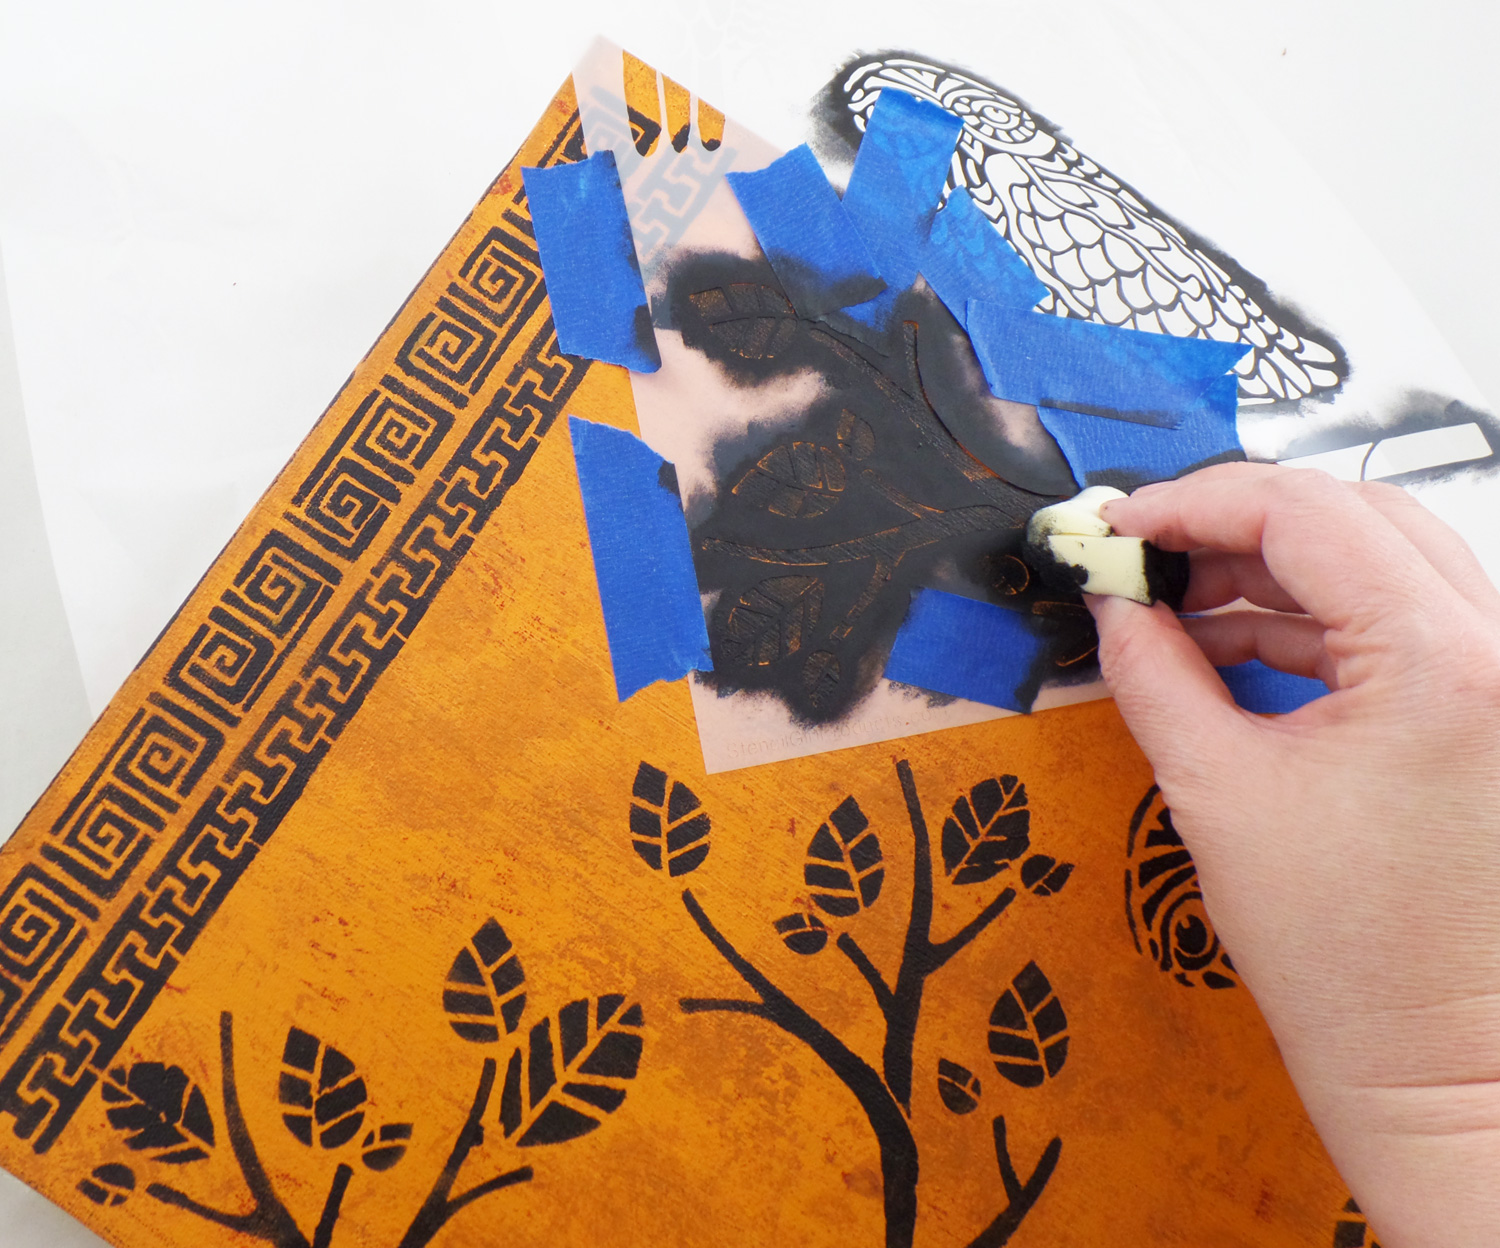
With a few branches I even taped off some of the leaves to create the look of tree just starting to sprout leaves in Spring. Once I was done stenciling it was easy to clean the stencils by placing them in a small tub with soap water and gently rubbing the paint off.

Once all of the paint was dry I went back to fix any stenciling mistakes I had made with a small paint brush. I then added some Light Yellow acrylic paint to the eyes of the owls and trim to further replicate the look of ancient Greek art.
I mixed up some Amazing Clear Cast Resin, let it sit for 10 minutes, and applied a thin layer to the front of the canvas with a cosmetic sponge. I applied the resin slowly, a downward motion, top to bottom of the canvas. I didn’t mind if I had little bumps and canvas texture showing through, as the resin was acting as a color intensifier and a thin protective coating. I let the resin fully cure for 24 hours before handling.
*If I wanted a more of a glassy smooth surface I would apply a second or even third layer of resin without a cosmetic sponge.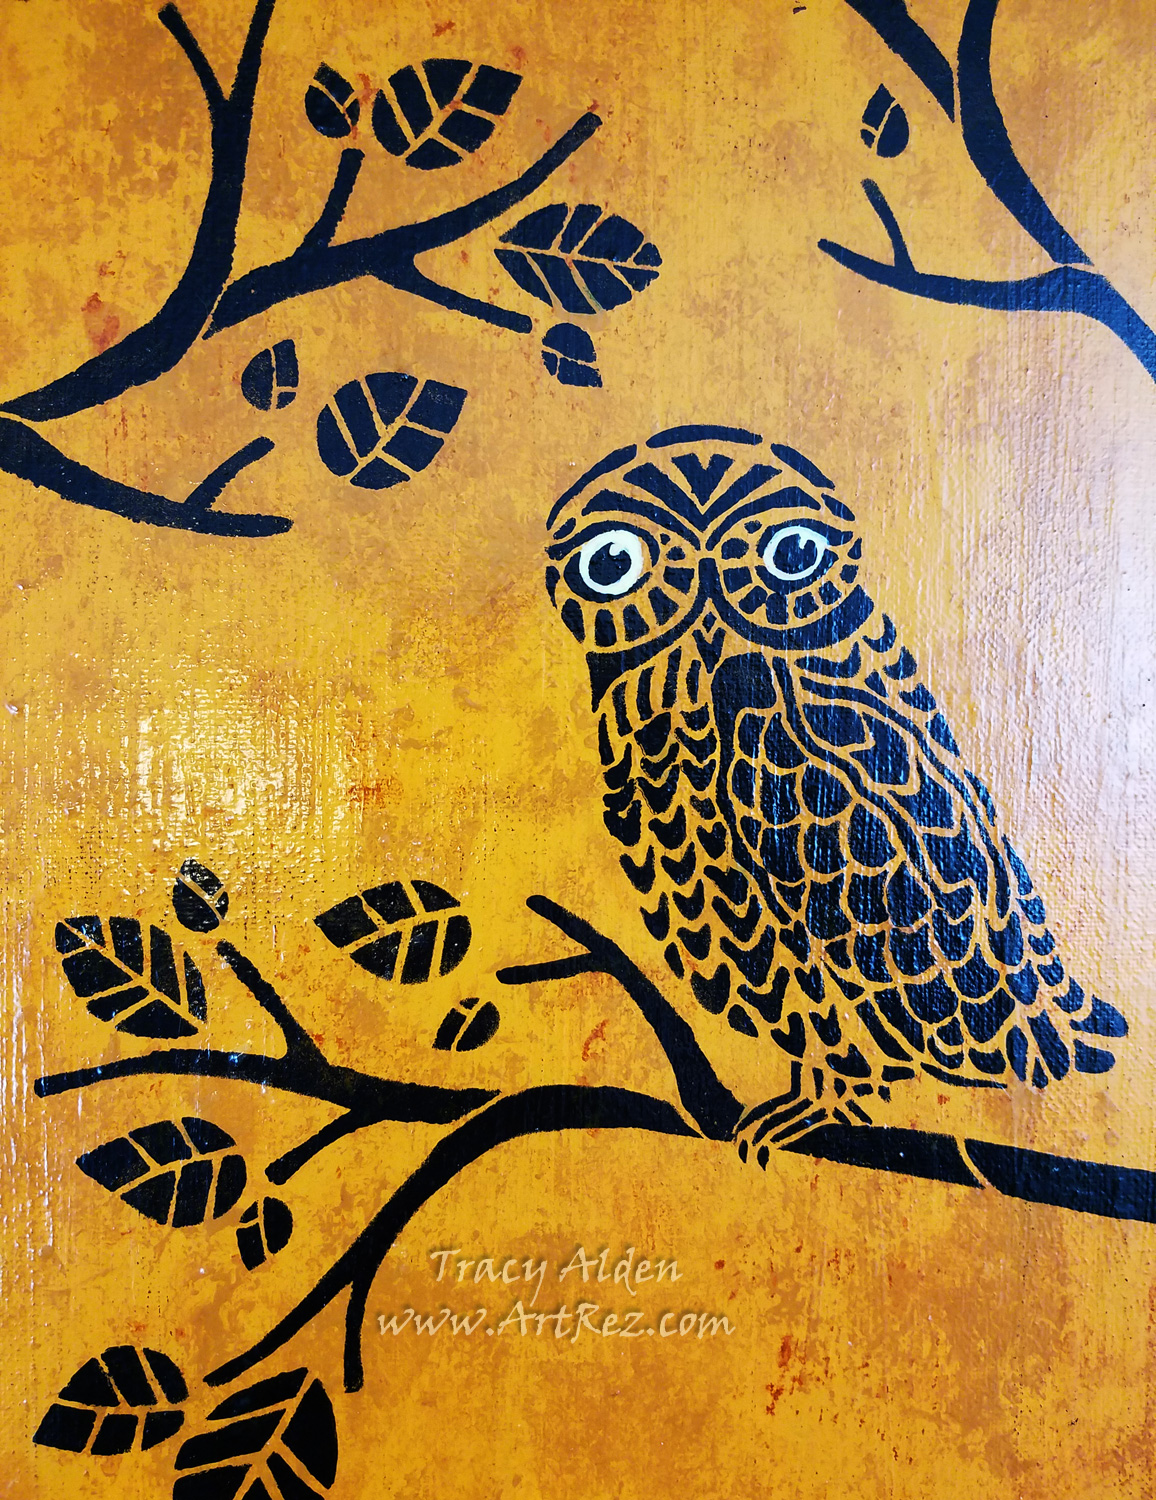
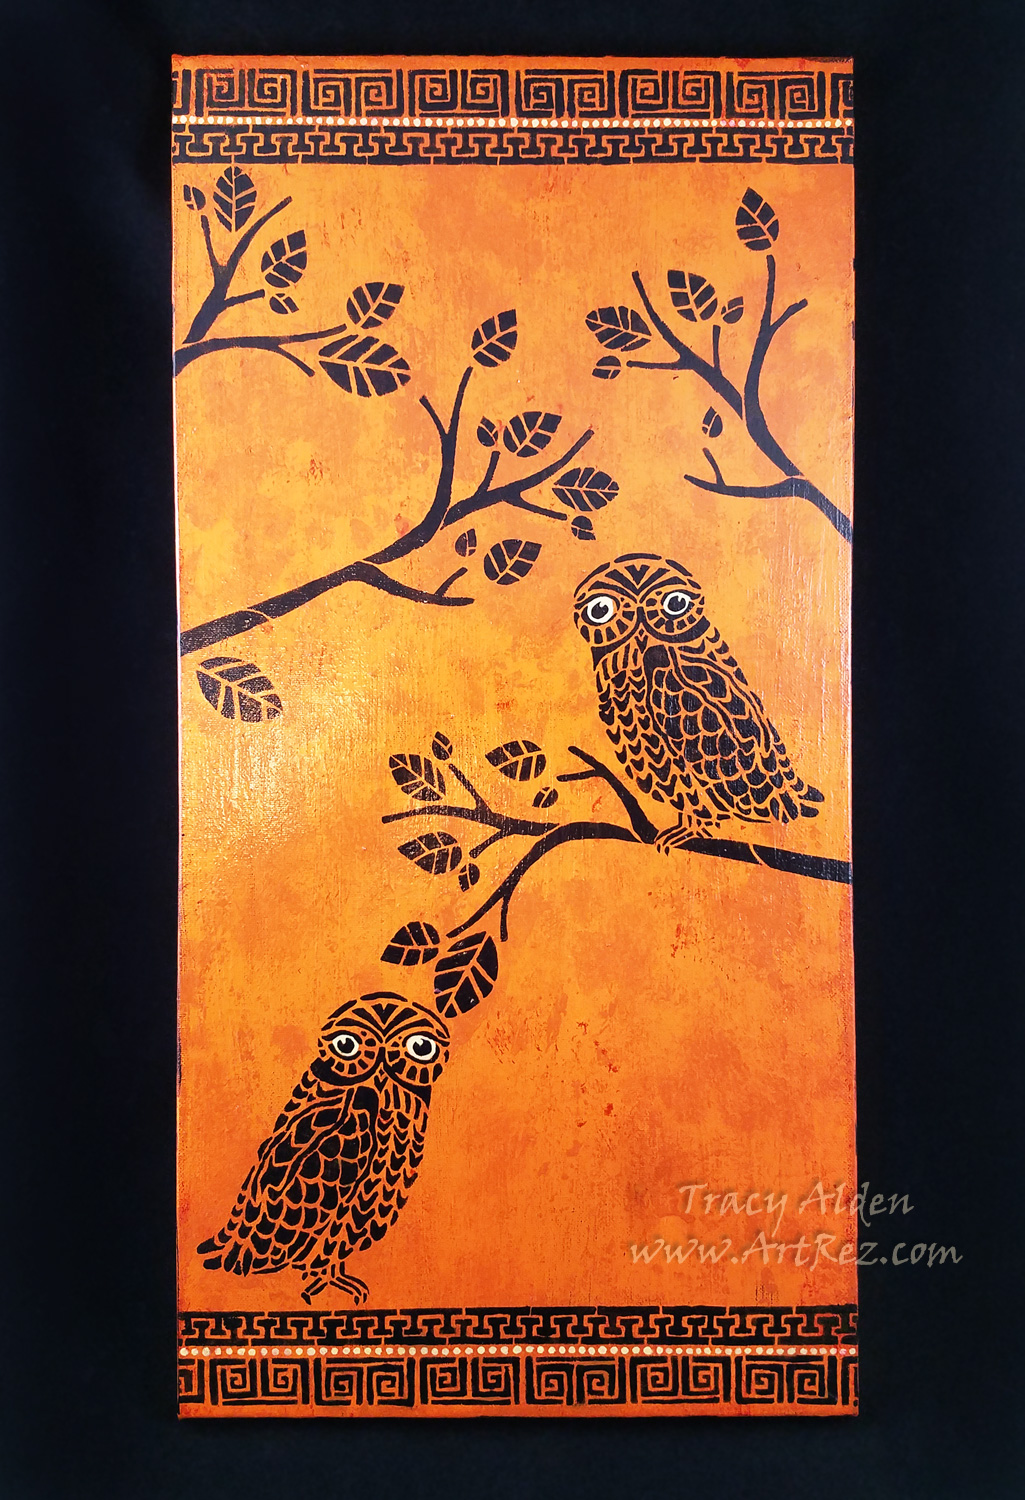
Now completed, Athena’s ever watchful owls seem to be right off an ancient fresco!
Until Next Time, Safe Travels!
#Cre8time Jewelry Creations Inspired by Art History

Hello! With Spring in full swing I have been cleaning the plethora of crafting supplies I seem to always have. While I destash I can’t help but notice I seem to add to the collection without noticing! So this time I set myself the goal of using my more coveted supplies to create jewelry on a more regular basis. Today I wanted to show with you some of those jewelry creations inspired by Art History.
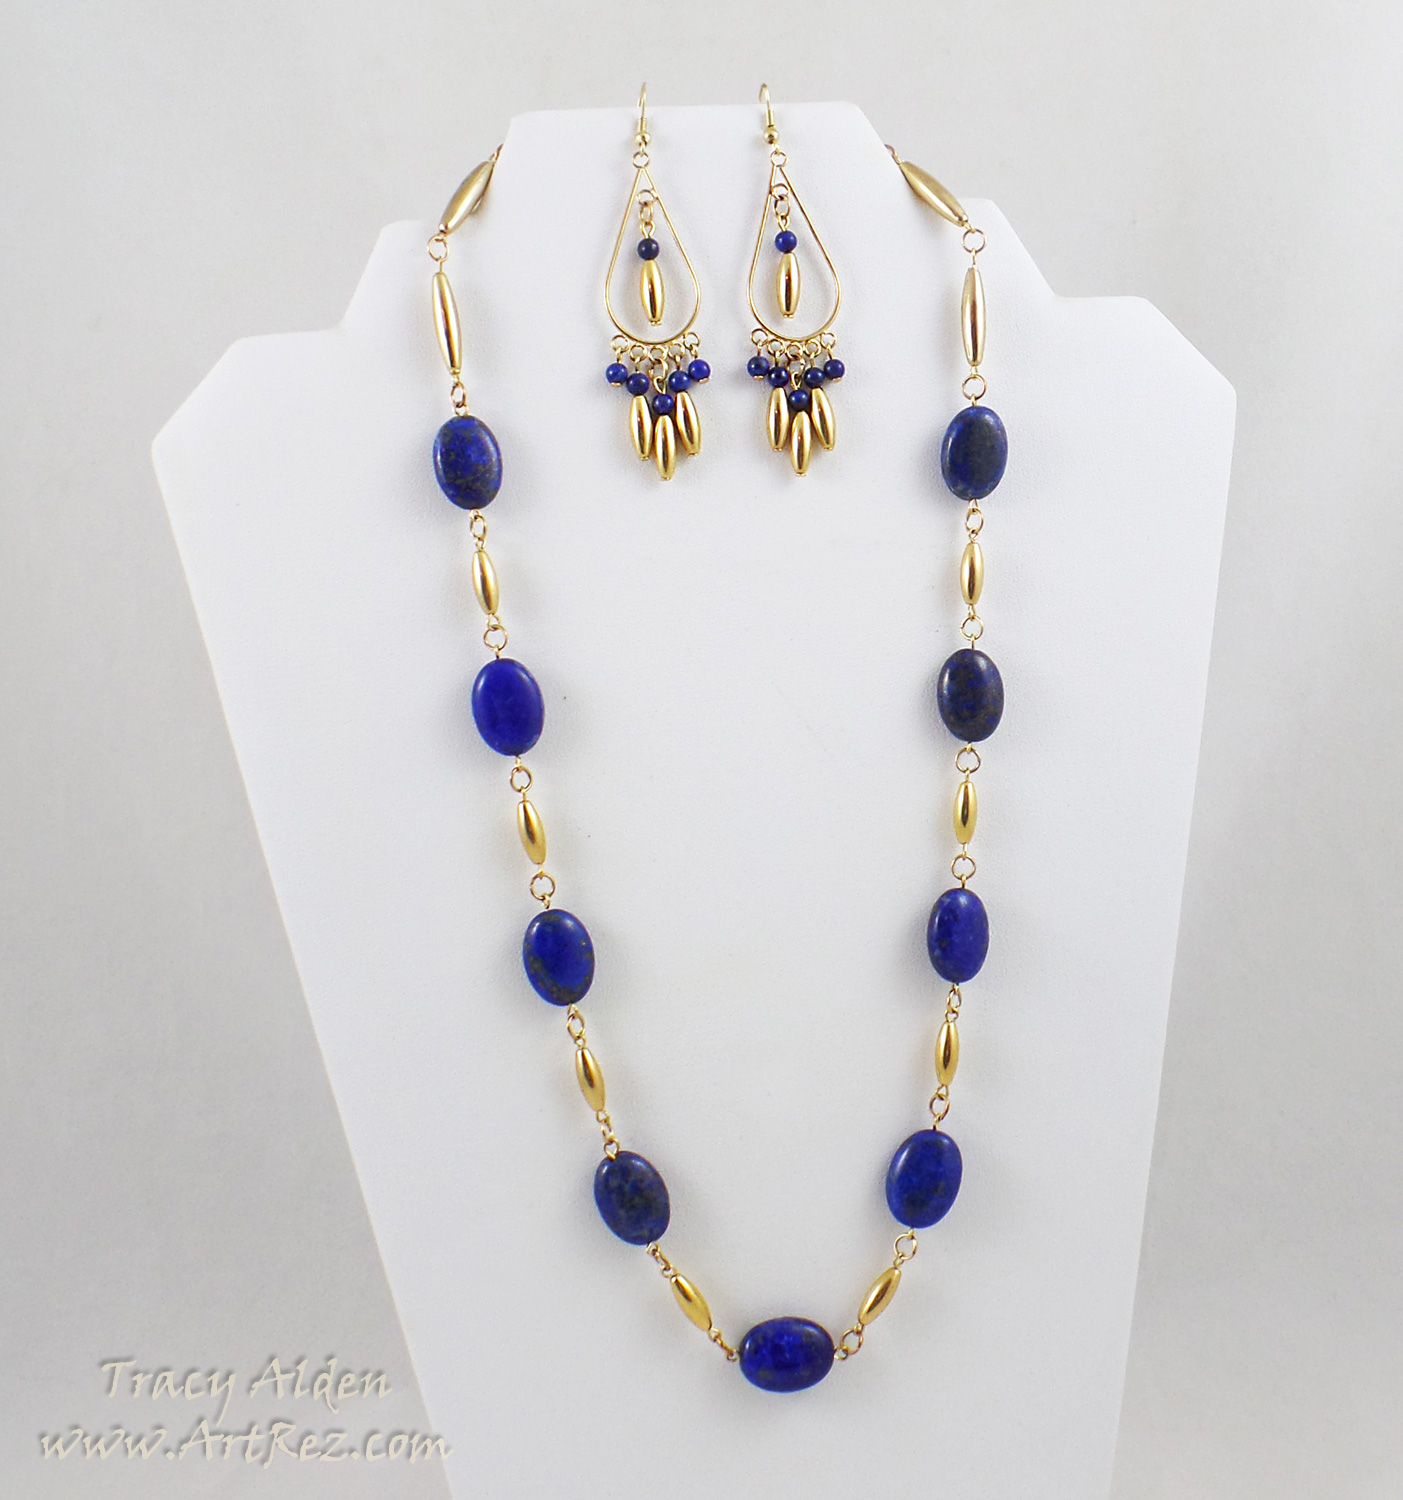
“Imhotep’s Gift”, vintage gold plated beads, Lapis Lazuli beads and vintage gold plated findings.
I have a serious love of Lapis Lazuli; the tiny highlights of naturally occurring Iron Pyrite always gives it a wonderful sparkle. Taking my inspiration from ancient Egypt, a matching set of chandler earrings and necklace was born.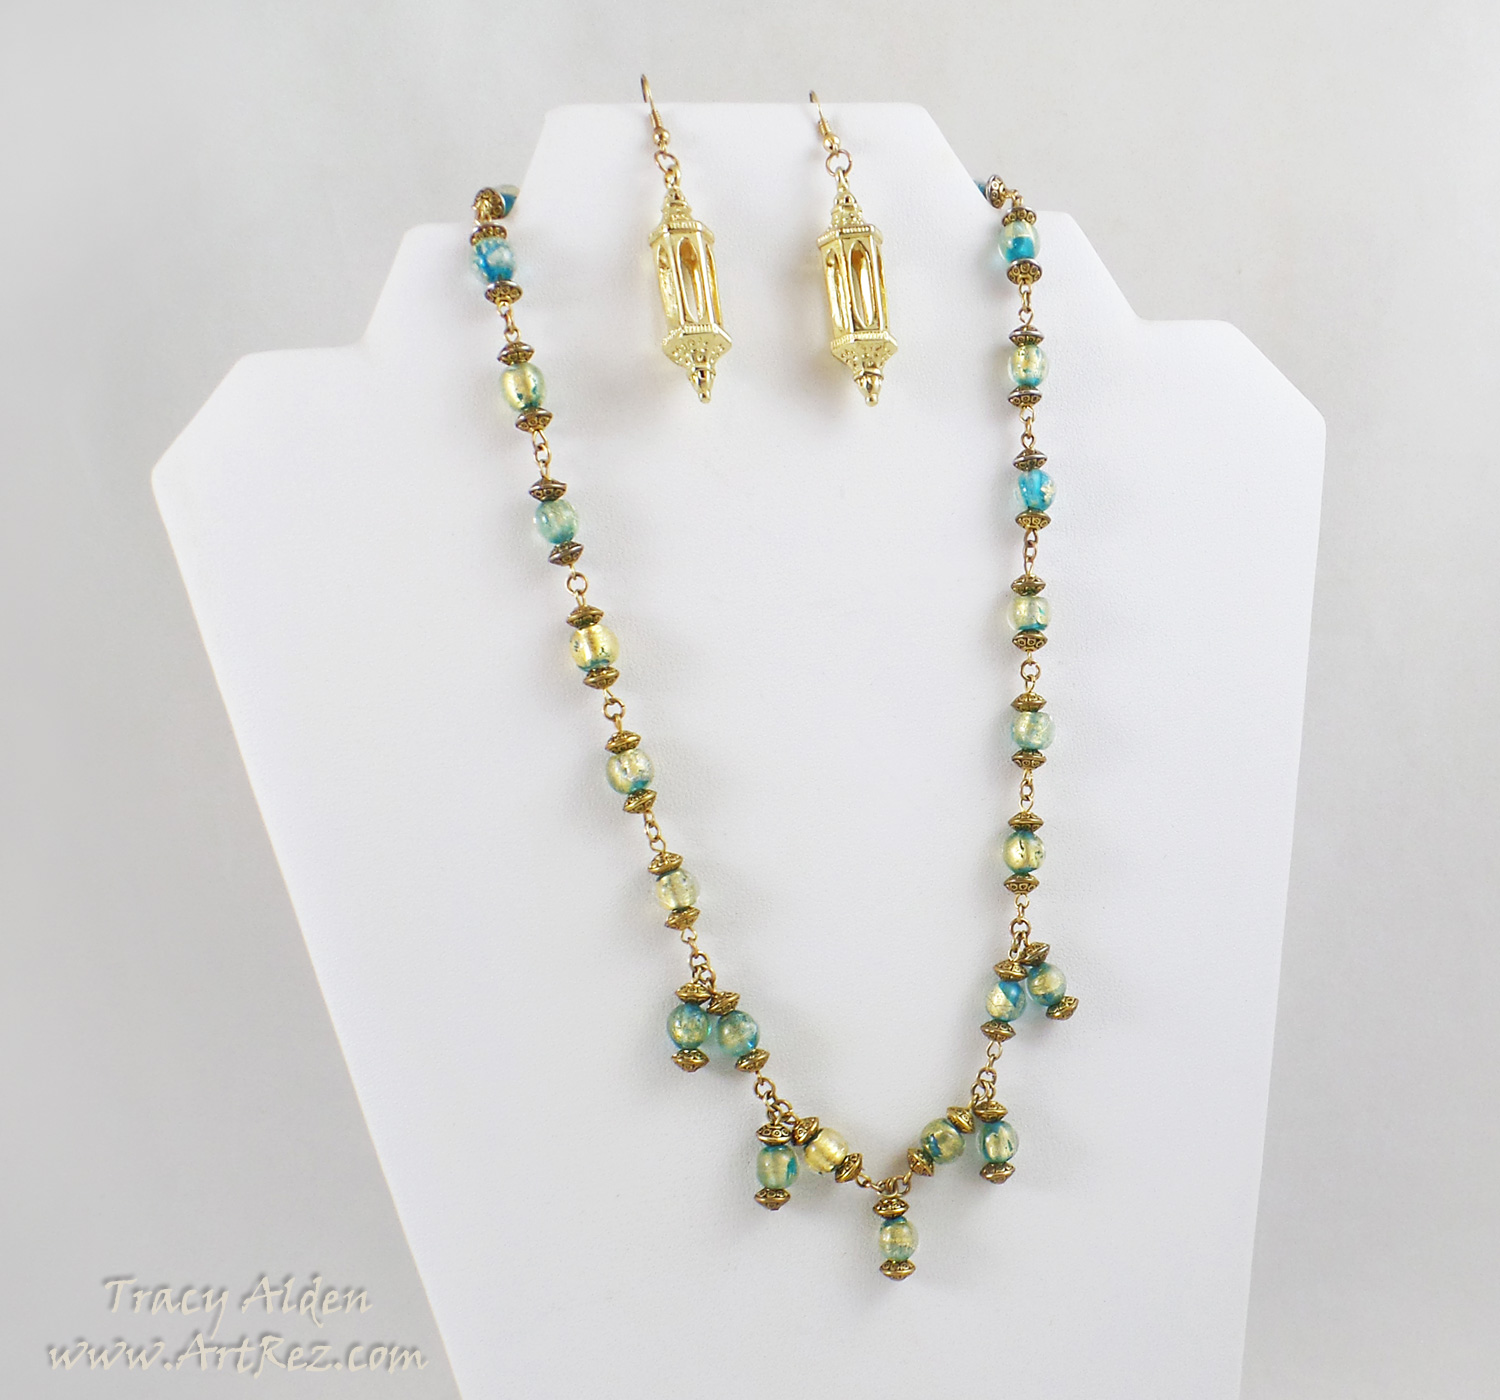
“Roman villa”, gold foil and turquoise colored lamp-worked beads, Bead Gallery® gold rondelle beads, vintage gold plated findings and Blue Moon Beads® gold lantern focals from JoAnns.
The gold foil lamp-worked beads immediately reminded me of how ancient Roman glass looks when unearthed at archaeology digs. Using surviving Roman necklaces as a guide I used a link and drop design to create this necklace. I felt using the same beads would look a bit much for earrings so I went with lantern focal drops instead.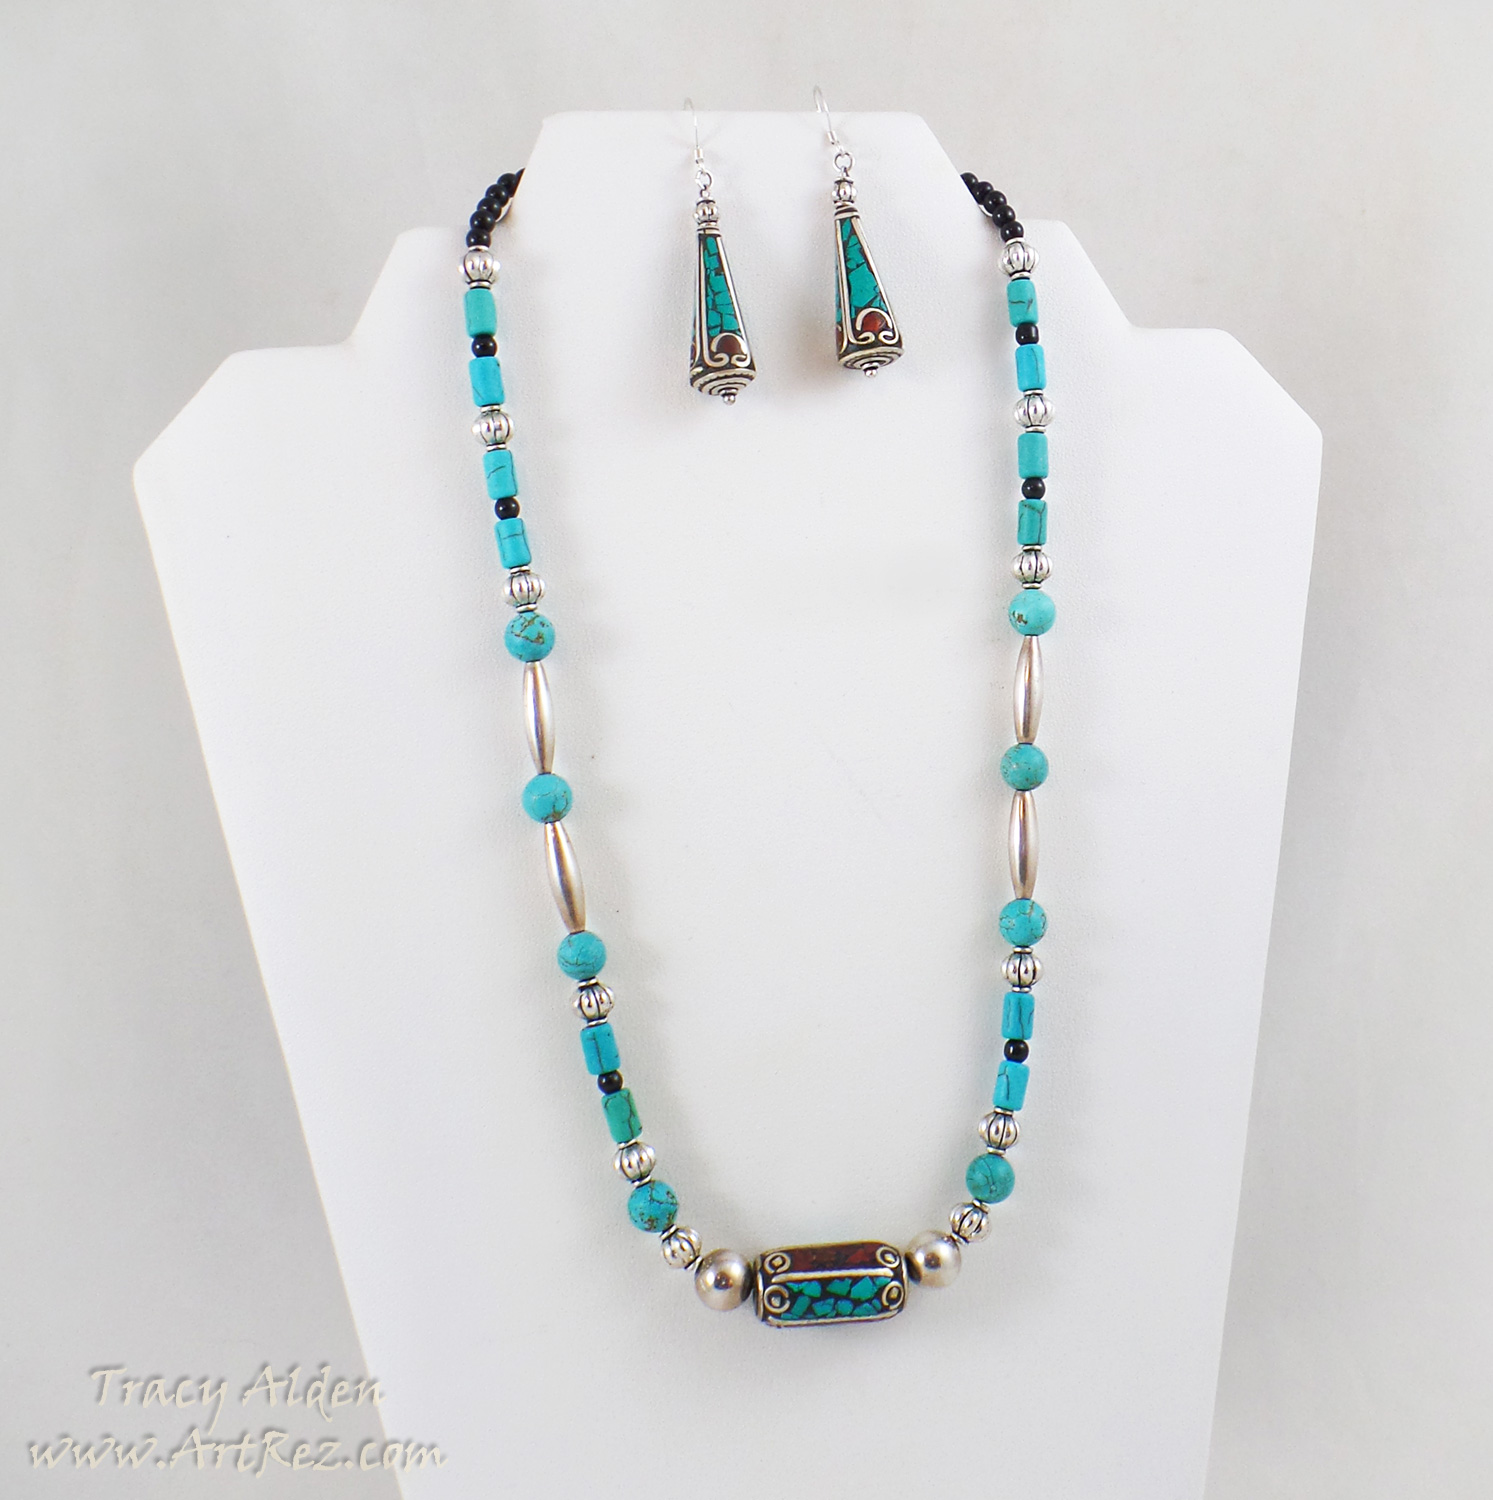
“Nepal Spring”, Sterling Silver Fair Trade beads from Nepal, vintage Sterling Silver spacer beads, Fiona Accessories black glass beads, Bead Gallery® turquoise tone Magnesite beads and vintage Sterling Silver findings.
I had bought the Nepal Fair Trade beads some years ago but could never think of what to do with them. I realized putting all the beads on one strand would be too heavy, so using only one bead as my focal I created a simple but stylish layout. The two additional beads from Nepal had their intricate details highlighted as earrings.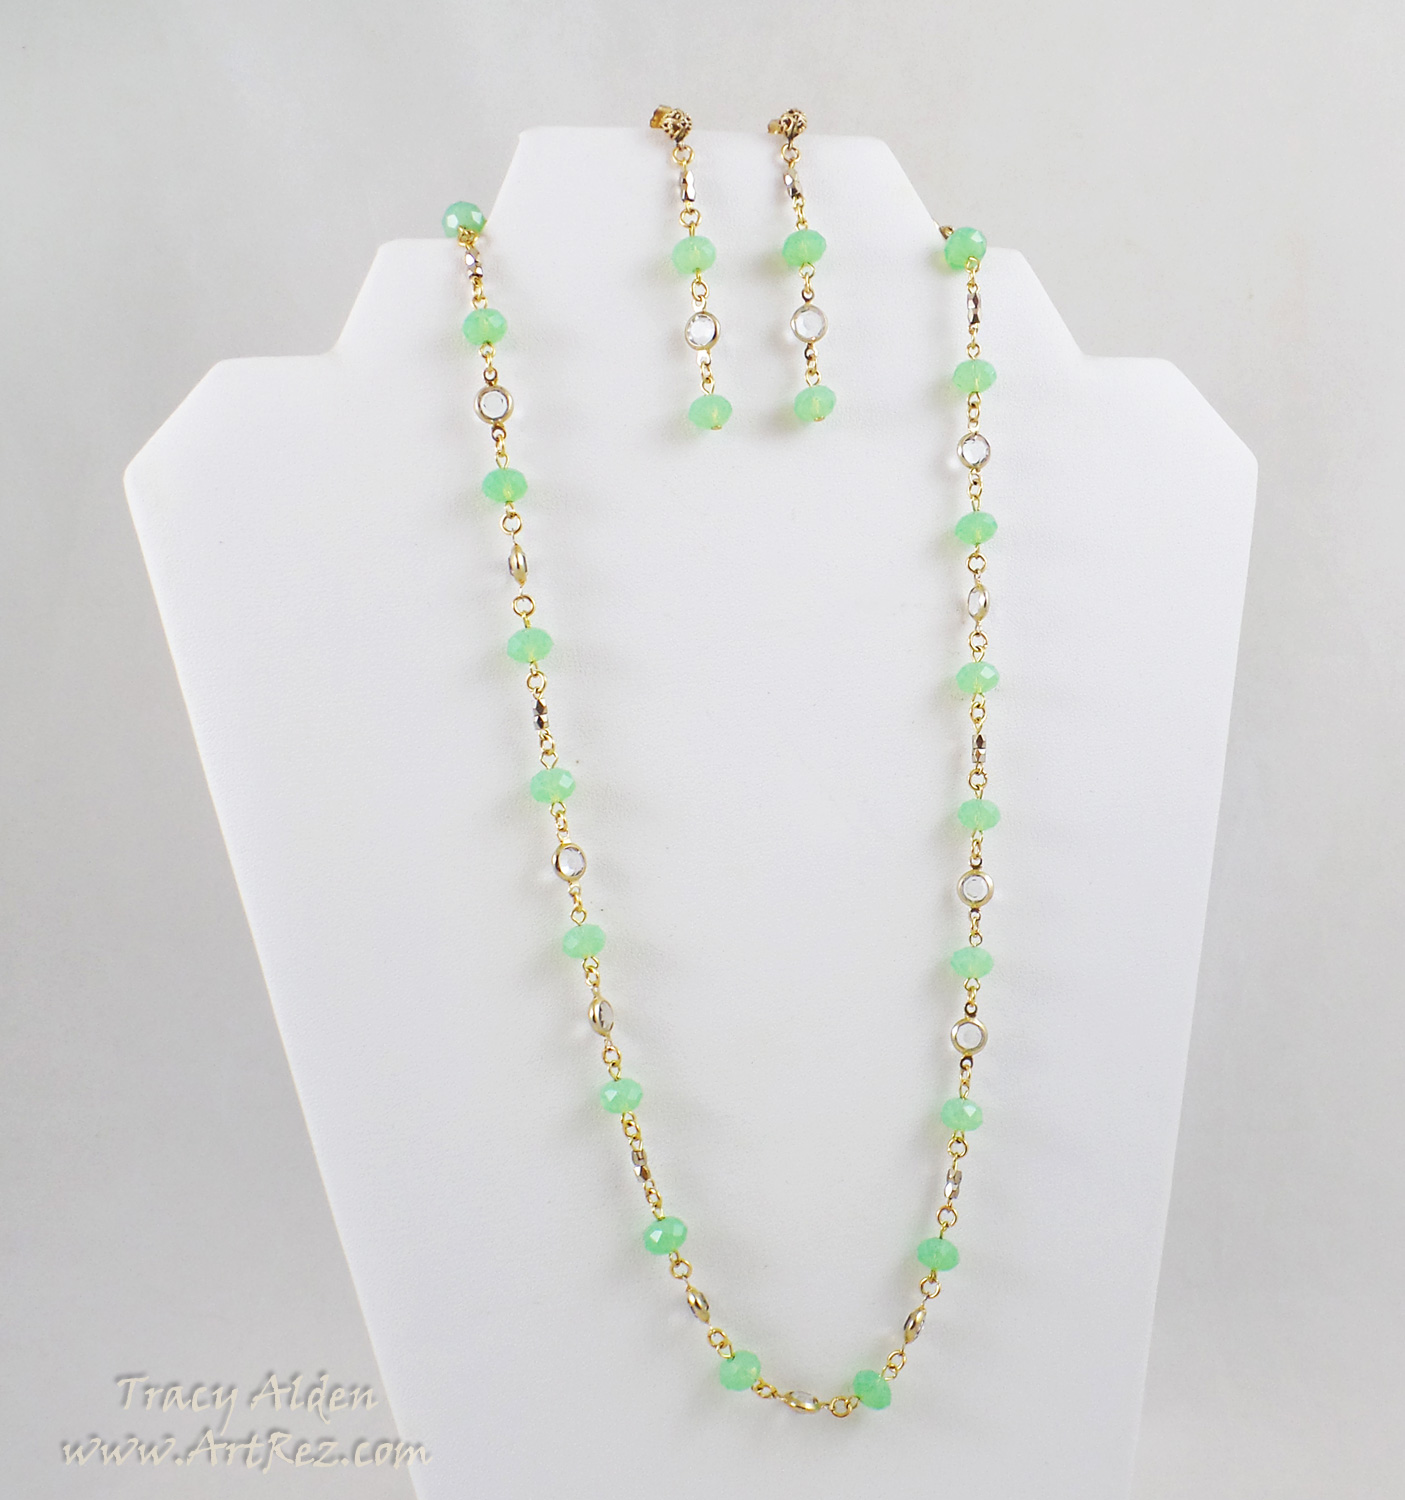
“Uranium Ball”, Neon green crystal beads (a discontinued line of crystals from Bead Gallery®?), vintage crystal and gold plated links, vintage gold plated spacer beads and vintage gold plated findings.
Once again the beads were my starting point of the design, the odd, almost glowing hue of the crystal beads made me think of Uranium glass. Uranium glass (also known as Vaseline glass), was glass tinted with Uranium to striking tones of green, was made into tableware and household items in the 1800 and early 1900s. Taking inspiration from the jewelry styles of the 1910-20s I created this set using mostly broken vintage jewelry pieces I have collected over the years.What type of wearable art could you create with a Spring destash of supplies?
Until Next Time, Safe Travels!

Ancient and Contemporary Inspired Artistry