
Metallic Resin Charm Necklaces
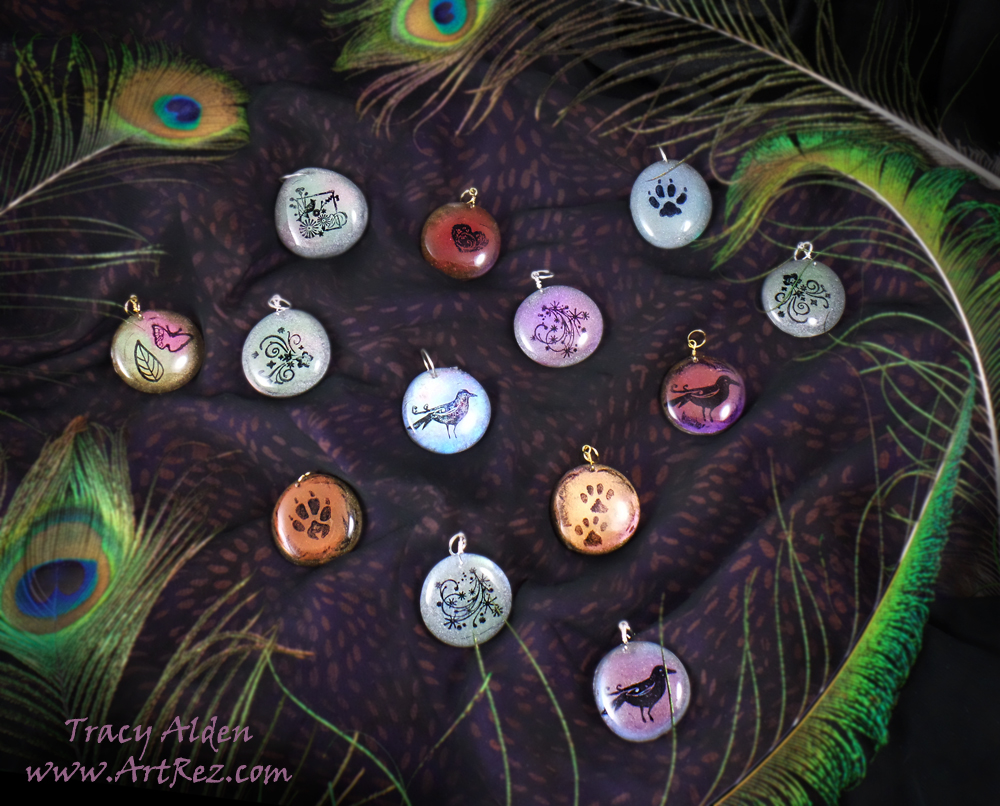
Sometimes inspiration for my craft projects is right in front of me, and surely this was one of those cases. I collect all kinds of little stones, trinkets and pieces of glass and often put them on display around the house in eclectic little assortments. I noticed the larger decorative glass pebbles I have, that can be found at most craft stores, have wonderful little round shapes that make me think of shapes of charms and pendants. I knew Amazing Remelt would make not only quick but glass-smooth molds and Amazing Clear Cast would be perfect to pour into the molds to create the charms, so off I went looking for my supplies!
Supplies:
Amazing Remelt
Amazing Clear Cast
Alumidust
Alumilite Metallic Powder
StazOn Ink
Stir Sticks
Mini Stamps
Decorative Glass Pieces
Small Hand Drill
Ribbons, Cording and Metal Wire
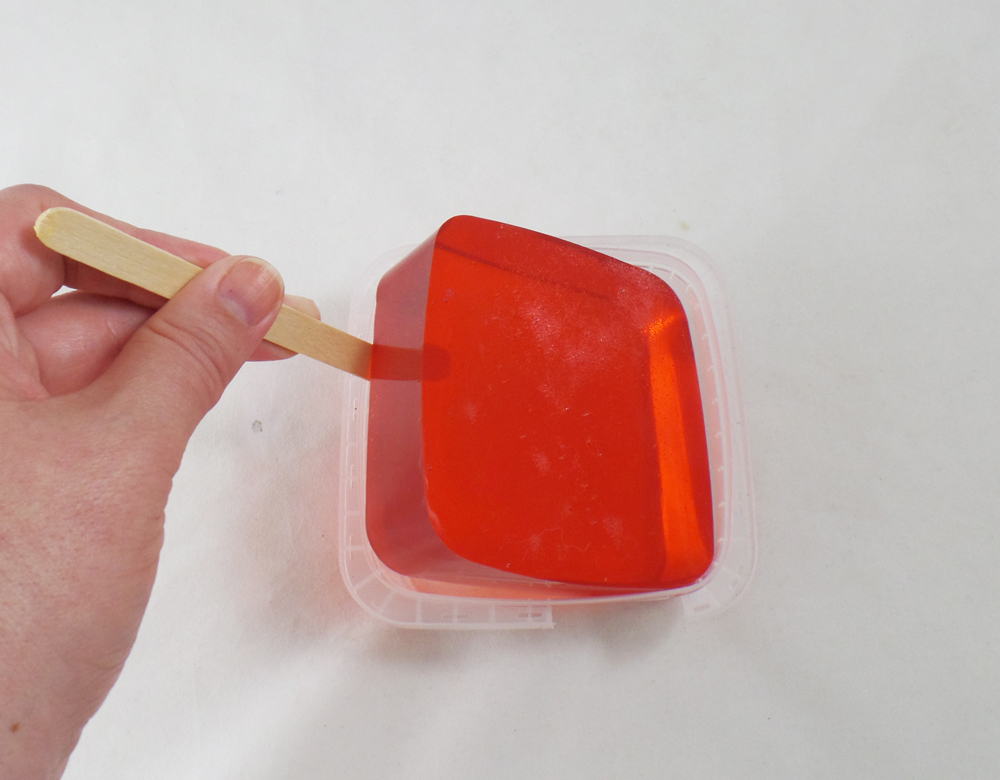
I started off with removing several blocks of Amazing Remelt from their containers. They are easy to remove by running a stir stick around the edges and gently lifting the Amazing Remelt from the container.
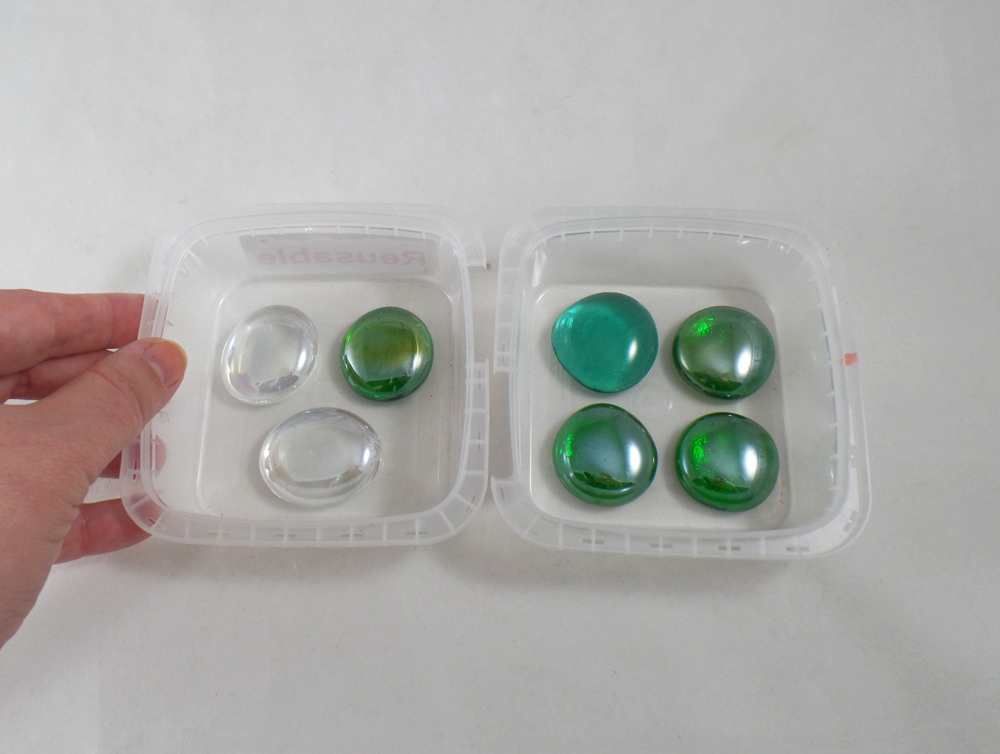
The Amazing Remelt containers acted as my mold boxes and I placed the glass pieces in the containers, making sure to leave some space between each piece so the mold will have separate spaces for each piece. You do not need to use an mold release on these pieces as they are smooth and non-porous.
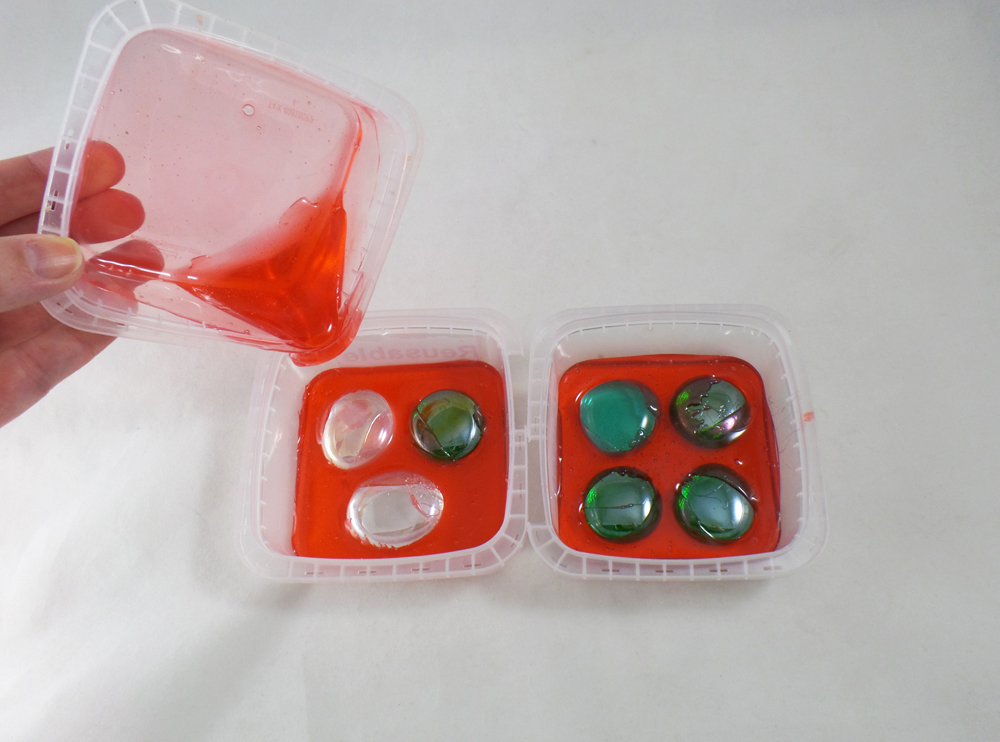
I heated one half of a Amazing Remelt brick in the microwave until liquid, in one of the containers it came in. I poured the heated Remelt in the two containers holding the glass pieces, but only a thin enough layer to cover the bottom and a bit of the sides of the glass. This layer acts as an anchor for the pieces without having to glue the glass in place, I let this layer cool completely.
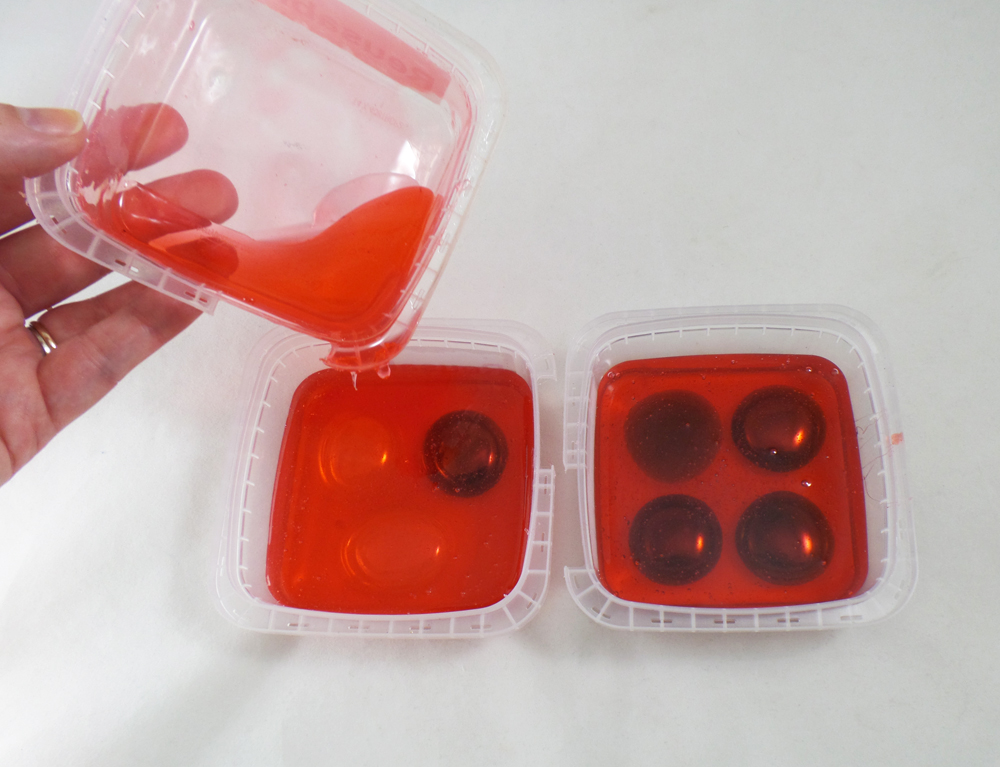
The second pour of Amazing Remelt I covered the glass pieces completely and let them cool to finish the molds.
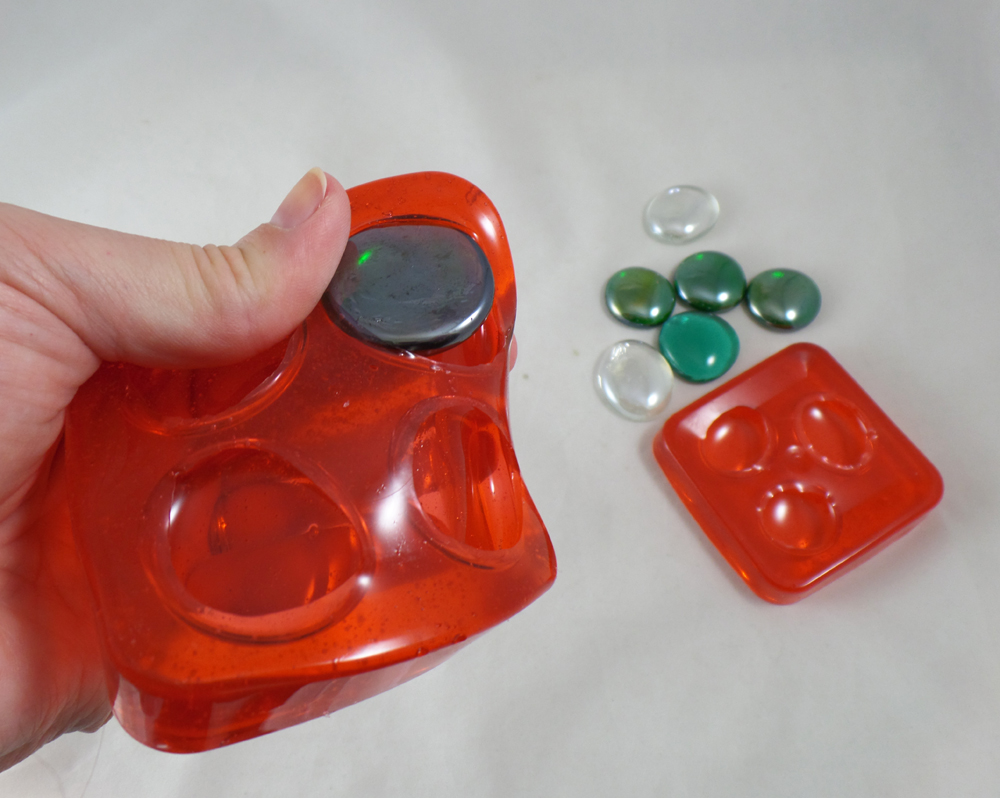
Once the molds were cool and no longer tacky I carefully removed them from the containers and flexed the molds until the glass pieces popped out.
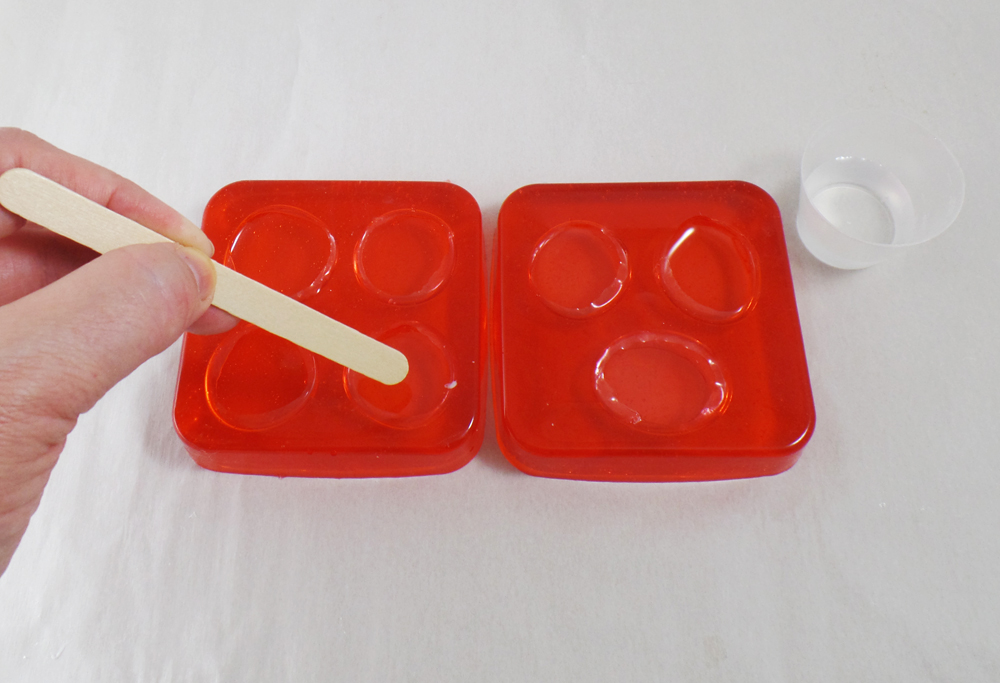
I mixed up a small batch of Amazing Clear Cast and filled each round in the mold halfway and let it cure to a hard yet somewhat tacky state.
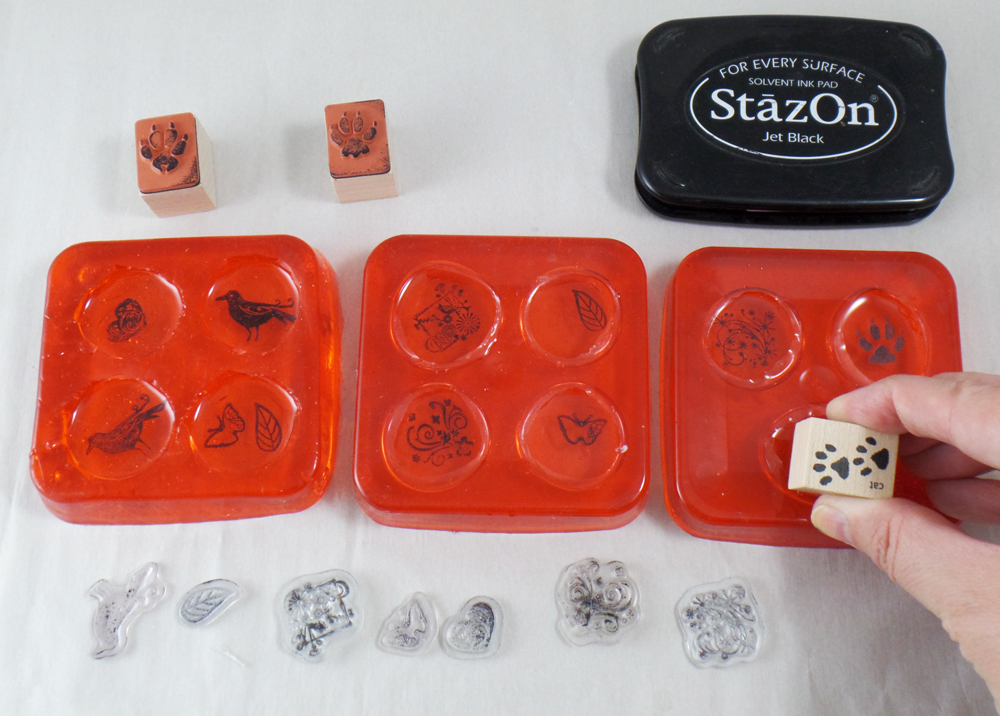
I then carefully inked and stamped little stamps with StazOn Ink into the tacky resin. The tacky state of the resin prevents the stamp from sliding and “grabs” onto the stamp, making sure I got a good stamped image.
*Pick your favorite stamps! As long as the stamp can fit the mold opening you can use any number of stamp images.
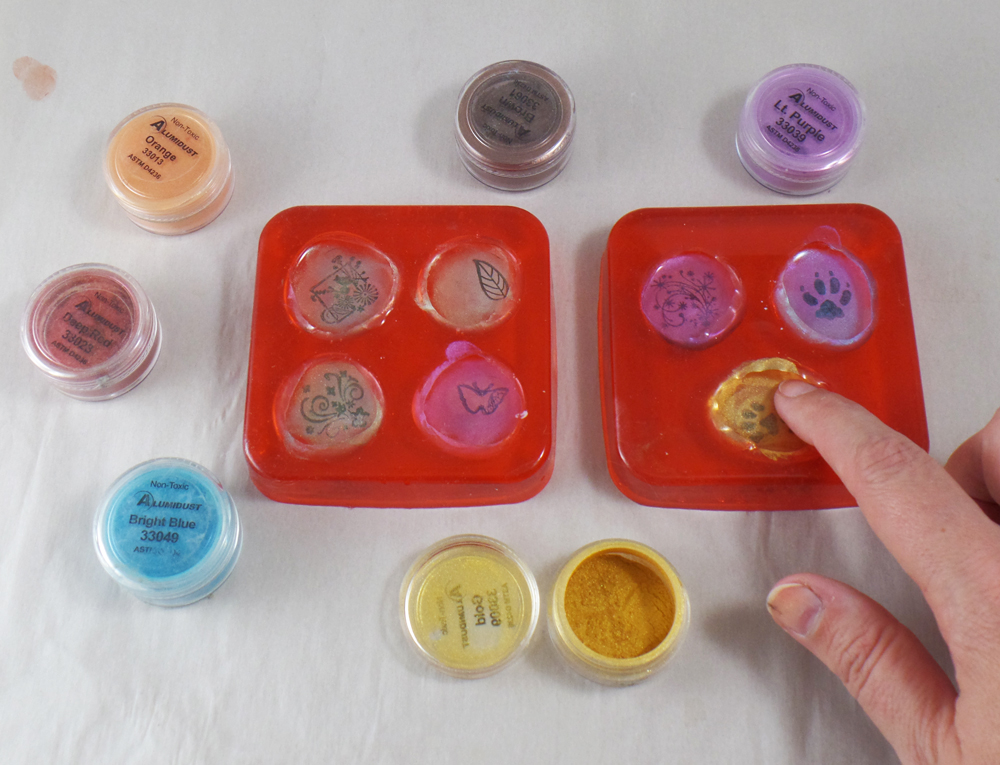
I rubbed Alumidust, in several different colors on the first layer of resin that was now stamped. Just like with the stamps there is no rhyme or reason to the color choices, just have fun with all the Alumidust colors!
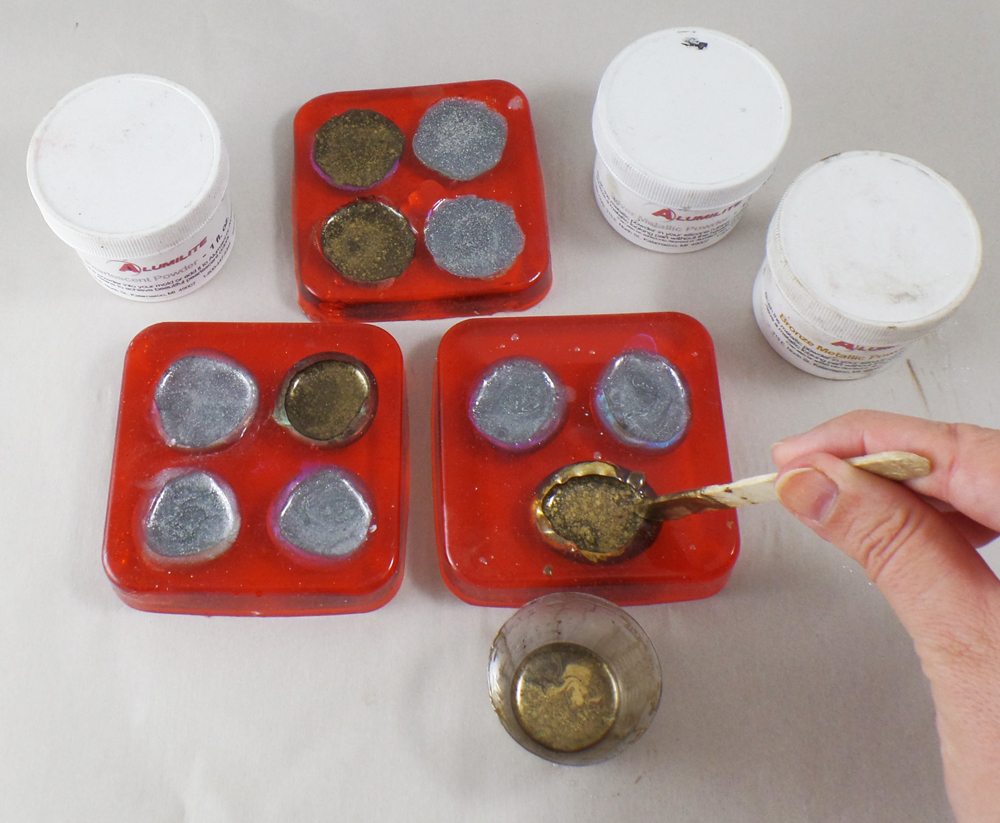
I mixed up two batches of Amazing Clear Cast mixed with Alumilite Metallic Powder, one silver and one bronze, and poured it in the molds as a second layer. I let it cure overnight.
* If you live in an high humidity area you might notice the when you pop out the resin pieces the next day they will be hard but slightly tacky. Just remove them from the molds and place them on parchment paper and wait for the resin to completely harden outside of the molds.
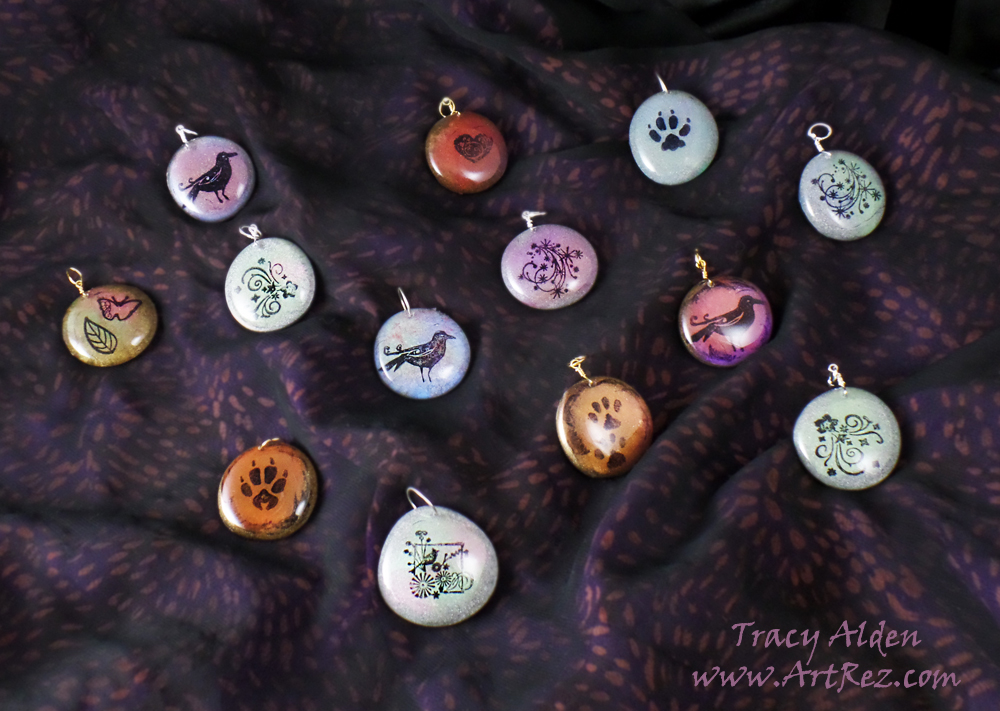
Once all of the pieces were fully cured, I carefully sanded any uneven edges and drilled holes with a hand drill. I scrubbed them clean and threaded jewelry wire and jump rings through the drilled holes. Now they are ready for ribbons, thread or chain!
4 Comments
Susan M. Brown {sbartist}
Tracy what a fabulous project! I really love the result and ease of use with the Amazing Remelt. Thanks for giving me a whole new use for my vault of stamps 🙂
Artresurrected
Thank you kindly, glad you liked it Susan! 🙂
I swear my stamps are breeding when I am not looking!
Tony
Hi Tracy, I encounter a problem while using the amazing clear cast resin to cast a bangle. I wanted my bangle to look metallic so I bought the alumilite gold and aluminum powder. Let me explain how I do my casting and the result. I start off with applying a layer of my gold
powder on the mold, then I mixed part A and part B( I filled 10cc part A into the small measuring cup and I part B into the same cup till it reach 20cc). I start to stir the resin for about 2-3mins until I don’t see any swirl. Then I added a few drops of acyclic paint(water base, and I’m aware later that I shouldn’t be using water base pigment)and continue to stir to blend the pigment with the resin for another 1min. Once I was satisfied with the blending I poured the resin slowly into the mold and left it to cure for about 36hours, but the bangle turn out to be soft. What could be the cause of the softness? Is it because of the mixing of resin not long enough or is it because of the water base color pigment?
I have anothe question. In order to get a shine metallic effect I saw on YouTube tutorial many people use 0000 steel wool to rub the cast, but when I try it, the cast didn’t shine but became dull, why is that so? I would really appreciate if you could help me on this 2 issues that I’m facing. Looking forward to your reply. Thank you.
Artresurrected
Hello Tony!
Sorry to hear you had problems making your bangle. Sadly yes the addition of water based paints and pigments will change the chemical mixture of any two part epoxy. Sometimes it with change the curing time, prevent it from curing, add trapped water pockets in the resin (making it weaker) or even fogging otherwise clear resin. As a general rule I never use water based paints to dye my resin, I stick with using Alumilite’s Dyes (made by Amazing Casting Products, super concentrated, a tiny drop goes a long way and has no odor) http://www.moldputty.com/store/p/1012-Alumilite-Dye.aspx or dry powder pigments.
As for getting a nice shine on your finished resin piece it depends on how the metallic powder was applied, if it was brushed on the mold as you did with your bangle I would apply a supper thin coat of Amazing Clear Cast on top of the finished piece with a cosmetic sponge and let it cure for a glossy finish. If you put metallic powder in resin before pouring it into the mold, a fine grit sandpaper starting 1000 and going up to 8000 or more will generally get you a nice smooth finish.
I hope this helps!