Drinks on me! Anything But a Card Challenge #36
Good morning! Today’s project tutorial is thanks to a challenge! The talented Susan M. Brown of SBartist: Painting In The Dark Blog asked me if I would be willing to be a guest designer for the Anything But a Card Challenge blog and of course I had to say yes!
Anything But a Card Challenge Challenge #36 : Summer Lovin’ – A celebration of all things summer! Think summer weather, vacations, sunflowers, beach parties, cold drinks and barbecues… bright colors and wide open sky. Pool parties all day, then sitting in lawn chairs sipping drinks and watching the night sky. The warm summer months have me thinking of cold drinks, sunny days and BBQs with family and friends. My project for the Anything But a Card Challenge for this month played perfectly into that inspiration!
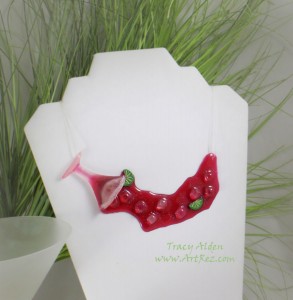
One of the aspects of having a party or BBQ is that someone is bound to spill a drink. While many find it an annoyance I decided to use it as a inspiration!
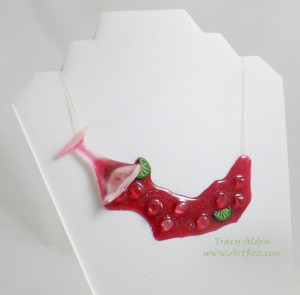
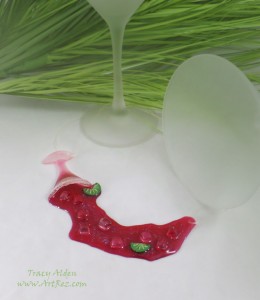
Starting with the idea of a spilled Pomegranate Martini or Cosmo, I came up with a wearable art piece called “Drinks on me!”
Supplies:
Amazing Mold Putty
Amazing Clear Cast Resin
Stampendous Multi Ultra Fine Crystal Glitter
Craft Knife
Polymer Clay
Stylus
Elastic jewelry cord
Small drill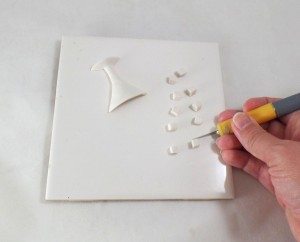
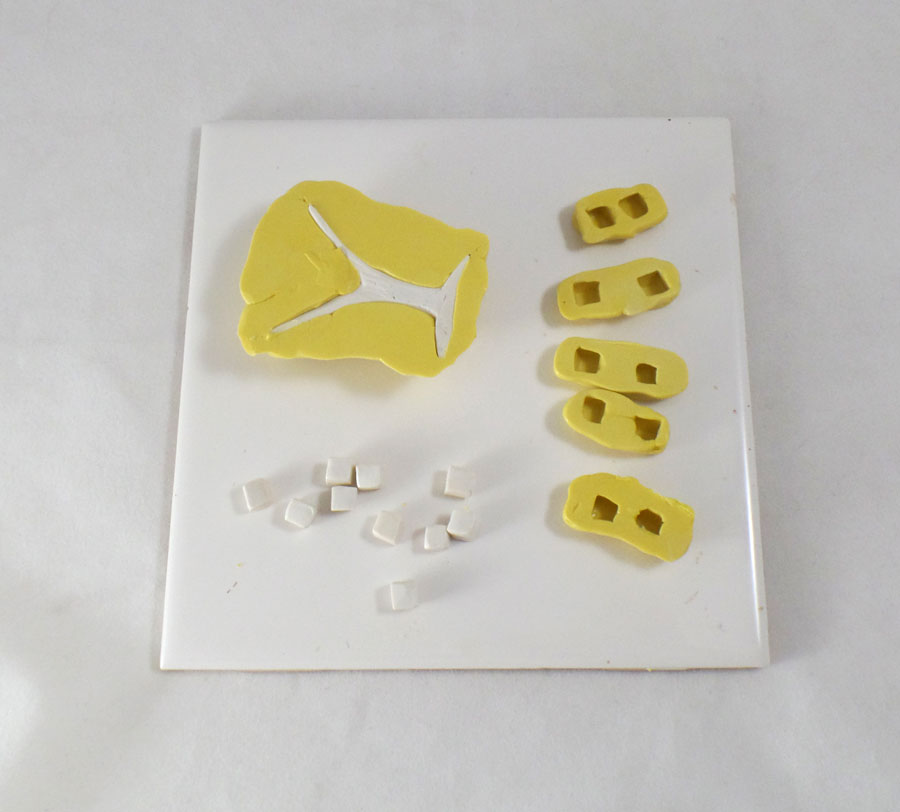
Using a stylus and a craft knife, I shaped and carved half a martini glass and ice cubes out of polymer clay. I then baked the clay pieces on the tile to manufacturer’s instructions.
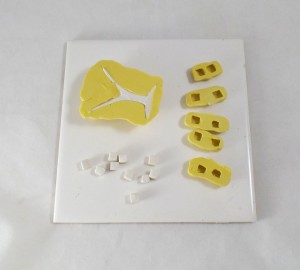
After I baked the polymer clay, I lightly sanded and trimmed the edges of the pieces with a craft knife and an emery board. Once the polymer pieces are cleaned of dust, I used Amazing Mold Putty to make molds of the pieces.
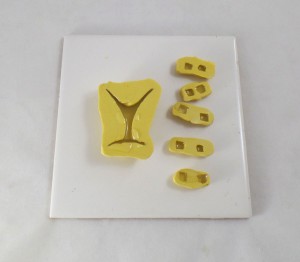
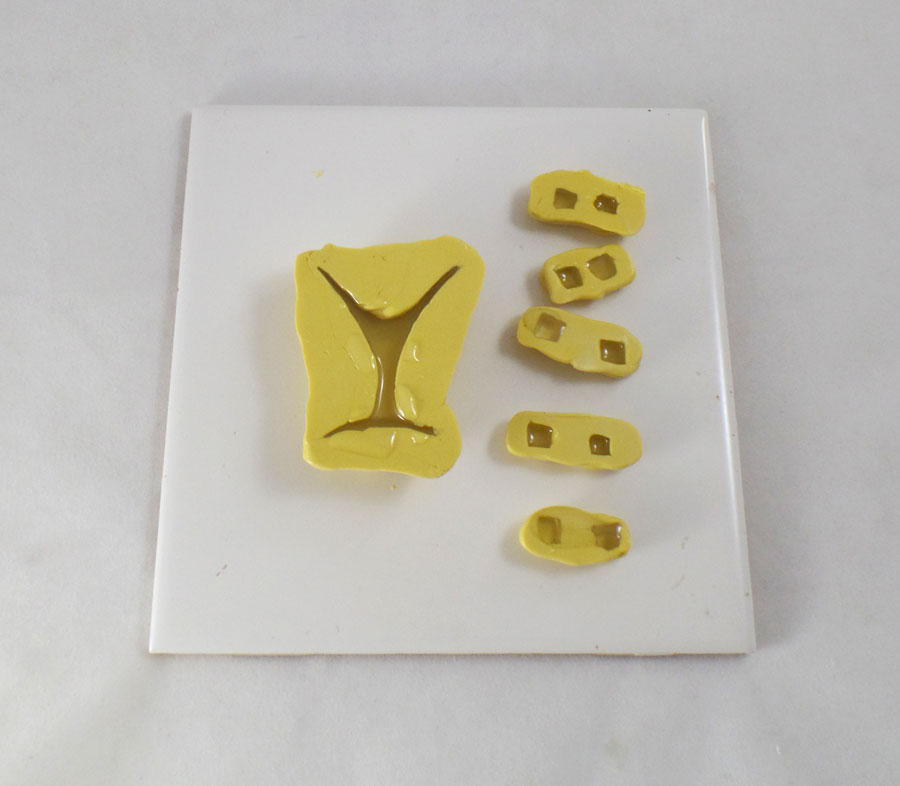
Once the molds were cured I poured Amazing Clear Cast Resin into the molds and let it set for about five hours. The pieces came out frosted by using the Mold Putty and that was the perfect look for the glass and ice cubes.
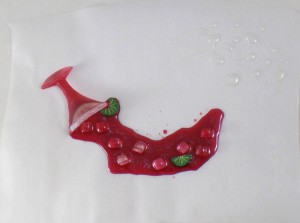
I then placed the glass upside down on *parchment paper and poured Amazing Clear Cast Resin tinted with Alumilite Red Dye in a controlled U shape. I coated the ice cube resin pieces with untinted Clear Cast and placed them gently into the tinted resin to give the illusion of melting ice. I added a few polymer clay lime cane slices, sprinkled a touch of Stampendous Multi Ultra Fine Crystal Glitter on the tinted resin to finish off the look and let it all cure.
*The resin has to be poured on parchment paper otherwise the resin will soak into any other paper.
I drilled a hole on each side of the pendant and threaded clear elastic jewelry cord on for easy wear.
One of the really fun aspects of this project is with a simple change of dye used with the resin you can create any spilled drink you would like!
What might YOU make for the Anything But a Card Challenge? CLICK HERE to link up your projects! 🙂
Until next time, safe travels!
Temple Rain, a Mixed Media Canvas
In April I had the great opportunity to receive a Frog Dog Studio kit by being part of the Amazing Crafting Products Design Team. I was so excited when I received the kit; it had so many wonderful goodies, from ink pads, pigment ink, mica, chipboard pieces, tissue paper and more! There was enough supplies to make several projects and still have things left over.
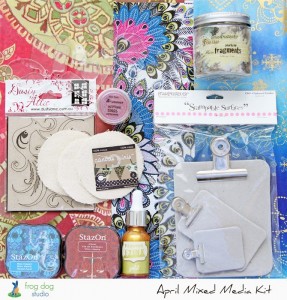
Many of the supplies in the April kit seemed to have a East Asian flair to it. It got me thinking about my trip through Asia and I was inspired to create a Mixed Media hidden story book.
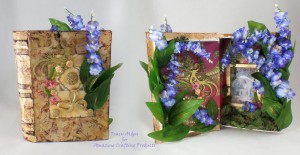
The tutorial for this project can be found here: Mixed Media Book Box
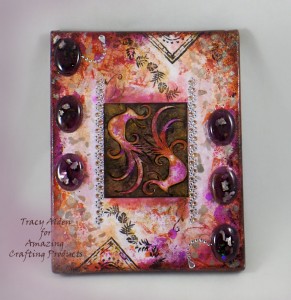
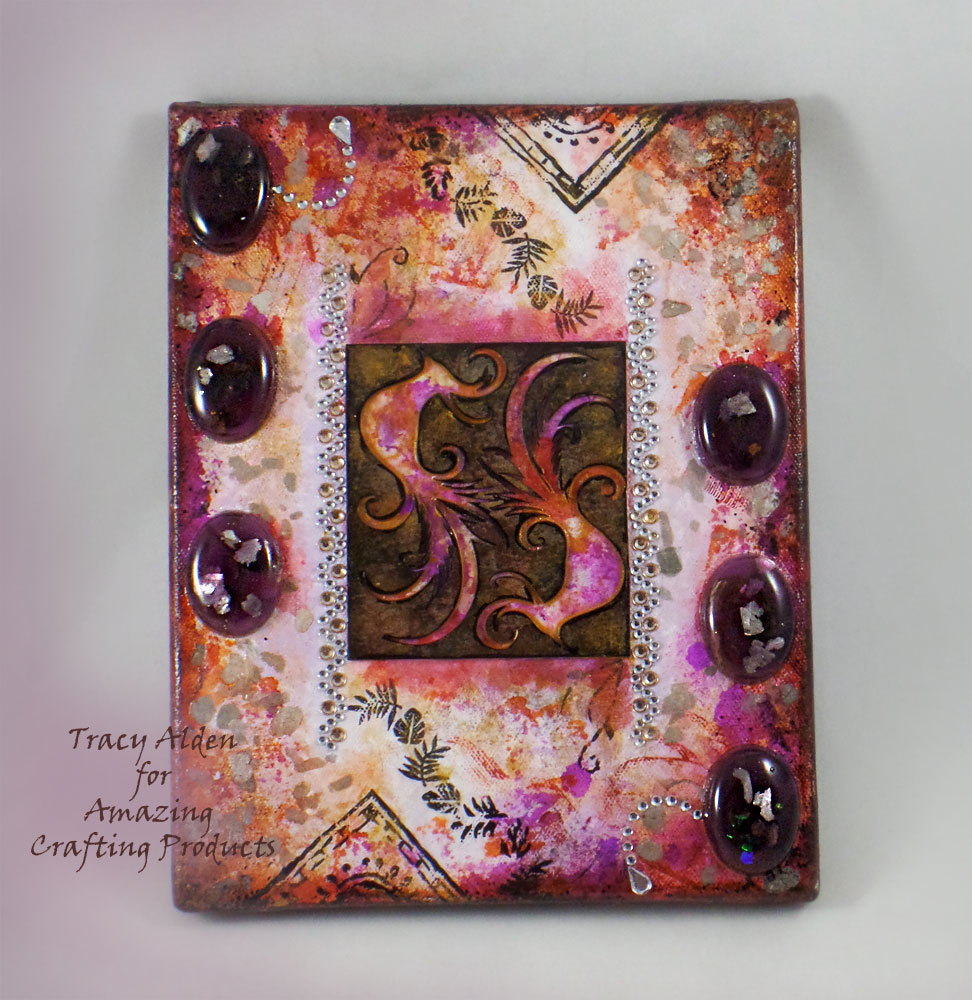
With more of the supplies left over, I created a Mixed Media Canvas piece with wild tropical colors. It was so much fun that I wanted to try making another canvas piece but with a completely different feel, and I still had supplies left over from the Frog Dog Studio kit. Sadly, I got busy with home improvement projects and had to wait until the end of May to start my new canvas.
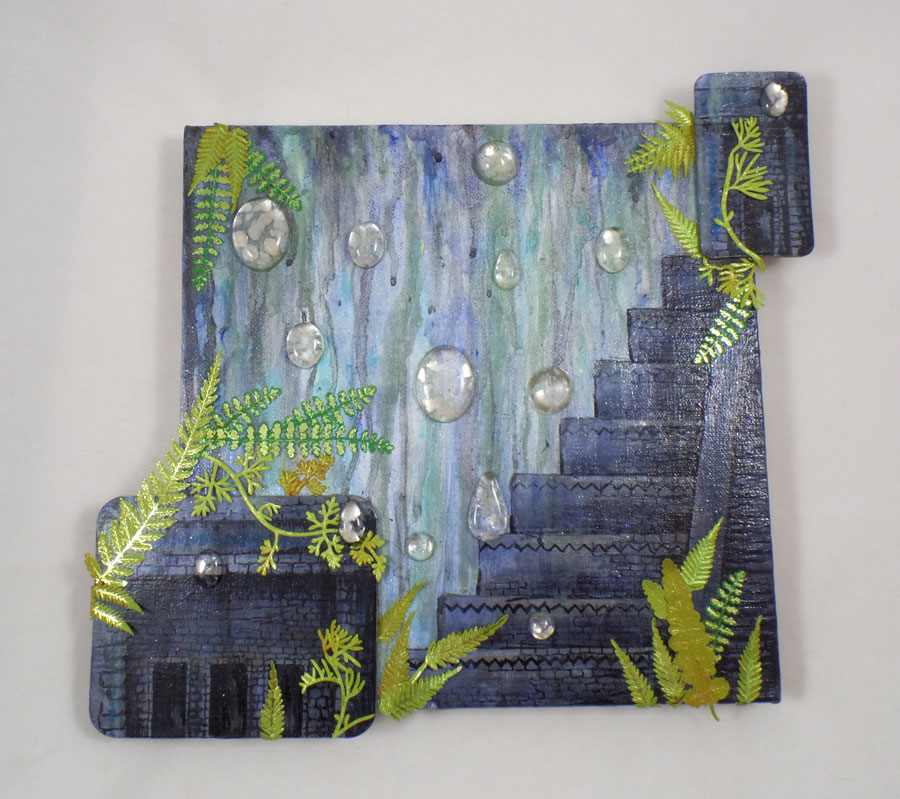
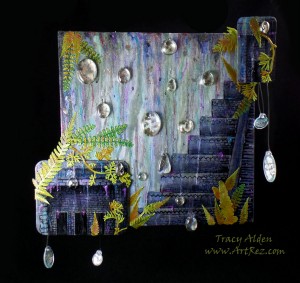
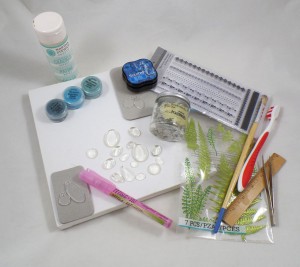 With a portion of the extras from the kit, miscellaneous supplies from my collection and canvas, I started to lay out the project, figuring out which direction to go. I wanted to use the chipboard from the Stampendous Mini Clipboard Canvas pack, the Tim Holtz Clear Fragments and Pearlized Stampendous Mica Fragments. I placed them this way and that on the canvas and suddenly I got an idea. What if I were to try making a abstract ruins in the rain?
Just like with my previous canvas piece, I pulled out what I call my resin “save for later” bin. This bin is populated with all kinds of resin pieces, some finished, uneven pourings or even pieces I just didn’t know what to do with. I picked out resin cabs that had the look of abstract water droplets.
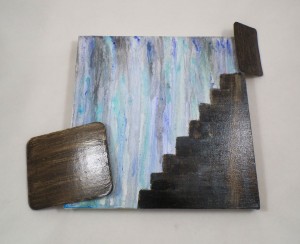 I applied water and acrylic paint to the canvas and tilted it so all the paint and water ran down to the bottom. Once dry, I painted a base dark layer for my ruins. I glued the chipboard pieces to the canvas using Nine Lives Products Glu6 Paste and let dry.
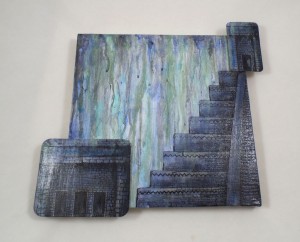
I applied a second layer of water and paint to give a look of rain falling. On went the crackle medium to the dark paint layer and once dry I added a gray-blue paint top layer that then crackled giving it the look of ancient stone. I wasn’t completely happy with the look so using a black permanent marker I drew in small bricks and shading to give detail to the ruins.

Using Nine Lives Products Glu6 Nonporous glue I glued the mica flakes to the back of the resin cabs and while the glue was still wet pressed them onto the canvas. The glue has to dry overnight but it is well worth the wait for a great bond on the resin cabs. I applied little paper leaves to look like plant overgrowth and Liquitex Gloss Varnish to seal the paper leaves and paint in place. I added some acrylic paint in blue and purple as highlights on the ruins and brown on the paper plants to give an earthy hue. A second layer of varnish in drops and dribbles gave the illusion of water to the finished canvas.
I added some acrylic paint in blue and purple as highlights on the ruins and brown on the paper plants to give an earthy hue. A second layer of varnish in drops and dribbles gave the illusion of water to the finished canvas.
Frog Dog Studio’s available kits change every month but the great variety offered in each kit is a great inspiration. What might you make with their next kit?Until next time, safe travels!

Ancient and Contemporary Inspired Artistry