
Inspire Art lapel pins
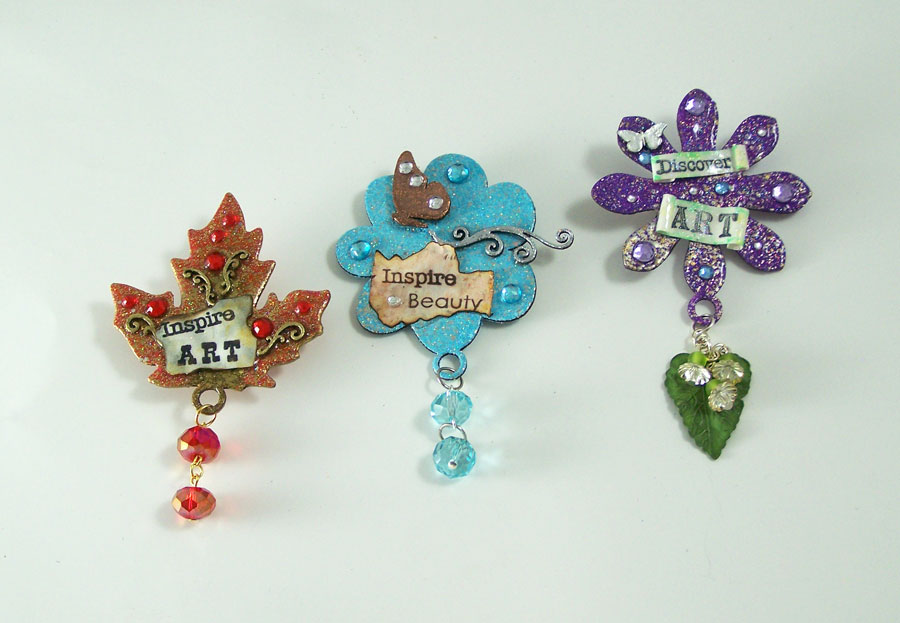
Positive affirmations, inspirational art and things that make one smile can really help with the creative process. Why not make and wear a little bit of inspiration? Today I want to show how to make your own Inspire Art lapel pins, such as the blue above with the copper butterfly.
Supplies:
G&P Assorted Bookboard Charm Bezel Shapes
G&P Bookboard Birds & Butterflies Accents
G&P Glastique Gloss Finishing Glaze
G&P Burnt Umber 3D Enamel Gel
G&P Yellow Ochre 3D Enamel Gel
G&P Metallic Copper 3D Enamel Gel
G&P Turquoise Lagoon Enamel Powder
G&P Copper Kettle Enamel Powder
G&P Siam Silver Enamel Powder
G&P Piccolo Embossing Powder Adhesive
Piccolo Easy Grip Tweezers
Heat Gun
2 Connie Crystal 10mm Crystal beads
2 Silver jumprings
1 Charm Brooch Pin
Crystal sticker gems
Small foam squares
2 Flat nose pliers
1 round nose plier
1 headpin
1 eyepin
Sentiment stamps or sticker

For this project we are using the large round flower bezel from the Charm Bezel Shapes set. Carefully remove one butterfly and swirl from the bookboard Accents set.
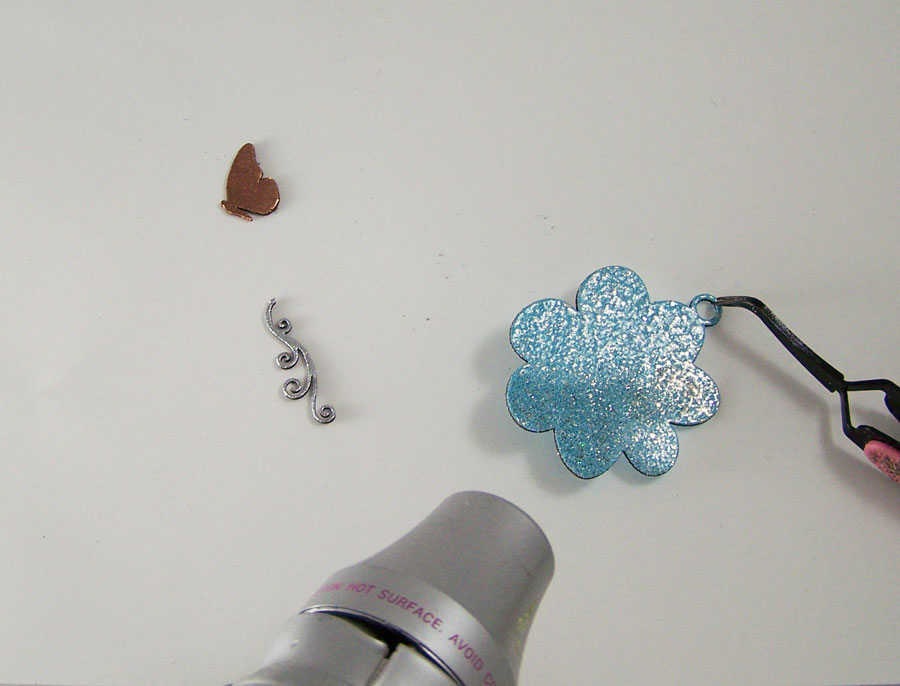 Apply Piccolo Enamel Adhesive to all of the bookboard pieces. Apply G&P Copper Kettle to the butterfly, G&P Siam Silver to the swirl and G&P Turquoise Lagoon Enamel Powder to the flower bezel. Heat set.
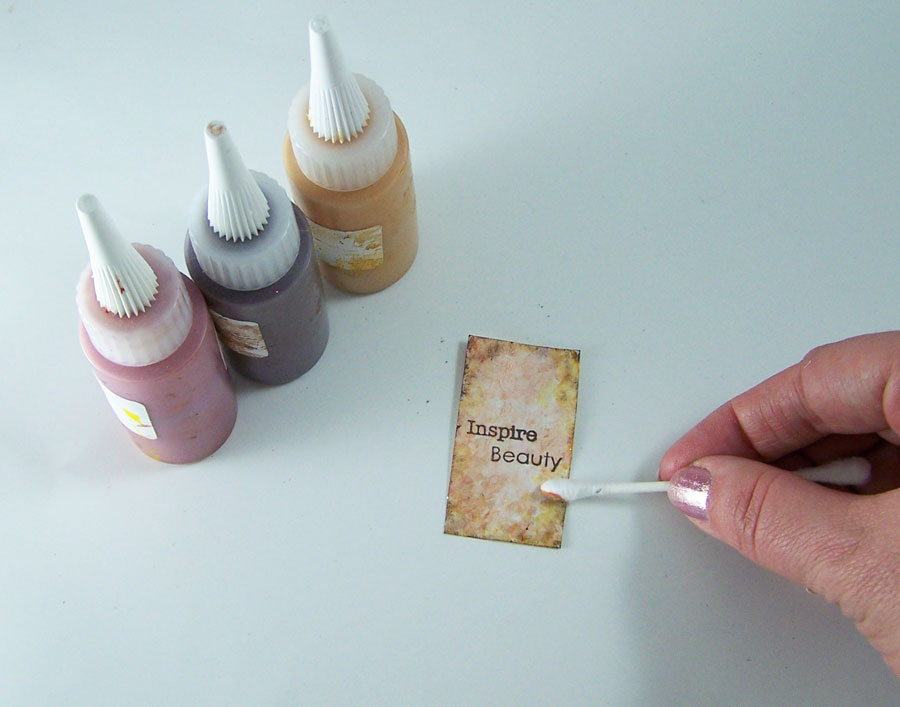 Stamp a sentiment on a 1inch by 2inch piece of paper. Apply G&P Burnt Umber. G&P Yellow Ochre, and G&P Metallic Copper 3D Enamel Gel with a cotton swap to the paper front and back to give an aged look.
*Ignore this step if you rather use a sentiment sticker.
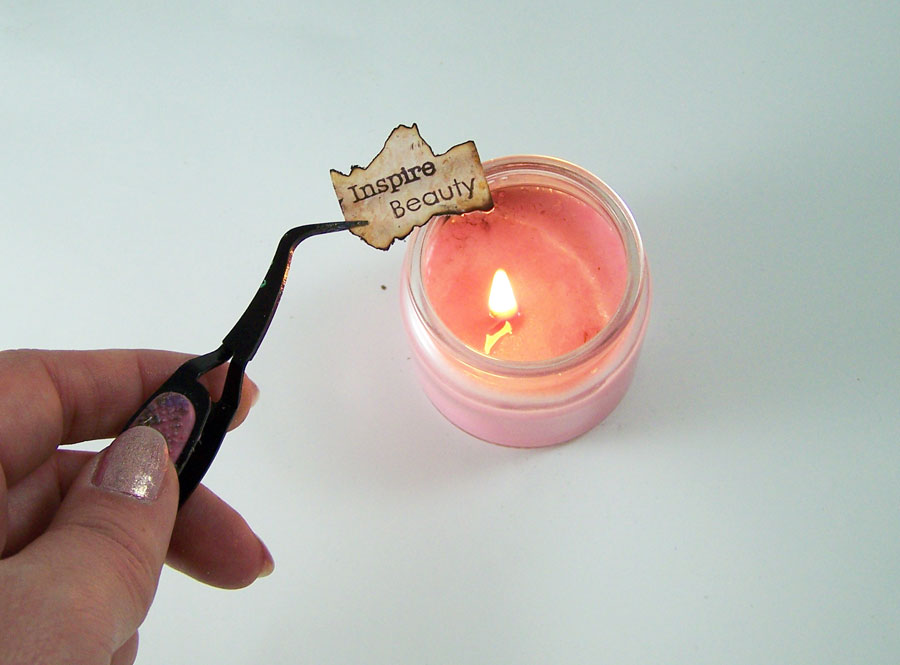 Using the tweezers grip the edge of the stamped paper and very carefully scorch the edges with a small candle flame.
*Ignore this step if you rather use a sentiment sticker.
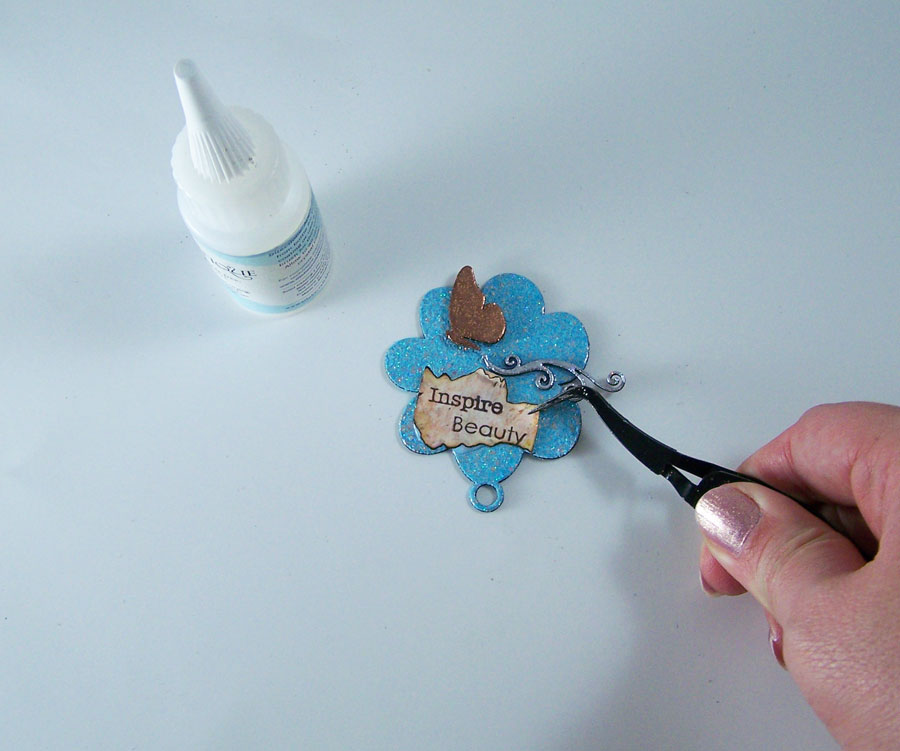
Use Glastique Gloss Finishing Glaze coat the flower bezel with a thin layer. Let dry. Adhere foam squares to the back of the butterfly and the sentiment, press onto the bezel. Attach the swirl Piccolo with Glastique Gloss and coat the assembled pieces with a thin coat of Glastique Gloss.
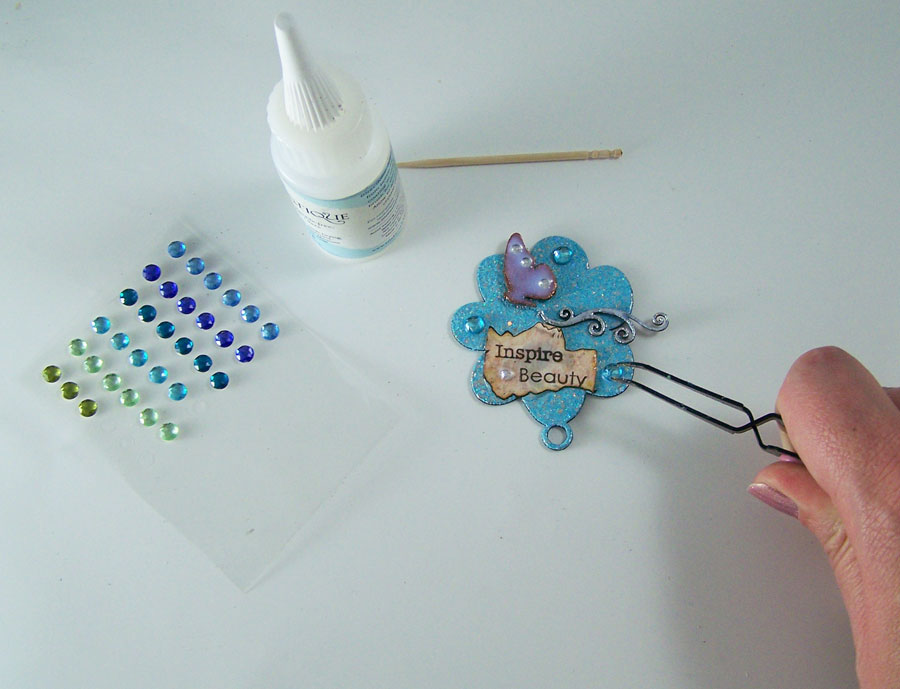 Use Glastique Gloss Finishing Glaze to glue on the sticker gems to the bezel as shown. Let dry.
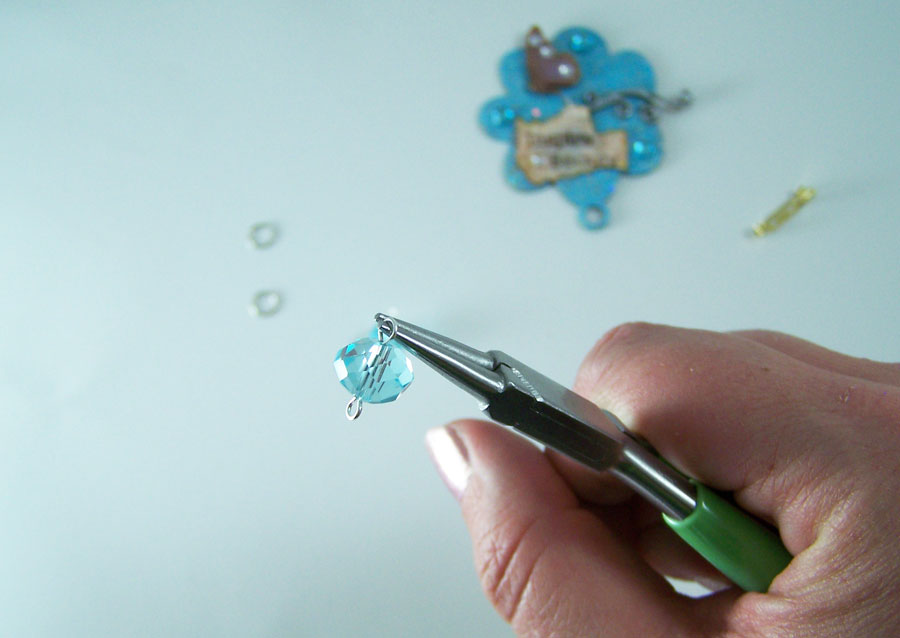 Thread one crystal bead onto the jewelry eyepin and one on the headpin. Using the round nose pliers curl over the remaining wire to form a loop on both jewelry pins.

Open up jump rings with the flat nose pliers and put one jumpring through the loop on the headpin and eyepin, close jumpring. Use the other open jumpring to connect the crystals to the bezel as shown, close jump ring.
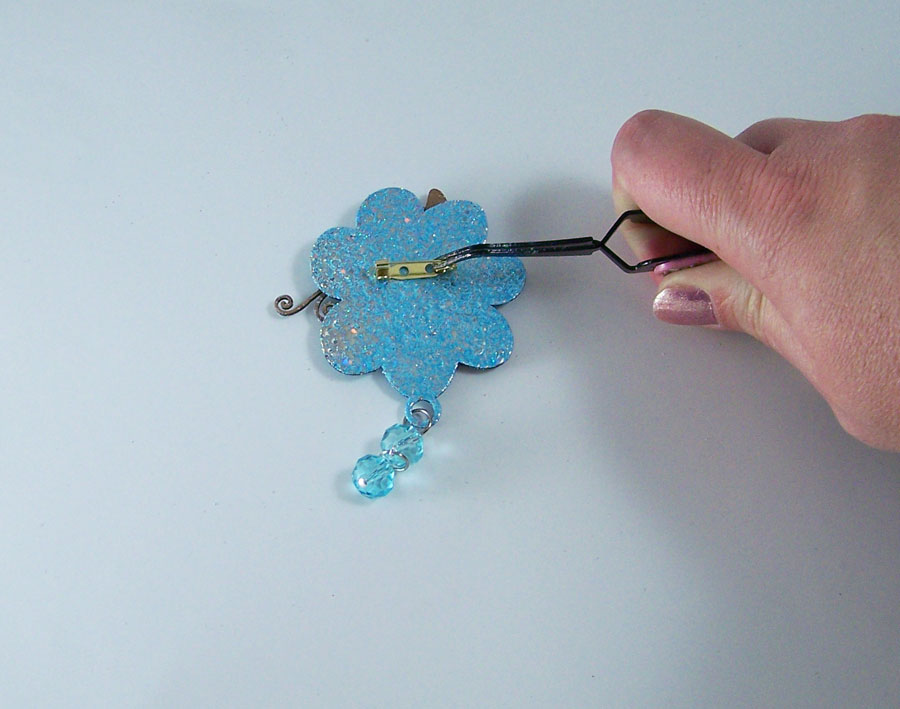 Glue charm brooch pin to the back of the bezel with jewelry glue. Let dry.

The inspire art pin is now ready to wear or give as a gift!
Until next time, safe travels!
4 Comments
Candy Spiegel
These are beautiful! I love the techniques.
Artresurrected
Thank you Candy! 🙂
Deb
I LOVE these Tracy! So pretty ad so personalizable!
Artresurrected
Thank you Debra! 🙂