
DIY Leprechaun Wee Folk Door

I have always loved the idea of the wee Folk or faery, be the good bad or just odd folk that roamed about. One of my favorite faery movies from my childhood was Darby O’Gill and the Little People. The costumes, sets and the illusion of the miniature world of the leprechauns had me entranced Leaving out small gifts or useable objects for them in hopes of getting the favor of the faery was always a magical idea to me. So I got to thinking, why not make a Leprechaun door to add a bit of magic to a home for Spring!
Supplies:
G&P Classic Victorian Oval Bookboard Frame
G&P Burnt Umber 3D Enamel Gel
G&P Glastique Matte Finishing Glaze
G&P Medium Flourishes Piccolos
G&P Shamrock Dreams Enamel Powder
G&P Vintage Gold Enamel Powder
G&P Mossy Glen Enamel Powder
G&P Piccolo Embossing Powder Adhesive
Piccolo Easy Grip Tweezers
Green crystal sticker gems
Sizzix Tim Holtz Alterations embossing folder Woodgrain
Dye ink pads in Black and Deep Brown
Small foam squares
Sharp scissors or craft knife

Carefully remove the frame from the package, put aside the globe and easel. Save those pieces for future projects.
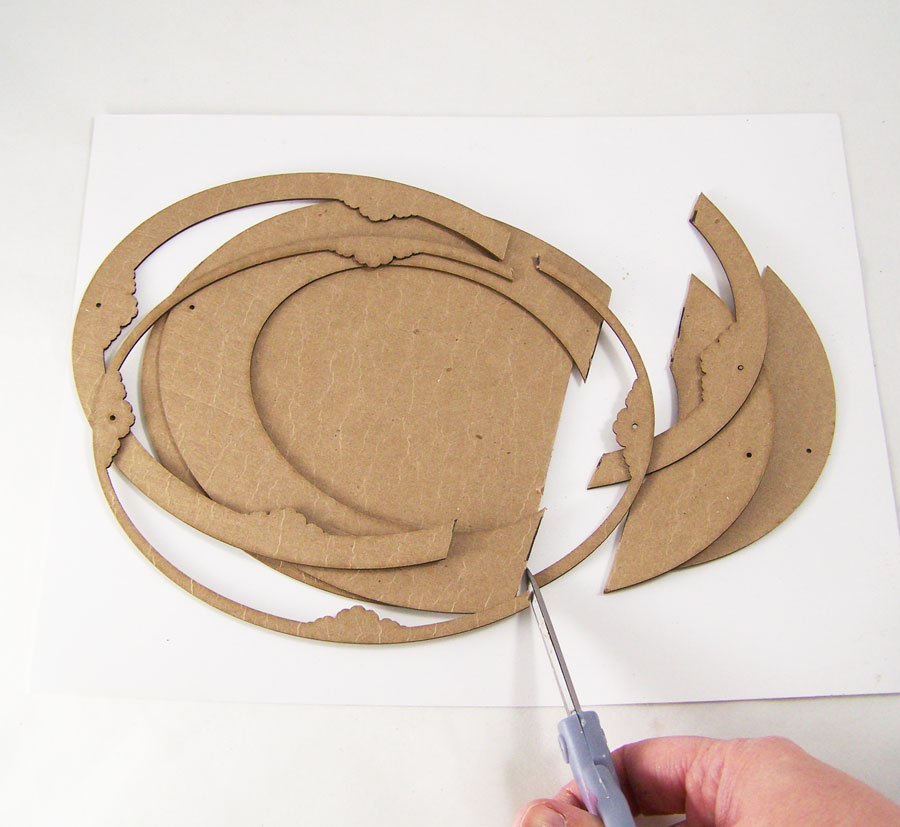
Using a ruler, mark a straight line about 2 inches from the bottom on the frame pieces. Using a sharp scissors or a craft knife, cut the bottom portion off.

Run the back plate and bottom frame sections through an embossing machine using the woodgrain embossing folder. Taking the brown and black dye ink pads, rub them on the embossed sections of the frame.
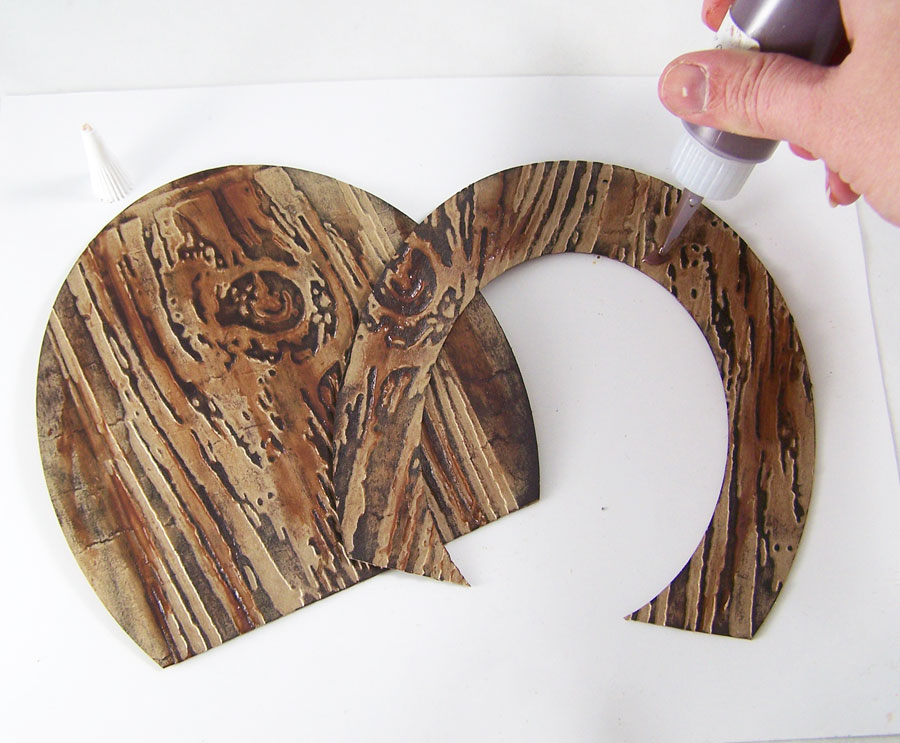
Apply G&P Burnt Umber 3D Enamel Gel to the embossed and now inked sections. Smear the enamel gel in the wood grain pattern with your finger or a cosmetic sponge in a up and down pattern.
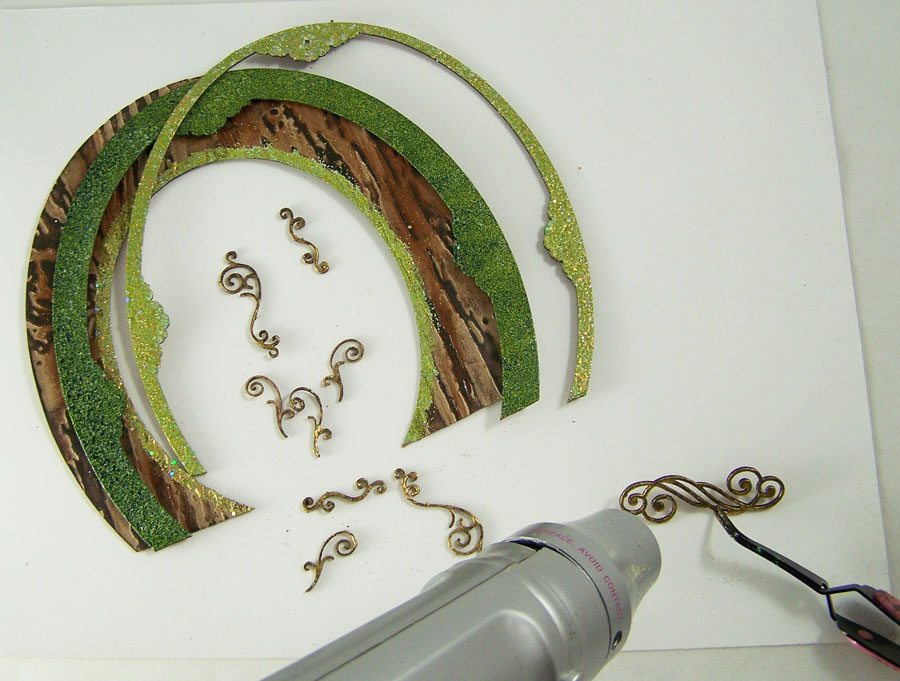
Apply Embossing Powder Adhesive to the top and middle pieces of the frame, the Piccolos and a thin line on the bottom frame. Apply Mossy Glen Enamel Powder to the middle frame, Shamrock Dreams powder to the top frame and thin line on the inner frame, Vintage Gold powder to the Piccolos. Heat to set.

Adhere all three sections of the frame together with Glastique Matte Finishing Glaze, using office clips to keep the frame pieces in place while it dries. Apply Glastique Matte to the back of the Piccolos, place them on the frame and let dry.
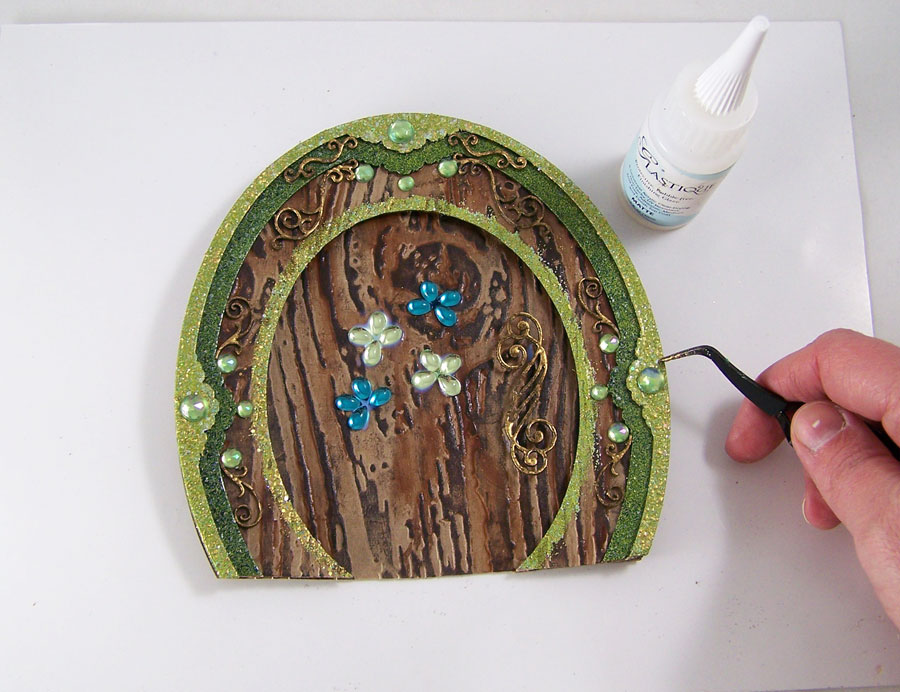
Adhere the back plate to the top frame portion with foam squares. Apply the large swirl Piccolo to the back plate with foam squares to give the illusion of a door handle. Apply the green sticker gems to the faux door with Glastique Matte Finishing Glaze and let dry.
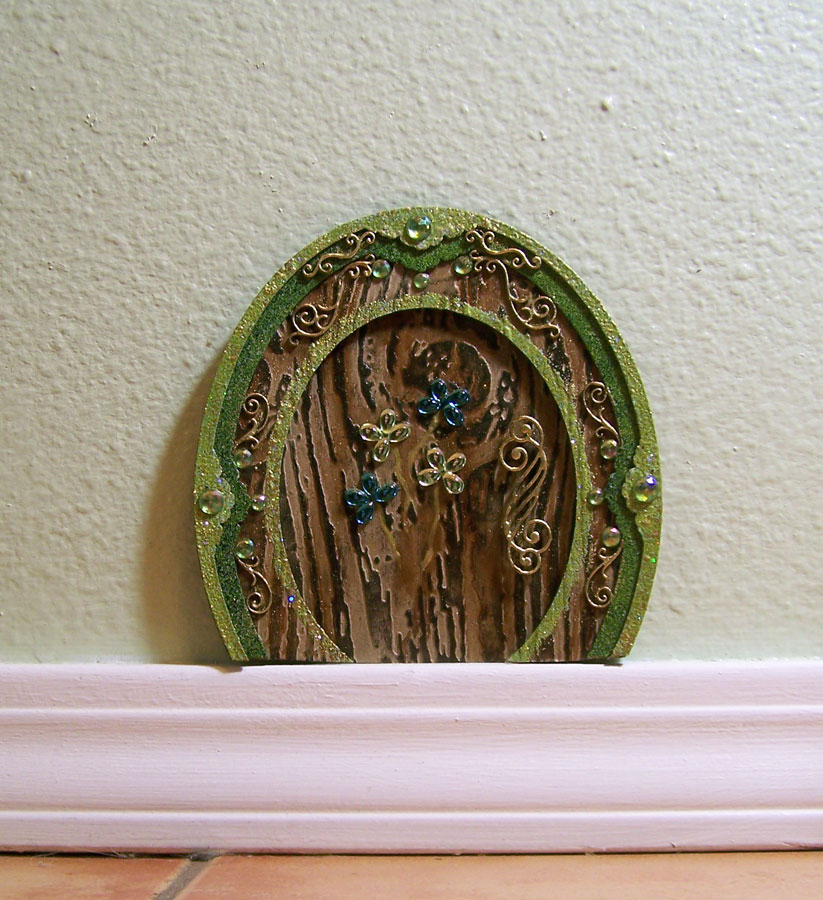
Apply removable poster adhesive to the back of the now completed faux door. Place at the bottom of a wall on the molding, a shelf or anywhere you think a leprechaun might like a magical door! May you have many lucky days ahead!
Until next time, safe travels!
6 Comments
linda
This little door is so cute! I’m sure there are some young children or cats who would get a kick out of this – imagine the wee little stories that could be created around this. Very fun!
Artresurrected
Thank you Linda. 🙂 When friends come over with their wee ones they are always asking form some evidence of fey living here or moving about. Thought it would be perfect for Spring.
Deb
So cute Tracy! I would be asking so many questions if I were a litlun and saw this along the wall. 🙂
Artresurrected
Thank you Debra. 🙂 I have made several versions of these doors and will have all of them hidden around the house shorty. Looking forward to the reactions. 🙂
Candy Spiegel
This is awesome. I may make one!
Artresurrected
Thank you Candy. 🙂 The fun part is depending on the style or size frame you can make all types of wee folk doors. 🙂